
STS 0600BK
EN
TOASTER
Translation of the original manual
STS 0600BK
A
ReheatDefrost
9
1
2
3
4
5
6
7
8
10
11
- 1 -
11/2024
2024, .
EN
Toaster
User Manual
Important Safety Instructions
READ CAREFULLY AND STORE FOR FUTURE USE.
• This appliance may be only used by children aged 8
years and older and by persons with physical, sensory or
mental impairments or lack of experience and knowledge,
if they are supervised or have been instructed on the safe
use of the appliance and understand the potential hazards.
• Children must not play with the appliance.
• Cleaning and maintenance must not be performed by
children unless they are older than 8 years of age and
under supervision.
• Children under 8 years of age must be kept away from the
appliance and its power cord.
• If the power cord is damaged, have it replaced in
aprofessional service centre in order to prevent
adangerous situation. It is forbidden to use the appliance
with the power cord damaged.
Caution: Hot surface
The temperature of accessible surfaces may be
higher if the appliance is in operation. Such surfaces
can become hot during use. Do not touch hot surface.
This could cause skin burns.
• The bread may catch on fire, so do not use the appliance
near or under flammable material such as curtains.
TOASTER

- 2 -
11/2024
2024, .
• Clean surfaces that come into contact with food
according to the instructions in the chapter “Cleaning
and Maintenance”. The removable tray must be cleaned
regularly to prevent the accumulation of crumbs. When
cleaning, follow the instructions in the chapter "Cleaning
and maintenance".
• This appliance is not intended for operation through an
external timer switch or aremote control.
. . . . . . . . . . . . . . . . . . . . . . . . . . . . . . . . . . . . . . . . . . . . . . . . . . . . . . . . . . . . . . . . . . . . . . . . . . . . . . . . . . . . . . . . . . . . . . . . . . . . . . . . . . . . . . . . . . . . . . . . . . . . . . . . . . . . . . . . . . . .
Additional Important Safety Instructions forUse of the Appliance
• This product is designed for household use only. It is also suitable for personal non-commercial use in spaces such as:
- staff kitchenettes in stores, offices and other workplaces;
- hotel or motel rooms andother living areas;
- agricultural farms;
- bed and breakfast establishments.
• The appliance is used for toasting baked goods such as toasted bread, ordinary consumer bread, buns, bagels, etc.
• Do not use the appliance in an industrial environment or outdoors or for purposes other than those for which it is intended.
• Do not use the appliance to bake sweet pastries that are sprinkled with sugar or contain compote, jam or marmalade, such as cakes, buns, etc.
Otherwise afire may result.
• Before connecting this appliance to apower socket, make sure the voltage stated on its rating label corresponds to the voltage in power socket.
Connect the appliance only to agrounded power socket.
• Fully unwind the power cord before using the appliance. Make sure the power cable does not hang over the edge of atable or that it is not touching
ahot surface.
• Do not place the appliance on or near an electric or gas hob, table edge, sink draining board or unstable surfaces. The appliance must be located on
astable and even surface.
• In terms of fire safety, this appliance complies with the standards in force in the European Union. Within the meaning of these standards, these are
appliances that can be operated on atable or similar surface, provided that asafe distance of at least 50 cm is maintained from combustible material
surfaces in the direction of main radiation and at least 10 cm in other directions.
• Do not use the appliance without the crumb tray properly inserted.
• Before using the appliance for the first time, it must be idled at least three times at the maximum toasting setting to get rid of any odour.
• The temperature of the accessible surfaces of the appliance may be higher during and after operation due to residual heat. Be careful not to touch
the heated surface.
• Do not leave the appliance unattended when in use.
• Never cover the appliance when it is inoperation or warm.
• Do not insert excessively large pieces of bread, bread wrapped in aluminium foil or metal objects into the toasting slots. Otherwise, fire or electric
shock may result.
• Special care must be taken when removing smaller pieces of bread from the appliance to prevent burns.
• Never bake bread by placing it horizontally directly on the toasting slots. This would disrupt the air circulation andcould cause afire.
• Never attempt to remove blocked toast, bagel or other baked goods with aknife or other metal object; damage to the heating elements, serious
malfunction of the appliance, or electric shock could result. Let the appliance cool down, pull the power cord out of the socket and carefully remove
the blocked piece of bread.
• Do not remove the bread while the appliance is inoperation.
• Use only the accessories supplied with the appliance.
• To prevent potential injury by electric shock, do not submerge this appliance or its power cord under water or any other liquid.
• Always switch off the appliance and unplug it from the mains socket when leaving it unattended or when not in use, before cleaning and moving it.
Allow the appliance to cool completely before moving, cleaning and storing.
• Unplug the appliance from the power socket by pulling the plug, not the power cord. Otherwise, damage to the power cord or the socket could occur.
• Do not use the appliance if it is damaged, if it is not working properly, if it has been dropped on the ground or immersed in water. To prevent
dangerous situations, do not repair or modify the appliance yourself. All repairs should be carried out by an authorised service centre. Tampering
with the appliance may result in the loss of your legal rights regarding faulty performance or warranty for quality.
. . . . . . . . . . . . . . . . . . . . . . . . . . . . . . . . . . . . . . . . . . . . . . . . . . . . . . . . . . . . . . . . . . . . . . . . . . . . . . . . . . . . . . . . . . . . . . . . . . . . . . . . . . . . . . . . . . . . . . . . . . . . . . . . . . . . . . . . . . . .

- 3 -
11/2024
2024, .
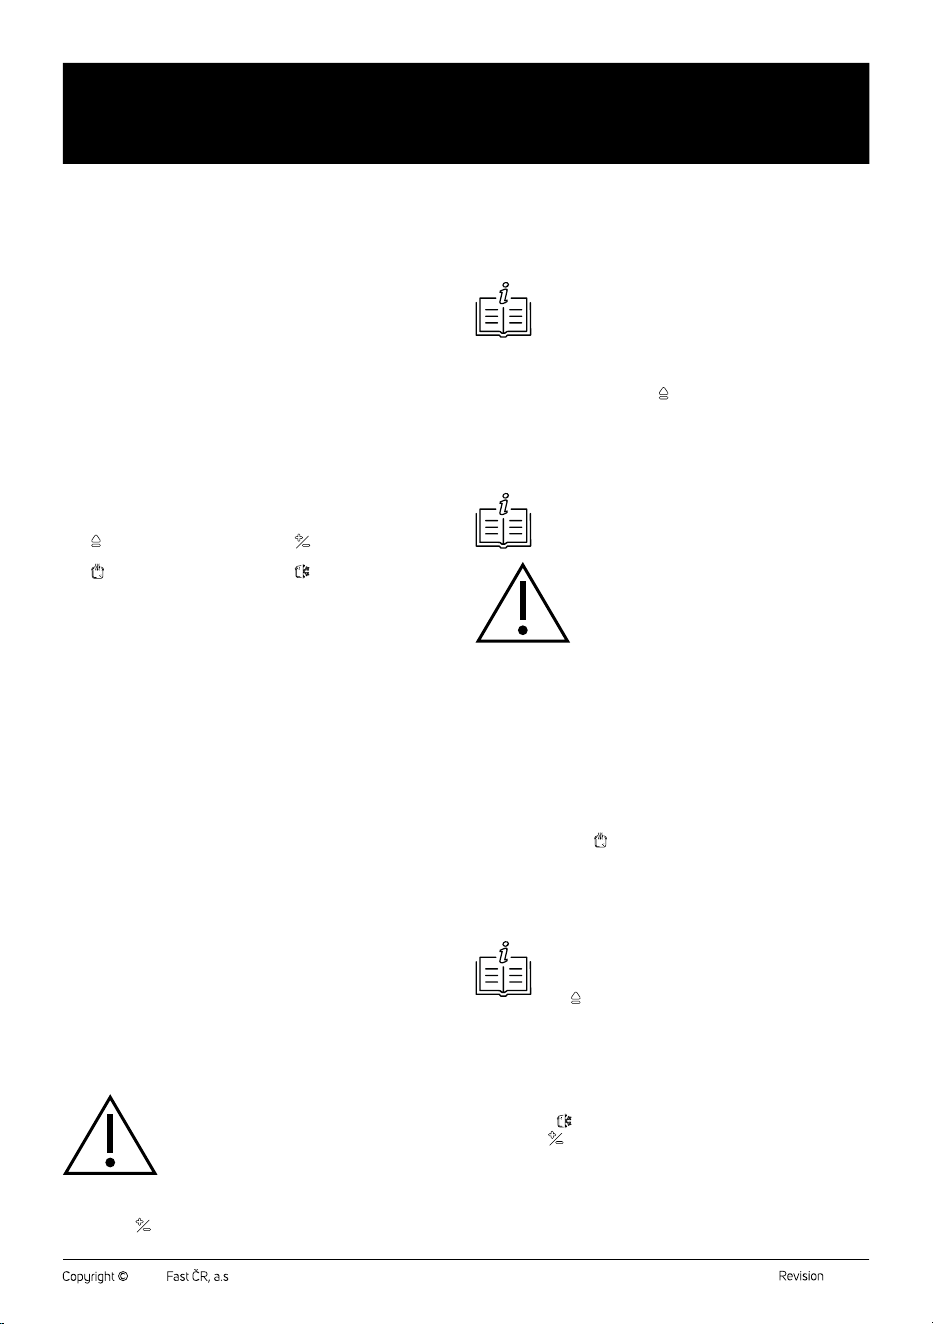
EXPLANATION OF SYMBOLS PLACED ON THE PRODUCT OR INTHE ACCOMPANYING DOCUMENTATION
The product meets all the basic requirements of the applicable EU directives.
This symbol on products or original documents means that used electric or electronic products must not be added to ordinary municipal
waste.
. . . . . . . . . . . . . . . . . . . . . . . . . . . . . . . . . . . . . . . . . . . . . . . . . . . . . . . . . . . . . . . . . . . . . . . . . . . . . . . . . . . . . . . . . . . . . . . . . . . . . . . . . . . . . . . . . . . . . . . . . . . . . . . . . . . . . . . . . . . .
- 4 -
11/2024
2024, .
• Thank you for purchasing our SENCOR product; we hope it will serve
to your satisfaction.
• Prior to using this appliance, please read the user manual thoroughly,
even in cases when you are already familiar with the use of similar
types of appliances. Use the appliance only as described in this
user manual. Keep the manual for future reference. If you pass the
appliance on to another person, ensure that this user manual is
included.
• Carefully unpack the appliance and make sure not to discard any part
of the packaging material until you have found all its components. It
is recommended to keep the original packaging, packing material,
receipt and confirmation of the extent of the seller'sliability or warranty
certificate at least for the duration of the legal right of defective
performance or quality guarantee. When transporting the appliance,
we recommend packaging it again in the original box provided by the
manufacturer.
. . . . . . . . . . . . . . . . . . . . . . . . . . . . . . . . . . . . . . . . . . . . . . . . . . . . . . . . . . . . . . . . . . . .
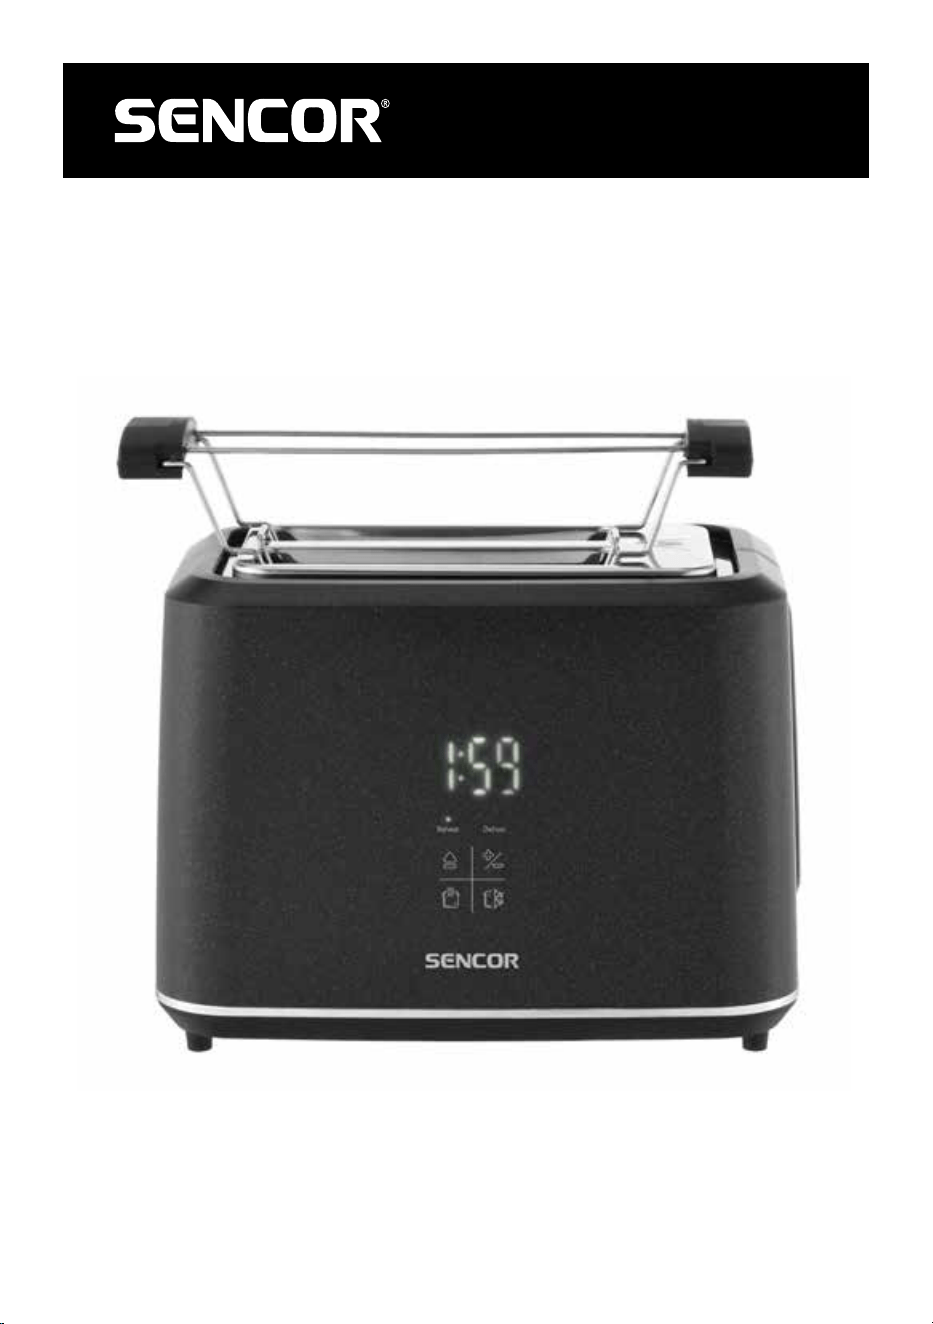
DESCRIPTION OF THE APPLIANCE
A1 Toasting slots
A2 Display
A3 Reheat indicator light
A4
button to stop the toasting
process immediately
A5
button for bread heating
A6 Detachable crumb tray
A7 Control lever
A8 Defrost indicator light
A9
button to adjust the degree
of toasting
A10 button for baking frozen
pastries
A11 Removable attachment for
toasting buns
. . . . . . . . . . . . . . . . . . . . . . . . . . . . . . . . . . . . . . . . . . . . . . . . . . . . . . . . . . . . . . . . . . . .
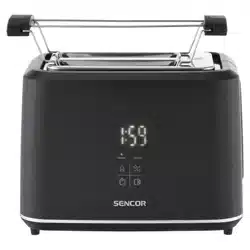
PURPOSE OF USE
• The Sencor STS 0600BK toaster is used for toasting baked goods
such as toasted bread, ordinary consumer bread, buns, bagels, etc.
. . . . . . . . . . . . . . . . . . . . . . . . . . . . . . . . . . . . . . . . . . . . . . . . . . . . . . . . . . . . . . . . . . . .
BEFORE FIRST USE
• Before first use, remove the appliance and its accessories form the
packaging and remove all promotional labels and tags.
• Before first use, the toaster must be run at least three times at the
maximum toasting setting to get rid of any odour. During this process,
you may notice aslight smoke or smell. This is anormal phenomenon
that will disappear over time.
. . . . . . . . . . . . . . . . . . . . . . . . . . . . . . . . . . . . . . . . . . . . . . . . . . . . . . . . . . . . . . . . . . . .
OPERATING THE APPLIANCE
1. Place the toaster on aflat, dry and stable surface well away from
combustible material surfaces as specified in the Safety Instructions
section.
2. Unwind the power cord completely. Insert the cord into the groove
located at the toaster bottom. This will ensure the safe routing of the
power cord. Then connect the toaster to the power socket.
3. Make sure the crumb tray is inserted correctly.
4. Insert aslice of toast bread, asmaller slice of regular bread, half
abun or bagel, etc. into each slot. The slices of bread must not be
too thick to avoid getting stuck in the slots and should not protrude
from the toaster when the control lever is in the down position.
Warning:
Do not put bread covered with butter, margarine, etc.
in the toaster.
5. Push down the control lever. It automatically locks in thelower
position.
6. Use the
button to set the toasting level from 1 to 7, where setting
1 is the lightest browning toasting and 7 is the darkest toasting
intensity. For the first use, we recommend setting the toasting
intensity to level 3. You can adjust the degree of toasting according
to your own preferences. The initial level of toasting is 4.
7. The display will show the set toasting level andafter awhile the
display will start counting down the toasting time. It cannot be
changed. It is preset for each stage andfunction of the toaster.
Note:
If the toaster is not connected to apower socket, the lever
will not be locked in the down position andthus will not
be started.
8. During the toasting process, you can check the state of toasting by
lifting the control lever upwards. If necessary, you can cancel the
toasting process by pressing
.
9. As soon as the set time has elapsed, asound alert will sound, the
toaster will automatically turn off andeject the inserted bread.
Remove the bread from the toaster and repeat the above procedure
to toast the other breads. However, it is recommended to reduce the
toasting level as the toaster is already heated.
Note:
To remove smaller pieces of bread, lift the control lever all
the way up.
Warning:
Never attempt to take out ajammed piece of bread
or any other bread product using aknife or another
metal object. This could lead to injury by electrical
shock or damage the appliance. If the bread is
blocked inside the toaster, turn it off, disconnect it
from the power socket andlet it cool down. Then
carefully remove the bread.
• After use, unplug the toaster from the power outlet and let it cool
down.
Bread Heating Function
This function allows you to heat the bread without further toasting.
1. Inset the pastry to be warmed up in the openings.
2. Push down the control lever. It automatically locks in thelower
position.
3. Press the button
and the Reheat indicator light will turn on.
4. The display starts counting down the preset heating time.
5. As soon as the set time has elapsed, asound alert will sound, the
toaster will automatically turn off andeject the inserted bread.
Remove the bread from the toaster and repeat the above procedure
to heat the other breads.
Note:
The heating time is preset from the factory and cannot be
adjusted. If you need to cancel the heating process, press
the
button.
Frozen Bread Toasting Function
Frozen Bread Toasting function is used todefrost the bread andtoast to
the set level.
1. Insert the frozen bread into the openings.
2. Push down the control lever. It automatically locks in thelower
position.
3. Press the
button and the Defrost indicator light will turn on.
4. Use the button to set the toasting level from 1 to 7, where setting
1 is the lightest browning toasting and 7 is the darkest toasting
intensity. For the first use, we recommend setting the toasting
intensity to level 3. You can adjust the degree of toasting according
to your own preferences. The initial level of toasting is 4.
5. The display will show the set toasting level andafter awhile the
display will start counting down the toasting time.
EN
Toaster
User Manual
- 5 -
11/2024
2024, .
6. As soon as the set time has elapsed, asound alert will sound, the
toaster will automatically turn off andeject the inserted bread.
Remove the bread from the toaster and repeat the above procedure
to toast the other breads.
Note:
If you need to cancel the toasting process of the frozen
bread, press
.
Warning:
The toasting function for frozen bread and the heating
function for bread cannot be selected at the same
time.
Attachment for toasting buns
• Place the attachment on the toaster and place the bread (small
baguette, roll or bun) you want to toast on it. Adjust the low toasting
intensity from 1 to 3 and press the control lever down until it locks in
the lower position. The toasting process starts automatically.
• Wait for the toasting process to end automatically, or press the
button to stop the operation immediately if the bread is already baked
sufficiently. If the bread is not baked sufficiently even after the end of
operation, repeat the toasting process.
• When removing the bread from the attachment, be very careful not to
touch the hot parts.
Tips andTricks toSet the Toasting Intensity
• Toasting is atwo-step process. The first phase evaporates the
moisture from the bread and the second phase toasts it.
• The toasting level depends on the type, size andfreshness of the
bread.
• Fresh bread will be toasted longer, because the moisture contained
init must first evaporate andonly then it begins to be toasted.
Therefore, it requires setting ahigher level of toasting intensity.
Wholemeal bread, thicker slices of bread, sliced buns and bagels also
require ahigher toasting setting.
• Older bread, which does not contain as much moisture as fresh bread,
will toast for ashorter time and therefore requires alower than normal
toasting intensity setting.
• Smaller and weaker slices of bread will toast faster than larger and
thicker slices of bread.
• If you are toasting only one slice of bread, set alower toasting level
than if you are toasting two slices at the same time.
. . . . . . . . . . . . . . . . . . . . . . . . . . . . . . . . . . . . . . . . . . . . . . . . . . . . . . . . . . . . . . . . . . . .
CLEANING AND MAINTENANCE
• Clean the toaster after each use. Before cleaning, make sure that it is
unplugged from the power outlet and that it is cool.
• Slide the crumb tray out of the toaster and remove the crumbs, wipe
it with aclean, dry cloth and put it back in place. Clean the crumb
tray after each use of the toaster. Make sure that crumbs do not
accumulate in it. Otherwise, they could burst into flames.
• To remove crumbs from the inner compartment, turn the toaster
upside down and carefully shake out the crumbs above the rubbish
bin.
• Wipe the outer surface of the toaster with adry or slightly damp cloth
and then wipe it dry. Make sure that no water or moisture leaks into
the inside of the toaster.
• Do not use cleaning products causing abrasion, petrol or solvents for
cleaning.
• To prevent potential injury by electric shock, do not submerge this
appliance or its power cord under water or any other liquid.
. . . . . . . . . . . . . . . . . . . . . . . . . . . . . . . . . . . . . . . . . . . . . . . . . . . . . . . . . . . . . . . . . . . .
TECHNICAL SPECIFICATIONS
Rated voltage range ...............................................................................220−240V~
Rated frequency ......................................................................................... 50−60 Hz
Rated power input ................................................................................ 920–1080 W
. . . . . . . . . . . . . . . . . . . . . . . . . . . . . . . . . . . . . . . . . . . . . . . . . . . . . . . . . . . . . . . . . . . .
INSTRUCTIONS AND INFORMATION ON DISPOSAL OF USED
PACKAGING MATERIAL
Dispose of used packaging material at the location designated by the
municipality for waste disposal.
DISPOSAL OF USED ELECTRICAL AND ELECTRONIC EQUIPMENT
Used electrical andelectronic products must not be added to ordinary
municipal waste. For proper disposal and recycling of these products,
deliver them to designated collection points. Alternatively, in some
European Union states or other European countries the products can be
returned to the local retailer when buying an equivalent new product. By
properly disposing of this product, you help preserve valuable natural
resources and contribute to preventing potential negative impacts on the
environment and human health resulting from improper waste disposal.
For further details, contact your local authorities or the nearest collection
point. Fines may be imposed for improper disposal of this type of waste in
accordance with national regulations.
For Business Entities in European Union States
To dispose of electric or electronic equipment, request necessary
information from your retailer or supplier.
Disposal in Other Countries Outside the European Union
If you wish to dispose of this product, request the necessary information
about the correct disposal method from the local council or from your
retailer.
. . . . . . . . . . . . . . . . . . . . . . . . . . . . . . . . . . . . . . . . . . . . . . . . . . . . . . . . . . . . . . . . . . . .
Changes to text and technical parameters are reserved.
