V1
User
manual
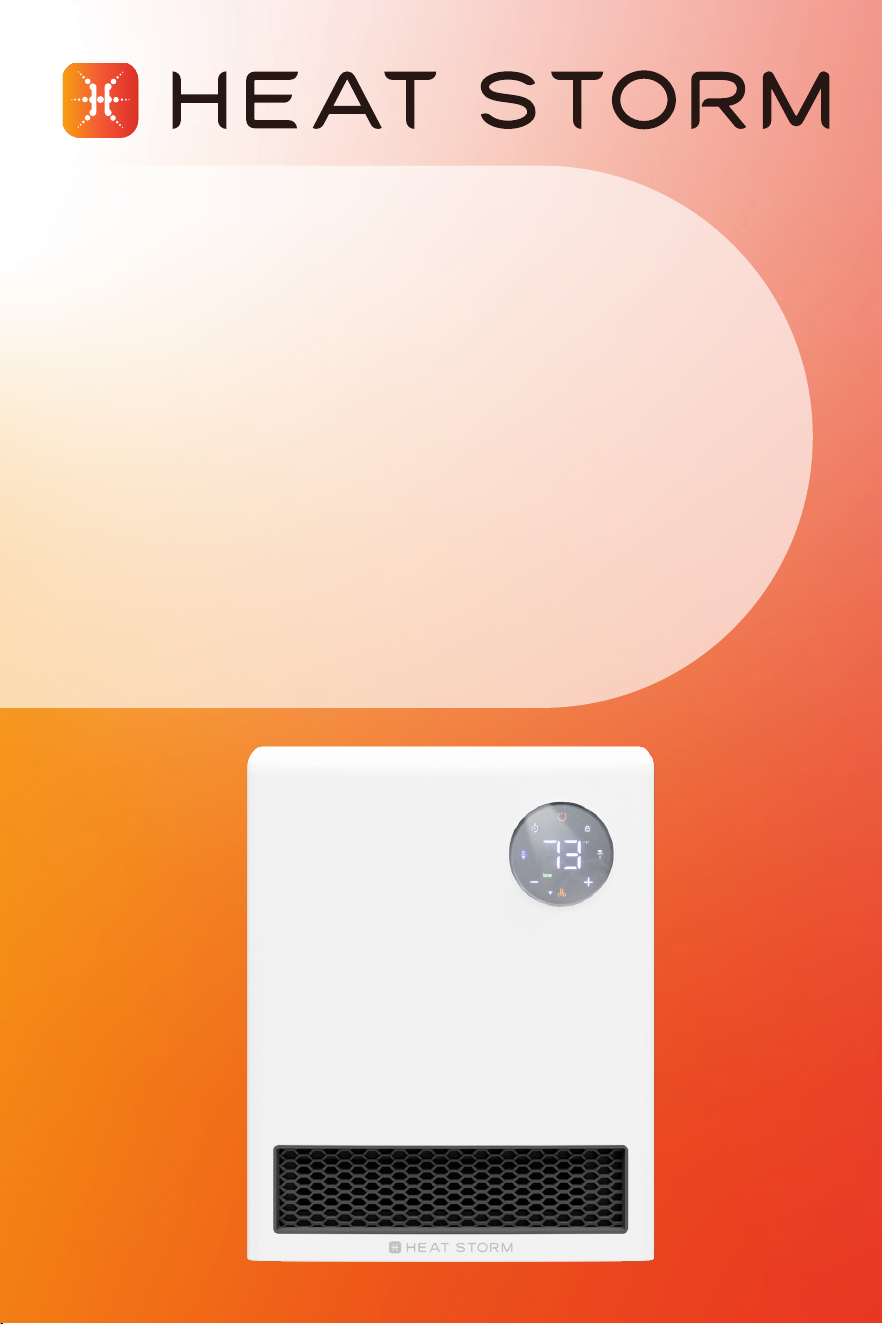
HS-1500-PTC-WI | A-1500-PTC-WI
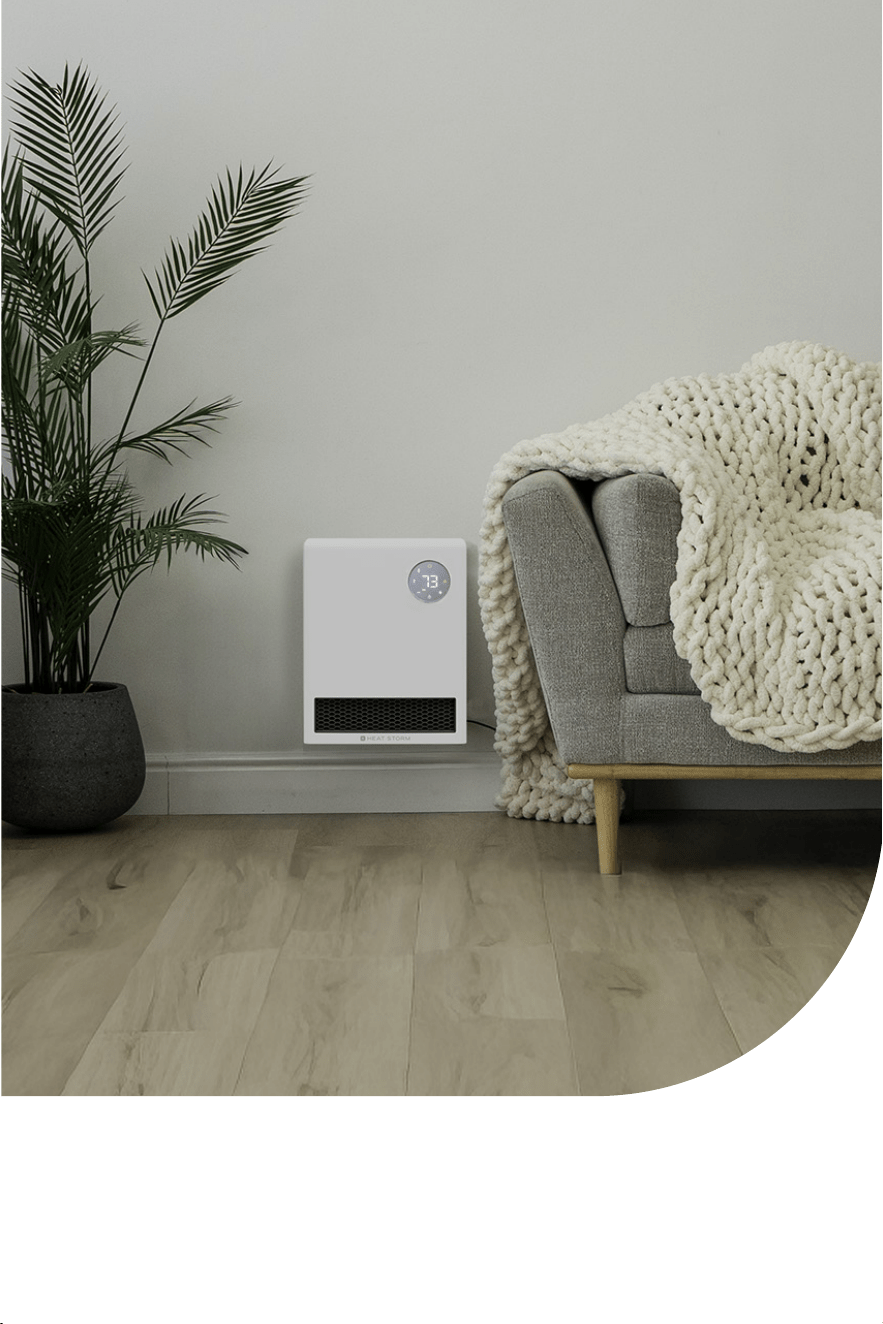
1500 W | Forced air | Wall mounted smart heater

2
Table of contents:
Important instructions ����������������������������������������������������������������������������������� page 3
Installation instructions ��������������������������������������������������������������������������������� page 5
Operations & controls ������������������������������������������������������������������������������������ page 9
Wi-Fi setup ����������������������������������������������������������������������������������������������������� page 12
Troubleshooting guide ��������������������������������������������������������������������������������� page 14
Return policy ������������������������������������������������������������������������������������������������� page 16
1-year limited warranty �������������������������������������������������������������������������������� page 16
Thank you and congratulations on your Heat Storm Heater! Please read
and keep all safety and use instructions. Should you have any questions
or concerns, please don't hesitate to reach out to us at 435-752-6611 or
cs@heatstorm�com�
SPECIFICATIONS
Wattage: 1500 LxWxH: 12 x 4�6 x 15�5 inches
Amps: 12�5 Weight: 5�7 lbs
BTU: 5200 Decibels: 42-47
Voltage: 120 Cord length: 3 ft
CFM: 48 Heat settings: 2
Square footage: 150-750 ft
2
Heating: ceramic
SAVE THESE INSTRUCTIONS

3
Important instructions
Please read and understand this entire manual before attempting to assemble,
operate, or install the product� Use this heater only as described in the manual� If
the directions are not followed, an electric shock or re may result causing property
damage, personal injury, or death�
SAFETY GUIDELINES
• Adhere to basic precautions to minimize the risk of re, electric shock, and
injury when using electrical appliances�
• The heater becomes hot during operation; avoid direct contact with hot
surfaces to prevent burns�
• Exercise extreme caution in the presence of children, or individuals with
reduced physical, sensory, or mental capabilities, or when the appliance is
unattended� Children should not play with the appliance�
• Individuals with reduced capabilities should not operate the appliance without
supervision or proper instruction�
• Unplug the heater when not in use for an extended period�
• The heater includes a thermostat limiter� If the inner temperature overheats
or abnormal heating occurs, power will be cut off to prevent the risk of re or
heater damage�
WARNING
• For any maintenance please contact an authorized service representative�
• High temperature, risk of re, keep electrical cords, drapery, furnishings, and
other combustibles at least 3 feet (0�9 m) from the front of the heater and away
from the side and rear. To reduce the risk of re, do not store or use gasoline or
other ammable vapors and liquids in the vicinity of the heater.
• Heat Storm Infrared Heaters are considered to be an appliance�
Each heater and appliance should be on its own circuit�
• DO NOT operate if the following occurs:
» Heater has a damaged cord or plug�
» After the heater malfunctions�
» Heater has been dropped or damaged in any manner�
Turn off the heater, disconnect the cord, and have heater inspected/serviced by
an electrician before reusing or discard the heater�

4
CAUTION
• To prevent electric shock, match the wide blade of the plug to the wide slot and
fully insert�
• Turn off and wait for the fan to stop before disconnecting�
• Do not insert foreign objects into ventilation or exhaust openings to prevent
electric shock, re, or heater damage.
• Do not block air intakes or exhaust�
• Under no circumstances should this heater be modied. Modications will void
the warranty� Parts removed for servicing must be replaced prior to operation�
• Plug the heater directly into a wall outlet; do not use extension cords, surge
protectors, or relocatable power taps� This heater is designed for standard 120-
volt outlets and should only be connected to a proper 3-prong polarized outlet�
• Ensure the cord is not under carpeting, covered with rugs, runners, or similar
coverings� Avoid routing it under furniture or appliances and position it away
from high-trafc areas to prevent tripping hazards.
• If the supply cord is damaged, it must be replaced by the manufacture, its
service agent, or similarly qualied persons in order to avoid a hazard.
• Do not use in the following areas: outdoors, closets, or locations with gasoline,
paint, or ammable liquids.
• To avoid excessive room temperatures which can cause hyperthermia: DO
NOT leave product running unattended in a conned space around infants, or
individuals with reduced physical, sensory, or mental capabilities�
• DO NOT USE in the following areas:
• Outdoors - use Heat Storm Outdoor Infrared Heaters
• Locations with gasoline, paint, or ammable liquids
• Wet or moist locations
• Closets
SAVE THESE INSTRUCTIONS

5
Installation instructions
Installation should be carried out by a certied electrician or a person possessing
the required expertise� Ensure that the heater is installed correctly before
activating the power�
HEATER LOCATION
When choosing a location for your new heater, ensure that the general
instructions are followed� Your heater must be properly installed prior to
operation� Do not prop the heater up against objects or use the heater with the
grill placed vertically� For best effect, install the heater out of direct sunlight�
Basement or garage use
The heater can be utilized in a nished basement with drywall and carpet. For
other scenarios, consider Heat Storm Outdoor Infrared Heaters� Visit heatstorm�
com for details�
Vaulted or cathedral ceilings
The heater can be used with vaulted or cathedral ceilings� However, initial room
heating may take longer� Once the desired temperature is reached, the heater will
cycle accordingly�
Poorly insulated areas
Note that rooms with poor insulation may not retain heat efciently, potentially
leading to longer or more frequent operation�
Cold climate installation note
Placing the unit under a window or on a poorly insulated wall may result in the
heater reading a colder ambient temperature than the actual room temperature�
Heating multiple rooms
Effectiveness depends on oor plan openness and room sizes. Experiment to nd
the most suitable conguration.
NOTE: Designed for supplemental heating in spaces from 150 to 750 square feet�
DO NOT USE in the following areas:
• Outdoors - use Heat Storm Outdoor Infrared Heaters
• Locations with gasoline, paint, or ammable liquids
• Wet or moist locations
• Closets
6
CAUTION - RISK OF FIRE!
Keep electrical cords, drapery, furnishings, and other
combustibles at least 3 feet (0�9 m) from the front of the
heater and away from the side and rear� To reduce the risk of
re, do not store or use gasoline or other ammable vapors
and liquids in the vicinity of the heater�
POWER CONNECTION GUIDELINES
Plug the heater directly into a wall outlet; do not use extension cords, surge
protectors, or relocatable power taps� This heater is designed for standard 120-volt
outlets and should only be connected to a proper 2-prong polarized outlet�
Ensure the cord is not under carpeting, covered with rugs,
runners, or similar coverings� Avoid routing it under furniture
or appliances and position it away from high-trafc areas to
prevent tripping hazards�
TOOLS NEEDED FOR INSTALLATION
• 3/16” drill bit
• Philips screwdriver
Missing parts? Email us at cs@heatstorm�com
7
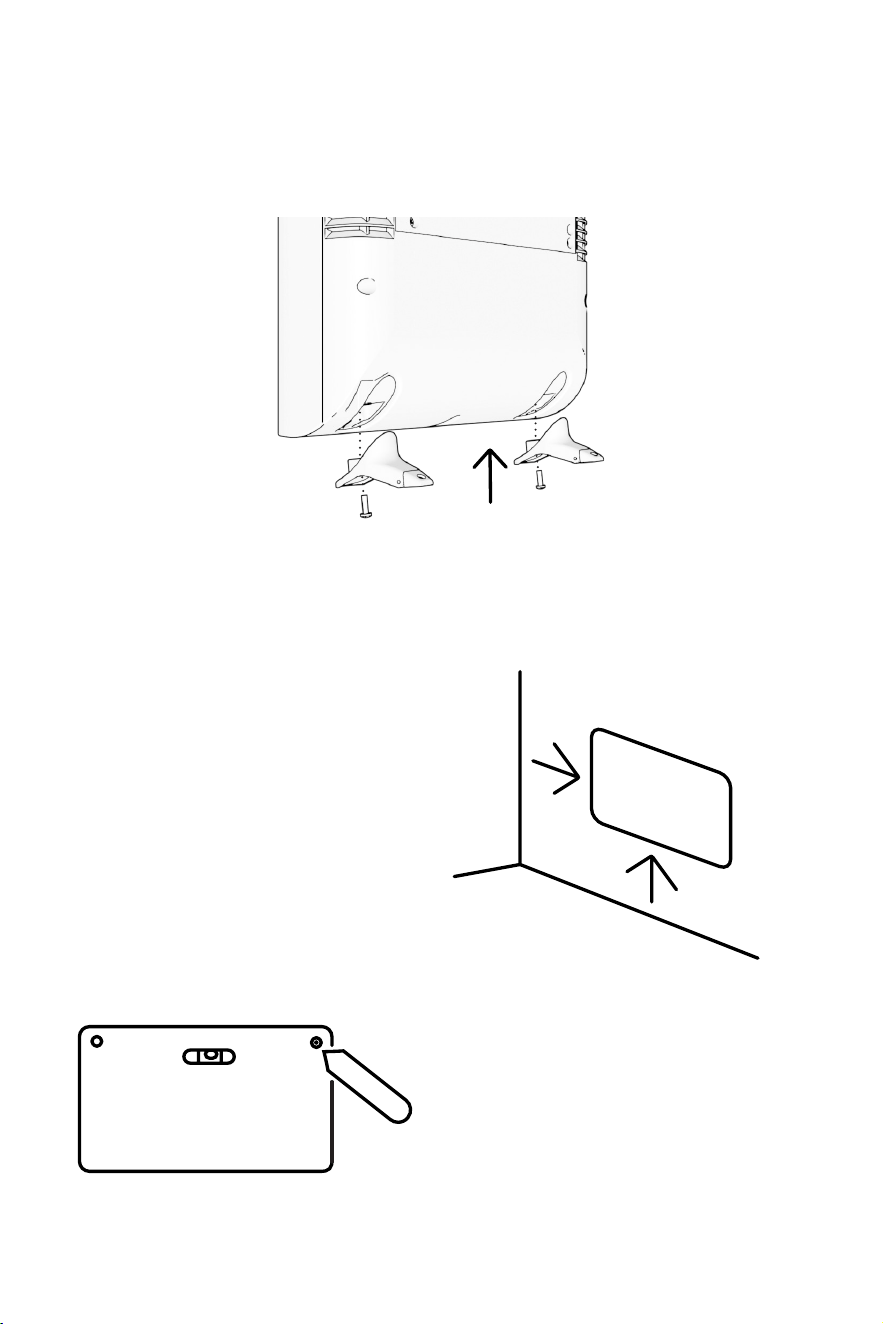
STEP 1: FEET INSTALLATION
Attach the two feet to the bottom of the heater using the provided M4x14
screws� Once the feet are securely attached, you can either use it as is or
proceed with wall installation�
STEP 2: WALL INSTALLATION
Use the drilling guide and a
pencil to MARK the guide holes�
2
Select a suitable wall for your
heater, ensuring there is at
least a 4½-inch clearance
between the heater and the
nearby walls, ceiling, and oor.
Additionally, place the heater
in a location where the cord
can reach an outlet for power�
1
8
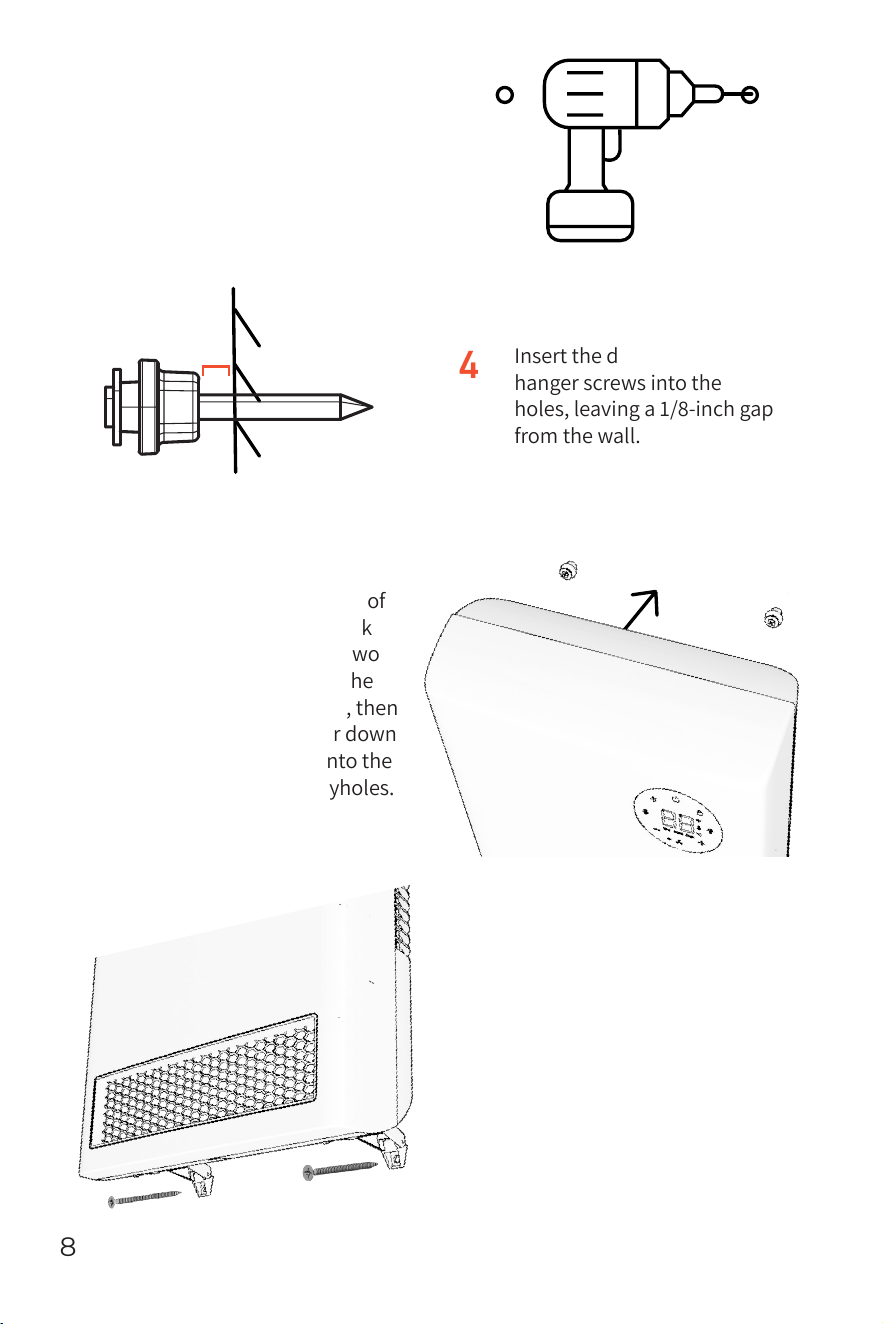
Finally, screw in the self-
tapping screws into the
bottom base anchor holes to
securely mount the heater
onto the wall�
6
Line up the big openings of
the keyholes (on the back
of the heater) with the two
screws in the wall� Set the
heater onto the screws, then
gently slide the heater down
so the screws move into the
narrow part of the keyholes�
5
Drill holes using the 3/16”
drill bit and insert the drywall
anchors into the holes�
3
Insert the double-headed
hanger screws into the top two
holes, leaving a 1/8-inch gap
from the wall�
4
1/8"
9
Operations & controls
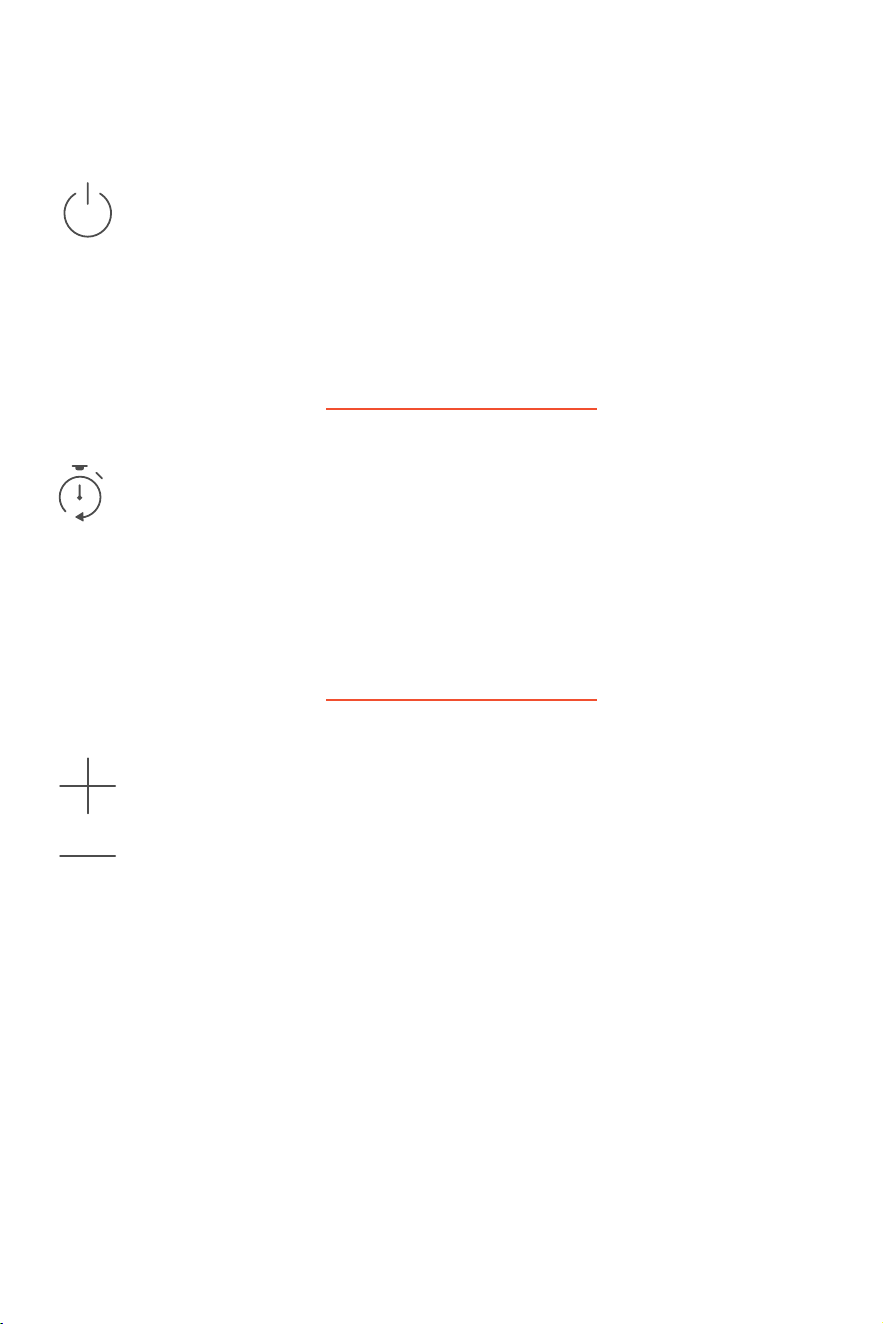
Power ON/OFF
Press the power icon to alternate between on(red) and off(white)�
Factory reset
Power off heater and allow time for elements to cool� Unplug and plug
in heater� Within 3 minutes of plugging in heater, press and hold power
icon for 10 seconds to reset the heater to factory settings�
Timer
When the heater is on, you can set the delay off time� Tap on the timer
icon to enable edit mode. The display will ash. Use the plus and minus
icons to change the "on" time (hour increments)� Wait 5 seconds for the
timer setting to activate�
• No timer set | White
• Timer set for off | Green
Setting the temperature
The default temperature for the heater is 70 °F or 21 °C� Pressing the +
or - icons enters temperature setting mode, where the thermostat can
be adjusted by 1 °F or 1 °C� The display exits this mode after 5 seconds
of inactivity, showing the current ambient temperature�
NOTE: After the heater function or power is turned off, the blower will continue
for several minutes to cool internal components�
Selecting Celsius & Fahrenheit
Press the + and - icons at the same time to switch between
Celsius and Fahrenheit�
NOTE: Switching between °C and °F
can only be performed using the control
panel on the heater, and is not available using the remote control�

10
Change working mode
Press the fan button to toggle between low, auto, and high
working modes�
• Low mode* | Green
Heater operates at 50% power, effectively halving the wattage�
This is benecial for situations where the breaker tends to trip
easily or when heating a small space�
• Auto mode (Eco mode) | White
Heater runs at full power until it's within 2 degrees of the set
temperature� It then shifts to 50% power to achieve and maintain
the desired temperature� This ensures more frequent, energy-
efcient operation while effectively maintaining the
set temperature�
• High mode* | Red
Heater runs at 100% power until desired temperature is met�
NOTE: The fan will turn on and off to circulate air� The heater is trying to
determine if the ambient temperature in the room has changed�
*Low and high modes will reach the set temperature, followed by a 2-degree
cooling period before reheating�
Fan only/heat mode
Press and hold the fan button for 3 seconds to toggle between fan only
(blue fan icon) and heat mode (red icon)�
Sound
Tap on the volume/thermometer icon to alternate between sound on/off�
Pair external thermostat
Press and hold the volume/thermometer icon for 5 seconds to pair
the Heat Storm External Thermostat� The light will start to blink red
to show it is in discovery mode� Next, press and hold the button on
the back of the external thermostat for 5 seconds until you hear a
beep� The volume/thermometer indicator light will glow red once the
thermostat has been successfully paired�
11
Child lock
Press and hold the lock icon for 3 seconds to engage/disengage child
lock� When the child lock the icon will turn red and no changes can be
made to the settings until the child lock is turned off�
Display brightness
Tap on the Wi-Fi/sun symbol to change the display brightness�
Wi-Fi discovery mode
Press and hold the Wi-Fi/sun symbol for 5 seconds to enable the Wi-Fi
discovery mode (will blink blue)� Refer to page 12 for guidance on
connecting to Wi-Fi� The blinking blue light will turn to a solid blue
once Wi-Fi is connected�
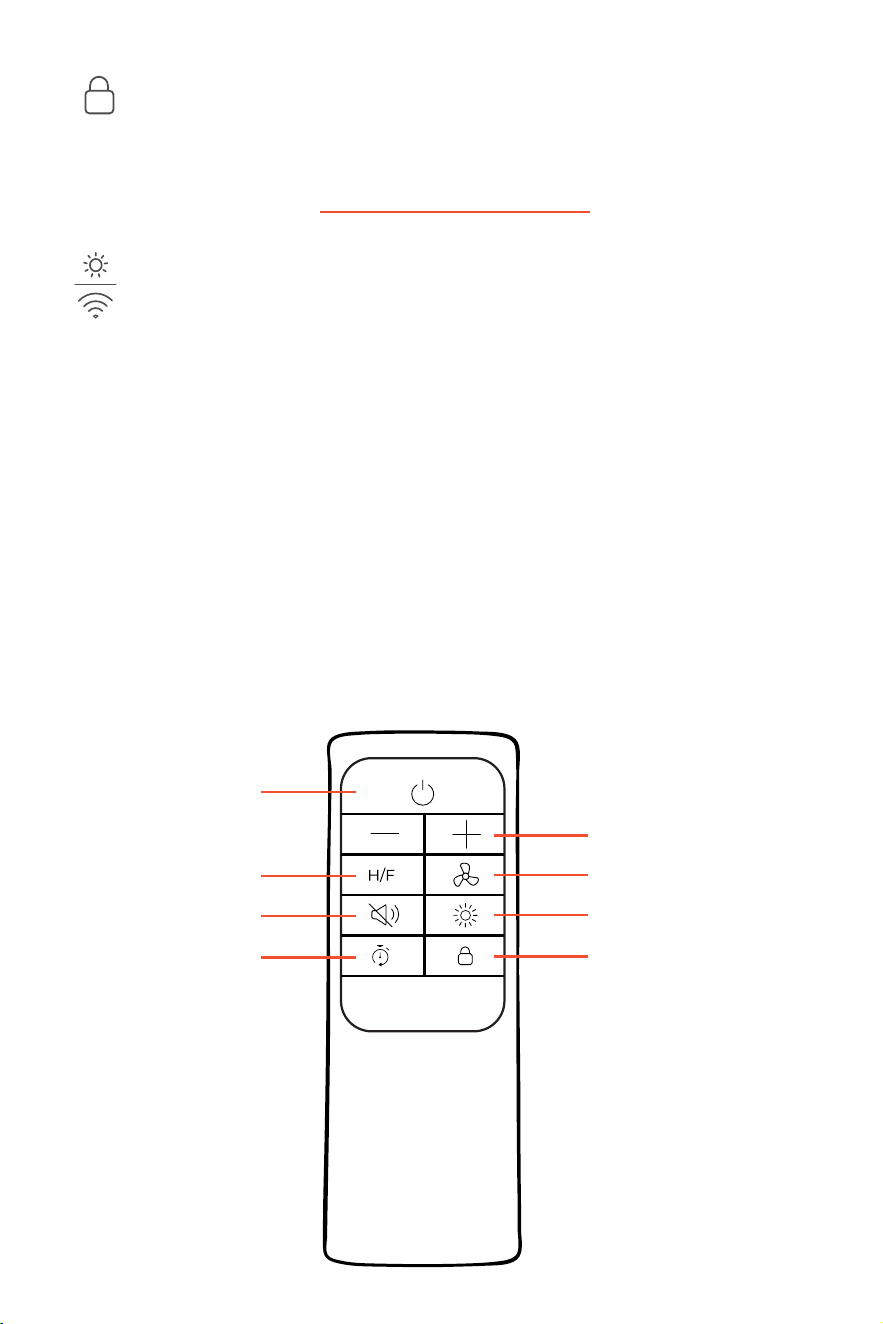
REMOTE CONTROL
The remote will function the same as the buttons on your unit� If you
have any questions on how a function works, please refer to the previous
control descriptions�
Power
Fan only/heat mode
Sound
Timer
Setting temperature
Working mode
Display brightness
Child lock
12
SMARTLIFE APP
Manage your Heat Storm Smart Heater conveniently anytime
and anywhere you desire. With just a tap of your nger, you can
adjust temperatures, create schedules, set a child lock, and ensure
warmth according to your preferences�
Prepare your phone
Enable Wi-Fi and Bluetooth® on your phone� Connect to your phone to a 2�4
GHz Wi-Fi network� Your phone needs to be connected to the same Wi-Fi that
you want to connect your heater to�
NOTE: for some dual band routers, you may need to manually create a network
dedicated to 2�4 GHz�
Download the SmartLife App
Download the app by scanning the QR code or search for
SmartLife in the App Store or on Google Play� Once the app is
downloaded, sign up, and agree to the User Agreement and
Privacy Policy�
Register with your email, set your password, and create a new home in the
SmartLife app�
CONNECT YOUR HEATER TO WI-FI
The SmartLife app offers multiple methods for Wi-Fi setup� If one method fails,
don't worry —simply move on to the next one�
It’s essential to note that the app might undergo updates over time� As a result,
the app prompts you encounter may differ slightly from the manual� For the
most accurate and up-to-date guidance, follow the prompts within the app�
Wi-Fi® setup
Need help?
Visit heatstorm.com/wi for video tutorials and helpful tips.

13
EASY CONNECT
*Ensure your phone's Wi-Fi, Bluetooth®, and location functions are all activated�
Choose Wi-Fi
Enter your case-sensitive Wi-Fi network name and password, then tap
“conrm.” Press "next" if prompted to reset the heater.
Conguration process
Wait for the connection to be completed� Please be patient, as this may take a
few minutes� The app will notify you that the device was successfully added�
Select “done” to enter the control interface�
3
2
Add device
When the machine is on, press and hold the Wi-Fi/sun button on the control
panel for 5 seconds until the Wi-Fi indicator light begins ashing slowly. Add
the appliance in the app:
i� If a pop-up is displayed, tap "go to add"� If you don't get a pop-up, tap
the plus icon in the top right corner� Select "add device�"
ii� Choose "small home appliance," then nd "heater (BLE)".
1
Choose Wi-Fi
Enter your case-sensitive Wi-Fi network name and password, then tap
“conrm.” Press "next" if it is asking you to reset your heater.
Conguration process
Wait for the connection to be completed� Please be patient, as this may take a
few minutes� The app will notify you that the device was successfully added�
Select “done” to enter the control interface�
4
Conguration mode
Conrm the Wi-Fi indicator light on control panel is ashing quickly
and select "blinking quickly" within the app. Then click on “nish
network conguration”.
2
Add device
i� When the machine is on, press and hold the Wi-Fi/sun button on the
control panel for 5 seconds until the Wi-Fi indicator light begins ashing.
ii� In the app, tap the plus icon in the top right corner�
iii� Select “add device�” Choose “small home appliance�”
iv� Tap “heater (Wi-Fi)�”
1
3
MANUAL CONNECT

14
Troubleshooting guide
RECALIBRATING YOUR HEATER
If your heater is not working like normal, try resetting it� Heaters are like other
electronics, sometimes they need a reboot (refer to the factory reset on page 9)�
If an issue persists, contact customer service at 435-752-6611�
FAN
Not blowing air
When powering the heater ON, it does not blow any air at rst. The initial 15 seconds
allow the infrared elements to heat up, ensuring that when the fan turns on, warm
air is circulated into the room�
Not blowing warm air
• Ensure the air inlet is not blocked�
• The ambient temperature (displayed) is higher than the ther mostat setting�
• There is something blocking the air ow. Move the object out of the way of the
heater� This is common if the heater is in a closet or under a desk�
Continuing to blow air when heater is turned off
This is the cool down phase� The heater will run for several minutes (up to 12) to
cool the internal components� This increases the lifespan of the infrared elements�
If the heater did not nish the cooling procedure when it was unplugged, the fan will
blow immediately when the heater is powered back on�
Heater fails to reach the set temperature and continues to run.
Things to check:
1. Room conditions: Drafts or poor insulation can prevent the room from
retaining heat�
2. Doors: Keep doors closed to help the heater warm the space more efciently.
3. Heater placement: For best results, place the heater on an interior wall and
away from windows�
4. Obstructions: Ensure there are no objects blocking the airow around the
heater� Poor circulation can lead to uneven room temperatures�
5. Room size: Verify the heater is appropriately sized for the space� It is ideal for
rooms between 150–750 sq� ft�, with primary heating performance around
150 sq� ft�
(Square footage recommendations may vary based on home insulation�)
If the issue persists, contact customer service at 435-752-6611�

15
Fan runs for under a minute and then turns off
The fan is turning on to attempt to create air ow within your room. The heater is
trying to determine if the ambient temperature in the room has changed�
THERMOSTAT
Ambient temperature reading of the heater different then the reading on my
central heating thermostat.
Thermostat readings may uctuate depending on the surroundings. You can manually
calibrate the thermostat on the heater to align with your central HVAC system� You may
need to attempt calibration multiple times to align your heater thermostat with your
HVAC system�
1. In the Smart Life app, tap on your heater to enter the temperature adjusting
screen� Press the icon to enter the temperature setting page�
2. Adjust the Heat Storm's thermostat with the slider to reach the same
temperature as your central HVAC�
NOTE: Generally, Heat Storm heater thermostats are more precise than home central
thermostats� Adjusting your Heat Storm heater to align with your central system may result in
reduced efciency.
BURNING PLASTIC SMELL
A light plastic odor is normal for new, unused heaters� If the smell persists for more
than a couple of hours, call customer service at 435-752-6611�
ERROR CODES
EE : Temperature sensor (probe) error, when this code shows, the heating element
and fan are turned off� Unplug heater and check if the temperature sensor is loose,
disconnected, or damaged�
EO : Program setup failure� Unplug and plug in again� If error persists, the PCBA
needs to be replaced�
E1: Tip-over error� The heater and fan are turned off� Reactivate by pressing the
on/off icon after repositioning the heater upright�
UH: Incorrect high voltage power supply error� Unplug heater immediately� Attempt
plugging the heater into a different outlet and ensure it is the sole major appliance
on the circuit�
LO: The temperature is less than 16° F (-9 °C)
HI: The temperature is greater than 99° F (37°C)

16
Returns & exchanges
30 DAY RETURN POLICY
Heaters purchased directly from Energy Wise Solutions can receive a refund of the
total sales amount if the following conditions are met within 30 days:
1. Product is in new condition�
2. Product is packed in the original manufacturers box and packing material�
3. Original manuals and accessories are included in package�
EXCHANGES & WARRANTY
After 30 days from the purchase date, the buyer is responsible for all freight/
shipping charges associated with exchanges, refunds, or warranty claims for the
purchased product�
SHIPPING & FEES
• Return shipping is the customer's responsibility�
• Original shipping charges and handling fees will be deducted from the refund�
• A 20% restocking fee applies for returns beyond 30 days�
1-year limited warranty
The manufacturer warrants this product and included accessories against defects
in materials and workmanship under normal use for a period of ONE (1) YEAR
from the date of retail purchase by the original end-user purchaser�
EXCLUSIONS AND LIMITATIONS
1. Install and operate the electric heater strictly in accordance with the
provided instructions at all times� Unauthorized repairs, alterations, willful
abuse, accidents, or misuse of the product will void this warranty�
2. This warranty is exclusive to the original owner, valid only if the
purchase was made through an authorized supplier of the product, and
is non-transferable�
3. The warranty is limited to repairing or replacing defective parts in
material or workmanship� This applies only if the said part(s) have been
exposed to normal conditions of use and service, conrmed by the
manufacturer's inspection�
4. The manufacturer may, at its discretion, fulfill warranty obligations by
refunding the wholesale price of the defective part(s)�

17
5. Costs related to installation, labor, construction, transportation, or
any other associated expenses arising from defective part(s), repair,
replacement, or otherwise, are not covered by this warranty� The
manufacturer disclaims responsibility for such costs�
6. The owner/user assumes all risks, including any direct, indirect, or
consequential loss or damage resulting from product use, except as
mandated by law�
7. All other warranties, whether expressed or implied, pertaining to the
product, its components, accessories, or any manufacturer obligations/
liabilities, are expressly excluded� The manufacturer neither assumes nor
authorizes any third party to assume additional liabilities related to the
product sale�
8. The manufacturer neither assumes nor authorizes any third party to
assume on its behalf, any other liabilities with respect to the sale
of the product�
9. The warranties as outlined in this document do not apply to non-
accessories used in conjunction with the installation of this product�
10. Specic legal rights provided; additional rights may vary by state.
Warranty void if prolonged exposure to dampness, unauthorized
alteration, willful abuse, accident, misuse, or lack of original
purchase receipt�
WARRANTY REDEMPTION
Reach out to Heat Storm customer service at 435-752-6611 during the warranty
period� Please have your sales receipt, purchase location, and product model
information ready� Troubleshooting support will be offered over the phone� If the
issue persists, you may be requested to email proof of purchase and a photo of
the manufacturer sticker to cs@heatstorm�com�
Replacement parts:
In some cases, we may send you a replacement part along with repair instructions�
This is classied as an authorized repair and does not void your warranty.
Unit repairs:
If the situation warrants, we will have you send the defective product to us for
inspection� Our technicians will repair the product or provide a new unit if your
heater is deemed irreparable� For units beyond the 30-day return policy, shipping
costs are the consumers responsibility� If interested in our discounted shipping
rates, kindly inform your customer service representative�

18

19
Need help?
435-752-6611 cs@heatstorm�com heatstorm�com