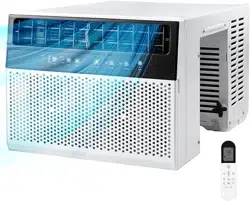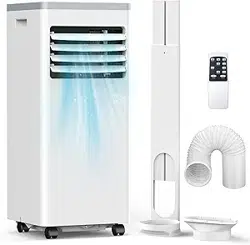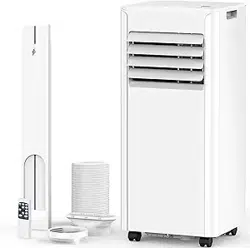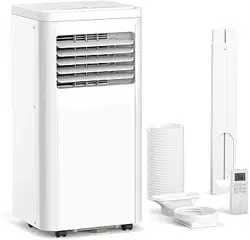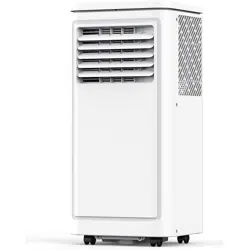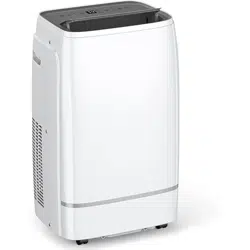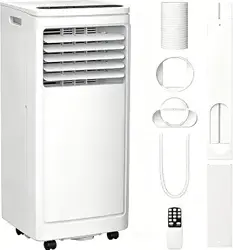
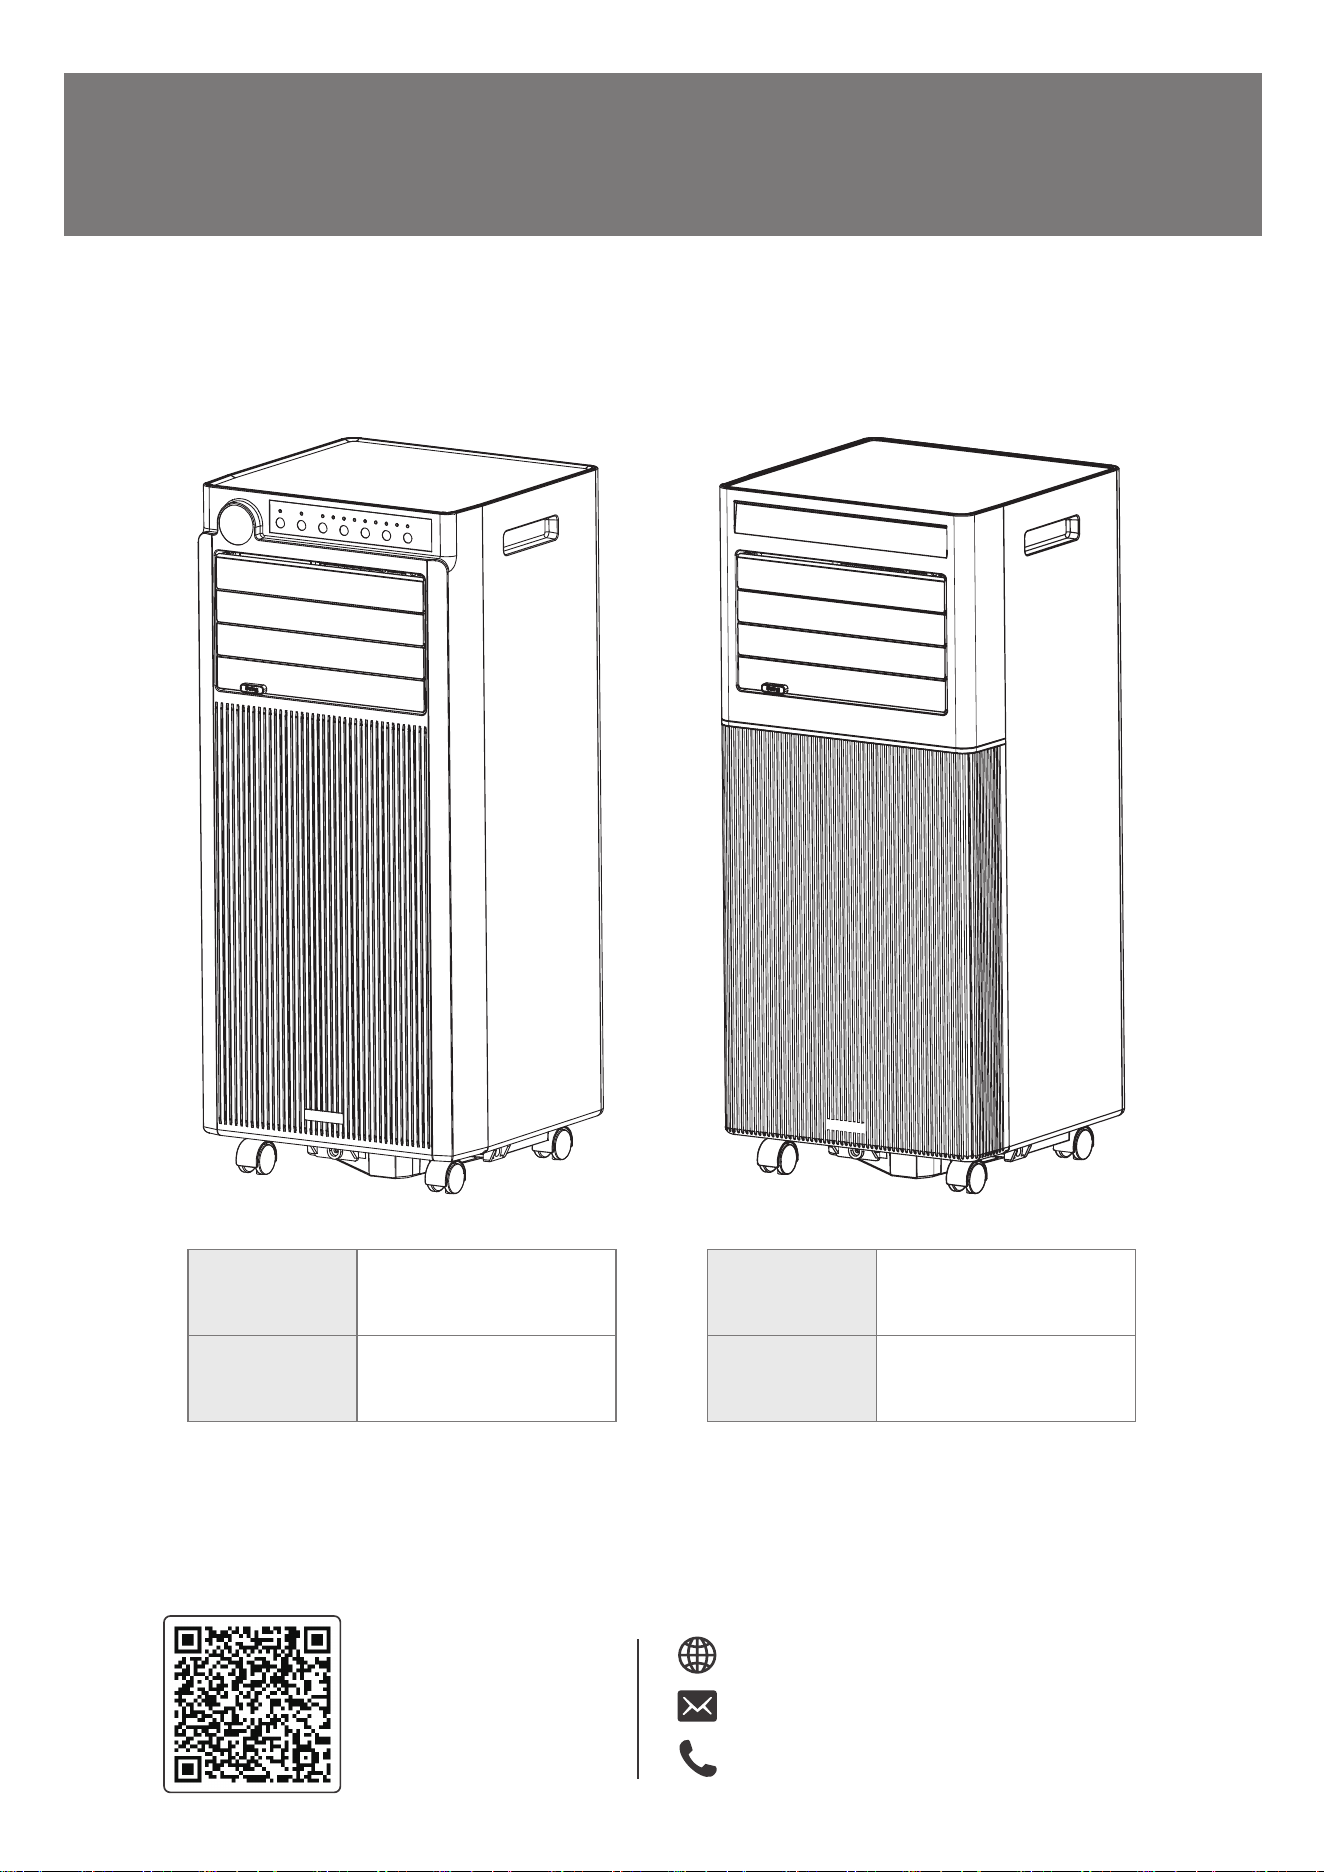
Read this booklet thoroughly before using and save it for future reference
Scan the QR code to
watch the product videos
Web: www.electacticshop.com
Email: [email protected]
Tel: 888-698-2504
Portable Air Conditioner
USER MANUAL
Model No.
NPPC3A-05C/X1E
NPPC3A-06C/X1E
Item No.
AC5419-8K-EL
AC5419-10K-EL
Model No.
NPPB2A-05C/X1E
NPPB2A-06C/X1E
Item No.
AC5420-8K-EL
AC5420-10K-EL
CONTENTS
SAFETY INSTRUCTIONS
PRODUCT INTRODUCTION
OPERATION INSTRUCTIONS
CLEANING AND MAINTENANCE
TROUBLESHOOTING
1
10
14
15
17
1
SAFETY INSTRUCTIONS
Your safety and the safety of others are very important.
WARNING-RISK OF FIRE OR EXPLOSION-STORE IN AWELLVEN-
TILATED ROOM WITHOUTCONTINUOUSLY OPERATING FLAMES
OR OTHER POTENTIAL IGNITION.
MISE EN GARDE-RISQUE D'INCENDIE OU D'EXPLOSION-CON-
SERVER DANSUNE PIÈCEBIEN VENTILÉE, SANS FLAMMES
ALLUMÉES EN PERMANENCENIAUTRE SOURCED'INFLAMMA-
TION POTENTIELLE.
IMPORTANT SAFETY INSTRUCTIONS
We have provided many important safety messages in this manual and on your appliance.
Always read and obey all safety messages.
WARNING: To reduce the risk of fire, electrical shock, injury to persons, or damage when using
the air conditioner, follow basic precautions, including the following:
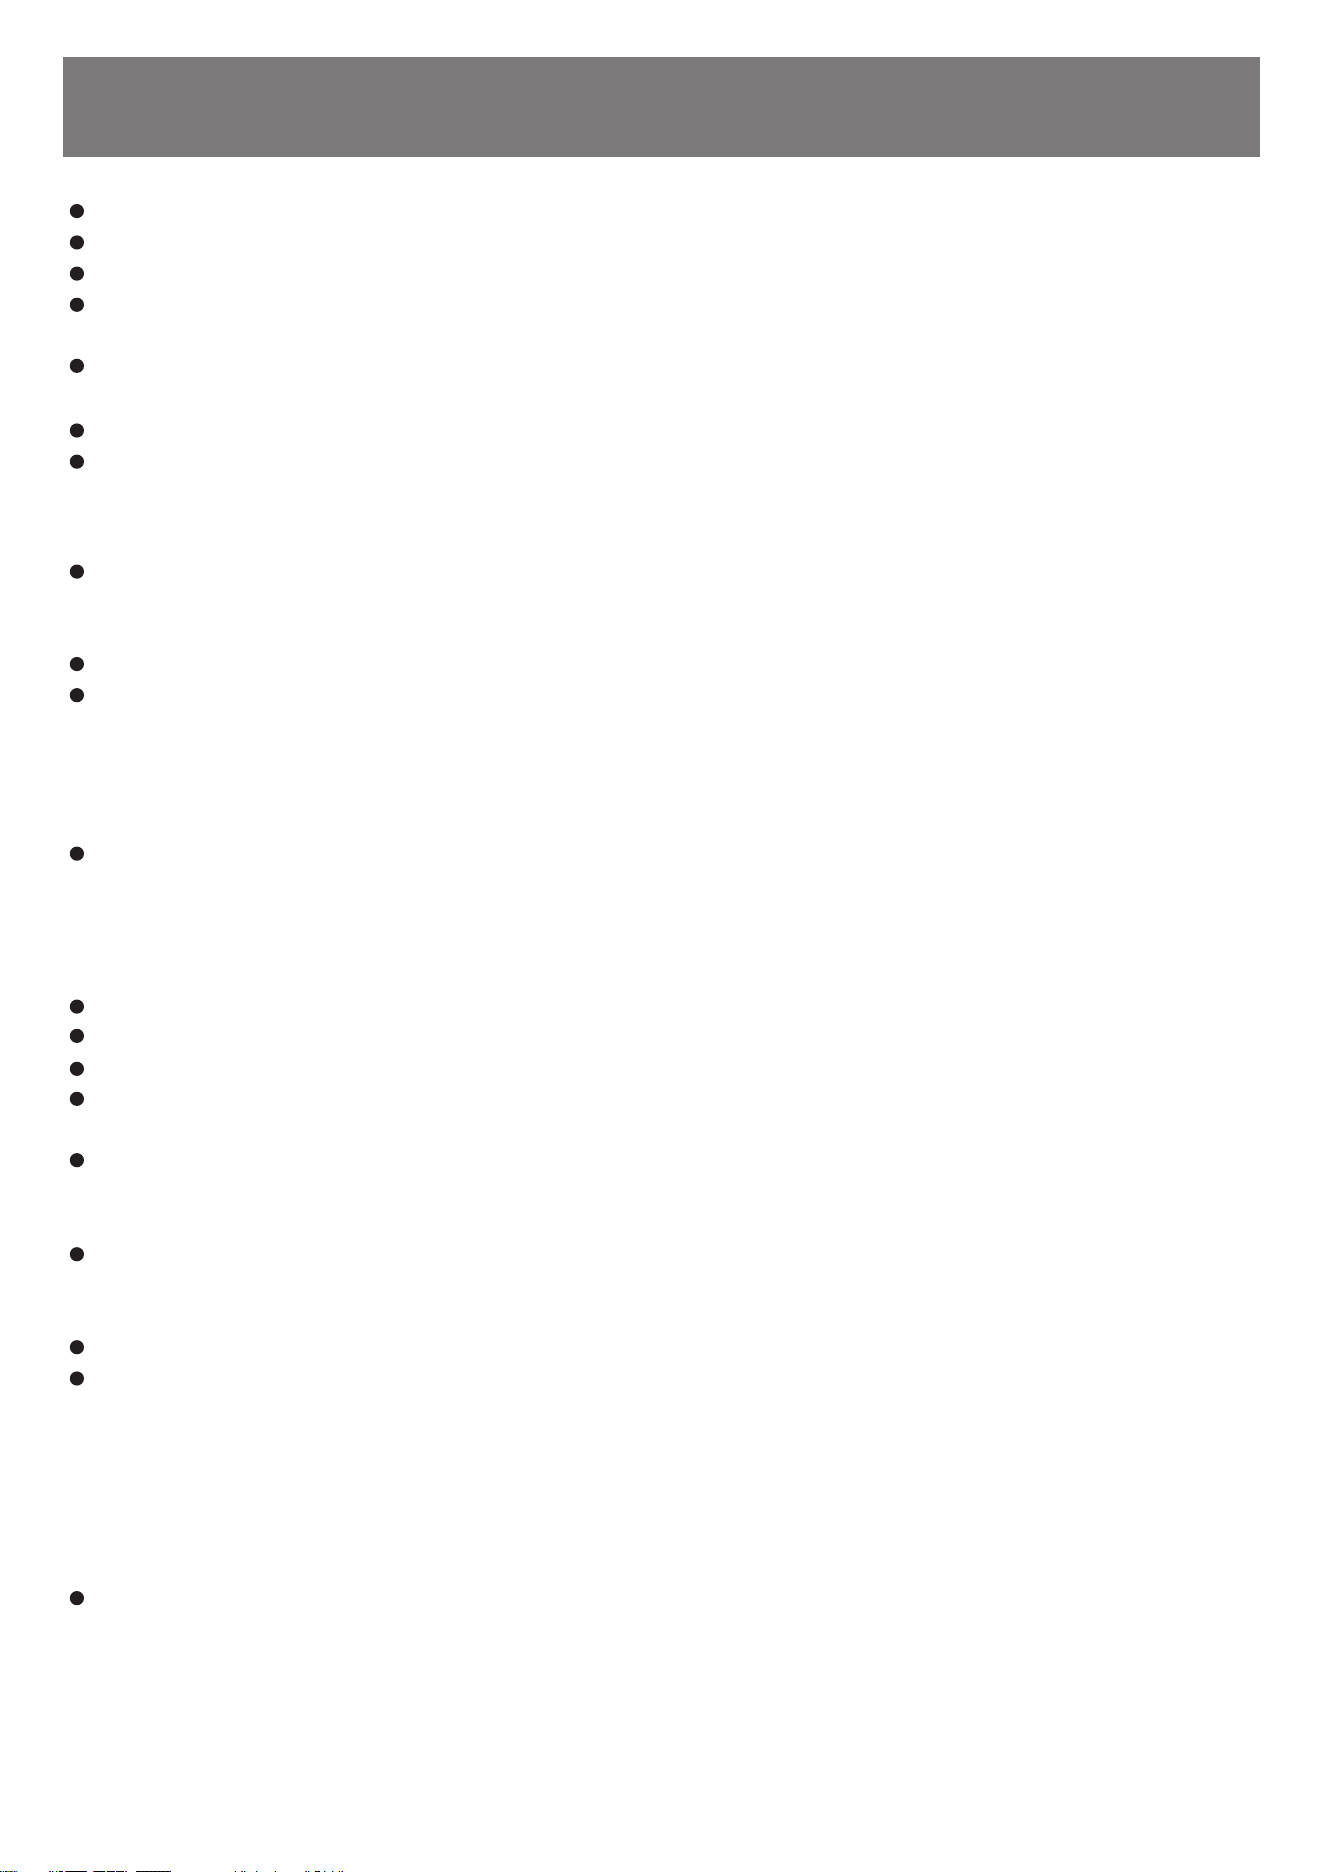
This is the safety alert symbol.
This symbol alerts you to potential hazards that can kill or hurt you and others.
All safety messages will follow the safety alert symbol and either the word
“DANGER”, “WARNING” or “CAUTION”. These words mean:
An imminently hazardous situation. You could be killed or
seriously injured if you don’t immediately follow instructions.
A potentially hazardous situation which, if not avoided, could
result in death or serious bodily injury.
A potentially hazardous situation which, if not avoided, may
result in moderate or minor injury.
All safety messages will tell you what the potential hazard is, tell you how to reduce the
chance of injury, and tell you what can happen if the instructions are not followed.
Appliance shall be stored in a well-ventilated area where the room size is not less than
4m².
Read all of the instructions before using this appliance.
Plug into a grounded 3 prong outlet.
Read operator’ Manual
Lire l'opérateur' Manuel
operator’ manual;
operating instructions
manuel de l'opérateur ;
mode d'emploi
WARNING: risk of fire warning; Flammable materials
Attention : risque d'avertissement d'incendie ; Matériaux inflammables
service indicator; read
technical manual
indicateur de service; lire
technique Manuel
2
SAFETY INSTRUCTIONS
Do not remove ground prong.
Do not use an adapter.
Do not use an extension cord.
Do not operate the air conditioner if it has a damaged cord or plug, if it is not working
properly, or if it has been damaged or dropped.
The air conditioner should be serviced only by qualified service personnel. Call an autho-
rized service company for examination, repair, or adjustment.
Disconnect power before servicing.
Disconnect power before cleaning.
Turning off power by pressing the Power button does NOT disconnect the appliance
from the power supply.
NOTE:
Do not install or use the air conditioner in any area where the atmosphere contains com-
bustible gases or where the atmosphere is contaminated. Avoid any chemicals coming in
contact with your air conditioner.
Do not store anything directly on top of the air conditioner.
The appliance can be used by children aged from 8 years and above and persons with
reduced physical, sensory or mental capabilities if they have been given supervision or
instruction concerning use of the appliance in a safe way and understand the hazards
involved. Children shall not play with the appliance. Cleaning and maintenance shall not
be made by children without supervision.
This appliance is not intended for use by persons (including children) with reduced physi-
cal, sensory or mental capabilities, or lack of experience and knowledge, unless they have
been given supervision or instruction concerning use of the appliance by a person
responsible for their safety. Children should be supervised to ensure that they do not play
with the appliance.
Use two or more people to move and install air conditioner.
Never operate the air conditioner without the filters in place.
Do not use the air conditioner near a bathtub, shower or wash basin or other wet area.
Do not use means to accelerate the defrosting process or to clean, other than those rec-
ommended by the manufacturer.
The appliance shall be stored in a room without continuously operating ignition sources
(for example: open flames, an operating gas appliance or an operating electric heater. Do
not pierce or burn.
Be aware that refrigerants may not contain an odor.
- the maximum refrigerant charge amount: NPP-05C/X1E - 7.05Oz
- the maximum refrigerant charge amount: NPP-06C/X1E - 6.77Oz
The appliance shall be stored so as to prevent mechanical damage from occurring.
Any person who is involved with working on or breaking into a refrigerant circuit should
hold a current valid certificate from an industry-accredited assessment authority, which
authorizes their competence to handle refrigerants safely in accordance with an industry
recognized assessment specification. Servicing shall only be performed as recommended
by the equipment manufacturer. Maintenance and repair requiring the assistance of
other skilled personnel shall be carried out under the supervision of the person competent
in the use of flammable refrigerants.
Prior to beginning work on systems containing flammable refrigerants, safety checks are
necessary to ensure that the risk of ignition is minimized. Work shall be undertaken under
a controlled procedure so as to minimize the risk of a flammable gas or vapor being pres-
ent while the work is being performed. All maintenance staff and others working in the
local area shall be instructed on the nature of work being carried out. Work in confined
spaces shall be avoided. The area around the workspace shall be sectioned off. Ensure
3
SAFETY INSTRUCTIONS
that the conditions within the area have been made safe by control of flammable material.
The area shall be checked with an appropriate refrigerant detector prior to and during
work, to ensure the technician is aware of potentially flammable atmospheres. Ensure that
the leak detection equipment being used is suitable for use with flammable refrigerants, i.e.
no sparking, adequately sealed or intrinsically safe.
If any hot work is to be conducted on the refrigeration equipment or any associated parts,
appropriate fire extinguishing equipment shall be available to hand. Have a dry powder or
CO² fire extinguisher adjacent to the charging area.
No person carrying out work in relation to a refrigeration system which involves exposing
any pipe work that contains or has contained flammable refrigerant shall use any sources
of ignition in such a manner that it may lead to the risk of fire or explosion. All possible igni-
tion sources, including cigarette smoking, should be kept sufficiently far away from the site
of installation, repairing, removing and disposal, during which flammable refrigerant can
possibly be released to the surrounding space. Prior to work taking place, the area around
the equipment is to be surveyed to make sure that there are no flammable hazards or
ignition risks. “No Smoking” signs shall be displayed.
Ensure that the area is in the open or that it is adequately ventilated before breaking into
the system or conducting any hot work. A degree of ventilation shall continue during the
period that the work is carried out. The ventilation should safely disperse any released
refrigerant and preferably expel it externally into the atmosphere.
Do not apply any permanent inductive or capacitance loads to the circuit without ensuring
that this will not exceed the permissible voltage and current permitted for the equipment in
use. Intrinsically safe components are the only types that can be worked on while live in the
presence of a flammable atmosphere. The test apparatus shall be at the correct rating.
Replace components only with parts specified by the manufacturer. Other parts may result
in the ignition of refrigerant in the atmosphere from a leak.
Check that cabling will not be subject to wear, corrosion, excessive pressure, vibration,
sharp edges or any other adverse environmental effects. The check shall also take into
account the effects of aging or continual vibration from sources such as compressors or
fans.
Under no circumstances shall potential sources of ignition be used in the searching for or
detection of refrigerant leaks. A halide torch (or any other detector using a naked flame)
shall not be used.
Electronic leak detectors shall be used to detect flammable refrigerants, but the sensitivity
may not be adequate, or may need re-calibration. (Detection equipment shall be calibrat-
ed in a refrigerant-free area.) Ensure that the detector is not a potential source of ignition
and is suitable for the refrigerant used. Leak detection equipment shall be set at a percent-
age of the LFL of the refrigerant and shall be calibrated to the refrigerant employed and the
appropriate percentage of gas (25 % maximum) is confirmed. Leak detection fluids are
suitable for use with most refrigerants but the use of detergents containing chlorine shall
be avoided as the chlorine may react with the refrigerant and corrode the copper
pipe-work. If a leak is suspected, all naked flames shall be removed/extinguished. If a leak-
age of refrigerant is found which requires brazing, all of the refrigerant shall be recovered
from the system, or isolated (by means of shut off valves) in a part of the system remote
from the leak. Oxygen free nitrogen (OFN) shall then be purged through the system both
before and during the brazing process.
When breaking into the refrigerant circuit to make repairs – or for any other purpose –
conventional procedures shall be used. However, it is important that best practice is
followed since flammability is a consideration. The following procedure shall be adhered to:
- remove refrigerant;
- purge the circuit with inert gas;
- evacuate;
- purge again with inert gas;
- open the circuit by cutting or brazing.
The refrigerant charge shall be recovered into the correct recovery cylinders. The system
shall be “flushed” with OFN to render the unit safe. This process may need to be repeated
several times. Compressed air or oxygen shall not be used for this task. Flushing shall be
achieved by breaking the vacuum in the system with OFN and continuing to fill until the
working pressure is achieved, then venting to atmosphere, and finally pulling down to a
vacuum. This process shall be repeated until no refrigerant is within the system. When the
final OFN charge is used, the system shall be vented down to atmospheric pressure to
enable work to take place. This operation is absolutely vital if brazing operations on the
pipe-work are to take place. Ensure that the outlet for the vacuum pump is not close to any
ignition sources and there is ventilation available.
In addition to conventional charging procedures, the following requirements shall be
followed.
4
SAFETY INSTRUCTIONS
Prior to recharging the system it shall be pressure tested with OFN. The system shall be
leak tested on completion of charging but prior to commissioning. A follow up leak test
shall be carried out prior to leaving the site.
Before carrying out this procedure, it is essential that the technician is completely familiar
with the equipment and all its detail. It is recommended good practice that all refrigerants
are recovered safely. Prior to the task being carried out, an oil and refrigerant sample shall
be taken in case analysis is required prior to re-use of reclaimed refrigerant. It is essential
that electrical power is available before the task is commenced.
Ensure that contamination of different refrigerants does not occur when using charging
equipment. Hoses or lines shall be as short as possible to minimize the amount of refrig-
erant contained in them.
Cylinders shall be kept upright.
Ensure that the refrigeration system is earthed prior to charging the system with refrig-
erant.
Label the system when charging is complete (if not already).
Extreme care shall be taken not to overfill the refrigeration system.
–
-
-
-
-
Become familiar with the equipment and its operation.
Isolate system electrically.
Before attempting the procedure ensure that:
a)
b)
c)
Pump down refrigerant system, if possible.
If a vacuum is not possible, make a manifold so that refrigerant can be removed from
various parts of the system.
Make sure that cylinder is situated on the scales before recovery takes place.
d)
e)
f)
mechanical handling equipment is available, if required, for handling refrigerant
cylinders;
all personal protective equipment is available and being used correctly;
the recovery process is supervised at all times by a competent person;
recovery equipment and cylinders conform to the appropriate standards.
-
-
-
-
READ AND SAVE THESE INSTRUCTIONS
5
SAFETY INSTRUCTIONS
Start the recovery machine and operate in accordance with manufacturer's instruc-
tions.
Do not overfill cylinders. (No more than 80 % volume liquid charge).
Do not exceed the maximum working pressure of the cylinder, even temporarily.
When the cylinders have been filled correctly and the process completed, make sure
that the cylinders and the equipment are removed from site promptly and all isolation
valves on the equipment are closed off.
Recovered refrigerant shall not be charged into another refrigeration system unless it
has been cleaned and checked.
g)
h)
i)
j)
k)
Equipment shall be labeled stating that it has been decommissioned and emptied of
refrigerant. The label shall be dated and signed. Ensure that there are labels on the equip-
ment stating the equipment contains flammable refrigerant.
When removing refrigerant from a system, either for servicing or decommissioning, it is
recommended good practice that all refrigerants are removed safely. When transferring
refrigerant into cylinders, ensure that only appropriate refrigerant recovery cylinders are
employed. Ensure that the correct number of cylinders for holding the total system charge
are available. All cylinders to be used are designated for the recovered refrigerant and
labeled for that refrigerant (i.e. special cylinders for the recovery of refrigerant). Cylinders
shall be complete with pressure relief valve and associated shut-off valves in good work-
ing order. Empty recovery cylinders are evacuated and, if possible, cooled before recovery
occurs. The recovery equipment shall be in good working order with a set of instructions
concerning the equipment that is at hand and shall be suitable for the recovery of flam-
mable refrigerants. In addition, a set of calibrated weighing scales shall be available and
in good working order. Hoses shall be complete with leak-free disconnect couplings and
in good condition. Before using the recovery machine, check that it is in satisfactory work-
ing order, has been properly maintained and that any associated electrical components
are sealed to prevent ignition in the event of a refrigerant release. Consult manufacturer if
in doubt.
The recovered refrigerant shall be returned to the refrigerant supplier in the correct recov-
ery cylinder, and the relevant Waste Transfer Note arranged. Do not mix refrigerants in
recovery units and especially not in cylinders. If compressors or compressor oils are to be
removed, ensure that they have been evacuated to an acceptable level to make certain
that flammable refrigerant does not remain within the lubricant. The evacuation process
shall be carried out prior to returning the compressor to the suppliers. Only electric heating
to the compressor body shall be employed to accelerate this process. When oil is drained
from a system, it shall be carried out safely.
L'appareil doit être stocké dans un endroit bien ventilé où la taille de la pièce n'est pas
inférieure à 4m².
Lisez toutes les instructions avant d'utiliser cet appareil.
Branchez-le dans une prise à 3 broches mise à la terre.
Ne pas enlever la broche de mise à la terre.
N'utilise pas un adaptateur.
AVERTISSEMENT : Pour réduire le risque d'incendie, de choc électrique, de blessure ou de
dommage lors de l'utilisation du climatiseur, suivez les précautions de base, notamment les
suivantes :
6
SAFETY INSTRUCTIONS
N'utilisez pas de rallonge.
N'utilisez pas le climatiseur s'il a un cordon ou une fiche endommagé, s'il ne fonctionne
pas correctement, ou s'il a été endommagé ou est tombé.
Le climatiseur ne doit être entretenu que par du personnel de service qualifié. Appelez une
société de service agréée pour un examen, une réparation ou un réglage.
Débranchez l'alimentation avant l'entretien.
Débranchez l'alimentation avant de nettoyer.
REMARQUE: couper l'alimentation en appuyant sur le bouton d'alimentation ne décon-
necte PAS l'appareil de l'alimentation électrique.
N'installez pas et n'utilisez pas le climatiseur dans une zone où l'atmosphère contient des
gaz combustibles ou où l'atmosphère est contaminée. Évitez tout contact chimique avec
votre climatiseur.
Ne rangez rien directement sur le climatiseur.
L'appareil peut être utilisé par des enfants âgés de 8 ans et plus et des personnes ayant
des capacités physiques, sensorielles ou mentales réduites s'ils ont reçu une supervision
ou des instructions concernant l'utilisation de l'appareil en toute sécurité et comprennent
les risques encourus. Les enfants ne doivent pas jouer avec l'appareil. Le nettoyage et
l'entretien ne doivent pas être effectués par des enfants sans surveillance.
Cet appareil n'est pas destiné aux personnes (y compris les enfants) ayant des capacités
physiques, sensorielles ou mentales réduites, ou un manque d'expérience et de connais-
sances, à moins qu'elles n'aient reçu une supervision ou des instructions concernant
l'utilisation de l'appareil par une personne responsable de leur sécurité. Les enfants
doivent être surveillés pour s'assurer qu'ils ne jouent pas avec l'appareil.
Utilisez deux personnes ou plus pour déplacer et installer le climatiseur.
Ne jamais faire fonctionner le climatiseur sans les filtres en place.
N'utilisez pas le climatiseur à proximité d'une baignoire, d'une douche, d'un lavabo ou de
toute autre zone humide.
N'utilisez pas de moyens pour accélérer le processus de dégivrage ou de nettoyage,
autres que ceux recommandés par le fabricant.
L'appareil doit être stocké dans une pièce sans sources d'inflammation en fonctionne-
ment continu (par exemple : flammes nues, appareil à gaz en fonctionnement ou radia-
teur électrique en fonctionnement. Ne pas percer ni brûler.
Sachez que les réfrigérants peuvent ne pas contenir d'odeur.
- la quantité maximale de charge de réfrigérant : NPP-05C/X1E - 7.05Oz
- la quantité maximale de charge de réfrigérant : NPP-06C/X1E - 6.77Oz
L'appareil doit être stocké de manière à éviter des dommages mécaniques.
Toute personne impliquée dans le travail ou l'effraction d'un circuit de réfrigérant doit
détenir un certificat en cours de validité délivré par une autorité d'évaluation accréditée
par l'industrie, qui autorise sa compétence à manipuler les réfrigérants en toute sécurité
conformément à une spécification d'évaluation reconnue par l'industrie. L'entretien ne doit
être effectué que selon les recommandations du fabricant de l'équipement. L'entretien et
les réparations nécessitant l'assistance d'un autre personnel qualifié doivent être effec-
tués sous la supervision de la personne compétente dans l'utilisation des réfrigérants
inflammables.
Avant de commencer à travailler sur des systèmes contenant des réfrigérants inflamma-
bles, des contrôles de sécurité sont nécessaires pour s'assurer que le risque d'inflamma-
tion est minimisé. Les travaux doivent être entrepris selon une procédure contrôlée afin de
minimiser le risque de présence de gaz ou de vapeurs inflammables pendant l'exécution
des travaux. Tout le personnel d'entretien et les autres personnes travaillant dans la zone
locale doivent être informés de la nature des travaux à effectuer. Le travail dans des
7
SAFETY INSTRUCTIONS
espaces confinés doit être évité. La zone autour de l'espace de travail doit être délimitée.
Assurez-vous que les conditions dans la zone ont été sécurisées par le contrôle des
matières inflammables.
La zone doit être vérifiée avec un détecteur de réfrigérant approprié avant et pendant le
travail, pour s'assurer que le technicien est conscient des atmosphères potentiellement
inflammables. Assurez-vous que l'équipement de détection des fuites utilisé est adapté à
une utilisation avec des réfrigérants inflammables, c'est-à-dire sans étincelles, correcte-
ment scellés ou intrinsèquement sûrs.
Si des travaux à chaud doivent être effectués sur l'équipement de réfrigération ou sur
toute pièce associée, un équipement d'extinction d'incendie approprié doit être disponible.
Disposez un extincteur à poudre sèche ou à CO² à côté de la zone de charge.
Aucune personne effectuant des travaux en relation avec un système de réfrigération qui
implique l'exposition d'une tuyauterie contenant ou ayant contenu un réfrigérant inflam-
mable ne doit utiliser de sources d'inflammation pouvant entraîner un risque d'incendie
ou d'explosion. Toutes les sources d'inflammation possibles, y compris la cigarette, doivent
être maintenues suffisamment loin du site d'installation, de réparation, de retrait et d'élim-
ination, au cours desquelles un réfrigérant inflammable peut éventuellement être libéré
dans l'espace environnant. Avant le début des travaux, la zone autour de l'équipement
doit être inspectée pour s'assurer qu'il n'y a pas de risques d'inflammabilité ou d'inflam-
mation. Des panneaux « interdiction de fumer » doivent être affichés.
Assurez-vous que la zone est à l'air libre ou qu'elle est suffisamment ventilée avant de
pénétrer dans le système ou d'effectuer des travaux à chaud. Une certaine ventilation doit
être maintenue pendant la durée des travaux. La ventilation doit disperser en toute sécu-
rité tout réfrigérant libéré et de préférence l'expulser de l'extérieur dans l'atmosphère.
N'appliquez aucune charge inductive ou capacitive permanente au circuit sans vous
assurer que cela ne dépassera pas la tension et le courant autorisés pour l'équipement
utilisé. Les composants à sécurité intrinsèque sont les seuls types sur lesquels on peut
travailler en direct en présence d'une atmosphère inflammable. L'appareil d'essai doit être
à la valeur nominale correcte. Remplacez les composants uniquement par des pièces
spécifiées par le fabricant. D'autres pièces peuvent provoquer l'inflammation du
réfrigérant dans l'atmosphère à la suite d'une fuite.
Vérifiez que le câblage ne sera pas soumis à l'usure, à la corrosion, à une pression exces-
sive, à des vibrations, à des arêtes vives ou à tout autre effet environnemental négatif. Le
contrôle doit également prendre en compte les effets du vieillissement ou des vibrations
continuelles provenant de sources telles que les compresseurs ou les ventilateurs.
En aucun cas, des sources potentielles d'inflammation ne doivent être utilisées pour
rechercher ou détecter des fuites de réfrigérant. Une torche aux halogénures (ou tout
autre détecteur utilisant une flamme nue) ne doit pas être utilisée.
Des détecteurs de fuites électroniques doivent être utilisés pour détecter les réfrigérants
inflammables, mais la sensibilité peut ne pas être adéquate ou nécessiter un réétalon-
nage. (L'équipement de détection doit être étalonné dans une zone sans réfrigérant.)
Assurez-vous que le détecteur n'est pas une source potentielle d'inflammation et qu'il est
adapté au réfrigérant utilisé. L'équipement de détection des fuites doit être réglé à un
pourcentage de la LFL du réfrigérant et doit être calibré en fonction du réfrigérant utilisé et
le pourcentage approprié de gaz (25 % maximum) est confirmé. Les fluides de détection
de fuites conviennent à la plupart des réfrigérants, mais l'utilisation de détergents conte-
nant du chlore doit être évitée car le chlore peut réagir avec le réfrigérant et corroder la
tuyauterie en cuivre. Si une fuite est suspectée, toutes les flammes nues doivent être
retirées/éteintes. Si une fuite de réfrigérant nécessitant un brasage est détectée, tout le
réfrigérant doit être récupéré du système ou isolé (au moyen de vannes d'arrêt) dans une
8
SAFETY INSTRUCTIONS
partie du système éloignée de la fuite. L'azote sans oxygène (OFN) doit ensuite être purgé
à travers le système avant et pendant le processus de brasage.
Lors de l'effraction du circuit frigorifique pour effectuer des réparations – ou à toute autre
fin – des procédures conventionnelles doivent être utilisées. Cependant, il est important
que les meilleures pratiques soient suivies car l'inflammabilité est une considération. La
procédure suivante doit être respectée :
- enlever le réfrigérant;
- purger le circuit avec du gaz inerte;
- évacuer;
- purger à nouveau avec du gaz inerte;
- open the circuit by cutting or brazing.
La charge de réfrigérant doit être récupérée dans les cylindres de récupération appro-
priés. Le système doit être « rincé » avec OFN pour rendre l'unité sûre. Ce processus peut
devoir être répété plusieurs fois. L'air comprimé ou l'oxygène ne doivent pas être utilisés
pour cette tâche. Le rinçage doit être réalisé en brisant le vide dans le système avec OFN
et en continuant à remplir jusqu'à ce que la pression de service soit atteinte, puis en évac-
uant dans l'atmosphère et enfin en tirant vers un vide. Ce processus doit être répété
jusqu'à ce qu'il n'y ait plus de réfrigérant dans le système. Lorsque la charge OFN finale est
utilisée, le système doit être ventilé jusqu'à la pression atmosphérique pour permettre le
travail. Cette opération est absolument indispensable pour réaliser des opérations de
brasage sur la tuyauterie. Assurez-vous que la sortie de la pompe à vide n'est pas à prox-
imité de sources d'inflammation et qu'il y a une ventilation disponible.
En plus des procédures de taxation conventionnelles, les exigences suivantes doivent être
respectées.
Avant de recharger le système, il doit être testé sous pression avec OFN. Le système doit
être testé contre les fuites à la fin de la charge mais avant la mise en service. Un test
d'étanchéité de suivi doit être effectué avant de quitter le site.
Avant d'effectuer cette procédure, il est essentiel que le technicien soit parfaitement
familiarisé avec l'équipement et tous ses détails. Il est de bonne pratique recommandée
que tous les réfrigérants soient récupérés en toute sécurité. Avant l'exécution de la tâche,
un échantillon d'huile et de réfrigérant doit être prélevé au cas où une analyse serait req-
uise avant la réutilisation du réfrigérant récupéré. Il est essentiel que l'alimentation élec-
trique soit disponible avant de commencer la tâche.
Assurez-vous que la contamination des différents réfrigérants ne se produit pas lors de
l'utilisation de l'équipement de charge. Les tuyaux ou conduites doivent être aussi courts
que possible pour minimiser la quantité de réfrigérant qu'ils contiennent.
Les cylindres doivent être maintenus debout.
Assurez-vous que le système de réfrigération est mis à la terre avant de charger le
système avec du réfrigérant.
Étiquetez le système lorsque la charge est terminée (si ce n'est déjà fait).
Un soin extrême doit être pris pour ne pas trop remplir le système de réfrigération.
–
-
-
-
-
Familiarisez-vous avec l'équipement et son fonctionnement.
Isoler le système électriquement.
Avant de tenter la procédure, assurez-vous que:
a)
b)
c)
un équipement de manutention mécanique est disponible, si nécessaire, pour la
manutention des bouteilles de fluide frigorigène ;
tous les équipements de protection individuelle sont disponibles et utilisés correcte-
ment ;
-
-
LIRE ET CONSERVER CES INSTRUCTIONS
9
SAFETY INSTRUCTIONS
L'équipement doit être étiqueté indiquant qu'il a été mis hors service et vidé de son
réfrigérant. L'étiquette doit être datée et signée. Assurez-vous qu'il y a des étiquettes sur
l'équipement indiquant que l'équipement contient un réfrigérant inflammable.
Lors de l'élimination du réfrigérant d'un système, que ce soit pour l'entretien ou la mise
hors service, il est recommandé de faire en sorte que tous les réfrigérants soient éliminés
en toute sécurité. Lors du transfert de réfrigérant dans des bouteilles, assurez-vous que
seules des bouteilles de récupération de réfrigérant appropriées sont utilisées.
Assurez-vous que le nombre correct de cylindres pour contenir la charge totale du sys-
tème est disponible. Toutes les bouteilles à utiliser sont désignées pour le réfrigérant
récupéré et étiquetées pour ce réfrigérant (c'est-à-dire des bouteilles spéciales pour la
récupération du réfrigérant). Les bouteilles doivent être équipées d'une soupape de sur-
pression et de vannes d'arrêt associées en bon état de fonctionnement. Les cylindres de
récupération vides sont évacués et, si possible, refroidis avant la récupération. L'équipe-
ment de récupération doit être en bon état de fonctionnement avec un ensemble d'in-
structions concernant l'équipement à portée de main et doit être adapté à la récupéra-
tion des fluides frigorigènes inflammables. De plus, un jeu de balances étalonnées doit
être disponible et en bon état de fonctionnement. Les tuyaux doivent être équipés de
raccords de déconnexion étanches et en bon état. Avant d'utiliser la machine de
récupération, vérifiez qu'elle est en bon état de fonctionnement, qu'elle a été correctement
entretenue et que tous les composants électriques associés sont scellés pour éviter toute
inflammation en cas de fuite de fluide frigorigène. Consulter le fabricant en cas de doute.
Le réfrigérant récupéré doit être retourné au fournisseur de réfrigérant dans le bon cylin-
dre de récupération, et la note de transfert de déchets appropriée doit être rédigée. Ne
pas mélanger les fluides frigorigènes dans les récupérateurs et surtout pas dans les bou-
teilles. Si des compresseurs ou des huiles de compresseur doivent être retirés,
assurez-vous qu'ils ont été évacués à un niveau acceptable pour s'assurer que le
réfrigérant inflammable ne reste pas dans le lubrifiant. Le processus d'évacuation doit être
effectué avant le retour du compresseur aux fournisseurs. Seul le chauffage électrique du
corps du compresseur doit être utilisé pour accélérer ce processus. Lorsque l'huile est
vidangée d'un système, elle doit être effectuée en toute sécurité.
Pump down refrigerant system, if possible.
Si un vide n'est pas possible, créez un collecteur afin que le réfrigérant puisse être retiré
de diverses parties du système.
Assurez-vous que le cylindre est situé sur la balance avant de procéder à la récupéra-
tion.Start the recovery machine and operate in accordance with manufacturer's
instructions.
Ne pas trop remplir les cylindres. (Pas plus de 80 % de volume de charge liquide).
Ne pas dépasser la pression maximale de service du vérin, même temporairement.
Lorsque les bouteilles ont été correctement remplies et que le processus est terminé,
assurez-vous que les bouteilles et l'équipement sont retirés du site rapidement et que
toutes les vannes d'isolement de l'équipement sont fermées.Recovered refrigerant
shall not be charged into another refrigeration system unless it has been cleaned and
checked.
d)
e)
f)
g)
h)
i)
le processus de récupération est supervisé en tout temps par une personne com-
pétente ;
les équipements de récupération et les bouteilles sont conformes aux normes ap-
propriées.
-
-
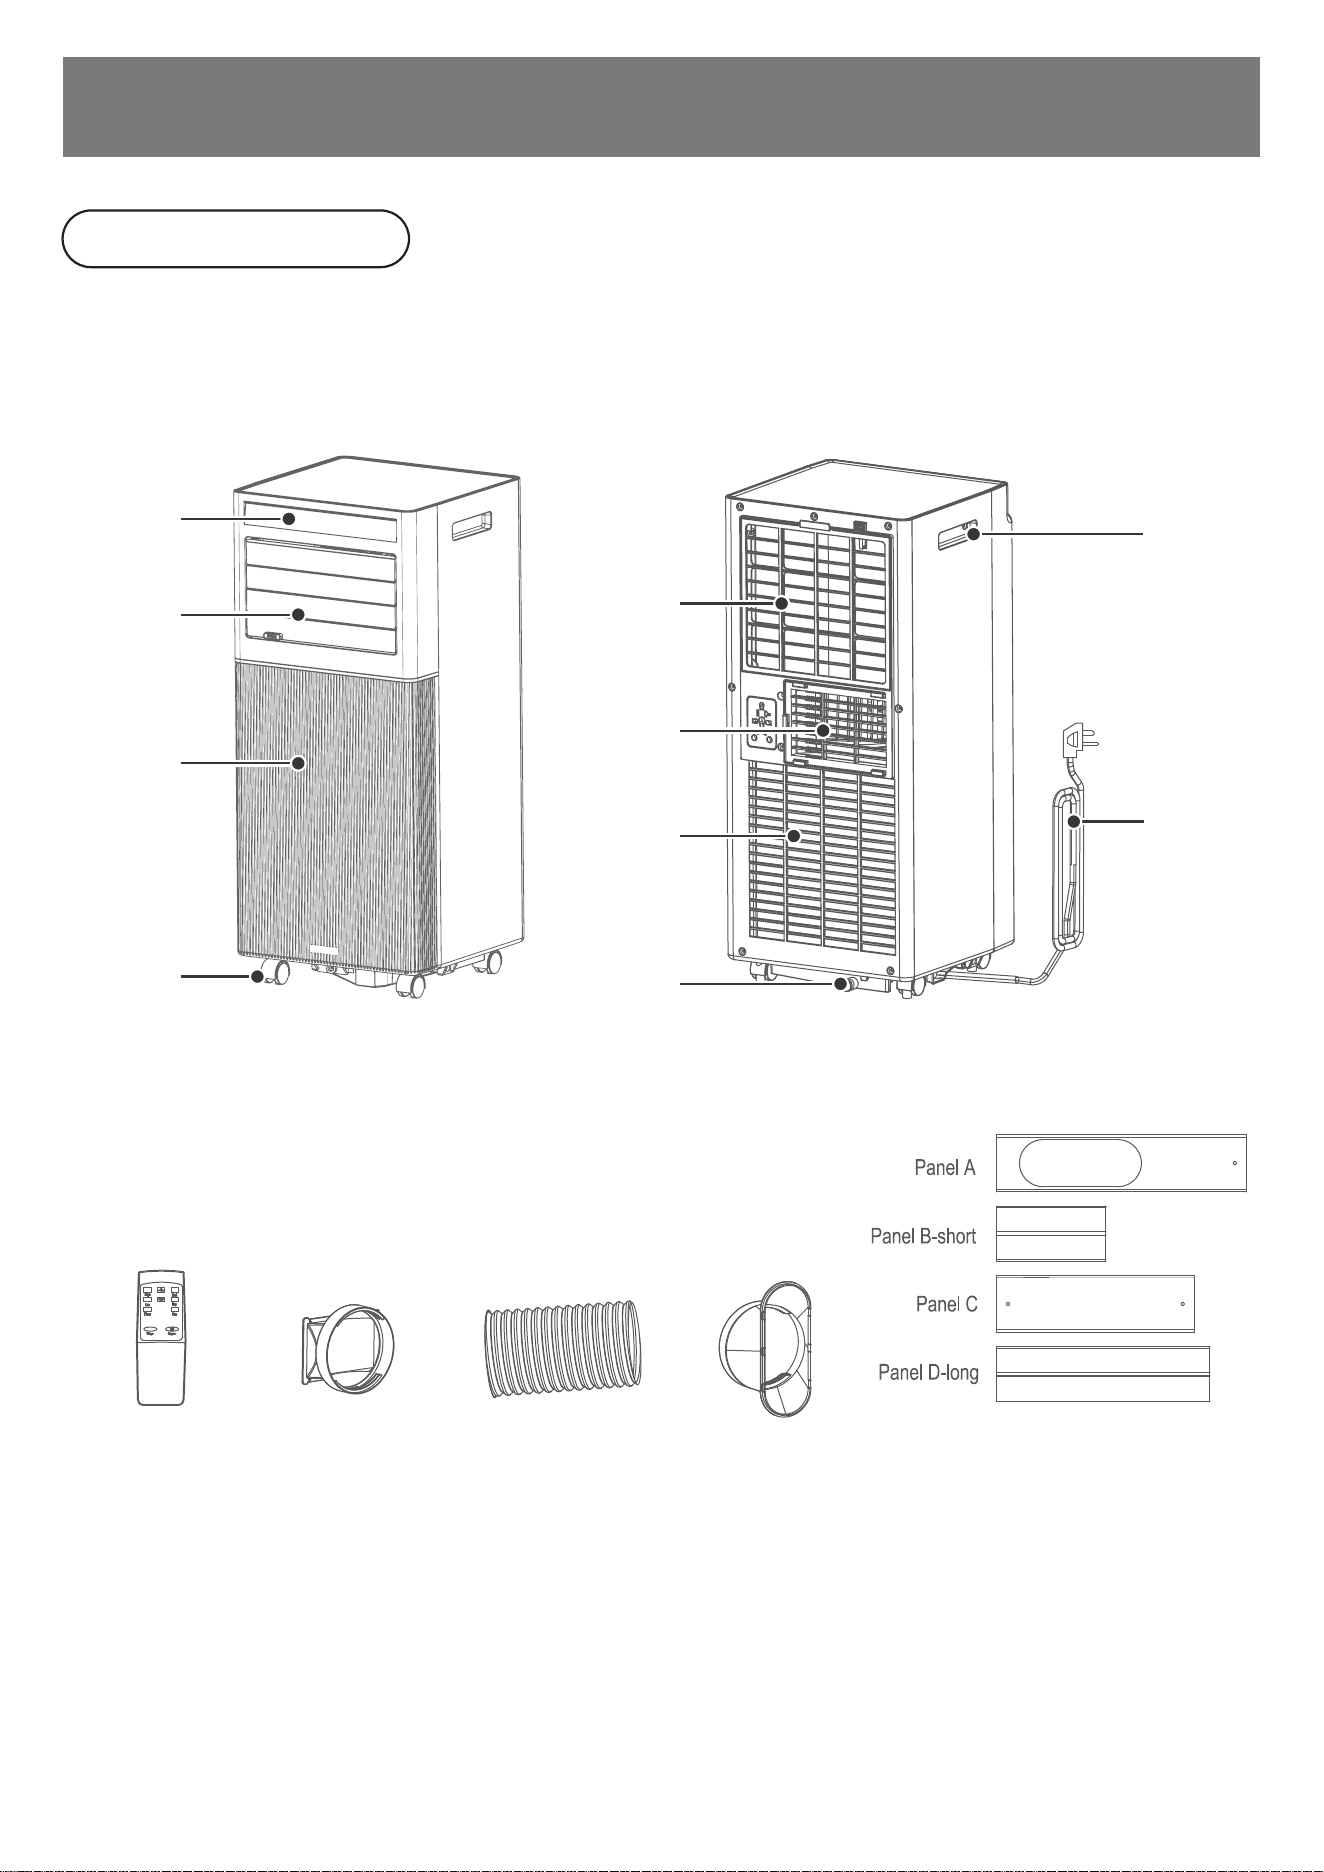
Component List
Handle
Power
supply
cord
Filter
Remote
control
Inside
connector
Exhaust
hose
Window panels
Adapter
Drain
port
Air
inlet
Air
outlet
Control
panel
Universal
wheels
Louver
10
PRODUCT INTRODUCTION
NOTE: The illustration is based on model NPPB2A for reference. The actual appearance will be
subject to the model you purchased.
Main
body
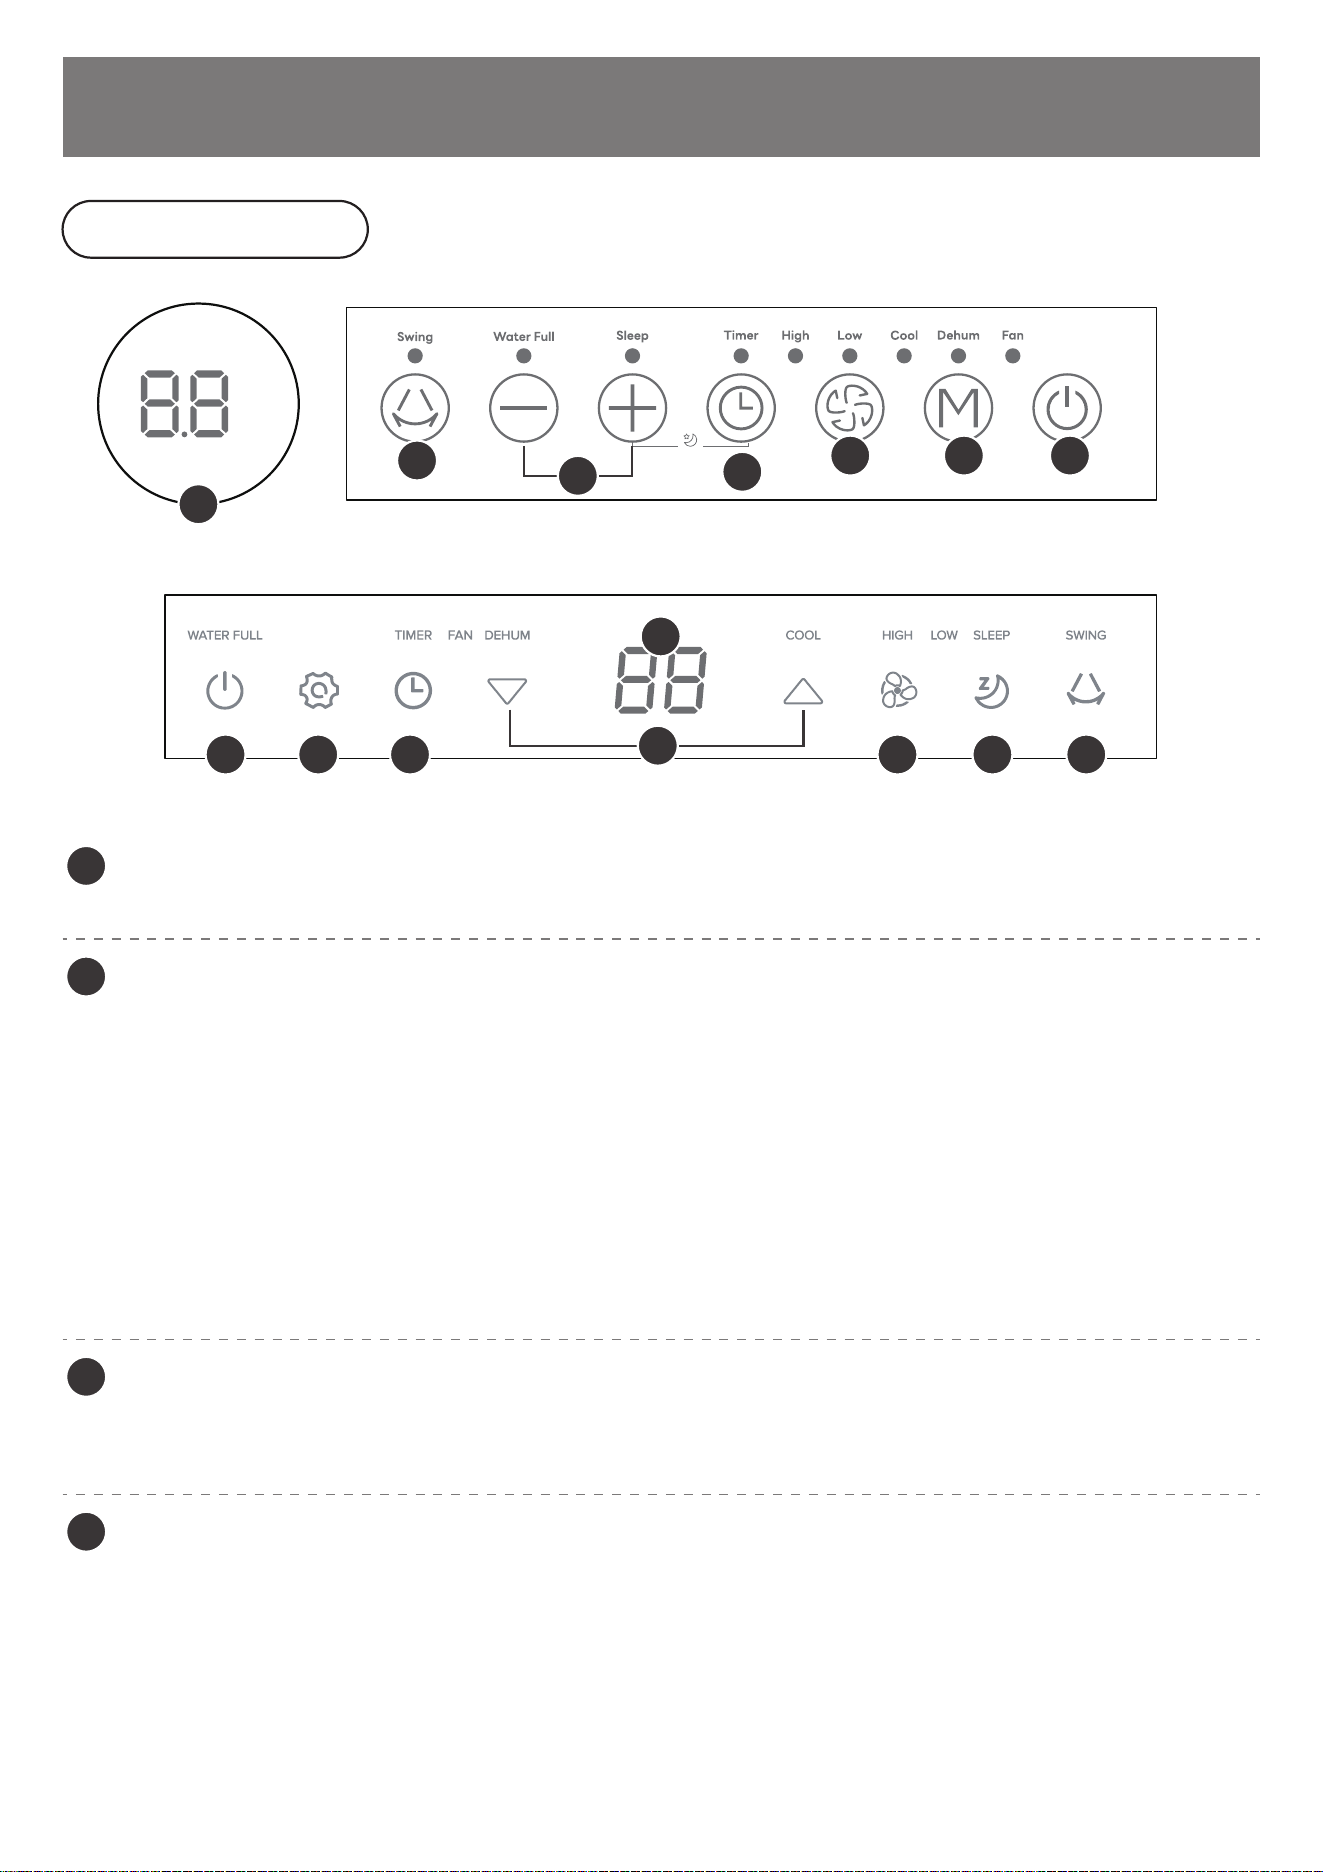
Model: NPPC3A
Model: NPPB2A
Power button
11
PRODUCT INTRODUCTION
Control Panel
1 2 34
1
1
23
4
5
5
67
6
Press the button to power on/off the air conditioner.
Mode button
2
Press the button to switch the operating mode. The corresponding indicator light will
illuminate.
Fan Speed button
3
Press the button to adjust the fan speed from Low to High, except in the DEHUM mode.
The corresponding fan speed indicator light will illuminate.
Timer button
4
Press the button to enter the program for setting the timer (from 1 hour to 24 hours) for
turning off or on as instructed below. When a timer is programmed, the TIMER indicator
light will illuminate.
When the air conditioner is in COOL mode, the temperature can be set between 61°F
(16°C ) and 86°F (30°C) by pressing the Up/Down button.
NOTE: Press the Up and Down buttons at the same time to switch the temperature unit
between °F or °C.
a. COOL: Reduce the room to the set temperature.
b. DEHUM: Reduce indoor humidity.
c. FAN: Circulates the air without cooling.
8
8
When the air conditioner is operating, press the Timer button, then press the Up/Down
button to set the number of hours you need the machine to run before it automatical-
ly shuts down. Wait for about 5 seconds to confirm the setting.
a.
12
PRODUCT INTRODUCTION
When the air conditioner is off (with the power supply connected), press the Timer
button, then press the Up/Down button to set the number of hours you need it to
remain off before it automatically turns on. Wait for about 5 seconds to confirm the
setting.
b.
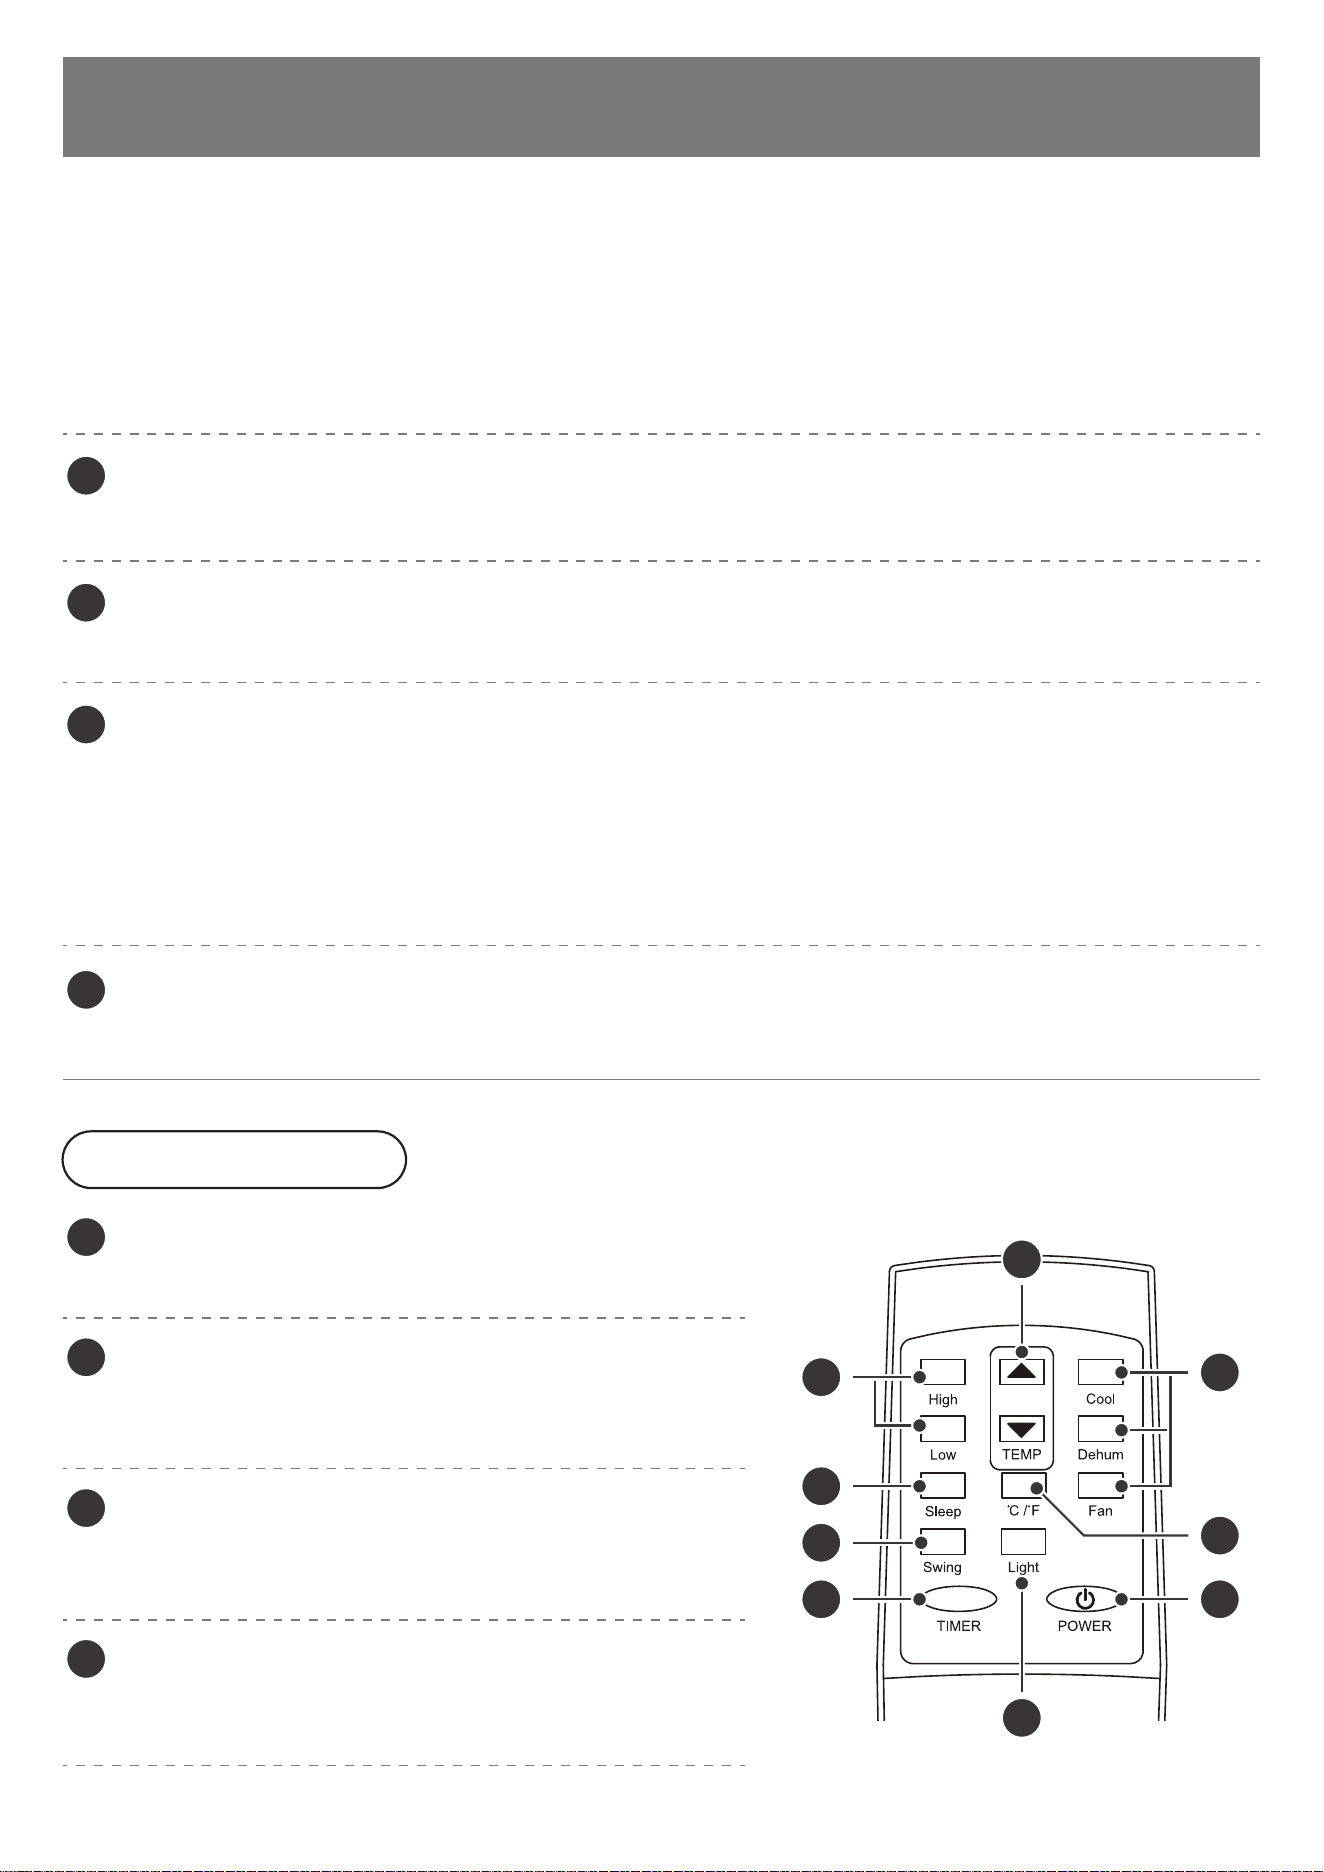
Up/Down button
5
Press the buttons to adjust the temperature or number of hours of the timer.
Power
1
Press the button to power on/off the unit.
Mode
2
Press the corresponding button to switch to your
desired mode.
Fan Speed
3
Press the corresponding button to adjust to your
desired fan speed, except in the DEHUM mode.
Swing button
6
Press this button to choose auto left-right swing or not.
Display screen
8
Displays the set temperature, or the remaining time before triggering the timer.
Sleep button
7
When the air conditioner is running in the COOL mode, press this button to enter sleep
mode, the fan will run at low speed to keep a minimum noise.
To cancel the timer, firstly press the Timer button once, when the Timer indicator light is
flashing, press again during the timing setting period.
Remote Control
Note: For model NPPC3A, when the air conditioner is running in the COOL mode, press
the Timer and Up buttons at the same time to enter Sleep mode, the fan will run at low
speed to keep a minimum noise.
5
3
6
9
8
4
2
7
1
Timer
4
Press the button to set the timer (in conjunction
with Up/Down buttons).
13
PRODUCT INTRODUCTION
Up/Down button
5
Press the button to adjust the tempera-
ture or number of hours of the timer.
Sleep mode
6
Press the button to enter Sleep mode.
Swing
9
Press this button to choose auto left-right swing or not.
Temperature Unit Switch
7
Press the button to switch tempera-
ture unit.
Light
8
Press the button to turn on/off the lights
on the control panel.
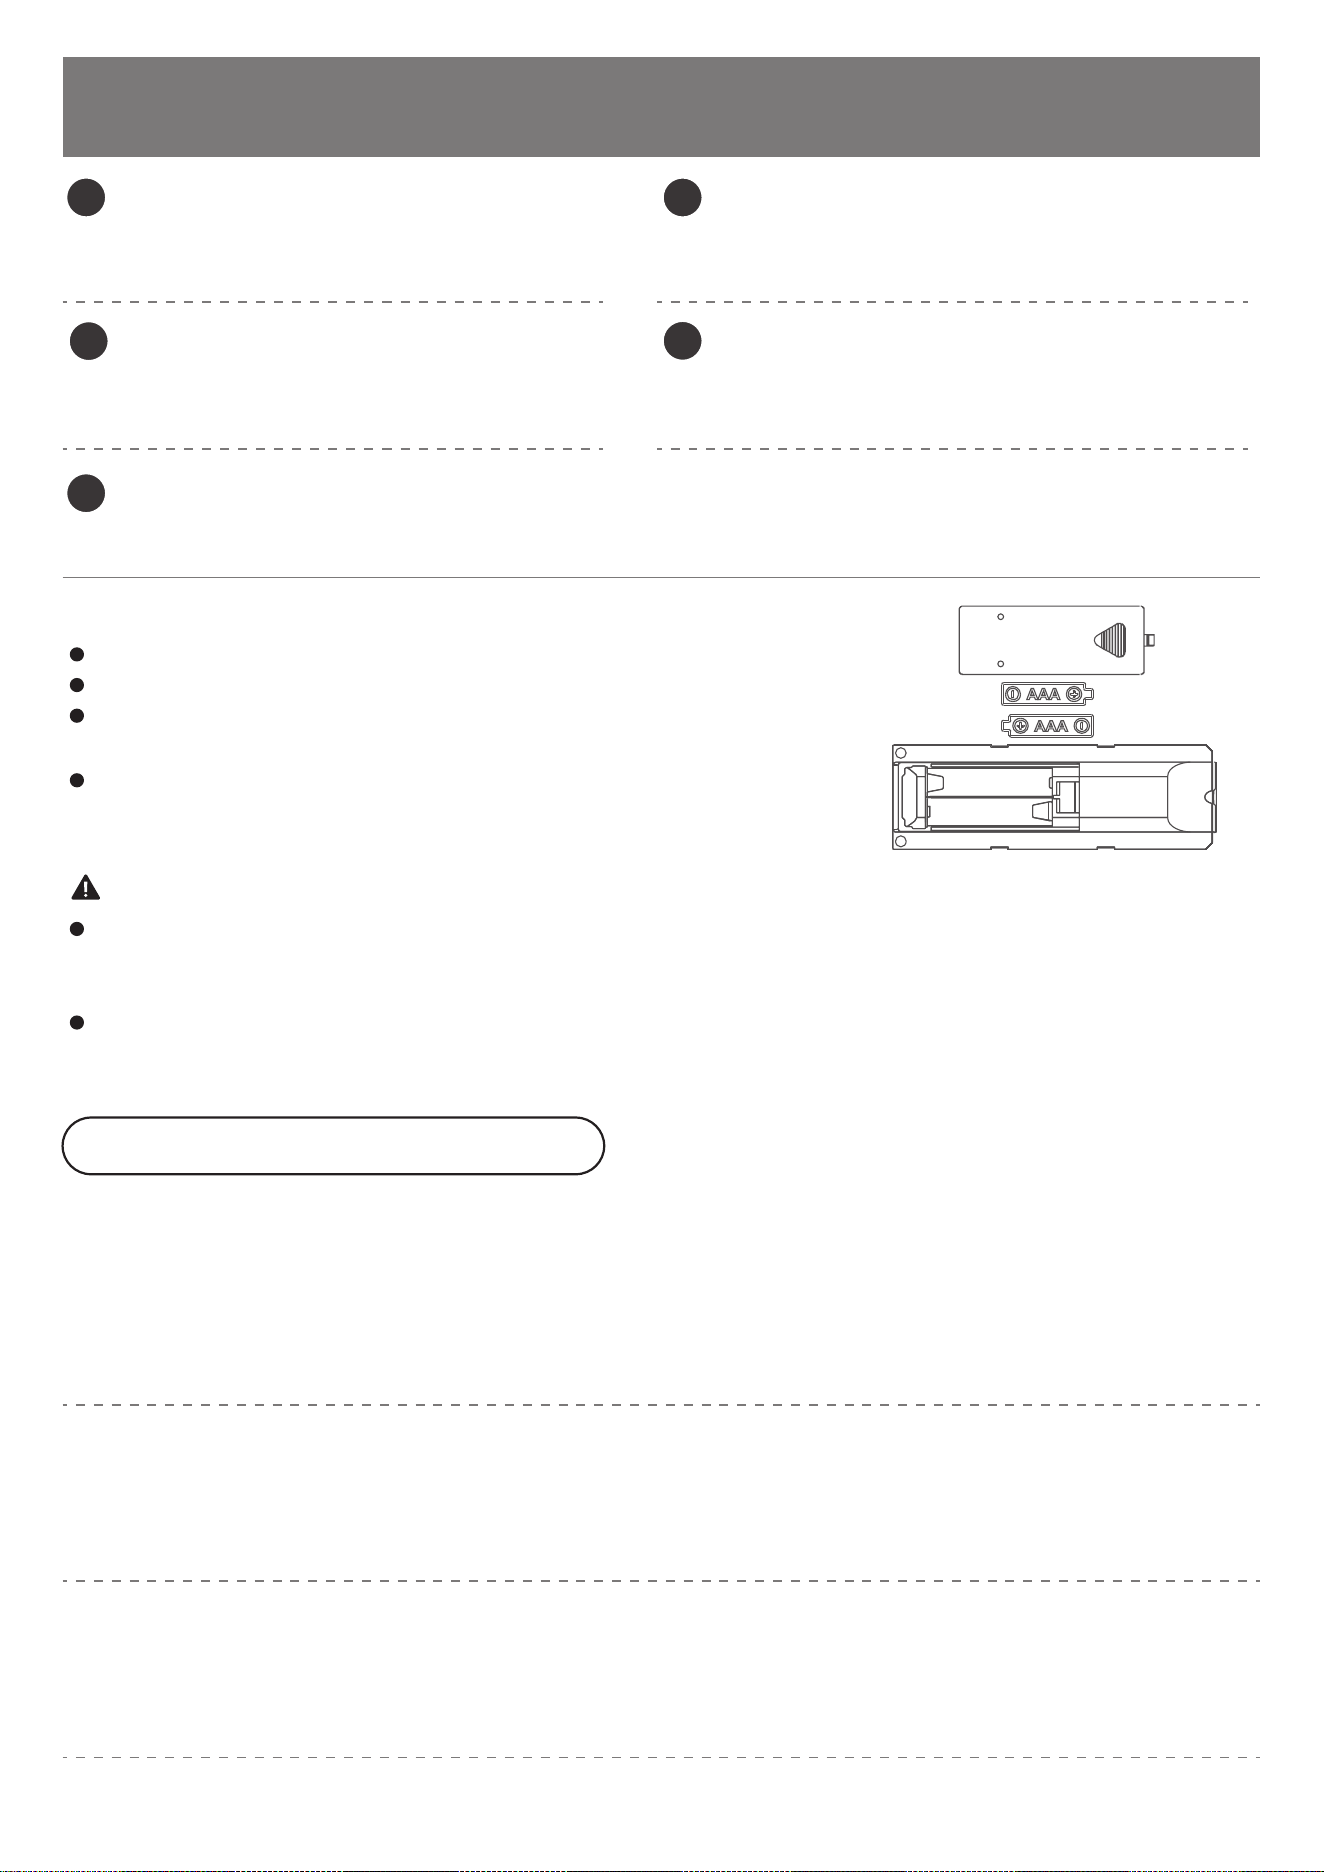
NOTE:
Insert two AAA batteries.
Do not use rechargeable batteries.
When replacing the battery, do not mix old and new
batteries.
If you won’t use this unit for a long time, please take out
the battery of the remote control and store it properly.
WARNING:
If the battery liquid of the remote control leaks on your skin or clothes, please rinse with
plenty of water as soon as possible; if you find a leak, please do not use the remote con-
trol.
If you swallow the battery liquid, rinse your mouth and seek medical attention as soon as
possible. The chemical substances in the battery may burn or cause other health hazards.
Safety Protection Features
1. Water-full alarm and auto shut-off protection
When the water volume exceeds the alarm level in water tank, WATER FULL indicator light
will illuminate, the machine will stop running and emit a alarm sound. You need to drain the
condensate and the machine will re-start automatically and restore to the original operat-
ing status if the unit is not shut down manually before.
2. Anti-frozen protection
When the ambient temperature ≤72°F/22°C and the compressor runs continuously for 30
minutes, the compressor will stop running, and the fan will be forced to run at high speed.
After 6 minutes, the air conditioner resumes normal operation.
3. Delay protection
This unit offers restart protection to compressor. The compressor starts immediately when
the unit is energized first time, but after being shut down, there will be a 3-minute delay
re-start protection.
14
PRODUCT INTRODUCTION
OPERATION INSTRUCTIONS
4. Sensor failure detection
NOTE:
To test the power cord before operation:
The coil and room temperature sensor failure will be detected each time the machine
starts or in the power-on state.
When a sensor failure is detected, it will immediately enter the failure state. If it returns
to normal at this time, it will enter the standby state.
(1)
(2)
Plug the power cord into a grounded 3 prong outlet.
Press the Test button, and then press and release the Reset button
to restore power.
1.
2.
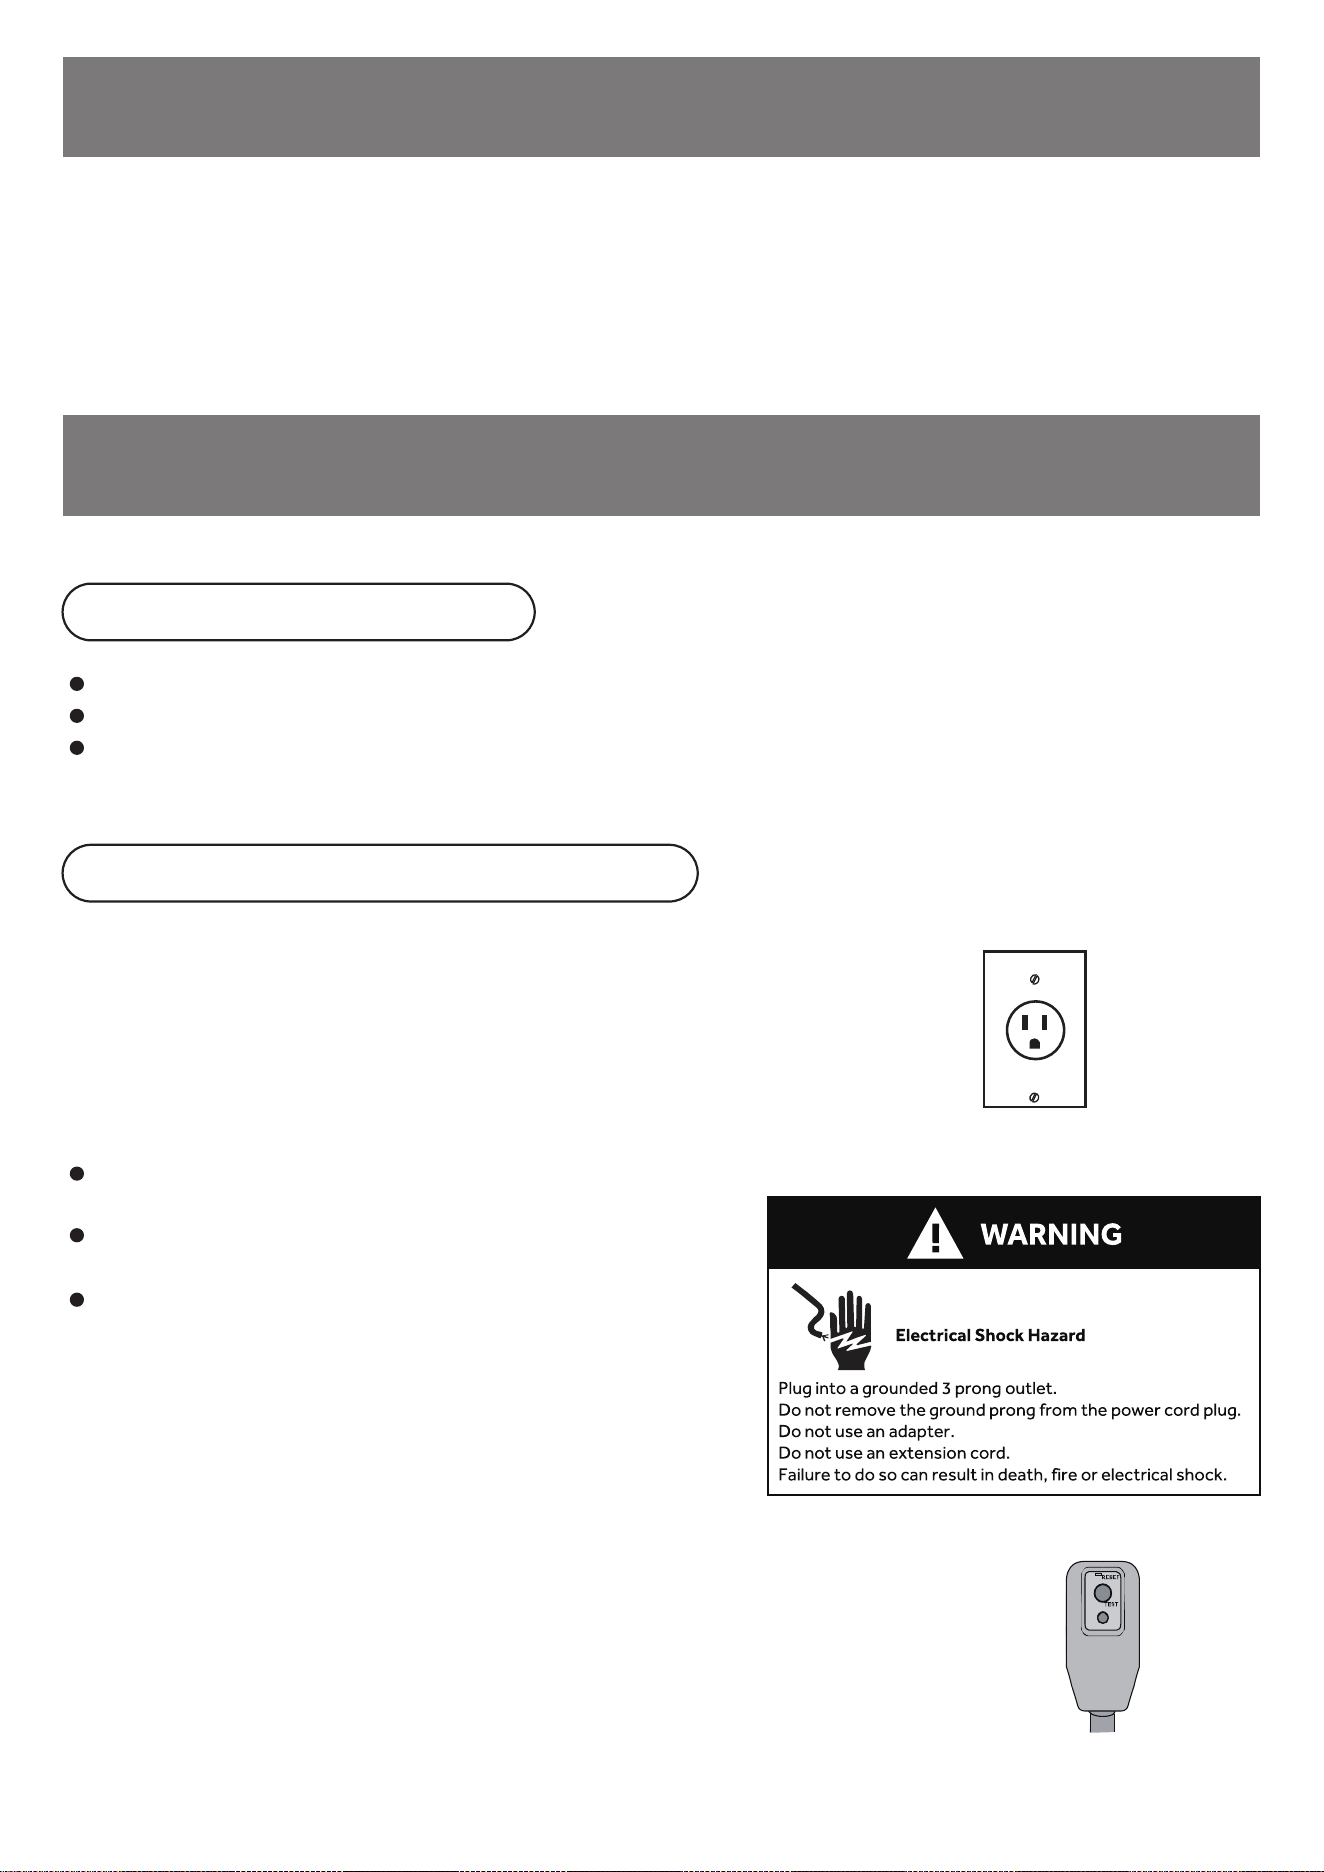
Handling Requirement
Power Connection Requirement
Hold handles to move the unit in upright position. Do not hold the louver.
Make the unit in the upright position whatever handling or moving it.
Drain the water in the unit completely to prevent water leakage and wet the floor or carpet
before handling or moving the unit.
115V
15 Amp
This air conditioner must be grounded.
The air conditioner is equipped with a power supply cord that has
a 3 prong grounding plug.
The power supply cord must be plugged into a mating, grounded
3 prong outlet, and grounded in accordance with all local codes
and ordinances.
115 Volt, 60Hz, 15-amp fused grounded 3 prong
outlet.
The use of a time-delay fuse or time-delay
circuit breaker is recommended.
Use a dedicated circuit only.
Do not operate any other electrical appliances on
this circuit or you may trip the circuit breaker/fuse.
The damaged power cord cannot be repaired. It
must be replaced with a cord from the product
manufacturer.
15
OPERATION INSTRUCTIONS
CLEANING AND MAINTENANCE
Once the unit shuts down upon water-full, turn off the unit and then unplug.
Put a small tray below the water outlet (drain port) at the back of the unit.
Screw off the drain cover, unplug the water stopper for water flow into the tray.
Once the water tank is empty, the unit will resume operation within a few minutes. Plug in
the stopper and tightly screw the drain cover back.
1.
2.
3.
4.
Clean the surface with wet soft cloth and do not use chemical solvents such as alcohol
and gasoline to avoid any damage to unit. Any thinner, alcohol-glazer or other similar
solvents is prohibited for cleaning.
Clean the air outlet or louver with wet soft cloth and detergent. No chemical solvents
should be used or placed near the unit for a long time.
-
-
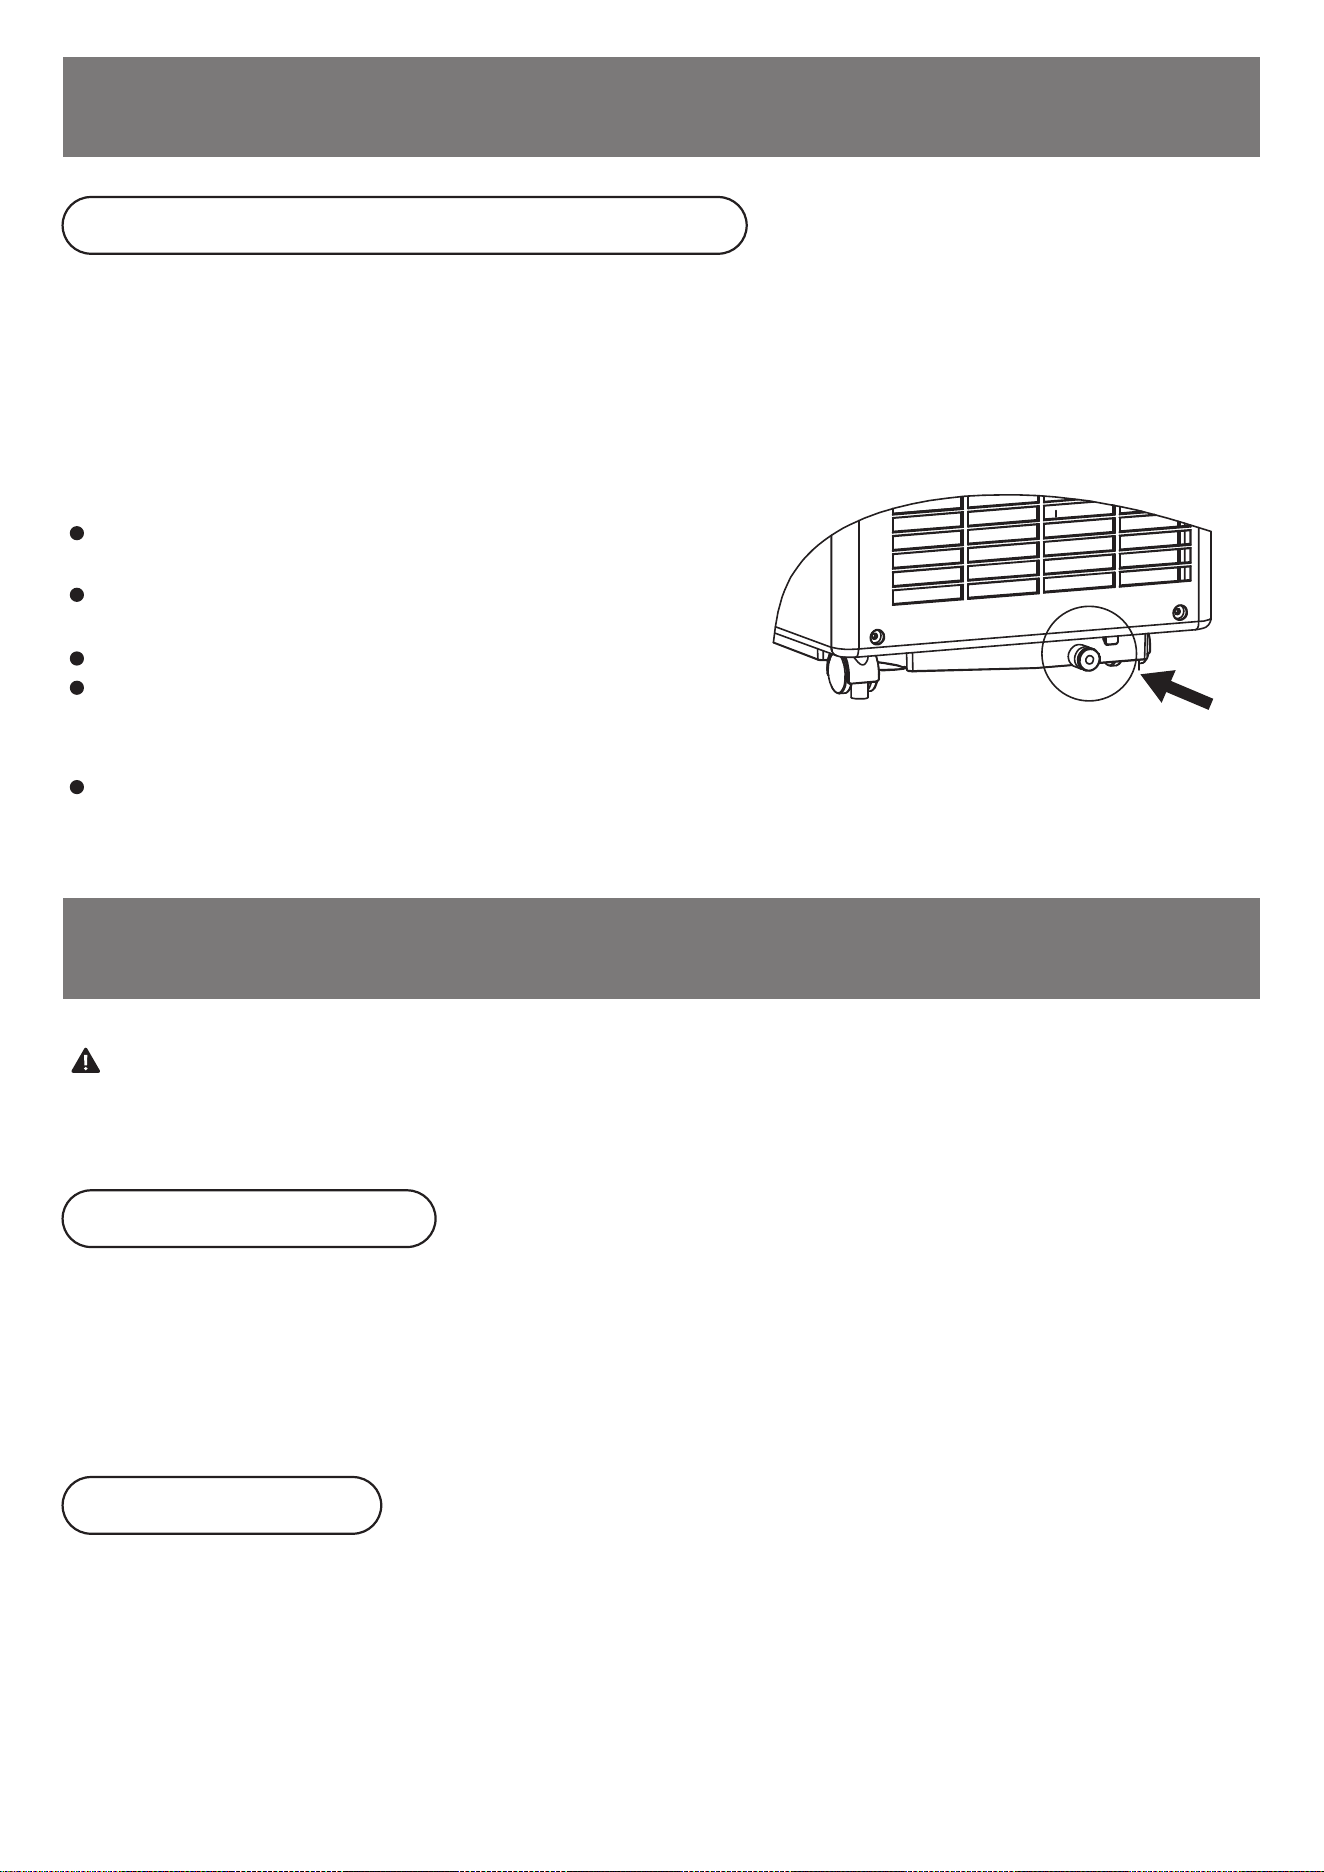
Manually Drain The Internal Water
Surface Cleaning
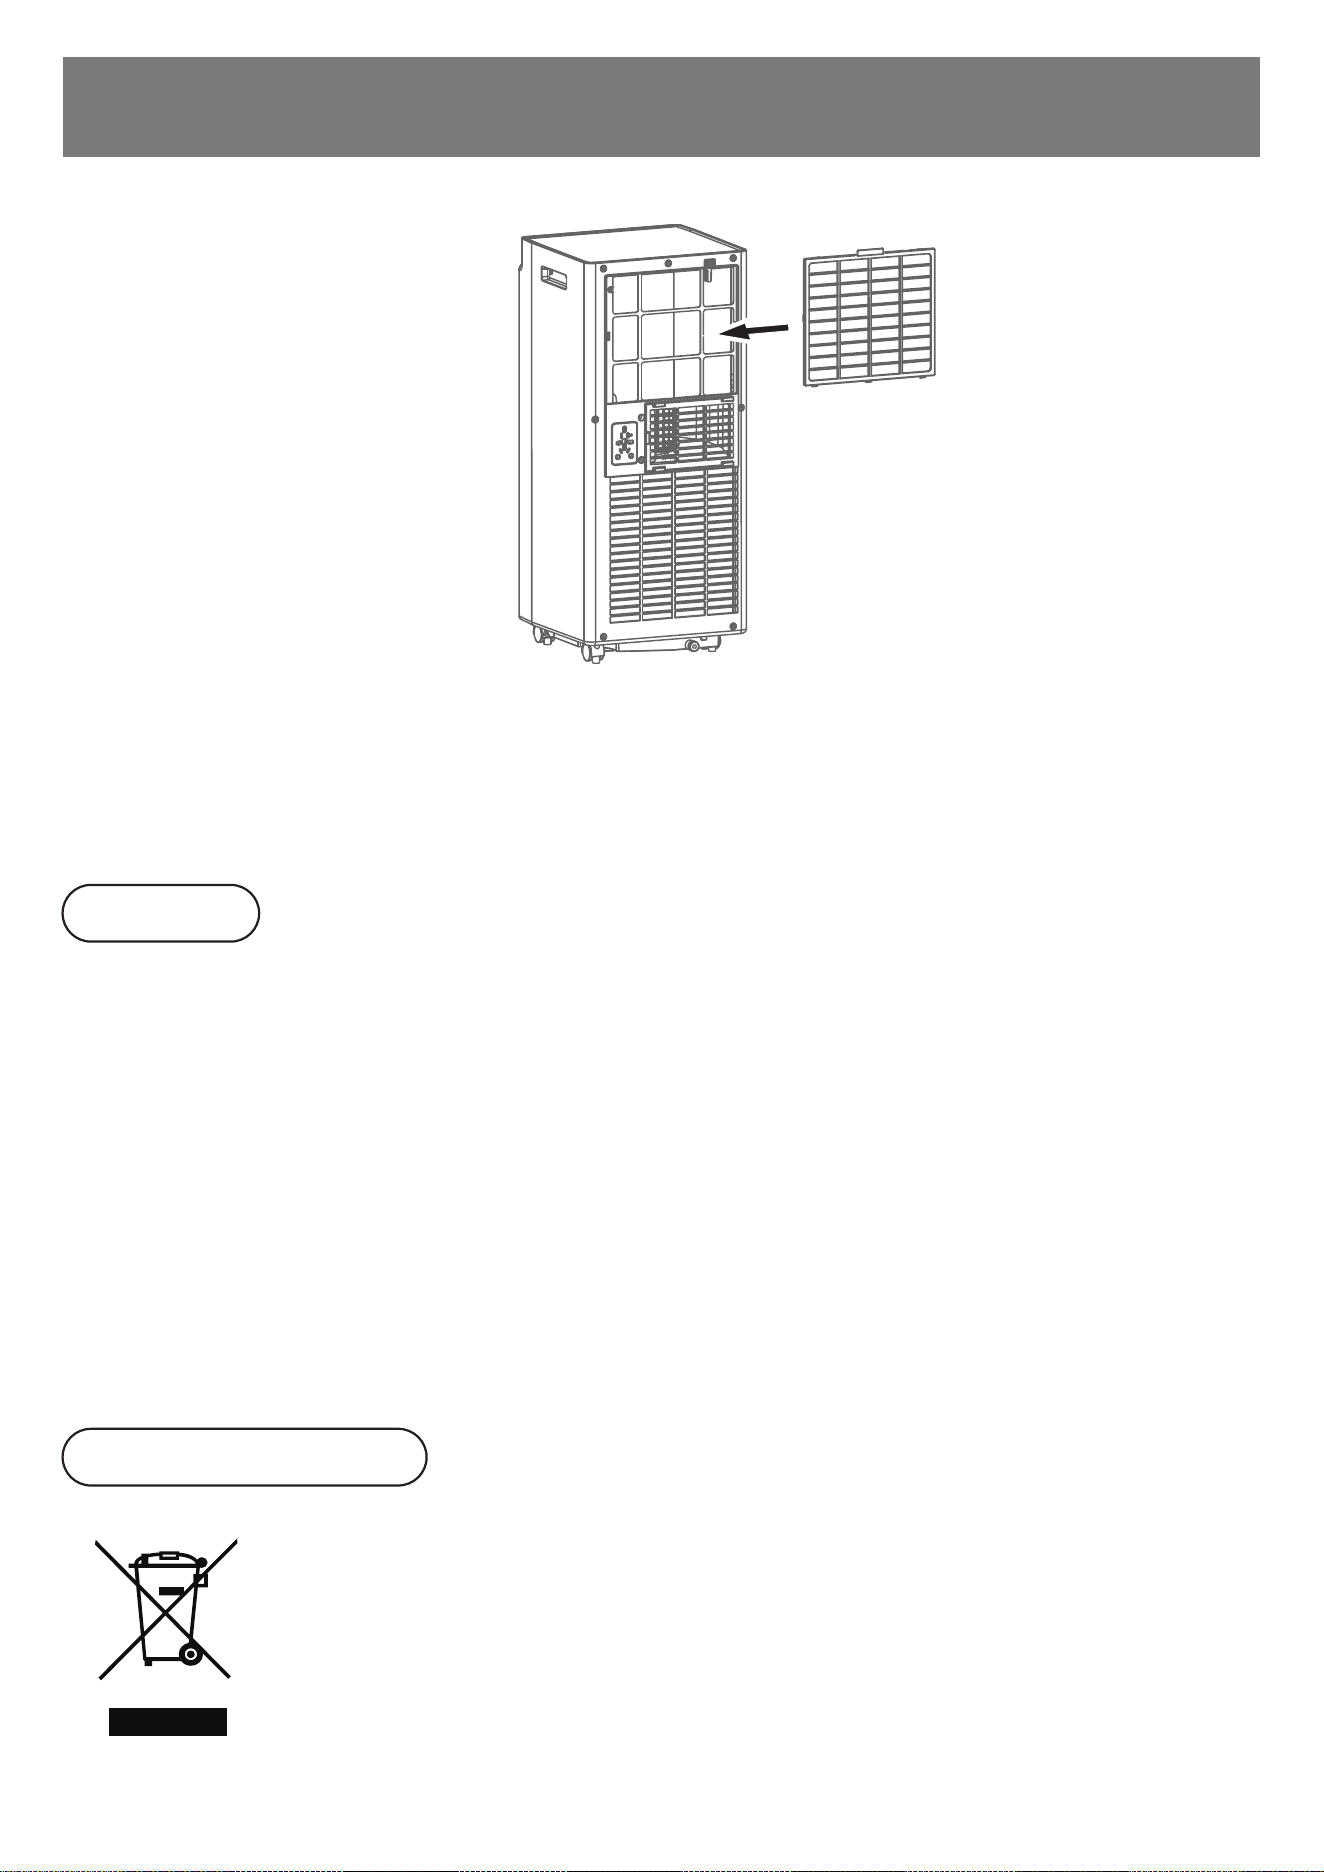
Clean the filter(s) every two weeks, or the unit function will be influenced if filter is clogged
with dust.
Grip the filter handle and pull it out gently in correct direction. Clean the dirty particles in
filter by cleaner if necessary. Immerse the filter into warm water mixed with neutral cleaner
(about 104°F/40°C) and wash gently, then rinse clean and dry thoroughly in the shade.
-
-
Filter Cleaning
NOTE:
Drain port
Protect the drain cover and water stopper
properly.
Move the unit carefully to avoid the leakage if it
is necessary.
Tilt the unit slightly backwards when draining.
Block the drain hole as soon as possible before
the tray is full to prevent the water leakage and
wet the floor or carpet.
Water stopper and drain cover must be tightly installed, to avoid new condensate to wet
the floor or carpet when the unit re-starts working.
WARNING:
Be sure to turn off the unit and pull out the plug before maintaining, cleaning or being sent to
service center.
16
CLEANING AND MAINTENANCE
Pull out the filter gently.
Do not squash or hit the mesh with sharp objects or brush.
Do not use the appliance without installing the filter.
-
-
-
NOTE:
Assure the unit is stored in a dry place. All accessories of the unit shall be protected
together properly. Keep the unit away from children.
NOTE:
Storage
Correct Disposal
Drain the condensate water completely.
Keep unit running in fan mode for half a day to ensure the interior is completely dry and
prevent mold.
Turn off the unit, pull out plug then wrap the power cord around the wire-winding pillar,
insert the plug into the universal fixing hole at the back panel of the unit, install the water
stopper and drain cover.
Remove and clean the exhaust hose assembly, keep it properly.
Take out the batteries from remote controller.
This marking indicates that the product should not be disposed with other
household wastes. To prevent possible harm to the environment or human
health from uncontrolled waste disposal, recycle it responsibly to promote
the sustainable reuse of material resources. To return your used device,
please use the return and collection systems or contact the retailer where
the product was purchased. They can take this product for environmentally
safe recycling.
1.
2.
3.
4.
5.
Please store the air conditioner properly if not in use.
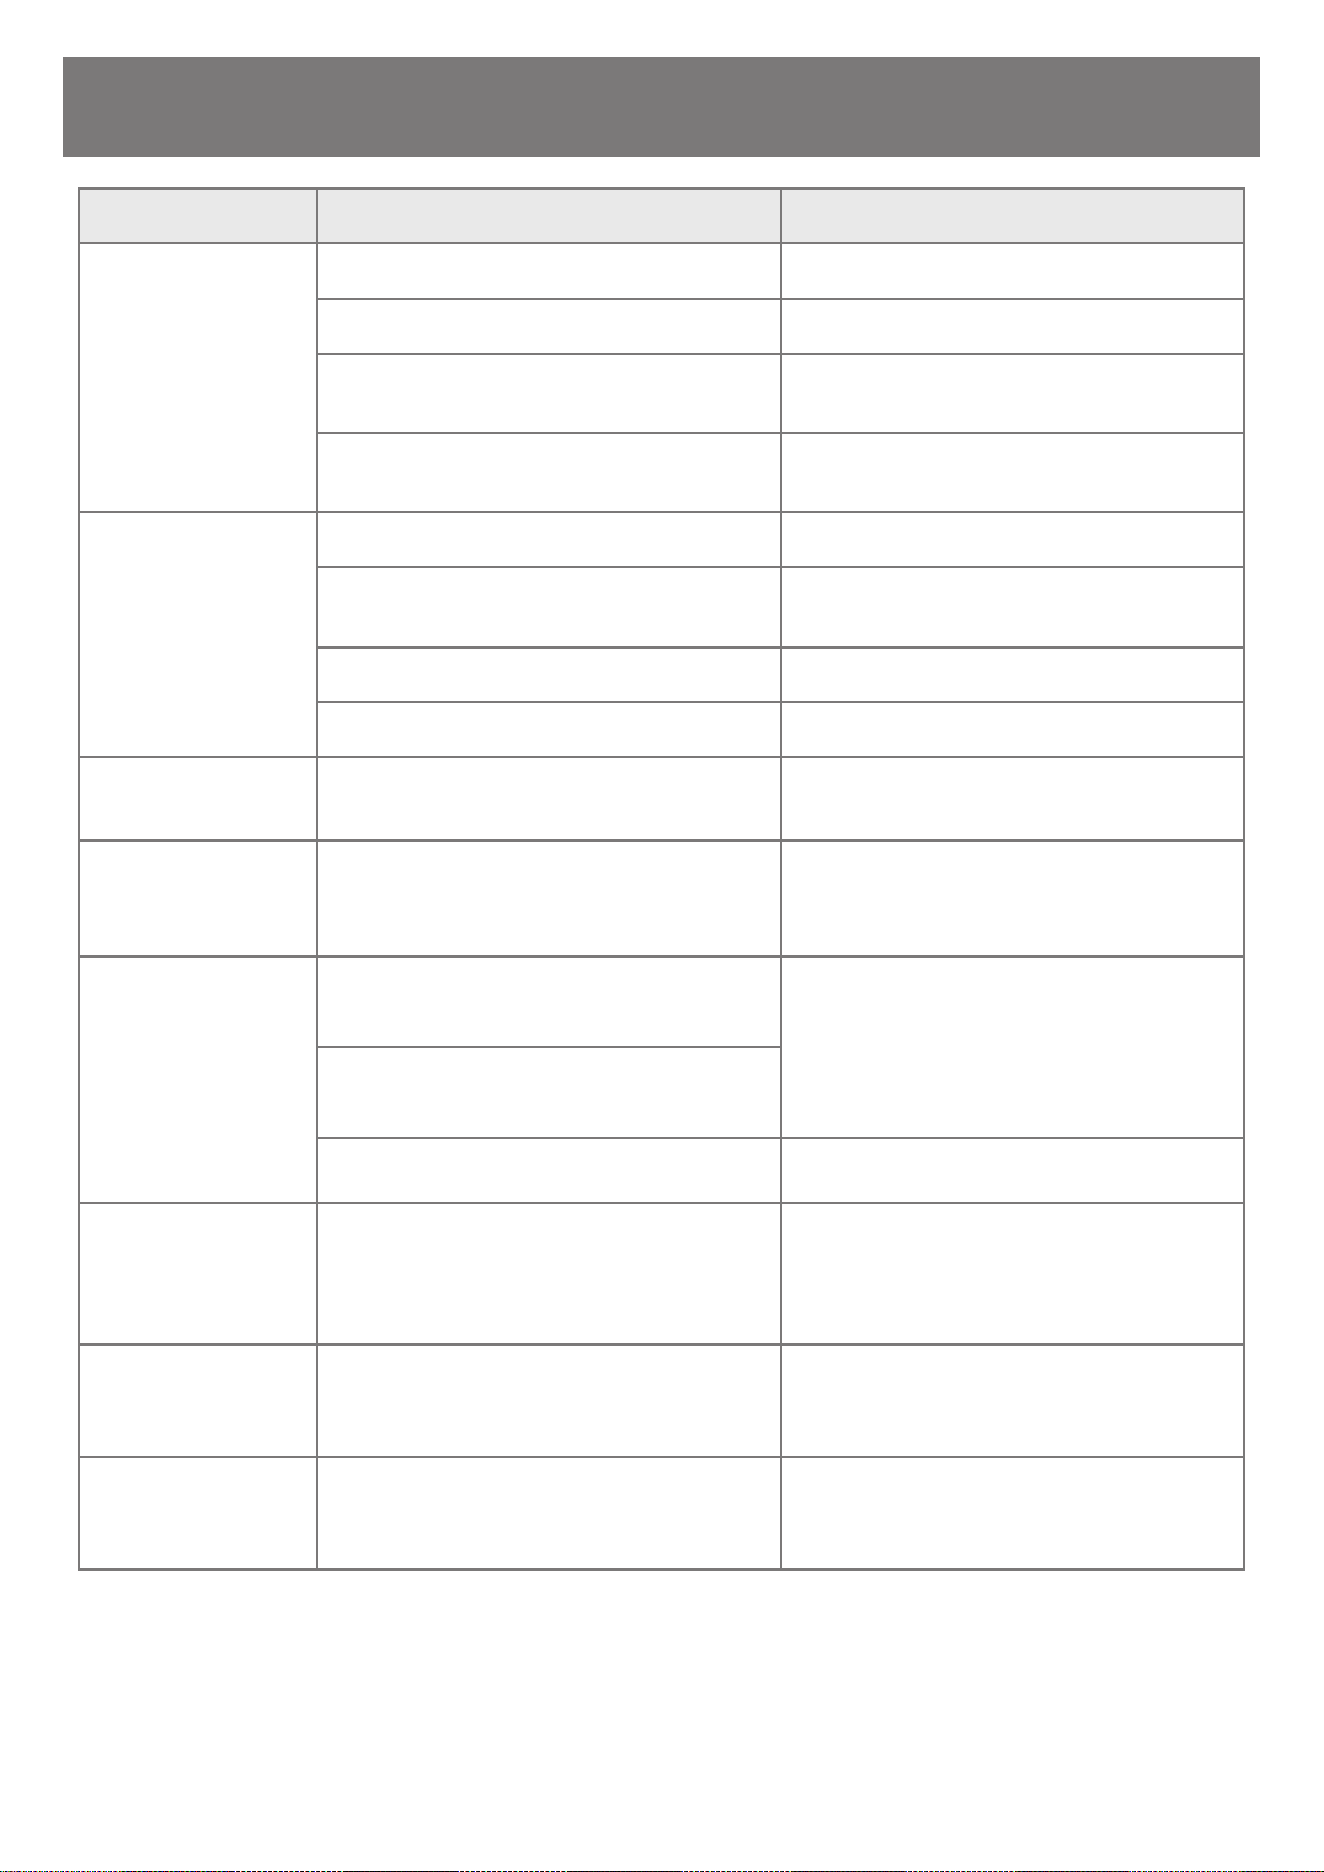
The unit fails to
start up.
Power supply failure. Connect the unit to a live socket.
17
TROUBLESHOOTING
The water tank is full. Drain the condensate water.
Ambient temperature too low
or low high.
It is recommended to use this
unit between 41-95°F(5-35°C).
The unit is being placed at uneven
surface.
Put the unit at a flat and firm place.
The room is ventilated or crowded, or
there are other heat sources.
Close the door and window, remove
other heat sources.
The room temperature is lower than the
set temperature in cooling mode.
Change the set temperature.
Bad cooling
effects
High noise level
There is direct sunlight. Avoid direct sunlight.
Overheat protection is activated.
Wait for 3 minutes until the temperature
decrease, the unitwill re-start
automatically.
The compressor
does not work.
Communication failure.
Check the connection lines and related
circuits between the display board and
the main board or contact customer
service.
"E0" code
displays.
Room temperature sensor failure.
Check the room temperature sensor
and related circuits or contact customer
service.
"E2" code
displays.
The water volume exceeds the alarm
level in water tank.
Drain the condensate and restart the
machine.
The WATER FULL
indicator light
is on.
Filter is dirty. Clean or replace the filter (mesh).
The distance between the remote
control and the unit is too far.
Reduce the distance between the
remote control and the unit. Make sure
to aim at the signal receptor.
The remote control didn’t aim at
signal receptor on the device.
The remote
control does not
work.
Air inlet or outlet clogged. Remove the obstruction.
Replace the batteries.
The batteries is out of power.
PROBLEM CAUSE SOLUTION
Do not dismantle or repair the unit without authorization. Improper repair will void the
warranty and cause harm to you and your property.
NOTE:

ROWAN ELECTRIC APPLIANCE LLC
8:30am-5:30pm P.S.T.
Monday to Friday