1
v2024.02.21
BULL DUAL FUEL
COUNTERTOP
PIZZA OVEN
MODELS
69550 LP
(LIQUID PROPANE GAS)
69564 NG
(NATURAL GAS)
USER GUIDE
2
ex
ex

3
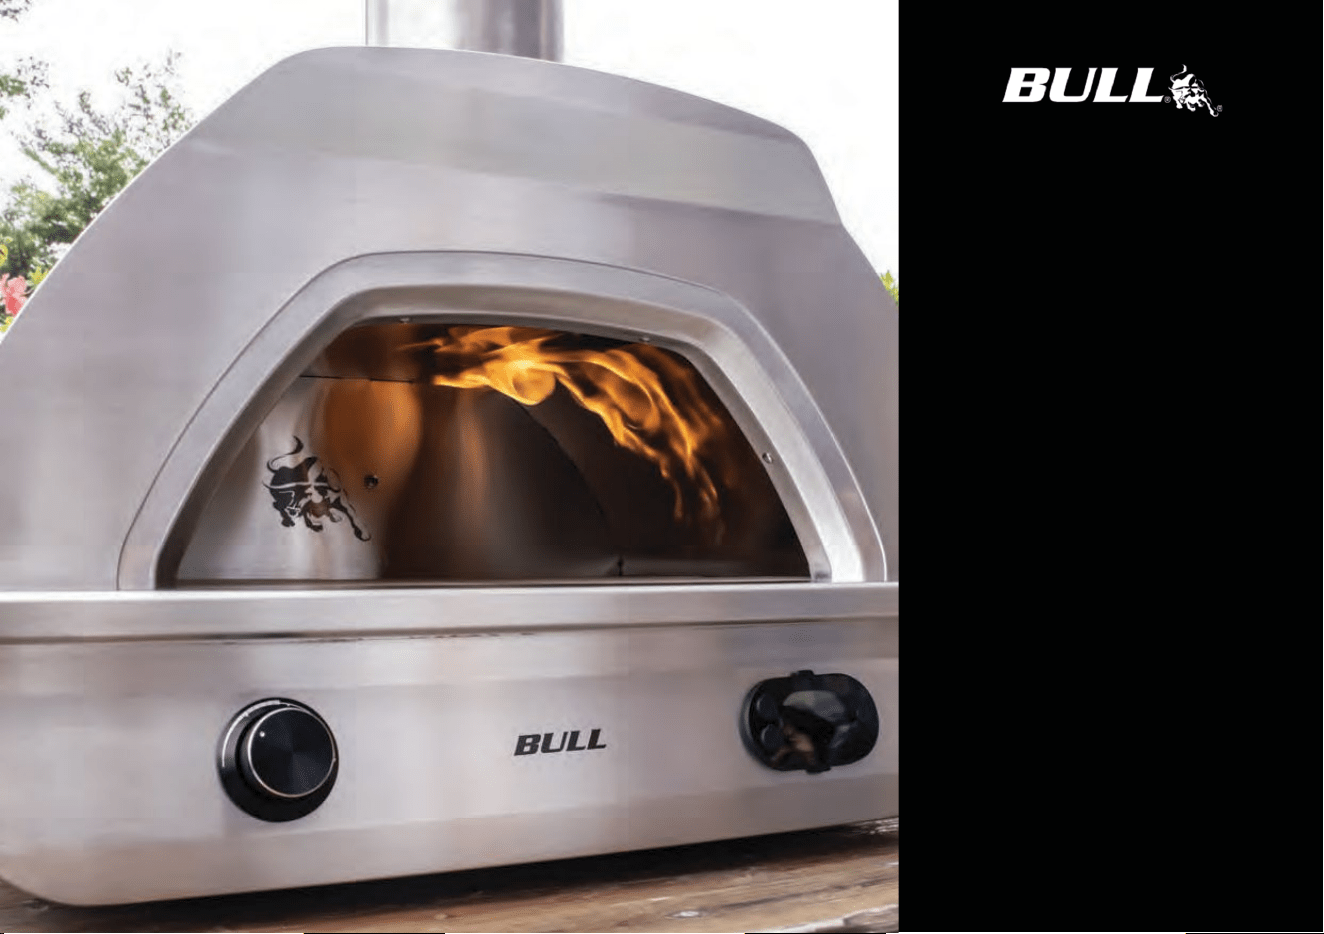
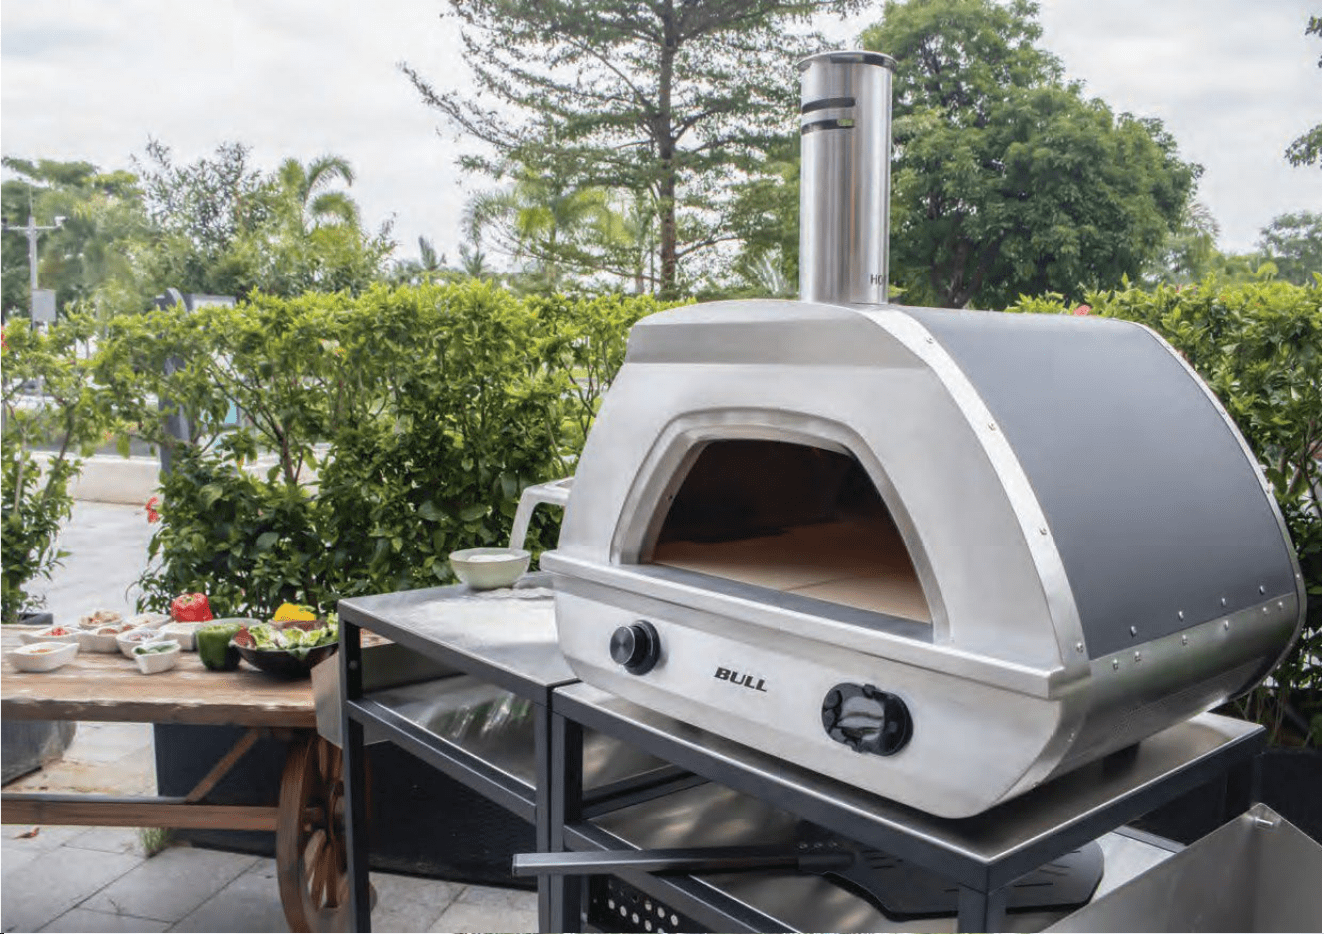
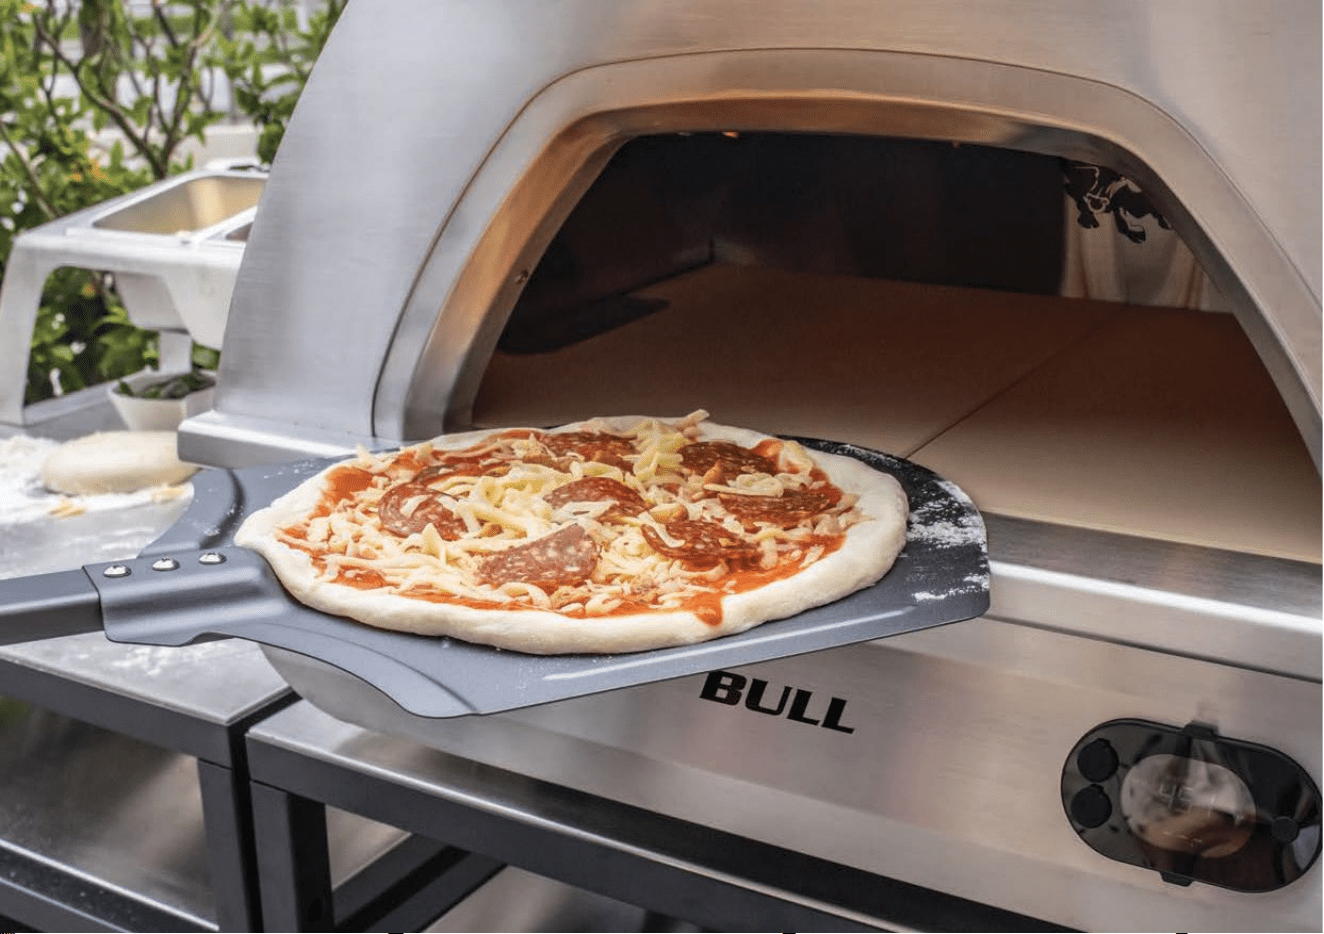
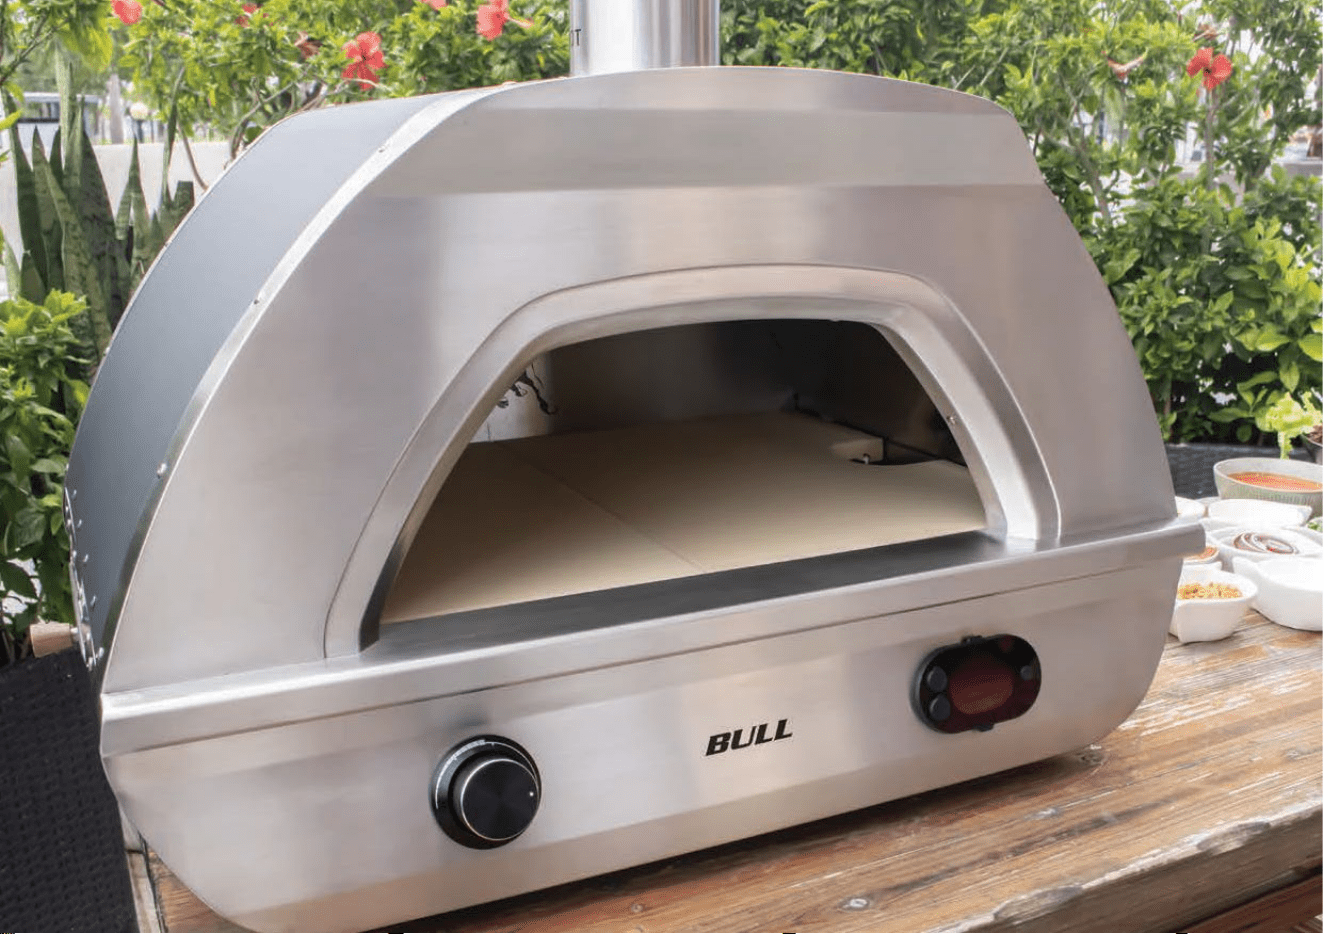
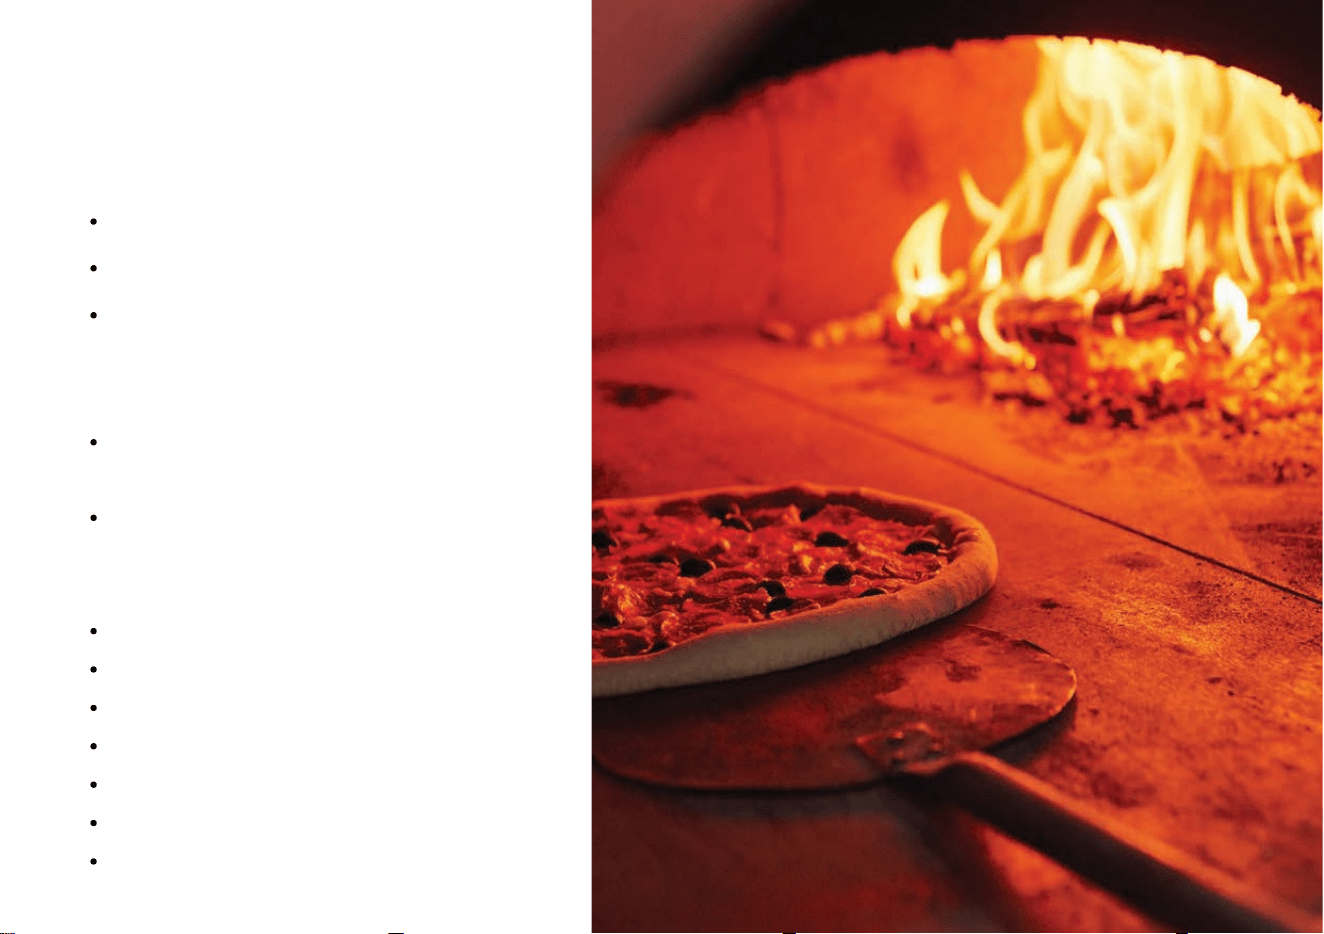
DUAL FUEL COUNTERTOP PIZZA OVEN
MORE THAN JUST A PIZZA OVEN.
Take your cooking game to a new level with our next-generation portable,
multi-fuel, and multi-functional outdoor oven.
Featuring Bluetooth connectivity and a custom-developed app for accurate and
controlled temperature monitoring, the Bull Dual Fuel Countertop Pizza Oven is engineered
to provide the ultimate outdoor cooking experience.
WWW.BULLBBQ.COM
\
4
TABLE OF CONTENTS PAGE NO.
SAFETY AND OPERATIONAL GUIDELINES 5-7
OVEN SPECIFICATION INFORMATION 8
‘WHATS IN THE BOX’ 9
UNBOXING DUAL FUEL COUNTERTOP PIZZA OVEN 11-12
SETTING UP DUAL FUEL COUNTERTOP PIZZA OVEN 13-14
GAS FIRE UP 16-17
GAS SAFETY 19-20
WARNING ‘IN THE EVENT OF FIRE’ 21
WOOD FIRE UP 22
FIRING UP WITH WOOD 23-24
MAINTENANCE 25
REPLACING THE STONE 26
INSTALLING THE APP AND REGISTERING YOUR PIZZA OVEN
INSTRUCTIONS FOR ORDERING REPLACEMENT PARTS 27
REPLACEMENT PART LIST 28
REFERENCE DRAWING FOR REPLACEMENT PARTS 29
WARRANTY POLICY 30-33
READ THIS ENTIRE MANUAL CAREFULLY AND RETAIN FOR FUTURE REFERENCE.
BE SURE YOUR GRILL IS PROPERLY INSTALLED, ASSEMBLED AND CARED FOR. FAILURE TO FOLLOW THESE INSTRUCTIONS MAY RESULT IN SERIOUS BODILY INJURY AND/OR PROPERTY
DAMAGE. IF YOU HAVE QUESTIONS CONCERNING ASSEMBLY OR OPERATION, CONSULT YOUR DEALER, GAS APPLIANCE SERVICE REPRESENTATIVE OR YOUR GAS COMPANY. NOTE TO
INSTALLER: LEAVE THESE INSTRUCTIONS WITH THE CONSUMER AFTER INSTALLATION.
- NOTE TO THE CONSUMER: RETAIN THESE INSTRUCTIONS FOR FUTURE REFERENCE.
- THIS OUTDOOR COOKING GAS APPLIANCE IS NOT INTENDED TO BE INSTALLED IN OR ON RECREATIONAL VEHICLES AND/OR BOATS.
5
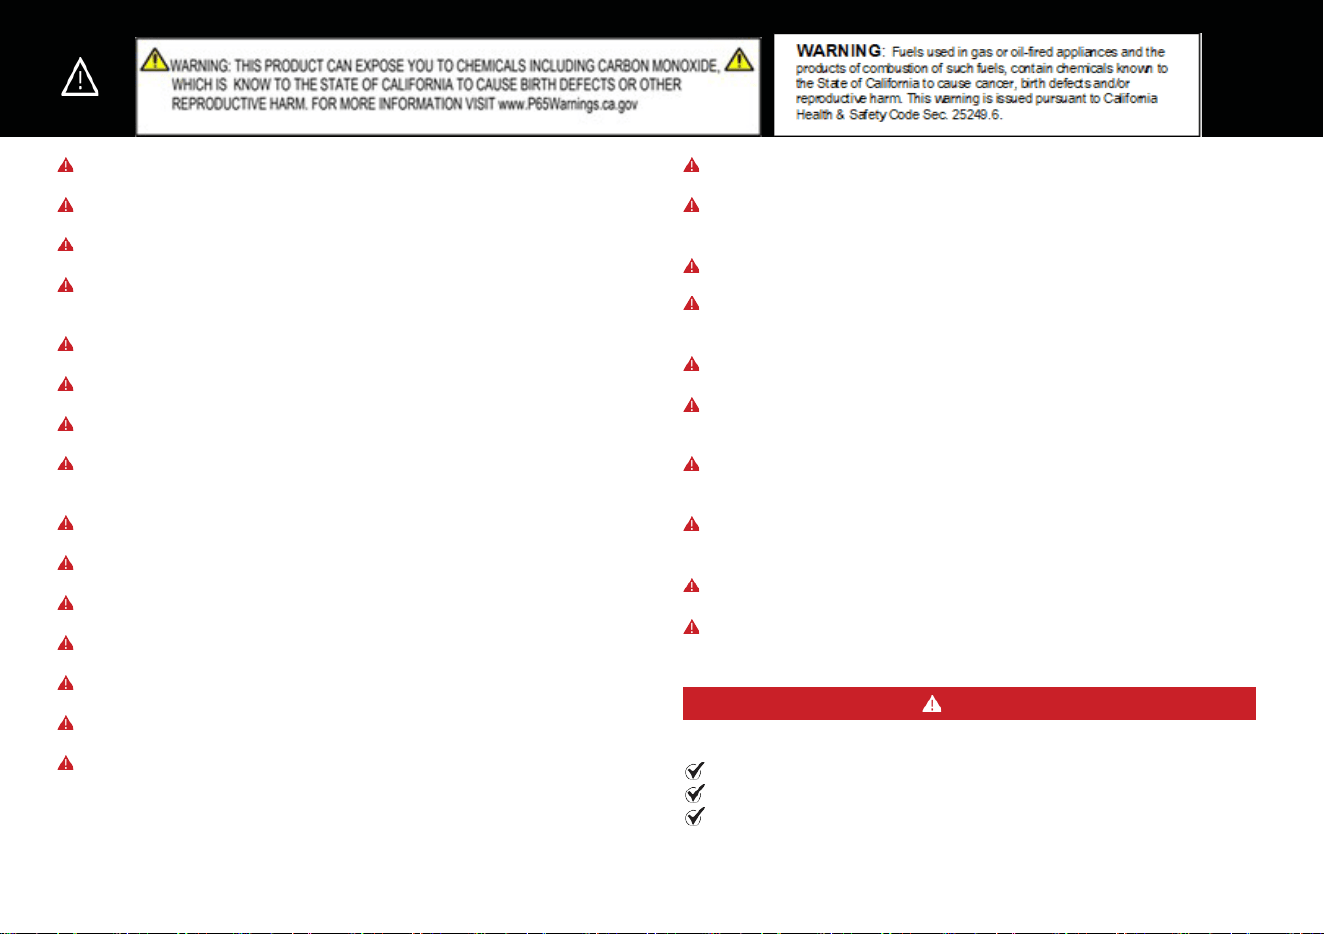
WARNIN
Please carefully read and follow all instructions and warnings outlined in the user guide before using the appliance.
To reduce the risk of fire hazards, follow all warnings and instructions before assembling and when using the appliance.
WARNING: Accessible parts may be very hot. Keep young children away.
Keep the fuel supply hose away from any heated surface(s).
WARNING: This barbecue will become very hot, do not move it during operation.
The use of alcohol, prescription or non-prescription drugs may impair the
consumer & ability to properly assemble or safely operate the appliance.
Do not use indoors!
This appliance is not intended for and should never be used as a heater.
WARNING! Do not use spirit or petrol for lighting or re-lighting! Use only
firelighters complying to EN 1860-3.
Small insects can nest inside the burner of the appliance and disrupt gas flow.
Inspect the burner at least once a year.
WARNING! Keep children and pets away.
Do not store this appliance indoors unless the gas cylinder is disconnected.
The regulator to be used indicating that it shall comply with the EN 16129.
Do not store gas cylinder in a building, garage or any other enclosed area
and always keep out of reach of children!
The hose to be used shall comply with local laws and regulations.
The hose connecting the appliance to the gas container and the length
recommended which shall not exceed 59 inches (shall not exceed 1.20m in
Finland).
This appliance is not intended to be installed in or on recreational vehicles
and/or boats.
This appliance must be kept away from flammable materials during use.
Check all gas supply fittings for leaks before each use. Do not use the
appliance until all connections have been checked and do not leak.
Use outdoors only.
Do not smoke while leak testing. Never leak test with an open flame.
Do not move the appliance during use.
When lighting, keep your face and hands as far away from the appliance as
possible.
Turn off the gas supply at the gas cylinder after use.
Do not modify the appliance.
Do not cook before the fuel has a coating of ash.
Use outdoors only. If you smell gas:
Shut off gas to the appliance.
Extinguish any open flame.
If odour continues, keep away from the appliance and immediately call
your gas supplier or your fire department.
Never operate this appliance unattended. If a fire should occur, keep away from
the appliance, and immediately call your fire department. Do not attempt to
extinguish an oil or a grease fire with water. Failure to follow these instructions
could result in fire, explosion or burn hazard which could cause property damage,
personal injury or death.
DANGER
6
WARNIN
Please carefully read and follow all instructions and warnings outlined in the user guide before using the appliance.
To reduce the risk of fire hazards, follow all warnings and instructions before assembling and when using the appliance.
Minimum clearance from sides of unit to combustible construction is
24 inches.
The burner outlets should be checked for obstruction and cleaned regularly
with a soft wire brush.
The parts which have been sealed by the manufacturer should not be
adjusted by the user.
It is necessary to avoid obstruction and to allow for a good combustion.
Inspect the gas supply hose prior to turning on the gas. If there is evidence
of cut, wear, or abrasion, it must be replaced prior to use.
When the appliance is using LPG A LPG cylinder should be used. LPG
Cylinder capacity to range from 11 lbs. to 42 lbs. The LPG cylinder size:
max diameter 13.8 inches, max height 15.75 inches.
Screw the regulator onto the gas cylinder. Leak check the hose and regulator
connections with a soap and water solution before lighting the appliance.
The appliance is to be installed with sufficient ventilation to prevent the
occurrence of unacceptable concentrations of substances harmful to
health in the room in which the appliance is installed.
Operating this appliance in enclosed spaces can cause a fire, explosion, and
can lead to property damage, personal injury, or death.
The minimum distances between the appliance and adjacent walls is 19.7
inches.
Always
operate
this
appliance
with
an
attendant
present.
The gas supply tubing or hose shall comply with the national
requirements in force and shall be periodically examined and replaced as
necessary.
This appliance should not be operated within 24.6 feet of a liquid flammable
substance.
The cooking vessel should not be filled beyond the dimensions of the door.
The hose should comply with the standard EN16436. The regulator should
comply with the standard EN16129.
Do not use glassware or plastics containers to cook in the appliance.
Check and suitably clean the inside of the oven before it is lit to avoid the
emission of fire from the oils that have accumulated during previous
cooking.
Operate
the
oven
with
heat-resistant
gloves
on.
If strong winds blow, do not operate oven. Strong winds can extinguish the flame
and cause irregular air pressure, which causes the flame and heat to escape. Make
use of a wind break in open areas, but keep your distance from it over 17.7 inches.
The burner outlets should be checked for obstruction during previous
cooking.
7
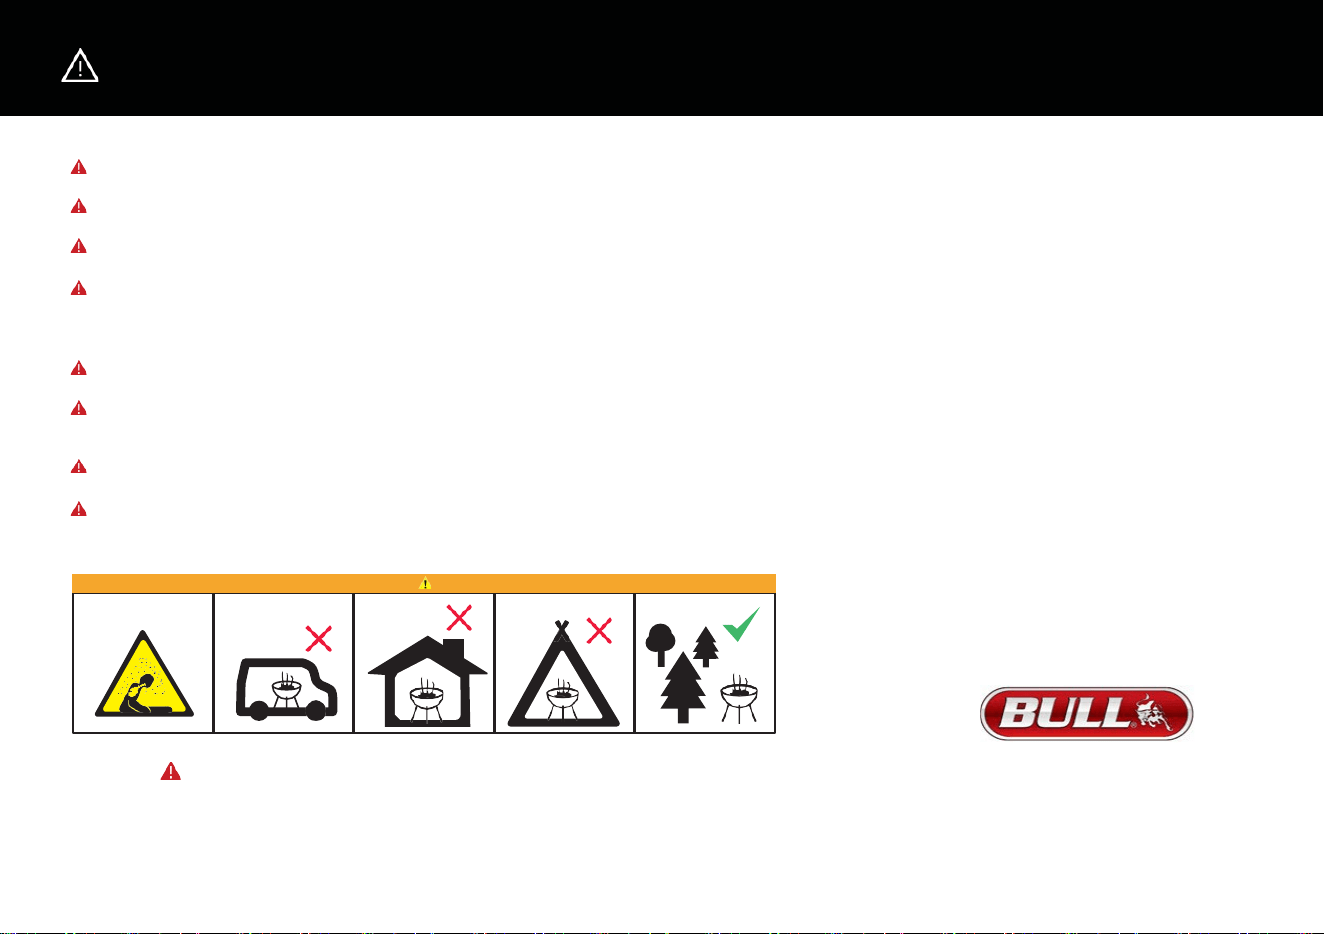
WARNIN
Please carefully read and follow all instructions and warnings outlined in the user guide before using the appliance.
To reduce the risk of fire hazards, follow all warnings and instructions before assembling and when using the appliance.
As
a
result
of
oil
and
grease,
do
not
pour
water
on
the
cooking
stone
when
operating
the
oven.
Take caution in not wearing loose-fitting clothes or sleeve when operating the oven.
Gas and wood should never be used at the same time.
When using the oven, do not touch the outer shell, stone baking board or immediate surroundings
as these areas become extremely hot and could
cause burns.
Do not use the oven to cook extremely fatty meats or other products which increase flare-up.
Keep the area surroundings the oven free from combustible material including fluids, rubbish and
vapours such as gasoline or charcoal lighter fluid.
Do not obstruct the flow of combustion and ventilation.
Never use the oven in extremely windy conditions.
Never use the oven in extremely windy conditions.

8
DUAL FUEL COUNTERTOP PIZZA OVEN
Is in conformity with the following EC directives: - Gas Appliance Regulation (EU) 2016/426 and that the following
harmonized standards have been applied: EN 498:2012[E] & EN1860:2013
The Notified Body who has performed EC
Type Examination: EC Type
Examination Certificate: 2531DN-0118 & 8504DN-0082
Notified Body: Danish Institute of Fire and Security
Technology Notified Body no.: 2531 & 8504
END OF LIFE At product’s end of life, please dispose responsibly.
9
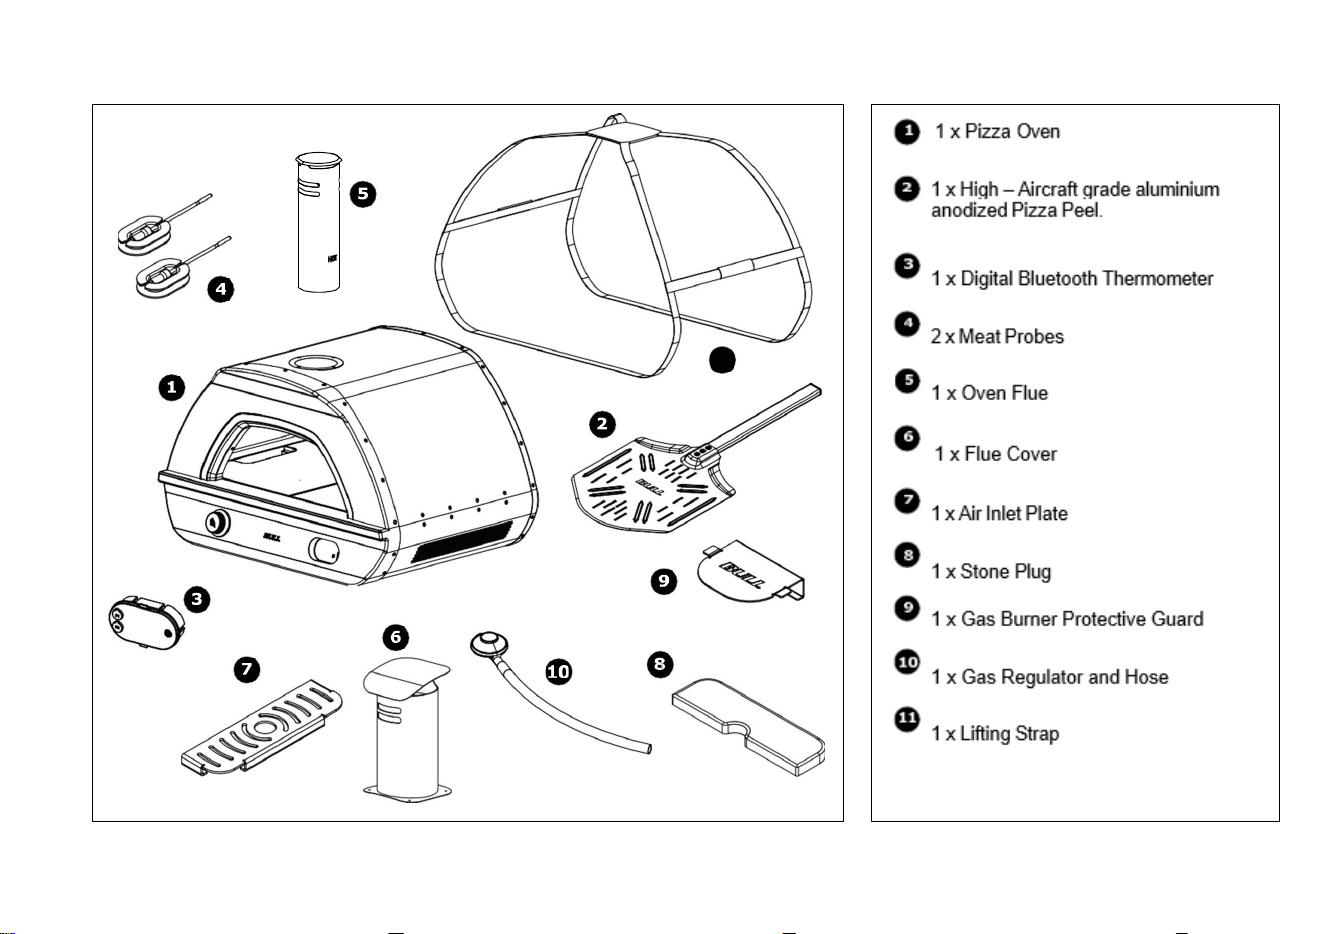
WHAT’S IN THE BOX
1
5
2
4
4
1
1
2
6
7
9
8
3
6
8
7
10
11
10
11
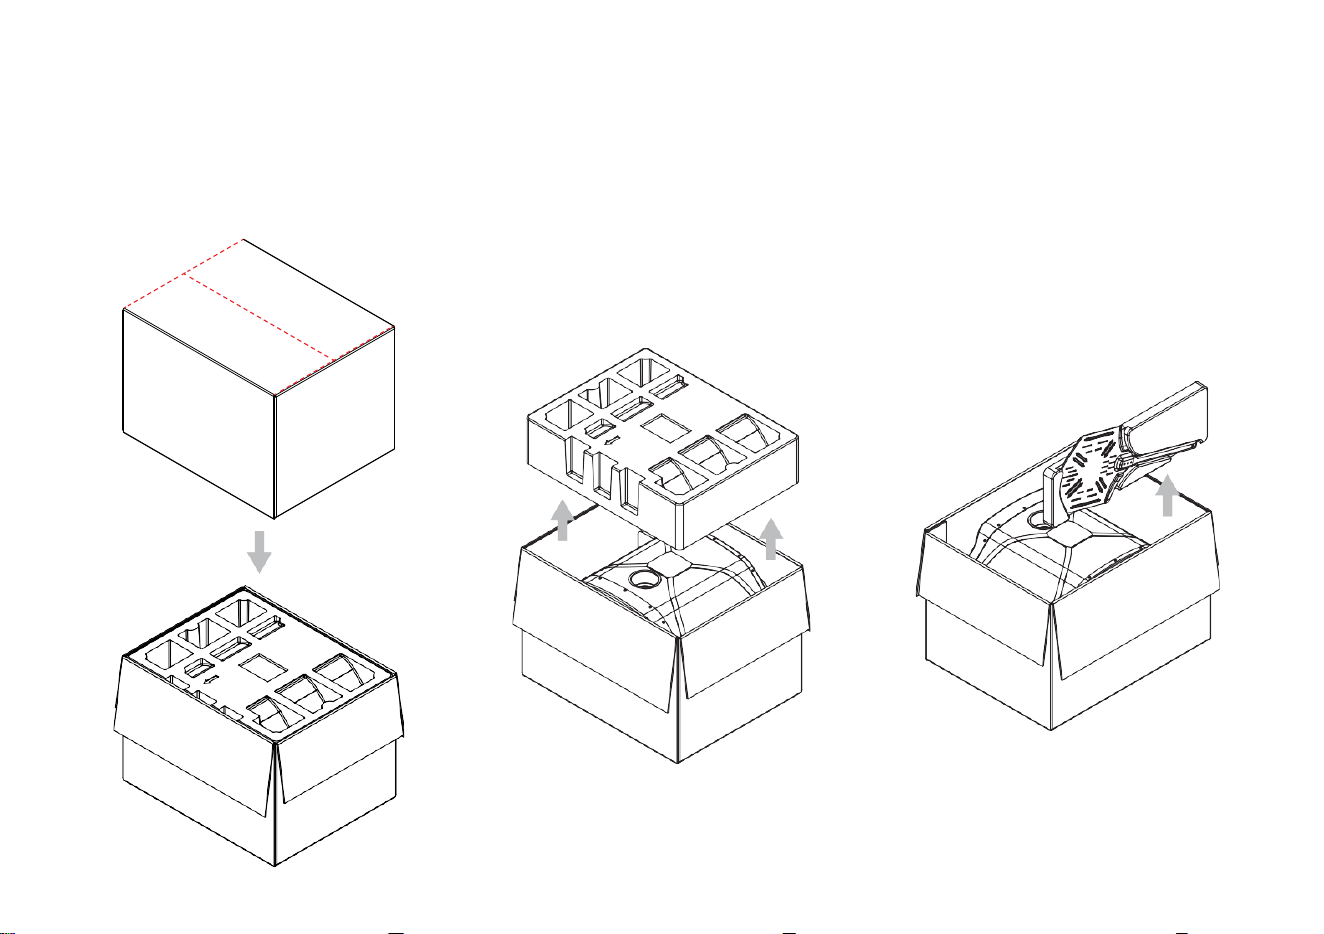
01
Cut open the box seal & unfold the tabs.
02
Lift the polystyrene top cover up & set aside.
03
Lift the pizza peel & polystyrene insert out
of the box & set aside.
UNBOXING DUAL FUEL COUNTERTOP PIZZA OVEN
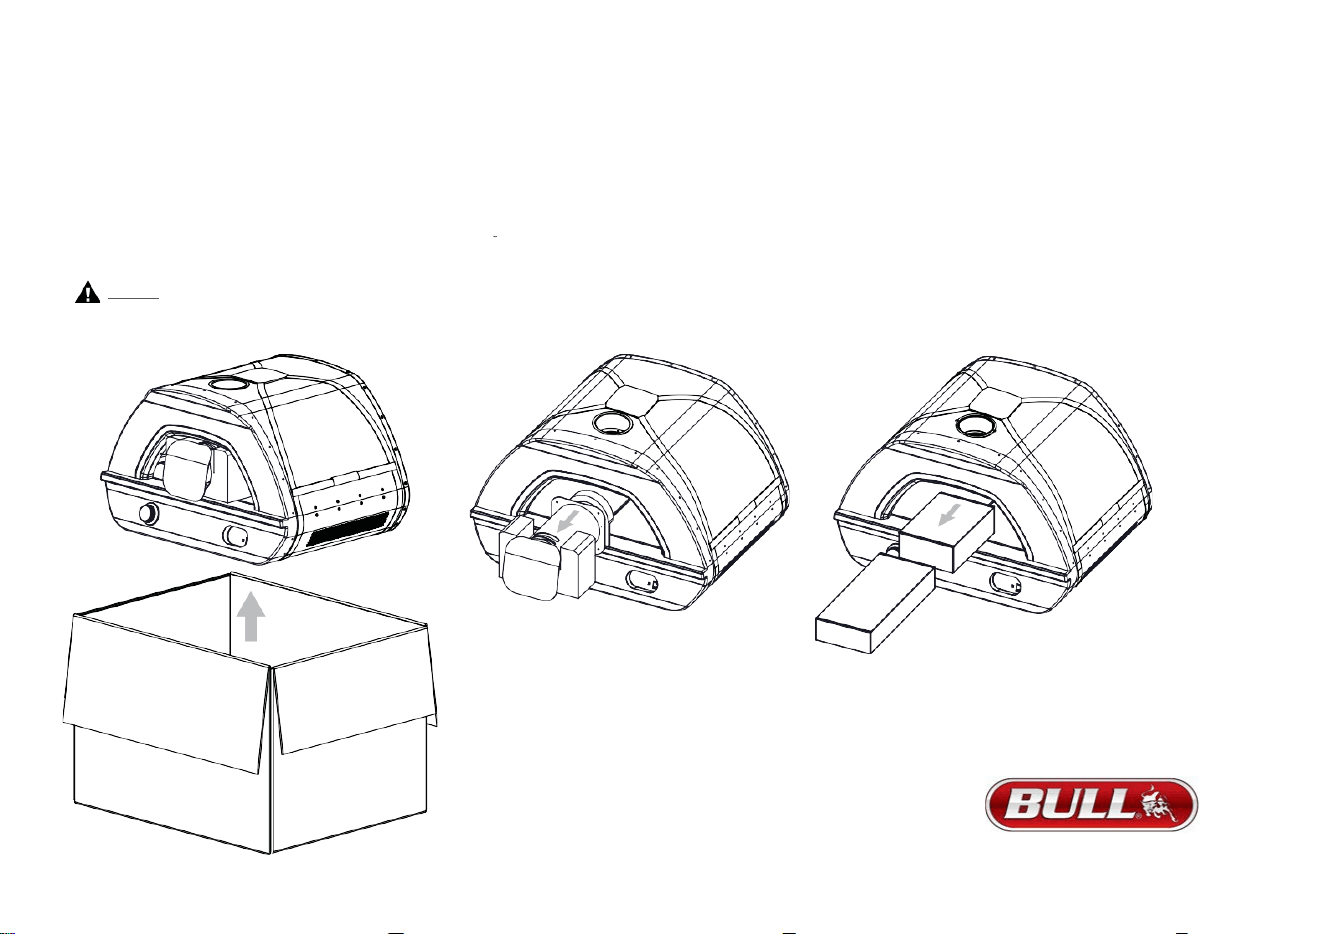
12
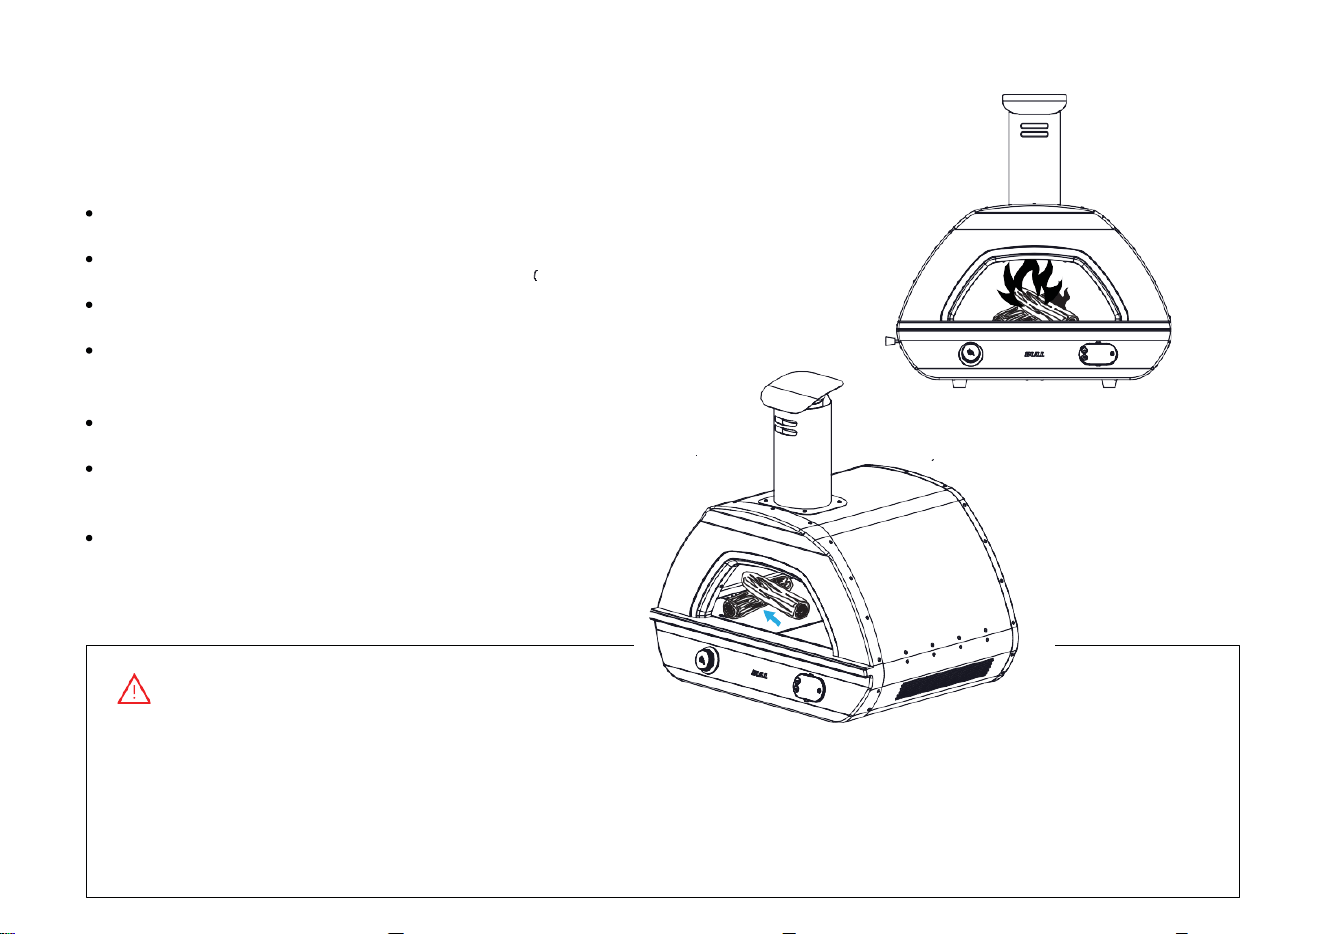
04 To lift the oven out of the box, use
the lifting strap attached to the oven.
05 Carefully retrieve the Flue Cover and
Oven Flue from the oven opening.
06 Lastly, take the Accessory Box and
Regulator Box out of the oven opening.
Ensure all packaging is now out of the
oven.
Warning: Never attempt to lift the oven out
by yourself. It is a 2 two-person job.
UNBOXING DUAL FUEL COUNTERTOP PIZZA OVEN
(Continued)
13
SETTING UP
DUAL FUEL
COUNTERTOP
PIZZA OVEN
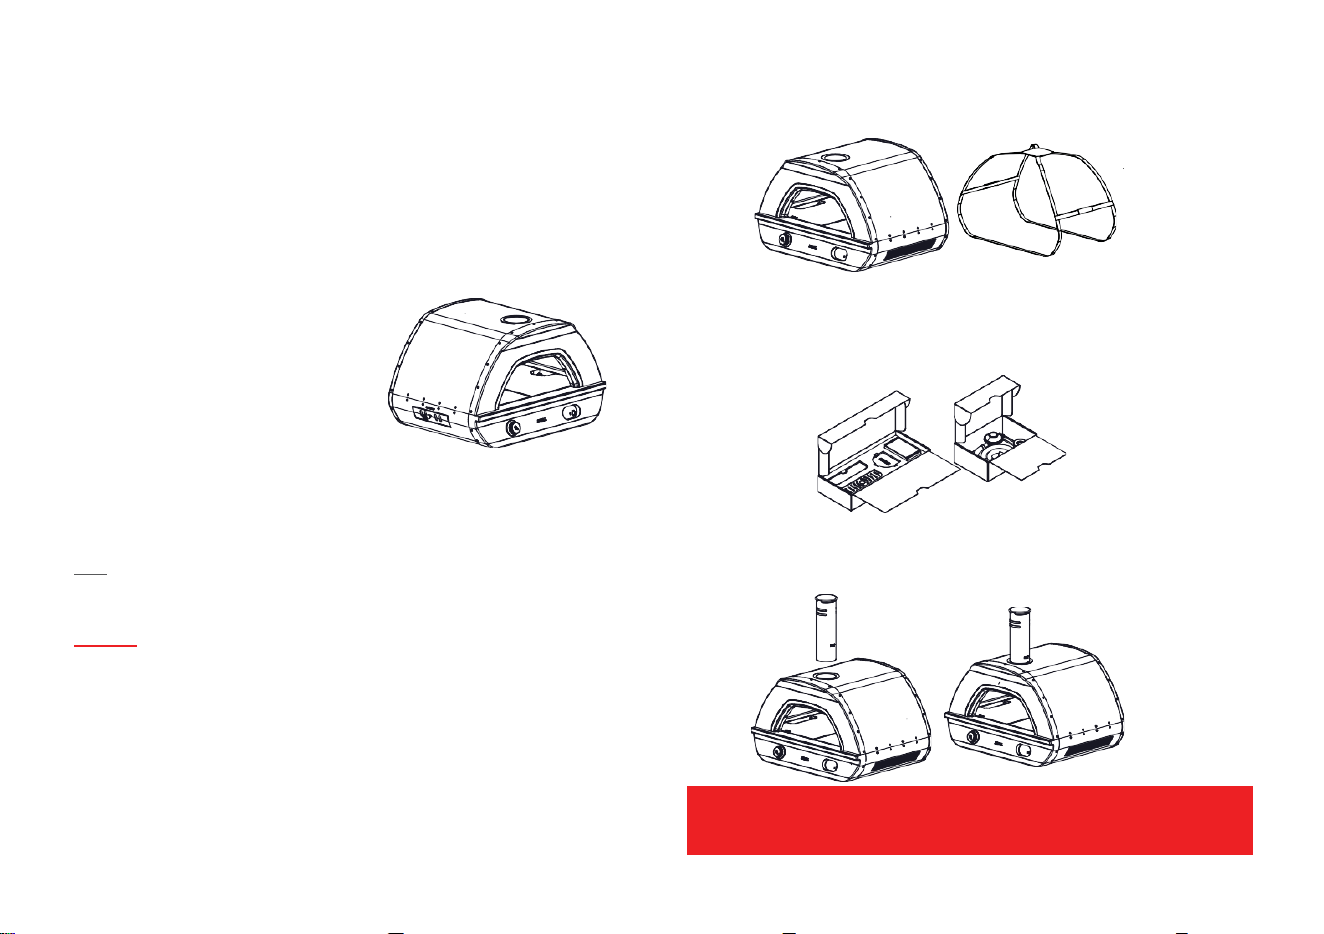
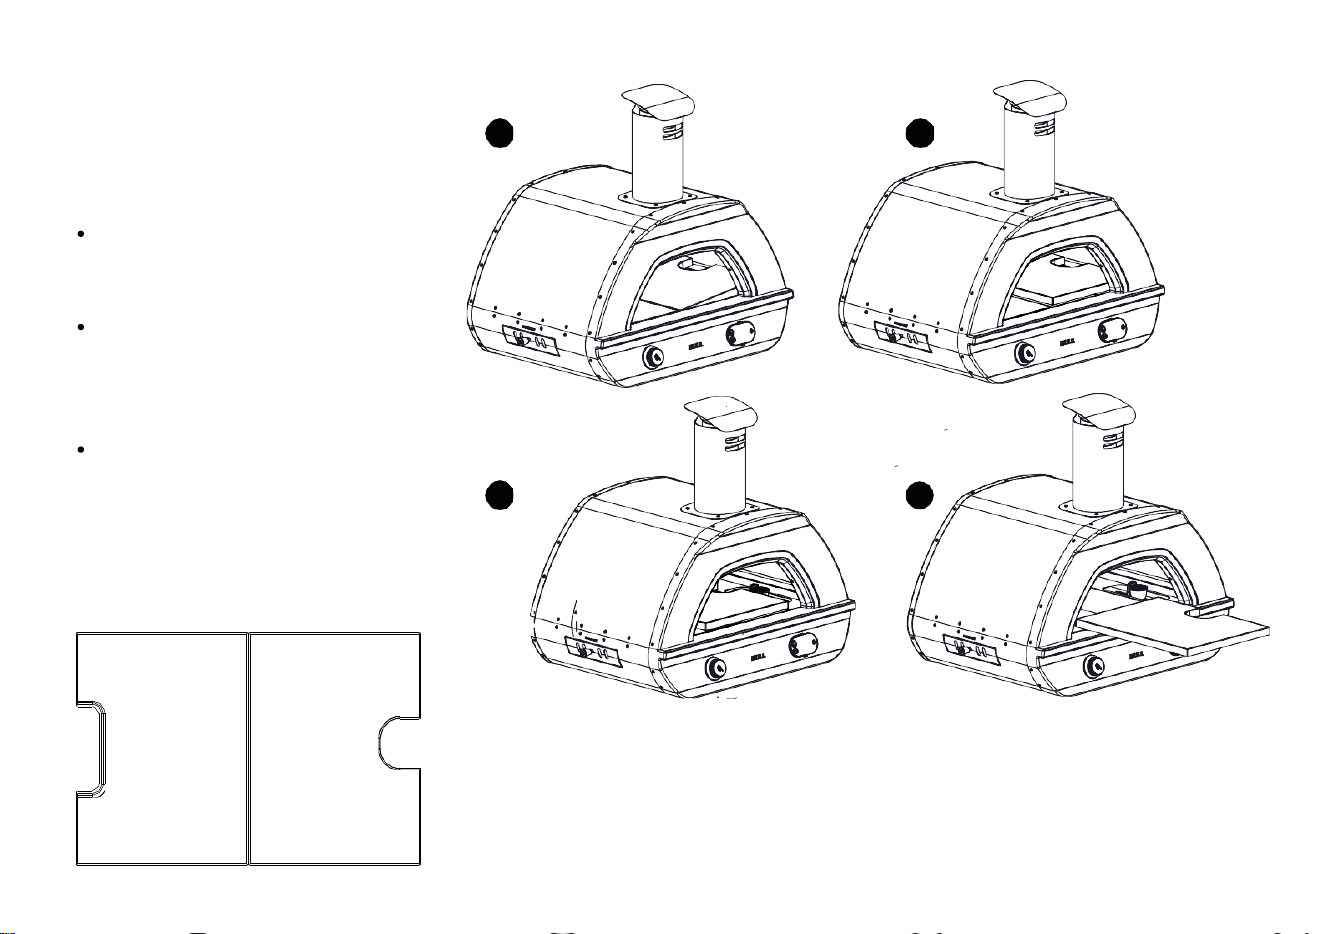
STEP 01
After removing the oven from the
box, place the oven on a flat
surface in an open area clear of
any obstruction or combustible
items. In order to operate the oven
safely, the air inlet holes should
never be blocked on the bottom,
sides, or back.
STEP
02
Remove the lifting strap after you have placed
the oven in the desired location.
STEP
03
Remove all items from the Accessory Box and
Regulator Box
STEP
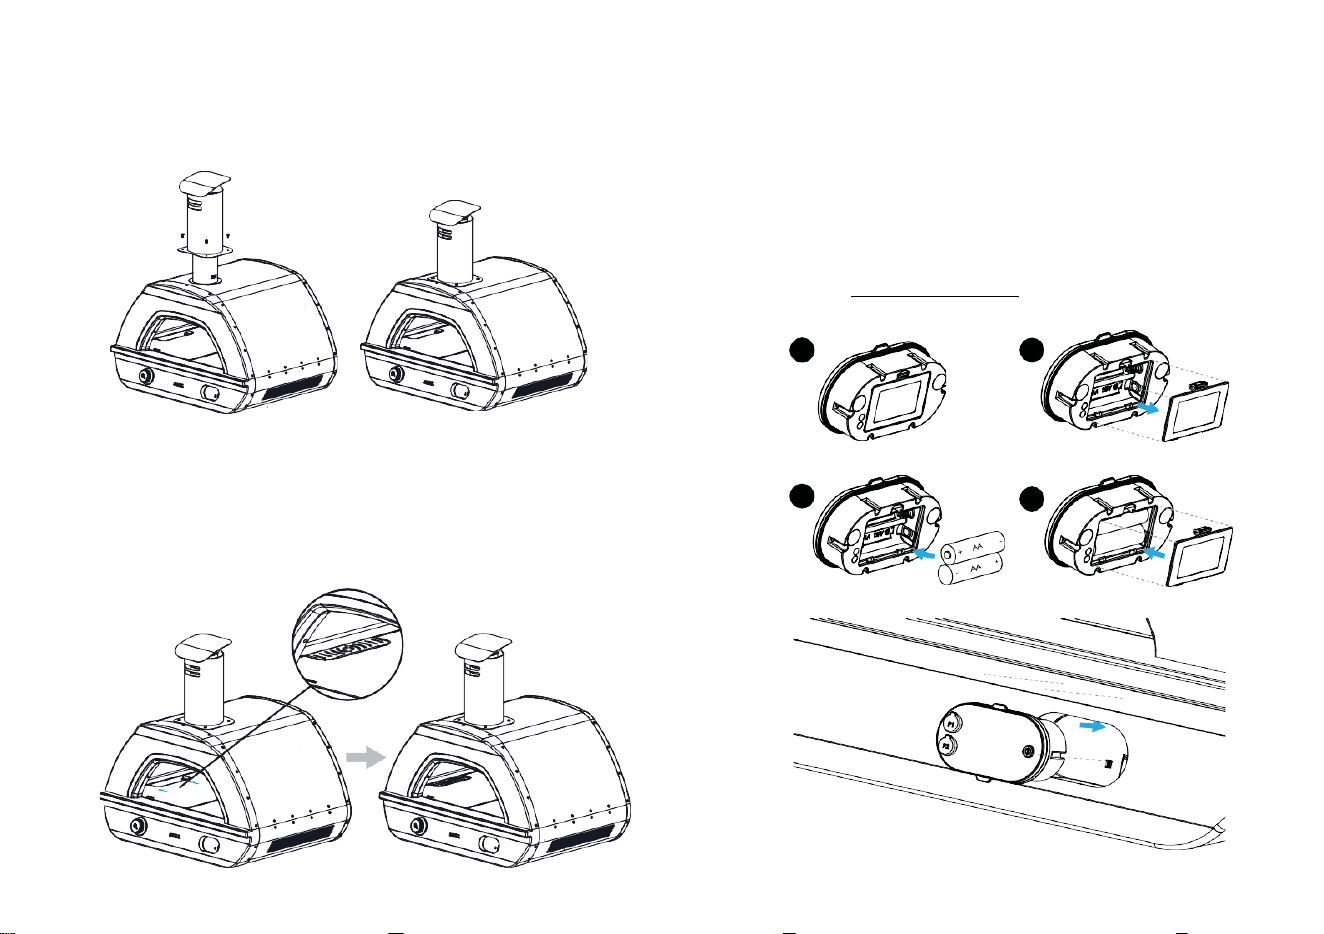
04
Insert the oven flue into the flue base on top of
the oven.
Note: Use the lifting strap to move
the oven to the desired position.
Warning: Never attempt to lift the oven
out by yourself. It is a 2 two-person job.
Warning: If the flue is incorrectly installed before it is used, you may injure yourself.
Never touch the flue when the oven is in operation.
14
STEP
05
Insert the flue cover over the oven flue and secure
with the 4x screws provided.
STEP
07
Add 2x AA batteries & insert the thermometer
into the thermometer slot at the front of the
oven. Please note the thermometer instructions
are provided in a separate user manual.
Please note the thermometer instructions are
provided in later section of the user guide.
https://www.bullbbq.com
1
2
STEP
06
Insert the air inlet plate above the ashtray
opening on the left side of the oven.
Alternatively, if you are using gas power,
you can place the stone plug here.
3
4
SETTING UP DUAL FUEL COUNTERTOP PIZZA OVEN (Continued)
15
16
GAS
FIRE
UP
LP GAS CYLINDER WARNING
Do not store spare liquid propane gas cylinder under or near this appliance.
Never fill the cylinder beyond 80 percent capacity.
Liquid propane cylinder must be fitted with an OVERFILL PROTECTION DEVICE (OPD).
If the information above is not followed exactly, a fire resulting in death or serious
injury may occur.
Please always keep the gas bottle in upright position.
If the appliance is not in use, the gas must be turned off at the supply cylinder.
The cylinder used must include a collar to protect the cylinder valve.
The minimum distance for the appliance and the gas tank is 40 inches apart.
To connect the liquid propane gas cylinder:
The cylinder valve should be in OFF position.
Make sure the burner valve is in OFF position.
17
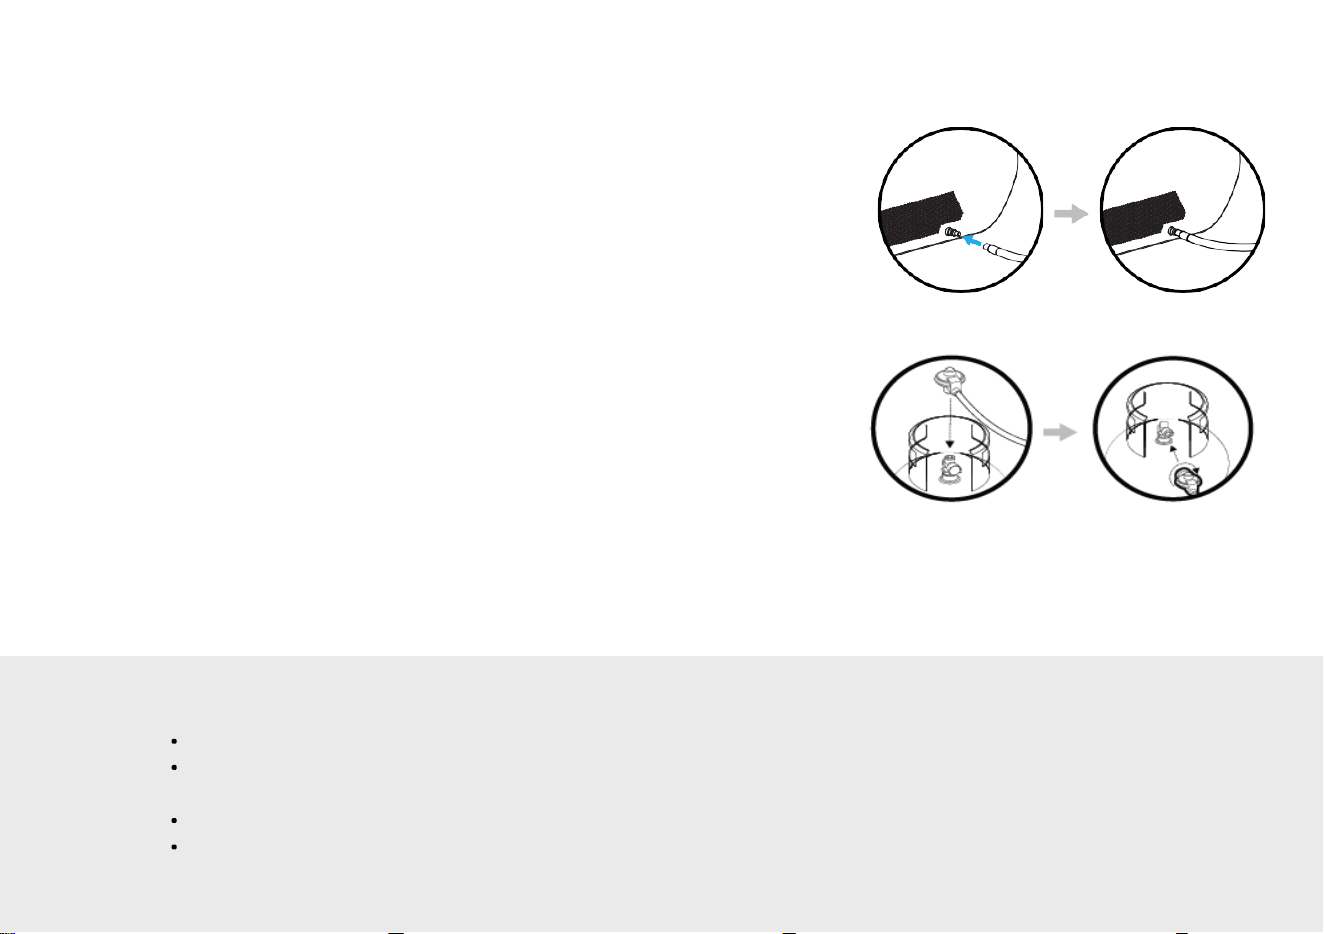
STEP
01
Remove the gas hose assembly & regulator from the packaging.
Carefully attach the hose to the oven using the quick connection.
To attach the quick connect, pull the spring loaded collar back and
insert it into the gas inlet. Once the connection is secure, release the
collar and it will slide back to its original position. Gently tug the
hose to check the assembly is secure. The connection must be
checked for leaks.
STEP
02
Carefully attach the regulator to the gas cylinder.
This is a push-on gas fitting. Ensure that the black switch is in the
horizontal position. Depress the button located below] the black switch
and press the regulator on to the tank valve until it locks into place.
Open the gas cylinder valve allowing gas to flow through the regulator
and into the oven AND TEST FOR LEAKS.
SAFETY
Although the gas connections of the appliance are leak tested prior packing and shipment, a complete test must be performed ahead to firing up the oven.
To test for gas leaks, First, make a solution of equal parts of liquid detergent water. You will need a spray bottle to spray the solution at the joints OR use a brush
or rag to apply a mixture of soapy water at the connection points.
If there is a leak, you will notice the soapy water will start forming bubbles. Should this happen, please reconnect/tighten all connections and test again for leaks.
If a leak is still found, turn the cylinder valve OFF, and do not use the oven until local liquid propane dealer can make repairs.
GAS
FIRE
UP (Continued)
18
GAS SAFETY
Before use, make sure that the oven, burner, and venturi are clear of any debris, for
instance leftover food residue or insects. If a nest is found, the insects must be
eliminated as they can be dangerous. Should your appliance stop working for any
reason, turn the control knob and the gas valve off. Wait five minutes before you turn
it back on again.
The oven should be attended at all times while it is operating since some foods
produce flammable fats and
juices.
Any fire caused by fat or grease will not be covered under warranty, so if such
an
event happens, be sure to turn off the burner knob and the gas cylinder valve
as
quickly as you can. Remove all the food off the surface of the appliance.
Before lighting the gas burner, remove all
Before operating any gas-powered appliance, please review all safety requirements.
Make sure the gas inlet cap is clean and free of debris before connecting the hose.
While the appliance is operating, do not disconnect any gas fittings.
Before each use, check all hose lines and fittings for cuts, cracks, or other damage.
Enclosed spaces should not be used to store gas cylinders.
Fuel supply hoses should be kept away from heated surfaces and direct sunlight.
Make sure not to use anything flammable while gas is operating.
WARNING
Check for gas leaks whenever
you disconnect and reconnect a
gas fitting. Do not ignite burners
while checking for leaks.
To test for gas leaks, use a soapy
water and a brush to apply a
mixture to the highlighted areas
and to any cracks
on the hose. If a leak is present
the solution will begin to
bubble.
If a leak at the hose to oven
connection is noticed, tighten
the fitting with a spanner and
check for leaks by applying
soapy water to the areas
highlighted by the brush. If leaks
continue turn off the gas and DO
NOT OPERATE THE OVEN.
During a leak, do not operate
the oven. Remove the LPG
cylinder. Make sure you use a
different LPG cylinder
19
GAS
SAFETY(Continued)
Once the setup is completed, you can fire up the oven for the first
time.
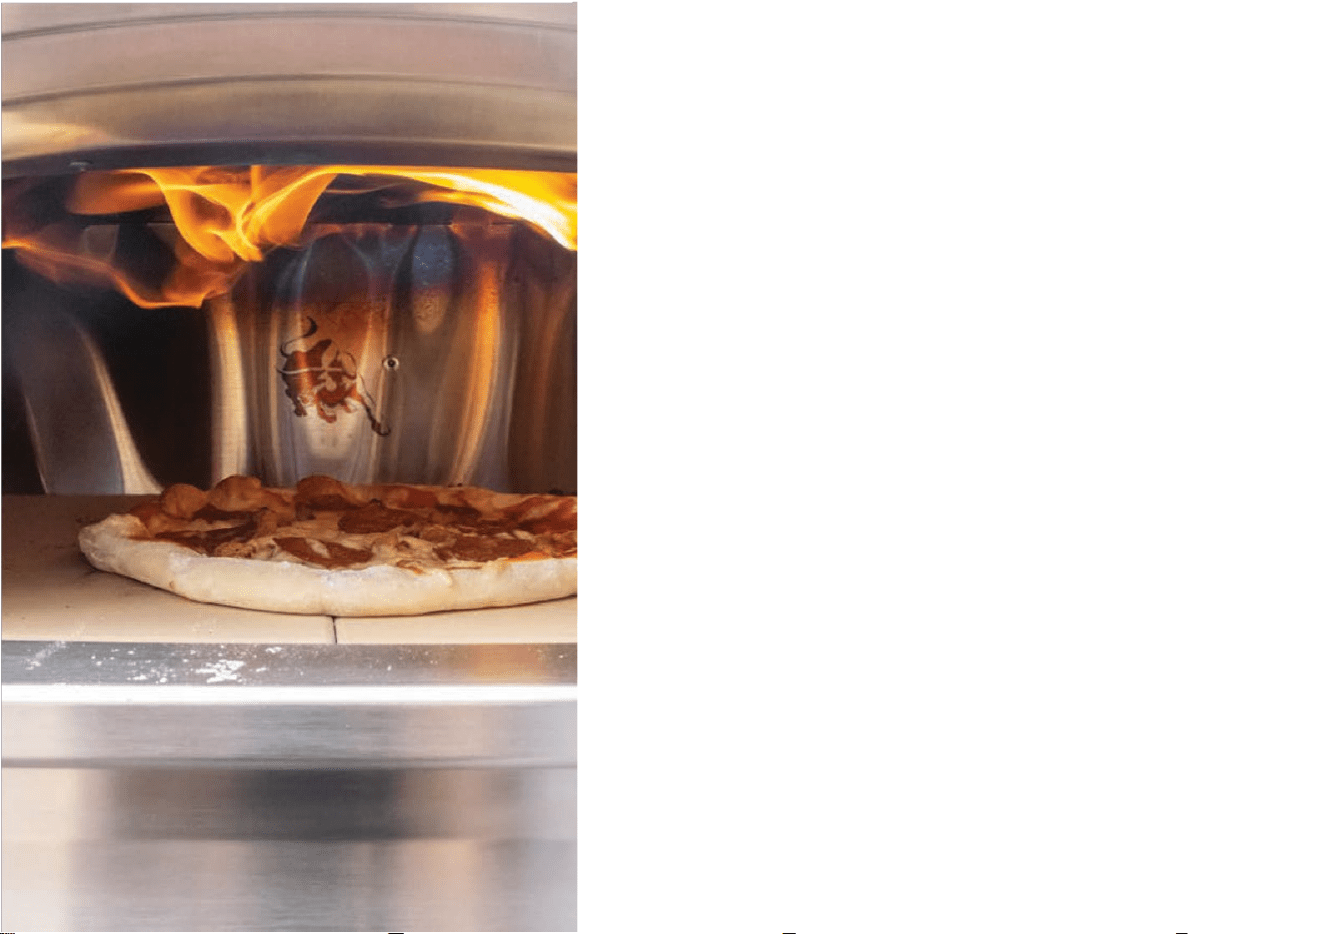
STEP
01
To fire up the oven, press & hold the control knob.
STEP
02
Rotate the control knob 180 degrees anti-clockwise
passing through the 2 ignition symbols. During the
rotation, you will hear and see the ignition needle
spark twice which will ignite the flame.
Our burner system utilizes a unique ignition
technology. Our gas valves produce two sparks in a
single rotation of the control knob which increases
the chances of igniting the flame instantly.
If the flame doesn’t ignite the first time, please try a few times
until it fires up successfully. Ensure to check gas flow to the oven
gas inlet.
20
STEP
03
Once the flame is on, ensure that you keep the gas
control knob in the pressed position for 20 seconds.
This will allow the thermocouple to heat up.
STEP
05
On your first firing, run your oven on max flame for
about 30 minutes. This will season the stone. Once
the stone is seasoned and up to temperature, you
can start cooking.
STEP
06
As soon as the cooking cycle is complete, turn off
the gas supply by depressing and rotating the
control knob clockwise to the OFF position. Also,
turn off the gas regulator. You must try to fire up the
oven again once you have turned the gas regulator
off in case there is any remaining gas.
Push, slowly turn past
two ignition symbols
and release to light.
Min. Power
Note: Wait for at least 2 hours before you start cleaning the oven. The oven
needs to cool down to the surrounding temperature before attempting
to
clean it.
If you encounter any issues/difficulties during the gas burner
operation,
please contact Shield Works immediately. DO NOT ATTEMPT TO FIX THE
ISSUE BY YOURSELF. LET THE EXPERTS GUIDE YOU.
Max
OFF
STEP 04
After 20 seconds let go of the control knob.
GAS SAFETY(Continued)
21
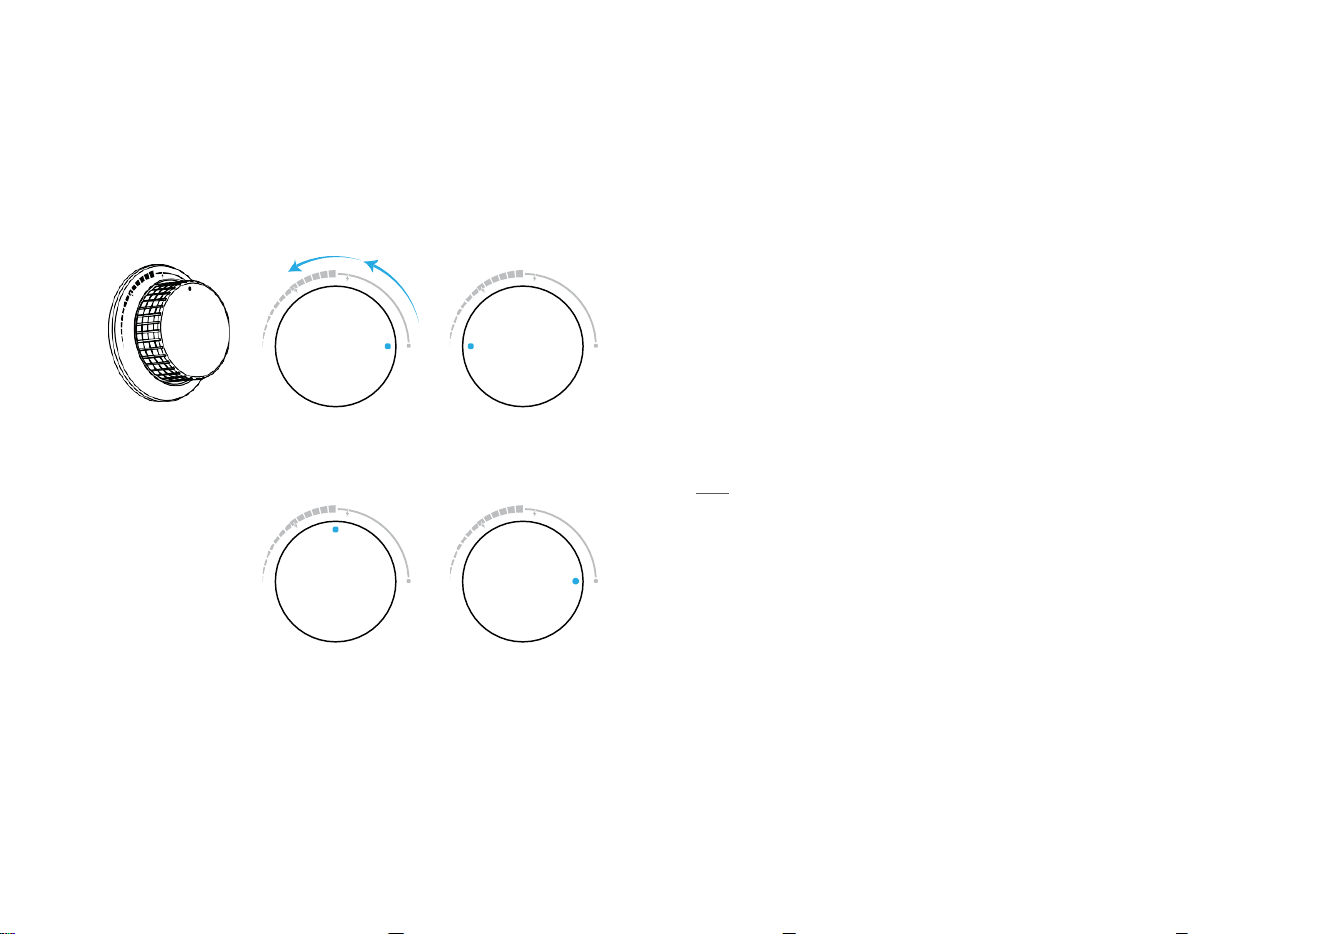
WARNING
IN
THE
EVENT
OF
FIRE
If there is a fire, ensure that all people and pets are as far away as possible
from the fire. Fires are usually caused by grease buildup, or (if using gas)
an improper gas connection.
If possible, use a fire extinguisher; but if water is the only fire retardant
available, be sure to saturate the area surrounding the appliance. Avoid
spraying strong jets of water on the stove. If that does happen, it may
lead to spilling of the burning grease, causing the fire to spread.
TO
DISCONNECT
THE
LIQUID
PROPANE
GAS
CYLINDER
Turn the oven burner valve OFF and make sure the oven is cool
Turn the liquid propane cylinder valve OFF by turning clockwise until it stops.
Detach the regulator assembly from the cylinder valve.
Place dust cap for cylinder valve outlet whenever the cylinder is not in use.
22
WOOD
FIRE
UP
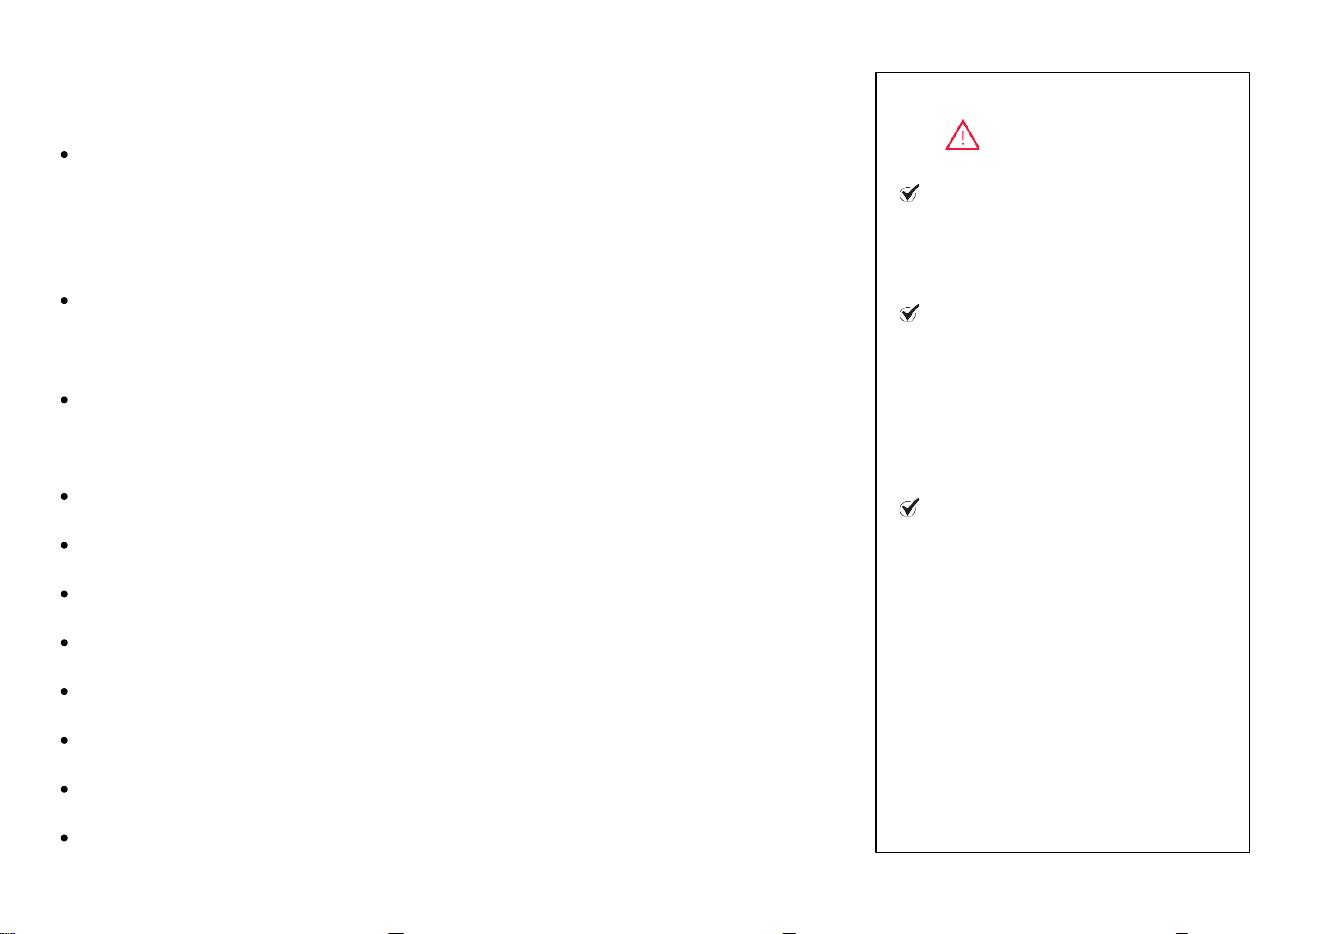
Do not use wood that has been treated or painted.
Do not use softwoods.
Your choice of wood will determine how well the
oven performs and gives flavor to your food. We
advise further online research before cooking with
wood.
We recommend small pieces of kindling roughly
5’-6” x 1’-2”
Do not add more than 7 lbs. of Wood.
SUGGESTED WOOD
Ash
Alder
Oak
Beech
Hickory
Mesquite
Fruit trees, Apple, Pear etc

23
•
In order to prevent wood debris from obstructing
the gas burner, ensure that the gas burner guard is
placed in position.
Before firing up with wood, ensure the Air Inlet Plate is
correctly inserted in position.
WOOD
FIRE
UP (Continued)
24
FIRING UP
WITH WOOD
Stack the wood in the center of the oven.
Light the wood with a
firelighter.
Let the wood burn for 30 minutes in the center of the oven.
Then push the wood over the grill to the left of the oven
using an ember rake.
Add wood as required.
There should never be a flame coming out of the mouth of
the oven.
Once the cooking cycle is completed and the oven back to
surrounding temperature, you can gently remove the wood
rack and dispose the ash/debris into the ashtray using a brush.
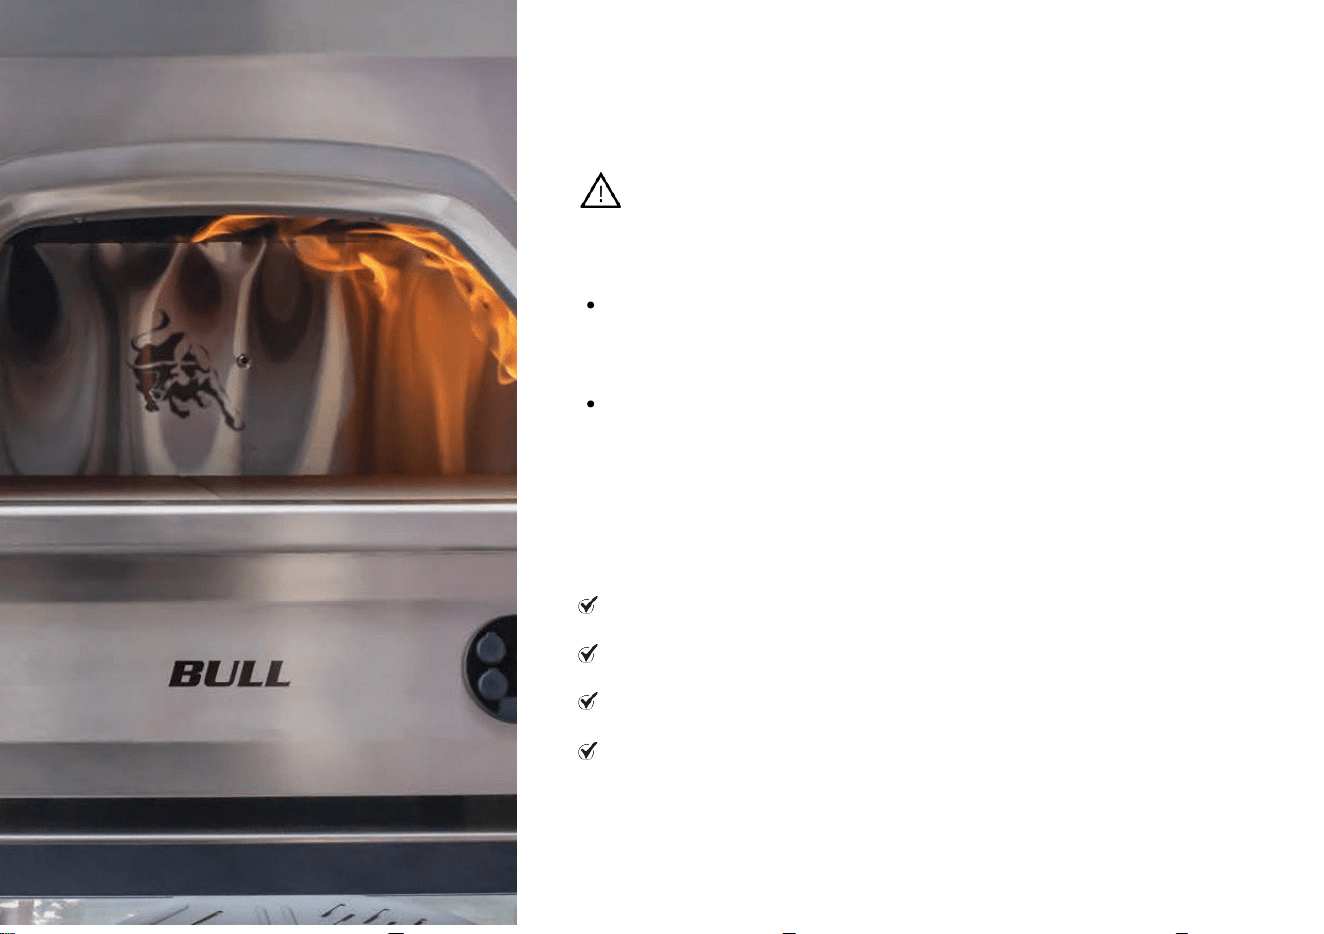
WARNING
In the event of fire
If there is a fire, ensure that all people and pets are as far away as possible from the fire. Fires are usually caused by grease buildup, or (if using gas)
an improper gas connection.
If possible, use a fire extinguisher; but if water is the only fire retardant available, be sure to saturate the area surrounding the appliance.
Avoid spraying strong jets of water on the stove. If that does happen, it may lead to spilling of the burning grease, causing the fire to spread.

25
MAINTENANCE
The best way to clean the oven is to fire it up and burn off
any food debris. In order for the oven floor to begin
"self-cleaning", it needs to reach >662F for four hours.
After the oven is cool, water can be sparingly used to clean
the stone. However, for the next use gently heat up the
stone for 30 mins at the lowest flame position.
Do not clean the thermometer with water. Thermometer
screen can be cleaned using a dry cloth.
Once the oven is cool and in normal surrounding
temperature, you can use a soft brush to clear any soot
inside the oven and vacuum clean.
For external cleaning use warm soapy water & non-abrasive
sponge/cloth. to clean the oven and then wipe it down with
kitchen towel.
When the oven is not is use, protect your oven with a cover
(can be purchased separately) and store in a dry place.
Keep oven away from direct sunlight when storing the oven
over long period of time without use.
Do not keep the oven exposed in harsh weather conditions
like rain, snow, hail, typhoons.
Do not use the stone over an open flame.
Do not cool the stone with water.
26
REPLACING
THE STONE
In the event that a stone is cracked, it
can be easily replaced by the user.
1
2
Carefully lift the right hand stone by
gripping the edge in the gas burner
cutout. Slide it out of the oven opening.
Then carefully lift the left hand stone
out. Slide it out of the oven opening.
3
4
Left Stone
Right Stone
To replace the stones, insert the left stone first, into the left hand side of the oven. Ensure this is tight
against the left side.
Next, carefully insert the right stone into the right hand side of the oven.
1
2
3
4
27
REGISTERING YOUR PIZZA OVEN
Thank you for purchasing your Bull Outdoor Products Pizza Oven. Please follow the instructions below to register your oven and validate your Limited
Warranty, you must submit the completed the Warranty Registration Form within 90 days from the date of purchase. For on-line registration go
to: https://bullbbq.com/register For Warranty Questions call Customer Service at (800) 521-2855
STEP 1 Download the ‘To Grill’ app onto your phone or tablet.
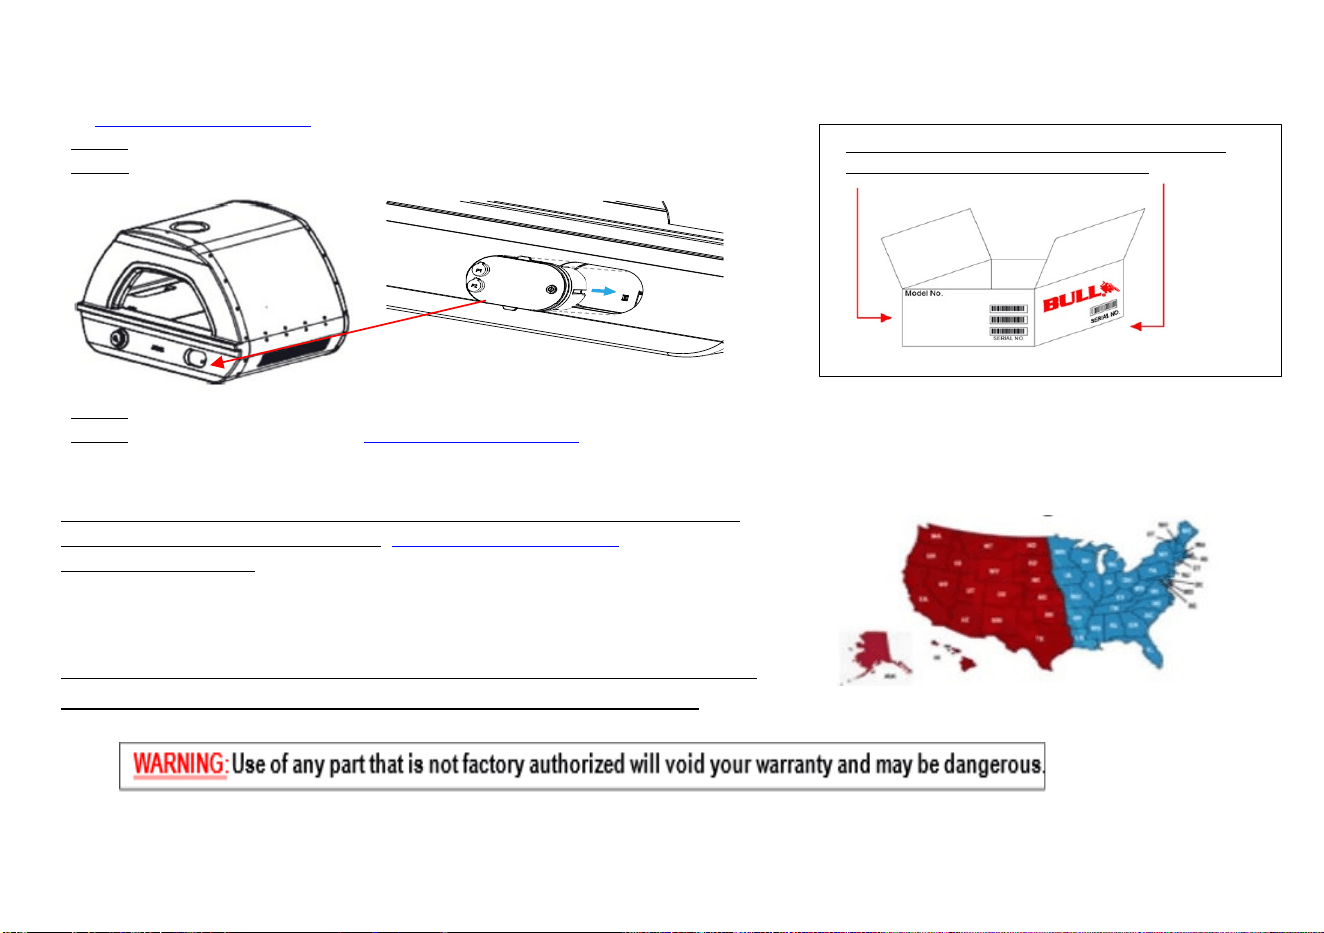
STEP 2 Remove the thermometer from the pizza oven.
STEP 3 Use the app to scan the QR code on the back of the thermometer OR the QR Code provided on the card inside the thermometer box.
STEP 4 For on-line registration go to: https://bullbbq.com/register For Warranty Questions call Customer Service at (800) 521-2855
INSTRUCTIONS FOR ORDERING REPLACEMENT PARTS
Your Bull Authorized Dealer will need your registration info to assure you get the correct part(s) to keep your Oven in top working condition.
Please refer to your owner’s manual parts list and illustration to identify what you need.
To Order Replacement Parts on-line go to: https://bullbbq.com/buy-parts
Ordering Parts by phone: Bull is ready to help with two regional suppliers.
Open Monday through Friday 8:00 am to 5:00 pm
For the Western Region, call (800) 258-6810
For the Eastern Region, call (800) 229-3056
INSP
ECT YOUR PIZZA OVEN FOR ANY DAMAGE AND CONTACT OUR SERVICE CENTER OR LOCAL
DEALER FOR REPLACEMENT OF ANY DAMAGED PARTS. IF DAMAGED DO NOT USE OVEN.
Pizza Oven Model and Serial Number can also be
found on the sides of the shipping box.
Western Region Eastern Region
28
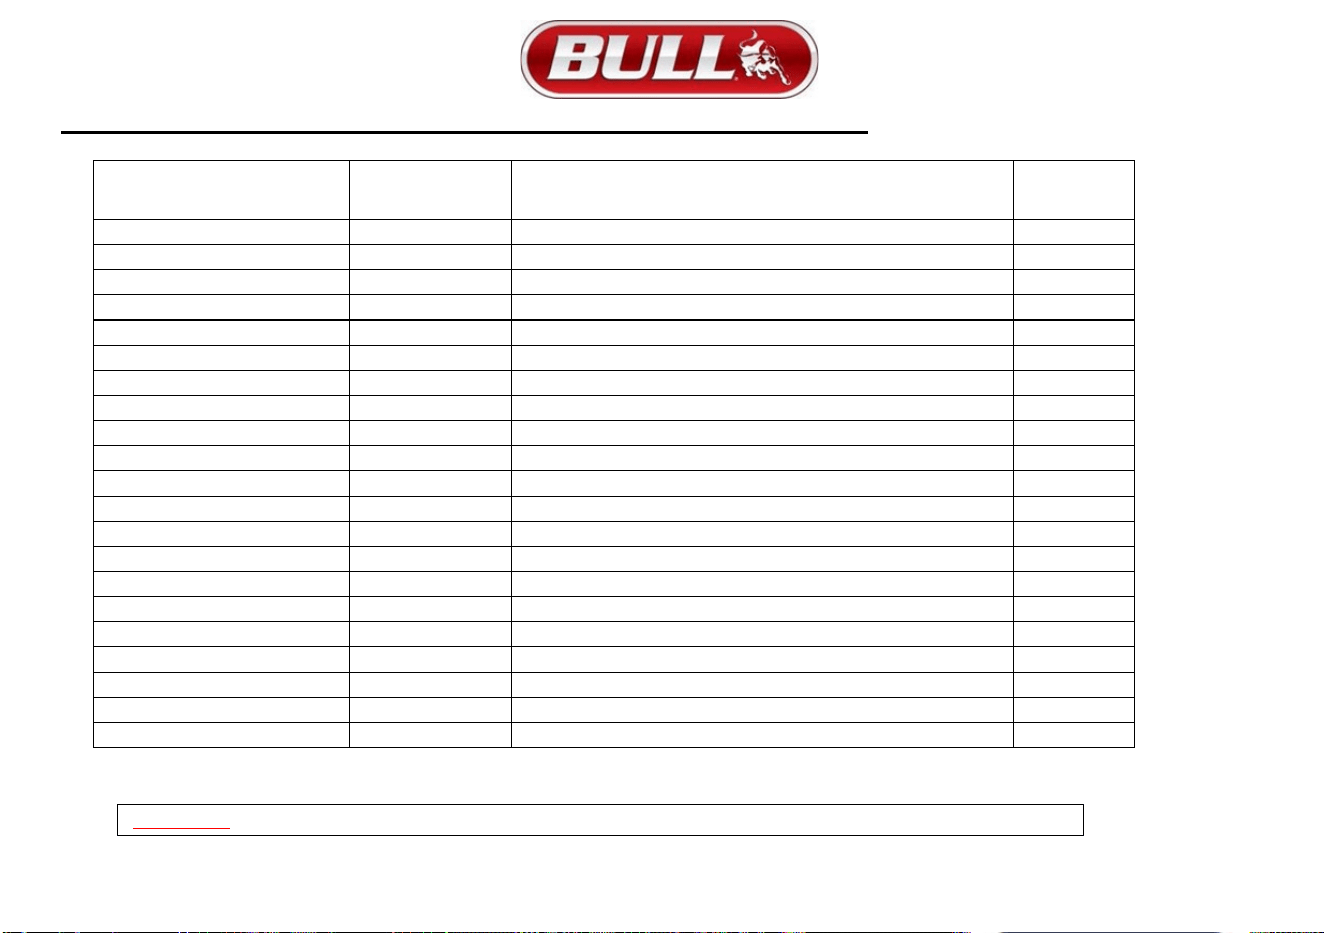
DUAL FUEL PIZZA OVEN REPLACEMENT PARTS LIST
MODELS 69550 LP & 69564 NG WARRANTY PERIOD FOR ALL PARTS IS ONE YEAR
NUMBER REF ON
DRAWING (NEXT PAGE)
BULL PART
NUMBER
DESCRIPTION QUANTITY
1
69551
ASH TRAY
1
2
69552
STONE PLUG
1
3
69553
AIR INTAKE PLATE
1
4
69554
BURNER GUARD
1
5
69555
CORDIERITE STONE - RIGHT
1
6
69556
CORDIERITE STONE - LEFT
1
7
69573
INSULATION BOARD
2
8
69557
THERMOMETER
1
9
69571
FLUE BASE
1
10
69558
FLUE
1
11
69559
FLUE COVER
1
12
69560
THERMOMETER PROBES
2
13
69561
PERFORATED PIZZA PEEL
1
14
69562
CONTROL KNOB
1
15
69576
CONTROL KNOB BEZEL
1
16
69574
GAS VALVE AND BURNER (LP) LIQUID PROPANE ONLY
1
17
69575
GAS VALVE AND BURNER (NG) NATURAL GAS ONLY
1
18
69563
LP GAS REGULATOR AND HOSE
1
19
69565
NG GAS HOSE AND CONNECTORS
1
20
69568
3/8 INCH NPT FLARE FITTING
1
21
69572
FEET
4
WARNING:
Use of any part that is not factory authorized will void your warranty and may be dangerous.
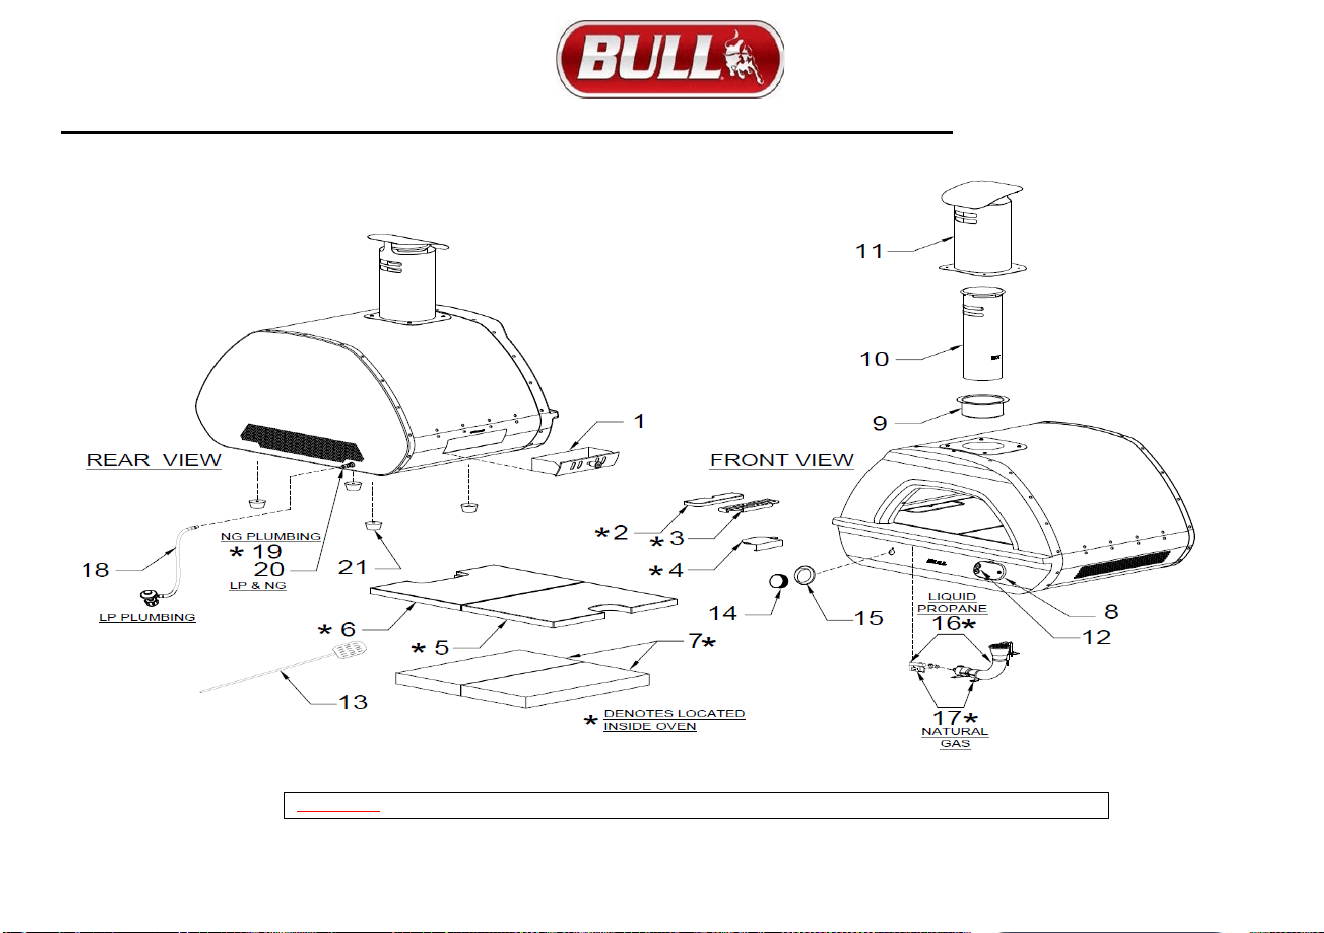
29
DUAL FUEL PIZZA OVEN REPLACEMENT PARTS DRAWING
MODELS 69550 LP & 69564 NG
WARNING:Use of any part that is not factory authorized will void your warranty and may be dangerous.
30
War
ranty Policy
LIMITED WARRANTY ON BULL OUTDOOR PRODUCTS, INC., PRODUCTS
THIS LIMITED WARRANTY GIVES YOU SPECIFIC LEGAL RIGHTS. YOU MAY ALSO HAVE OTHER RIGHTS, WHICH VARY FROM STATE
TO STATE.
HIS LIMITED WARRANTY CAN ALSO BE FOUND ON OUR WEB SITE AT:
https://www.bullbbq.com/support-warranty (United States Customers)
https://bullbbq.eu/customer-care/#warranty-registration-form (International Customers)
THIS LIMITED WARRANTY IS SUBJECT TO THE EXCLUSIONS, CONDITIONS AND LIMITATIONS SET FORTH BELOW.
ANY IMPLIED WARRANTIES IMPOSED BY LAW, INCLUDING WITHOUT LIMITATION THE IMPLIED WARRANTIES OF
MRECHANTABILITY AND FITNESS FOR A PARTICULAR PURPOSE, ARE LIMITED IN DURATION TO THE DURATION OF THIS EXPRESS
LIMITED WARRANTY.
SOME STATES DO NOT ALLOW LIMITATIONS ON HOW LONG AN IMPLIED WARRANTY LASTS, SO THE ABOVE
LIMITATION MAY NOT APPLY TO YOU.
WHO MAY USE THIS WARRANTY?
BULL OUTDOOR PRODUCTS, INC. located at address 1011 East Pine St. Lodi, CA. 95240
("we") extend this limited warranty only to the consumer who originally purchased the product ("yo
u") at the original site of delivery or
installation. It does not extend to any subsequent owner or other transferee of the product. It does not apply to products installed in any
rental, commercial or non-residential application. Examples of excluded applications include, but are not limited to day care centers,
schools, bed and breakfast centers, churches,
private clubs, fire stations, club houses, common areas in multi-family dwellings, restaurants,
hotels, nursing homes, food service locations and institutional food service locations.

31
Warranty Policy (Continued)
WHAT DOES THIS WARRANTY COVER?
This limited warranty covers defects in materials and workmanship of the product and product components identified below for the
Warranty Periods defined below.
• Grill Warranty Periods
The following parts are covered for one year on all our current gas grill models:
The lid, control panel, grease tray, bezels, knobs, temperature gauge, valves, regulator, flex tubes, rotisserie burner,
transformer, and all components of the lighting system.
The following parts are covered for three years on all our current gas grill models:
The manifold, handle end caps, flame tamers, heat shields, and warming rack.
The following parts are covered for lifetime on all our current gas grill models:
Insert assembly and the grates.
The warranty period for the grill burners vary by type:
Cast stainless steel burners - lifetime,
Welded burners – 5 years, and
Porcelain coated burners – 3 years.
The warranty period for the charcoal grill is one year on all parts, except for the insert assembly, which is covered for 5 years.
The Bel Air grill included a one-year warranty on all parts.

32
Warranty Policy (Continued)
Component Warranty Periods
All of the parts for our components/grill carts/refrigerators/kegerators/drawers/doors are covered for one year with these
exceptions:
Power Burner
o The insert/grates are lifetime covered parts.
o The manifold/burner are covered for 3 years.
Searing Station/Slide in Double Sideburner
o The grates are covered for lifetime,
o the insert for 5 years, and
o the manifold for 3 years.
Single Sideburner
o The grates are covered for 5 years and
o the burner for 3 years.
Sidekick
o The burner is covered for 3 years.
• Pizza Ovens/Islands/Fire Features Warranty Periods
All of the parts and construction materials are covered for one year.
Grill Accessories and Grill Covers do not include a warranty period.

33
DUAL FUEL
COUNTERTOP
PIZZA OVEN
Warranty Policy (Continued)
WHAT DOES THIS WARRANTY NOT COVER?
This limited warranty does not cover any damage due to: (a) transportation; (b) storage; (c) improper installation or use; (d) use on improper
fuel/gas supply; (e) failure to follow the product instructions or to perform any preventive maintenance; (f) modifications; (g) unauthorized
repair; (h) normal wear and tear; or (i) external causes such as accidents, abuse, or other actions or events beyond our reasonable control.
WHAT ARE YOUR REMEDIES UNDER THIS WARRANTY?
With respect to any defective product claim made during the Warranty Period, we will, in our sole discretion, either: repair or replace such
product (or the defective part) free of charge or (b) refund the purchase price of such product. We will not pay for shipping charges for
repaired or replacement parts, or for any labor or labor related charges. We will not pay for any accessory products or ancillary products
purchased by you for use in connection with the product.
HOW DO YOU OBTAIN WARRANTY SERVICE?
To obtain warranty service, you must submit a warranty claim online through the Bullbbq.com website during the Warranty Period.
Warranty claims will not be accepted via email, fax or phone.
LIMITATION OF LIABILITY
THE REMEDIES DESCRIBED ABOVE ARE YOUR SOLE AND EXCLUSIVE REMEDIES AND OUR ENTIRE LIABILITY FOR ANY BREACH OF
THIS LIMITED WARRANTY. OUR LIABILITY SHALL UNDER NO CIRCUMSTANCES EXCEED THE ACTUAL AMOUNT PAID BY YOU FOR THE
DEFECTIVE PRODUCT, NOR SHALL WE UNDER ANY CIRCUMSTANCES BE LIABLE FOR ANY CONSEQUENTIAL, INCIDENTAL, SPECIAL OR
PUNITIVE DAMAGES OR LOSSES, WHETHER DIRECT OR INDIRECT.
SOME STATES DO NOT ALLOW THE EXCLUSION OR LIMITATION OF INCIDENTAL OR CONSEQUENTIAL DAMAGES, SO THE ABOVE
LIMITATION OR EXCLUSION MAY NOT APPLY TO YOU.
Warranty Policy Revised 10-15-2020 APR
