Operator's Manual
Part 355922-1
1/17/2025
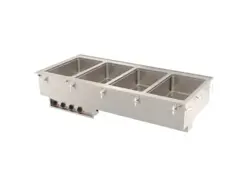
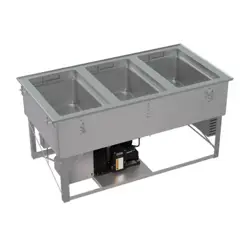
Hot/Cold/Frozen Modular Drop-Ins
Thank you for purchasing this Vollrath® product! Save this manual for reference and the packaging in case shipping is necessary.
SAFETY PRECAUTIONS
To help ensure safe use, please read and fully understand this manual and all safety messages before operation!
WARNING
Warning indicates a hazardous situation which, if not avoided, could result in death or serious injury.
CAUTION
Caution indicates a hazardous situation which, if not avoided, could result in minor or moderate injury.
NOTICE: addresses practices not related to physical injury.
To reduce risk of injury or damage to the unit
• Equipment must be installed by a qualified person
• Use only grounded electrical circuits and outlets that match the nameplate-rated voltage. Do not use extension cords or power strips of any kind.
• Never modify the wiring, cord, or plug. This could damage the unit and cause injury and will void the warranty.
• Use in a flat, level position.
• Keep unit and power cord away from open flames, electric burners, and excessive heat.
• Only operate the hot well with water.
• Use pans 6" (15.2 cm) or less in depth.
• Only operate properly functioning, undamaged units.
• Always attend the unit when operating.
• Do not set anything on the top surface.
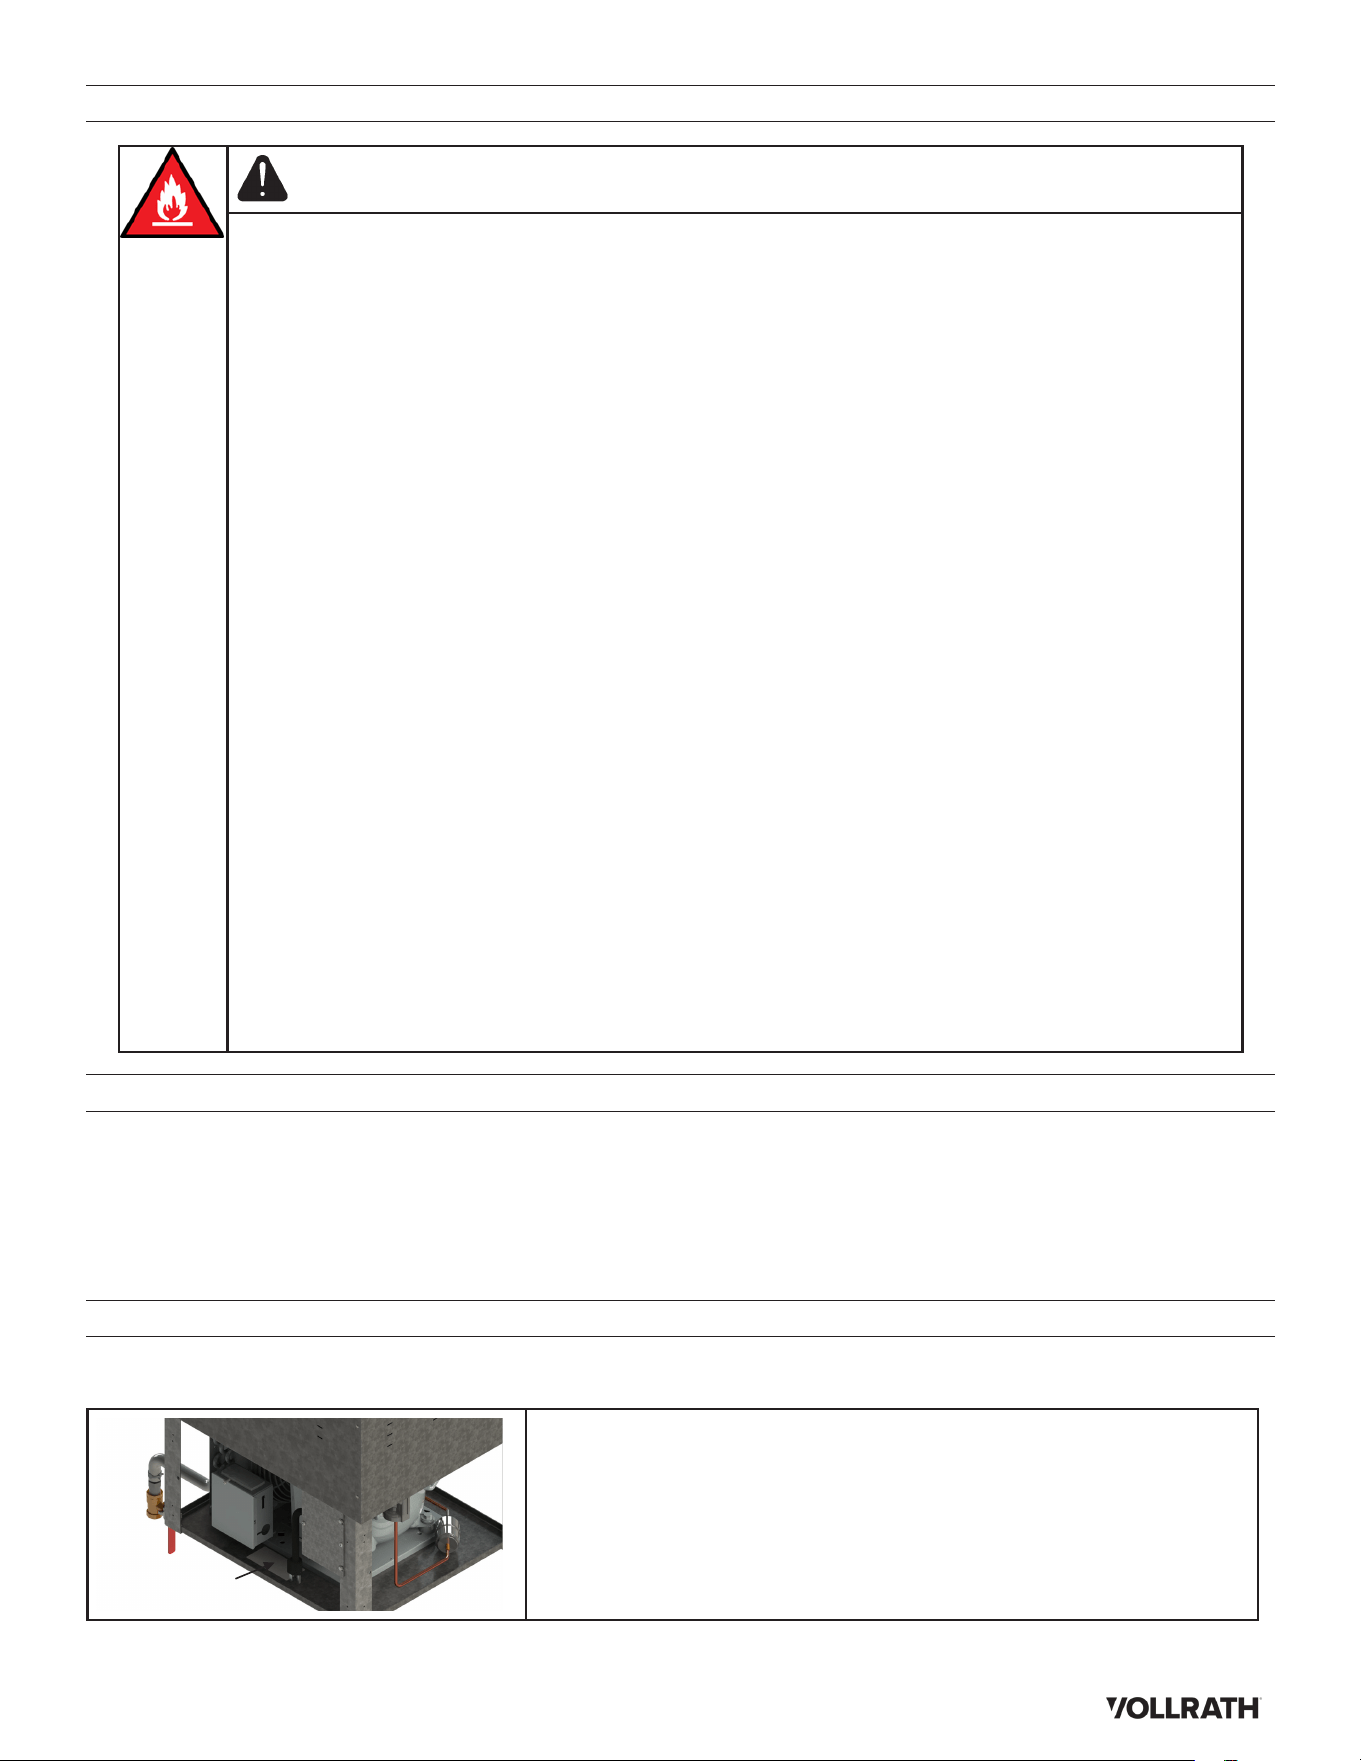
UL GUIDANCE FOR PRODUCTS WITH R290 REFRIGERANT
This product utilizes R290 Refrigerant. Follow all safety precautions for use of R290.
Per UL, the following is an explanation of the characters marked on the appliance. All models are Test Room Climate Class 5.
FC-HCF-XXYYY-ZZZ
• FC: Fabricator Component
• HCF: Hot/Cold/Frozen Modular Drop-Ins
• XX: Pan Size
• YYY: Voltage
• ZZZ: Optional sux to indicate Auto Drain (AD) or Flat Flange (FF) Top
WARNING
Do not store explosive substances such as aerosol cans with a flammable propellant in this appliance..
Hot/Cold/Frozen Modular Drop-Ins
2
UL GUIDANCE FOR PRODUCTS WITH R290 REFRIGERANT CONTINUED
WARNING
Keep clear of obstruction all ventilation openings in the appliance enclosure or in the structure for building-in.
WARNING
Do not use mechanical devices or other means to accelerate the defrosting process.
WARNING
Do not damage the refrigerating circuit.
WARNING
Do not use electrical appliances inside the food/ice storage compartments.
WARNING
Component parts shall be replaced with like components so as to minimize the risk of possible ignition due to
incorrect parts.
WARNING
Appliance is to be installed in accordance with the Safety Standard for Refrigeration Systems, ANSI/ASHRAE 15.
WARNING
• Do not use means to clean, other than those recommended by Vollrath®.
• The appliance shall be stored in a room without continuously operating ignition sources (for example: open flames,
an operating gas appliance or an operating electric heater.
• Do not pierce or burn.
• Be aware that refrigerants may not contain an odor.
3
Hot/Cold/Frozen Modular Drop-Ins
UL GUIDANCE FOR PRODUCTS WITH R290 REFRIGERANT CONTINUED
WARNING
Prior to beginning work on systems containing FLAMMABLE REFRIGERANTS, safety checks are necessary to
ensure that the risk of ignition is minimized. For repair to the REFRIGERATING SYSTEM, the following steps shall be
completed prior to conducting work on the system.
Work procedure
• Work shall be undertaken under a controlled procedure so as to minimize the risk of a flammable gas or vapour
being present while the work is being performed.
General work area
• All maintenance sta and others working in the local area shall be instructed on the nature of work being carried
out. Work in confined spaces shall be avoided.
Checking for presence of refrigerant
• The area shall be checked with an appropriate refrigerant detector prior to and during work, to ensure the
technician is aware of potentially toxic or flammable atmospheres. Ensure that the leak detection equipment being
used is suitable for use with all applicable refrigerants, i.e., non-sparking, adequately sealed, or intrinsically safe.
Presence of fire extinguisher
• If any hot work is to be conducted on the refrigerating equipment or any associated parts, appropriate fire
extinguishing equipment shall be available on hand. A dry chemical or CO2 fire extinguisher should be adjacent to
the charging area.
No ignition sources
• No person carrying out work in relation to a REFRIGERATING SYSTEM which involves exposing any pipe work shall
use any sources of ignition in such a manner that it may lead to the risk of fire or explosion. All possible ignition
sources, including cigarette smoking, should be kept suciently far away from the site of installation, repairing,
removing and disposal, during which refrigerant can possibly be released to the surrounding space. Prior to work
taking place, the area around the equipment shall be surveyed to make sure that there are no flammable hazards or
ignition risks. “No Smoking” signs shall be displayed.
Ventilated area
• Ensure that the area is in the open or that it is adequately ventilated before breaking into the system or conducting
any hot work. A degree of ventilation shall continue during the period that the work is carried out. The ventilation
should safely disperse any released refrigerant and preferably expel it externally into the atmosphere.
Checks to the refrigerating equipment
• Where electrical components are being changed, they shall be fit for the purpose and to the correct specification.
At all times, the manufacturer’s maintenance and service guidelines shall be followed. If in doubt, consult the
manufacturer’s technical department for assistance.
The following checks shall be applied to installations using FLAMMABLE REFRIGERANTS:
A. The actual REFRIGERANT CHARGE is in accordance with the room size within which the refrigerant containing
parts are installed,
B. The ventilation machinery and outlets are operating adequately and are not obstructed,
C. If an indirect refrigerating circuit is being used, the secondary circuit shall be checked for the presence of
refrigerant,
D. Marking to the equipment continues to be visible and legible. Markings and signs that are illegible shall be
corrected,
E. Refrigerating pipe or components are installed in a position where they are unlikely to be exposed to any
substance which may corrode refrigerant containing components, unless the components are constructed of
materials which are inherently resistant to being corroded or are suitably protected against being so corroded.
Checks to electrical devices
Repair and maintenance to electrical components shall include initial safety checks and component inspection
procedures. If a fault exists that could compromise safety, then no electrical supply shall be connected to the circuit
until it is satisfactorily dealt with. If the fault cannot be corrected immediately but it is necessary to continue operation,
an adequate temporary solution shall be used. This shall be reported to the owner of the equipment, so all parties are
advised. Initial safety checks shall include:
A. That capacitors are discharged: this shall be done in a safe manner to avoid possibility of sparking;
B. That no live electrical components and wiring are exposed while charging, recovering or purging the system;
C. That there is continuity of earth bonding.
4
Hot/Cold/Frozen Modular Drop-Ins
UL GUIDANCE FOR PRODUCTS WITH R290 REFRIGERANT CONTINUED
WARNING
Repairs to sealed components
• During repairs to sealed components, all electrical supplies shall be disconnected from the equipment being
worked upon prior to any removal of sealed covers, etc. If it is absolutely necessary to have an electrical supply to
equipment during servicing, then a permanently operating form of leak detection shall be located at the most critical
point to warn of a potentially hazardous situation.
• Particular attention shall be paid to the following to ensure that by working on electrical components, the casing
is not altered in such a way that the level of protection is aected. This shall include damage to cables, excessive
number of connections, terminals not made to original specification, damage to seals, incorrect fitting of glands, etc.
Ensure that the apparatus is mounted securely.
• Ensure that seals or sealing materials have not degraded to the point that they no longer serve the purpose
of preventing the ingress of flammable atmospheres. Replacement parts shall be in accordance with the
manufacturer’s specifications.
Cabling
• Check that cabling will not be subject to wear, corrosion, excessive pressure, vibration, sharp edges, or any other
adverse environmental eects. The check shall also take into account the eects of aging or continual vibration
from sources such as compressors or fans.
Detection of flammable refrigerants
Under no circumstances shall potential sources of ignition be used in the searching for or detection of refrigerant
leaks. A halide torch (or any other detector using a naked flame) shall not be used.
The following leak detection methods are deemed acceptable for all refrigerant systems:
• Electronic leak detectors may be used to detect refrigerant leaks but, in the case of FLAMMABLE
REFRIGERANTS, the sensitivity might not be adequate, or might need re-calibration. (Detection equipment
shall be calibrated in a refrigerant-free area.) Ensure that the detector is not a potential source of ignition and
is suitable for the refrigerant used. Leak detection equipment shall be set at a percentage of the LFL of the
refrigerant and shall be calibrated to the refrigerant employed, and the appropriate percentage of gas (25 %
maximum) is confirmed.
• Leak detection fluids are also suitable for use with most refrigerants but the use of detergents containing
chlorine shall be avoided as the chlorine can react with the refrigerant and corrode the copper pipe-work.
• If a leak is suspected, all naked flames shall be removed/extinguished.
• If a leakage of refrigerant is found which requires brazing, all of the refrigerant shall be recovered from the
system, or isolated (by means of shut o valves) in a part of the system remote from the leak.
5
Hot/Cold/Frozen Modular Drop-Ins
UL GUIDANCE FOR PRODUCTS WITH R290 REFRIGERANT CONTINUED
WARNING
Decommissioning
Before carrying out this procedure, it is essential that the technician is completely familiar with the equipment and
all its detail. It is recommended good practice that all refrigerants are recovered safely. Prior to the task being
carried out, an oil and refrigerant sample shall be taken in case analysis is required prior to re-use of recovered
refrigerant. It is essential that electrical power is available before the task is commenced.
A. Become familiar with the equipment and its operation.
B. Isolate the system electrically.
C. Before attempting the procedure, ensure that:
i. Mechanical handling equipment is available, if required, for handling refrigerant cylinders;
ii. All personal protective equipment is available and being used correctly;
iii. The recovery process is supervised at all times by a competent person;
iv. Recovery equipment and cylinders conform to the appropriate standards.
D. Pump down refrigerant system, if possible.
E. If a vacuum is not possible, make a manifold so that refrigerant can be removed from various parts of the
system.
F. Make sure that cylinder is situated on the scales before recovery takes place.
G. Start the recovery machine and operate in accordance with instructions.
H. Do not overfill cylinders (no more than 80 % volume liquid charge).
I. Do not exceed the maximum working pressure of the cylinder, even temporarily.
J. When the cylinders have been filled correctly and the process completed, make sure that the cylinders and
the equipment are removed from site promptly and all isolation valves on the equipment are closed o.
K. Recovered refrigerant shall not be charged into another REFRIGERATING SYSTEM unless it has been cleaned
and checked.
L. Labelling: Equipment shall be labelled stating that it has been de-commissioned and emptied of refrigerant.
The label shall be dated and signed. For appliances containing FLAMMABLE REFRIGERANTS, ensure that
there are labels on the equipment stating the equipment contains FLAMMABLE REFRIGERANT.
FUNCTION & PURPOSE
These units are intended to keep food at proper serving temperatures in locations with ambient temperatures below 86 °F (30 °C). Using them
in locations with warmer temperatures will take units out of NSF compliance. Modifying refrigeration parameters may void the warranty.
Hot Mode is not intended to cook raw food or to reheat prepared food. Cold Mode is not intended to cool or chill food and Frozen Mode is not
intended to cool or freeze food. Food must be prepared and placed into the food station at proper serving temperatures. Refrigerated/Cold and
Frozen Modes are best used for holding periods up to four hours. For best performance, stainless steel containers are recommended.
Units are not intended for household, industrial, or laboratory use
RECORD YOUR SERIAL NUMBER
The serial number for this equipment can be found on the rating plate located below the well, near the power cord. To aid in future
communication about your product, please record the serial number in the space below.
Rating Plate
Serial Number:
6
ITEMS & MODELS
Item/Model Description
FC-HCF-01120-AD 1-Well Auto Drain, 120V FC-HCF-03120 3-Well, 120V
FC-HCF-01120-AD-FF 1-Well Auto Drain, Flat Flange, 120V FC-HCF-03120-AD 3-Well Auto Drain, 120V
FC-HCF-01208-AD 1-Well Auto Drain, 120/208–240V FC-HCF-03120-AD-FF 3-Well Auto Drain, Flat Flange, 120V
FC-HCF-01208-AD-FF 1-Well Auto Drain, Flat Flange 120/208–240V FC-HCF-03120-FF 3-Well Flat Flange, 120V
FC-HCF-02120 2-Well, 120V FC-HCF-03208 3-Well, 120V/208–240V
FC-HCF-02120-AD 2-Well Auto Drain, 120V FC-HCF-03208-AD 3-Well Auto Drain, 120/208–240V
FC-HCF-02120-AD-FF 2-Well Auto Drain, Flat Flange 120V FC-HCF-03208-AD-FF 3-Well Auto Drain, Flat Flange 120/208–240V
FC-HCF-02120-FF 2-Well Flat Flange, 120V FC-HCF-03208-FF 3-Well Flat Flange 120/208–240V
FC-HCF-02208 2-Well, 120V/208–240V FC-HCF-04208 4-Well, 120V/208–240V
FC-HCF-02208-AD 2-Well, Auto Drain, 208–240V FC-HCF-04208-AD 4-Well Auto Drain, 120/208–240V
FC-HCF-02208-AD-FF 2-Well Auto Drain, Flat Flange 120/208–240V FC-HCF-04208-AD-FF 4-Well Auto Drain, Flat Flange 120/208–240V
FC-HCF-02208-FF 2-Well Flat Flange 120/208–240V FC-HCF-04208-FF 4-Well Flat Flange 120/208–240V
UNPACKING THE UNIT
1. Remove all packing material, tape, and protective plastic.
2. Clean any glue residue left over from the plastic or tape.
3. Place unit in desired location.
4. Plug unit into a properly grounded electrical supply matching the nameplate rating.
NOTICE: Using incorrect voltage can cause damage and will void the warranty.
LOCATION & CLEARANCE
• Refer to the included installation instructions and the specification s
heet which can be found on vollrathfoodservice.com.
• Do not move the unit by pushing or pulling on the breath guard (if it is present).
• Place and operate unit in a flat, level position.
BEFORE FIRST USE
1. Clean and dry unit per the Cleaning and Maintenance Section.
FEATURES AND CONTROLS
HOT
COLD
OFF
FROZEN
1
HOT
COLD
OFF
FROZEN
2
HOT
COLD
OFF
FROZEN
3
HOT
COLD
OFF
FROZEN
4
A
E
C
D
Lorem ipsum
B
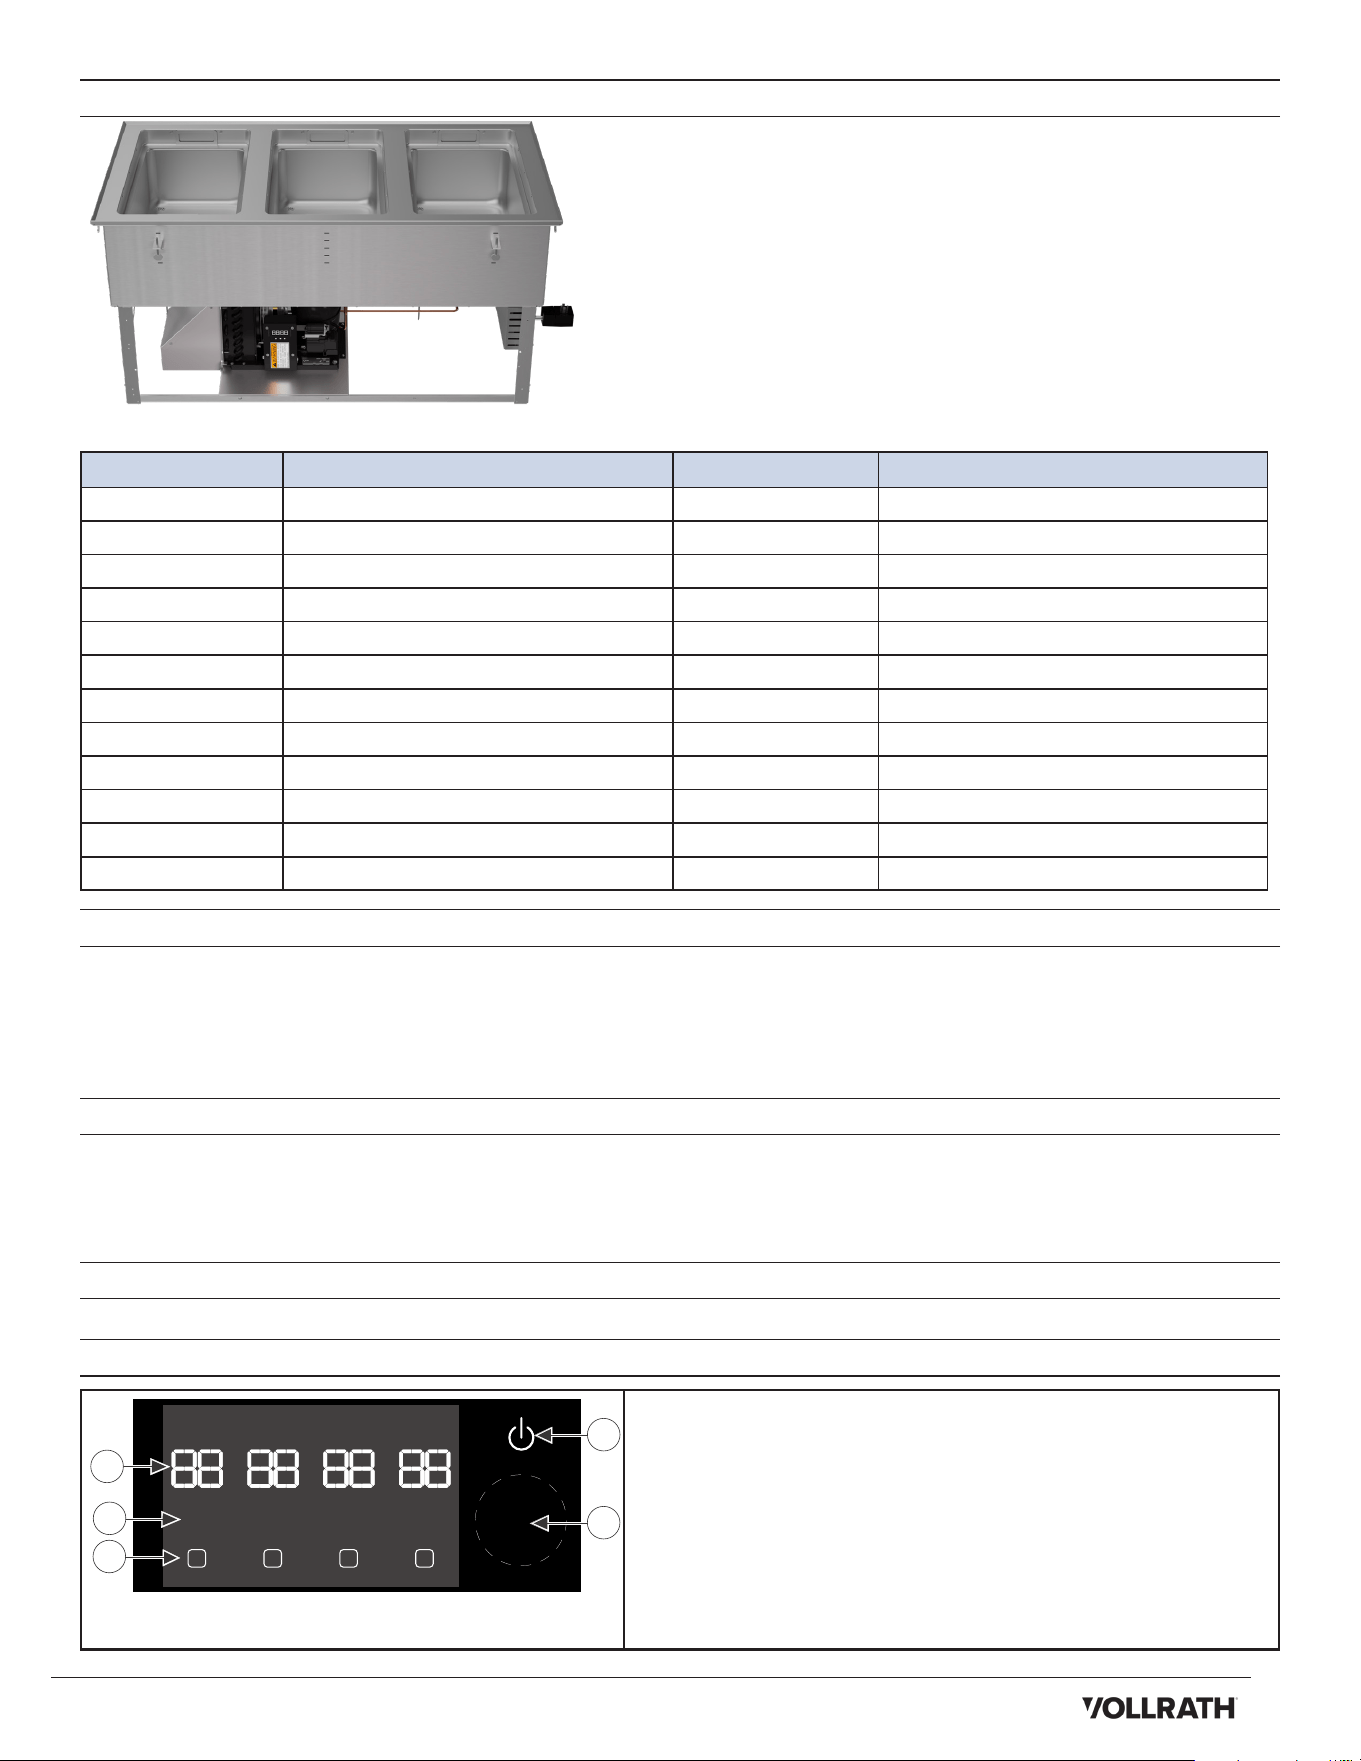
A. Well Display—shows temperature setting for a specific well when in HOT Mode.
B. Mode Indicator Lights—flash when unit is turned on. One flashes while selecting
and becomes solid after 3 seconds to indicate selected Mode.
C. Mode Selectors—turn wells on or off individually and allow simple switching
between Hot, Cold, and Frozen modes. Numbers correspond to well
placement from left to right, facing the operator's side of the unit.
D. Temperature Control—sets temperature of a well in HOT mode by pressing the
knob, then turning it while the value is flashing.
E. Power Control—turns unit as a whole on or off when pushed. Well Displays will
illuminate to show the value from the last use.
Hot/Cold/Frozen Modular Drop-Ins
FC-HCF-03208-AD
Hot/Cold/Frozen Modular Drop-Ins
7
BEFORE FIRST USE
Unit must be thoroughly cleaned and dried before use per the cleaning section of this manual.
OPERATION
WARNING
Electrical Shock Hazard.
Keep water and other liquids from entering the unit. Liquid inside the unit could cause an electrical shock or short circuit.
Do not immerse the cord, plug, or unit in water or any other liquid, spray liquids onto the unit, or operate if the unit or cord
are damaged or altered.
NOTICE: Using voltage other than the nameplate-rated voltage or modifying the cord or any electrical component will damage
the unit and void the warranty.
General Guidelines
• For best performance, prevent drafts or room air currents from flowing over food pans.
• Drain water in wells before switching from Hot to Cold modes.
• Do not use food pans deeper than 6" (15.2 cm).
• Do not place hot items on the top surface.
• Do not heap, mound, overfill, or elevate pans. This will take the unit out of NSF compliance.
Cold or Frozen Mode
1. Fill clean pans to just below the top with food.
2. Cover and refrigerate pans with food to be served cold or cover and freeze pans containing food to be served frozen.
3. Pre-chill wells that will hold cold or frozen food by pressing the Mode Selector (C) until Cold or Frozen is illuminated.
4. Allow unit to run for about 60 minutes if all wells will be used in Cold Mode and two hours if some will be used in Frozen Mode.
5. Ensure food is at proper serving temperatures, then place containers of cold or frozen food into corresponding pre-chilled wells.
6. Monitor food temperature closely safety. The Unites States Public Health Service recommends that cold food be held at a maximum of 41 °F (5 °C).
7. When finished using the unit, press the mode selector until OFF illuminates.
8. Remove food containers and dispose of leftovers or store appropriately for food safety.
9. When finished using the unit, flip the power switch to OFF.
Hot Mode
WARNING
Burn Hazard.
To avoid burns and splattering, do not touch unit, heating surfaces, or food—or drop water onto hot surfaces
while operating.
1. Fill clean pans with pre-heated/hot food at proper serving temperature to just below the top.
2. Pour about 1" (2.5 cm) of clean, fresh water into each well that will be used in Hot Mode.
3. Preheat each well that has water by pressing the Mode Selector for each corresponding well until HOT is illuminated.
4. Cover each well that is in HOT Mode with empty food containers or covers.
5. Turn the Temperature Control to the maximum level and allow the unit to preheat for 60 minutes.
6. Place containers with food heated to at least 141 °F (60.6 °C) in preheated wells.
7. Reduce heat to a level that will maintain safe food holding temperatures and product quality.
8. Approximately every two hours, remove food containers from hot wells and check water level; replenish as needed.
9. When finished using unit, press HOT well Mode Selectors until OFF illuminates. Protect hands and remove hot food.
NOTICE: Monitor food temperature closely for food safety. The United States Public Health Service recommends that hot
food be held at a minimum of 140 ºF (60 ºC) to help prevent bacteria growth. Maintain correct water level and temperature
setting. Periodically remove food container and check the water level. Add water if needed.
WARNING
Health Hazard.
Ice used to hold product is designated as used in a food-contact zone. It is subject to food spills and contamination and
MUST NOT be used for human consumption.
The Vollrath Company, L.L.C.
1236 North 18th Street
Sheboygan, Wisconsin 53081-3201 USA
Main Tel: 800.624.2051 or 920.457.4851
Main Fax: 800.752.5620 or 920.459.6573
Customer Service: 800.628.0830
Canada Customer Service: 800.695.8560
© 2024 The Vollrath Company L.L.C.
vollrathfoodservice.com
Technical Services
Induction Products: 800.825.6036
Countertop Warming Products: 800.354.1970
All Other Products: 800.628.0832
Part 355922-1
1/17/2025
DAILY CLEANING
WARNING
Electrical Shock Hazard.
Keep water and other liquids from entering unit. Liquid inside unit could cause an electrical shock or short circuit.
Do not immerse cord, plug, or unit in water or any other liquid, spray liquids onto the unit, or operate if the unit or
cord are damaged or altered.
NOTICE: Do not use caustic cleaning chemicals, steel wool or commercial products to clean the unit.
1. Remove food containers.
2. Turn the unit OFF with the On/O switch and allow the unit to defrost at room temperature.
3. Soak up residual water from defrosting with a clean cloth.
4. If you have a drain hose and valve (not provided), place drain hose into a bucket of sucient size, then open the Drain Valve to empty the
water from the well.
5. Soak up residual water with a clean cloth.
6. Use a damp cloth or sponge dipped in soapy water to wipe the inside of the well and outside of unit.
7. Thoroughly rinse unit with clean water, then dry thoroughly.
TROUBLESHOOTING
Problem Potential Cause Course of Action
Drop-In or wells do not turn on. Unit does not have power. Plug in unit.
Circuit breaker tripped. Reset the circuit breaker; contact an electrician if the problem
persists.
Circuit is defective or power supply is not
correct.
Contact an electrician.
Unit has power, but is not operating. Component malfunctioned. Contact Vollrath Technical Service.
Ambient air temperature is too high. Reduce ambient air temperature to below 86 °F (30 °C)???
Warm or cool air currents are aecting
operation.
Reduce/regulate air currents or move unit to consistent area.
Unit does not get cold enough. There could be a compressor issue. Contact Vollrath Technical Service.
SERVICE AND REPAIR
Serviceable parts are available on vollrathfoodservice.com.
To avoid serious injury or damage, never attempt to repair the unit or replace a damaged power cord yourself. Do not send units
directly to The Vollrath Company LLC. Please contact Vollrath Technical Services for instructions.
When contacting Vollrath Technical Service, please be ready with the item number, model number (if applicable), serial number, and
proof of purchase showing the date the unit was purchased.
WARRANTY STATEMENT FOR THE VOLLRATH CO. L.L.C.
The Vollrath Company LLC warrants to the original commercial end user that each of Vollrath’s foodservice products will be free from
defects in materials and workmanship.
For warranty period, exclusions, and details, visit vollrathfoodservice.com/vollrath-resources/warranty-info/warranty-policy.