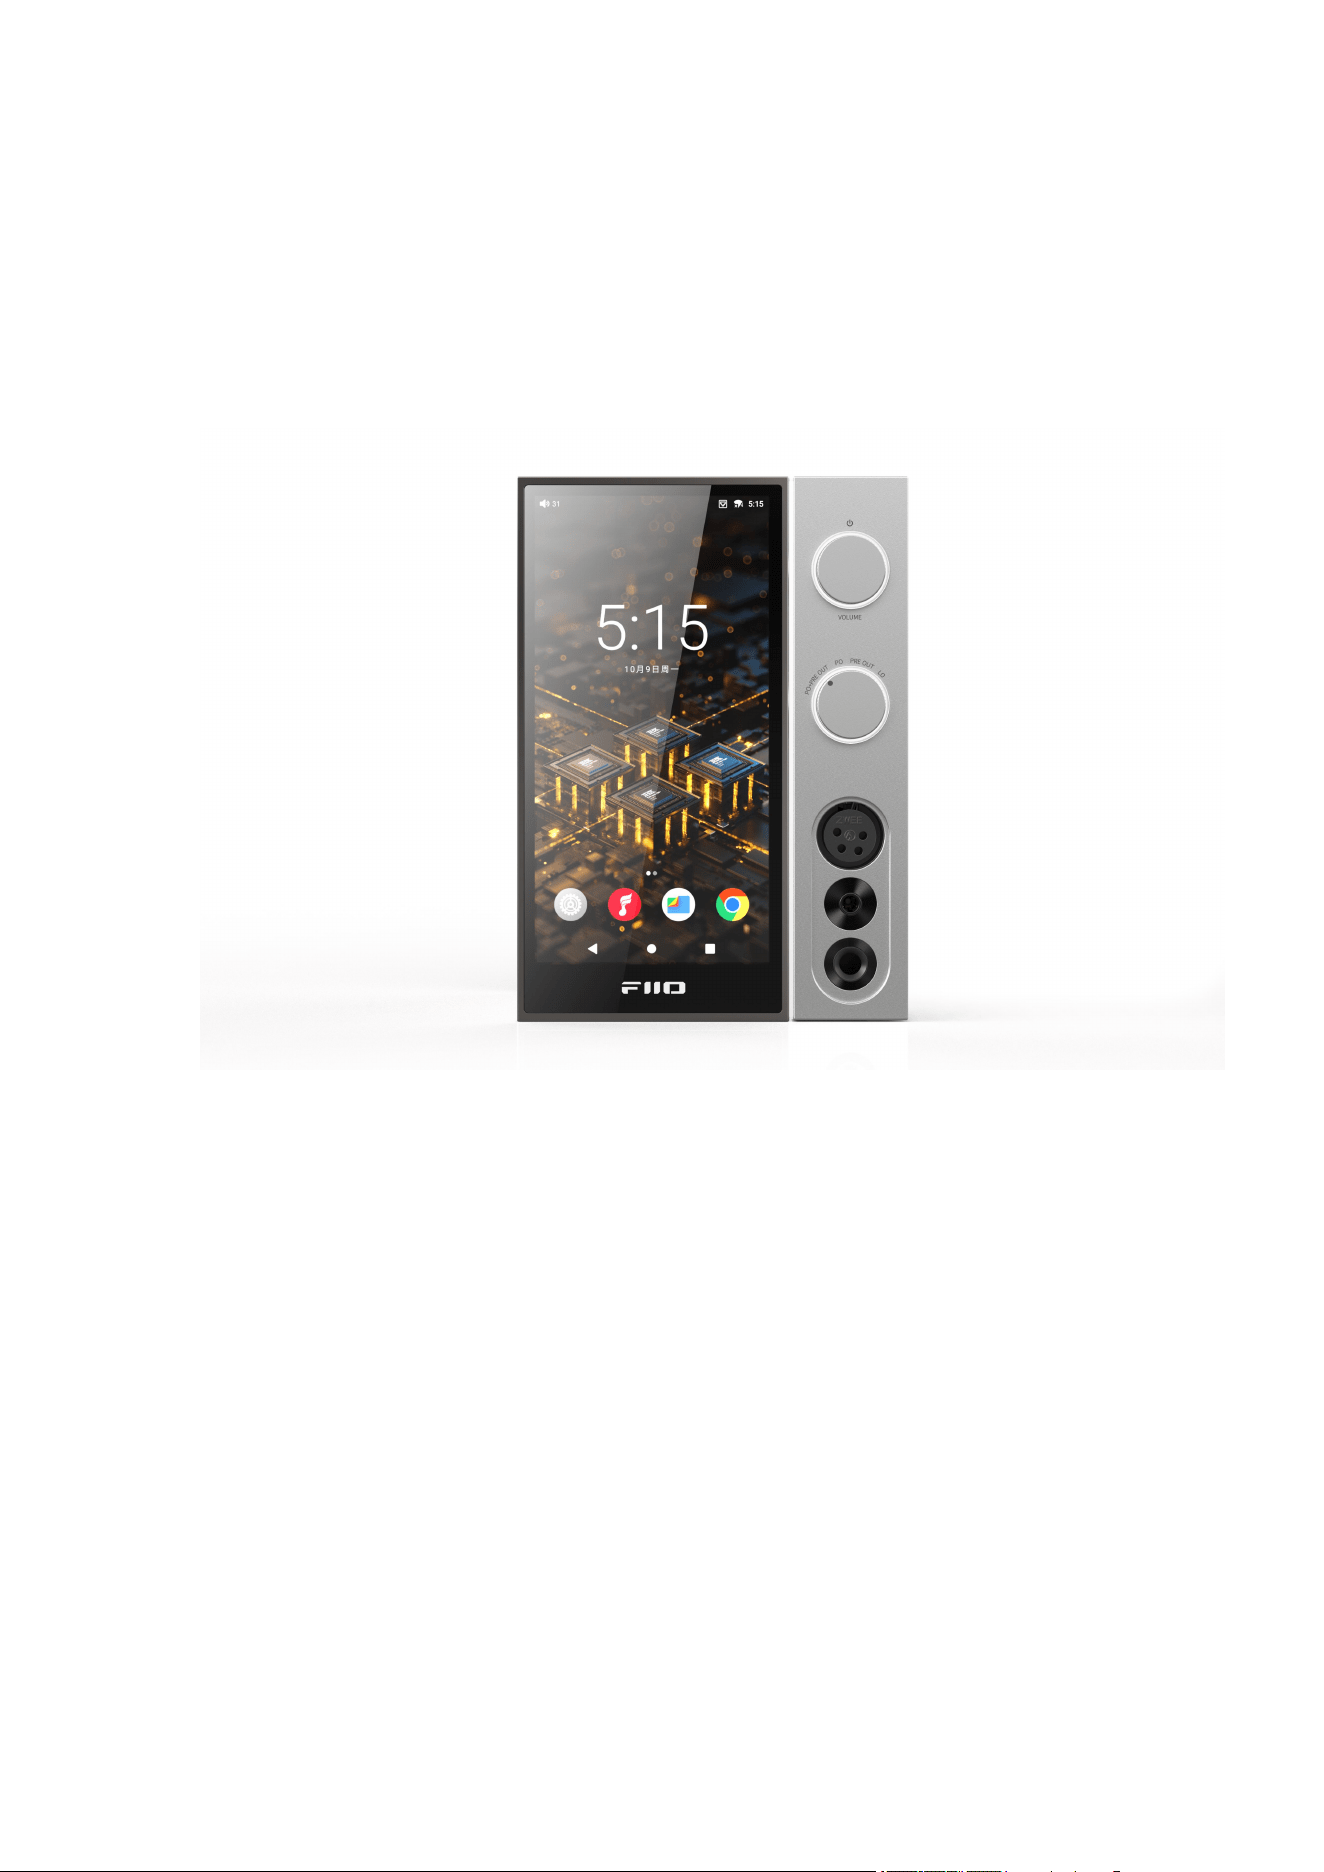
All the pictures below are for illustrations only. Specifics are subject to the
actual product.

Foreword
Thank you so much for purchasing FiiO's portable high resolution lossless
music player R9. We have prepared this complete user manual for you. We
hope this manual can help you get the hang of the R9 and unleash its full
potential.
An introduction to the R9
Building a desktop HiFi system traditionally has been full of compromises.
Stacking various brands of equipment together makes it hard to have an
elegant and compact setup.
For streaming media, such a setup usually brings an unacceptable experience.
But now there is a new solution.
With the R9 serving as the centerpiece, and backed by the SP3 speakers and
FT3 headphones, you will experience a consistent and highly enjoyable audio
and visual device.
Welcome to a new era of a slick desktop HiFi experience!
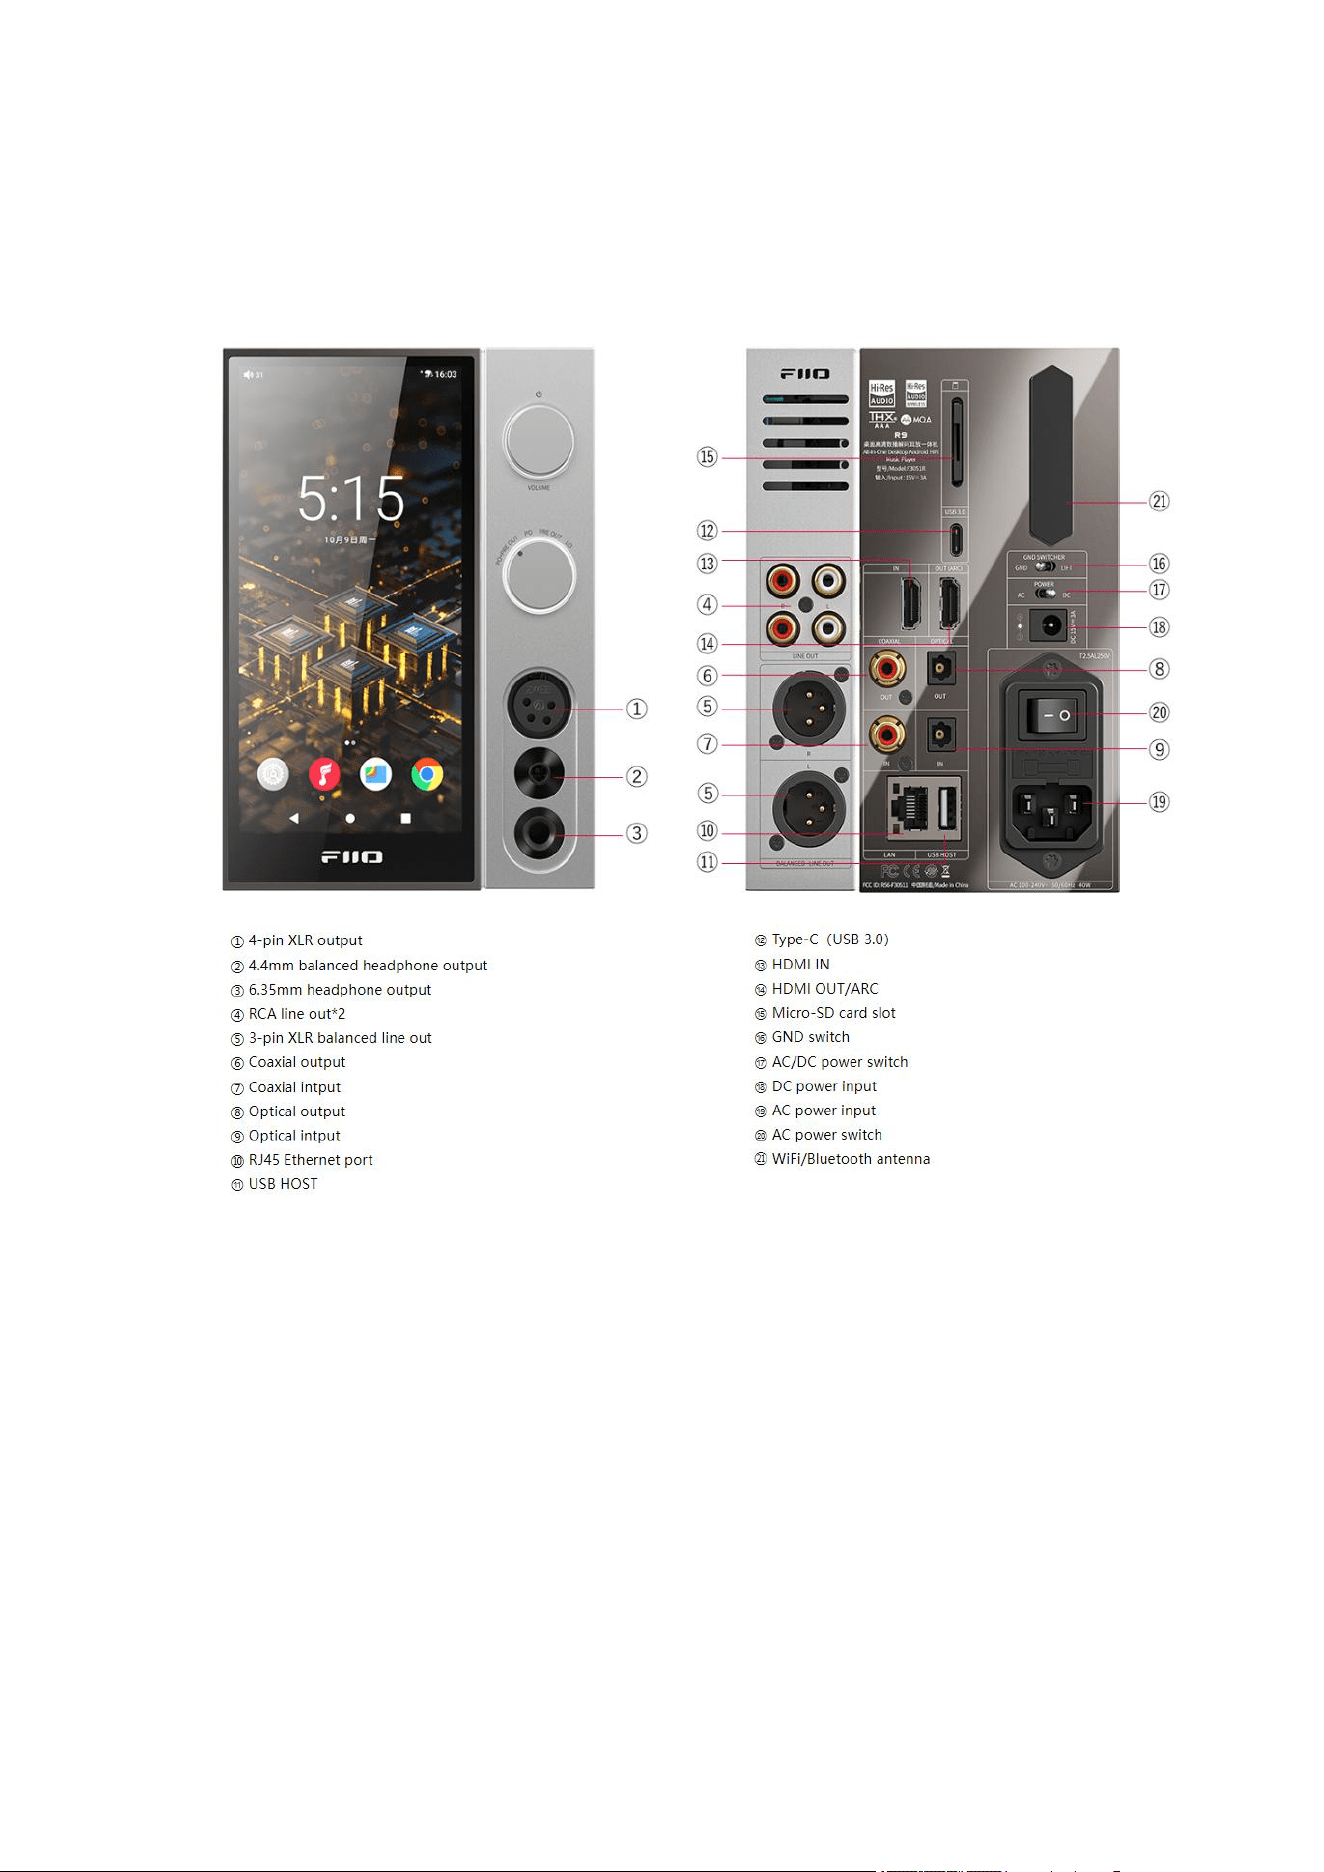
Buttons and ports
1. Pictorial guide to buttons and ports
(Pictures are for reference only. The real product may vary.)
2. Instructions for buttons and ports
① 4-pin XLR4 output: Supports XLR4 balanced headphone.
② 4.4mm balanced headphone out: Supports 4.4mm balanced headphone.
③ 6.35mm headphone output: Supports 6.35mm headphone.
④ RCA line out*2: Supports RCA line out.
⑤ 3-pin XLR balanced line out: Supports XLR3 balanced lineout.
⑥ Coaxial output: Supports coaxial output. You can enable coaxial output from
system Settings-Audio-OPT/COAX output first.
⑦ Coaxial input: Supports coaxial input. You can hold the power button and
switch to COAX mode.

⑧ Optical output: Supports optical output. You can enable optical output from
system Settings-Audio-OPT/COAX output first.
⑨ Optical input: Supports optical input. You can hold the power button and
switch to OPT mode.
⑩ RJ45 Ethernet port: You can connect Ethernet to provide networking to the
R9.
⑪ USB Host: Supports USB HOST and USB OTG.
⑫ Type-C (USB 3.0): Supports data transfer, USB HOST, USB OTG and so
On.
⑬ HDMI IN: Supports access to Computers/Game consoles/Blu-ray machines
and other devices.
⑭ HDMI OUT/ARC: HDMI OUT can be connected to devices such as
TVs/monitors, and the R9's images can be transmitted to larger display
devices; HDMI ARC can be connected to devices such as TVs/Blu-ray players,
and can be connected to devices such as FiiO SP3 through RCA or XLR
interfaces.
⑮ Micro-SD card slot: Supports one TF card (micro SD card), theoretically up
to 2TB expansion.
⑯ GND Switch:Used to select and switch the connection status between the
motherboard ground and the case ground. If it is turned to the GND end, the
motherboard ground is connected to the case ground. Dial to the LIFT end,
and the motherboard ground is suspended (that is, not connected to the
casing). It is mainly used to optimize the common ground loop interference
problem between the two devices.
⑰ AC/DC power switch: You can switch between AC/DC power mode
according to your preference.
⑱ DC power input: DC power input port.
⑲ AC power input: AC power input port.
⑳ AC power switch: When using AC power mode, please enable AC power
switch first. ("O" is off, "—" is on.)

㉑ WiFi/Bluetooth antenna: WiFi/Bluetooth antenna.
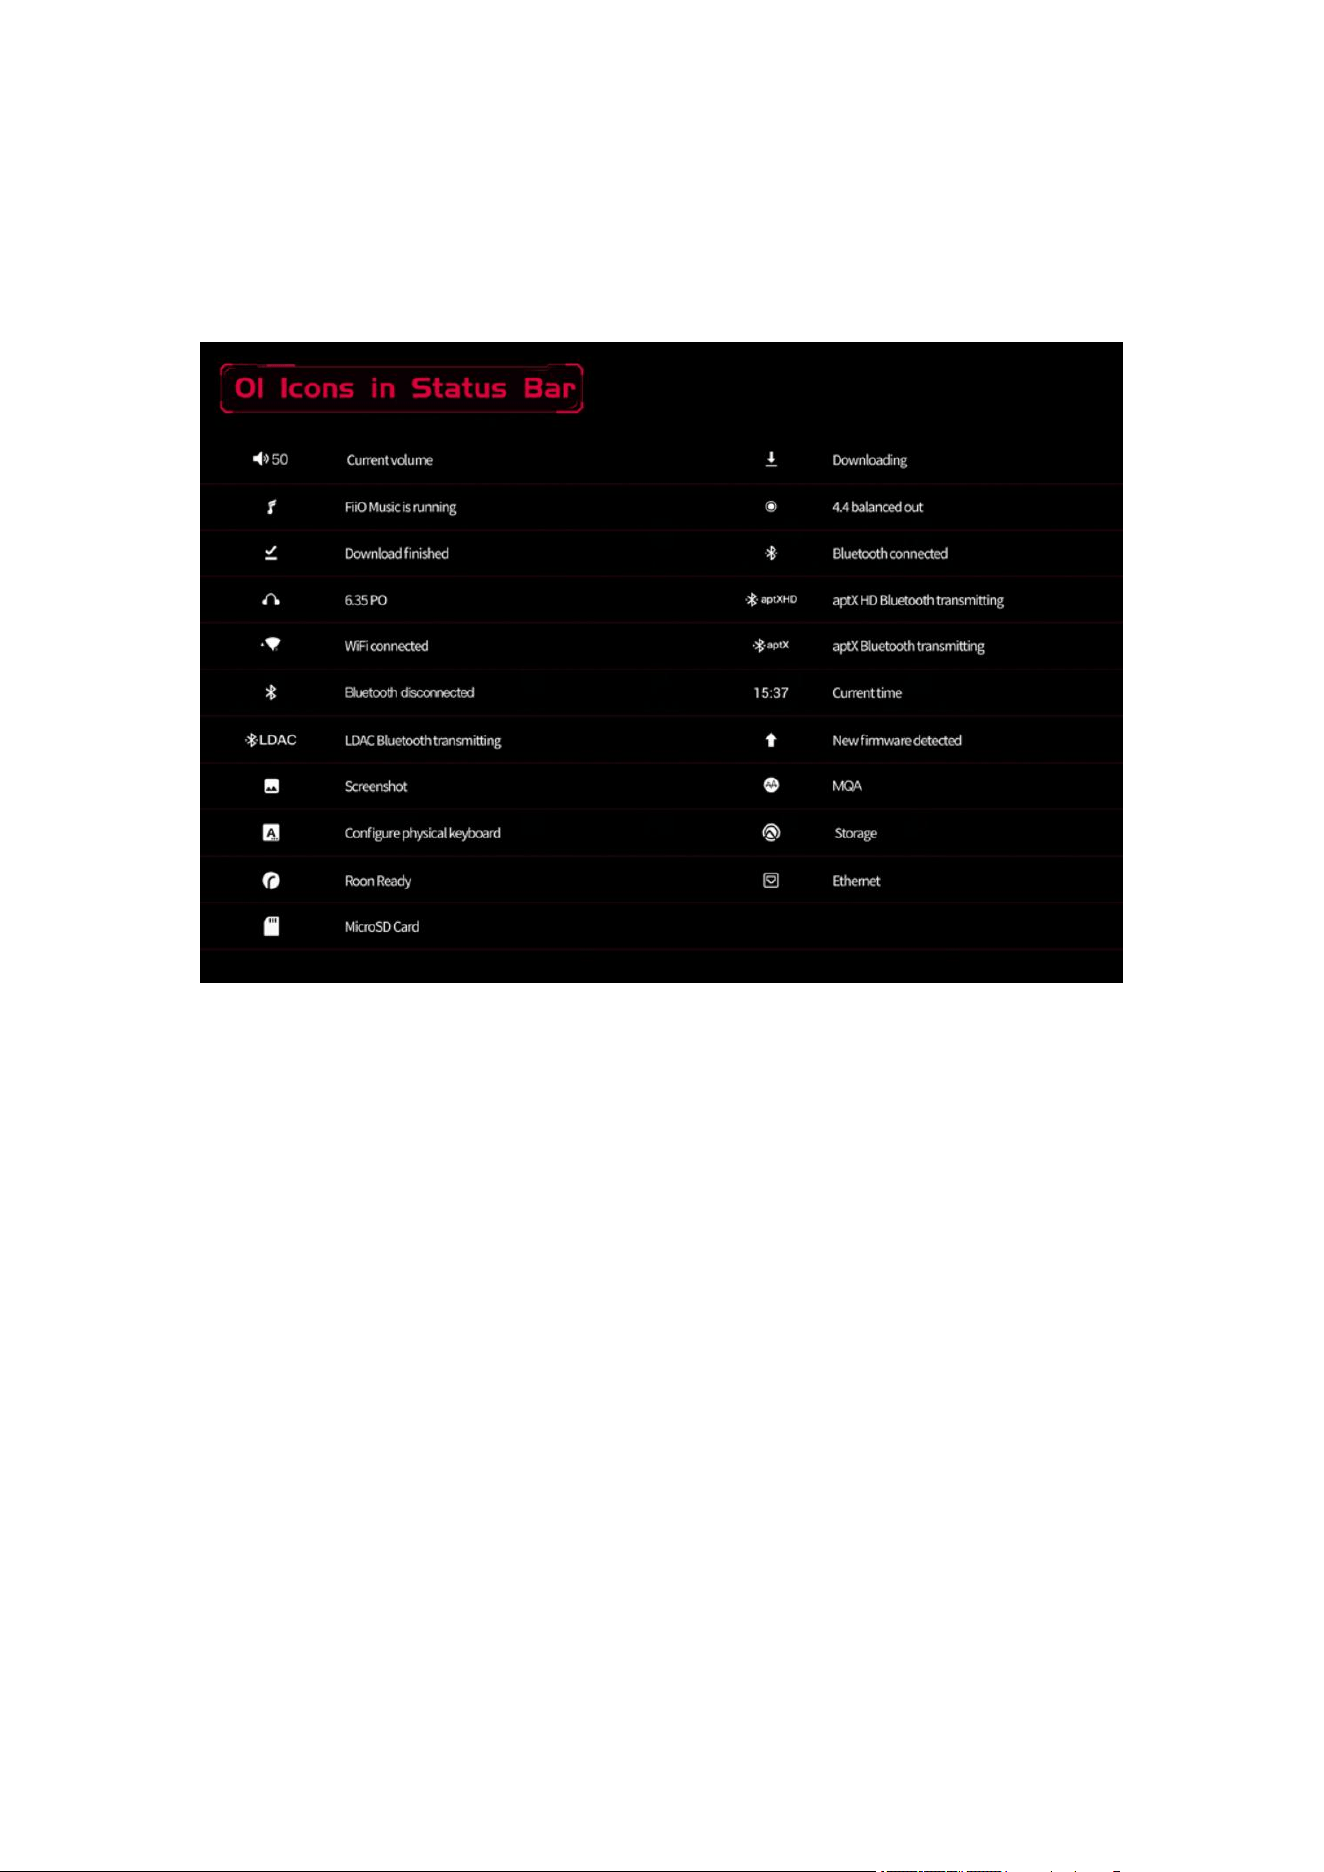
Status bar and display page
1. Status bar
The status bar on the top screen shows the working states of the R9.
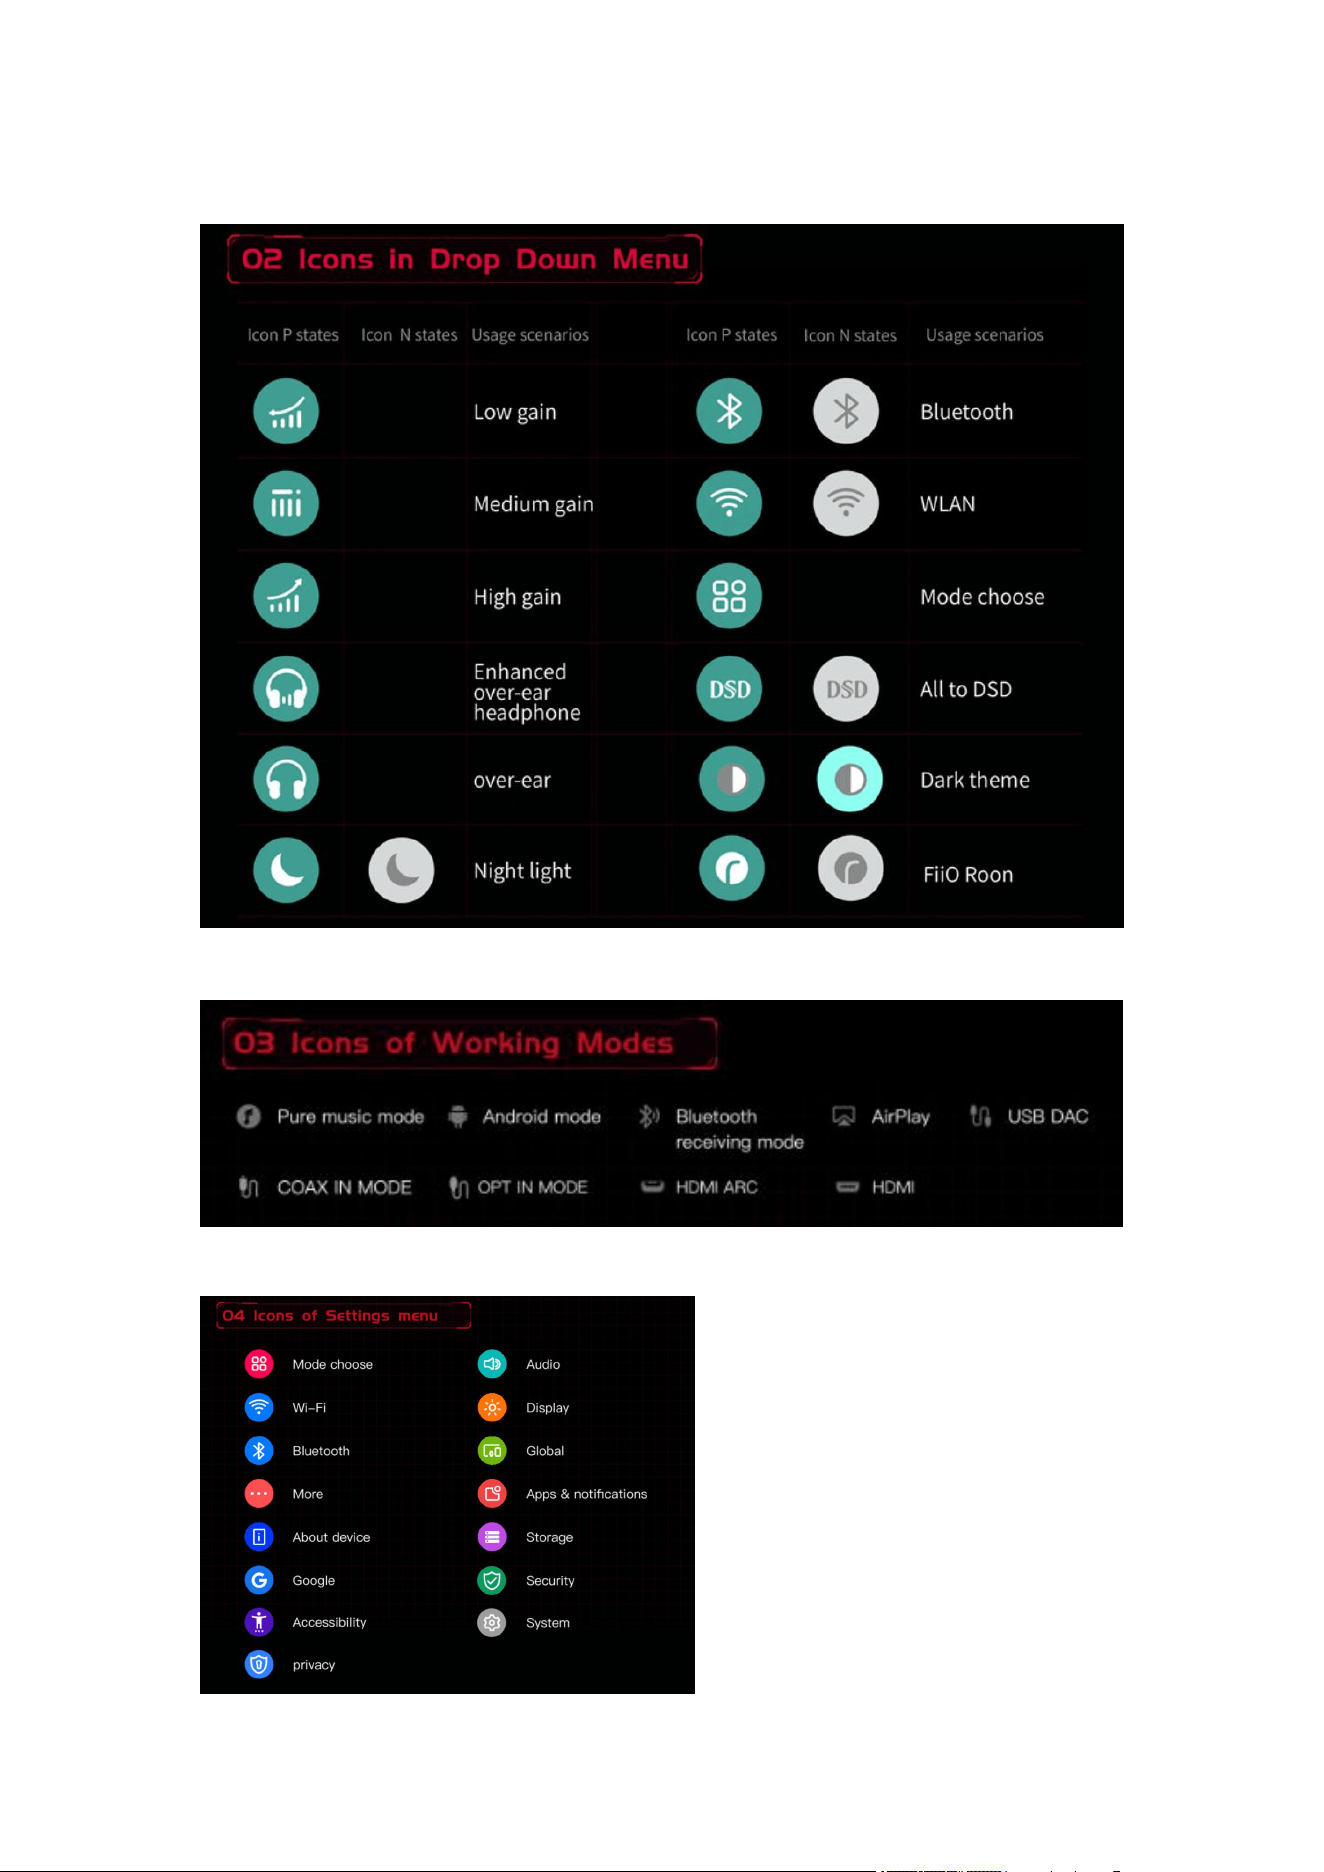
2. Icons in drop-down menu
3. Icons of working modes
4. Icons of setting menus
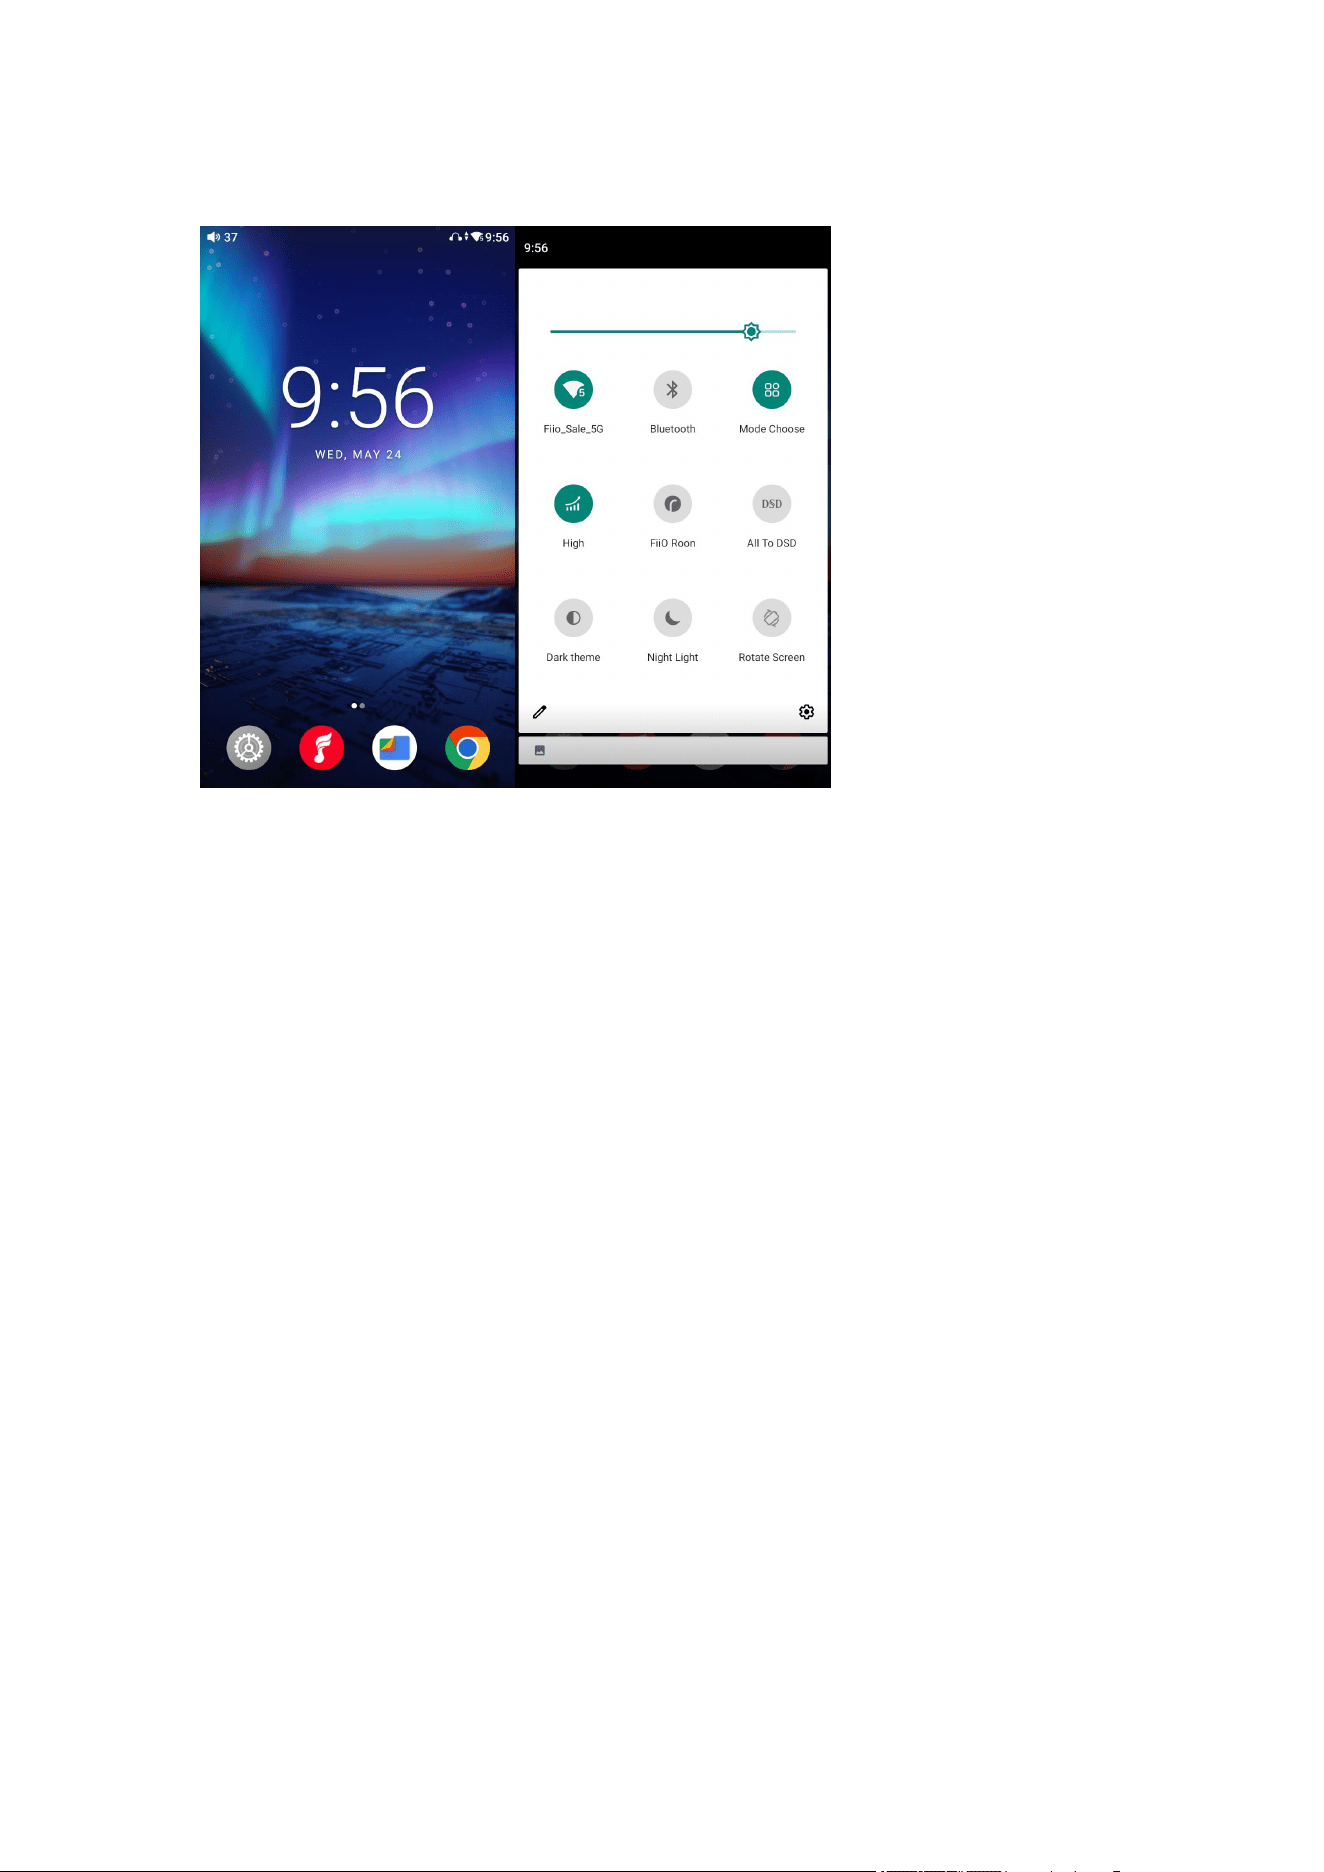
5. Homepage and drop-down menu
Instructions for entry-level functions
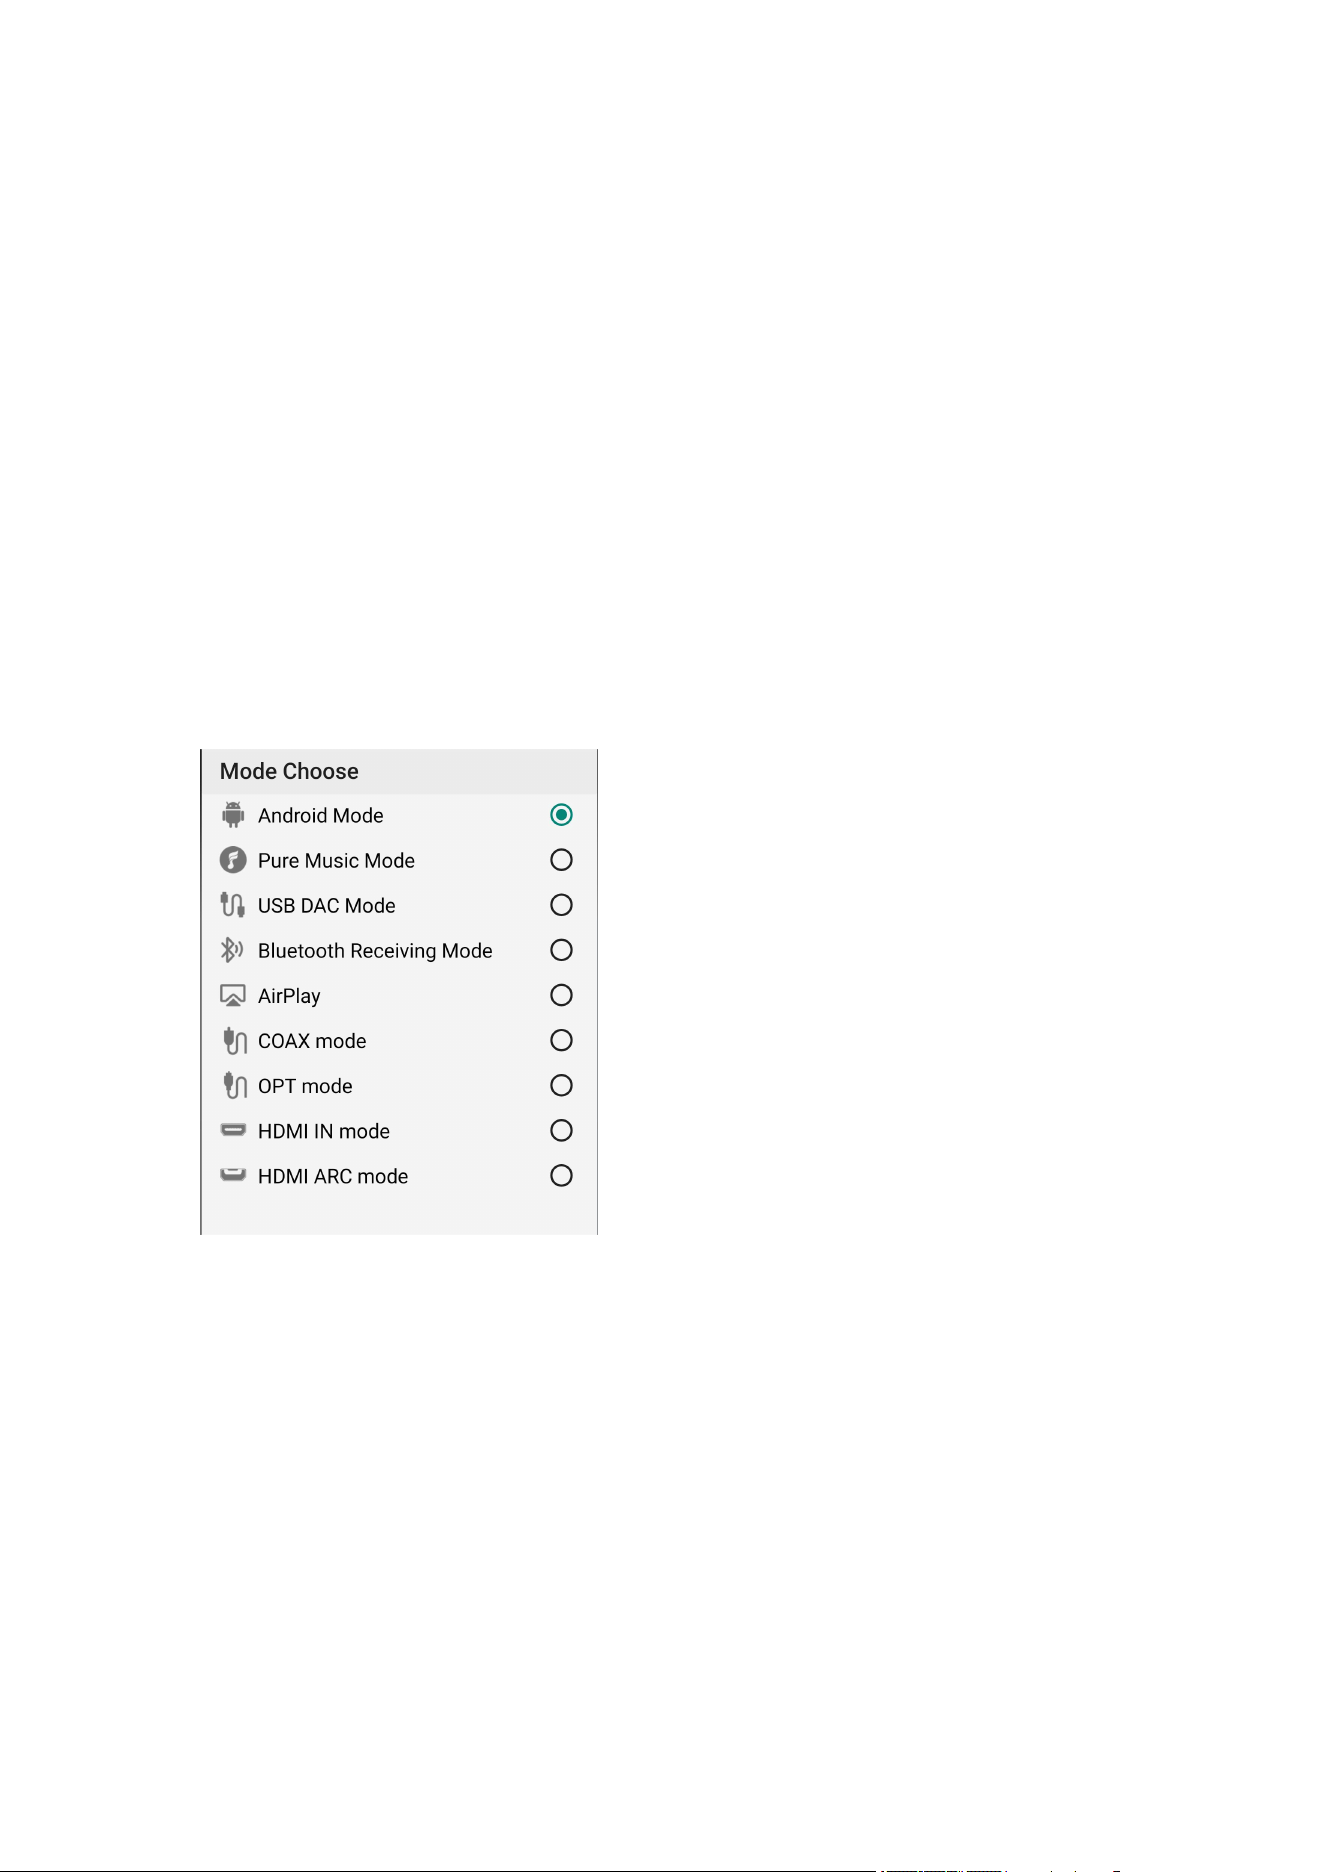
1. Seven working modes
The R9 has 9 independent working modes: Android Mode, Pure Music Mode,
USB DAC Mode, Bluetooth Receiving Mode, Airplay, COAX mode, OPT mode,
HDMI IN mode and HDMI ARC mode.
It is defaulted to enter Android mode when it powers on for the first time. You
can switch to other operating modes by holding the power button for about 2s
or dropping down the menu from the status bar.
If the player is in other modes but not the Android mode, you can switch it to
other modes through the selection on the display, or tap Settings->Exit to go
back to Android mode.
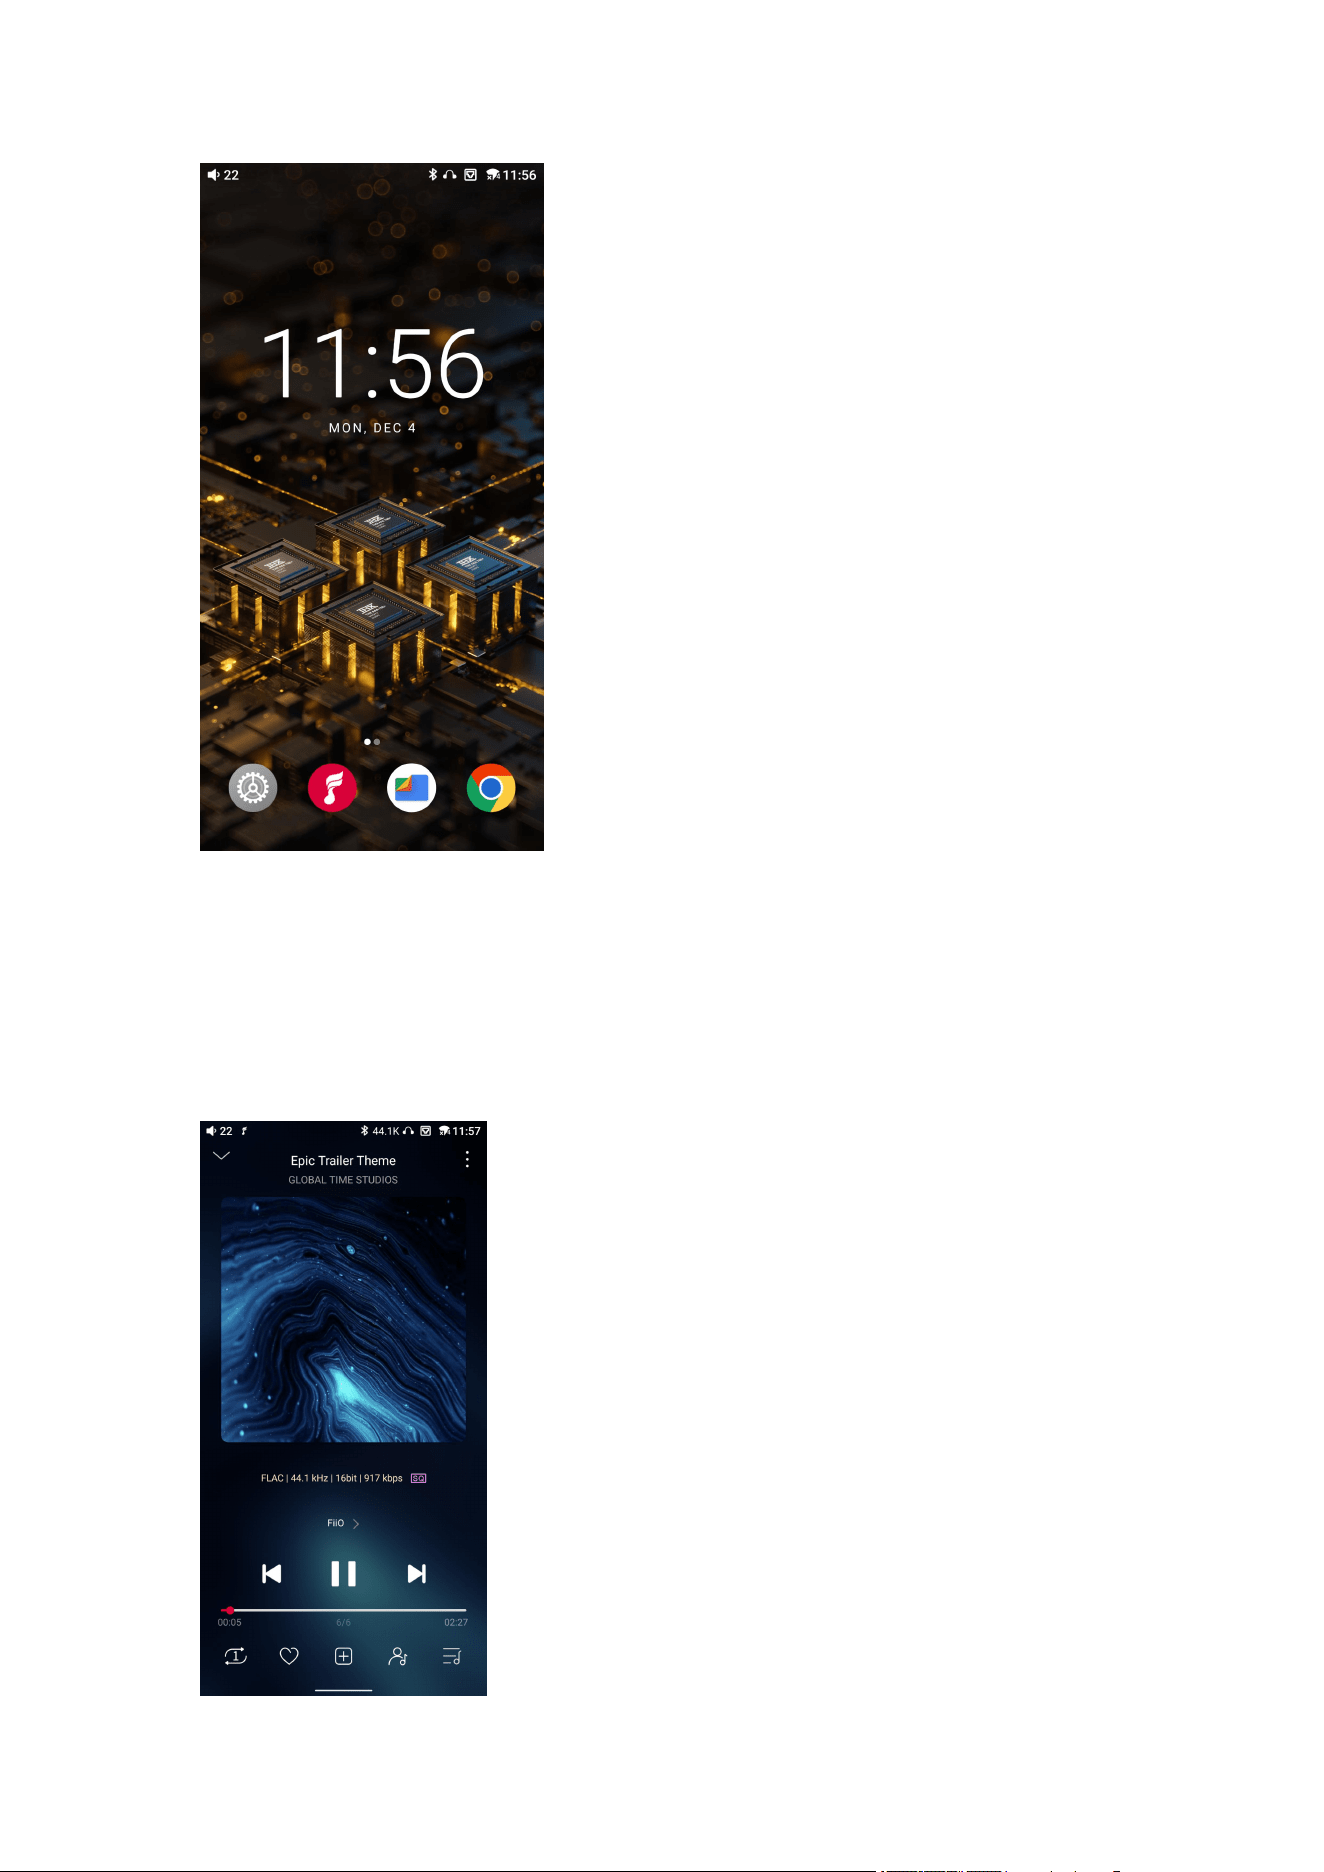
Android Mode
Third party applications will be available at will. It can be switched to other
modes on the drop-down or settings menu.
Pure Music Mode
Third party applications will be automatically disabled while FiiO Music app will
be auto-enabled. It can be switched to other modes on the drop-down or
settings menu.
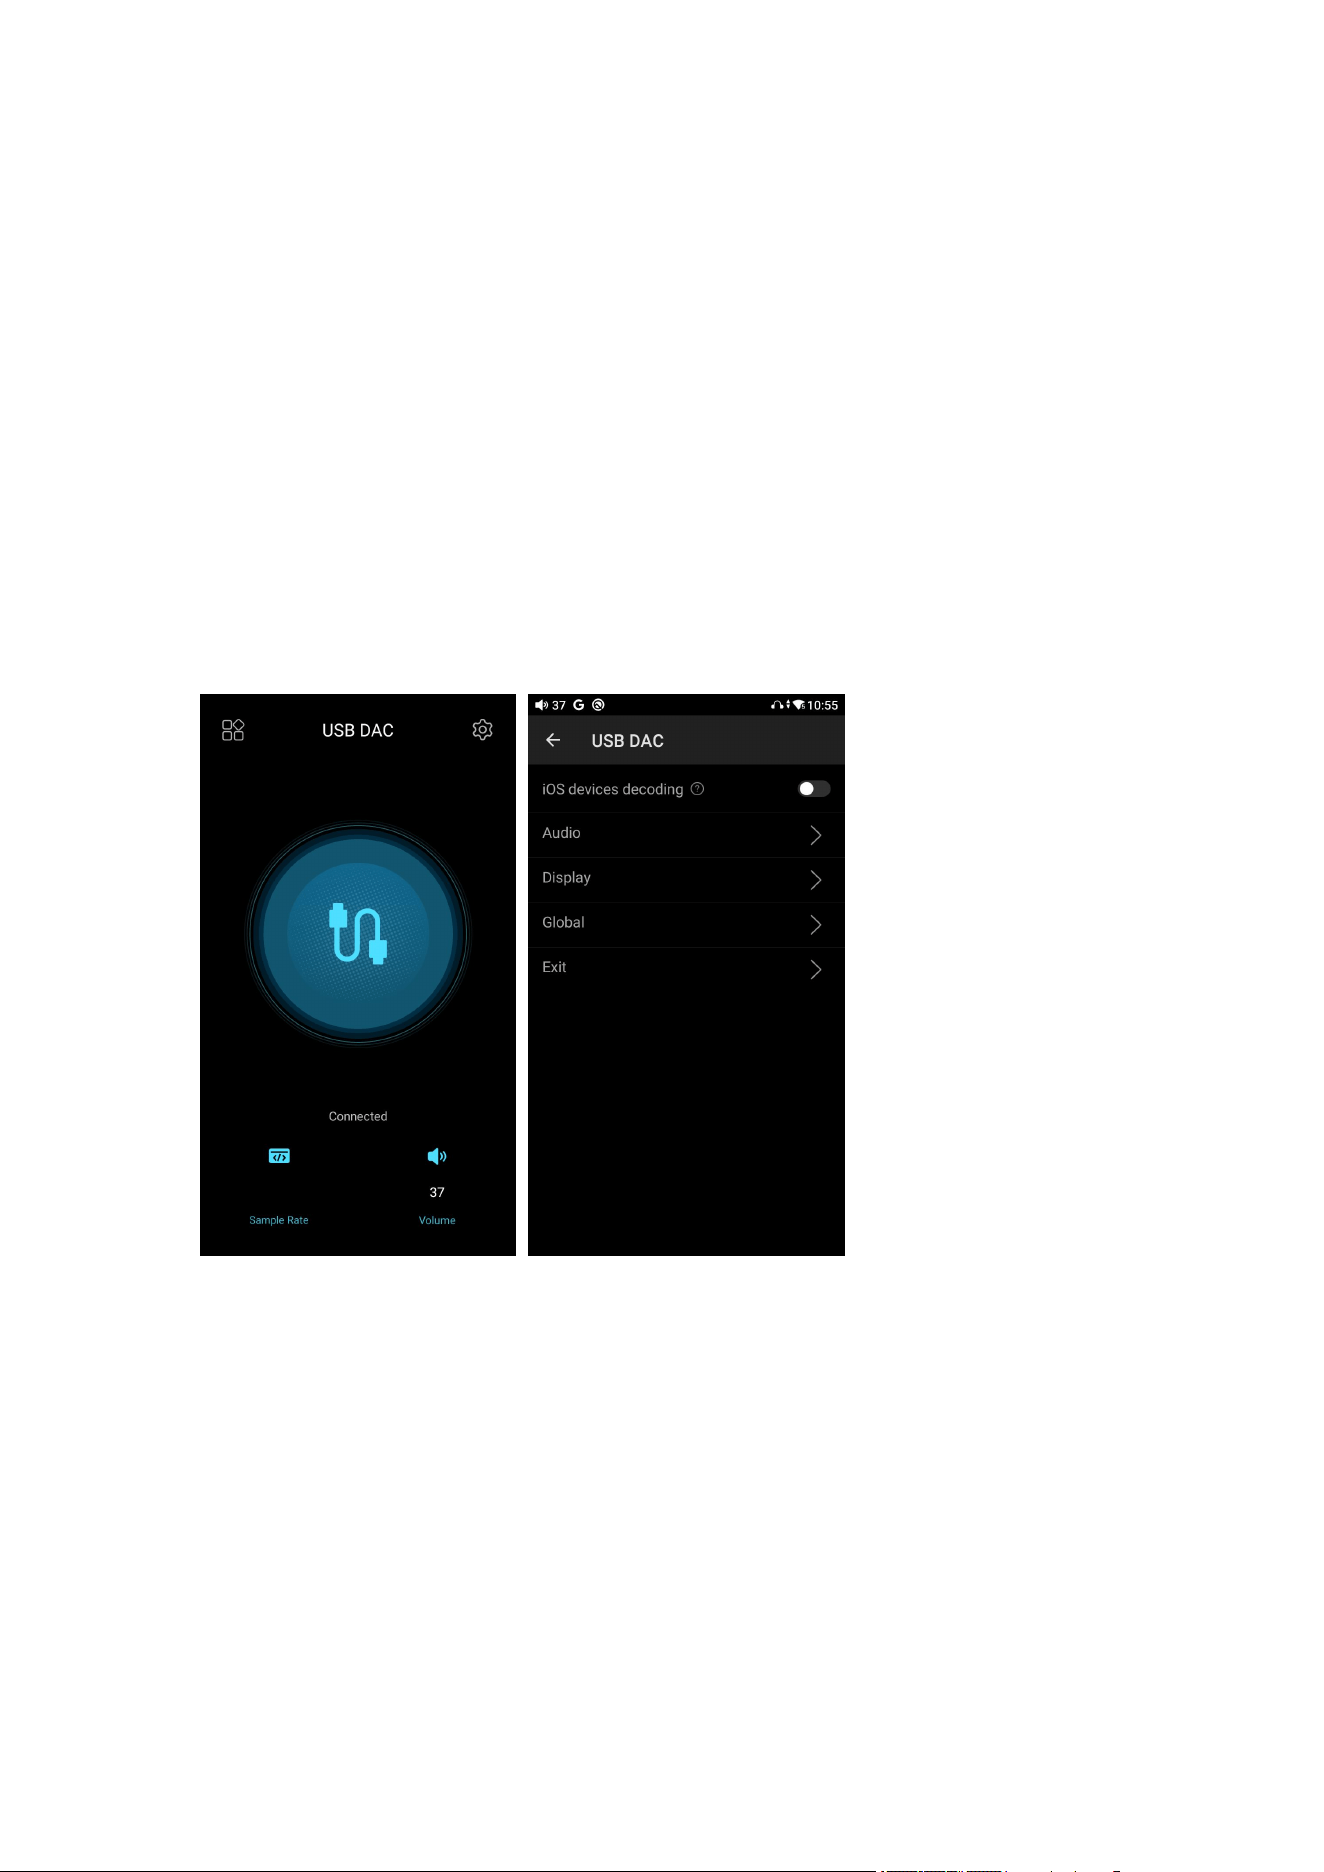
USB DAC Mode
In USB DAC mode, the R9 can be connected to other devices like a computer,
working as a USB DAC/Amp. It can be switched to other modes on the
drop-down or settings menu.
Notes:
1. When the R9 is going to work in the USB DAC mode for the first time in
Windows computer, FiiO's exclusive USB DAC driver is required. Please
download it on our website and follow relevant instructions to install it.
2. When the R9 is used as USB DAC for iOS device, please enable the ‘iOS
devices decoding’ option in the setting menu first.
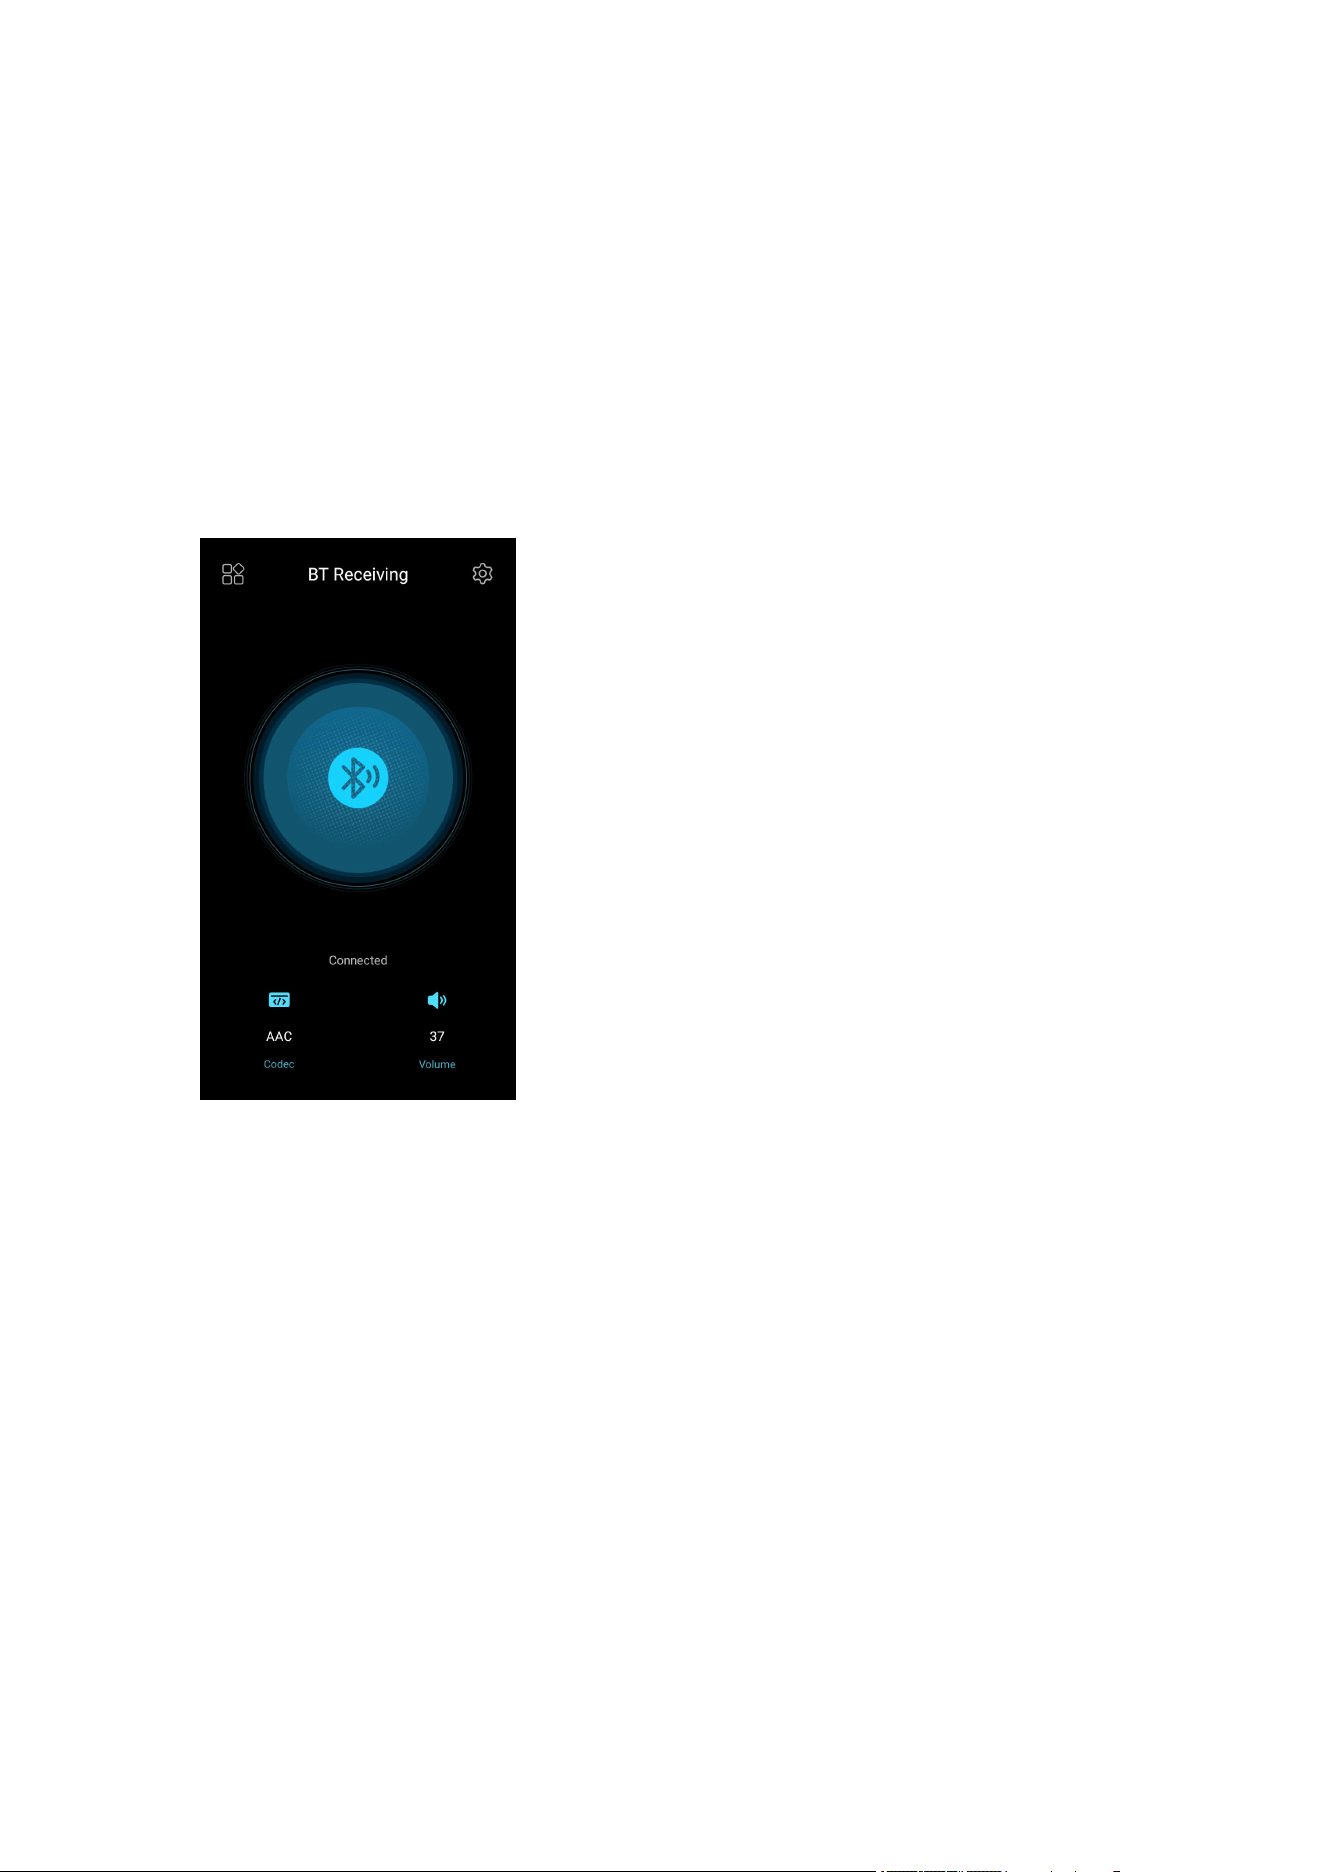
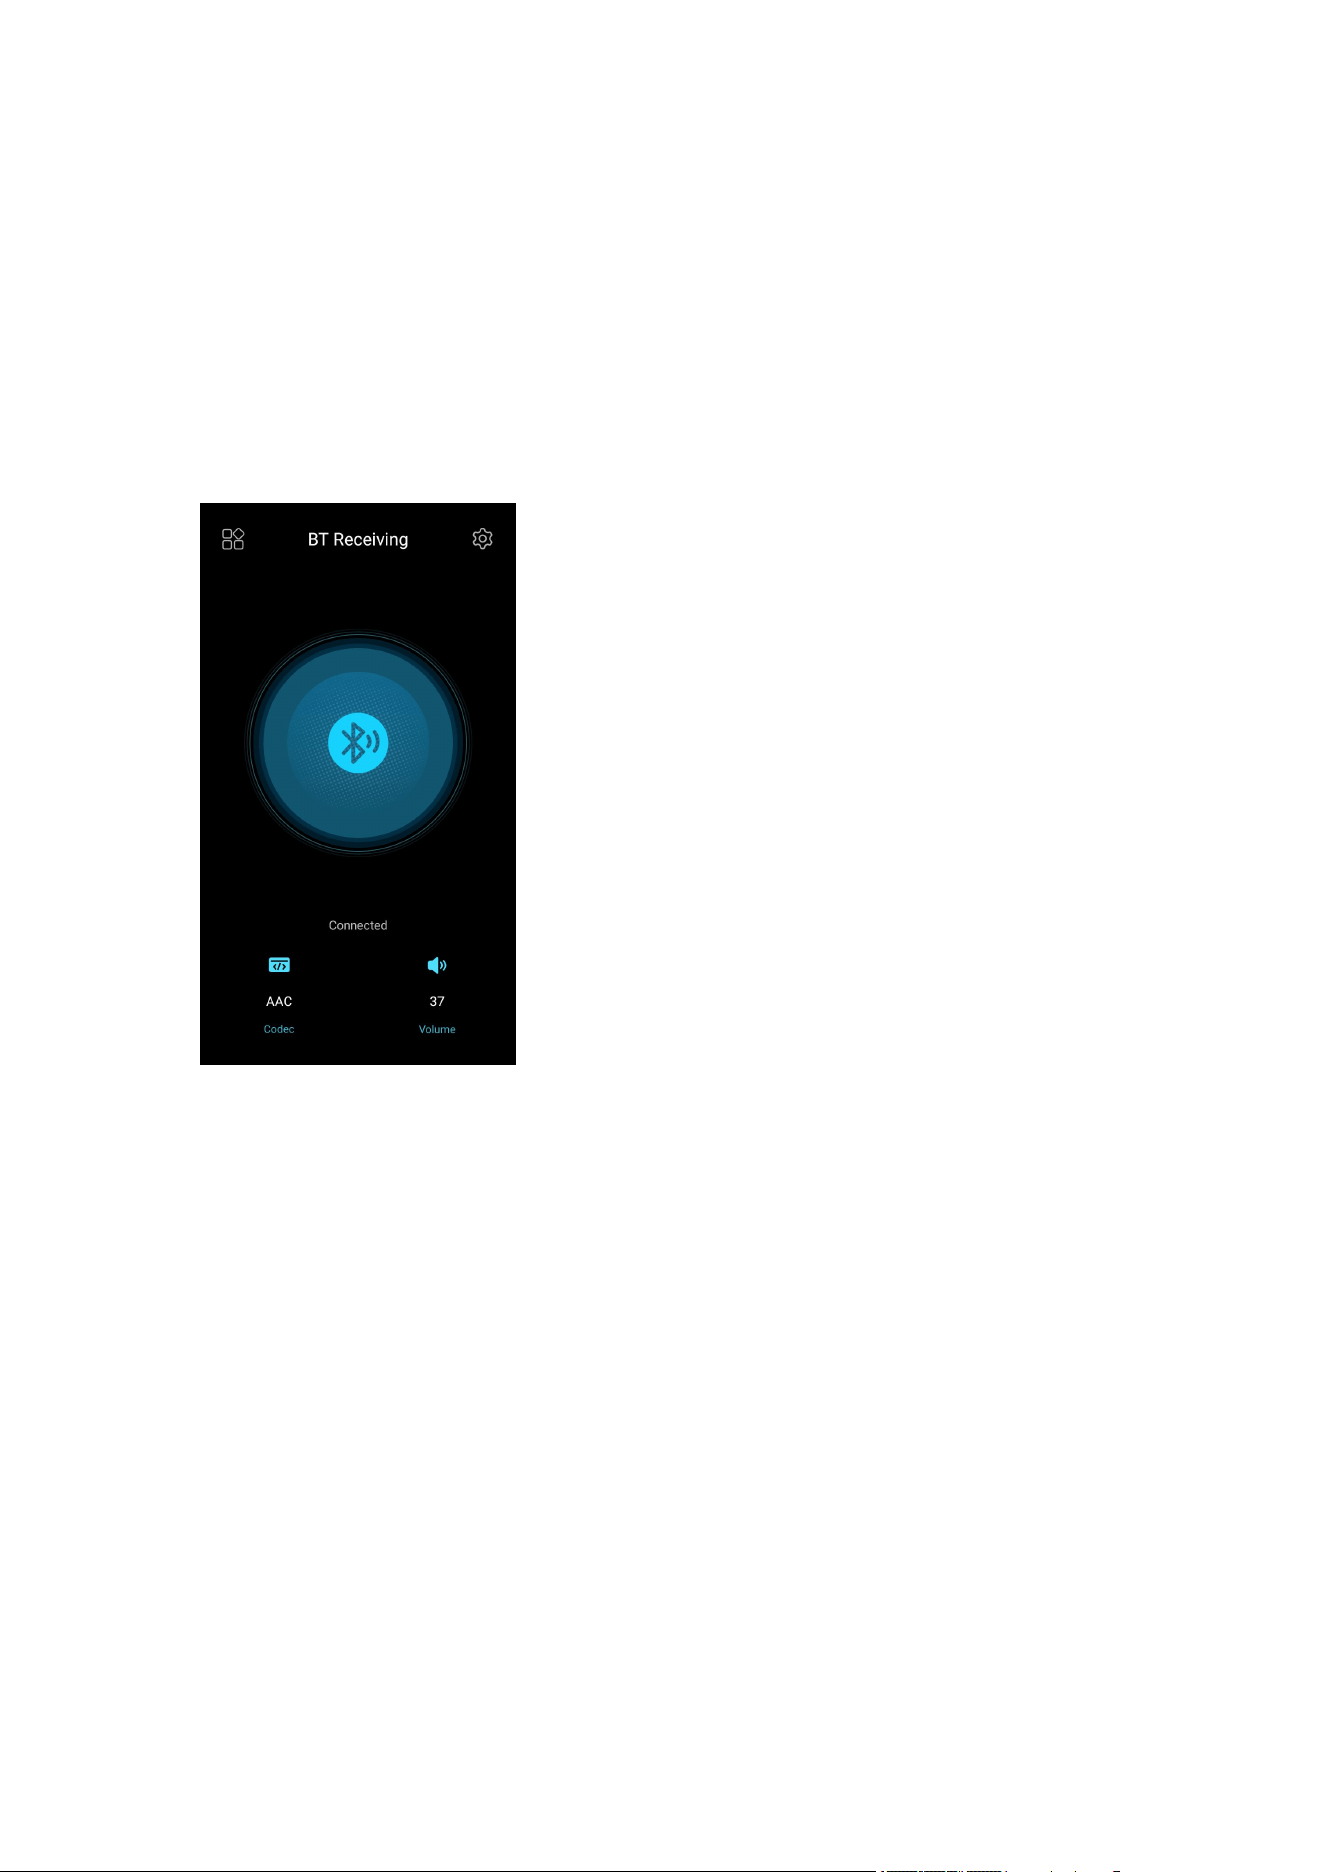
Bluetooth Receiving Mode
1. When switching to the Bluetooth Receiving Mode for the first time, the R9
will automatically enter the pairing state. The next time it enters Bluetooth
Receiving Mode, it will reconnect to the last connected device automatically.
2. Go to the Bluetooth transmitting list of the mobile phone, and tap the R9 to
complete the connection.
-Force the device to enter pairing mode: Hold the Play/Pause button for about
3 seconds.
-Manually enter reconnecting mode: Short press the Play/Pause button when
not in pairing mode.
-Clear current pairing: Hold the Previous and Next track buttons at the same
time for about 3 seconds.
-Play/Pause: Short press the Play/Pause button.
-Previous/Next track: Short press the Previous/Next track button.
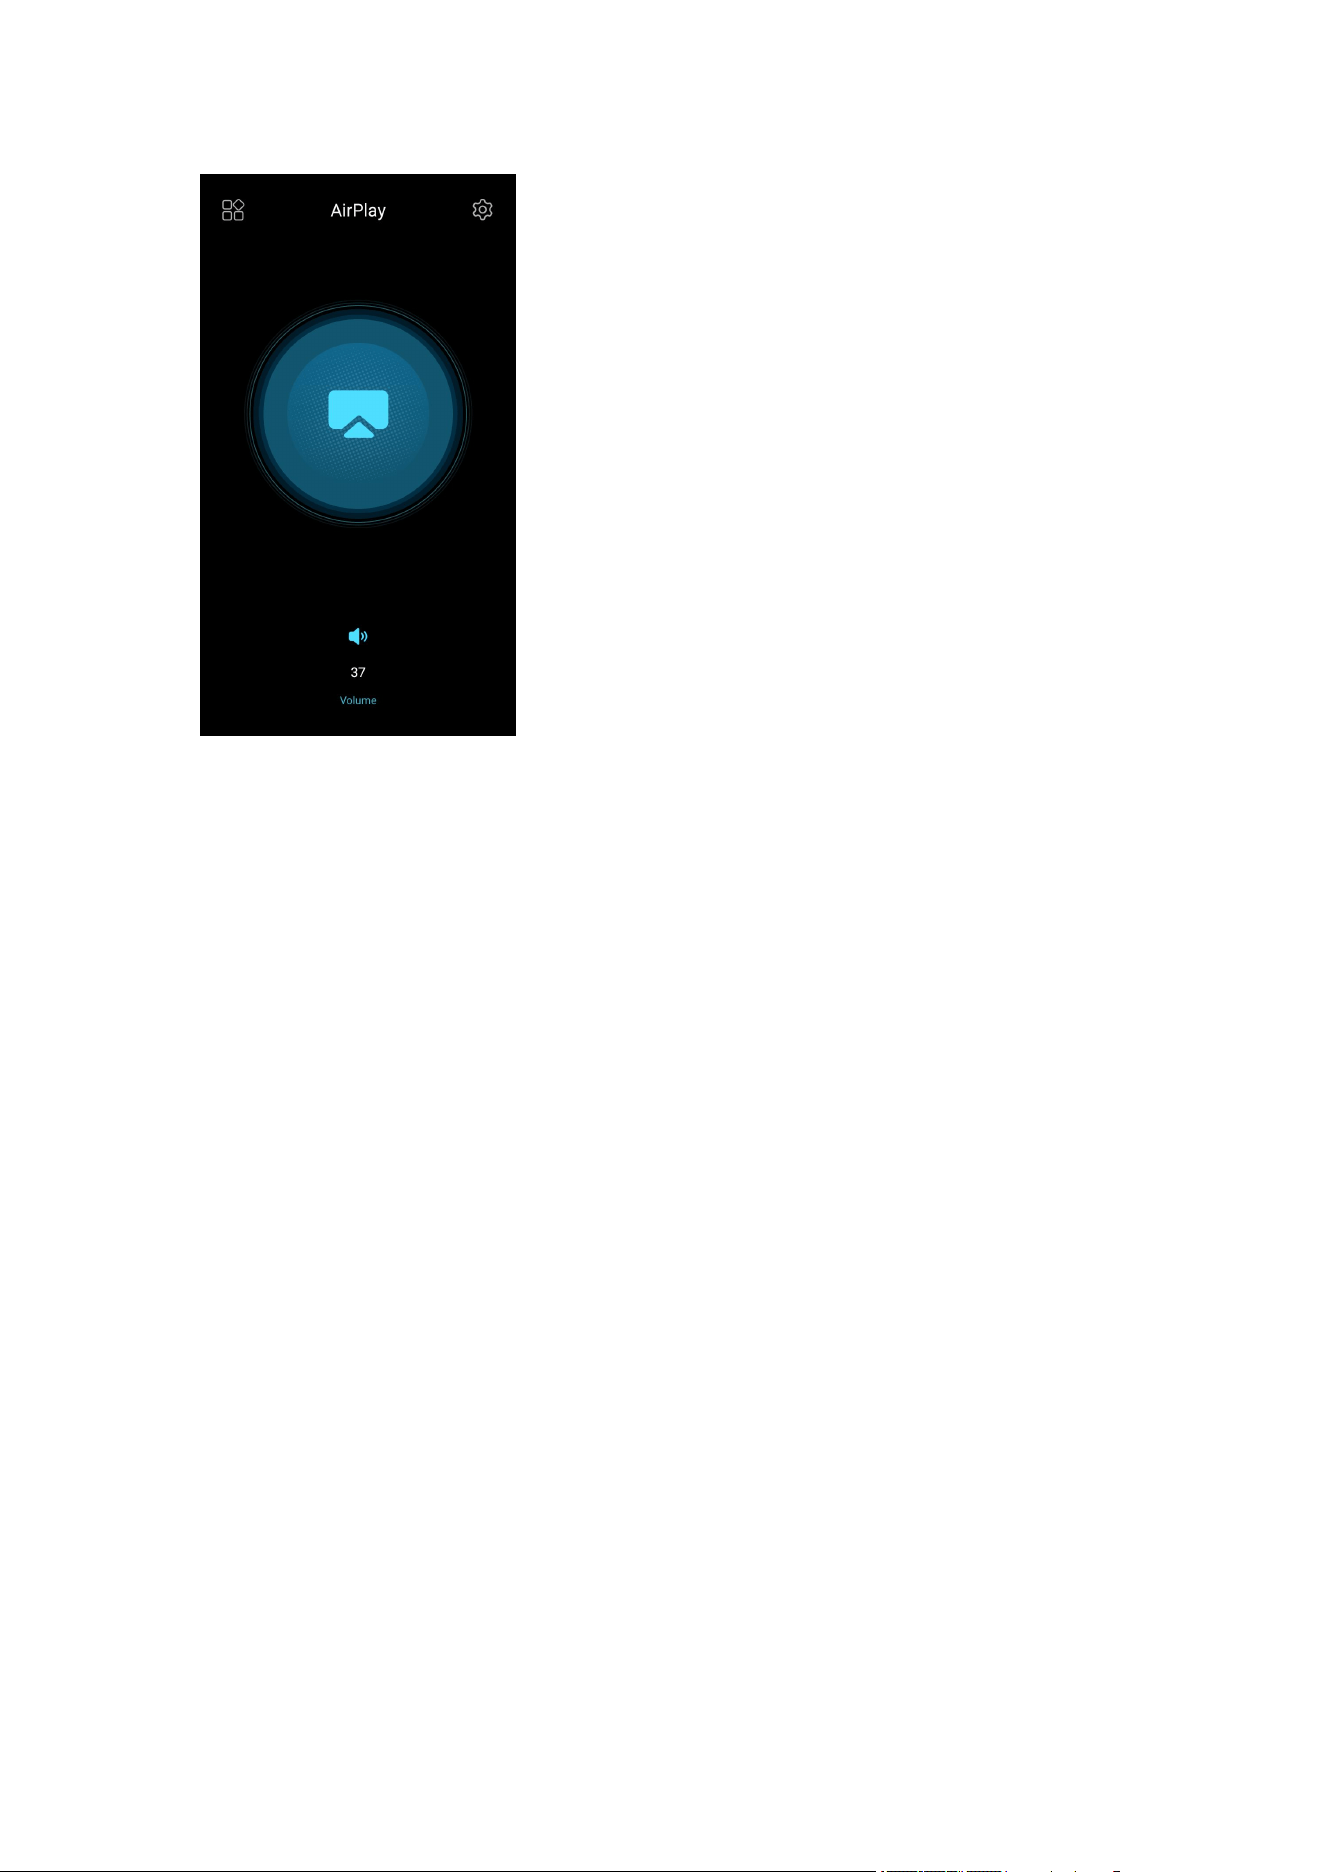
AirPlay
When working in AirPlay mode, the R9 requires a valid WiFi connection.
Please confirm that it is connected to an available network before entering
AirPlay mode.
There are mainly 3 steps.
1. Make sure the R9 and your iOS devices are connected to the same WiFi
network.
2. Switch the R9 to the AirPlay mode.
3. On the drop-down menu of the iOS device, choose the R9 as the playing
device. So the R9 can receive audio signals from the iOS device.
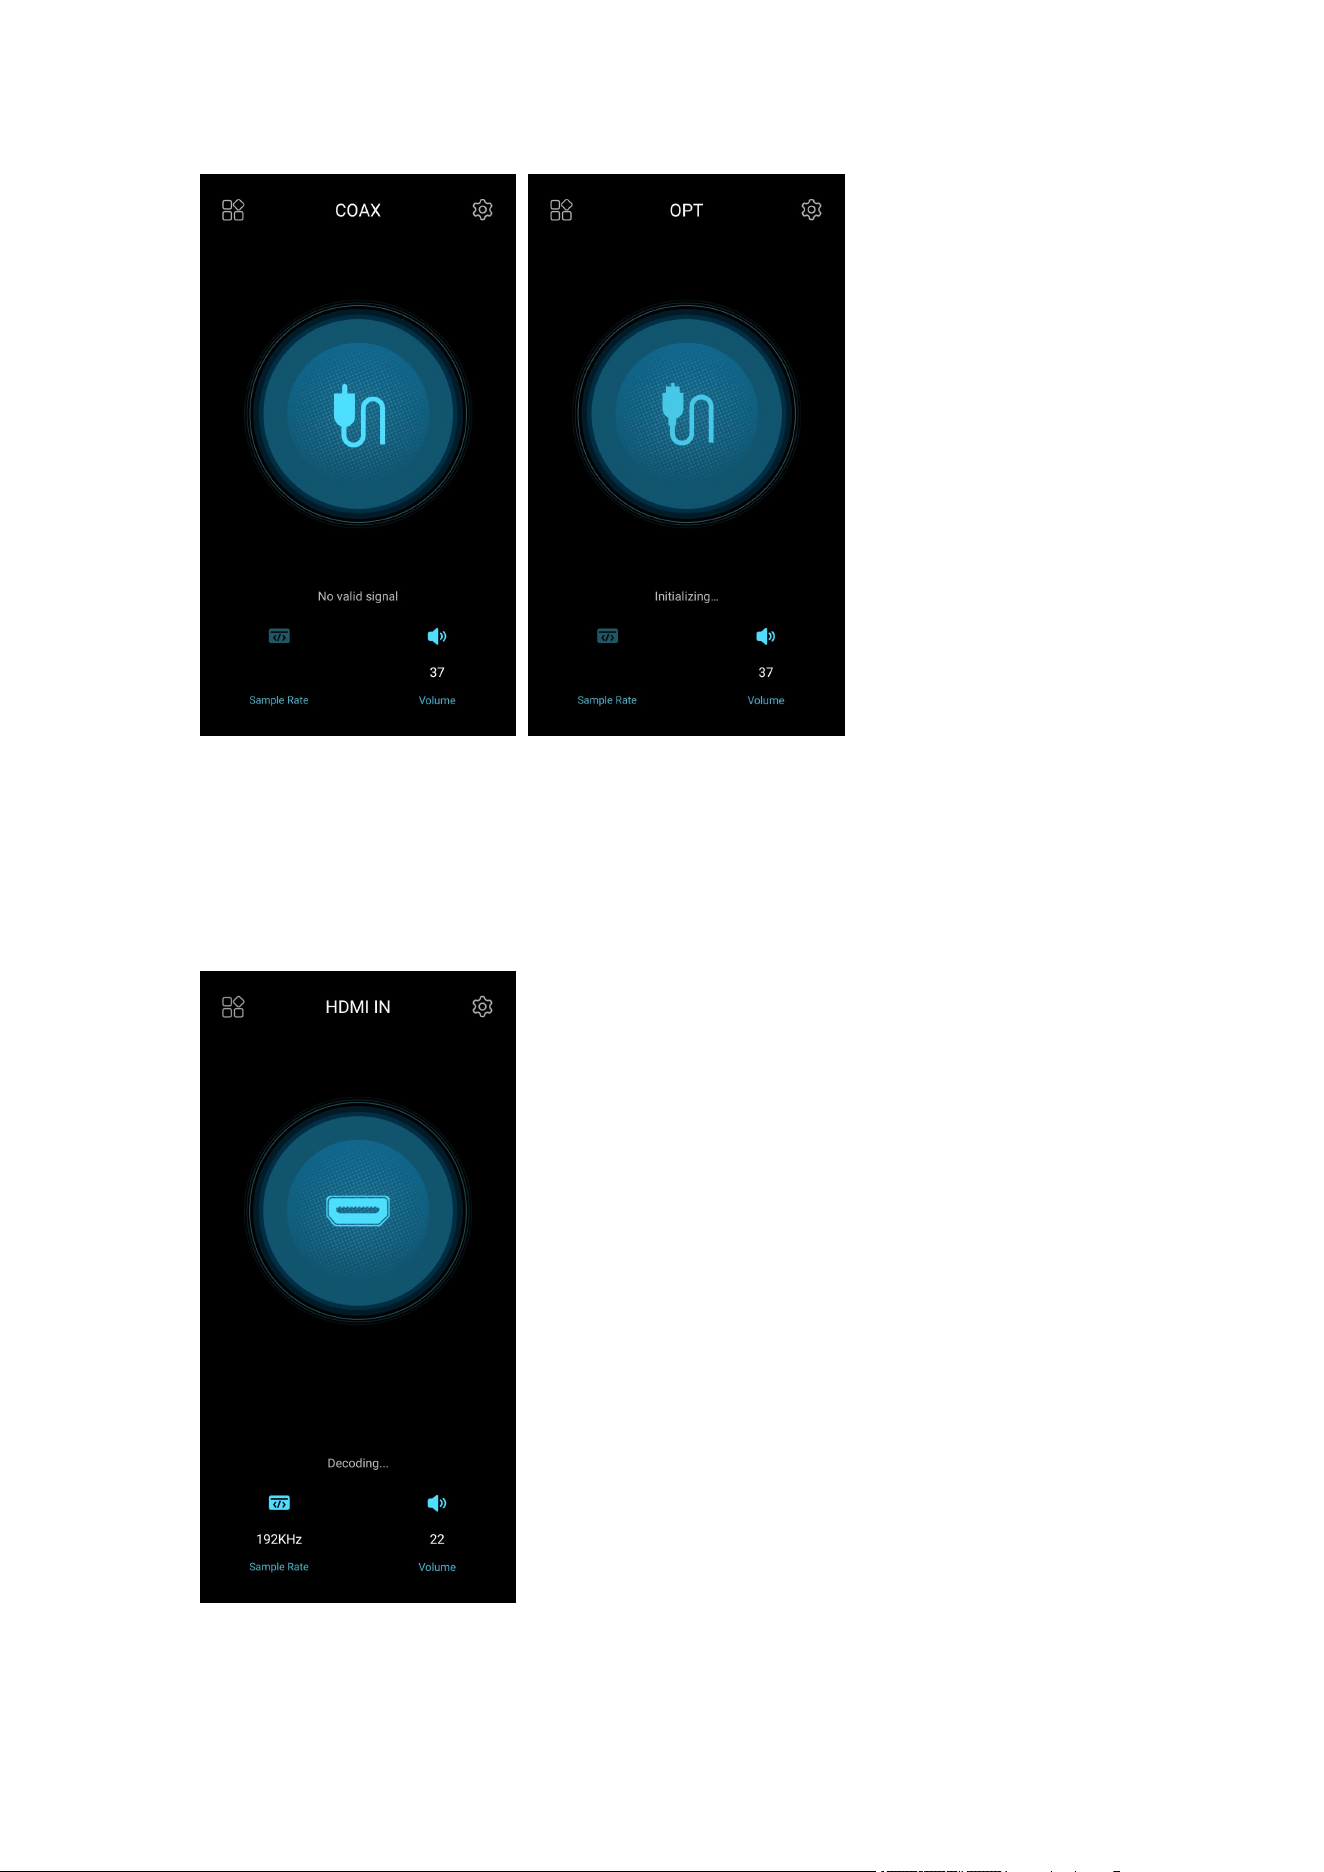
COAX mode/OPT mode
[How to connect]
Optical / Coaxial output device -> R9 -> Headphones / Speakers
[How to Set]
1. R9 input setting: After power on the R9, hold the power button for about 2s
or drop down the menu from the status bar, then switch to the corresponding
optical / coaxial decoding mode. And access the corresponding optical /
coaxial cable to [OPTIAL IN] or [COAXIAL IN] port in the back panel of the R9.
2. R9 output setting: switch to the corresponding output port according to the
interface used, switch to [PO] on the front panel headphone out, switch to
[PRELO] or [LO] on the rear panel line-out,switch to [PO+PRELO] on the front
panel headphone out and rear panel line-out.
3. Play music from the front-end Optical / Coaxial output device and you could
enjoy the music.
Note: If there is no sound, please try other tracks to exclude the format and file
problem.
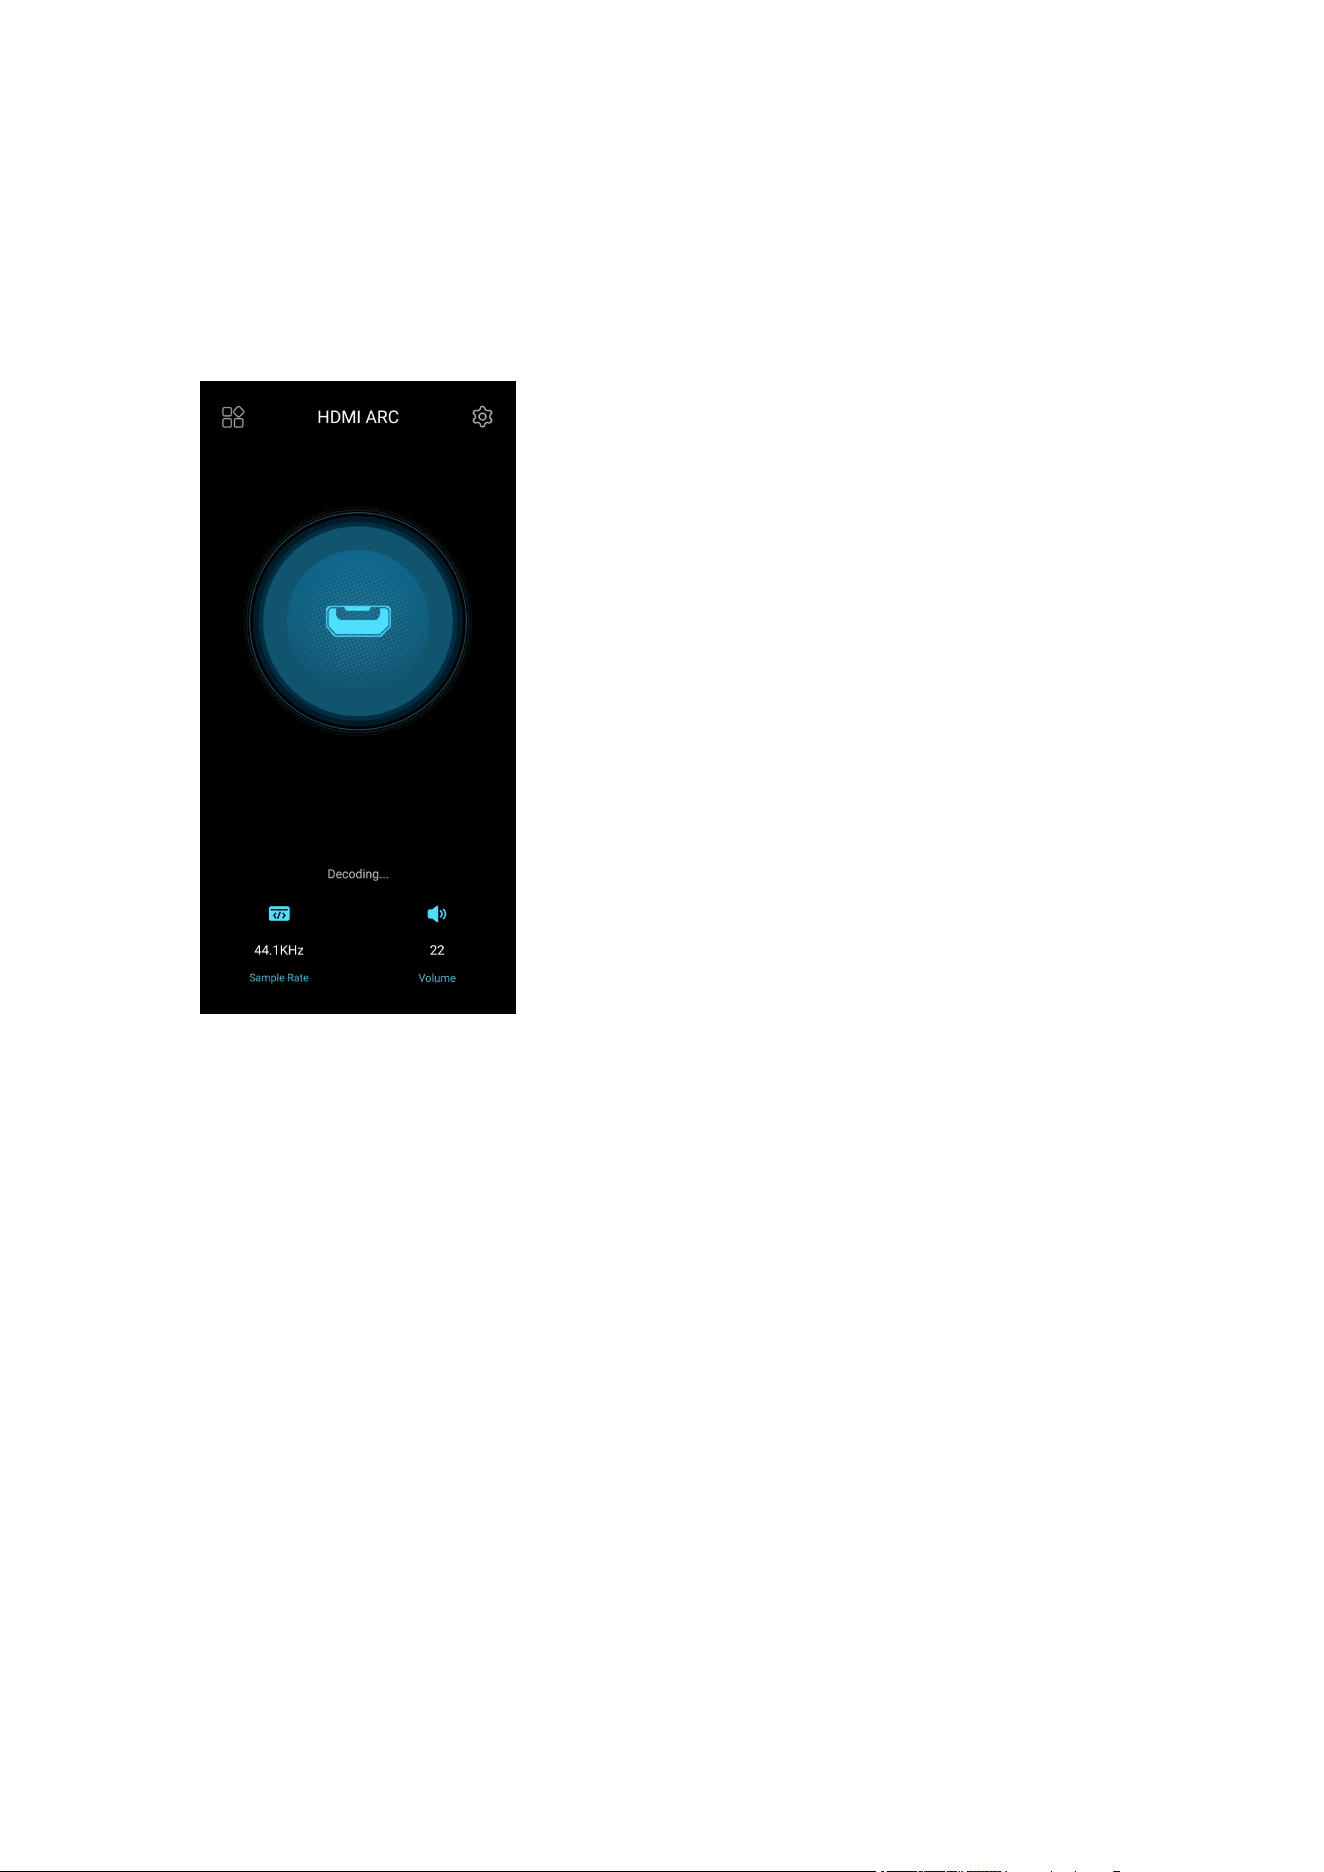
HDMI IN mode
In this mode, R9 can connect to computers/game consoles/Blu-ray players
and other devices through HDMI IN.
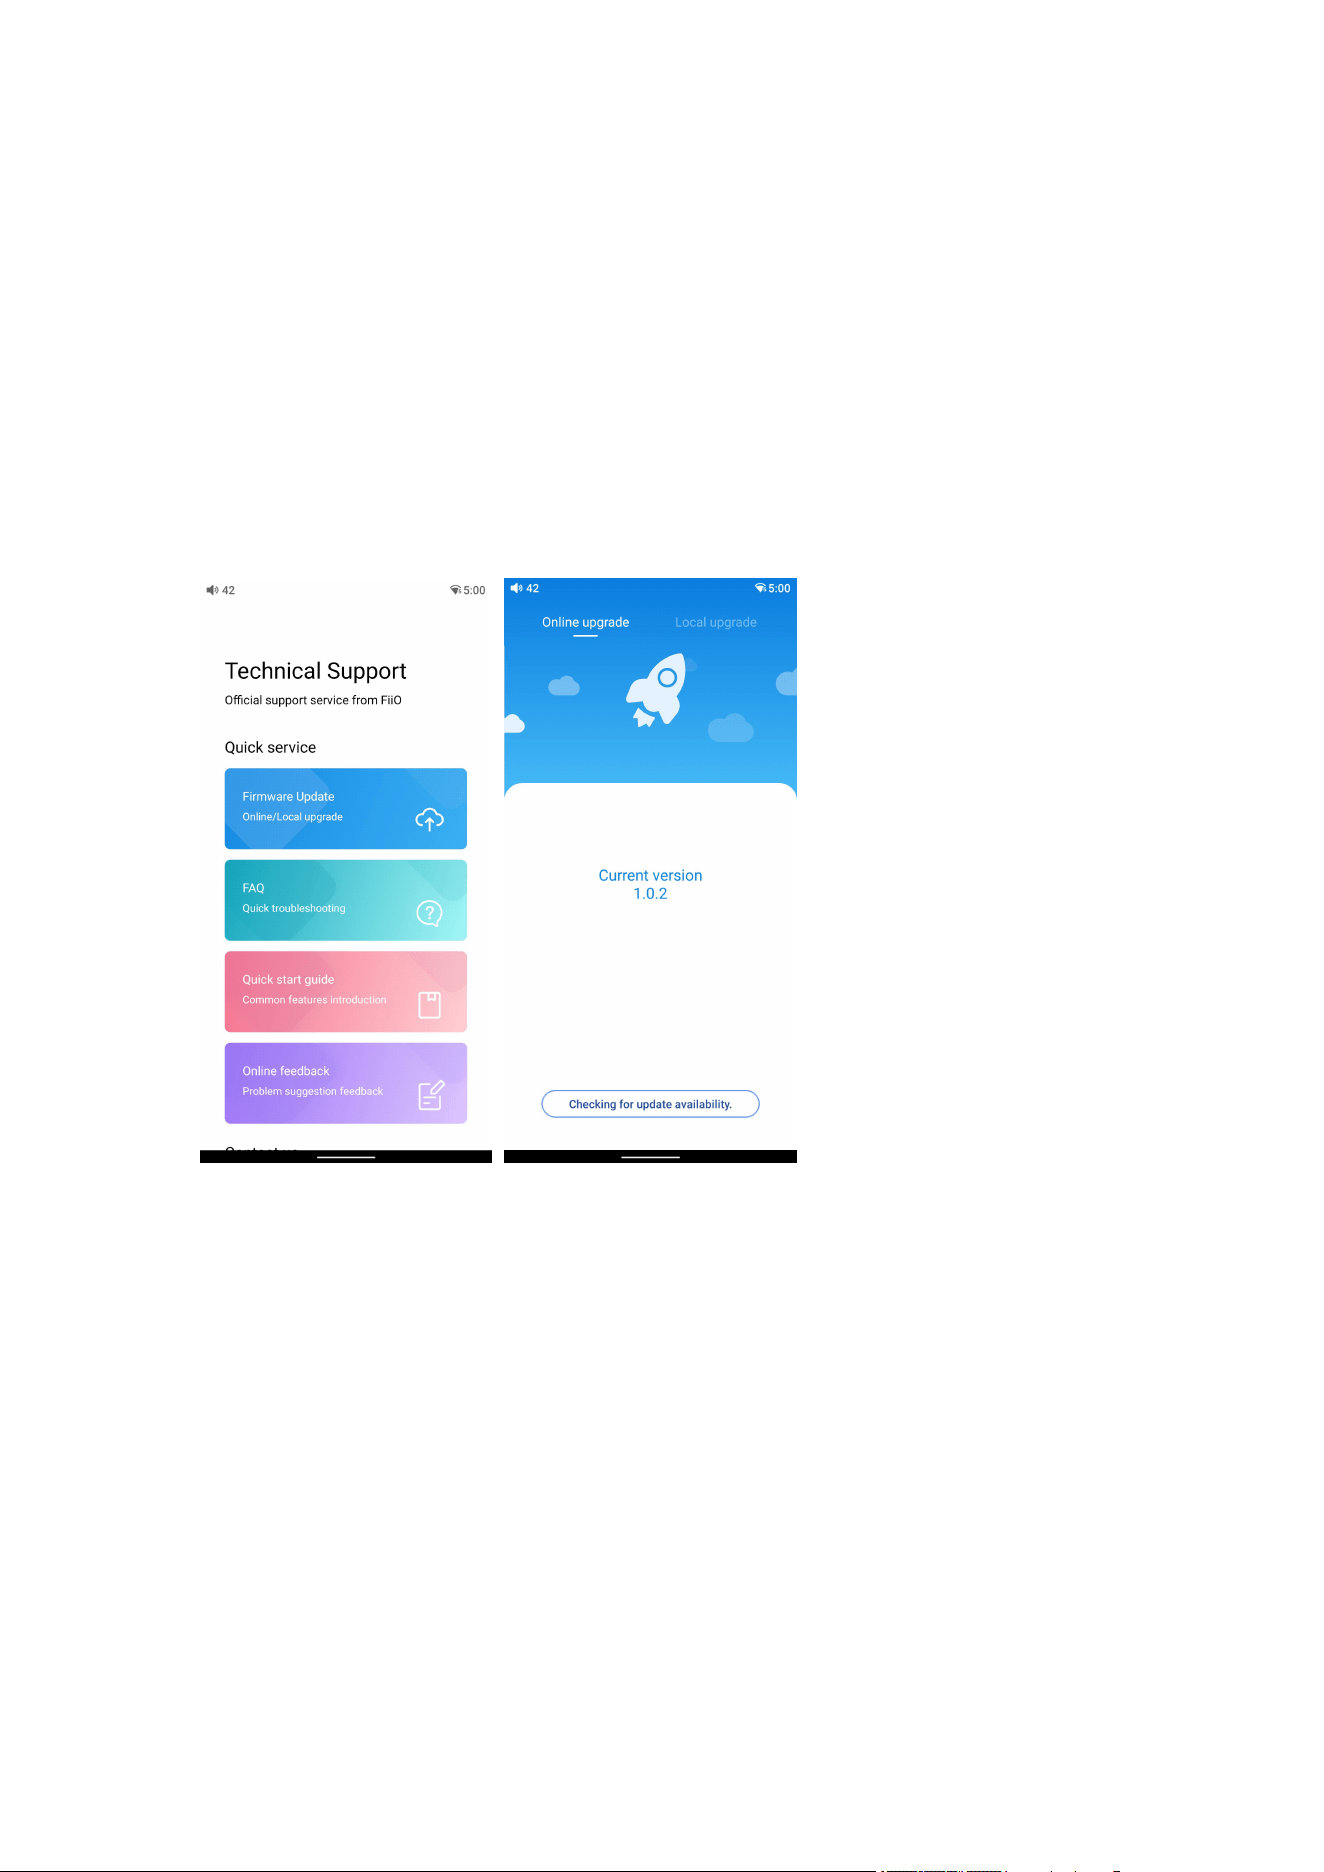
HDMI ARC mode
In this mode, R9 can be connected to devices such as TVs/Blu-ray players,
and FiiO SP3 and other devices through RCA or XLR interfaces to enjoy
high-quality audio performance.
2. How to access the storage/SD card after connecting the R9 to a
computer?
For Windows computers, it is driver-free. After connecting the R9 to the
computer by the included USB cable, the driver will be automatically installed.
Then the FiiO R9 disk can be directly seen on the computer.
Mac computers need a driver:
1. After connecting the R9 to the Mac computer, click the "NO NAME" folder
emerging on the desktop->double click Mac->Mac/MAC OS MTP
Client->Android File Transfer.dmg. Drag the "Android File Transfer.dmg" to the
desktop of the computer.
2. Drag the "Android File Transfer" file to the "Applications" folder and wait for
the completion of the copy.
3. Enter "Applications", and double click the "Android File Transfer". Then you
can manage the files stored in the internal storage of the R9 or the Micro SD
card.
Notes: The R9 folder will directly pop up the next time it is being connected to
the same computer.
3. How to upgrade firmware?
The R9 supports online upgrade and local upgrade.
Online upgrade:
If a new firmware is available and can be detected (with the R9 connected to
an available internet), an upgrade notification will show up in the notification
center. Tap on it to enter the update menu for the online upgrade. If there's no
upgrade notification showing up, you can go to the "Technical
Support->Firmware Upgrade" menu, and tap the "Checking for update
availability" icon to check manually.
Local upgrade:
Also, the R9 can be upgraded locally by a firmware package. Download the
firmware package file from FiiO website, and copy it to the internal storage of

the R9 or an SD card. Go to the "Technical Support->Firmware
Upgrade->Local Upgrade" menu, and find the firmware package file to start the
upgrade.
Notes:
1.Do not unzip the firmware package file.
2.Before the upgrade, ensure the power of the device is adequate (>30%) so
to avoid upgrade failure.
3.If the device goes to factory mode which cannot detect the firmware, the
reason may be that the firmware file is damaged. At this time, press the power
button to reboot the device. Re-download the firmware file and restart the
upgrade.
4. How to install third-party apps?
There are two ways to install applications that are similar to mobile phones'.
1. After connecting the device to a valid WiFi, go to FiiO market, Google Play
or other app markets to download and install the app directly.
2. Local installation: copy the APK file to the R9. Go to the file management
menu to find the file and install it.
5. How to change the language?
Go to Settings->System->Languages & input->Languages->+ Add a language
to choose the intended language. Press the "=" icon on the right side and drag
it to the first line to select the language successfully.
The language of the FiiO Music app defaults to follow the system's. You can
also go to FiiO Music app-> Settings->Languages to choose the language
independently.
6. How to enable the USB DAC function?
For Mac computers, it is driver-free.
For Windows computers, please make the settings as the followed steps.
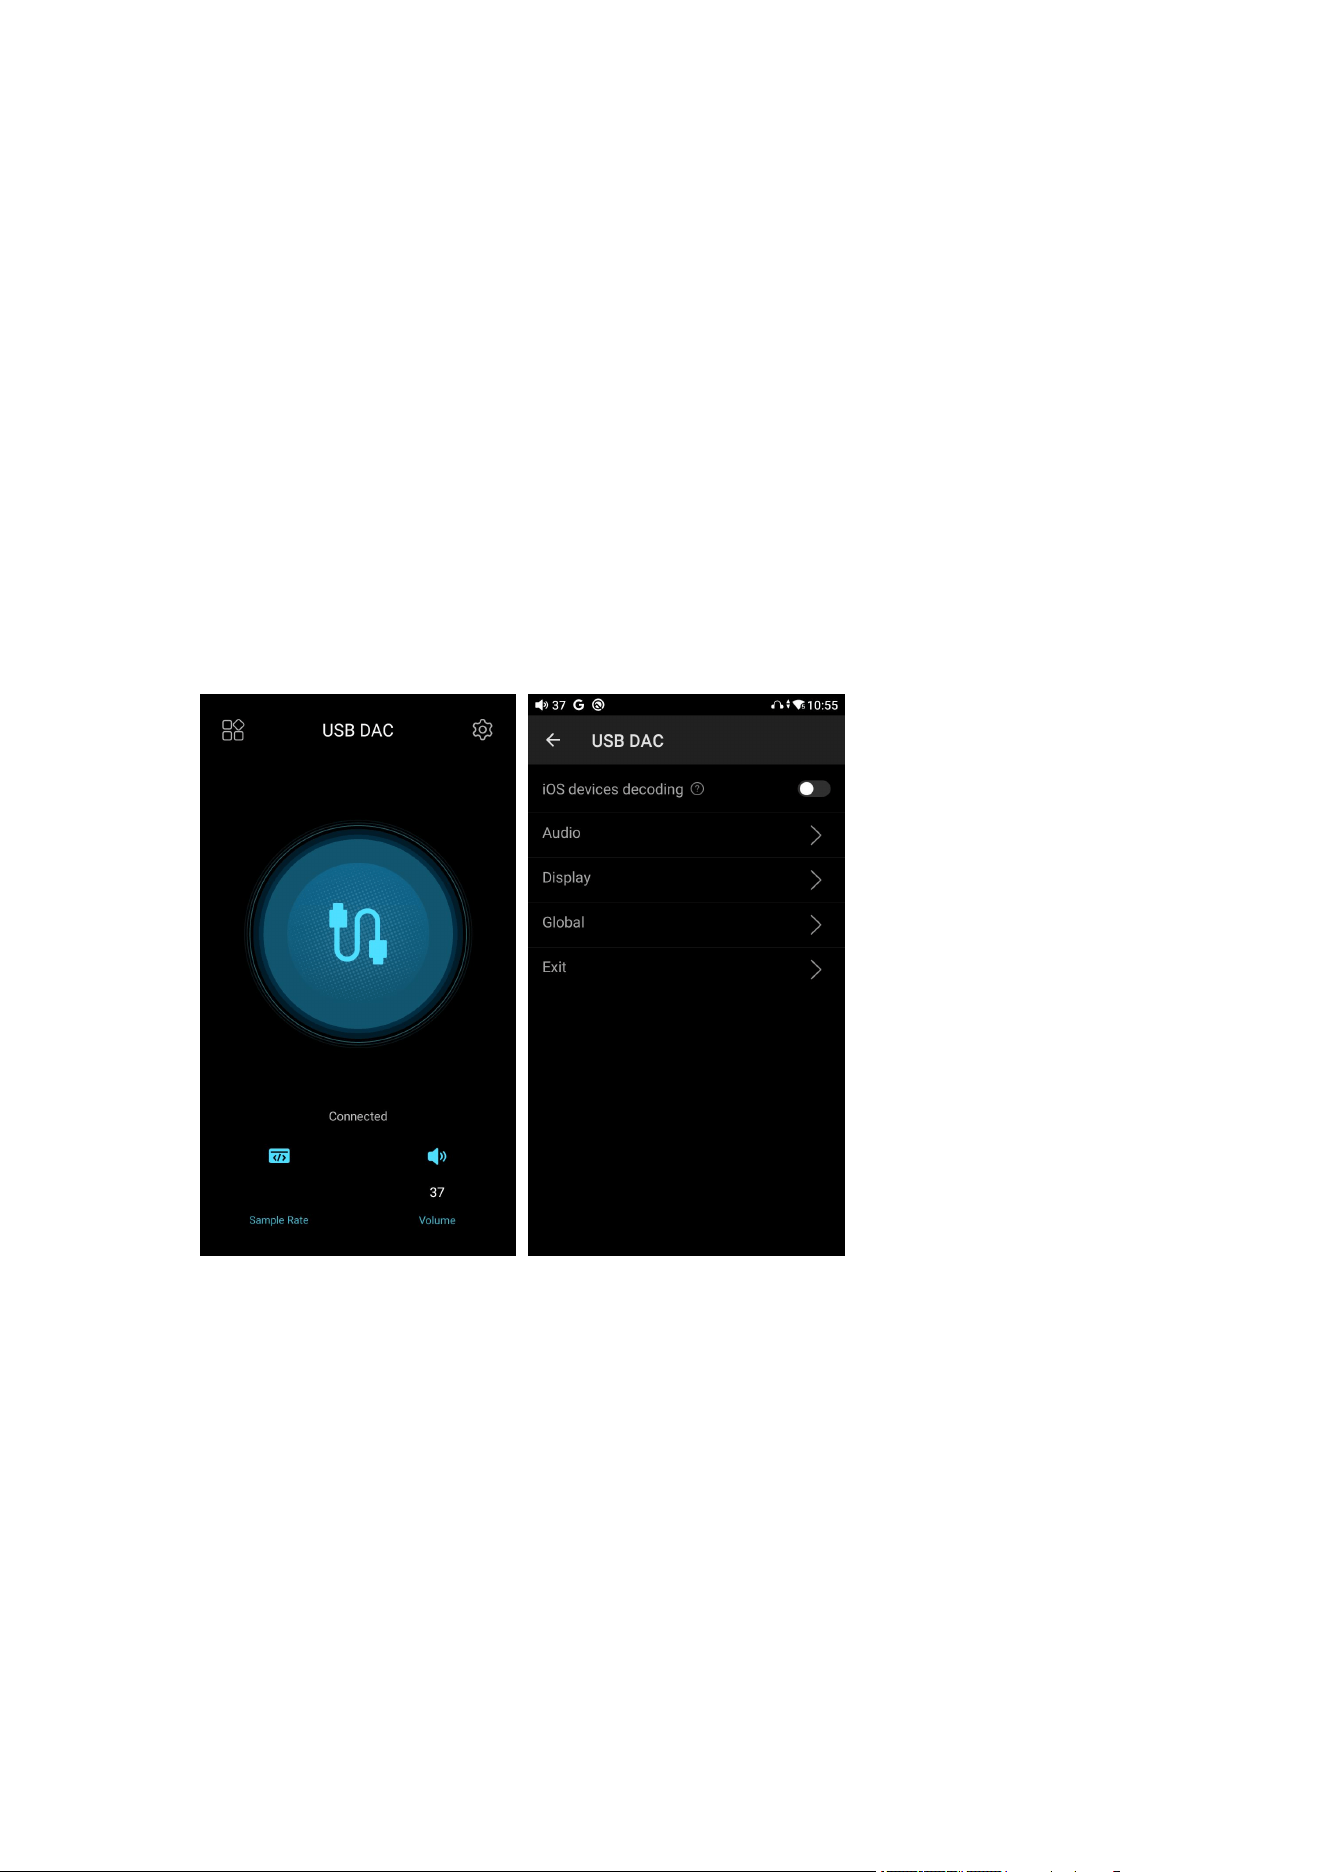
1. Install the FiiO USB DAC driver in the computer first.
2. Switch the working mode of the R9 to USB DAC Mode on the drop-down
menu or go to Settings->Mode Choose menu to enter the USB DAC Mode.
3. Connect the R9 to the computer by the USB port. Select the R9 as the audio
input both in the computer and the music app, so it can work.
Notes:
1. When in the USB DAC Mode, the R9 does not support Bluetooth
transmitting.
2. When the R9 is used as USB DAC for iOS device, please enable the “iOS
devices decoding” option in the setting menu first.
7. How to use the R9 as a Bluetooth receiver?
1. Go to the drop-down or Settings menu of the R9, and choose the working
mode as Bluetooth Receiving Mode.
2. Go to the Bluetooth transmitting list of the mobile phone, and tap the R9 to
complete the connection.
Note: If the connection fails, please turn off the Bluetooth function for R9 and
mobile phone. Then turn on the Bluetooth again for try.

8. How to use the R9 as a Bluetooth transmitter?
It is similar to the mobile phone's. Here are the instructions.
1. Go to the Settings->Bluetooth menu to turn on the Bluetooth function.
2. Make the Bluetooth receiving device, such as Bluetooth earphones, enter
the pairing state. (Please refer to the user manual of the Bluetooth receiving
device about how to enter pairing state.)
3. Go to the Bluetooth device list of the R9->Pair new device to complete the
connection.
What can be done if the R9 fails to connect to Bluetooth earphones?
If it fails to connect to Bluetooth earphones for the first time, please make sure
the earphones are under pairing state (the connection will fail if the earphones
are under reconnecting state for the first-time connection). Go to the Bluetooth
menu of the R9 to start the connection.
What Bluetooth codecs does the R9 support? And how to switch the
Bluetooth codecs?
The R9 supports LHDC, LDAC, aptX-HD, aptX, AAC and SBC which can be
switched on Settings->Audio->Bluetooth Audio Encoder menu.
What can be done if the volume is too low when the R9 is connected to
AirPods?
Go to Settings->About phone, and continuously tap the "Build number" 7 times.
Go back to Settings->System->Developer options menu to turn off the"Disable
absolute volume". Disconnect and reconnect the two devices through
Bluetooth.(Note: You could find this option from Setting-Audio if your are using
the firmware above FW1.0.3.)
9. How to enable the coaxial and optical output of R9?
You could enable the OPT/COAX output from Settings->Audio->OPT/COAX
output option.
[R9 optical / coaxial no output]
Please enable the OPT/COAX output from system setting-Audio-OPT/COAX

output option first.
Note: When the optical/coaxial output switch is turned on, the output will follow
the standard SPDIF protocol specification.
Maximum supported sampling rate:
COAX OUT: 384kHz/24bit; DSD128 (D2P/DOP)
OPT OUT: 192kHz/24bit
The tracks exceeding the maximum sampling rate will be SRC before
outputting.
[The sample rate will show in the status bar when using coaxial / optical
output?]
The coaxial/optical output port of R9 is independent. The analog output and
digital output can output at the same time. Besides, the XLR connector is
without detection, so there is no distinction for analog output and digital output.
10. How to use FiiO Roon(Roon Ready) in R9?
1. You need to have a PC running Roons core software before anything else.
You can’t just run it on the R9 since it is only an endpoint or controller. Official
website of Roon: https://roonlabs.com/
2. Download Roon on your computer and log in your Roon account. On the
computer:
Roon-Setting-Storage: Add local music or log in your Tidal account as the
media library
Roon-Setting-Audio: Enable the R9.
3. The computer and R9 should connect to the same Ethernet. Start the FiiO
Roon in R9 and start up the Roon Ready feature on the R9 to enable full bit
perfect audio.
11. How to turn on the R9? How to choose the suitable power supply for
R9?
Power supply: As a desktop All-in-one machine, the R9 does not come with a

battery. It supports DC or AC power supply. You could choose either power
supply for it.
AC power input: compatible with 100~240V
R9 power adapter power supply voltage support between 100V to 240V AC
power
When you use the AC power supply, please turn off the AC power switch first.
Then toggle the AC/DC power switch to AC, and turn on the AC power switch.
DC power input: external DC power supply, 15V/≥3A
The R9 can also be used with external DC power supplies, such as the FiiO
PL50 linear power supply or other power supplies to give your sound an even
purer, blacker background to truly make the musical details pop.
When you use the DC power supply, please toggle the AC/DC power switch to
DC.
Power on:
After connecting to the power supply, short press the power button for 2
seconds to turn on the R9.
Shutdown:
Long press the power button,then click the power icon in the upper right corner
of the screen. Click shutdown to turn off the R9.
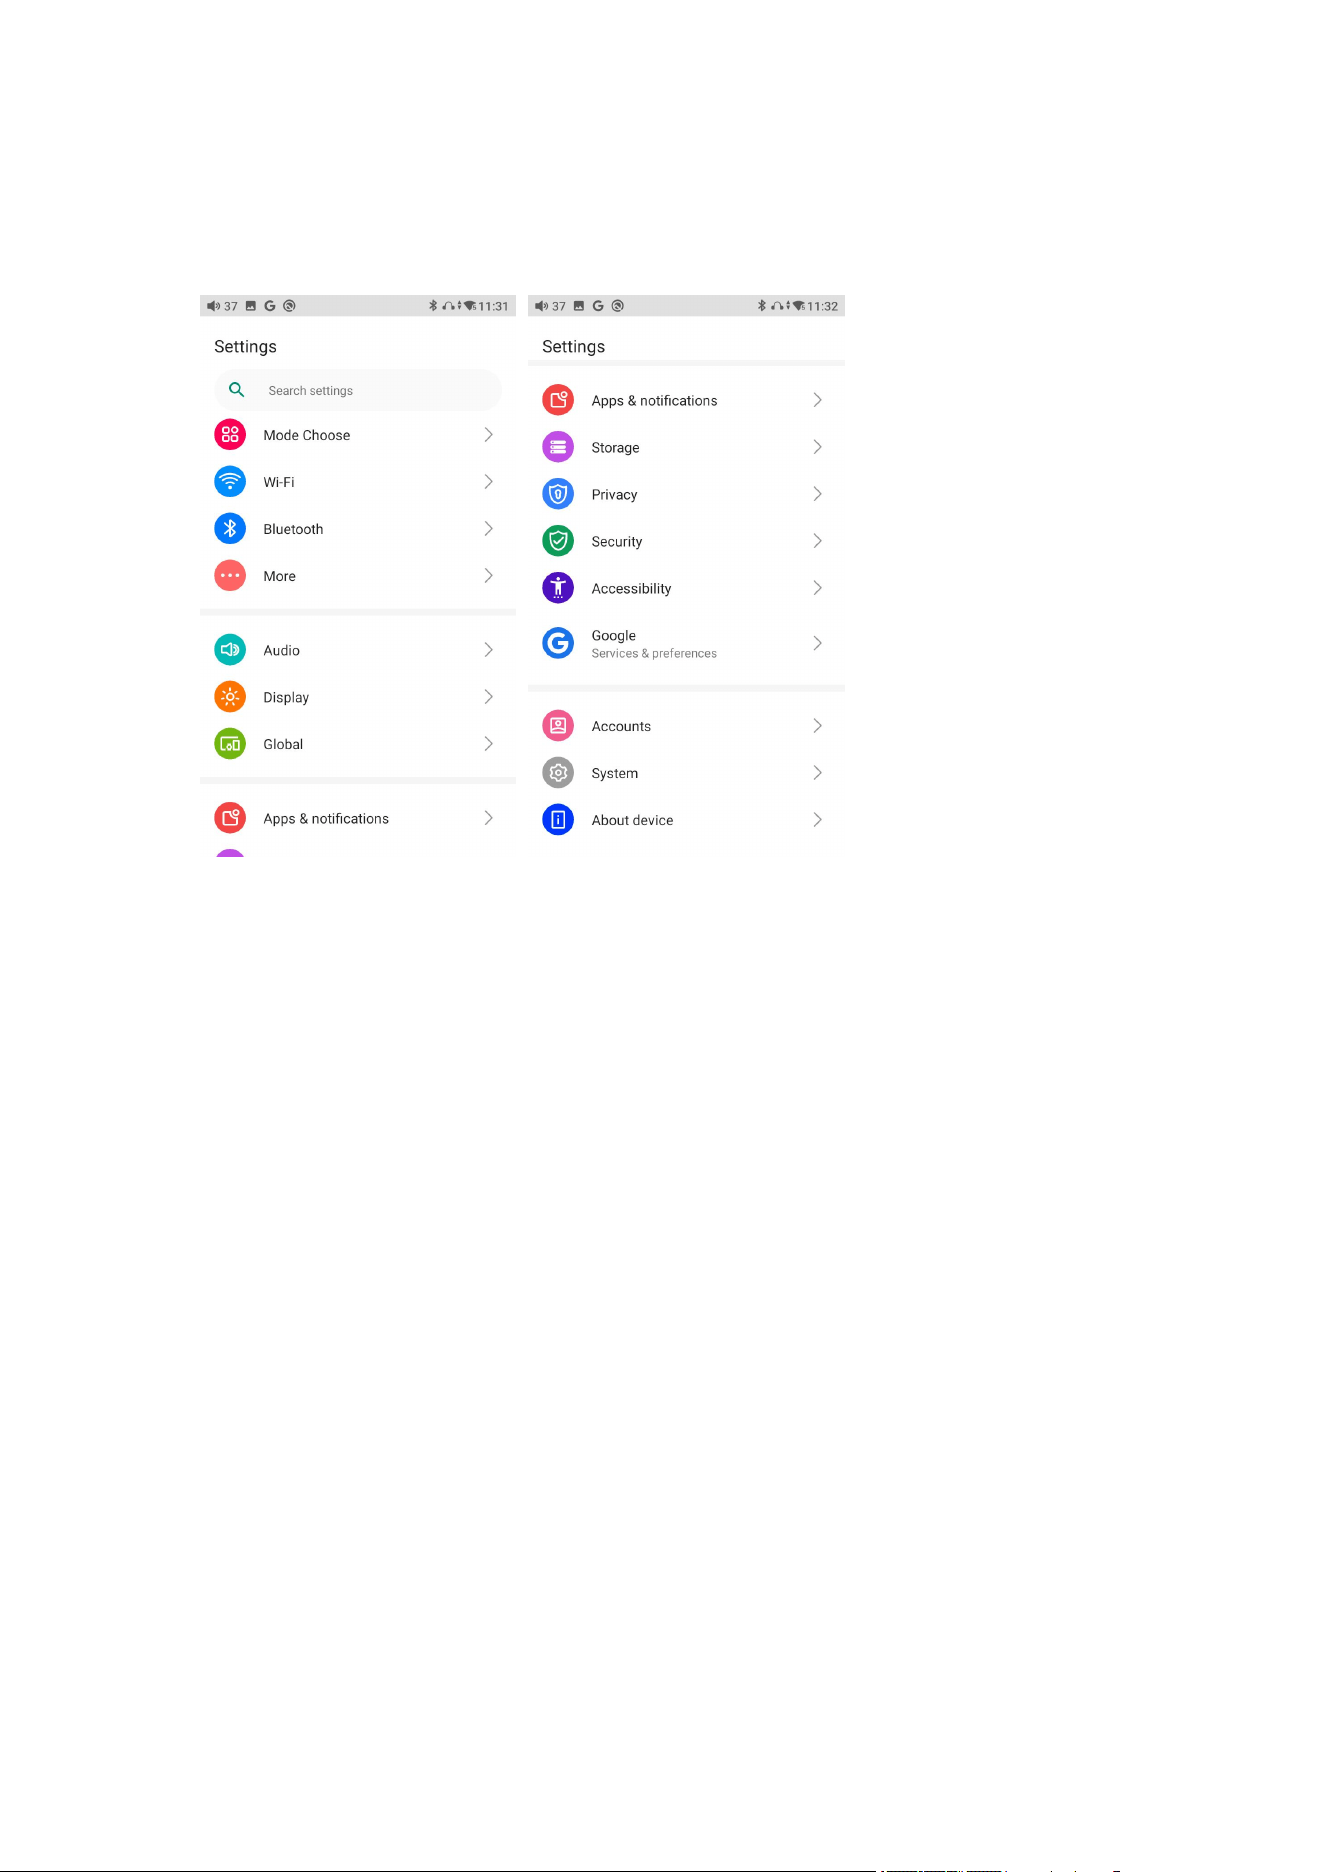
Introduction to system settings menu
Here is the system settings menu of the R9
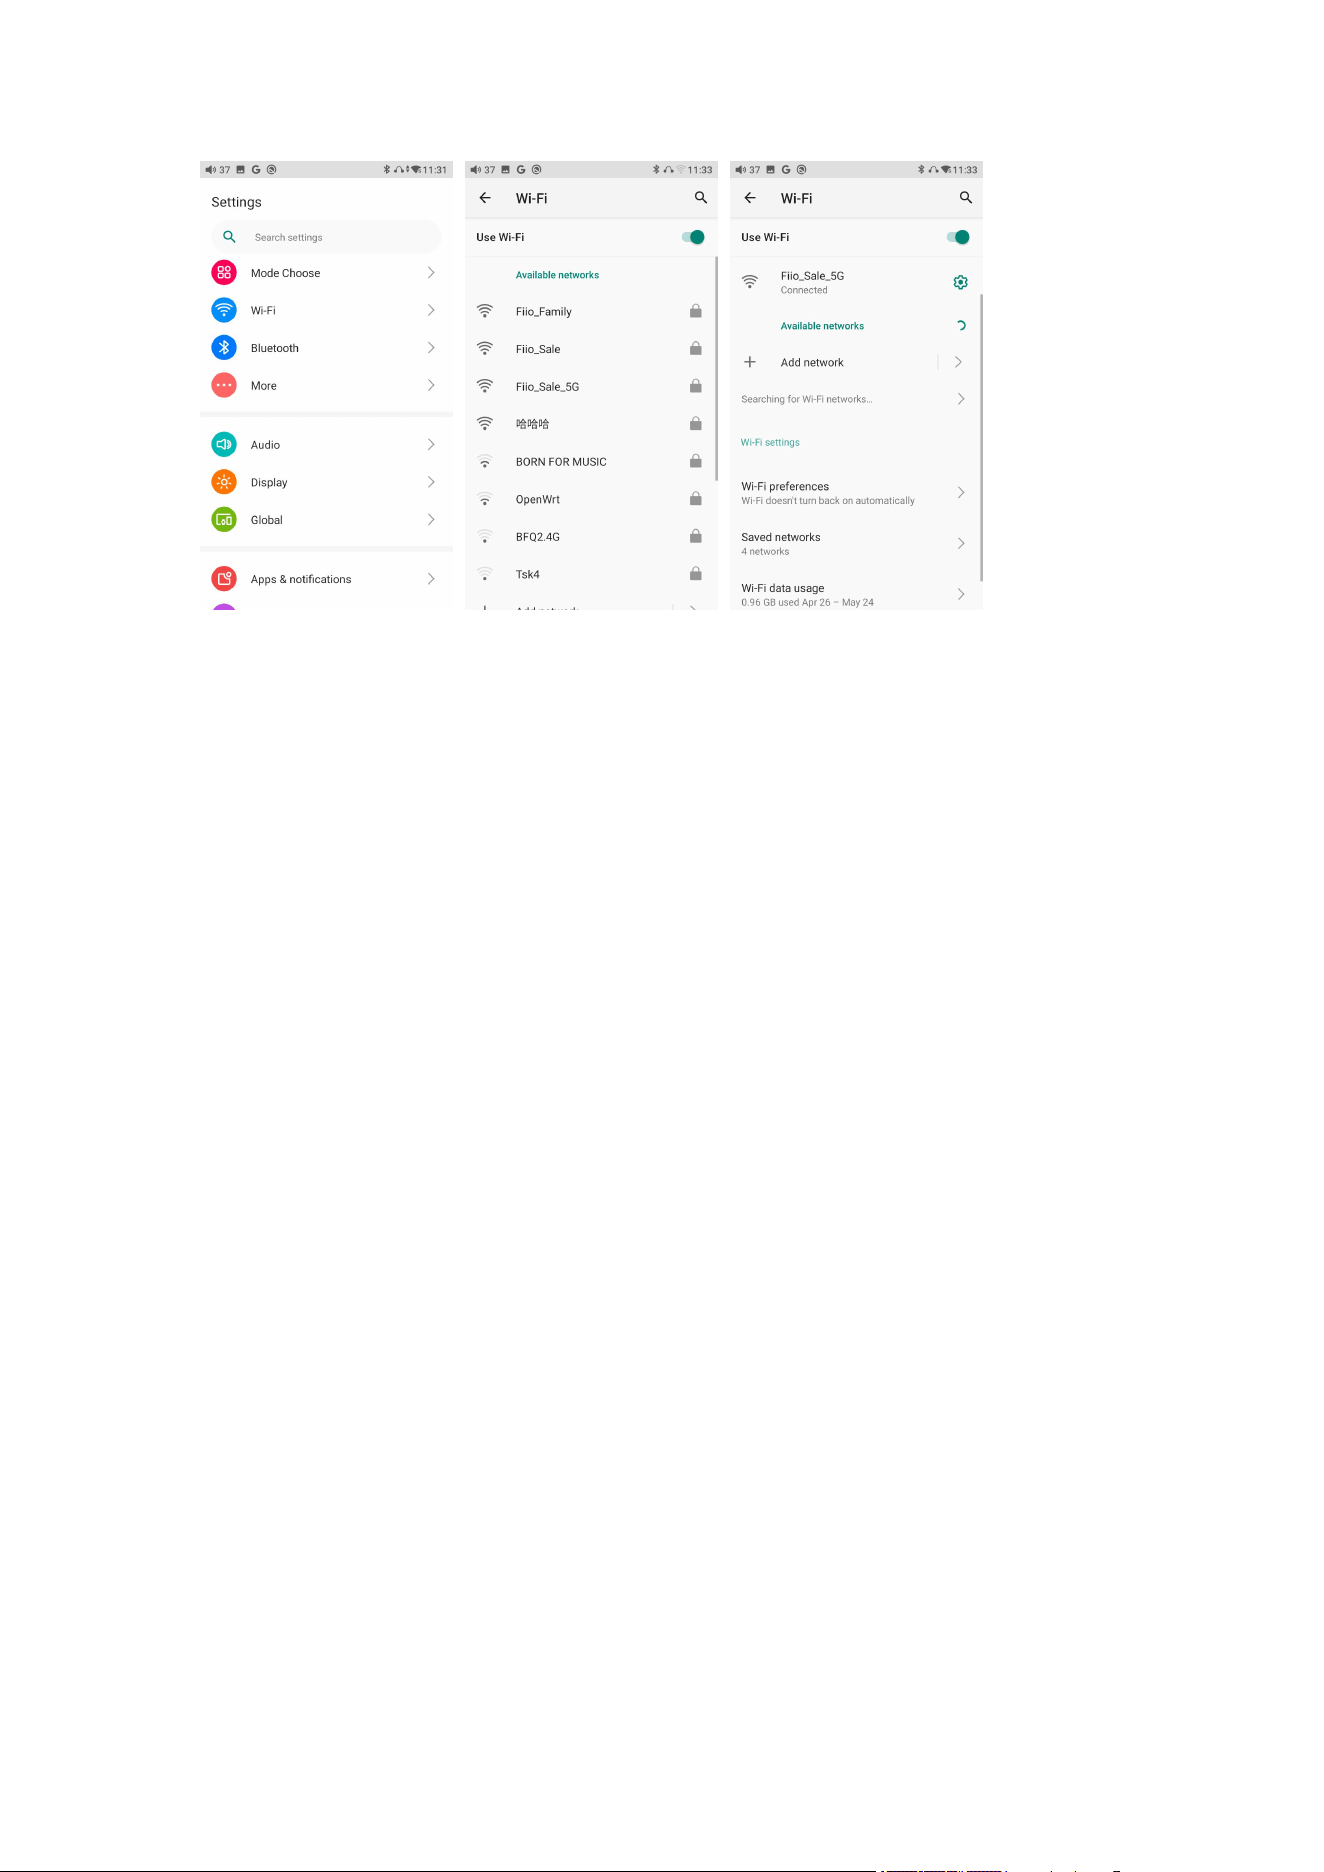
1. WiFi
The R9 supports a WiFi connection of 2.4/5G dual-band for music resources
access. Here are the steps to connect the R9 to a new WiFi device.
1) In the settings menu of the R9, tap "WiFi".
2) Turn it on. The R9 will automatically search for and list available WiFi
devices nearby.
3) Tap the intended WiFi device and connect them.
2. Bluetooth
The R9 supports lots of Bluetooth codecs for both transmission and reception,
allowing for rich wireless connections.
Bluetooth transmitter instructions:
When being a Bluetooth transmitter connecting to new Bluetooth devices
(such as Bluetooth headphones, Bluetooth speakers), the R9 needs to pair
with the Bluetooth device first. Here are the steps.
1. Go to the Settings->Bluetooth menu to turn on the Bluetooth function.
2. Make the Bluetooth receiving device, such as Bluetooth earphones, enter
the pairing state. (Please refer to the user manual of the Bluetooth receiving
device about how to enter pairing state.)
3. Go to the Bluetooth device list of the R9->Pair new device to complete the
connection.
4. Tap the intended device to start the connection. Successfully connected
devices will be displayed on the list of Available media devices with an "Active"
prompt.
Before connecting to a Bluetooth device, you can select the Bluetooth codec
you like in the R9. Here are the steps.
1) Go to the Settings->Audio menu.
2) Tap Wireless playback quality-> choose the intended Bluetooth codec.
Note:
When the Bluetooth is enabled, the R9 will preferentially connect to the
last-connected available Bluetooth devices.
Bluetooth Receiving Mode
1. Go to the drop-down or Settings menu of the R9, and choose the working
mode as Bluetooth receiving mode.
2. Go to the Bluetooth transmitting list of the mobile phone, and tap the R9 to
complete the connection.
Note: If the connection fails, please turn off the Bluetooth function for R9 and
mobile phone. Then turn on the Bluetooth again for try.
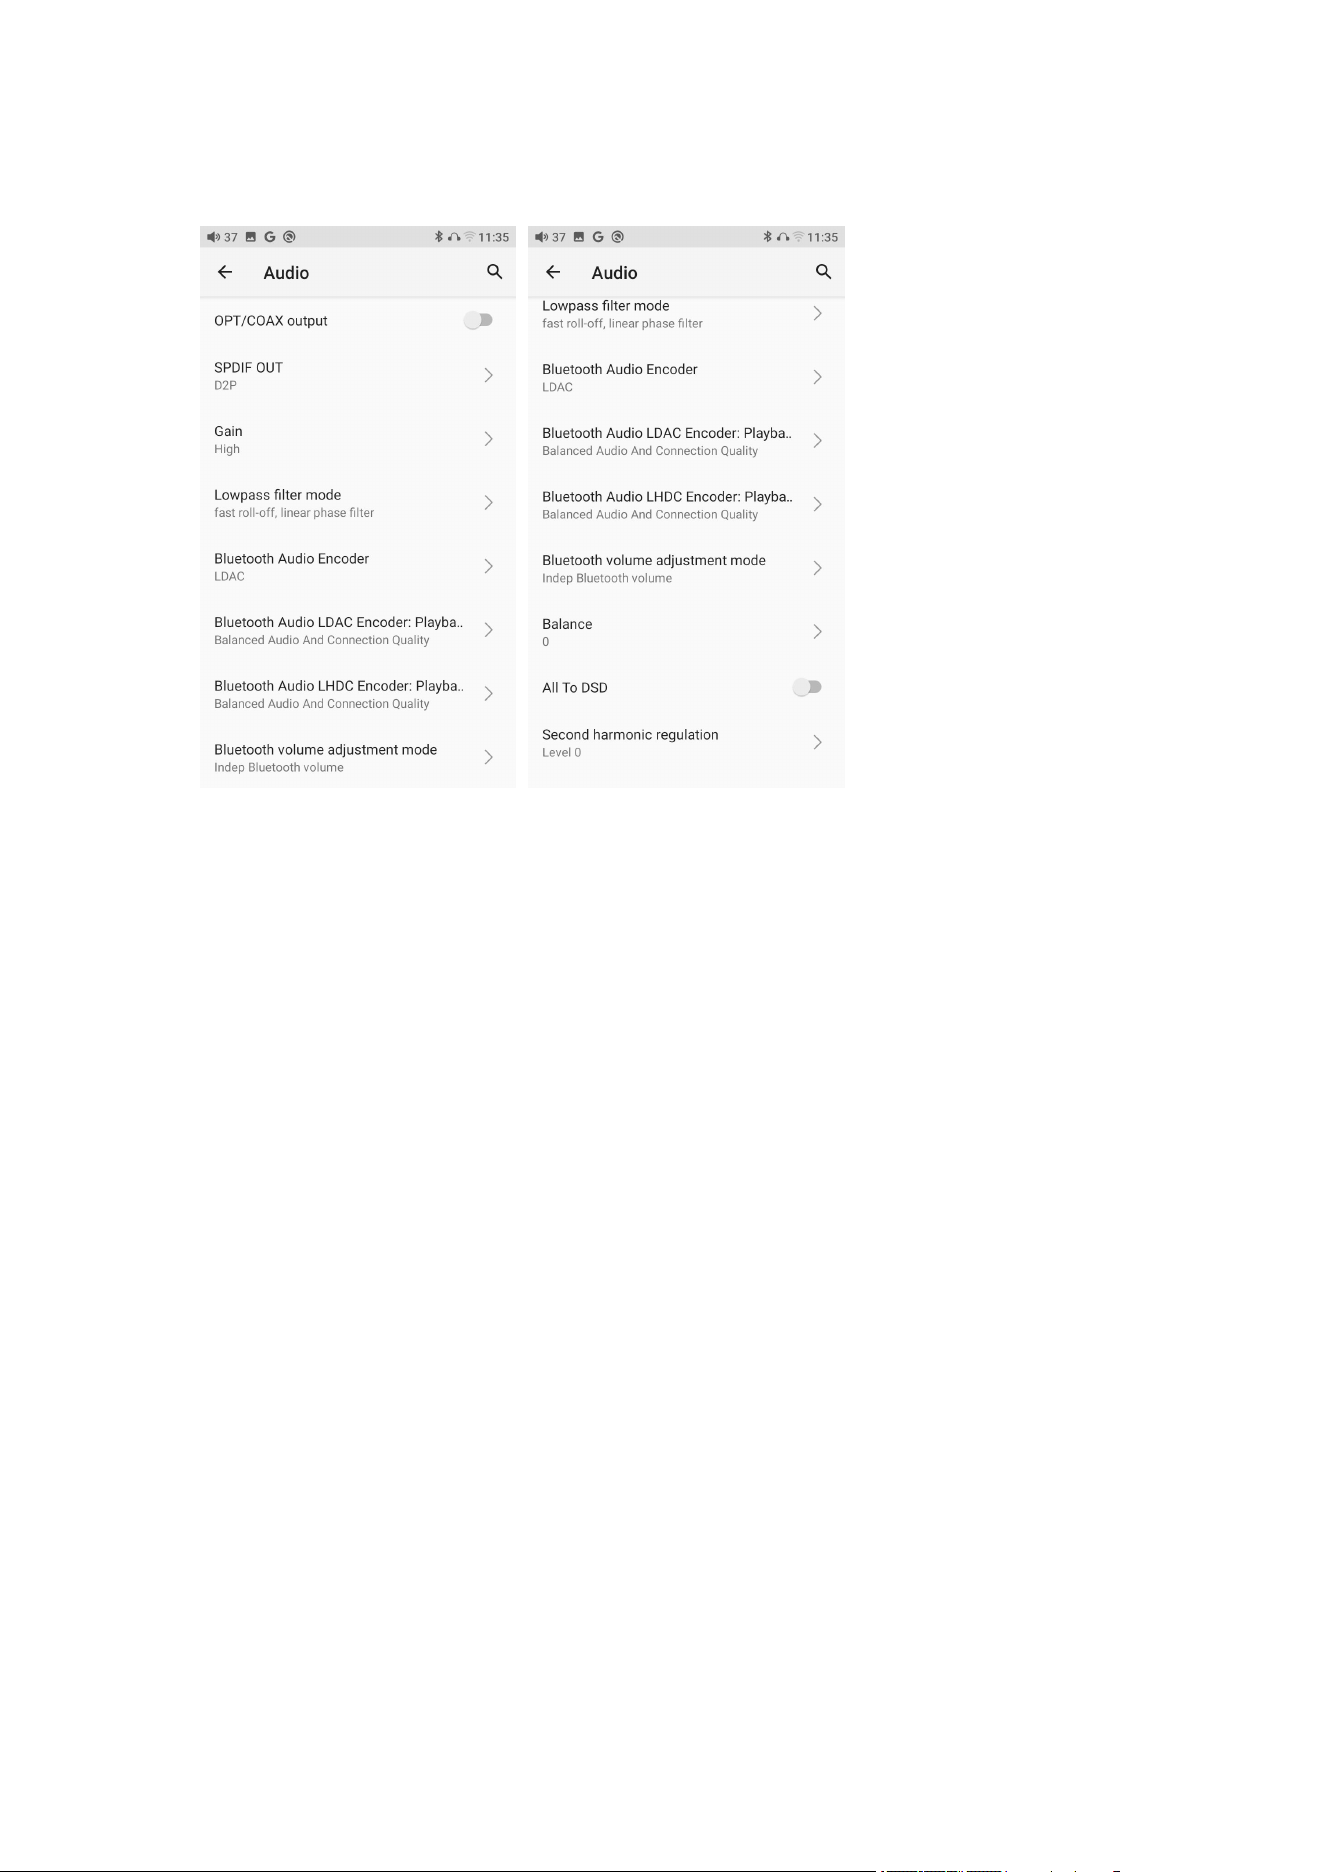
3. Audio
OPT/COAX output
Control the optical/coaxial output port, the default state is OFF.
SPDIF OUT
Coaxial output signal setting: This setting needs to be adjusted only when
using coaxial output
D2P mode, playing PCM signal will output native PCM signal; playing DSD
signal will output converted DSD signal;
DoP mode, PCM signal and DSD signal will be natively output.
[Note] DoP is preferred, D2P needs to selecting when some devices that do
not support DoP.
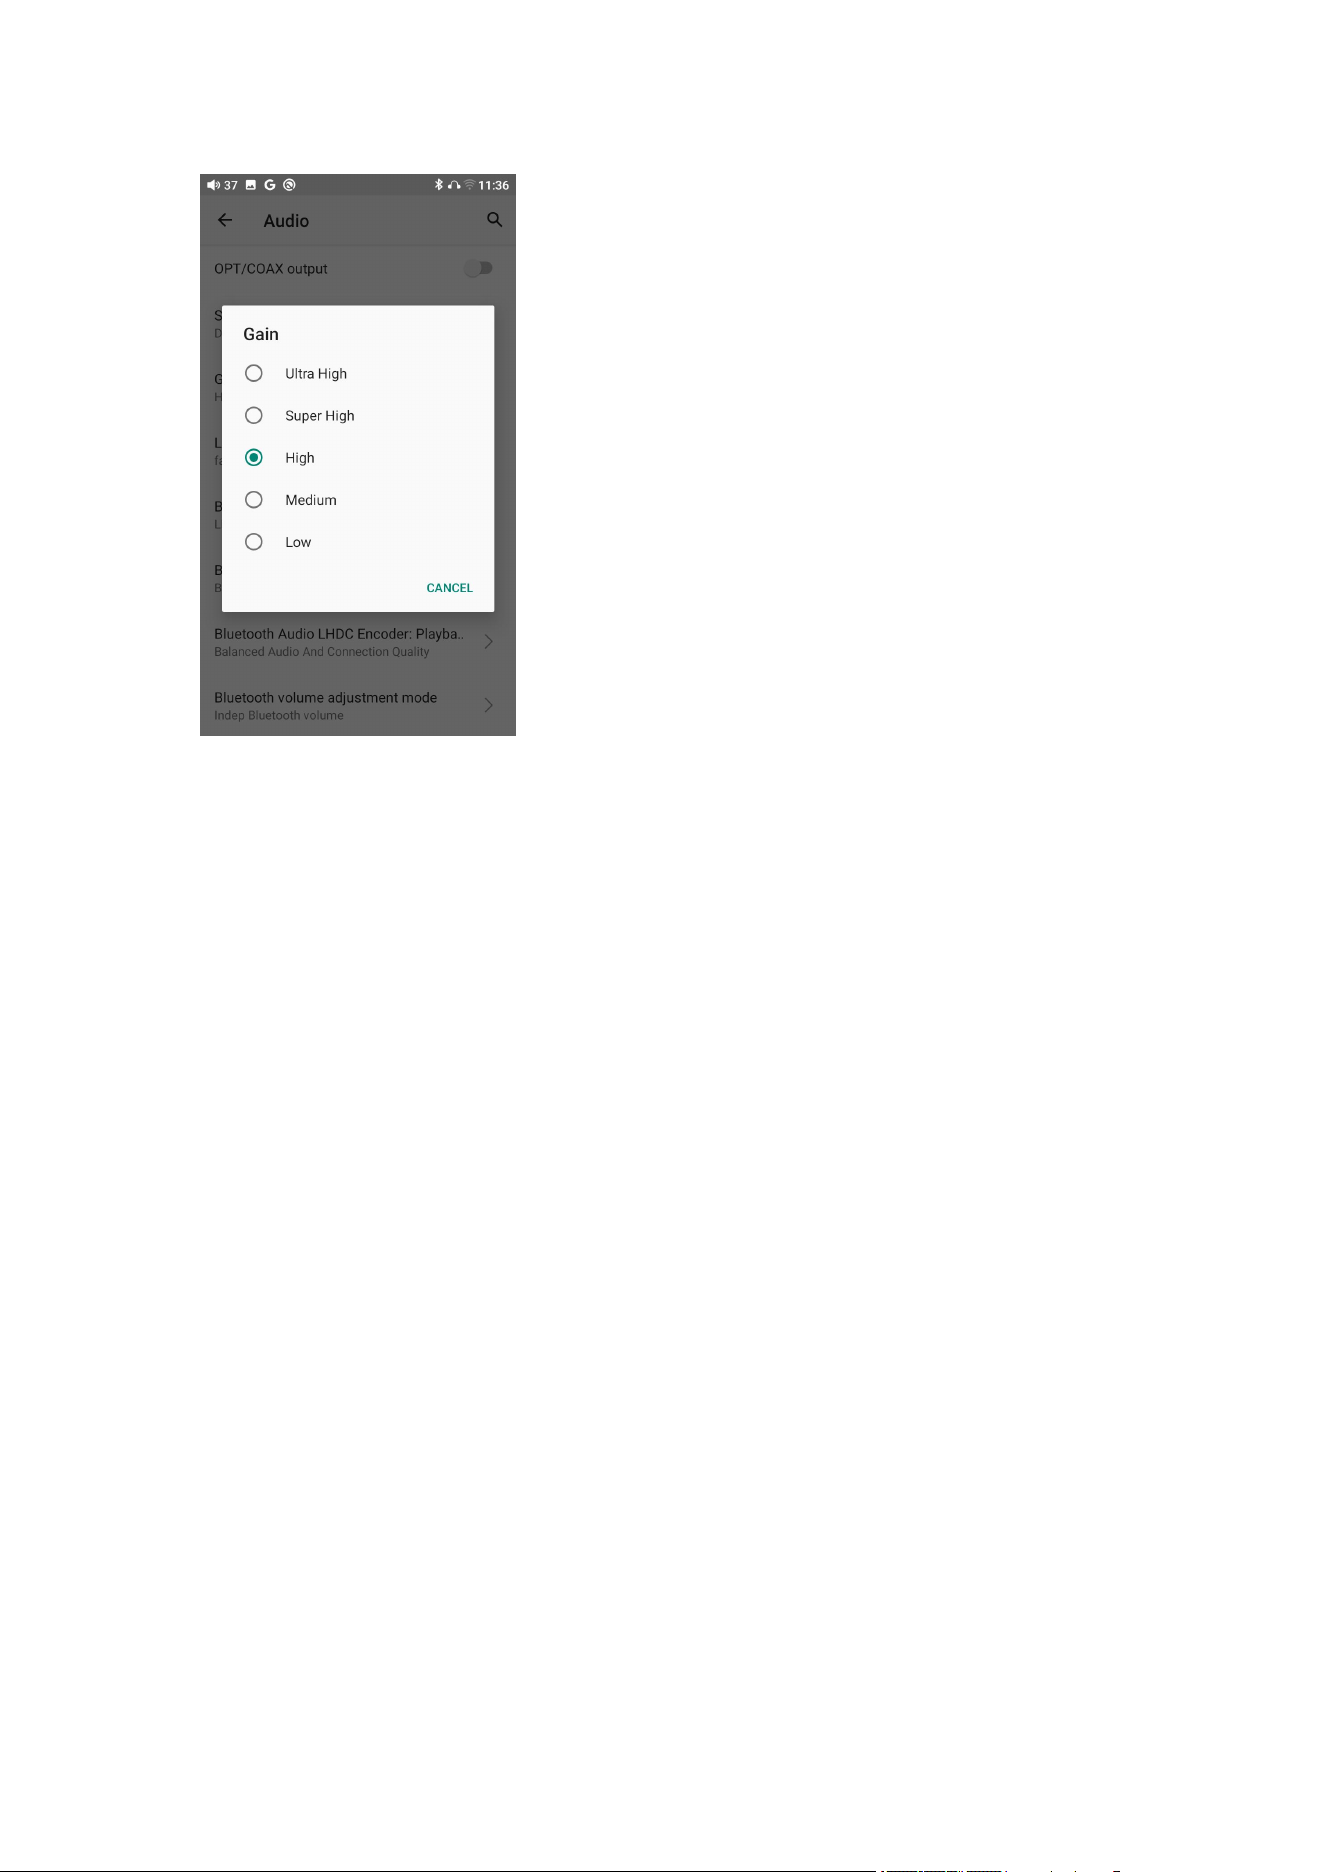
Gain
There are five gain levels: Ultra High, Super High, High, Medium, Low.
Corresponding to five levels of output voltage. You can choose different gains
according to your headphones.
Lowpass filter mode
There are seven different filters on the R9, you can choose them according to
your listening preferences.
Filters are some effects that come with the original DAC chips, and the
adjustment is subtle for the sound. The following is the hearing description of
some filters, for reference only:
Linear phase fast roll-off filter: the sound is full and mellow, the vocals are in
the behind, rich and full, with strong reverberation, suitable for pop music;
Linear phase slow roll-off filter: the sound is clean, the vocals are in the front,
clear and original, suitable for classical music;
Minumum phase fast roll-off filter: The sound is thicker and mid-frequency;
thick and warm, suitable for music with slower sound and rhythm;
Minimum phase slow roll-off filter: The sound is warmer and mid-frequency;
the sound field is large, suitable for large-scale music such as symphony;
Apodizing fast roll-off filter: The sound is restored to the original sound; the
music has a strong texture and is suitable for fast-paced music;
Hybrid fast roll-off minimum phase filter: The sound is full-bodied and suitable
for string instruments.
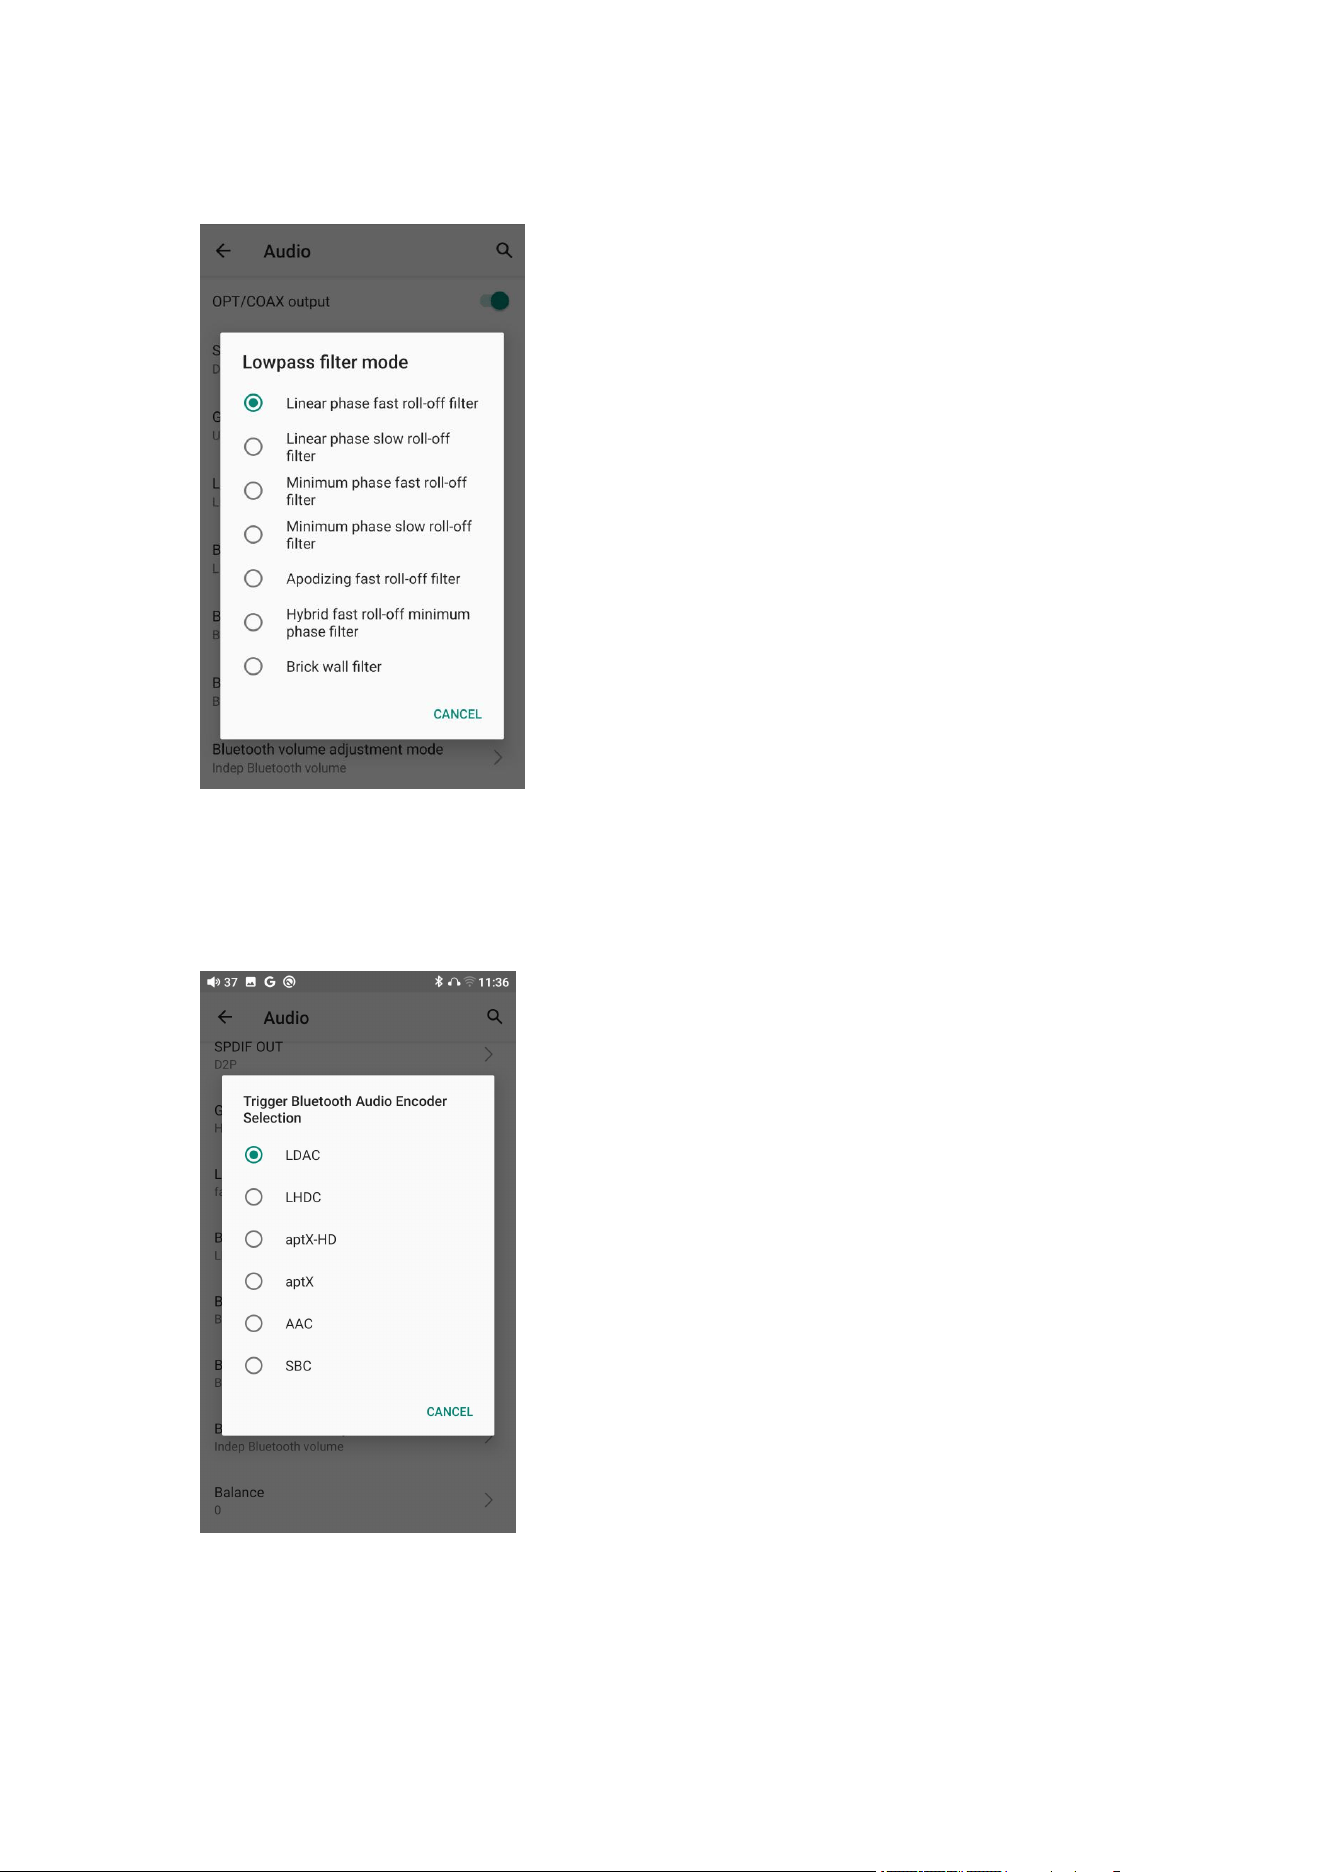
Brick wall filter: The sound is warm and neutral in tone.
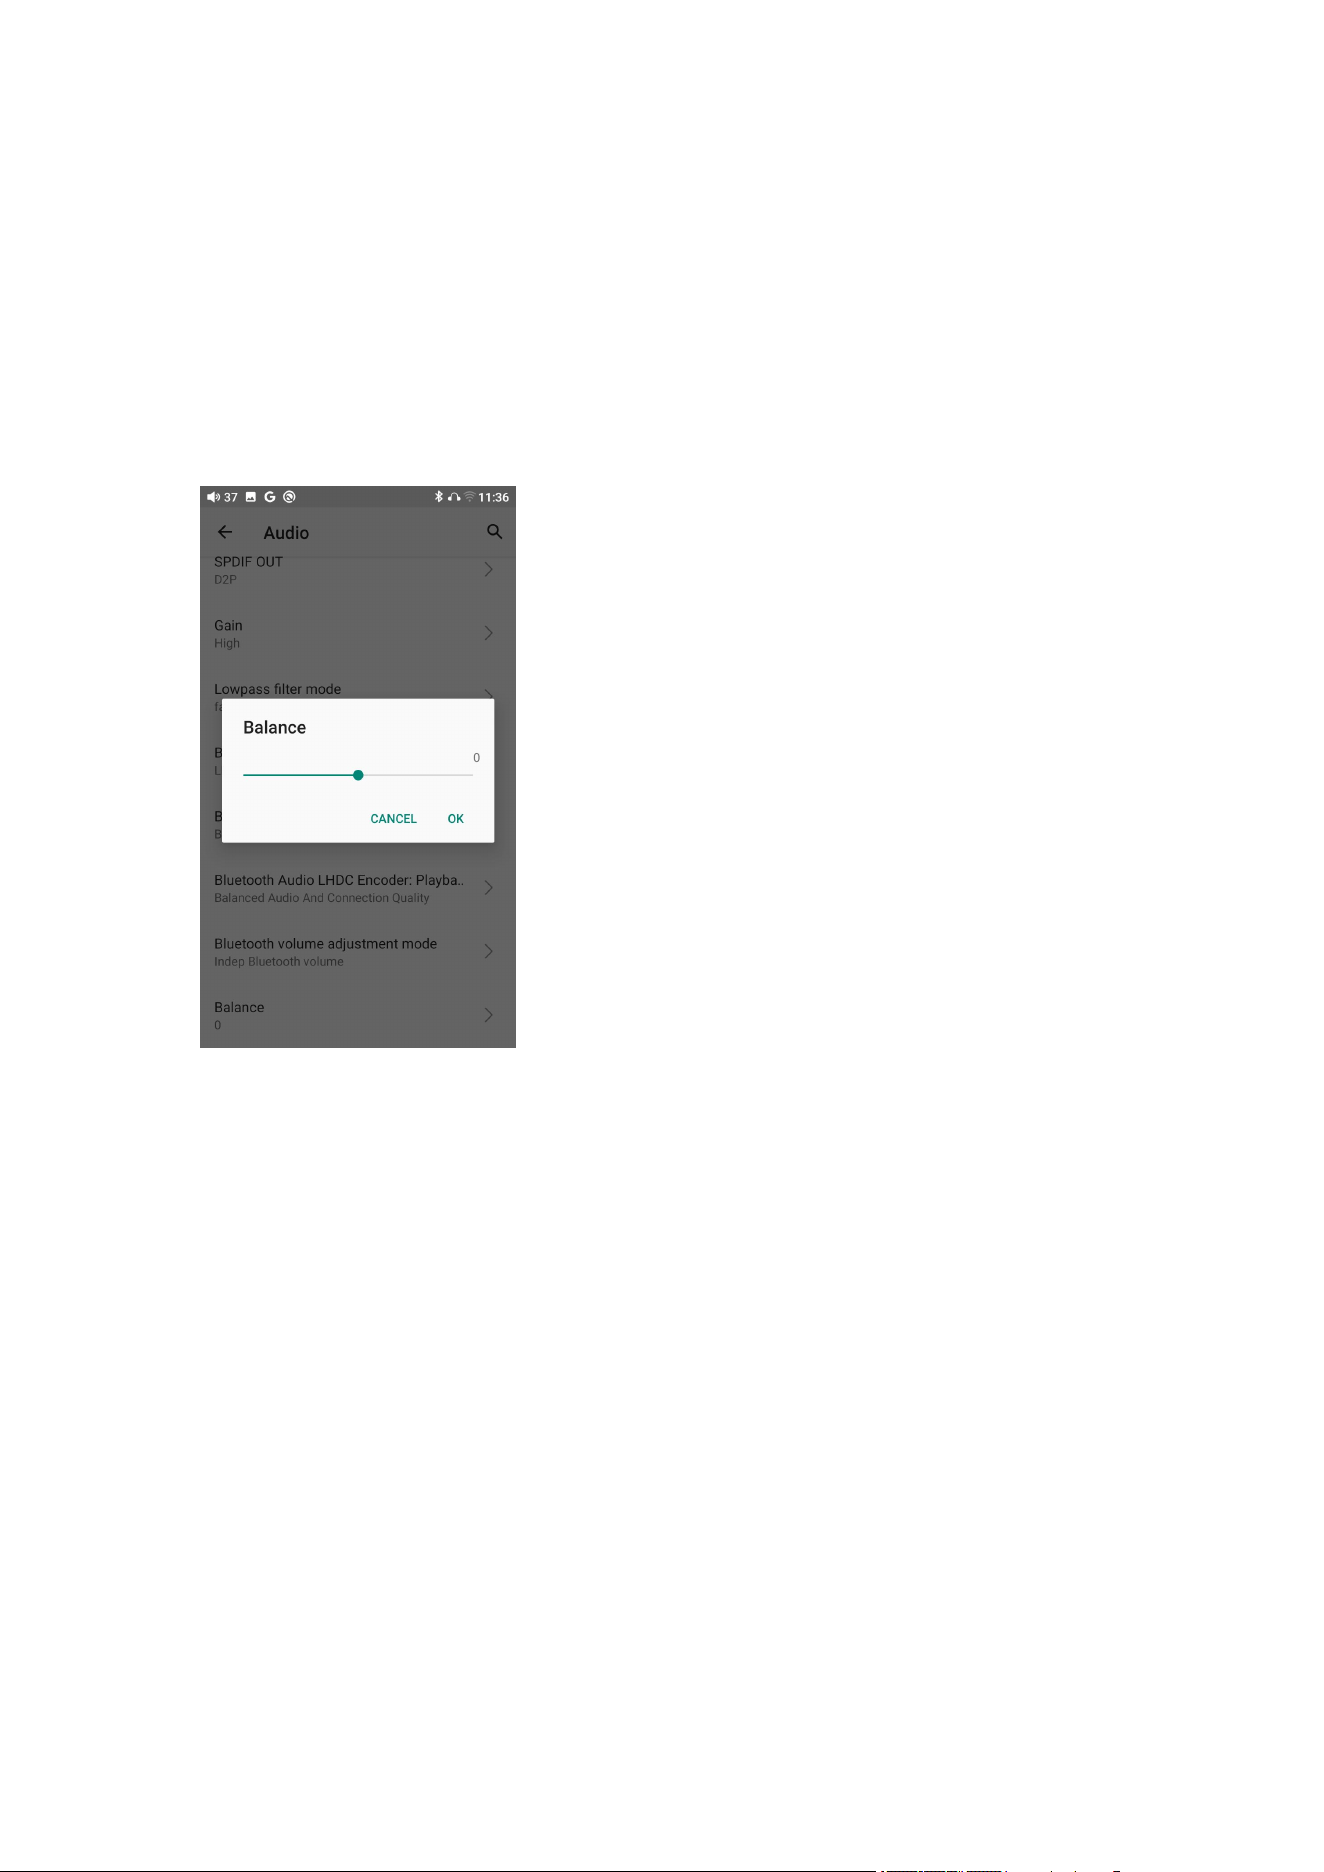
Bluetooth Audio Encoder
The default codec for Bluetooth transmission is the highest supported codec,
and you can select the supported encoding through this setting.
Bluetooth Audio LDAC Encoder: Playback Quality
When meeting playback problems during LDAC Bluetooth transmission, you
can adjust this option to balance audio and connection quality.
Bluetooth Audio LHDC Encoder: Playback Quality
When meeting playback problems during LDAC Bluetooth transmission, you
can adjust this option to balance audio and connection quality.
Balance
When you encounter channel deviation, you can adjust the balance of the left
and right channels here. Up to 20 levels of adjustment is supported.
ALL TO DSD
After turning on the All to DSD, the global PCM audio will be converted to DSD
for output, and the sound quality will be further improved.
[Principle] The most important thing of All To DSD is to convert the digital signal
in PCM format to DSD format, so that the DSD format can be used when
performing D/A conversion to obtain different styles of sound, more clear and
natural sound. In addition, since the lowest DSD format is DSD64, which is 4
times the data of 44.1K/16BIT only calculated from the amount of data, so ALL
TO DSD is also equivalent to up-sampling the PCM signal. The effect of All To
DSD also supports third-party APP.
Second harmonic regulation
It simulates the special distortion of tube amplifiers. The second harmonic that
doesn't exist in the original signal is artificially increased.
Compared to level 0, level 1 adds more second harmonics. If comparing the
numbers, the harmonic distortion is about 0.X% for level 2, about 0.0X% for
level 1, and about 0.00X% when off.
Note: This function is only effective when the volume is high, for example: in
high (or higher) gain mode, the effect will be more obvious when the volume is
above 70.
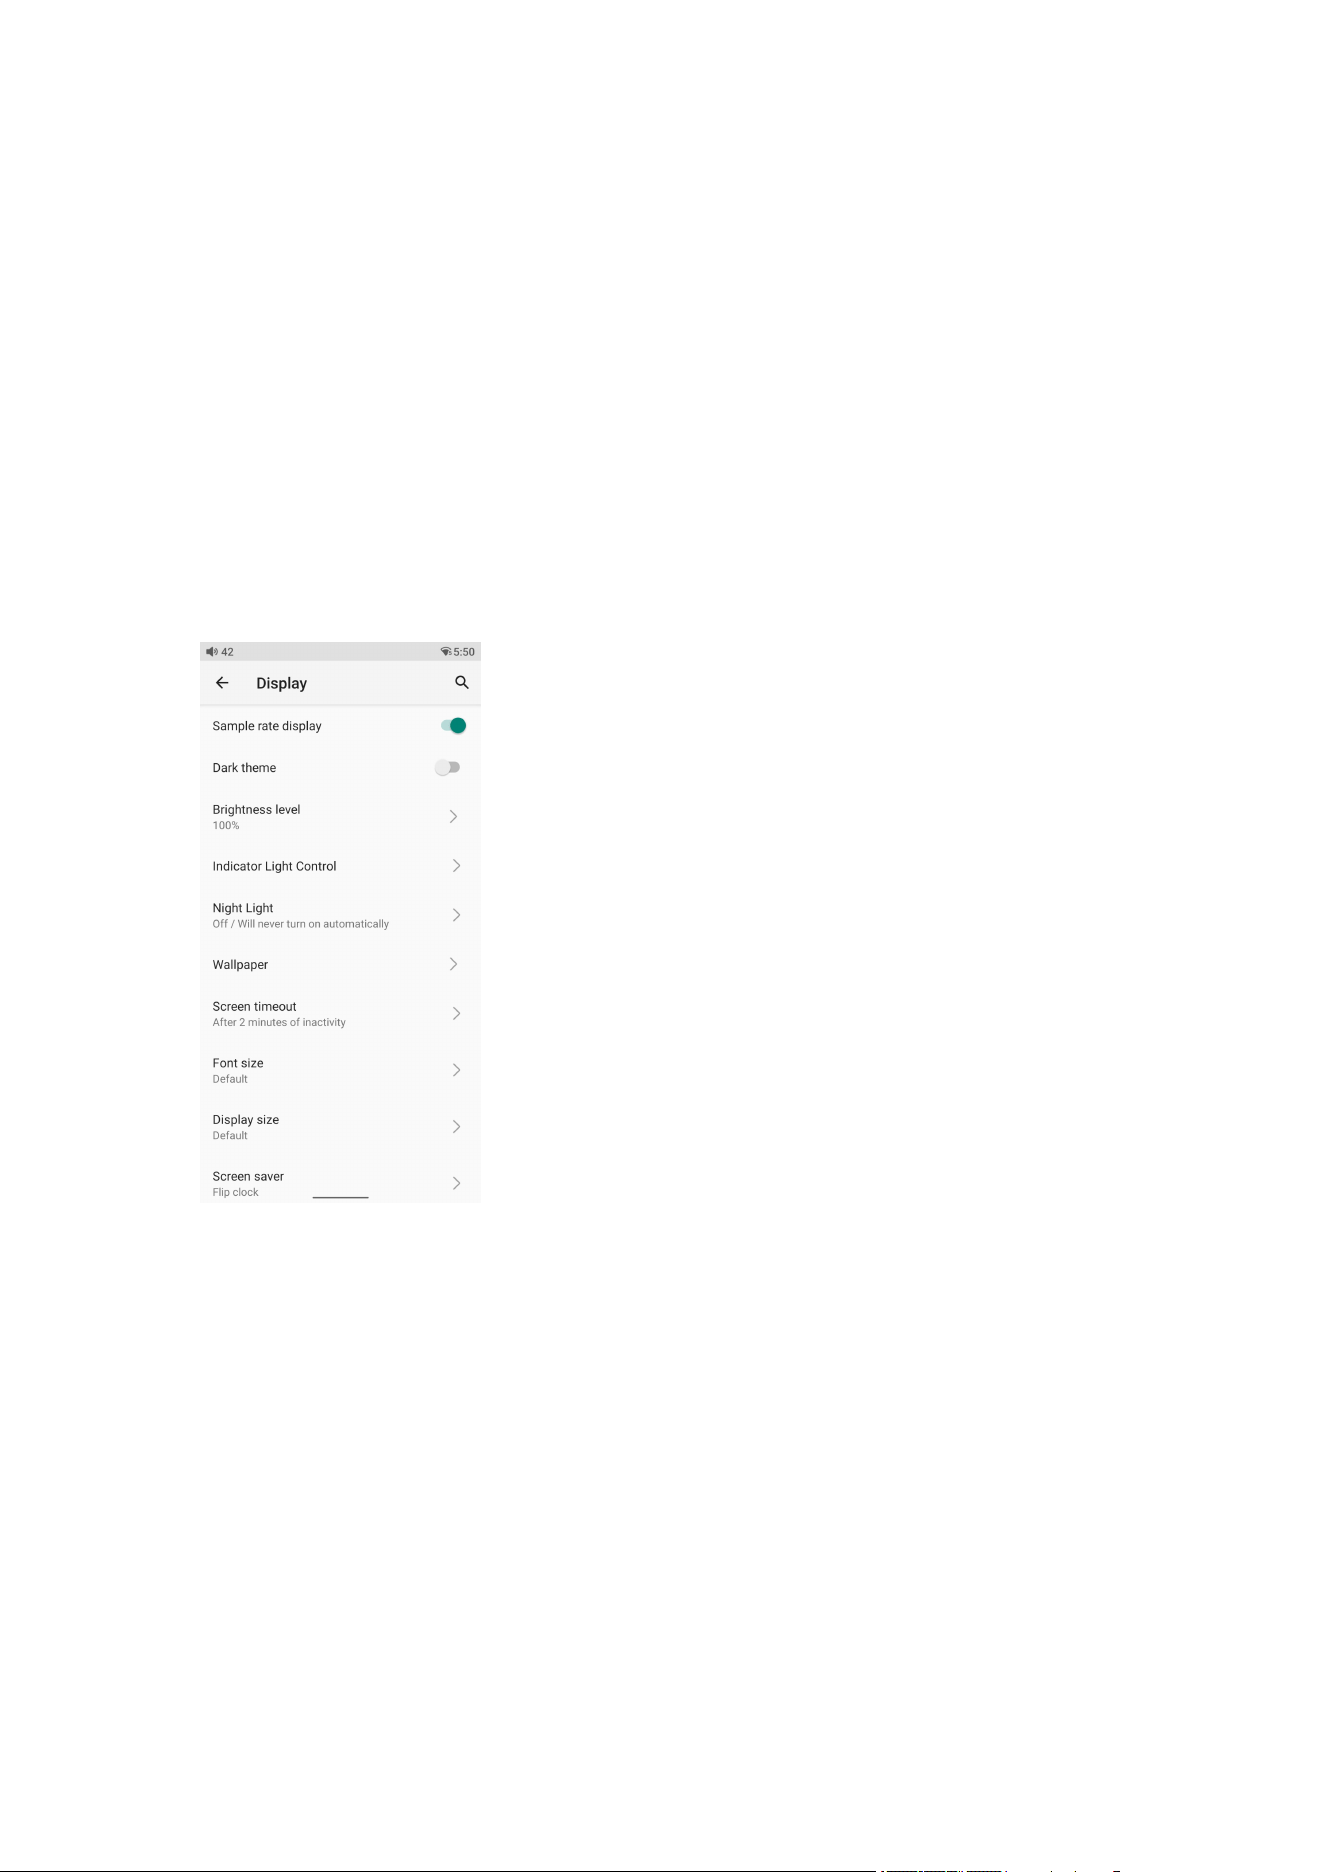
4. Display
The display settings consist of Sample rate display, Dark theme, Brightness
level, Indicator Light Control, Night Light, Wallpaper, Screen timeout, Font size,
Display size, Screen saver. The following are detailed descriptions of some
common items.
Sample rate display
With it turned on, the sample rate of the currently playing song will be
displayed.
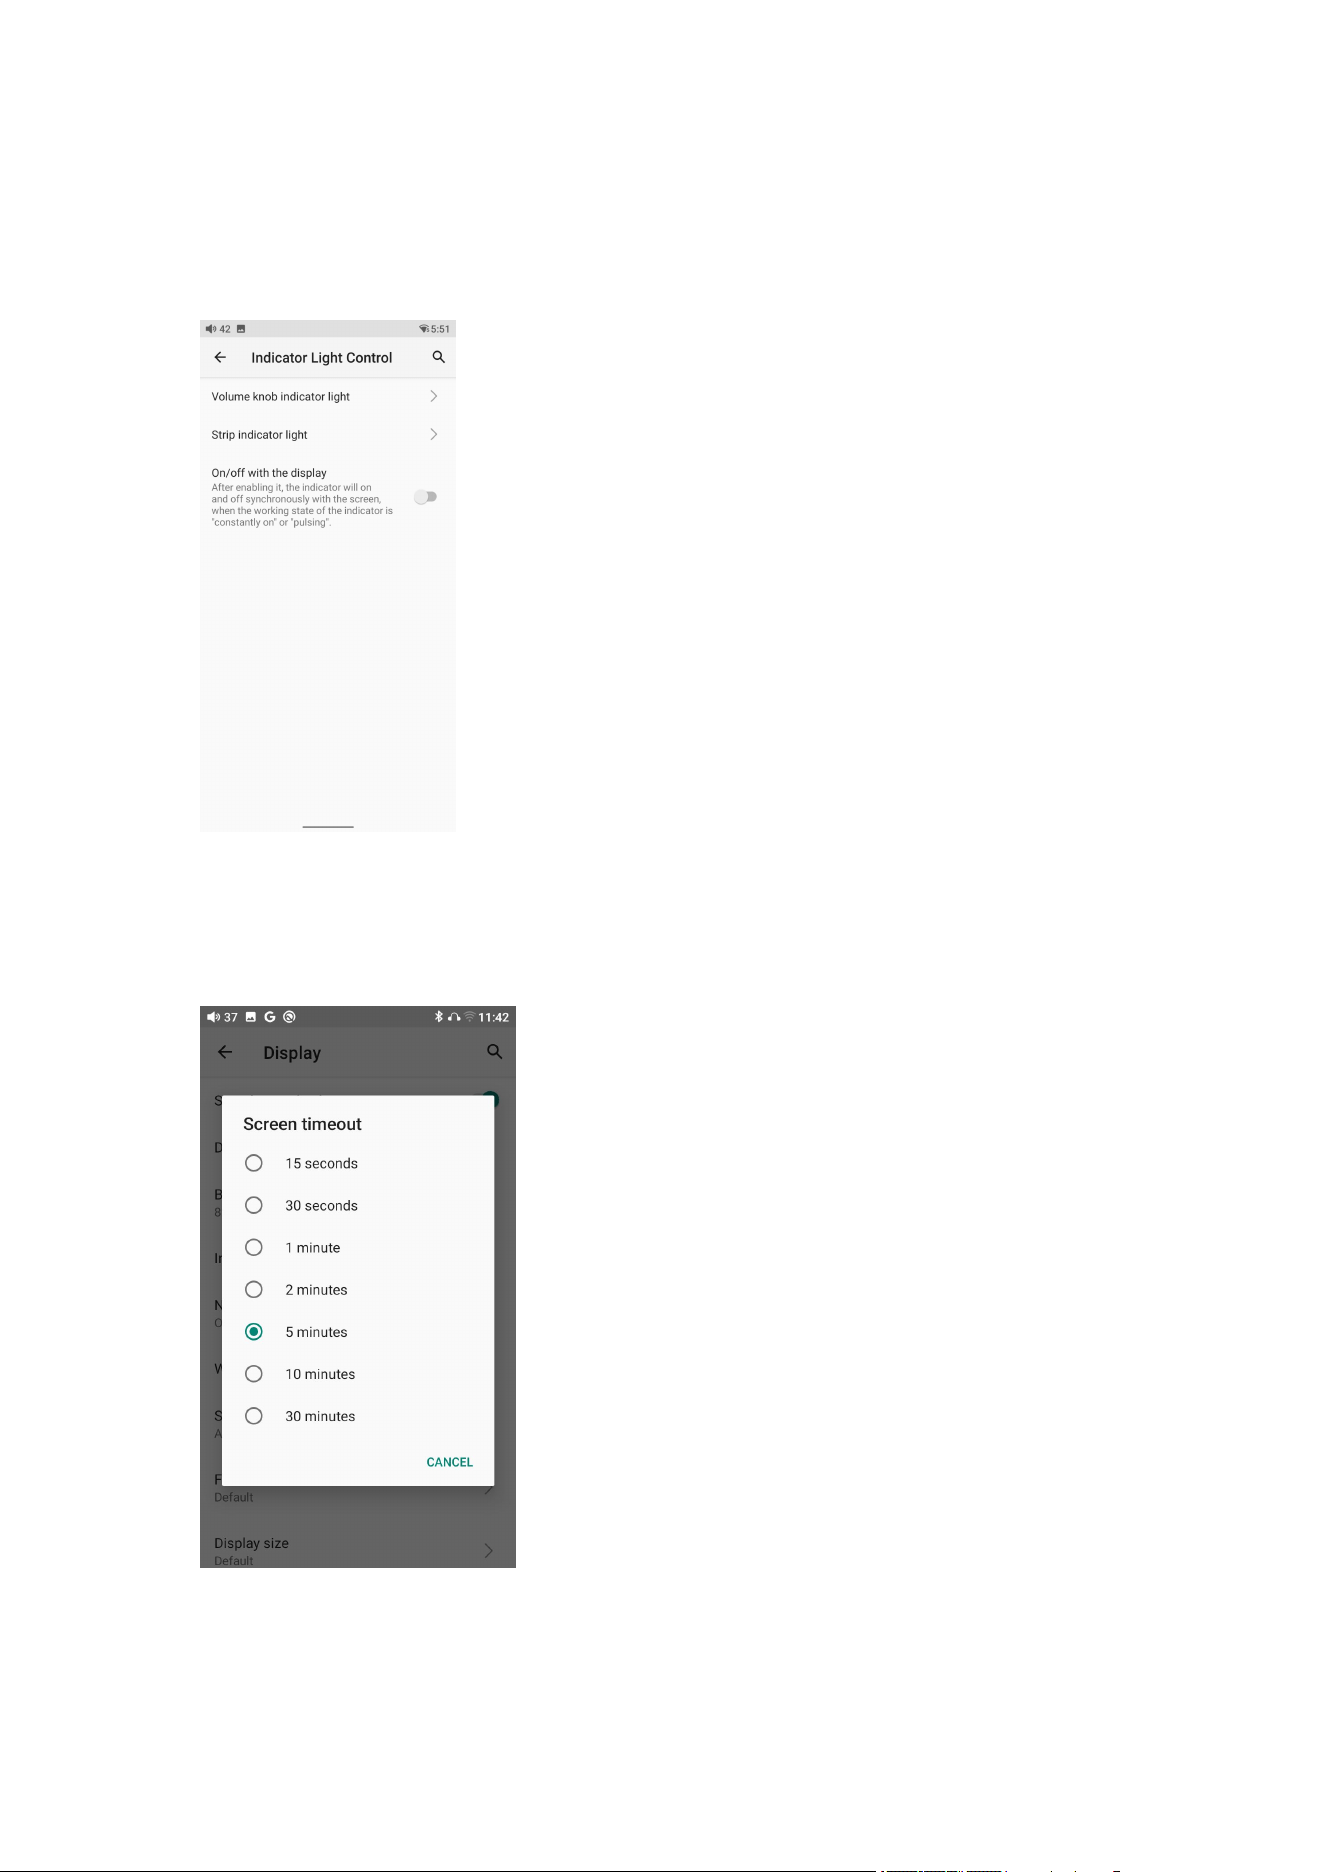
Indicator Light Control
The brightness level and light color of the volume knob indicator and Output
Knob indicator light under working and charging status can be set in this menu.
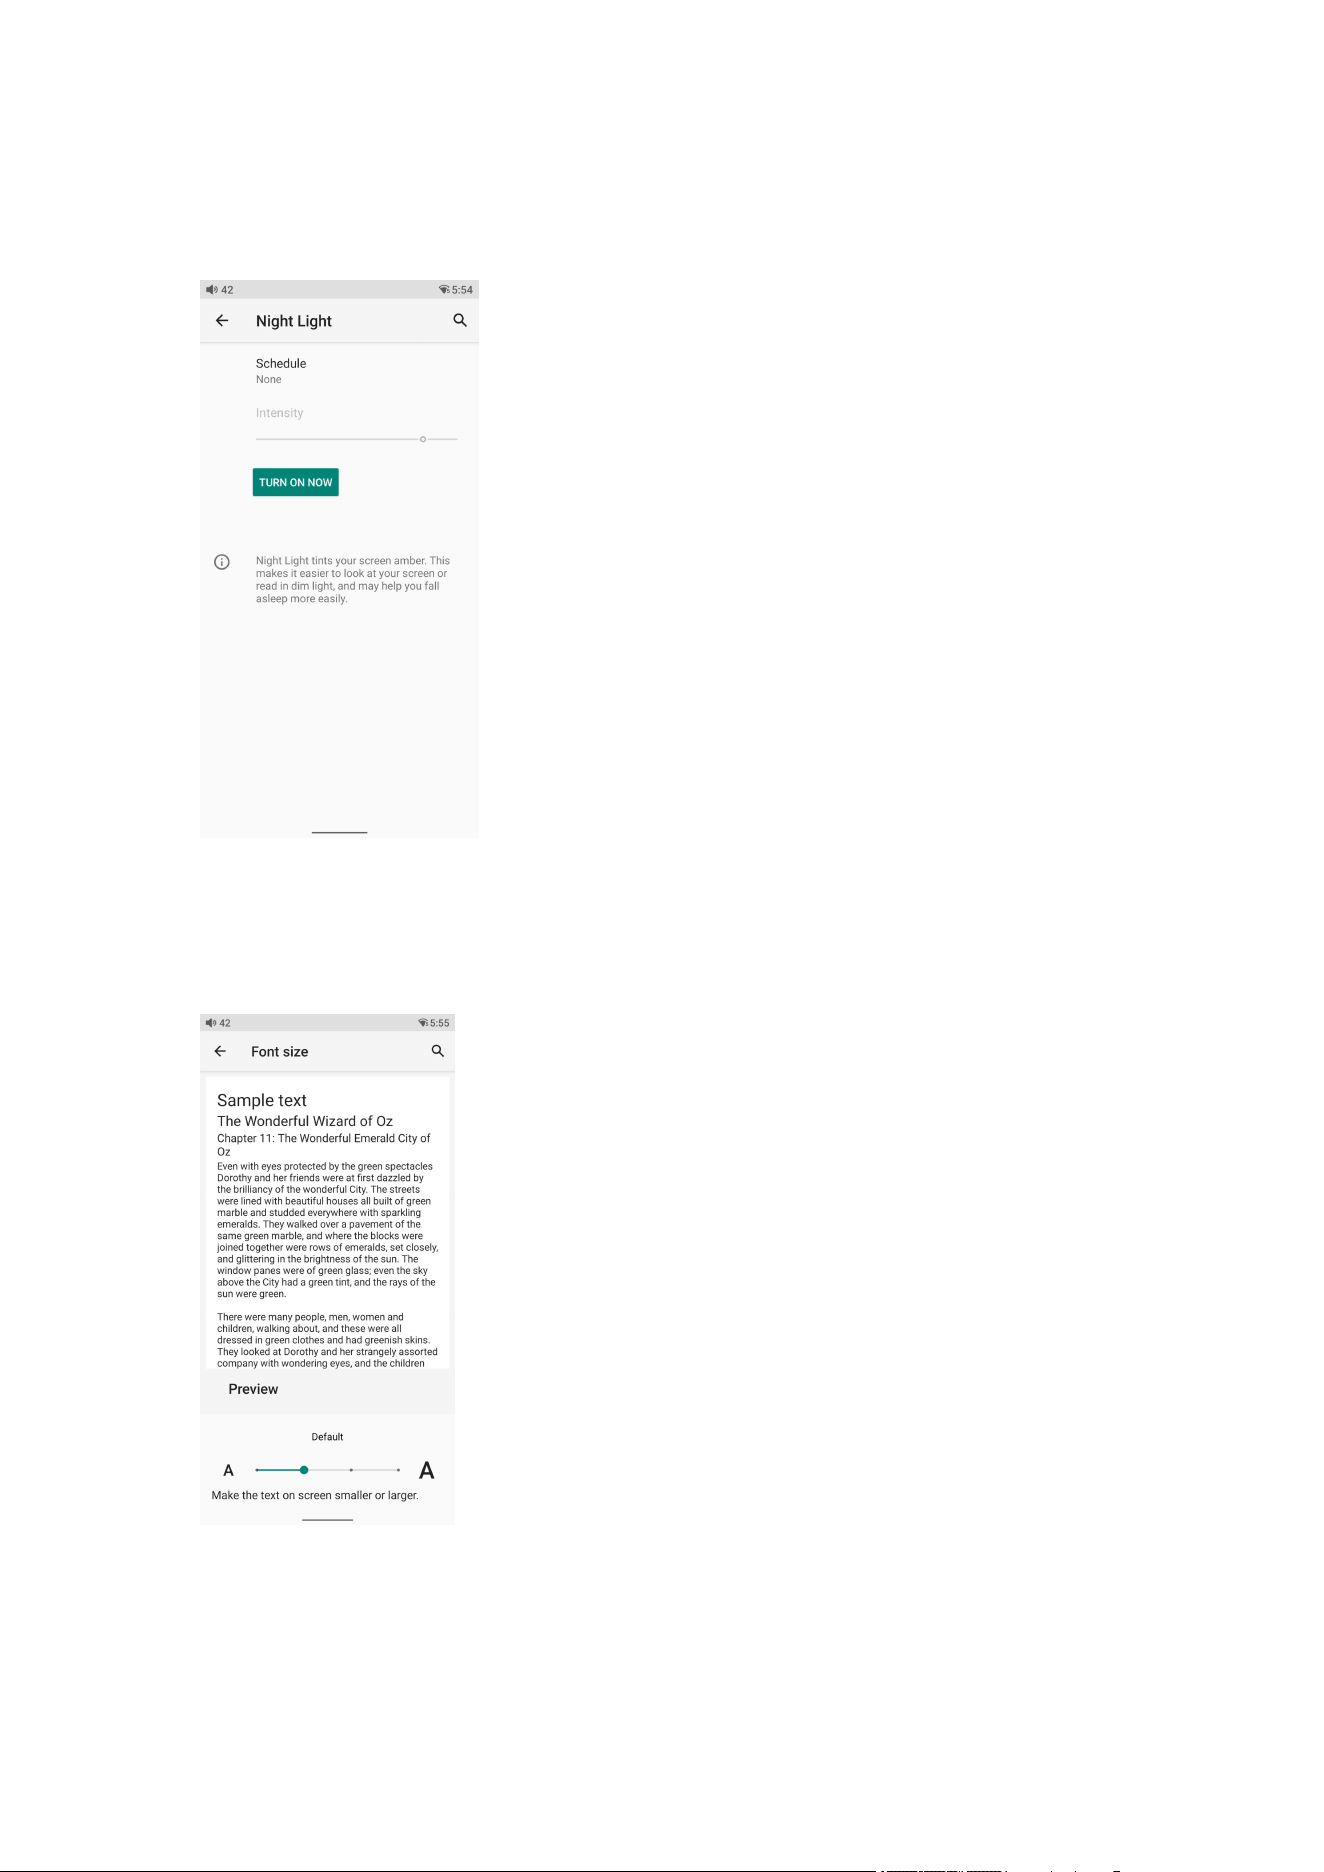
Screen timeout
This option is to set the time when the device will enter sleeping mode after
inactivity. Short press the Power/Lockscreen button to wake it up.
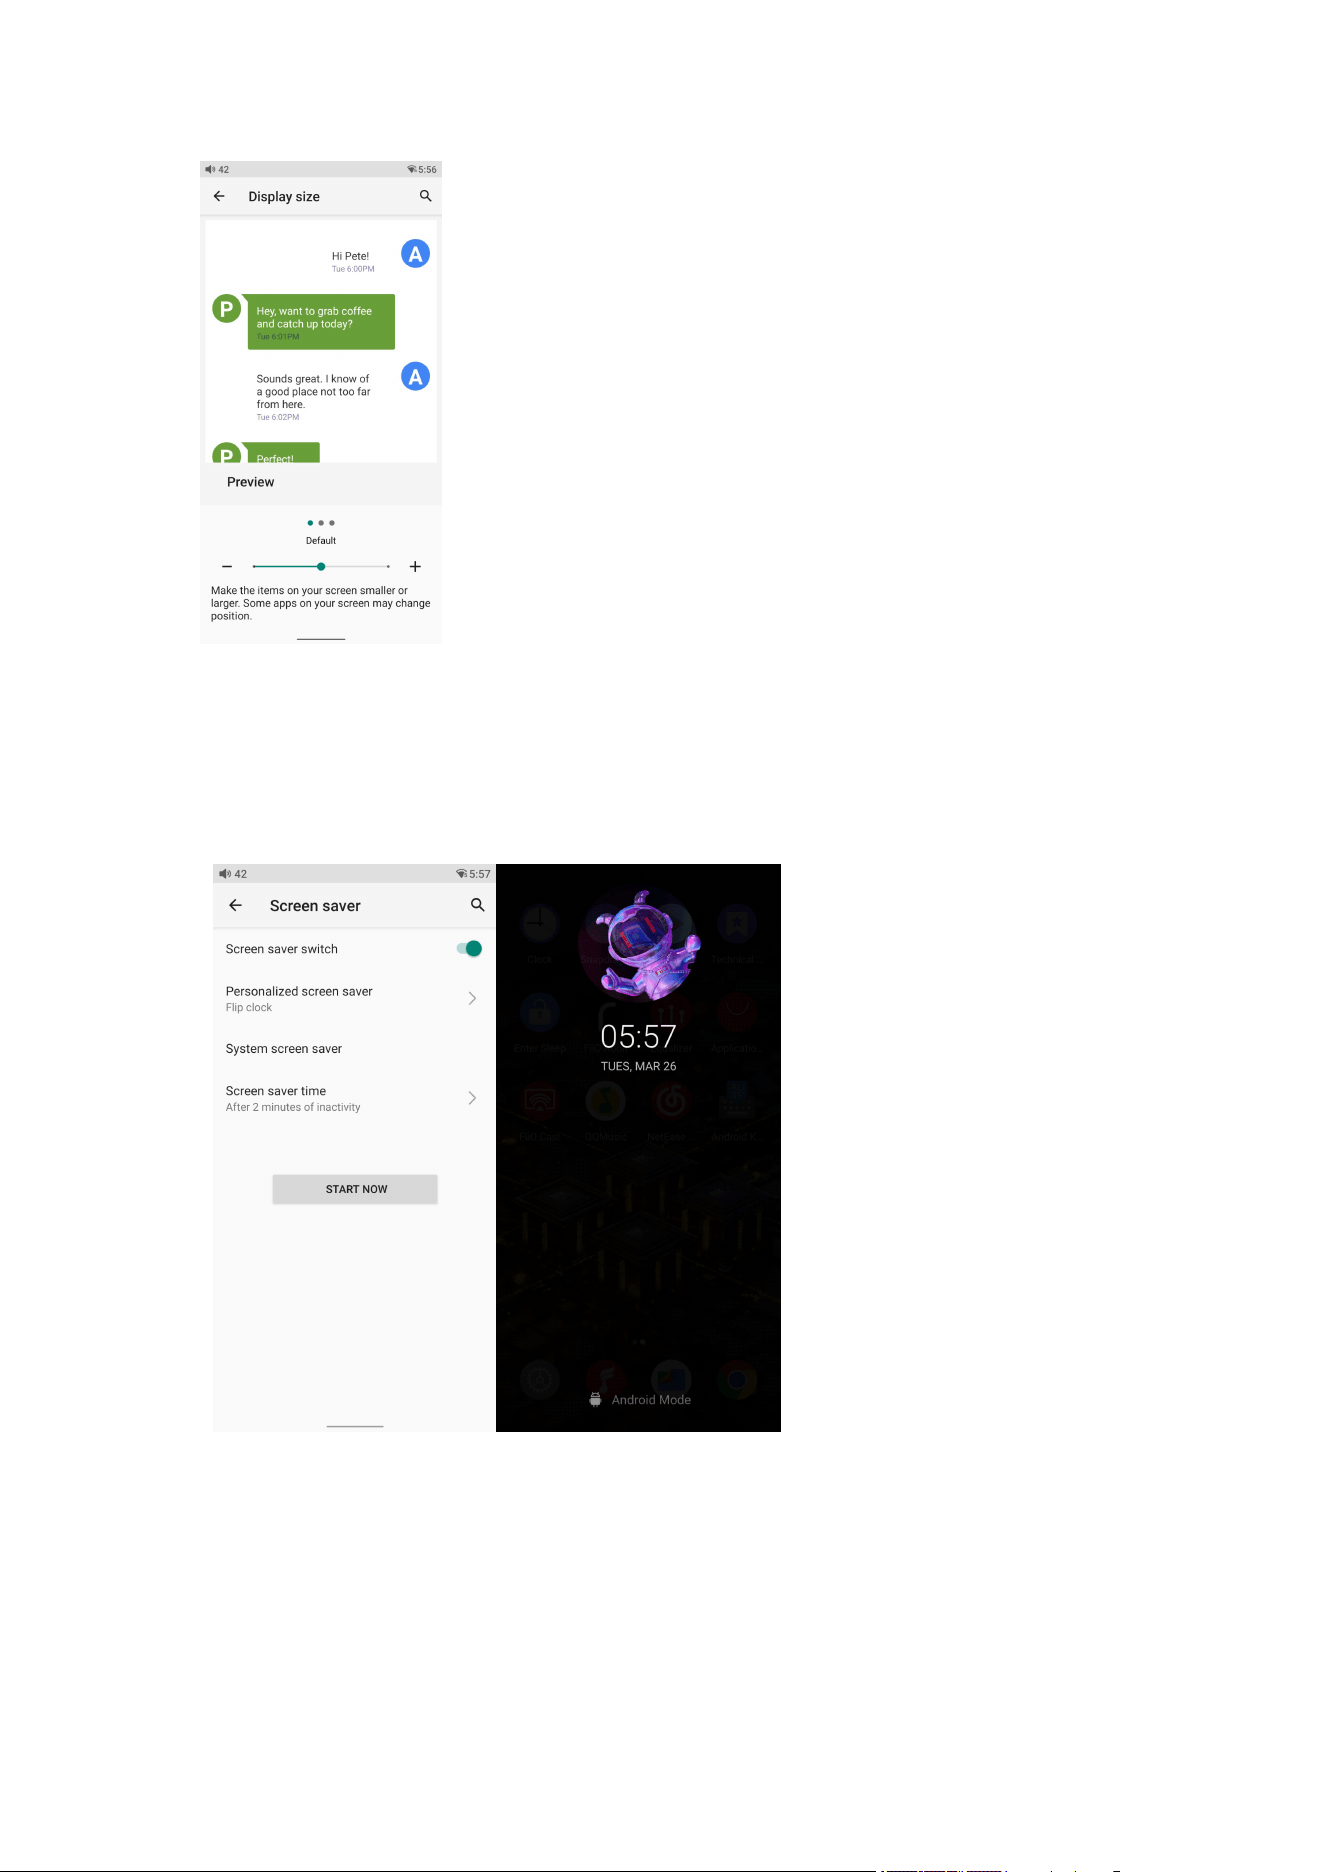
Night light
The color of the display screen will be adjusted in amber under Night light
mode. You could enable the Night light mode at a custom time , or from sunset
to sunrise.
Font size
There are four standards available, which respectively are small, default, large
and largest.
Display size
The display size corresponds to the size of the icons and texts displayed on
the screen.
Screen saver
Select the Personalized screen saver or system screen saver.
Screen saver time: The R9 will enter the screen saver page when not
operating the R9 within the setting time.
5. Global
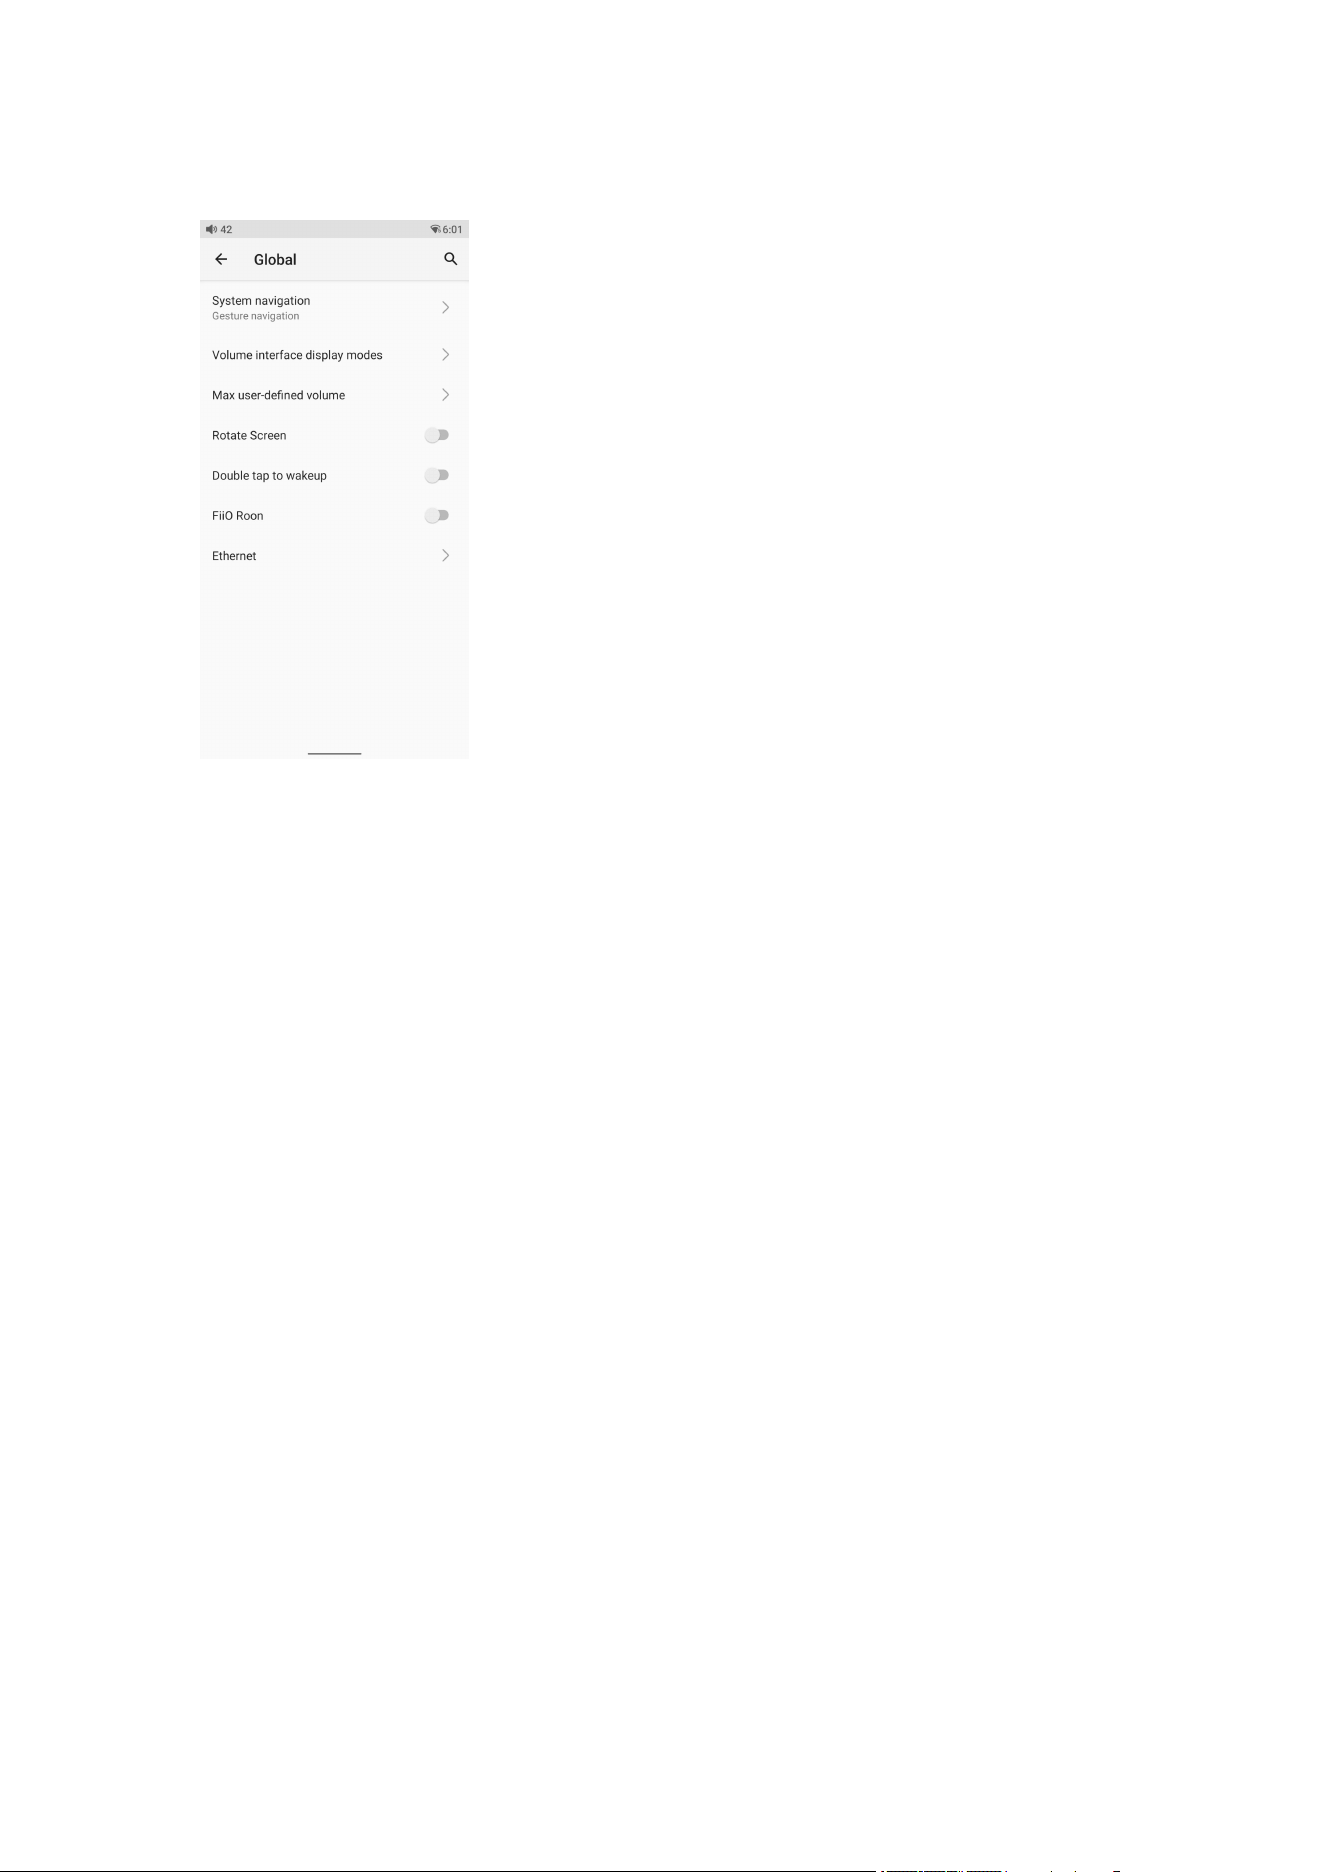
System navigation
There are 3 navigation ways for your preference and needs, including Gesture
navigation, 2-button navigation and 3-button navigation.
Volume interface display modes
Two different volume display modes are available.
Max user-defined volume
After setting the maximum volume, subsequent adjustments to the device
volume cannot exceed this volume value.
Rotate screen
The display page will rotate 180° if it is enabled.
Double tap to wakeup
If it is enabled, double tap the screen can wake up the R9 when it is under off
or in sleeping states.
FiiO Roon
The R9 allows you to access music from a ROON CORE source such as a
NAS or a computer.
How to use FiiO Roon(Roon Ready) in R9?

1. You need to have a PC running Roons core software before anything else.
You can’t just run it on the R9 since it is only an endpoint or controller. Official
website of Roon: https://roonlabs.com/
2. Download Roon on your computer and log in your Roon account. On the
computer:
Roon-Setting-Storage: Add local music or log in your Tidal account as the
media library
Roon-Setting-Audio: Enable the R9.
3. The computer and R9 should connect to the same Ethernet. Start the Fiio
Roon in R9 and start up the Roon Ready feature on the R9 to enable full bit
perfect audio.
Ethernet
When it is enabled, the R9 can connect to the Internet directly through a
network cable instead of connecting to Wifi, which brings less interference.
It is on by default. When wired network and WiFi are connected at the same
time, the wired network will be selected first.
6. System
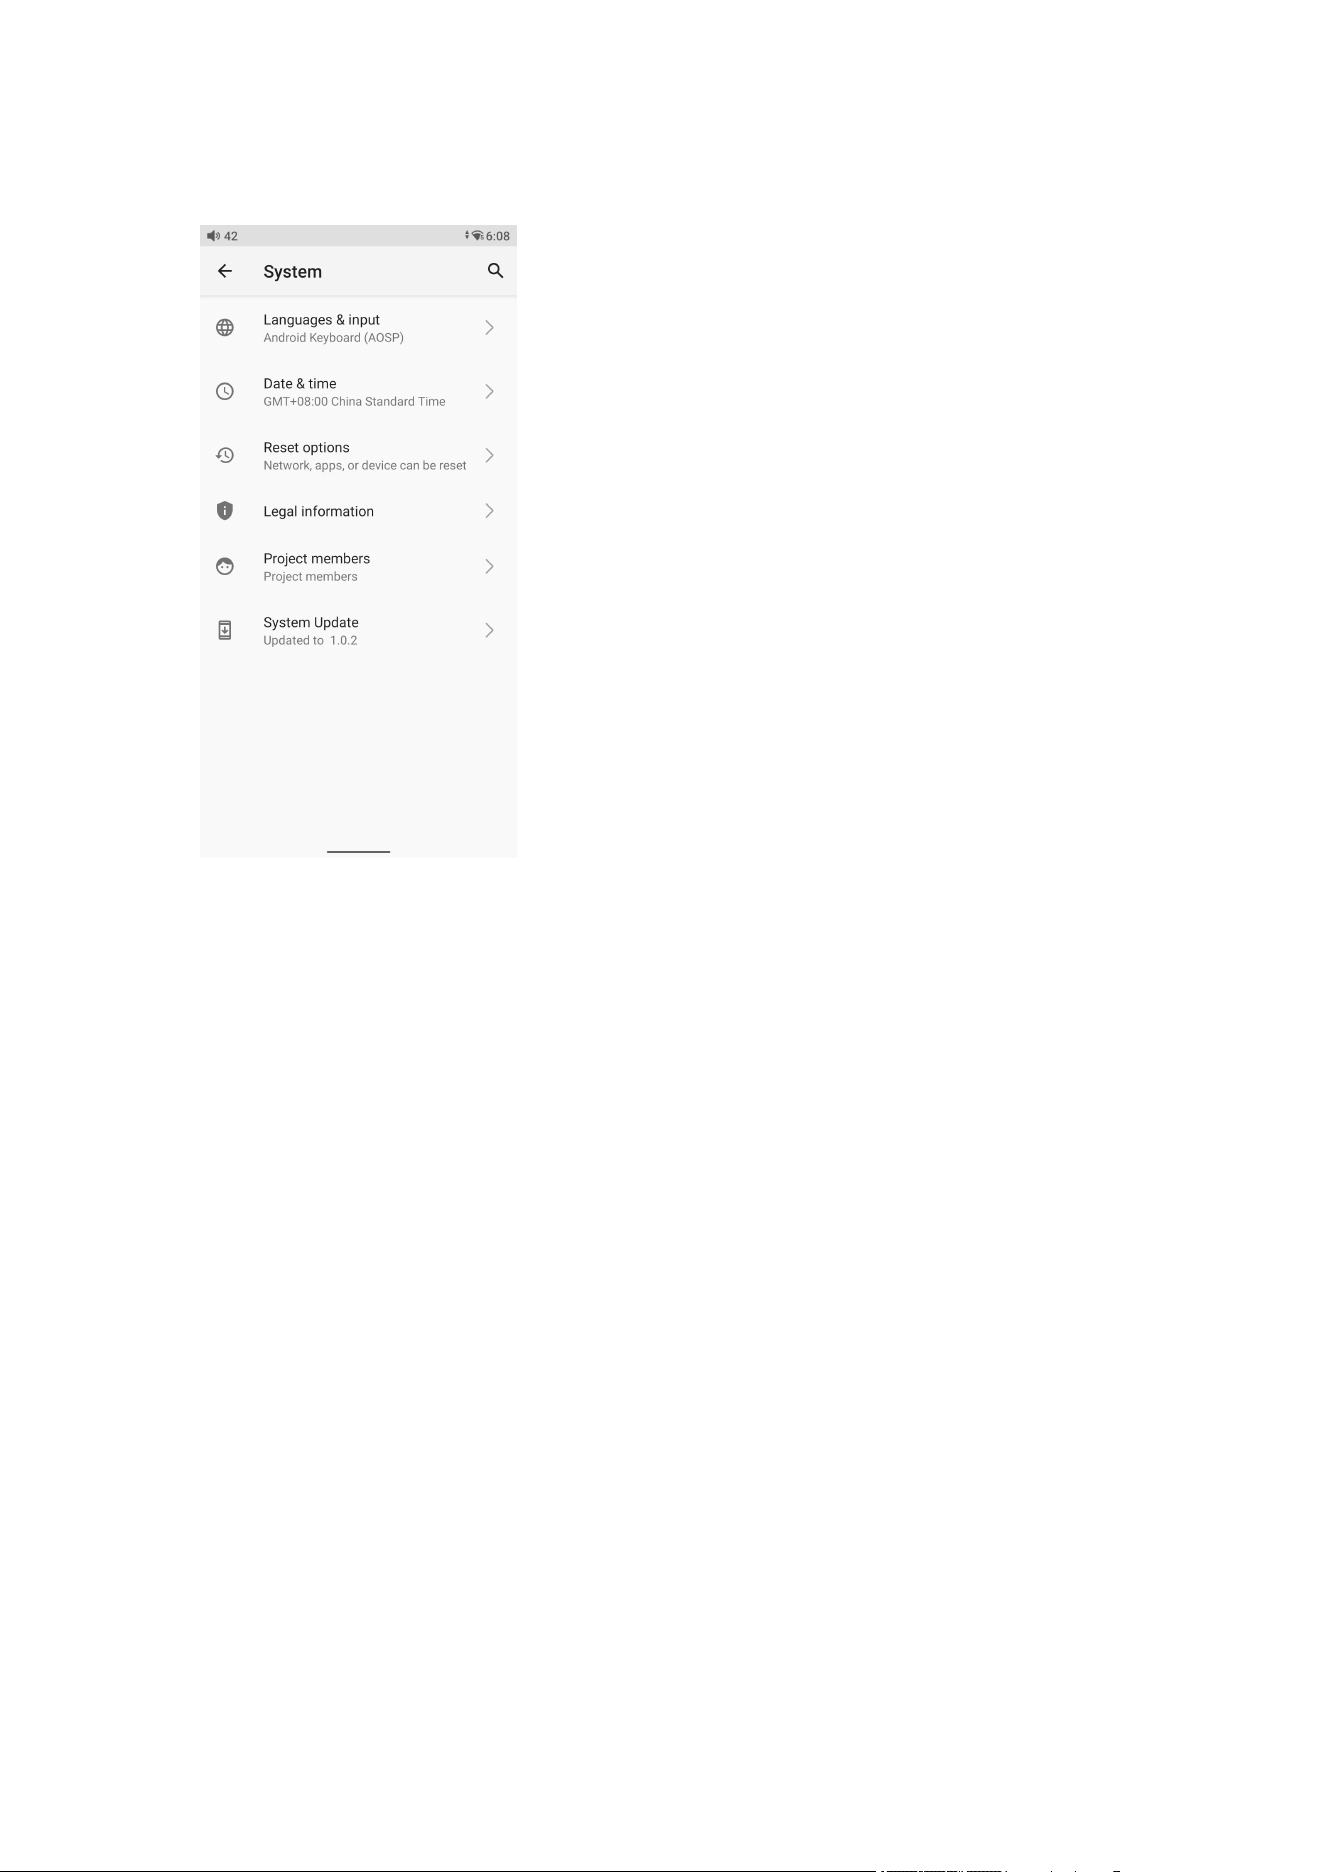
Languages & input
The first time the device starts up, you can choose an appropriate language
from the prompt.
If you want to choose other languages, you can go to the Settings menu. Here
are the instructions.
1) Go to the menu of Settings-> System-> Languages & input-> Languages;
2) In the Languages page, tap Add a language;
3) Select a language;
4) After selecting the language, hold the “=” icon on the right side of the target
language and drag it to the top, so to successfully select the language.
Reset options
"Reset WiFi, mobile & Bluetooth" will reset all network settings, including WiFi
and Bluetooth.
"Reset app preferences" will reset all preferences including the items shown in
the following picture.
"Erase all data", i.e. factory reset, will erase all data from your device's internal
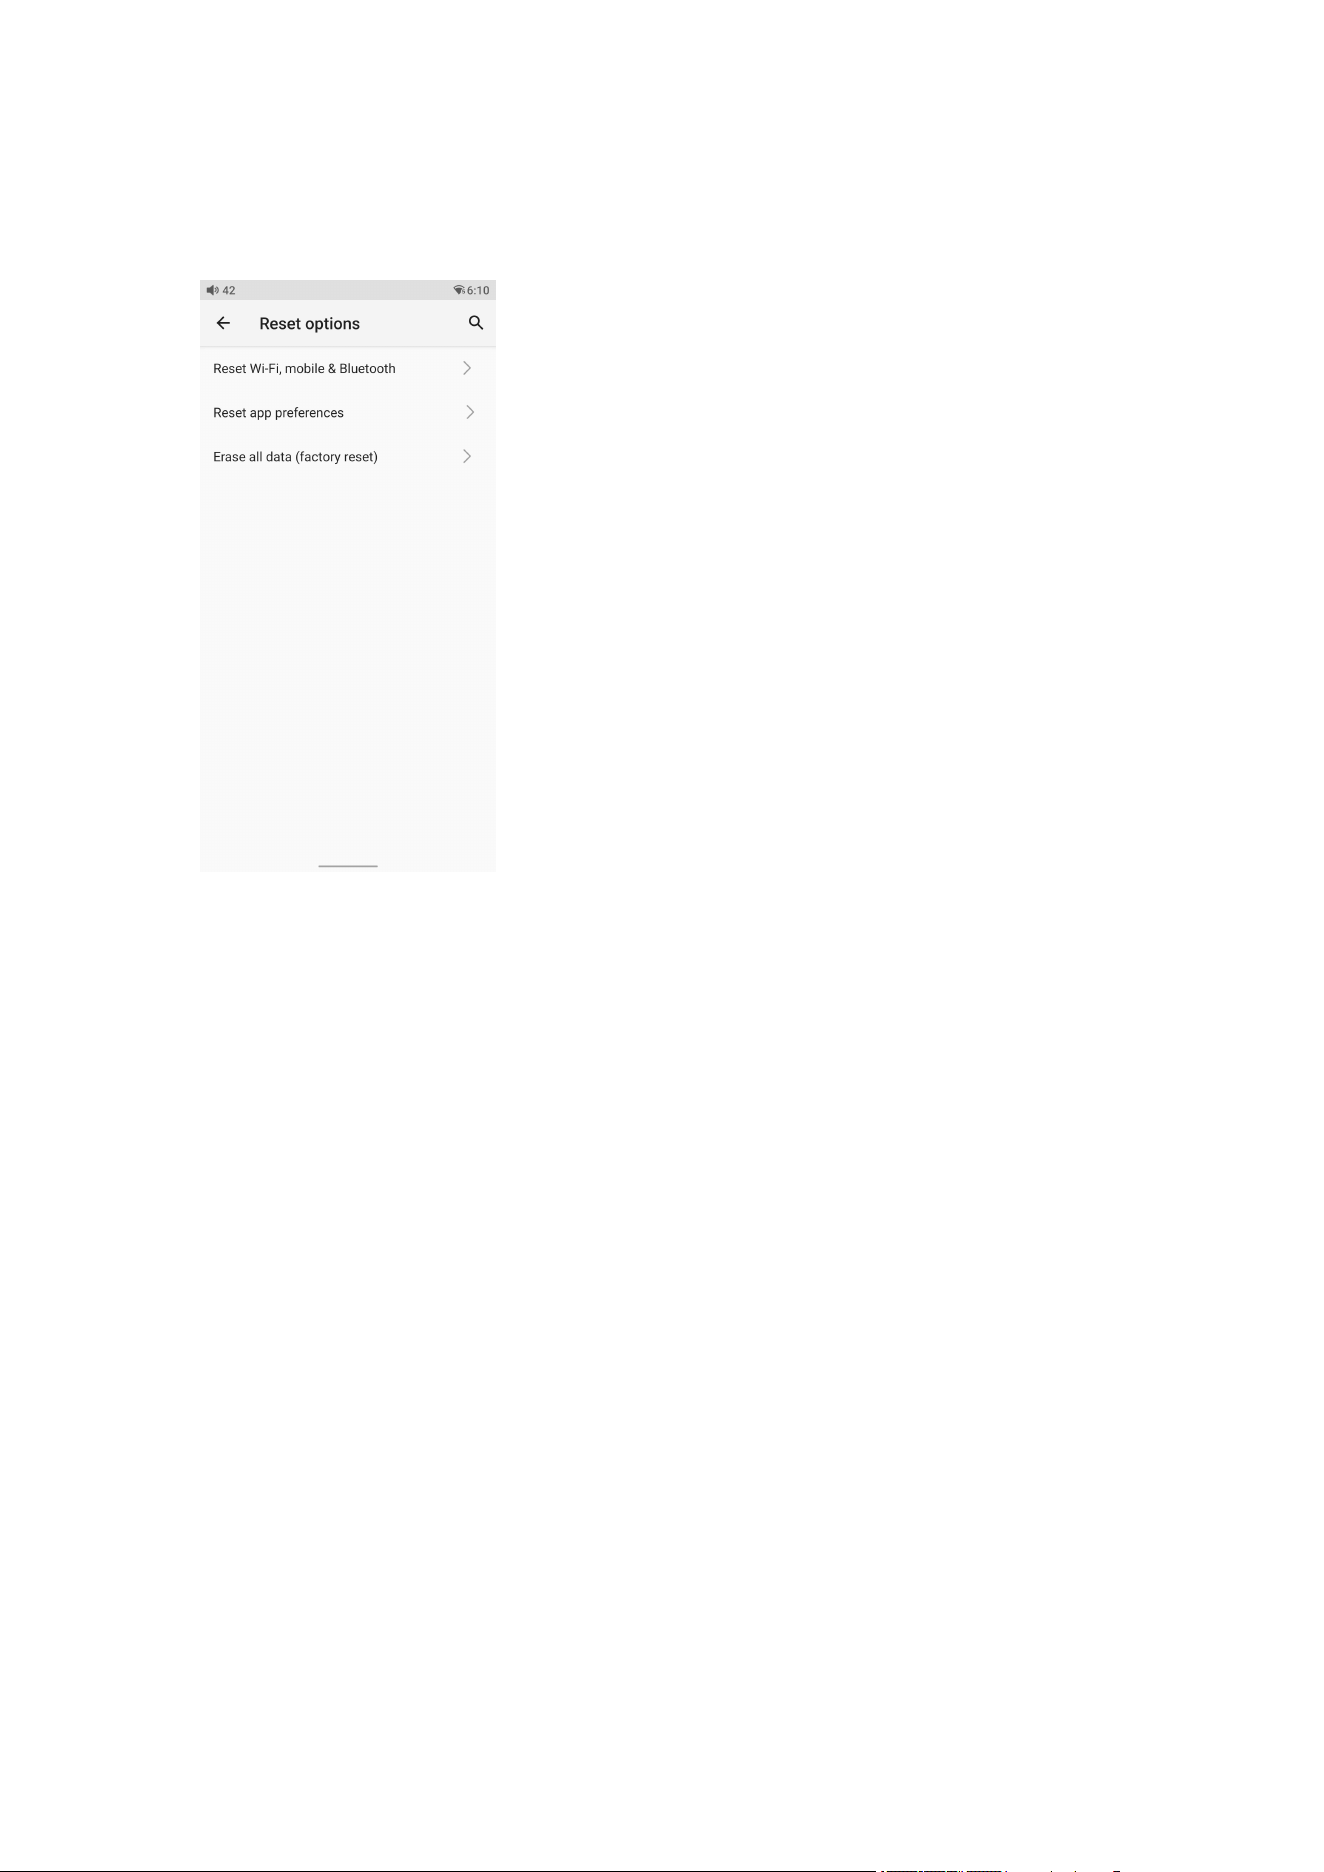
storage, and all settings will be reset to default. Please back up your important
data before resetting.