Item #XXXXXXX
Model #SW17B2L BN
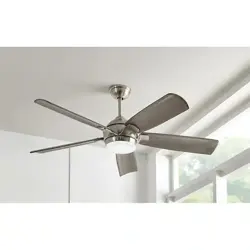
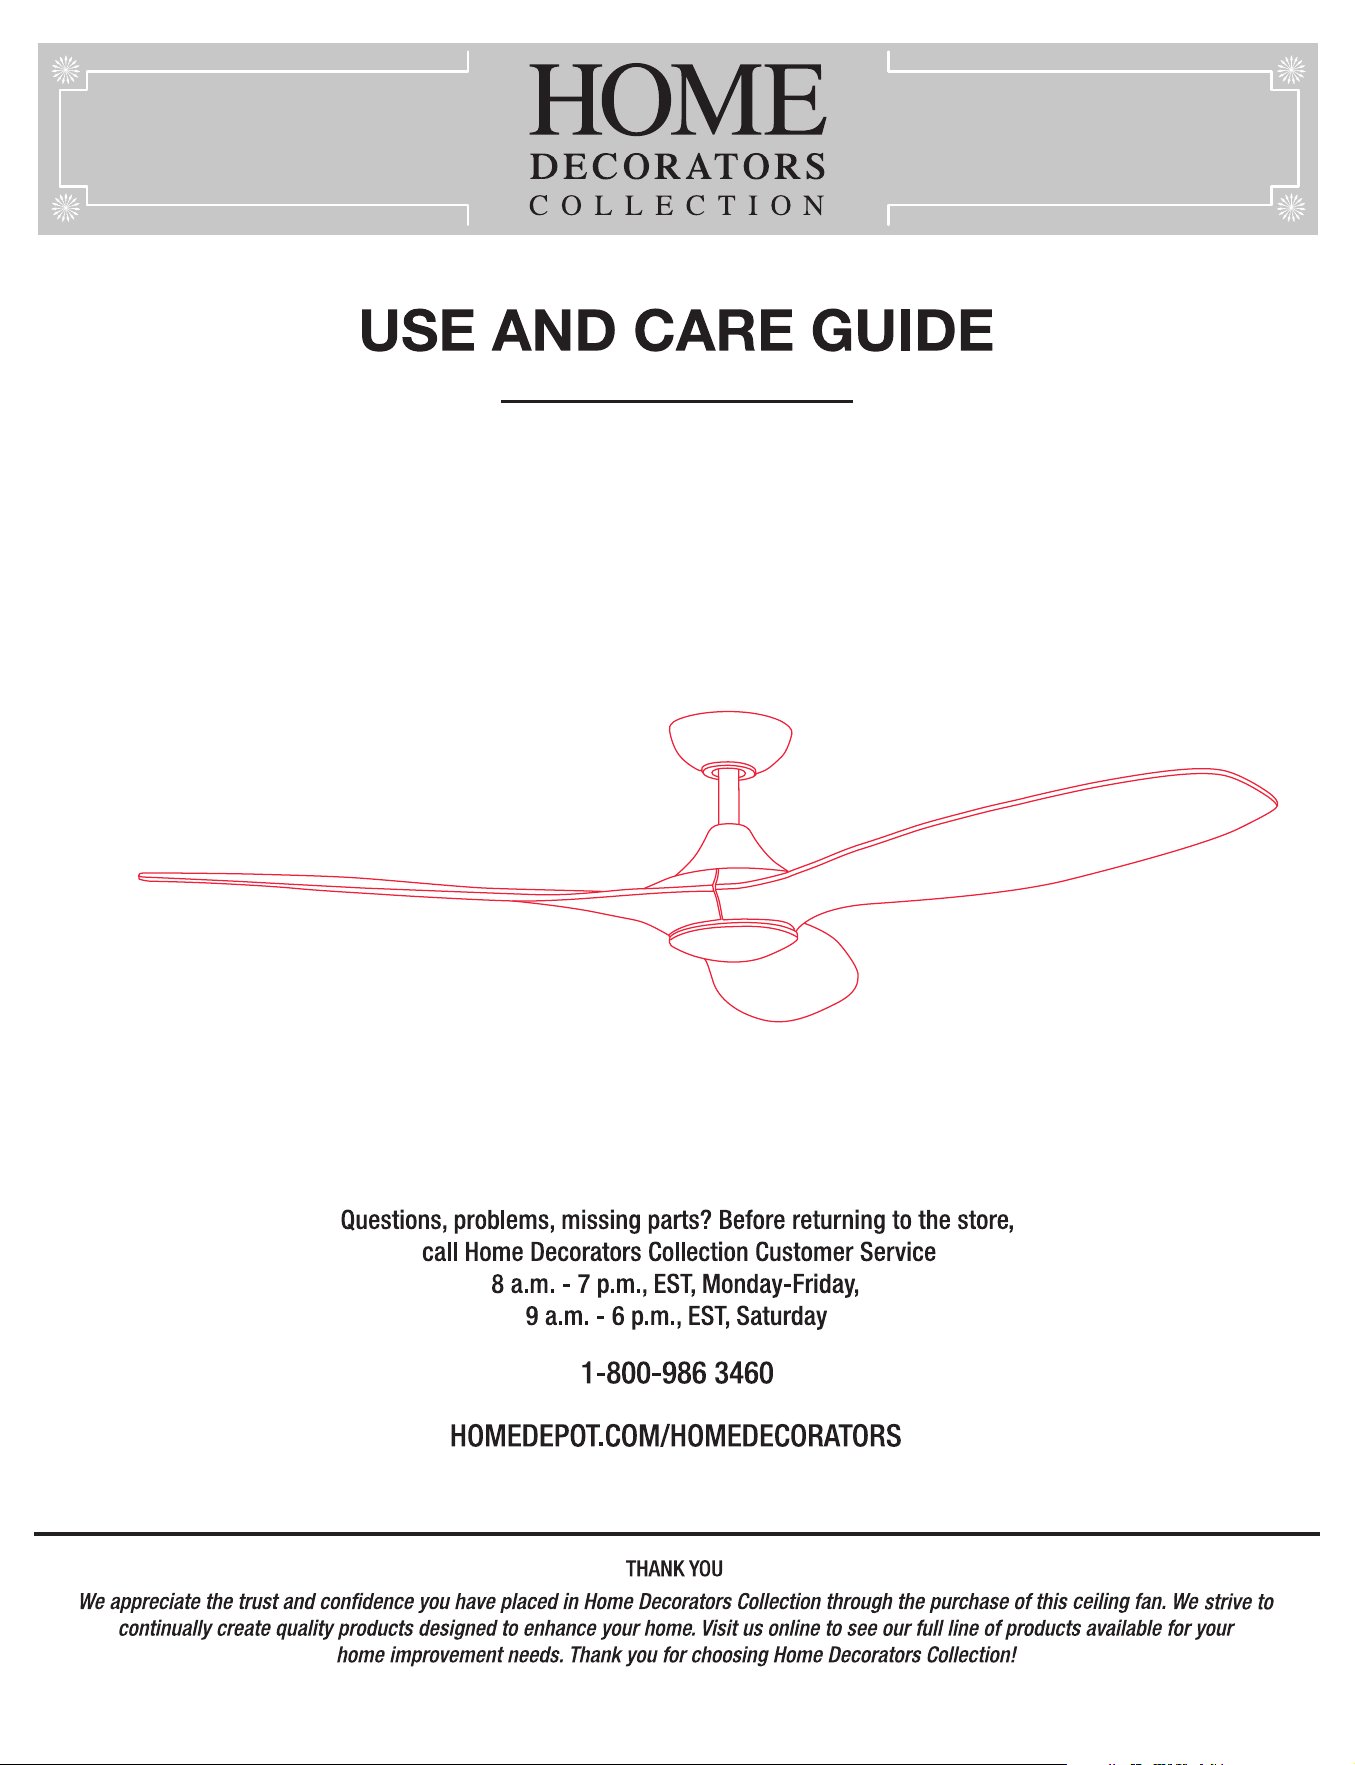
CANTERBURY LED 60 INCH CEILING FAN
Installing the Light Kit and Metal Shade................................
Attaching the Fan Blades........................................................
14
14
15
15
15
16
17
To reduce the risk of fire or electric shock, this
fan should only be used with fan speed control part
NO.:DL-1170FCS-10, manufactured by: Summer Wind
International.,Ltd.
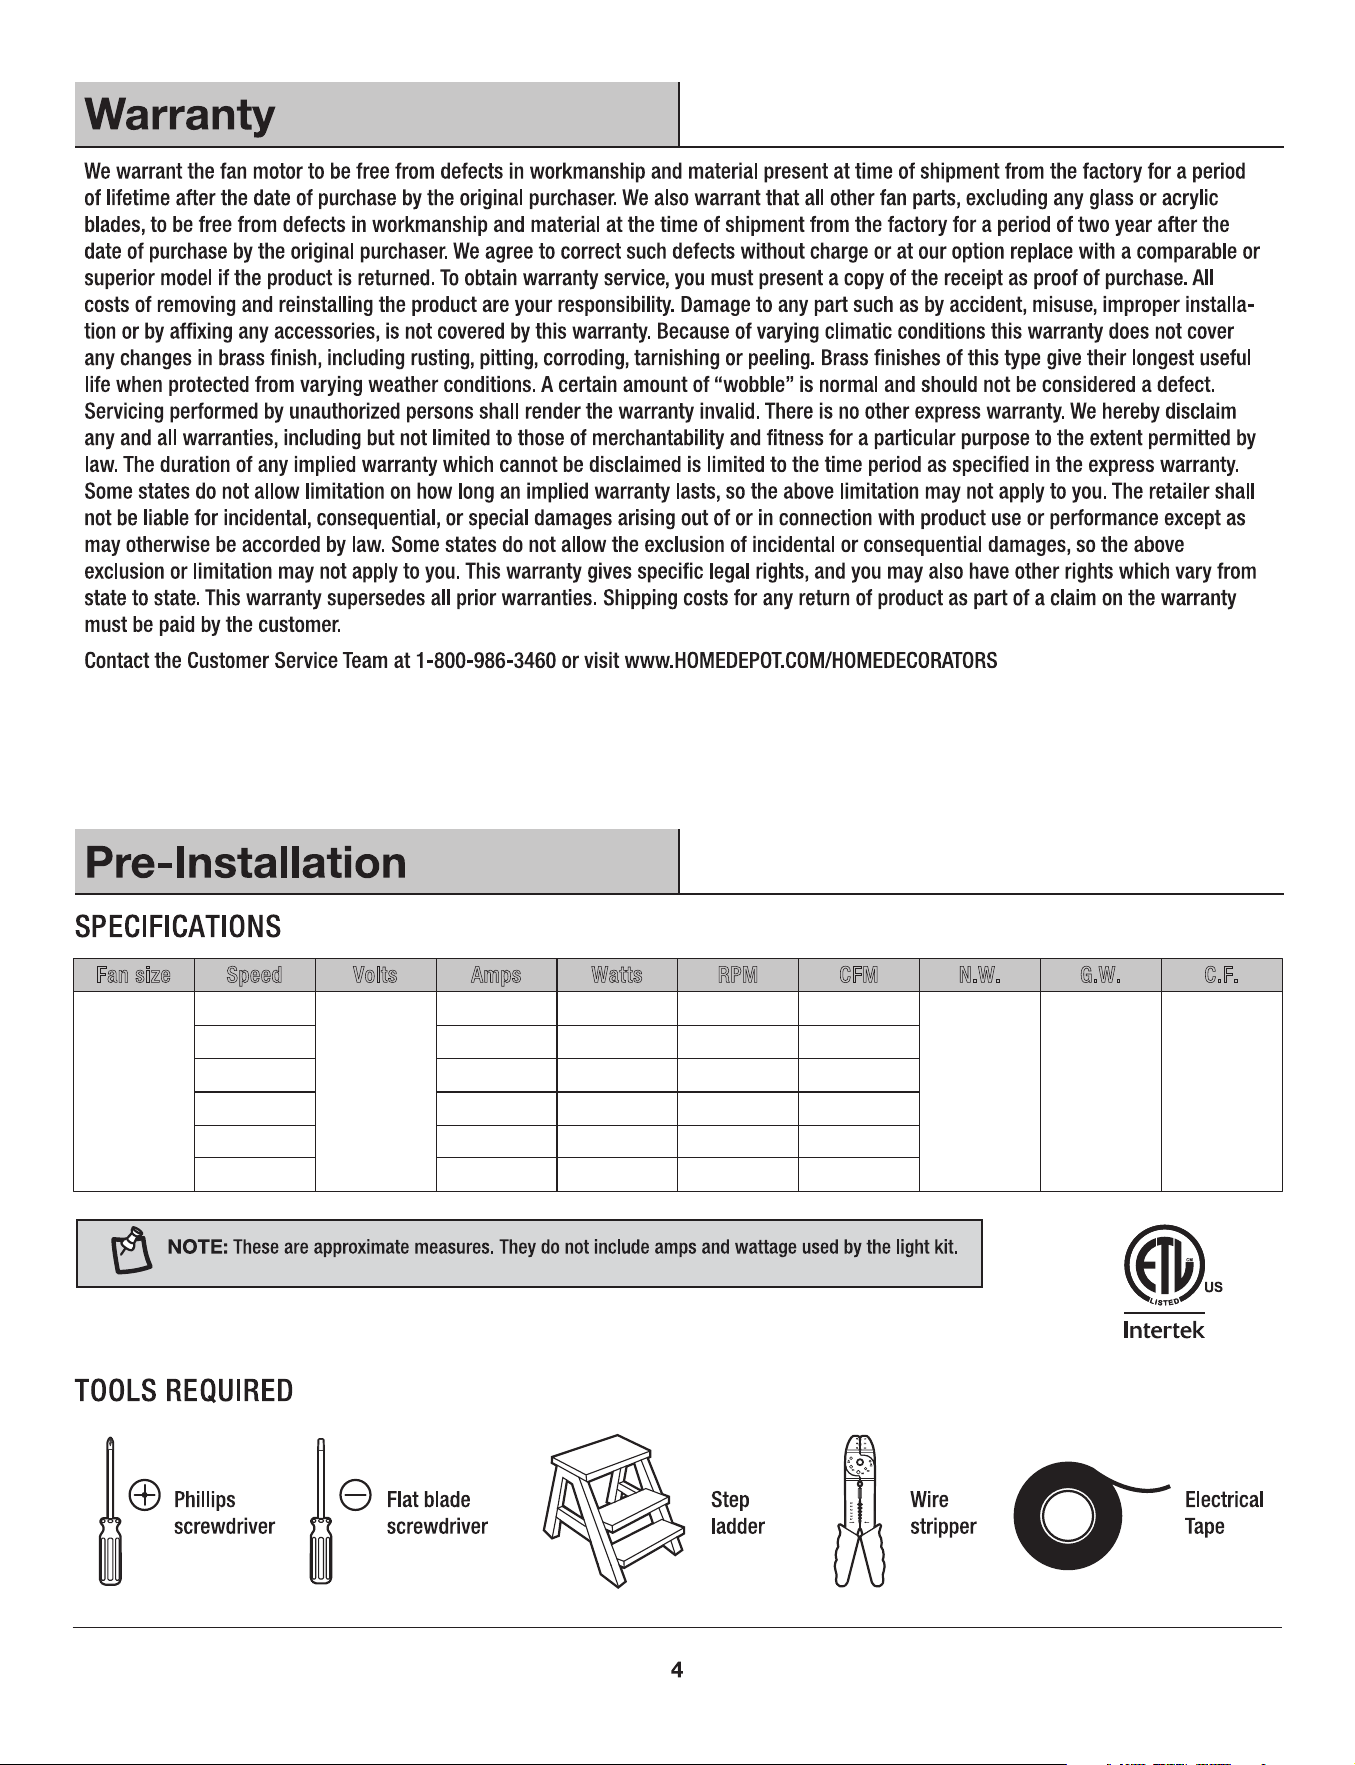
60 in.(1,52 M) 120
Fan
size Watts RPM CFMSpeed Volts Amps N.W. G.W. C.F.
2.41’ ft.
5.42 kgs
(11.92 lbs)
7.01 kgs
(15.42 lbs)
0.05
0.08
0.13
0.20
0.32
0.41
2.58
4.15
6.98
10.86
18.69
25.19
49
65
82
98
115
129
2270
3099
4016
4788
5502
6065
1
2
3
4
5
6
KK
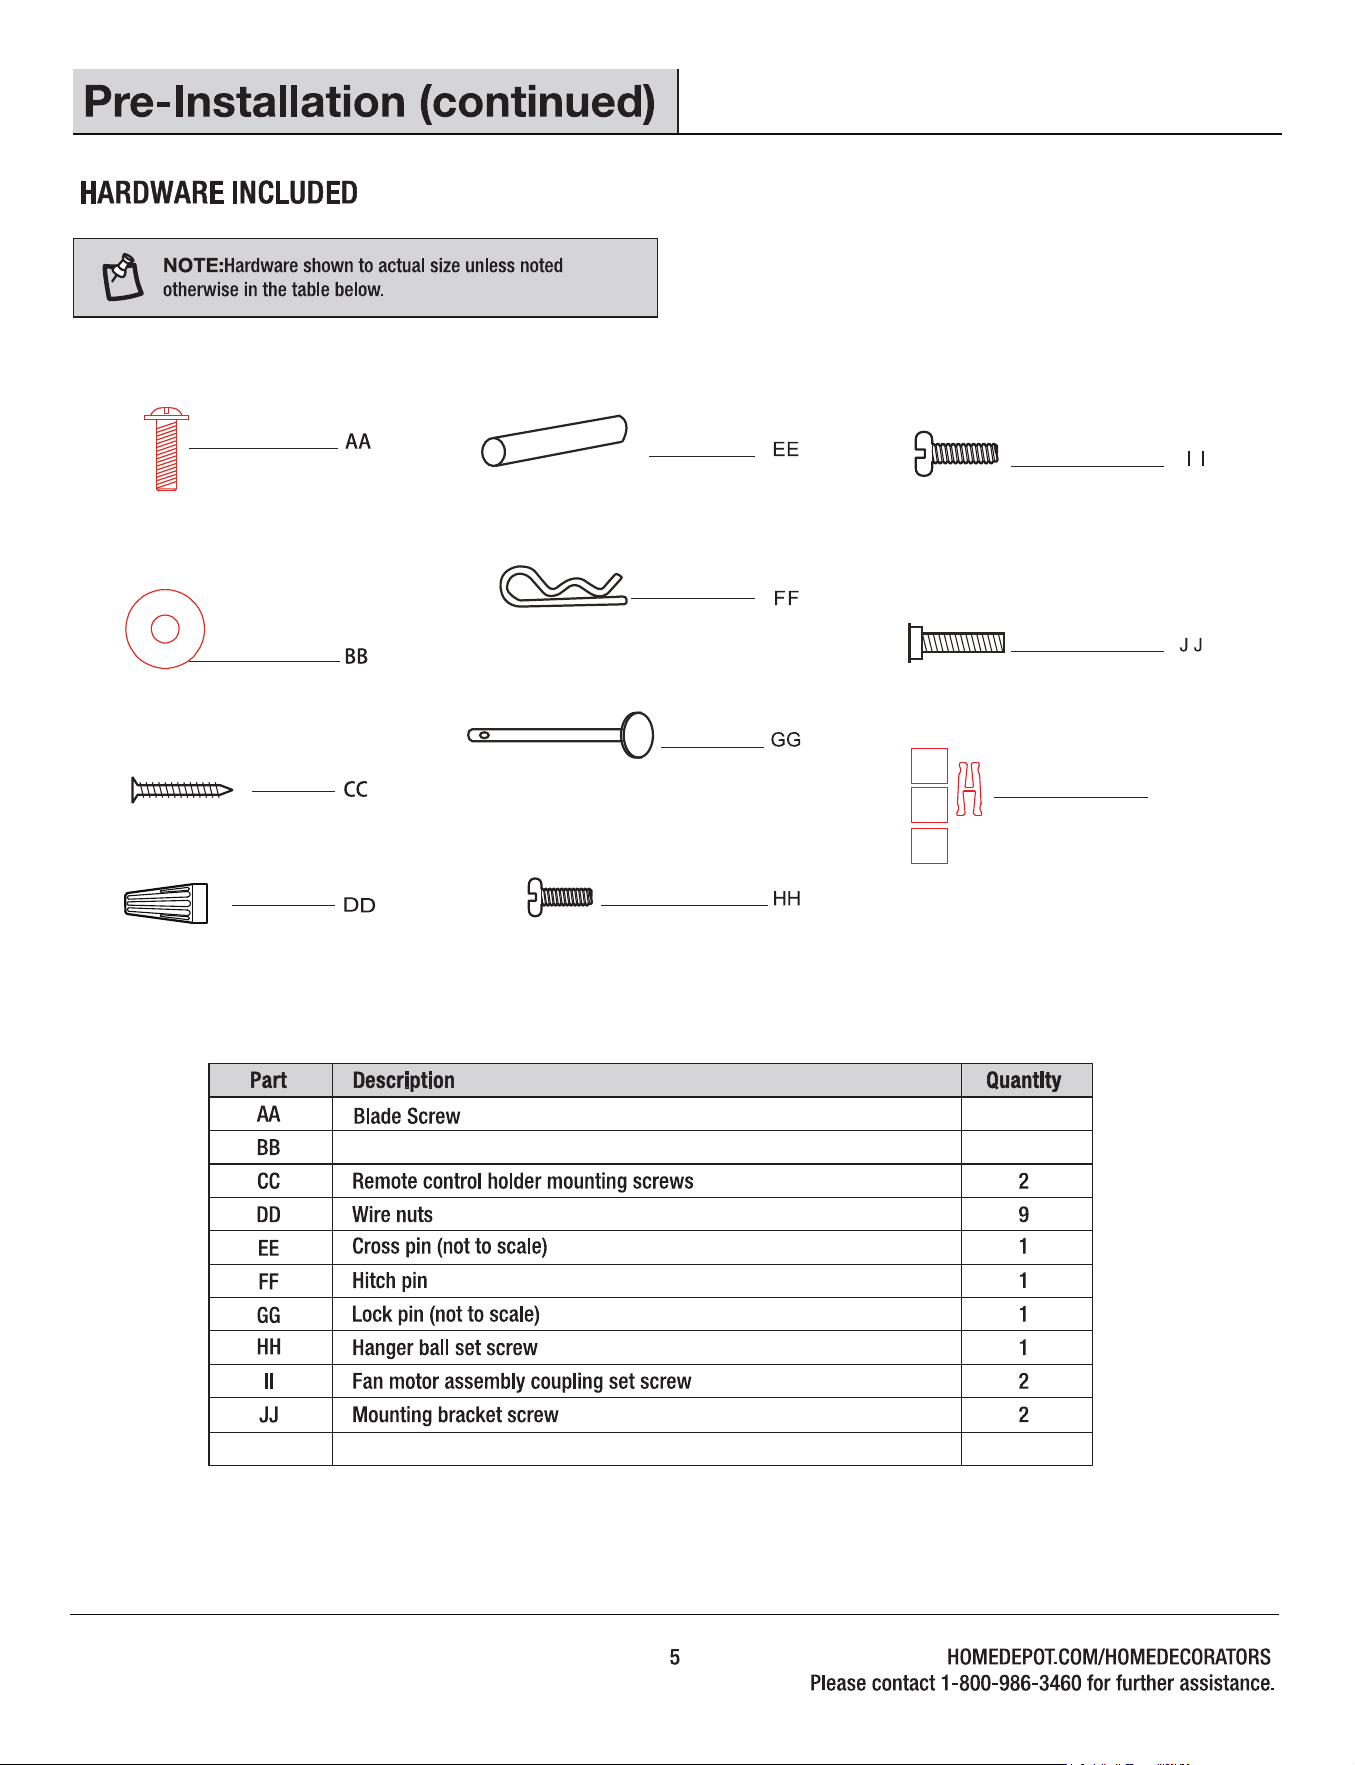
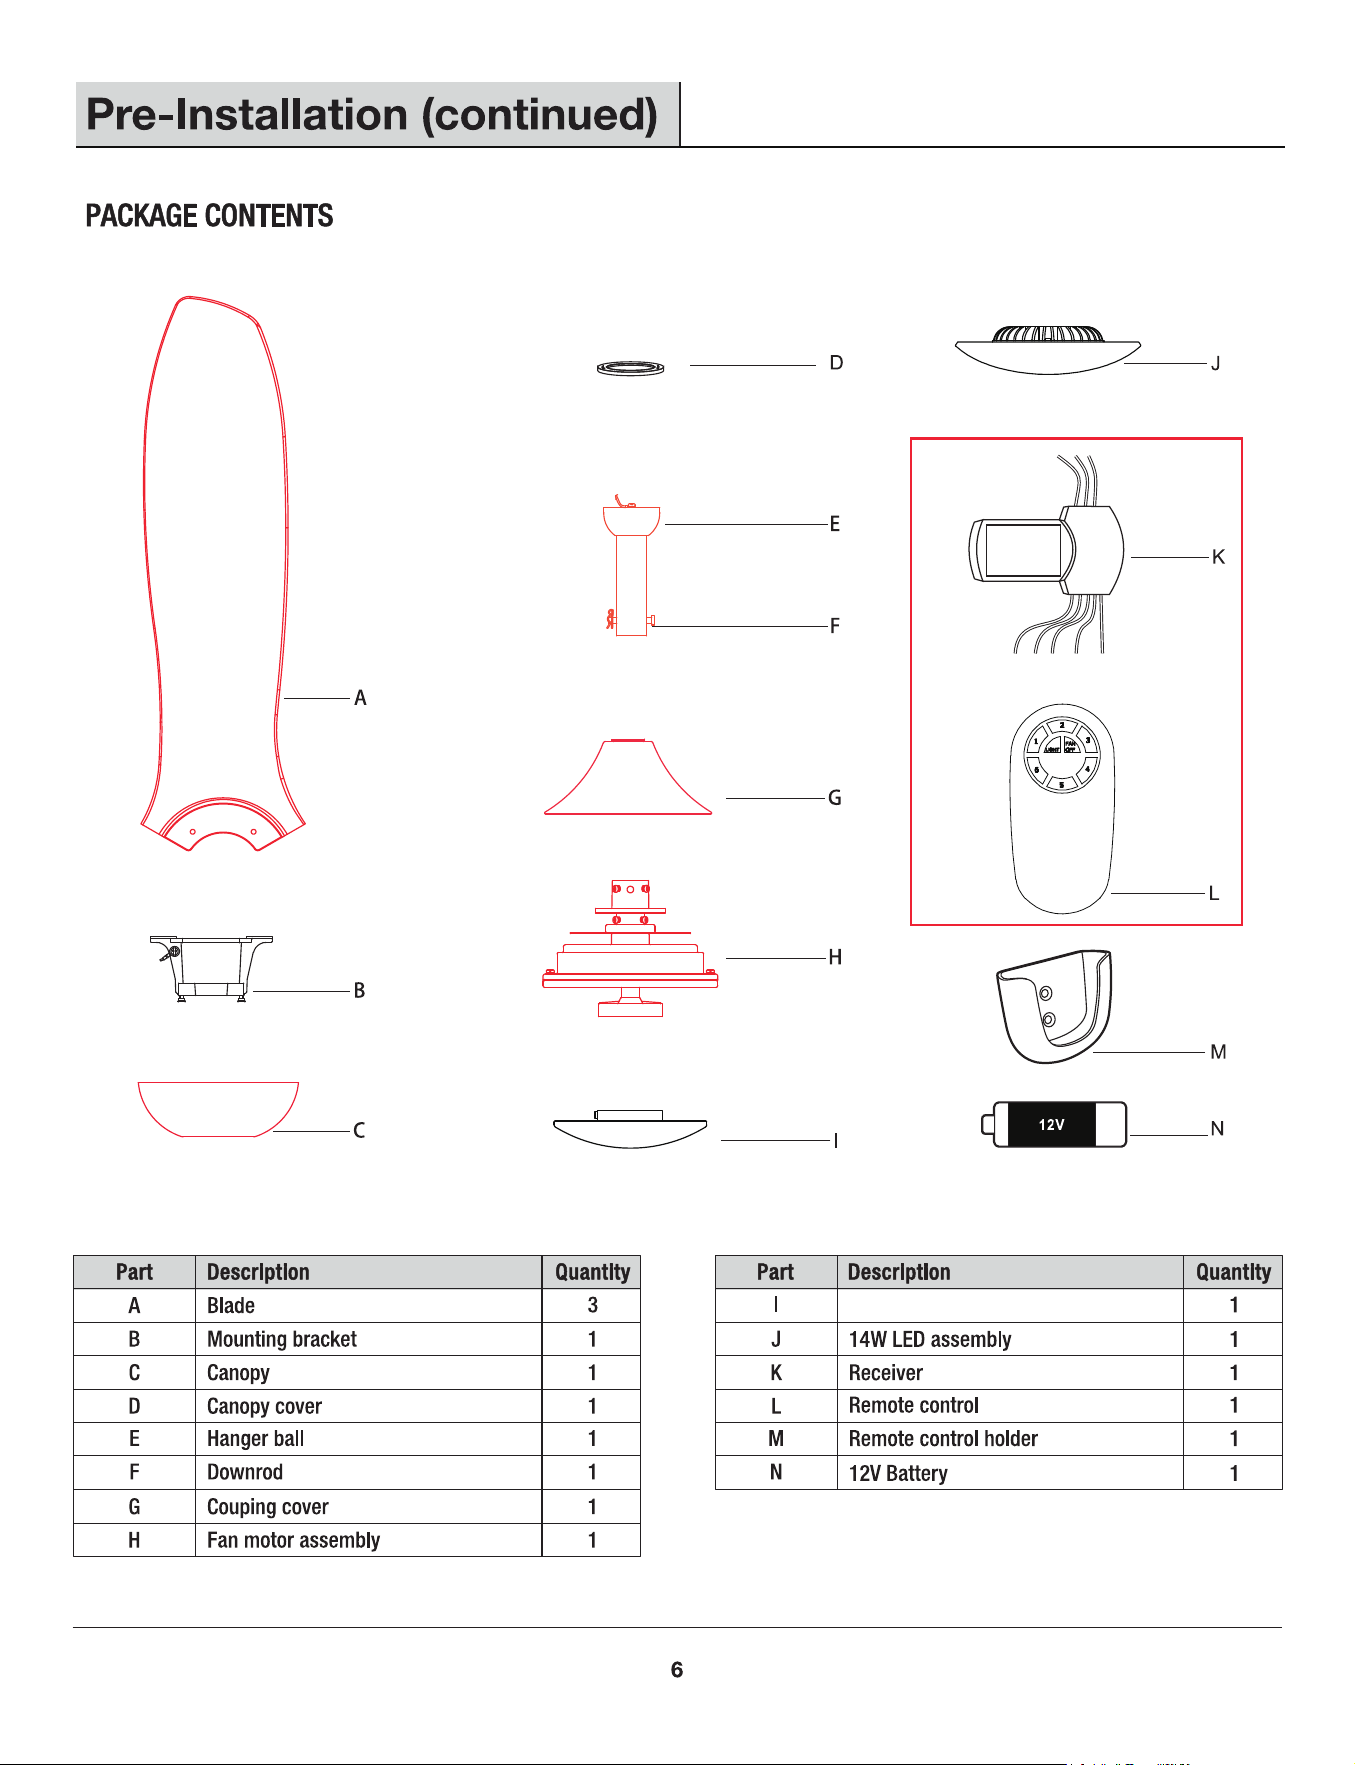
Metal washer
(pre-assembled)
(pre-assembled)
(pre-assembled)
(pre-assembled)
(pre-assembled)
(pre-assembled)
KK
Balancing kit 1
7
7
(pre-assembled)
(pre-assembled)
Metal shade
II
□
□
□
II
FF GG
HH
EE
GG
FF
H
H
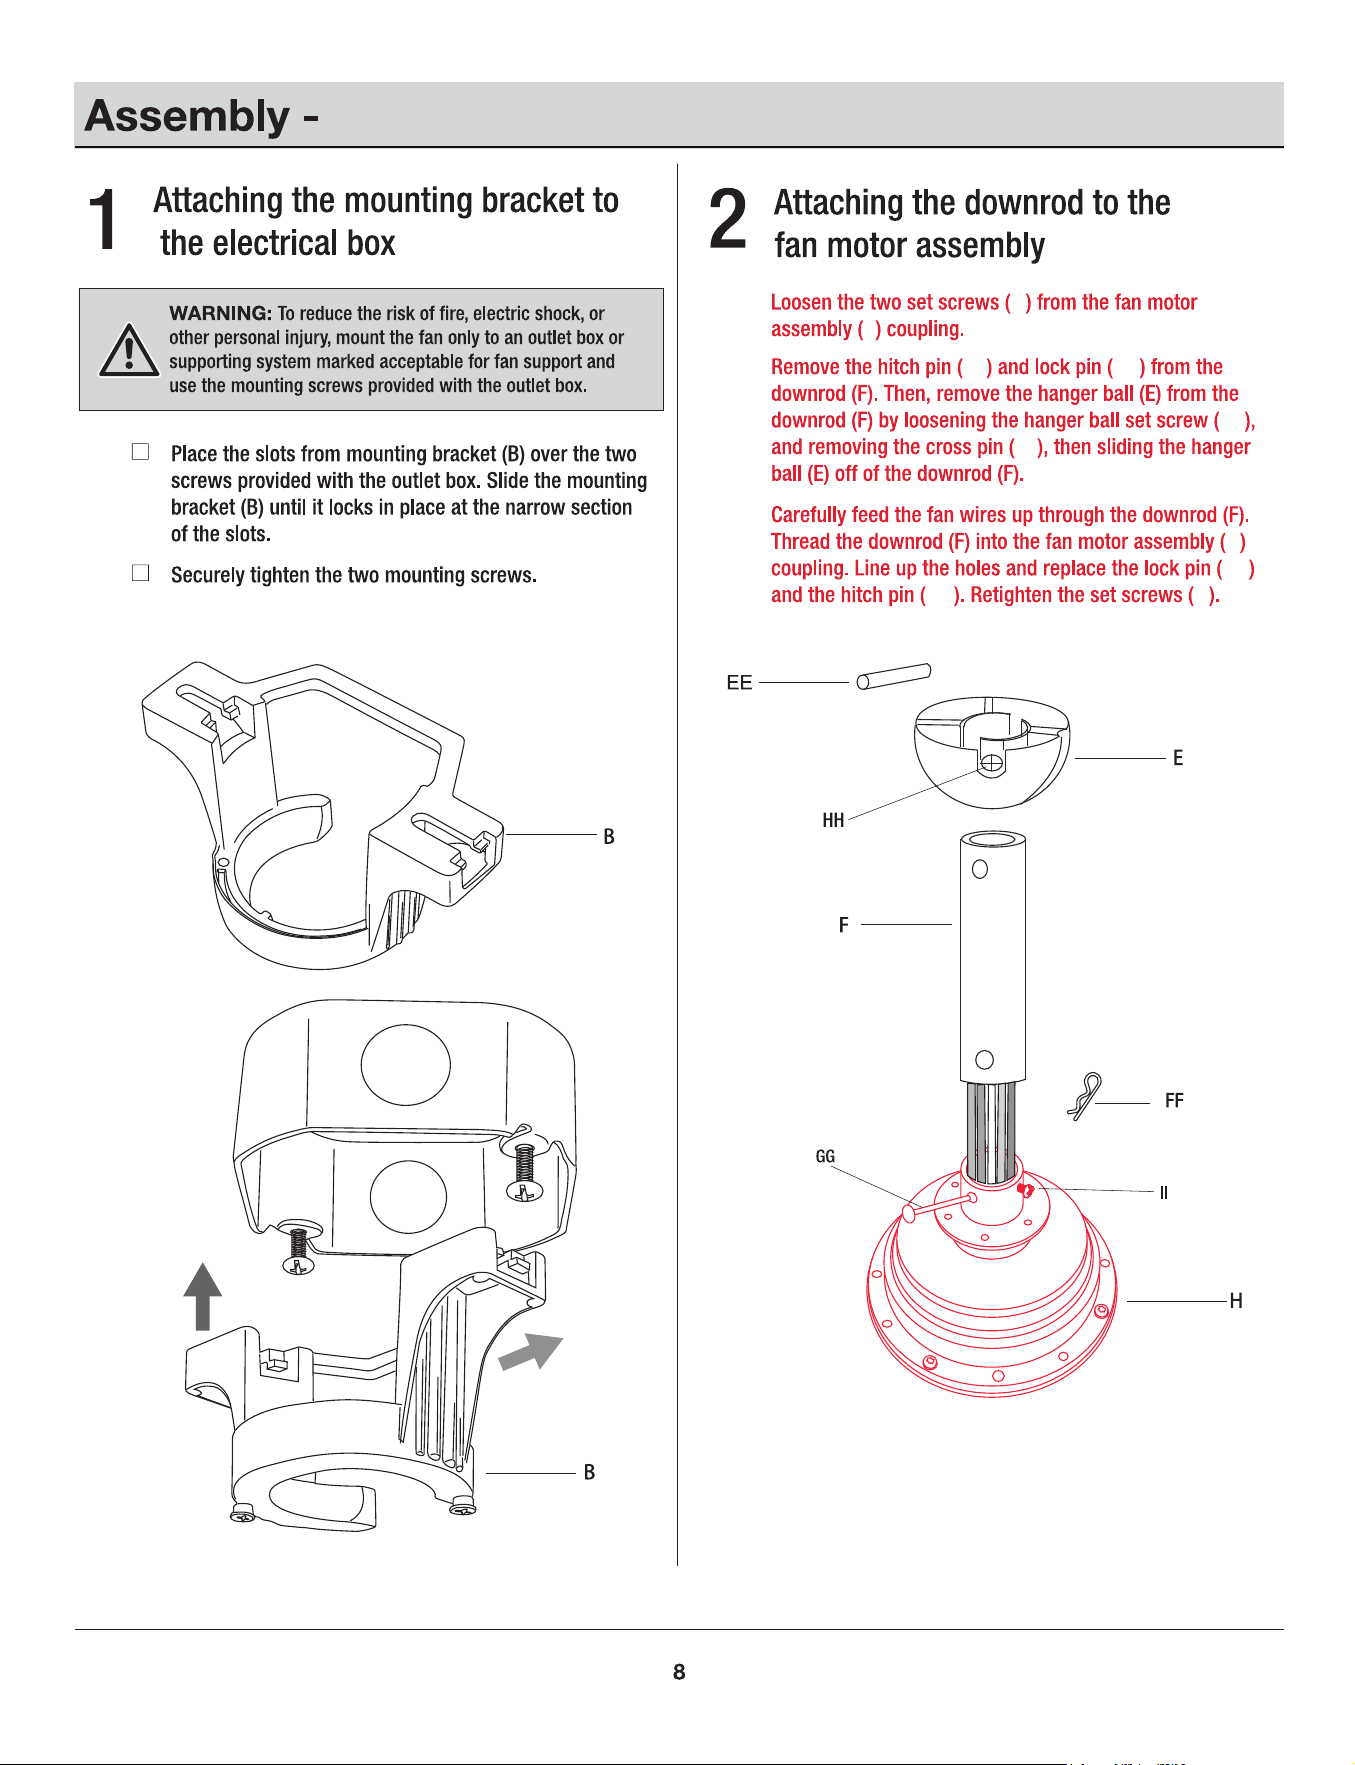
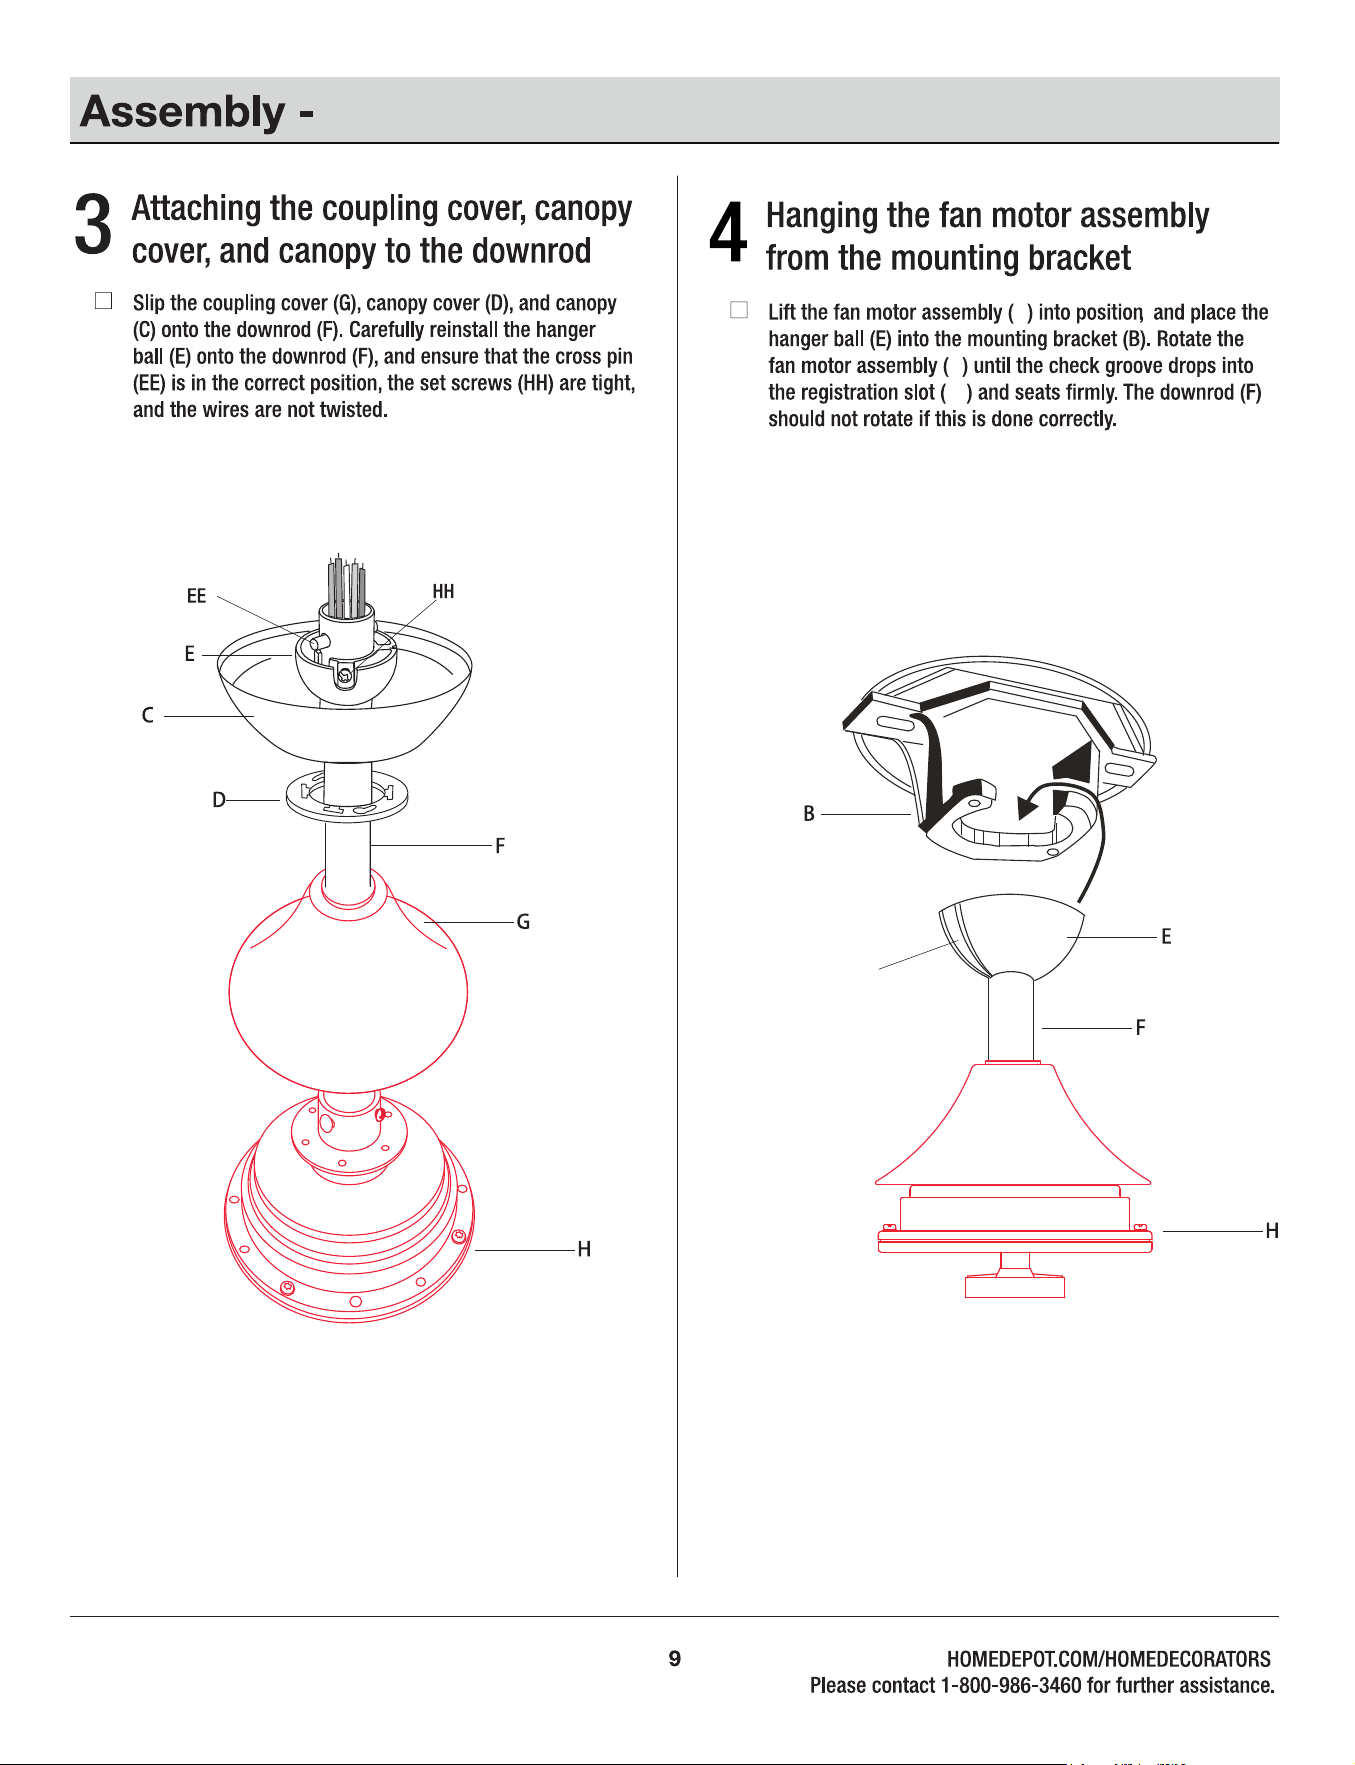
Hanging the Fan
LL
Hanging the Fan (continued)
LL
H
H
K
B
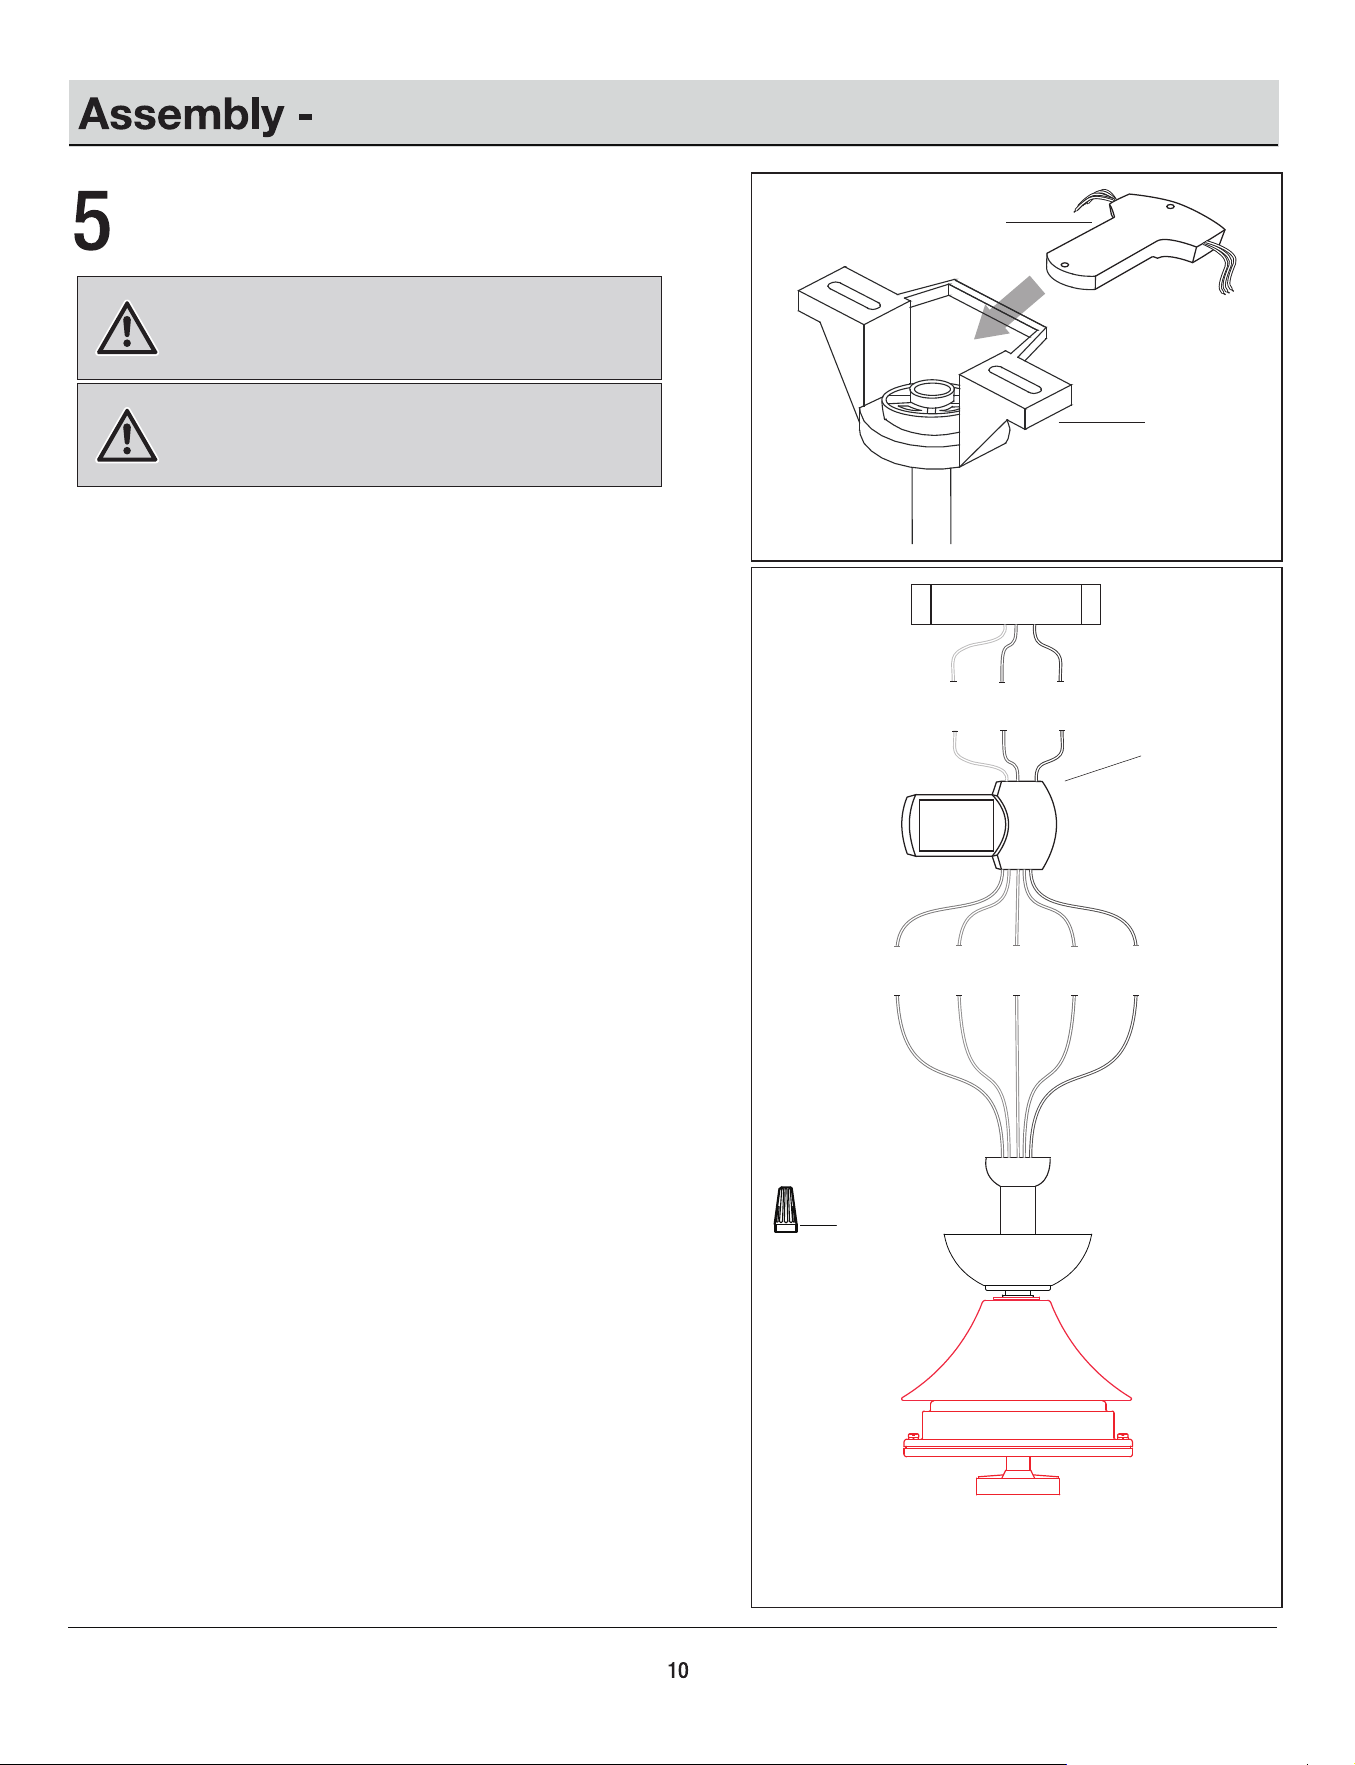
Making the electrical connections
WARNING: To avoid possible electrical shock, ensure the
electricity is turned off at the circuit breaker or main fuse box
before wiring.
WARNING: Check to see that all connections are tight,
including the ground, and that no bare wire is visible at the
wire nuts, except for the ground wire.
Motor to Receiver Electrical Connections:
Connect the WHITE wire from the fan to the WHITE wire marked
“Light N” from the Receiver.
Connect the BLUE wire from the fan to the BLUE wire marked
“Light L” from the Receiver.
Connect the YELLOW wire from the fan to the YELLOW wire
marked “MOTOR 1” from the Receiver.
Connect the RED wire from the fan to the RED wire marked
“MOTOR 2” from the Receiver.
Connect the GREY wire from the fan to the GREY wire marked
“MOTOR 3” from the Receiver.
Receiver to House Supply Wires Electrical connections:
Connect the WHITE wire (Neutral) from the outlet box to the
WHITE wire marked ”AC in N” from the receiver.
Connect the BLACK wire (Hot) from the outlet box to the BLACK
wire marked “AC in L” from the receiver.
If your outlet box has a GROUND wire (Green or Bare
Copper),connect this wire to the Hanger Ball and Hanger
Bracket and receiver Ground wires.
If your outlet box does not have a Ground Wire, then connect the
Hanger Ball and Hanger Bracket and Receiver Ground Wire
together.
Secure wire connection with the plastic wire nuts (DD)
provided. Especially , for the ground wires, please use bigger wire
nut (DD) provided.
After all splices are made, check to make sure there are no
loose strands.
P
□
□
□
□
□
Outlet Box
Blue
Blue
White
White Yellow
Yellow
Red
Red
Grey
Grey
Black
Black
Green
Green
White
White
Note: Fan must be installed from a maximum distance of 40 feet
(12.2 m) from the transmitting unit for proper signal transmission
between the transmitting unit and the fan’s receiving unit.
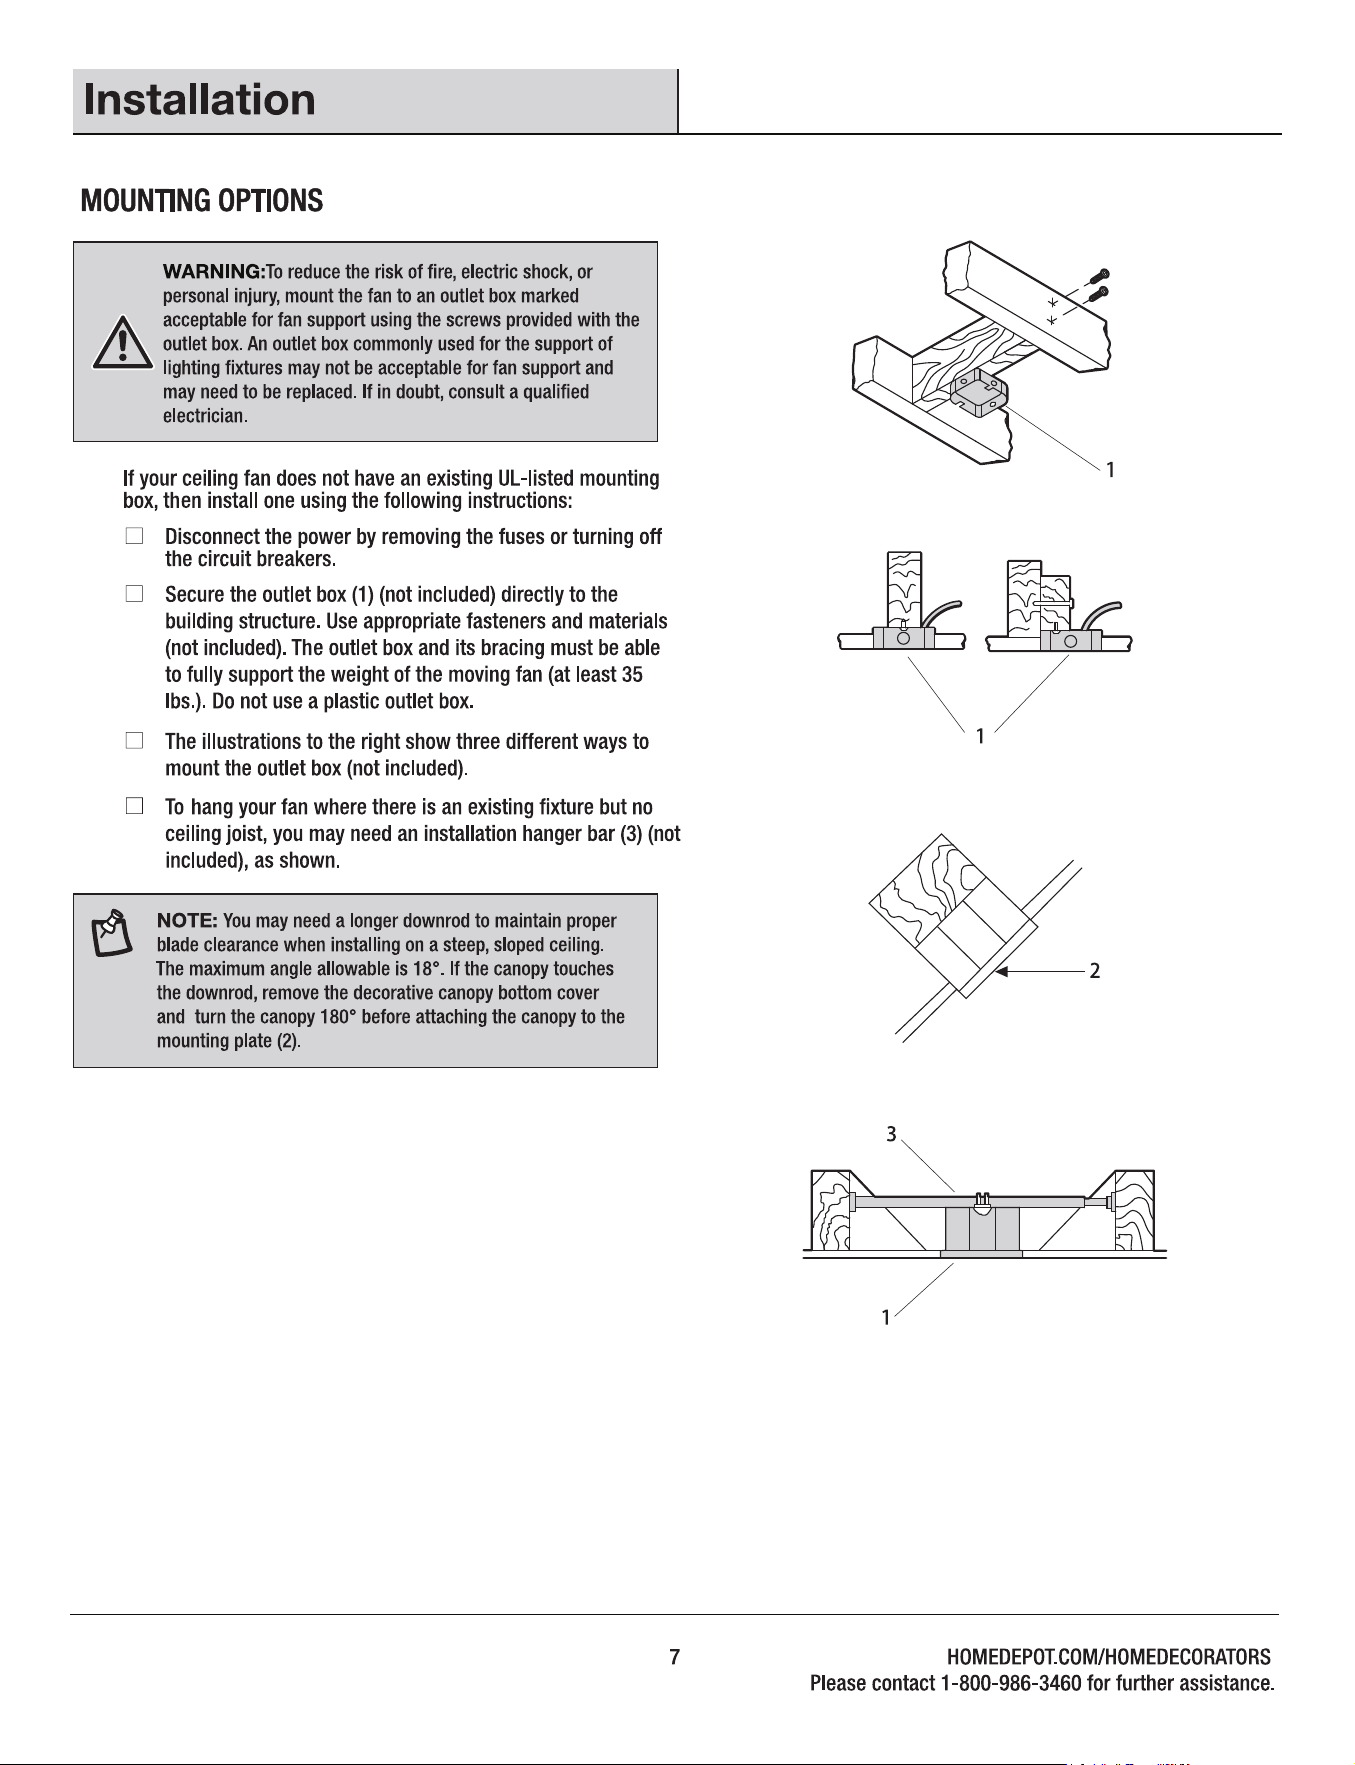
Insert the receiver (K) into the mounting bracket (B) with the flat
side of the receiver (K) facing the ceiling.
Follow the steps below to connect the fan to your house supply
wires. Secure the wire nuts supplied with your fan by wrapping the
connections with electrical tape.
DD (x9)
Hanging the Fan (continued)
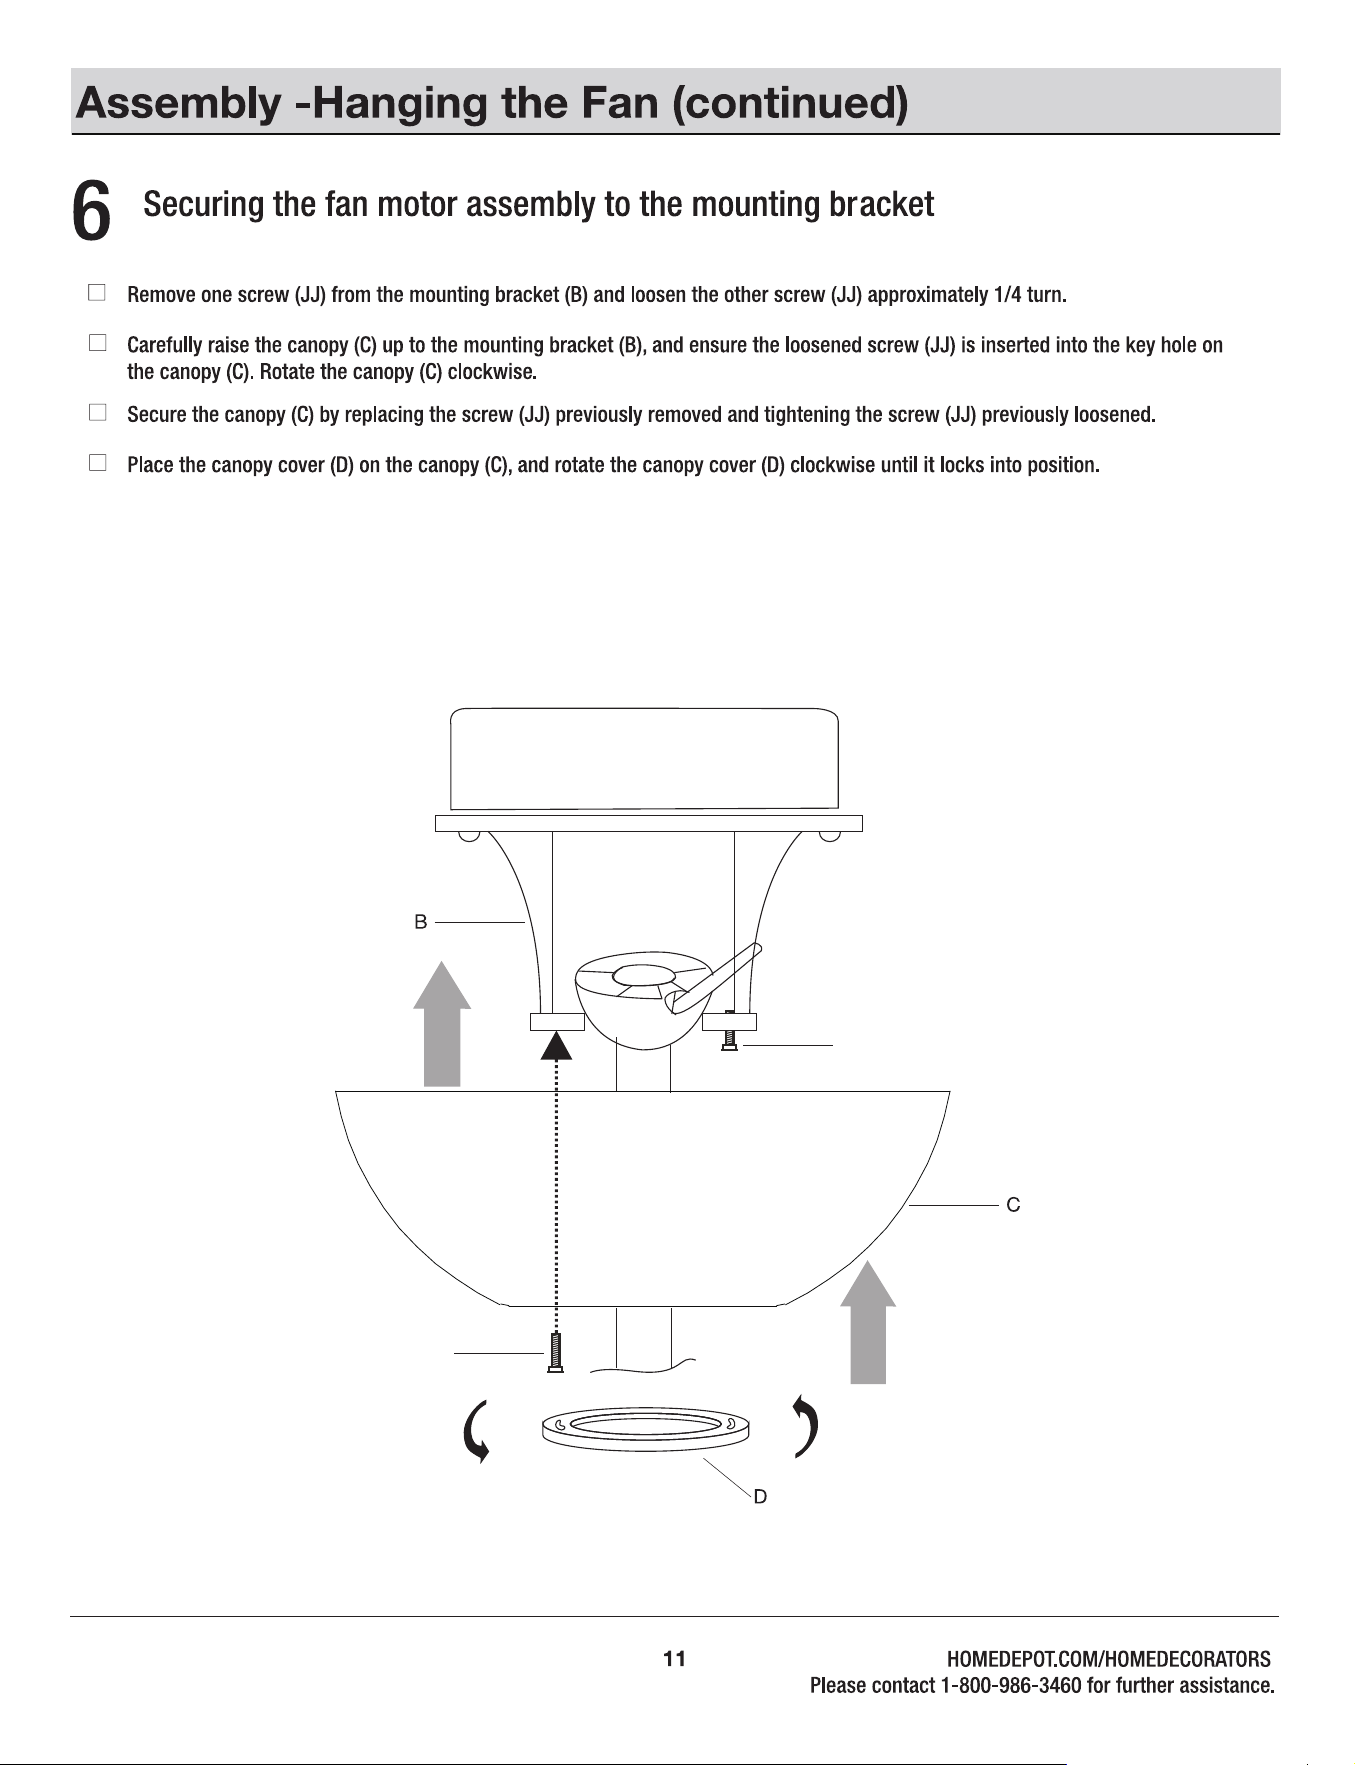
JJ
JJ
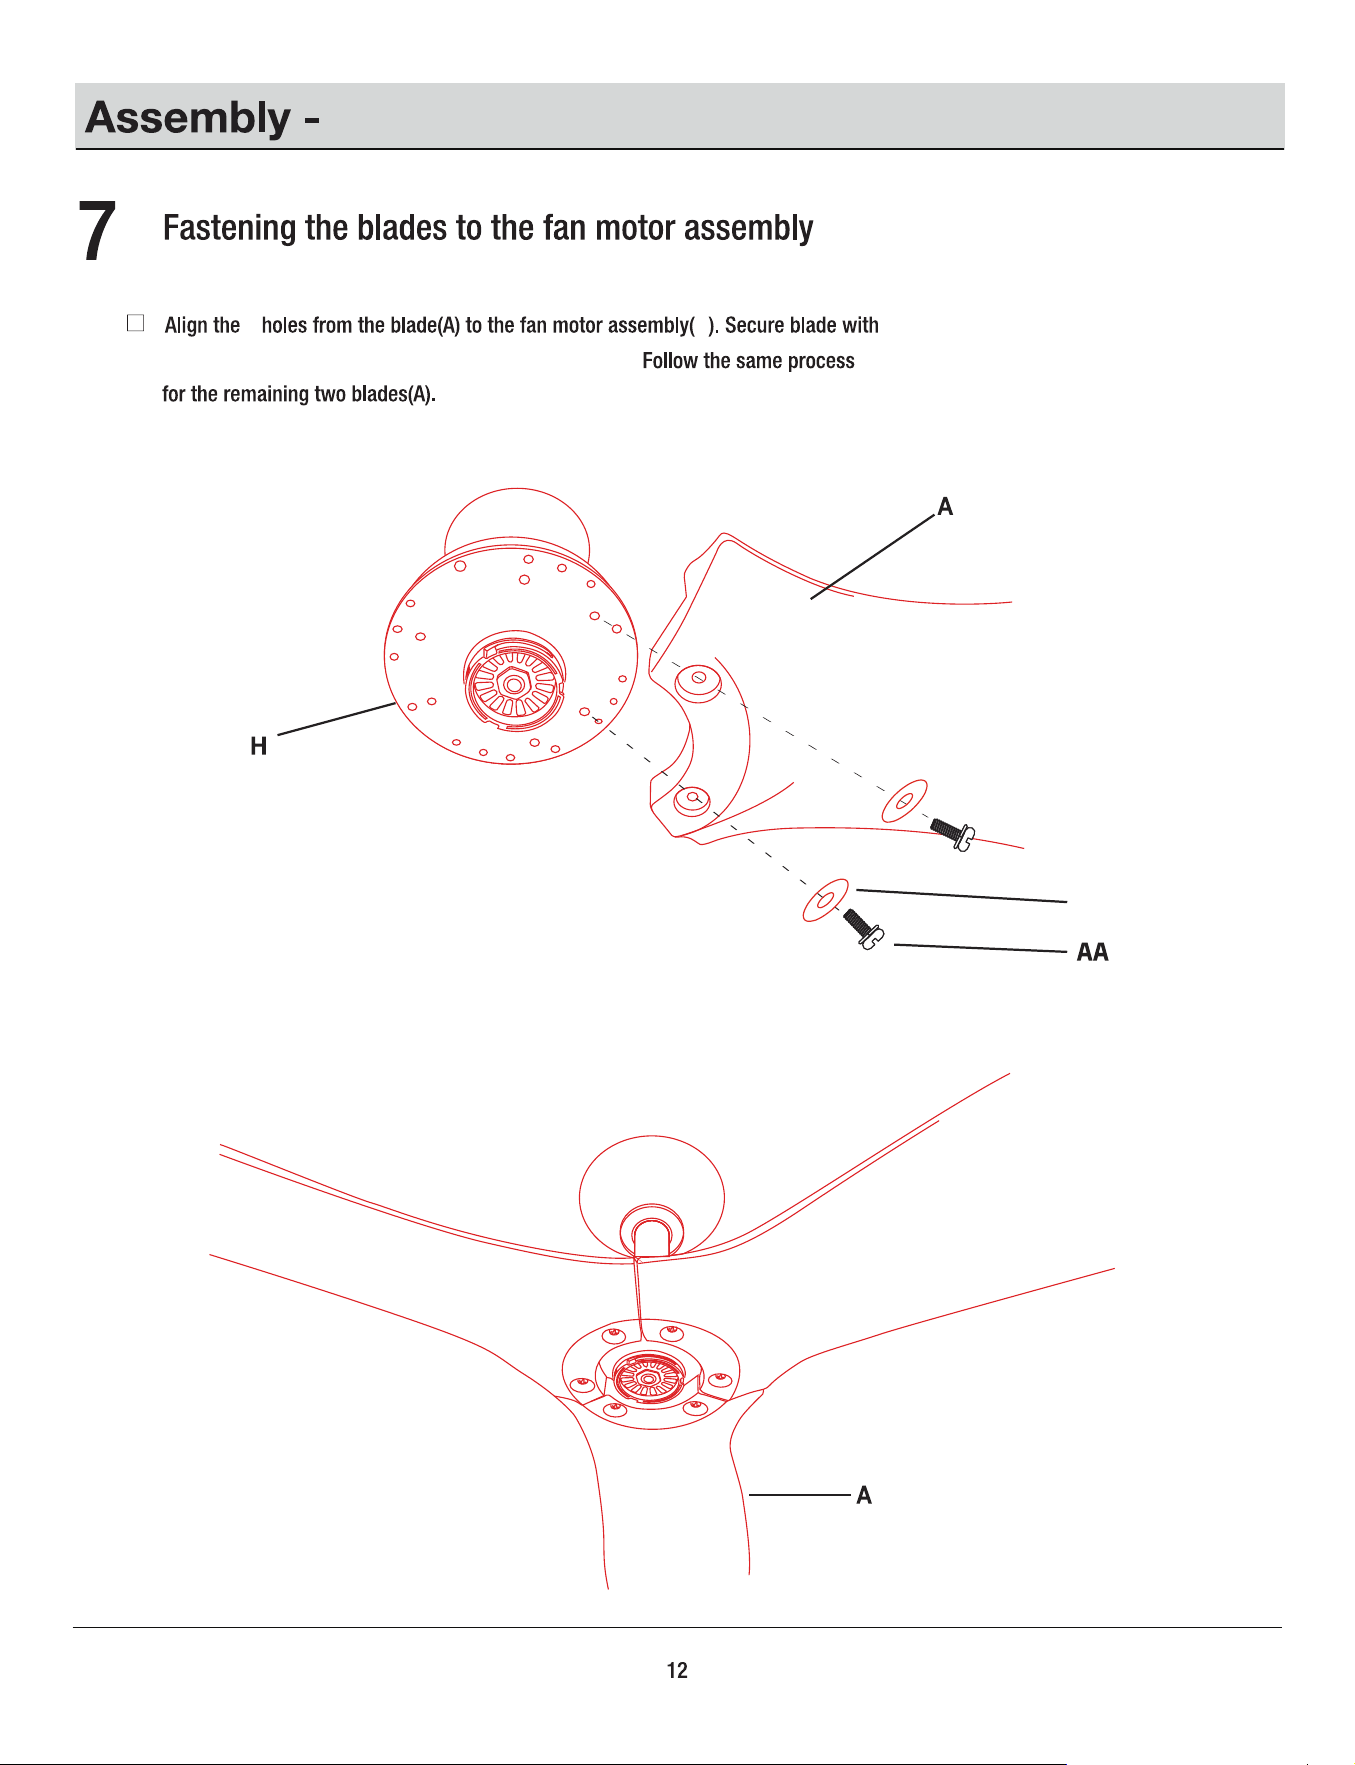
BB
K
the blade washer (AA) and metal washer (BB) provided.
2
Attaching the Fan Blades
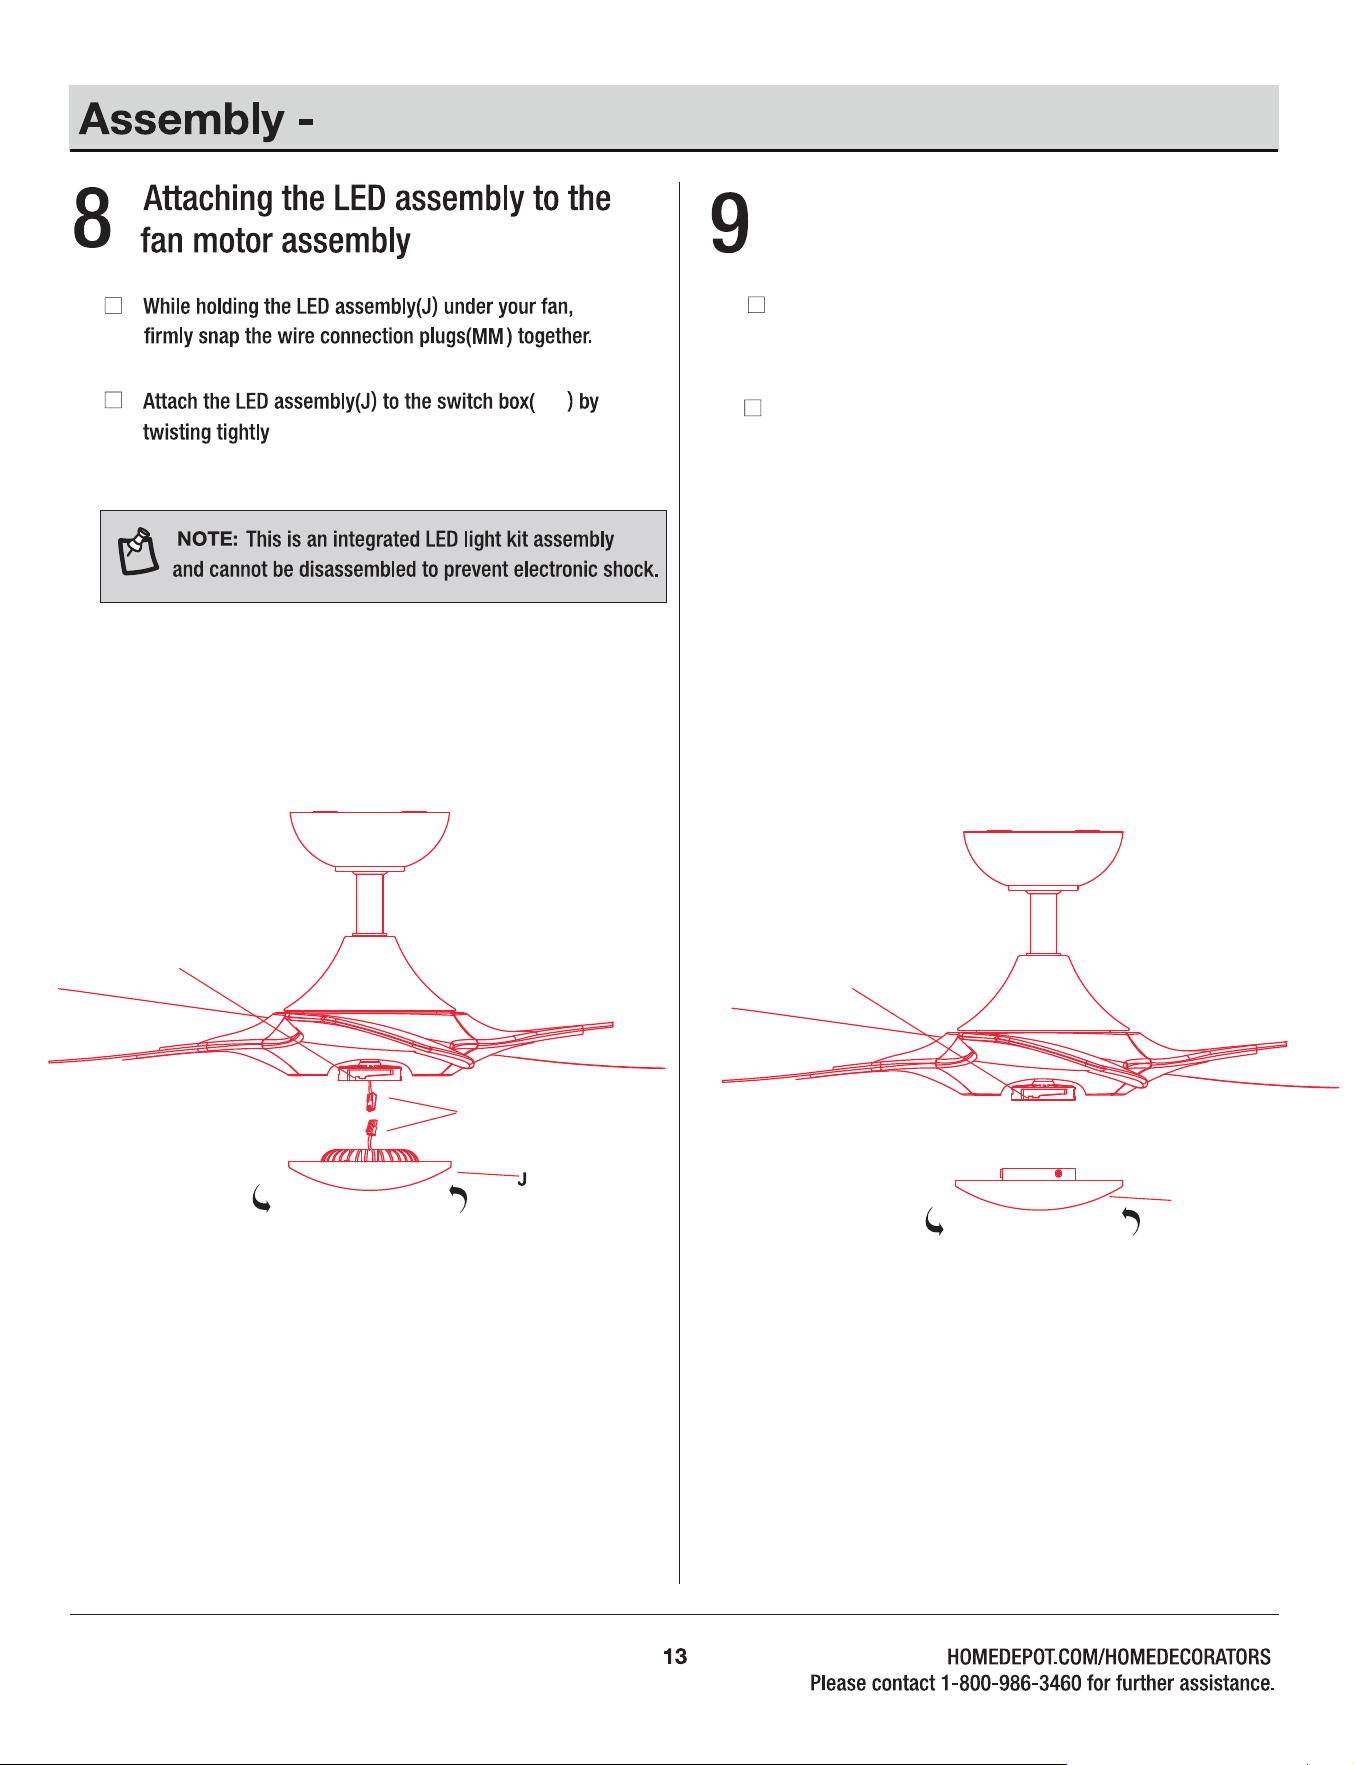
Attaching the metal shade to the
fan motor assembly
If you want the fan to be non-light version, please
kindly skip step 8 above and follow the procedure
directly.
I
NN
MM
NN
Attach the metal shade (I) to the switch box (NN)
by twisting tightly.
NN
Installing the Light Kit and Metal Shade
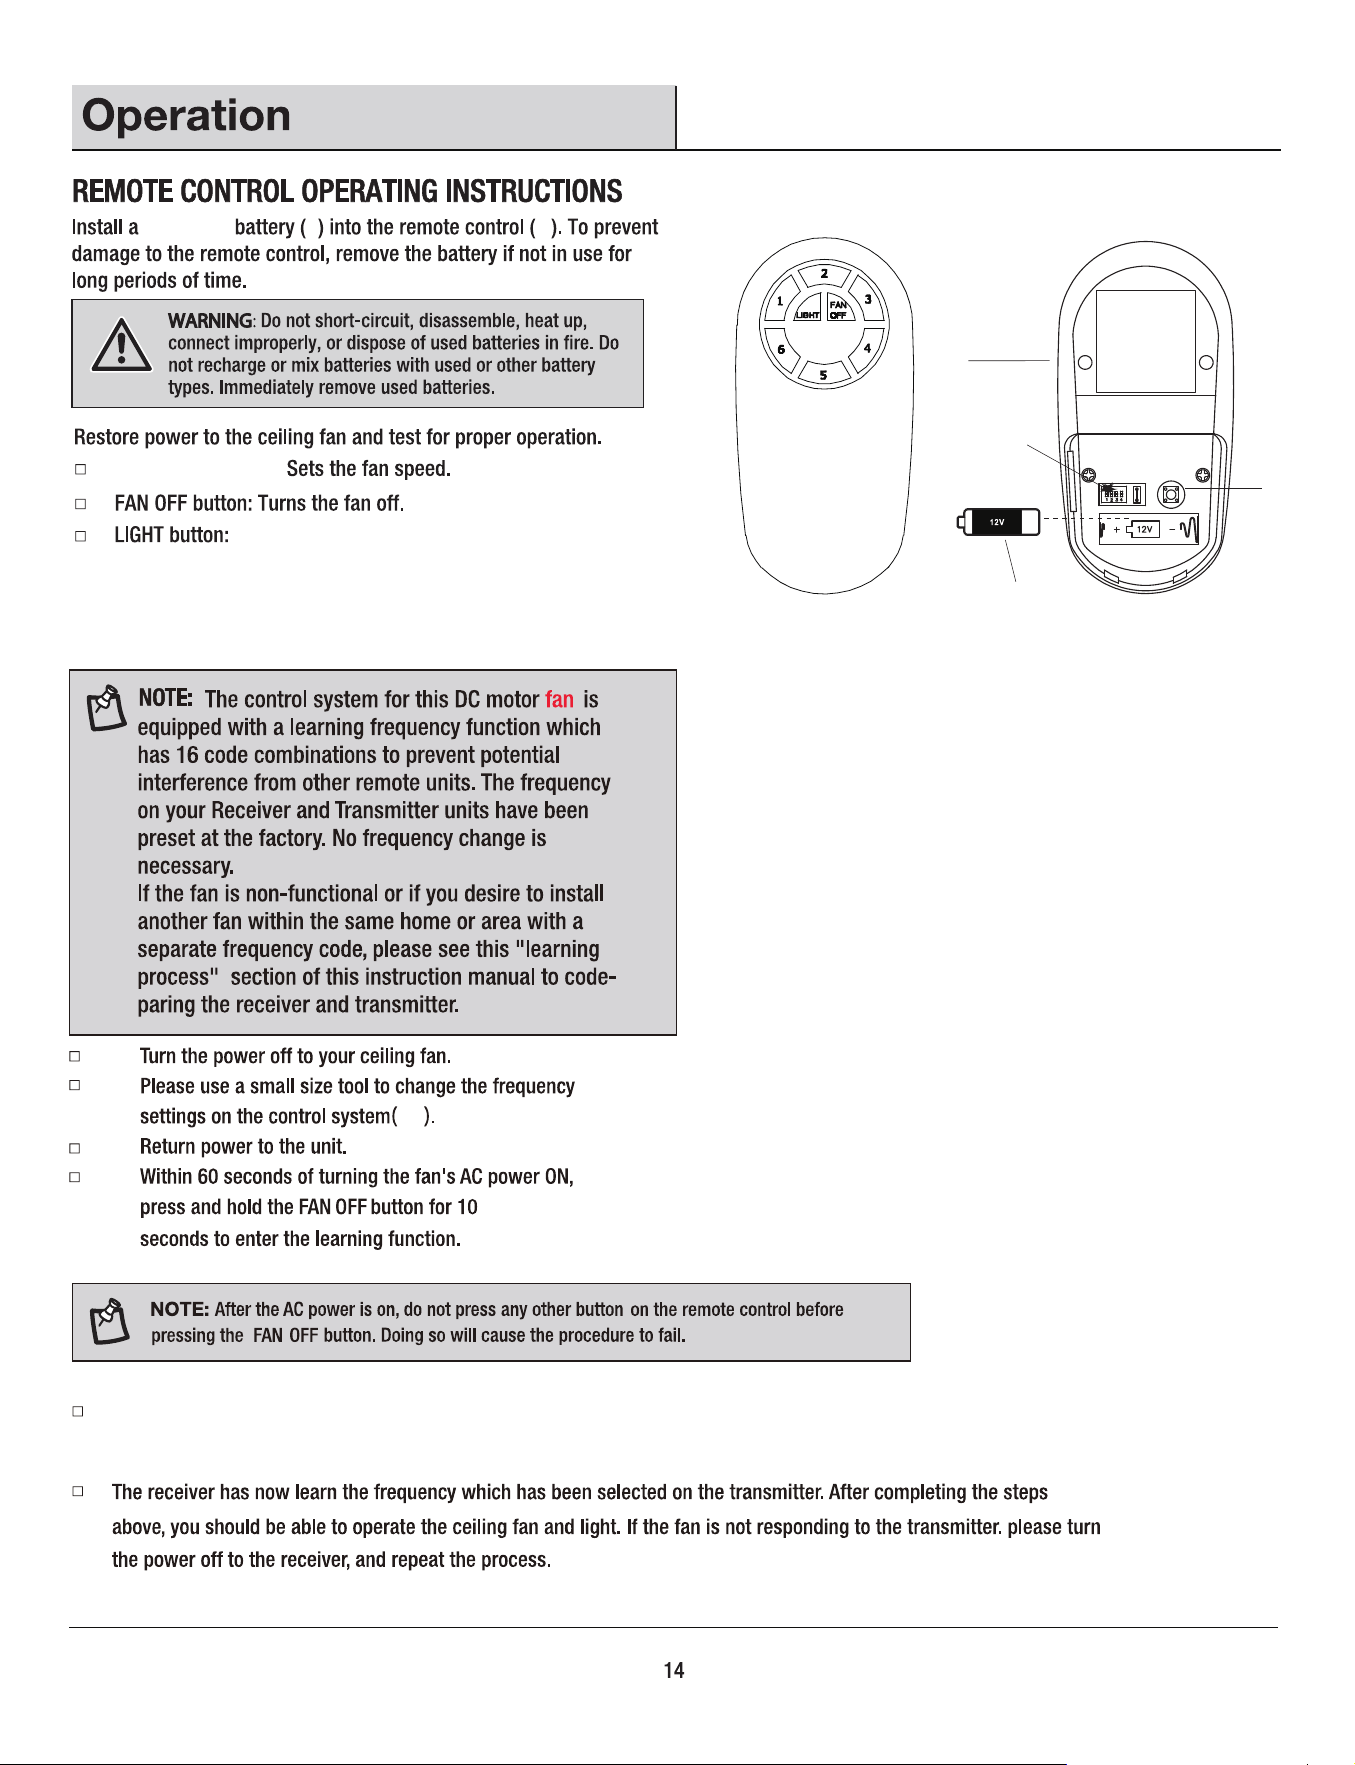
L
N
N
L
1.2.3.4.5.6 buttons:
OO
OO
PP
Learning process
A23G 12V
Turns the light ON or OFF. Press and hold the
button to set the desired brightness.
Once the receiver has detected the set frequency, the fan will begin to rotate for a short period and then shut
off. And if the fan is with light , the light will blink twice.
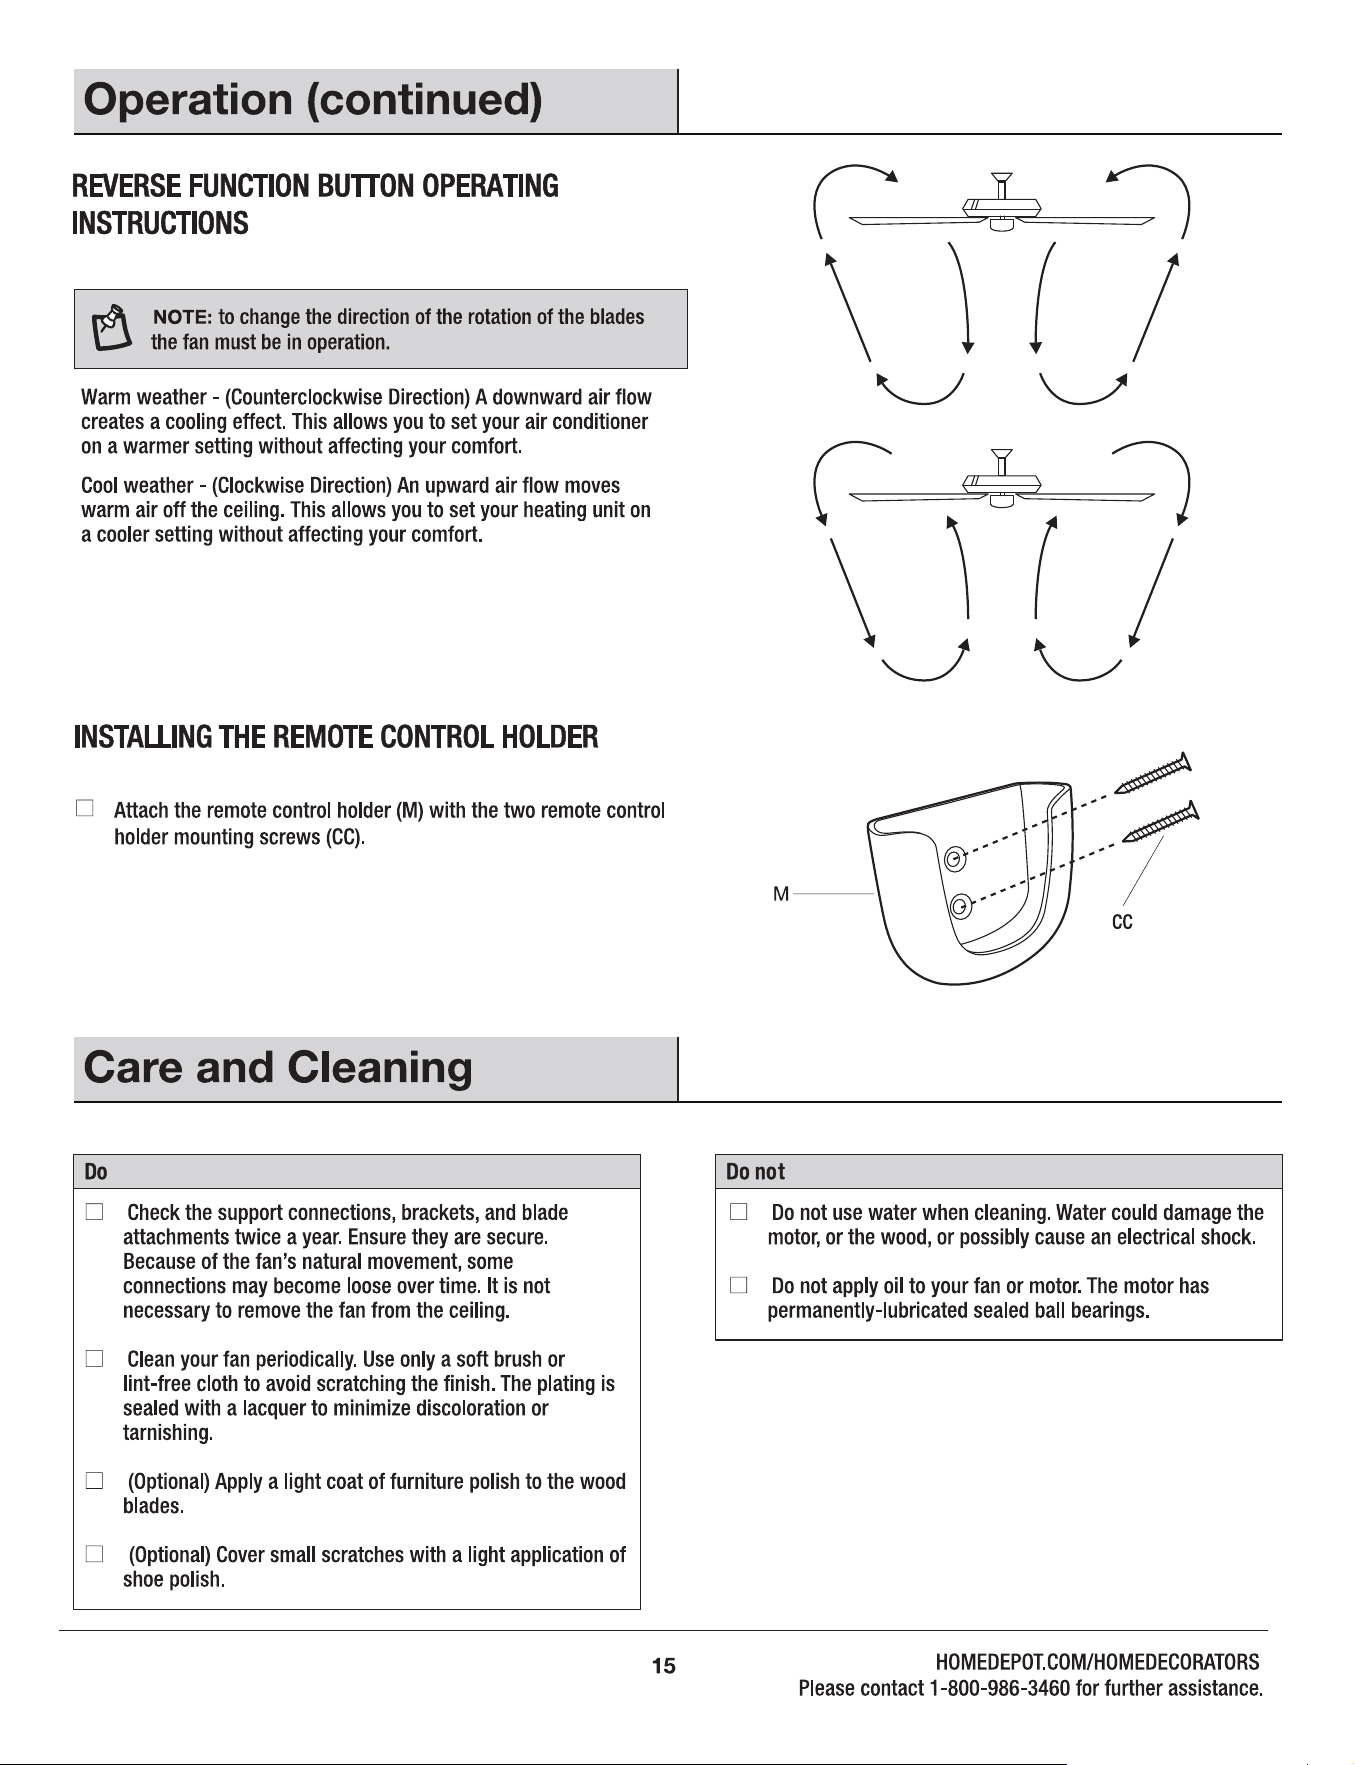
Reverse function button (PP): Controls the fan direction.
10
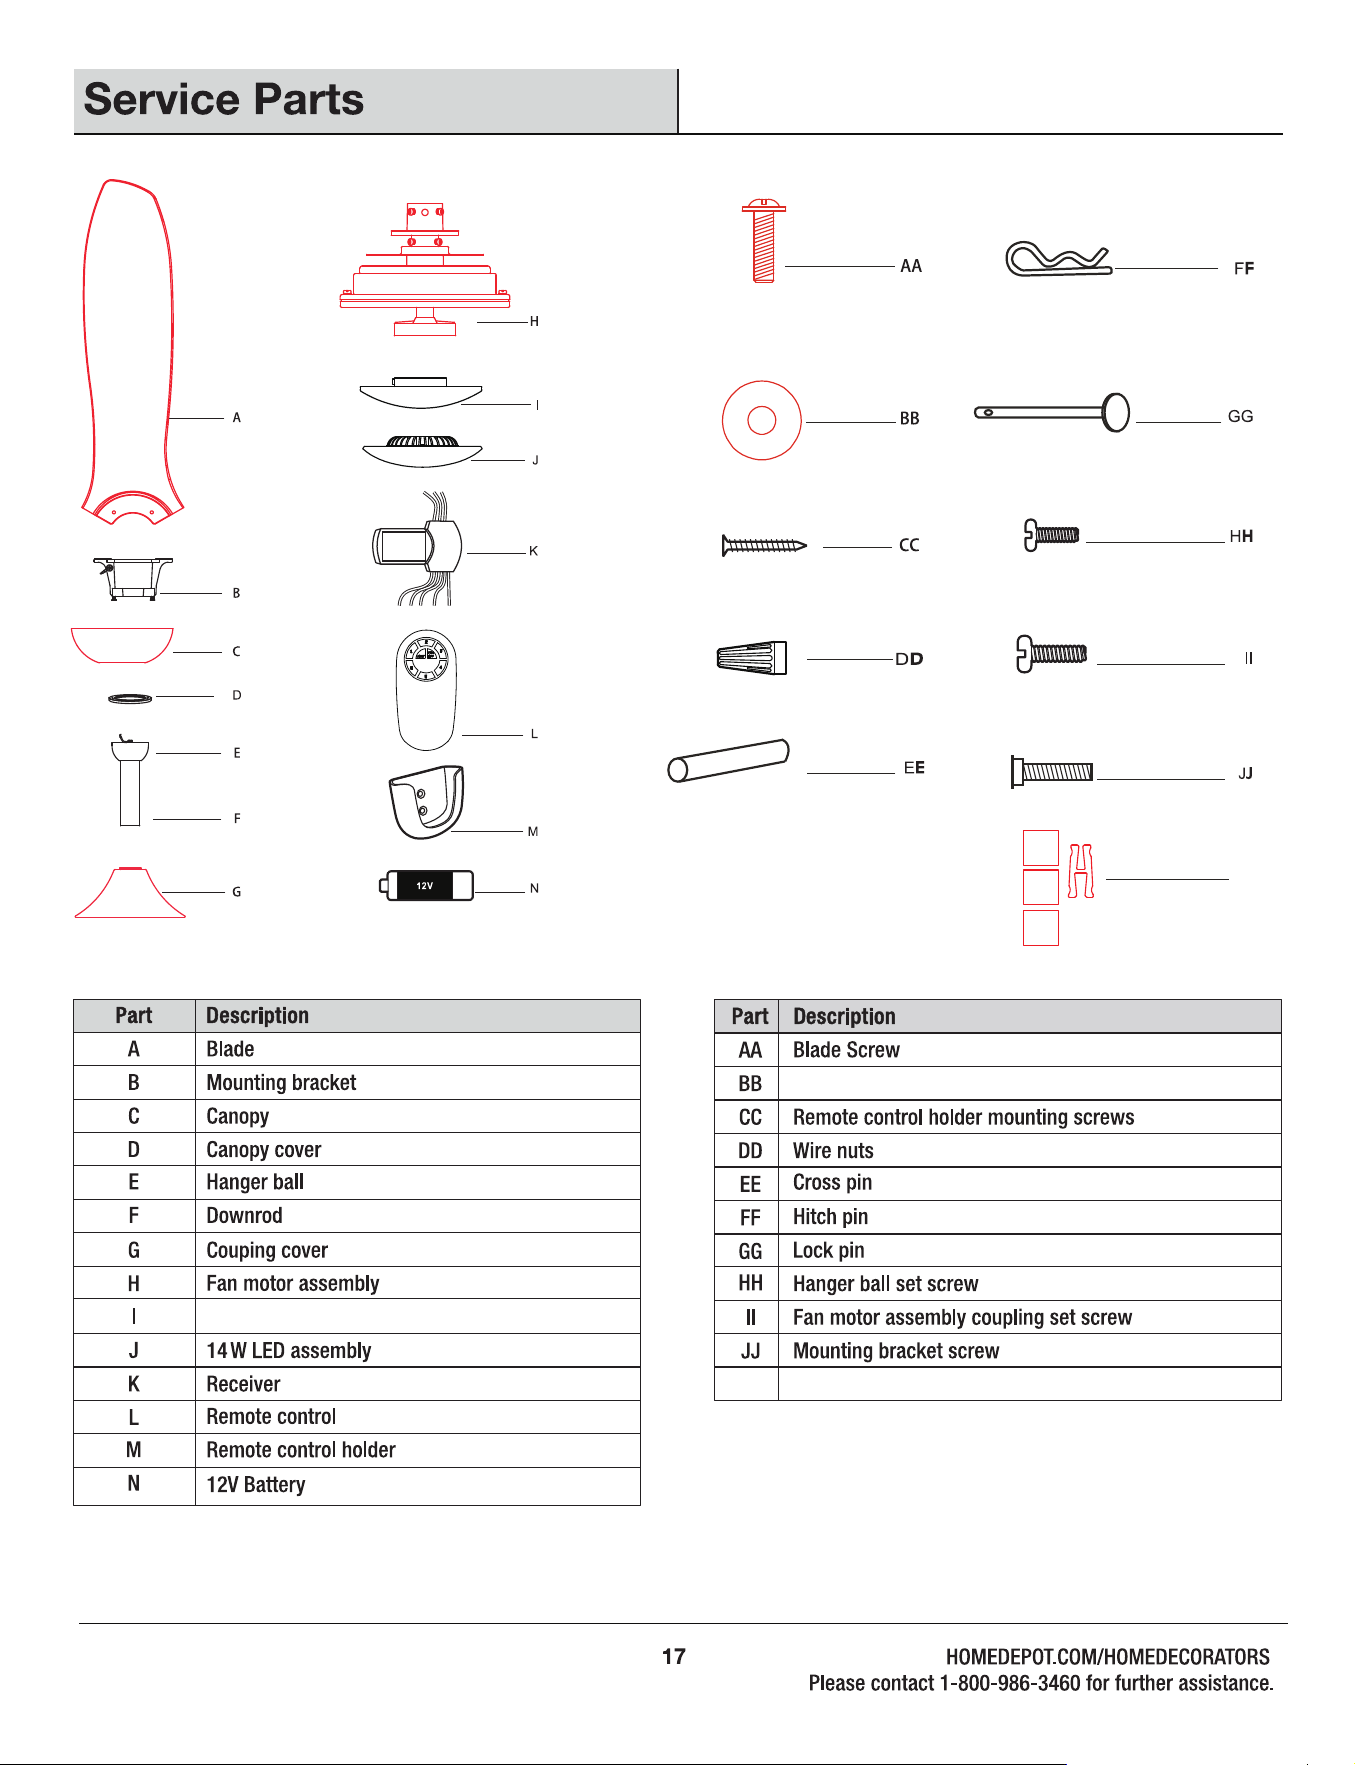
Metal shade
KK
Metal washer
KK
Balancing kit