Read me before use!
QUICK START GUIDE
IPL265,HUVIPCSC1
Keep manual and all relevant information for future reference.
Description of the device
Installation the device
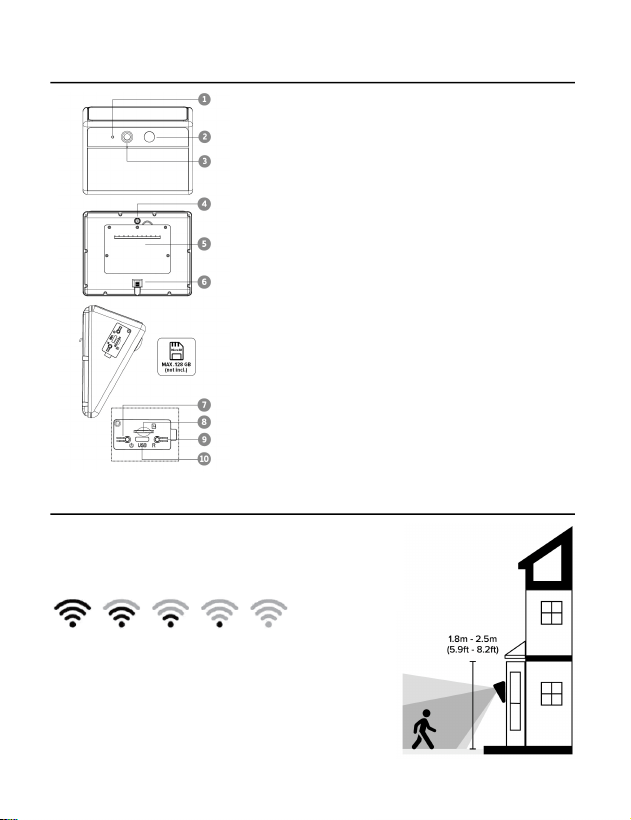
1. Working indicator
- Red light solid on: the camera is charging via USB-C cable
- Blue light solid on: system setup
- Blue light blinking fast: waiting for the pairing
- Blue light blinking slowly: waiting for the Wi-Fi connection
2. PIR motion sensor
3. Camera lens
4. 1/4” Tripod
5. Cover of battery
6. Screw hole (for fixing the camera with bracket)
7. Power button
8. Micro SD card slot (local storage, max.128GB)
9. Reset button
10. USB-C for charging
Check that you have a strong Wi-Fi signal (at
least two bars) where the smart device is to be
installed.
Mounting the camera with 1.8-2.5m height.
Install the camera solar panel in an open area
with no shading, and its angle to face direct
sunlight for optimal performance.

About the device
1. Charging and power on the device
Charge the device before start to use.
The camera with built-in rechargeable battery, charge the battery with a
5V (1A~2A) adapter (not included) to connect device’s USB interface with
supplied power cable.
When charging via USB, the red indicator light will stay on.
Hold and press the power button for 3 seconds, the camera will be
powered on with a prompt voice.
2. Micro SD card
To save the events into local storage, the device needs a max.
8GB~128GB (Class 10 or higher) micro SD card.
Please format the card before using.
3. Reset
If the device is not able to be connected to the app, you may need to reset
the device.
Hold and press the reset button for 5 seconds, the device will be restarted
and you will hear the “welcome” voice announcement, which means the
reset is succeed and the device is ready to connect.
4. Installation the device
Connect the device with App to check the signal before mounting the
device.
Setup with the App
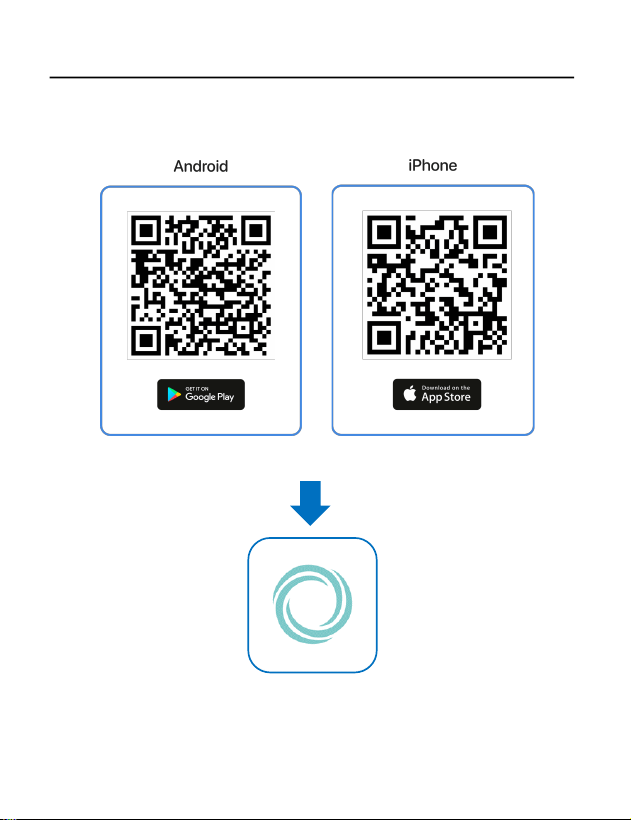
1. Download and Install the app:
Download and install the HALOWatch app by scanning the QR code for
the Apple Store or Google Play Store.
HALOWATCH
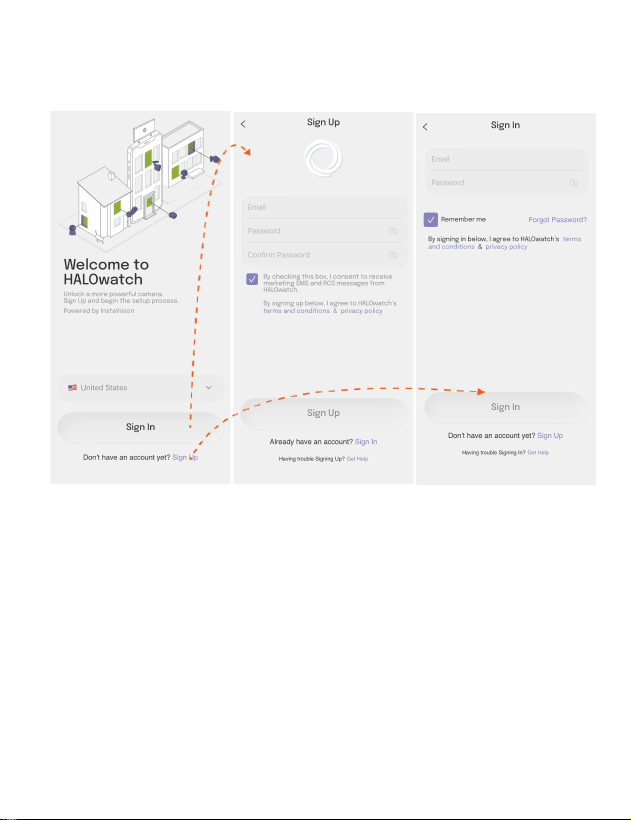
2. Account Registration:
Open the app and register a new account or log in to an existing account.
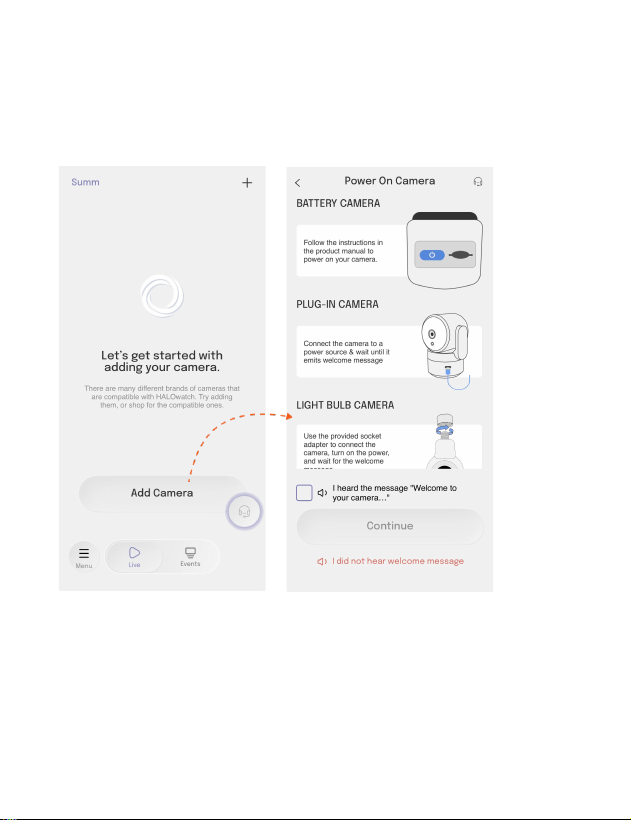
3. Add device:
Navigate to the Home Page within the app. Locate and select "Add
Camera" then go through preparation instructions to power on your
device properly.
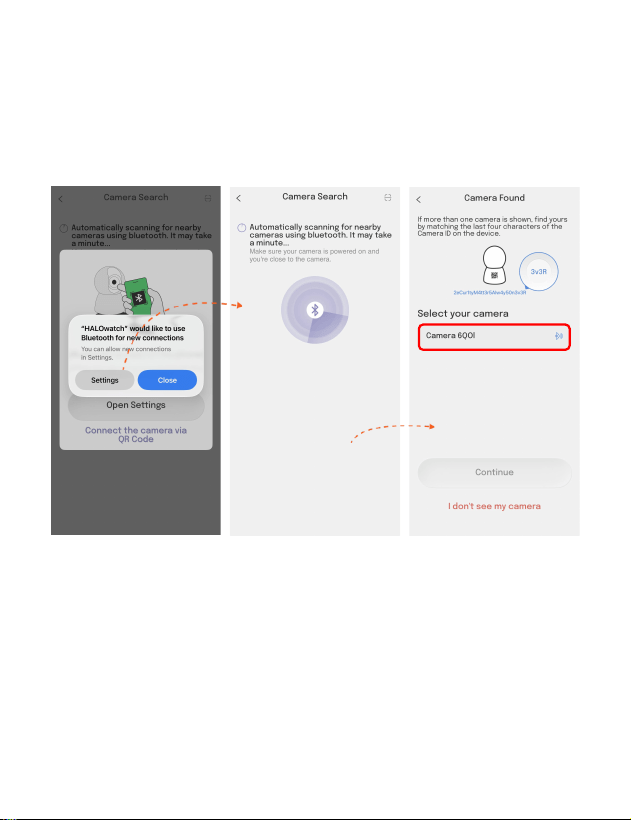
4. Bluetooth Access:
Follow the on-screen instructions to enable Bluetooth access, which is
required for device discovery.
Do not skip this step. Ensure Bluetooth access is enabled as instructed,
allowing the app to discover the device via BLE.
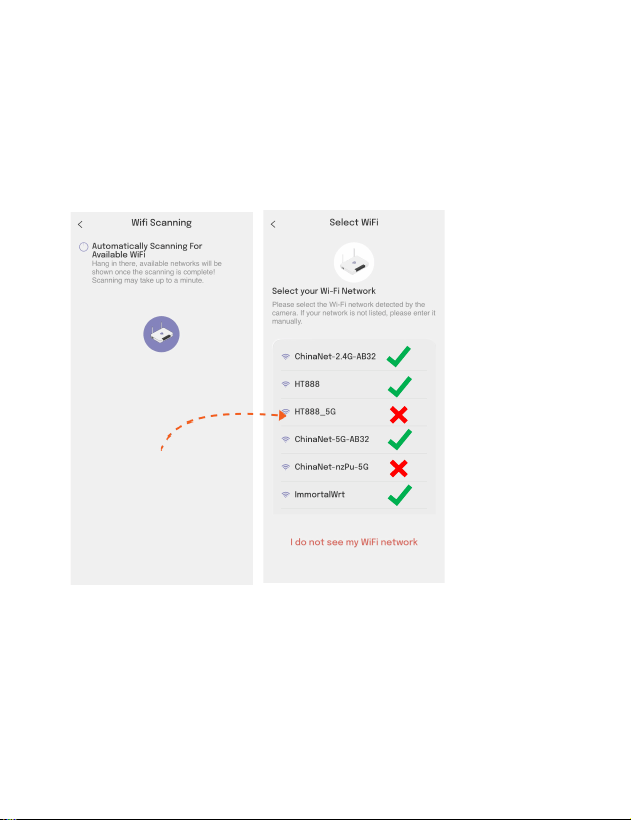
5. Connect to Wi-Fi:
The app will automatically scan for nearby 2.4 GHz &5 GHz Wi-Fi routers.
Note: This camera only supports 2.4GHz Wi-Fi, if your smartphone
connects to a 5GHz Wi-Fi please switch to 2.4GHz then connect with
camera.
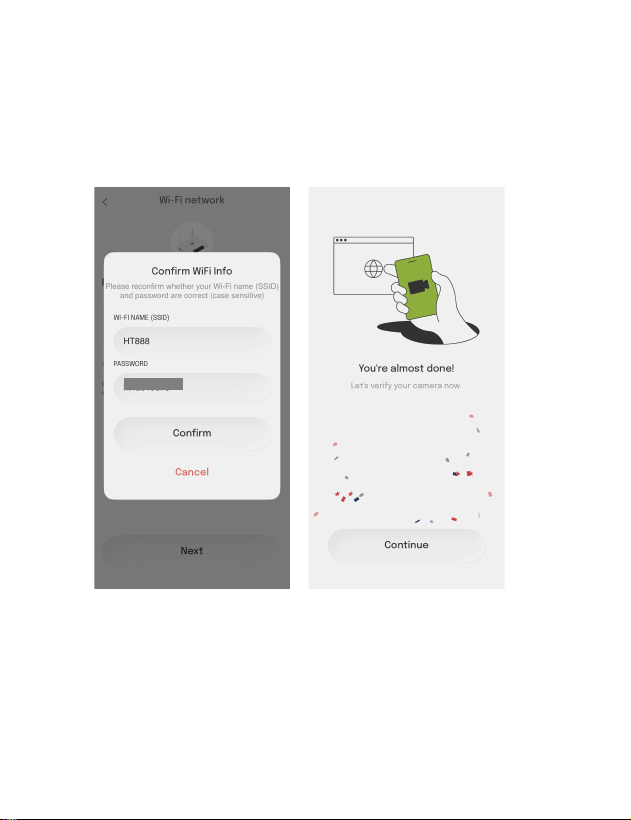
6. Input Wi-Fi Credentials:
Enter the password for your selected Wi-Fi network. Click "Next" to
initiate connection. Wait a few seconds for the device to connect to the
internet. You'll hear a notification sound from the device indicating
successful progress.
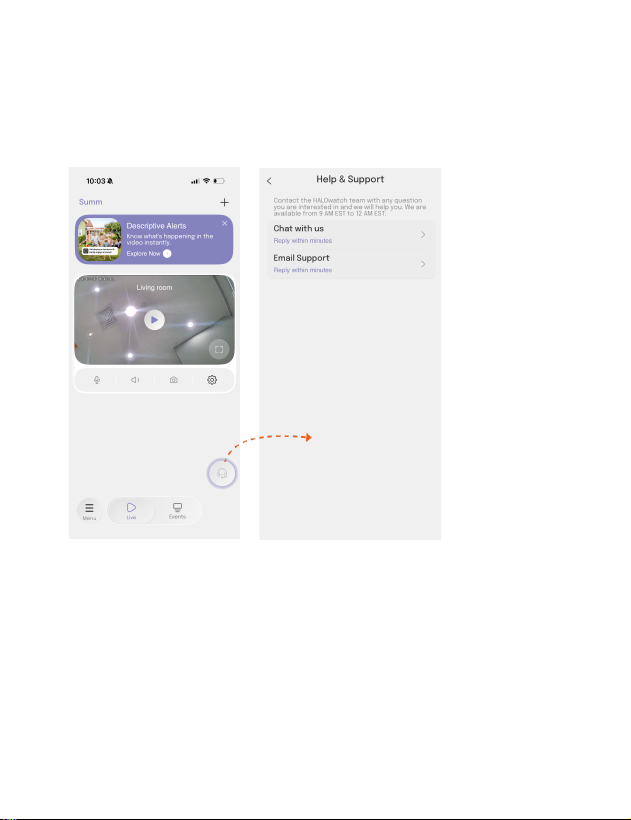
7. Live view and app support
Hear and talk to the device with the app.
If you have any questions or suggestions, find the support icon as
following to chat or e-mail with us.
FCC Statement
Changes or modifications not expressly approved by the party
responsible for compliance could void the user's authority to operate the
equipment.
This device complies with Part 15 of the FCC Rules. Operation is subject
to the following two conditions: (1) this device may not cause harmful
interference, and (2) this device must accept any interference received,
including interference that may cause undesired operation.
This equipment has been tested and found to comply with the limits for a
Class B digital device, pursuant to Part 15 of the FCC Rules. These limits
are designed to provide reasonable protection against harmful
interference in a residential installation. This equipment generates, uses
and can radiate radio frequency energy and, if not installed and used in
accordance with the instructions, may cause harmful interference to
radio communications. However, there is no guarantee that interference
will not occur in a particular installation.
If this equipment does cause harmful interference to radio or television
reception, which can be determined by turning the equipment off and on,
the user is encouraged to try to correct the interference by one or more of
the following measures:
- Reorient or relocate the receiving antenna.
- Increase the separation between the equipment and receiver.
- Connect the equipment into an outlet on a circuit different from that to
which the receiver is connected.
- Consult the dealer or an experienced radio/TV technician for help.
This equipment complies with FCC radiation exposure limits set forth for an
uncontrolled environment. This equipment should be installed and operated with a
minimum distance of 20cm between the radiator & your body. This transmitter must
not be co-located or operating in conjunction with any other antenna or transmitter.

