version:2.
SeekTag F12
Operation Manual
0
Please scan the QR code
(Install APP or view electronic manual)
2
1.Preface
Due to functional differences
between various versions of this App,
some features mentioned in this
document may not fully match those in
the version you are currently using.
We apologize for any inconvenience
caused.
2.Install the app
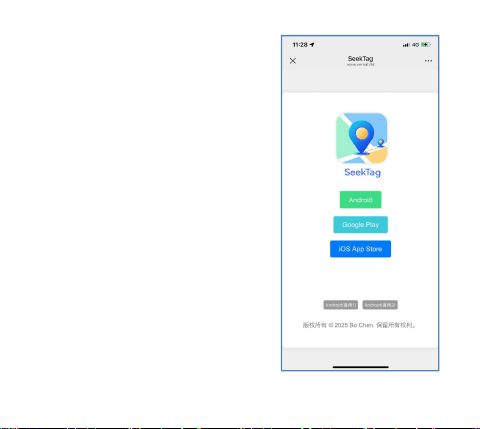
Scan the QR code on the homepage
and select the corresponding software
according to your mobile phone. Please
use the mobile phone's built-in
browser to download the software. If
you scan the code with WeChat, after
scanning, click the top right corner
to open it in the browser.
Please turn on the mobile phone's
location and Bluetooth functions
before use.
3
3.Register an account
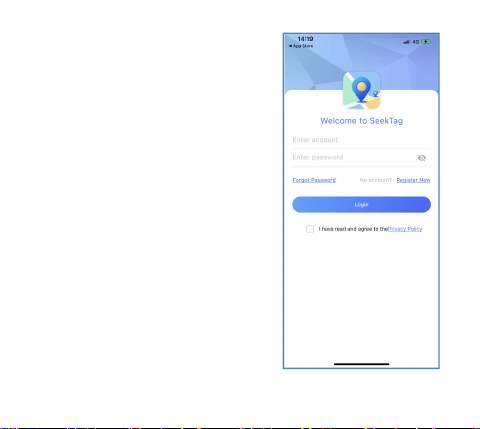
3.1 Click the "SeekTag" app icon
to open the software, and select
"Agree" in the warm reminder.
3.2 Select "Register Now", enter
your mobile phone number or email
address as the account, and set a
password. After completing the
registration, enter your account and
password to log in to the software. In
the prompt box where "SeekTag"
requests permission to access location
information, select "Allow".
4
4.Add Device
4.1 Press the power button briefly
or remove the insulating sheet to turn
on the device (depending on the user's
device). For devices with a power
button, they need to be bound within
three minutes after being turned on.
If not bound, the device will
automatically shut down after three
minutes. To continue binding the
device, you need to press the button
again to turn it on.
4.2 After turning on the device,
bring it close to your phone. Go to
the "Home" page and click the" "icon
to add a new device. This will take
you to the "Add Device" page, where
the device will be detected
automatically. If no device is
detected, you can click "Click to
Search" repeatedly until the "Add
Device" page appears.
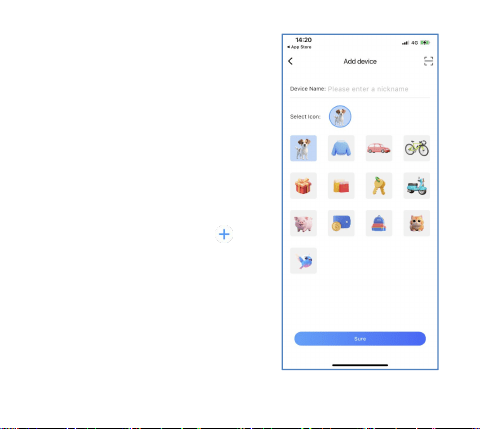
4.3 Once you enter the "Add
Device" page, enter the device name,
select an avatar, and click "Confirm".
5
After the evice is successfully bound,
the bound device will be displayed on
the "Home" page.
5.Device Location Search
Go to the "Home" page, find the
device you want to query, click the "
" icon of that device, and you will
enter the "Location Query" page.
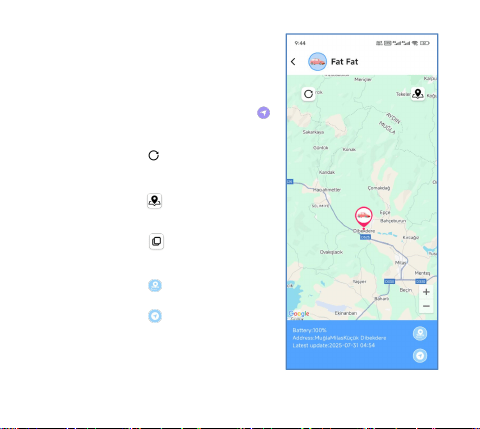
5.1 Click the " " icon at the
top left to refresh the device's
location.
5.2 Click the " " icon at the
top right to select either Google Maps
or Gaode Maps.
5.3 Click the " " icon at the
top right to switch between the basic
map and satellite map.
5.4 Click the " " icon at the
bottom right to enter the "Track" page.
5.5 Click the " " icon at the
bottom right to open the installed
"Map App" and navigate to the device's
location.
6
.6 The information such as the
device's battery level, address and
last update time is displayed below.
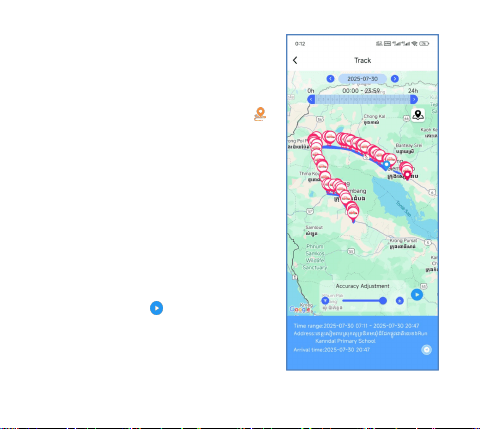
6.Device Track Query
Go to the "Home" page, find the
device you want to query, click the "
" icon of that device, and enter the
"Track" page.
6.1 On the "Track" page, adjust
the query date and time period to view
the track for that period.
6.2 Drag the "Accuracy Adjustment"
icon to adjust the number of
positioning points. If there are
relatively few positioning points, you
need to adjust it to the far right; if
there are too many positioning points,
you can adjust it appropriately to the
left.
6.3 Click the " " icon to play
the movement track of the selected
time period.
7
6.4 Click the " " icon at the
bottom right to select a map and
navigate to the current device's
location.
7.Device Sharing
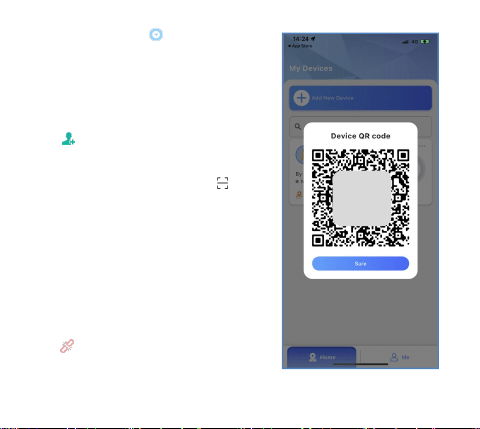
7.1 Go to the "Home" page, find
the device you want to share, click
the " " icon of that device, and a
"Device QR Code" will pop up.
7.2 Other users should go to the
"Add Device" page, click the " "
icon at the top right, turn on the
camera as prompted, scan the "Device
QR Code", and bind the device
according to the instructions. This
allows multiple users to bind the same
device and share the device
information simultaneously.
8.Unbind Device
Go to the "Home" page, find the
device you want to unbind, and click
the " " icon of that device. After
the unbinding prompt page pops up,
select "Confirm" to complete the
Scan the
QR code
8
unbinding. Once unbound, other users
can bind the device. Select "Cancel"
to abort the unbinding process.
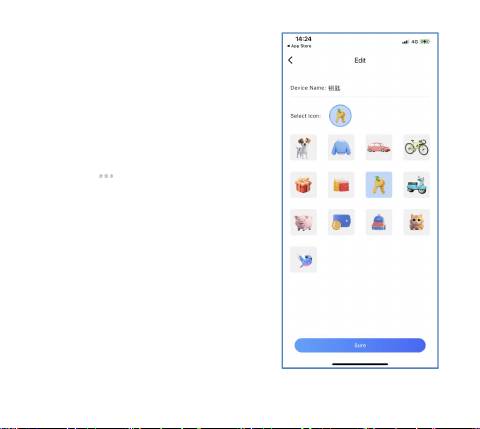
9.Device Renaming
Go to the "Home" page, find the
device you want to rename or change
the avatar for. Click the avatar icon
of the device to enter the "Edit" page,
where you can change the device name
and replace the avatar. Alternatively,
click the " " icon to bring up the
function menu, select "Rename and
Change Avatar" to enter the "Edit"
page, and then change the device name
and replace the avatar
9
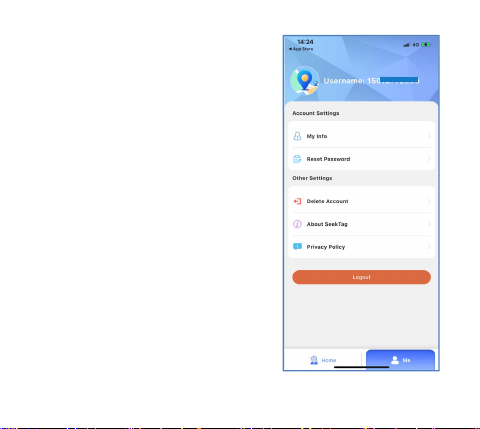
10.Introduction to the
'Me' Function
10.1 My Info: View the account and
registration time.
10.2 Reset Password: Modify the
account login password.
10.3 Delete Account: Canceling an
account means deleting it. After
cancellation, you will no longer be
able to use the account, and all
devices under the account will be
deleted.
10.4 About SeekTag: Check for and
update to the latest version of the
app.
10.5 Privacy Policy: Learn in
detail about how SeekTag respects and
protects users' personal privacy.
10.6 LogOut: After clicking to log
out, you will need to re-enter your
account and password to log in when
opening the software again.

10
11.FAQ
11.1 Binding Failure
Please check if the phone network is working properly and whether
all permissions were allowed when opening the app. If you
accidentally disabled the permissions and don’t know how to enable
them, you can first uninstall the app and grant all required
permissions when reinstalling it.
11.2 Slow Remote Location Updates
The remote positioning function of this device reports location
through relevant communication products near the device. It is
normal for there to be a certain delay sometimes.
Warm Reminder
The product is strictly prohibited from
being used for illegal purposes; otherwise,
the legal liabilities arising therefrom shall
be borne by the user themselves.
FCC Caution:
This device complies with part 15 of the FCC Rules. Operation is subject to the following two conditions: (1)
This device may not cause harmful interference, and (2) this device must accept any interference received,
including interference that may cause undesired operation.
Any changes or modifications not expressly approved by the party responsible for
compliance could void the user's authority to operate the equipment.
NOTE: This equipment has been tested and found to comply with the limits for a Class B digital device,
pursuant to Part 15 of the FCC Rules. These limits are designed to
provide reasonable protection against harmful interference in a residential installation.
This equipment generates, uses and can radiate radio frequency energy and, if not
installed and used in accordance with the instructions, may cause harmful interference
to radio communications. However, there is no guarantee that interference will not occur in a particular
installation.
If this equipment does cause harmful interference to radio or television reception,
which can be determined by turning the equipment off and on, the user is encouraged to try to correct the
interference by one or more of the following measures:
-- Reorient or relocate the receiving antenna.
-- Increase the separation between the equipment and receiver.
-- Connect the equipment into an outlet on a circuit different
from that to which the receiver is connected.
-- Consult the dealer or an experienced radio/TV technician for help.
The device has been evaluated to meet general RF exposure requirement. The
device can be used in portable exposure condition without restriction.
11