
INSTRUCTION MANUAL
MODEL 5329629
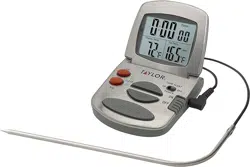
PROGRAMMABLE DUAL PROBE THERMOMETER WITH TIMER
Thank you for purchasing a TruTemp® digital thermometer. Your TruTemp® thermometer is an example of
superior design and craftsmanship. Please read this instruction manual carefully before use. Keep these
instructions handy for future reference.
BATTERY INSTALLATION
1. Use 2 AAA (1.5 volt) batteries (included). There is a strip under the battery door to prevent battery drain
during shipping. Please remove before use.
2. Loosen screws on the battery compartment cover until the battery cover can be lifted and removed from
the thermometer housing.
3. When batteries need replacement, remove the old batteries and place new batteries into the battery compartment
according to the “+” and “-” polarity symbols in the battery compartment.
4. Replace battery compartment cover and screw back on. Turn the thermometer on.
BATTERY WARNINGS
NOTE: Please recycle or dispose of batteries per local regulations.
WARNING: Batteries may pose a choking hazard. As with all small items, do not let children handle batteries. If
swallowed, seek medical attention immediately.
PRECAUTION: Do not dispose of batteries in fire. Batteries may explode or leak.
Always purchase the correct size and grade of battery most suitable for the intended use.
Remove the batteries if the product will not be used for a long period of time. Remove used batteries promptly. Clean
the battery contacts and also those of the device prior to battery installation.
Non-rechargeable batteries are not to be recharged.
Do not force discharge, recharge, disassemble, heat above 60°C, or incinerate. Doing so may result in injury due to
venting, leakage or explosion resulting in chemical burns.
Examine devices and make sure the battery compartments are correctly secured, e.g. the screw or other mechanical
fastener is tight. Do not use if the compartment is not secure.
Always replace all batteries at the same time; do not mix old and new batteries. Do not mix alkaline, standard (carbon-
zinc) or rechargeable (ni-cad, ni-mh, etc.) batteries.
When batteries of different brand or type are used together, or new and old batteries are used together, some batteries
may be over-discharged due to a difference of voltage or capacity. This can result in venting, leakage, and rupture and
may cause personal injury.
LOW BATTERY: If readings become dim or thermometer is malfunctioning, replace batteries.
GENERAL OPERATION
Temperature Range: 32°F to 392°F (0°C to 200°C)
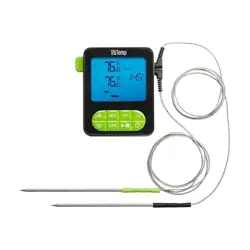
1. Plug the sensor probes into the sockets on the right side of the main unit. They are labeled #1 and #2.
Either color probe (green or black) can be placed in each port. Probes can also be used independently. If a
probe is unplugged the THERMO TEMP will show “---“ for P1 or P2. Make sure the probe cable is free of
knots, bends or kinks.
2. Select Fahrenheit or Celsius temperature readings by pressing the F/C on the back of the thermometer.
3. Select THERMOMETER functions by pressing “ ” button on the back of the thermometer. Select TIMER
functions by pressing the “ ” button on the back of thermometer.
4. Turn the unit ON by pressing the “ ” button on the front of the thermometer.
5. The unit turns off after 10 minutes if there is not temperature change, if no buttons are pressed, and the
temperature is under 122°F (50°C).
6. Press and hold the “ ” button for 3 seconds to turn off the unit manually.

INSTRUCTION MANUAL
PROGRAMMING THE TEMPERATURE
Your digital cooking thermometer is programmed with preset temperatures for various cooking levels. To use
the preset temperature settings:
1. Be sure the thermometer is set to temperature mode on the back of the unit. The SET TEMP words will
display on the screen.
2. Press the SET button to toggle the current selection between P1 or P2.
3. Once the probe selection to program has been made, press the MEAT button to scroll through the icons.
4. Press the TASTE button until desired doneness level is selected.
5. To modify the set temperature outside of the preset temperatures, press the UP or DOWN (H/M) buttons
until the desired target temperature is selected.
6. Note that pressing the MEAT, TASTE, UP or DOWN buttons will clear the setting.
The below chart shows the preset temperatures for the thermometer:
MEAT
TASTE
Target
temperature
BEEF
RARE
140°F / 60°C
MED RARE
145°F / 63°C
MEDIUM
160°F / 71°C
MED WELL
165°F / 74°C
WELL DONE
170°F / 77°C
PORK
MEDIUM
145°F / 63°C
WELL DONE
170°F / 77°C
CHICKEN
-
165°F / 74°C
LAMB
RARE
140°F / 60°C
MED RARE
145°F / 63°C
MEDIUM
160°F / 71°C
MED WELL
165°F / 74°C
WELL DONE
170°F / 77°C
HAMBURGER
-
160°F / 71°C
HAM
-
145°F / 63°C
TURKEY
-
165°F / 74°C
FISH
-
145°F / 63°C

INSTRUCTION MANUAL
USING THE COOKING THERMOMETER
1. Insert the metal probe into the thickest part of the food to be cooked. Do not come in contact with bone,
fat, or gristle, as these areas will not provide accurate temperature readings.
2. Place the food in the oven, grill, or other cooking space. The digital thermometer unit must be placed
outside of the oven, grill, or other cooking space (DO NOT place the thermometer unit into any cooking
space). Be careful not to crimp the probe cords with the doors or lids. To prevent damage to the base
unit, do not place it on a hot surface.
3. Make sure the sensor plugs on the other end of the cords are plugged into the thermometer unit.
4. The current internal temperature reading for each probe will be shown on the left side of the display (as
THERMO TEMP).
5. When the set temperature is reached, the backlight will flash, the current and target temperature words on
the display will blink, and the alarm will sound until the START/STOP button is pushed.
IMPORTANT: The P1 and P2 alarms will alert even when in TIMER mode. The probe that reached the target
temperature will blink on the screen.
ALARM SOUND WHEN SETTINGS ARE REACHED:
P1 = probe 1 will sound a single beep every 0.5 seconds
P2 = probe 2 will sound two quick beeps every 0.5 seconds
TIMER will sound 3 quick beeps every 0.5 seconds
TIMER INSTRUCTIONS
Your cooking thermometer is also equipped with a convenient hour/minute timer. To operate the timer:
1. Press the timer/thermometer button on the back of the unit to toggle to the TIMER function. The screen
will show the TIMER icon.
2. Press the UP and DOWN arrows (H/M) to scroll until the desired HOUR setting is selected.
3. Press the UP and DOWN arrows (H/M) to scroll until the desired MINUTE setting is selected.
4. Press the START/STOP button to start the timer countdown function. The colon will be blinking to indicate
it is working.
5. When the timer reaches 00:00, the backlight will flash, the TIMER words will blink on the screen, and the
alarm will sound.
6. The timer will start to count up until the START/STOP button is pressed.
7. Press both the UP and DOWN arrows (H/M) at the same time to reset the timer to 00:00.
8. To make the timer count up, reset the timer to 00:00 by holding the UP and DOWN buttons together
briefly. Press the START button to begin counting up and the colon will be blinking to indicate it is working.
9. To stop counting up, press the START/STOP button.
BACKLIGHT FEATURE
1. A bright blue backlight will illuminate the display in both thermometer and timer modes.
2. Press the BACKLIGHT button to activate the backlight for about 20 seconds.
SILICONE HANGING LOOP: To use the silicone hanging loop, press the green release tab down to release
the corner of the silicone strap out of the housing channel. Pull the strap up and over the thermometer unit.
Find appropriate hanging location that will not damage the silicone or the thermometer unit.

INSTRUCTION MANUAL
CARE AND PRECAUTIONS
This thermometer unit is designed to be IPX4 rated.
After each use hand wash only. Wipe the thermometer with a damp cloth and dry thoroughly, being extra careful
not to get water into the probe sockets.
Use caution while handling the thermometer. Always wear a heat-resistant glove when touching the
thermometer or probes during or just after use. Do not touch thermometer or probes with bare hands.
When running the probe cables into an oven/grill be sure to gently close the door to avoid crimping or
severing the cable.
Do not immerse the thermometer unit in liquid or pour liquid directly on the thermometer unit.
Do not wash in a dishwasher.
Do not place the thermometer display unit into an oven/grill.
Do not use this thermometer in a microwave oven.
Do not tamper with unit’s internal components.
Do not subject the unit to excessive force, water, shock, dust, temperature, or humidity.
DISPLAY ERROR CODES
When the detected temperature is higher than 392°F/200°C the screen will read “HHH”.
When the detected temperature is lower than 32°F/0°C the screen will read “LLL”.
One (1) Year Limited Warranty
TruTemp® warrants this product to be free from defects in material or workmanship (excluding batteries) for one (1)
year for the original purchaser from date of retail purchase. It does not cover damages or wear resulting from accident,
misuse, abuse, commercial use, or unauthorized adjustment and/or repair.
Taylor Precision Products
2220 Entrada Del Sol, Suite A
Las Cruces, New Mexico 88001 USA
www.taylorusa.com
Email: taylorusa@lifetimebrands.com
There are no expressed warranties except as listed above. This warranty gives you specific legal rights, and you may
have other rights which vary from state to state. For additional product information, or warranty information outside the
USA, please contact us through www.taylorusa.com.
© 2025 Taylor Precision Products, a division of Lifetime Brands Inc. All rights reserved.
Made to our exact specifications in China.
Not legal for trade.
5329629_2.2025SMS