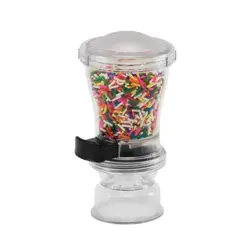
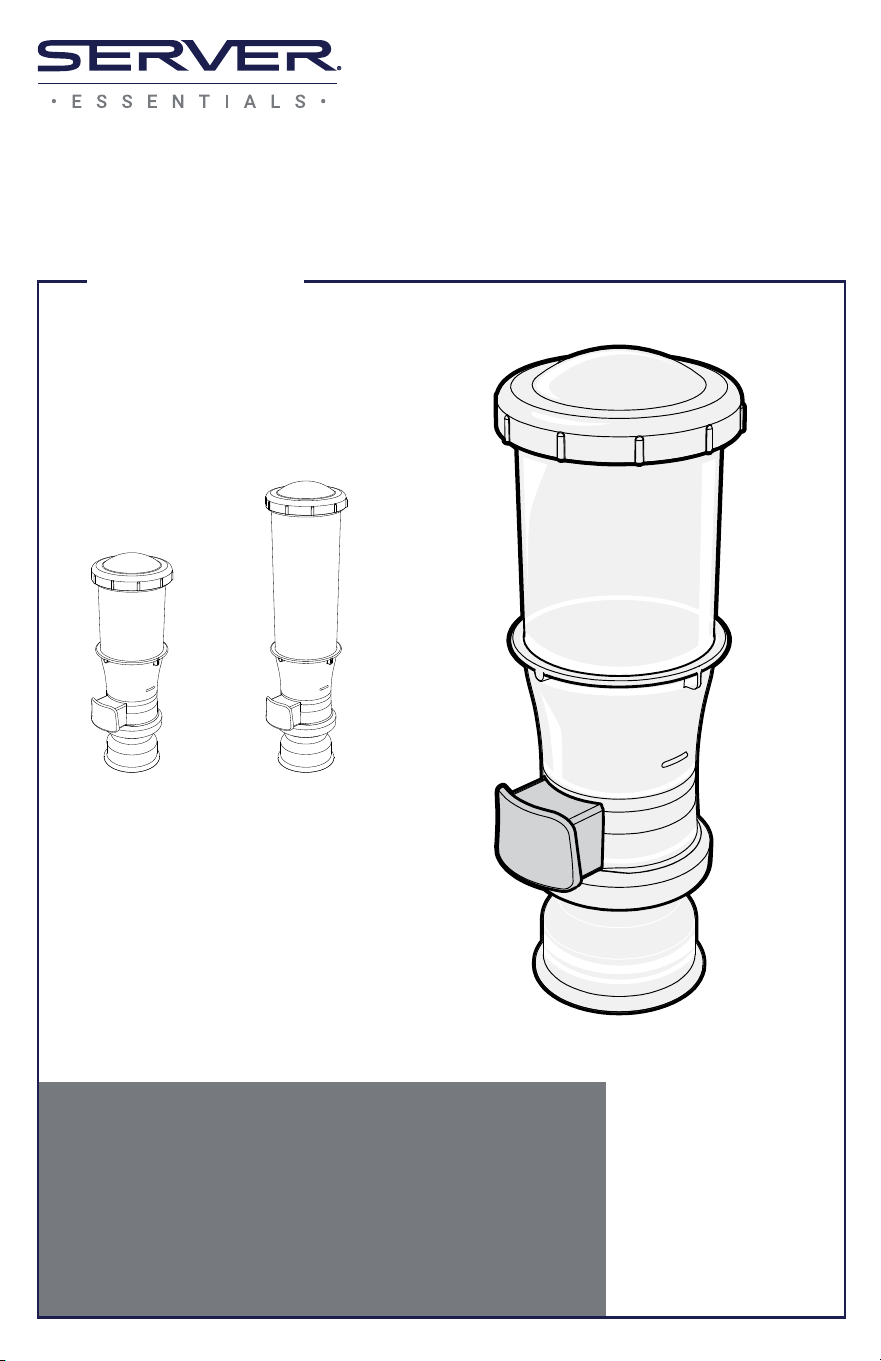
InSweeten
®
Dispenser
for purchasing our InSweeten
®
dispenser.
Now you can quickly deliver perfect portions
of bulk sweeteners with the push of the button
—equivalent to common portion packs.
PERFECTLY SWEETENED EVERY TIME!
Thank You
MODEL: INS
InSweeten
®
14 oz.
InSweeten
®
24 oz.
Page 2
ASSEMBLY
WASH ALL PARTS
PROPERLY BEFORE USE.
See page 5.
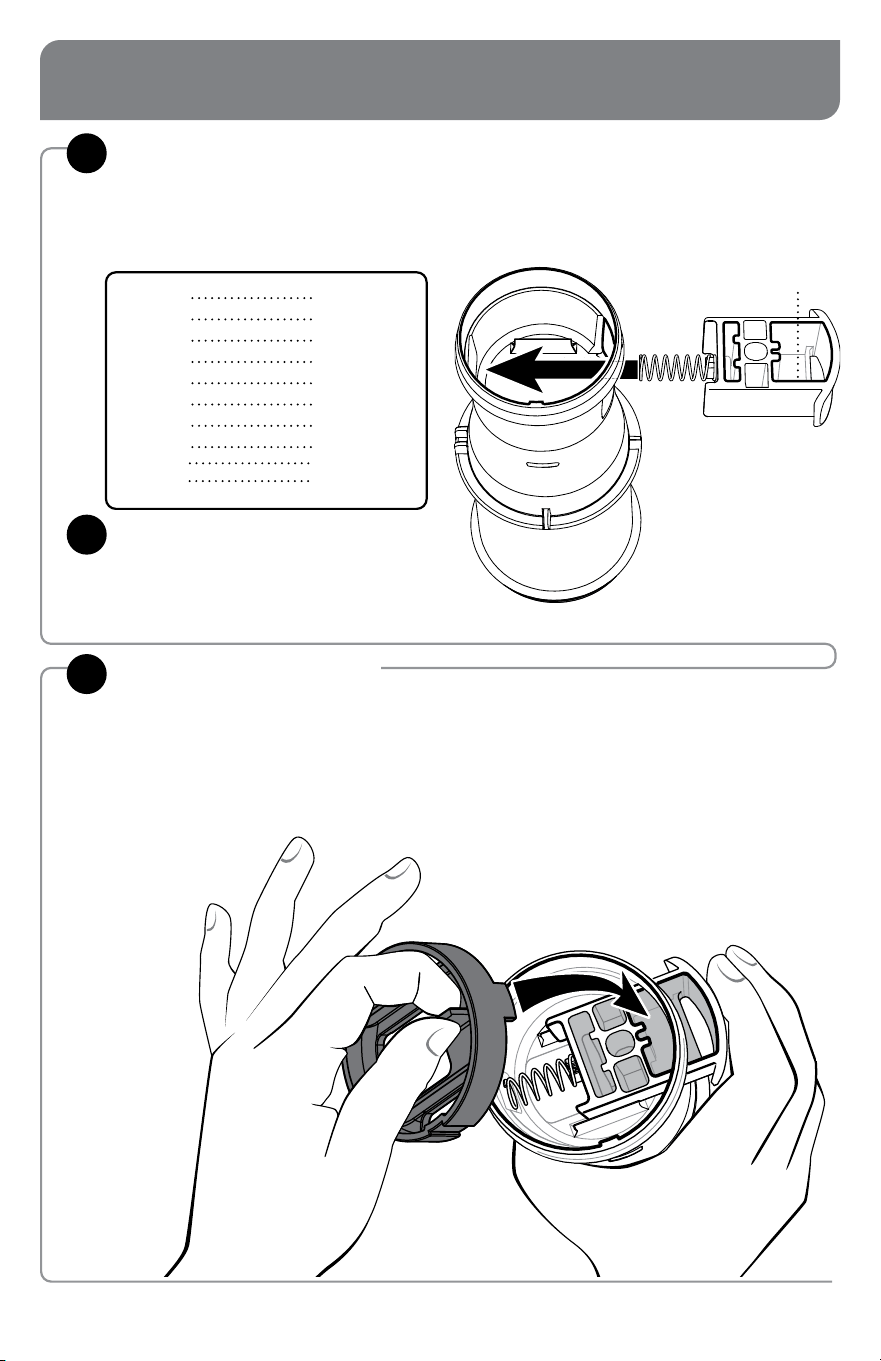
SELECT PORTION TRIGGER
1
INSERT TRIGGER
2
With unit upside down on countertop, slide
spring end of trigger assembly into side slot.
Smooth side of trigger should face down.
Portion size is also
stamped in trigger cavity.
(if more than one is provided).
Trigger determines portion size dispensed.
1/2 TSP
0.31 TSP
0.31 TSP
0.31 TSP
0.31 TSP
0.7 TSP
1 TSP
1 TSP
1 TSP
1.217 TSP
PORTION SIZE TRIGGER
WHITE
BLUE
PINK
YELLOW
GREEN
WHITE
WHITE
GREEN
TAN
TAN
INSTALL CLOSER PLATE
3
into unit body.
Hold closer plate by grasp tab.
Slowly push trigger assembly into unit body.
Ensure spring does not pop loose.
Insert closer plate rim tab into largest
interior opening of trigger.
Page 3
Portion size is also
stamped in trigger cavity.
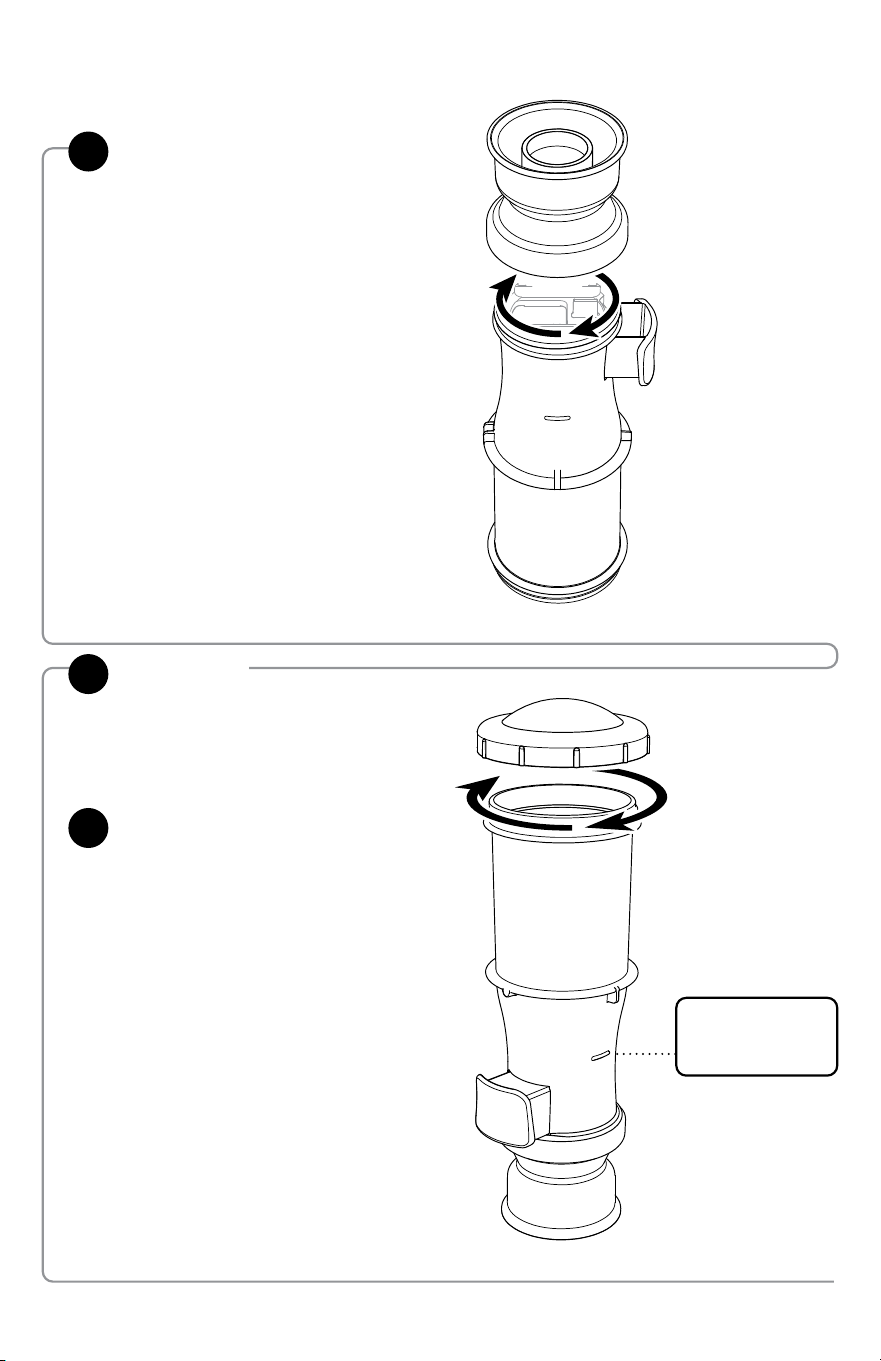
FILL UNIT
5
INSTALL LID
6
IMPORTANT: Rell
when product level
falls below ll line.
INSTALL SPREADER
4
onto unit body,
rotating clockwise to tighten.
onto unit body,
rotating clockwise to tighten.
Flip unit right-side up and
add granular ingredient.
Page 4
SAFETY
According to food and safety regulations, most
foods must be stored and/or served at certain
temperatures or they could become hazardous.
Check with local food and safety regulators for
specic guidelines. Server Products, Inc. cannot be
responsible for the serving of potentially hazardous
product.
IMPORTANT
Clean, rinse, sanitize, and dry parts daily or regularly to
comply with local sanitization requirements.
NSF International listed.
DISASSEMBLY
EMPTY UNIT
Pour out any remaining ingredient.
2
REMOVE LID
1
REMOVE SPREADER
3
REMOVE CLOSER PLATE
Set unit upside down on countertop.
Grasp tab of closer plate while holding
trigger in.
Pull closer plate up and out of unit.
Slowly release trigger to home position,
to ensure spring does not pop loose.
4
REMOVE TRIGGER ASSEMBLY
from side slot of unit.
5
Page 5
CLEANING
SANITIZE
all parts according to local sanitization
requirements. All parts in contact with food
must be sanitized.
3
AIR DRY
all parts fully before relling.
5
Use dishwashing
soap and hot water
YES!
• Dishwasher safe
• Do not use abrasive, caustic or ammonia
based cleansers.
• Do not use cleansing agents with high
concentrations of acid, alkaline or chlorine.
• Do not use metal scrapers or cleaning
pads that could scratch surfaces.
RINSE
Fully rinse all parts thoroughly with clear
water.
2
WASH
After disassembly, wash all parts with
dishwashing detergent and hot water.
1
GENERAL SERVICE,
REPAIR OR RETURNS
Before sending any item to Server Products for service,
repair, or return, contact Server Products customer
service to request a Return Authorization Number.
Merchandise must be sent to Server Products with this
number. Service is extremely prompt. Typically, units
are repaired and ship out within 48 hours of receipt.
Merchandise being returned for credit must be in new
and unused condition and not more than 90 days old
and will be subject to a 20% restocking charge.
SERVER PRODUCTS
LIMITED WARRANTY
This Server product is backed by a two-year
limited warranty against defects in materials and
workmanship. See Server-Products.com for details.
Page 6
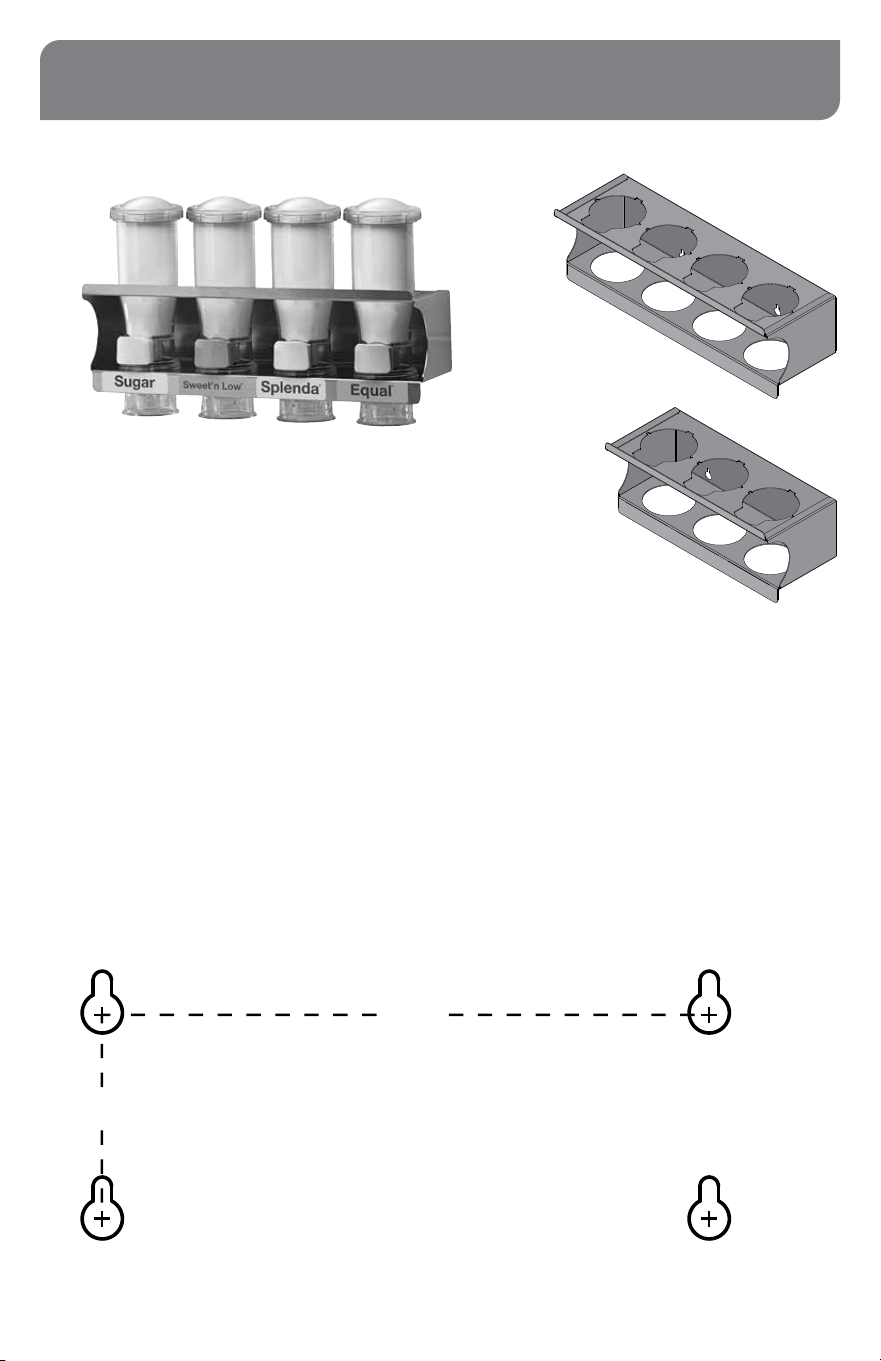
SWEETSTATION
®
RACKS
SWEETSTATION™
RACK MOUNTING
• Select wall location or sturdy vertical surface
for mounting.
• Determine proper mounting hardware you will
need to supply.
• Consider best placement for ease of use.
• Locate (4) mounting holes 7" and 2-3/8"
apart as shown in diagram below.
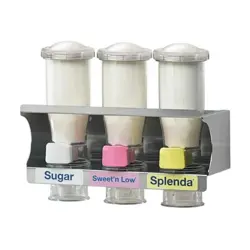
Lightweight, wall-mounted rack
securely holds dispensers in place
for single-handed operation.
Key slot mounting makes
removal easy.
7"
2-3/8"
SweetStation
™
Quad Shelf
87135
SweetStation
™
Triple Shelf
80085
Registered trademarks of Sweet ‘N Low
®
, Splenda
®
and Equal
®
are property of their respective owners.
Page 7
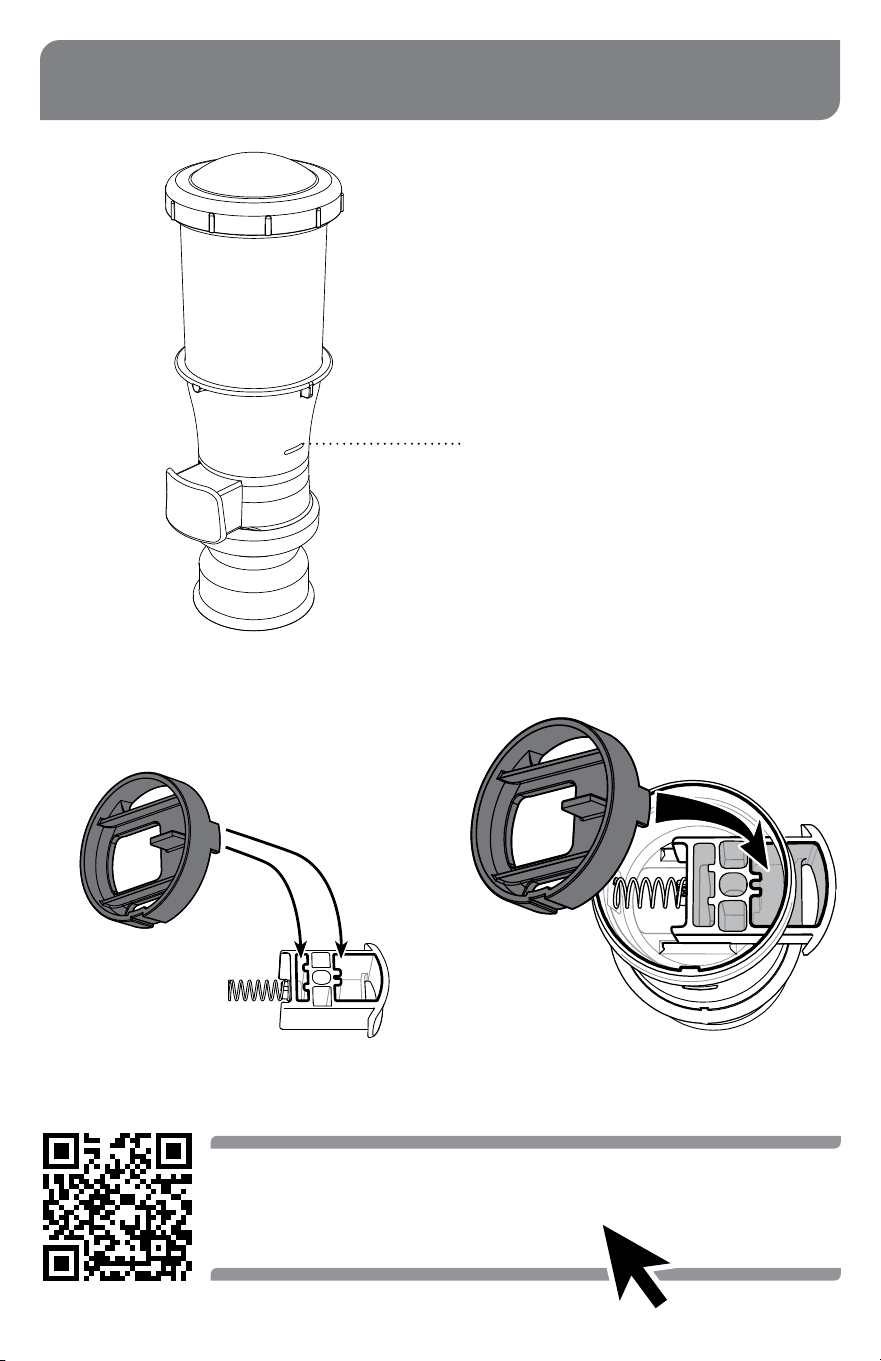
Heat and moisture can cause ingredients
to settle and become packed in.
• Shake unit to dislodge light clumping.
• Ensure ingredients have not become clogged
within the unit—disassemble and inspect.
• Clean unit and air dry fully before relling.
• Ensure ingredient level is above ll line.
INCONSISTENT PORTIONS?
• Ensure closer plate is properly installed with
rim tab in the largest opening of trigger.
TRIGGER WON’T PUSH IN?
NO YES
TROUBLESHOOTING
Please Visit
www.YouTube.com/user/ServerProducts
to see videos of more information.
Registered trademarks of Sweet ‘N Low
®
, Splenda
®
and Equal
®
are property of their respective owners.
Page 8
Manual #EM_01695_RevF_InSweeten 053023
NEED HELP?
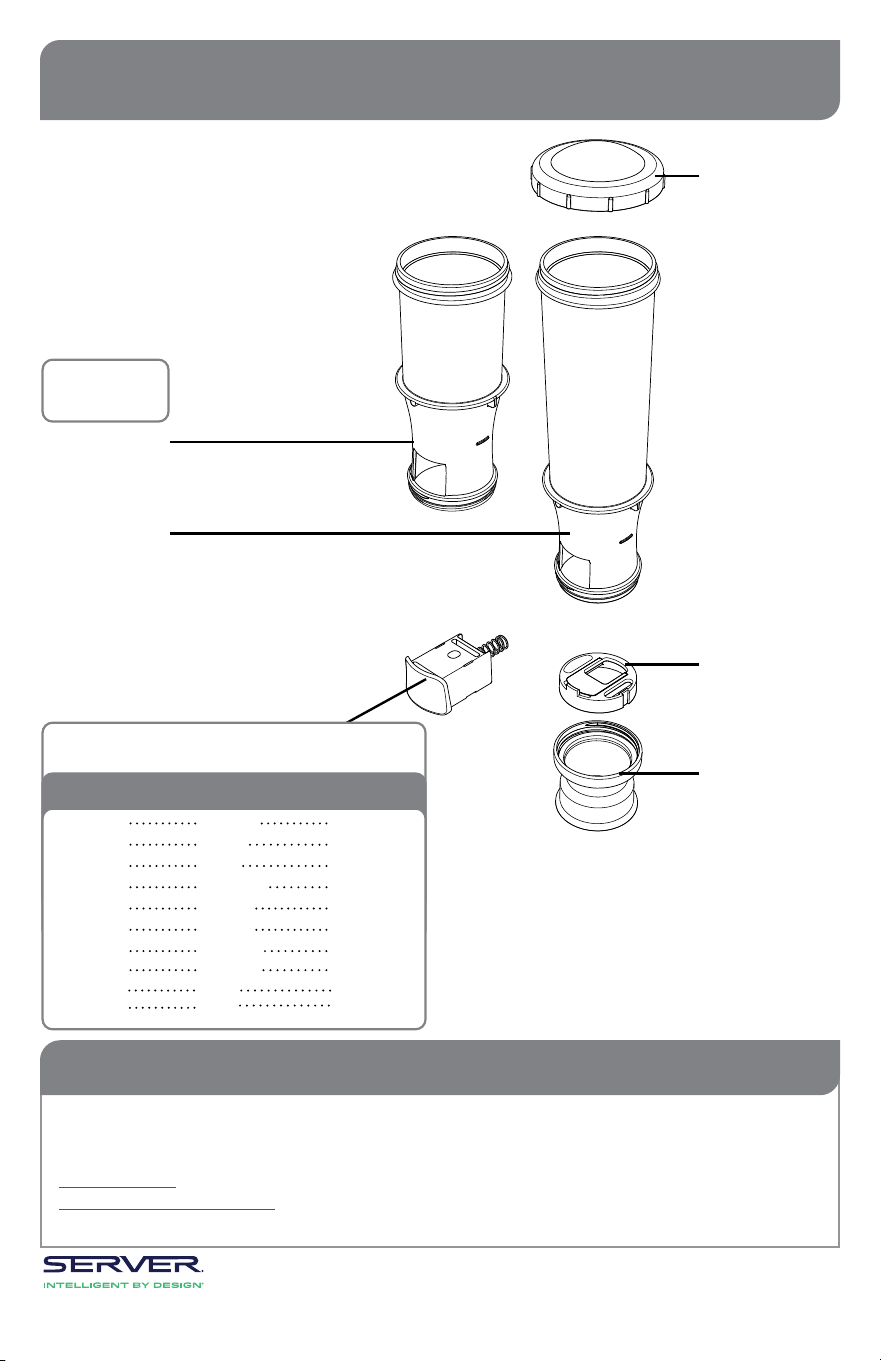
LID
87883
14 OZ. BODY
87163
24 OZ. BODY
87162
CLOSER PLATE
87095
AVAILABLE
TRIGGER ASSEMBLIES
AVAILABLE
BODIES
Please be prepared with the Part Numbers for your
items. Individual part numbers are listed above.
1/2 TSP
0.31 TSP
0.31 TSP
0.31 TSP
0.31 TSP
0.7 TSP
1 TSP
1 TSP
1 TSP
1.217 TSP
PORTION SIZE TRIGGER PART
WHITE
BLUE
PINK
YELLOW
GREEN
WHITE
WHITE
GREEN
TAN
TAN
87177
87178
87179
87181
100938
87176
87173
87174
87175
100957
INSWEETEN
®
INDIVIDUAL PARTS
SPREADER
87156
Server Products Inc.
3601 Pleasant Hill Road
Richfield, WI 53076 USA
Chat with us!
262.628.5600 | 800.558.8722