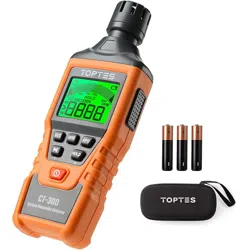
LKC-1000C CO Detector
User Manual

Get More Information
1
Under normal circumstances, carbon monoxide is a
colourless, odourless, tasteless gas that is insoluble
in water. It is commonly found in poorly ventilated
family rooms, gas produced by coal stoves or liquefied
petroleum gas pipeline leakage or industrial production
of gas, and the high concentration of carbon monoxide
means that fresh air or ventilation is needed, otherwise
it will lead to carbon monoxide poisoning, with mild
headache, dizziness and transient syncope, while the
heavier ones will rapidly enter into coma with pale or
blue, or even death from respiratory paralysis.
Carbon Monoxide (CO)
Scan the QR code for multi-language manuals and more.
Scan for multi-language manuals and more product support.
Scannen Sie nach mehrsprachigen Handbüchern und mehr Produktsupport.
Numérisez pour obtenir des manuels multilingues et plus d'assistance sur les produits.
Scansione per manuali multilingue e maggiore supporto al prodotto.
Busque manuales en varios idiomas y más asistencia sobre productos.
2
★ When using the detector, avoid dropping it from high places
or subjecting it to violent impacts.
★ Do not use detector in humid places or environments with
strong odor to maintain accuracy.
★ Do not cover the vents of the detector and do not allow lint to
enter the detector, as this will aect the accuracy of the detector.
★ Do not come into contact with organic solvents, which
include silica gel and other adhesives, paintings, drugs, oil,
and high-concentration gases.
★
Children should only use this device under adult supervision.
Keep packaging materials, such as plastic bags and plastic wrap,
out of the reach of children as they present a choking hazard.
★
Do not dismantle the unit yourself. In the event of a defect, contact
your dealer instead, who will liaise with the service center and, if
necessary, send the device in for repair.
Important!
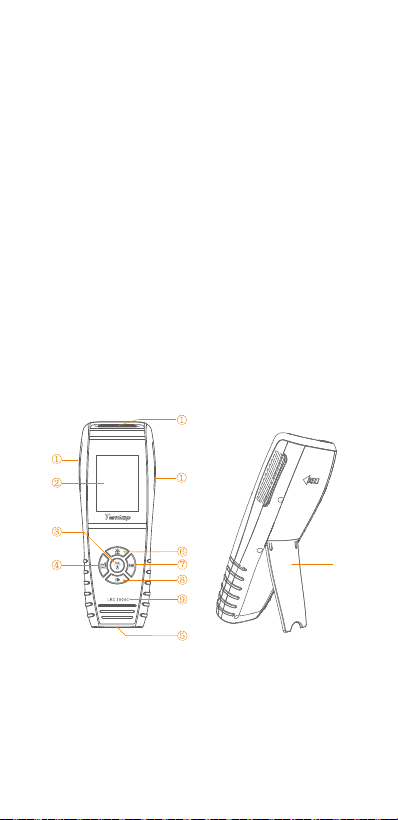
Overview
① Air Inlet/Outlet
④ Data Button
⑦ Menu Button
⑨ Model
⑩
③ Power/OK Button
⑥ Buzzer/Up Button
② LCD Screen
⑤ USB Port
⑧ Running/Hold/Down Button
⑩ Bracket

Specifications
Note: The above data are from Temtop Laboratory.
Model
Dimensions
Battery Capacity
Battery Life
Charging Output
Display
Weight
Operating
Environment
CO
LKC-1000C
177*65.5*32mm (6.9*2.6*1.2 in)
3000mAh
40-50 hours (with backlight set to level 2)
DC5V, 1A
TFT color LCD screen
About 190g
Temperature: 0~50°C
(32~122°F)
Humidity: 0~90%RH
Measuring range: 0-1000 PPM
Resolution: 1 PPM
3
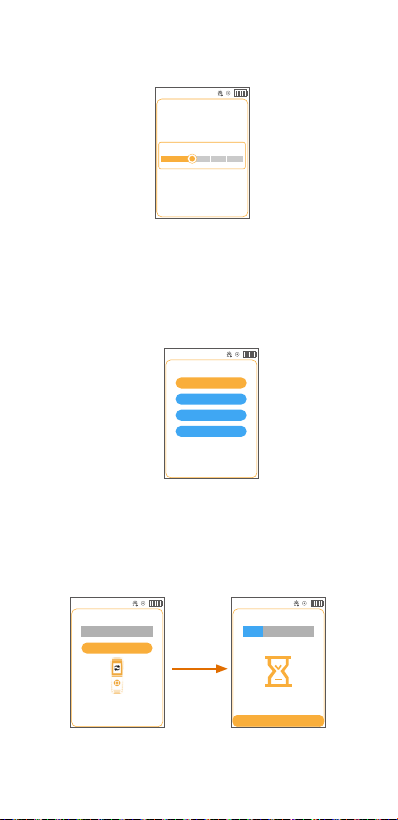
1.Switch On/O
Press and hold button for 2 seconds to turn on/o the detector.
After initialization, the instrument enters the default interface.
Temtop
CO Detector
Notice
Do not place detector in
heavily polluted
environments for a long time,
or it may cause damages to
the sensor.
15%
05/27 09:02
Sensor is warming up
52%
Lower Alarm
Threshold:
50 PPM
05/27 09:02
Severely
Over-limit Alert:
Over-limit Alert:
200 PPM
100 PPM
82.1 ℉
50 %
Normal
200
50
10000
100
05/27 09:02
2
CO
PPM
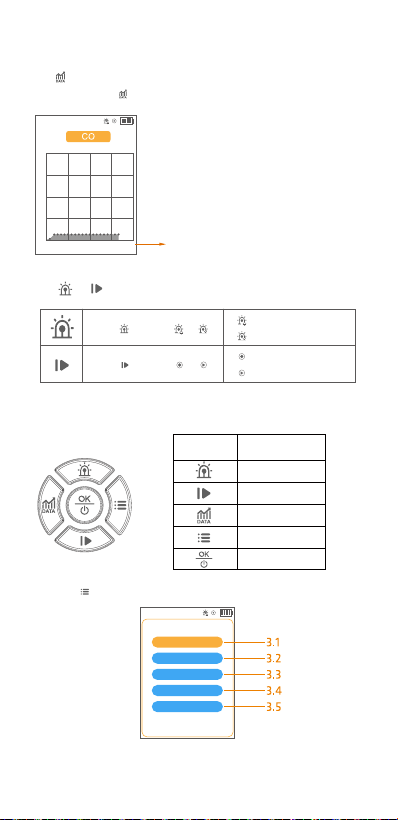
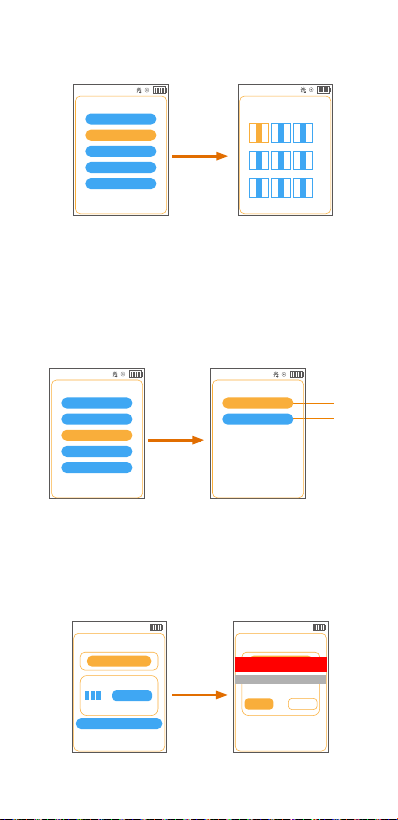
2.Detection
2.1 Button
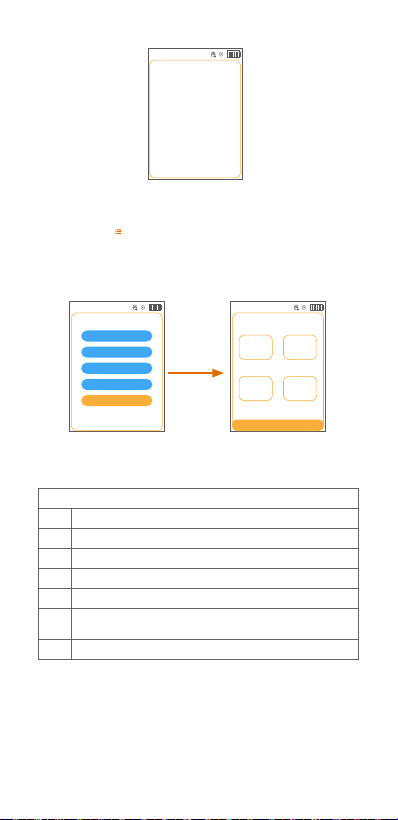
Please click the button to view the following interfaces.
CO Graph View
4
3.Settings Menu
Buttons
Click the button to enter the setup menu.
Button Setting Function
Up/Increase
Down/decrease
Left
Right
OK
34
26
17
9
0
18 s 36 s 54 s 72 s
05/27 09:02
2.2 & Button
Click to toggle or .
Click to toggle or .
:Turn o the alarm.
:Turn on the alarm.
:Start testing.
:Stop testing.
Exit: Clicking the “Exit” option will exit this page and return to the previous page.
Menu
System Settings
Alarm Settings
Calibration
History
About
05/27 09:02
Exit
Note:
Data updates every 3 seconds when x axis value is
within 72 seconds.
Data updates every 1 minute when x axis value is
within 24 minutes.
Data updates every 5 minutes when x axis value is
within 120 minutes.
Data updates every 30 minutes when x axis value is
within 12 hours.

5
3.1 System Settings
Press the or button to switch up or down to System Setup and
then press the button to enter the System Setup screen.
3.1.1 Time and Date (Example Of Button Operation)
Press the or button to scroll up or down and press the button
to confirm.
Press the or button to switch to the item you want to set.
Press the or button to increase or decrease the current value.
Then press the or button to switch to save or exit, and press
button to save the setting or exit the interface.
3.1.2 Units
In this screen, you can switch the temperature unit.
Note: After completing the setup it will return to the previous screen and you can
return to the main page to check that the temperature units are set up properly.
The unit generally defaults to ℉.
Menu
System Settings
Alarm Settings
Calibration
History
About
05/27 09:02
Exit
3.1.1
3.1.2
3.1.3
3.1.4
3.1.5
System Settings
Time and Date
Units
Brightness
Language
Reset
05/27 09:02
Exit
System Settings
Time and Date
Units
Brightness
Language
Reset
05/27 09:02
Exit
Time&Date Setting
05/27 09:02
Exit
Time
Date
Save
<
05
>
<
27
>
/ /
< 2025 >
< 0 > < 9 > < 0 > < 2 >
:
Units
℃
℉
Exit
05/27 09:02
6
3.1.3 Brightness
In this interface, you can set the screen brightness.
3.1.5 Reset
After entering the reset interface, you can reset the device.
Note: Levels are divided into 1, 2, 3, 4, and 5, with 2 being the default.
3.1.4 Language
In this screen, you can set the desired language and the device will
switch to your desired language immediately after completing the
setting.
Note: The language usually defaults to English.
Brightness
05/27 09:02
Exit
Save
1 4 5
32
Language
English
Deutsch
Español
Français
Exit
05/27 09:02
Reset
05/27 09:02
Restoring factory settings, please
wait...
Exit
26%
In Reset
Reset
05/27 09:02
Exit
0%
Reset Factory Set
Please confirm whether to restore
factory settings!
7
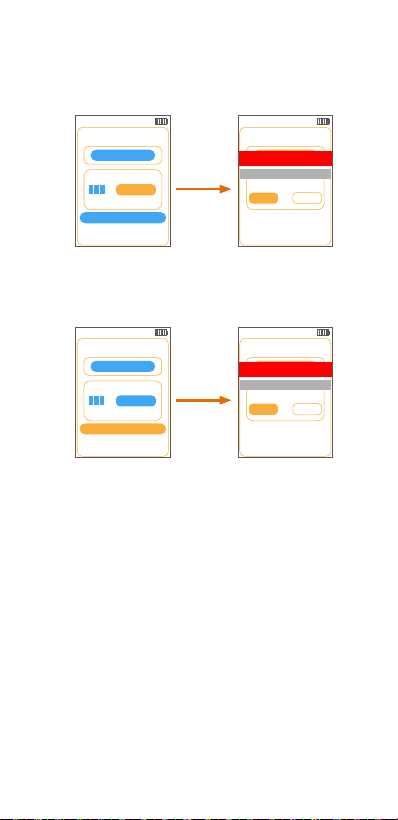
3.3 Calibration
In this screen, you can calibrate CO, temperature, and humidity.
3.3.1 CO Calibration
Enter the CO calibration interface, where you can perform CO
calibration.
1. Please ensure that you can perform zero calibration outdoors in fresh air.
2. The product must run stably for a period of time before zero calibration.
3.3.1
3.3.2
Calibration
CO
TEMP & HUM
Exit
05/27 09:02
3.2 Alarm Settings
After entering the alarm setting interface, you can set the alarm
value.
CO Calibration
05/27 09:02
Cal Zero
Calibration Reset
Exit
Calibration
Calibration value
500
Cal Zero:
Note:
1) Anti-jitter threshold: To prevent gas concentration fluctuations near the low alarm value
(high alarm value) from causing repeated entry into and exit from the low alarm (high alarm)
state, the low alarm (high alarm) state will only be released when the gas concentration drops
below the low alarm (high alarm) value minus the anti-jitter threshold.
2) High alarm - high anti-shake threshold > low alarm value; low alarm - low anti-shake
threshold > 0.
Menu
System Settings
Alarm Settings
Calibration
History
About
Exit
05/27 09:02
Alarm Threshold
05/27 09:02
Exit
Save
Lower Alarm Threshold
< 0 > < 5 > < 0 >
PPM
Over-limit Alert
< 1 > < 0 > < 0 >
PPM
Severely Over-limit Alert
< 2 >
< 0 > < 0 >
PPM
Menu
System Settings
Alarm Settings
Calibration
History
About
Exit
05/27 09:02
Cal Zero
CO Calibration
05/27 09:02
Exit
Calibration value
Exit Start
0%
CO Sensor under calibration
8
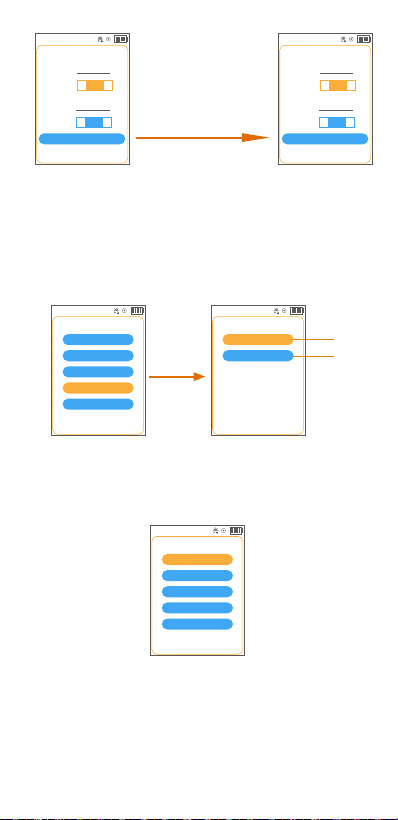
CO Calibration
05/27 09:02
Cal Zero
Calibration Reset
Exit
Calibration value
Calibration
500
Calibration:
In the calibration chamber, introduce carbon monoxide (CO) and maintain it for a
certain period of time until the concentration value stabilises (e.g. 500 ppm). Then
set this value to 500 in the interface and continue with the calibration operation.
Calibration Reset:
After calibration reset is complete, the product will return to factory default settings.
Note:
During calibration, do not perform any other operations until calibration is successful
and you return to the previous menu interface.
3.3.2 TEMP & HUM Calibration
You can calibrate the temperature and humidity by modifying the
"OFFSET" value.
Formula :
OFFSET(TEMP target value) = TEMP(target value) - TEMP(current value) + OFFSET(TEMP current value).
OFFSET(HUM target value) = HUM(target value) - HUM(current value) + OFFSET(HUM current value).
Example:
If TEMP target value is 25.0, current value is 23.0, current value of OFFSET(TEMP) is -0.2.
Then "OFFSET(TEMP target value)=25.0-23.0+(-0.2)=+1.8".
If HUM target value is 36.0, current value is 33.0, current value of OFFSET(HUM) is +1.5.
Then "OFFSET(HUM target value)=36.0-33.0+(+1.5)=+4.5".
Cal Zero
CO Calibration
05/27 09:02
Exit
Calibration value
Exit Start
0%
CO Sensor under calibration
CO Calibration
05/27 09:02
Exit
Calibration value
Exit Start
0%
CO Sensor under calibration
CO Calibration
05/27 09:02
Cal Zero
Calibration Reset
Exit
Calibration value
Calibration
500
9
Increase "OFFSET(TEMP)" to +1.8°C
Increase "OFFSET(HUM)" to +4.5%rh
3.4 History
In this interface, you will see the figure below.
Note: The default storage interval is 01 min.
3.4.1 Storage Interval
In this interface, you can set the storage interval.
3.4.1
3.4.2
Calibration
05/27 09:02
Exit
Save
Calibration Reset
TEMP
< -0.2 >
23.0 ℃
OFFSET
℃
< +1.5 >
HUM 33.0
%RH
OFFSET
%RH
Calibration
05/27 09:02
Exit
Save
Calibration Reset
TEMP
< +1.8 >
25.0 ℃
OFFSET
℃
< +4.5 >
HUM 36.0
%RH
OFFSET
%RH
Note:
Calibration Reset: After calibration reset is complete, the product will return to the
factory default ‘OFFSET’ and return to the previous interface.
Menu
System Settings
Alarm Settings
Calibration
History
About
Exit
05/27 09:02
History
Storage Interval
Data Export
Exit
05/27 09:02
Storage Interval
01min
05min
10min
30min
60min
Exit
05/27 09:02

10
3.4.2 Data Export
In this interface, you will see the figure below.
If connected to the computer successfully by the USB cable,
the detector will pop up a tip USB connection successful; If
not, it will remind you of the failure (See the figures below).
After successful connection, the detector creates a removable
storage device "TEMTOP" on the computer, which contains a
folder named "HISTORY". This history folder contains a history
file named after the time, e.g. "20230601". The history file is in
CSV format and lists information such as date, CO, Temperature,
Humidity, etc.(
see figure below). Please save it to your computer
for viewing.
After copying and viewing historical data, please press to exit
(see figure below).
Note: In the exported data, C represents °C and F represents °F.
Export
05/27 09:02
USB connected
successfully. During the
data export process, please
do not unplug the USB. If
you want to exit the USB
connection mode, press the
button!
Export
05/27 09:02
No USB connection
detected!
Export
05/27 09:02
The instrument is testing
whether the USB is
connected correctly...
DATE
2025/6/1 9:01:40
2025/6/1 9:02:40
2025/6/1 9:03:40
2025/6/1 9:04:40
2025/6/1 9:05:40
1
1
1
1
1
26
26
26
26
26
61.4
61.4
61.4
61.4
61.4
C
C
C
C
C
TEMPUNITTEMP
CO
(PPM)
HUMI
(%RH)
LOW ALARM
(ppm)
HIGH ALARM
(ppm)
50
50
50
50
50
200
200
200
200
200
MID ALARM
(ppm)
100
100
100
100
100
11
Note: USB connected successfully. During the data export process,
please do not unplug the USB. If you want to exit the USB connection
mode, press the button!
3.5 About
In this interface, you will see the figure below.
CO Concentration Levels
LKC-1000C Detector x 1
Calibration Certificate x 1
User Manual x 1
USB Cable x 1
What's Included
CO Concentration Levels
PPM
Explanation
0-1
9
35
125
Normal background levels.
EPA/ASHRAE levels for living areas.
OSHA/NlOSH maximum 8 hr exposure limit.
ACGIH ceiling limit of exposure.
OSHA/Nl0SH upper limit of exposure: mild headache, fatigue,
nausea and dizziness within 2-3 hours.
OSHA lmediately Dangerous to Life or Health (IDHL).
1500
200
Export
05/27 09:02
Successfully exit the USB
connection, return to the
menu, please wait!
Menu
System Settings
Alarm Settings
Calibration
History
About
Exit
05/27 09:02
About
05/27 09:02
Exit
Serial
Number
Model
LKC-1000C
TQ6XXXXXXXXX
Firmware
Version
VX.X
Brand
Temtop

12
FAQ
Temtop warrants the included detector for 1 year from the date
of original purchase. The item can be exchanged or returned
within 30 days if the defect is not caused by artificial damage.
Temtop warranty does NOT include:
•Malfunction or damages caused by artificial damage or
modification.
•Other deliberate damages.
•Damage caused by natural events.
Before return or delivery for repair, please check if the following √
items are ready:
Warranty
Detector
Accessories
Item
1 year included
N/A
Warranty Period
Return
Exchange
Repair
Detector &
Accessories
√
√
√
Complete
Package
√
√
Proof of
Purchase*
√
√
√
Gift (if any)
√
* Including invoice, order number and etc.
Malfunction
Reason
Processing
Unable to
start up
No reaction to
detected gases
Display inaccuracy
Time display error
The instrument
displays full scale
Low voltage
System lockup
Circuit failure
Circuit failure
Sensor expired
Charge promptly
Contact your dealer for repairs
Contact your dealer for repairs
Contact your dealer for repairs
Contact your dealer to replace the sensor
Please calibrate promptly.
Charge promptly and reset the time.
reset the time
Sensor failure
Contact your dealer to replace the sensor
Long-term
uncalibrated
Strong electromagnetic
interference
The battery is
completely discharged

V1.0
Made in China
Elitech Technology, Inc
2528 Qume Dr, Ste 2
San Jose, CA 95131 USA
Tel: (+1) 408-898-2866
Facebook: www.facebook.com/temtopus
Instagram: www.instagram.com/temtopaqm/
youtube: www.youtube.com/@Temtopus
linkedin: www.linkedin.com/company/temtop-us/
X: x.com/temtopus48285
Sales: [email protected]
Website: www.temtopus.com
Elitech (UK) Limited
Unit 13 Greenwich Business Park,
53 Norman Road,London, SE10 9QF
Tel: (+44)208-858-1888
Youtube: @elitech_uk
Instagram:@elitechuk_
Facebook: @hvaccontrol
Sales:[email protected]
Website: www.temtop.co.uk
Elitech Brazil Ltda
R.Dona Rosalina,90-Lgara, Canoas-RS
92410-695,Brazil
Tel: (+55)51-3939-8634
Sales: [email protected]
Website: www.elitechbrasil.com.br