
Technical Support and E-Warranty Certificate
www.vevor.com/support
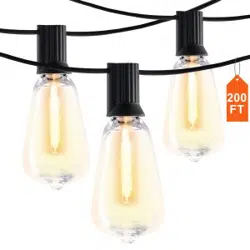
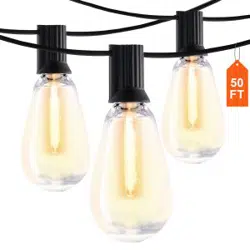
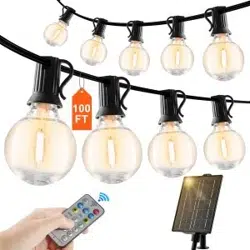
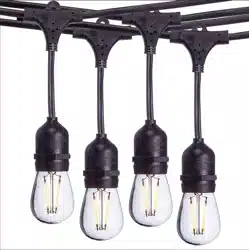
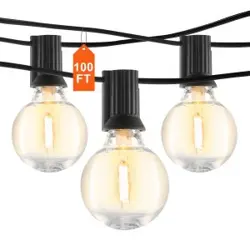
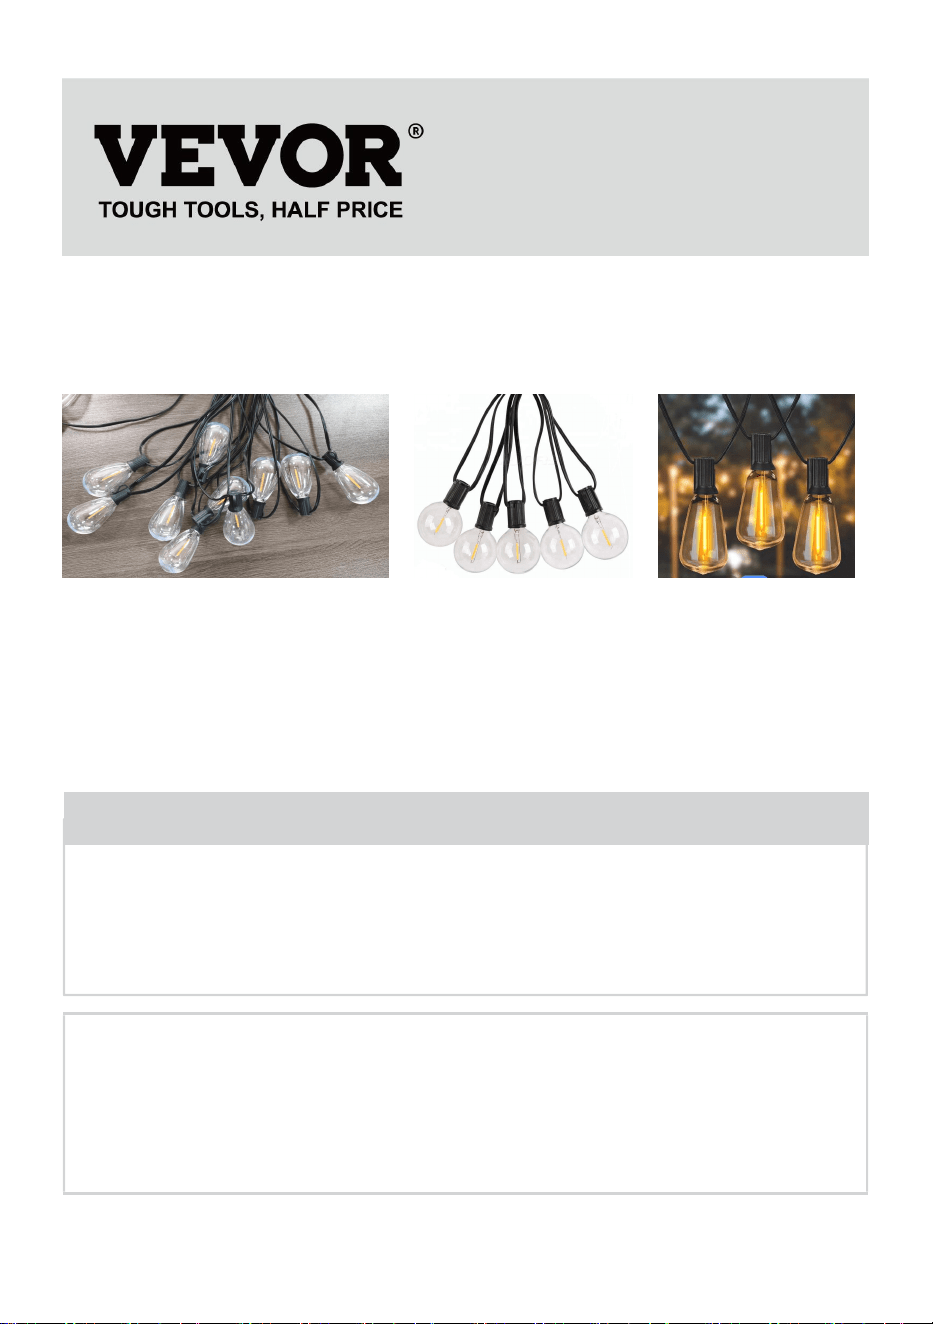
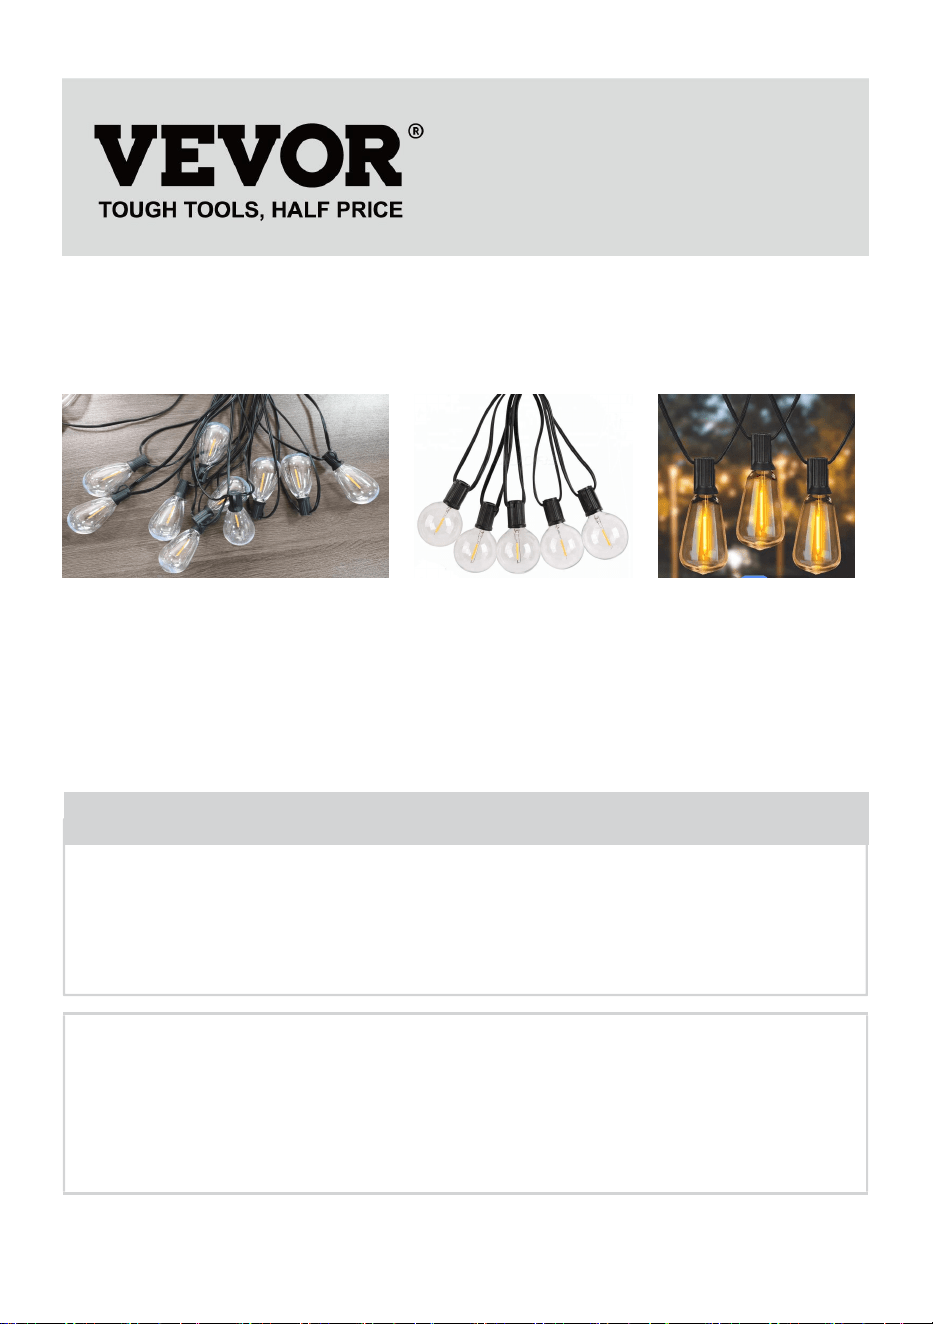
OUTDOOR STRING LIGHTS
USER MANUAL
MODEL:AX-DC-001 /AX-DC-002 / AX-DC-003
We continue to be committed to provide you tools with competitive price.
"Save Half", "Half Price" or any other similar expressions used by us only represents an
estimate of savings you might benefit from buying certain tools with us compared to the major
top brands and does not necessarily mean to cover all categories of tools offered by us. You
are kindly reminded to verify carefully when you are placing an order with us if you are
actually saving half in comparison with the top major brands.


- 1 -
(The picture is for reference only, please refer to the actual object)
Have product questions? Need technical support? Please feel free to
contact us:
Technical Support and E-Warranty Certificate
www.vevor.com/support
NEED HELP? CONTACT US!
This is the original instruction, please read all manual instructions
carefully before operating. VEVOR reserves a clear interpretation of our
user manual. The appearance of the product shall be subject to the
product you received. Please forgive us that we won't inform you again if
there are any technology or software updates on our product.
Outdoor String Lights
AX-DC-001
AX-DC-002
AX-DC-003
- 2 -
INSTRUCTIONS
Warning-To reduce the risk of injury, user must read instructions
manual carefully.
This device complies with Part 15 of the FCC Rules. Operation
is subject to the following two conditions:(1)This device may not
cause harmful interference, and (2)this device must accept any
interference received, including interference that may cause
undesired operation.
NOTICE:
CAUTION: To prevent the risk of fire and electric shock, please be sure to
read all instructions before installing or using this unit.
WARNING:
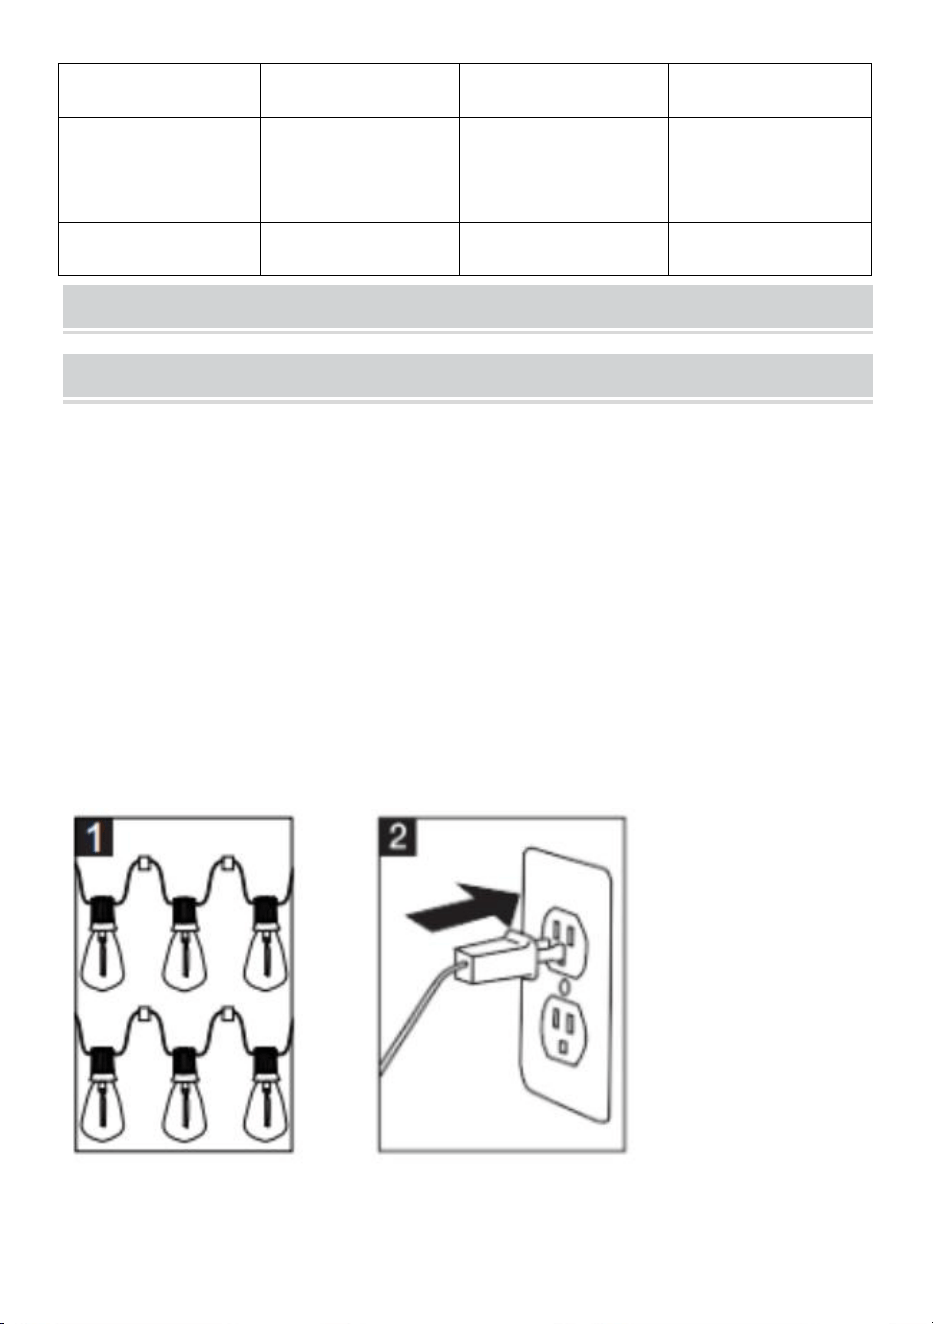
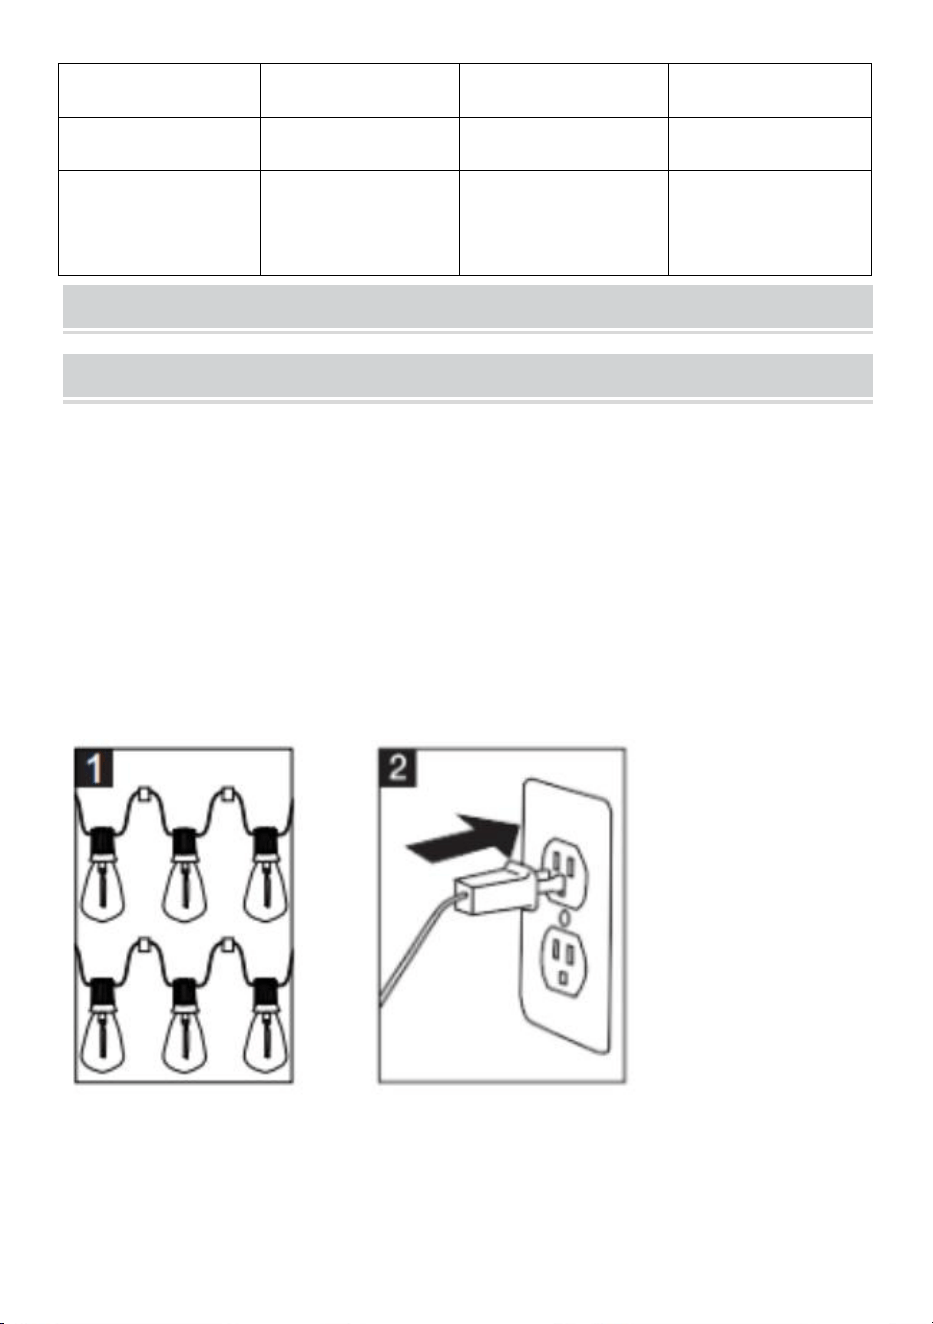
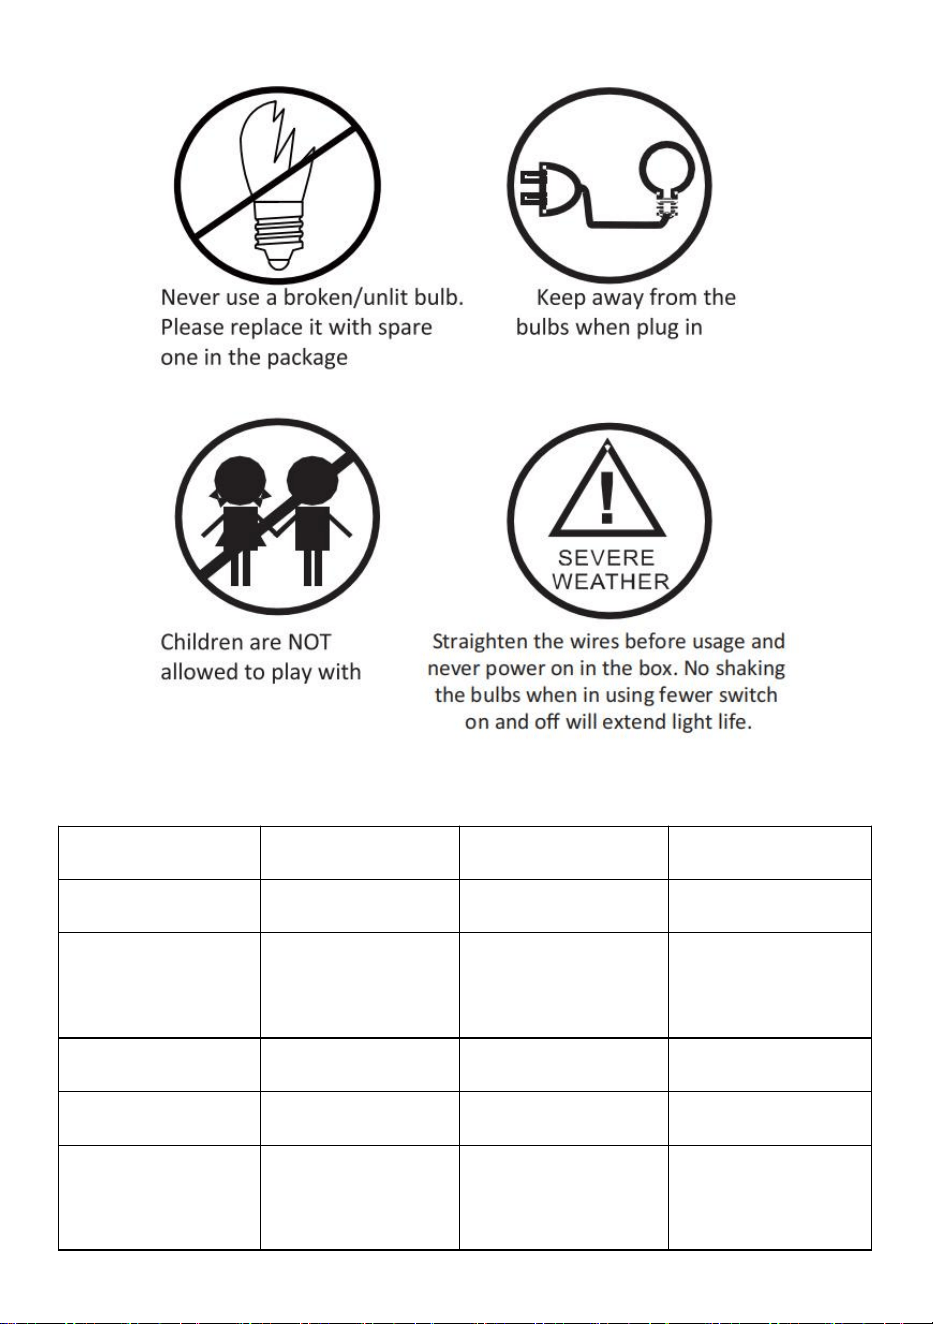
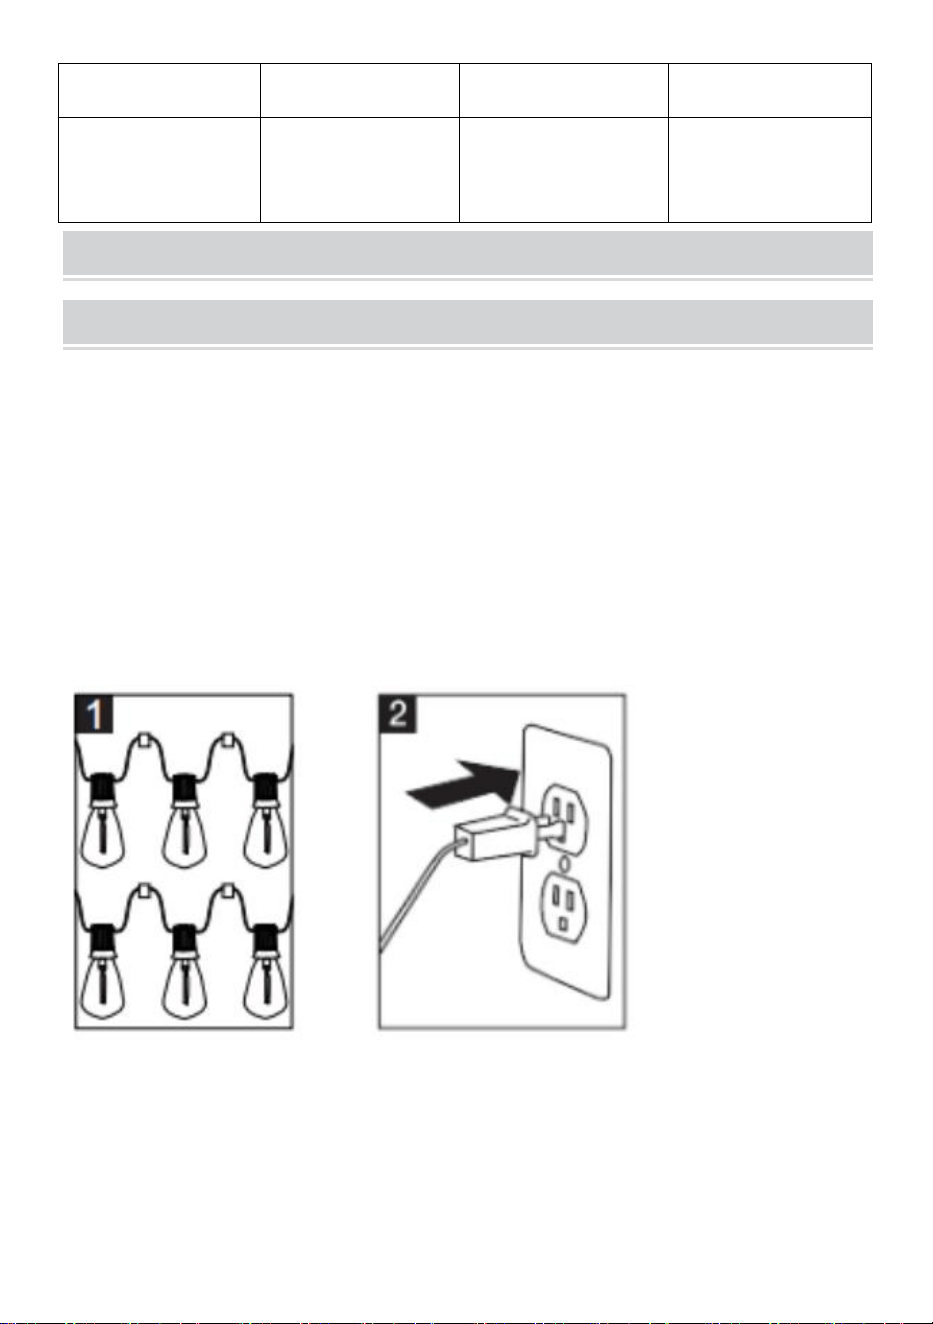
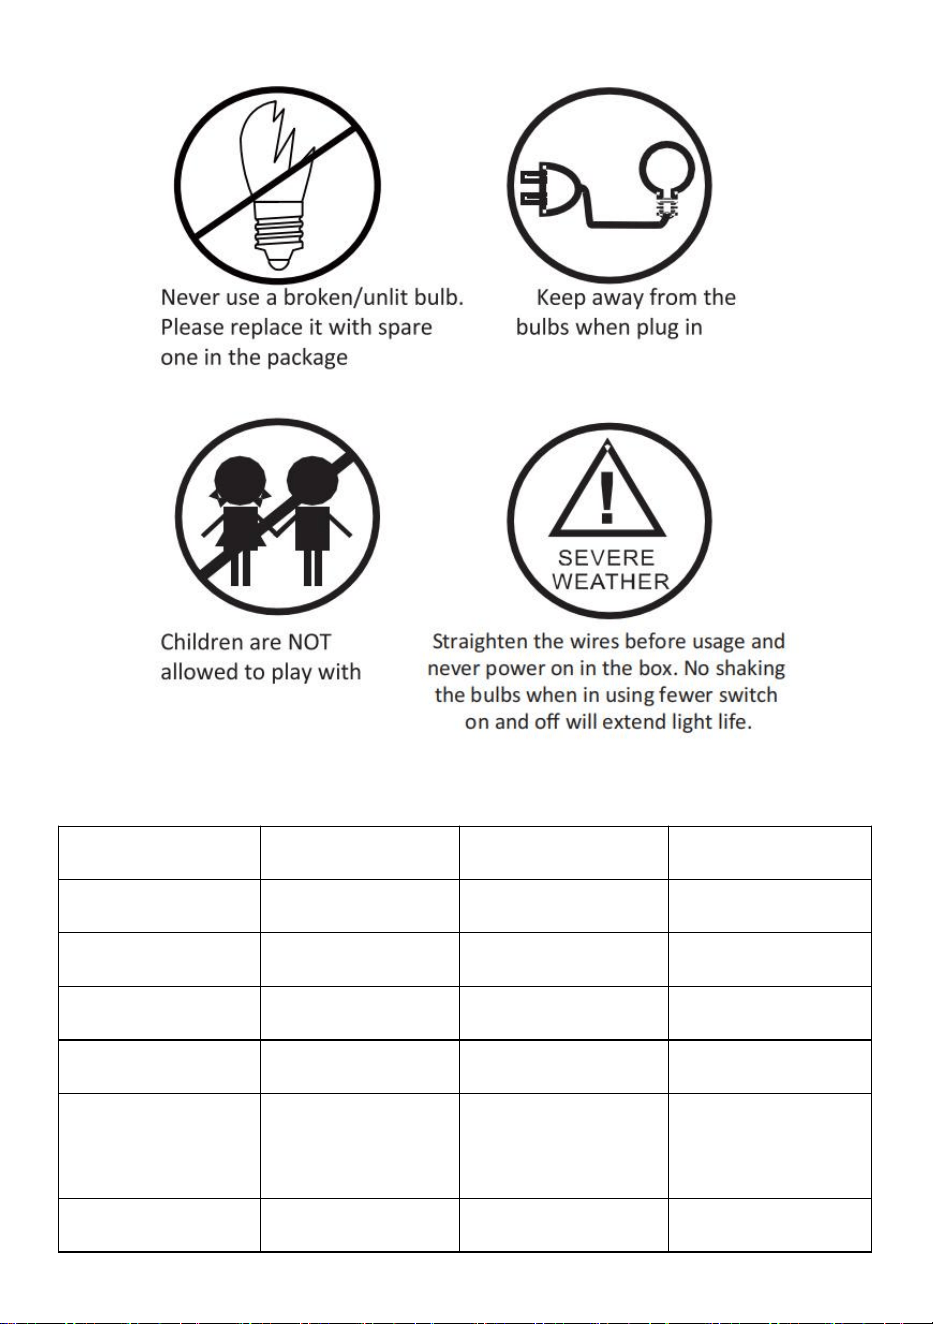
1.Before use, ensure that all light bulbs are properly secured in their
sockets and tighten them one by one.
2.Plug the string light into the power outlet which is into the waterproof box.
3.Hang your string lights in the desired location,ensure all bulbs are facing
downwards, which could make the sockets are IP65.

- 3 -
PERFORMANCE PARAMETER
Model
AX-DC-001
AX-DC-002
AX-DC-003
Rating
AC120V 60Hz 9W
AC120V 60Hz 30W
AC120V 60Hz 60W
Bulb Type
LED S14 0.6W
LED G40 0.6W
LED ST38 0.6W
Length
50 FT
100 FT
200 FT
Socket Type
E12
E12
E12
Color Temperature
2700K
2700K
2700K
Luminous Value
31LM
42LM
44LM
Max Connection
30 Sets
10 Sets
5 Sets

- 4 -
INSTALLATION,SAFETY AND CARE INSTRUCTIONS
CAREFULLY to avoid the risk of fire, burns or electric shock. Please save
these instructions.
INSTALLATION
(Hardware, hooks, cable ties and guiding wire are not included.)
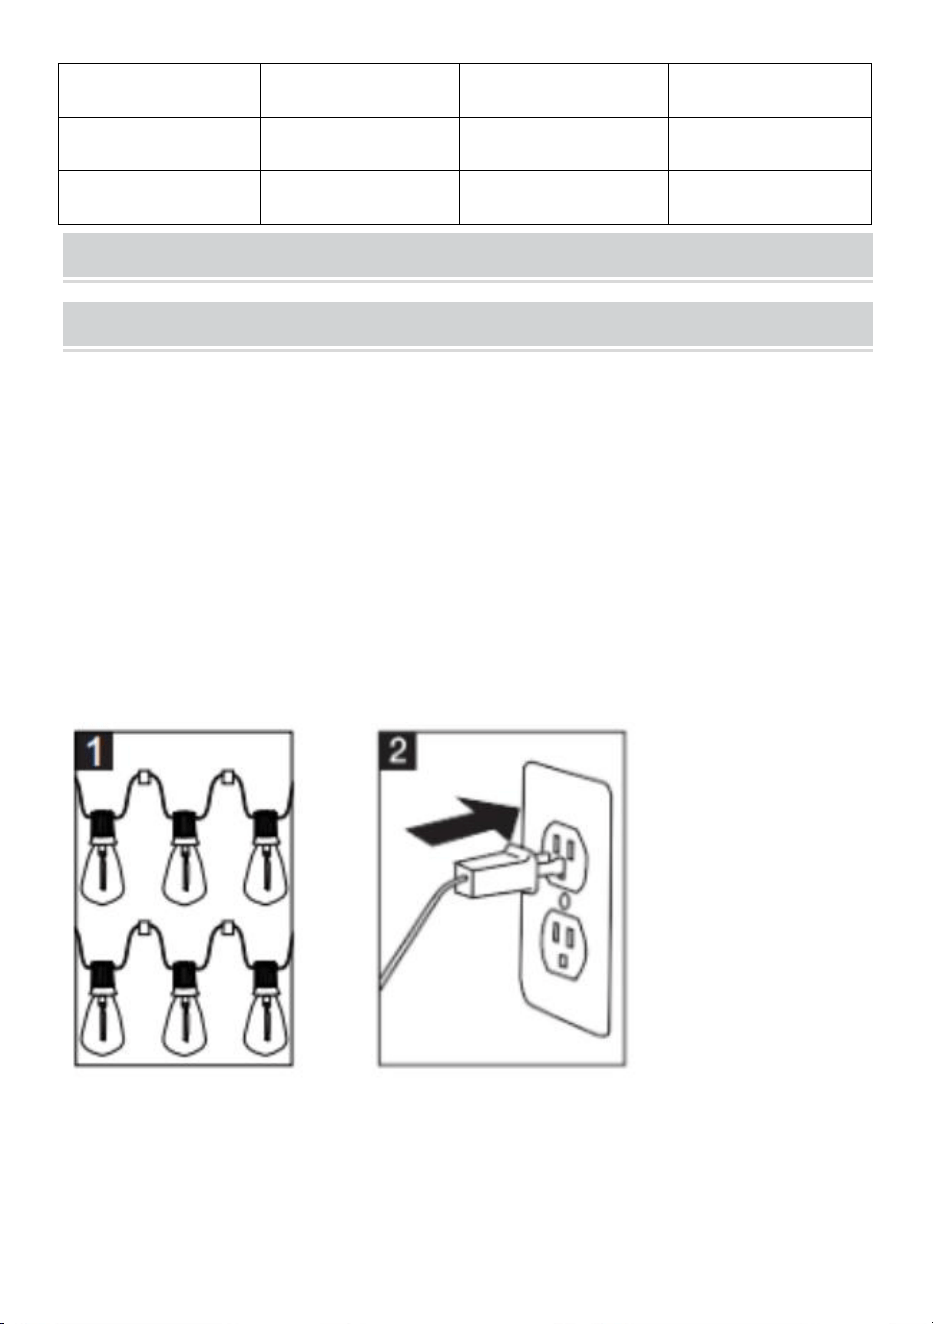
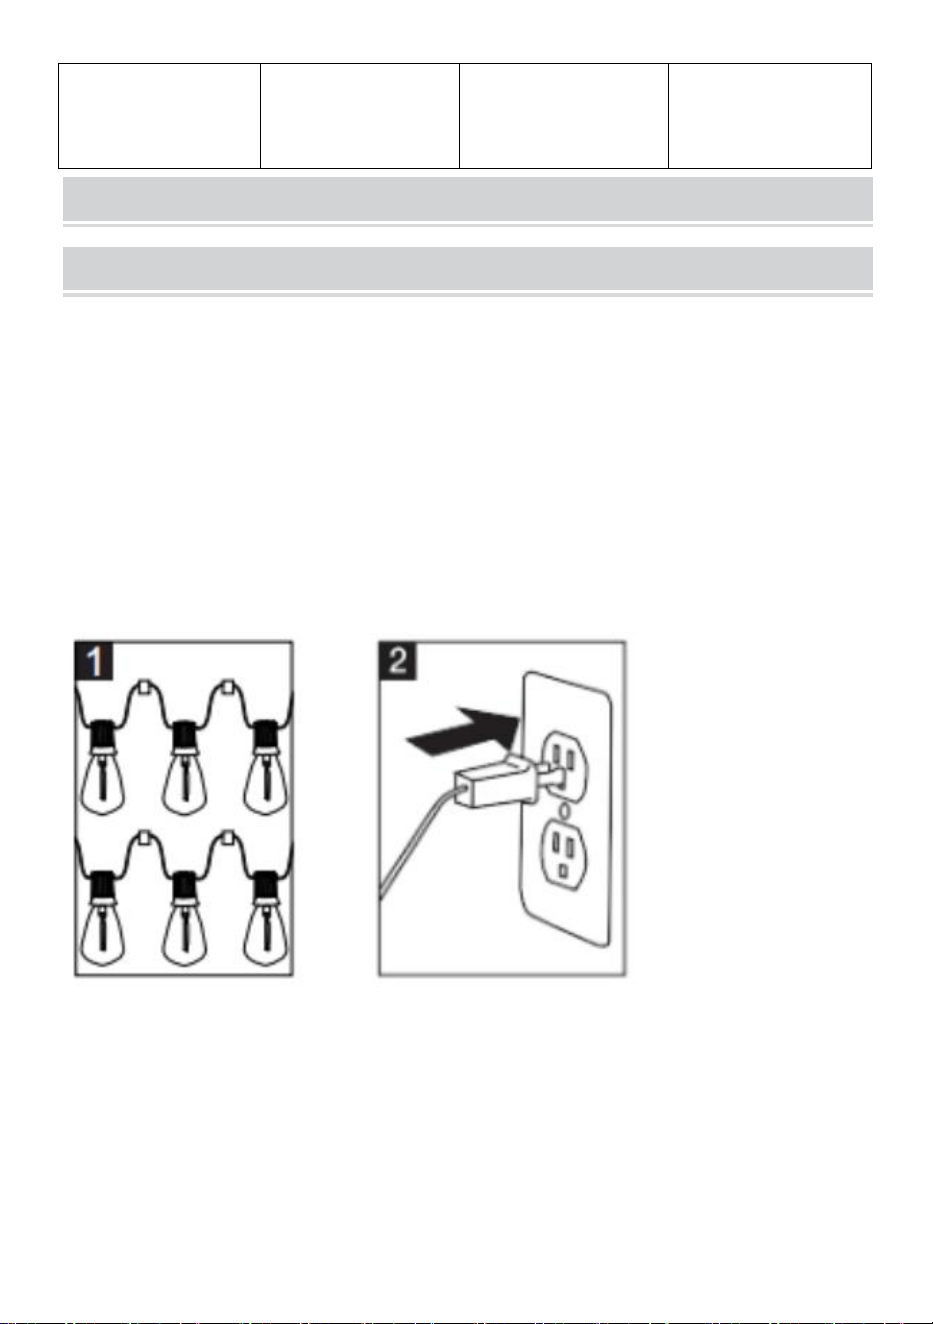
1.Hang your string lights in the desired location, ensure all bulbs are
properly secured into their sockets tighten one by one, and make sure all
bulbs are adown.
2.Plug the string light into the power outlet which is into the waterproof box.
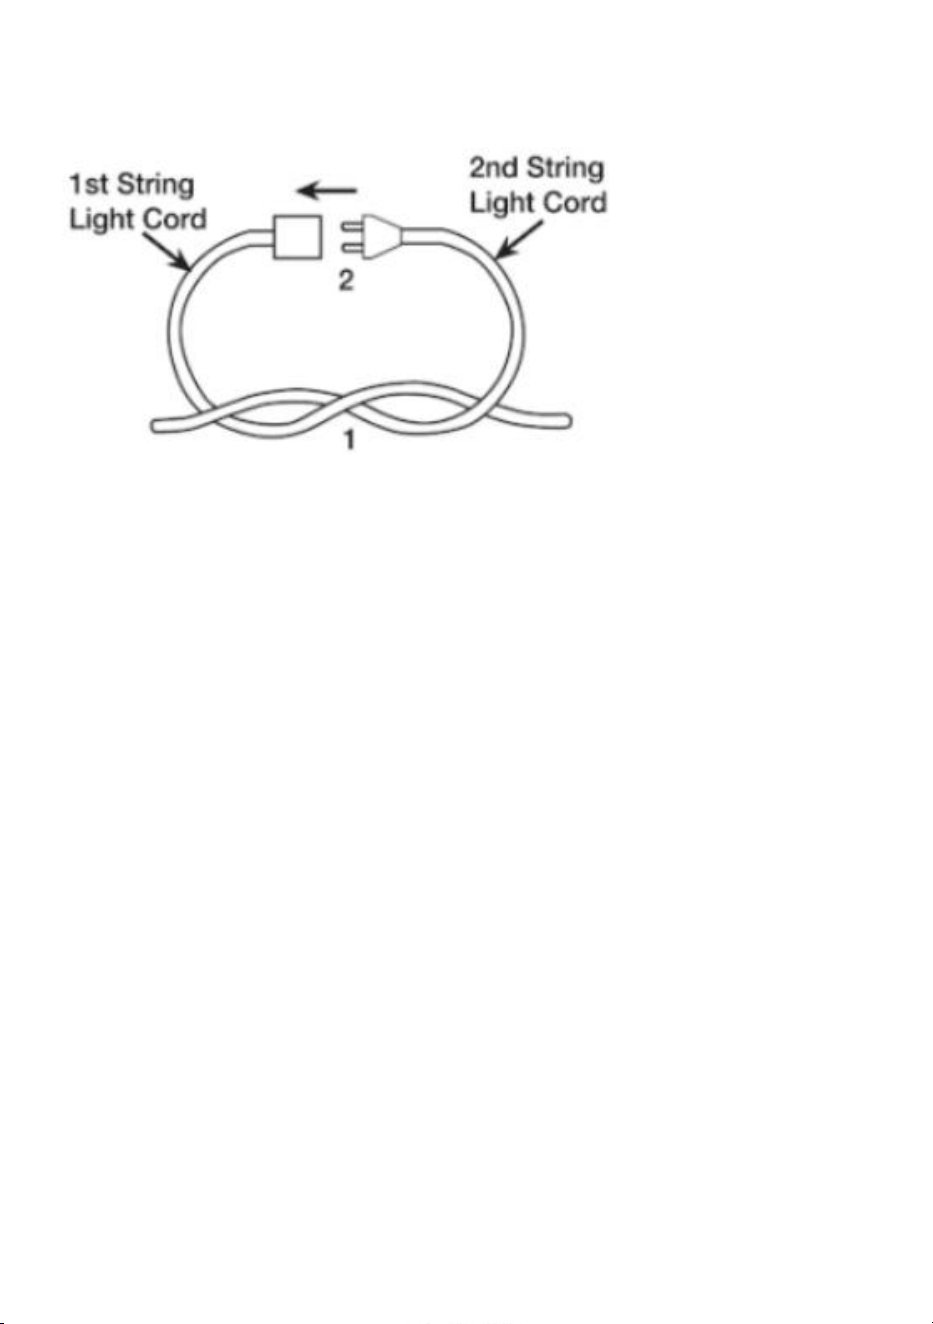
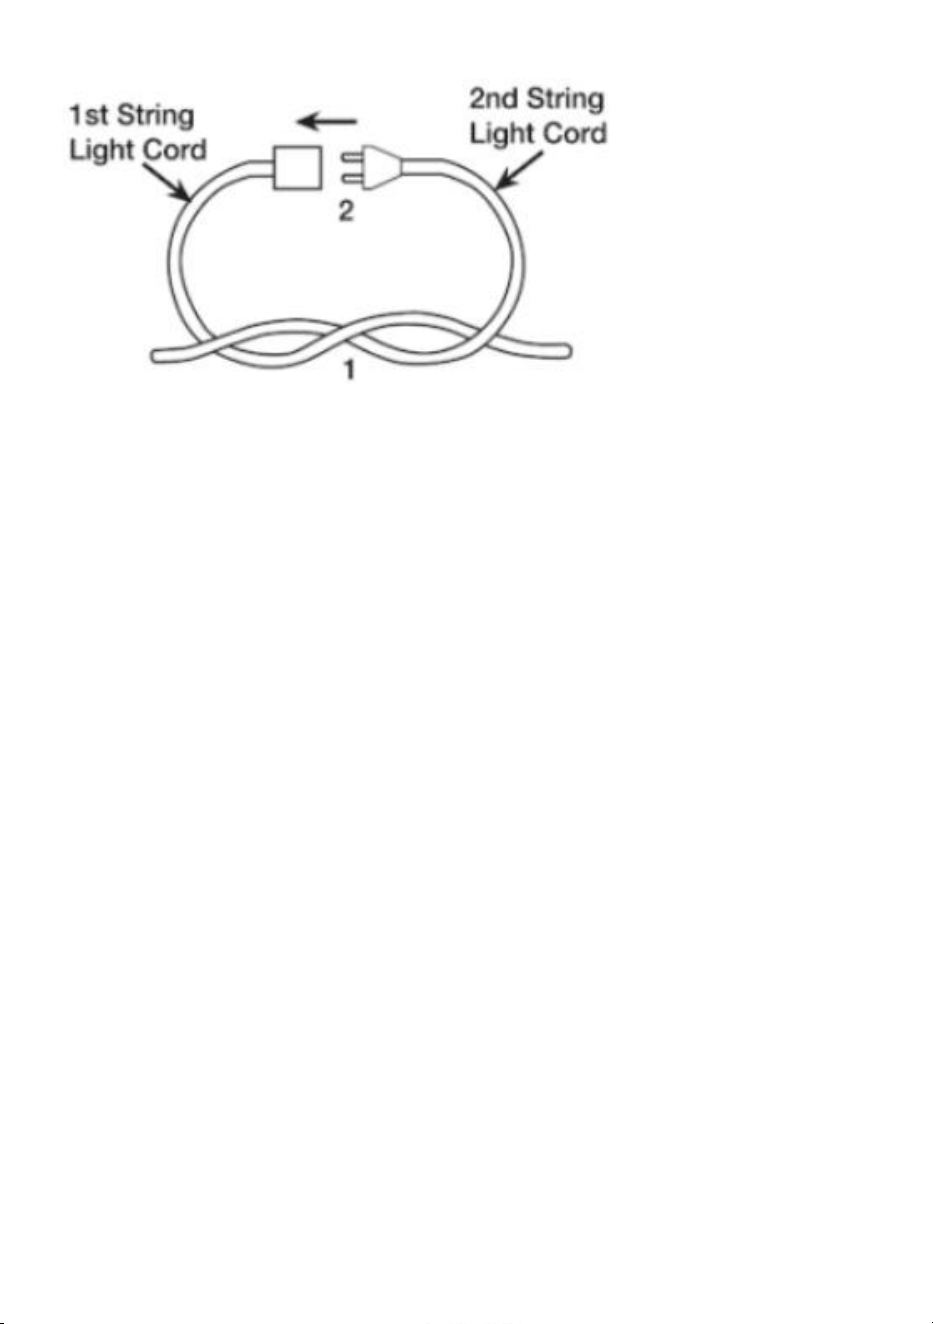
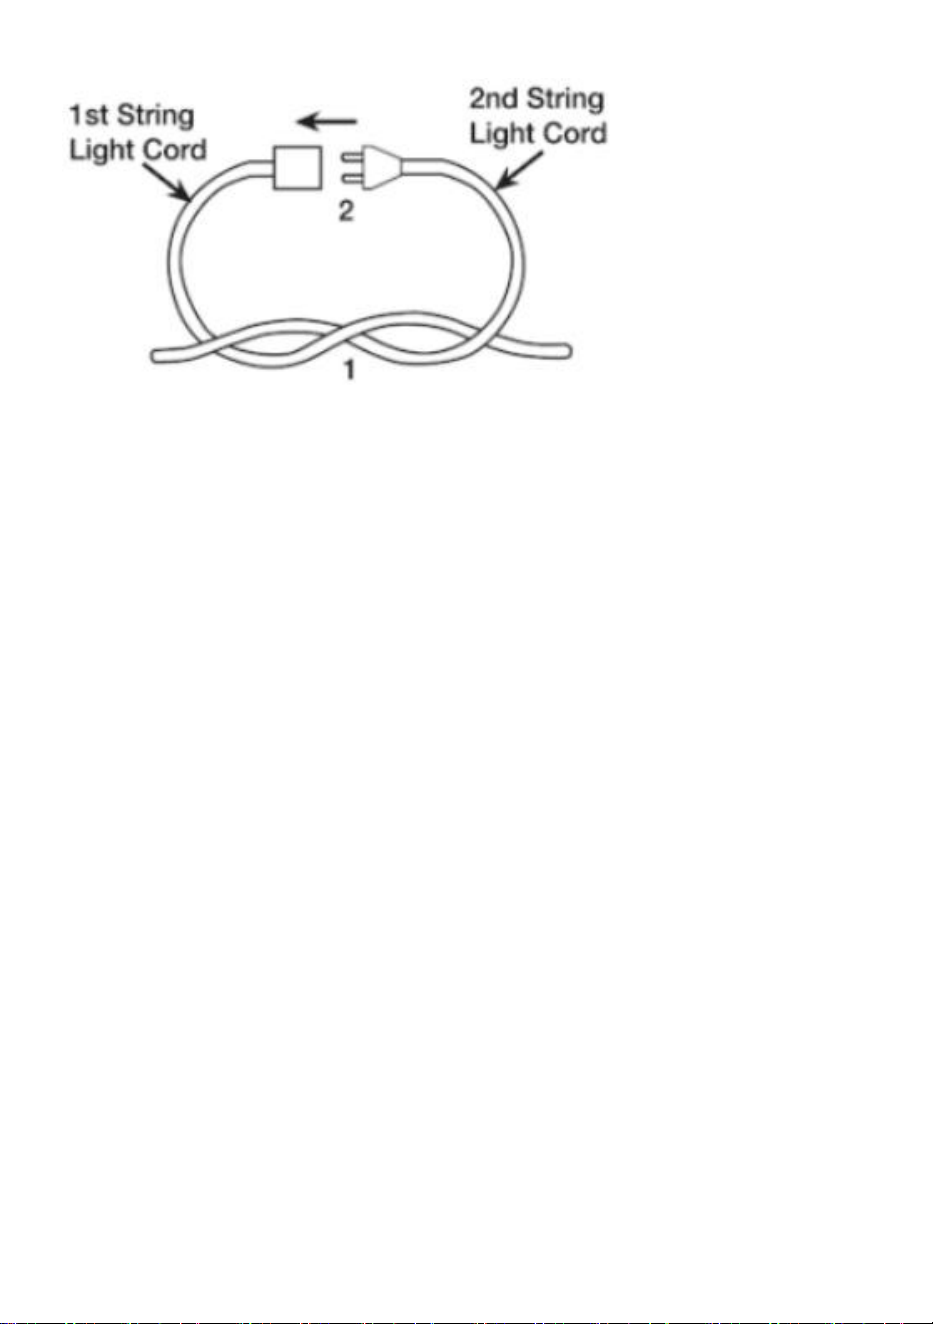
NOTICE: When connecting multiple cords together, create a knot with the
cord ends as shown below or use a plug protector to prevent the plugs
from pulling apart during use.

- 5 -
WARNING
1. DO NOT hang the string lights while plugged in.
2.DO NOT secure cords with staples or nails.
3. If changing to a new location, remove bulbs before installation.
4. INSPECT set up and product condition before each use.5. Keep bulbs at
least 6 inches from other objects
IMPORTANT SAFETY INSTRUCTIONS
When using electrical products,basic precautions should always be
followed including the following:
a) READ AND FOLLOW ALL SAFETY INSTRUCTIONS.
b)Do not use seasonal products outdoors unless marked suitable for
indoor and outdoor use When products are used in outdoor
applications,connect the product to a Ground Fault Circuit
Interrupting(GFCI) outlet.If one is not provided.contact a qualified
electrician for proper installation.
c) This seasonal use product is not intended for permanent installation or
use
d) Do not mount or place near gas or electric heaters,fireplace,candles
or other similar sources of heat.
e) Do not secure the wiring of the product with staples or nails,or place
on sharp hooks or nails
f) Do not let lamps rest on the supply cord or on any wire.
g) Unplug the product when leaving the house,when retiring for the
night,or it left unattended.
h) This is an electric product-not a toy!To avoid risk of fire,burns,personal
injury and electric shock it should not be played with or placed where small
children can reach it.
i) Do not use this product for other than its intended use.
j) Do not hang ornaments or other objects from cord.wire,or light string.
k) Do not close doors or windows on the product or extension cords as
this may damage.

- 6 -
l) Do not cover the product with cloth,paper or any material not part of
the product when in use.
m) This product has a polarized plug (one blade is wider than the other)
as a feature to reduce the risk of electric shock. This plug will fit in a
polarized outlet only one way. If the plug does not fit fully in the outlet,
reverse the plug. If it still does not fit, contact a qualified electrician. Do not
use with an extension cord unless the plug can be fully inserted.
Do not alter or replace the plug.
n) This product employs overload protection [fuse]. A blown fuse
indicates an overload or short-circuit situation. If the fuse blows,unplug the
product from the outlet and unplug any additional strings or products that
may be attached to the product. Replace the fuse as per the user servicing
instructions (follow product marking for proper fuse rating) and check the
product. If the replacement fuse blows, a short circuit may be present, and
the product should be discarded.
o) Read and follow all instructions that are on the product or provided
with the product.
p) Use and Care Instructions
SAVE THESE INSTRUCTIONS
a) When the product is placed on a live tree. The tree should be
well adamantine fresh. Do not place it on live trees in which the needles
are brown or break off easily. Keep the beholder filled with water
b) If the product is placed on a tree, the tree should be well secured and
stable
c) Before unenterprising,inspect pre-production Counterproductive that
have cut. damaged,or frayed wire insulation or cords,cracks in the
placeholder enclosures. loose connections.or exposed copper wire.
d) When storing the product,careful remove the product from
wheresoever placed, Including tree,branches.or bushes,to avoid any
undue strain or stress on the product conductors connections.and wires.
e) When not in use.store neatly in a cool,dry location protected from
sunlight
Note:The blank 1 shall befuddled in with the eigenvalue of emplacement
- 7 -
lamp User Servicing Instructions.
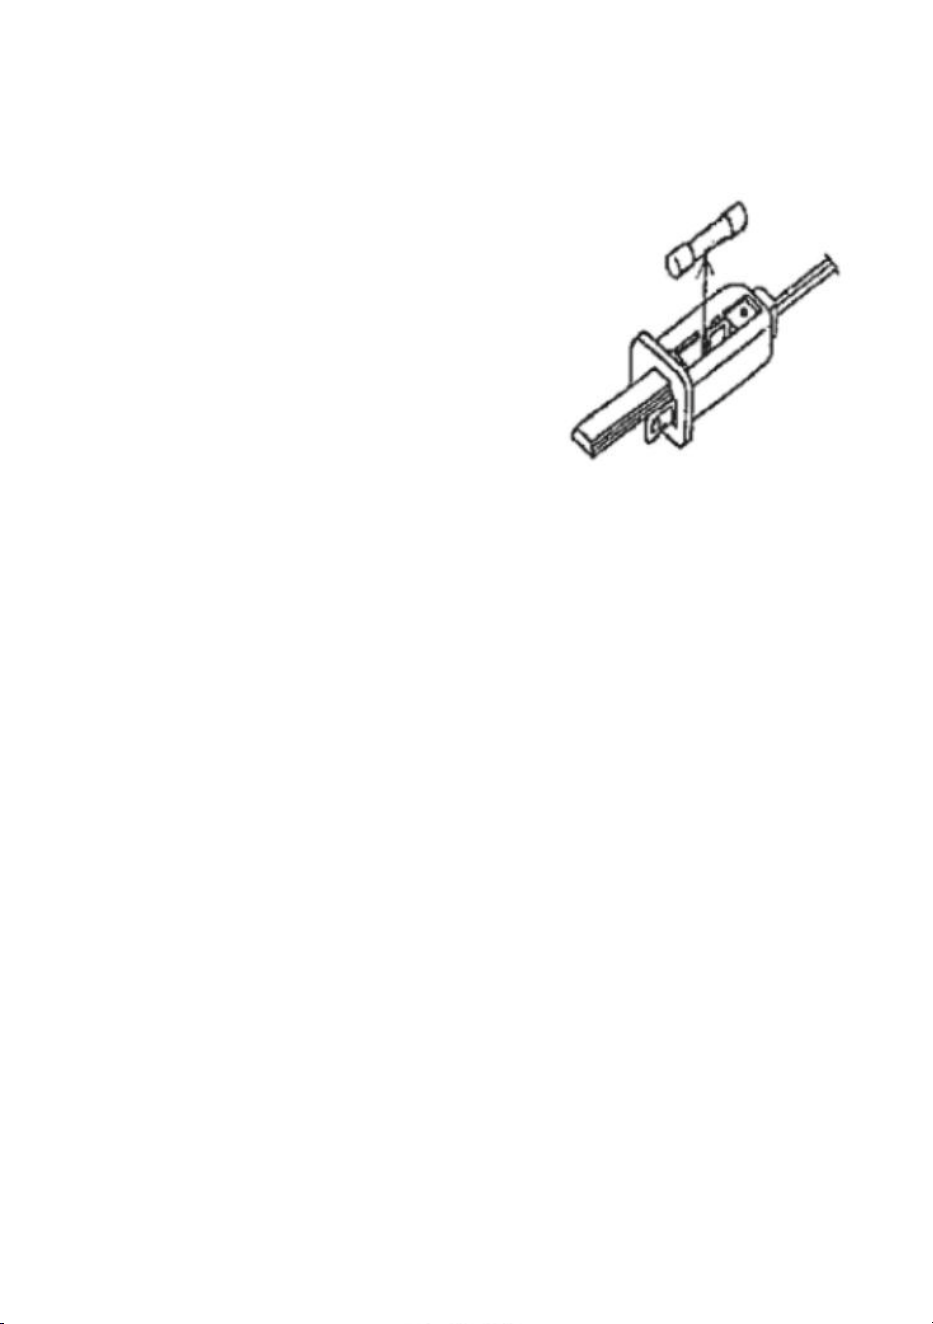
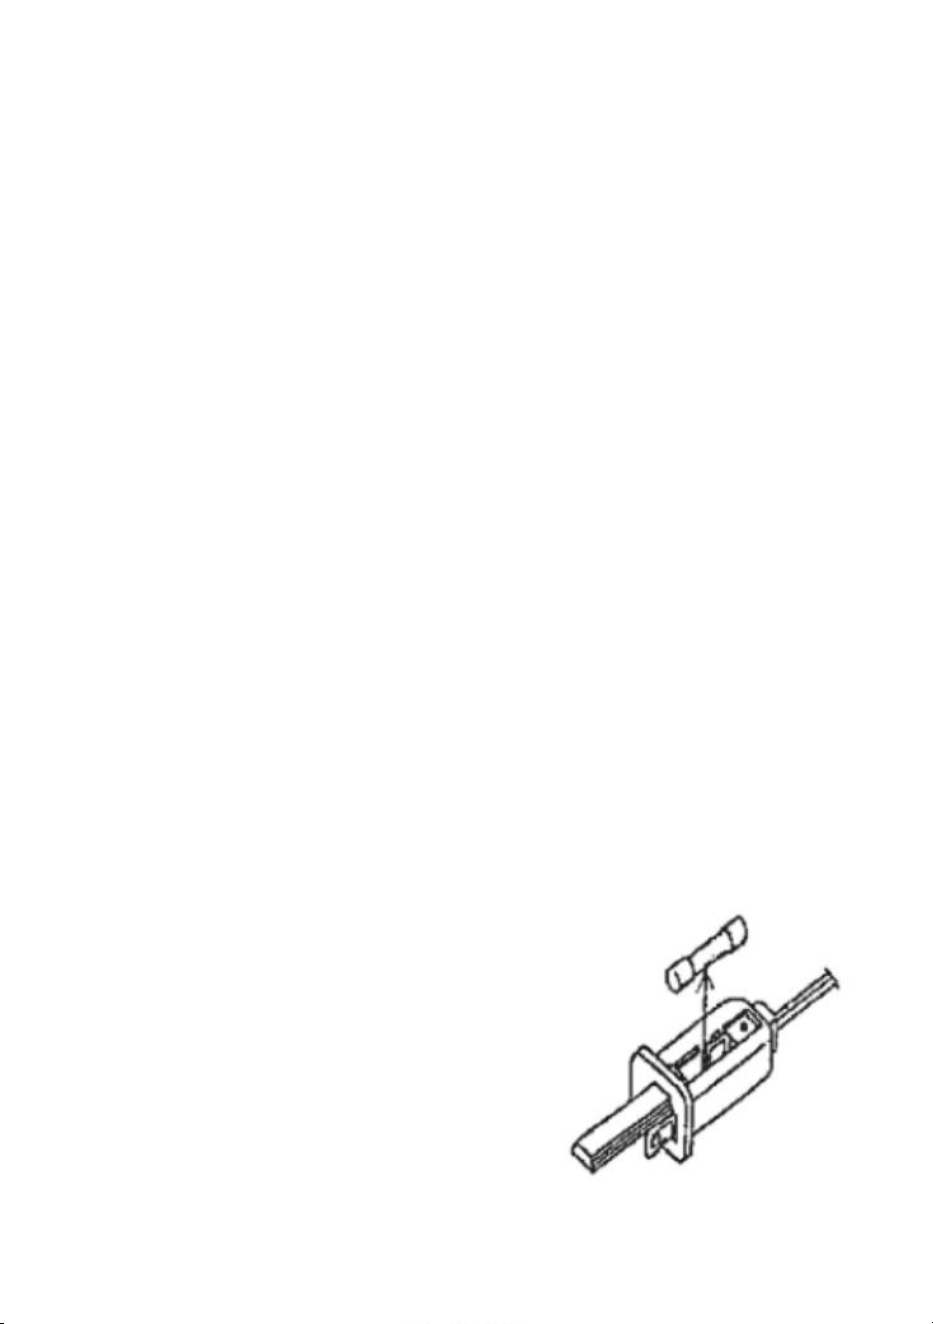
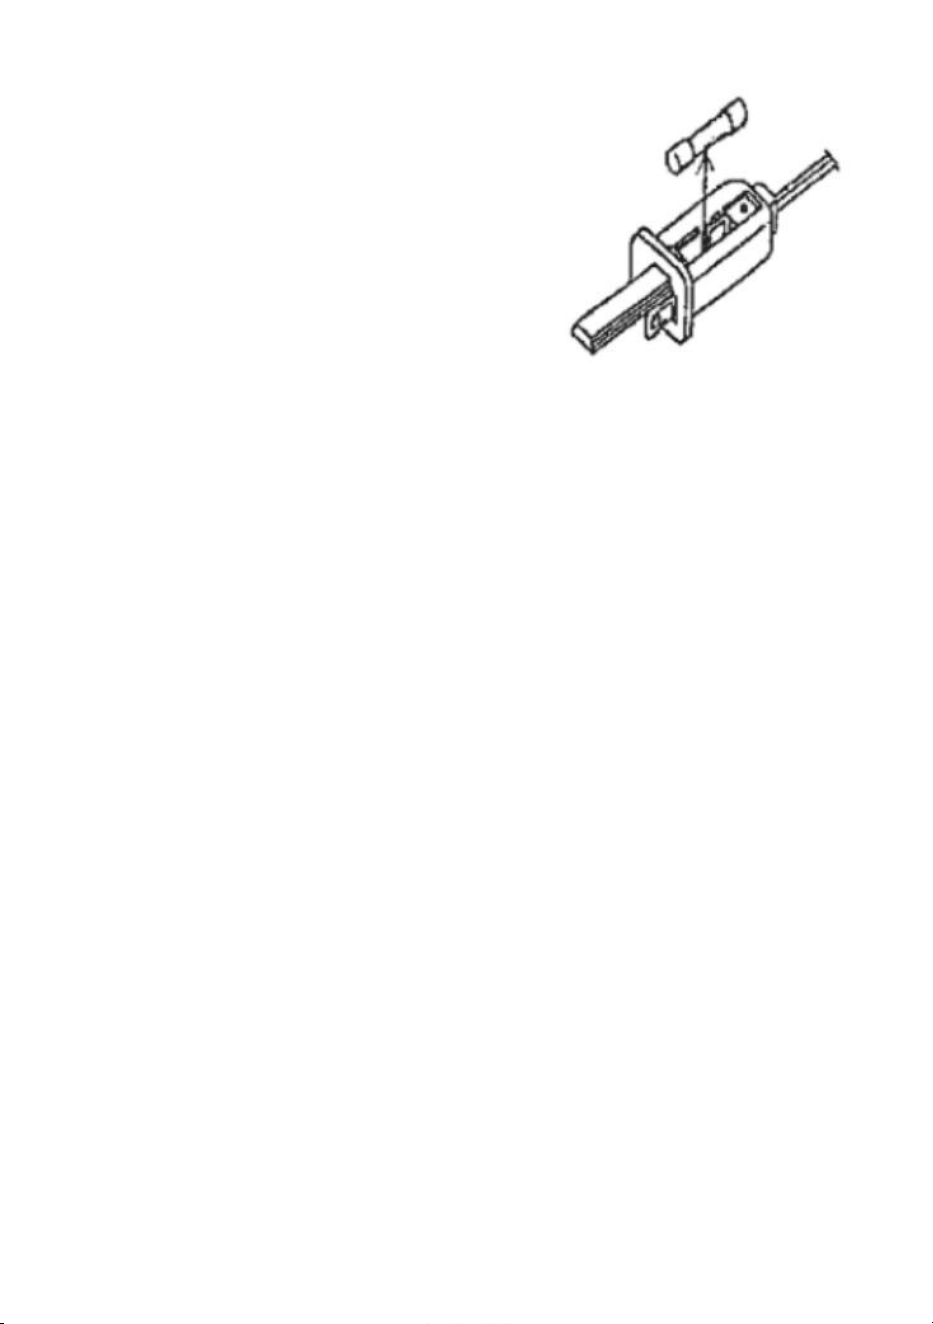
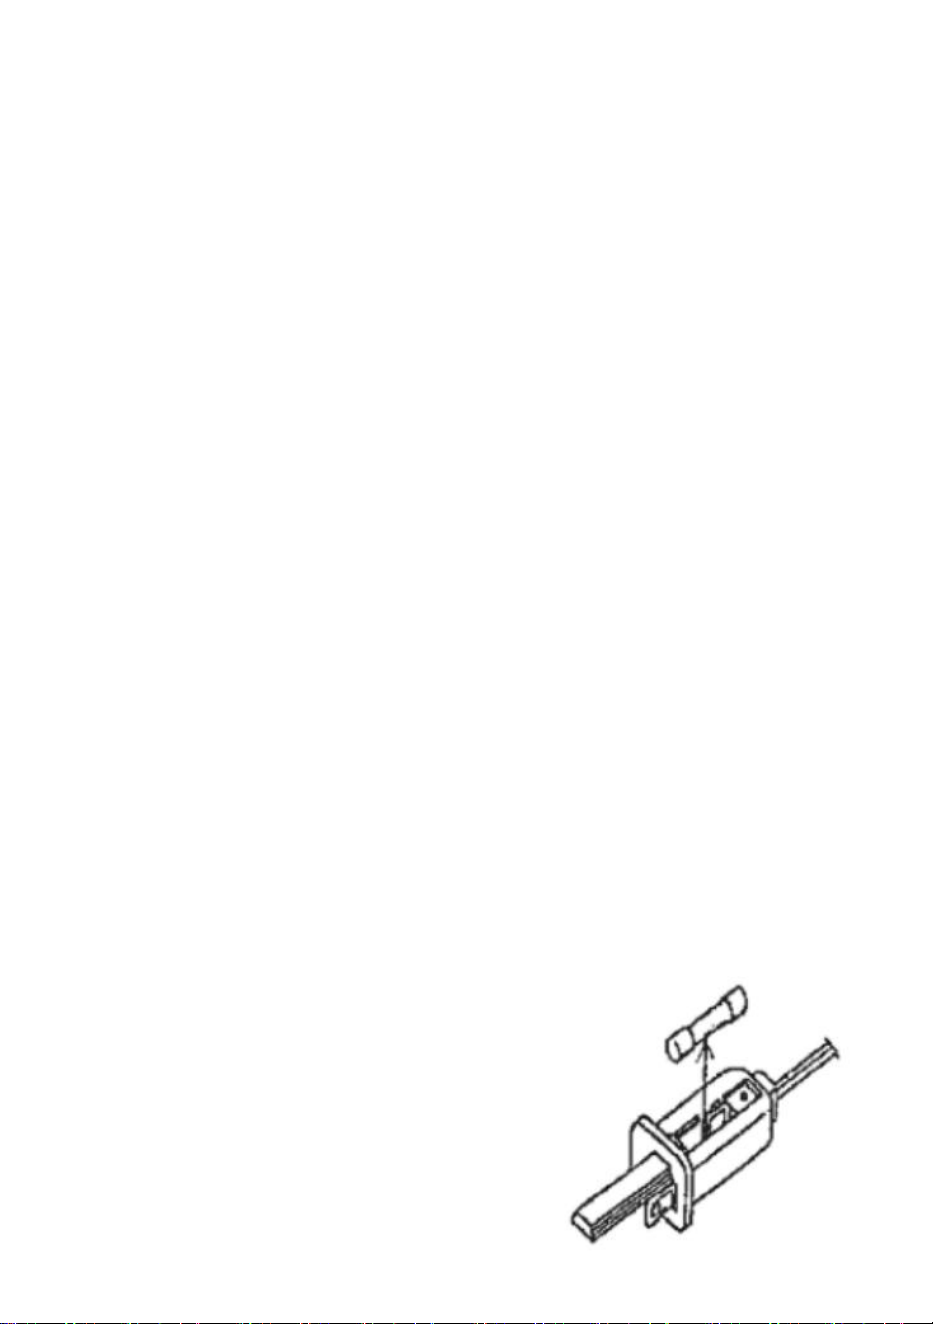
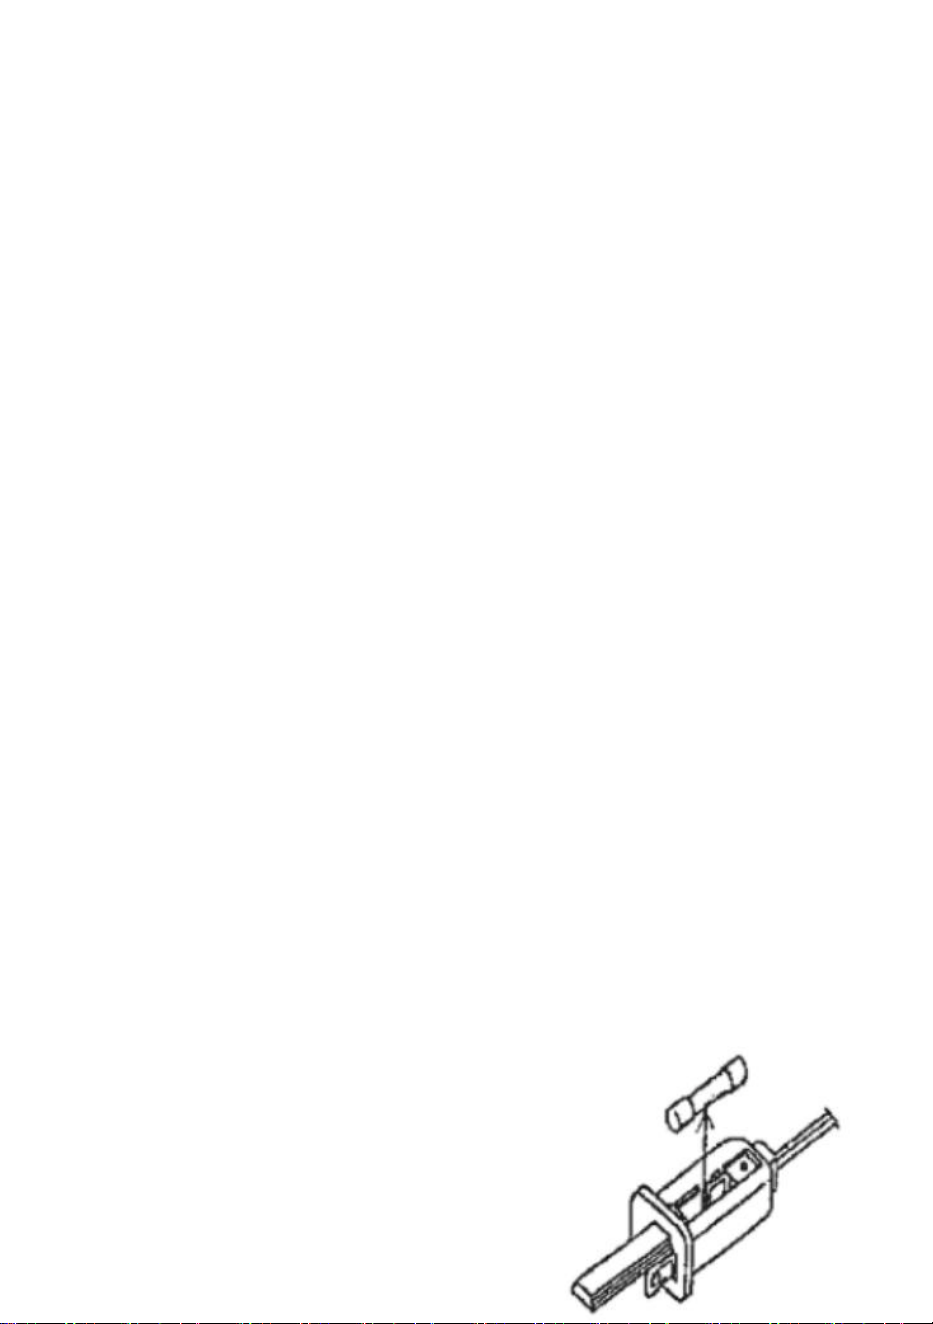
Replace the fuse
a) Grasp plug and remove from the
receptacle or otherworldly annulling cord.
b) Open fuse cover Slide confuse access
cover on top of attachment plug towards
blades.
c) Remove fuse carefully.
d) Risk of fire Replace fuse only with 5
Amp,125 Volt fuse (provided with product) .
e) Close fuse cover Slide closed the fuse
access cover on top of attachment plug.
f) Risk of fire Do not replace attachment plug Contains a safety device
(fuse) that should not be removed Discard product if the attachment is
damaged
If connecting to alighting string that does not have a Wattage(W)rating
[found on the tag within 6 inches of the plug}calculate the wattage as
follows:Multiply the current(A) which is on the flag-type tag by 120.
For Example:Lighting string is rated 120V,60Hz,0.2 Amps.0.2X120=24
Watts Add the wattage of each light string together for a total of 300 watts
or less.(Do not exceed 300 Watts).
CAUTION
1. Replace only with same type 0.6 Watt Max candelabra-base UL
Classified lamps.
2.To reduce the risk of fire do not deliberately reposition either lamp holder
contact.
3.To reduce the risk of fire and electric shock:a)Do not install on trees
having needles leaves or branch coverings of metal or materials which look
like metal.and b]Do not mount or support string sin a manner that can cut
or damage wire insulation

- 8 -
ACCESSORIES LIST
AX-DC-001:
1.Spare light bulb *1
2.User Manual *1
AX-DC-002:
1.Spare light bulb *2
2.User Manual *1
AX-DC-003:
1.Spare light bulb *3
2.User Manual *1
Sanven Technology Ltd.
Address: Suite 250, 9166 Anaheim Place, Rancho Cucamonga, CA 91730


Technique Certificat d'assistance et de garantie électronique
www.vevor.com/support
GUIRLANDES LUMINEUSES
D'EXTÉRIEUR
MANUEL D'UTILISATION
MODÈLE : AX-DC-001 / AX-DC-002 / AX-DC-003
We continue to be committed to provide you tools with competitive price.
"Save Half", "Half Price" or any other similar expressions used by us only represents an
estimate of savings you might benefit from buying certain tools with us compared to the major
top brands and does not necessarily mean to cover all categories of tools offered by us. You
are kindly reminded to verify carefully when you are placing an order with us if you are
actually saving half in comparison with the top major brands.


- 1 -
(L'image est à titre de référence uniquement, veuillez vous référer à l'objet
réel)
Have product questions? Need technical support? Please feel free to
contact us:
Technical Support and E-Warranty Certificate
www.vevor.com/support
NEED HELP? CONTACT US!
This is the original instruction, please read all manual instructions
carefully before operating. VEVOR reserves a clear interpretation of our
user manual. The appearance of the product shall be subject to the
product you received. Please forgive us that we won't inform you again if
there are any technology or software updates on our product.
Outdoor String Lights
AX-DC-001
AX-DC-002
AX-DC-003

- 2 -
INSTRUCTIONS
Avertissement - Pour réduire le risque de blessure, l'utilisateur
doit lire attentivement le manuel d'instructions.
Cet appareil est conforme à la partie 15 des règles de la FCC.
Son fonctionnement est soumis aux deux conditions suivantes :
(1) Cet appareil ne doit pas provoquer d'interférences nuisibles
et (2) Cet appareil doit accepter toute interférence reçue, y
compris les interférences pouvant entraîner un fonctionnement
indésirable.
AVIS:
ATTENTION : Pour éviter tout risque d'incendie et de choc électrique,
assurez-vous de lire toutes les instructions avant d'installer ou d'utiliser
cet appareil.
AVERTISSEMENT:
1.Avant utilisation, assurez-vous que toutes les ampoules sont
correctement fixées dans leur douilles et serrez-les une par une.
2.Branchez la guirlande lumineuse sur la prise de courant qui se trouve
dans le boîtier étanche.
3. Accrochez votre guirlande lumineuse à l'emplacement souhaité,
assurez-vous que toutes les ampoules sont orientées vers le bas, ce qui
pourrait rendre les douilles IP65.

- 3 -
Modèle
AX-DC-001
AX-DC-002
AX-DC-003
Notation
CA 120 V 60 Hz 9
W
CA 120 V 60 Hz 30
W
CA 120 V 60 Hz 60
W
Type d'ampoule
DIRIGÉ S14
0,6 W
DIRIGÉ G40 0,6
W
DIRIGÉ ST38 0,6
W
Longueur
50 pieds
100 pieds
200 pieds
Type de prise
E12
E12
E12
Température de
2700K
2700K
2700K
- 4 -
PERFORMANCE PARAMETER
INSTALLATION,SAFETY AND CARE INSTRUCTIONS
ATTENTION pour éviter tout risque d'incendie, de brûlure ou de choc
électrique. Veuillez sauvegarder ces instructions.
INSTALLATION
(Le matériel, les crochets, les serre-câbles et le fil de guidage ne sont pas
inclus.)
1. Accrochez votre guirlande lumineuse à l'emplacement souhaité,
assurez-vous que toutes les ampoules sont correctement fixés dans leurs
douilles, serrez-les un par un et faites Bien sûr, toutes les ampoules sont
éteintes.
2.Branchez la guirlande lumineuse sur la prise de courant qui se trouve
dans le boîtier étanche.
AVIS : Lorsque vous connectez plusieurs cordons ensemble, créez un
nœud avec les extrémités du cordon comme indiqué ci-dessous ou utilisez
couleur
Valeur lumineuse
31LM
42LM
44LM
Max Connexion
30 ensembles
10 ensembles
5 ensembles
- 5 -
un protecteur de prise pour éviter que les bouchons ne se désolidarisent
pas pendant l'utilisation.
AVERTISSEMENT
1. NE PAS suspendre la guirlande lumineuse lorsqu'elle est branchée.
2. NE PAS fixer les cordons avec des agrafes ou des clous.
3. Si vous changez d'emplacement, retirez les ampoules avant installation.
4. INSPECTEZ l'installation et l'état du produit avant chaque utilisation. 5.
Gardez les ampoules à au moins 6 pouces des autres objets
CONSIGNES DE SÉCURITÉ IMPORTANTES
Lors de l'utilisation de produits électriques, précautions de base devrait
toujours être suivi y compris le suivant:
a ) LIRE ET SUIVEZ TOUS SÉCURITÉ INSTRUCTIONS.
b) N'utilisez pas de produits saisonniers à l'extérieur, sauf indication
contraire. convient pour l'intérieur et utilisation en extérieur Lorsque les
produits sont utilisés dans des applications extérieures, connectez le
produit à un défaut à la terre Prise de courant avec disjoncteur différentiel
(GFCI ). Si elle n'est pas fournie, contactez un technicien qualifié.
électricien pour une installation correcte.
c ) Ce produit à usage saisonnier n'est pas destiné à une installation ou
une utilisation permanente
d ) Ne pas monter ou placer à proximité de radiateurs à gaz ou

- 6 -
électriques, d'une cheminée, de bougies ou d'autres sources de chaleur
similaires.
e ) Ne fixez pas le câblage du produit avec des agrafes ou des clous, ou
le placer sur des crochets ou des clous pointus
f ) Ne laissez pas les lampes reposer sur l'alimentation cordon ou sur
n'importe quel fil.
g ) Débranchez le produit quand sortie le maison, quand sortant pour le
nuit, ou il laissé sans surveillance.
h ) Il s'agit d'un produit électrique, pas d'un jouet ! Pour éviter tout risque
d'incendie, de brûlure, de blessure corporelle et de choc électrique, ne doit
pas être utilisé pour jouer ou placé là où de petits les enfants peuvent
l'atteindre.
je fais pas utilise ceci produit pour autre que c'est destiné utiliser.
j ) Ne pas suspendre d’ornements ou d’autres objets à un cordon, un fil
ou une guirlande lumineuse.
k ) Ne fermez pas les portes ou les fenêtres sur le produit ou les
rallonges car cela pourrait les endommager.
l ) Ne pas couvrir le produit avec du tissu, du papier ou tout matériau ne
faisant pas partie du produit lors de son utilisation.
m ) Ce produit est doté d'une fiche polarisée (une lame est plus large
que l'autre) afin de réduire le risque de choc électrique. Cette fiche ne peut
être insérée dans une prise polarisée que d'une seule manière. Si la fiche
ne s'insère pas complètement dans la prise, inversez-la. Si elle ne s'insère
toujours pas, contactez un électricien qualifié. N'utilisez pas de rallonge si
la fiche ne peut pas être insérée complètement. Ne modifiez pas et ne
remplacez pas la fiche.
n ) Ce produit utilise une protection contre les surcharges [fusible]. Un
fusible grillé indique une situation de surcharge ou de court-circuit. Si le
fusible grille, débranchez le produit de la prise et débranchez tous les
cordons ou produits supplémentaires qui peuvent être connectés au
produit. Remplacez le fusible conformément aux instructions d'entretien de
l'utilisateur (suivez le marquage du produit pour connaître la valeur
nominale du fusible appropriée) et vérifiez le produit. Si le fusible de
remplacement grille, un court-circuit peut être présent et le produit doit être
- 7 -
mis au rebut.
o ) Lisez et suivez toutes les instructions figurant sur le produit ou
fournies avec le produit.
p ) Utiliser et Conseils d'entretien
SAUVEGARDER CES INSTRUCTIONS
a ) Lorsque le produit est placé sur un arbre vivant. L'arbre doit être
bien frais. Ne le placez pas sur des arbres vivants dont les aiguilles sont
brunes ou se cassent facilement. Gardez le récipient rempli d'eau
b ) Si le produit est placé sur un arbre, l'arbre doit être bien fixé et stable
c ) Avant peu entreprenant, inspecter pré-production Contreproductif que
avoir coupure, isolation des fils ou des cordons endommagés ou effilochés,
fissures dans les boîtiers d'espace réservé. connexions desserrées ou fil
de cuivre exposé.
d ) Lorsque stockage le produit, attention retirer le produit depuis où que
ce soit placé, y compris les arbres, les branches ou les buissons, pour
éviter toute tension ou contrainte excessive sur le produit conducteurs,
connexions et fils.
e ) Lorsqu'il n'est pas utilisé, conserver soigneusement dans un endroit
frais et sec, à l'abri du soleil.
Remarque : le blanc 1 doit être confondu avec la valeur propre des
instructions d'entretien de l'utilisateur de la lampe d'emplacement.
Remplacer le fusible
a ) Saisissez la fiche et retirez-la de la
prise ou de l'autre annulation corde.
b ) Ouvrez le couvercle du fusible. Faites
glisser le couvercle d'accès au fusible situé
sur le dessus de la fiche de fixation vers les
lames.
c ) Supprimer fusible soigneusement.
d ) Risque d'incendie Remplacez le
fusible uniquement par un fusible de 5 A,
125 V (fourni avec produit ) .

- 8 -
e ) Fermez le couvercle du fusible. Faites glisser le couvercle d'accès au
fusible sur le dessus de la fiche de raccordement.
f ) Risque d'incendie Ne pas remplacer la fiche de raccordement
Contient un dispositif de sécurité (fusible ) qui ne doit pas être retiré Jetez
le produit si l'accessoire est endommagé
En cas de connexion à une chaîne d'éclairage qui n'a pas de puissance
nominale (W) [indiquée sur l'étiquette à l'intérieur 6 pouces de le
fiche}calculer le puissance comme suit :Multiplier le courant (A) qui se
trouve sur l'étiquette de type drapeau par 120.
Pour Exemple : Éclairage chaîne est noté 120 V, 60 Hz, 0,2
Ampères.0,2X120=24 Watts Ajoutez la puissance de chaque guirlande
lumineuse ensemble pour un total de 300 watts ou moins. (Ne pas
dépasser 300 watts).
PRUDENCE
1. Remplacez-les uniquement par des lampes à culot candélabre de même
type de 0,6 W max, classées UL.
2. Pour réduire le risque d’incendie, ne repositionnez pas délibérément l’un
ou l’autre des contacts du support de lampe.
3. Pour réduire le risque d'incendie et de choc électrique : a) Ne pas
installer sur des arbres ayant des aiguilles, des feuilles ou des branches
recouvertes de métal ou de matériaux ressemblant à du métal. et b) Ne
pas monter ou soutenir la corde d'une manière qui pourrait couper ou
endommager l'isolation du fil.
ACCESSORIES LIST
AX-DC-001:
1.Ampoule de rechange *1
2.Manuel d'utilisation *1
AX-DC-002:
1.Ampoule de rechange *2

- 9 -
2.Manuel d'utilisation *1
AX-DC-003:
1.Ampoule de rechange *3
2.Manuel d'utilisation *1
Sanven Technologie Ltée.
Adresse : Suite 250, 9166 Anaheim Place, Rancho Cucamonga, CA 91730


Technisch Support und E-Garantie-Zertifikat
www.vevor.com/support
LICHTERKETTEN FÜR DRAUßEN
BENUTZERHANDBUCH
MODELL: AX-DC-001 /AX-DC-002 / AX-DC-003
We continue to be committed to provide you tools with competitive price.
"Save Half", "Half Price" or any other similar expressions used by us only represents an
estimate of savings you might benefit from buying certain tools with us compared to the major
top brands and does not necessarily mean to cover all categories of tools offered by us. You
are kindly reminded to verify carefully when you are placing an order with us if you are
actually saving half in comparison with the top major brands.


- 1 -
(Das Bild dient nur als Referenz, bitte beziehen Sie sich auf das
tatsächliche Objekt)
Have product questions? Need technical support? Please feel free to
contact us:
Technical Support and E-Warranty Certificate
www.vevor.com/support
NEED HELP? CONTACT US!
This is the original instruction, please read all manual instructions
carefully before operating. VEVOR reserves a clear interpretation of our
user manual. The appearance of the product shall be subject to the
product you received. Please forgive us that we won't inform you again if
there are any technology or software updates on our product.
Outdoor String Lights
AX-DC-001
AX-DC-002
AX-DC-003

- 2 -
INSTRUCTIONS
Warnung: Um das Verletzungsrisiko zu verringern, muss der
Benutzer die Bedienungsanleitung sorgfältig lesen.
Dieses Gerät entspricht Teil 15 der FCC-Bestimmungen. Der
Betrieb unterliegt den folgenden beiden Bedingungen: (1)
Dieses Gerät darf keine schädlichen Störungen verursachen
und (2) dieses Gerät muss alle empfangenen Störungen
akzeptieren, einschließlich Störungen, die einen
unerwünschten Betrieb verursachen können.
BEACHTEN:
ACHTUNG: Um Brand- und Stromschlaggefahr zu vermeiden, lesen Sie
bitte unbedingt alle Anweisungen bevor Sie dieses Gerät installieren oder
verwenden.
WARNUNG:
1. Stellen Sie vor dem Gebrauch sicher, dass alle Glühbirnen richtig in
ihren Stecknüsse und ziehen Sie diese nacheinander fest.
2. Stecken Sie die Lichterkette in die Steckdose in der wasserdichten Box.
3. Hängen Sie Ihre Lichterkette an der gewünschten Stelle auf und achten
Sie darauf, dass alle Glühbirnen nach unten zeigen, damit die Fassungen
IP65 entsprechen.
- 3 -
Modell
AX-DC-001
AX-DC-002
AX-DC-003
Bewertungen
Wechselstrom 120
V, 60 Hz, 9 W
Wechselstrom 120
V, 60 Hz , 30 W
Wechselstrom 120
V, 60 Hz , 60 W
Lampentyp
LED Staffel 14
0,6 W
LED G40 0,6W
LED ST38 0,6 W
Länge
50 Fuß
100 Fuß
200 Fuß
Sockeltyp
E12
E12
E12
Farbtemperatur
2700K
2700K
2700K
- 4 -
PERFORMANCE PARAMETER
INSTALLATION,SAFETY AND CARE INSTRUCTIONS
VORSICHTIG, um das Risiko von Feuer, Verbrennungen oder
Stromschlägen zu vermeiden. Bitte speichern diese Anleitung.
INSTALLATION
(Hardware, Haken, Kabelbinder und Führungsdraht sind nicht im
Lieferumfang enthalten.)
1.Hängen Sie Ihre Lichterkette an der gewünschten Stelle auf und stellen
Sie sicher, dass alle Glühbirnen richtig in ihren Buchsen befestigt sind,
ziehen Sie einen nach dem anderen fest und machen Sie Stellen Sie
sicher, dass alle Glühbirnen aus sind.
2. Stecken Sie die Lichterkette in die Steckdose in der wasserdichten Box.
HINWEIS: Wenn Sie mehrere Kabel miteinander verbinden, machen Sie
einen Knoten mit die Kabelenden wie unten gezeigt oder verwenden Sie
einen Steckerschutz, um zu verhindern, verhindert, dass sich die Stecker
während des Gebrauchs lösen.
Lichtwert
31LM
42LM
44LM
Max Verbindung
30 Sätze
10 Sätze
5 Sätze

- 5 -
WARNUNG
1. Hängen Sie die Lichterkette NICHT auf, während sie eingesteckt ist.
2. Befestigen Sie Kabel NICHT mit Klammern oder Nägeln.
3. Wenn Sie den Standort wechseln, entfernen Sie die Glühbirnen vor
Installation.
4. Überprüfen Sie vor jedem Gebrauch die Einrichtung und den
Produktzustand. 5. Halten Sie die Glühbirnen mindestens 6 Zoll von
anderen Objekten entfernt
WICHTIGE SICHERHEITSHINWEISE
Bei der Verwendung von elektrischen Produkten, grundlegende
Vorsichtsmaßnahmen sollen stets Sei gefolgt einschließlich der
Folgendes:
a ) LESEN UND FOLGEN SIE ALLEN SICHERHEIT
ANWEISUNGEN.
b) Verwenden Sie keine Saisonprodukte im Freien, es sei denn, sie sind
als solche gekennzeichnet. geeignet für den Innenbereich Und
Verwendung im Außenbereich Wenn Produkte im Außenbereich verwendet
werden, das Produkt an einen Erdschluss Steckdose mit
Stromkreisunterbrechung (GFCI ). Wenn keine vorhanden ist, wenden Sie
sich an einen qualifizierten

- 6 -
Lassen Sie sich für die ordnungsgemäße Installation von einem
Elektriker beraten.
c ) Dieses Produkt für den Saisongebrauch ist nicht für die dauerhafte
Installation oder Verwendung vorgesehen
d ) Nicht in der Nähe von Gas- oder Elektroheizungen, Kaminen, Kerzen
oder ähnlichen Wärmequellen montieren oder platzieren.
e ) Sichern Sie die Verkabelung nicht des Produkts mit Klammern oder
Nägeln oder an scharfen Haken oder Nägeln befestigen
f ) Lampen nicht auf dem Stromnetz abstellen Kabel oder an einem
beliebigen Draht.
g ) Ziehen Sie den Stecker aus der Produkt Wann Verlassen Die Haus,
wenn Ruhestand für Die Nacht, oder Es unbeaufsichtigt gelassen.
h ) Dies ist ein elektrisches Produkt, kein Spielzeug! Um die Gefahr von
Feuer, Verbrennungen, Verletzungen und Stromschlägen zu vermeiden,
darf nicht damit gespielt oder an Orten platziert werden, wo kleine für
Kinder erreichbar ist.
ich tue nicht benutze dies Produkt für außer es ist beabsichtigt
verwenden.
j ) Hängen Sie keine Ornamente oder andere Gegenstände an Kordeln,
Drähten oder Lichterketten auf.
k ) Schließen Sie keine Türen oder Fenster und decken Sie das Produkt
oder die Verlängerungskabel nicht ab, da dies zu Schäden führen kann.
l ) Bedecken Sie das Produkt nicht mit Stoff, Papier oder jegliches
Material, das während der Verwendung nicht Teil des Produkts ist.
m ) Dieses Produkt verfügt über einen polarisierten Stecker (ein Stift ist
breiter als der andere), um das Risiko eines Stromschlags zu verringern.
Dieser Stecker passt nur auf eine Art in eine polarisierte Steckdose. Wenn
der Stecker nicht vollständig in die Steckdose passt, drehen Sie ihn um.
Wenn er immer noch nicht passt, wenden Sie sich an einen qualifizierten
Elektriker. Verwenden Sie kein Verlängerungskabel, wenn der Stecker
nicht vollständig eingesteckt werden kann. Verändern oder ersetzen Sie
den Stecker nicht.
n ) Dieses Produkt verfügt über einen Überlastungsschutz [Sicherung].
Eine durchgebrannte Sicherung weist auf eine Überlastung oder einen

- 7 -
Kurzschluss hin. Wenn die Sicherung durchbrennt, ziehen Sie den Stecker
des Produkts aus der Steckdose und ziehen Sie alle weiteren Kabel oder
Produkte ab, die möglicherweise an das Produkt angeschlossen sind.
Ersetzen Sie die Sicherung gemäß den Wartungsanweisungen des
Benutzers (folgen Sie der Produktkennzeichnung für die korrekte
Sicherungsstärke) und überprüfen Sie das Produkt. Wenn die
Ersatzsicherung durchbrennt, liegt möglicherweise ein Kurzschluss vor
und das Produkt sollte entsorgt werden.
o ) Lesen und befolgen Sie alle Anweisungen, die sich auf dem Produkt
befinden oder mit dem Produkt geliefert werden.
p ) Nutzung und Pflegehinweise
SPEICHERN DIESE ANWEISUNGEN
a ) Wenn das Produkt auf einem lebenden Baum platziert wird. Der
Baum sollte gut frisch sein. Platzieren Sie es nicht auf lebenden Bäumen,
deren Nadeln braun sind oder leicht abbrechen. Halten Sie den Behälter
mit Wasser gefüllt
b ) Wenn das Produkt an einem Baum angebracht wird, Der Baum sollte
gut gesichert und stabil sein
c ) Vorher unternehmungslustig, inspizieren Vorproduktion
Kontraproduktiv Das haben Schnitte, beschädigte oder ausgefranste
Drahtisolierungen oder Kabel, Risse in den Platzhaltergehäusen. lose
Verbindungen oder freiliegende Kupferdrähte.
d ) Wann Speicherung Die Produkt, vorsichtig entfernen Die Produkt aus
wo auch immer platziert, einschließlich Baum, Äste oder Büsche, um eine
übermäßige Belastung oder Beanspruchung des Produkts zu vermeiden
Leiterverbindungen und Drähte.
e ) Bei Nichtgebrauch ordentlich an einem kühlen, trockenen und vor
Sonnenlicht geschützten Ort aufbewahren.
Hinweis: Das leere 1 ist mit den Eigenschaften der
Benutzer-Wartungsanweisungen für Einbaulampen zu verwechseln .
Ersetzen Sie die Sicherung
- 8 -
a ) Den Stecker fassen und aus der
Steckdose ziehen oder den Stecker Kabel.
b ) Sicherungsabdeckung öffnen.
Schieben Sie die
Sicherungszugangsabdeckung oben auf
dem Befestigungsstecker in Richtung der
Klingen.
c ) Entfernen Sicherung sorgfältig.
d ) Brandgefahr Ersetzen Sie die
Sicherung nur durch eine 5 Ampere, 125 Volt Sicherung (im Lieferumfang
enthalten) Produkt ) .
e ) Sicherungsabdeckung schließen. Schieben Sie die
Sicherungszugangsabdeckung oben auf dem Anschlussstecker zu.
f ) Brandgefahr Den Stecker nicht austauschen. Enthält eine
Sicherheitsvorrichtung (Sicherung ) , die sollte nicht entfernt werden
Entsorgen Sie das Produkt, wenn der Aufsatz beschädigt ist
Bei Anschluss an eine Lichterkette ohne Watt-Angabe (zu finden auf
dem Etikett im 6 Zoll von Die Stecker}berechnen Die Wattzahl als
folgt:Multiplizieren Die Strom (A) welches sich auf dem Flaggentyp-Tag bei
120 befindet.
Für Beispiel:Beleuchtung Schnur Ist bewertet 120 V, 60 Hz, 0,2
Ampere.0,2X120=24 Watt Fügen Sie die Wattzahl hinzu von jede
Lichterkette zusammen für insgesamt 300 Watt oder
weniger.(Überschreiten Sie nicht 300 Watt).
VORSICHT
1. Ersetzen Sie ihn ausschließlich durch UL-klassifizierte Lampen des
gleichen Typs mit max. 0,6 Watt und Kerzensockel.
2. Um die Brandgefahr zu verringern, verändern Sie die Kontakte der
Lampenfassung nicht absichtlich.
3. Um das Risiko von Feuer und Stromschlag zu verringern: a) Installieren
Sie das Gerät nicht an Bäumen, deren Nadeln, Blätter oder Äste aus Metall
oder aus metallisch aussehenden Materialien bestehen. b) Montieren oder
stützen Sie die Saiten nicht auf eine Weise, bei der die Isolierung der

- 9 -
Drähte beschädigt werden kann.
ACCESSORIES LIST
AX-DC-001:
1. Ersatzglühbirne *1
2.Benutzerhandbuch *1
AX-DC-002:
1.Ersatzglühbirne *2
2.Benutzerhandbuch *1
AX-DC-003:
1.Ersatzglühbirne *3
2.Benutzerhandbuch *1
Sanven Technology Ltd.
Adresse: Suite 250, 9166 Anaheim Place, Rancho Cucamonga, CA 91730


Tecnico Supporto e certificato di garanzia elettronica
www.vevor.com/support
LUCI A CORDA PER ESTERNI
MANUALE D'USO
MODELLO: AX-DC-001 /AX-DC-002 / AX-DC-003
We continue to be committed to provide you tools with competitive price.
"Save Half", "Half Price" or any other similar expressions used by us only represents an
estimate of savings you might benefit from buying certain tools with us compared to the major
top brands and does not necessarily mean to cover all categories of tools offered by us. You
are kindly reminded to verify carefully when you are placing an order with us if you are
actually saving half in comparison with the top major brands.


- 1 -
(L'immagine è solo di riferimento, fare riferimento all'oggetto reale)
Have product questions? Need technical support? Please feel free to
contact us:
Technical Support and E-Warranty Certificate
www.vevor.com/support
NEED HELP? CONTACT US!
This is the original instruction, please read all manual instructions
carefully before operating. VEVOR reserves a clear interpretation of our
user manual. The appearance of the product shall be subject to the
product you received. Please forgive us that we won't inform you again if
there are any technology or software updates on our product.
Outdoor String Lights
AX-DC-001
AX-DC-002
AX-DC-003

- 2 -
INSTRUCTIONS
Attenzione: per ridurre il rischio di lesioni, l'utente deve leggere
attentamente il manuale di istruzioni.
Questo dispositivo è conforme alla Parte 15 delle Norme FCC.
Il funzionamento è soggetto alle due condizioni seguenti: (1)
Questo dispositivo non può causare interferenze dannose e (2)
Questo dispositivo deve accettare qualsiasi interferenza
ricevuta, comprese le interferenze che possono causare un
funzionamento indesiderato.
AVVISO:
ATTENZIONE: per prevenire il rischio di incendi e scosse elettriche,
assicurarsi di leggere tutte le istruzioni prima di installare o utilizzare
questa unità.
AVVERTIMENTO:
1. Prima dell'uso, assicurarsi che tutte le lampadine siano correttamente
fissate nelle loro sedi. prese e serrarle una alla volta.
2. Collegare la catena luminosa alla presa di corrente che si trova nella
scatola impermeabile.
3. Appendere la catena luminosa nel punto desiderato, assicurandosi che
tutte le lampadine siano rivolte verso il basso, in modo che le prese siano
IP65.

- 3 -
Modello
Codice articolo:
AX-DC-001
Codice articolo:
AX-DC-002
AX-DC-003
Valutazione
AC120V 60Hz 9W
AC120V 60Hz 30W
AC120V 60Hz 60W
Tipo di lampadina
GUIDATO S14
0,6 W
GUIDATO G40
0,6 W.
GUIDATO ST38
0,6 W.
Lunghezza
50 PIEDI
100 PIEDI
200 PIEDI
Tipo di presa
E12
E12
E12
Temperatura del
2700K
2700K
2700K
- 4 -
PERFORMANCE PARAMETER
INSTALLATION,SAFETY AND CARE INSTRUCTIONS
ATTENZIONE per evitare il rischio di incendi, ustioni o scosse elettriche.
Per favore salva queste istruzioni.
INSTALLAZIONE
(La ferramenta, i ganci, le fascette e il filo guida non sono inclusi.)
1. Appendere le luci della stringa nella posizione desiderata, assicurarsi
che tutte le lampadine siano fissati correttamente nelle loro sedi, stringere
uno per uno e fare assicurati che tutte le lampadine siano spente.
2. Collegare la catena luminosa alla presa di corrente che si trova nella
scatola impermeabile.
AVVISO: quando si collegano più cavi insieme, creare un nodo con il cavo
termina come mostrato di seguito o utilizzare una protezione per la spina
per evitare che le spine si stacchino durante l'uso.
colore
Valore luminoso
31LM
42LM
44LM
Massimo
Connessione
30 set
10 set
5 set
- 5 -
AVVERTIMENTO
1. NON appendere le luci a catena mentre sono collegate.
2. NON fissare i cavi con graffette o chiodi.
3. Se si cambia posizione, rimuovere le lampadine prima installazione.
4. CONTROLLARE l'installazione e le condizioni del prodotto prima di ogni
utilizzo. 5. Tenere le lampadine ad almeno 6 pollici da altri oggetti
IMPORTANTI ISTRUZIONI DI SICUREZZA
Quando si utilizzano prodotti elettrici, precauzioni di base Dovrebbe
Sempre Essere seguito compreso il seguente:
a ) LEGGERE E SEGUI TUTTI SICUREZZA ISTRUZIONI.
b) Non utilizzare prodotti stagionali all'aperto, a meno che non siano
contrassegnati adatto per interni E uso esterno Quando i prodotti vengono
utilizzati in applicazioni esterne, collegare il prodotto a un guasto a terra
Presa di corrente con interruttore differenziale (GFCI ). Se non ne è
presente uno, contattare un tecnico qualificato.
elettricista per una corretta installazione.
c ) Questo prodotto per uso stagionale non è destinato all'installazione o
all'uso permanente
d ) Non montare o posizionare vicino a stufe a gas o elettriche, caminetti,
candele o altre fonti di calore simili.
e ) Non fissare il cablaggio del prodotto con graffette o chiodi, o

- 6 -
posizionare su ganci o chiodi affilati
f ) Non lasciare le lampade appoggiate sull'alimentazione corda o su
qualsiasi filo.
g ) Scollegare il prodotto Quando in partenza IL casa,quando in
pensione per IL notte, o Esso lasciato incustodito.
h ) Questo è un prodotto elettrico, non un giocattolo! Per evitare rischi di
incendio, ustioni, lesioni personali e scosse elettriche, non deve essere
utilizzato per giocare o essere posizionato dove i bambini piccoli i bambini
possono raggiungerlo.
Io faccio non usa questo prodotto per altro che suo destinato utilizzo.
j ) Non appendere ornamenti o altri oggetti a fili, corde o fili luminosi.
k ) Non chiudere porte o finestre sul prodotto o sulle prolunghe poiché
potrebbero danneggiarlo.
l ) Non coprire il prodotto con stoffa, carta o qualsiasi materiale che non
faccia parte del prodotto durante l'uso.
m ) Questo prodotto ha una spina polarizzata (una lama è più larga
dell'altra) come caratteristica per ridurre il rischio di scosse elettriche.
Questa spina si adatta a una presa polarizzata solo in un modo. Se la
spina non si adatta completamente alla presa, invertirla. Se ancora non si
adatta, contattare un elettricista qualificato. Non utilizzare con una
prolunga a meno che la spina non possa essere inserita completamente.
Non modificare o sostituire la spina.
n ) Questo prodotto impiega una protezione da sovraccarico [fusibile].
Un fusibile bruciato indica una situazione di sovraccarico o cortocircuito.
Se il fusibile brucia, scollegare il prodotto dalla presa e scollegare eventuali
stringhe o prodotti aggiuntivi che potrebbero essere collegati al prodotto.
Sostituire il fusibile secondo le istruzioni di manutenzione dell'utente
(seguire la marcatura del prodotto per la corretta classificazione del fusibile)
e controllare il prodotto. Se il fusibile sostitutivo brucia, potrebbe essere
presente un cortocircuito e il prodotto dovrebbe essere scartato.
o ) Leggi e segui tutto istruzioni presenti sul prodotto o fornite con lo
stesso.
p ) Utilizzare e Istruzioni per la cura

- 7 -
SALVA QUESTI ISTRUZIONI
a ) Quando il prodotto è posizionato su un albero vivo. L'albero deve
essere fresco e adamantino. Non posizionarlo su alberi vivi in cui gli aghi
sono marroni o si spezzano facilmente. Mantenere il contenitore pieno
d'acqua
b ) Se il prodotto è posizionato su un albero, l'albero deve essere ben
fissato e stabile
c ) Prima poco intraprendente, ispezionare pre-produzione
Controproducente Quello Avere taglio, isolamento dei cavi o cavi
danneggiati o sfilacciati, crepe nelle custodie segnaposto. collegamenti
allentati o filo di rame esposto.
d ) Quando immagazzinamento IL prodotto,attento rimuovere IL prodotto
da dovunque posizionato, compresi alberi, rami o cespugli, per evitare
qualsiasi sforzo o stress eccessivo sul prodotto collegamenti dei conduttori
e fili.
e ) Quando non in uso, conservare ordinatamente in un luogo fresco e
asciutto, al riparo dalla luce solare.
Nota: il vuoto 1 deve essere confuso con l'autovalore delle istruzioni per
la manutenzione dell'utente della lampada di installazione.
Sostituire il fusibile
a ) Afferrare la spina e rimuoverla dalla
presa o dall'annullamento ultraterreno
corda.
b ) Aprire il coperchio del fusibile. Far
scorrere il coperchio di accesso al fusibile
sulla parte superiore della spina di
collegamento verso le lame.
c ) Rimuovi fusibile accuratamente.
d ) Rischio di incendio Sostituire il fusibile
solo con un fusibile da 5 Amp, 125 Volt (fornito con prodotto ) .
e ) Chiudere il coperchio del fusibile. Far scorrere il coperchio di accesso
al fusibile sulla parte superiore della spina di collegamento.
f ) Rischio di incendio Non sostituire la spina di collegamento Contiene

- 8 -
un dispositivo di sicurezza (fusibile ) che non deve essere rimosso Smaltire
il prodotto se l'accessorio è danneggiato
Se ci si collega a una stringa di accensione che non ha una potenza
nominale (W) [trovata sull'etichetta all'interno 6 pollici Di IL spina}calcolare
IL potenza in watt COME segue: Moltiplicare IL corrente(A) che si trova sul
tag di tipo bandiera a 120.
Per Esempio:Illuminazione corda È valutato 120V,60Hz,0,2
Ampere.0,2X120=24 Watt Aggiungere la potenza in watt Di ogni stringa di
luci insieme per un totale di 300 watt o meno. (Non superare 300 Watt).
ATTENZIONE
1. Sostituire solo con lampade dello stesso tipo, con base a candela da 0,6
Watt max, classificate UL.
2. Per ridurre il rischio di incendio, non riposizionare deliberatamente
nessuno dei contatti del portalampada.
3. Per ridurre il rischio di incendi e scosse elettriche: a) Non installare su
alberi con aghi, foglie o rami rivestiti di metallo o materiali che sembrano
metallo. e b] Non montare o sostenere la corda in un modo che possa
tagliare o danneggiare l'isolamento del filo.
ACCESSORIES LIST
ITALIANO:
1.Lampadina di ricambio *1
2.Manuale utente *1
ITALIANO:
1.Lampadina di ricambio *2
2.Manuale utente *1
ITALIANO:
1.Lampadina di ricambio *3

- 9 -
2.Manuale utente *1
Azienda
Indirizzo: Suite 250, 9166 Anaheim Place, Rancho Cucamonga, CA 91730


Técnico Certificado de soporte y garantía electrónica
www.vevor.com/support
LUCES DE CADENA PARA EXTERIORES
MANUAL DEL USUARIO
MODELO: AX-DC-001 / AX-DC-002 / AX-DC-003
We continue to be committed to provide you tools with competitive price.
"Save Half", "Half Price" or any other similar expressions used by us only represents an
estimate of savings you might benefit from buying certain tools with us compared to the major
top brands and does not necessarily mean to cover all categories of tools offered by us. You
are kindly reminded to verify carefully when you are placing an order with us if you are
actually saving half in comparison with the top major brands.


- 1 -
(La imagen es solo de referencia, consulte el objeto real)
Have product questions? Need technical support? Please feel free to
contact us:
Technical Support and E-Warranty Certificate
www.vevor.com/support
NEED HELP? CONTACT US!
This is the original instruction, please read all manual instructions
carefully before operating. VEVOR reserves a clear interpretation of our
user manual. The appearance of the product shall be subject to the
product you received. Please forgive us that we won't inform you again if
there are any technology or software updates on our product.
Outdoor String Lights
AX-DC-001
AX-DC-002
AX-DC-003

- 2 -
INSTRUCTIONS
Advertencia: Para reducir el riesgo de lesiones, el usuario debe
leer atentamente el manual de instrucciones.
Este dispositivo cumple con la Parte 15 de las Normas de la
FCC. Su funcionamiento está sujeto a las dos condiciones
siguientes: (1) Este dispositivo no puede causar interferencias
perjudiciales y (2) Este dispositivo debe aceptar cualquier
interferencia que reciba, incluidas las interferencias que
puedan causar un funcionamiento no deseado.
AVISO:
PRECAUCIÓN: Para evitar el riesgo de incendio y descarga eléctrica,
asegúrese de leer todas las instrucciones. antes de instalar o utilizar esta
unidad.
ADVERTENCIA:
1. Antes de usar, asegúrese de que todas las bombillas estén
correctamente fijadas en sus enchufes y apriételos uno por uno.
2. Conecte la cadena de luces a la toma de corriente que se encuentra en
la caja impermeable.
3. Cuelgue las luces de cadena en la ubicación deseada, asegúrese de
que todas las bombillas estén orientadas hacia abajo, lo que podría hacer
que los casquillos sean IP65.

- 3 -
Modelo
AX-DC-001
AX-DC-002
AX-DC-003
Clasificación
CA 120 V, 60 Hz, 9
W
CA 120 V 60 Hz 30
W
CA 120 V, 60 Hz,
60 W
Tipo de bombilla
CONDUJO S14
0,6 W
CONDUJO G40
0,6 W
CONDUJO ST38
0,6 W
Longitud
50 pies
100 pies
200 pies
Tipo de zócalo
E12
E12
E12
Temperatura del
2700K
2700K
2700K

- 4 -
PERFORMANCE PARAMETER
INSTALLATION,SAFETY AND CARE INSTRUCTIONS
CON CUIDADO para evitar el riesgo de incendio, quemaduras o descarga
eléctrica. Por favor guarde Estas instrucciones.
INSTALACIÓN
(Los herrajes, ganchos, bridas y cable guía no están incluidos).
1. Cuelga las luces de cadena en la ubicación deseada, asegúrate de que
todas las bombillas estén debidamente asegurados en sus zócalos,
apriételos uno por uno y asegúrese de que Asegúrese de que todas las
bombillas estén apagadas.
2. Conecte la cadena de luces a la toma de corriente que se encuentra en
la caja impermeable.
AVISO: Al conectar varios cables juntos, haga un nudo con Los extremos
del cable se muestran como se muestra a continuación o utilice un
protector de enchufe para evitar que los tapones se deshagan durante el
uso.
color
Valor luminoso
31LM
42LM
44LM
Máximo Conexión
30 juegos
10 juegos
5 juegos

- 5 -
ADVERTENCIA
1. NO cuelgue las luces de cadena mientras estén enchufadas.
2. NO asegure los cables con grapas o clavos.
3. Si se cambia de ubicación, retire las bombillas antes instalación.
4. INSPECCIONE la instalación y el estado del producto antes de cada
uso. 5. Mantenga las bombillas a una distancia mínima de 6 pulgadas de
otros objetos.
INSTRUCCIONES DE SEGURIDAD IMPORTANTES
Precauciones básicas al utilizar productos eléctricos debería siempre
ser seguido incluyendo el siguiente:
a ) LEER Y SEGUIR TODO SEGURIDAD INSTRUCCIONES.
b)No utilice productos de temporada en exteriores a menos que esté
marcado Apto para interior y Uso al aire libre Cuando los productos se
utilizan en aplicaciones al aire libre, conecte el producto a una falla a tierra
Toma de corriente con interruptor de circuito (GFCI ). Si no se proporciona
una, comuníquese con un técnico calificado.
electricista para una correcta instalación.
c ) Este producto es de uso estacional . No está destinado a una
instalación o uso permanente.
d ) No montar ni colocar cerca de calentadores de gas o eléctricos,
chimeneas, velas u otras fuentes de calor similares.

- 6 -
e ) No asegure el cableado del producto con grapas o clavos, ni
colocarlo sobre ganchos o clavos afilados
f ) No deje que las lámparas descansen sobre la fuente de alimentación.
cable o cualquier cable.
g ) Desconecte el producto cuando partida el casa,cuando saliente para
el noche,o él dejado desatendido.
h ) ¡ Este es un producto eléctrico, no un juguete! Para evitar el riesgo
de incendio, quemaduras, lesiones personales y descargas eléctricas, No
se debe jugar con ellos ni colocarlos donde los niños sean pequeños. Los
niños pueden alcanzarlo.
sí no usa esto producto para otro que es destinado usar.
j ) No cuelgue adornos u otros objetos del cable, alambre o cadena de
luces.
k ) No cierre puertas ni ventanas sobre el producto ni sobre los cables
de extensión, ya que esto podría dañarlos.
l ) No cubra el producto con tela, papel o cualquier material que no forme
parte del producto cuando esté en uso.
m ) Este producto tiene un enchufe polarizado (una clavija es más ancha
que la otra) como característica para reducir el riesgo de descarga
eléctrica. Este enchufe encaja en un tomacorriente polarizado de una sola
manera. Si el enchufe no encaja completamente en el tomacorriente,
invierta el enchufe. Si aún así no encaja, comuníquese con un electricista
calificado. No lo use con un cable de extensión a menos que el enchufe se
pueda insertar completamente. No altere ni reemplace el enchufe.
n ) Este producto utiliza protección contra sobrecargas [fusible]. Un
fusible fundido indica una situación de sobrecarga o cortocircuito. Si el
fusible se funde, desenchufe el producto de la toma de corriente y
desconecte cualquier otro cable o producto que pueda estar conectado al
producto. Reemplace el fusible según las instrucciones de servicio del
usuario (siga las marcas del producto para conocer la clasificación
adecuada del fusible) y verifique el producto. Si el fusible de repuesto se
funde, es posible que haya un cortocircuito y se debe desechar el
producto.
- 7 -
o ) Lea y siga todas las instrucciones que se encuentran en el producto
o se proporcionan con el producto.
p ) Uso y Instrucciones de cuidado
AHORRAR ESTOS INSTRUCCIONES
a ) Cuando el producto se coloca sobre un árbol vivo. El árbol debe
estar bien fresco y adamantino. No lo coloque sobre árboles vivos en los
que las agujas estén marrones o se rompan fácilmente. Mantenga el
recipiente lleno de agua.
b ) Si el producto se coloca en un árbol, El árbol debe estar bien
asegurado y estable.
c ) Antes poco emprendedor,inspeccionar preproducción
Contraproducente eso tener cortes, aislamientos de cables o cordones
dañados o deshilachados, grietas en los compartimentos de los
marcadores de posición. Conexiones sueltas o cable de cobre expuesto.
d ) Cuando almacenando el producto,cuidado eliminar el producto de
dondequiera que Colocado, incluidos árboles, ramas o arbustos, para
evitar cualquier tensión o estrés indebido en el producto. Conexiones de
conductores y cables.
e ) Cuando no esté en uso, guárdelo cuidadosamente en un lugar fresco
y seco, protegido de la luz solar.
Nota: El espacio en blanco 1 deberá estar familiarizado con el valor
propio de las instrucciones de servicio del usuario de la lámpara de
colocación.
Reemplace el fusible
a ) Sujete el enchufe y retírelo del
receptáculo o de otra manera anulándolo.
cable.
b ) Abra la tapa del fusible Deslice la tapa
de acceso al fusible en la parte superior del
enchufe de conexión hacia las cuchillas.
c ) Eliminar fusible con cuidado.
d ) Riesgo de incendio Reemplace el

- 8 -
fusible únicamente con un fusible de 5 amperios y 125 voltios (incluido con
el suministro). producto ) .
e ) Cierre la tapa del fusible Deslice para cerrar la tapa de acceso al
fusible en la parte superior del enchufe de conexión.
f ) Riesgo de incendio No sustituya el enchufe del accesorio Contiene un
dispositivo de seguridad (fusible ) que No debe quitarse Deseche el
producto si el accesorio está dañado
Si se conecta a una cadena de luces que no tiene una clasificación de
potencia (W) [que se encuentra en la etiqueta dentro 6 pulgadas de el
enchufe}calcular el potencia como sigue:Multiplica el corriente(A) que está
en la etiqueta tipo bandera por 120.
Para Ejemplo: Iluminación cadena es calificado 120 V, 60 Hz, 0,2
Amperios.0.2X120=24 Vatios Añade el vataje de Cada cadena de luces
juntos para un total de 300 vatios o menos. (No exceda 300 vatios).
PRECAUCIÓN
1. Reemplace únicamente con lámparas con base de candelabro del
mismo tipo, con clasificación UL y potencia máxima de 0,6 vatios.
2. Para reducir el riesgo de incendio, no cambie deliberadamente la
posición de ninguno de los contactos del portalámparas.
3. Para reducir el riesgo de incendio y descarga eléctrica: a) No lo instale
en árboles que tengan hojas aciculares o ramas cubiertas de metal o
materiales que parezcan de metal. b] No monte ni apoye la cuerda de
manera que pueda cortar o dañar el aislamiento del cable.
ACCESSORIES LIST
AX-DC-001:
1. Bombilla de repuesto *1
2. Manual del usuario *1
AX-DC-002:
1. Bombilla de repuesto * 2

- 9 -
2. Manual del usuario *1
AX-DC-003:
1. Bombilla de repuesto *3
2. Manual del usuario *1
Tecnología Sanven Ltd.
Dirección: Suite 250, 9166 Anaheim Place, Rancho Cucamonga, CA 91730


Techniczny Wsparcie i certyfikat e-gwarancji
www.vevor.com/support
ŚWIATŁA ZEWNĘTRZNE
INSTRUKCJA OBSŁUGI
MODELE: AX-DC-001 /AX-DC-002 / AX-DC-003
We continue to be committed to provide you tools with competitive price.
"Save Half", "Half Price" or any other similar expressions used by us only represents an
estimate of savings you might benefit from buying certain tools with us compared to the major
top brands and does not necessarily mean to cover all categories of tools offered by us. You
are kindly reminded to verify carefully when you are placing an order with us if you are
actually saving half in comparison with the top major brands.


- 1 -
(Zdjęcie ma charakter poglądowy, proszę odnosić się do rzeczywistego
obiektu)
Have product questions? Need technical support? Please feel free to
contact us:
Technical Support and E-Warranty Certificate
www.vevor.com/support
NEED HELP? CONTACT US!
This is the original instruction, please read all manual instructions
carefully before operating. VEVOR reserves a clear interpretation of our
user manual. The appearance of the product shall be subject to the
product you received. Please forgive us that we won't inform you again if
there are any technology or software updates on our product.
Outdoor String Lights
AX-DC-001
AX-DC-002
AX-DC-003

- 2 -
INSTRUCTIONS
Ostrzeżenie: Aby zminimalizować ryzyko obrażeń, użytkownik
powinien uważnie przeczytać instrukcję obsługi.
To urządzenie jest zgodne z częścią 15 przepisów FCC. Jego
działanie podlega następującym dwóm warunkom: (1) To
urządzenie nie może powodować szkodliwych zakłóceń i (2) to
urządzenie musi akceptować wszelkie odbierane zakłócenia, w
tym zakłócenia, które mogą powodować niepożądane
działanie.
OGŁOSZENIE:
UWAGA: Aby uniknąć ryzyka pożaru i porażenia prądem, należy
dokładnie przeczytać wszystkie instrukcje. przed zainstalowaniem lub
użyciem tego urządzenia.
OSTRZEŻENIE:
1. Przed użyciem należy upewnić się, że wszystkie żarówki są prawidłowo
zamocowane w swoich gniazdach. gniazda i dokręcaj je po kolei.
2. Podłącz lampkę do gniazdka elektrycznego znajdującego się w
wodoodpornej obudowie.
3. Zawieś lampki choinkowe w wybranym miejscu, upewniając się, że
wszystkie żarówki są skierowane w dół, dzięki czemu oprawki będą miały
klasę ochrony IP65.
- 3 -
Model
AX-DC-001
AX-DC-002
AX-DC-003
Ocena
AC120V 60Hz 9W
AC120V 60Hz 30W
AC120V 60Hz 60W
Typ żarówki
PROWADZONY
S14 0,6 W
PROWADZONY
G40 0,6 W
PROWADZONY
ST38 0,6 W
Długość
50 stóp
100 stóp
200 stóp
Typ gniazda
E12
E12
E12
Temperatura
barwowa
2700 tys.
2700 tys.
2700 tys.
- 4 -
PERFORMANCE PARAMETER
INSTALLATION,SAFETY AND CARE INSTRUCTIONS
OSTROŻNIE, aby uniknąć ryzyka pożaru, oparzeń lub porażenia prądem.
Proszę zapisać te instrukcje.
INSTALACJA
(Sprzęt, haki, opaski zaciskowe i drut prowadzący nie są dołączone.)
1. Zawieś lampki w wybranym miejscu, upewnij się, że wszystkie żarówki
są prawidłowo zamocowane w gniazdach, dokręcaj je jeden po drugim i
wykonaj Upewnij się, że wszystkie żarówki są zgaszone.
2. Podłącz lampkę do gniazdka elektrycznego znajdującego się w
wodoodpornej obudowie.
UWAGA: Łącząc ze sobą kilka przewodów, należy wykonać węzeł za
pomocą końce przewodu należy podłączyć w sposób pokazany poniżej lub
użyć osłony wtyczki, aby zapobiec zapobiegając rozłączaniu się wtyczek w
czasie użytkowania.
Wartość świetlna
31LM
42LM
44LM
Maksymalnie
Połączenie
30 zestawów
10 zestawów
5 zestawów
- 5 -
OSTRZEŻENIE
1. NIE wieszaj lampek choinkowych, gdy są podłączone do prądu.
2. NIE mocuj przewodów zszywkami ani gwoździami.
3. W przypadku zmiany lokalizacji należy przedtem wyjąć żarówki.
instalacja.
4. PRZED KAŻDYM UŻYCIEM SPRAWDZIĆ stan produktu i jego
konfigurację. 5. Przechowywać żarówki w odległości co najmniej 15 cm od
innych przedmiotów.
WAŻNE INSTRUKCJE BEZPIECZEŃSTWA
Podczas korzystania z produktów elektrycznych należy zachować
podstawowe środki ostrożności powinien zawsze Być śledzony w tym
on następny:
a ) PRZECZYTAJ I ŚLEDŹ WSZYSTKIE BEZPIECZEŃSTWO
INSTRUKCJE.
b) Nie używaj produktów sezonowych na zewnątrz, chyba że są
oznaczone. nadaje się do wewnątrz I do użytku na zewnątrz W przypadku
stosowania produktów na zewnątrz należy je podłączyć produkt do
uziemienia Gniazdo z wyłącznikiem różnicowoprądowym (GFCI ). Jeśli nie
jest dostępne, skontaktuj się z wykwalifikowanym
elektryka w celu prawidłowej instalacji.

- 6 -
c ) Ten produkt jest przeznaczony do użytku sezonowego nie jest
przeznaczony do stałej instalacji lub użytkowania
d ) Nie montować i nie umieszczać w pobliżu grzejników gazowych lub
elektrycznych, kominków, świec lub innych podobnych źródeł ciepła.
e ) Nie zabezpieczaj okablowania produktu za pomocą zszywek lub
gwoździ lub umieścić na ostrych haczykach lub gwoździach
f ) Nie pozostawiaj lamp na zasilaniu. sznurze lub na jakimkolwiek
przewodzie.
g ) Odłącz produkt Kiedy odjazd ten dom, kiedy ustępujący Do ten noc,
lub To pozostawione bez opieki.
h ) To jest produkt elektryczny, a nie zabawka! Aby uniknąć ryzyka
pożaru, oparzeń, obrażeń ciała i porażenia prądem, nie należy się nimi
bawić ani umieszczać w miejscach małych dzieci mogą do niego
dosięgnąć.
Ja robię nie użyj tego produkt dla inny niż jego przeznaczony używać.
j ) Nie wieszaj ozdób i innych przedmiotów na sznurku, drucie lub
girlandzie świetlnej.
k ) Nie należy zamykać drzwi ani okien na produkcie lub przedłużaczach,
gdyż może to spowodować ich uszkodzenie.
l ) Nie przykrywać produktu materiałem, papierem ani jakikolwiek
materiał nie stanowiący części produktu w trakcie jego użytkowania.
m ) Ten produkt ma spolaryzowaną wtyczkę (jeden bolec jest szerszy od
drugiego) jako cechę zmniejszającą ryzyko porażenia prądem. Ta wtyczka
pasuje do spolaryzowanego gniazdka tylko w jeden sposób. Jeśli wtyczka
nie pasuje całkowicie do gniazdka, odwróć ją. Jeśli nadal nie pasuje,
skontaktuj się z wykwalifikowanym elektrykiem. Nie używaj z
przedłużaczem, chyba że wtyczka może być całkowicie włożona. Nie
zmieniaj ani nie wymieniaj wtyczki.
n ) Ten produkt wykorzystuje zabezpieczenie przed przeciążeniem
[bezpiecznik]. Przepalony bezpiecznik oznacza przeciążenie lub zwarcie.
Jeśli bezpiecznik się przepali, odłącz produkt od gniazdka i odłącz
wszelkie dodatkowe przewody lub produkty, które mogą być podłączone
do produktu. Wymień bezpiecznik zgodnie z instrukcją serwisowania
użytkownika (postępuj zgodnie z oznaczeniami produktu, aby uzyskać

- 7 -
właściwą wartość znamionową bezpiecznika) i sprawdź produkt. Jeśli
wymieniony bezpiecznik się przepali, może występować zwarcie i produkt
należy wyrzucić.
o ) Przeczytaj i postępuj zgodnie ze wszystkimi instrukcje umieszczone
na produkcie lub dołączone do produktu.
p ) Użyj i Instrukcje pielęgnacji
RATOWAĆ TE INSTRUKCJE
a ) Gdy produkt jest umieszczony na żywym drzewie. Drzewo powinno
być dobrze adamantynie świeże. Nie umieszczaj go na żywych drzewach,
których igły są brązowe lub łatwo się łamią. Trzymaj beholder wypełniony
wodą
b ) Jeżeli produkt jest umieszczony na drzewie, drzewo powinno być
dobrze zabezpieczone i stabilne
c ) Przed nieprzedsiębiorczy,kontrolować przedprodukcja
Kontrproduktywny To Posiadać przecięcie, uszkodzona lub przetarta
izolacja przewodów lub sznurów, pęknięcia w obudowach zastępczych.
luźne połączenia lub odsłonięty przewód miedziany.
d ) Kiedy przechowywanie ten produkt,uwaga usunąć ten produkt z
gdziekolwiek umieszczone, w tym na drzewach, gałęziach lub krzewach,
aby uniknąć nadmiernego obciążenia lub stresu dla produktu połączenia
przewodników i przewodów.
e ) Gdy nie jest używany, przechowywać w chłodnym i suchym miejscu,
chroniąc od światła słonecznego.
Uwaga: Puste pole 1 należy pomylić z wartością własną lampy
umiejscowienia Instrukcje serwisowania użytkownika.
Wymień bezpiecznik
a ) Chwyć wtyczkę i wyjmij ją z gniazdka
lub innego urządzenia wyłączającego
sznur.
b ) Otwórz pokrywę bezpieczników.
Przesuń pokrywę dostępu do
bezpieczników na górze wtyczki

- 8 -
przyłączeniowej w kierunku ostrzy.
c ) Usuń bezpiecznik ostrożnie.
d ) Ryzyko pożaru Bezpiecznik należy wymieniać wyłącznie na
bezpiecznik 5 A, 125 V (dołączony do zestawu). produkt ) .
e ) Zamknij pokrywę bezpieczników. Przesuń pokrywę bezpieczników na
górę wtyczki przyłączeniowej i zamknij ją.
f ) Ryzyko pożaru Nie należy wymieniać wtyczki przyłączeniowej.
Zawiera urządzenie zabezpieczające (bezpiecznik ) , które: nie należy
usuwać. W przypadku uszkodzenia mocowania należy wyrzucić produkt.
W przypadku podłączania do łańcucha oświetleniowego, który nie ma
podanej mocy znamionowej (W) [znajdującej się na etykiecie wewnątrz] 6
cale z ten podłącz}oblicz ten moc Jak następuje:Mnożenie ten prąd(A)
który jest na znaczniku typu flagi o wartości 120.
Dla Przykład:Oświetlenie smyczkowy Jest oceniony 120 V, 60 Hz, 0,2
Ampery 0,2X120=24 Waty Dodaj moc z każdy sznur świetlny łącznie o
łącznej mocy 300 watów lub mniejszej. (Nie przekraczać 300 watów).
OSTROŻNOŚĆ
1. Wymieniać wyłącznie na żarówki tego samego typu o mocy maks. 0,6 W
z trzonkiem świeczkowym, posiadające klasyfikację UL.
2. Aby zmniejszyć ryzyko pożaru, nie należy celowo zmieniać położenia
styków uchwytu lampy.
3. Aby zmniejszyć ryzyko pożaru i porażenia prądem: a) Nie instaluj na
drzewach mających igły, liście lub gałęzie pokryte metalem lub materiałami
wyglądającymi jak metal. b) Nie montuj ani nie podtrzymuj sznurka w
sposób, który może przeciąć lub uszkodzić izolację przewodu.
ACCESSORIES LIST
AX-DC-001:
1. Żarówka zapasowa *1
2. Instrukcja obsługi *1

- 9 -
AX-DC-002:
1. Żarówka zapasowa *2
2. Instrukcja obsługi *1
AX-DC-003:
1. Żarówka zapasowa *3
2. Instrukcja obsługi *1
Sanven Technology Ltd.
Adres: Suite 250, 9166 Anaheim Place, Rancho Cucamonga, CA 91730


Technisch Ondersteuning en E-garantiecertificaat
www.vevor.com/support
BUITENVERLICHTING
GEBRUIKERSHANDLEIDING
MODEL: AX-DC-001 /AX-DC-002 /AX-DC-003
We continue to be committed to provide you tools with competitive price.
"Save Half", "Half Price" or any other similar expressions used by us only represents an
estimate of savings you might benefit from buying certain tools with us compared to the major
top brands and does not necessarily mean to cover all categories of tools offered by us. You
are kindly reminded to verify carefully when you are placing an order with us if you are
actually saving half in comparison with the top major brands.

- 1 -
(De afbeelding is alleen ter referentie, kijk naar het daadwerkelijke object)
Have product questions? Need technical support? Please feel free to
contact us:
Technical Support and E-Warranty Certificate
www.vevor.com/support
NEED HELP? CONTACT US!
This is the original instruction, please read all manual instructions
carefully before operating. VEVOR reserves a clear interpretation of our
user manual. The appearance of the product shall be subject to the
product you received. Please forgive us that we won't inform you again if
there are any technology or software updates on our product.
Outdoor String Lights
AX-DC-001
AX-DC-002
AX-DC-003

- 2 -
INSTRUCTIONS
Waarschuwing: om het risico op letsel te verkleinen, moet de
gebruiker de gebruiksaanwijzing zorgvuldig lezen.
Dit apparaat voldoet aan Deel 15 van de FCC-regels. De
werking is onderworpen aan de volgende twee voorwaarden:
(1) Dit apparaat mag geen schadelijke interferentie
veroorzaken, en (2) dit apparaat moet alle ontvangen
interferentie accepteren, inclusief interferentie die ongewenste
werking kan veroorzaken.
KENNISGEVING:
LET OP: Om het risico op brand en elektrische schokken te voorkomen,
dient u alle instructies zorgvuldig door te lezen. voordat u dit apparaat
installeert of gebruikt.
WAARSCHUWING:
1. Controleer voor gebruik of alle lampen goed vastzitten. doppen en draai
ze één voor één vast.
2. Steek de stekker van de lichtslinger in het stopcontact dat zich in de
waterdichte doos bevindt.
3. Hang de lichtsnoeren op de gewenste locatie en zorg ervoor dat alle
lampen naar beneden wijzen. Zo kunnen de fittingen IP65 zijn.
- 3 -
Model
AX-DC-001
AX-DC-002
AX-DC-003
Beoordeling
AC120V 60Hz 9W
AC120V 60Hz 30W
AC120V 60Hz 60W
Lamptype
LED S14 0,6W
LED G40 0,6W
LED ST38 0,6W
Lengte t h
50 voet
100 voet
200 voet
Type stopcontact
E12
E12
E12
Kleurtemperatuur
2700K
2700K
2700K
Lichtwaarde
31LM
42LM
44LM
- 4 -
PERFORMANCE PARAMETER
INSTALLATION,SAFETY AND CARE INSTRUCTIONS
ZORGVULDIG om het risico op brand, brandwonden of elektrische
schokken te voorkomen. Gelieve op te slaan deze instructies.
INSTALLATIE
(Hardware, haken, kabelbinders en geleidingsdraad zijn niet inbegrepen.)
1. Hang uw lichtsnoer op de gewenste locatie en zorg ervoor dat alle
lampen goed vastzitten. goed vastgezet in hun houders, draai ze één voor
één vast en maak Zorg ervoor dat alle lampen kapot zijn.
2. Steek de stekker van de lichtslinger in het stopcontact dat zich in de
waterdichte doos bevindt.
LET OP: Wanneer u meerdere snoeren aan elkaar verbindt, maak dan een
knoop met de uiteinden van het snoer zoals hieronder weergegeven of
gebruik een stekkerbeschermer om te voorkomen dat de voorkomen dat
stekkers tijdens gebruik uit elkaar vallen.
Maximaal
Verbinding
30 sets
10 sets
5 sets

- 5 -
WAARSCHUWING
1. Hang de lichtslinger NIET op terwijl deze is aangesloten op het lichtnet.
2. Maak de snoeren NIET vast met nietjes of spijkers.
3. Als u naar een nieuwe locatie verhuist, verwijder dan de bollen voordat u
ze plant. installatie.
4. INSPECTEER de opstelling en de staat van het product voor elk gebruik.
5. Houd de lampen op een afstand van ten minste 15 cm van andere
objecten.
BELANGRIJKE VEILIGHEIDSINSTRUCTIES
Bij het gebruik van elektrische producten zijn de volgende
basisvoorzorgsmaatregelen van toepassing: zou moeten altijd zijn
gevolgd inclusief de volgend:
a ) LEES EN VOLG ALLES VEILIGHEID INSTRUCTIES.
b) Gebruik geen seizoensgebonden producten buitenshuis, tenzij dit is
aangegeven geschikt voor binnen En Buitengebruik Wanneer producten in
buitentoepassingen worden gebruikt, sluit u ze aan het product op een
aardlek Stopcontact met aardlekschakelaar (GFCI ). Als er geen
stopcontact aanwezig is, neem dan contact op met een gekwalificeerde
elektricien.
Laat een elektricien de installatie correct uitvoeren.

- 6 -
c ) Dit seizoensproduct is niet bedoeld voor permanente installatie of
gebruik
d ) Niet monteren of plaatsen in de buurt van gas- of elektrische kachels,
open haarden, kaarsen of andere soortgelijke warmtebronnen.
e ) Maak de bedrading niet vast van het product met nietjes of spijkers,
of plaats het op scherpe haken of spijkers
f ) Laat de lampen niet op de voeding rusten snoer of aan een draad.
g ) Trek de stekker uit het stopcontact product wanneer vertrekken de
huis,wanneer met pensioen gaan voor de nacht,of Het onbeheerd
achtergelaten.
h ) Dit is een elektrisch product, geen speelgoed! Om het risico op brand,
brandwonden, persoonlijk letsel en elektrische schokken te voorkomen,
mag niet mee worden gespeeld of op een plek worden neergezet waar
kleine kinderen kinderen erbij kunnen.
ik doe niet gebruik dit product voor anders dan zijn bedoeld gebruik.
j ) Hang geen ornamenten of andere voorwerpen aan snoeren, draden of
lichtsnoeren.
k ) Sluit geen deuren of ramen van het product of verlengsnoeren, omdat
dit schade kan veroorzaken.
l ) Bedek het product niet met doek, papier of elk materiaal dat geen deel
uitmaakt van het product tijdens gebruik.
m ) Dit product heeft een gepolariseerde stekker (één pen is breder dan
de andere) als functie om het risico op een elektrische schok te
verminderen. Deze stekker past slechts op één manier in een
gepolariseerd stopcontact. Als de stekker niet volledig in het stopcontact
past, draai de stekker dan om. Als hij nog steeds niet past, neem dan
contact op met een gekwalificeerde elektricien. Gebruik het niet met een
verlengsnoer, tenzij de stekker volledig kan worden ingebracht. Wijzig of
vervang de stekker niet.
n ) Dit product maakt gebruik van overbelastingsbeveiliging [zekering].
Een doorgebrande zekering duidt op een overbelastings- of
kortsluitingssituatie. Als de zekering doorbrandt, haal dan de stekker van
het product uit het stopcontact en haal alle extra kabels of producten los
die mogelijk aan het product zijn bevestigd. Vervang de zekering volgens
- 7 -
de onderhoudsinstructies van de gebruiker (volg de productmarkering voor
de juiste zekeringwaarde) en controleer het product. Als de vervangende
zekering doorbrandt, kan er sprake zijn van kortsluiting en moet het
product worden weggegooid.
o ) Lees en volg alle instructies die op het product staan of bij het
product worden geleverd.
p ) Gebruik en Onderhoudsinstructies
REDDEN DEZE INSTRUCTIES
a ) Wanneer het product op een levende boom wordt geplaatst. De
boom moet goed adamantine vers zijn. Plaats het niet op levende bomen
waarvan de naalden bruin zijn of gemakkelijk afbreken. Houd de houder
gevuld met water
b ) Als het product in een boom wordt geplaatst, de boom moet goed
vastgezet en stabiel zijn
c ) Voor onondernemend,inspecteren pre-productie Contraproductief Dat
hebben gesneden, beschadigde of gerafelde draadisolatie of snoeren,
scheuren in de tijdelijke behuizingen. losse verbindingen of blootliggende
koperdraad.
d ) Wanneer opslaan de product,voorzichtig verwijderen de product van
waar dan ook geplaatst, inclusief bomen, takken of struiken, om onnodige
spanning of stress op het product te voorkomen geleiders, aansluitingen
en draden.
e ) Wanneer niet in gebruik, bewaar het op een koele, droge plaats,
beschermd tegen zonlicht.
Let op: De blanco 1 moet worden verward met de eigenwaarde van de
plaatsingslamp . Gebruiksaanwijzing voor onderhoud.
Vervang de zekering
a ) Pak de stekker vast en haal hem uit
het stopcontact of haal hem uit de
buitenaardse ontlading koord.
b ) Open het zekeringdeksel. Schuif het
toegangsdeksel boven op de

- 8 -
bevestigingsplug in de richting van de bladen.
c ) Verwijderen samensmelten voorzichtig.
d ) Brandgevaar Vervang de zekering alleen door een zekering van 5
Ampère, 125 Volt (meegeleverd). product ) .
e ) Sluit het zekeringdeksel. Schuif het toegangsdeksel van de zekering
bovenop de aansluitstekker dicht.
f ) Brandgevaar Vervang de aansluitstekker niet Bevat een
veiligheidsvoorziening (zekering ) die mag niet worden verwijderd Gooi het
product weg als de bevestiging beschadigd is
Als u verbinding maakt met een ontstekende snaar die geen Wattage
(W)-classificatie heeft [te vinden op het label in 6 duim van de
plug}berekenen de vermogen als volgt:Vermenigvuldigen de stroom(A) die
op het vlagtype-label van 120 staat.
Voor Voorbeeld: Verlichting snaar is beoordeeld 120V,60Hz,0,2
Ampère.0.2X120=24 Watt Voeg het wattage toe van elke lichtsnoer samen
voor een totaal van 300 watt of minder. (Overschrijd niet 300 Watt).
VOORZICHTIGHEID
1. Vervang alleen door lampen met een UL-classificatie en een
kandelaarvoet van hetzelfde type van maximaal 0,6 Watt.
2. Om het risico op brand te verkleinen, mag u de contactpunten van de
lamphouder niet opzettelijk verplaatsen.
3. Om het risico op brand en elektrische schokken te verminderen: a)
Installeer het apparaat niet op bomen met naalden, bladeren of takken met
metalen bekleding of materialen die op metaal lijken. b) Monteer of
ondersteun het apparaat niet op een manier die de isolatie van de draad
kan doorsnijden of beschadigen.
ACCESSORIES LIST
AX-DC-001:
1. Reservelamp *1
2.Gebruiksaanwijzing *1

- 9 -
AX-DC-002:
1. Reservelamp *2
2.Gebruiksaanwijzing *1
AX-DC-003:
1. Reservelamp *3
2.Gebruiksaanwijzing *1
Sanven Technologie Ltd.
Adres: Suite 250, 9166 Anaheim Place, Rancho Cucamonga, CA 91730


Teknisk Support och e-garanticertifikat
www.vevor.com/support
STRÄNGLJUS UTOMHUS
ANVÄNDARMANUAL
MODELL: AX-DC-001 /AX-DC-002 / AX-DC-003
We continue to be committed to provide you tools with competitive price.
"Save Half", "Half Price" or any other similar expressions used by us only represents an
estimate of savings you might benefit from buying certain tools with us compared to the major
top brands and does not necessarily mean to cover all categories of tools offered by us. You
are kindly reminded to verify carefully when you are placing an order with us if you are
actually saving half in comparison with the top major brands.

- 1 -
(Bilden är endast för referens, se det faktiska objektet)
Have product questions? Need technical support? Please feel free to
contact us:
Technical Support and E-Warranty Certificate
www.vevor.com/support
NEED HELP? CONTACT US!
This is the original instruction, please read all manual instructions
carefully before operating. VEVOR reserves a clear interpretation of our
user manual. The appearance of the product shall be subject to the
product you received. Please forgive us that we won't inform you again if
there are any technology or software updates on our product.
Outdoor String Lights
AX-DC-001
AX-DC-002
AX-DC-003
- 2 -
INSTRUCTIONS
Varning - För att minska risken för skada måste användaren
läsa instruktionerna noggrant.
Denna enhet uppfyller del 15 av FCC-reglerna. Driften är
föremål för följande två villkor: (1) Den här enheten får inte
orsaka skadliga störningar och (2) den här enheten måste
acceptera alla mottagna störningar, inklusive störningar som
kan orsaka oönskad funktion.
VARSEL:
FÖRSIKTIGHET: För att förhindra risken för brand och elektriska stötar,
var noga med att läsa alla instruktioner innan du installerar eller använder
denna enhet.
VARNING:
1. Före användning, se till att alla glödlampor är ordentligt säkrade i deras
hylsor och dra åt dem en efter en.
2. Anslut ljusslingan till eluttaget som sitter i den vattentäta lådan.
3. Häng dina ljusslingor på önskad plats, se till att alla glödlampor är vända
nedåt, vilket kan göra att sockeln är IP65.
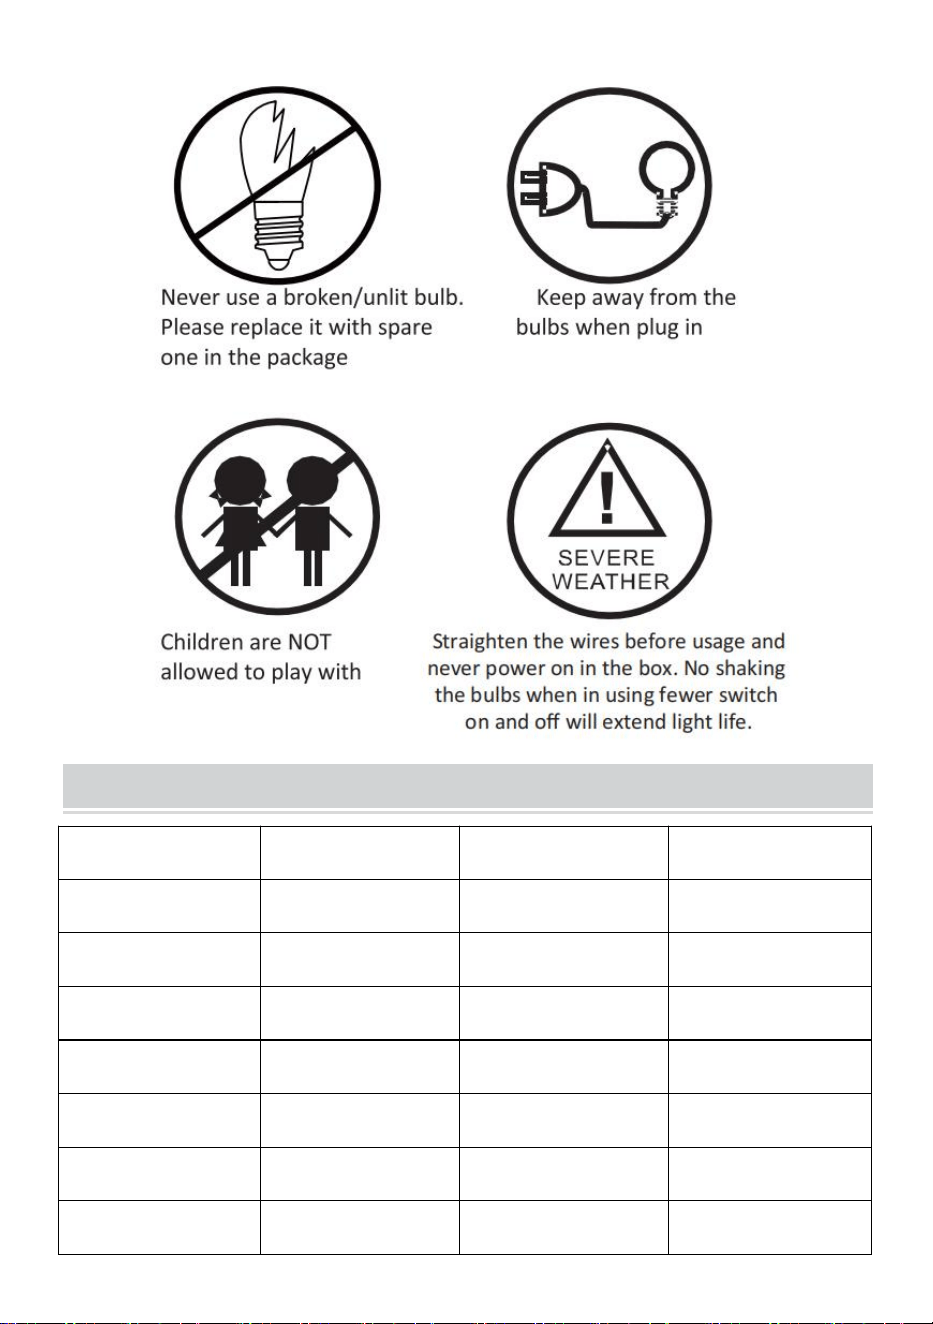
- 3 -
PERFORMANCE PARAMETER
Modell
AX-DC-001
AX-DC-002
AX-DC-003
Gradering
AC120V 60Hz 9W
AC120V 60Hz 30W
AC120V 60Hz 60W
Typ av glödlampa
LED S14 0,6W
LED G40 0,6W
LED ST38 0,6W
Längd t h
50 FT
100 FT
200 FT
Typ av uttag
E12
E12
E12
Färg T -temperatur
2700K
2700K
2700K
Ljusande V alue
31LM
42LM
44LM
Max Förbindelse
30 set
10 set
5 set
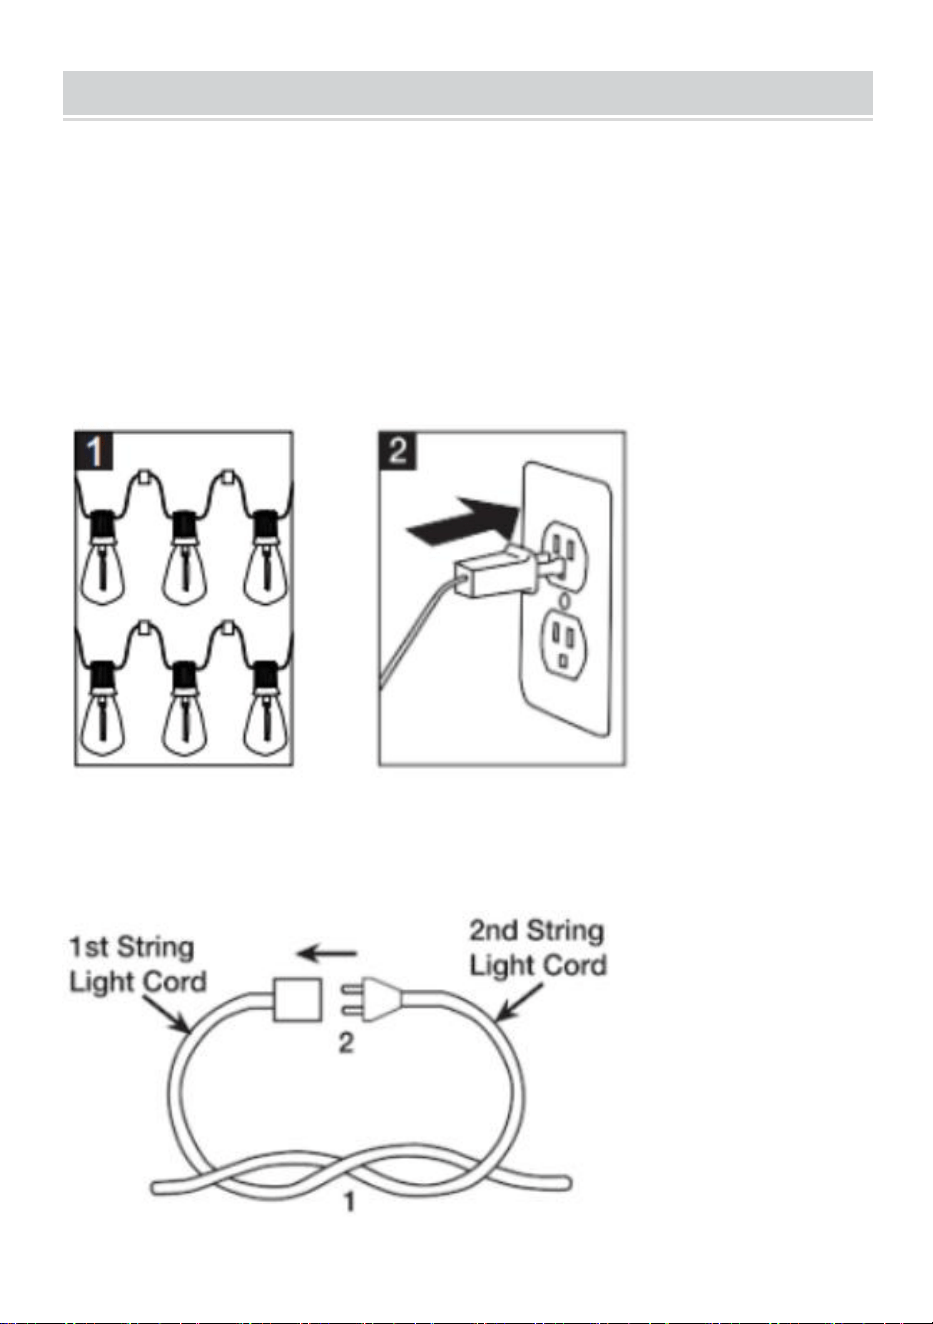
- 4 -
INSTALLATION,SAFETY AND CARE INSTRUCTIONS
FÖRSIKTIGT för att undvika risk för brand, brännskador eller elektriska
stötar. Vänligen spara dessa instruktioner.
INSTALLATION
(Hårdvara, krokar, buntband och styrtråd ingår inte.)
1. Häng dina ljusslingor på önskad plats, se till att alla glödlampor är
ordentligt fastsatta i sina uttag dra åt en efter en och gör säker på att alla
glödlampor är nere.
2. Anslut ljusslingan till eluttaget som sitter i den vattentäta lådan.
NOTERA: När du ansluter flera sladdar tillsammans, skapa en knut med
sladden slutar enligt bilden nedan eller använd ett kontaktskydd för att
förhindra pluggar från att dras isär under användning.

- 5 -
VARNING
1. Häng INTE upp lamporna när de är anslutna.
2. Fäst INTE sladdar med häftklamrar eller spikar.
3. Om du byter till en ny plats, ta bort glödlamporna innan installation.
4. KONTROLLERA uppställningen och produktens skick före varje
användning.5. Håll glödlampor minst 6 tum från andra föremål
VIKTIGA SÄKERHETSINSTRUKTIONER
Vid användning av elektriska produkter, grundläggande
försiktighetsåtgärder skall alltid vara följde inklusive han följande:
a ) LÄS OCH FÖLJ ALLA SÄKERHET INSTRUKTIONER.
b)Använd inte säsongsbetonade produkter utomhus om de inte är
märkta lämplig för inomhusbruk och utomhusanvändning När produkter
används i utomhusapplikationer, anslut produkten till ett jordfel Circuit
Interrupting (GFCI ) uttag. Om ett sådant inte tillhandahålls. kontakta en
kvalificerad
elektriker för korrekt installation.
c ) Denna produkt för säsongsanvändning är inte avsedd för permanent
installation eller användning
d ) Montera eller placera inte nära gas- eller elvärmare, öppen spis, ljus
eller andra liknande värmekällor.
e ) Säkra inte kablarna av produkten med häftklamrar eller spik, eller
placera på vassa krokar eller spikar
f ) Låt inte lampor vila på strömförsörjningen sladd eller på valfri tråd.
g ) Koppla ur produkt när lämnar de hus, när går i pension för de natt,
eller det lämnas obevakad.
h ) Detta är en elektrisk produkt, inte en leksak! För att undvika risk för
brand, brännskador, personskada och elektriska stötar bör inte lekas med
eller placeras där den är liten barn kan nå det.
i ) Gör inte använd detta produkt för annat än dess avsedd använda.
j ) Häng inte prydnadsföremål eller andra föremål från sladd eller
ljussnöre.

- 6 -
k ) Stäng inte dörrar eller fönster på produkten eller förlängningssladdar
eftersom det kan skadas.
l ) Täck inte över produkten med tyg, papper eller allt material som inte
ingår i produkten när det används.
m ) Denna produkt har en polariserad kontakt (det ena bladet är bredare
än det andra) som en funktion för att minska risken för elektriska stötar.
Den här kontakten passar endast på ett sätt i ett polariserat uttag. Om
kontakten inte passar helt i uttaget, vänd på kontakten. Om den fortfarande
inte passar, kontakta en behörig elektriker. Använd inte med en
förlängningssladd om inte kontakten kan sättas in helt. Ändra eller byt inte
ut kontakten.
n ) Denna produkt använder överbelastningsskydd [säkring]. En trasig
säkring indikerar en överbelastnings- eller kortslutningssituation. Om
säkringen går, koppla ur produkten från eluttaget och koppla ur alla
ytterligare snören eller produkter som kan vara fästa på produkten. Byt ut
säkringen enligt användarens serviceinstruktioner (följ produktmärkningen
för korrekt säkringsklassning) och kontrollera produkten. Om
ersättningssäkringen går kan en kortslutning vara närvarande och
produkten bör kasseras.
o ) Läs och följ alla instruktioner som finns på produkten eller medföljer
produkten.
p ) Använd och Skötselråd
SPARA DESSA INSTRUKTIONER
a ) När produkten placeras på ett levande träd. Trädet ska vara bra
fräscht. Placera den inte på levande träd där nålarna är bruna eller lätt
bryts av. Håll betraktaren fylld med vatten
b ) Om produkten placeras på ett träd, trädet ska vara väl säkrat och
stabilt
c ) Före företagsam, inspektera förproduktion Kontraproduktivt att ha
skära. skadad eller sliten trådisolering eller sladdar, sprickor i
platshållarhöljena. lösa anslutningar.eller blottad koppartråd.
d ) När lagring de produkt, försiktig ta bort de produkt från varhelst
placeras, inklusive träd, grenar eller buskar, för att undvika onödig
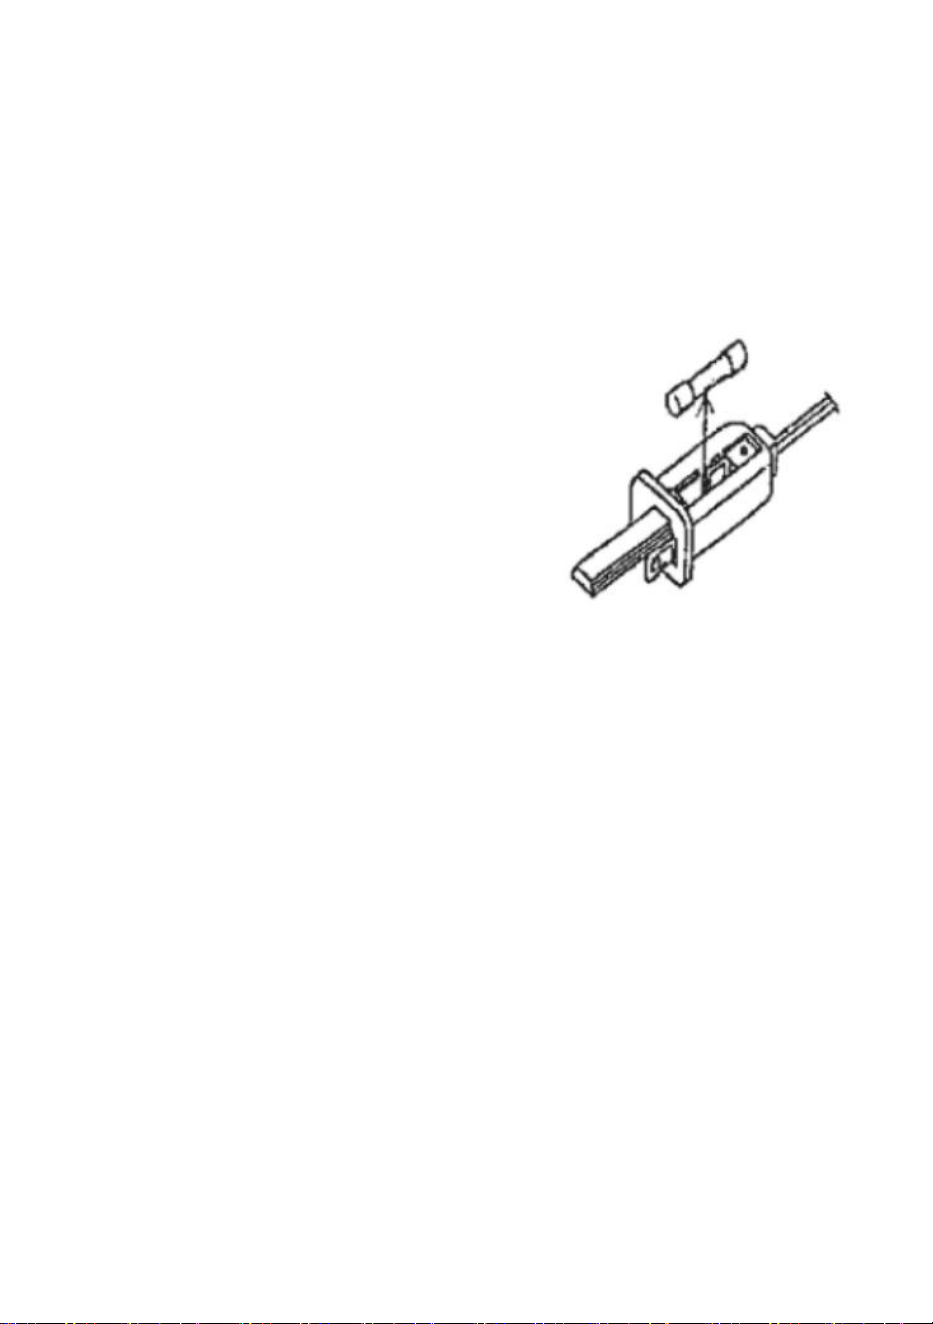
- 7 -
belastning eller stress på produkten ledare anslutningar.och ledningar.
e ) När den inte används. Förvara prydligt på en sval, torr plats skyddad
från solljus
Obs: Det tomma 1 ska blandas ihop med egenvärdet för
serviceinstruktionerna för placeringslampan.
Byt ut säkringen
a ) Ta tag i kontakten och ta bort den från
uttaget eller utomjordisk annullering sladd.
b ) Öppna säkringslocket Skjut det
förvirrade åtkomstlocket ovanpå
fästpluggen mot bladen.
c ) Ta bort säkring försiktigt.
d ) Brandrisk Byt endast ut säkringen mot
5 Amp, 125 Volt säkring (medföljer
produkt ) .
e ) Stäng säkringslocket Skjut stängt säkringsåtkomstlocket ovanpå
fästpluggen.
f ) Brandrisk Byt inte ut fästpluggen Innehåller en säkerhetsanordning
(säkring ) som ska inte tas bort Kassera produkten om tillbehöret är skadat
Om du ansluter till avstigningssträng som inte har en
Wattage(W)-klassning [finns på taggen inom 6 tum av de plug}beräkna de
wattal som följer: Multiplicera de ström(A) som finns på flaggtyptaggen
med 120.
För Exempel: Belysning sträng är betygsatt 120V,60Hz,0,2
Amps.0,2X120=24 Watt Lägg till watt av varje ljusslinga tillsammans för
totalt 300 watt eller mindre.(Överskrid inte 300 watt).
FÖRSIKTIGHET
1. Byt endast ut med samma typ 0,6 Watt Max kandelaberbaserade
UL-klassade lampor.
2.För att minska risken för brand, flytta inte avsiktligt någon av
lamphållarens kontakt.
3.För att minska risken för brand och elektriska stötar:a)Installera inte på

- 8 -
träd som har nålar löv eller grenbeläggningar av metall eller material som
ser ut som metall.och b]Montera eller stöd inte snören på ett sätt som kan
skära eller skada trådisoleringen
ACCESSORIES LIST
AX-DC-001:
1. Reservglödlampa *1
2.Användarmanual *1
AX-DC-002:
1. Reservglödlampa *2
2.Användarmanual *1
AX-DC-003:
1. Reservglödlampa *3
2.Användarmanual *1
Sanven Technology Ltd.
Adress: Suite 250, 9166 Anaheim Place, Rancho Cucamonga, CA 91730