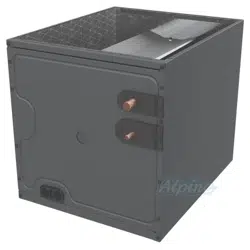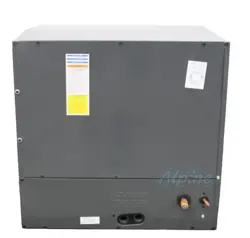
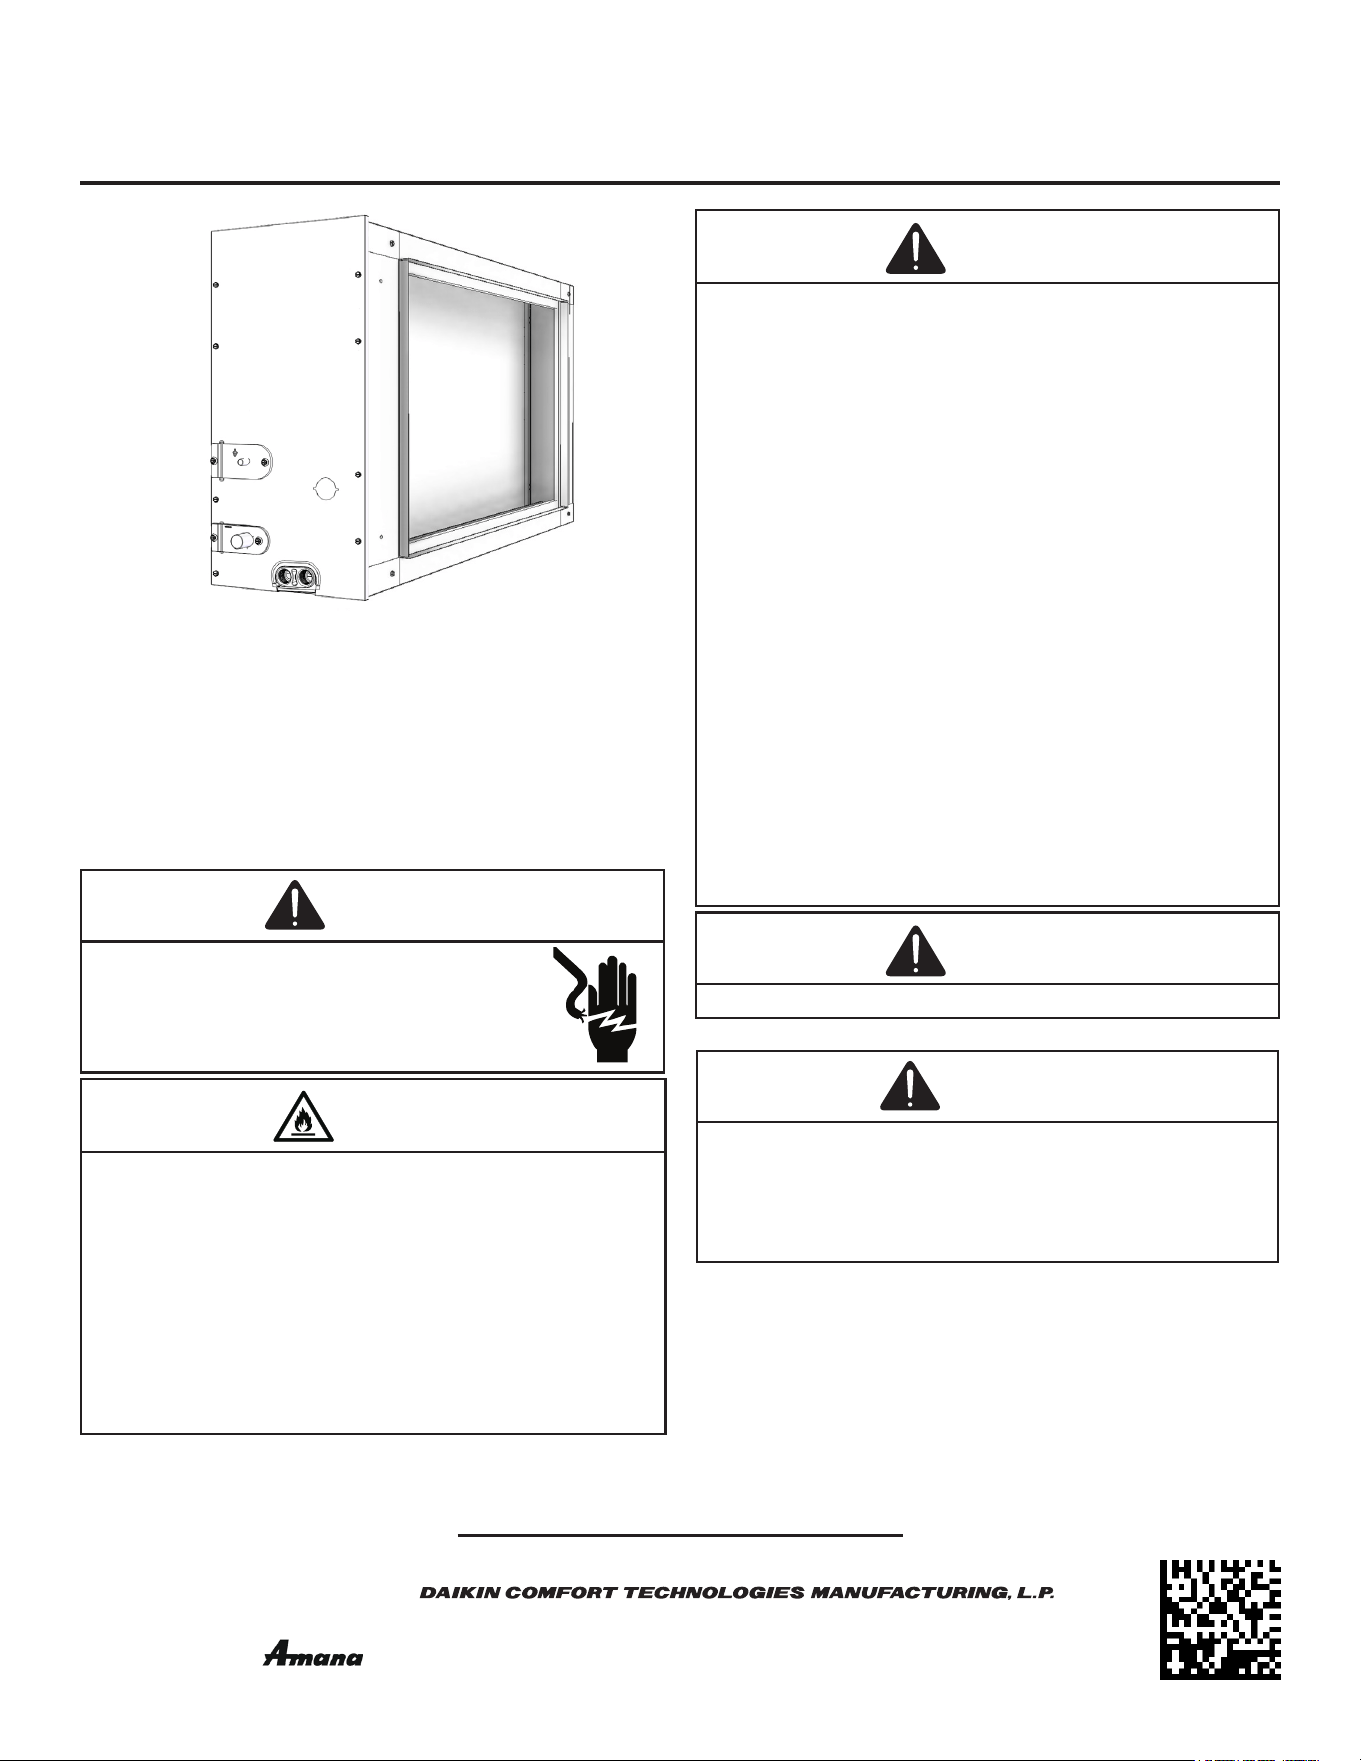
HORIZONTAL COILS
INSTALLATION INSTRUCTIONS
CSCT 24-60
1. Important Safety Instructions
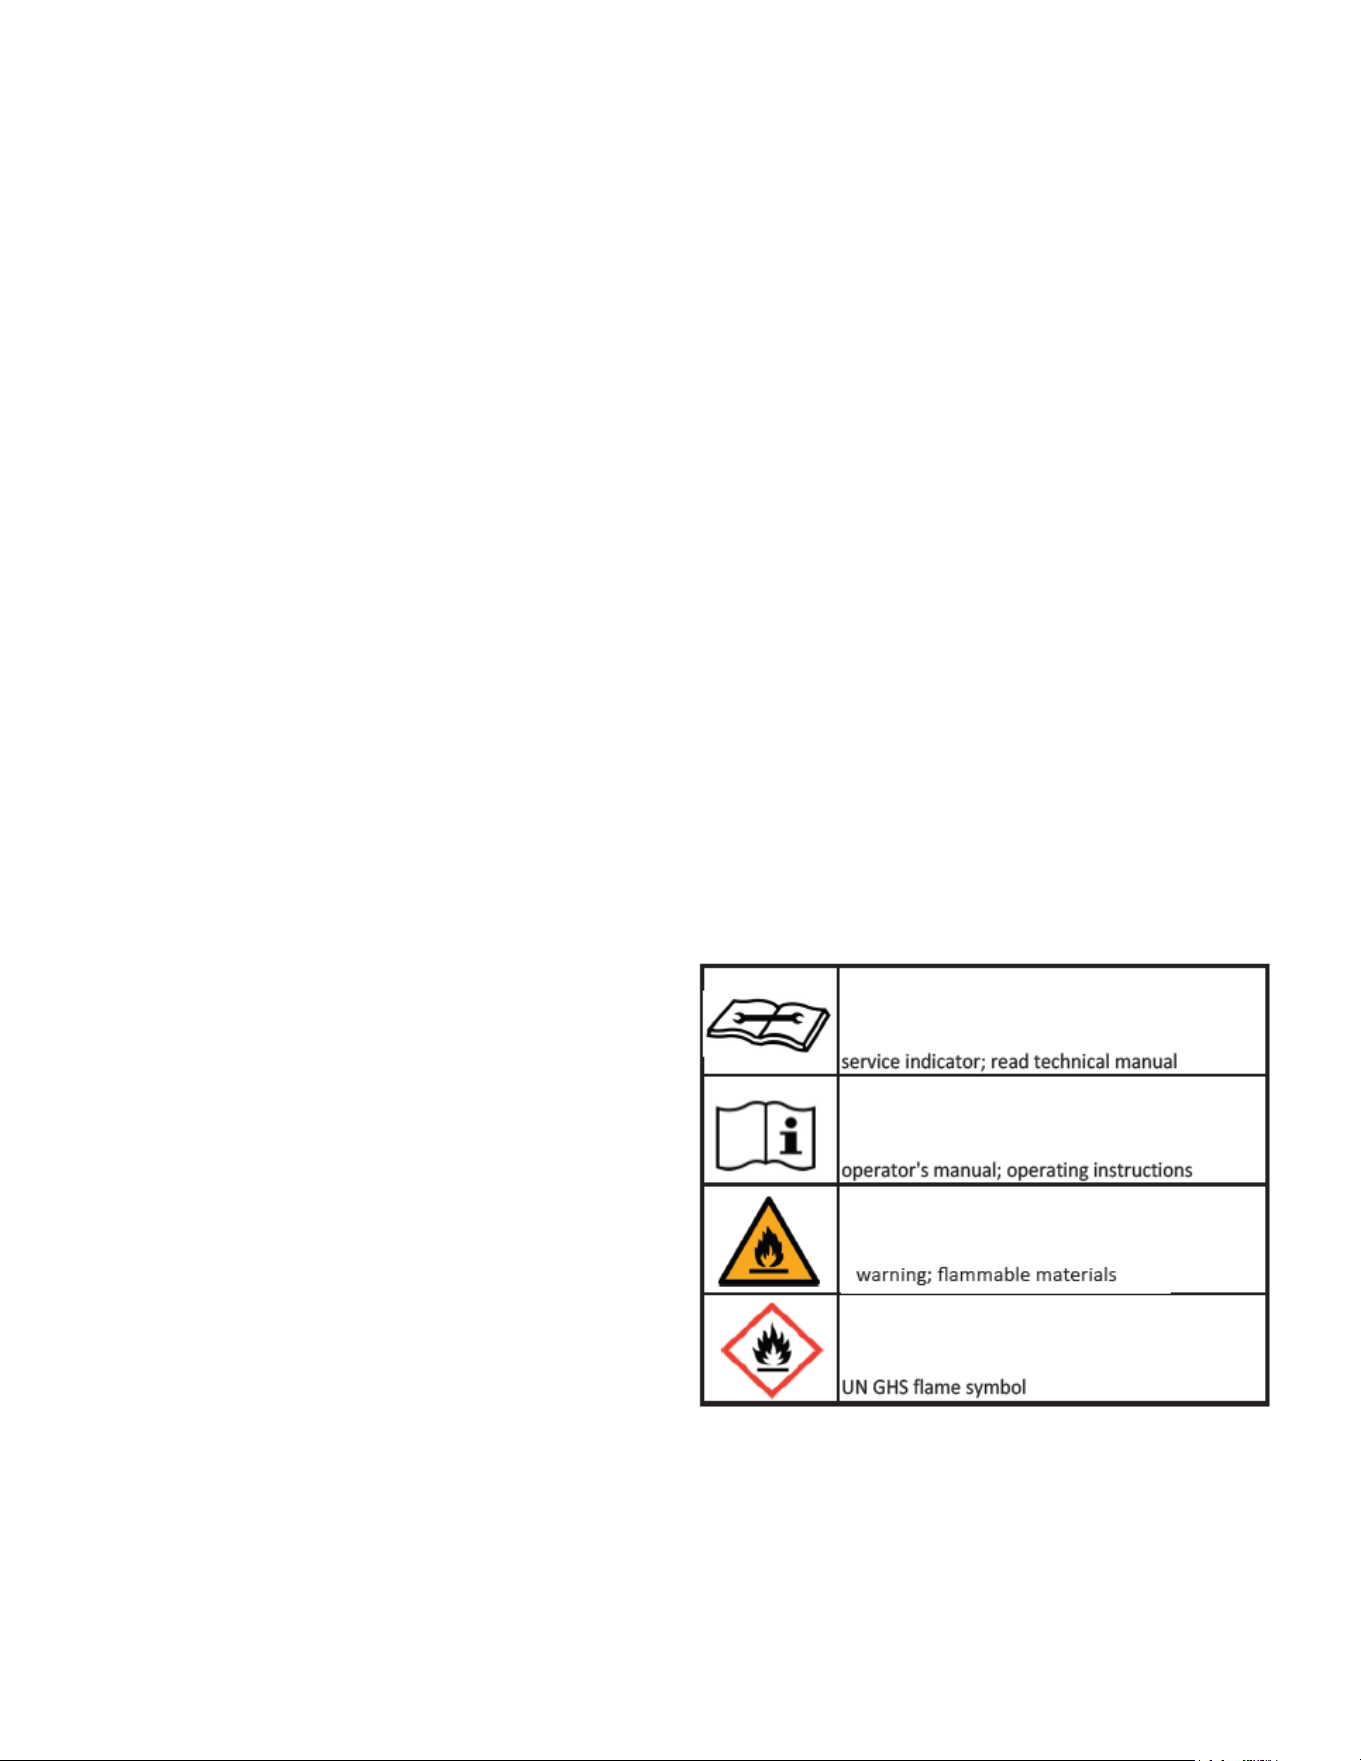
The following symbols and labels are used throughout this
manual to indicate immediate or potential safety hazards. It is
the owner’s and installer’s responsibility to read and comply
with all safety information and instructions accompanying
these symbols. Failure to heed safety information increases
the risk of personal injury, property damage, and/or product
damage.
WARNING
HIGH VOLTAGE
Disconnect all power before servicing or
installing this unit. Multiple power sources
may be present. Failure to do so may cause
property damage, personal injury or death.
If any hot work is to be conducted on the refrigerating
equipment or an associated part, appropriate fire
extinguishing equipment shall be available on hand. Have
a dry powder or CO2 fire extinguisher adjacent to the hot
work area.
Ensure that the area is in the open or that it is
adequately ventilated before breaking into the system
or conducting any hot work. A degree of ventilation
shall continue during the period that the work is carried
out. The ventilation should safely disperse any released
refrigerant and preferably expel it externally into the
atmosphere.
WARNING
Only personnel that have been trained to install, adjust,
service, maintenance or repair (hereinafter, “service”)
the equipment specified in this manual should service the
equipment.
This equipment is not intended for use by persons
(including children) with reduced physical, sensory or
mental capacities, or lack of experience and knowledge,
unless they have been given supervision or instruction
concerning use of the appliance by a person responsible
for their safety.
Children should be supervised to ensure that they do not
play with the equipment.
The manufacturer will not be responsible for any injury
or property damage arising from improper supervision,
service or service procedures. If you service this unit, you
assume responsibility for any injury or property damage
which may result. In addition, in jurisdictions that require
one or more licenses to service the equipment specified in
this manual, only licensed personnel should service the
equipment. Improper supervision, installation, adjustment,
servicing, maintenance or repair of the equipment specified
in this manual, or attempting to install, adjust, service
or repair the equipment specified in this manual without
proper supervision or training may result in product
damage, property damage, personal injury or death.
WARNING
Do not bypass safety devices.
WARNING
WARNING
This unit CSCT is a PARTIAL UNIT AIR CONDITIONER, complying
with PARTIAL UNIT requirements of this Standard, and must
only be connected to other units that have been confirmed
as complying to corresponding PARTIAL UNIT requirements
of this Standard. UL 60335-2-40/CSA C22.2 No. 60335-2-40, or
UL 1995/CSA C22.2 No 236.
19001 Kermier Rd., Waller, TX 77484
© 2024-2025
www.daikincomfort.com • www.goodmanmfg.com • www.amana-hac.com
IO-4016B
01/2025
® is a registered trademark of Maytag Corporation or its related companies and is used under
license. All rights reserved.

2
Contents
1. Important Safety Instructions .....................................1
2. Shipping Inspection ....................................................2
2.1 Handling ..................................................................2
3. Codes & Regulations ..................................................2
4. Replacement Parts ......................................................2
5. Pre-Installation Instructions .......................................2
5.1 Preparation..............................................................3
5.2 Clearances ..............................................................4
6. System Matches ..........................................................4
7. Application Information ..............................................4
8. Condensate Drain Piping ............................................ 4
9. Plastic Drain Pan Application .....................................5
9.1 Horizontal Coil Water Blow-O Bracket ...............5
10. Sensor and Accessory Wiring ................................... 6
11. Refrigerant Lines ........................................................7
11.1 Standing Pressure Test ........................................ 7
11.2 Deep Vacuum Method ..........................................7
11.3 Tubing Size/Length ............................................... 8
11.4 Tubing Preparation ...............................................8
11.5 Brazing ...................................................................8
11.6 Tubing Connections for TXV Version .................8
11.7 Thermal Expansion Valve System Adjustment .. 9
11.8 Piston Charge Instructions ................................ 10
11.9 Leak Detection ....................................................10
12. Altitude adjustment factor to calculate min room
area ..................................................................................10
13. Supply Duct Connection .......................................... 12
14. Return Ductwork......................................................12
15. Sealing Along the Panel Gap ..................................12
16. Removing Coil from Cabinet ..................................12
17. Aluminum Indoor Coil Cleaning ............................. 13
18. Start-Up Procedure..................................................13
19. Refrigerant Recovery ..............................................14
20. Before you call your Servicer .................................14
21. Start-Up Checklist ...................................................15
2. Shipping Inspection
This equipment is approved for use with R-32 refrigerant
only. Upon receiving the product, inspect it for damage from
shipment. Shipping damage, and subsequent investigation
is the responsibility of the carrier. Verify the model number,
specications, and accessories are correct prior to
installation. The distributor or manufacturer will not accept
claims from dealers for transportation damage or installation
of incorrectly shipped units.
2.1 Handling
Use caution when transporting/carrying unit. Do not carry
unit with hooks or sharp object. The preferred method
of carrying the unit after arrival at the job site is to carry
by two-wheel hand truck from the back or sides or by
hand by carrying at the cabinet corners. Take proper
precautions when carrying unit to avoid any damage to
the piping.
3. Codes & Regulations
This product is designed and manufactured to comply
with national codes such as ASHRAE 15, ASHRAE 15.2,
IAPMO Uniform Mechanical Code, ICC, International
Mechanical Code, or CSA B52. The product shall be
installed in accordance with national wiring regulations.
Installation in accordance with such codes and/or prevailing
local codes/regulations is the responsibility of the installer.
Compliance with national gas regulations shall be observed.
The manufacturer assumes no responsibility for equipment
installed in violation of any codes or regulations.
The United States Environmental Protection Agency
(EPA) has issued various regulations regarding the
introduction and disposal of refrigerants. Failure to
follow these regulations may harm the environment and
can lead to the imposition of substantial nes. These
regulations may vary by jurisdiction. A certied technician
must perform the installation and service of this product.
Should you have any questions please contact the local
oce of the EPA and / or refer to EPA's website www.epa.
gov.
4. Replacement Parts
Inspect the unit to verify all required components are present
and intact. Report any missing components immediately to
the manufacturer or to the distributor. Make sure to include
the full product model number and serial number when
reporting and/or obtaining service parts. Replacement parts
for this product are available through your contractor or
local distributor. For the location of your nearest distributor
consult or contact:
HOMEOWNER SUPPORT
DAIKIN COMFORT TECHNOLOGIES
MANUFACTURING, L.P.
19001 KERMIER ROAD
WALLER, TEXAS 77484
855-770-5678
5. Pre-Installation Instructions
The appliance shall be installed in accordance with
national wiring regulations. This product was tested at an
external static pressure of 0.66 inches of WC. None of the
components in this product line are designed or approved to
be suitable for outdoor use.
Refrigerant lines must be routed depending on conguration
of unit to maintain the required 24” minimum clearance for
service.
This appliance is equipped with a leak detection sensor
which must be wired to the proper connector on the furnace
PCB or Non-A2L Furnace Integration Kit.
The R-32 Sensor must be installed and powered for service.
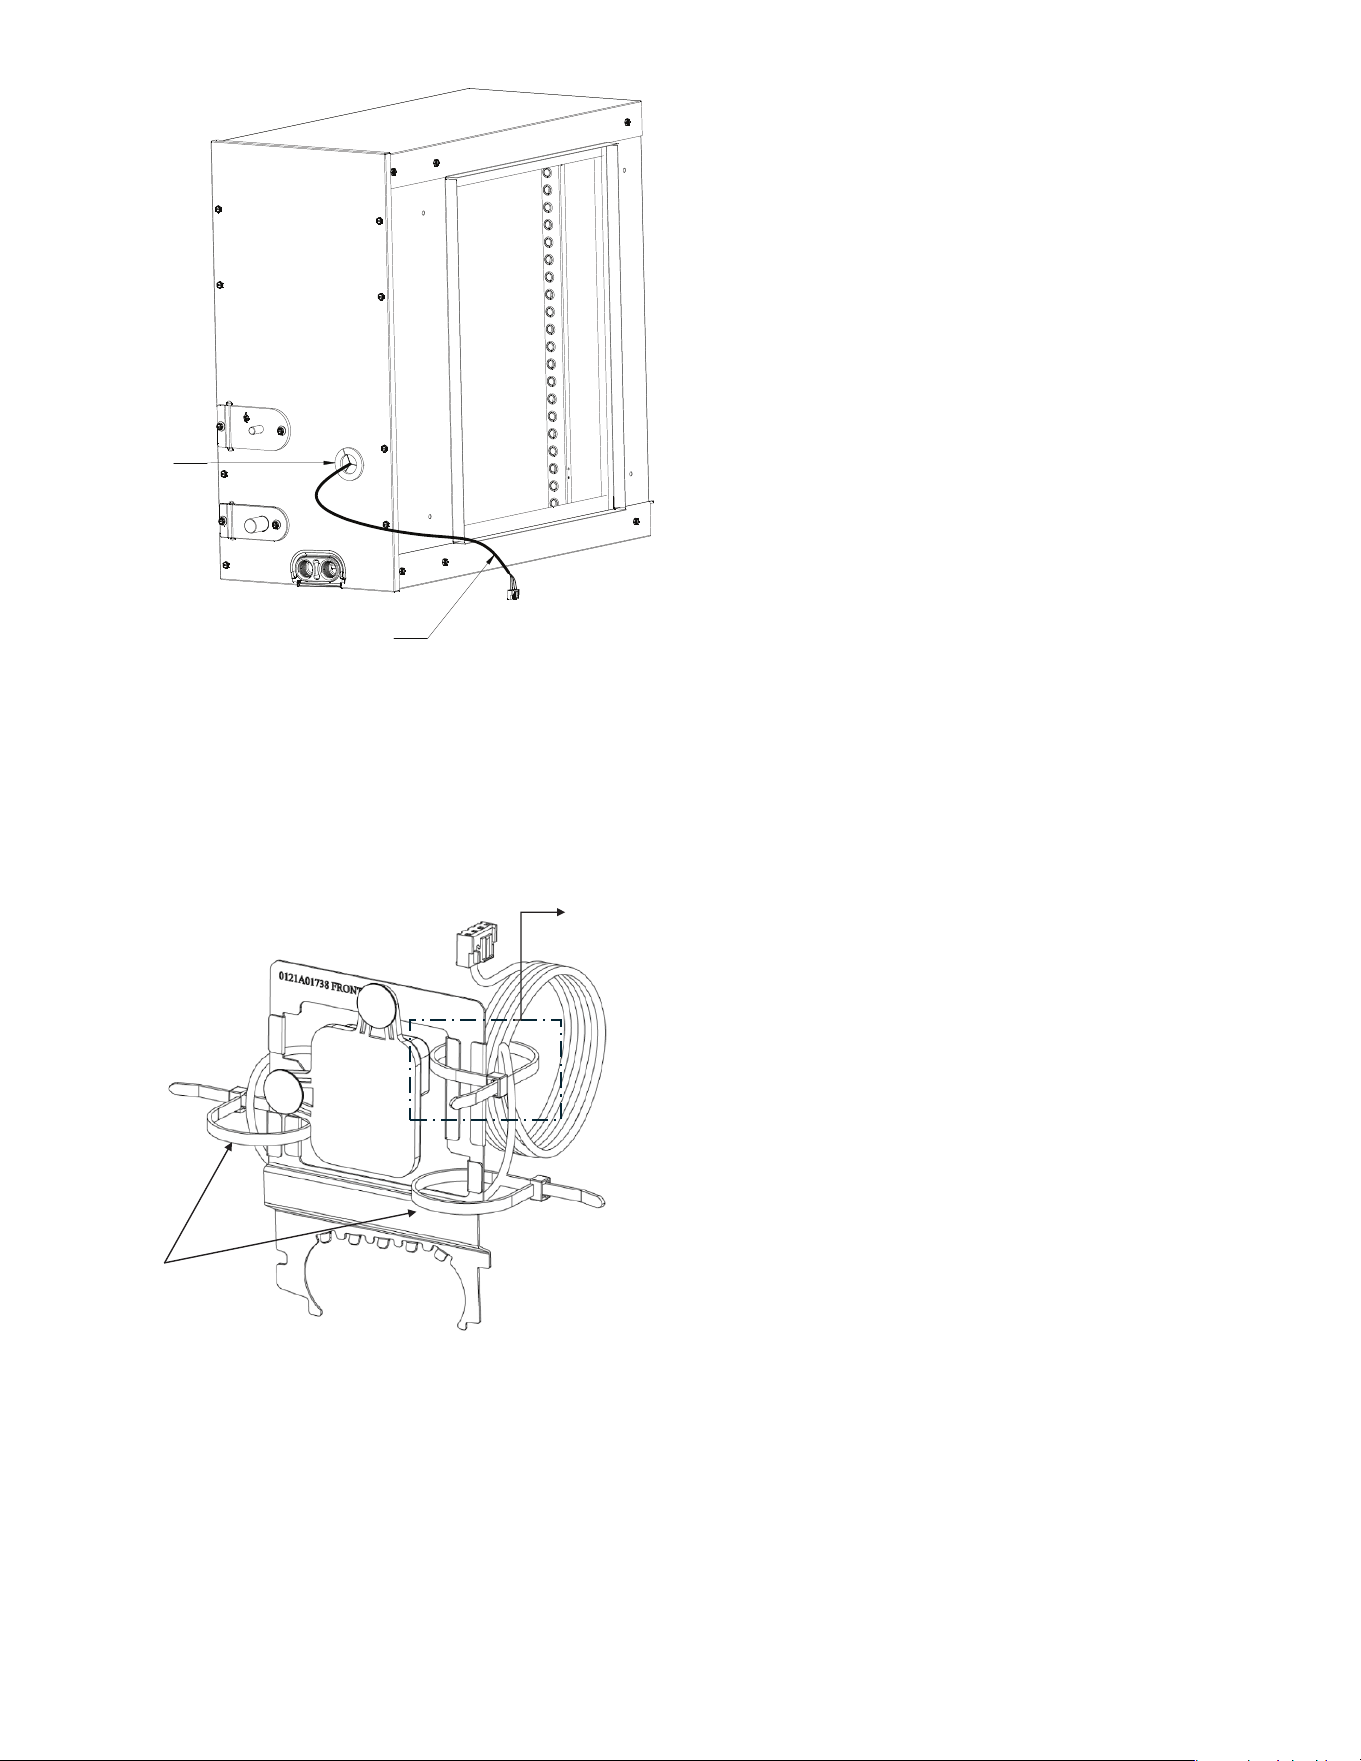
Ensure that the grommet is installed through the access
panel knockout hole. (see Figure 1)
3
GROMMET
SENSOR WIRE
FIGURE 1
Figure 1
The R-32 Sensor bracket assemblies are shipped with
three zip ties, two of which are designed for strain relief.
The two zip ties shown in Figure 2, must be kept attached
to the sensor bracket assy. The other zip tie (Figure 2,
detail A) must be cut to release the wire bundle.
Figure 2
Follow one of the 3 scenarios below to determine where the
R-32 sensor needs to be connected to:
Scenario 1: Amana®Brand / Goodman / Daikin Furnace
PCB with R-32 sensor compatibility.
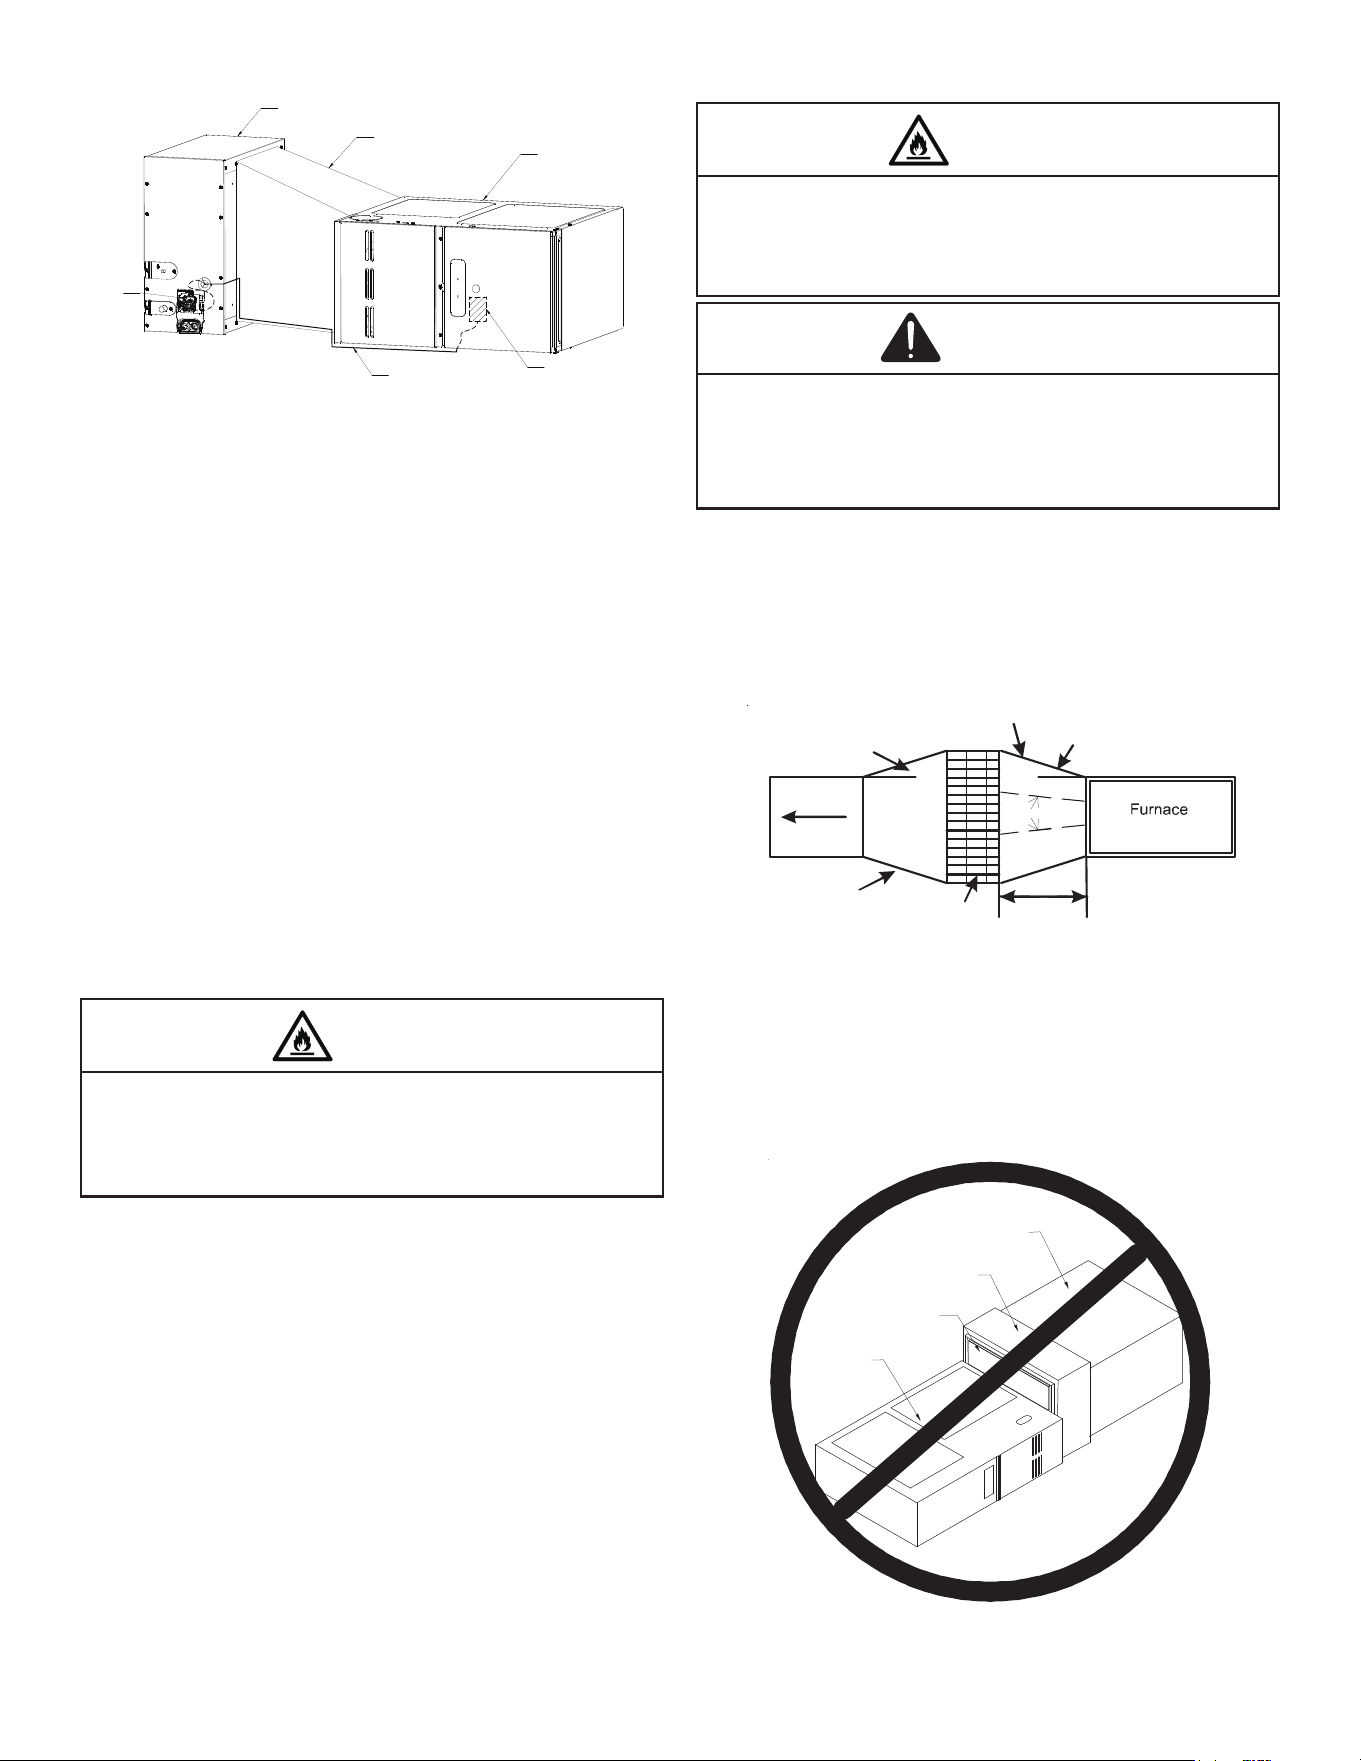
The leak detection sensor must be wired directly to the
furnace. Follow routing diagram as shown in Figure 8. This
wiring is intended to be passed through the access hole on
the furnace. If a hole must be cut into the furnace, ensure
that the wiring is well protected from mechanical damage
and that the hole is free from burrs or sharp edges. Utilize a
protective coating for all exposed metallic edges to prevent
corrosion. Verify that the A2L function (This is required for
R-32 integration) is enabled on the furnace board PCB.
Refer to the furnace Installation manual for further instruction
on how to toggle this function from disabled to enabled. The
A2L verication step as described on the furnace Installation
manual (this is required for R-32 integration) must be
completed before the unit is commissioned. If the test is
not successful, call 1-855-DAIKIN1, option 3, for further
assistance.
Scenario 2: Amana®Brand / Goodman / Daikin Furnace or
Modular Blower PCB with no R-32 sensor compatibility.
The leak detection sensor must be wired directly to the Non-
A2L Furnace Integration Kit and installed as a pass-through
to the non-A2L furnace control board. For instructions on
how to correctly wire the Non-A2L Furnace Integration Kit
refer to the kit Installation manual. Always select a furnace
speed tap that will satisfy the minimum airow required for
each system as per table 3.
Scenario 3: All other OEM Furnaces.
The availability of mitigation mode, or equivalent, must be
checked through the furnace model manufacturer IO. Please
follow relevant instructions to disable mitigation mode, or
equivalent. Once this step is complete follow instructions of
scenario 2. If mitigation mode, or equivalent, is present but
can't be disabled the furnace must be replaced. If mitigation
mode, or equivalent, is not available follow the instructions
in scenario 2.
Under no circumstance should the system be charged with
refrigerant at a capacity greater than the refrigerant charge
listed on the serial plate. This value indicates refrigerant
charge at or above 30% GREATER than the intended
charge with the longest line-sets.
If additional charge is required, you must contact Daikin
Comfort’s Homeowner Support Line.
5.1 Preparation
Keep this document with the unit. Carefully read all
instructions for the installation prior to installing the
product. Make sure each step or procedure is understood
and any special considerations are taken into account
before starting installation. Assemble all tools, hardware
and supplies needed to complete the installation. Some
items may need to be purchased locally. Make sure
everything needed to install the product is on hand before
starting.
Table 5
A
STRAIN RELIEF
4
FURNACE
COIL
PLENUM
SENSOR WIRE
SENSOR
A2L
PCB
FIGURE 8
Figure 8
5.2 Clearances
Consult all appropriate regulatory codes prior to
determining nal clearances. In installations that may lead
to physical damage (i.e. a garage) it is advised to install a
protective barrier to prevent such damage. Always install
units such that a positive slope in condensate line (1/4” per
foot) is allowed.
Further, any joints made in the installation between
parts of the refrigerating system must be accessible for
maintenance purposes.
NOTE: Furnace application requires that the installer
MUST review and strictly follow ALL furnace installation
clearance guidelines. Failure to do so may result in
property / equipment damage, personal injury or death.
CONSULT ALL APPROPRIATE REGULATORY CODES
WHEN DETERMINING FINAL CLEARANCES.
When installed in a room with an area less than that
outlined in table 3, that room shall be without continuously
operating open flames (for example an operating gas
appliance) or other potential ignition sources (for example
an operating electric heater, hot surfaces).
WARNING
6. System Matches
The entire system (combination of indoor and outdoor
sections) must be manufacturer approved and Air
Conditioning, Heating, and Refrigeration Institute (AHRI)
listed.
NOTE: Installation of unmatched systems is not permitted.
7. Application Information
Auxiliary devices which may be a potential ignition source
are not to be installed in the duct work. Such potential
ignition sources include hot surfaces with a temperature
exceeding 700°C and electric switching devices. For example,
Electronic air filters are a potential ignition source.
WARNING
WARNING
Only auxiliary devices approved by the appliance
manufacturer or declared suitable with the refrigerant
shall be installed in connecting ductwork. If an existing
device is not approved by the appliance manufacturer for
use with the refrigerant, the device must be removed or
disconnected.
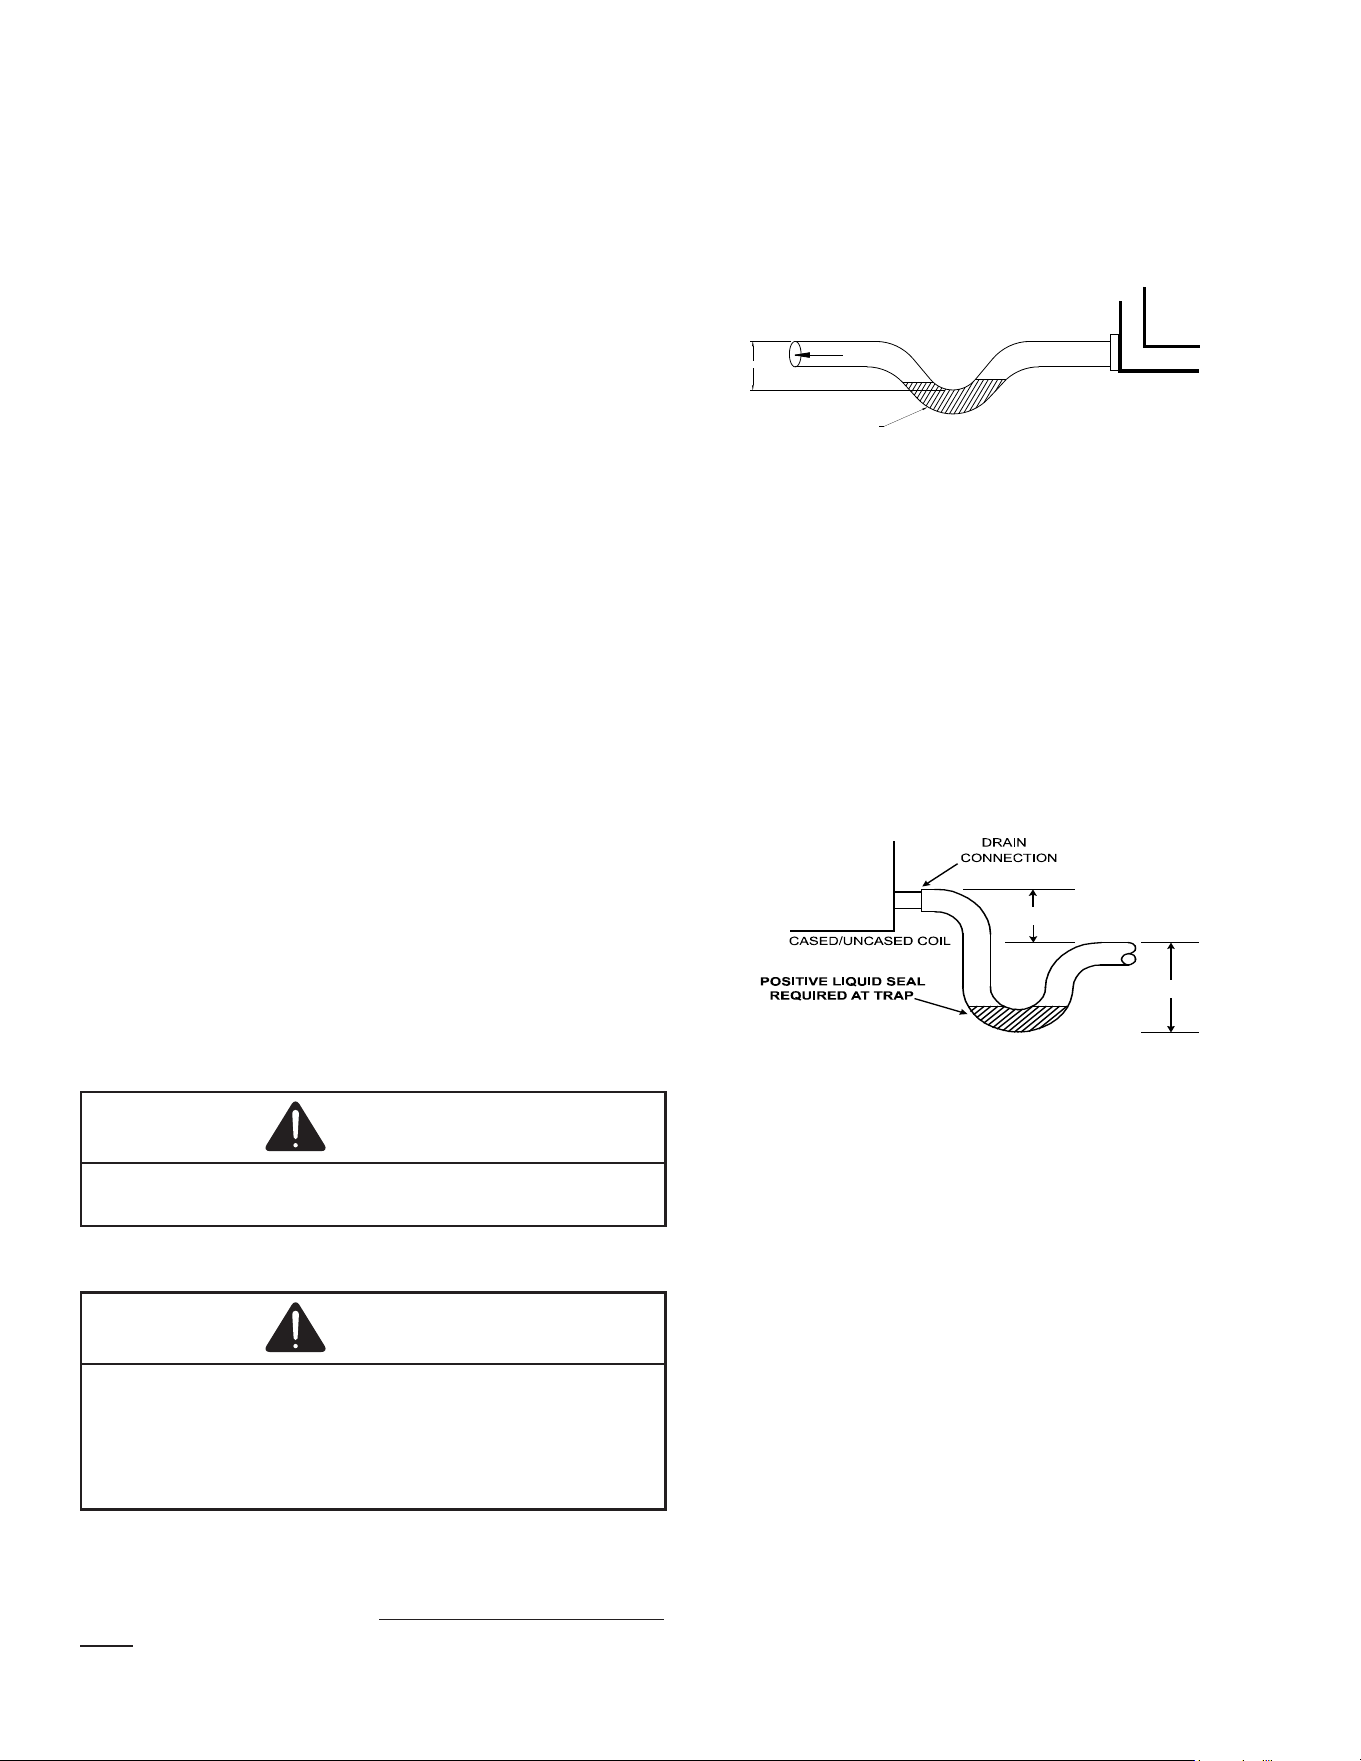
Coil must be installed downstream (discharge air) of the
furnace. Allow a minimum of 18” from the furnace outlet to
the coil for adequate transition. This coil is a bi-directional coil
and can be installed in either the left or right direction. The
coil is factory shipped for left-side application. Determine the
coil direction by the side that allows the best access.
Airflow
Splitters
Horizontal Coil
Converging
Transition
Diverging
Transition
Max 15° Angle
Max 10° Angle
18”
Minimum
Figure 3
If the coil and furnace combination are not similar in depth
and width, a eld-supplied transition must be used to
center the furnace and coil openings (see Figure 3 above).
The coil must not be installed directly onto the furnace
outlet (see Figure 4 below).
COIL
FURNACE
PLENUM
DUCT BOARD, SHEET
METAL OR OTHER
FILLER MATERIAL
Figure 4
5
8. Condensate Drain Piping
In all cooling applications where condensate overow may
cause damage, a secondary drain pan must be provided by
the installer and placed under the entire unit with a separate
drain line properly sloped and terminated in an area visible
to the owner. This secondary drain pan can provide extra
protection to the area under the unit should the primary drain
plug up and overow. As expressed in our product warranty,
we will not be liable for any damages, structural or otherwise
due to the failure to follow this installation requirement.
Condensate drain connections are located in the drain
pan at the bottom of the coil/enclosure assembly. Use the
female (3/4" FPT) threaded tting that protrudes outside
of the enclosure for external connections. The connectors
required are 3/4" NPT male, either PVC or metal pipe, and
must be hand tightened to a torque of no more than 37
in-lbs. to prevent damage to the drain pan connection. An
insertion depth between .36 to .49 inches (3-5 turns) should
be expected at this torque. Insulate PVC drain lines/pipes
with high heat resistive tape within 1" furnace ue/vent pipe.
Foil-Mastic Sealant tape is the preferred wrapping material.
1. Ensure drain pan hole is NOT obstructed.
2. To prevent potential sweating and dripping on nished
space, it may be necessary to insulate the condensate
drain line located inside the building. Use Armaex® or
similar material.
A secondary condensate drain connection, now called for
by many building codes, has been provided. Pitch the drain
line 1/4” per foot to provide free drainage. Provide required
support to drain line to prevent bowing. Install a condensate
trap in the primary drain line to ensure proper drainage. If the
secondary drain line is required, run the line separately from
the primary drain and end it where condensate discharge
can be easily seen.
NOTE: Water coming from this line means the coil primary
drain is plugged and needs clearing.
CAUTION
If secondary drain is not installed, the secondary access
must be plugged.
9. Plastic Drain Pan Application
WARNING
Do not use the coil drain pan shipped with the unit on oil
furnaces or any application where the temperature of the
drain pan may exceed 300°F. A field fabricated metal drain pan
must be used for applications where temperature exceeds
300°F. Failure to follow this warning may result in property
damage and/or personal injury.
NOTE: Trapped lines are required by many local codes. In
the absence of any prevailing local codes, please refer to
the requirements listed in the Uniform Mechanical Building
Code.
A drain trap in a draw-through application prevents air from
being drawn back through the drain line during fan operation
thus preventing condensate from draining, and if connected
to a sewer line to prevent sewer gases from being drawn
into the airstream during blower operation.
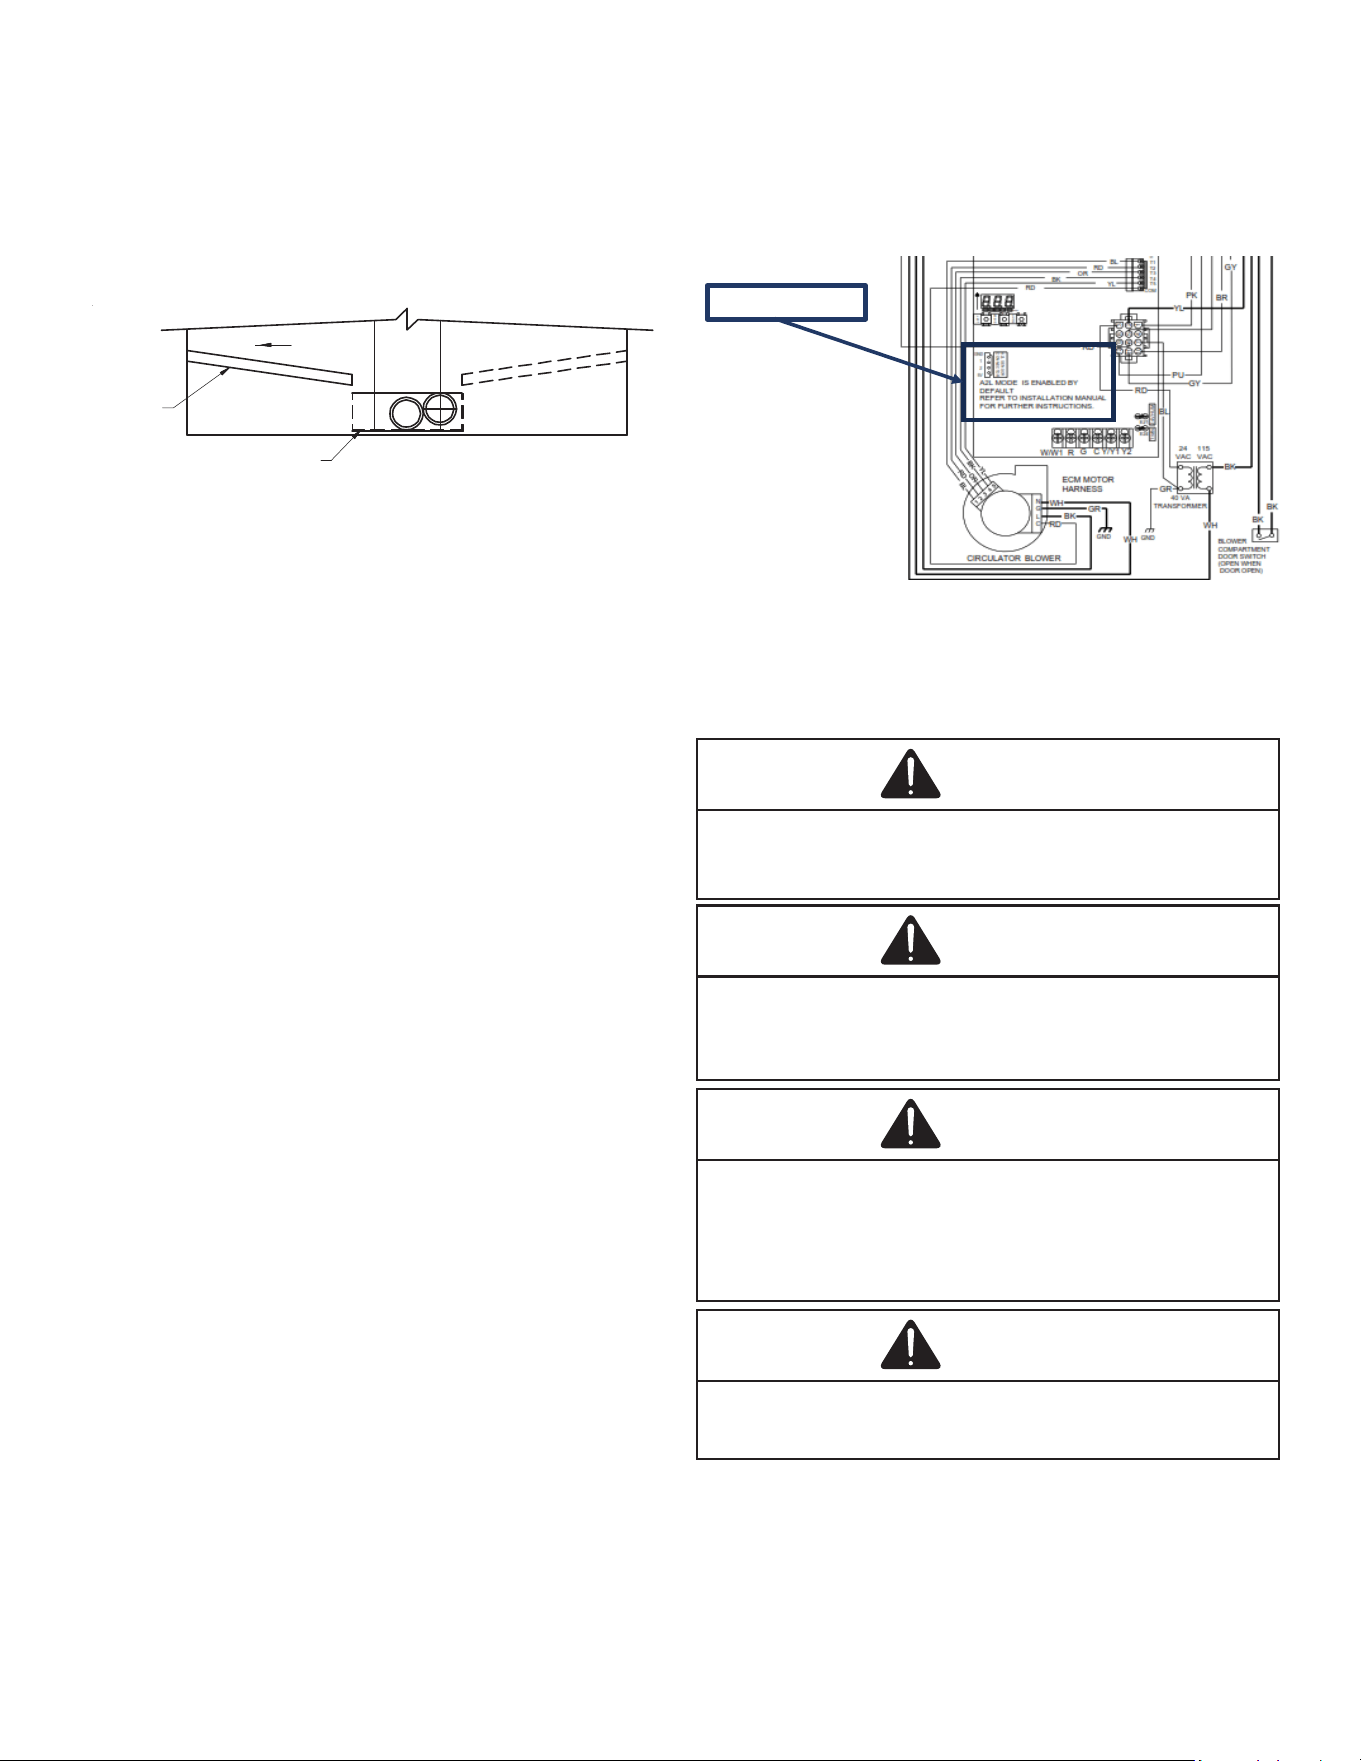
DATEENGCHKDESCRIPTIONREVECN/DR
04-Jun-2024 16:22XX KKINITIAL RELEASE A1
A1
1" MINIMUM
CONDENSATE
DRAIN
CONNECTION
PITCH
TOWARDS
DRAIN
POSITIVE LIQUID
SEAL REQUIRED AT
TRAP
Figure 5
In a blow-through application the drain trap prevents
conditioned air from escaping. It is permissible in this
application to use a shallow trap design sometimes referred
to as a running trap. The appliance shall be stored so as to
prevent mechanical damage from occurring. The depth of
a running trap should be either 1" or a depth that permits
unrestricted condensate drainage without excessive air
discharge.
NOTE: Units operating in high static pressure applications
may require a deeper eld constructed "P" style trap than
is shown in Figure 6 to allow proper drainage and prevent
condensate overow.
2” MIN.
3” MIN.
Figure 6
Field experience has shown condensate drain traps with an
open vertical Tee between the air handler and the
condensate drain trap can improve condensate drainage in
some applications, but may cause excessive air discharge
out of the open Tee. The manufacturer does not prohibit this
type of drain but we also do not recommend it due to the
resulting air leakage.
Regardless of the condensate drain design used, it is the
installer’s responsibility to ensure the condensate drain
system is of sucient design to ensure proper condensate
removal from the coil drain pan.
Install a trap in the drain line below the bottom of the drain
pan (required). If using a copper drain line, solder a short
piece of pipe, minimum 6" length, to the connector before
installing a drain tting. DO NOT over torque the 3/4” copper
connector to the plastic drain connection. Using a wet rag or
heatsink material on the short piece to protect plastic drain
pan, complete the drain line installation.
6
9.1 Horizontal Coil Water Blow-O Bracket
This coil is factory shipped with a horizontal water blow-
o bracket installed on the left side for "horizontal-left"
installation on gas furnaces. If the gas furnace is to be
installed horizontal-right, the water blow-o bracket must
be moved to the right side. To move the bracket, slide the
bracket o the left edge of the drain pan and slide it back on
the right (see Figure 7).
AIRFLOW
BRACKET
FACTORY
INSTALLED
HERE
DRAIN PAN
Figure 7
10. Sensor and Accessory Wiring
Refer to Table 3 for minimum conditioned room area
requirements.
R-32 sensor fault codes should be referenced through the
corresponding R-32 equipped furnace or accessory IO
manuals. It is the installer’s responsibility to ensure that
mitigation mode is operational.
Sensor is not intended for service or repair. If the sensor is
not functioning properly, mitigation mode will engage and
the sensor must be replaced by removing the old sensor
from the bracket and re-installing with new push-pins
and zip-ties. The R-32 sensor shall only be replaced with
sensors specied by the appliance manufacturer (Sensor
replacement part can be determined through the homeowner
support line provided on page 2.)
All wiring installed in the eld to be used in conjunction with
the sensor must meet the following minimum specication:
• 18 AWG
• 1.58mm insulation thickness or protected from
damage
If the sensor used in this unit must be routed through the
Non-A2L Furnace Integration Kit, then reference the Non-
A2L Furnace Integration Kit installation manual for further
instructions.
For any and all accessories which may become a potential
ignition source, they must be installed to our accessory
control board. Ensure that any additional wiring from the
cased coil is done so as to protect from damage and wear,
avoiding the ue pipe and any joints which may need to be
brazed or disconnected for service. If a zone control system
is installed in the ductwork attached to this system, the zone
controller must be powered through a zone-control kit to
ensure that the zoning dampers actuate during mitigation
mode. Refer to the product specication sheet for the zoning
and accessory control kit part number.
Check that wiring will not be subject to wear, corrosion,
excessive pressure, vibration, sharp edges or any other
adverse environmental eects. The check shall also take
into account the eects of aging or continual vibration from
sources such as compressors or fans.
A2L Sensor Input
Typical Design for Refrigerant Detection Sensor
connectors.
Figure 9
11. Refrigerant Lines
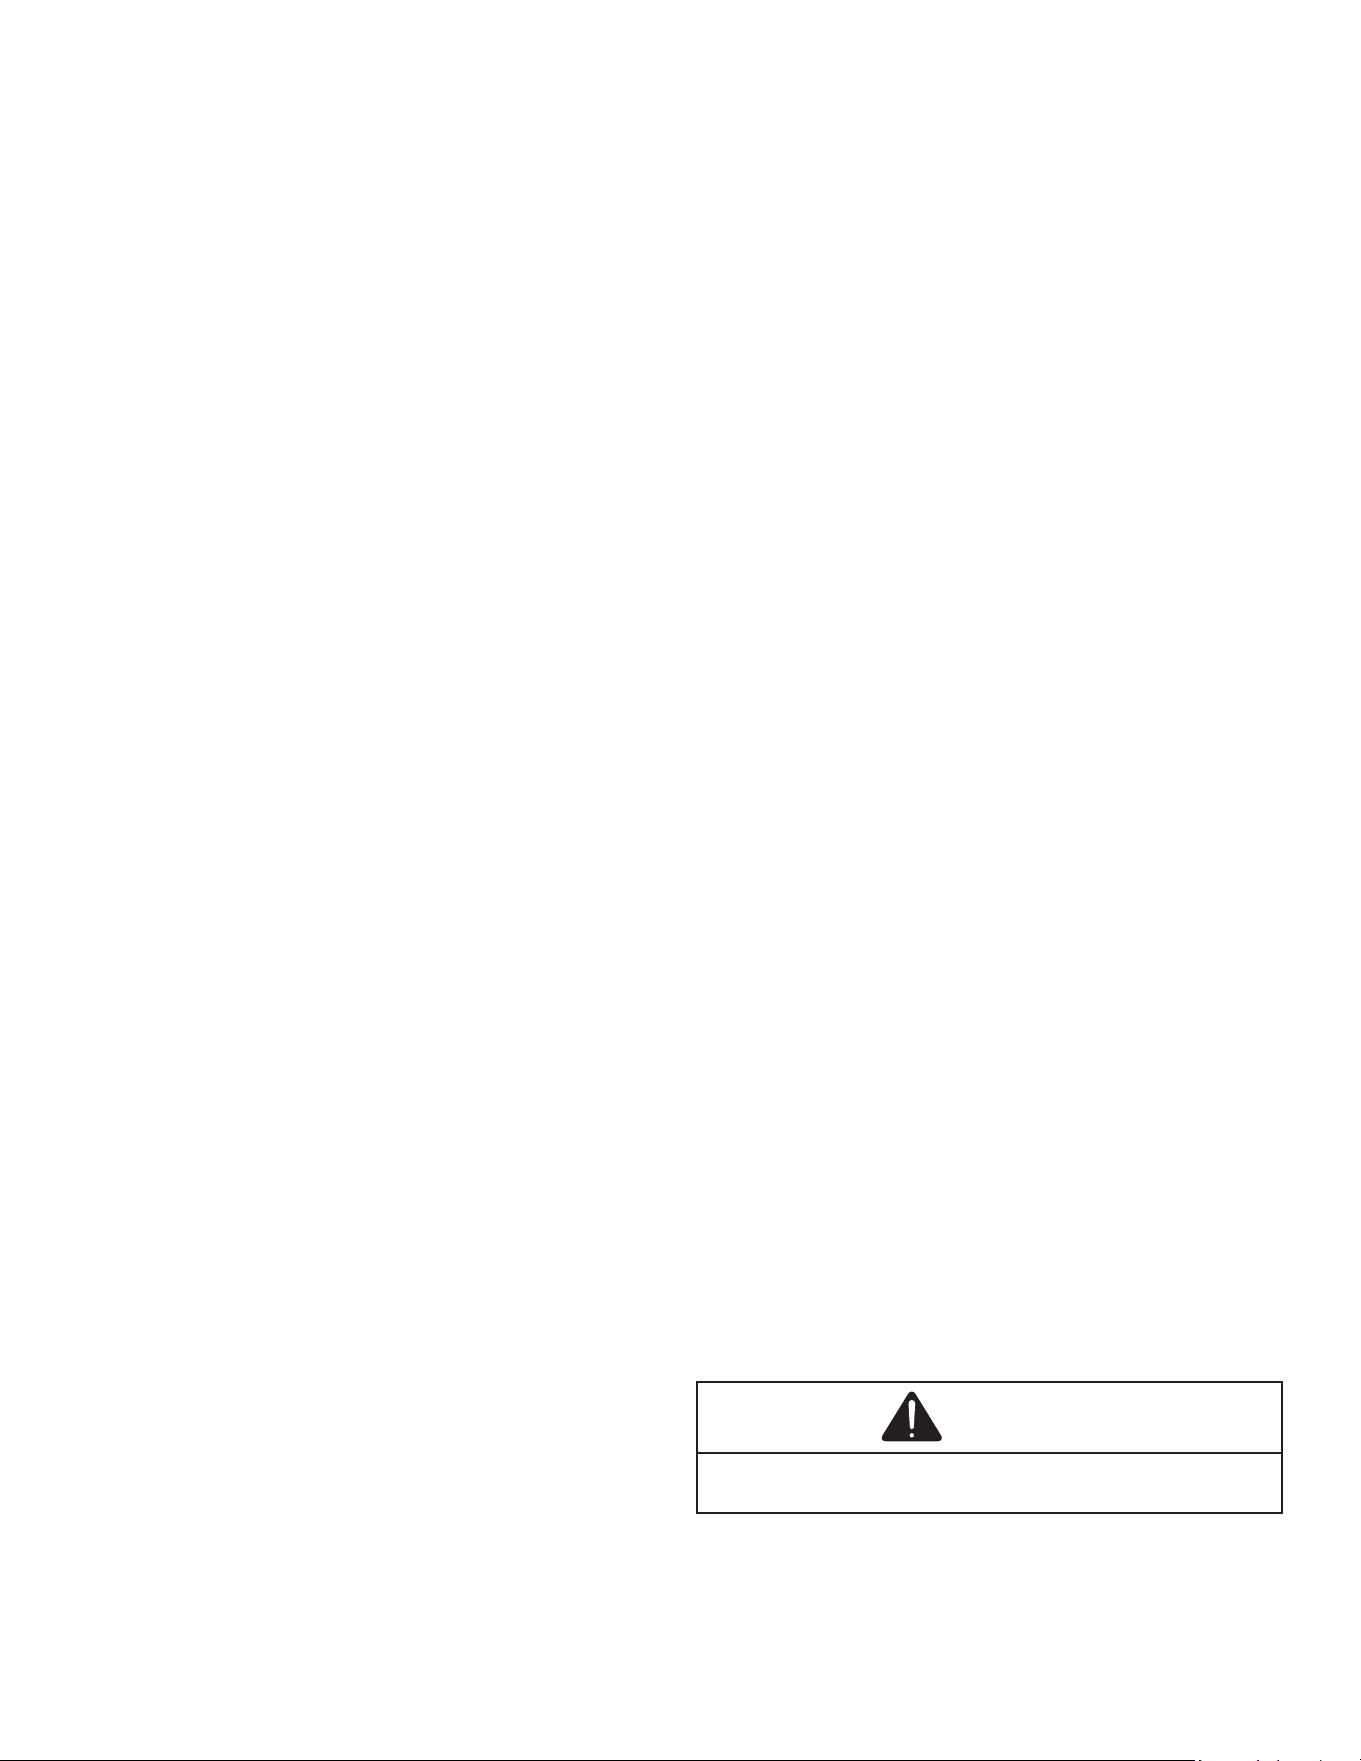
CAUTION
The coil is shipped under pressure with a dry nitrogen
mixture. Use appropriate service tools and follow these
instructions to prevent injury.
WARNING
A quenching cloth is strongly recommended to prevent
scorching or marring of the equipment finish when brazing
close to the painted surfaces. Use brazing alloy of 5%
minimum silver content.
NOTE: Refrigerant tubing must be routed to allow adequate
access for servicing and maintenance of the unit.
Do not handle coil assembly with manifold or owrator tubes.
Doing so may result in damage to the tubing joints. Always
use clean gloves for handling coil assemblies.
CAUTION
Only brazing techniques and approved mechanical joints
should be used to connect refrigerant tubing connections.
non-approved mechanical connectors and other methods
are not permitted in this system containing a2l refrigerant.
approved mechanical joints will be detailed in the product's
specification sheets.
CAUTION
Work shall be undertaken under a controlled procedure to
minimize the risk of flammable gas or vapor being present
while the work is being performed.
7
Follow standards related to ASHRAE 15, ASHRAE 15.2,
IAPMO Uniform Mechanical Code, ICC International
Mechanical Code or CSA B52 during any installation. Piping
must be accessible for inspection prior to being covered or
enclosed in compliance with national and local codes.
The indoor equipment and pipes must be securely mounted
and guarded such that accidental rupture of equipment
cannot occur from such events as moving furniture or
reconstruction activities. Field-made refrigerant joints
indoors shall be tightness tested. The test method shall have
a sensitivity of 5 grams per year of refrigerant or better under
a pressure of at least 0.25 times the maximum allowable
pressure. No leak shall be detected (Should be leak tight).
Field pipework must be pressure tested with an inert gas and
then vacuum tested prior to refrigerant charging according
to the following requirements:
11.1 Standing Pressure Test (Recommended before
vacuum)
Using dry nitrogen or dry helium, pressurize the system
to maximum allowable pressure as listed on the serial
plate.
Allow the pressure to stabilize and hold for 15 Minutes
(minimum). The system is considered leak-free if the
pressure does not drop below above selected maximum
allowable pressure. If, after 15 Minutes, the pressure
drops, it implies a leak in the system. Proceed with
identifying and sealing the leak and repeating the
Standing Pressure Test. Leak test the system using dry
nitrogen or dry helium and soapy water to identify leaks.
No refrigerant shall be used for pressure testing to
detect leaks.
Proceed to system evacuation using the Deep Vacuum
Method.
11.2 Deep Vacuum Method
The Deep Vacuum Method requires a vacuum pump
rated for 500 microns or less. This method eectively and
eciently ensures the system is free of non-condensable
air and moisture. The Triple Evacuation Method is
detailed in the Service Manual for this product model as
an alternative. To expedite the evacuation procedure, it is
recommended that the Schrader Cores be removed from
the service valves using a core-removal tool.
1. Connect the vacuum pump, micron gauge, and
vacuum-rated hoses to both service valves. Evacuation
must use both service valves to eliminate system
mechanical seals.
2. Evacuate the system to less than 500 microns.
3. Isolate the pump from the system and hold the vacuum
for 10 minutes (minimum). Typically, pressure will rise
slowly during this period. If the pressure rises to less
than 1000 microns and remains steady, the system is
considered leak-free; proceed to system charging and
startup.
4. If pressure rises above 1000 microns but holds steady
below 2000 microns, non-condensable air or moisture
may remain, or a small leak may be present. Return to
step 2: If the same result is achieved, check for leaks and
repair. Repeat the evacuation procedure.
5. If pressure rises above 2000 microns, a leak is
present. Check for leaks and repair them. Then, repeat
the evacuation procedure.
11.3 Tubing Size/Length
For the correct tubing size, follow the specication for
the condenser/heat pump. Give special consideration
to minimizing the length of refrigerant tubing when
installing coils. Refer to Remote Cooling/Heat Pump
Technical Publication TP-110* Long Line Set Application
for guidelines for line lengths over 80’. Leave a minimum
3” straight in line set from braze joints before any bends.
11.4 Tubing Preparation
All cut ends are to be round, burr free, and cleaned. Any
other condition increases the chance of a refrigerant
leak. Use a pipe cutter to remove the closed end of the
spun closed suction line.
Installation of pipe-work must be kept to a minimum. Pipe-
work including piping material, pipe routing and installation
must be protected from physical damage and shall not
be installed in an unventilated space. Equipment piping
in any occupied space shall be installed in such a way to
protect against accidental damage in operation and service.
Precautions must be taken to avoid excessive vibration
or pulsation to refrigeration piping. Protection devices,
piping and ttings shall be protected as far as possible
against adverse environmental eects, for example, the
danger of water collecting and freezing in relief pipes or the
accumulation of dirt and debris. Steel pipes and components
shall be protected against corrosion with a rustproof coating
before applying any insulation. Any solenoid valves and
piping in the refrigerant systems must be designed and
installed to minimize the likelihood of hydraulic shock
damaging the system. Solenoid valves must not block in
liquid refrigerant unless adequate relief is provided to the
refrigerant system's low pressure side. Provisions must be
made for expansion and contraction of long runs of piping.
WARNING
This unit must be charged with R-32 refrigerant. Ensure that
sensor is installed correctly and is operational.
8
11.5 Brazing
Braze joints should be made only with the connections
provided external to the cabinet. Do not alter the cabinet
nor braze inside the cabinet. To avoid overheating after
brazing, quench all brazed joints with water or a wet rag.
This system must be charged with R-32 refrigerant in
order to operate safely.
When breaking into the refrigerant circuit to make repairs
– or for any other purpose – conventional procedures
shall be used. However, the ammability classication
for any refrigerant must be considered. The following
procedure shall be adhered to:
1. Safely remove refrigerant following local and national
regulations.
2. Evacuate.
3. Purge the circuit with inert gas.
4. Evacuate.
5. Continuously ush or purge with inert gas when
using ame to open circuit; and
6. Open the circuit.
For appliances containing ammable refrigerants,
refrigerants purging shall be achieved by breaking the
vacuum in the system with oxygen-free nitrogen and
continuing to ll until the working pressure is achieved,
then venting to atmosphere, and nally pulling down
to a vacuum (optional for R-32). This process shall be
repeated until no refrigerant is within the system (optional
for R-32). When the nal oxygen-free nitrogen charge is
used, the system shall be vented down to atmospheric
pressure to enable work to take place.
The outlet for the vacuum pump shall not be close to
any potential ignition sources, and ventilation shall be
available.
CAUTION
Applying too much heat to any tube can melt the tube.
Torch heat required to braze tubes of various sizes must be
proportional to the size of the tube. Service personnel must
use the appropriate heat level for the size of the tube being
brazed.
11.6 Tubing Connections for TXV Version
WARNING
Field installed TXV Metering devices, including Piston kits
and EEV, must be housed within the cabinet. Do not install
external to the unit.
TXV models come with factory installed adjustable TXV
with the bulb permanently located on the suction tube.
1. Remove coil access panel and rubber grommets.
2. Remove access valve tting cap and depress the
valve stem in access tting to release pressure. No
pressure indicates possible leak.
3. Reinstall the Coil Access Panel & rubber grommets.
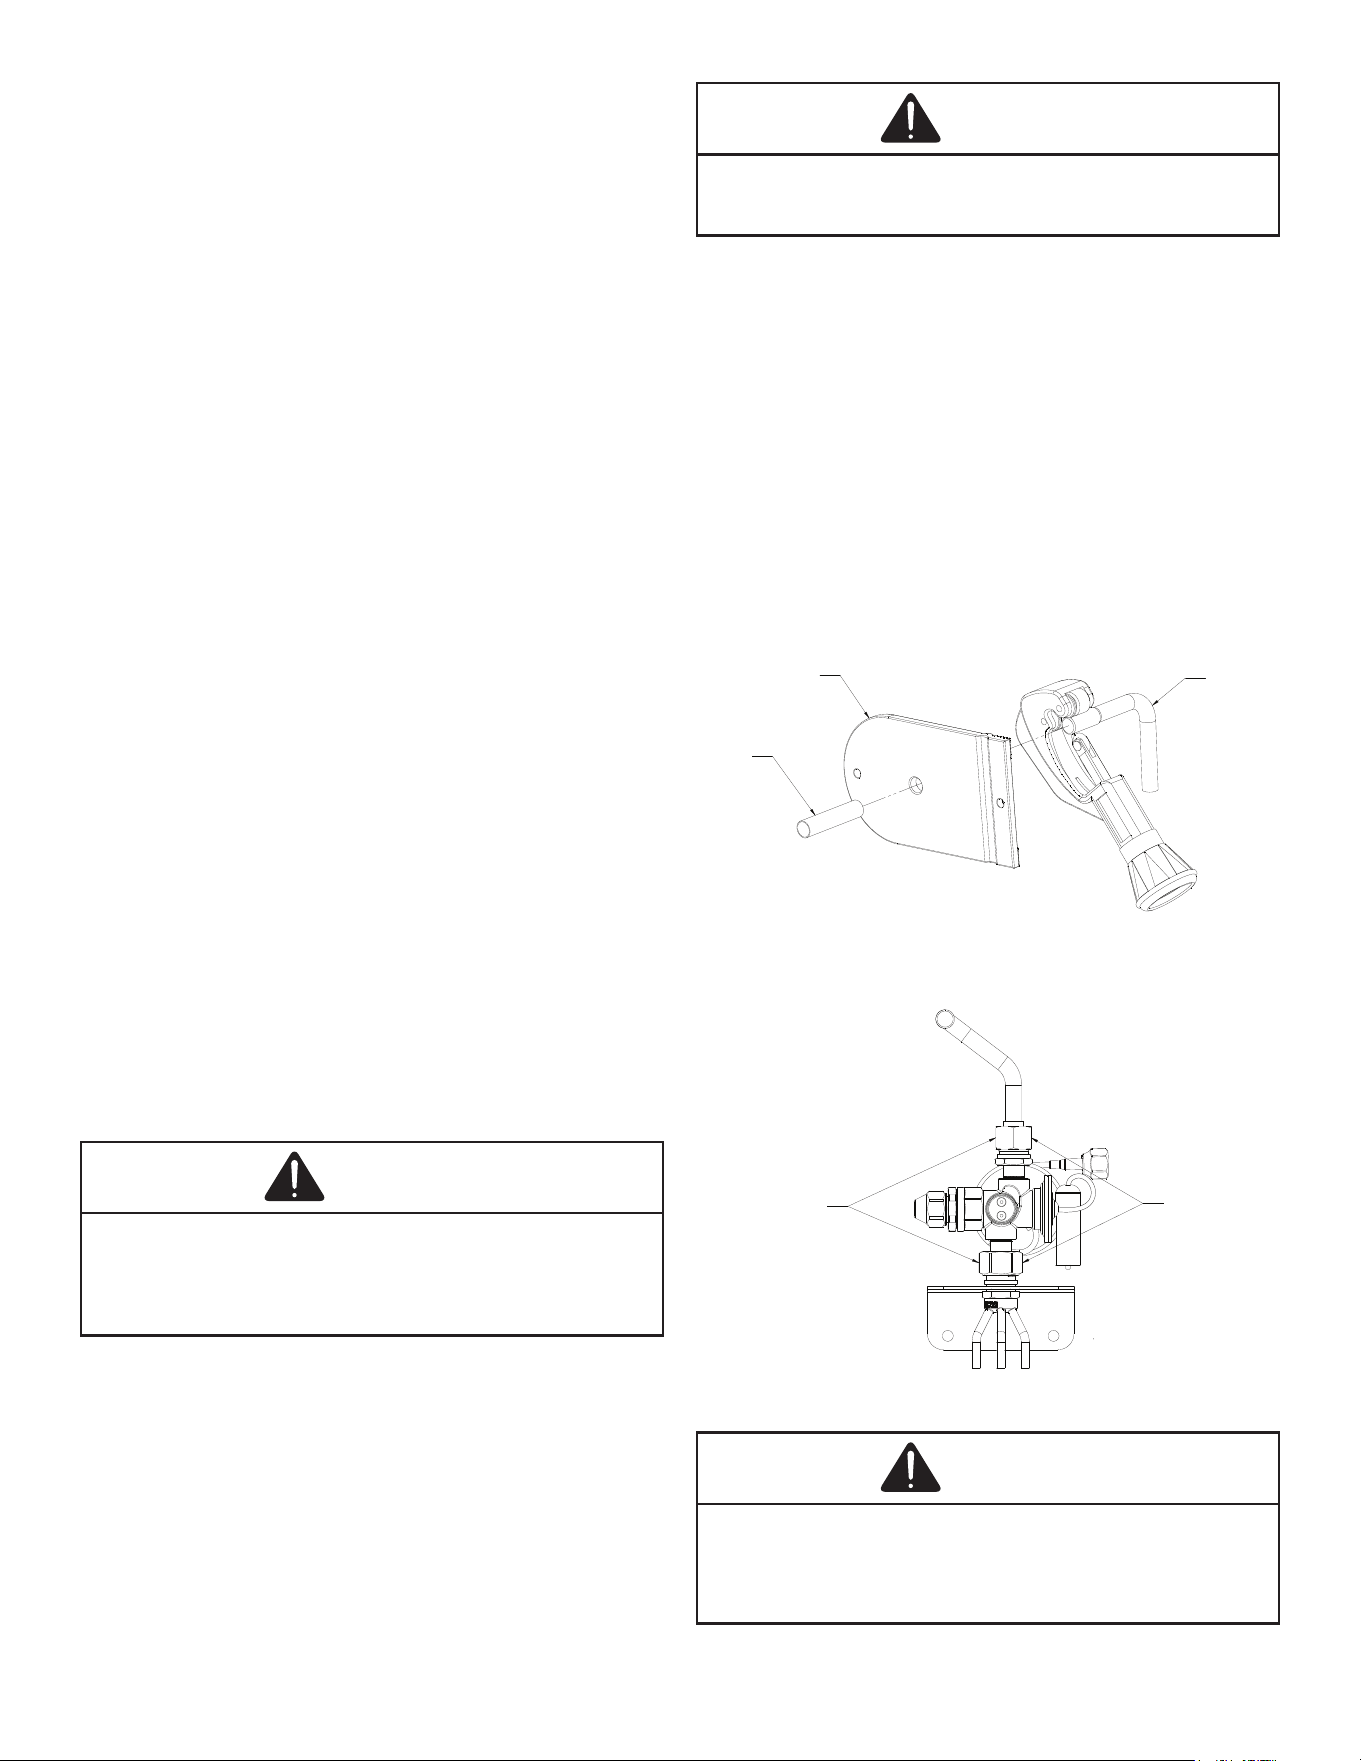
4. Remove the spin closure on both the liquid
and suction tubes using a tubing cutter (Refer
to Figure 10A, 10B and 10C). DO NOT USE A
CUTTING METHOD THAT WOULD RESULT IN
THE GENERATION OF COPPER SHAVINGS OR
COPPER DUST.
LIQUID LINE
LIQUID
GROMMET
LIQUID
LINE SET
FIGURE 10A
Figure 10A
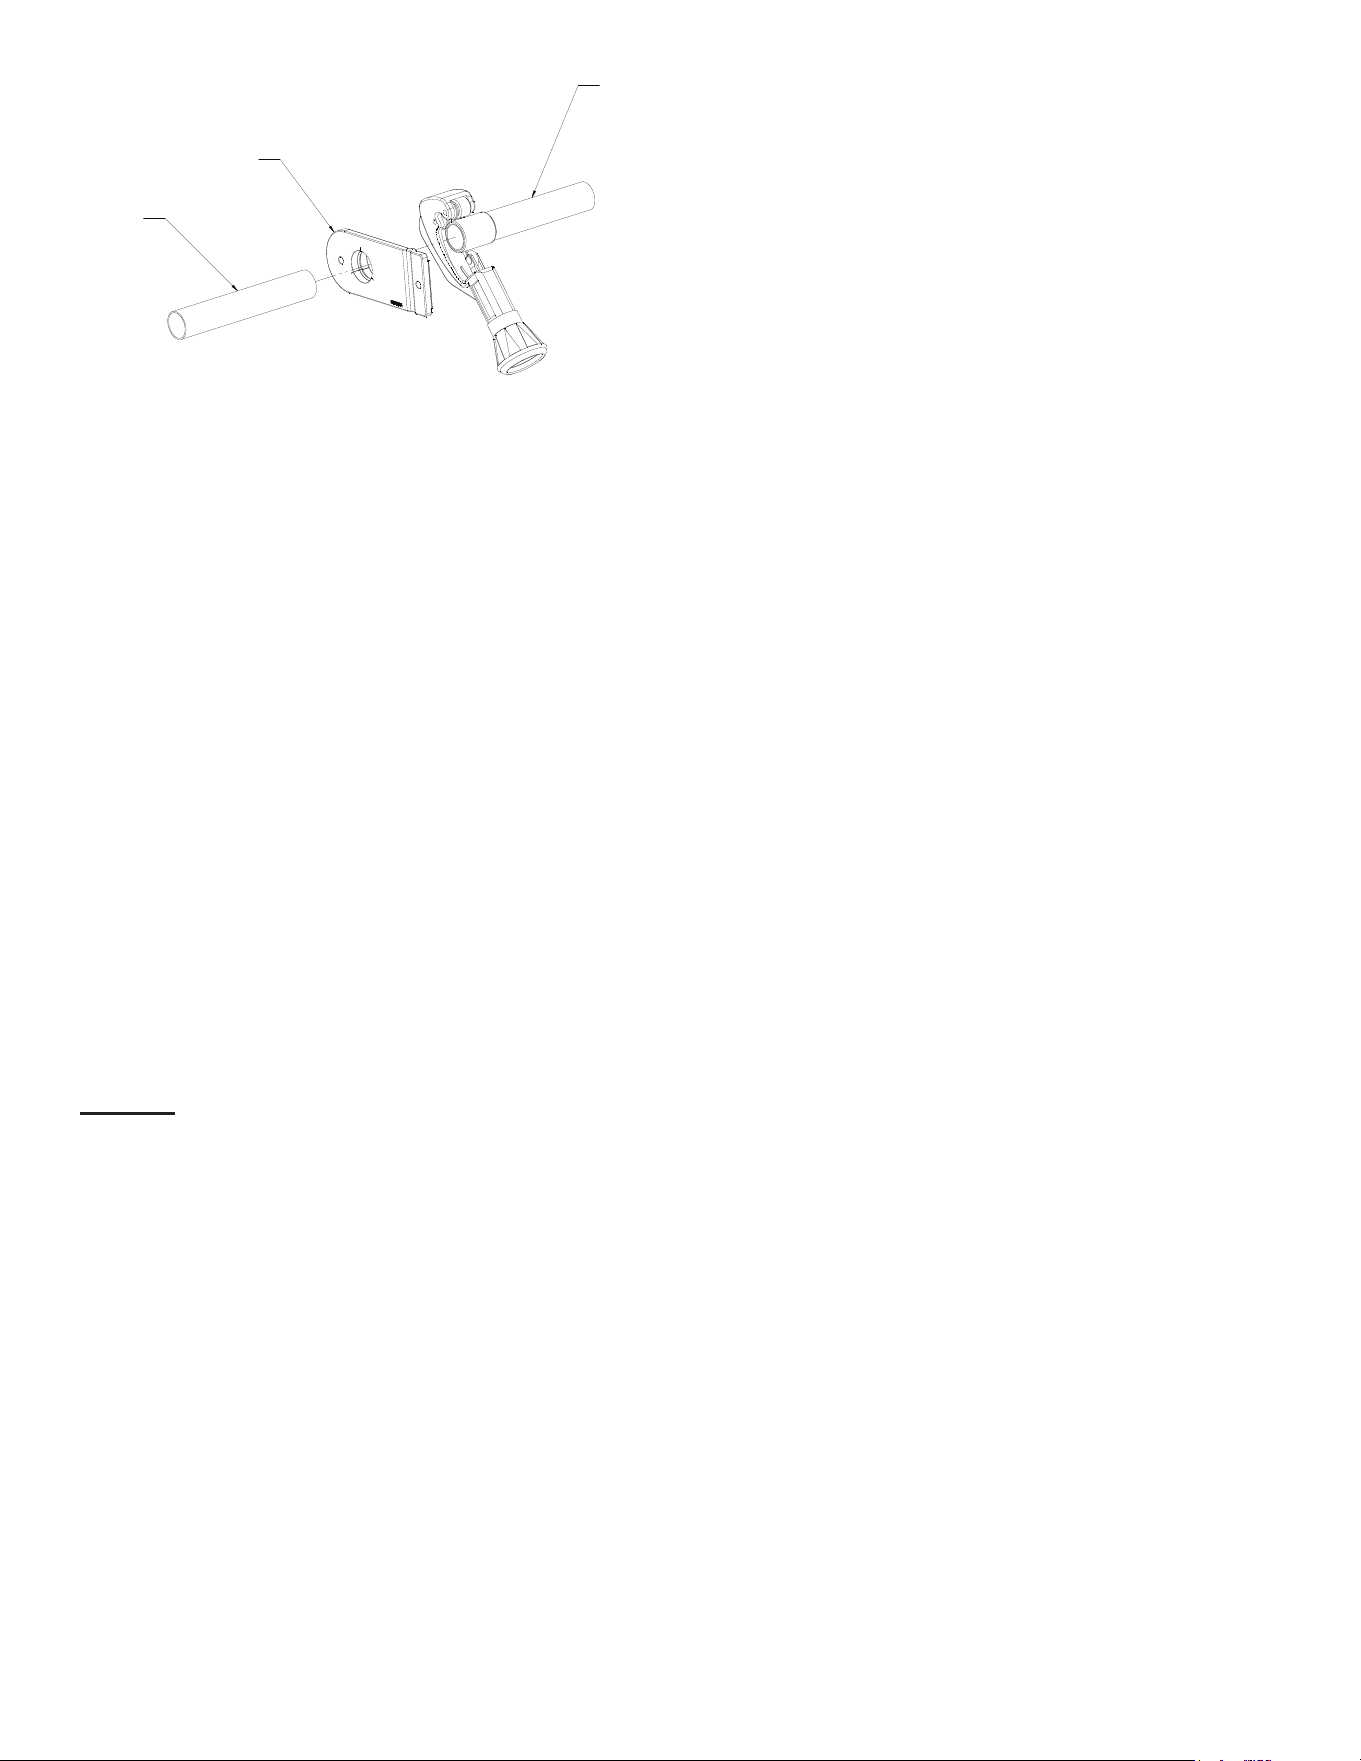
TORQUE 180-240 IN-LBS
ENSURE THAT SEAL
WASHERS STAY
IN POSITION
FIGURE 10B
Figure 10B
CAUTION
Excessive torque can cause the TXV retaining ring to weaken
& create a leak. This will make it difficult to re-install. The
proper torque settings should be configured as below when
adjusting. Oiled equalizer should be set to 10-12 ft/lbs.
Outlet and inlet chat fitting should be set to 15-20 ft/lbs.
9
SUCTION
TUBE
SUCTION
GROMMET
SUCTION
LINE SET
FIGURE 10C
Figure 10C
5. Insert liquid line set into liquid tube expansion and
slide grommet about 18” away from braze joint.
6. Insert suction line set into suction tube expansion and
slide insulation and grommet about 18” away from
braze joint.
7. Braze suction and liquid line joints.
11.7 Thermal Expansion Valve System Adjustment
The following information for the indoor unit should be
veried before attempting to charge system or adjust TXV
if necessary.
1. Total static pressure is .5” WC or less.
2. Airow is correct for installed unit.
3. Airow tables are in the installation manual and Spec
Sheet for Indoor Unit.
4. Complete airow tables and charging information are
in Service Manual.
5. The outdoor temperature must be 60°F or higher.
6. Set the room thermostat to COOL, fan switch to AUTO
7. Set the temperature control well below room
temperature.
Superheat adjustments should not be made until indoor
ambient conditions have stabilized. This could take up to
24 hours depending on indoor temperature and humidity.
Before checking superheat run the unit in cooling for 10
minutes or until refrigerant pressures stabilize. Use the
following guidelines and methods to check unit operation
and ensure that the refrigerant charge is within limits. NOTE:
Charge two stage units on low stage.
In addition to conventional charging procedures, the
following requirements shall be followed:
1. Ensure that contamination of dierent refrigerants
does not occur when using charging equipment.
Hoses or lines shall be as short as possible to
minimize the amount of refrigerant contained in them.
2. A2L refrigerant cylinders shall be kept in an
appropriate position according to the instructions.
3. Ensure that the refrigeration system is grounded prior
to charging the system with refrigerant.
4. Label the system when charging is complete (if not
already).
5. Extreme care shall be taken not to overll the
refrigerating system
Prior to recharging the system, it shall be pressure-tested
with the appropriate purging gas. The system shall be leak-
tested on completion of charging but prior to commissioning.
A follow up leak test shall be carried out prior to leaving the
site.
1. Purge gauge lines. Connect service gauge manifold to
base-valve service ports.
2. Temporarily install a thermometer on the liquid line at the
liquid line service valve and 4-6” from the compressor
on the suction line. Ensure the thermometer makes
adequate contact and is insulated for best possible
readings. Use liquid line temperature to determine
subcooling and vapor temperature to determine
superheat.
3. If subcooling and superheat are low, adjust TXV
superheat, then check subcooling as specied in
Outdoor Installation and Instruction manual.
a. If subcooling is low and superheat is high, add
charge to raise subcooling 8°F +/- 1°F then, check
superheat.
b. If subcooling and superheat are high, adjust TXV
superheat, then check subcooling as specied in
Outdoor Installation and Instruction manual.
4. After adjustments are complete reinstall cap on
adjustment stem and tighten 1/6 turn.
5. Remove gauges and check the Schrader ports for
leaks and tighten valve cores if necessary. Install caps
nger tight.
For optimum system performance subcool and superheat
should be matched as specied in Outdoor Installation
and Instruction manual. Outdoor should be matched with
approved AHRI combination, other approved system shall
have subcooling set to 8°F ± 1°F and superheat set to 12°F
± 1°F.
NOTE: The minimum time between TXV adjustments shall
be 20 minutes.
NOTE: In situations where the TXV must be removed and
replaced or re-installed into the system, the TXV should be
hand tightened rst and then apply a half turn to fully set the
TXV. No more than 20 ft-lb torque should be applied to the
joints of the TXV.
NOTE: Do NOT adjust the charge based on suction pressure
unless there is a gross undercharge.
NOTE: Check the Schrader ports for leaks and tighten valve
cores if necessary. Install caps nger-tight.
SUBCOOL FORMULA = SAT. LIQUID LINE TEMP. -
LIQUID LINE TEMP.
SUPERHEAT FORMULA = SUCT. LINE TEMP. - SAT.
SUCT. TEMP.
10
11.8 Leak Detection
Under no circumstances shall potential sources of ignition
be used in the searching for or detection of refrigerant leaks.
A halide torch (or any other detector using a naked ame)
shall not be used. If a leak is suspected, all naked ames
shall be removed/extinguished. If a leakage of refrigerant is
found which requires brazing, all of the refrigerant shall be
recovered from the system, or isolated (by means of shut o
valves) in a part of the system remote from the leak.
The following leak detection methods have been deemed
acceptable, provided proper care is taken in their
implementation:
1. Electronic leak detectors rated for use with R-32
refrigerant. Ensure the detection equipment is
calibrated in a refrigerant-free area and that the leak
detector itself is not a potential source of ignition. Leak
detection equipment shall be set at a value of no more
than 0.075 kg/m³.
2. Leak detection uids - such as the bubble method or
uorescent method. Ensure that the use of detergents
containing chlorine are avoided as the chlorine may
react with the refrigerant and corrode the pipe-work.
12. Altitude adjustment factor to calculate min
room area.
As seen in table 3, the indoor equipment mitigation
requirements are calculated at sea level. The maximum
refrigerant charge shown on the Indoor unit serial plate is
the maximum limit and must not be exceeded. However, if
the actual charge is lower than what’s shown on the serial
plate, you can adjust the minimum room area as per the
table 3.
Total System
Refrigerant
Charge
(oz)
Total System
Refrigerant
Charge
(kg)
Minimum Air
Conditioned
Room Area
(m
2
)
Minimum Air
Conditioned
Room Area
(ft
2
)
Minimum
Required
Mitigation
Airflow
(m
3
/hr)
Minimum
Required
Mitigation
Airflow
(CFM)
40.01~50.00
1.14~1.42
4.22
46
112
66
50.01~60.00
1.42~1.71
5.09
55
140
83
60.01~70.00
1.71~1.99
5.92
64
168
99
70.01~80.00
1.99~2.27
6.75
73
196
116
80.01~90.00
2.27~2.56
7.61
82
223
132
90.01~100.00
2.56~2.84
8.44
91
251
148
100.01~110.00
2.84~3.12
9.27
100
279
165
110.01~120.00
3.12~3.41
10.14
110
306
181
120.01~130.00
3.41~3.69
10.97
119
335
198
130.01~140.00
3.69~3.97
11.80
128
362
214
140.01~150.00
3.97~4.26
12.66
137
390
230
150.01~160.00
4.26~4.54
13.49
146
418
247
160.01~170.00
4.54~4.82
14.32
155
446
263
170.01~180.00
4.82~5.11
15.19
164
473
279
180.01~190.00
5.11~5.39
16.02
173
501
295
190.01~200.00
5.39~5.67
16.85
182
529
312
200.01~210.00
5.67~5.96
17.71
191
556
328
210.01~220.00
5.96~6.24
18.54
200
585
345
220.01~230.00
6.24~6.53
19.40
209
612
361
230.01~240.00
6.53~6.81
20.24
218
641
378
240.01~250.00
6.81~7.09
21.07
227
668
394
250.01~260.00
7.09~7.38
21.93
237
696
410
260.01~270.00
7.38~7.66
22.76
245
724
427
270.01~280.00
7.66~7.94
23.59
254
751
443
280.01~290.00
7.94~8.23
24.46
264
779
459
290.01~300.00
8.23~8.51
25.29
273
807
475
300.01~310.00
8.51~8.79
26.12
282
835
492
310.01~320.00
8.79~9.08
26.98
291
862
508
320.01~330.00
9.08~9.36
27.81
300
891
525
330.01~340.00
9.36~9.64
28.64
309
918
541
340.01~350.00
9.64~9.93
29.51
318
946
557
350.01~360.00
9.93~10.21
30.34
327
974
574
360.01~370.00
10.21~10.49
31.17
336
1001
590
370.01~380.00
10.49~10.78
32.03
345
1029
606
380.01~390.00
10.78~11.06
32.86
354
1057
623
390.01~400.00
11.06~11.34
33.69
363
1085
639
Table 3
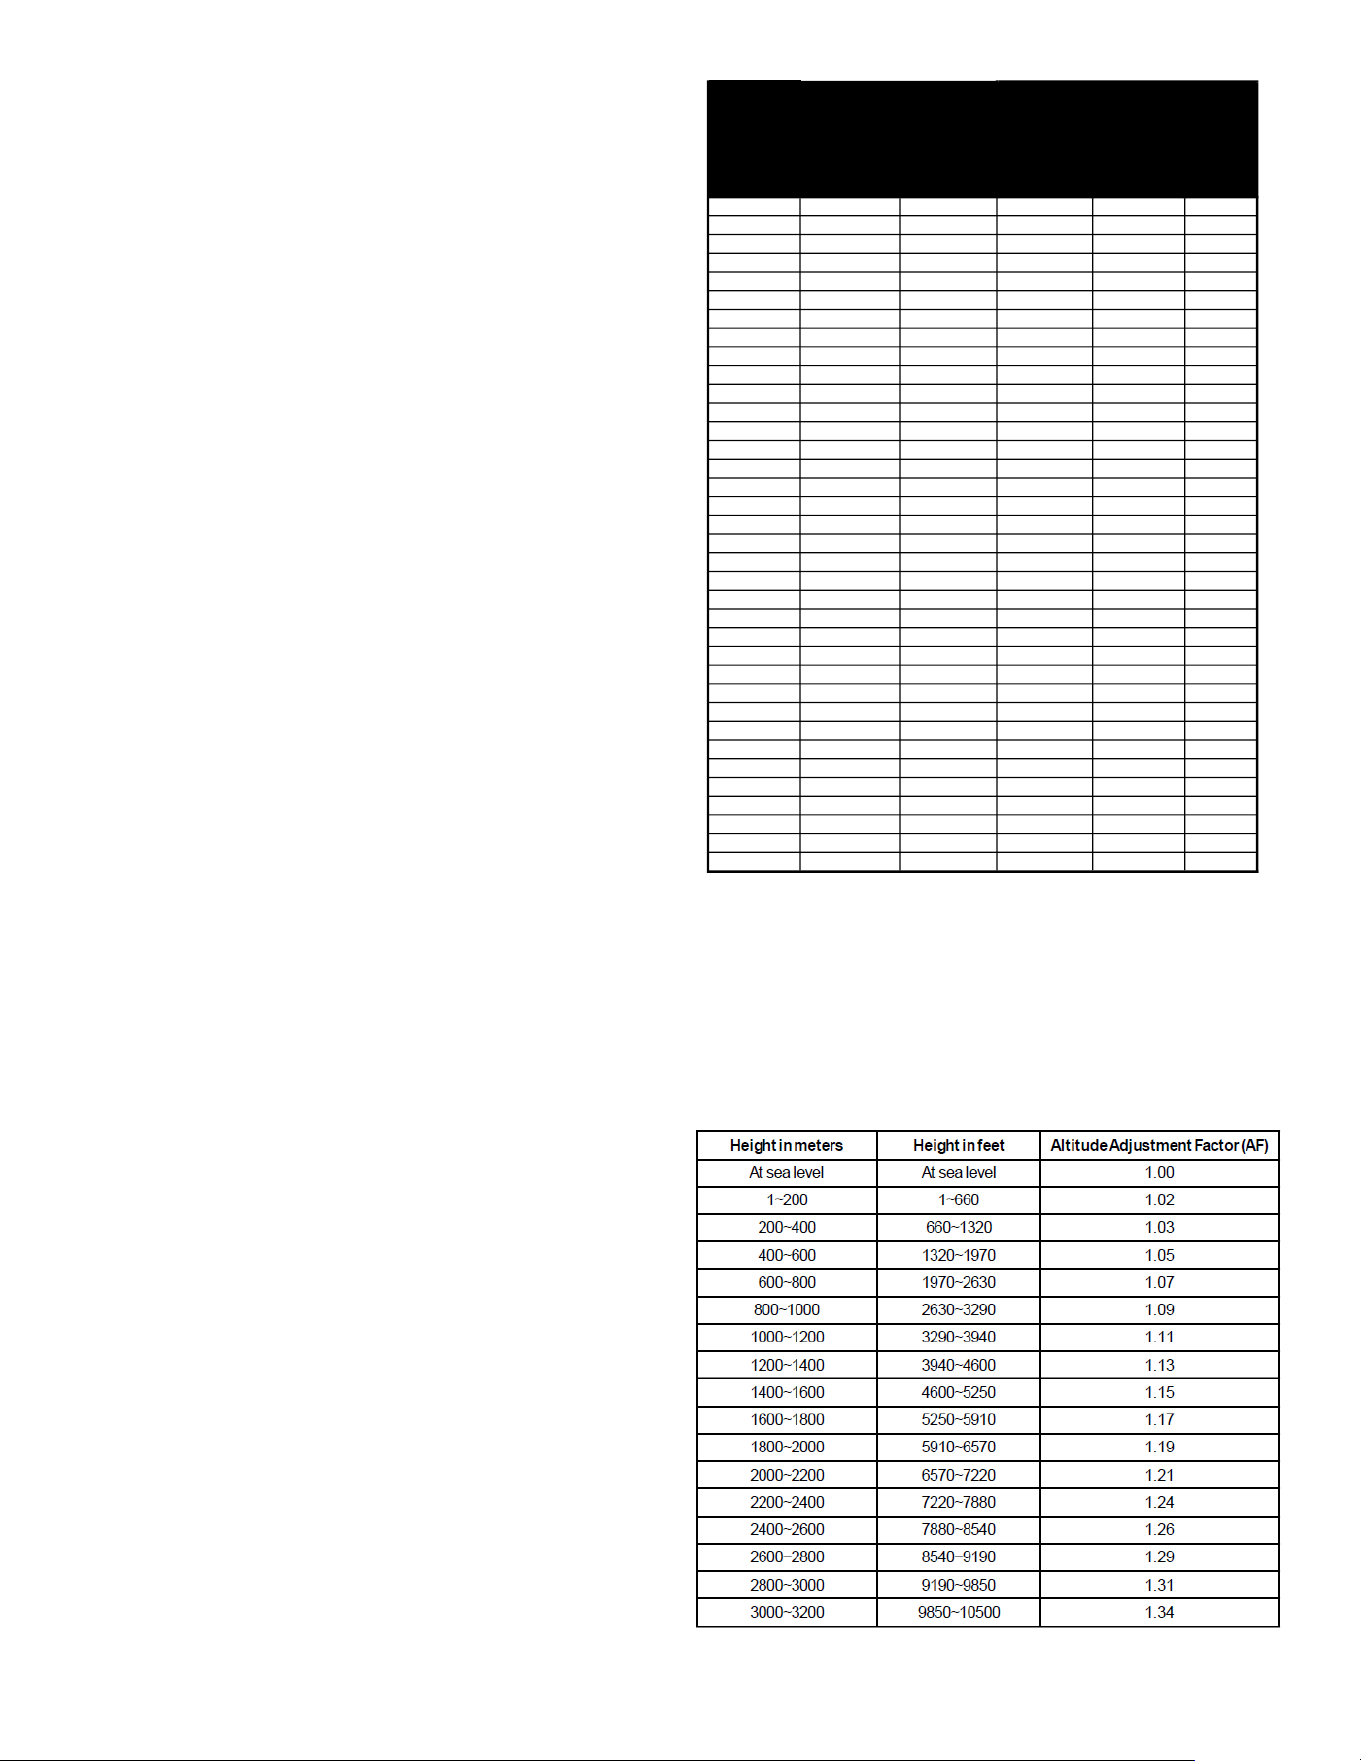
For higher altitudes adjust the minimum room area specied
on the Serial Plate by the corresponding altitude adjustment
factor shown below. Table 4 is provided as a reference.
Adjusted room area (Amin adj) is the product of the minimum
room area specied in the serial plate and the adjustment
factor AF, as shown in below formula.
Amin adj = Amin (serial plate) * AF
Table 4
Table 4 - A_min altitude correction factor
11
Saturated Suction
Temperature ºF
R-32
0.57
2.06
3.51
4.94
6.33
7.69
9.03
10.34
11.62
12.88
14.12
15.34
16.53
17.70
18.86
19.99
22.75
25.41
27.97
30.44
35.16
39.59
43.79
47.76
51.55
55.17
58.64
56
110
120
70
72
74
76
78
80
Saturated Suction Pressure
Temperature Chart
85
90
95
100
58
60
62
64
66
68
Suction Pressure
PSIG
50
52
54
130
140
150
160
170
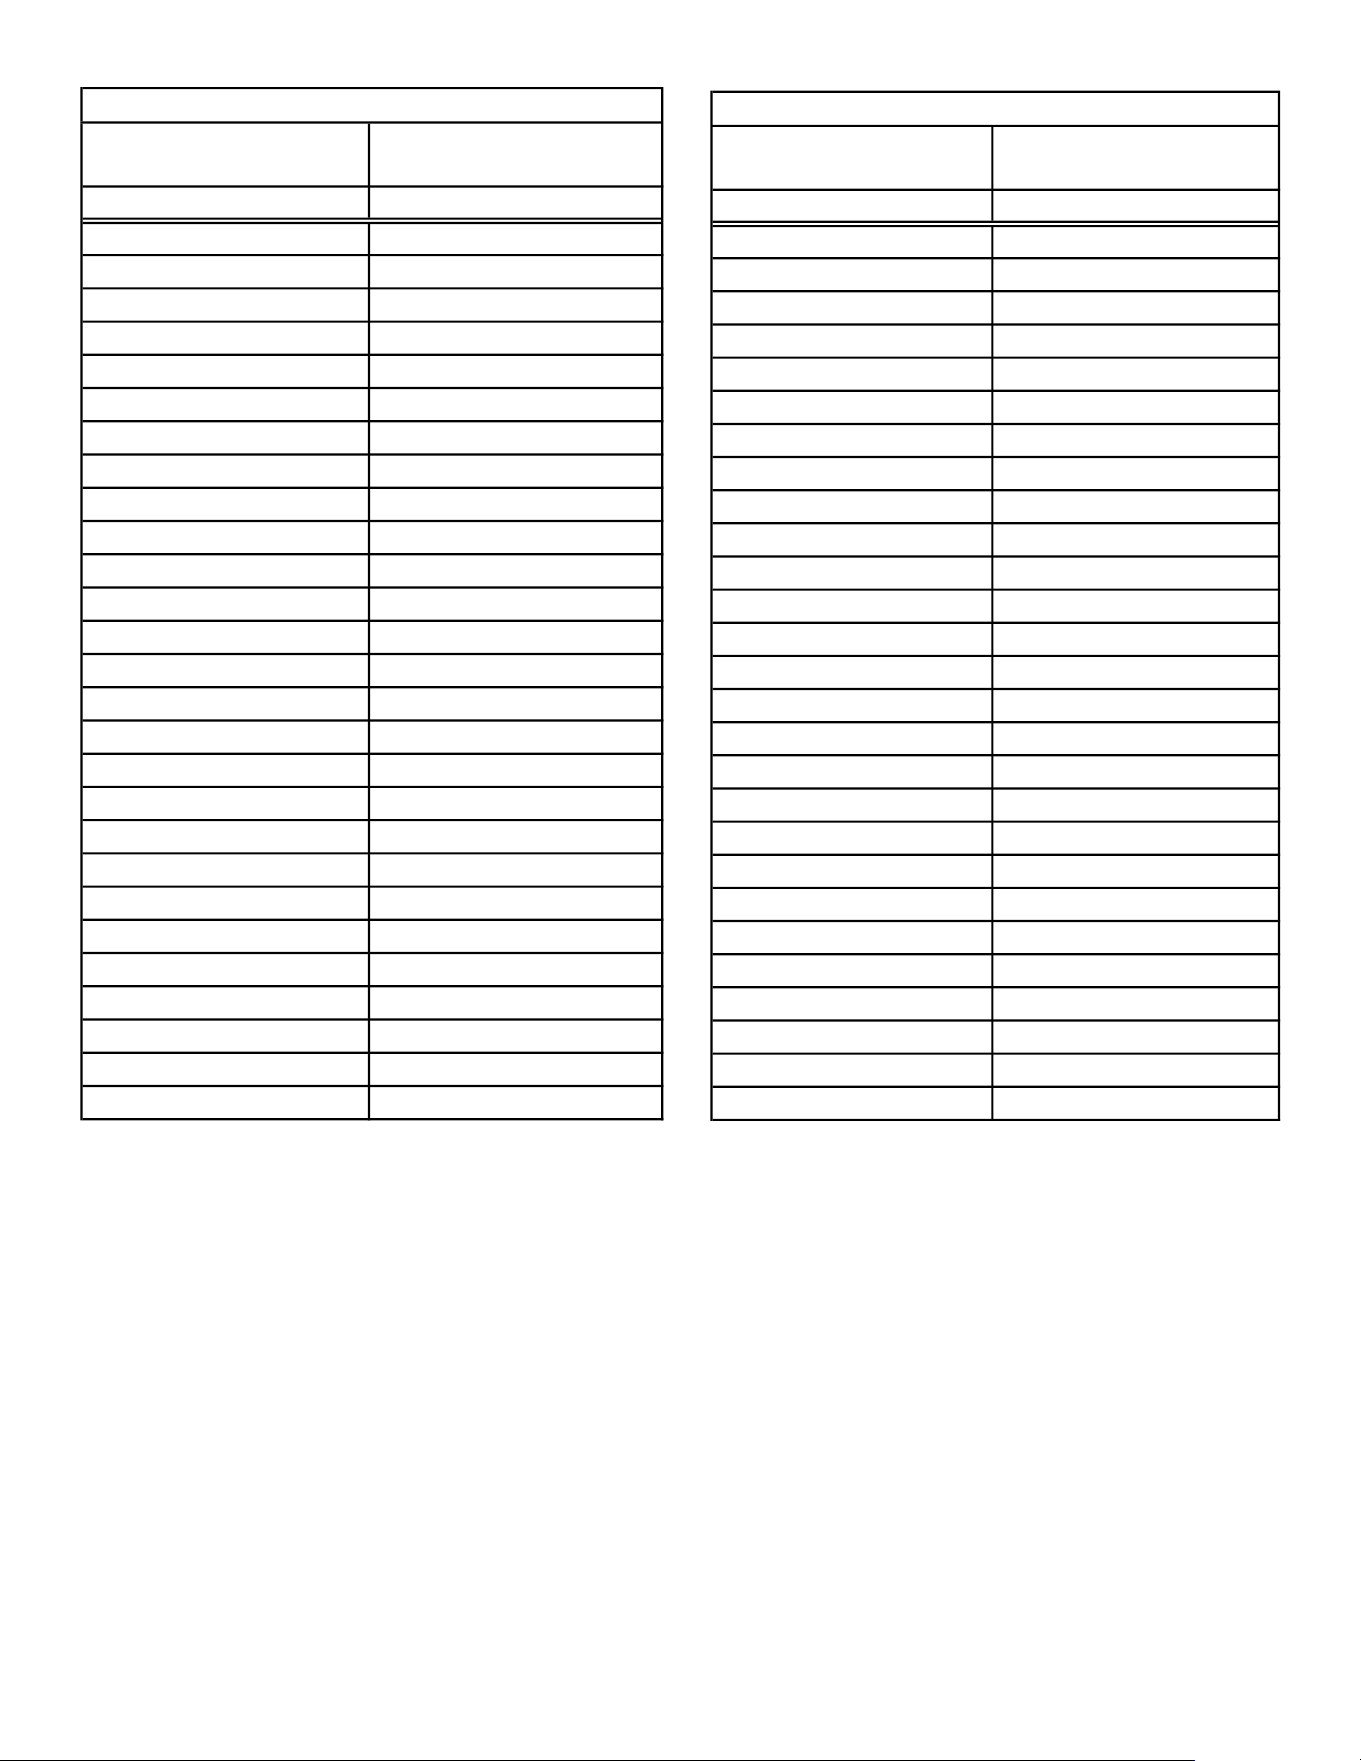
Table 1
Saturated Liquid
Temperature ºF
R-32
68.25
71.23
74.11
75.50
78.25
80.91
83.50
86.03
88.48
90.86
93.19
95.46
99.85
106.08
110.02
115.65
117.46
119.24
120.98
122.70
127.68
131.65
135.48
139.17
142.73
146.17
149.50
275
Saturated Liquid Pressure
Temperature Chart
Suction Pressure
PSIG
200
210
220
225
235
245
255
265
475
285
295
305
325
355
375
405
415
425
435
445
500
525
550
575
600
625
Table 2
12
13. Supply Duct Connection
WARNING
All required ventilation openings must be clear of
obstruction and all ducts connected to the appliance free
of potential ignition sources.
For appliances using A2L REFRIGERANTS, connected via
an air duct system to one or more rooms, the supply and
return air shall be directly ducted to the space. Open areas
such as false ceilings shall not be used as a return air duct.
The air extraction opening from the room shall be located
equal or below the refrigerant release point. For oor
mounted units, it shall be as low as practicable. The air
extraction openings shall be located a sucient distance
from the air intake openings to prevent re-circulation to the
space.
14. Return Ductwork
DO NOT TERMINATE THE RETURN DUCTWORK
IN AN AREA THAT CAN INTRODUCE TOXIC OR
OBJECTIONABLE FUMES/ODORS INTO THE
DUCTWORK.
15. Sealing Along The Panel Gap
IMPORTANT NOTE: To prevent cabinet sweating and
airow leak, apply eld provided insulation tape along all
joining surfaces between the coil, gas furnace, duct work
and panels. See Figure 11.
FIGURE 11
Figure 11
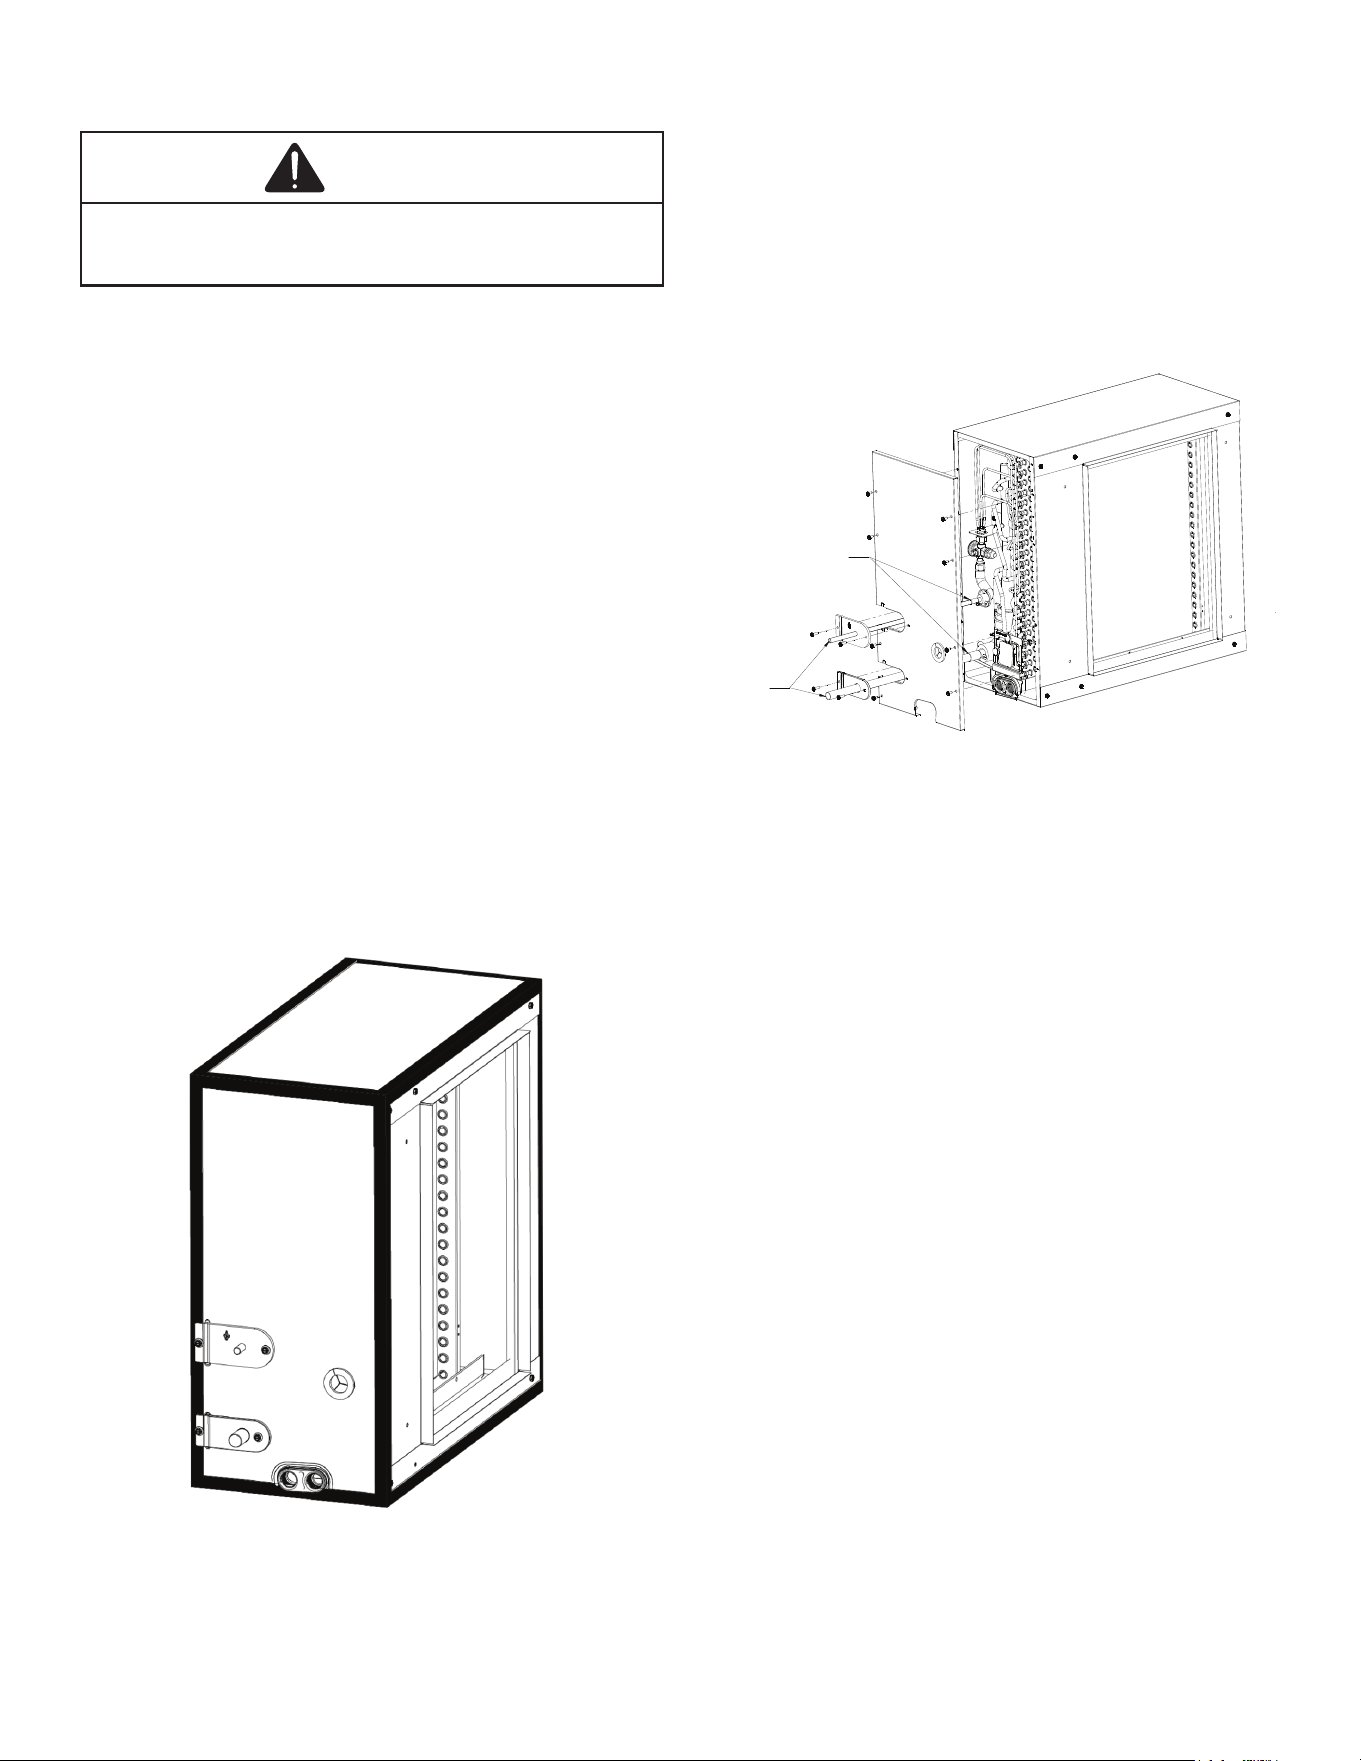
16. Removing Coil from Cabinet
In an event of removing coils from cabinet to service or
replace; remove access panel, to allow the coils to slide out
of the cabinet.
After servicing or replacement, slide the coil back into the
cabinet. Ensure that the sensor and bracket are correctly
positioned on the drain ports, and conrm the sensor wire is
securely connected. Finally, reinstall the access panel.
See Figure 12.
FIELD PIPING
FIELD PIPING FITTING
PORT (BRAZED)
FIGURE 12
Figure 12
13
17. Aluminum Indoor Coil Cleaning
(Qualied Servicer Only)
R-32 sensor must be removed from the unit before
applying coil cleaners to avoid damage and contamination.
Reassemble the R-32 sensor back to the unit after done
with coil cleaning process. This unit is equipped with an
aluminum tube evaporator coil. The safest way to clean the
evaporator coil is to simply ush the coil with water. This
cleaning practice remains as the recommended cleaning
method for both copper tube and aluminum tube residential
evaporator coils.
It has been determined that many coil cleaners and drain
pan tablets contain corrosive chemicals that can be harmful
to aluminum tube and n evaporator coils. Even a one-
time application of these corrosive chemicals can cause
premature aluminum evaporator coil failure. Any cleaners
that contain corrosive chemicals including, but not limited
to, chlorine and hydroxides, should not be used.
An alternate cleaning method is to use one of the products
listed in TP-109* to clean the coils. The cleaners listed are
the only agents deemed safe and approved for use to clean
round tube aluminum coils. TP-109 is also available on the
web site in Partner Link > Service Toolkit.
NOTE: Ensure coils are rinsed well after use of any chemical
cleaners.
WARNING
Do not use means to accelerate the defrosting process or to
clean, other than those recommended by the manufacturer.
The appliance shall be stored in a room without
continuously operating ignition sources (for example: open
flames, an operating gas appliance or an operating electric
heater). Do not pierce or burn. Be aware that refrigerants
may not contain an odor.
18. Start-Up Procedure
WARNING
HIGH VOLTAGE
Disconnect all power before servicing or
installing this unit. Multiple power sources
may be present. Failure to do so may cause
property damage, personal injury or death.
• Prior to start-up, ensure that all electrical wires are
properly sized and all connections are properly
tightened.
• All panels must be in place and secured. For airtight
application, gasket must be positioned at prescribed
locations to achieve 1.4% leakage.
• Tubing must be leak free.
• Condensate line must be trapped and pitched to allow
for drainage.
• Low voltage wiring is properly connected.
• Auxiliary drain is installed when necessary and
pitched to allow for drainage.
• Unit is protected from vehicular or other physical
damage.
• Return air is not obtained from, nor are there any
return air duct joints that are unsealed in, areas where
there may be objectionable odors, ammable vapors
or products of combustion such as carbon monoxide
(CO), which may cause serious personal injury or
death.
• Ensure that the equipped R-32 sensor is wired to
the furnace PCB and that there are no sources of
potential ignition within the system.
IMPORTANT: The A2L verication step as described on the
furnace Installation manual or the Non-A2L Integration Kit
Installation manual must be completed.
14
19. Refrigerant Recovery
When removing refrigerant from a system, either for servicing
or decommissioning, all refrigerants must be removed safely.
When transferring refrigerant into cylinders, ensure that only
appropriate refrigerant recovery cylinders are employed.
Ensure that the correct number of cylinders for holding the
total system charge are available. All cylinders to be used
are designated for the recovered refrigerant and labeled
for that refrigerant (i.e. special cylinders for the recovery of
refrigerant). Cylinders shall be complete with pressure-relief
valve and associated shut-o valves in good working order.
Empty recovery cylinders are evacuated and, if possible,
cooled before recovery occurs.
All recovery equipment must be suitable for the recovery of
A2L refrigerant and in good working order. Ensure that you
follow the manufacturer's instructions carefully. Hoses shall
be complete with leak-free disconnect couplings and in good
condition. The recovered refrigerant shall be processed
according to local legislation in the correct recovery cylinder,
and the relevant waste transfer note arranged. Do not mix
refrigerants in recovery units and especially not in cylinders.
If compressors or compressor oils are to be removed,
ensure that they have been evacuated to an acceptable
level to make certain that ammable refrigerant does not
remain within the lubricant. The compressor body shall not
be heated by an open ame or other ignition sources to
accelerate this process. When oil is drained from a system,
it shall be carried out safely.
20. Before you call your Servicer
• Check the thermostat to conrm that it is properly set.
• Wait 15 minutes. Some devices in the outdoor unit or
in programmable thermostats will prevent compressor
operation for awhile, and then reset automatically. Also,
some power companies will install devices which shut
o air conditioners for several minutes on hot days. If
you wait several minutes, the unit may begin operation
on its own.
• Check the electrical panel for tripped circuit breakers or
open fuses. Reset the circuit breakers or replace fuses
as necessary.
• Check the disconnect switch near the indoor furnace or
blower to conrm that it is closed.
• Check for obstructions on the outdoor unit. Conrm that
it has not been covered on the sides or the top. Remove
any obstructions that can be safely removed. If the unit
is covered with dirt or debris, call a qualied servicer to
clean it.
• Check for blockage of the indoor air inlets and outlets.
Conrm that they are open and have not been blocked
by objects (rugs, curtains or furniture).
• Check the lter. If it is dirty, clean or replace it.
• Listen for any unusual noise(s), other than normal
operating noise, that might be coming from the outdoor
unit. If you hear unusual noise(s) coming from the unit,
call a qualied servicer.
Table 5
15
Air Handler / Coil
ELECTRICAL
Line Voltage (Measure L1 and L2 Voltage) L1 - L2
Secondary Voltage (Measure Transformer Output Voltage) R - C
Blower Amps
Heat Strip 1 - Amps
Heat Strip 2 - Amps
BLOWER EXTERNAL STATIC PRESSURE
Return Air Sta�c Pressure IN. W.C.
Supply Air Sta�c Pressure IN. W.C.
Total External Sta�c Pressure (Ignoring +/- from the reading above, add total here) IN. W.C.
TEMPERATURES
Return Air Temperature (Dry bulb / Wet bulb)
DB °F WB °F
DB °F WB °F
Hea�ng Supply Air Temperature DB °F
Temperature Rise DB °F
Delta T (Difference between Supply and Return Temperatures) DB °F
Air Handler / Coil - (Inverter Matched)
INVERTER AH / COIL ONLY
Check EEV and EEV wiring is secure (no adjustment required)
Addi�onal Checks
Check wire rou�ngs for any rubbing
Check product for proper draining
Check screw �ghtness on blower wheel
Check factory wiring and wire connec�ons
Check product for proper clearances as noted by installa�on instruc�ons
°F to °C formula: (°F - 32) divided by 1.8 = °C °C to °F formula: (°C mul�plied by 1.8) + 32 = °F
Model Number
Serial Number
Cooling Supply Air Temperature (Dry bulb / Wet bulb)
21. Start-Up Checklist
16
NOTE: SPECIFICATIONS AND PERFORMANCE DATA LISTED HEREIN ARE SUBJECT TO CHANGE WITHOUT NOTICE
CUSTOMER FEEDBACK
We are very interested in all product comments.
Please ll out the feedback form on one of the following links:
Daikin Products: (https://daikincomfort.com/contact-us)
Goodman
®
Brand Products: (http://www.goodmanmfg.com/about/contact-us).
Amana
®
Brand Products: (http://www.amana-hac.com/about-us/contact-us).
You can also scan the QR code on the right for the product brand you
purchased to be directed to the feedback page.
DAIKIN
AMANA
®
BRAND
GOODMAN
®
BRAND
19001 Kermier Rd., Waller, TX 77484
© 2024-2025
www.daikincomfort.com • www.goodmanmfg.com • www.amana-hac.com
®
is a registered trademark of Maytag Corporation or its related companies and is used
under license. All rights reserved.