MT553C
INSTALLATION INSTRUCTIONS
THESE INSTRUCTIONS MUST BE
LEFT WITH HOMEOWNER
R
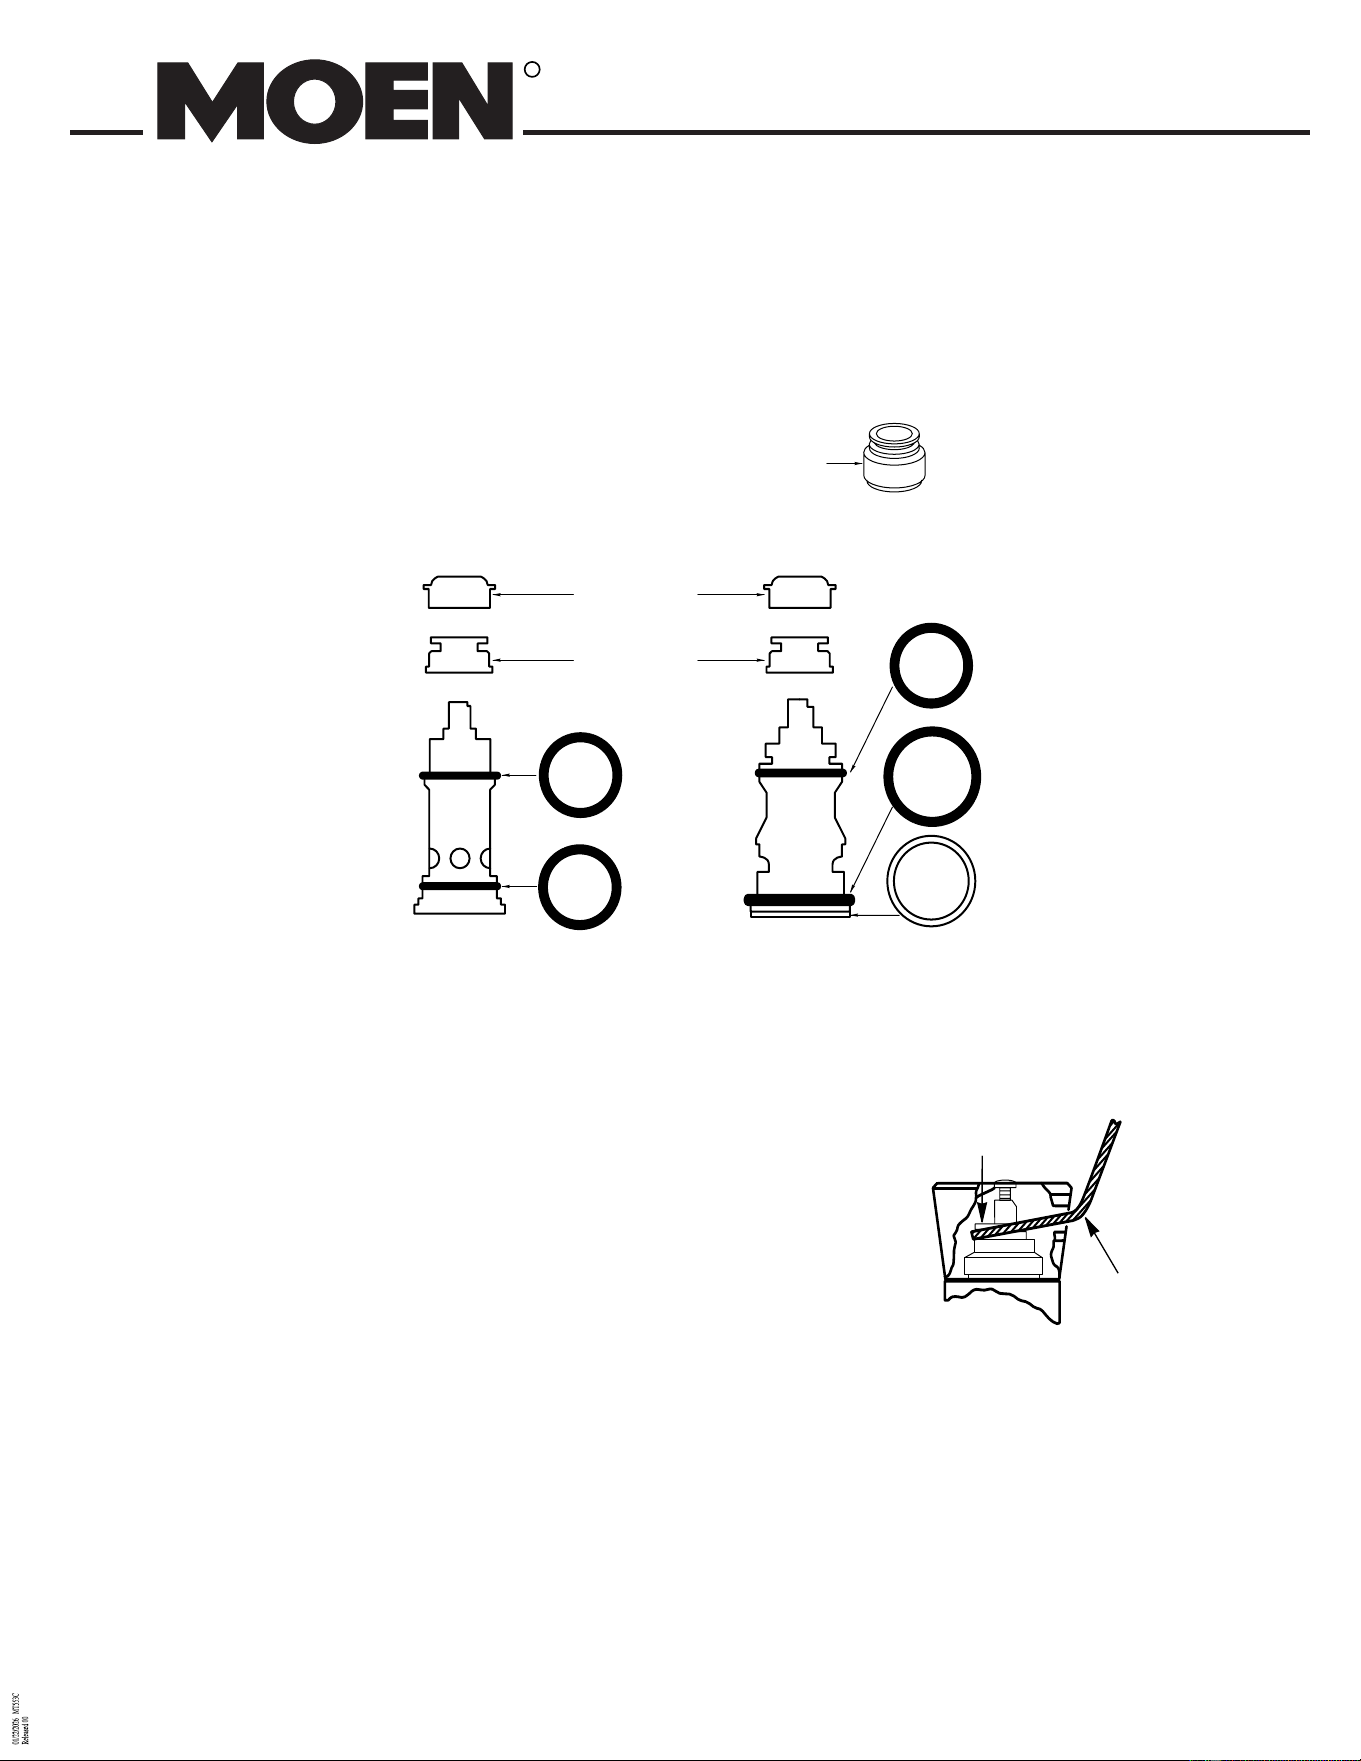
NOTE: On older model faucets there will be a
retainer nut and separate grooved sleeve,
replace these with PN. 92309, a one piece
retainer pivot nut.
PN 92309
GROOVED SLEEVE
(FURNISHED WITH OLD FAUCET)
SEAL
SEAL
BEARING
RING
SEAL
SEAL
RETAINER NUT
(FURNISHED WITH OLD FAUCET)
Reassembly
1. Replace O-Ring seals on spout body, use silicone grease (supplied)
when installing.
2. Replace spout. Push down until it nearly touches the faucet escutcheon.
3. Screw on retainer pivot nut. (If you have an older model faucet with a
retainer nut and separate grooved sleeve replace these with PN 92309,
a one piece retainer pivot nut). DO NOT CROSS THREAD. Tighten snug.
4. Press cartridge stem down. Holding handle UP, Figure 1, hook handle ring
(inside the handle body) into groove on the retainer pivot nut.
5. Swing handle back and forth until it drops down into place.
6. Replace handle screw. Tighten securely. Push handle
cap down until it snaps into place.
Disassembly
1. CAUTION: Turn “OFF” both hot and cold water supplies. Turn faucet on
to alleviate water pressure. Pull handle cap up and off (it snaps into place).
Remove the handle screw.
2. Lift and tilt handle lever and handle body off. Leave handle inside the body.
3. Remove retainer pivot nut. (Older models may have retainer nut and
separate grooved sleeve).
4. Lift and twist spout off.
HOLD HANDLE UP
FIGURE 1
RETAINER PIVOT NUT
SPOUT O-RING REPLACEMENT KIT
FOR KITCHEN FAUCET MODELS
To Eliminate Cross-Piping On Back-To-Back Installations, or To Correct Reversed Rough-ln Where Hot and Cold
Positions Are Reversed: Remove handle cap, handle screw and handle assembly (see “Disassembly” instructions). Turn
valve stem around so that the notched flat is turned one half turn or 180°. Re-install handle parts (see “Reassembly”).
Continued on Reverse
SPOUT O-RING REPLACEMENT KIT
FOR KITCHEN FAUCET MODELS
(7200 MODEL SERIES ONLY)
© Copyright, 1991
Moen Incorporated
Printed in U.S.A.
377 WOODLAND AVE., ELYRIA, OH. 44035, U.S.A.
R
MT553C MAR 92
To Eliminate Cross-Piping On Back-To-Back Installations, or To Correct Reversed Rough-ln Where Hot and Cold
Positions Are Reversed: Remove handle cap, handle screw and handle assembly (see “Disassembly” instructions). Turn
valve stem around so that the notched flat is turned one half turn or 180°. Re-install handle parts (see “Reassembly”).
(800) 321-6636;
HELPLINE: Call our toll free Helpline number,
for answers to any product, installation, replacement
parts, or warranty questions.
MOEN
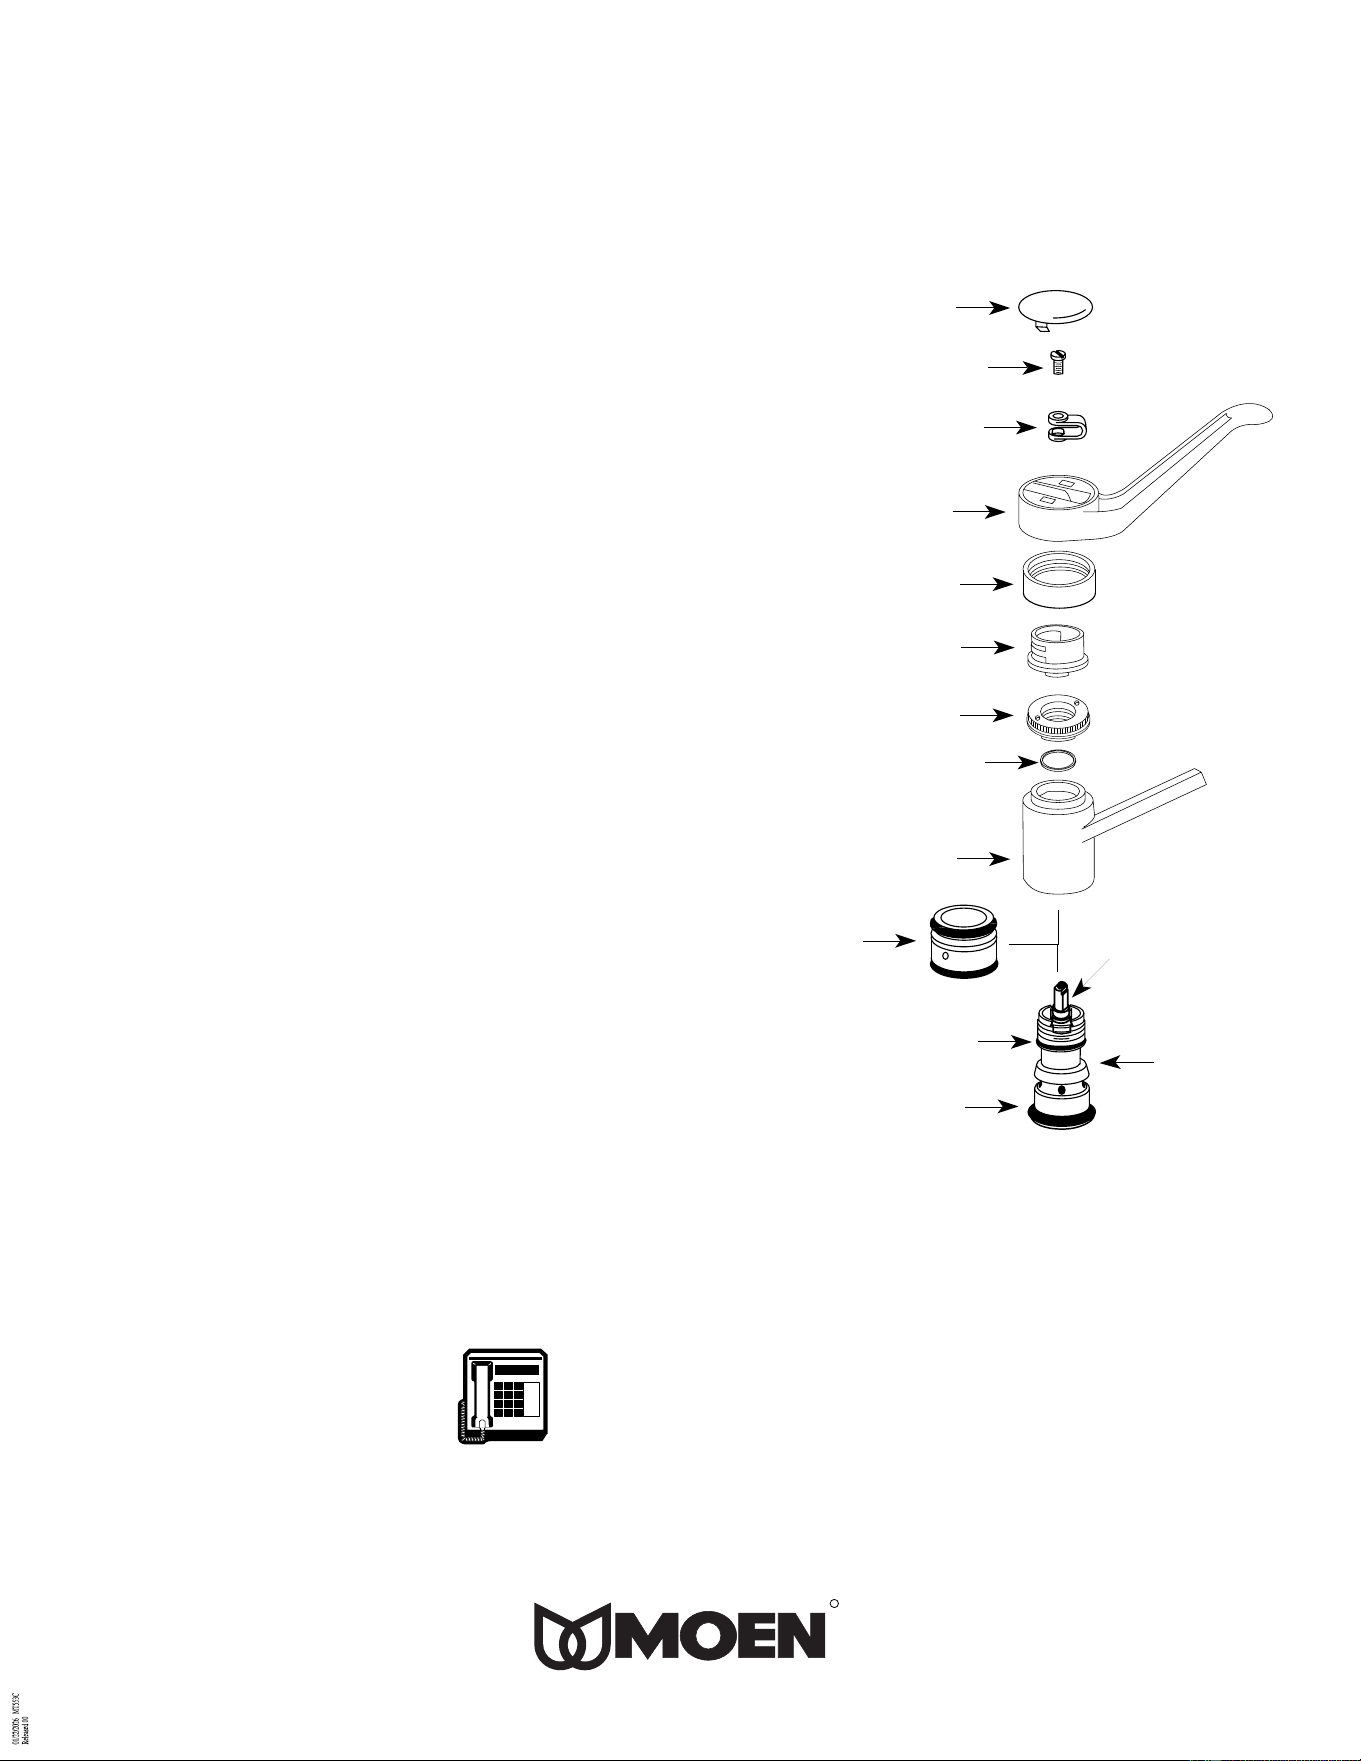
HANDLE
COVER
HANDLE
SCREW
HANDLE
CONNECTOR
HANDLE
COLLAR
PIVOT
RETAINER
RETAINER
NUT
SPOUT
DIVERTER
THRUST
WASHER
CARTRIDGE
STEM
SPOUT
SEAL
VALVE
BODY
SPOUT
SEAL
Disassembly
Turn OFF both hot and cold water supplies, then open faucet to relieve
pressure and insure that water has been COMPLETELY shut off.
1. Pry off handle cover carefully with flatbladed instrument.
2. Remove handle screw, using Phillips screwdriver.
3. Lifting up on handle connector, lift handle up and off.
4. Unscrew and remove collar and pivot retainer.
5. Unscrew and remove retainer nut, and thrust washer (PN99738
spanner wrench available if required for old style retainer nut).
6. Lift spout off (for diverter models, remove diverter to replace
o-ring seals).
Reassembly
1. Replace O-Ring seals on valve body, use silicone grease
(supplied) when installing.
2. Replace diverter if diverter model, then replace spout. Push
downuntil it nearly touches the faucet escutcheon.
3. Replace retainer nut, and thrust washer, tighten with wrench.
4. Re-install pivot retainer with grooves facing the back of the
faucet. Replace the collar, tighten snugly by hand.
5. With cartridge stem notch facing the front of the faucet, hook
handle lug into pivot retainer groove. Align handle connector
with cartridge stem and gently press handle onto cartridge
stem.
6. Replace handle screw and press on handle cap.