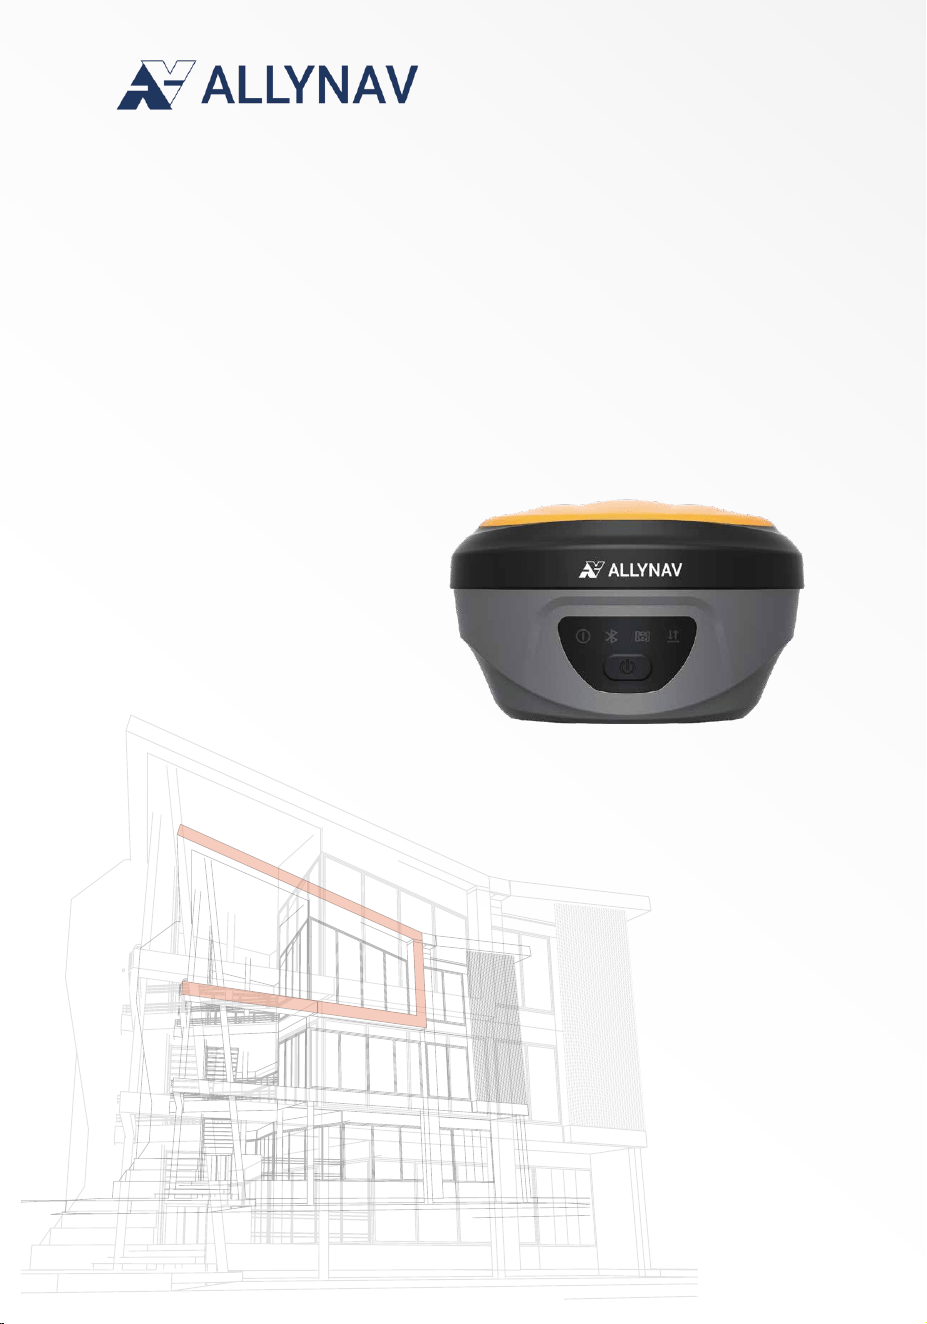
R90
USER MANUAL

AllyNav R90 Instruction Manual
Page
2
Foreword
Introduction
Thank you for choosing the RTK product from Shanghai AllyNav Technology Co., Ltd.
To learn more about the intelligent RTK or other products of us, please visit our official
website at www.allynav.com.
This manual introduces the RTK product and its associated operating software and
provides details on how to set up, connect, configure, and use the product. In case of any
discrepancies between the icons and images in this manual and the actual product, please
refer to the actual product. To ensure optimal use of our RTK product, we recommend you
read this manual carefully before operating the device.

AllyNav R90 Instruction Manual
Page
3
Company Profile
Shanghai AllyNav Technology Co., Ltd. is a high-tech company specializing in research
and development, production, sales, and service. Based on GNSS satellite navigation
technology, we are committed to expanding the applications of GNSS and providing our
clients with comprehensive and diverse high-precision navigation and positioning solutions.
AllyNav closely follows the global development trends of the four major satellite
navigation systems, deploying high-precision applications across various industries. We
strive to meet the diverse needs of various sectors . Our products are applied in precision
agriculture, intelligent transportation, geographic information, surveying and mapping,
and more.
Our core team members have been recognized with numerous national, provincial,
and ministerial-level awards for their contributions to science and technological advances
progress, with more than 10 years of experience in satellite navigation research and
development, industry applications, product promotion, and technical service. Our
primary products and services include high-precision GNSS boards, high-precision GNSS
receivers, wireless data transmission devices, integrated navigation products, deformation
monitoring systems, autonomous driving systems, intelligent navigation, variable control,
solutions, and related software development.

AllyNav R90 Instruction Manual
Page
4
Disclaimer
This document provides information on products from Shanghai AllyNav Technology
Co., Ltd. This document does not convey any license or rights under any patent, trademark,
copyright, or other intellectual property right of the Company or any third party, whether
by implication, estoppel, or otherwise.
Except for the liabilities stated in the Company’s product general sales terms and
conditions for its products, the Company assumes no other liabilities. Nor does the
Company grant any express or implied warranties, with respect to the sale and/or use of
its products, including fitness for a particular purpose, merchantability, or
non-infringement of any patent, copyright, or other intellectual property right. The
Company reserves the right to modify product specifications and descriptions at any time
without prior notice.
Copyright © 2015-2025, Shanghai AllyNav Technology Co., Ltd. All rights reserved.

AllyNav R90 Instruction Manual
Page
5
User Notice
Before using this product, carefully read all user materials provided to ensure you
understand how to use the product and are aware of all safety precautions.
Do not connect or disconnect any cables, including the base station antenna or serial
port cables, while power is on.
Connect your device strictly in accordance with the manual. Firmly hold the
connector and gently insert and remove when connecting or disconnecting cables.
Avoid pulling, forcing, or twisting cables, as this may damage pins.
When powering the product (system), observe the power requirements for the
device
Do not use damaged cables. Replace damaged cables promptly with new ones to
avoid harm and ensure optimal performance.
Damage to the device caused by force majeure (lightning, high voltage, impact) is not
covered by the warranty.
Do not disassemble the product. Doing so will void the warranty.

AllyNav R90 Instruction Manual
Page
6
Product Features
﹥Efficient operation
Linux intelligent OS, stable system, powerful functions
WEBUI supports mobile device to connect the device via WIFI for convenient
monitoring of device information and configuration of working mode;
Supports the insertion of external SIM cards to use the receiver network.
It is not necessary to verify to check the bubble for tilts up to 120º (operation within
a 60° tilt range is recommended for optimal accuracy.)
The bottom camera supports AR stakeout.
The laser module supports laser measurement function
At least 40% improvement in surveying efficiency
At least 40% improvement in stakeout efficiency
Significant reduction in operator fatigue
﹥Consistently High Accuracy
• The receiver, integrated with an inertial measurement unit, ensures real-time and
interference-free tilt compensation, unaffected by magnetic fields or surrounding metallic
structures.
• 2CM accuracy in tilt compensation (<60°).

AllyNav R90 Instruction Manual
Page
7
Contents
I. Product Description .............................................................................. 1
1.1 Buttons and indicators of R90 ...................................................1
1.2 Bottom panel description of R90 ................................................2
II. RTK Surveying Workflow ......................................................................3
2.1How to operate the AllyPad ........................................................ 3
2.1.1 Create/Open a project ..................................................... 3
2.1.2 Connect to device ............................................................ 3
2.1.3 Configure base station and rover modes ......................... 4
2.1.4 Parameter configuration ..................................................6
2.1.5 Surveying work ................................................................ 8
2.1.6 Export data .................................................................... 11
2.2 How to operate WEBUI .............................................................12
2.2.1 Login .............................................................................. 12
2.2.2 Receiver Status .............................................................. 12
2.2.3 Work Mode ....................................................................13
2.2.4 GNSS information .......................................................... 15
2.2.5 NetWork Setting ............................................................ 16

AllyNav R90 Instruction Manual
Page
8
2.2.6 Data Communication ..................................................... 16
2.2.7 System setting ................................................................17
III. Firmware Update .............................................................................. 18
IV. Advanced Functions .......................................................................... 18
4.1 Base station shift warning ........................................................ 18
AllyNav R90 Instruction Manual
Page
1
I. Product Description
1.1 Buttons and indicators of R90
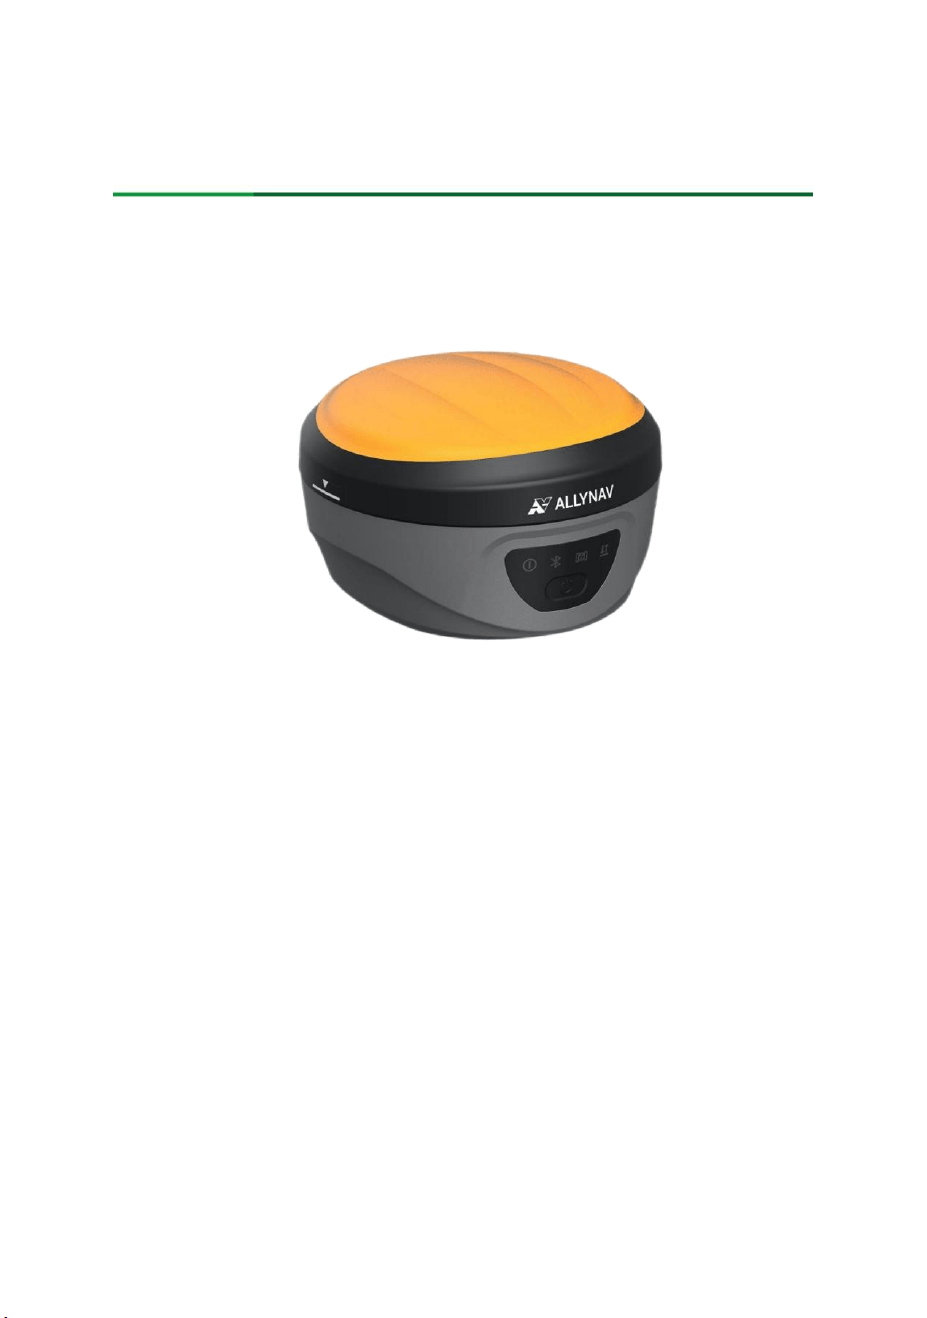
Power LED: bi-colour light,the red light is constantly on when charging; the
green light is constantly on when fully charged; and the red light is constantly on when
working.
BL LED: Green, the light is constantly on when connected otherwise off
Satellite indicator: Green, flashes when receiving satellite signals; otherwise off
Differential LED: Green, flashes once per second when It flashes when
transmitting, receiving or storing data; otherwise off.
AllyNav R90 Instruction Manual
Page
2
1.2 Bottom panel description of R90
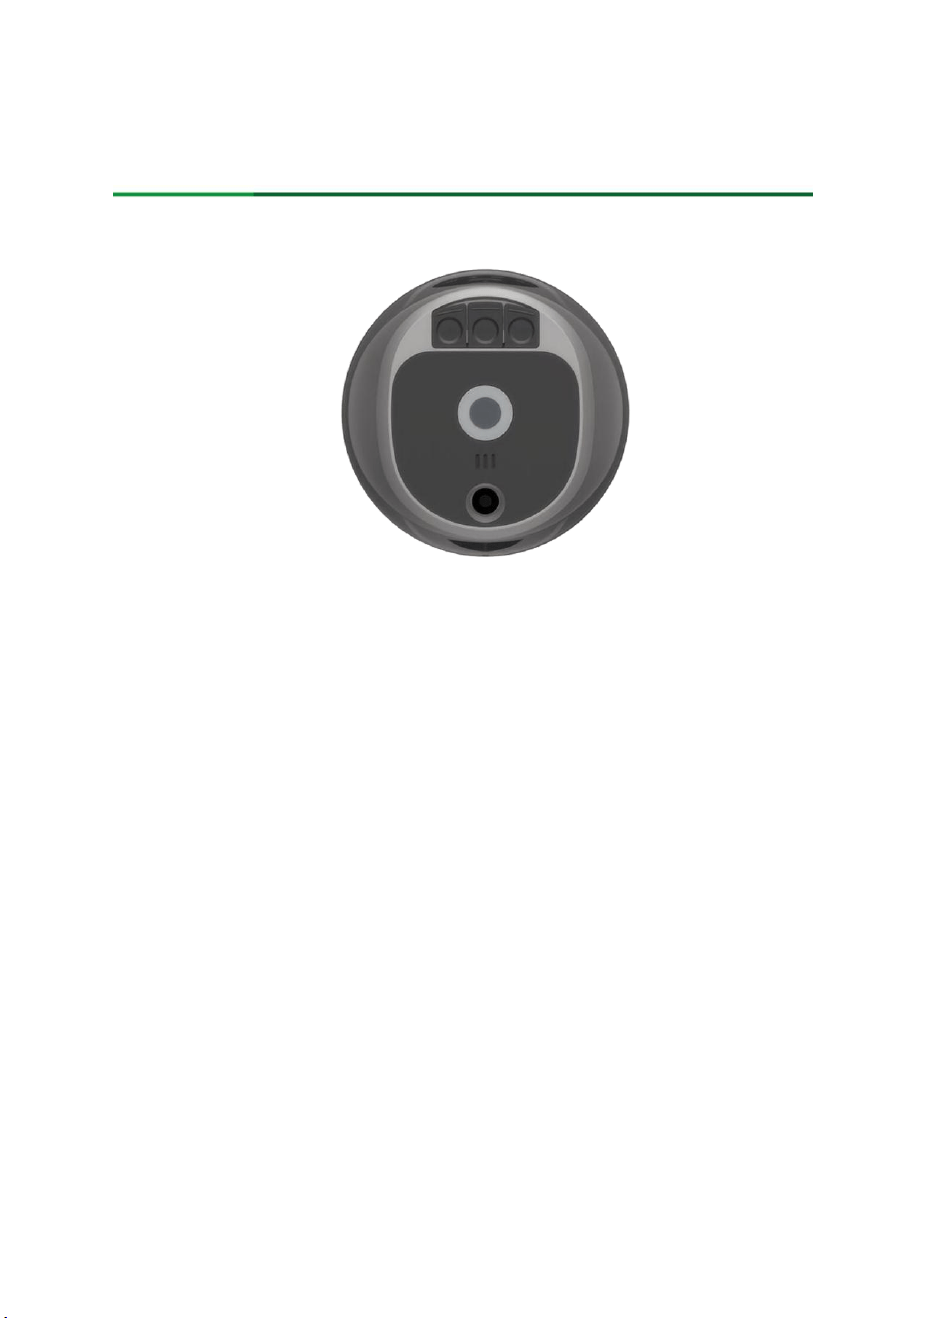
USB interface: Charge and Debug
SIM card slot: Supports Nano SIM
UHF interface: SMA interface
AllyNav R90 Instruction Manual
Page
3
II. RTK Surveying Workflow
2.1How to operate the AllyPad
2.1.1 Create/Open a project
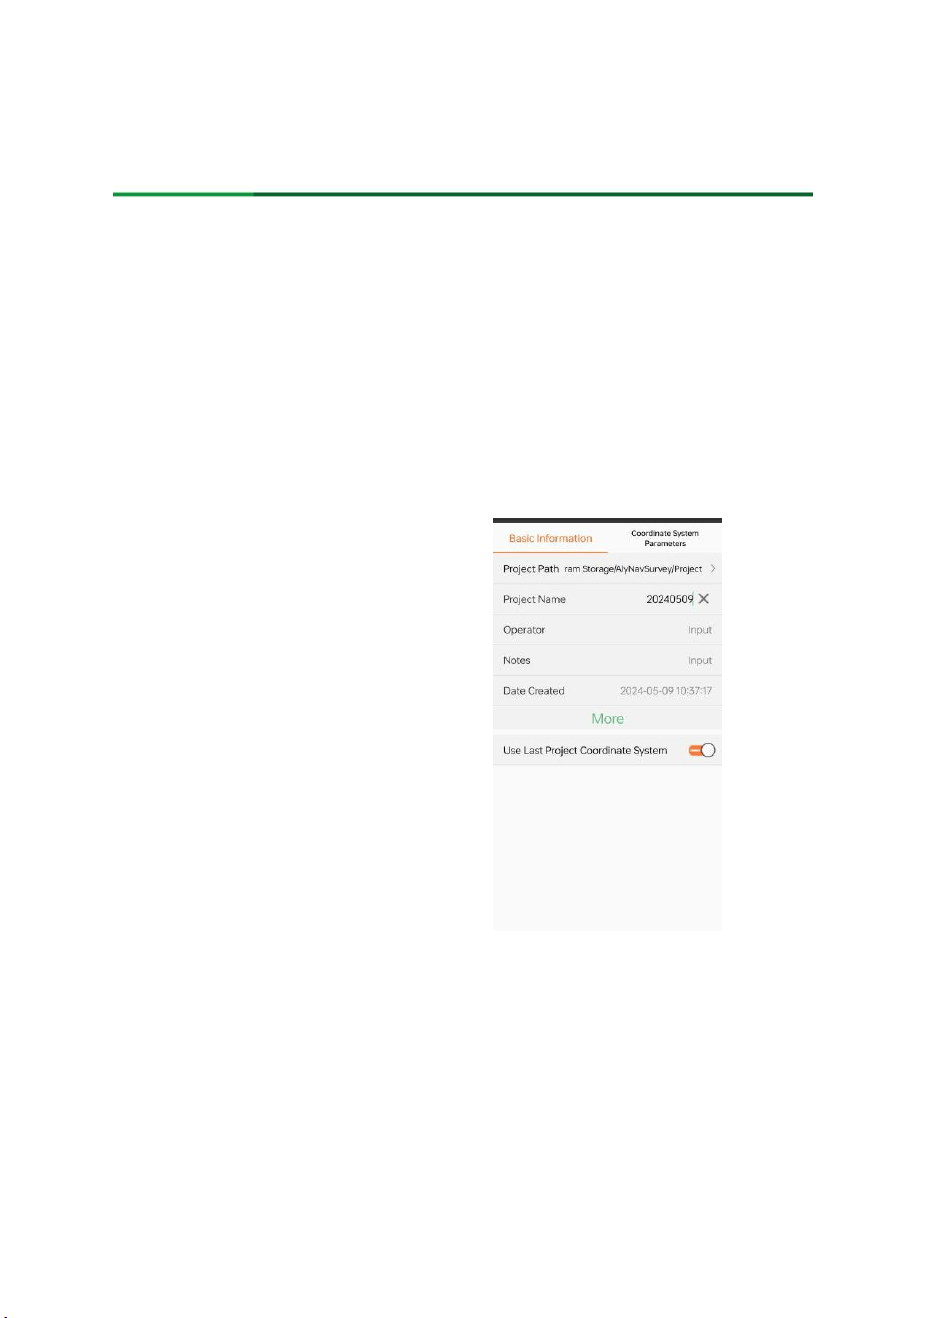
Click Project - Project Management - New. Enter relevant project information and
coordinate system parameters. Select the coordinate system and modify central meridian.
Click OK to create a new project.
2.1.2 Connect to device
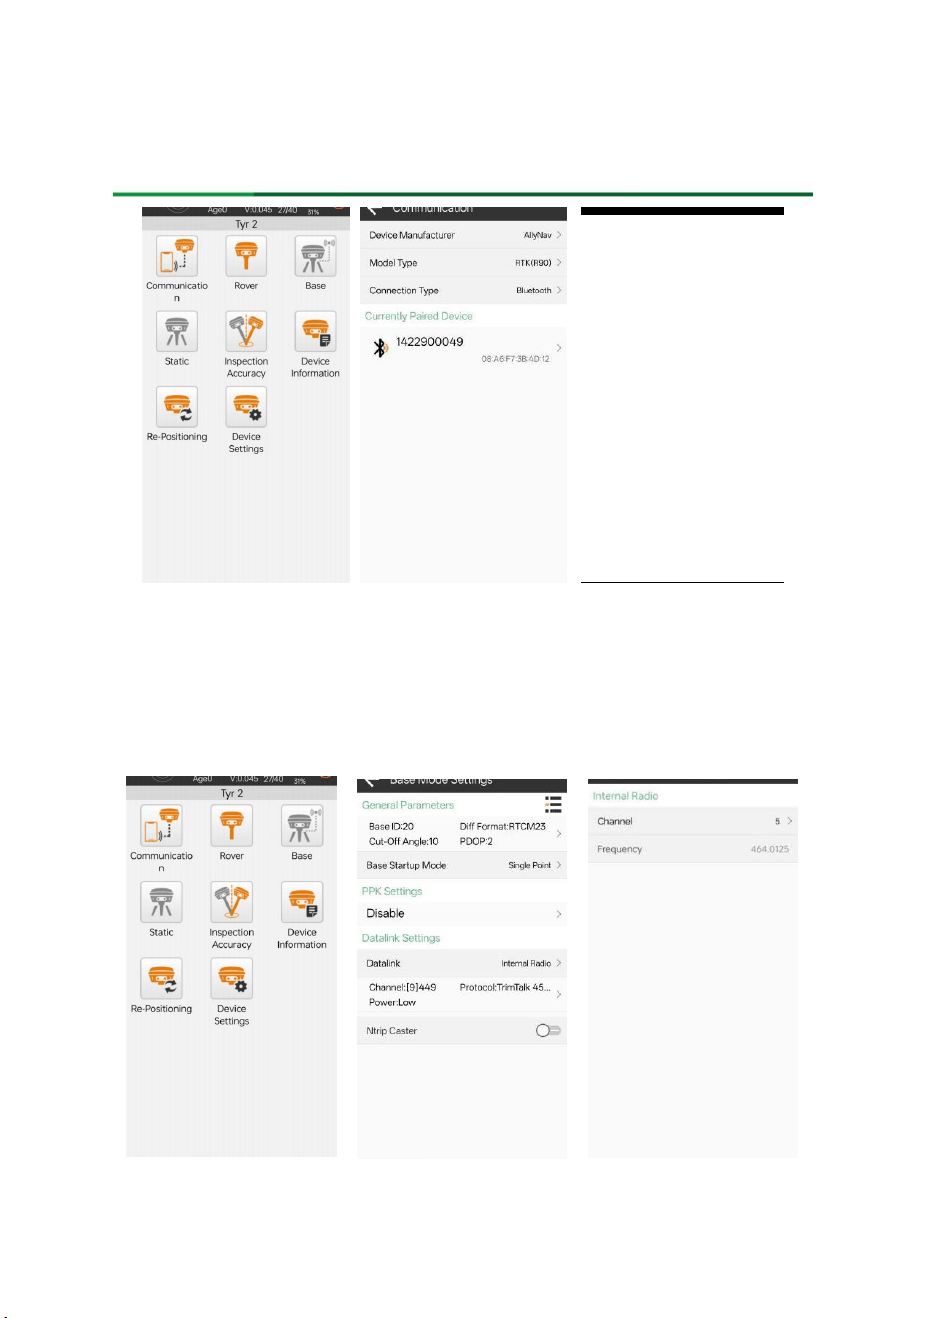
Click Device - Communication Settings. For initial connection, press the blank area
under Device Parameters. The software will automatically search for Bluetooth devices.
Select the correct RTK device SN and press Connect.
AllyNav R90 Instruction Manual
Page
4
2.1.3 Configure base station and rover modes
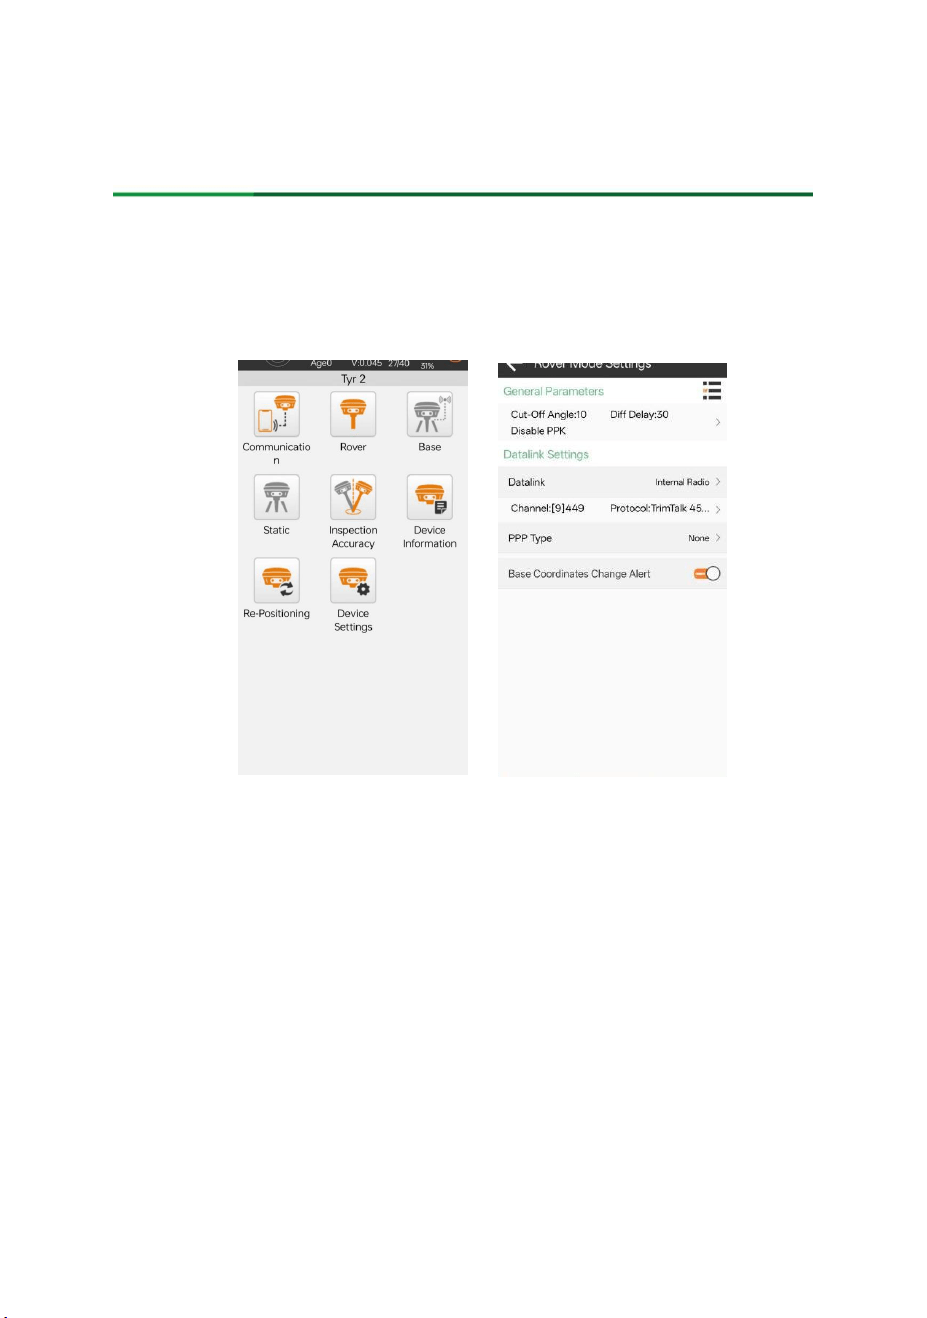
1. Base station - Internal Radio Mode
Go to Base Station Mode, select Internal Radio, and configure the channel frequency
and other relevant settings
AllyNav R90 Instruction Manual
Page
5
2. Rover - Radio Mode
Go to Rover Mode, select Internal Radio, and configure the channel frequency and
other relevant settings
3. Rover - CORS Login
Go to Rover Mode, select Data Recorder Network or Receiver Network, and then
access the Datalink Settings,Enter the parameters and select the mountpoint.

AllyNav R90 Instruction Manual
Page
6
2.1.4 Parameter configuration
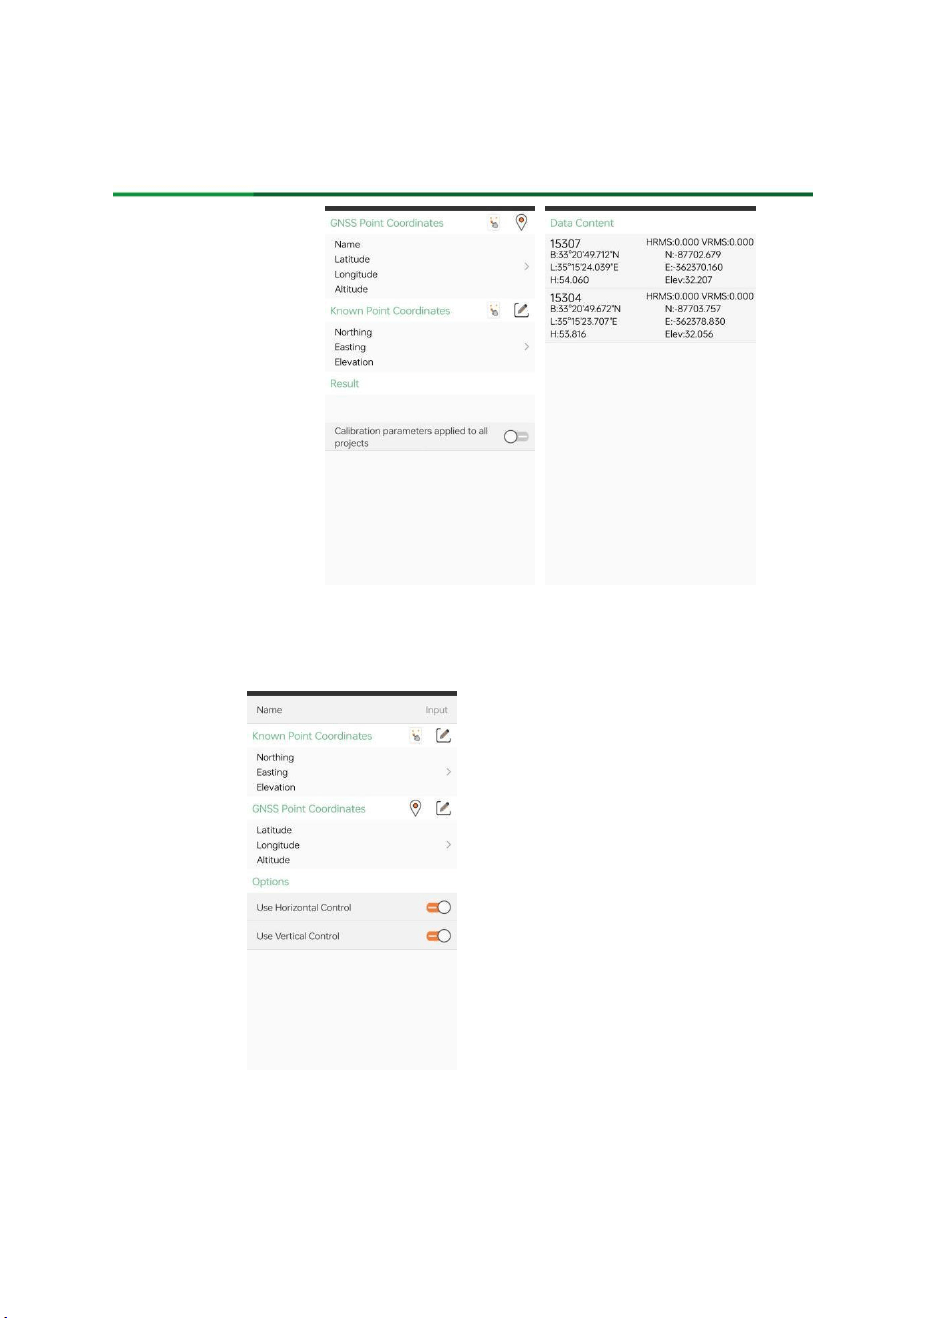
1. Localization
Go to localization and press Add. Select the control point you entered for the known
coordinates and the collected point for GNSS coordinates. Click Calculate to obtain the
transformation parameters.
AllyNav R90 Instruction Manual
Page
7
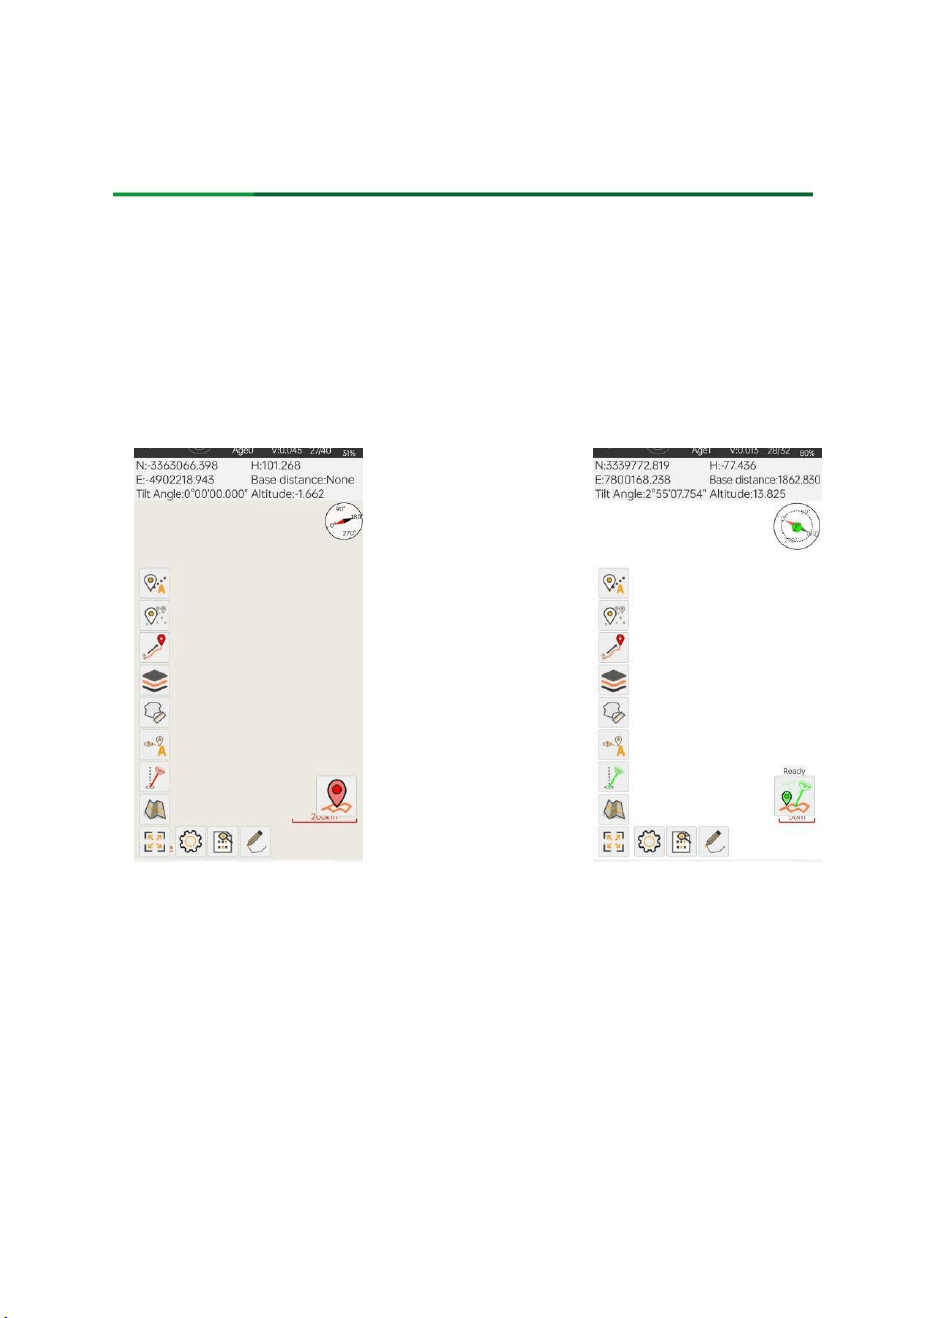
2. Calibrate Point
Perform calibrate point if the base station is moved or powered off and restarted.
AllyNav R90 Instruction Manual
Page
8
2.1.5 Surveying work
1. Tilt survey
In the Point Survey interface, activate Tilt Survey function. Follow the prompts to
calibrate and set the antenna height, which can be adjusted at any time.
Begin point survey when “INS Ready” is displayed.
2. Laser point survey
After turning on the laser, it can be used for laser point survey,or by turning on the
camera for laser point survey. (Note: To use the camera function, a connection to the
receiver's WIFI is required.)

AllyNav R90 Instruction Manual
Page
9
3. AR Stakeout
After selecting a stakeout point and entering the stakeout interface, press the AR
button to use AR stakeout.

AllyNav R90 Instruction Manual
Page
10
4. Laser Stakeout
After selecting a stakeout point and entering the stakeout interface, Laser stakeout
can also be performed by turning on the laser and camera functions

AllyNav R90 Instruction Manual
Page
11
2.1.6 Export data
Select the desired data formats for export (multiple selections allowed) as shown in
the figure, and select the export location and enter the desired file name. Click Export to
complete the data export process. If multiple formats are selected, the exported files will
be saved in a single folder.
AllyNav R90 Instruction Manual
Page
12
2.2 How to operate WEBUI
2.2.1 Login
Connect your device to the receiver’s WiFi. Enter the IP address ( 192.168.10.1) in a
web browser on your device to access the GNSS receiver’s web configuration system login
page.
2.2.2 Receiver Status
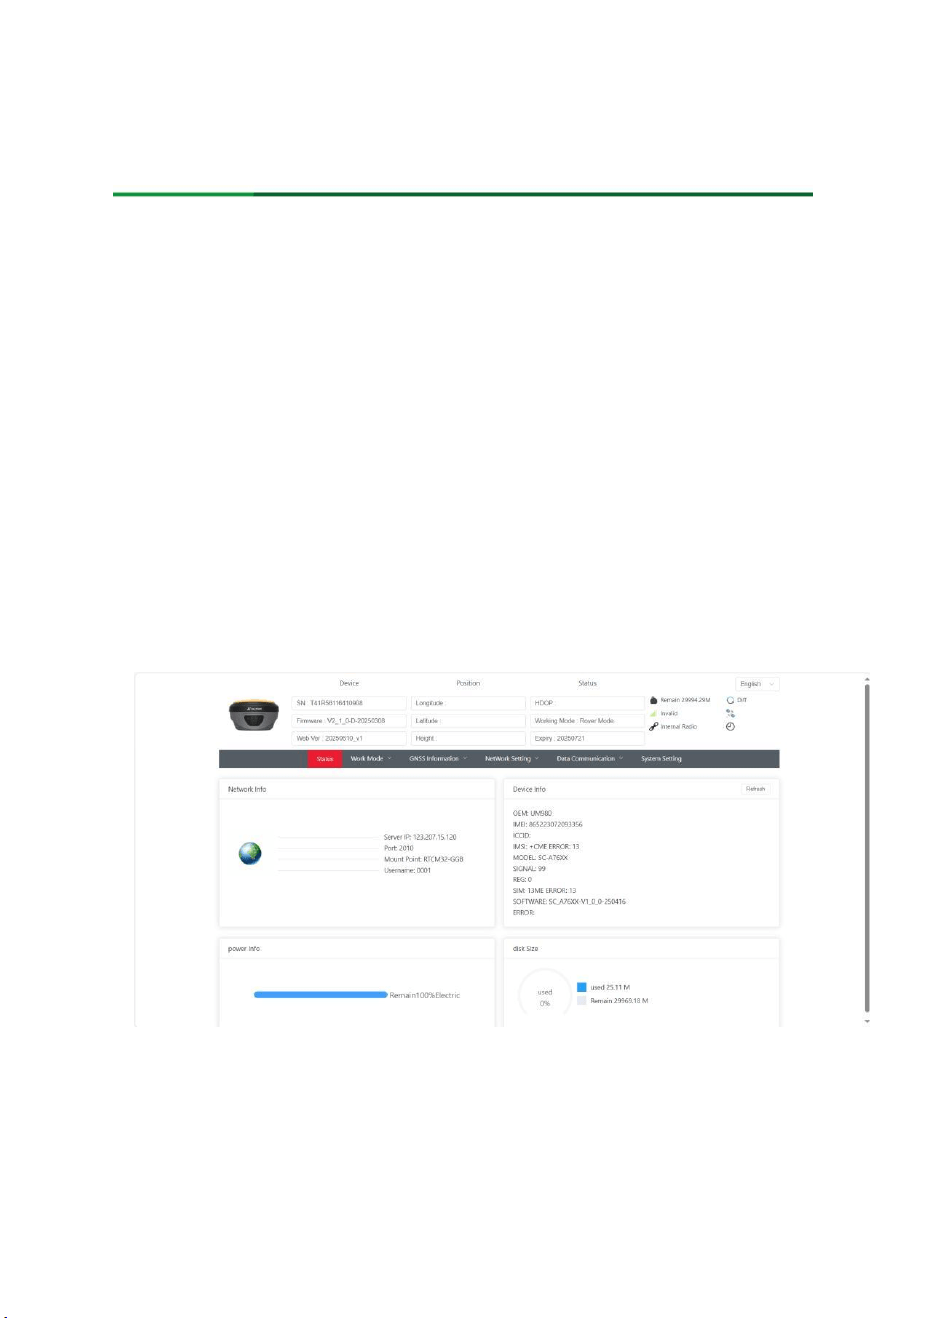
The home page displays information such as the device, Position, and status. The
interface is shown below:
AllyNav R90 Instruction Manual
Page
13
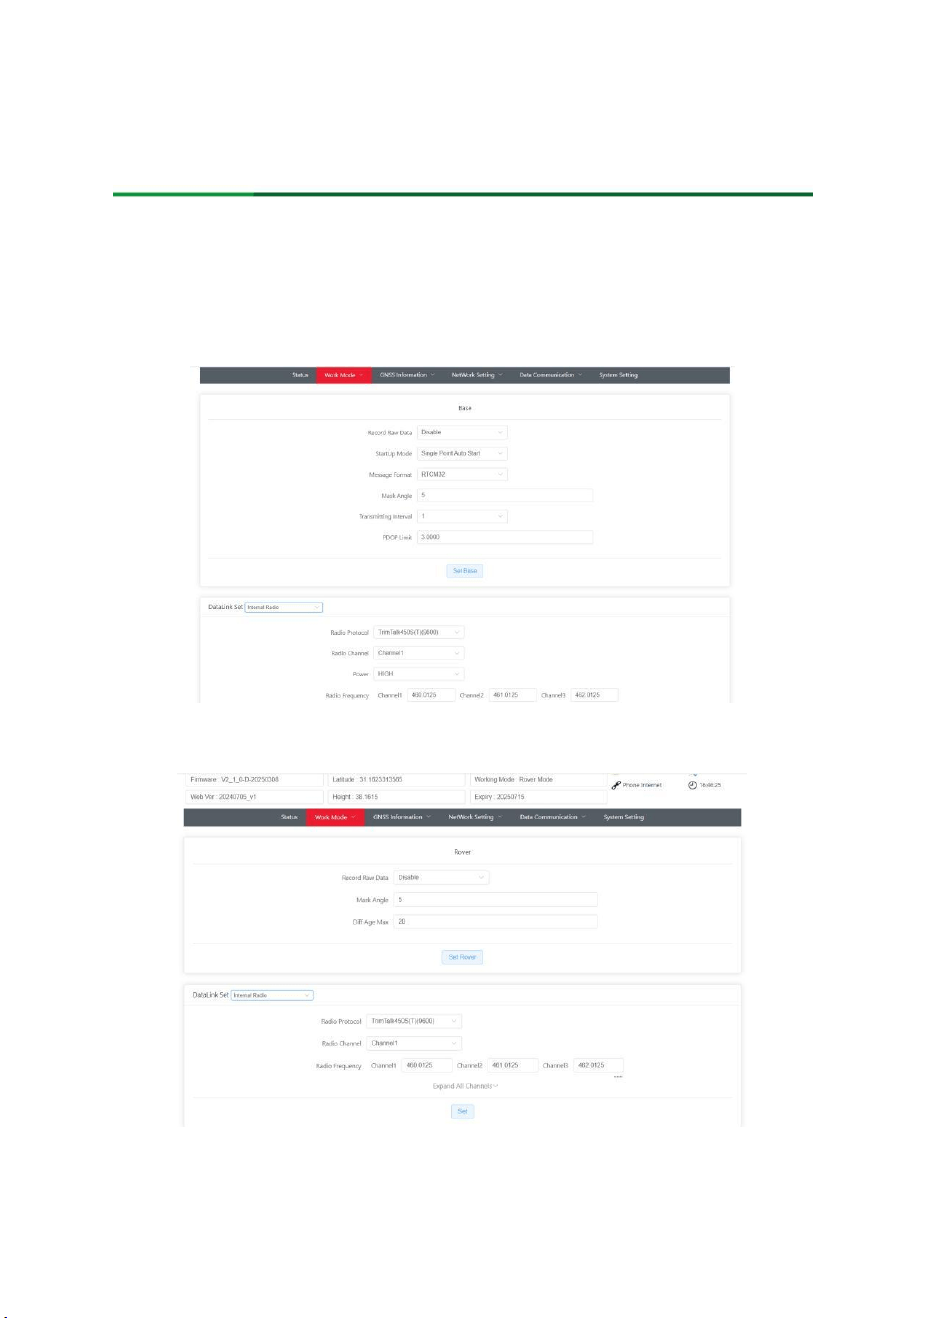
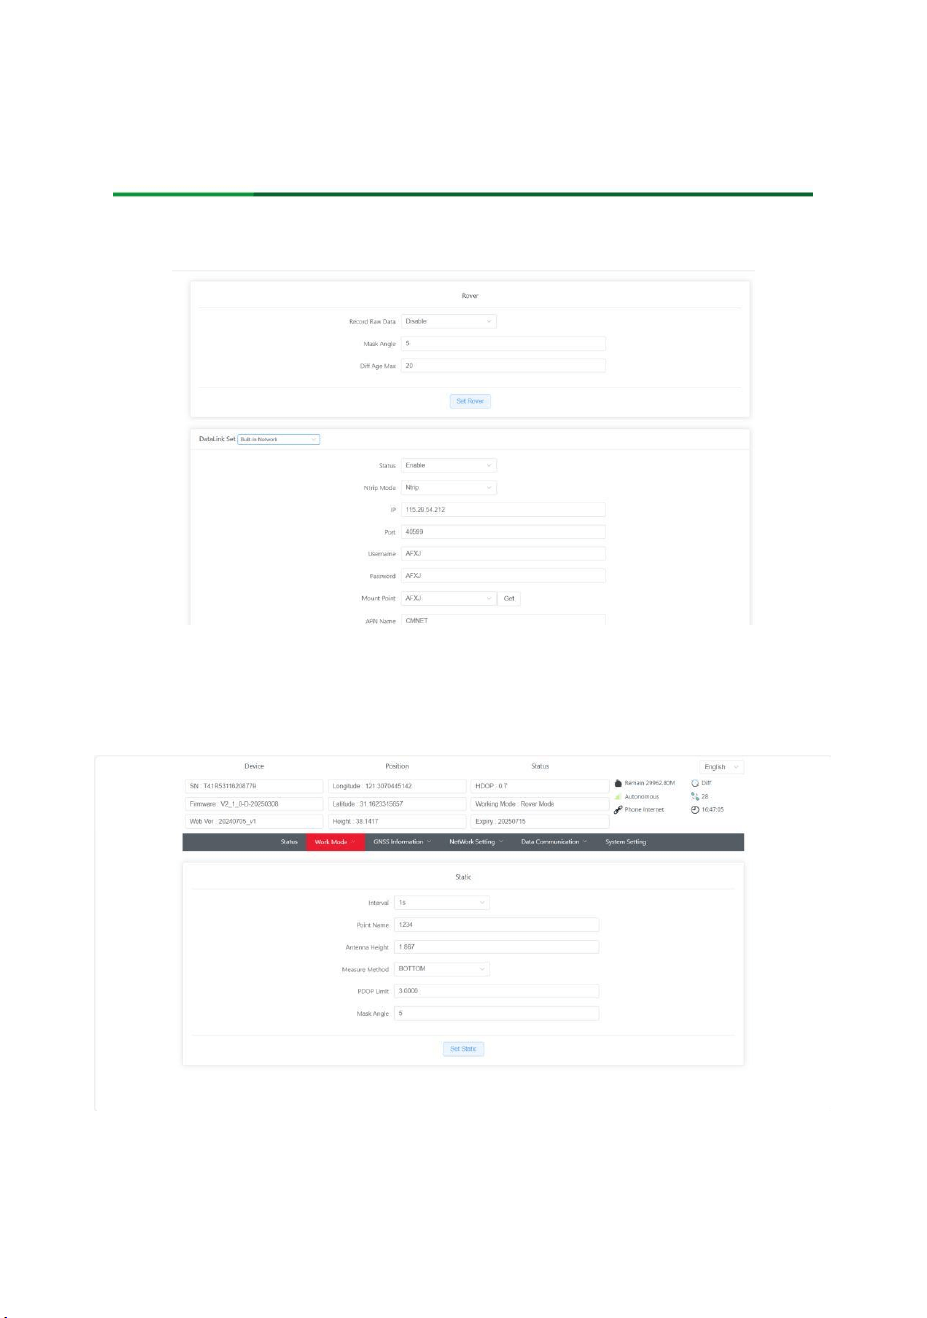
2.2.3 Work Mode
Set the working mode of the receiver. Base station and rover settings are currently
supported.Base station: radio mode.
Rover: Radio mode
AllyNav R90 Instruction Manual
Page
14
Rover: Network link mode
Static:
AllyNav R90 Instruction Manual
Page
15
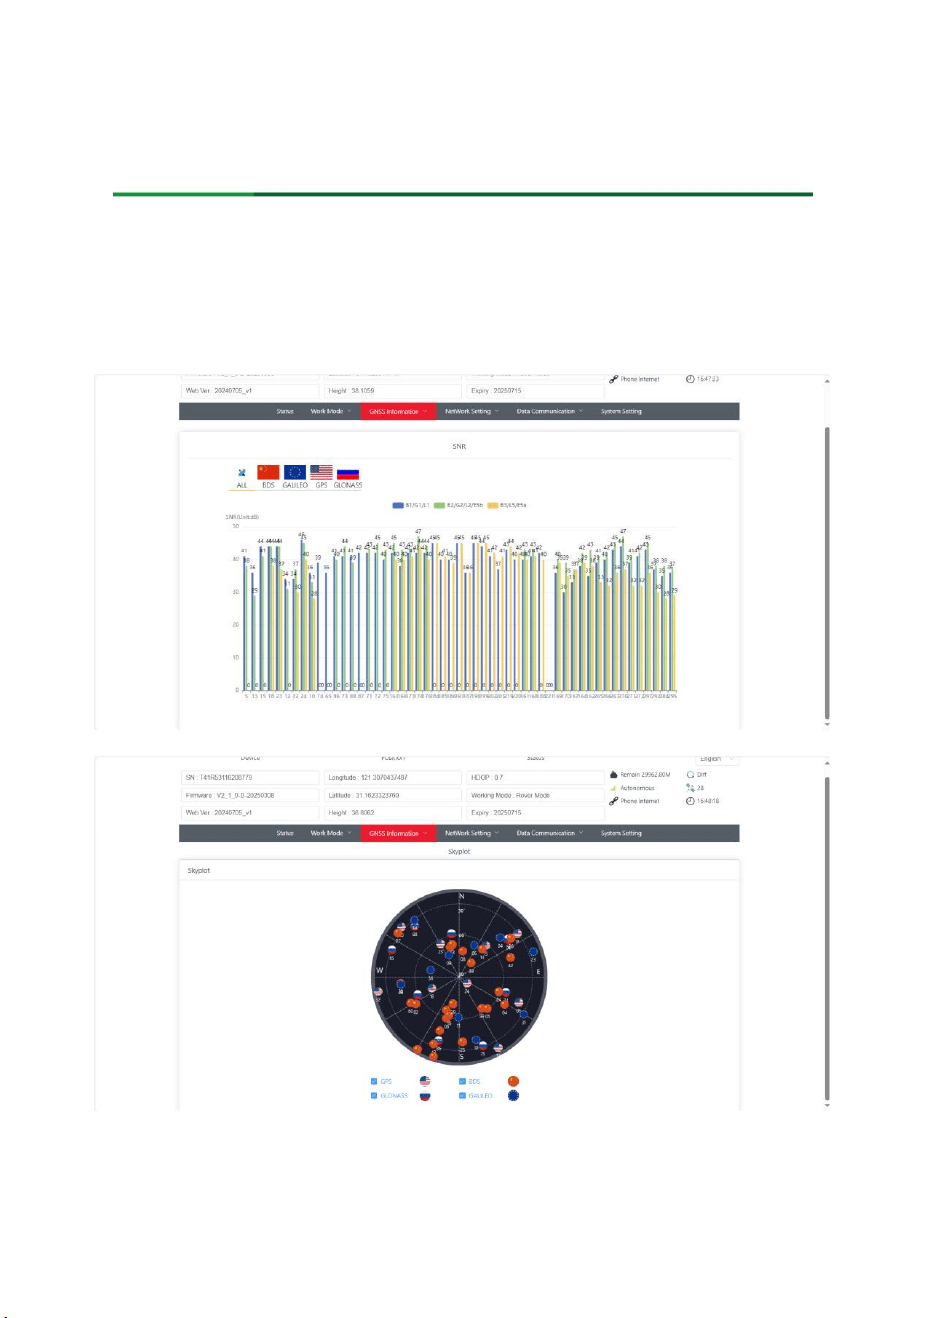
2.2.4 GNSS information
This page displays a list of all satellites being tracked by the receiver, a sky plot of
satellite, and signal-to-noise ratios for satellites. The list of satellites is shown below:
AllyNav R90 Instruction Manual
Page
16
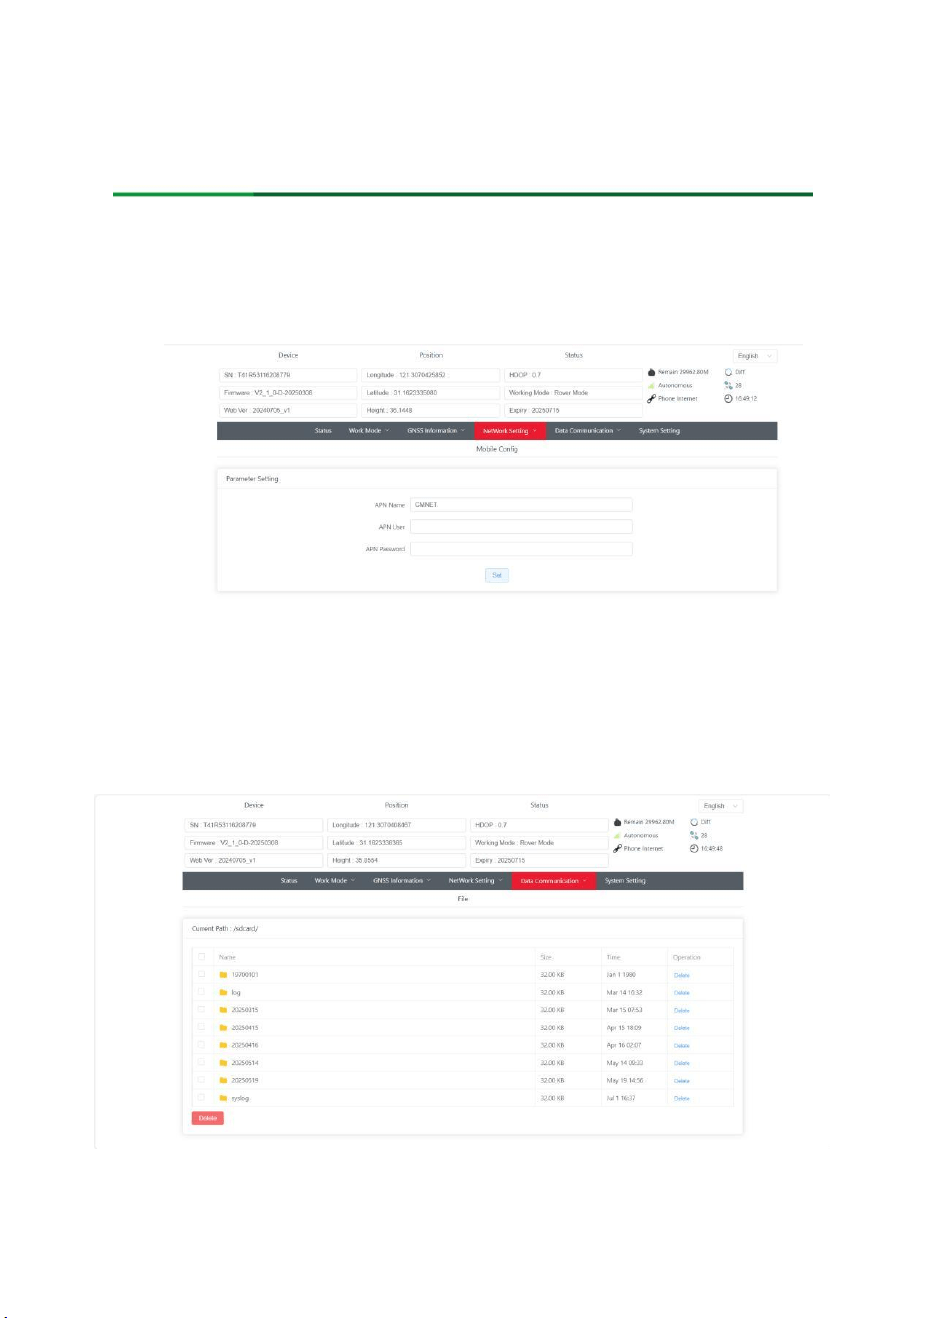
2.2.5 NetWork Setting
This page mainly sets the APN parameters
2.2.6 Data Communication
Download static data from the receiver
AllyNav R90 Instruction Manual
Page
17
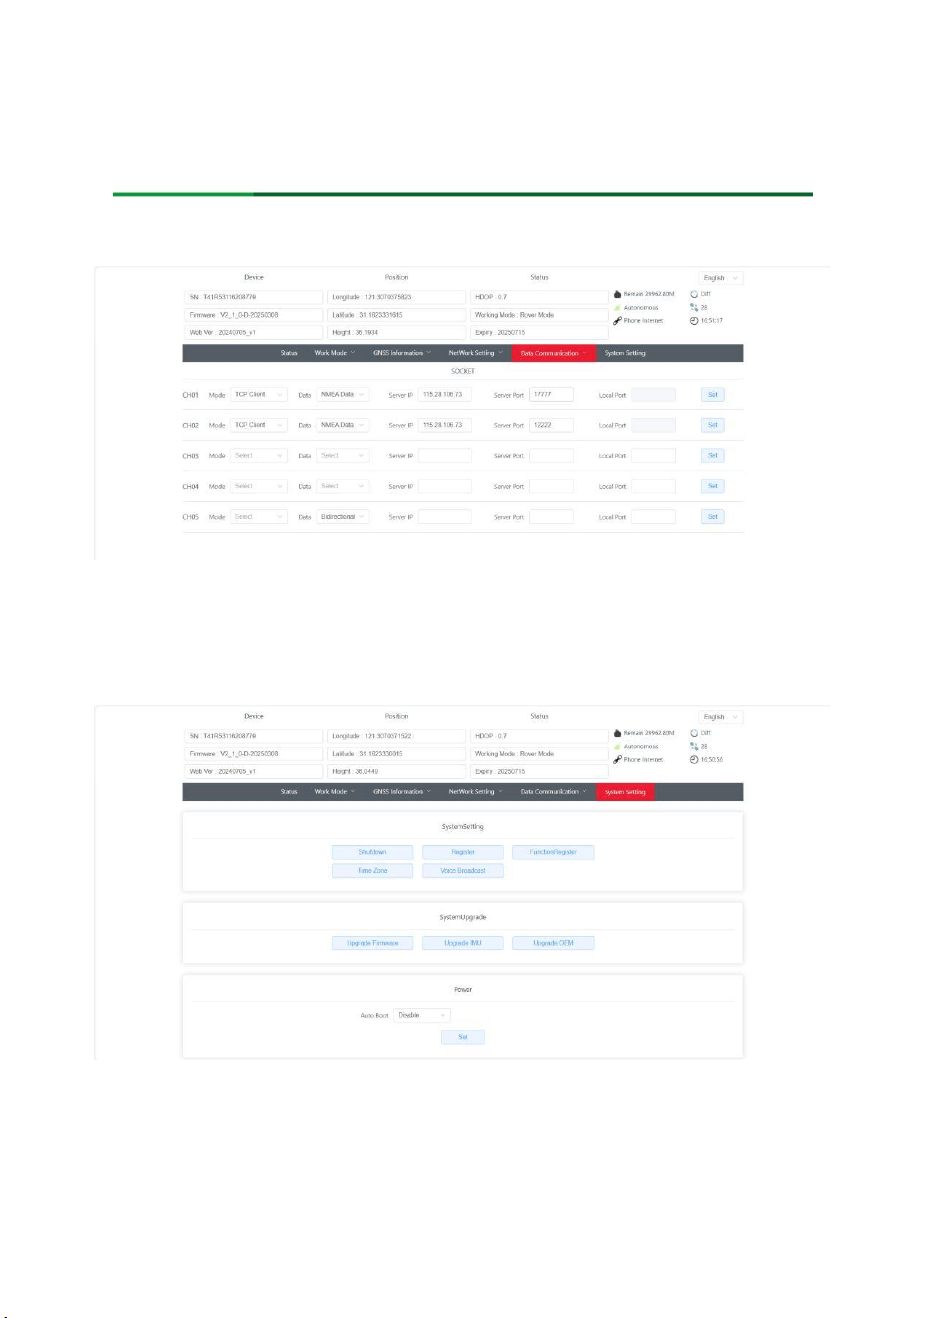
If other data transmission links are needed, it can be set up in this page
2.2.7 System setting
System setting and system upgrade can be operated in this page.

AllyNav R90 Instruction Manual
Page
18
III. Firmware Update
If a firmware update is required for the receiver, it can be performed either through
the WEBUI or using a data cable.
IV. Advanced Functions
The advanced functions include a base station shift warning. We recommend you
become familiar with the basic functions before operating the device, or operate the
device under the guidance of a professional.
4.1 Base station shift warning
If the base station is tilted or moved by impact, AllyPad will alert the user that the
base station coordinates have changed. The coordinates that are collected after a base
station shift will be inaccurate. Power cycle the base station and correct its position before
continuing work.
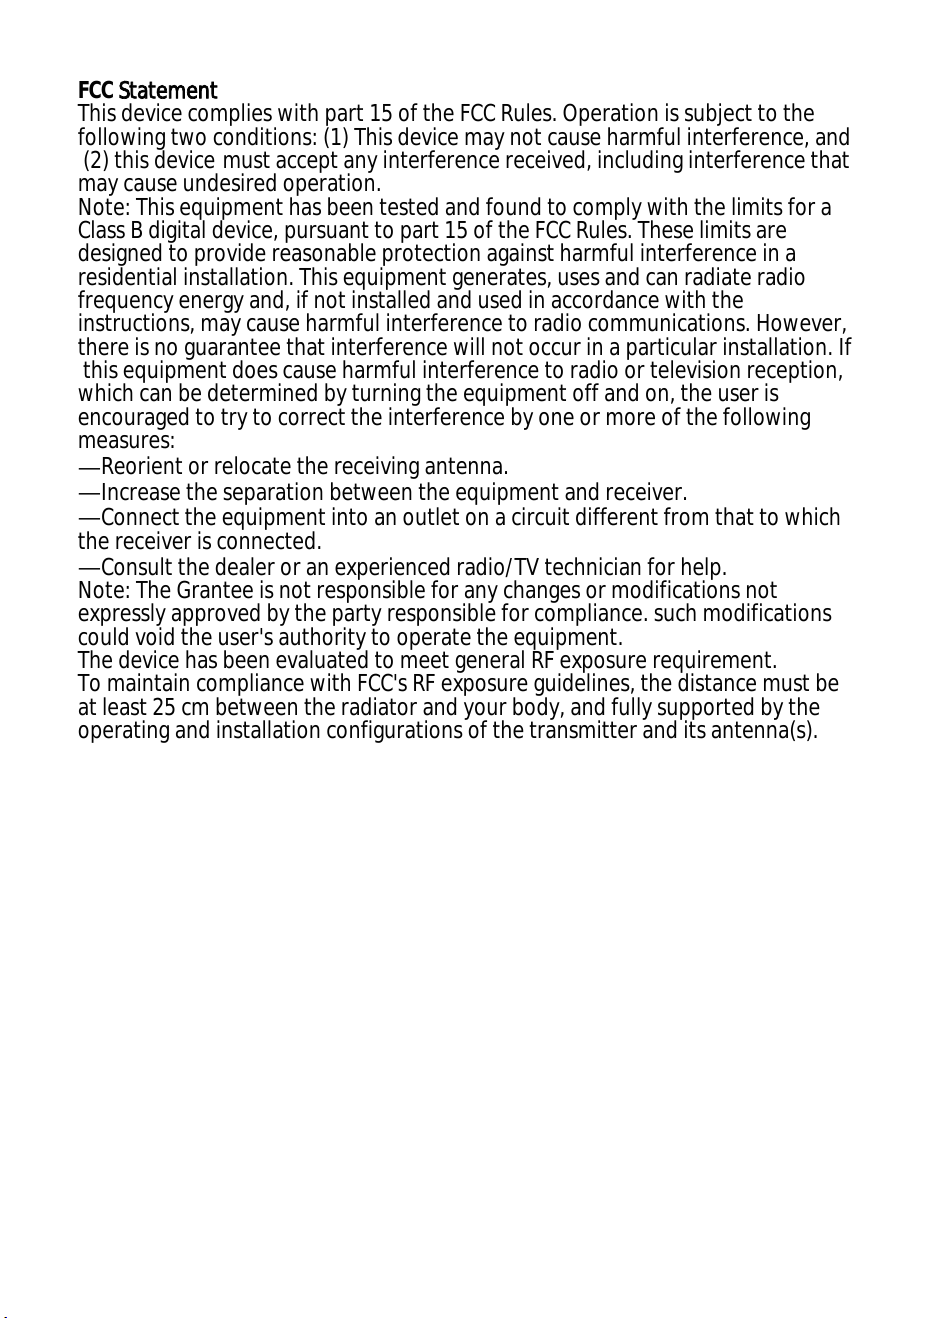
FCC Statement
This device complies with part 15 of the FCC Rules. Operation is subject to the
following two conditions: (1) This device may not cause harmful interference, and
(2) this device must accept any interference received, including interference that
may cause undesired operation.
Note: This equipment has been tested and found to comply with the limits for a
Class B digital device, pursuant to part 15 of the FCC Rules. These limits are
designed to provide reasonable protection against harmful interference in a
residential installation. This equipment generates, uses and can radiate radio
frequency energy and, if not installed and used in accordance with the
instructions, may cause harmful interference to radio communications. However,
there is no guarantee that interference will not occur in a particular installation. If
this equipment does cause harmful interference to radio or television reception,
which can be determined by turning the equipment off and on, the user is
encouraged to try to correct the interference by one or more of the following
measures:
—
Reorient or relocate the receiving antenna.
—Increase the separation between the equipment and receiver.
—Connect the equipment into an outlet on a circuit different from that to which
the receiver is connected.
—Consult the dealer or an experienced radio/TV technician for help.
Note: The Grantee is not responsible for any changes or modifications not
expressly approved by the party responsible for compliance. such modifications
could void the user's authority to operate the equipment.
The device has been evaluated to meet general RF exposure requirement.
To maintain compliance with FCC's RF exposure guidelines, the distance must be
at least 25 cm between the radiator and your body, and fully supported by the
operating and installation configurations of the transmitter and its antenna(s).

SHANGHAI ALLYNAV TECHNOLOGY CO., LTD.
ALLYNAV, ALL FOR AGRICULTURE
FOLLOW US
WWW.ALLYNAV.COM