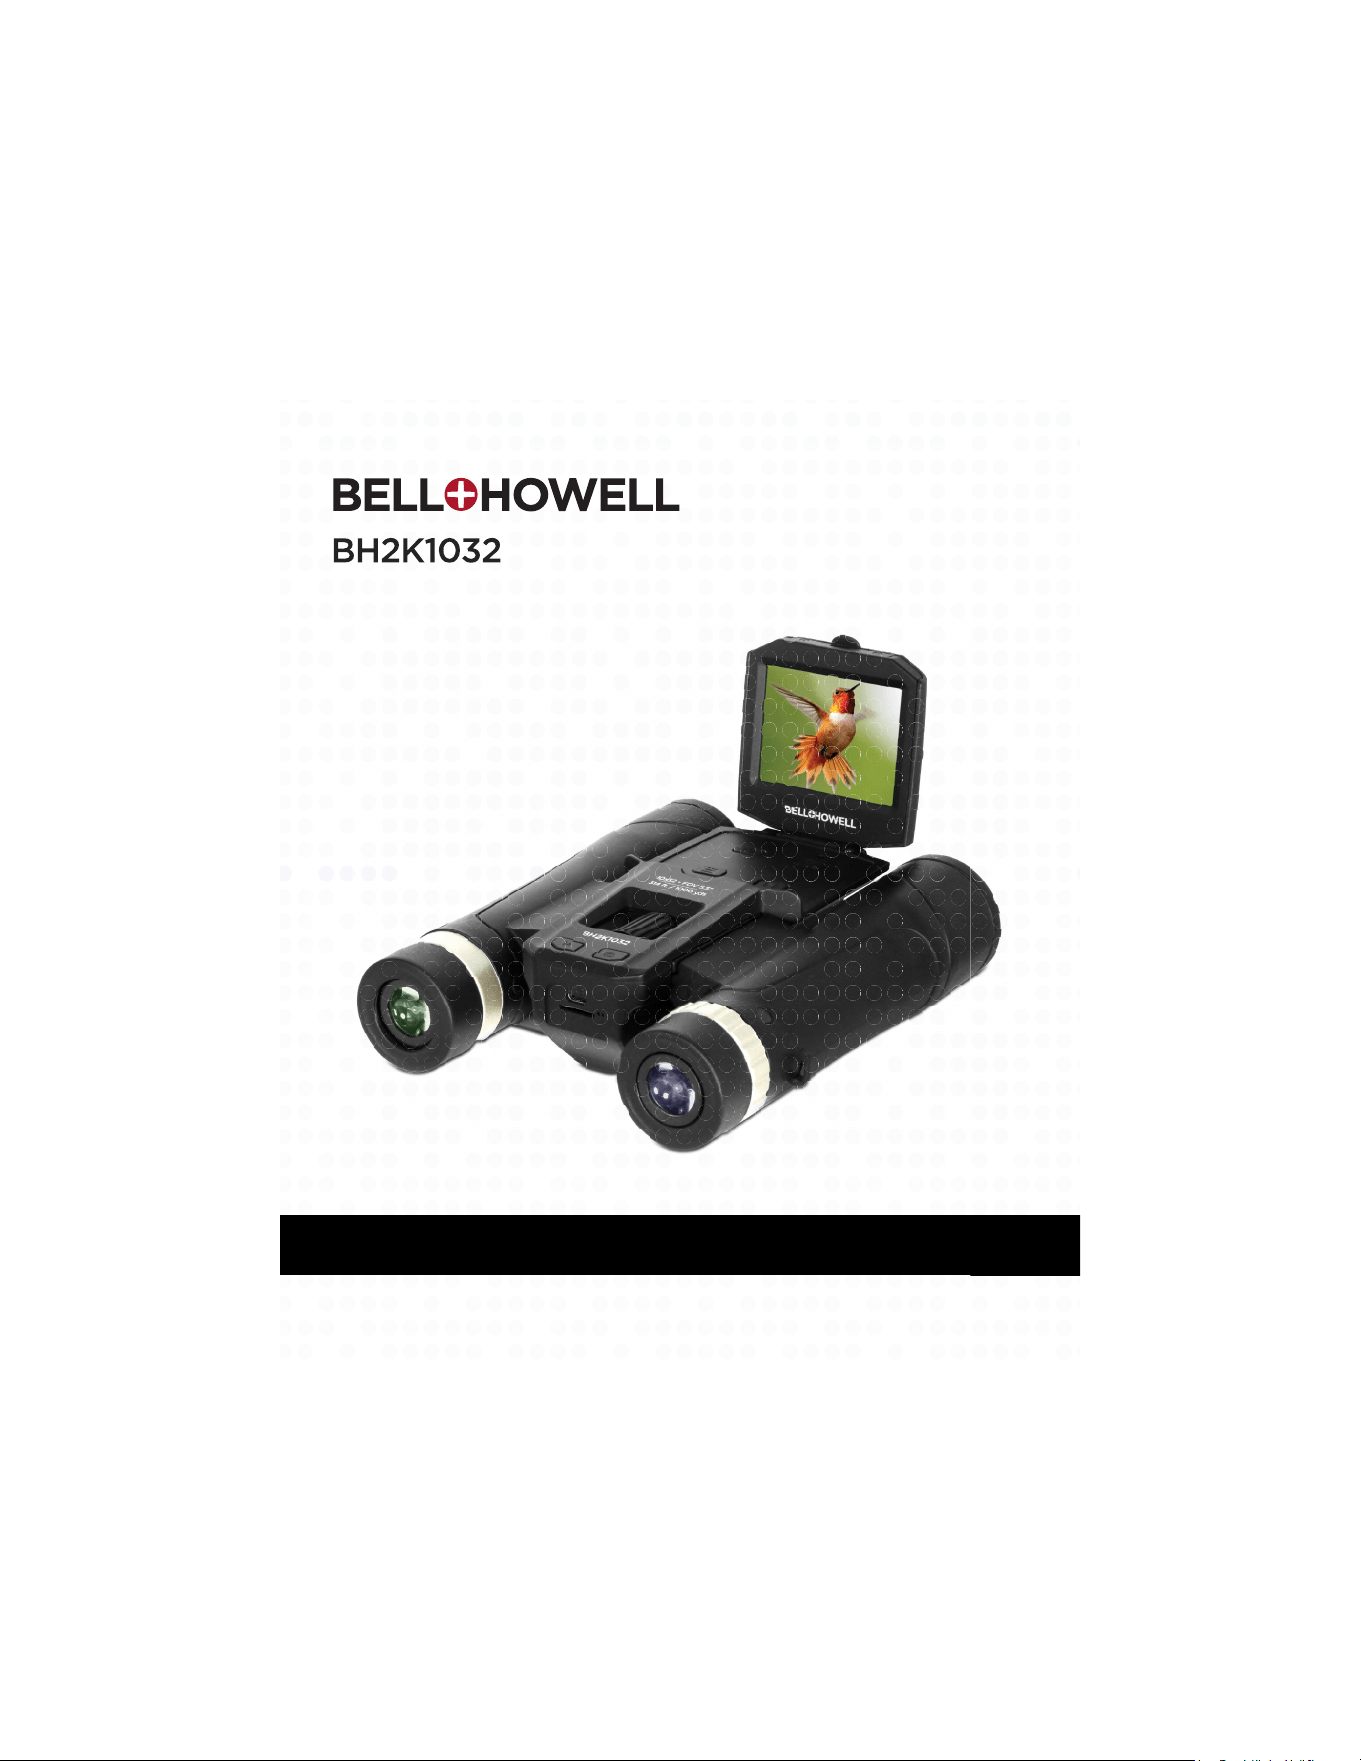
BH2K1032 User’s Manual

1. About Your
1
About this Manual
Congratulations on purchasing the Bell+Howell BH2K1032 Digital Camera
Binoculars! The contents of this manual are subject to change without notice.
Note that the example screens and product illustrations shown in this
Guide may differ somewhat from the screens and configuration of the actual
camera.
Copyright
This manual contains proprietary information protected by copyright. All rights
are reserved. No part of this manual may be reproduced by any mechanical,
electronic or other means, in any form, without prior written permission of Elite
Brands Inc. © 2023.
FEDERAL COMMUNICATIONS COMMISSION INTERFERENCE STATEMENT
This equipment has been tested and found to comply with the limits for a Class B
digital device, pursuant to Part 15 of the FCC Rules. These limits are designed to
provide reasonable protection against harmful interference in a residential
installation. This equipment generates, uses and can radiate radio frequency
energy and, if not installed and used in accordance with the instructions, may
cause harmful interference to radio communications. However, there is no
guarantee that interference will not occur in a particular installation. If this
equipment does cause harmful interference to radio or television reception,
which can be determined by turning the equipment off and on, the user is
encouraged to try to correct the interference by one or more of the following
measures:
Reorient or relocate the receiving antenna.
Increase the separation between the equipment and receiver.
Connect the equipment into an outlet on a circuit different from that to
which the receiver is connected.
Consult the dealer or an experienced radio/TV technician for help.
CAUTION:
Any changes or modifications not expressly approved by the party responsible
for compliance could void the user's authority to operate the equipment.
This device complies with Part 15 of the FCC Rules. Operation is subject to the
following two conditions:
(1)
This device may not cause harmful interference and
(2)
This device must accept any interference received, including
interference that may cause undesired operation.
RF Exposure Warning
This equipment complies with FCC RF radiation exposure limits set forth for an
uncontrolled environment. This equipment must be installed and operated in
2
accordance with provided instructions and must not be co-located or operating in
conjunction with any other antenna or transmitter. End-users and installers must
be provided with antenna installation instructions and transmitter operating
conditions for satisfying RF exposure compliance.
FCC: SAR standard Value: 1.6 W/Kg, Maximal Measure: 0.4 W/kg
CE Mark Warning
This is a Class B product, in a domestic environment, this product may cause
radio interference, in which case the user may be required to take adequate
measures.
Safety and Handling Precautions
Camera Information
Do not disassemble or attempt to service the camera yourself.
Do not expose the camera to moisture, or extreme temperatures.
Allow the camera to warm up when moving from cold to warm
temperatures.
Do not touch and put pressure on the camera lens.
Do not expose the lens to direct sunlight for extended periods.
Do not use abrasive chemicals, cleaning solvents or strong detergents
to clean the product. Wipe the product with a slightly damp soft cloth.
Do not use the flash or LED Light near a person's eyes to prevent
possible eye injury.
To prevent you from falling over or resulting in traffic accident, please
do not use the camera while you are walking, driving or riding a vehicle.
Please handle the camera strap with care, and never place the strap
around the neck of an infant or child. Wrapping the strap around a neck
may cause suffocation.
Do not subject the LCD screen to impact.
To prevent the risk of fire or electric shock, do not expose this
appliance to rain or moisture.
Battery Information
Turn off the camera before installing or removing the battery.
Use only the provided batteries or type of battery and charger that
came with your camera. Using other types of battery or charger may
damage the device and invalidate the warranty.
Inserting the battery upside down can cause damage to the product
1. About Your
3
and possibly cause an explosion.
When the camera is used for an extended period of time, it is normal
for the camera body to feel warm.
Download all pictures and remove the battery from the camera if you
are going to store the camera for a long period of time.
The type of battery and the battery power level may cause the lens to
be stuck up. Ensure you use the correct battery type and use a fully
charged battery.
Risk of explosion if battery is replaced by an incorrect type. Dispose of
used batteries according to the instructions.
Please keep the batteries out of the reach of children to prevent from
swallowing batteries, which might cause poisoning.
Once the battery's color changes or its shape is twisted, please stop
using it.
USB Adaptor Information
Do not expose the adapter to high temperatures or moisture places.
Otherwise, it may cause fire or electric shock.
Do not attempt to repair, disassemble, change or transform the
adapter.
Avoid sudden changes in temperature, which may cause condensation
immediately in
this situation.
Do not touch the plug with wet hands. Otherwise, it may cause electric
shock.
Do not use the travel voltage converter or AC/DC power inverter.
Otherwise, it may cause damage, overheating, malfunction or fire to the
camera.
1. About Your
4
1.1
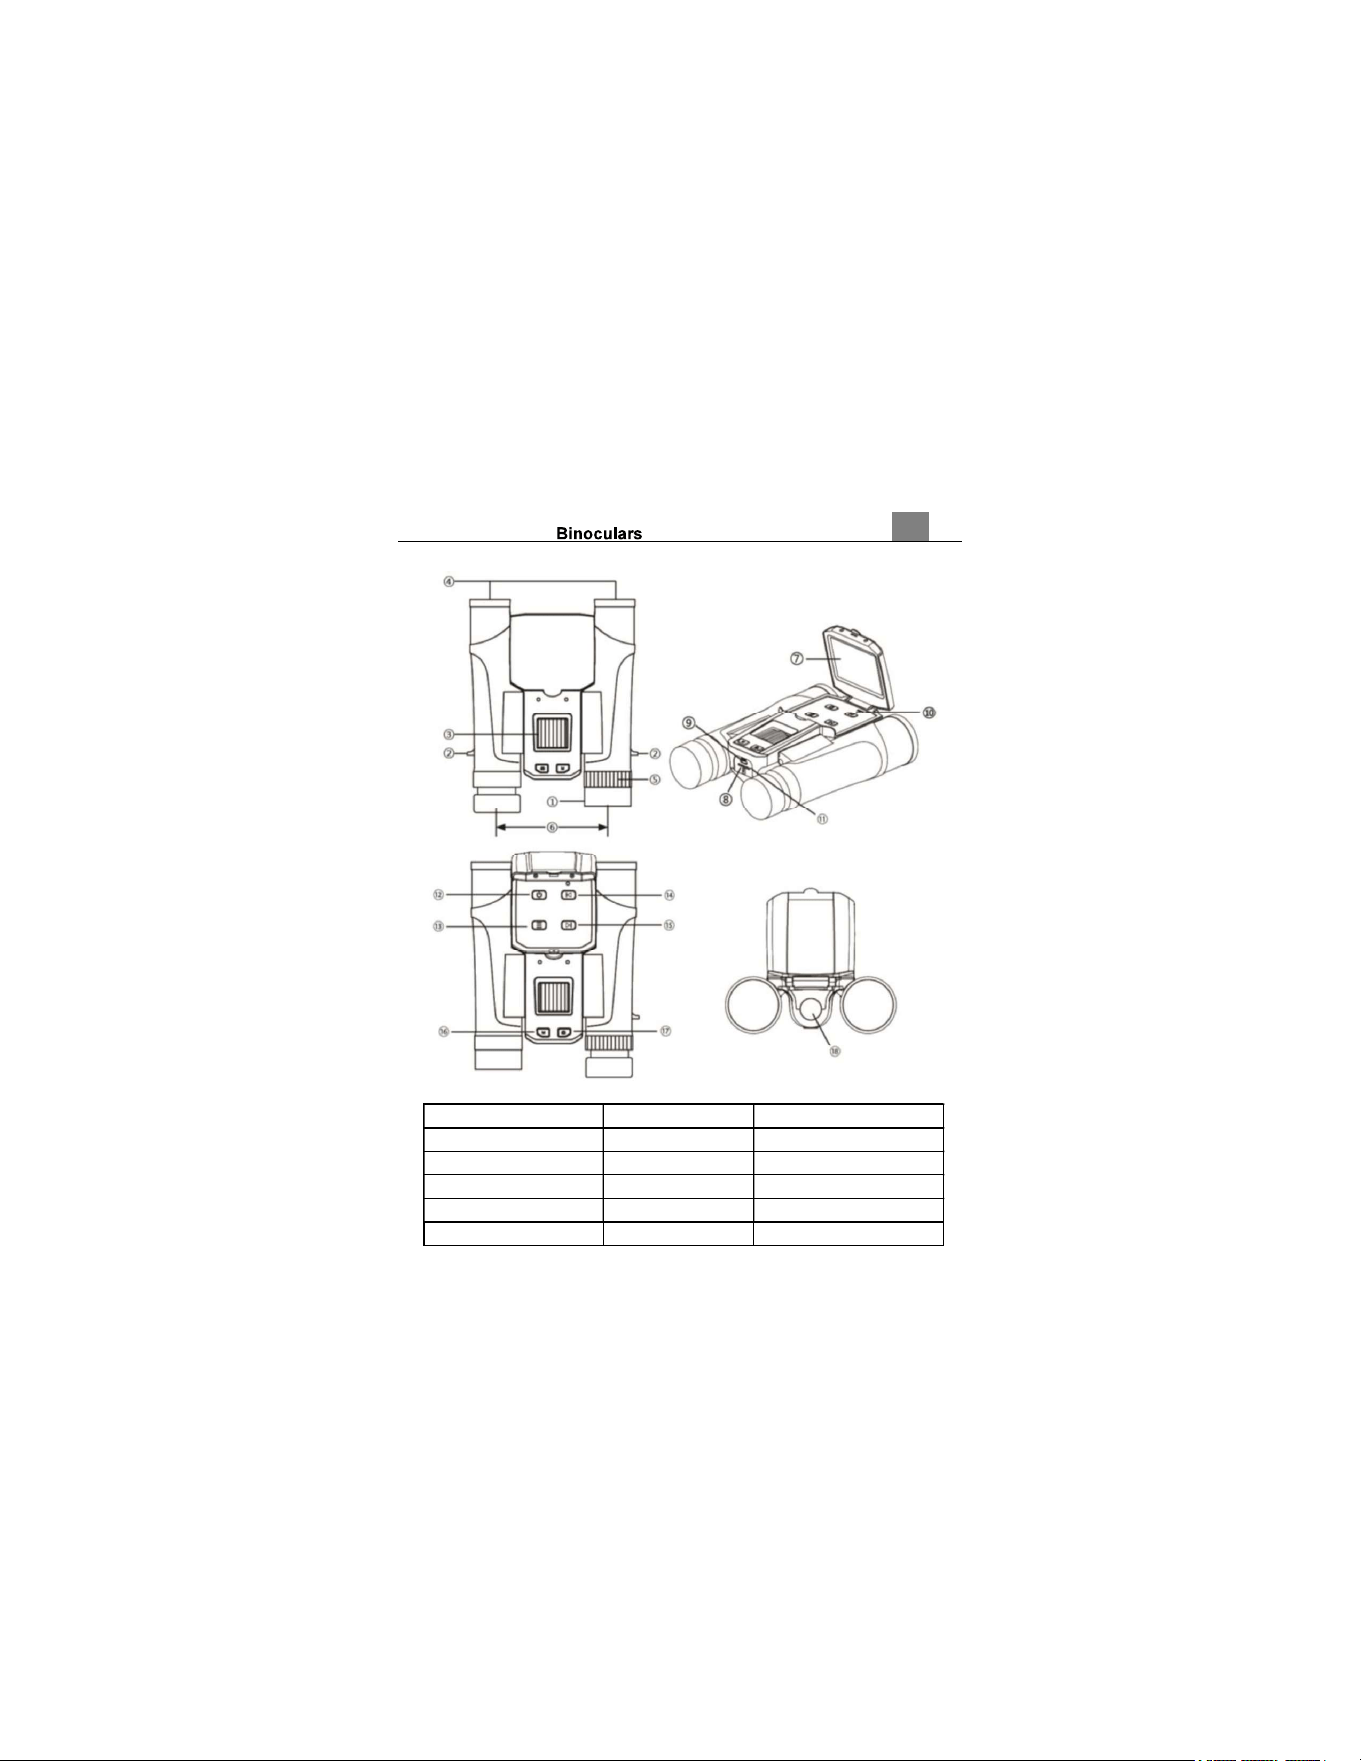
Digital Camera Binocular Interface
1. Eyecups 7. LCD Screen 13. Menu Button
2. Neck Strap Eyelets 8. Memory Card Slot 14. Left/Zoom In Button
3. Focusing Ring 9. USB Port 15. Right/Zoom Out Button
4. Objective Lens 10. Reset Button 16. Mode Button
5. Diopter Ring 11. Status LED 17. Shutter/Ok Button
6. Interpupillary Distance 12. Power Button 18. Camera Lens
1. About Your
5
1.2
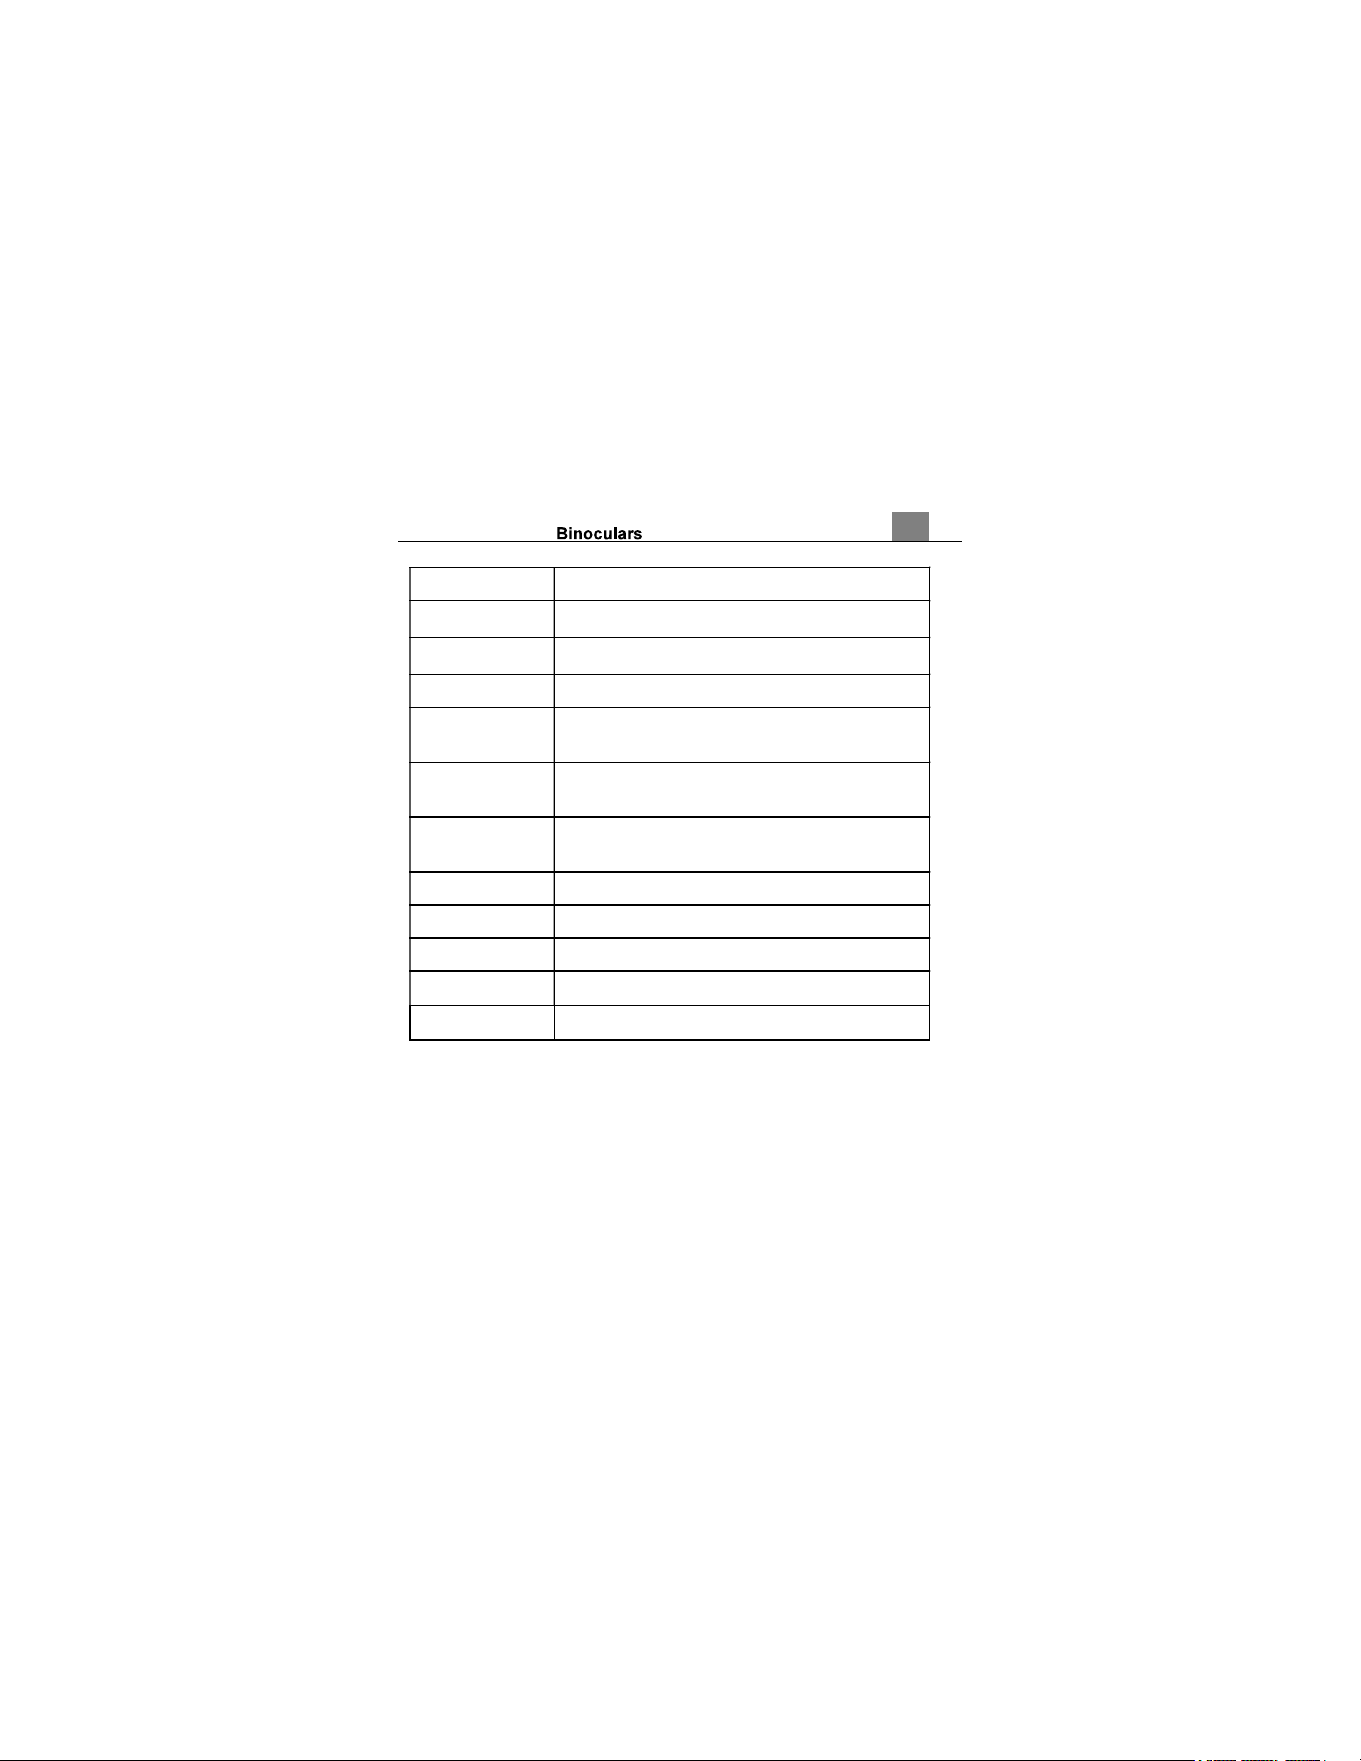
Button Function Description
Function Description
Power
Press once to power on and press and hold for 3
seconds to power off.
Mode
Tap to cycle between Photo, Video and Playback
modes.
Menu Tap to access and exit all menus and submenus.
Left | Zoom In
In Video or Photo: Press and hold to zoom in.
In menu: Press to navigate menus and options.
In Playback: Press to scroll through media gallery.
Right | Zoom
Out
In Video or Photo: Press and hold to zoom out.
In Menu: Press to navigate menus and options.
In Playback: Press to scroll through media gallery.
Photo | OK
In Photo: Tap to capture a photo.
In Video: Tap to start and stop recording.
OK button in menus. Tap to confirm a setting
Tripod Mount Mount port for attaching to a tripod nut.
Speaker Built-in speaker output for playback of video files.
Lens Front capture device for all video and photo.
Memory Card
Slot
Used for inserting a memory card.
Micro USB Port
Used to charge the camera and for connecting to a
computer.
1. About Your
2. First
6
2.
First Use
2.1
Inserting the Memory Card
Insert the included memory card to record and store your videos and photos.
When the battery is low, media stored on the memory card will not be erased.
Please insert the memory card by following the steps below:
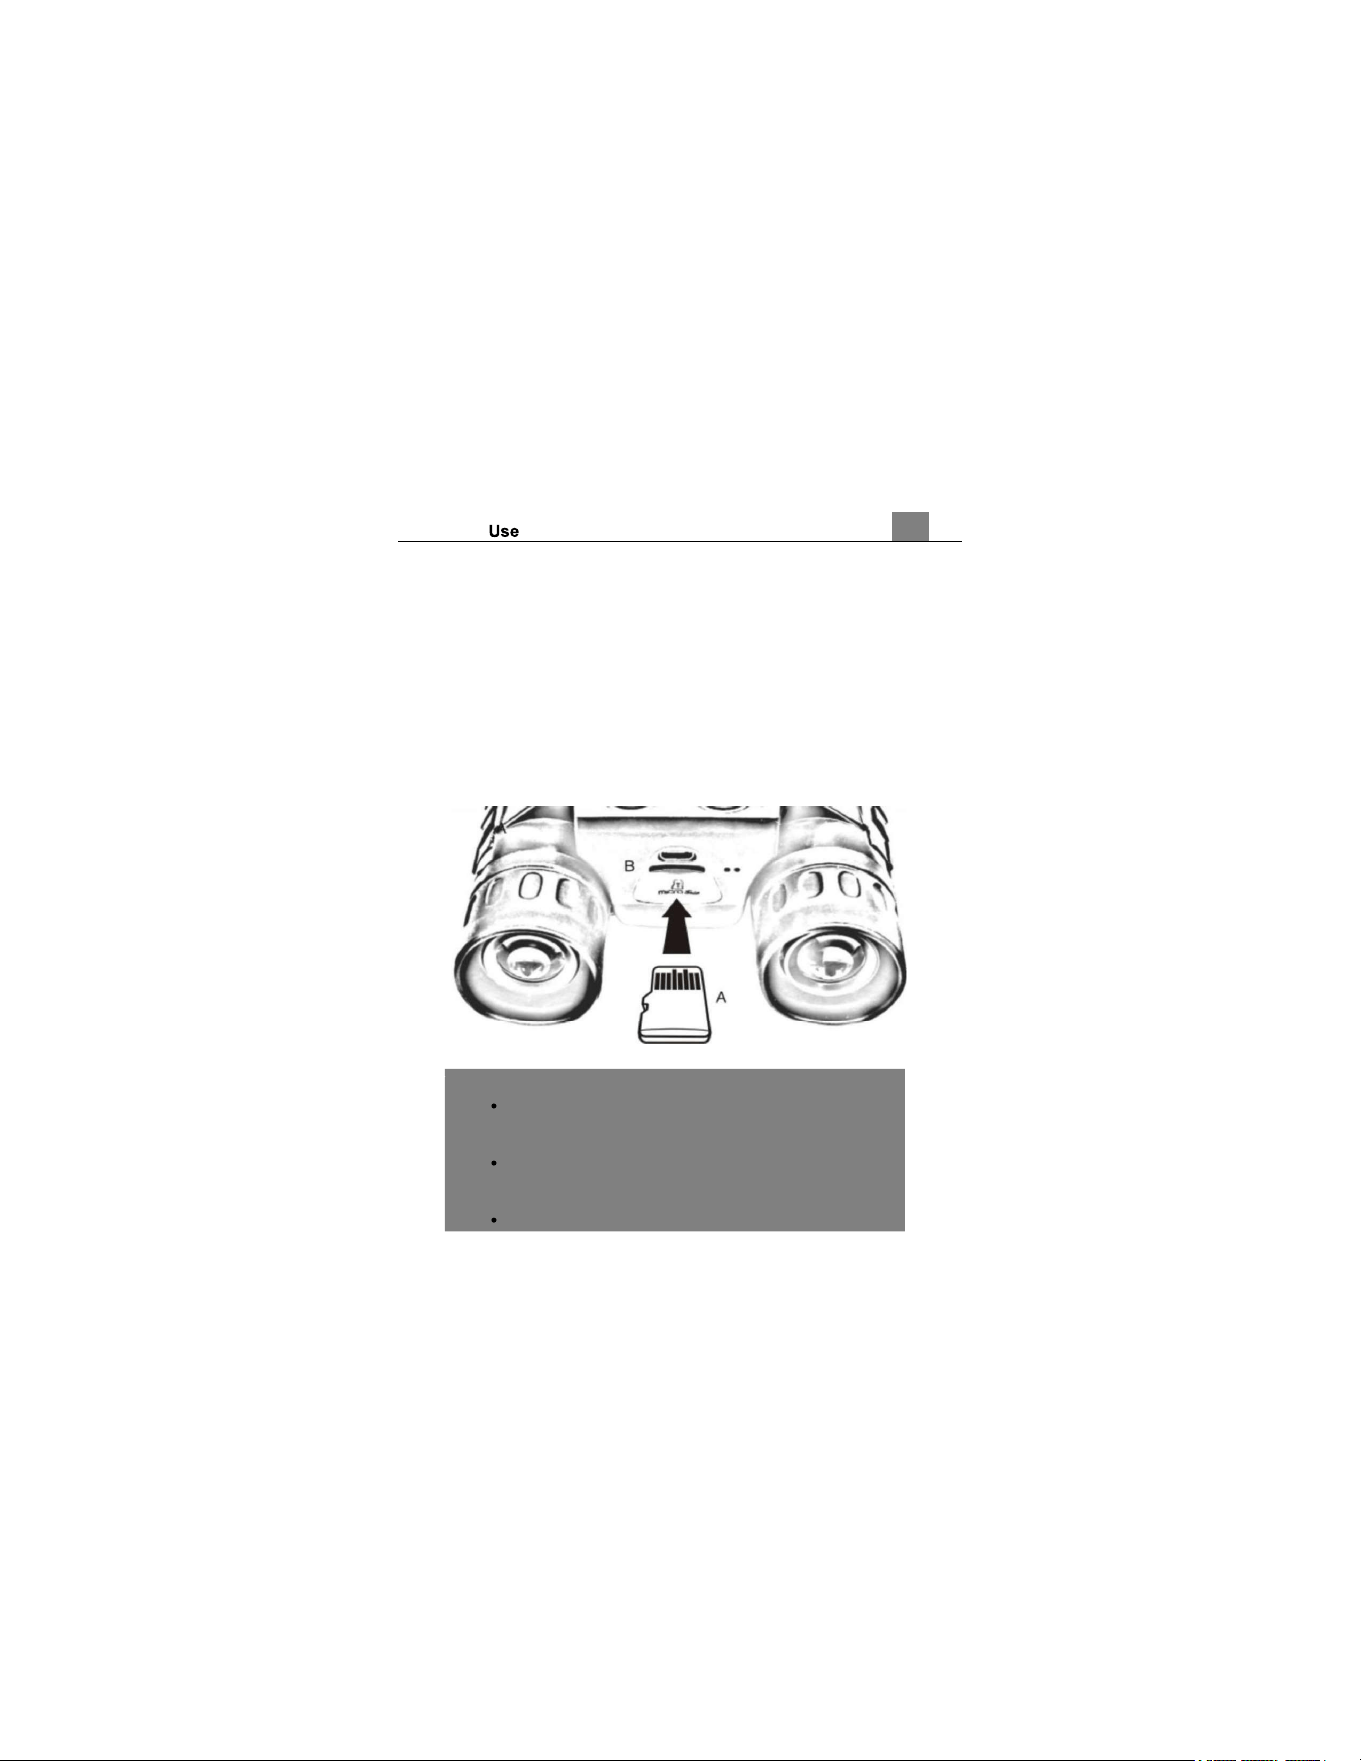
Insert the memory card (A) into the memory card slot (B). Ensure that the
metal contacts are inserted first. Push the memory card down until you hear
an audible click.
The memory card can only be inserted in one way. Do not force the card in if
it will not go in smoothly.
To remove the memory card, simply push in and the card will eject back out.
NOTE:
Please format the memory card before using the camera
(Caution, this will erase all data on the card).
Do not remove or insert the memory card when
recording. It may damage the card or cause data loss.
Memory card rating must be Class 10 or above.
2. First Use
7
2.2
Charging the Battery
Connect your camera to the included AC adaptor with the USB cable provided
for charging. Insert the small end of the USB plug into the camera s port, and
the larger end in to the included AC adaptor.
2.3
Powering the Camera On/Off
Press the POWER button once to power the camera on. To power the camera
off, press and hold the POWER button for 3 seconds.
The camera will not automatically power on and off when the screen is
opened or closed. You must manually power the camera off.
If the camera
screen and it will automatically shut down within a few seconds to prevent
memory corruption or loss.
2.4
Switching Modes
Press the MODE button to cycle between Photo, Video and Playback Modes.
The corresponding mode will be displayed in the top left corner of the screen.
2.5
Using the Zoom Function
This camera has a digital zoom function. To operate the zoom function, press
and hold the LEFT button to zoom in closer to the subject, and press and hold
the RIGHT button to zoom away from the subject.
. Us
8
3.
Using the Binoculars
3.1
Adjusting Eye Piece Distance
1.
Hold the binoculars to your eyes in the regular viewing position.
2.
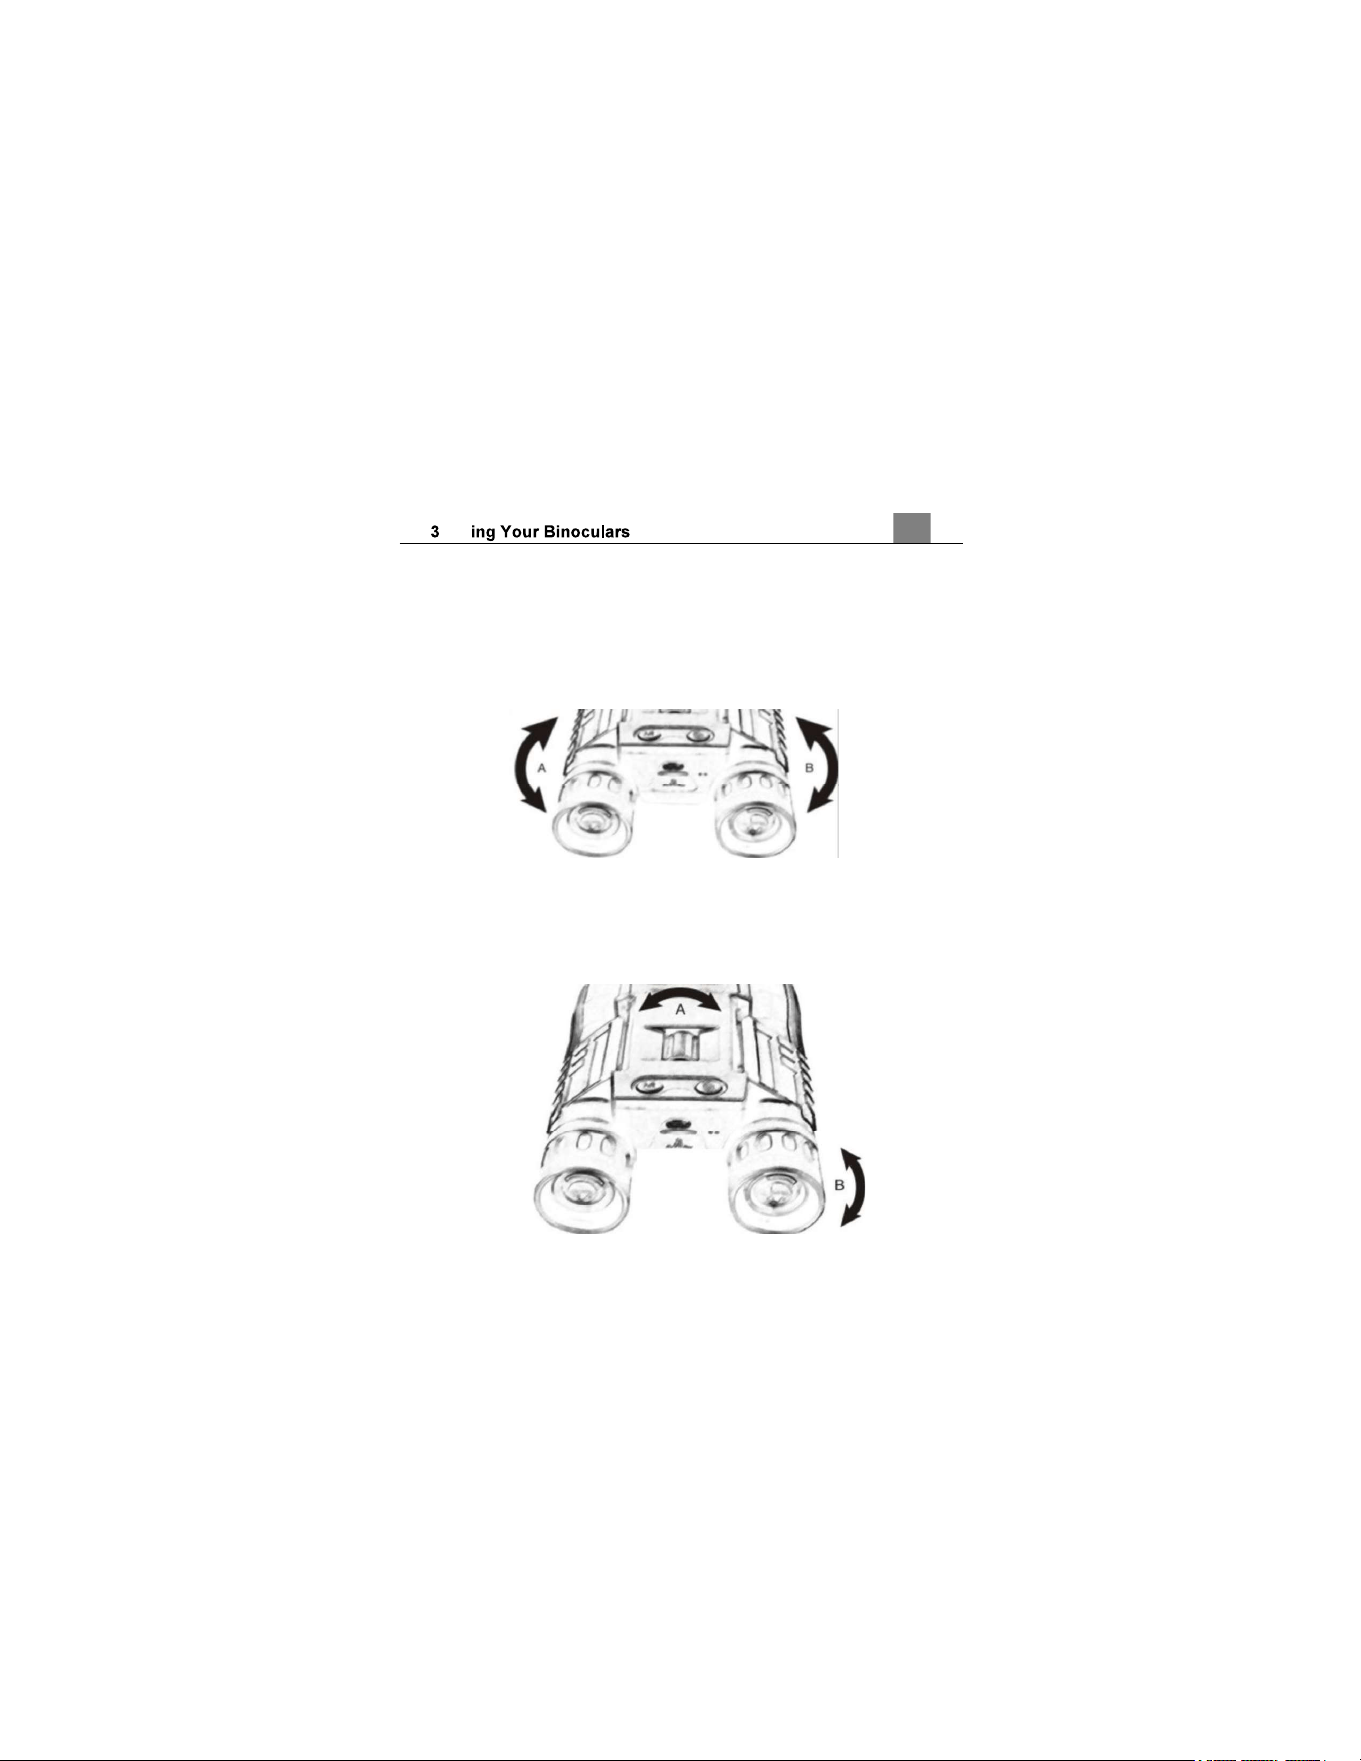
Grasp each barrel A and B firmly. Move the barrels closer together or
further apart until you see a single circle through the eye pieces.
3.
Adjustments may be necessary in between uses as the sides might
change positions.
3.2
Focusing Eye Pieces
1.
Look through the eye pieces. While closing your right eye, look only with
your left eye and rotate the center knob (A) in either direction until your
view comes into clear focus.
2.
Closing your left eye, look with your right eye and rotate the right eye
piece (B) until your view is clear.
9
3.3
Maintenance and Cleaning
Only use a clean microfiber cloth to clean fingerprints and dust from the
lenses.
Only use liquid cleaning products specifically designed for prescription
glasses.
Do not disassemble or try and clean inside the binoculars.
Store the binoculars in a dry or ventilated place when not using them.
CAUTION: Do not look at the sun with the binoculars. You can cause
permanent damage to your eyes.
3.4
Quick Tips on Using the Camera
3.4.1 Mode Options
With the camera powered on, press the MODE button to select the mode you
want to use: PHOTO Mode, PLAYBACK Mode and VIDEO Mode.
3.4.2 Photo Mode
The camera automatically enters PHOTO Mode when powered on. You can
either take a photo when looking through the binocular lenses or with the LCD
screen open. Press the SHUTTER button to capture a photo.
3.4.3 Video Mode
Press the MODE button to switch to video mode and then press the
SHUTTER button to start recording the video. Press the SHUTTER button
again to stop the recording.
3.4.4 Playback Mode
Press the MODE button to switch to PLAYBACK Mode and press the LEFT
and RIGHT buttons to select the photos or video files you want to view. Press
the SHUTTER/OK button to play the videos or to show the photos.
3.4.5 Digital Zoom
To use the digital zoom, press and hold the LEFT and RIGHT buttons when in
Photo or Video modes to select the range of the digital zoom you want.
. Us

10
For a better result on your photos and videos, hold the binocular tightly or
attach a tripod to prevent any shakes during the recording.
. Us
11
4.
Using the Camera and Changing Settings
4.1
Photo Shooting
Power the camera on and it will be ready to take pictures right away.
1.
You can either look through the binocular eyepieces or line up your shot
by looking at the LCD screen to see what is in the shot.
2.
Press and hold the LEFT or RIGHT buttons to zoom in or out.
3.
Hold the camera steady and press the SHUTTER/OK button to capture a
photo.
4.
The number of photos that can be captured at a particular resolution will
be displayed in the top right corner of the screen.
5.
The memory card icon on the screen will have a cross through it if there is
no memory card inserted in the camera
message will be shown on the screen when the memory card is full.
6.
The number of remaining photos is determined by the selected photo
resolution. The higher the photo resolution, the lower the number of
photos you are able to be save to the memory card. Before capturing any
photos, you can select a preferred photo resolution.
4.1.1 Photo Capture Mode
This setting allows you to select the photo capture mode, either a single photo
or 3 consecutive pictures automatically.
1.
In Photo Mode press the MENU button.
2.
Select Photo Capture Mode using LEFT or RIGHT buttons and press the
SHUTTER/OK button to enter the Photo Capture Mode submenu.
3.
Press the LEFT or RIGHT buttons to navigate the menu, and press the
SHUTTER/OK button to confirm the selected option (Single, 3-Photo
Burst, Cancel).
4.
Press the MENU button to exit the menu without making a selection.
4.1.2 Self Timer
This function determines the time delay before a photograph is captured.
1. In Photo Mode press the MENU button.
2. Select using LEFT or RIGHT buttons and press the
SHUTTER/OK button to enter the submenu.
3. Press the LEFT or RIGHT buttons to navigate the menu, and press the
12
SHUTTER/OK button to confirm the selected option (Off, 2 Seconds, 5
Seconds, 10 Seconds, Cancel).
4. Press the MENU button to exit the menu without making a selection.
4.1.3 Image Size (Resolution)
This function sets the photo resolution. The higher the resolution, the greater
the photo quality and the larger the file size of the photo.
1.
In Photo Mode press the MENU button.
2.
Select Image using the LEFT or RIGHT buttons and press the
SHUTTER/OK button to enter the Image submenu.
3.
Press the LEFT or RIGHT buttons to navigate the menu, and press the
SHUTTER/OK button to confirm the selected photo resolution (48MP,
30MP, 24MP, 20MP, 16MP, 12MP, 10MP, 8MP, 7MP, 5MP, 3MP, 2MP,
Cancel).
4.
Press the MENU button to exit the menu without making a selection.
4.1.3 Scene Mode
produce the best image for that selected scene.
1.
In Photo Mode press the MENU button.
2.
Select Scene Mode using the LEFT or RIGHT buttons and press the
SHUTTER/OK button to enter the Scene Mode submenu.
3.
Press the LEFT or RIGHT buttons to navigate the menu, and press the
SHUTTER/OK button to confirm the selected photo resolution (Auto,
Night, Portrait, Landscape, Backlight, Sport, Party, Beach, High
Sensitivity, Cancel).
4.
Press the MENU button to exit the menu without making a selection.
4.1.4 Anti-Shake
This function enables photo capture in high speed and low-light by
electronically minimizing motion blur and reducing camcorder shake.
1.
In Photo Mode press the MENU button.
2.
Select Anti-Shake using the LEFT or RIGHT buttons and press the
SHUTTER/OK button to enter the Anti-Shake submenu.
3.
Press the LEFT or RIGHT buttons to navigate the menu, and press the
SHUTTER/OK button to confirm the selected photo resolution (On, Off,
13
Cancel).
4.
Press the MENU button to exit the menu without making a selection.
4.1.5 ISO
This function adjusts the light sensitivity in your photograph.
1.
In Photo Mode press the MENU button.
2.
Select ISO using the LEFT or RIGHT buttons and press the
SHUTTER/OK button to enter the ISO submenu.
3.
Press the LEFT or RIGHT buttons to navigate the menu, and press the
SHUTTER/OK button to confirm the selected photo resolution (Auto, 100,
200, 400, Cancel).
4.
Press the MENU button to exit the menu without making a selection.
4.1.6 Exposure
his function adjusts the frame brightness in your video.
1.
In Photo Mode press the MENU button.
2.
Select Exposure using the LEFT or RIGHT buttons and press the
SHUTTER/OK button to enter the Exposure submenu.
3.
Press the LEFT or RIGHT buttons to navigate the menu, and press the
SHUTTER/OK button to confirm the selected photo resolution (+3, +2, +1,
0, -1, -2, -3, Cancel).
4.
Press the MENU button to exit the menu without making a selection.
4.1.7 White Balance
White Balance changes the color of light in your pictures, making it seem
warmer or cooler depending on how the light you're shooting in affects the
frame.
1.
In Photo Mode press the MENU button.
2.
Select White Balance using the LEFT or RIGHT buttons and press the
SHUTTER/OK button to enter the White Balance submenu.
3.
Press the LEFT or RIGHT buttons to navigate the menu, and press the
SHUTTER/OK button to confirm the selected photo resolution (Auto,
Daylight, Cloudy, Fluorescent, Tungsten, Cancel).
4.
Press the MENU button to exit the menu without making a selection.

14
4.1.8 Quality
The Photo Quality function determines the level of compression the camera
uses when saving photos to a memory card.
1.
In Photo Mode press the MENU button.
2.
Select Quality using the LEFT or RIGHT buttons and press the
SHUTTER/OK button to enter the Quality submenu.
3.
Press the LEFT or RIGHT buttons to navigate the menu, and press the
SHUTTER/OK button to confirm the selected photo resolution (Super
Fine, Fine, Normal, Cancel). Super Fine uses the least amount of
compression for saving, and as a result produces a higher photo quality.
4.
Press the MENU button to exit the menu without making a selection.
4.1.9 Sharpness
This function adjusts the visible detail of a photograph.
1.
In Photo Mode press the MENU button.
2.
Select Sharpness using the LEFT or RIGHT buttons and press the
SHUTTER/OK button to enter the Sharpness submenu.
3.
Press the LEFT or RIGHT buttons to navigate the menu, and press the
SHUTTER/OK button to confirm the selected photo resolution (Sharp,
Normal, Soft, Cancel).
4.
Press the MENU button to exit the menu without making a selection.
4.1.10 Color Effect
This function sets the color filter effect of a photograph.
1.
In Photo Mode press the MENU button.
2.
Select Color Effect using the LEFT or RIGHT buttons and press the
SHUTTER/OK button to enter the Color Effect submenu.
3.
Press the LEFT or RIGHT buttons to navigate the menu, and press the
SHUTTER/OK button to confirm the selected photo resolution (Normal,
Black & White, Sepia, Red, Green, Blue, Sunset, Warm, Cool, Over
Exposure, IR, Binary, Vivid, Undertone, Dog Eye, Aibao, Gothic, Japan
Style, LOMO, Negative, Cancel).
4.
Press the MENU button to exit the menu without making a selection.
4.1.11 Date Stamp
This setting allows you to imprint a date & time onto your recorded video files.
15
Once a video file is recorded with the imprint, the imprint cannot be removed.
1.
In Photo Mode press the MENU button.
2.
Select Date Stamp using the LEFT or RIGHT buttons and press the
SHUTTER/OK button to enter the Date Stamp submenu.
3.
Press the LEFT or RIGHT buttons to navigate the menu, and press the
SHUTTER/OK button to confirm the selected option (Off, Date, Date &
Time, Cancel).
4.
Press the MENU button to exit the menu without making a selection.
Note: Once a date/time stamp is captured on a photograph or video, it
cannot be removed.
4.1.12 Language
This function
1.
In Photo or Video Modes press the MENU button.
2.
Select using the LEFT or RIGHT buttons and press the
SHUTTER/OK button to enter the submenu.
3.
Select using the LEFT or RIGHT buttons and press the
SHUTTER/OK button to enter the submenu.
4.
Press the LEFT or RIGHT buttons to navigate the menu, and press the
SHUTTER/OK button to confirm the selected option.
5.
Press the MENU button to exit the menu without making a selection.
4.1.13 Set Date
This function allows you to set the current Date and Time on your recorded
video clips and captured photos.
1.
In Photo or Video Modes press the MENU button.
2.
Select using the LEFT or RIGHT buttons and press the
SHUTTER/OK button to enter the submenu.
3.
Select Set Date using the LEFT or RIGHT buttons and press the
SHUTTER/OK button to enter the Set Date submenu.
4.
Press the SHUTTER/OK button to switch between year, month, day,
hours, minutes and seconds.
5.
Once your desired field is highlighted, press the LEFT or RIGHT buttons
to cycle through numbers.
6.
Once completed with all of the fields, press the MODE button to confirm
the changes and exit the menu.
16
4.1.14 Auto Power Off
This function sets the duration of time in which the camera will wait with no
user input before automatically powering off.
1.
In Photo or Video Modes press the MENU button.
2.
Select using the LEFT or RIGHT buttons and press the
SHUTTER/OK button to enter the submenu.
3.
Select using the LEFT or RIGHT buttons and press the
SHUTTER/OK button to enter the submenu.
4.
Press the LEFT or RIGHT buttons to navigate the menu, and press the
SHUTTER/OK button to confirm the selected option (Off, 1 Minute, 3
Minutes, 5 Minutes, Cancel).
5.
Press the MENU button to exit the menu without making a selection.
4.1.15 Button Sound
This function allows you to turn off the sound the camera makes when you
press a button.
1.
In Photo or Video Modes press the MENU button.
2.
Select using the LEFT or RIGHT buttons and press the
SHUTTER/OK button to enter the submenu.
3.
Select Button Sound using the LEFT or RIGHT buttons and press the
SHUTTER/OK button to enter the Button Sound submenu.
4.
Press the LEFT or RIGHT buttons to navigate the menu, and press the
SHUTTER/OK button to confirm the selected photo resolution (On, Off,
Cancel).
5.
Press the MENU button to exit the menu without making a selection.
4.1.16 Frequency
This function sets the frequency of the camera from 50Hz to 60Hz. Please
check the frequency of your location and set accordingly.
1.
In Photo or Video Modes press the MENU button.
2.
Select using the LEFT or RIGHT buttons and press the
SHUTTER/OK button to enter the submenu.
3.
Select Frequency using the LEFT or RIGHT buttons and press the
SHUTTER/OK button to enter the Frequency submenu.
4.
Press the LEFT or RIGHT buttons to navigate the menu, and press the
SHUTTER/OK button to confirm the selected photo resolution (60 Hz, 50
17
Hz, Cancel). The default frequency for the United States is 60Hz.
5.
Press the MENU button to exit the menu without making a selection.
4.1.17 Format Memory Card
The format setting erases all photos, videos and data stored on your memory
card.
1.
In Photo or Video Modes press the MENU button.
2.
Select using the LEFT or RIGHT buttons and press the
SHUTTER/OK button to enter the submenu.
3.
Select Format Memory using the LEFT or RIGHT buttons and press
the SHUTTER/OK button to enter the Format Memory submenu.
4.
Press the LEFT or RIGHT buttons to navigate the menu, and press the
SHUTTER/OK button to confirm the selected option (Yes, No).
5.
Press the MENU button to exit the menu without making a selection.
NOTE: This will delete all of your media and cannot be undone
4.1.18 Restore Default Setting
Factory default settings can be restored in this menu. This function will not
delete the media stored on the memory card, and will only restore all of the
1.
In Photo or Video Modes press the MENU button.
2.
Select using the LEFT or RIGHT buttons and press the
SHUTTER/OK button to enter the submenu.
3.
Select using the LEFT or RIGHT buttons and press the
SHUTTER/OK button to enter the submenu.
4.
Press the LEFT or RIGHT buttons to navigate the menu, and press the
SHUTTER/OK button to confirm the selected option (Yes, No).
5.
Press the MENU button to exit the menu without making a selection.
18
4.2
Video Recording
Power the camera on and press the MODE button to switch modes. A video
camera icon will appear in the top left corner of the screen when you are in
Video mode.
1. You can either look through the binocular eyepieces or line up your shot
by looking at the LCD screen to see what is in the shot.
2. Press and hold the LEFT or RIGHT buttons to zoom in or out.
3. The amount of time that can be recorded in the current settings is
displayed in the top right corner of the screen.
4. Hold the binoculars steady and press the SHUTTER/OK button to begin
recording.
5. When recording begins, a rolling timer will display in red in the top right
corner of the screen. This indicates the recorded video time elapsed.
6. Press the SHUTTER/OK button to stop recording.
7. The recorded video files will automatically save onto the inserted memory
card.
4.2.1 Movie Size (Resolution)
Your camera has a number of preset resolutions.
1.
In Video Mode press the MENU button.
2.
Select Movie using the LEFT or RIGHT buttons and press the
SHUTTER/OK button to enter the Movie submenu.
3.
Press the LEFT or RIGHT buttons to navigate the menu, and press the
SHUTTER/OK button to confirm the selected photo resolution (2.7K,
1080P, 720P, 480P, Cancel). A higher resolution will produce a higher
quality and larger video file.
4.
Press the MENU button to exit the menu without making a selection.
4.2.2 Scene Mode
produce the best image for that selected scene.
1.
In Video Mode press the MENU button.
2.
Select Scene Mode using the LEFT or RIGHT buttons and press the
SHUTTER/OK button to enter the Scene Mode submenu.
3.
Press the LEFT or RIGHT buttons to navigate the menu, and press the
19
SHUTTER/OK button to confirm the selected photo resolution (Auto,
Night, Portrait, Landscape, Backlight, Sport, Party, Beach, High
Sensitivity, Cancel).
4.
Press the MENU button to exit the menu without making a selection.
4.2.3 ISO
This function adjusts the light sensitivity in your photograph.
1.
In Video Mode press the MENU button.
2.
Select ISO using the LEFT or RIGHT buttons and press the
SHUTTER/OK button to enter the ISO submenu.
3.
Press the LEFT or RIGHT buttons to navigate the menu, and press the
SHUTTER/OK button to confirm the selected photo resolution (Auto, 100,
200, 400, Cancel).
4.
Press the MENU button to exit the menu without making a selection.
4.2.4 Exposure
his function adjusts the frame brightness in your video.
1.
In Video Mode press the MENU button.
2.
Select Exposure using the LEFT or RIGHT buttons and press the
SHUTTER/OK button to enter the Exposure submenu.
3.
Press the LEFT or RIGHT buttons to navigate the menu, and press the
SHUTTER/OK button to confirm the selected photo resolution (+3, +2, +1,
0, -1, -2, -3, Cancel).
4.
Press the MENU button to exit the menu without making a selection.
4.2.5 White Balance
White Balance changes the color of light in your pictures, making it seem
warmer or cooler depending on how the light you're shooting in affects the
frame.
1.
In Video Mode press the MENU button.
2.
Select White Balance using the LEFT or RIGHT buttons and press the
SHUTTER/OK button to enter the White Balance submenu.
3.
Press the LEFT or RIGHT buttons to navigate the menu, and press the
SHUTTER/OK button to confirm the selected photo resolution (Auto,
Daylight, Cloudy, Fluorescent, Tungsten, Cancel).
4.
Press the MENU button to exit the menu without making a selection.

20
4.2.6 Sharpness
This function adjusts the visible detail of a photograph.
1.
In Video Mode press the MENU button.
2.
Select Sharpness using the LEFT or RIGHT buttons and press the
SHUTTER/OK button to enter the Sharpness submenu.
3.
Press the LEFT or RIGHT buttons to navigate the menu, and press the
SHUTTER/OK button to confirm the selected photo resolution (Sharp,
Normal, Soft, Cancel).
4.
Press the MENU button to exit the menu without making a selection.
4.2.7 Color Effect
This function sets the color filter effect of a photograph.
1.
In Video Mode press the MENU button.
2.
Select Color Effect using the LEFT or RIGHT buttons and press the
SHUTTER/OK button to enter the Color Effect submenu.
3.
Press the LEFT or RIGHT buttons to navigate the menu, and press the
SHUTTER/OK button to confirm the selected photo resolution (Normal,
Black & White, Sepia, Red, Green, Blue, Sunset, Warm, Cool, Over
Exposure, IR, Binary, Vivid, Undertone, Dog Eye, Aibao, Gothic, Japan
Style, LOMO, Negative, Cancel).
4.
Press the MENU button to exit the menu without making a selection.
4.2.8 Date Stamp
This setting allows you to imprint a date & time onto your recorded video files.
Once a video file is recorded with the imprint, the imprint cannot be removed.
1.
In Video Mode press the MENU button.
2.
Select Date Stamp using the LEFT or RIGHT buttons and press the
SHUTTER/OK button to enter the Date Stamp submenu.
3.
Press the LEFT or RIGHT buttons to navigate the menu, and press the
SHUTTER/OK button to confirm the selected option (Off, Date, Date &
Time, Cancel).
4.
Press the MENU button to exit the menu without making a selection.
Note: Once a date/time stamp is captured on a photograph or video, it
cannot be removed.
21
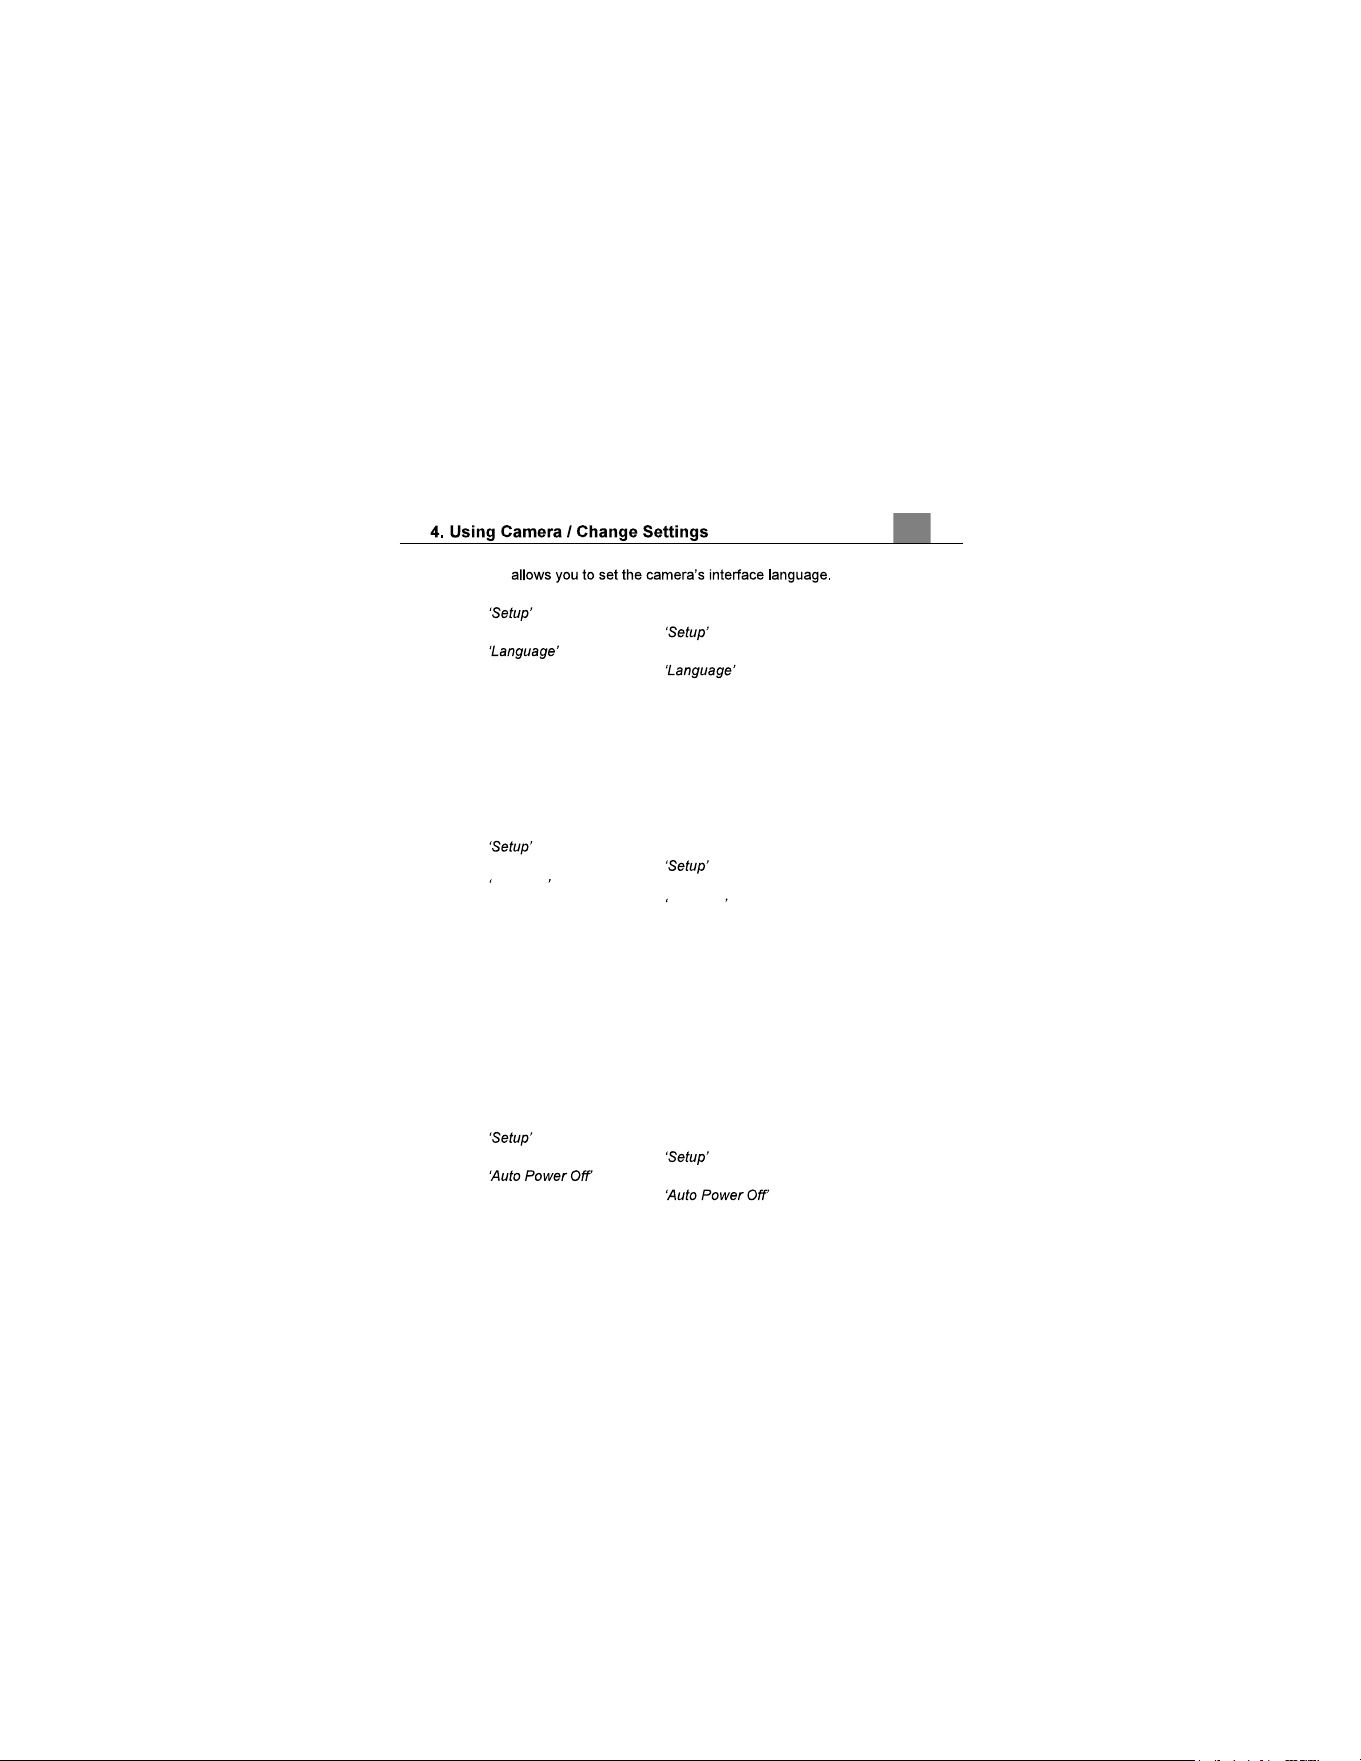
4.2.9 Language
This function
1.
In Photo or Video Modes press the MENU button.
2.
Select using the LEFT or RIGHT buttons and press the
SHUTTER/OK button to enter the submenu.
3.
Select using the LEFT or RIGHT buttons and press the
SHUTTER/OK button to enter the submenu.
4.
Press the LEFT or RIGHT buttons to navigate the menu, and press the
SHUTTER/OK button to confirm the selected option.
5.
Press the MENU button to exit the menu without making a selection.
4.2.10 Set Date
This function allows you to set the current Date and Time on your recorded
video clips and captured photos.
1.
In Photo or Video Modes press the MENU button.
2.
Select using the LEFT or RIGHT buttons and press the
SHUTTER/OK button to enter the submenu.
3.
Select Set Date using the LEFT or RIGHT buttons and press the
SHUTTER/OK button to enter the Set Date submenu.
4.
Press the SHUTTER/OK button to switch between year, month, day,
hours, minutes and seconds.
5.
Once your desired field is highlighted, press the LEFT or RIGHT buttons
to cycle through numbers.
6.
Once completed with all of the fields, press the MODE button to confirm
the changes and exit the menu.
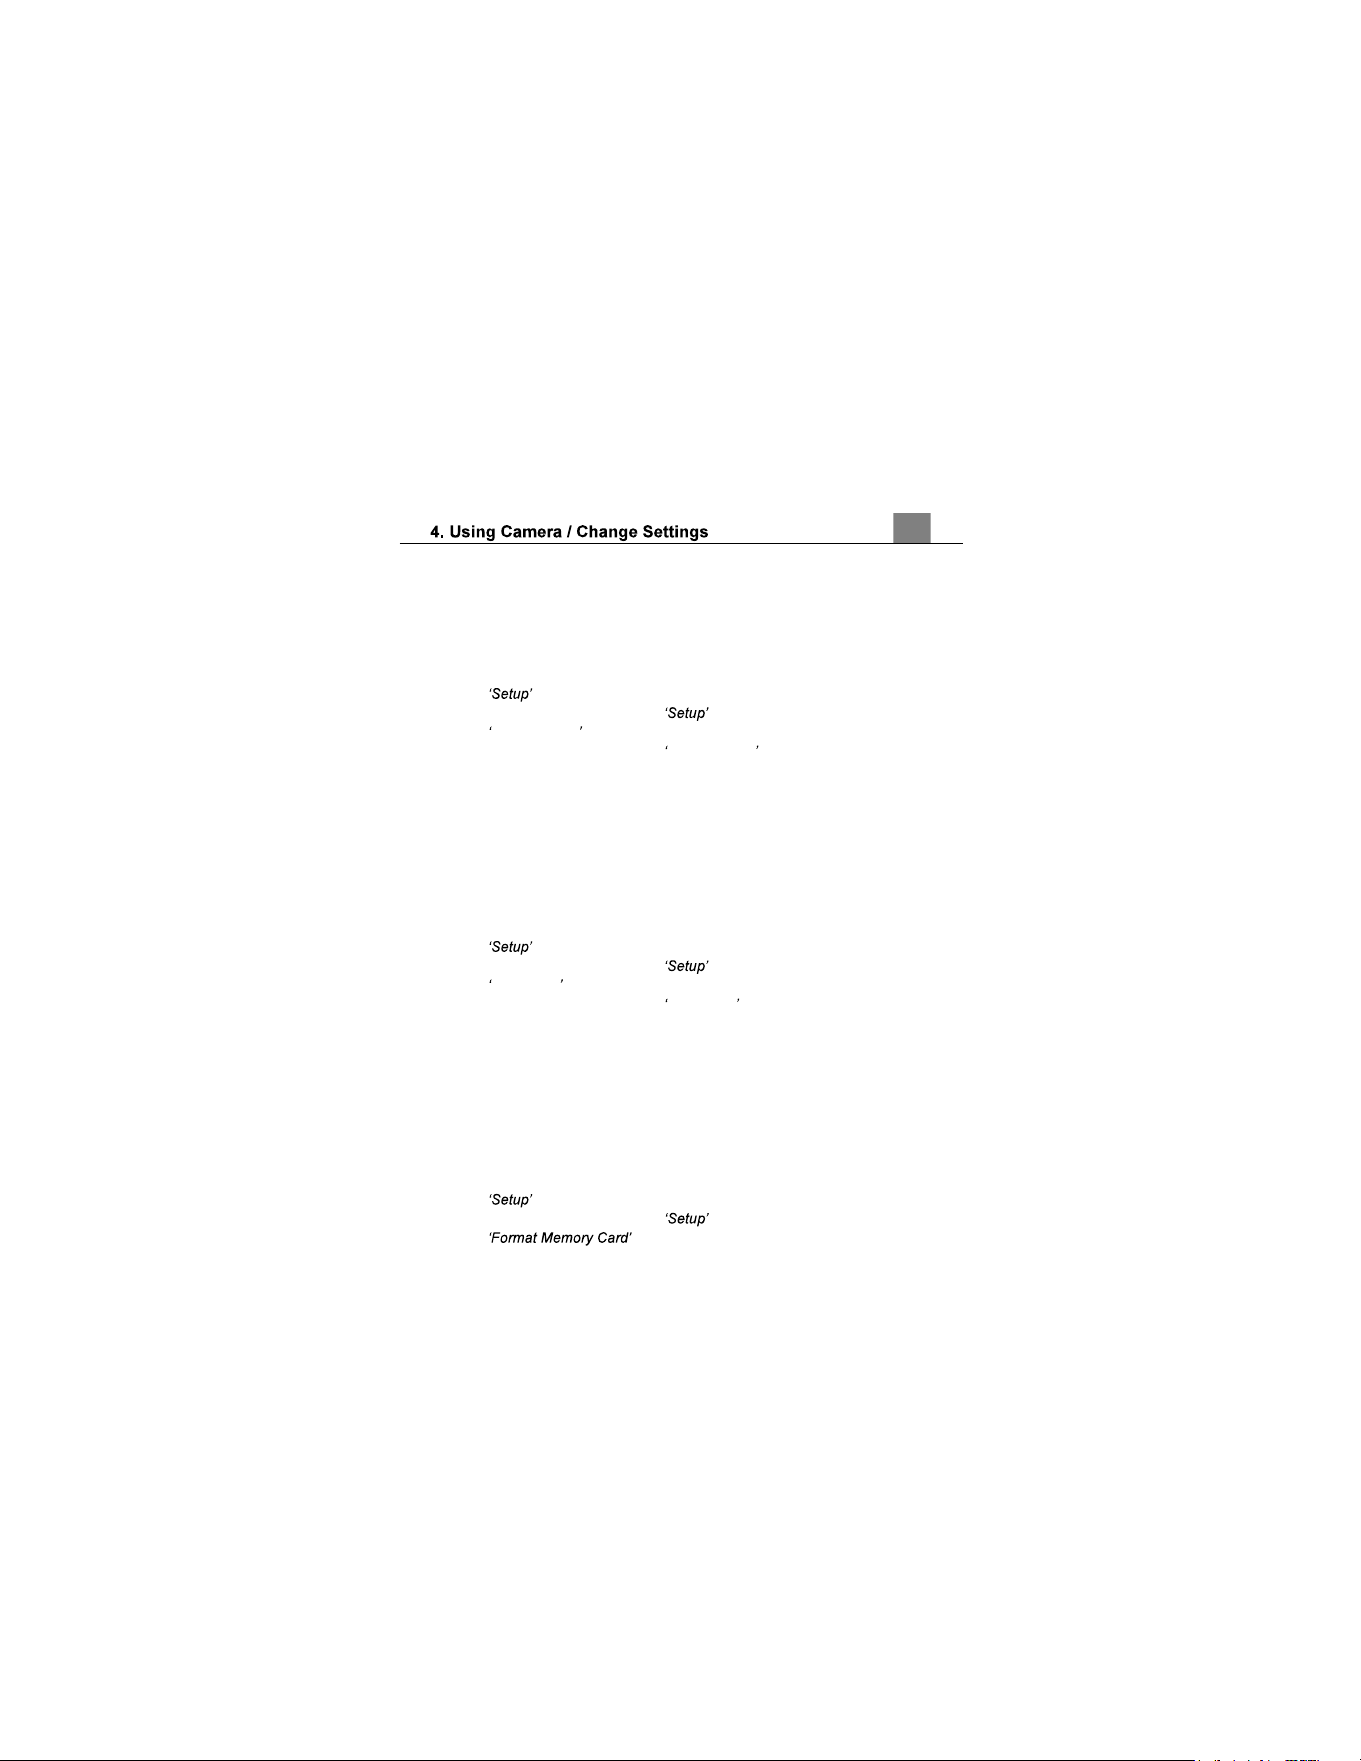
4.2.11 Auto Power Off
This function sets the duration of time in which the camera will wait with no
user input before automatically powering off.
1.
In Photo or Video Modes press the MENU button.
2.
Select using the LEFT or RIGHT buttons and press the
SHUTTER/OK button to enter the submenu.
3.
Select using the LEFT or RIGHT buttons and press the
SHUTTER/OK button to enter the submenu.
4.
Press the LEFT or RIGHT buttons to navigate the menu, and press the
SHUTTER/OK button to confirm the selected option (Off, 1 Minute, 3
22
Minutes, 5 Minutes, Cancel).
5.
Press the MENU button to exit the menu without making a selection.
4.2.12 Button Sound
This function allows you to turn off the sound the camera makes when you
press a button.
1.
In Photo or Video Modes press the MENU button.
2.
Select using the LEFT or RIGHT buttons and press the
SHUTTER/OK button to enter the submenu.
3.
Select Button Sound using the LEFT or RIGHT buttons and press the
SHUTTER/OK button to enter the Button Sound submenu.
4.
Press the LEFT or RIGHT buttons to navigate the menu, and press the
SHUTTER/OK button to confirm the selected photo resolution (On, Off,
Cancel).
5.
Press the MENU button to exit the menu without making a selection.
4.2.13 Frequency
This function sets the frequency of the camera from 50Hz to 60Hz. Please
check the frequency of your location and set accordingly.
1.
In Photo or Video Modes press the MENU button.
2.
Select using the LEFT or RIGHT buttons and press the
SHUTTER/OK button to enter the submenu.
3.
Select Frequency using the LEFT or RIGHT buttons and press the
SHUTTER/OK button to enter the Frequency submenu.
4.
Press the LEFT or RIGHT buttons to navigate the menu, and press the
SHUTTER/OK button to confirm the selected photo resolution (60 Hz, 50
Hz, Cancel). The default frequency for the United States is 60Hz.
5.
Press the MENU button to exit the menu without making a selection.
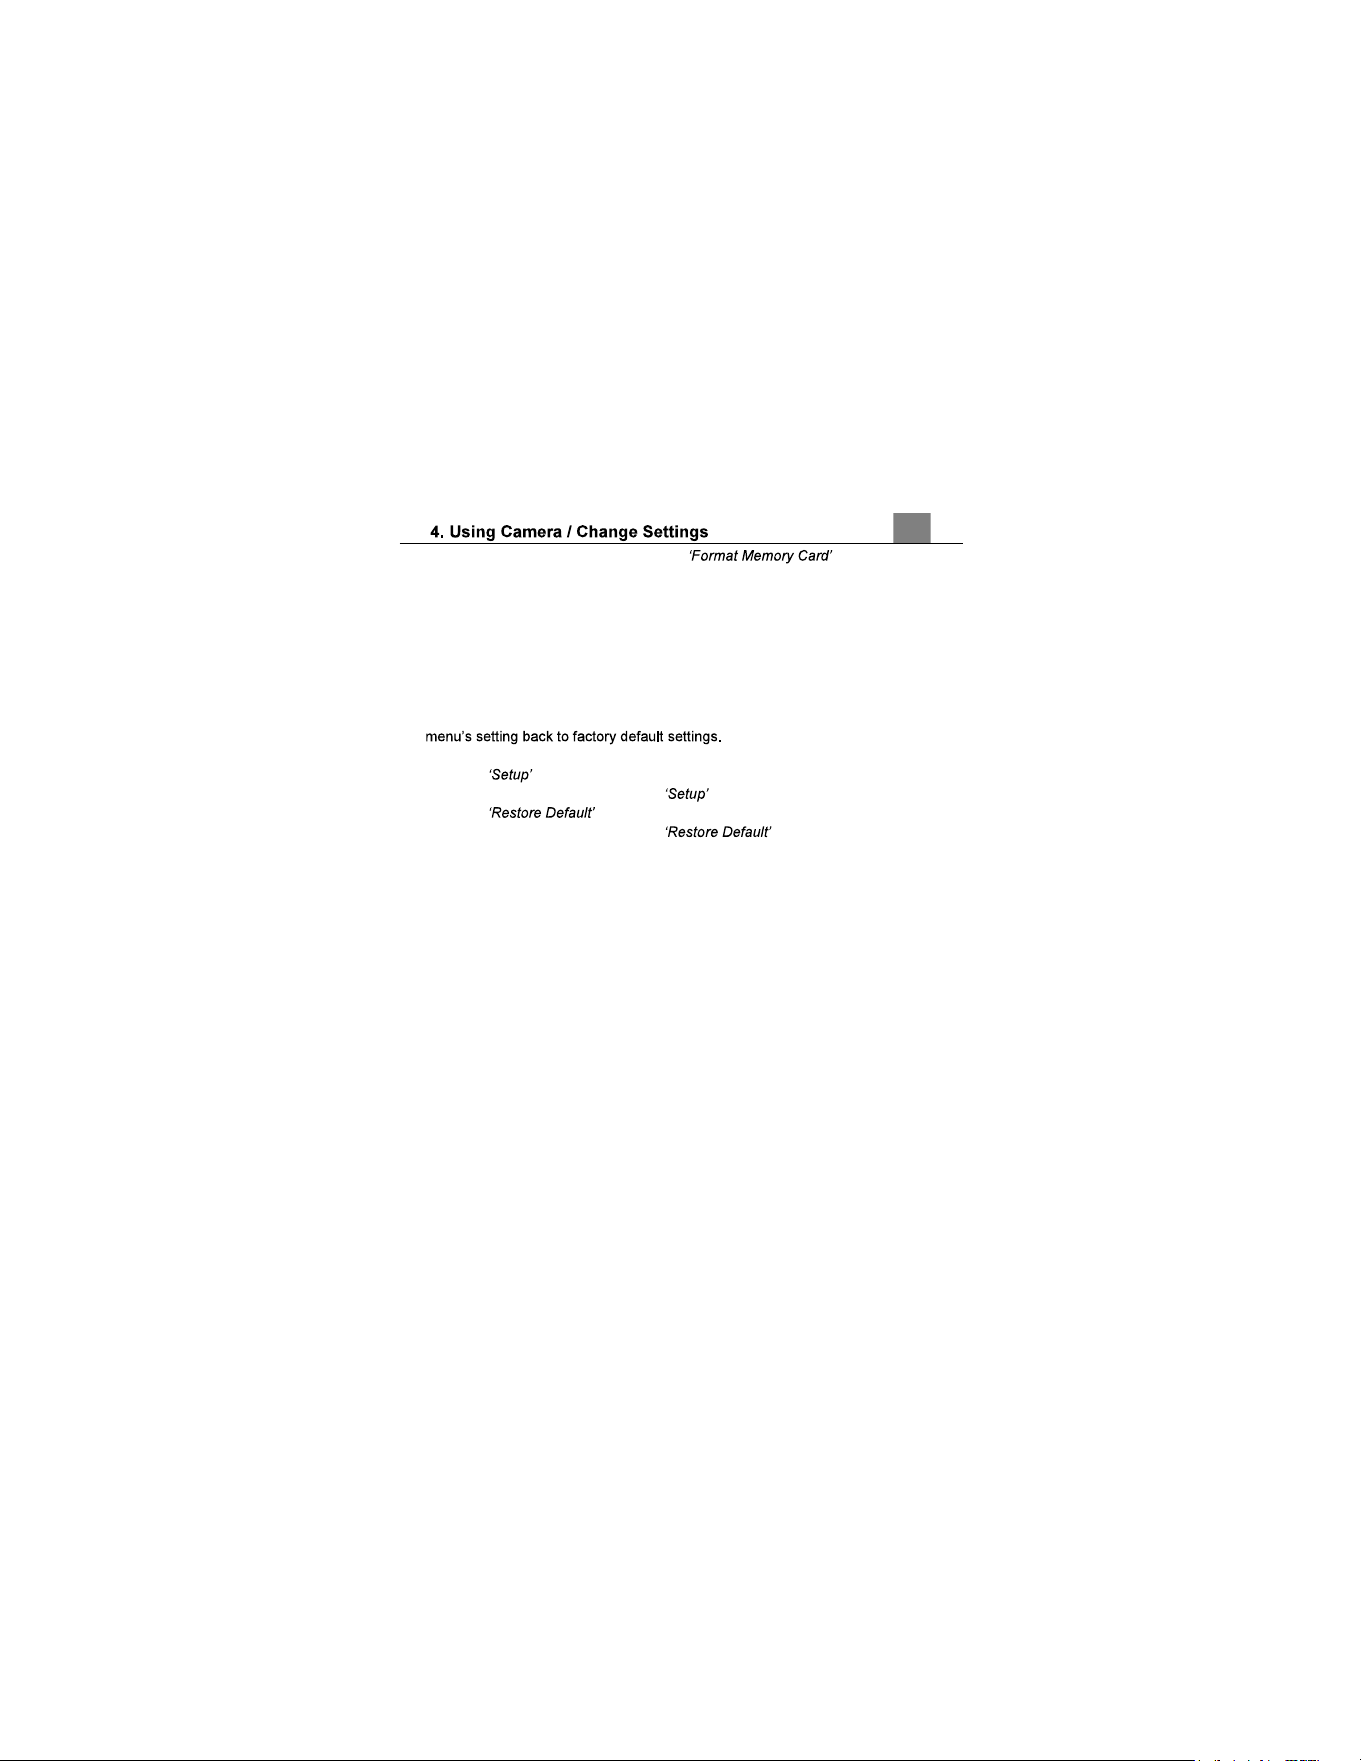
4.2.14 Format Memory Card
The format setting erases all photos, videos and data stored on your memory
card.
1.
In Photo or Video Modes press the MENU button.
2.
Select using the LEFT or RIGHT buttons and press the
SHUTTER/OK button to enter the submenu.
3.
Select using the LEFT or RIGHT buttons and press
23
the SHUTTER/OK button to enter the submenu.
4.
Press the LEFT or RIGHT buttons to navigate the menu, and press the
SHUTTER/OK button to confirm the selected option (Yes, No).
5.
Press the MENU button to exit the menu without making a selection.
NOTE: This will delete all of your media and cannot be undone
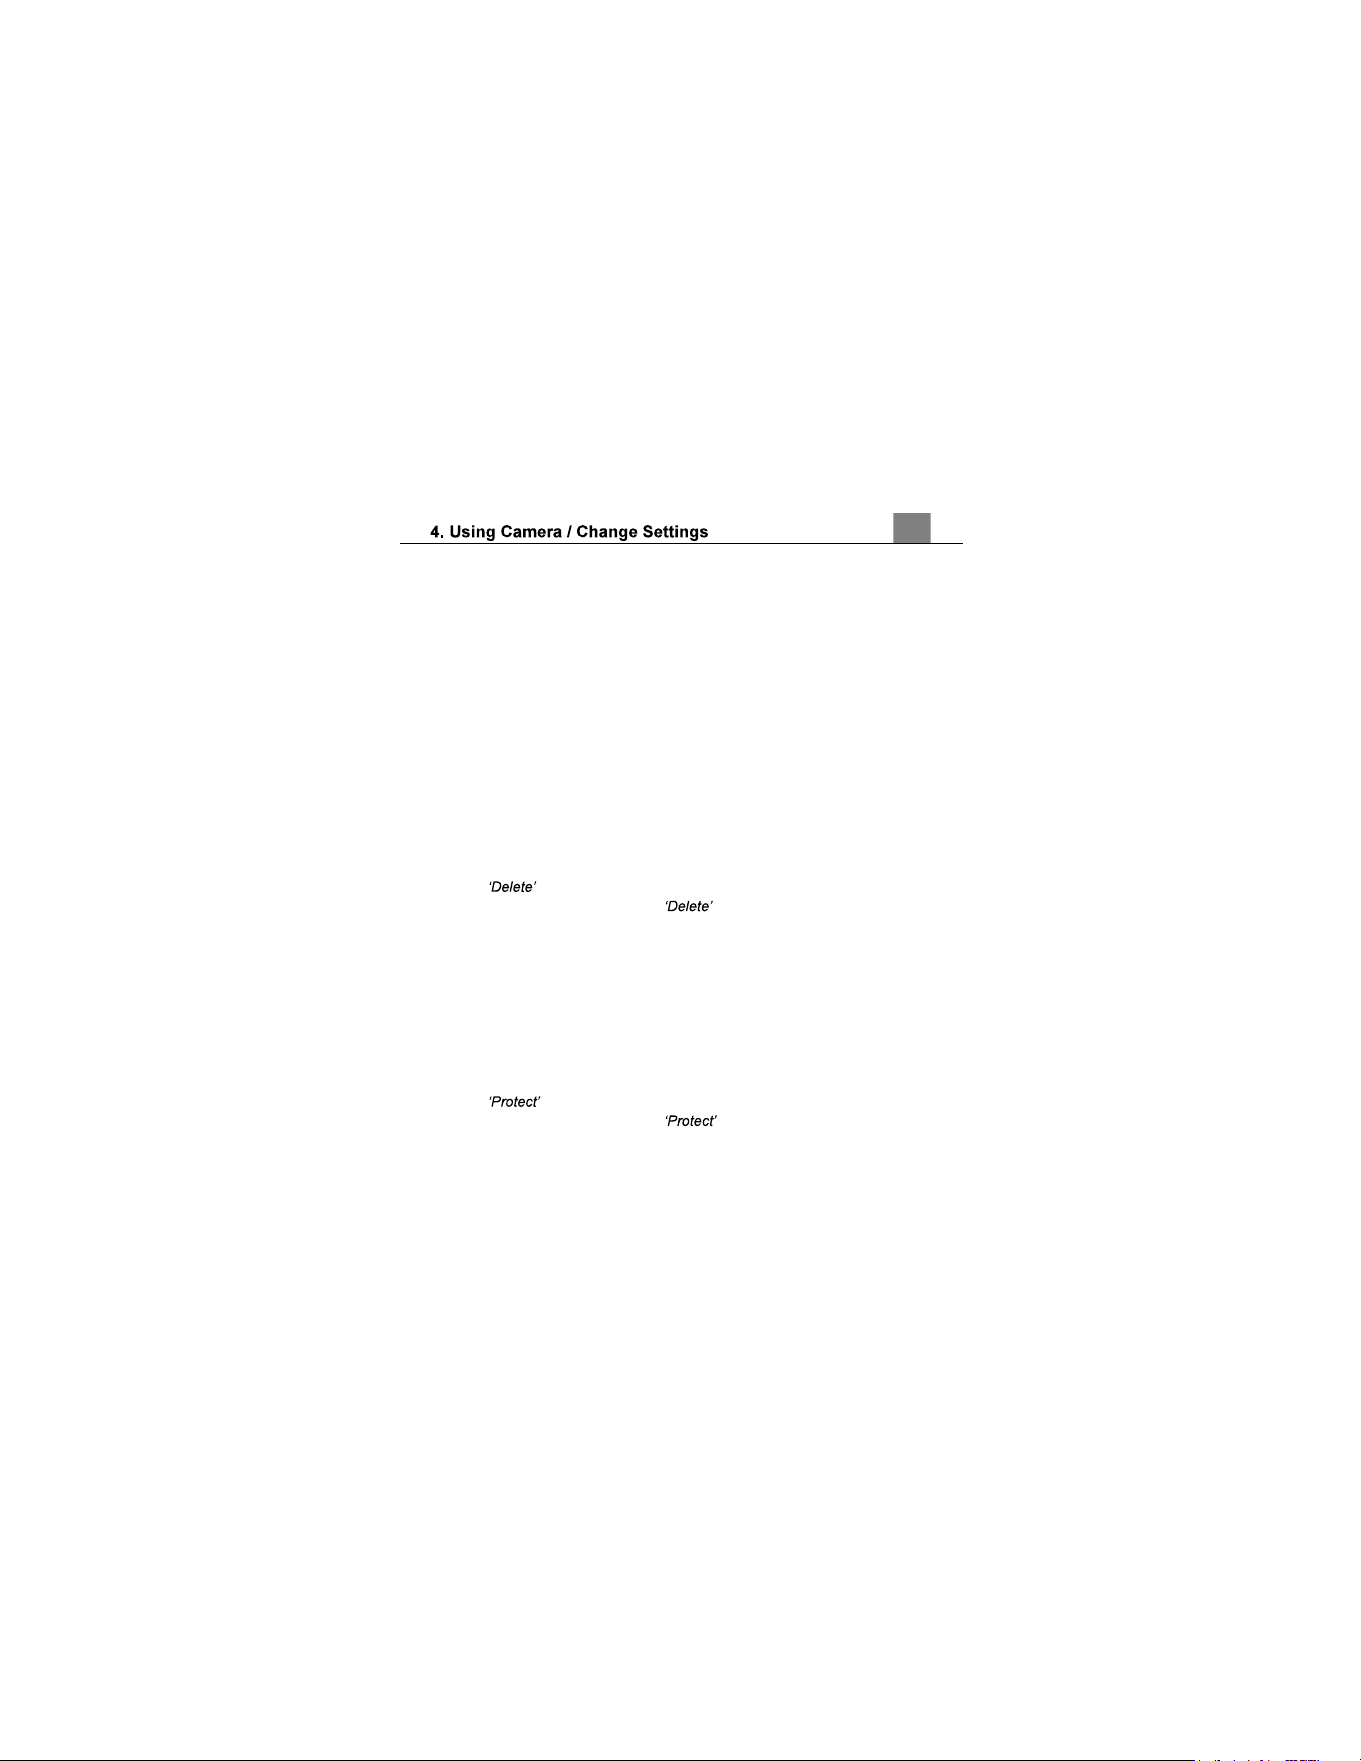
4.2.15 Restore Default Setting
Factory default settings can be restored in this menu. This function will not
delete the media stored on the memory card, and will only restore all of the
1.
In Photo or Video Modes press the MENU button.
2.
Select using the LEFT or RIGHT buttons and press the
SHUTTER/OK button to enter the submenu.
3.
Select using the LEFT or RIGHT buttons and press the
SHUTTER/OK button to enter the submenu.
4.
Press the LEFT or RIGHT buttons to navigate the menu, and press the
SHUTTER/OK button to confirm the selected option (Yes, No).
5.
Press the MENU button to exit the menu without making a selection.
24
4.3 Playback Mode
Videos and photos captured on your camera can be easily played back.
Power the camera on and press the MODE button to switch to Playback
Mode.
1. Press the MODE button to enter Playback Mode. Your last recorded
image or video will appear on the screen when fist entering playback
mode.
2. Press the LEFT or RIGHT buttons to cycle through the captured videos
and photos stored on the memory card.
3. To enter into a video, press the SHUTTER/OK button.
In Playback Mode the following options are available:
4.3.1 Delete
This function is used to delete photos and videos. Photos and videos can
be deleted singly or all at once.
1.
In Playback Mode press the MENU button.
2.
Select using the LEFT or RIGHT buttons and press the
SHUTTER/OK button to enter the submenu.
3.
Press the LEFT or RIGHT buttons to navigate the menu, and press the
SHUTTER/OK button for your selected setting (This Image, All, Cancel).
4.
Press the MENU button to exit the menu without deleting any pictures or
videos.
4.3.2 Protect
This function protects the photo/video file. The file will be protected from being
deleted accidentally. Files must be unprotected to be deleted.
1.
In Playback Mode press the MENU button.
2.
Select using the LEFT or RIGHT buttons and press the
SHUTTER/OK button to enter the submenu.
3.
Press the LEFT or RIGHT buttons to navigate the menu, and press the
SHUTTER/OK button for your selected setting (Lock Current, Unlock
Current, Lock All, Unlock All, Cancel).
4.
Press the MENU button to exit the menu without making a selection.
25
4.3.3 Rotate
This function allows you to rotate stored images.
1.
In Playback Mode press the MENU button.
2.
Select using the LEFT or RIGHT buttons and press the
SHUTTER/OK button to enter the submenu.
3.
Press the LEFT or RIGHT buttons to navigate the menu, and press the
SHUTTER/OK button for your selected setting (90°, 180°, 270°, Cancel).
4.
Press the MENU button to exit the menu without making a selection.
4.3.4 Slide Show
Photographs can be viewed as a slide show on the camera.
1.
In Playback Mode press the MENU button.
2.
Select using the LEFT or RIGHT buttons and press the
SHUTTER/OK button to enter the submenu.
3.
Press the LEFT or RIGHT buttons to navigate the menu, and press the
SHUTTER/OK button for your selected setting (3 Seconds, 5 Seconds, 10
Seconds, Cancel).
4.
Press the SHUTTER/OK button to stop a playing slide show.
5.
Press the MENU button to exit the menu without making a selection.
4.3.5 Video Playback
Videos can be played back and viewed on your camera.
1.
In Playback Mode, press the LEFT or RIGHT buttons to select the video
file for playback.
2.
Press the SHUTTER/OK button to start playing the video. Press the
MODE button to pause the video, press the LEFT button to rewind the
video, press the RIGHT button to fast forward the video and press the
SHUTTER/OK button to stop the video.

.
26
5.
How to Connect to Your Computer
Connect the small end of the USB cable to the USB port on the camera. Then
connect the large end of the USB cable to a USB port on your computer. If the
camera is off, power it on and the LCD screen will show a USB icon on the
screen. You will now be able to download the photos and videos to your
computer.
.
27
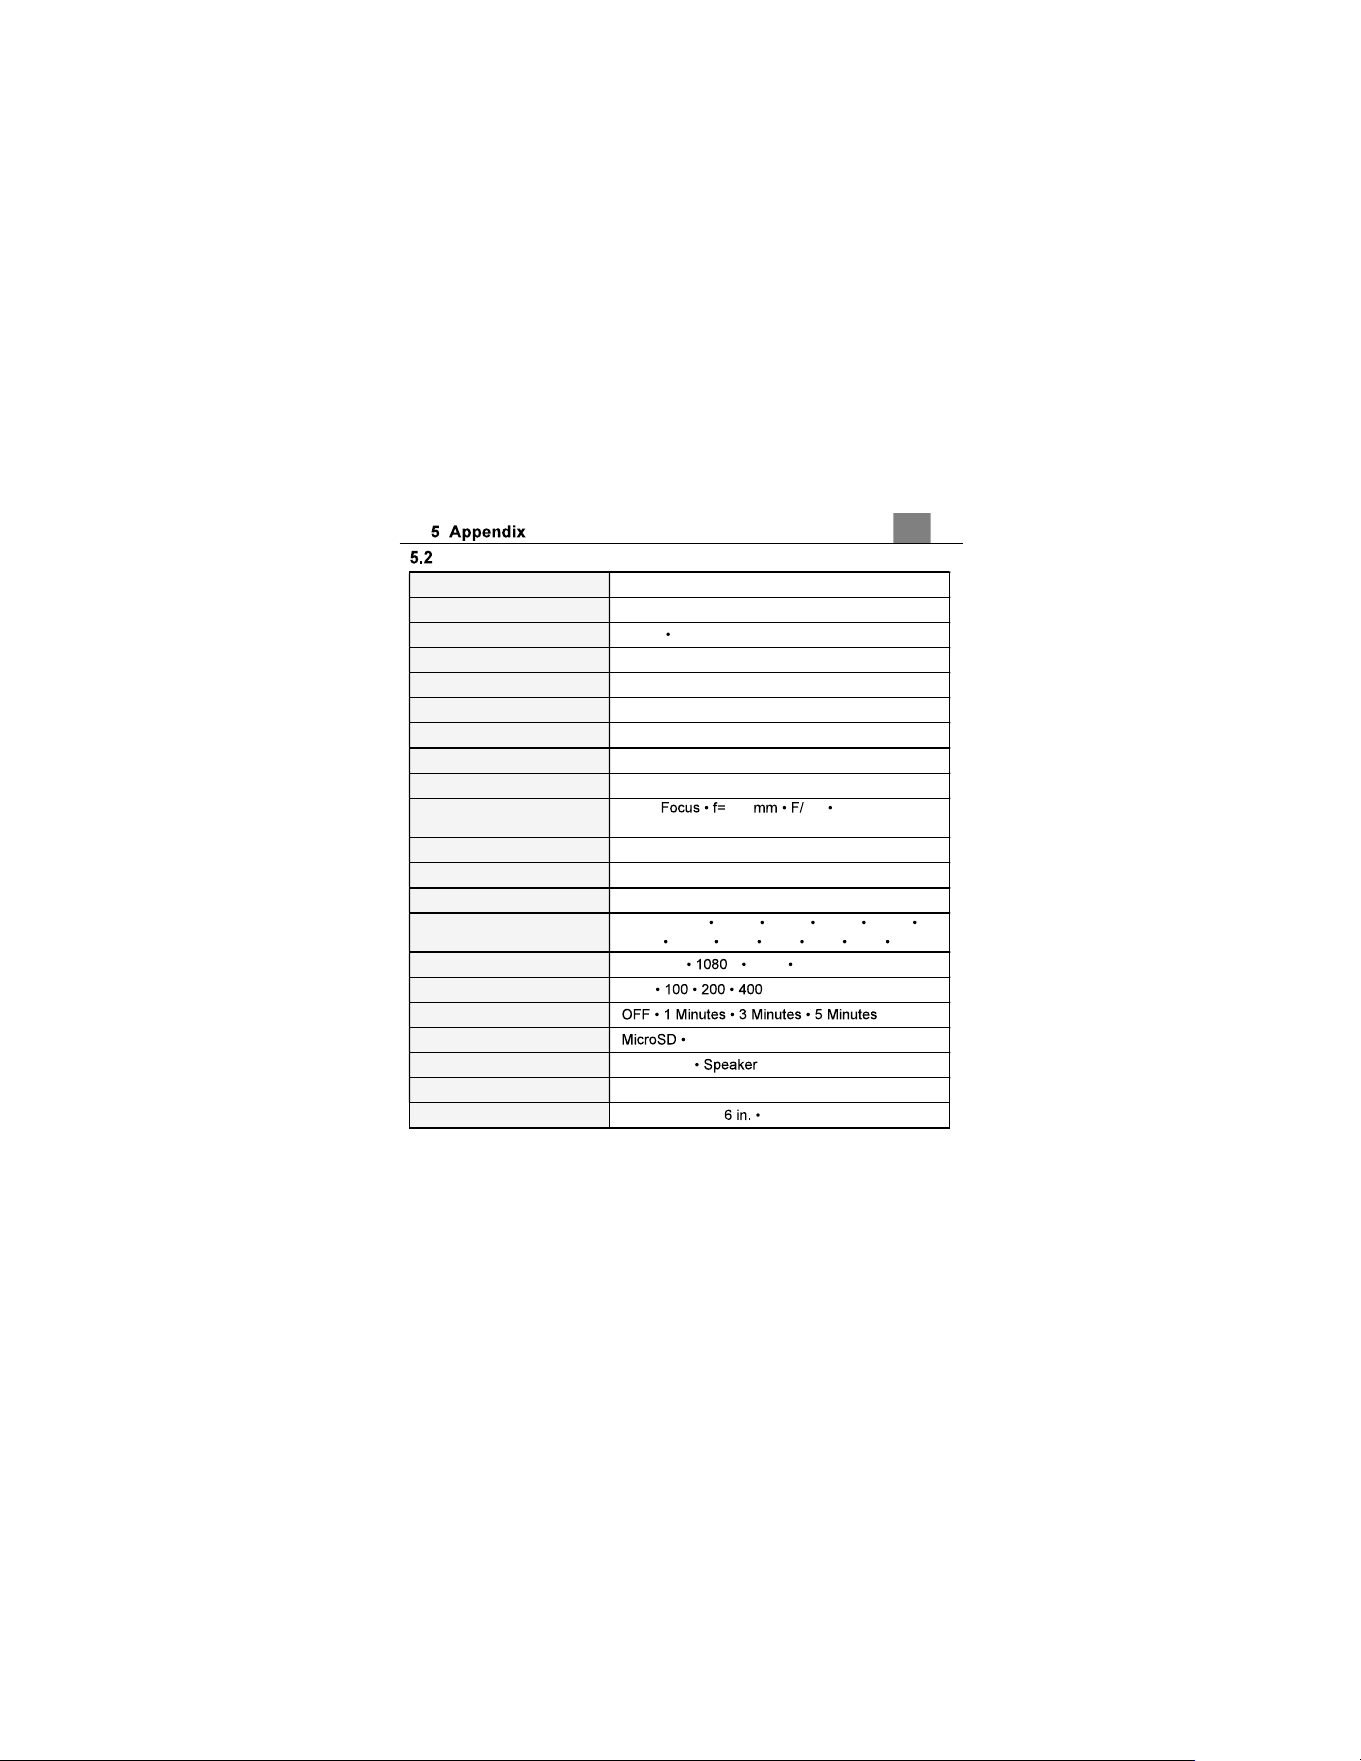
Technical Specifications
Model Number
BH2K1032
Magnification
10x
Objective Lens Diameter
32mm BK7 Fogproof Multi-Coated
Optical Design
Roof Prism
Field of View
5.5° / 314 ft. @ 1000 yds FOV
Exit Pupil Diameter
3.1mm
Eye Relief
12.6mm
Interpupillary Adjustment
62.0mm ~ 88.0mm
Minimum Focus Distance
8.0m
Camera Lens
Fixed 21.0 6.0 Electronic
Stabilization
Image Sensor
8.0 Mega Pixels CMOS
Zoom
8x Digital Zoom
LCD Monitor
2.4 Inch LCD Anti-Glare Monitor
Pixels (photo)
JPEG: 48MP 30MP 24MP 20MP 16MP
12MP 10MP 8MP 7MP 5MP 3MP 2MP
Pixels (video)
AVI: 2.7K P 720P 480P
ISO Sensitivity
Auto
Power Saving Mode
Recording Media
MicroSDHC; Maximum: 256GB
I/O Ports
Micro USB
Power
3.7V Lithium-Ion, 1,000 mAh non-removable
Dimensions
5. 5 x 3.23 x 1.8 9.7 oz.

Distributed under license of BHH LLC in the United States by:
Elite Brands Inc.
40 Wall Street, 61st Floor,
New York, NY 10005 USA
Tel: 800-441-1100
www.bellhowellcameras.com www.elitebrands.com
Copyright © 2023 Elite Brands Inc.