Wireless Solar Driveway Alarm
User Manual

Read and follow the safety instructions below:
Safety Instructions
• Keep the device away from water immersion, extreme heat, or open flames. This
product is weather-resistant but not designed for submersion.
• Motion detection is based on passive infrared (PIR) technology and may be
affected by environmental conditions such as heavy rain, sandstorms, tempera-
ture fluctuations, or moving heat sources, which may result in false alarms or
reduced sensitivity.
• The working temperature should be between 14°F to 140°F (-10°C to 60°C).
• Do not attempt to disassemble or modify the product, as this may result in mal-
function and will void the warranty.
• This product is not a toy. Keep out of reach of children to prevent misuse or acci-
dental damage.
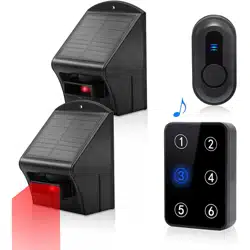
Product Overview
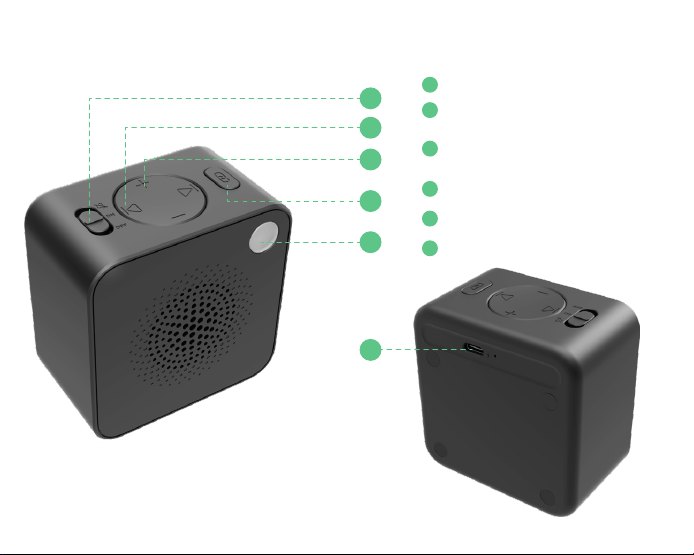
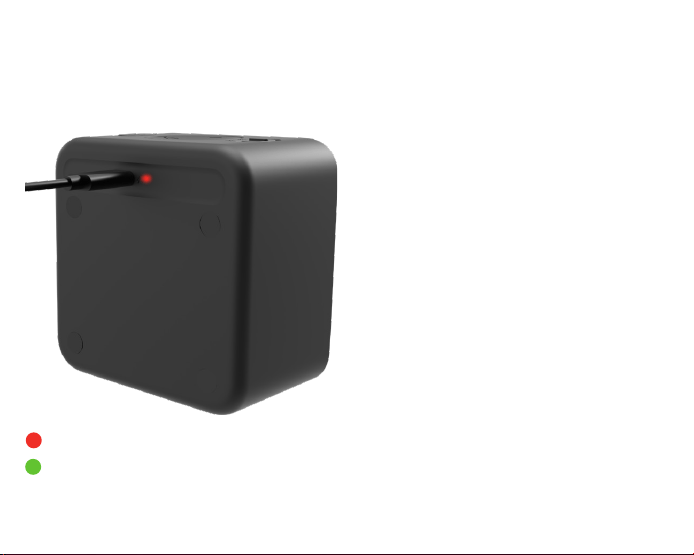
Receiver
1
2
3
4
5
6
1
2
3
4
5
6
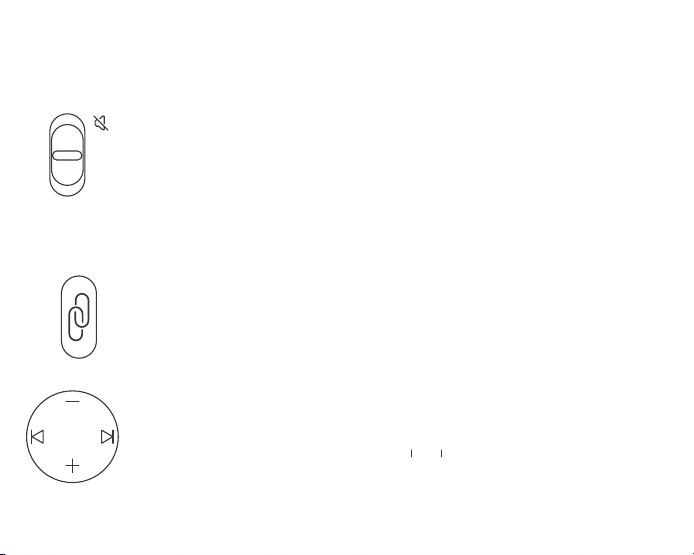
Mute / ON / OFF Slide Switch
Volume +/-
Pairing Button
LED Indicator
Type-C Charging Port
(10 adjustable levels)
Previous / Next Chime
(37 tones available)
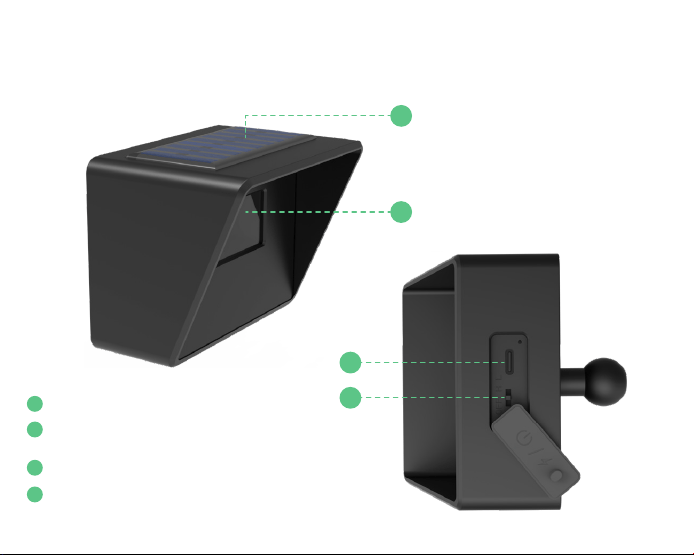
Solar Motion Sensor
1
2
3
4
Solar Panel
Sensor Lens
Type-C Charging Port
Power / Sensitivity Switch
(PIR Detection Area)
(OFF / High / Low)
1
2
3
4
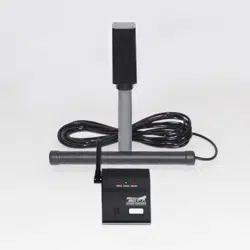
How to Charge
Receiver
Charging
Fully charged
The receiver includes a built-in
backup battery:
-Can be used while plugged in
-Can also operate wirelessly
after a full charge
When the battery is low, the
receiver will announce:
“Battery low.”
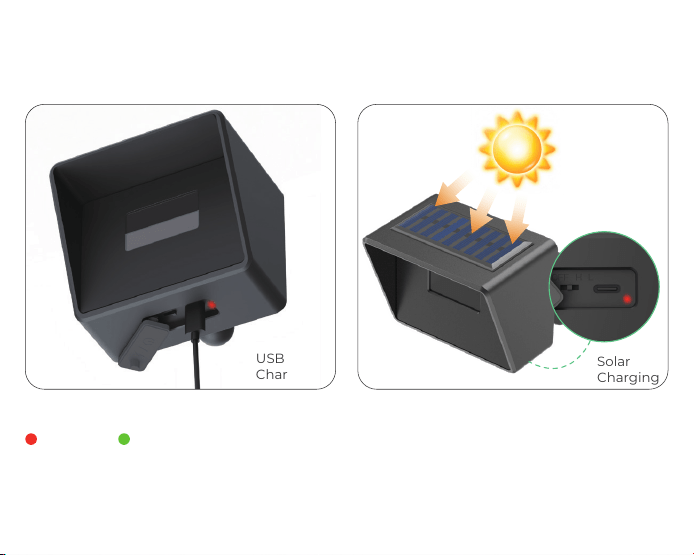
Solar Motion Sensor
When the sensor battery is low, the receiver will announce:“Sensor battery low.”
USB
Charging
Solar
Charging
Recommendation: Fully charge both the receiver and sensor before first
use to ensure optimal performance.
Fully charged
Charging
Pairing Setup
Step 1: Power On Receiver
Turn on the receiver. It will automatically play a default
factory chime once powered on.
Step 2: Enter Pairing Mode
Press the Pairing Button once to enter pairing mode.
While in pairing mode:
Press the Pairing Button again to exit pairing mode manually.
The receiver will announce:
“Pairing, please select a sound, then wave your hand in front of
the sensor.”
Use the Chime Selection Buttons (◀ / ▶) to select your desired
chime.
Note: If no operation is performed within 10 seconds after power-on, the
receiver will enter sleep mode. In sleep mode, pressing the Pairing Button
once will wake the device and replay the last selected chime. Press the Pairing
Button again to enter pairing mode.
OFF
ON
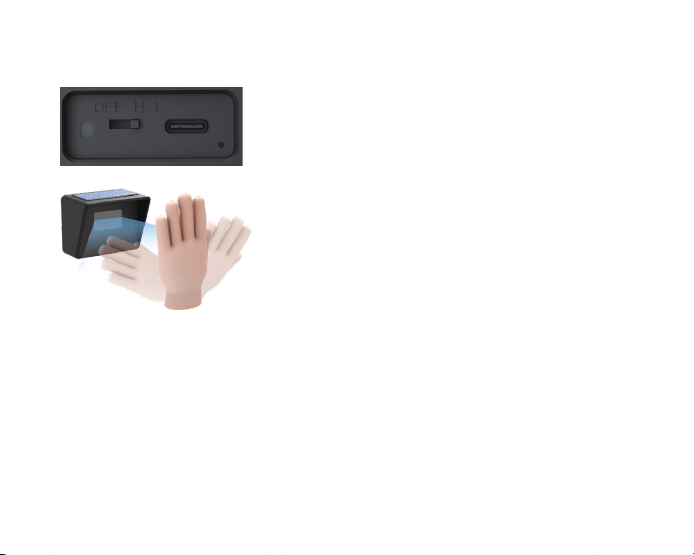
Step 3: Sensor Activation & Pairing Completion
Step 4: Pairing Multiple Sensors
After selecting the chime, switch the sensor from
OFF to H or L (sensitivity mode) to power it on.
Then wave your hand in front of the sensor to
complete pairing.
· The sensor will detect motion and activate
· The LED indicator will flash white
· The receiver will announce: “Pairing complete.”
After pairing the first sensor, additional sensors can be added one by one:
1.Set the already paired sensor to OFF using the bottom switch.
2.Set the next sensor from OFF to H or L mode (working mode).
3.Repeat Steps 2–3 to pair each additional sensor individually.
Note: To change the chime of an already paired sensor,
re-enter pairing mode and repeat the pairing process.
Important: During final installation, ensure all sensors are set to H or L mode (not OFF) to remain
active.

Automatic Exit (Timeout)
During pairing mode, if no operation is detected on both the receiver and the
sensor within 25 seconds, the system will automatically exit pairing mode.
The receiver will announce: “Exiting pairing.”
Sensor Removal
· Remove all paired sensors:
Press and hold the Pairing Button to delete all previously paired sensors at once.
The receiver will announce:“Paired sensor removed.”
· Disable a single sensor:
Turn the sensor switch to OFF at the bottom of the device.
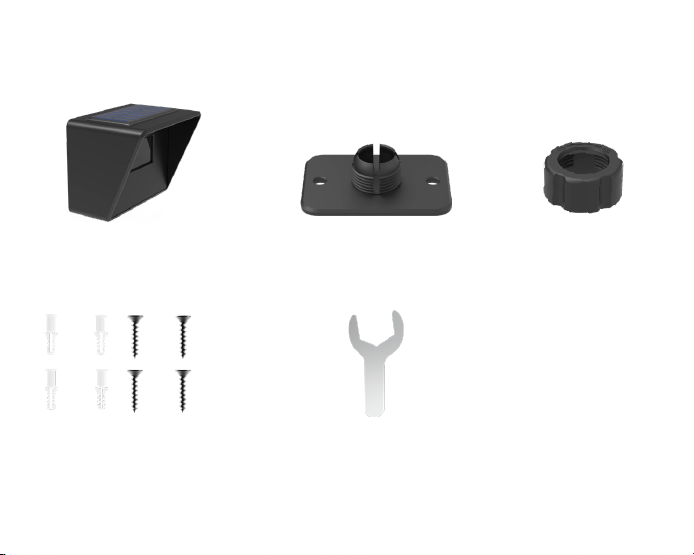
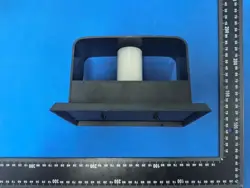
Solar Sensor Installation
Solar Motion Sensor Mounting Plate Locking Ring Nut
Screws Wrench
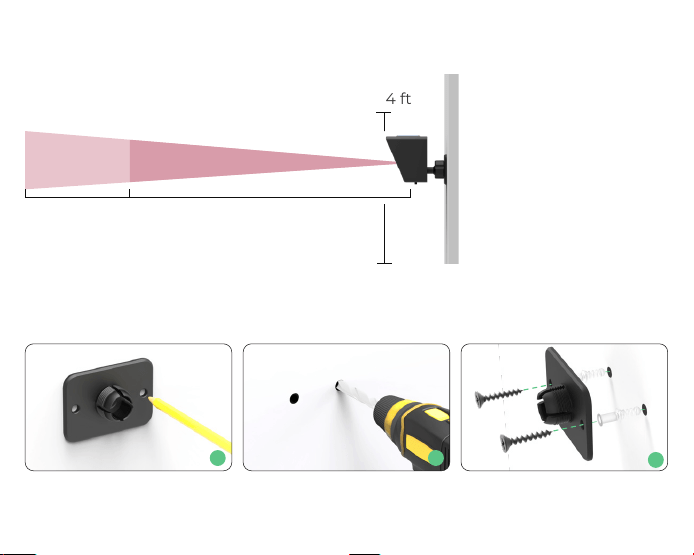
Installation Steps
Step 1: Position the mounting plate on the desired surface. Mark the hole locations,
drill holes, and secure the plate firmly using screws.
Recommended Installation Height
Install the motion
sensor at a height of
3.3–4 ft (1–1.2 m) above
the ground for optimal
detection performance.
Height
3.3–4 ft
LOW
32.8ft(10m)
HIGHT
55.7ft(17m)
1
2
3
Installation Tips
· Mount the sensor level and perpendicular to the ground. Do not tilt it up or down,
or install it at an angle.
· Ensure the solar panel receives direct sunlight for efficient charging, but avoid
pointing the sensor lens directly toward strong sunlight to prevent false alarms.
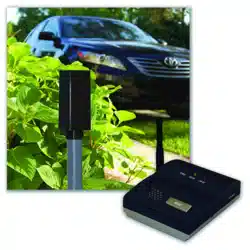
· Position the sensor to face an open detection area such as a driveway or pathway.
· Avoid aiming the sensor at trees, bushes, or moving objects, as wind movement
may trigger false alerts.
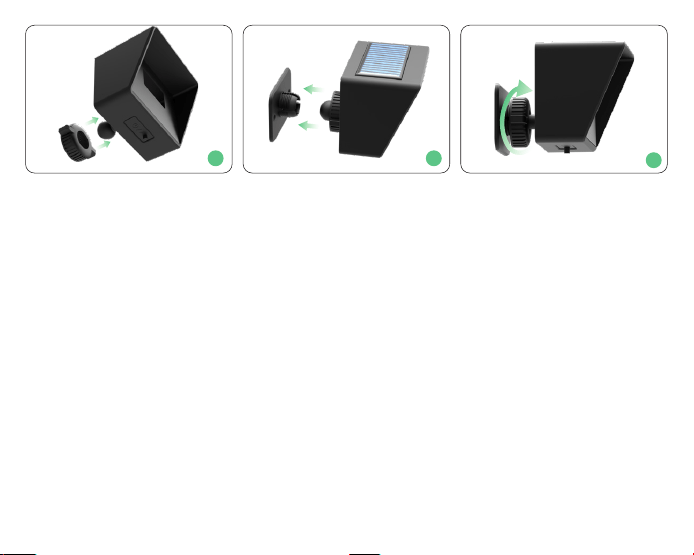
Step 2: Attach the solar sensor to the mounted backplate. Use a wrench to tighten
the ring nut onto the backplate, securing the sensor firmly in place for stability.
1
2
3

Specifications
Model
DA01
Detection Range
High: 49–56 ft (15–17 m)
Low: 26–33 ft (8–10 m)
Detection Angle
Horizontal: 35°
Recommended
Installation Height
3.3–4 ft (1–1.2 m)
Receiver Power
4000mAh Rechargeable Battery
Supports Plug-in & Wireless Use
Sensor Power
Solar Powered +
2000mAh Rechargeable Battery
Supports Solar Charging & USB Charging
Operating
Temperature
14°F to 140°F (-10°C to 60°C)
Sensor Waterproof Rating
IP65

Troubleshooting
Q1: Why is there no detection or the range is short?
A:
Install the sensor at 3.3–4 ft (1–1.2 m) and keep it level, facing the detection area
Switch to High sensitivity mode
Q2: Why does the sensor trigger false alarms?
A:
Switch to Low sensitivity mode in complex environments
Q3: Why is the receiver not working or no sound?
A:
Recharge the receiver or keep it plugged in
Disable mute mode or increase the volume
Re-pair the sensor and receiver


FCC Warnning:
This equipment has been tested and found to comply with the limits for a Class B digital device,
pursuant to part 15 of the FCC Rules. These limits are designed to provide
reasonable
protection against harmful interference in a residential installation. This equipment generates,
uses and can radiate radio
frequency
energy
and,
if
not
installed
and
used
in
accordance
with
the
instructions,
may cause
harmful
interference
to
radio
communications.
However,
there
is
no
guarantee
that interference
will
not
occur
in
a
particular
installation.
If
this
equipment
does
cause
harmful interference to radio or television reception, which can be
determined by turning the equipment off
and
on,
the
user
is
encouraged
to
try
to
correct
the interference
by
one
or
more
of
the following measures:
•
Reorient or relocate the receiving antenna.
•
Increase the separation between the equipment and receiver.
•
Connect the equipment into an outlet on a circuit different from that to which the receiver is
connected.
• Consult the dealer or an experienced radio/TV technician for help.
Caution:
Any
changes
or
modifications
to
this
device
not
explicitly
approved
by
manufacturer
could void your authority to operate this equipment.
This
device
complies
with
part
15
of
the
FCC
Rules.
Operation
is
subject
to
the
following
two
conditions:
(1)This
device
may
not
cause
harmful
interference,
and
(2)
this
device
must
accept
any
interference received, including interference that may cause undesired operation.
This
equipment
complies
with
FCC
radiation
exposure
limits
set
forth
for
an
uncontrolled
environment.
This
equipment
should
be
installed
and
operated
with
minimum
distance
0cm
between the radiator and your body.