*
Upon registering your product
at morphyrichards.co.uk
3 Year
Guarantee
*
Please read and keep these instructions for future use
User Manual
Model No.
248020, 248021,
248022, 248023
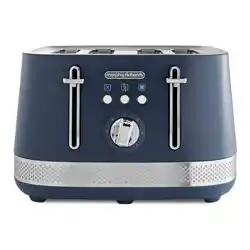
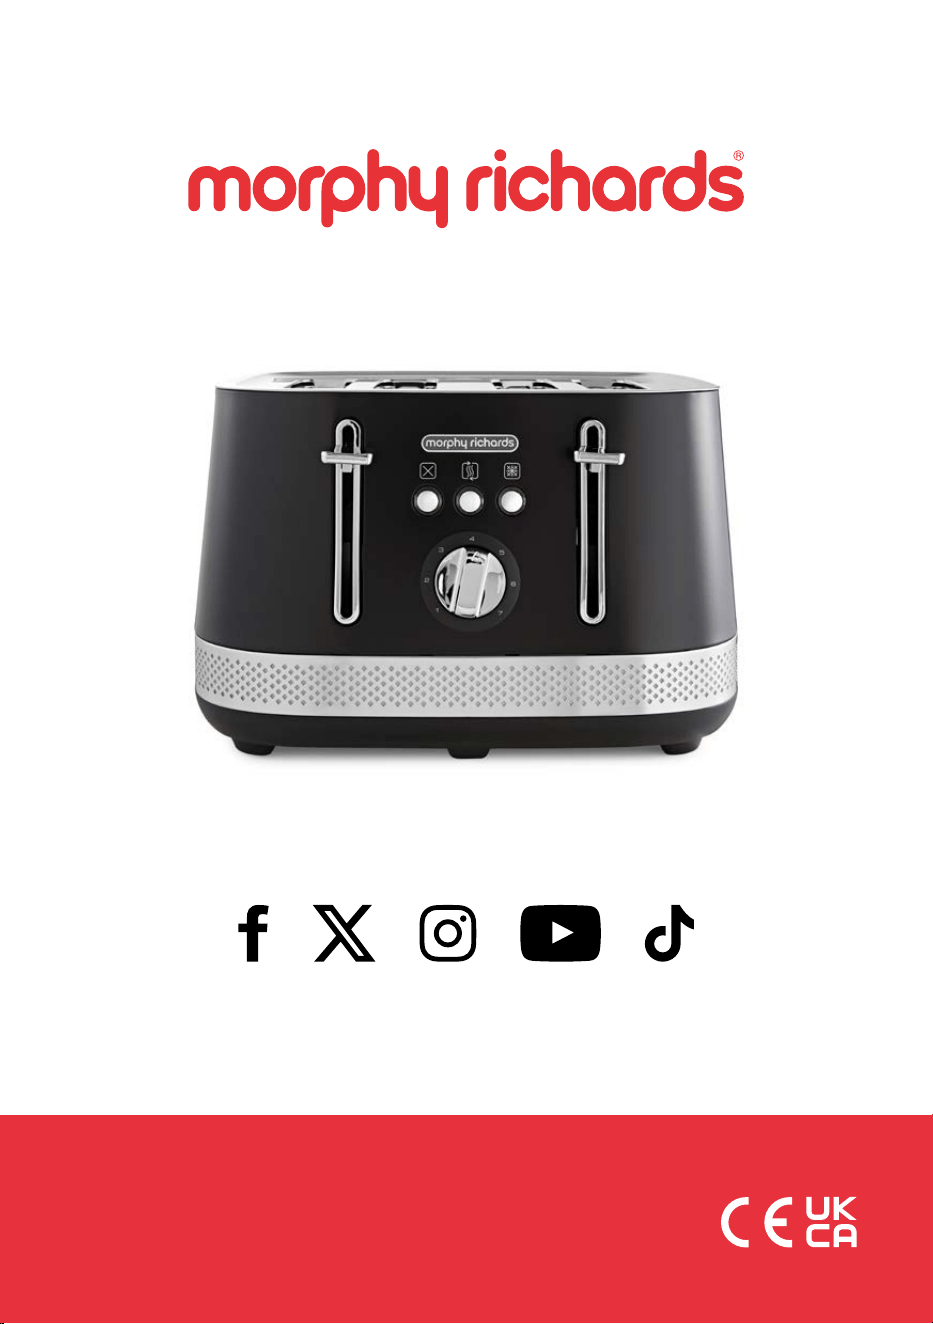
4 Slice Toaster

2
HEALTH AND SAFETY
The use of any electrical appliance requires
the following common sense safety rules.
Read these instructions carefully and retain
for future reference.
• WARNING: Disconnect from the mains
supply before carrying out any routine
maintenance.
• WARNING: Misuse of the appliance could
cause personal injury.
• This appliance can be used by children
aged from 8 years and above and persons
with reduced physical, sensory or mental
capabilities, or lack of experience and
knowledge, if they have been given
supervision or instruction concerning the
use of the appliance in a safe way and
understand the hazards involved.
• Children shall not play with the appliance.
• Cleaning and user maintenance shall not be
made by children unless they are older than
8 years and supervised.
• Keep the appliance and its cord out of
reach of children less than 8 years.

3
HEALTH AND SAFETY
• If the supply cable is damaged, it must be
replaced by the manufacturer, its service
agent or similarly qualied persons in order
to avoid a hazard.
• The bread may burn, therefore do not use
the appliance near or below combustible
material such as curtains.
• This appliance is not intended to be
operated on an extension cable or by
means of an external timer or separate
remote control system.
• This appliance is intended for household use
only. It is not suitable for use in sta kitchen
areas in shops, oces and other commercial
environments.

4
HEALTH AND SAFETY
WARNING: Danger to the person!
IMPORTANT: Damage to the
appliance!
MAINS CABLE
• Do not let the cable run across a
cooker or hot area which might
damage the cable.
OTHER SAFETY CONSIDERATIONS
• Only use for intended purpose.
PERSONAL SAFETY
• Do watch your appliance during
use.
• WARNING: Do not touch the top
of the appliance or other hot
parts during or after use, use
handles or knobs.
• WARNING: Do not wrap the cable
around the main body of the
appliance during or after use.
• WARNING: Do not use under
cupboards.
• WARNING: Do not insert oversize
foods, metal, foil packages or
utensils into the toaster.
• WARNING: Do not attempt to
dislodge food when the appliance
is plugged in and never insert
cooking utensils into the slots.
• IMPORTANT: Do not place bread
or other items on top of the
slots as this may damage the
appliance and creates a re
hazard.
PRECAUTIONS
• Never use the appliance when it
is empty (when there is no bread
inside) except on rst use.
• Do not use very thin or broken
slices of bread.
• Do not insert other foods that
may drip during the cooking
process. In addition to making the
cleaning procedure more dicult,
these may cause res.
• Clean the crumb tray regularly:
crumbs can smoke or burn.
• Do not insert (by force) foods that
are too big for the slots.
• Do not insert forks or other
utensils into the toaster in order
to remove bread. As well as
damaging the toaster, there is a
high risk of electric shock.
• Should some toast remain
blocked in the toaster, remove
the plug from the mains, wait for
the toaster to cool down until it
is safe to touch, then turn the
toaster over and shake it gently.
5
HEALTH AND SAFETY
ELECTRICAL DETAILS
• Check that the voltage on the rating plate of your appliance
corresponds with your house electricity supply which must be A.C.
(Alternating Current).
• Should the fuse in the mains plug require changing, replace it with a
fuse of the same rating as originally tted.
• The power consumption in o mode is 0W.
• When the appliance is not working, it enters the o mode immediately
(0 min).
• WARNING: This appliance must be earthed.
PLEASE BE AWARE OF HOT SURFACES
HANDLE WITH CARE
Treating scalds
• Run cold water over the aected area immediately.
• Do not stop to remove clothing.
• Seek medical advice quickly.
6
Before using the appliance for the rst time, operate the toaster
without bread.
As with all new electric heating elements, your toaster will emit a ‘new’
smell when it is rst switched on. This is quite normal and not a cause
for concern.
PRODUCT OVERVIEW
BEFORE FIRST USE
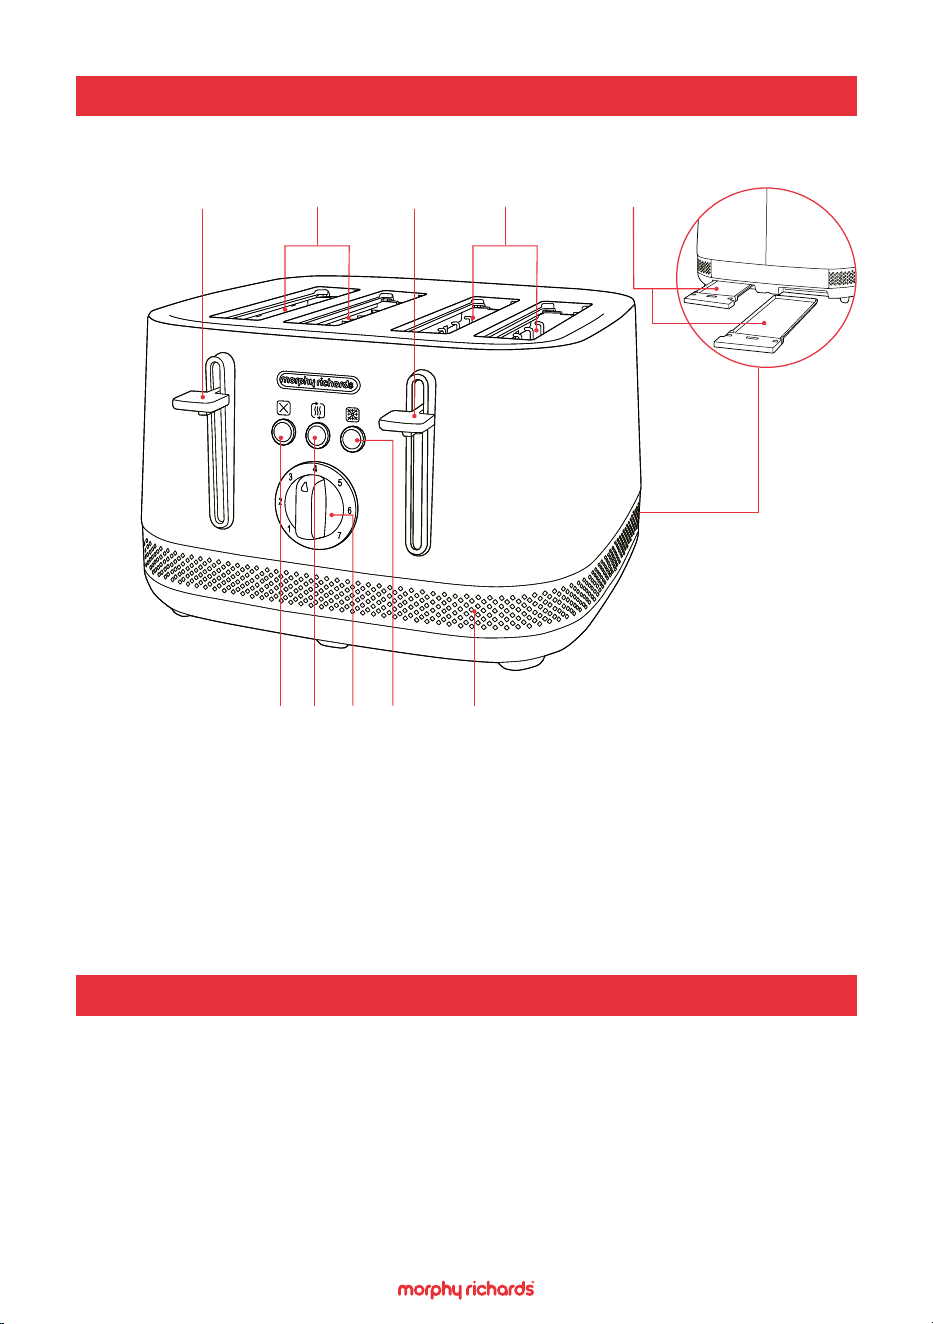
108 96 7
31
42
1. Left Bread Carriage Lever
2. Left Bread Slots
3. Right Bread Carriage Lever
4. Right Bread Slots
5. Crumb Trays (at rear)
6. Cancel Button
7. Re-heat Button
8. Browning Control
9. Defrost Button
10. Illumination Strip
5
7
QUICK START GUIDE
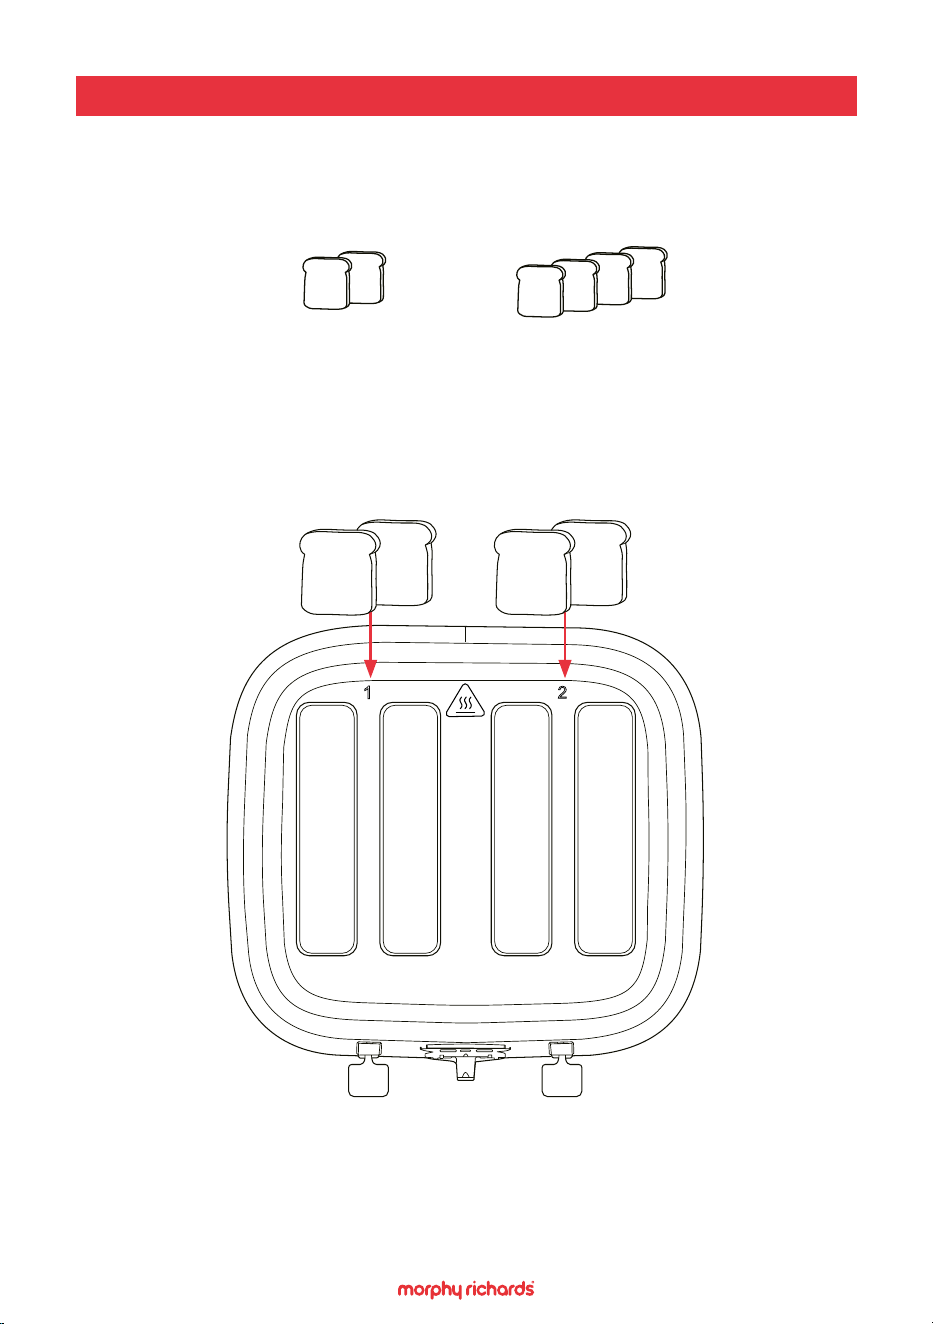
The right bread carriage lever (3) will not operate unless the left bread
carriage lever (1) is in use.
If toasting one
or two slices:
1
1
2
2
3
4
Always use
the left bread
carriage lever (1)
and left bread
slots (2)
Use both the Left (1)
and right (3) bread
carriage levers and
left (2) and right (4)
bread slots
If toasting more
than two slices:
31
42
8
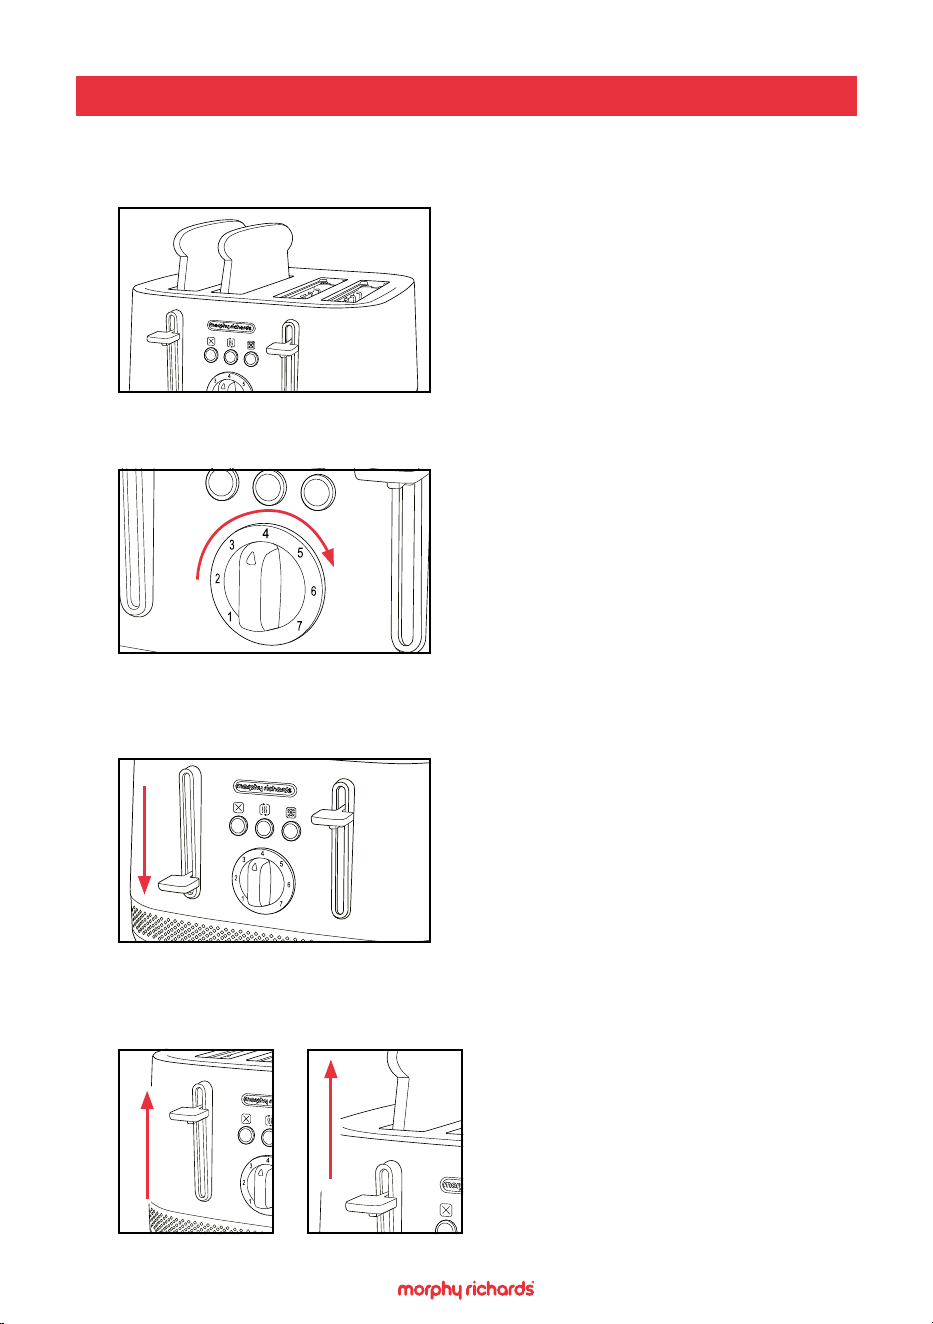
TOASTING ONE OR TWO SLICES
Place the sliced bread into the left bread slots (2).
Adjust the browning control (8) to the desired setting.
Depress the left bread carriage lever (1). The toaster will begin toasting
the bread. The illumination strip (10) and the cancel button (6) will light up.
When completed, the left bread carriage lever will automatically rise and
lift the toast from the toaster.
1 2
9
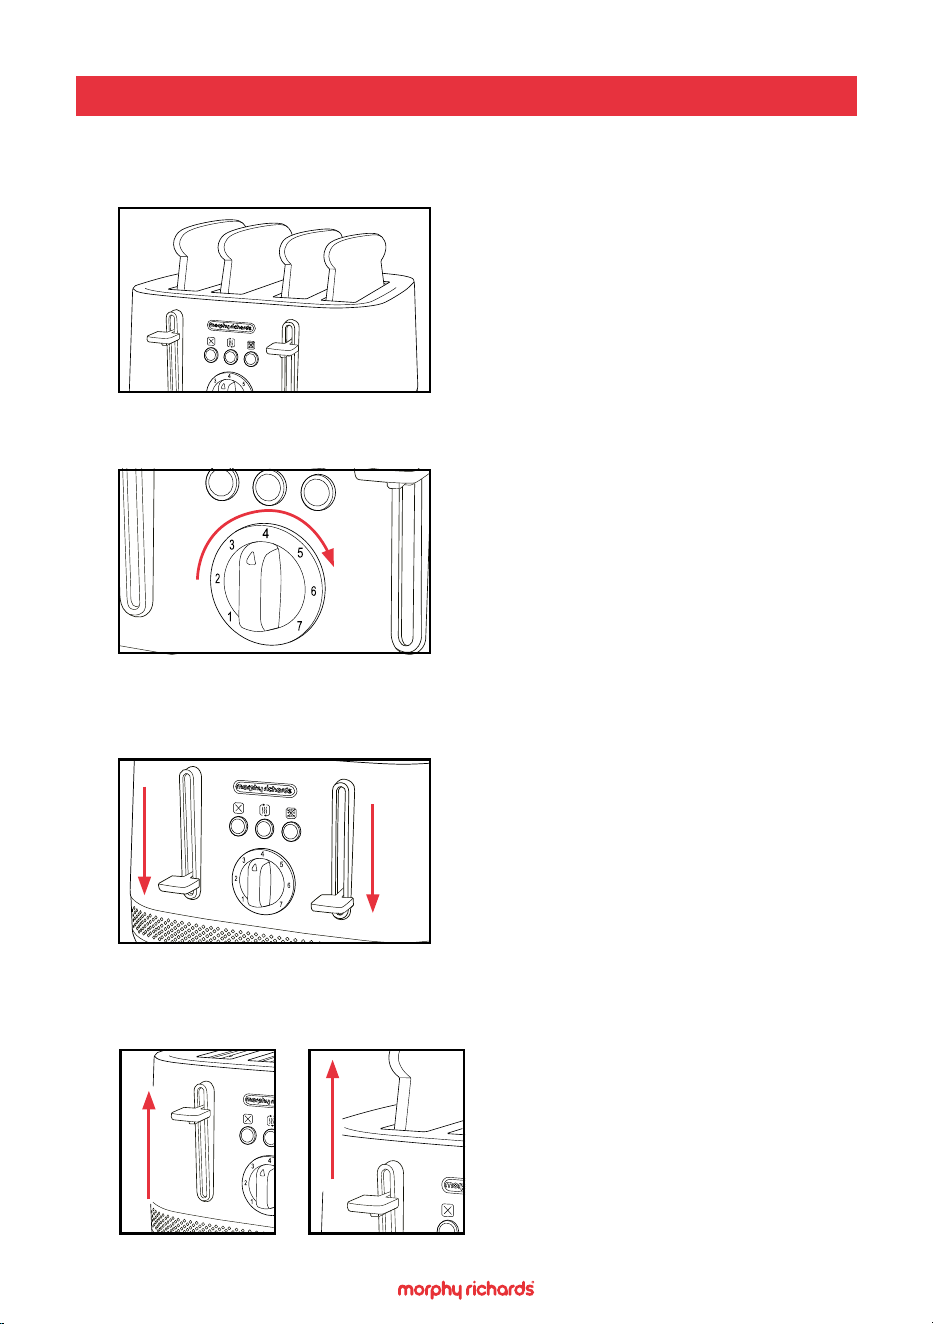
TOASTING THREE OR FOUR SLICES
Place the sliced bread into the left (2) and right (4) bread slots.
Adjust the browning control (8) to the desired setting.
Depress both bread carriage levers (1 & 3). The toaster will begin toasting
the bread. The illumination strip (10) and the cancel button (6) will light up.
When completed, the bread carriage levers will automatically rise and lift
the toast from the toaster.
3
4
1 2

10
• In order to achieve uniform browning, we recommend you wait a
minimum of 30 seconds between each toasting cycle, so that the
control can be automatically reset.
• If toasting one slice only, you may need to adjust the browning
control (8) to a slightly lower setting. You will notice a variation in
toast colour on one side of a single slice. The side next to the empty
slot that is powered on will usually be darker due to the extra heat.
• When toasting 2 slices it is recommended they are of equal size and
freshness.
• Stale bread toasts more rapidly than fresh bread. Therefore, the
browning controls should be set at a lower setting than usual.
• All sorts of bread can be used as well as teacakes, small rolls etc.
However, slices should not be so thick they will cause burning or
jamming within the bread slots (2 & 4).
• If the bread in your toaster becomes jammed disconnect your toaster
at the socket, allow it to cool, then remove the bread.
• Allow your toaster to cool fully before storing.
ADDITIONAL FEATURES
HINTS AND TIPS
Cancel Button (6)
If you wish to stop the toasting process, press the cancel button.
Re-heat Button (7)
If your toast has popped up and gone cold, the toaster oers a re-heat
facility. To use, lower the bread carriage levers (1 & 3) and press the re-
heat button immediately. The button will illuminate and the toaster will
operate for a short period reheating the bread.
Defrost Button (9)
To toast frozen bread, do not adjust the browning controls (8) from your
normal setting. Place the frozen bread in the bread slots (2 & 4), lower
the bread carriage lever and press the defrost button. The button will
illuminate and the toaster will operate for a longer period defrosting
and toasting the bread.

11
CLEANING YOUR TOASTER
REMOVEABLE CRUMB TRAYS (5)
• Before cleaning, unplug your toaster and let it cool fully.
• The external surfaces of your toaster can be cleaned with a soft
cloth. Do not use abrasive detergents that can ruin the surface.
• DO NOT IMMERSE IN WATER.
• After each use, remove the plug from the electrical outlet and empty
the crumb collection tray that is under the appliance.
• DO NOT TOUCH ANY PART OF YOUR TOASTER WITH SHARP OR
METAL UTENSILS, ESPECIALLY INSIDE THE BREAD SLOTS. RISK OF
ELECTRIC SHOCK AND DAMAGE TO THE TOASTER.
WARNING: Crumbs will accumulate in the crumb trays and could catch
re if not emptied regularly.
1. When your toaster has cooled down completely, tap the sides of the
case lightly to dislodge any crumbs lodged in the bread slots (2 & 4).
2. Pull the crumb trays and remove from the toaster.
3. Empty the crumb trays and replace back into the toaster.
Never operate your toaster without the crumb trays tted.
12
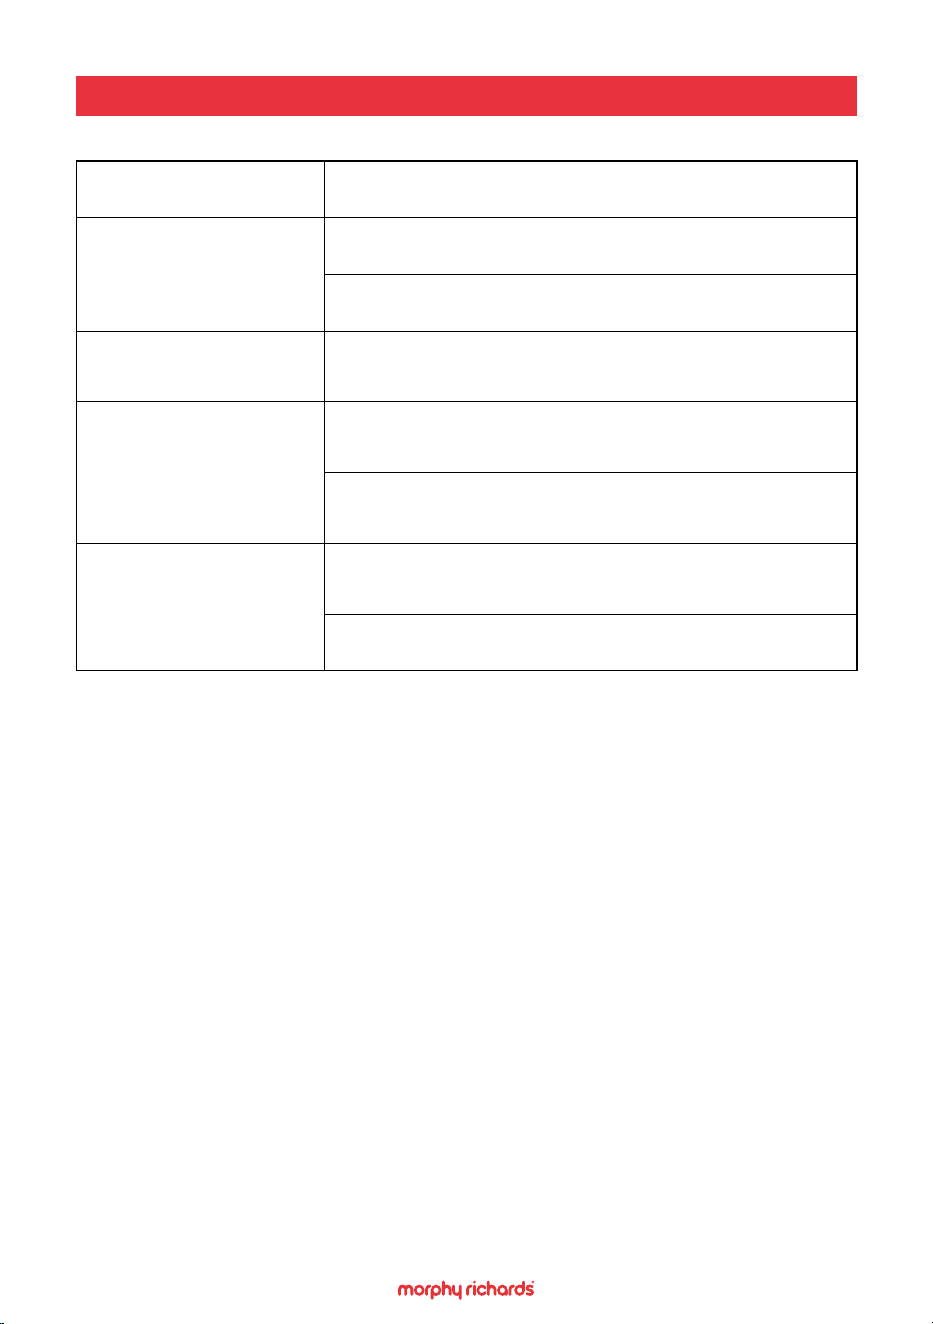
TROUBLESHOOTING
Problem Solution
No power
Try another socket.
Change the fuse in the plug.
Bread carriage levers
won't latch
Ensure the toaster is plugged in and switched on at
the mains outlet.
Bread is burnt
Check the bread isn't too thick and touching the
elements.
Ensure the correct setting is selected on the
browning control and change as necessary
Smoking
Check that the bread isn't touching the elements.
Replace with thinner slices.
Check the crumb tray isn't full. Empty as necessary.
13
CONTACT US
If you are having a problem with your appliance, please contact our
Helpline, as we are more likely to be able to help than the store you
purchased the item from. Please have the product name, model number
and serial number to hand when you contact us to help us deal with
your enquiry quicker.
email: hello@morphyrichards.co.uk
www.morphyrichards.co.uk
For electrical products sold within the European
Community, at the end of the electrical products useful
life, it should not be disposed of with household waste.
Please recycle where facilities exist.
Check with your Local Authority or retailer for recycling
advice in your country.
PRODUCT RECYCLING
14
Your standard 2 year guarantee is extended for an additional 1 year
when you register the product within 28 days of purchase with Morphy
Richards. If you do not register the product with Morphy Richards within
28 days, your product is guaranteed for 2 years.
To validate your 3 year guarantee,
scan the QR code or register online
at www.morphyrichards.co.uk
N.B. Each qualifying product needs to be registered with Morphy
Richards individually. Please note that the 2 year guarantee is only
available in the UK. Please refer to the 2 year guarantee for more
information.
YOUR 2 YEAR GUARANTEE
It is important to retain the retailer’s receipt as proof of purchase.
Staple your receipt to the back cover for future reference.
Please quote the following information if the product develops a fault.
These numbers can be found on the base of the product.
Model no.
Serial no.
All Morphy Richards products are individually tested before leaving the
factory. In the unlikely event of any appliance proving to be faulty within
28 days of purchase, it should be returned to the place of purchase
for it to be replaced. If the fault develops after 28 days and within 24
months of original purchase, you should contact the Helpline quoting
Model number and Serial number on the product, or write to Morphy
Richards at the address shown. You may be asked to return a copy of
proof of purchase.
Subject to the exclusions set out on the next page (see Exclusions), the
faulty appliance will then be repaired or replaced as appropriate and
dispatched usually within 7 working days of receipt.
If, for any reason, this item is replaced or repaired during the 2 year
REGISTERING YOUR 3 YEAR GUARANTEE

15
guarantee period, the guarantee on the new item will be calculated
from the original purchase date. Therefore it is vital to retain your
original till receipt or invoice to indicate the date of initial purchase.
To qualify for the 2 year guarantee, the appliance must have been used
according to the instructions supplied.
The appliance is intended for domestic use only. Misuse or use for
commercial or any other purpose will render the guarantee invalid.
Exclusions
Morphy Richards shall not be liable to replace or repair the goods under
the terms of the guarantee where:
1. The fault has been caused or is attributable to accidental use,
misuse, negligent use or used contrary to the manufacturer’s
recommendations or where the fault has been caused by power
surges or damage caused in transit.
2. The appliance has been used on a voltage supply other than that
stamped on the products.
3. Repairs have been attempted by persons other than our service
sta (or authorised dealer).
4. The appliance has been used for hire purposes or non domestic use.
5. The appliance is second hand or refurbished.
6. Morphy Richards reserves the right not to carry out any type of
servicing under the guarantee at its discretion.
This guarantee does not confer any rights other than those expressly
set out above and does not cover any claims for consequential loss
or damage. This guarantee is oered as an additional benet and
does not aect your statutory rights as a consumer. Morphy Richards
products are intended for household use only. See usage limitations
within the location safety instructions.
Disclaimer
Morphy Richards has a policy of continuous improvement in product
quality and design. The company, therefore reserves the right to
change the specication of its models at any time.
REGISTERING YOUR 3 YEAR GUARANTEE
morphyrichards.co.uk
TT248020MUK Rev4
@morphyrichardsuk #loveyourmorphy
Morphy Richards
9 Cabot Lane, Poole, Dorset, BH17 7BY, UK