USE + CARE
MANUAL
REV.032026
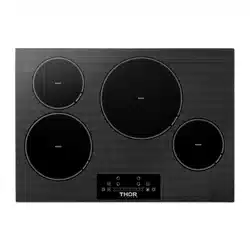
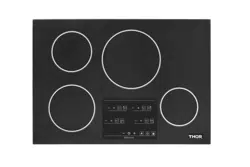
30/36 INCH PROFESSIONAL
INDUCTION COOKTOP
PIH30 | PIH36

USE & CARE MANUAL
30/36 INCH PROFESSIONAL
INDUCTION COOKTOP
PIH30 / PI
H36

3
TABLE OF CONTENTS
IMPORTANT INSTRUCTION.................................................................................................................................... 4-6
Safety Warning............................................................................................................................................................................... 5-6
CONNECTING THE POWER SUPPLY.................................................................................................................................... 7
PRODUCT OVERVIEW.......................................................................................................................................................... 8-9
BEFORE USING YOUR NEW COOKTOP.............................................................................................................................10-11
Using the Touch Controls............................................................................................................................................................. 10
Choosing the right Cookware....................................................................................................................................................... 10
How to Check if Cookware is Suitable......................................................................................................................................... 10
USING YOUR COOKTOP................................................................................................................................................... 12-17
To start cooking............................................................................................................................................................................. 12
Using the Boost Function............................................................................................................................................................. 13
Using the Keep Warm Function................................................................................................................................................... 13
Using the Pause Function............................................................................................................................................................ 14
Using the Timer as a Minute Minder........................................................................................................................................... 15
Using the Timer to Switch off One or More Cooking Zones...................................................................................................... 16
Setting the Timer for Multiple Cooking Zones........................................................................................................................... 17
COOKING SAFETY AND TIPS.............................................................................................................................................18-21
Important Safety Notice ............................................................................................................................................................... 18
Heat Settings................................................................................................................................................................................. 19
care instructions............................................................................................................................................................................ 20
Tips and
Trouble Shooting............................................................................................................................................................ 21
FAILUER DISPLAY AND INSPECTION................................................................................................................................. 22
WARRANTY......................................................................................................................................................................... 23
4
IMPORTANT INSTRUCTION
PLEASE READ THE FOLLOWING INSTRUCTIONS CAREFULLY BEFORE USING THE APPLIANCE.
2) Never Use Your Appliance for Warming or Heating the Room.
3) Do Not Leave Children Alone-Children should not be left alone or unattended in area where appliance is in use.
They should never be allowed to sit or stand on any part of the appliance.
6) Storage in or on Appliance-Flammable materials should not be stored in an oven or near surface units.
8) Use Only Dry Potholders-Moist or damp potholders on hot surfaces may result in burns from steam. Do not let
potholder touch hot heating elements. Do not use a towel or other bulky cloth.
9) Use Proper Pan Size-This appliance is equipped with one or more surface units of different size. Select utensils
10) Never Leave Surface Units Unattended at High Heat Settings-Boilover causes smoking and greasy spillovers
that may ignite.
subject wiring or components underneath to damage.
14) Do Not Cook on Broken Cook-Top-If cook-top should break, cleaning solutions and spillovers may penetrate the
15) Clean Cook-Top With Caution-If a wet sponge or cloth is used to wipe spills on a hot cooking area, be careful to
16) Do not place metallic objects such as knives, forks, spoons and lids on the cooktop surface since they can get hot.
17) CAUTION: Do not store items of interest to children in cabinets above a range or on the backguard of a
range-children cllmbing on the range to reach Items could be serlously Injured.
18) DO NOT TOUCH SURFACE UNITS OR AREAS NEAR UNITS-Surface units may be hot even though they are dark
in color. Areas near surface units may become hot enough to cause burns. During and after use, do not touch, or let
20) Read these instructions carefully before installing or using this appliance.
21) No combustible material or products should be placed on this appliance at any time.
5
IMPORTANT INSTRUCTION
Please make this information available to the person responsible for installing the appliance as it could reduce
your installation costs.
In order to avoid a hazard, this appliance must be installed according to these instructions for installation.
This appliance should be connected to a circuit which incorporates an solating switch providing full
disconnection from the power supply.
WARNING: Use only cooktop guards designed by the manufacturer of the cooking appliance or indicated by the
manufacturer of the appliance in the instructions for use as suitable or cooktop guards incorporated in the
appliance.
The use of inappropriate guards can cause accidents.
Failure to install the appliance correctly could invalidate any warranty or liability claims.
Regarding the details of installation, thanks to refer to the section <Installation>.
Connect only to a 3-wire, 240-volt power supply; the neutral conductor is not required for the operation of the
appliance. The potential at the power supply electrical connections shall be 150-volts-to-ground or less.
Electrical Shock Hazard
• Do not cook on a broken or cracked cooktop. If the cooktop surface is break or crack, switch the appliance off
• Switch the cooktop off at the wall before cleaning or maintenance.
• Failure to follow this advice may result in electrical shock or death.
Health Hazard
• This appliance complies with electromagnetic safety stdars.
Hot Surface Hazard
• During use, accessible parts of this appliance will become hot enough to cause burns. Do not let your body, clothing
or any item other than suitable cookware contact the ceramic glass until the surface is cool.
• Metallic objects such as knives, forks, spoons and lids should not be placed on the cooktop surface since they can
get hot.
• Children less than 8 years of age shall be kept away unless continuously supervised.
• Handles of saucepans may be hot to touch. Check saucepan handles do not overhang other cooking zones that are
on. Keep handles out of reach of children.
• Failure to follow this advice could result in burns and scalds.
Cut Hazard
•
and always store safely and out of reach of children.
• Failure to use caution could result in injury or cuts. Safety instructions
• Never leave the appliance unattended when in use. Boilover causes smoking and greasy
spillovers that may ignite.
• Never use your appliance as a work or storage surface.
• Never leave any objects or utensils on the appliance.
• Never use your appliance for warming or heating the room.
SAVE THESE INSTRUCTIONS
6
IMPORTANT INSTRUCTION
• After use, always turn off the cooking zones and the cooktop as described in this manual (i.e. by using the touch
controls).
• Do not allow children to play with the appliance or sit, stand, or climb on it.
• Do not store Items of Interest to chlldren In cabinets above the appliance. Children climbing on the cooktop could
be seriously injured.
• Do not leave children alone or unattended in the area where the appliance is in use.
• Children or persons with a disability which limits their ability to use the appliance should have a responsible and
competent person to instruct them in its use. The instructo
without danger to themselves or thelr surroundings.
• Do not repair or replace any part of the appliance unless speci
• Do not use a steam cleaner to clean your cooktop.
• Do not place or drop heavy objects on your cooktop.
• Do not stand on your cooktop.
• Do not use pans with Jagged edges or drag pans across the glass surface as this can scratch the glass.
• Do not use scourers or any other harsh abrasive cleaning agents to clean your cooktop, as these can scratch the
ceramic glass.
• If the supply cord is damaged, it must be replaced by the manuf
persons in order to avoid a hazard.
• This appliance is intended to be used in a domestic household environment only! Commerclal use of any kind is not
covered under the manufacturer's warranty!
• WARNING: The appliance and its accessible parts become hot during use.
• Care should be taken to avoid touching heating elements.
• Children shall not play with the appliance. Cleaning and user maintenance shall not be made by children without
supervision.
• WARNING: Unattended cooking on a cooktop with fat or oil can be dangero
NEVER try to
• WARNING:
• WARNING: If the surface is cracked, switch off the appliance to avoid the possibility of electric
shock, for cooktop surfaces of glass-ceramic or similar material which protect live parts.
• A steam cleaner is not to be used.
• The appliance is not intended to be operated by means of an ext
• State of California Proposition 65 Warnings
This product may contain a chemical known to the State of California, which can cause cancer or reproductive harm.
ernal timer or separate remote-control system.
STATE OF CALIFORNIA PROPOSITION 65 WARNING:
Cancer and Reproductive Harm - www.P65Warnings.ca.gov
WARNING
•
•
•
•
•
•
•
•
•
7
CONNECTING THE POWER SUPPLY
Power Supply Connection:
Electrical Safety and Cable Handling:
• The power supply must be connected in accordance with relevant electrical standards and regulations.
• A single-pole circuit breaker
d wiring to ensure safe
operation.
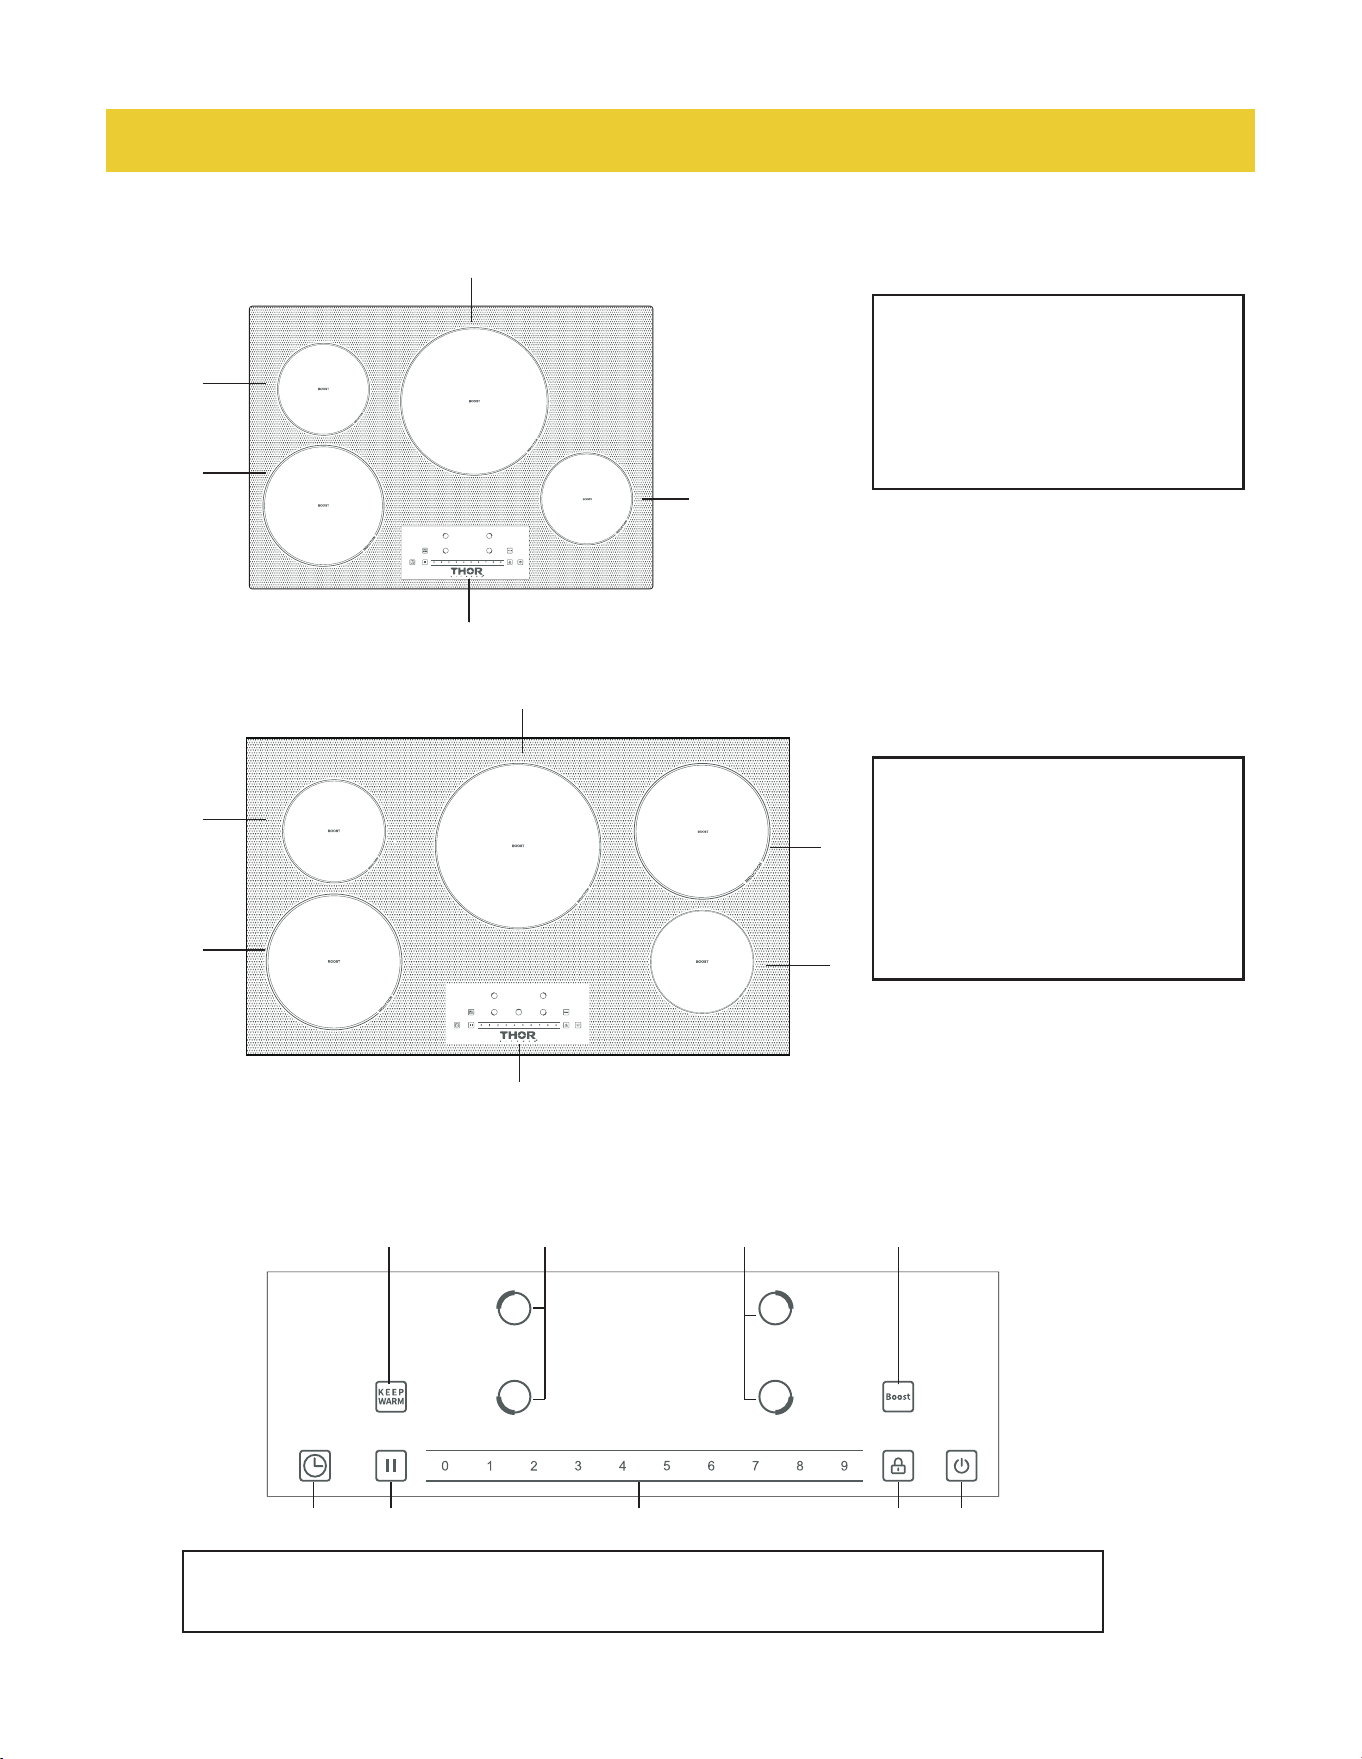
The connection method is illustrated inthe diagram below:
• If the p
ower cable is damaged or needs replacement, this must be carried out by an authorized after-sales
technician using the proper tools to prevent accidents.
• When connecting the appliance d
irectly to the mains supply, an omnipolar circuit breaker must be installed, with a
minimum contact gap of 0.12 in (3 mm).
• The installer must e
nsure that the electrical connection is correct and fully complies with safety regulations.
For 3-wire cable from home power supply
• The power cable m
ust not be bent, twisted, or compressed, as this can cause damage and create a safety hazard.
3-Wire Cable from Home Power Supply
White Wire
(Neutral)
Red Wire
Green Wire
(Grounding)
Black Wire
Junction Box
Cable from Appliance
Cable from Power Supply
Red Wire
Important:
• All electrical connections must be carried out by a
.
• Ensure that the power supply voltage and frequency correspond t
rating label of the
cooktop.
• Improper connection may result in electric shock, short circuit, or damage to the appliance.
8
PRODUCT OVERVIEW
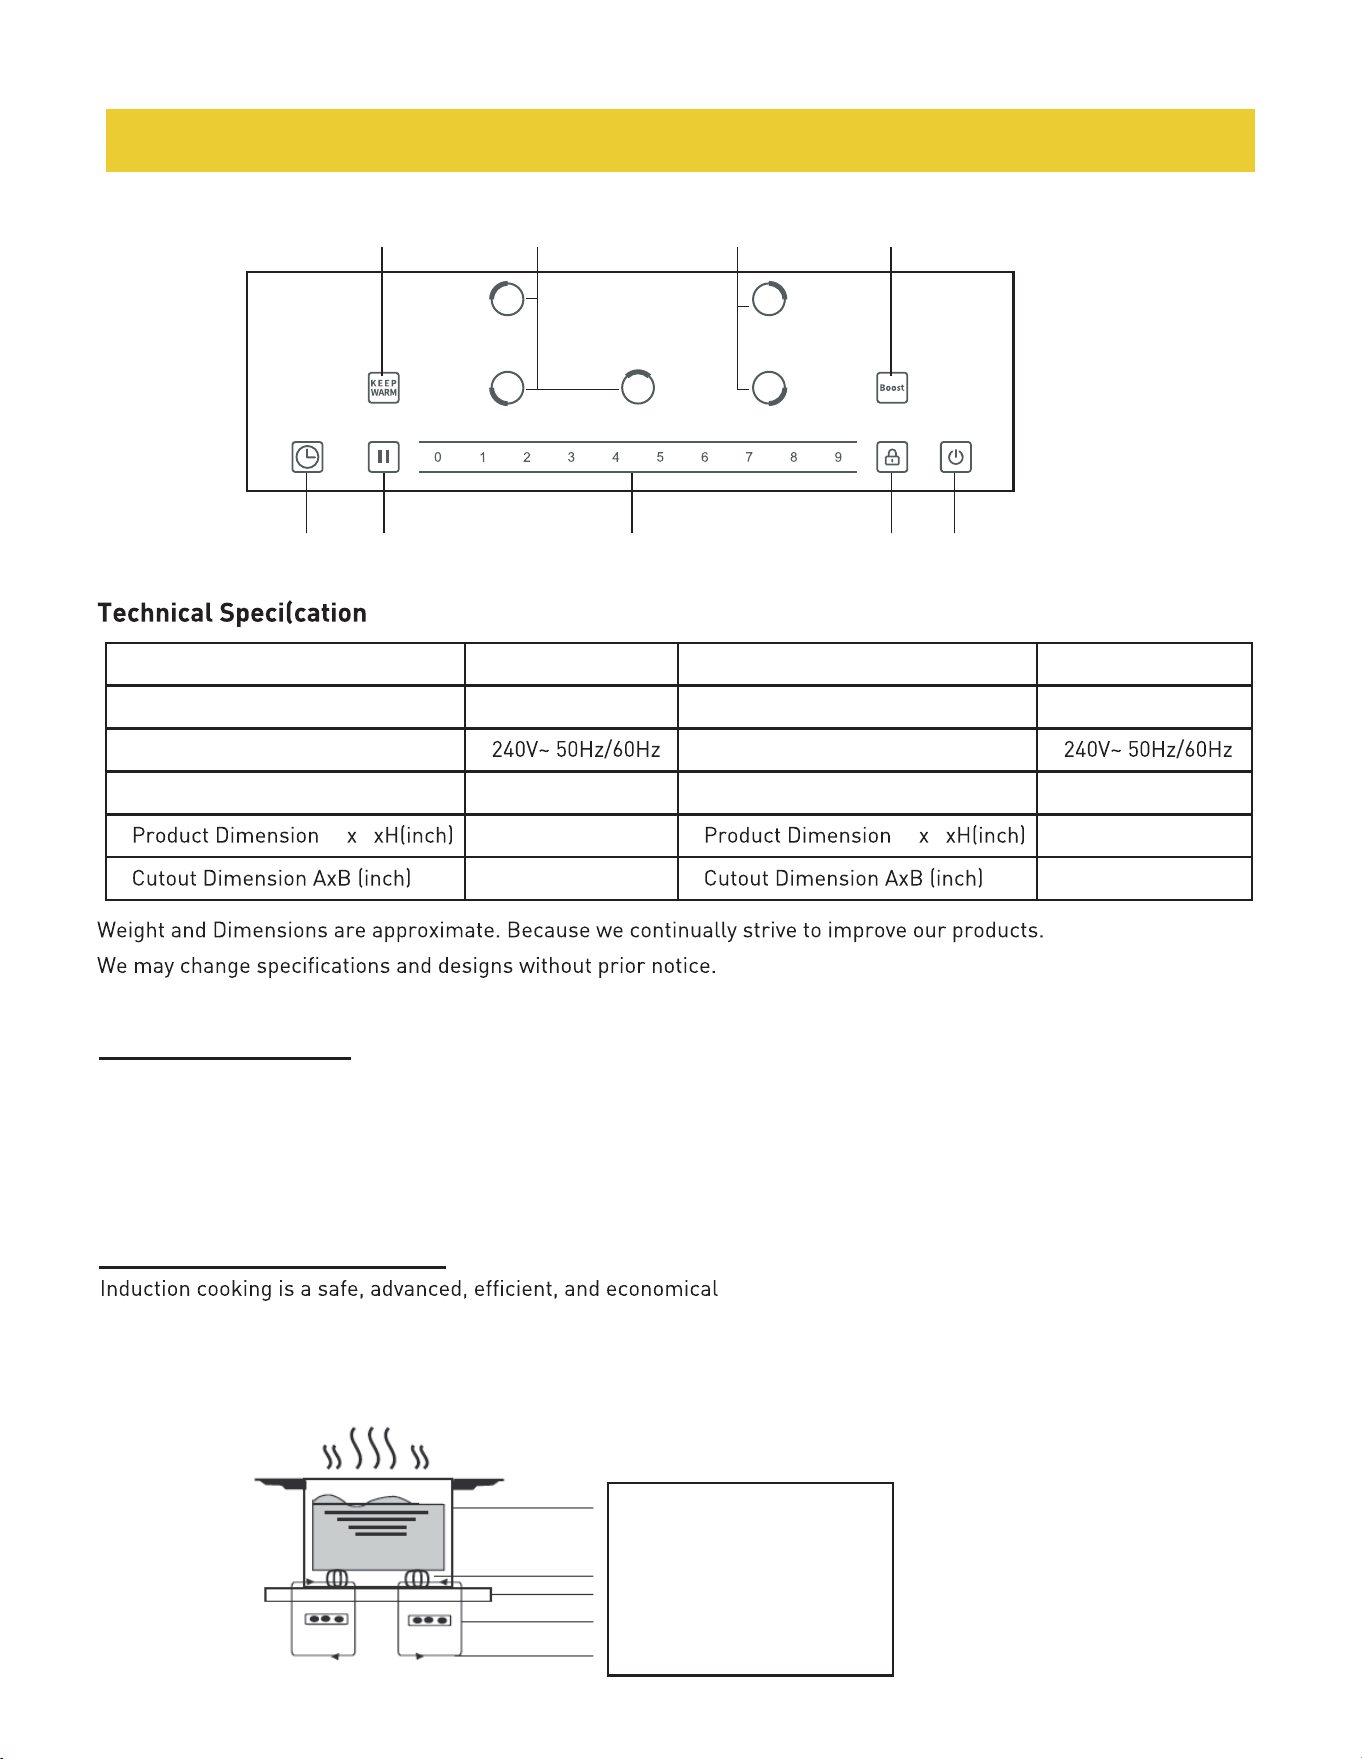
Top View
The Control Panel
PIH30
PIH30
PIH36
1
2
3
5
1
2
3
6
4
7 5 5
283 4 1
6
5
4
1. ON/OFF switch 5. Select heating zone
6. Boost control
7. Keep warm
8. Pause2. Select power level
3. Setting the timer
4. Child lock
1. 36inch max. 1800/2100W zone
2. 36inch max. 1200/1600W zone
3. 36inch max. 2300/3700W zone
4. 36inch max. 1800/2100W zone
5. 36inch max. 1200/1600W zone
1. 30inch max. 1800/2100W zone
2. 30inch max. 1200/1600W zone
3. 30inch max. 2300/3700W zone
4. 30inch max. 1200/1600W zone
5 . 30inch Control panel
6. 36inch Control panel
PRODUCT OVERVIEW
PIH36
9
Product Information:
The ceramic glass induction can meet different kinds of cuisine demands because of resistance wire heating,
micro-computerized control and multipower selection, really the optimal choice for modern families. The cooktop
centers on customers and adopts personalized design. The cooktop has safe and reliable performances, making your
life comfortable and enabling to fully enjoy the pleasure from life.
A Word on Induction Cooking:
7 5 5
23 8 4 1
6
cooking technology. It operates by generating
cooking technology. It operates by generating electromagnetic fields that heat the cookware directly, rather than
heating the glass surface. The glass surface warms only as a result of contact with the heated cookware, ensuring
faster heating, improved energy efficiency, and enhanced safety.
iron pot
magnetic circuit
induced currents
induction coil
ceramic glass plate
Induction Cooktop PIH30
Cooking Zones 4 Zones
Supply Voltage
Power
W D W D
Induction Cooktop PIH36
Cooking Zones 5 Zones
Supply Voltage
Power 11100W
7700W
30” x 21” x 5 1/4”
36” x 21” x 5 1/4”
29 1/4” x 20 1/4”
35 1/4” x 20 1/4”
• Read this guide, taking special note of the 'Safety Warnings' section.
•
ktop.
•
ooktop.
10
BEFORE USING YOUR NEW COOKTOP
Using the Touch Controls:
Choosing the right Cookware:
• Only use cookware with a base suitable for induction cooking. Look for Cookware suitable for induction cooking
must have a ferromagnetic base meaning the base must be magnetic and of the correct size for the cooking zone.
The cooktop automatically detects the p
osition, size, and shape of the cookware based on the ferromagnetic
properties and diameter of its base.
• Always follow the cookware manufacturer's instructions regarding induction compatibility.
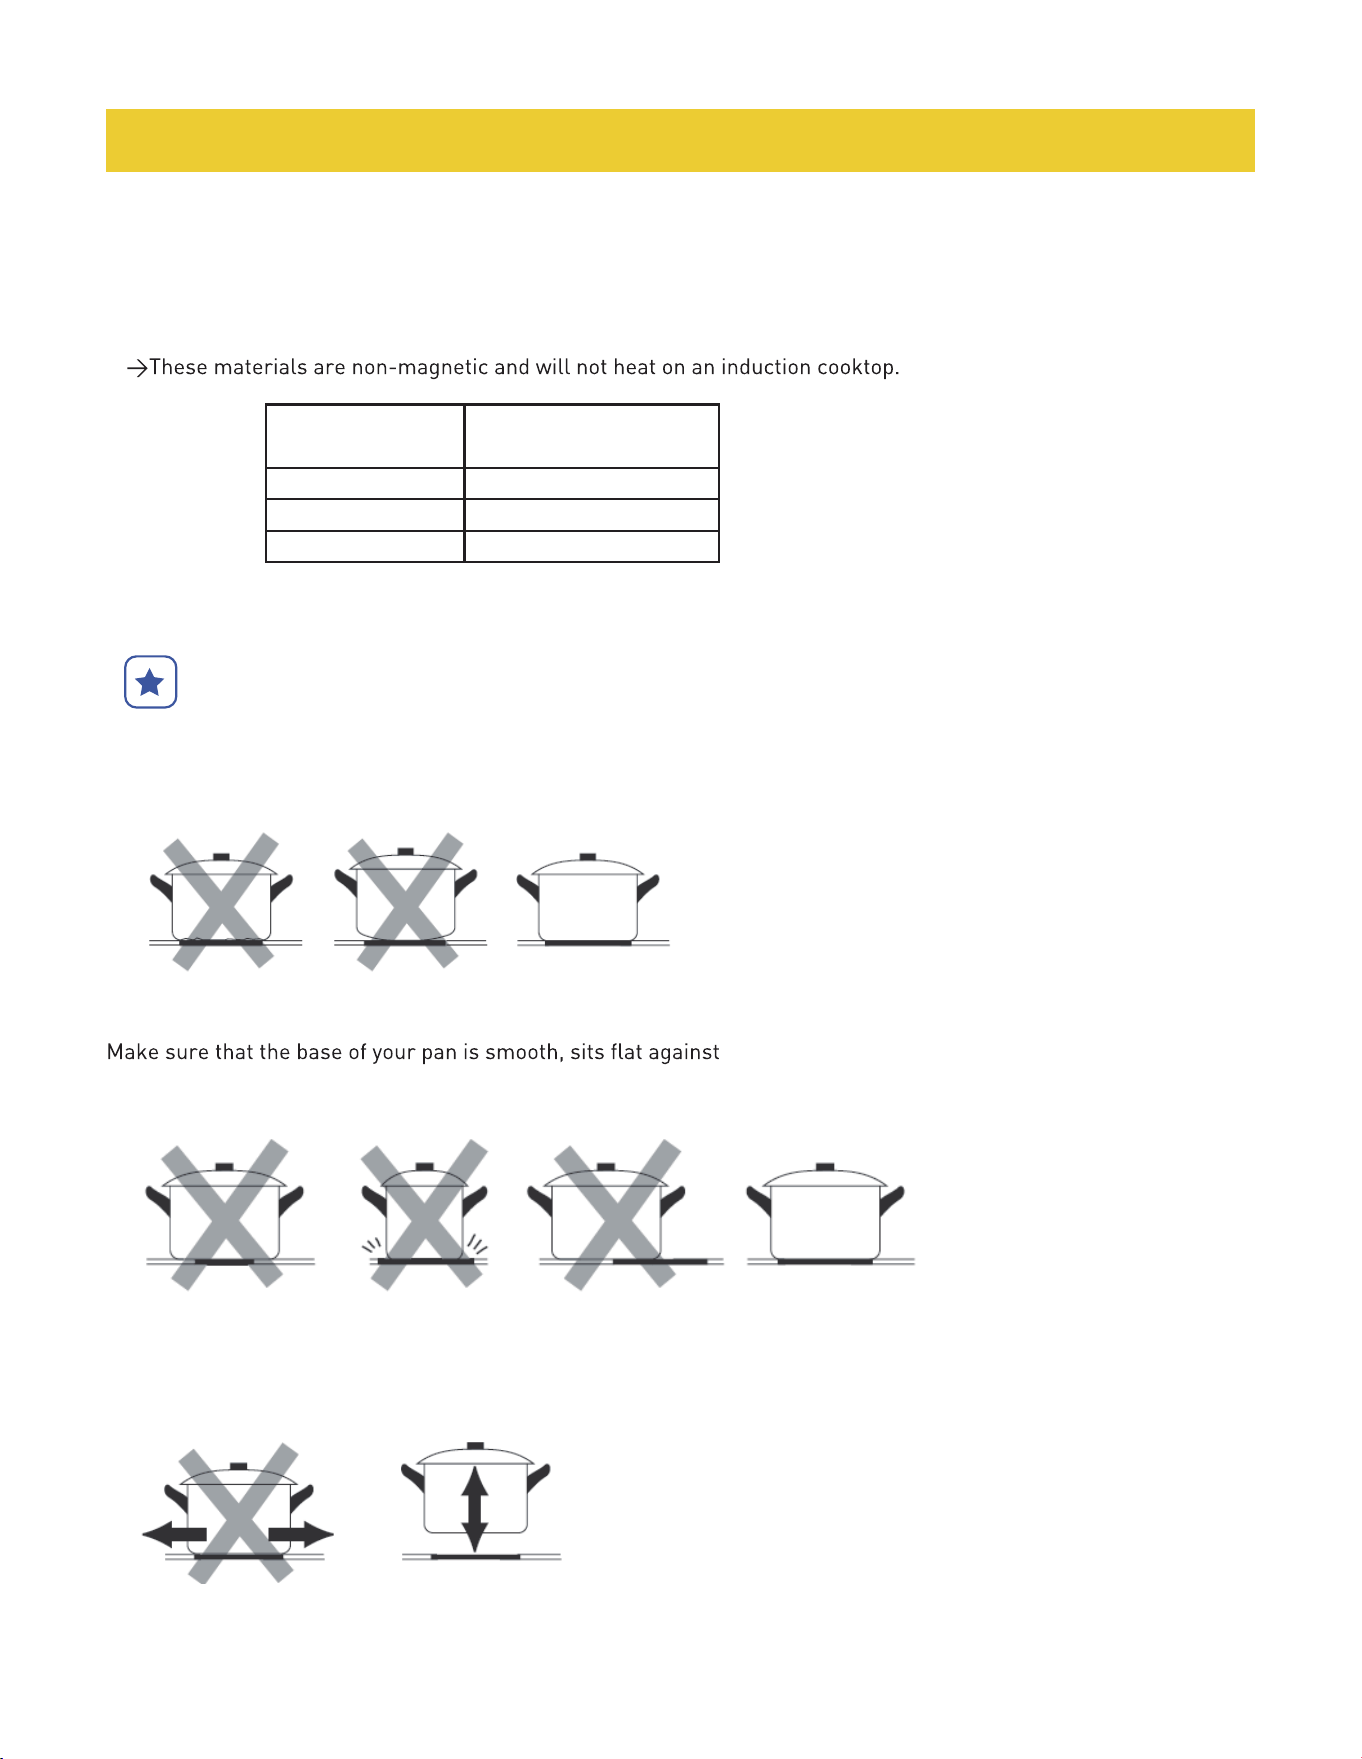
How to Check if Cookware is Suitable :
• You can easily determine whether your cookware is compatible with induction
1) Magnet Test:
• Place a small magnet (such as a refrigerator magnet) on the base of the
cookware.
•
• If the magnet only sticks weakly or not at all, the cookware is not suitable.
2) Cooktop Detection Test:
• Place the cookware on a cooking zone and switch the cooktop on.
• Select a low power setting.
• If the display indicates a heating error or the cookware does not warm up, the material is not compatible.
• Suitable Cookware
• Cookware with a partially ferromagnetic base.
• Cookware with aluminum content in the base.
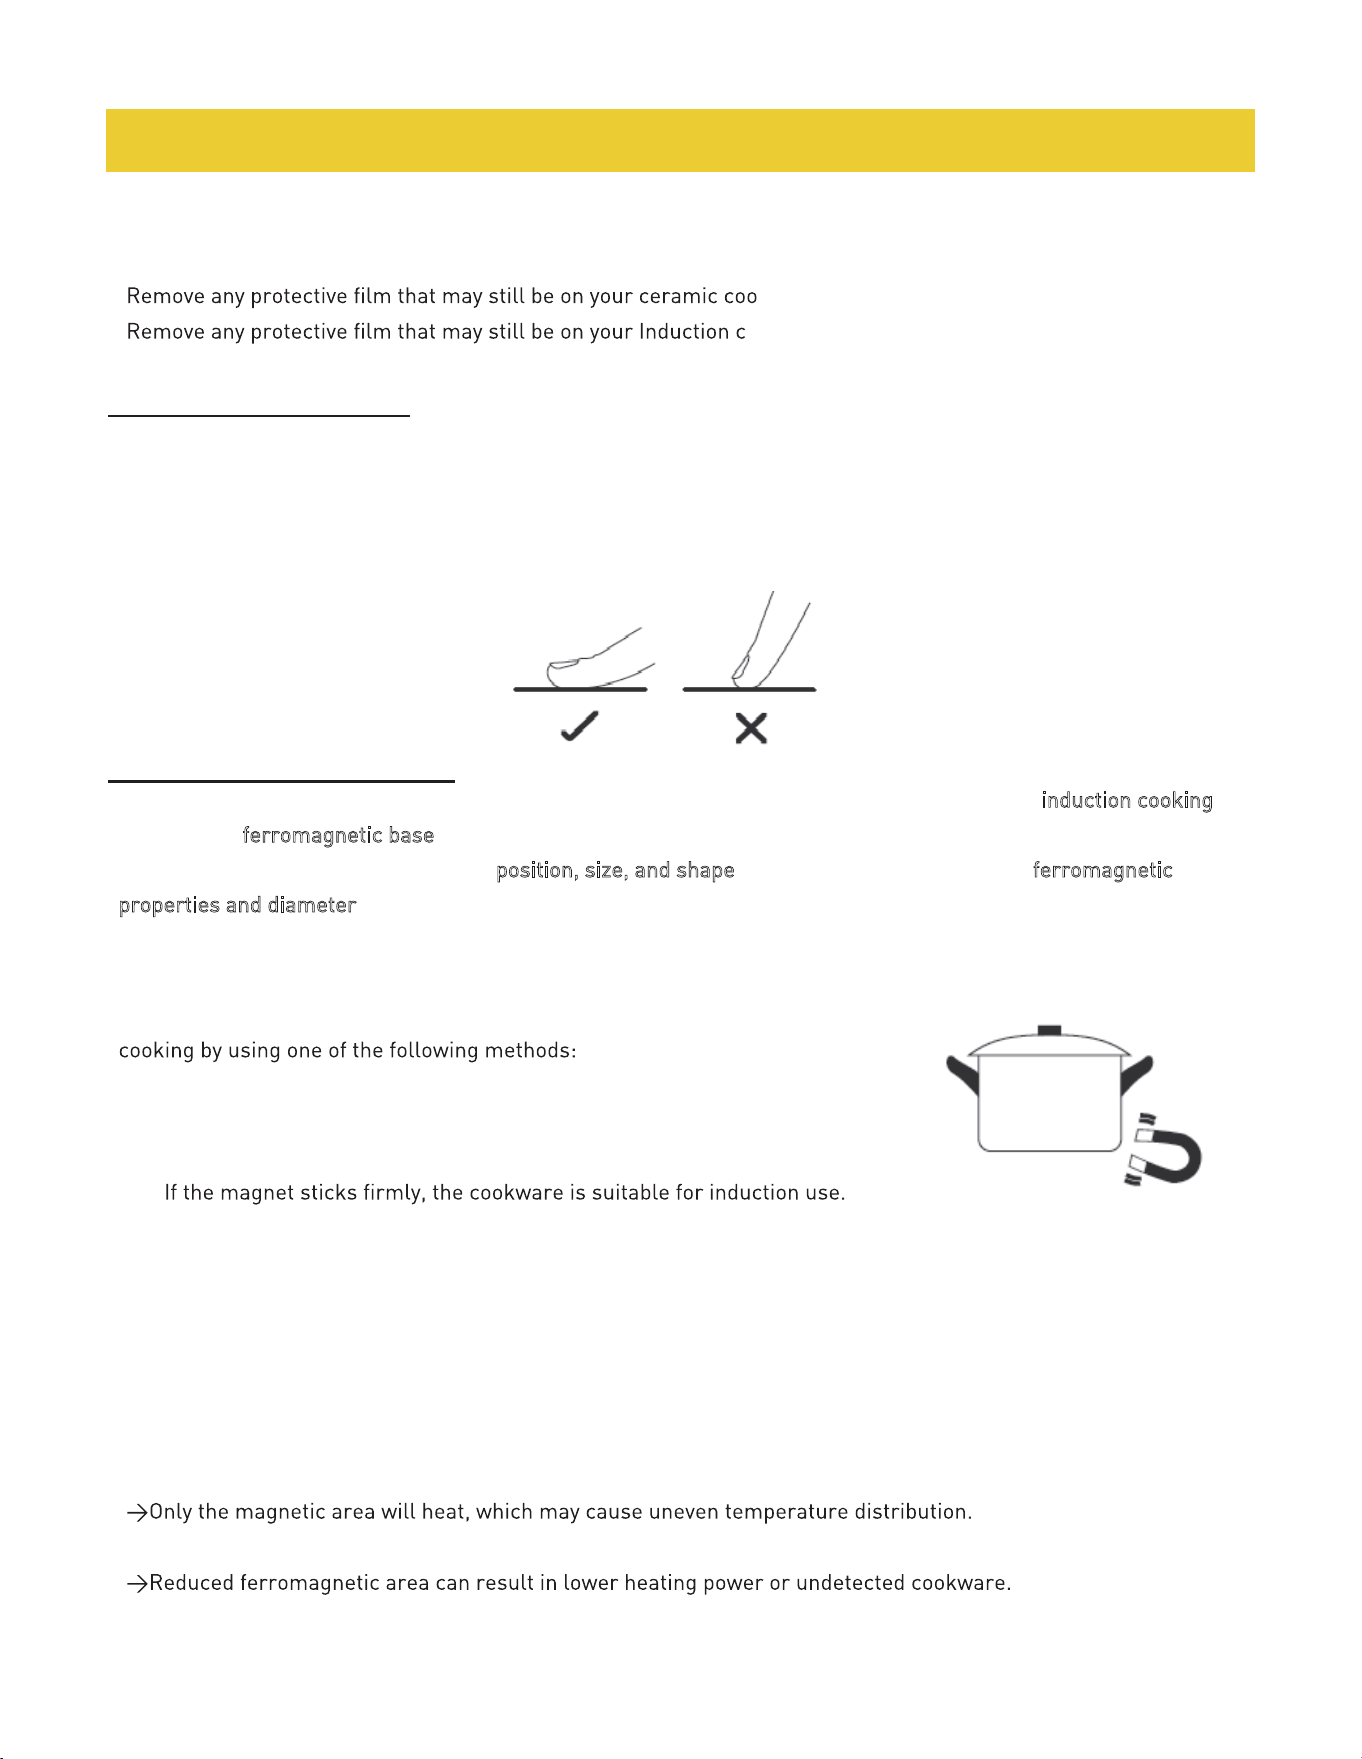
• The controls are touch sensitive; no pressure is required.
Use the ball of your finger for best response.•
• A beep will sound each time a touch is successfully registered.
• Make sure the control area is clean and dry, and keep it free of objects such as utensils or cloths. Even a thin
layer of moisture may affect the touch controls.
• Not Suitable Cookware
• Cookware made of thin steel, glass, clay, porcelain, wood, copper, or standard aluminum
(without inductioncompatible base).
Size of burner(in)
6 1/4" 4 3/4"
The minimum cookware
(diameter /in)
7 1/16" 5 1/2"
8 1/4"
6 1/4"
BEFORE USING YOUR NEW COOKTOP
11
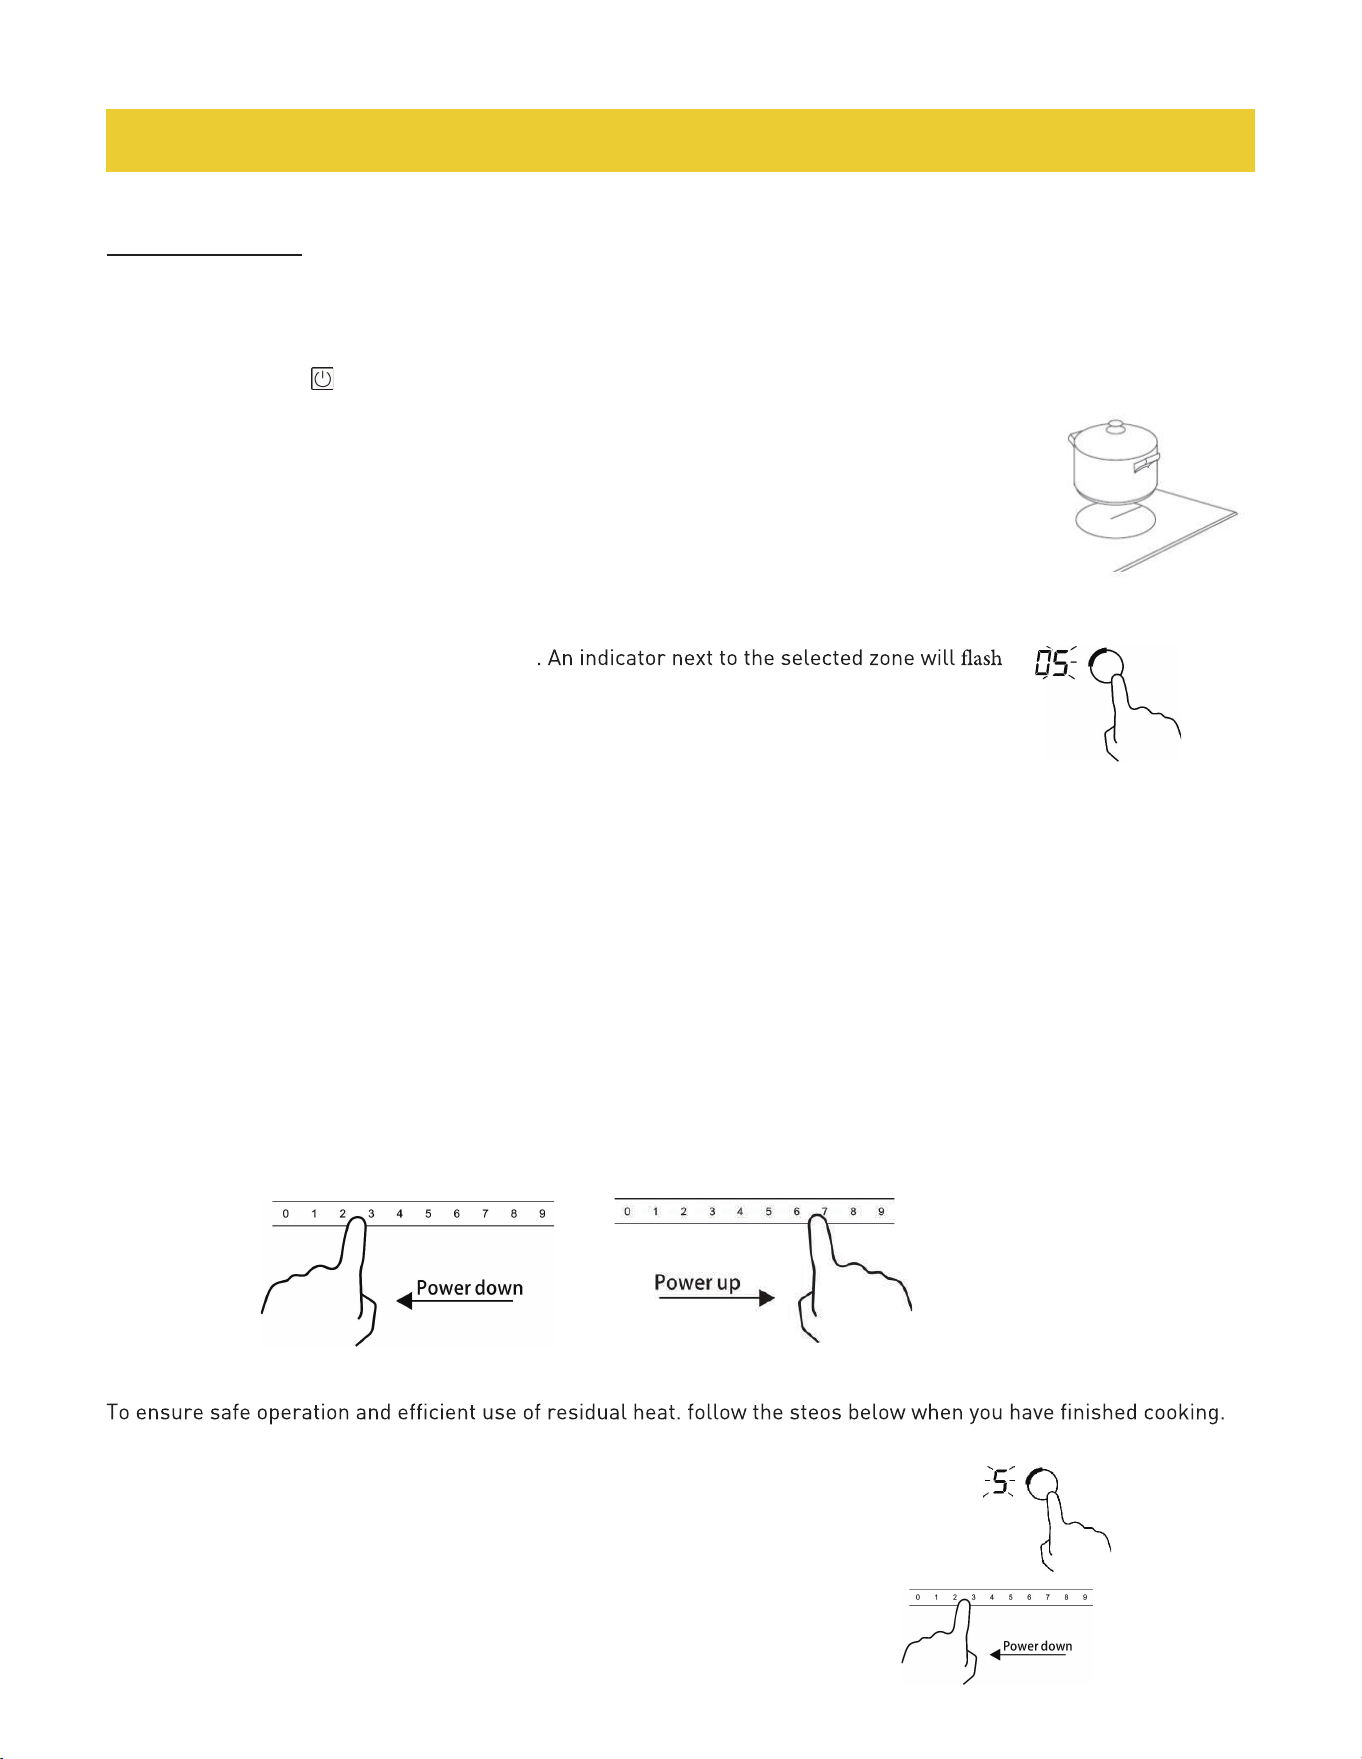
IMPORTANT
Do not use cookware with jagged edges or a curved base.
the glass, and is the same size as the cooking zone.
Always centre your pan on the cooking zone.
Always lift pans off the ceramic cooktop-do not slide, or they may scratch the glass.
12
USING YOUR COOKTOP
Turn On the Cooktop
To start cooking:
After powering on, the buzzer will beep once. All indicators will light up for 1 second and then go out, indicating that
the cooktop has entered standby mode.
• Touch the ON/OFF switch. All indicators will show "-".
• If you do not select a heating zone or set a heat level within 30 seconds, the cooktop will
automatically switch off. You will need to restart from Step I.
Place a Suitable Cookware
• Place a compatible cookware on the cooking zone you wish to use.
• Ensure that the bottom of the cookware and the surface of the cooking zone are clean and dry.
Select the Cooking Zone
•
•
Touch the
Preset power levels:
1. 30 inch Left Front area= 1800/2100 power level
30 inch Left Back area= 1200/1600 power level
30 inch Middle area= 2300/3700 power level
30 inch Right Front area= 1200/1600 power level
2. 36 inch Left Front area= 1800/2100 power level
36 inch Left Back area= 1200/1600 power level
36 inch Middle area= 2300/3700 power level
36 inch Right Front area= 1200/1600 power level
36 inch Left Back area= 1800/2100 power level
heating zone selection control
.
Set the Heat Level
• Use the slider control to select the desired heat setting.
• If you do not select a heat setting within 30 seconds, the cooktop will automatically switch off. You will need to
restart from Step 1.
Adjust Heat During Cooking
• You can modify the heat setting at any time while cooking by using the slider control.
Select the Cooking Zone
• Touch the heating zone selection corresponding to the area you wish to switch off.
Turn Off the Cooking Zone
• Touch the slider control for the desired cooking zone.
• Ensure that the display shows "O", indicating that the zone is turned off.
When You Have Finished cooking
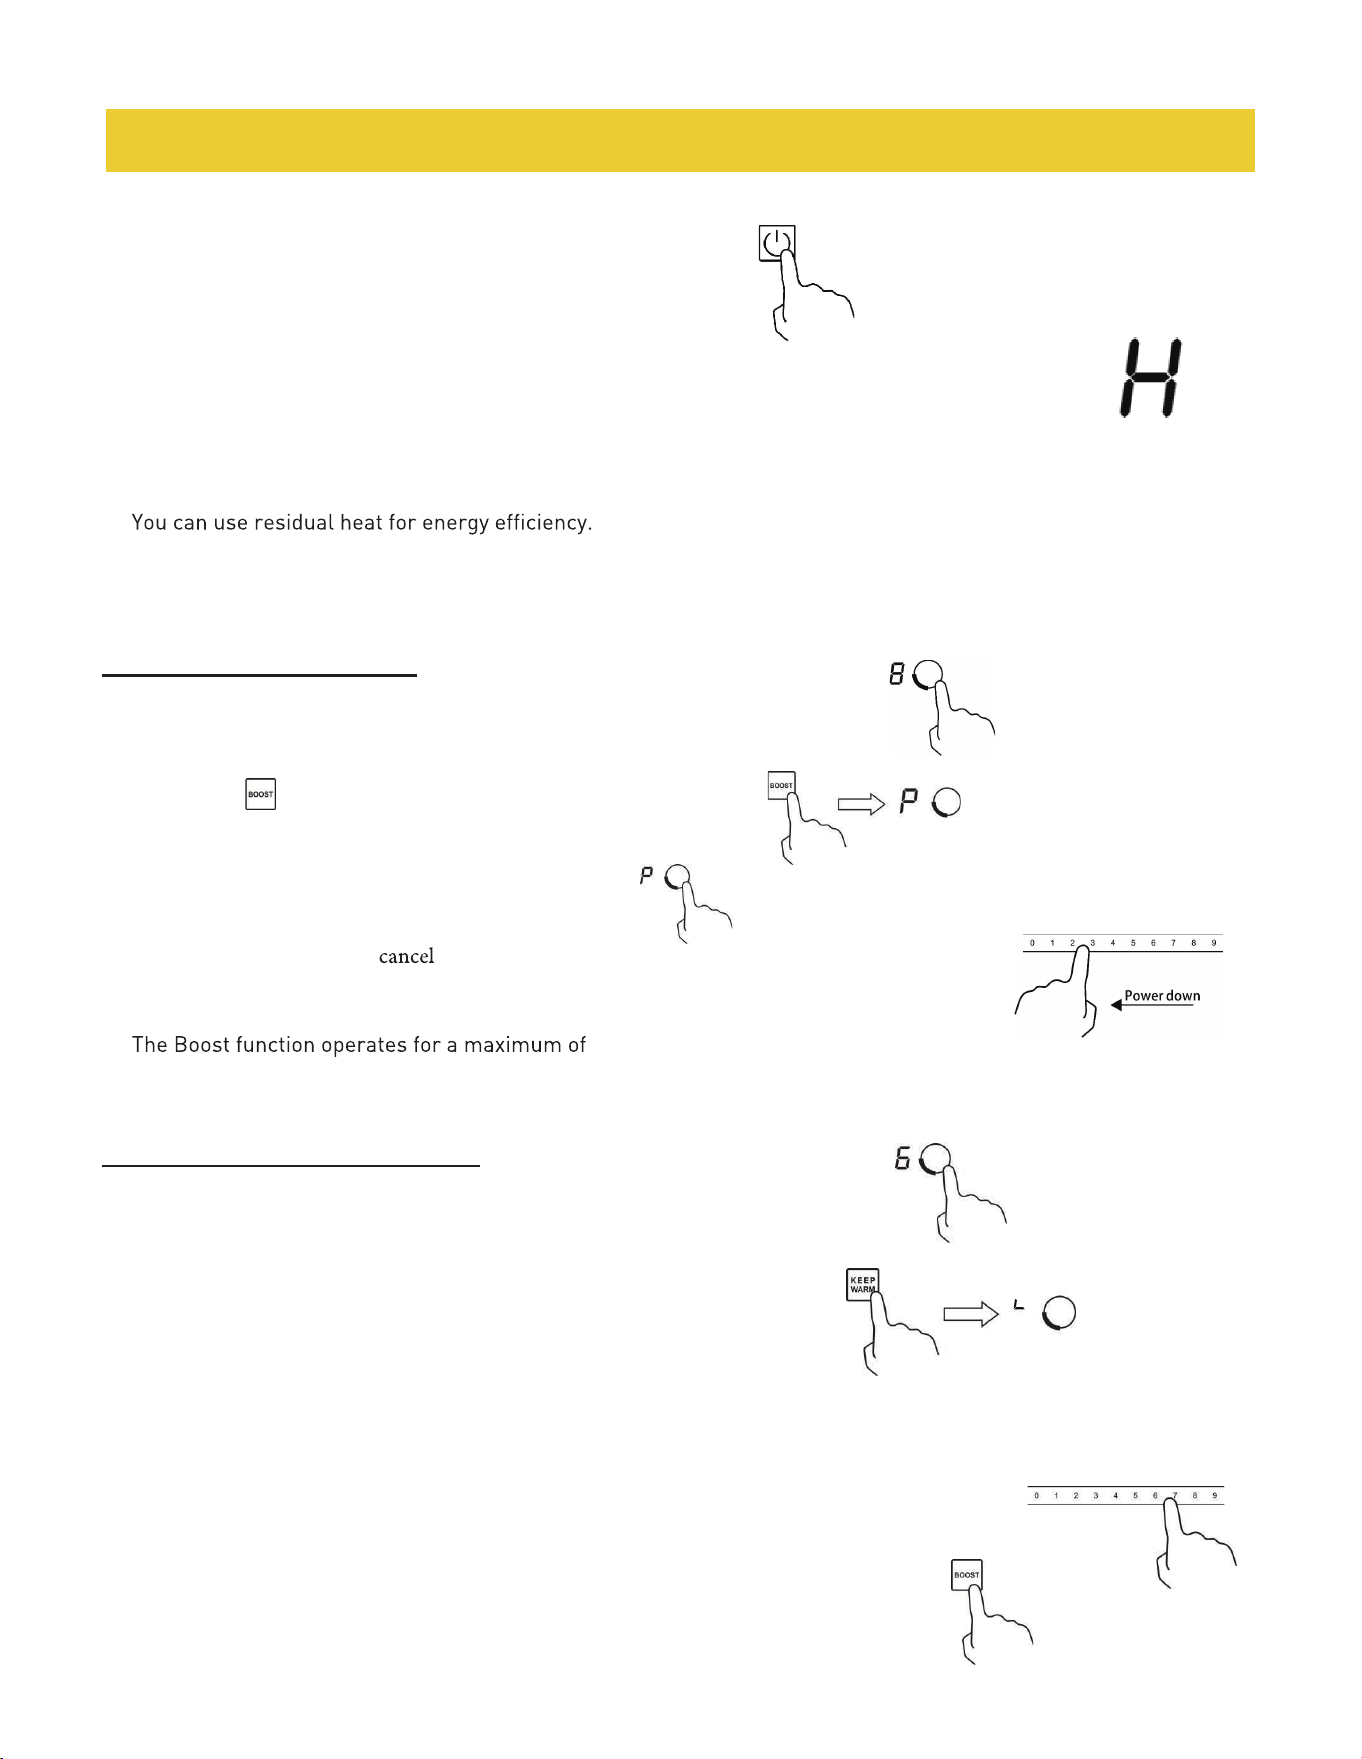
Turn Off the Cooktop
• Touch the On/off control to switch off the entire cooktop.
USING YOUR COOKTOP
Using the Boost Function:
Activate the Boost Function
• Select the cooking zone with the Boost function (front left zone).
• Touch the " " until the power level indicator shows "P".
Using the Keep Warm Function:
Activate the Keep Warm function
• Select the cooking zone with the Keep Warm function.
• Touch the Keep Warm control. The zone indicator will display "L".
Cancel the Keep Warm function
• Select the same cooking zone.
• Choose one of the following options:
1) Touch the slider control to cancel the Keep Warm function and set a new power level.
2) Touch another function control (e.g, Boost). The cooking zone will switch to the
selected function or level.
• Select the same cooking zone (front left zone).
• Use the slider control to
the Boost function and select the desired power level.
Note:
•
5 minutes.
• After 5 minutes, the power level will automatically revert to level 9.
Cancel the Boost Function
13
Hot Surface Indicator
• The symbol12ol "H" will appear on the display to indicate that the cooking zone is still hot.
• Do not touch the area while "H" is displayed, as the surface temperature may still cause burns.
• The "H" symbol will disappear once the surface has cooled to a safe temperature.
Energy-Saving Tip
•
• If you wish to heat additional pans, place them on a cooking zone that still shows the "H" indicator to make use
of the remaining heat.
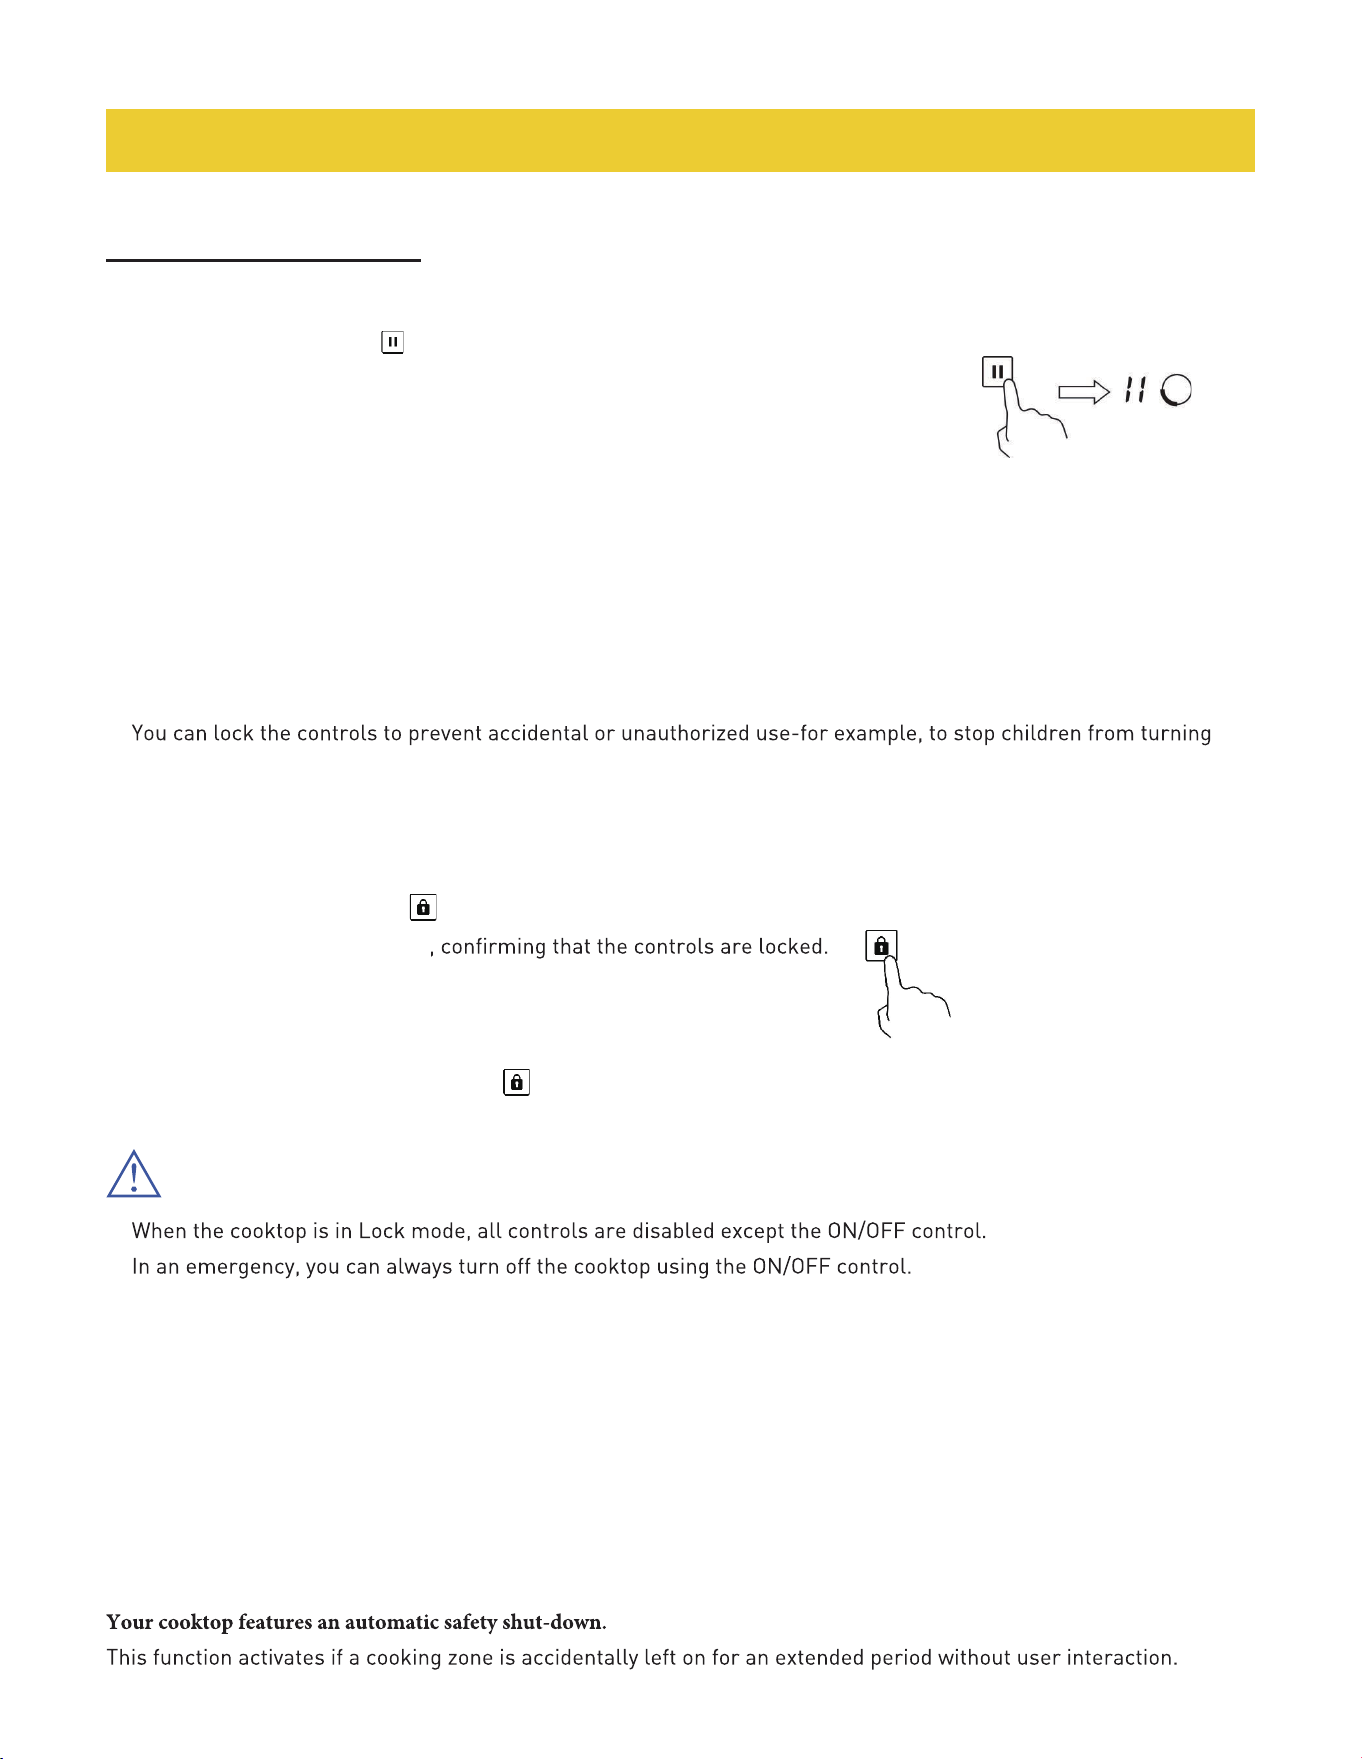
Using the Pause Function:
Activate Pause Mode
• Touch the Pause control .
• All zone indicators will display "II", and all active heating zones wil temporarily stop
heating.
Resume Cooking
• Touch the Pause control again.
• All heating zones will return to their previous settings. Note:
1) The Pause function can be used when one or more heating zones are operating.
2) If you do not cancel Pause mode within 10 minutes, the cooktop will automatically switch off.
Locking the Controls
•
the cooktop on.
• When the controls are locked, all controls are disabled except the ON/OFF control.
To Lock the Controls
1) Touch the Key Lock control .
2) The indicator will display "Lo"
To Unlock the Controls
1) Make sure the cooktop is turned on.
2) Touch and hold the Key Lock control for 3 seconds.
3) The indicator will go out, and you can now operate the cooktop as normal.
•
•
• You must unlock the cooktop before using it again.
Residual Heat Warning
After cooking, the cooktop surface may remain hot.
• The letter "H" will appear on the display to indicate residual heat.
• Do not touch the cooking zone while "H" is displayed
• The indicator will disappear once the surface has cooled to a safe temperature.
Auto Shutdown
14
CAUTION
USING YOUR COOKTOP
15
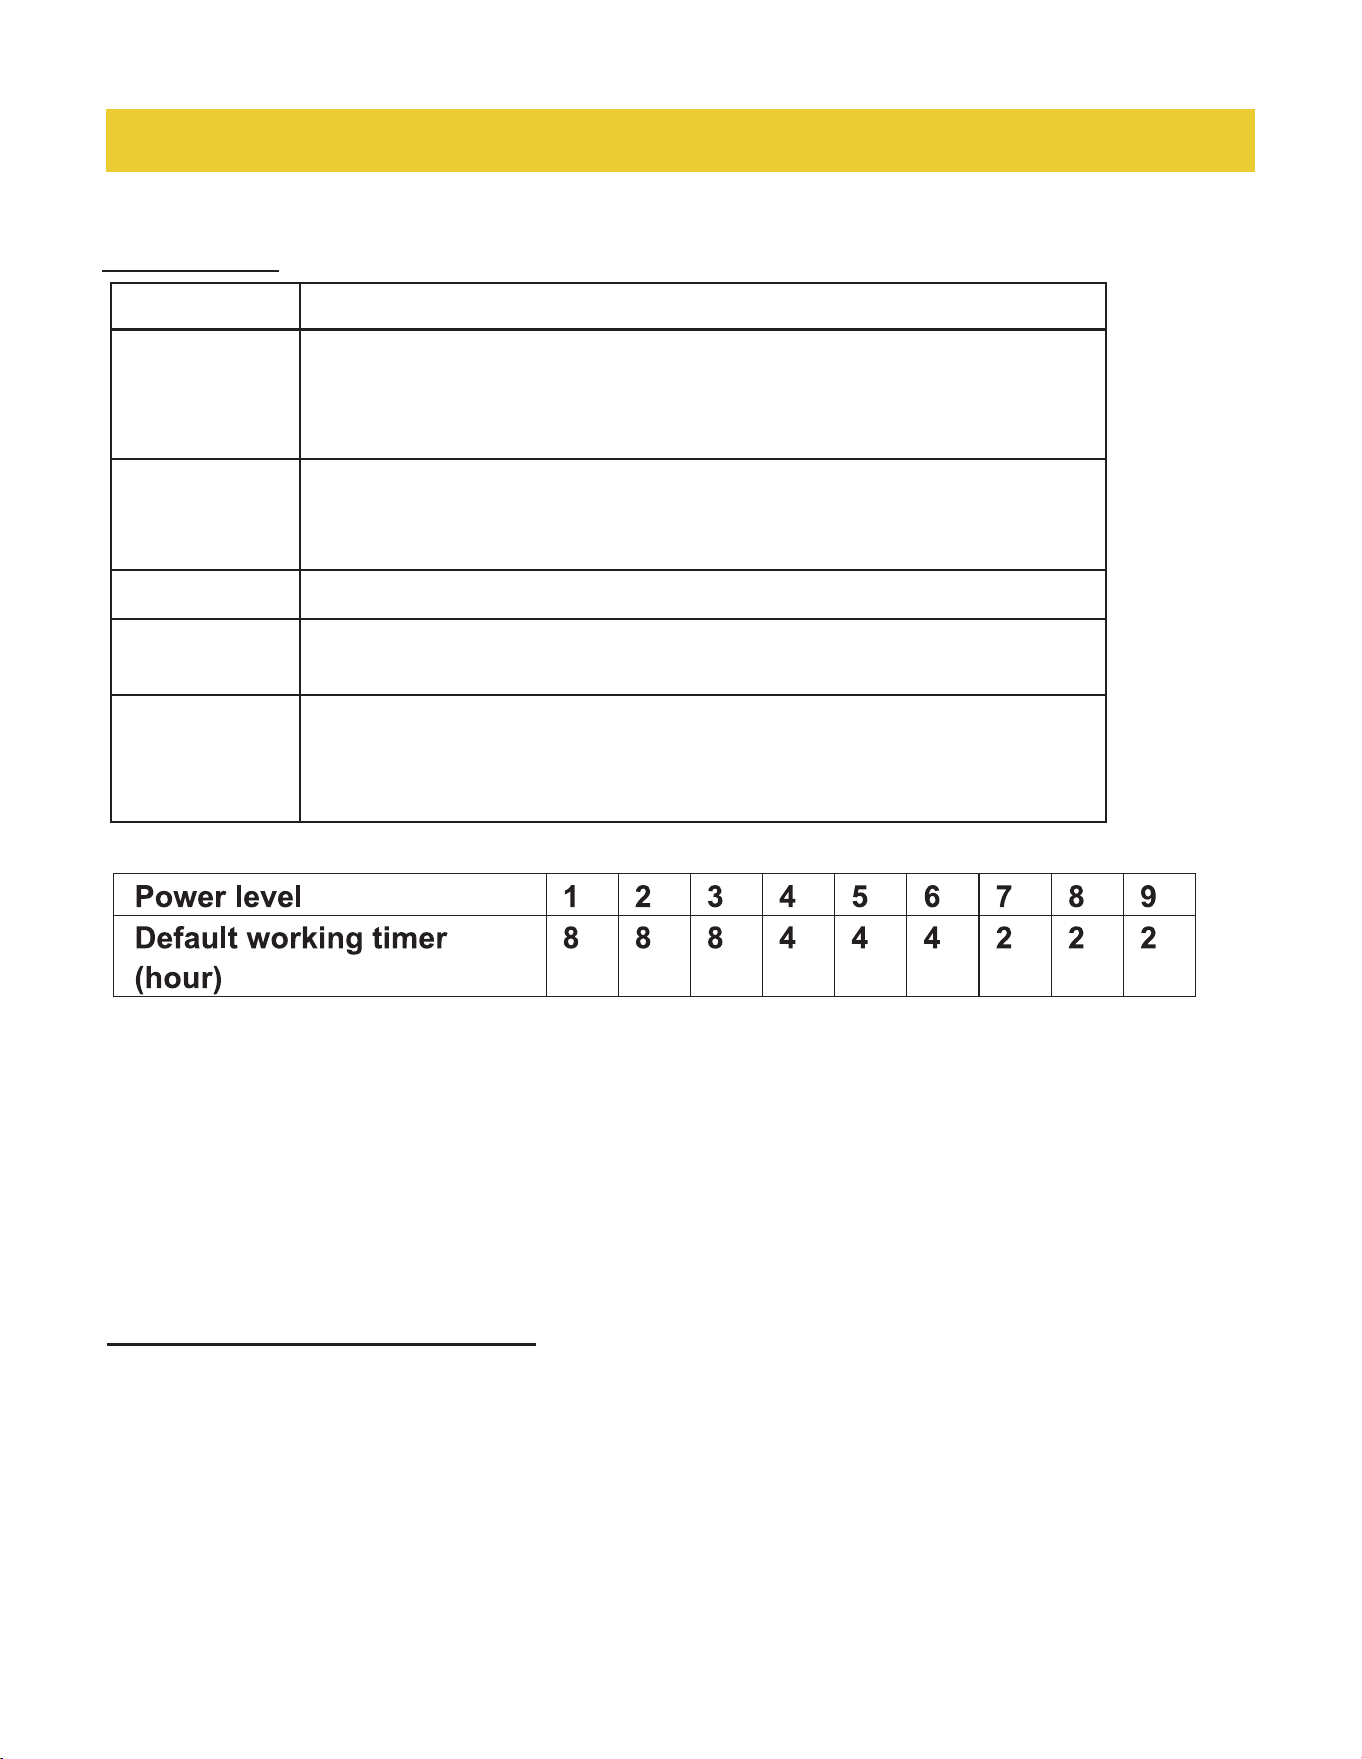
After these times, the affected cooking zone will automatically switch off for safety.
Using the Timer
Your cooktop features a multi-function timer that can be used in two ways:
• As a Minute Minder:
The timer counts down the set time but does not turn off any cooking zone when the time is up.
• As a Cut-Off Timer: The timer automatically turns off one or more cooking zones after the set time has elapsed.
• You can set the timer for up to 99 minutes.
Using the Timer as a Minute Minder:
Ensure the Cooktop Is Turned On
• The cooktop must be powered on, and no cooking zone should be selected (the zone indicator should not be
fashing).
Note: You can set the minute minder before or after setting the power level of any cooking zone.
USING YOUR COOKTOP
Heat Settings
Heat Setting Suitabitity
1-2 • delicate warming for small amounts of food.
• melting chocolate, butter, and foods that burn quickly.
• gentle simmering.
• slow warming.
3-4 • reheating
• rapid simmering
• cooking rice
5-6 • pancakes
7-8 • sauteing
• cooking pasta
9 • stir-frying
• searing
• bringing soup to the boil
• boiling water
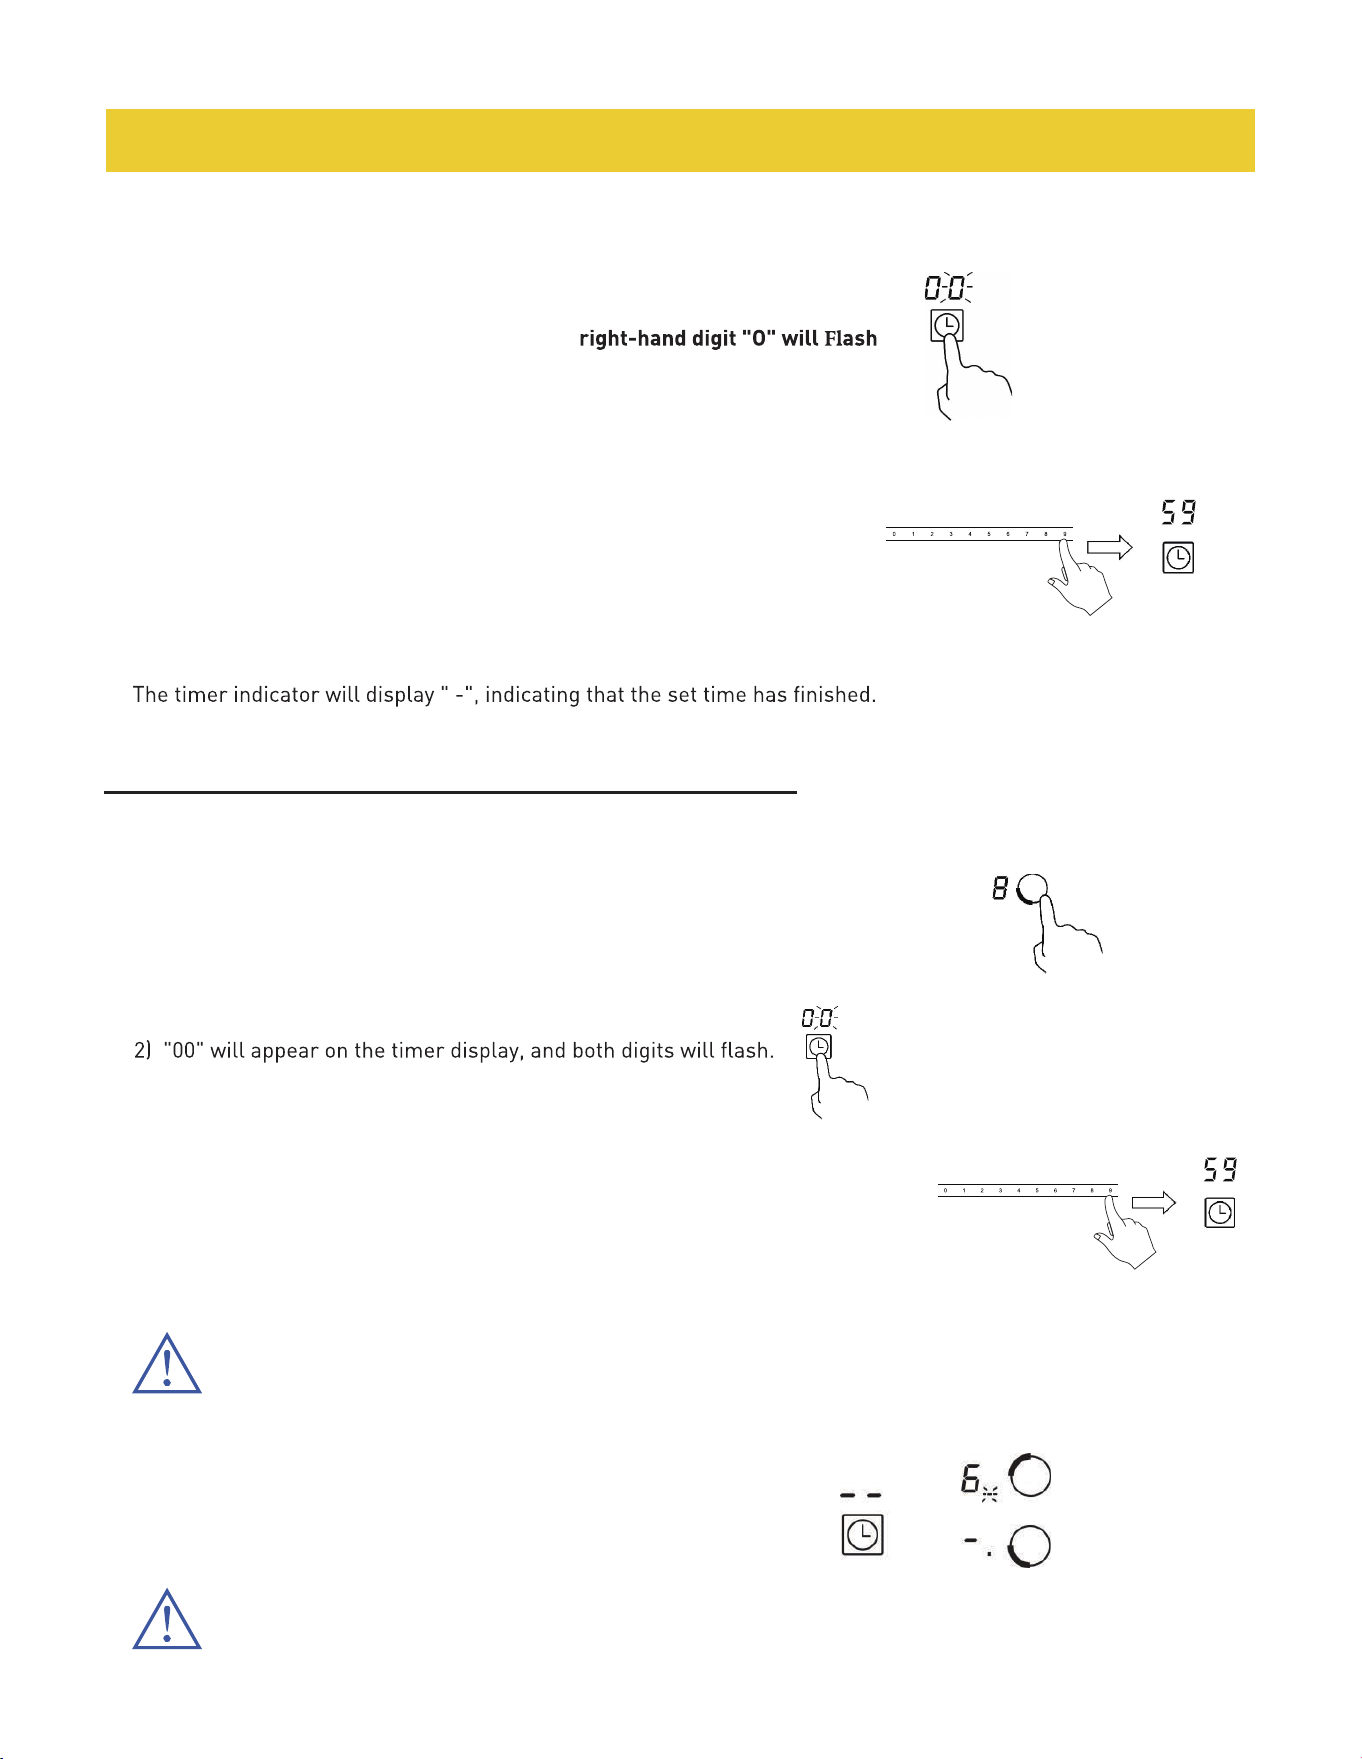
Activate tho Timer
• Touch the Timer control.
• "00" will appear on the timer display, and the
.
Set the Time
• Use the slider control to adjust the timer setting (for example, touch“5”and "9" to set 59 minutes).
• The timer will begin counting down automatically once the time is set.
• The display will show the remaining time.
Timer Completion
• When the countdown reaches zero, a buzzer will beep for 30 seconds.
•
16
USING YOUR COOKTOP
Using the Timer to Switch off One or More Cooking Zones:
You can use the timer to automatically turn off one or more cooking zones after a set period of time.
Setting the Timer for One Cooking Zone
• Select the Cooking Zone
1) Touch the heating zone selection control for the zone you want to set the timer on.
• Activate the Timer
1) Touch the Timer control.
• Set the Time
1) Use the slider control to set the desired time (for example, touch “5”and "9"
to set 59 minutes).
2) The timer will start counting down immediately, and the display will show the
remaining time.
Note: A red dot will appear in the lower right corner of the power level display
to indicate that the timer is active for that cooking zone.
• When the Timer Expires
1) The corresponding cooking zone will automatically switch off.
2) The timer indicator will display "--".
Note: Any other cooking zones that are turned on will continue operating normally.
17
USING YOUR COOKTOP
Setting the Timer for Multiple Cooking Zones:
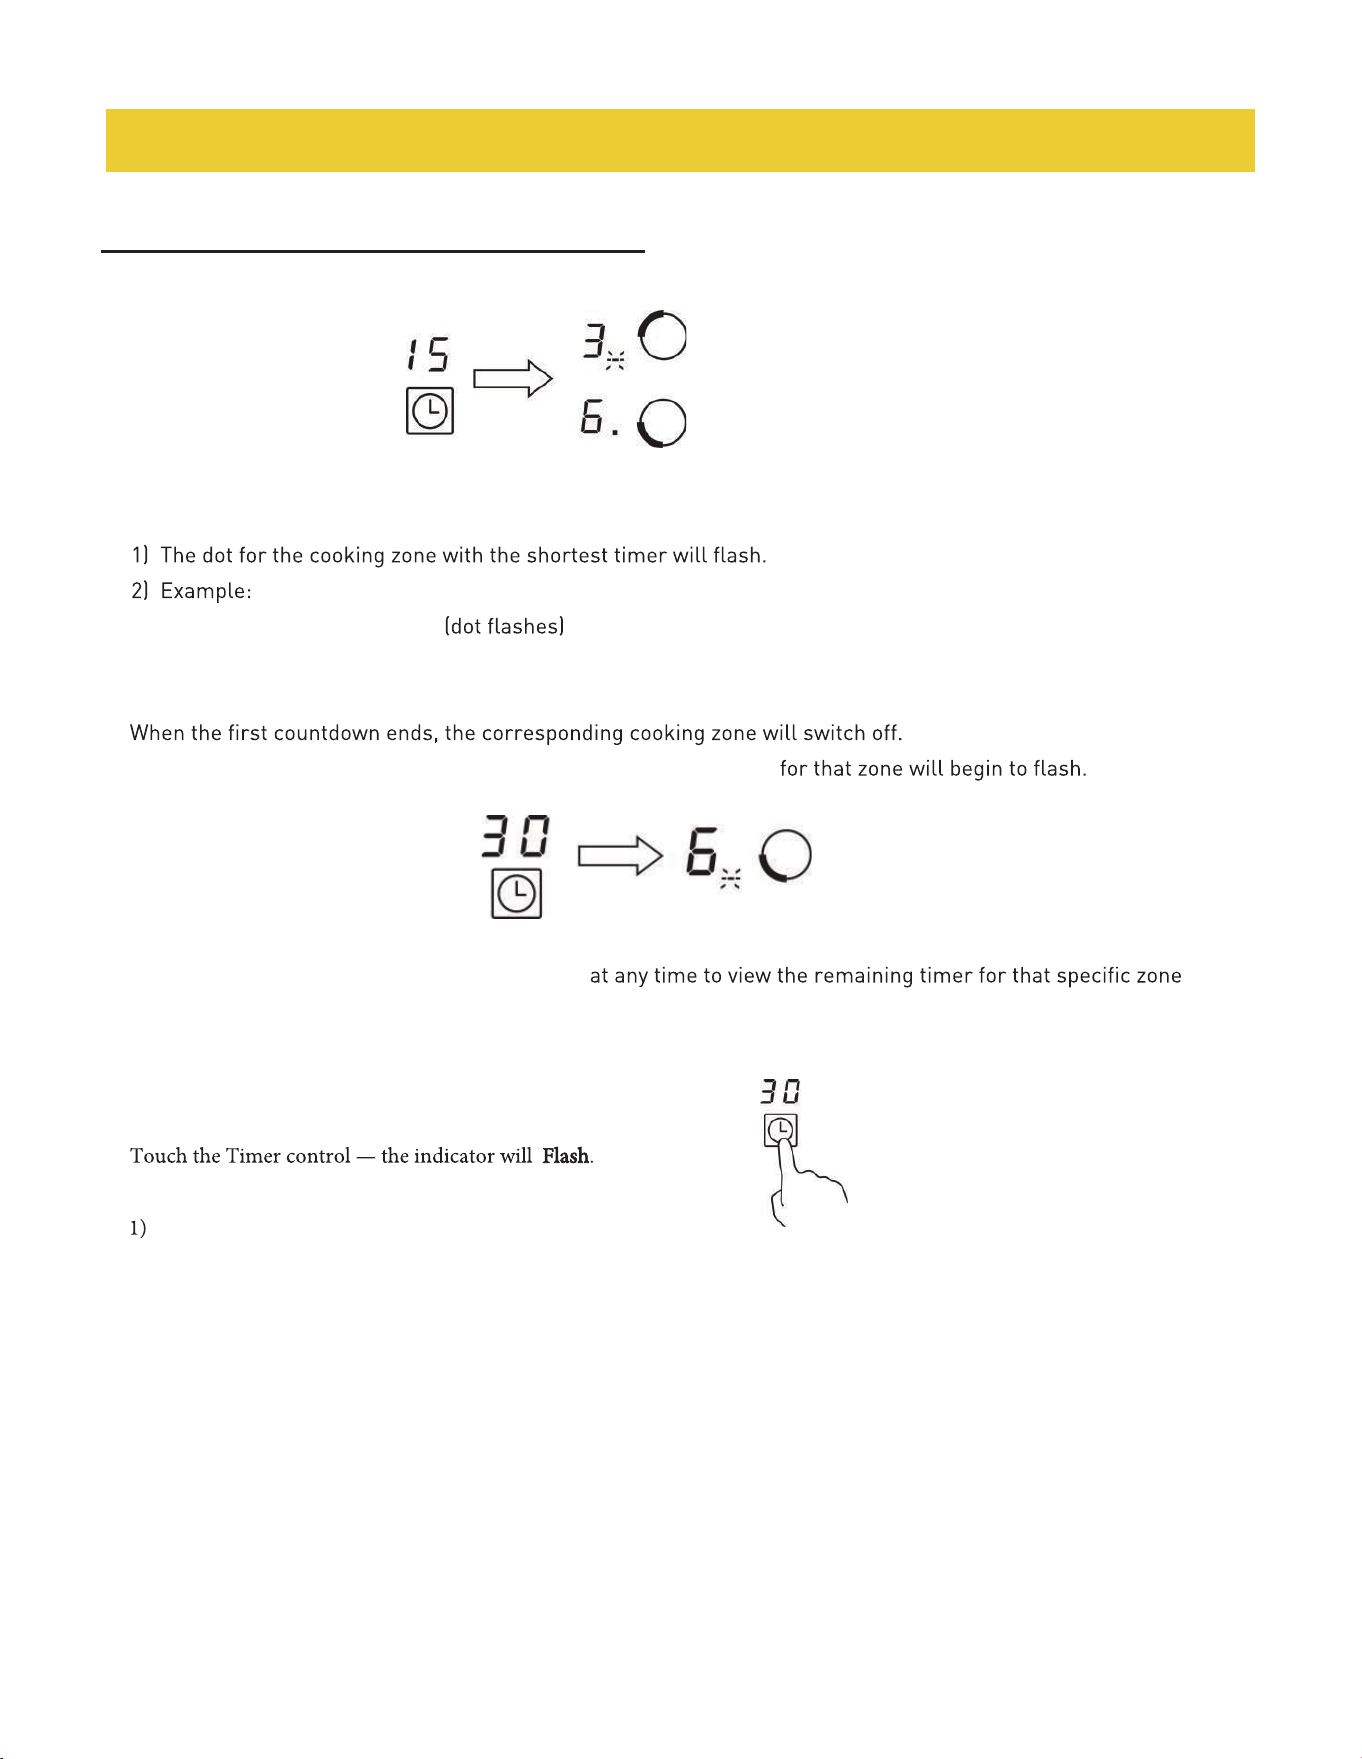
• When a timer is set for several cooking zones, red dots will appear beside the relevant power level indicators.
• The timer display will show the shortest remaining time among all active timers.
1> Zone A set to 15 minutes
2> Zone B set to 45 minutes (dot steady)
(set to 15 minutes)
(set to 45 minutes)
•
1) The display will then show the next shortest timer, and the dot
Tip:
You can touch the heating zone selection control
Cancelling the Timer
• Touch the heating zone selection control for the zone you
wish to cancel the timer on.
•
• Use the slider control to set the timer to "00".
The timer is now cancelled for that zone.
18
COOKING SAFETY AND TIPS
Important Safety Notice
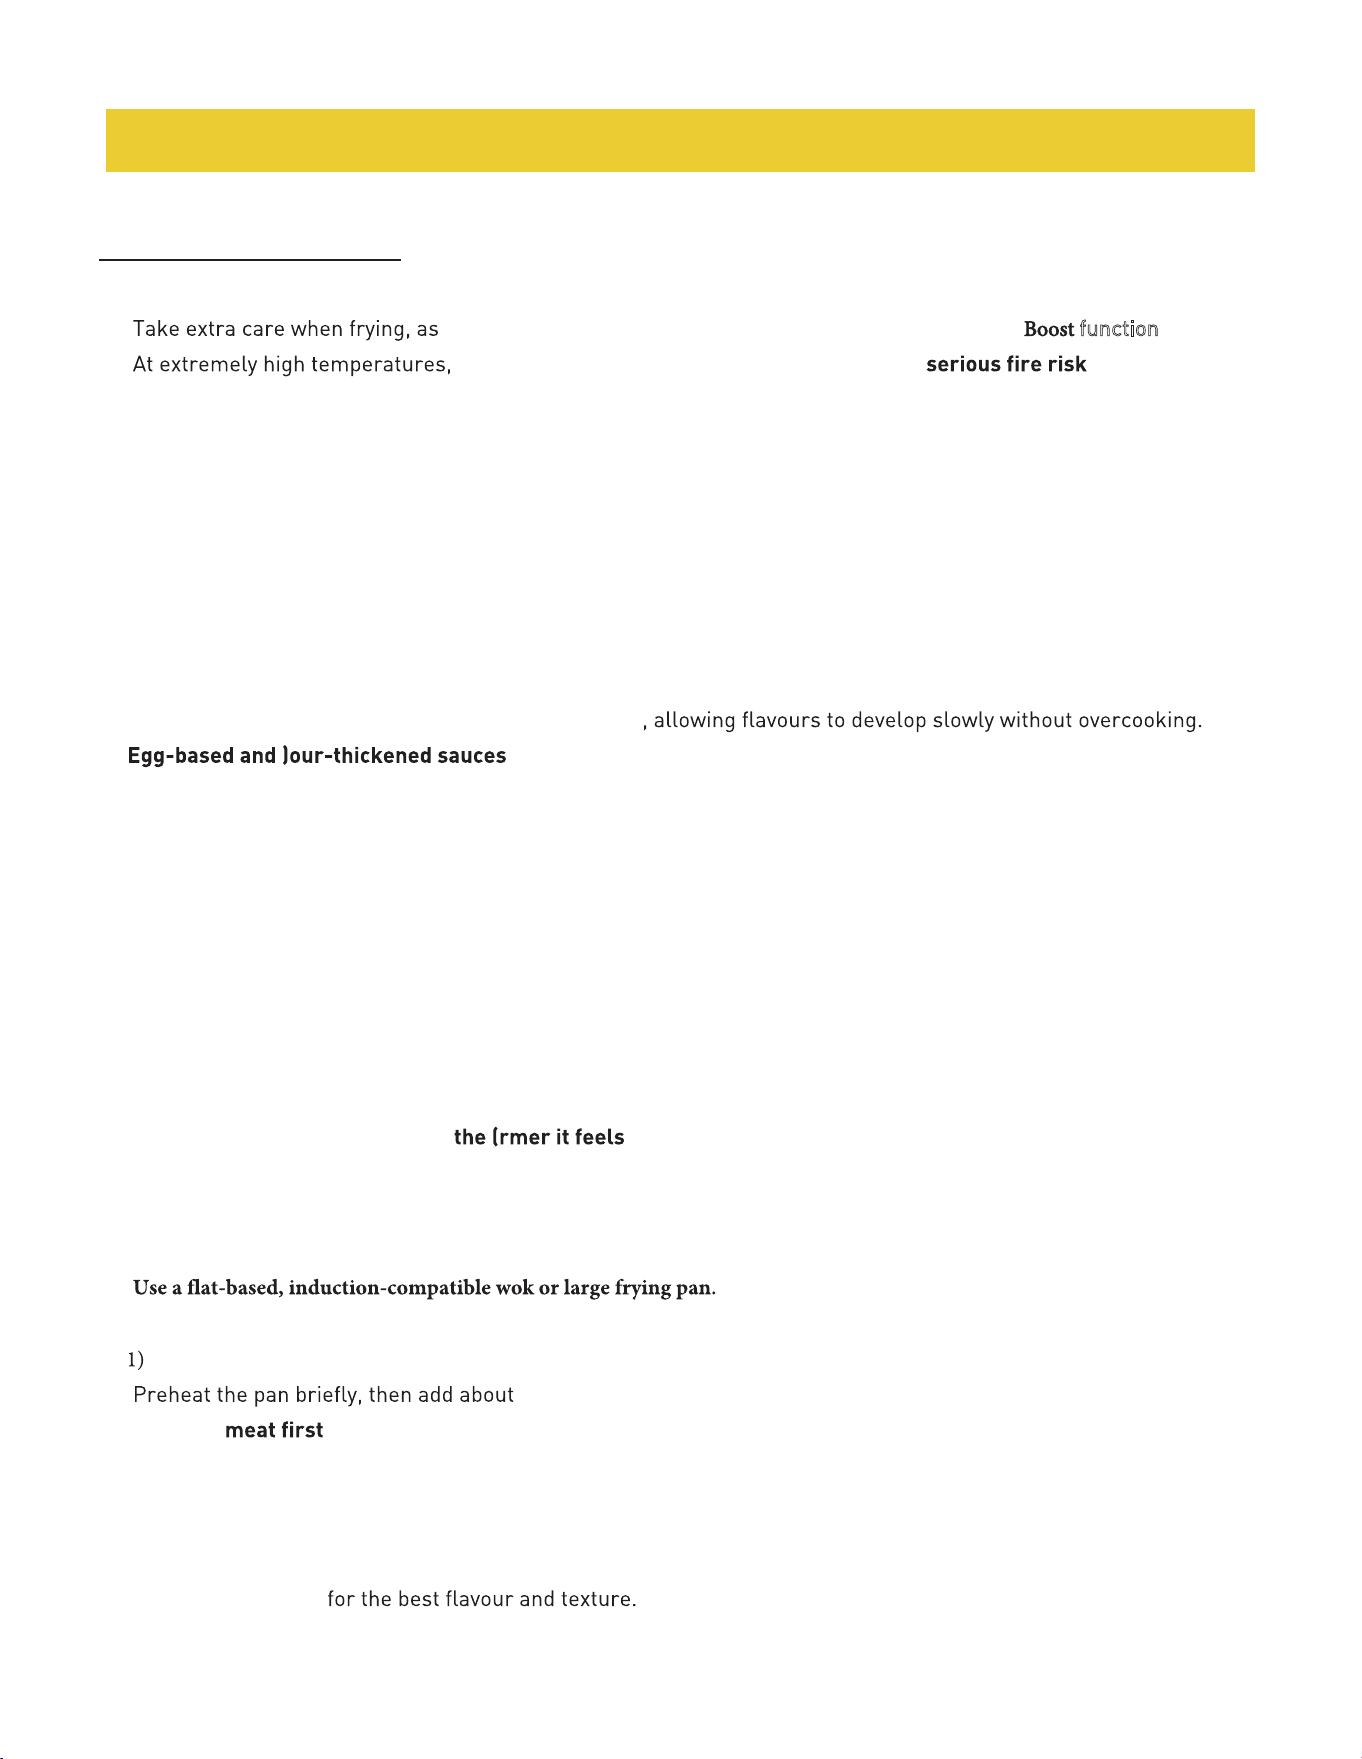
When Frying:
•
oil and fat heat up very quickly especially when using the
function.
•
oil and fat can ignite spontaneously, creating a .
• Never leave your cooking unattended when frying or using high heat settings.
General Cooking Tips:
• When food reaches boiling point, reduce the power setting to prevent overcooking or boiling over.
• Use a lid to retain heat, reduce cooking times, and save energy.
• Minimise liquid or fat in your recipes to shorten cooking times.
• Start cooking on a high setting. then reduce to a lower setting once the food has heated through.
Simmering and Cooking Rice:
• Simmering occurs just below boiling point, around 185°F/85°C, when small bubbles rise occasionally to the surface.
• Simmering is ideal for soups, stews, and casseroles
• should also be cooked below boiling point to avoid curdling or separation.
• Some dishes-such as rice cooked by the absorption method-may require a slightly higher setting than the lowest
level to cook properly within the recommended time.
Searing Steak To cook juicy, favoursome steaks:
• Allow the meat to stand at room temperature for about 20 minutes before cooking.
• Preheat a heavy-based frying pan on a high setting.
• Brush both sides of the steak lightly with oil. Add a small amount of oil to the hot pan, then place the steak in
carefully.
• Turn the steak only once during cooking.
1) Cooking time depends on the thickness of the steak and your preferred doneness, typically 2-8 minutes per
side.
1) Press the steak gently to test:
, the more well-done it is.
• After cooking, let the steak rest on a warm plate for a few minutes to allow the juices to redistribute and the
meat to become tender.
For Stir-Frying:
•
• Prepare all ingredients in advance - stir-frying is a quick process.
For larger quantities, cook in smaller batches to maintain high heat.
•
two tablespoons of oil.
• Cook the
, remove it from the pan, and keep it warm.
• Stir-fry the vegetables until they are hot but still crisp.
• Reduce the cooking zone to a lower power setting, return the meat to the pan, and add your
sauce.
• Stir gently to heat everything through evenly.
• Serve immediately
19
COOKING SAFETY AND TIPS
Saving Energy
Use Cookware of the Correct Size
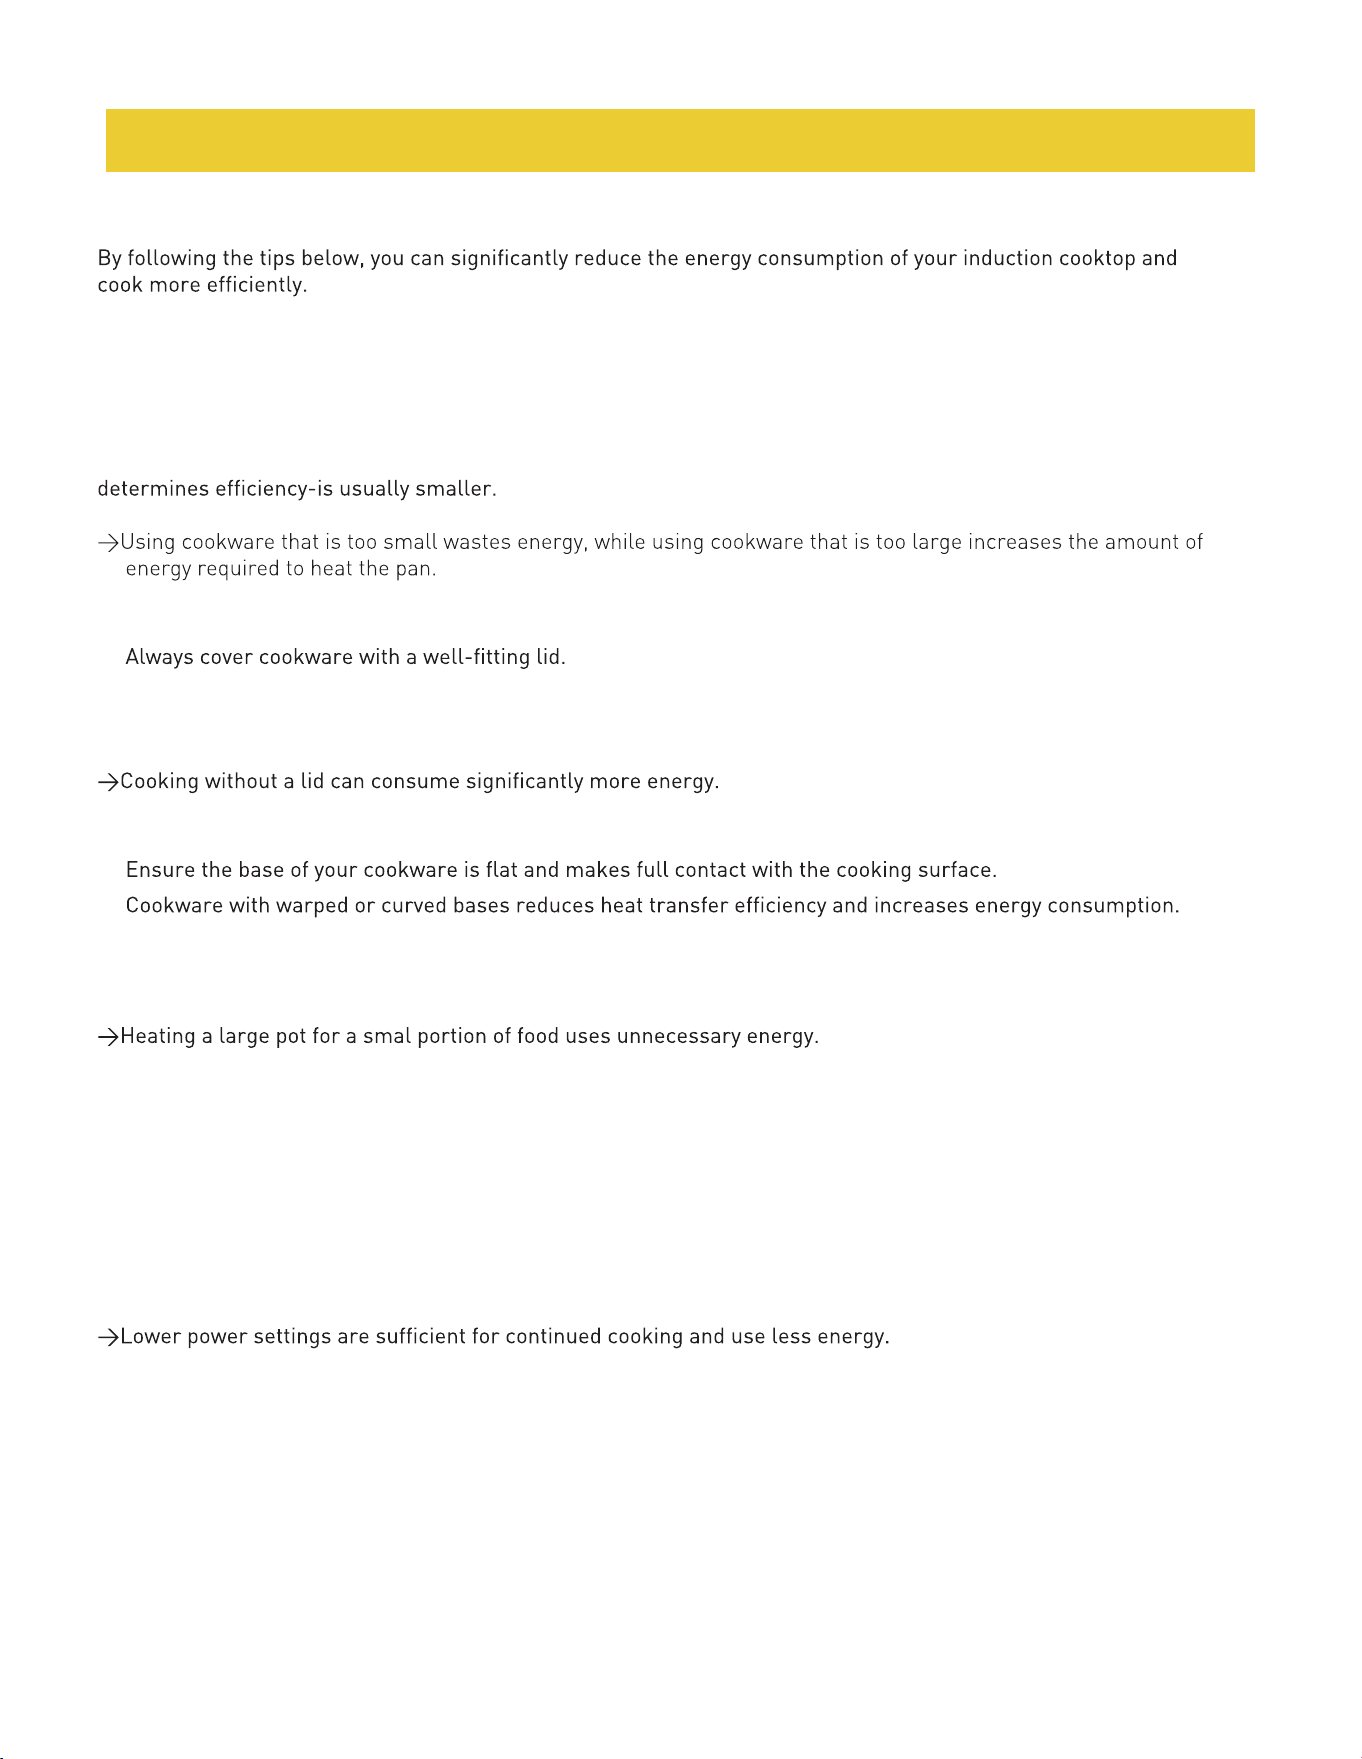
• Always select cookware with a base diameter that matches the size of the cooking zone.
• Center the cookware properly on the cooking zone to ensure optimal heat transfer.
Note: For frying pans, manufacturers often specify the top diameter of the pan. The base diameter—which
Use Lids When Cooking
•
• Avoid lifting the lid unnecessarily, as this allows heat and energy to escape.
• A glass lid allows you to monitor the cooking process without removing it, helping to retain heat and moisture.
Choose Cookware with a Flat, Solid Base
•
•
Match Cookware Size to the Quantity of Food
• Use cookware appropriate to the amount of food being prepared.
Use the Appropriate Amount of Water
• When boiling or steaming, add only as much water as needed to cook the food properly.
• Avoid unnecessary excess water, which wastes energy and increases cooking time.
• Make sure there is always enough water to prevent the food from drying out or burning.
Adjust Power Levels Appropriately
• After bringing food to a boil, reduce the power level as soon as possible to maintain a gentle simmer or steady
cooking temperature.
COOKING SAFETY AND TIPS
20
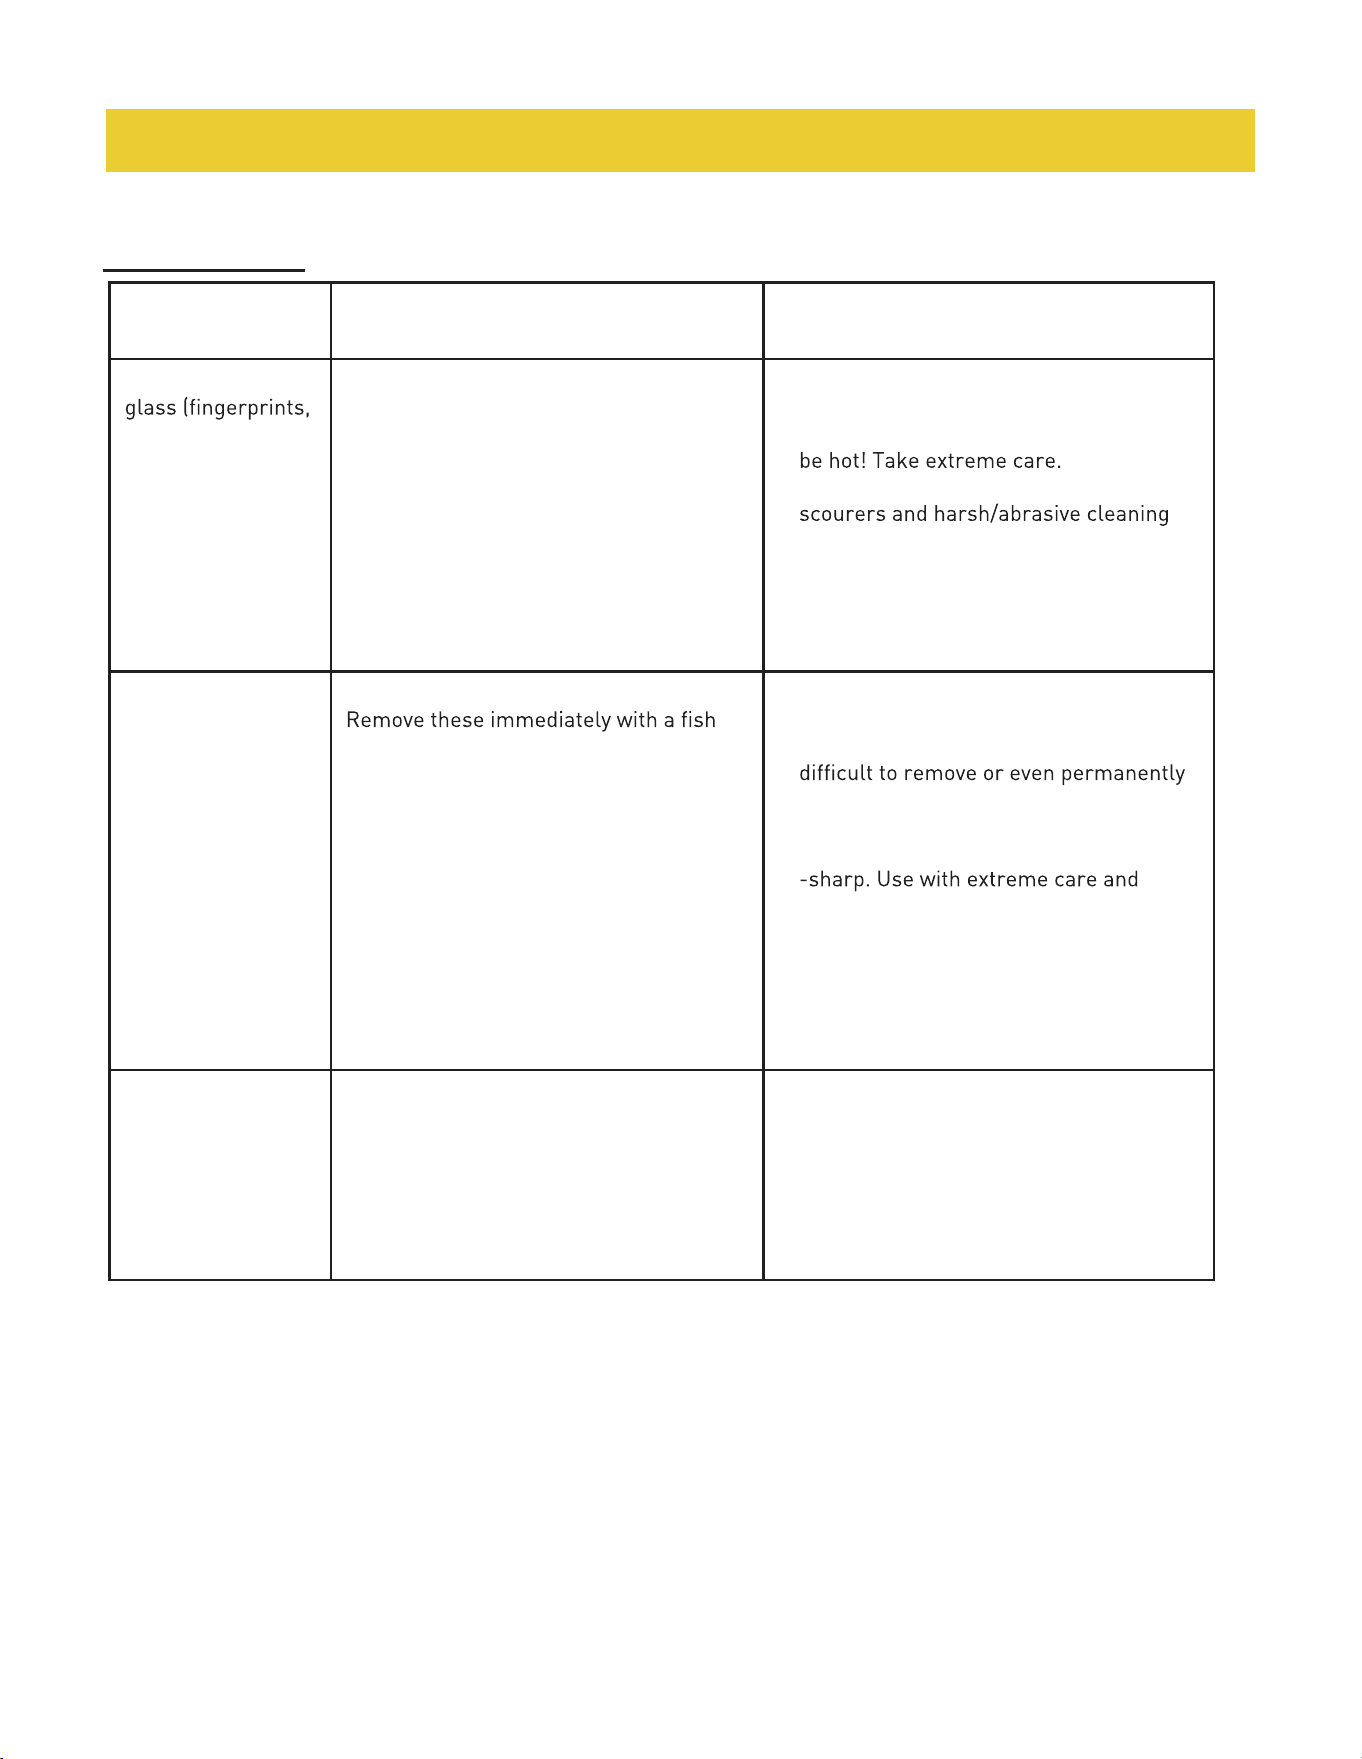
General Care Tip
To maintain the appearance and performance of your induction cooktop:
care instructions
What?
Overview of the Most Common
Types of Damage
Important!
Everyday soiling on
marks, stains left by
food or non-sugary
spillovers on the
glss)
• Switch the power to the cooktop off.
• Apply a cooktop cleaner while the glass
is still warm (but not hot!)
• Rinse and wipe dry with a clean cloth or
paper towel.
• Switch the power to the cooktop back
on.
• When the power to the cooktop is
switched off, there will be no 'hot surface'
indication but the cooking zone may still
• Heavy-duty scourers, some nylon
agents may scratch the glass. Always
read the label to check if your cleaner or
scourer is suitable.
• Never leave cleaning residue on the
cooktop: the glass may become stained.
Boilovers, melts,
and hot sugary
spills on the glass
Switch the power to the cooktop off.
slice, palette knife or razor blade scraper
suitable for ceramic glass cooktops, but
beware of hot cooking zone surfaces:
• Switch the power to the cooktop off at
the wall.
• Hold the blade or utensil at a 30° angle
and scrape the soiling or spill to a cool
area of the cooktop.
• Clean the solling or splll up with a dish
cloth or paper towel.
• Follow steps 2 to 4 for 'Everyday soiling
on glass' above.
• Remove stains left by melts and sugary
food or spillovers as soon as possible. If
left to cool on the glass, they may be
damage the glass surface.
• Cut hazard: when the safety cover is
retracted, the blade in a scraper is razor
always store safely and out of reach of
children.
Spillovers on the
touch controls
• Switch the power to the cooktop off.
• Soak up the spill
• Wipe the touch control area with a
clean damp sponge or cloth.
• Wipe the area completely dry with a
paper towel. 5. Switch the power to the
cooktop back on.
• The cooktop may beep and turn itself off,
and the touch controls may not function
while there is liquid on them. Make sure
you wipe the touch control area dry
before turning the cooktop back on.
• Clean the surface after each use with a soft cloth and suitable cleaner.
• Do not place hot lids or other items on the surface that could cause thermal stress
• Allow the cooktop to cool before cleaning.
21
COOKING SAFETY AND TIPS
Tips and Trouble Shooting
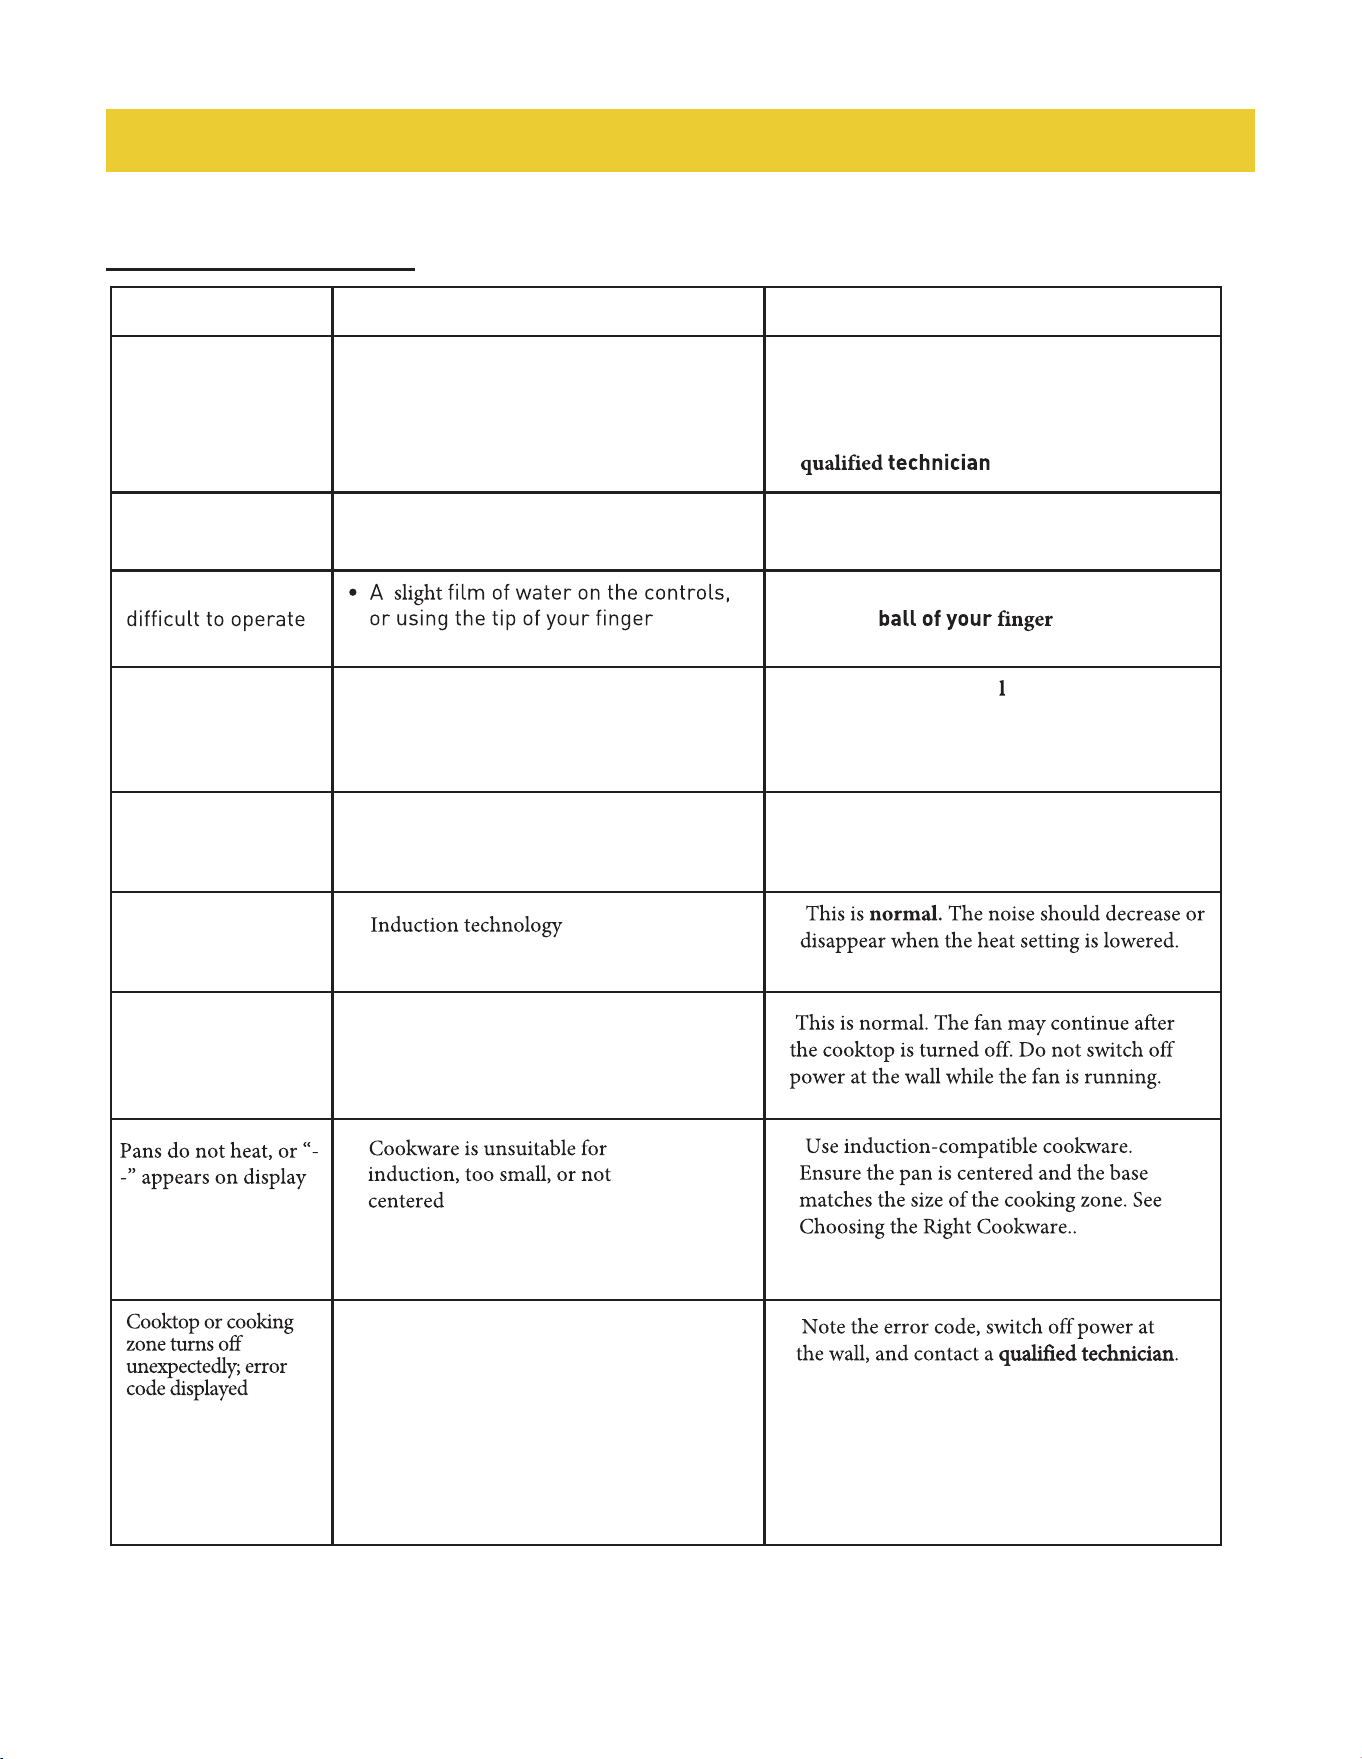
Problem Possible causes What to do
The cooktop cannot
be turned on.
• No power • Ensure the cooktop is properly connected
to the power supply and switched on.
• Check for a power outage in your home or
area. If the issue persists contact a
.
Touch controls are
unresponsive
• The controls are locked. • Unlock the controls. See Using Your
Induction Cooktop for instructions.
Touch controls are • Ensure the touch control area is dry and
use the
when operating
the controls.
Glass surface is
being scratched
• Rough-edged cookware or abrasive
cleaning products
• Use cookware with f at, smooth bases.
• See Choosing the Right Cookware.
• Use recommended cleaning products and
methods (Care and Cleaning section).
Some pans make
crackling or clicking
noises
• Cookware construction (different metal
layers vibrating)
• This is normal and does not indicate a
fault.
Low humming noise
on high heat
•
Fan noise from the
cooktop
• Cooling fan operating to prevent
overheating
• Technical fault.
•
•
•
•
•
22
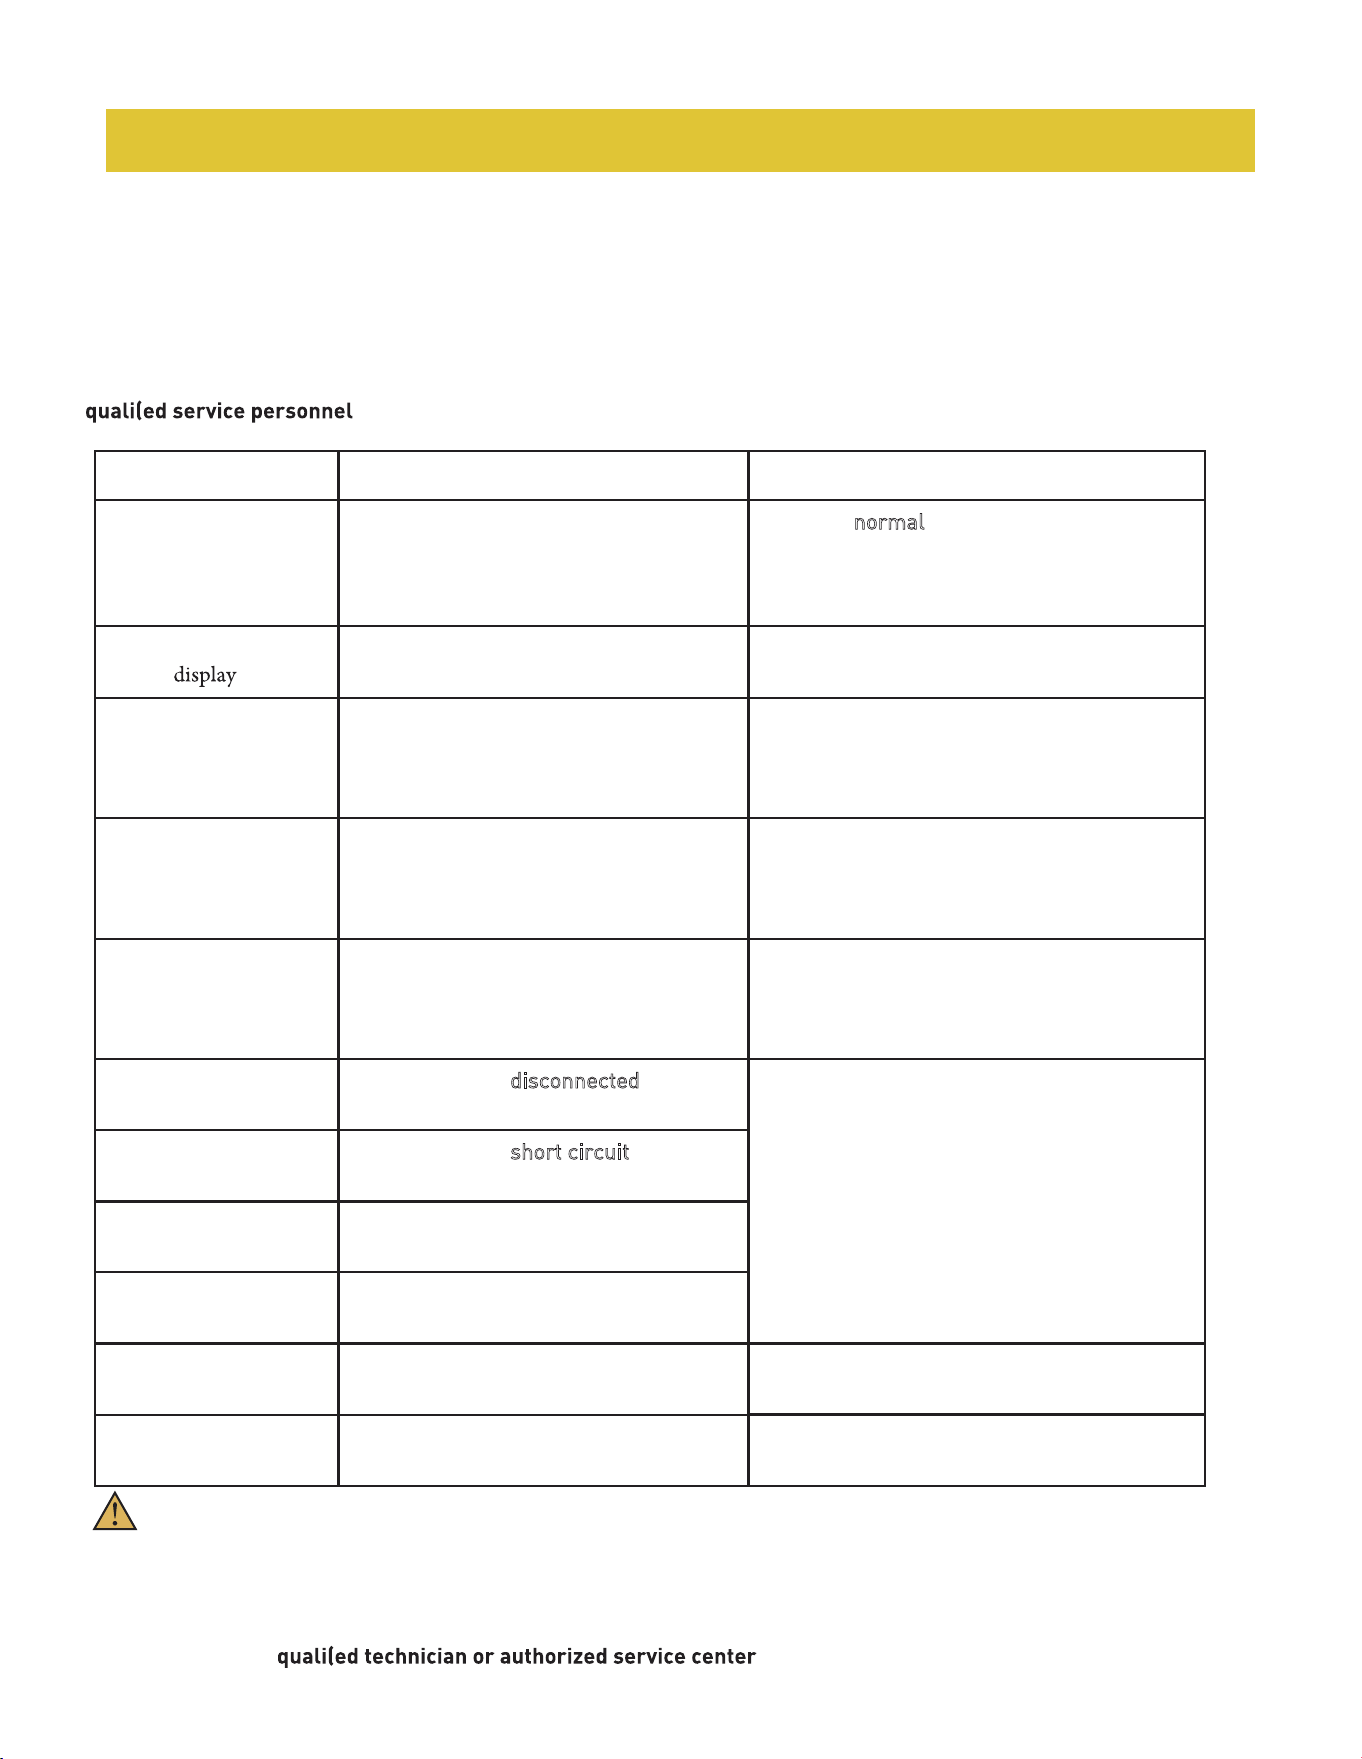
If an abnormal condition occurs, the induction cooktop will automatically enter a protective state to ensure safety and
prevent damage. When this happens, the cooktop will stop operating and display a corresponding error or protection
code on the control panel.
Refer to the Error Code Table in your manual to identify the issue and follow the recommended actions.
If the problem persists after performing the suggested checks, please disconnect the power supply and contact
for inspection and repair,
• The information above provides guidance for identifying and inspecting common failures.
• Do not attempt to disassemble or repair the induction cooktop yourself, as this may cause electric shock,
fire, or permanent damage to the appliance.
• Always contact a
for inspection and repair.
Important Safety Notice
Problem/Error Code Possible causes Solutions
The fans keep running
for about one minute
after the cooking zone
bas been switched off
• The internal electronics are cooling
down.
• This is normal. The fans will stop
automatically once the components have
cooled.
"EO" appears in the
timer
• The IGBT (electronic component) is
overheating.
• Turn off the cooktop and allow it to cool
down. Once cooled, restart the cooktop.
"U" appears in the
Timer display
• No cookware detected, or cookware
is improperly placed.
• Ensure the cookware is centered on the
cooking zone and that it is induction
-compatible. See Compatible Cookware
section.
"E2" appears in the
Timer display
• Supplied voltage to the cooktop is
too low
• This may be caused by reduced voltage
from the household circuit. If connections
are correct and. voltage returns to normal,
the code will clear automatically.
"E3" appears in the
Timer display
• Supplied voltage to the cooktop is
too high
• This may be caused by an electrical surge
or overvoltage. If connections are correct
and voltage returns to normal, the code
will clear automatically.
"E7" appears in the
Timer display
• NTCI sensor disconnected
(break-off).
• Turn off and unplug the cooktop for 30
seconds. Reconnect and restart. If the
problem persists, contact service.
"E8" appears in the
Timer display
• NTCI sensor short circuit.
"E9" appears in the
Timer display
• NTC2 sensor disconnected
(break-off).
"EE" appears in the
Timer display
• NTC2 sensor short circuit.
"F" appears in the
Timer display
• Communication error or electronic
fault.
Noise (humming,
crackling, or buzzing)
• Normal operating sounds caused by
cookware and induction technoloav.
• This is normal. See Operational Cooktop
Noises section for more details.
• Contact an authorized service technician
for inspection and repair.
FAILUER DISPLAY AND INSPECTION

23
WARRANTY

Warranty Registration
Made Easy.
We Stand Behind
the Quality of Our
Appliances.
Reliability and customer satisfaction are our top priorities. We offer a
solid two-year warranty on both parts and labor. Enjoy professional-grade
performance with the condence that we’ve got you covered.
01
02
03
Scan the QR Code or visit thorkitchen.
com/register-your-product.
Input your purchase and product
information and select register.
That’s it. You’re all set.
Enjoy!
WARRANTY
PARTS
Questions: [email protected]