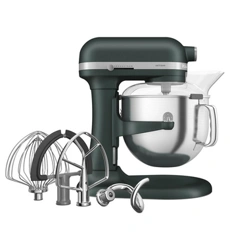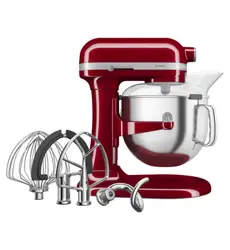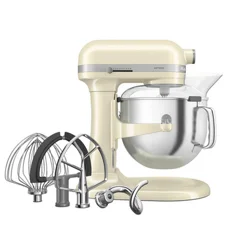
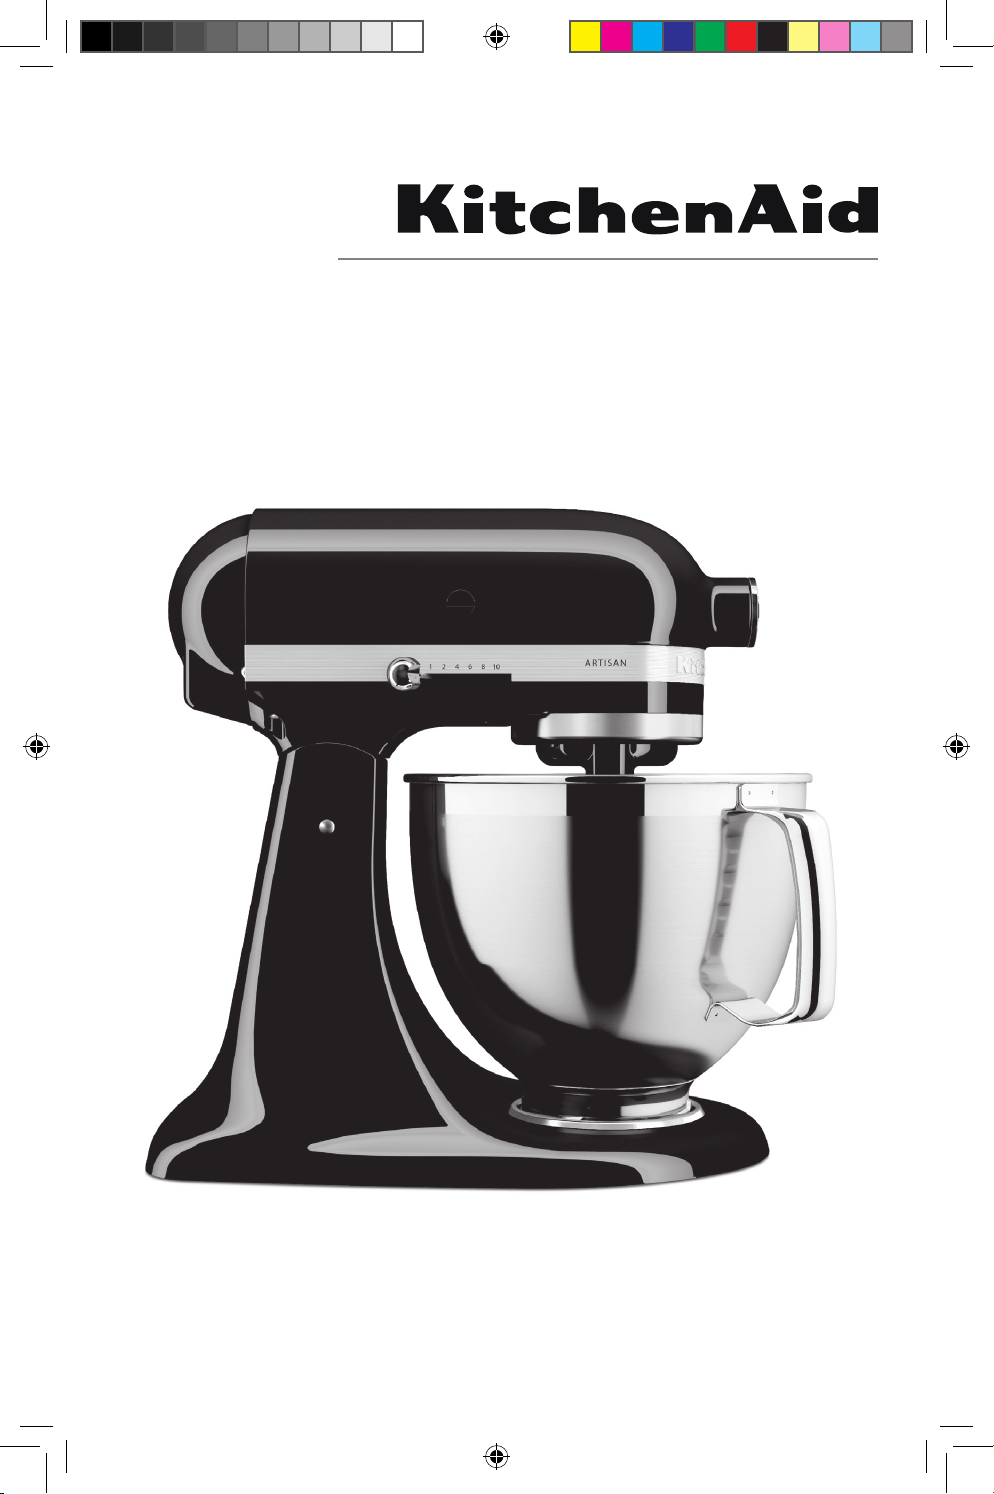
Stand Mixer
5KSM45A - 5KSM200A Series
W11556021C.indd 1W11556021C.indd 1 7/6/2022 2:46:01 PM7/6/2022 2:46:01 PM
2
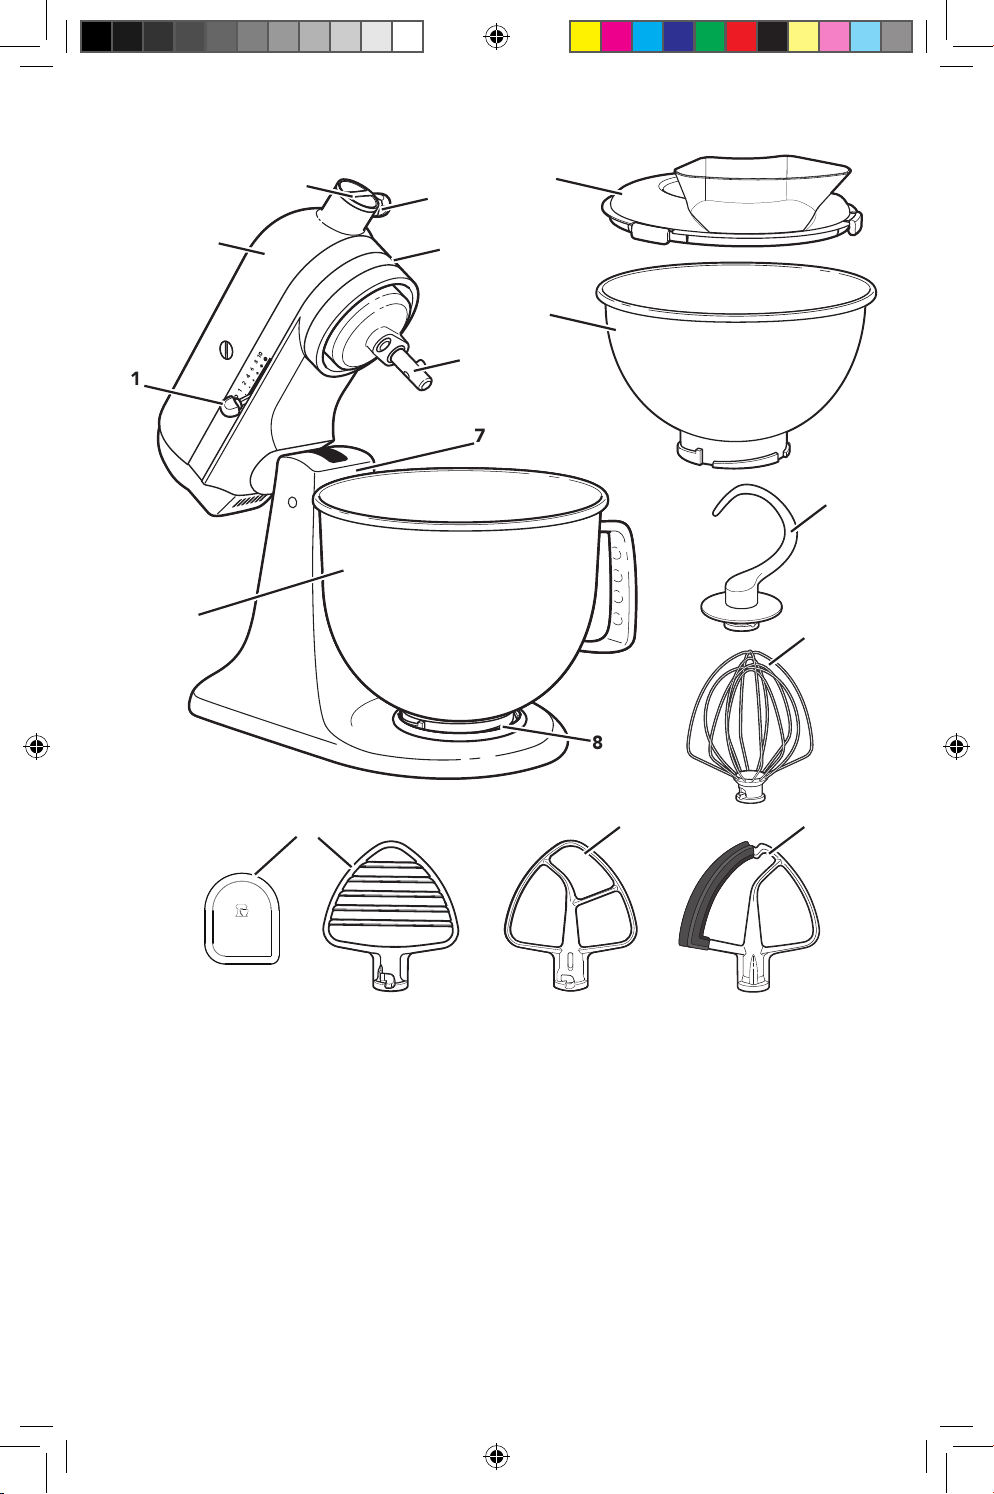
PARTS AND FEATURES
*Included with select models only. Also available as optional accessory.
**The Bowl design and material depend on the Stand Mixer model.
***Can also be used to scrape your Bowl.
1
2
4
5
6
11
10
1 Speed Control Lever
2 Motor Head
3 Attachment Hub
4 Attachment Knob
5 Motor Head Locking Lever
(not shown)
6 Beater Shaft
7 Beater Height Adjustment Screw
(not shown)
8 Bowl Clamping Plate
9 Bowl**
10 Pouring Shield*
11 2.8 L Stainless Steel Bowl*
12 Dough Hook
13 Wire Whip
14 Flex Edge Beater*
15 Flat Beater*
16 Pastry Beater* and Scraper* ***
8
3
7
13
1415
9
12
16
W11556021C.indd 2W11556021C.indd 2 7/6/2022 2:46:02 PM7/6/2022 2:46:02 PM
ENGLISH
3
IMPORTANT SAFEGUARDS
When using electrical appliances, basic safety precautions should always be
followed, including the following:
1. Read all instructions. Misuse of appliance may result in personal injury.
2. To protect against risk of electrical shock, do not put Stand Mixer in water or
other liquid.
3. This appliance is not intended for use by persons (including children) with
reduced physical, sensory, or mental capabilities, or lack of experience and
knowledge, unless they have been given supervision or instruction concerning
use of the appliance by a person responsible for their safety.
4. Turn the appliance off (0), then unplug from the outlet when not in use, before
assembling or disassembling parts and before cleaning. To unplug, grasp the
plug and pull from the outlet. Never pull from the power cord.
5. Avoid contacting moving parts. Keep hands, hair, clothing, as well as spatulas
and other utensils away from beater during operation to reduce the risk of injury
to persons and/or damage to the Stand Mixer.
6. Do not operate any appliance with a damaged cord or plug, or after the
appliance malfunctions, or is dropped or damaged in any manner. Return
appliance to the nearest Authorised Service Facility for examination, repair,
or electrical or mechanical adjustment.
7. The use of attachments not recommended or sold by KitchenAid may cause fire,
electrical shock or injury.
8. Do not use the appliance outdoors.
9. Do not let the cord hang over edge of table or counter.
10. Do not let the cord contact hot surfaces, including the stove.
11. Remove Flat Beater, Flex Edge Beater, Wire Whip, Dough Hook, or Pastry Beater
from Stand Mixer before washing.
PRODUCT SAFETY
W11556021C.indd 3W11556021C.indd 3 7/6/2022 2:46:02 PM7/6/2022 2:46:02 PM
4
12. Children should be supervised to ensure that they do not play with the appliance.
13. If the supply cord is damaged, it must be replaced by the manufacturer, its
service agent, or similarly qualified persons in order to avoid a hazard.
14. Never leave the appliance unattended while it is in operation.
15. To avoid product damage, do not use the Stand Mixer Bowls in areas of high
heat such as an oven, microwave, or on a stovetop.
16. Allow the appliance to cool completely before putting on or taking off parts, and
before cleaning the appliance.
17. Refer to the “Care and Cleaning” section for instructions on cleaning the
surfaces in contact with food.
18. This appliance is intended to be used in household and similar applications such
as:
- staff kitchen areas in shops, offices, or other working environments;
- farmhouses;
- by clients in hotels, motels and other residential type environments;
- bed and breakfast type environments.
SAVE THESE INSTRUCTIONS
ELECTRICAL REQUIREMENTS
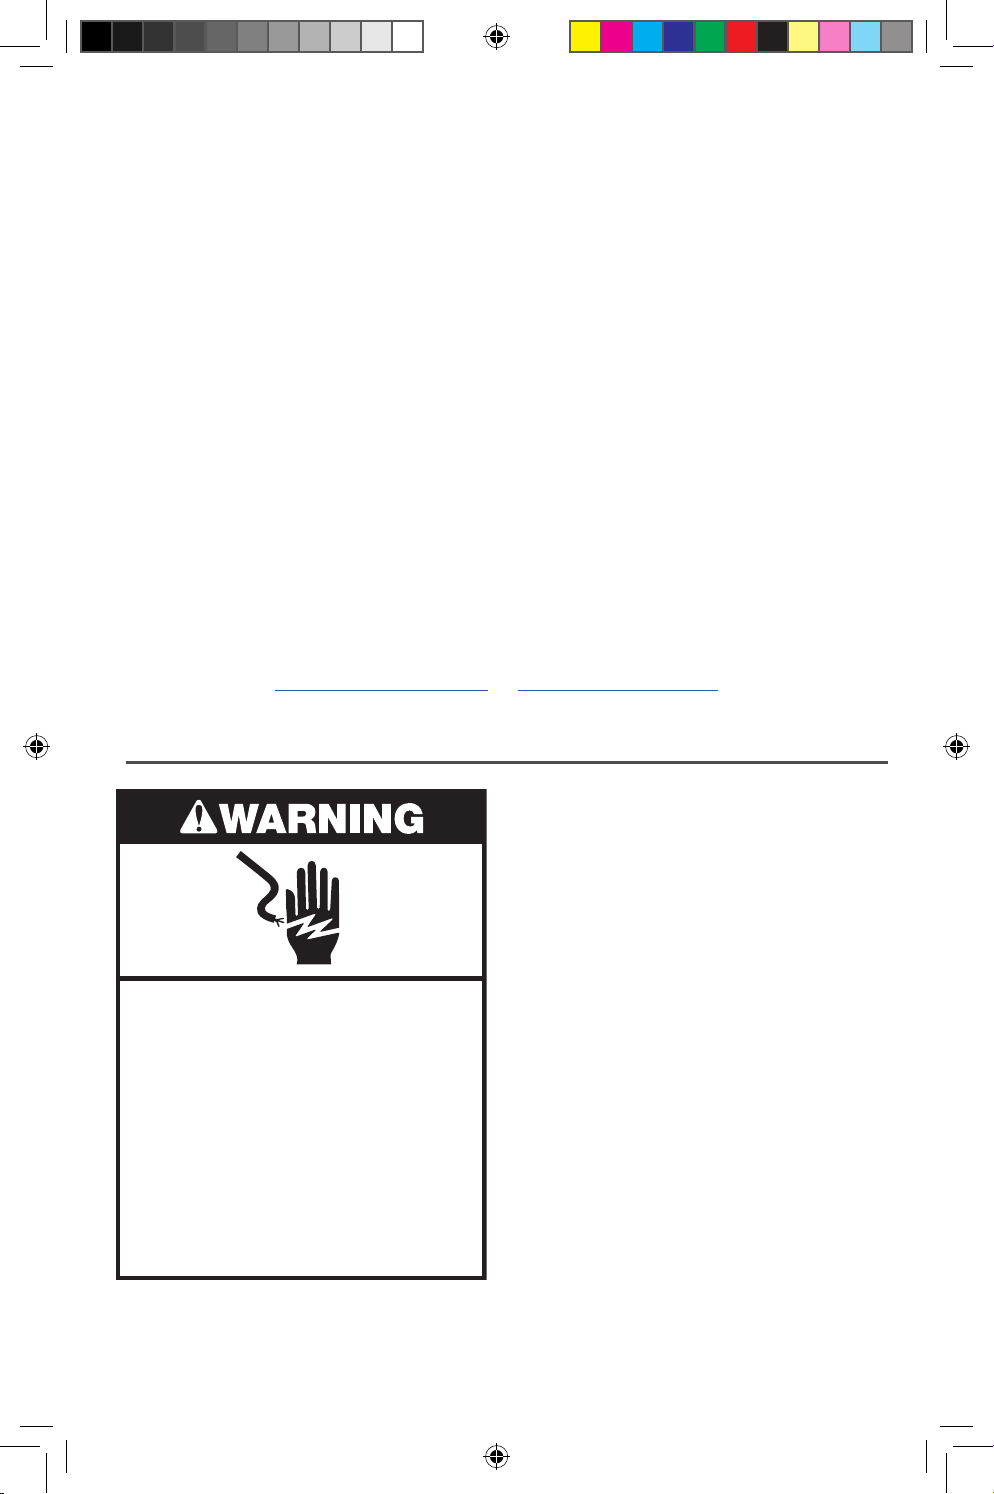
Electrical Shock Hazard
Plug into an earthed outlet.
Do not remove earth prong.
Do not use an adapter.
Do not use an extension cord.
Failure to follow these
instructions can result in
death, fire, or electrical shock.
Power:
300 W max.
For 5KSM125 - 5KSM200 Series
275 W max.
For 5K45, 5KSM45 - 5KSM100 Series
Voltage: 220-240 V
Frequency: 50-60 Hz
NOTE: If the plug does not fit in the
outlet, contact a qualified electrician.
Do not modify the plug in any way.
Do not use an adapter.
Do not use an extension cord. If the power
supply cord is too short, have a qualified
electrician or service technician install an
outlet near the appliance.
PRODUCT SAFETY
Instructions are also available online, visit our website at:
www.kitchenaid.com.au or www.KitchenAid.co.nz
W11556021C.indd 4W11556021C.indd 4 7/6/2022 2:46:03 PM7/6/2022 2:46:03 PM
ENGLISH
5
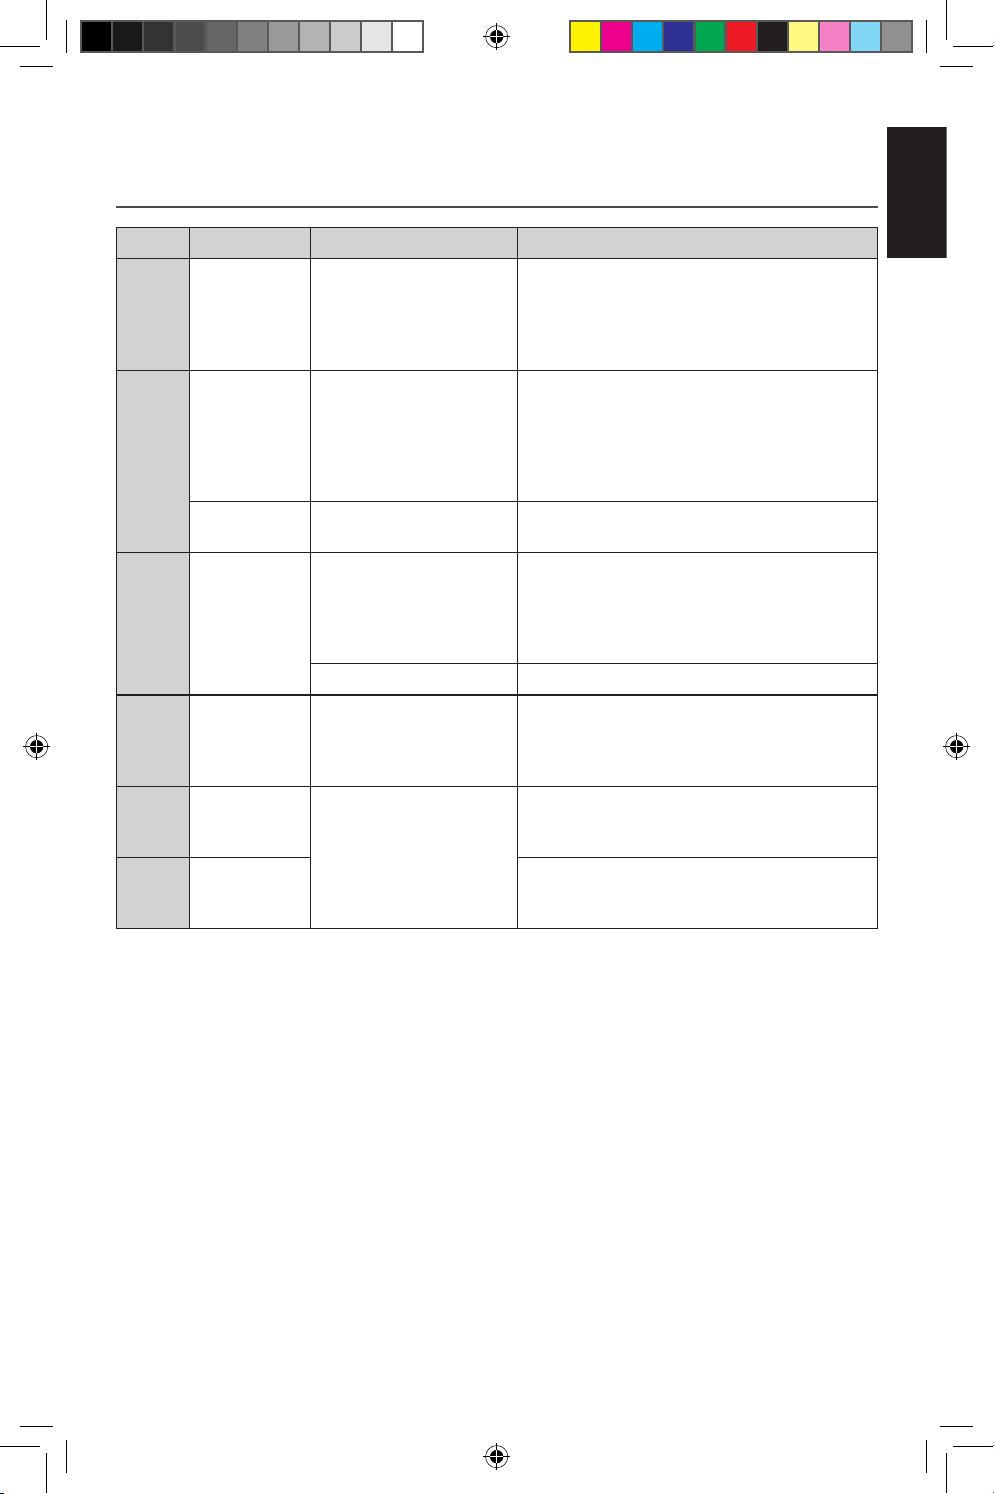
NOTE: The Speed Control Lever can be set between the speeds listed in the above chart to
obtain speeds 3, 5, 7, and 9 if a finer adjustment is required.
IMPORTANT: Do not exceed Speed 2 when preparing yeast doughs as this may cause
damage to the Stand Mixer.
SPEED CONTROL GUIDE
SPEED ACTION ATTACHMENT DESCRIPTION
1 STIR
Flat Beater*
Flex Edge Beater*
For slow stirring, combining, mashing,
starting all mixing procedures. Use to add
flour and dry ingredients to batter, and to
add liquids to dry ingredients. Do not use
Speed 1 to mix or knead yeast doughs.
2
SLOW
MIXING
Flat Beater*
Flex Edge Beater*
Dough Hook
For slow mixing, mashing, faster stirring.
Use to mix and knead yeast doughs,
heavy batters and candies, start mashing
potatoes or other vegetables, cut
shortening into flour, and mix thin or
splashy batters.
STIR Pastry Beater*
Cut butter into flour to make pastry
dough; Mash fruits and vegetables.
4
MIXING,
BEATING
Flat Beater*
Flex Edge Beater*
Wire Whip
For mixing semi-heavy batters, such
as cookies. Use to combine sugar and
shortening and to add sugar to egg
whites for meringues. Medium speed for
cake mixes.
Pastry Beater* For shredding meats.
6
BEATING,
CREAMING
Flat Beater*
Flex Edge Beater*
Wire Whip
For medium-fast beating (creaming) or
whipping. Use to finish mixing cake,
doughnut, and other batters. High speed
for cake mixes.
8
FAST
BEATING,
WHIPPING
Wire Whip
For whipping cream, egg whites, and
boiled frostings.
10
FAST
WHIPPING
For whipping small amounts of cream,
egg whites, or for final whipping of
mashed potatoes.
PRODUCT USAGE
*Included with select models only. Also available as optional accessory.
W11556021C.indd 5W11556021C.indd 5 7/6/2022 2:46:03 PM7/6/2022 2:46:03 PM
6
PRODUCT USAGE
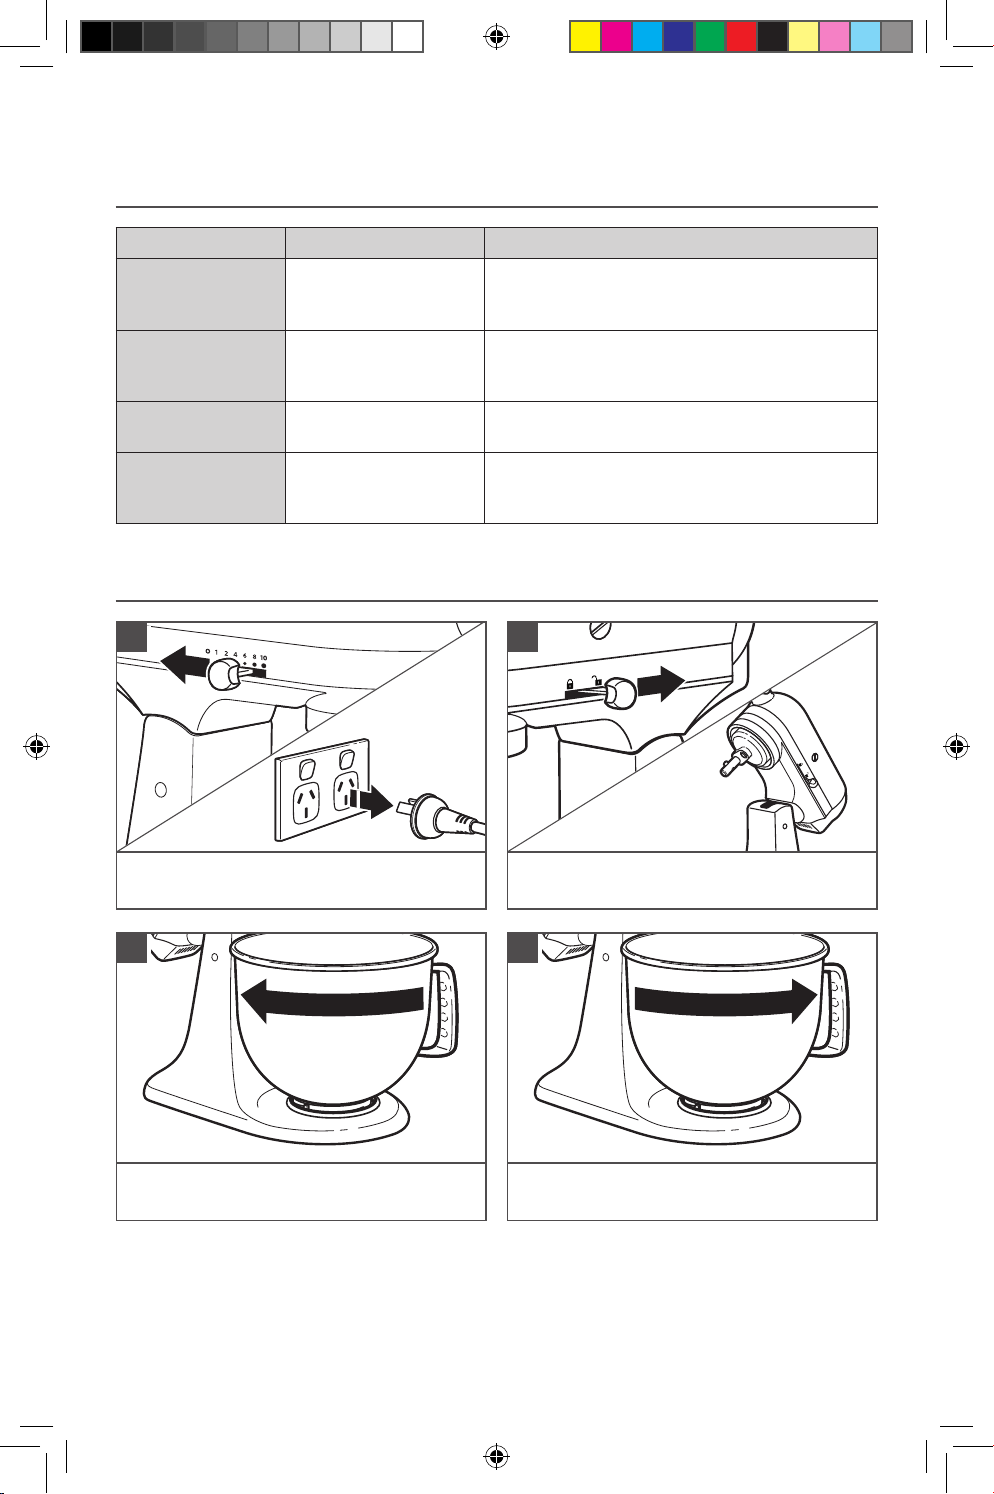
ACCESSORY GUIDE
ACCESSORY USE TO MIX SUGGESTED ITEMS
Flat Beater*
Flex Edge Beater*
Normal to heavy
mixtures:
Cakes, creamed frostings, candies, cookies,
pie pastry, shredding meats, biscuits, meat
loaf, mashed potatoes.
Wire Whip
Mixtures that need air
incorporated:
Eggs, egg whites, heavy cream,
boiled frostings, sponge cakes, mayonnaise,
some candies.
Dough Hook
Mixing and kneading
yeast doughs:
Breads, rolls, pizza dough, coffee cakes, buns.
Pastry Beater* Cut butter into flour:
For pie dough, biscuits and other pastries,
mashing fruits and vegetables, and shredding
meats.
*Included with select models only. Also available as optional accessory.
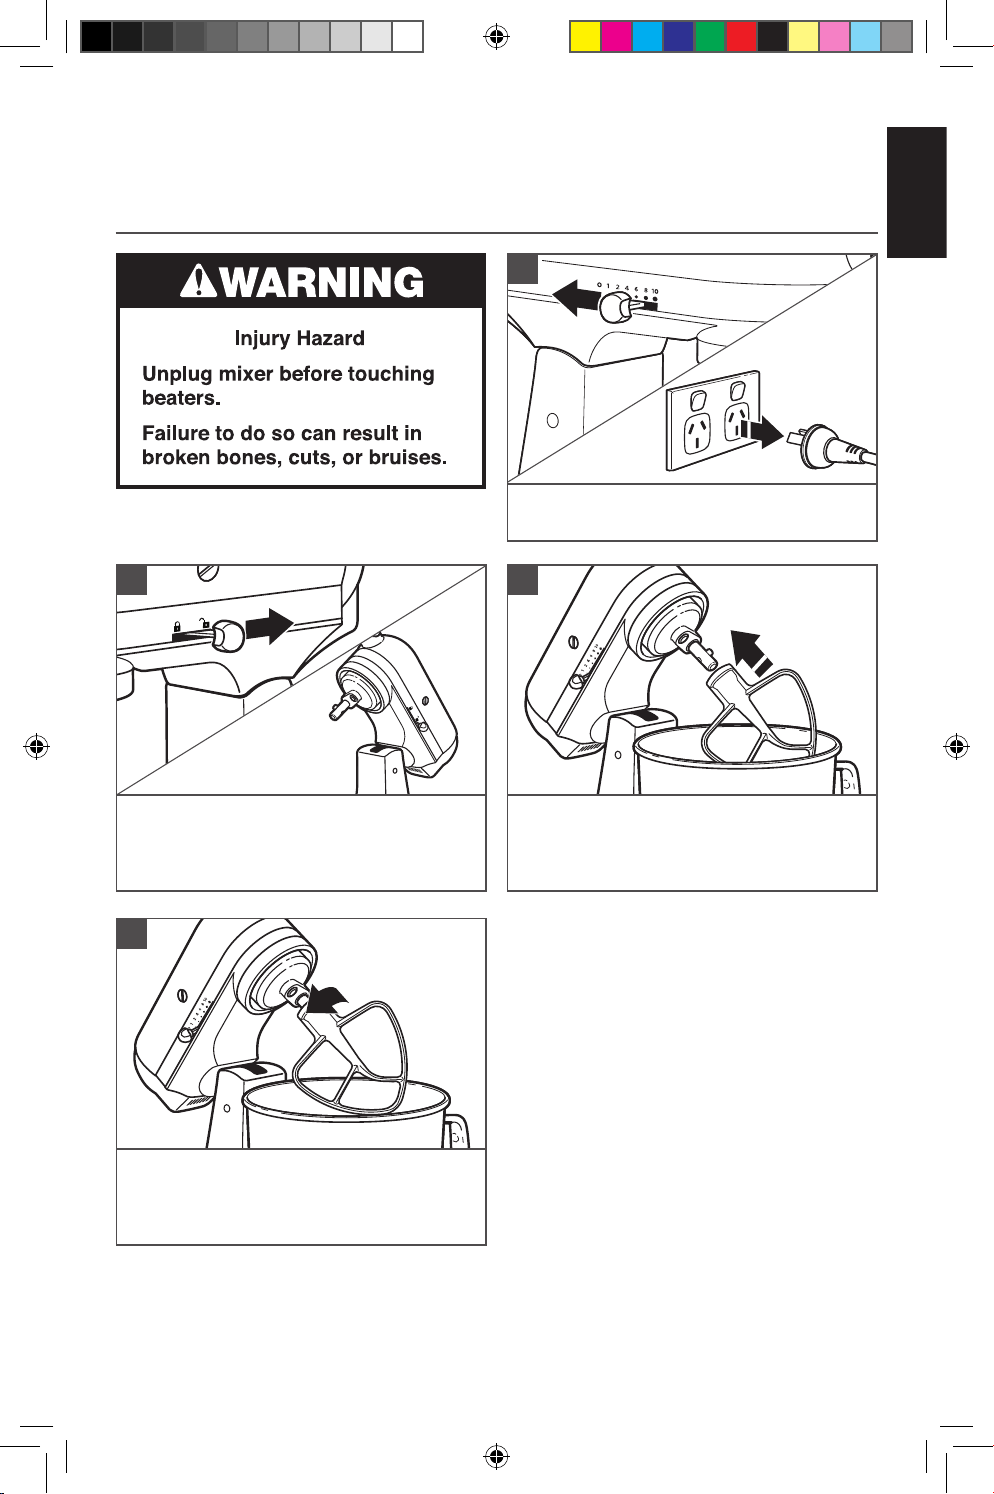
ATTACHING/REMOVING THE BOWL
To attach Bowl: Turn speed control to
“0”. Unplug Stand Mixer.
1
Place Bowl on Bowl Clamping Plate. Turn
Bowl gently in clockwise direction.
3
Unlock and lift the Motor Head. Then,
lock** the head to keep it lifted.
2
To remove Bowl: Repeat steps 1 and 2.
Turn Bowl gently counterclockwise.
4
NOTE: Motor Head should always be in lock position when using the Stand Mixer.
**Locking option is available on select models.
W11556021C.indd 6W11556021C.indd 6 7/6/2022 2:46:03 PM7/6/2022 2:46:03 PM
ENGLISH
7
PRODUCT USAGE
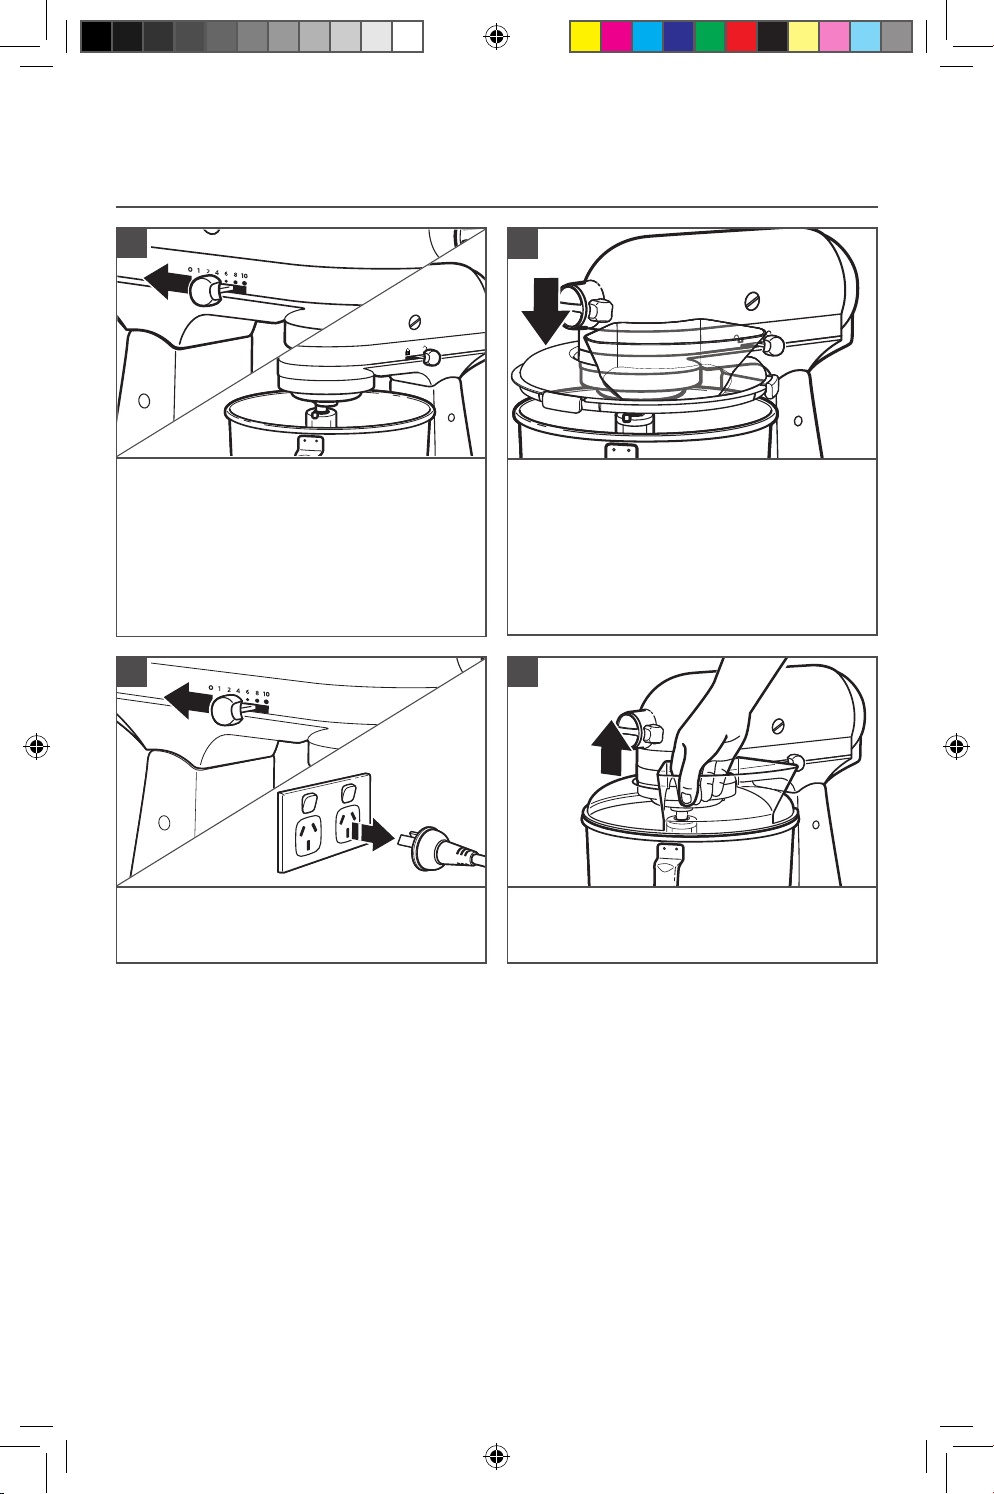
ATTACHING/REMOVING THE FLAT BEATER*, FLEX EDGE BEATER*,
WIRE WHIP, PASTRY BEATER* OR DOUGH HOOK
To attach accessory: Turn speed control
to “0”. Unplug Stand Mixer.
1
To remove accessory: Repeat steps 1
and 2. Press accessory upward as far as
possible and turn to the left. Then pull
accessory from the Beater Shaft.
4
Unlock and lift the Motor Head. Then,
lock** the head to keep it lifted.
2
Slip accessory onto Beater Shaft and
press upward as far as possible. Then,
turn accessory to the right, hooking
accessory over the pin on the shaft.
3
**Locking option is available on select models.
W11556021C.indd 7W11556021C.indd 7 7/6/2022 2:46:03 PM7/6/2022 2:46:03 PM
8
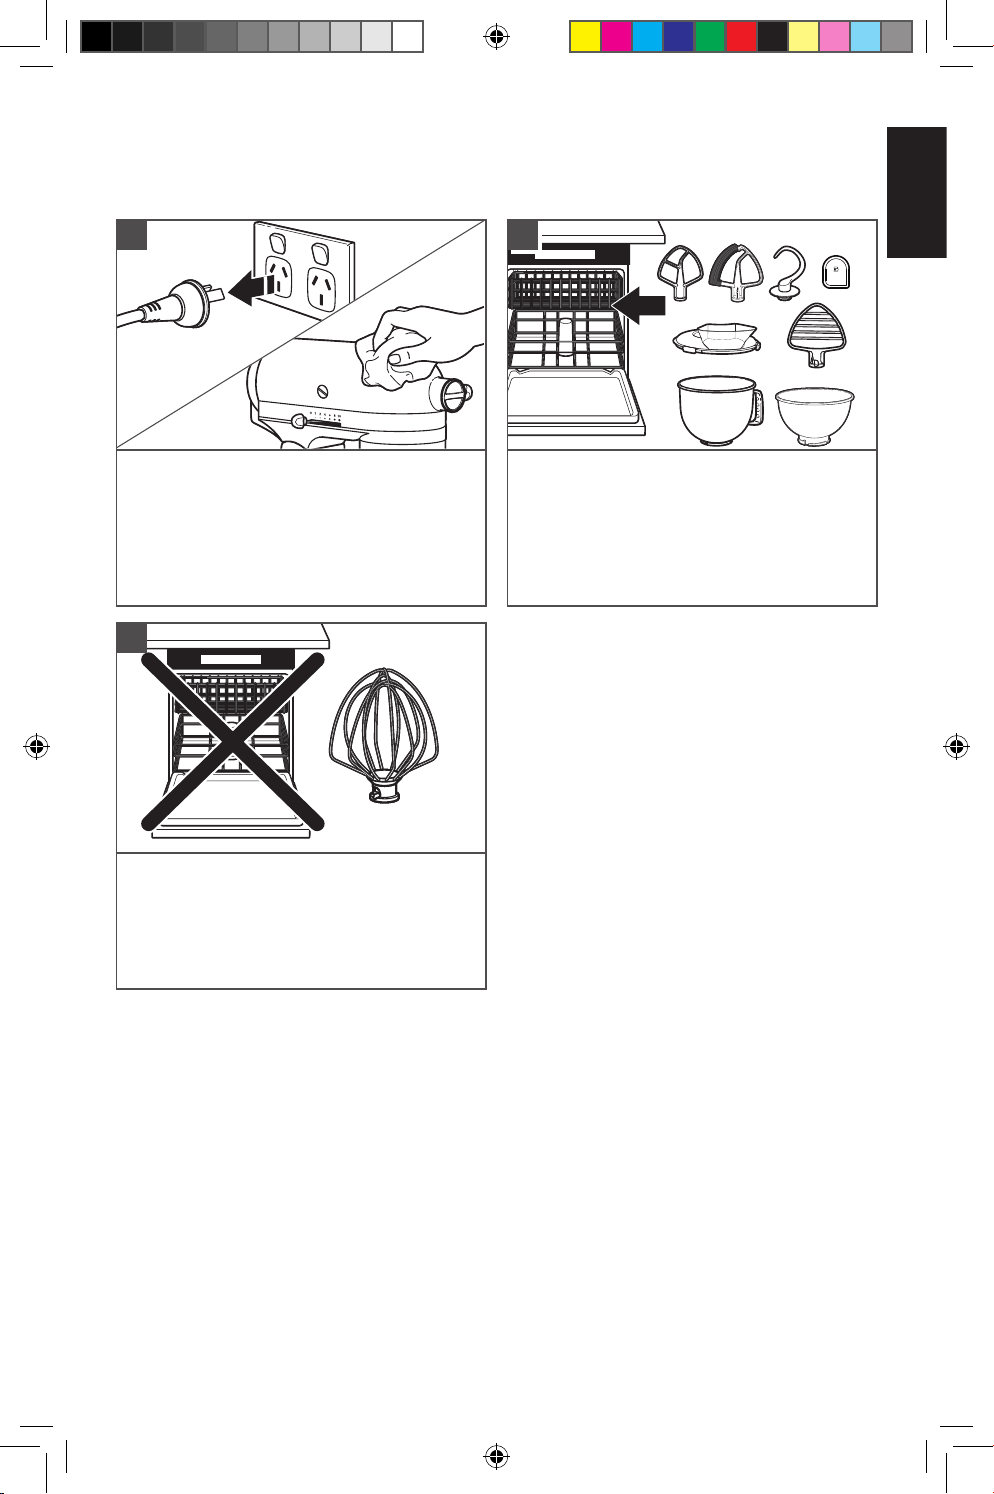
PLACING/REMOVING THE POURING SHIELD**
To place Pouring Shield**: Turn speed
control to “0”. Unplug Stand Mixer.
Attach your chosen accessory. See the
“Attaching/removing the Flat Beater*,
Wire Whip, or Dough Hook” section.
1
From the front of the Stand Mixer place
the Pouring Shield** onto the Bowl so
that the Motor Head covers the u-shaped
gap in the shield. This will position the
pouring chute just to the right of the
Attachment Hub as you face the mixer.
Press lightly so that the Easy Snap tabs
snap the shield onto the Bowl.
2
PRODUCT USAGE
To remove Pouring Shield**: Turn speed
control to “0”. Unplug Stand Mixer.
3
Lift the front of the Pouring Shield** clear
of the rim of the Bowl***. Pull away from
the Stand Mixer.
4
*Included with select models only. Also available as optional accessory.
**Pouring Shield is not compatible with KitchenAid Ceramic or Glass Bowls.
***The Bowl design and material depend on the Stand Mixer model.
W11556021C.indd 8W11556021C.indd 8 7/6/2022 2:46:04 PM7/6/2022 2:46:04 PM
ENGLISH
9
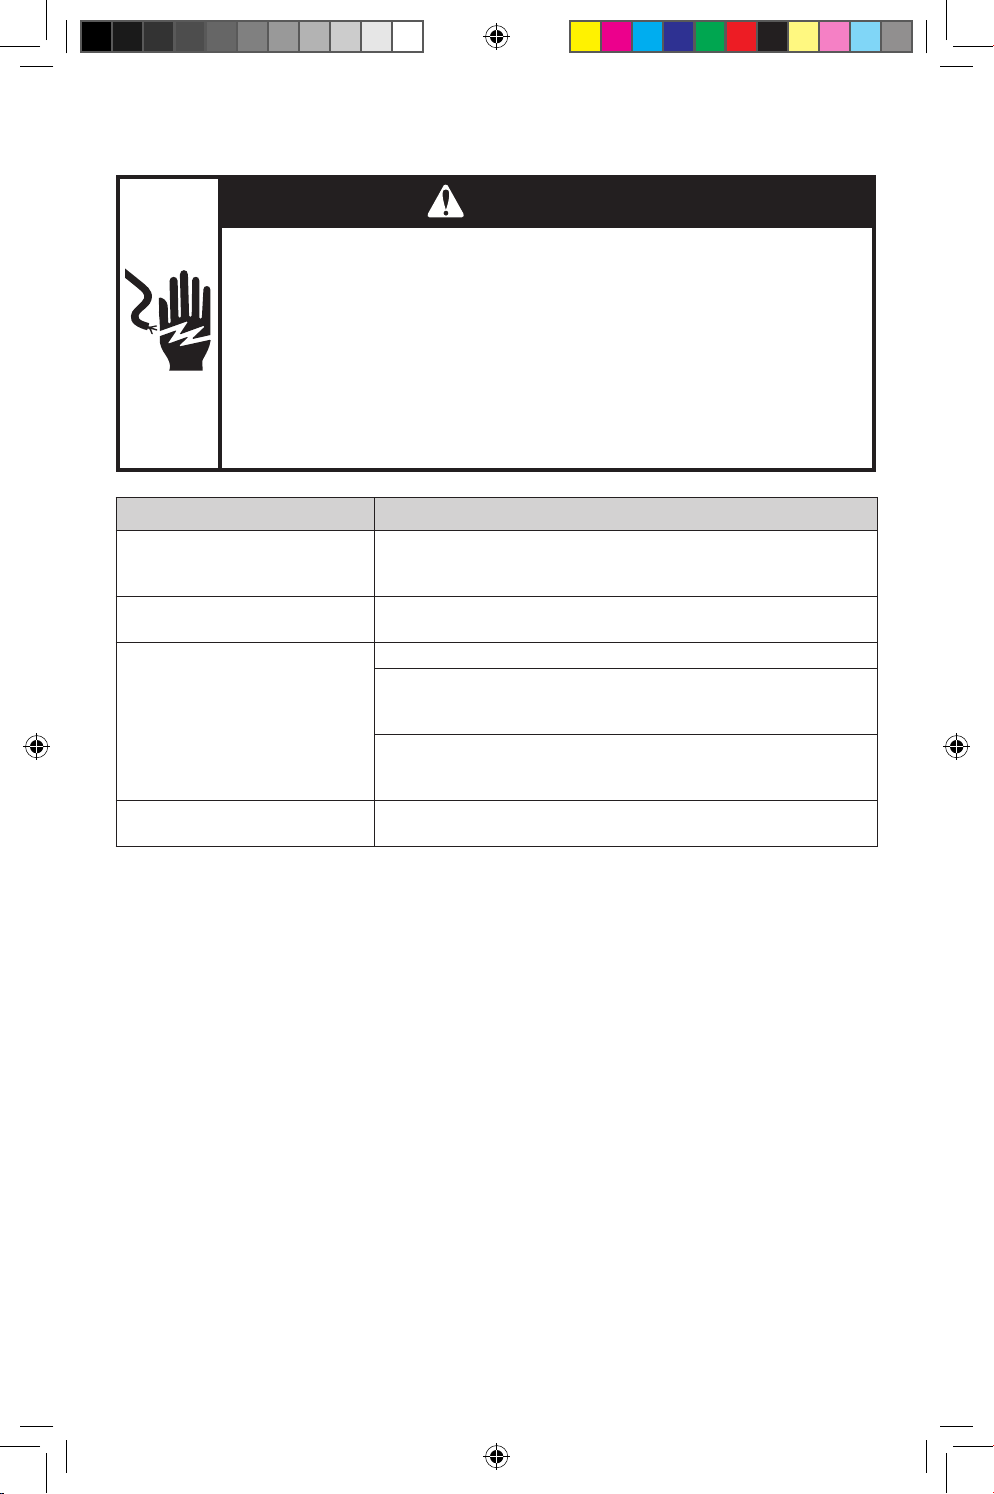
CARE AND CLEANING
*Included with select models only. Also available as an optional accessory.
***Can also be used to scrape your Bowl.
Always be sure to unplug Stand Mixer
before cleaning. Wipe Stand Mixer with a
soft, damp cloth. Do not use
household/commercial cleaners. Wipe
off Beater Shaft frequently, removing any
residue that may accumulate. Do not
immerse in water.
1
Bowls, Pouring Shield*, Flat Beater*,
Flex Edge Beater*, Pastry Beater*,
Scraper* ***, and Dough Hook may be
washed in a dishwasher. Or, wash them
thoroughly in hot sudsy water and rinse
completely before drying. Do not store
Beaters on shaft.
2
IMPORTANT: The Wire Whip is only
Dishwasher-safe for model 5KSM180 and
5KSM182. For all other models, wash it
thoroughly in hot sudsy water and rinse
completely before drying. Do not store
Wire Whip on shaft.
3
IMPORTANT: Allow the appliance to cool completely before putting on or taking off
parts, and before cleaning the appliance.
W11556021C.indd 9W11556021C.indd 9 7/6/2022 2:46:04 PM7/6/2022 2:46:04 PM
10
TROUBLESHOOTING
PROBLEM SOLUTION
If Stand Mixer warms up
during use:
Heavy Loads should not exceed Speed 2. Under heavy loads
with extended mixing time periods, you may not be able to
comfortably touch the top of the unit. This is normal.
If Stand Mixer emits a
pungent odour:
This is common with electric motors, especially when new.
If your Stand Mixer should fail
to operate, please check the
following:
Is the Stand Mixer plugged in?
Is the fuse in the circuit to the Stand Mixer in working
order? If you have a circuit breaker box, be sure the circuit
is closed.
Turn off the Stand Mixer for 10-15 seconds, then turn it back
on. If the Stand Mixer still does not start, allow it to cool for
30 minutes before turning it back on.
If the problem cannot be
corrected:
See the “Customer Service” section. Do not return the
Stand Mixer to the retailer; retailers do not provide service.
WARNING
Electrical Shock Hazard
Plug into an earthed outlet.
Do not remove an earth prong.
Do not use an adapter.
Do not use an extension cord.
Failure to follow these instructions can result in death, re,
or electrical shock.
W11556021C.indd 10W11556021C.indd 10 7/6/2022 2:46:04 PM7/6/2022 2:46:04 PM
ENGLISH
11
In Australia:
For any questions, or to find the nearest Authorised KitchenAid Service Centre,
please find our contact details below.
NOTE: All service should be handled locally by an Authorised KitchenAid Service
Centre.
Toll free number: 1-800-990-990
Phone number: 02 49026500
Address Australia:
KitchenAid Australia Pty Ltd
6-8 Billbrooke Close
Cameron Park NSW 2285, Australia
Phone: 1-800-990-990
Mobile: 0249026500
Email: [email protected]
In New Zealand:
Website: www.KitchenAid.co.nz
Email: [email protected]
Phone: 0800 881 200
In other countries:
For all product related questions and after-sales matters, please contact your dealer
to obtain the name of the nearest Authorised KitchenAid Service/Customer Centre.
For more information, visit our website at:
www.KitchenAid.com.au
CUSTOMER SERVICE
©2022 All rights reserved.
KITCHENAID and the design of the stand mixer are trademarks in the U.S. and elsewhere.
W11556021C.indd 11W11556021C.indd 11 7/6/2022 2:46:04 PM7/6/2022 2:46:04 PM
NOTES
W11556021C.indd 12W11556021C.indd 12 7/6/2022 2:46:04 PM7/6/2022 2:46:04 PM
NOTES
W11556021C.indd 13W11556021C.indd 13 7/6/2022 2:46:04 PM7/6/2022 2:46:04 PM
NOTES
W11556021C.indd 14W11556021C.indd 14 7/6/2022 2:46:04 PM7/6/2022 2:46:04 PM
NOTES
W11556021C.indd 15W11556021C.indd 15 7/6/2022 2:46:04 PM7/6/2022 2:46:04 PM
W11556021C
©2022 All rights reserved.
KITCHENAID and the design of the stand mixer are trademarks in the U.S. and elsewhere.
07/22
W11556021C.indd 16W11556021C.indd 16 7/6/2022 2:46:04 PM7/6/2022 2:46:04 PM