CHECK FOR CONCEALED DAMAGE
FILE CLAIM WITH DELIVERING FREIGHT CARRIER
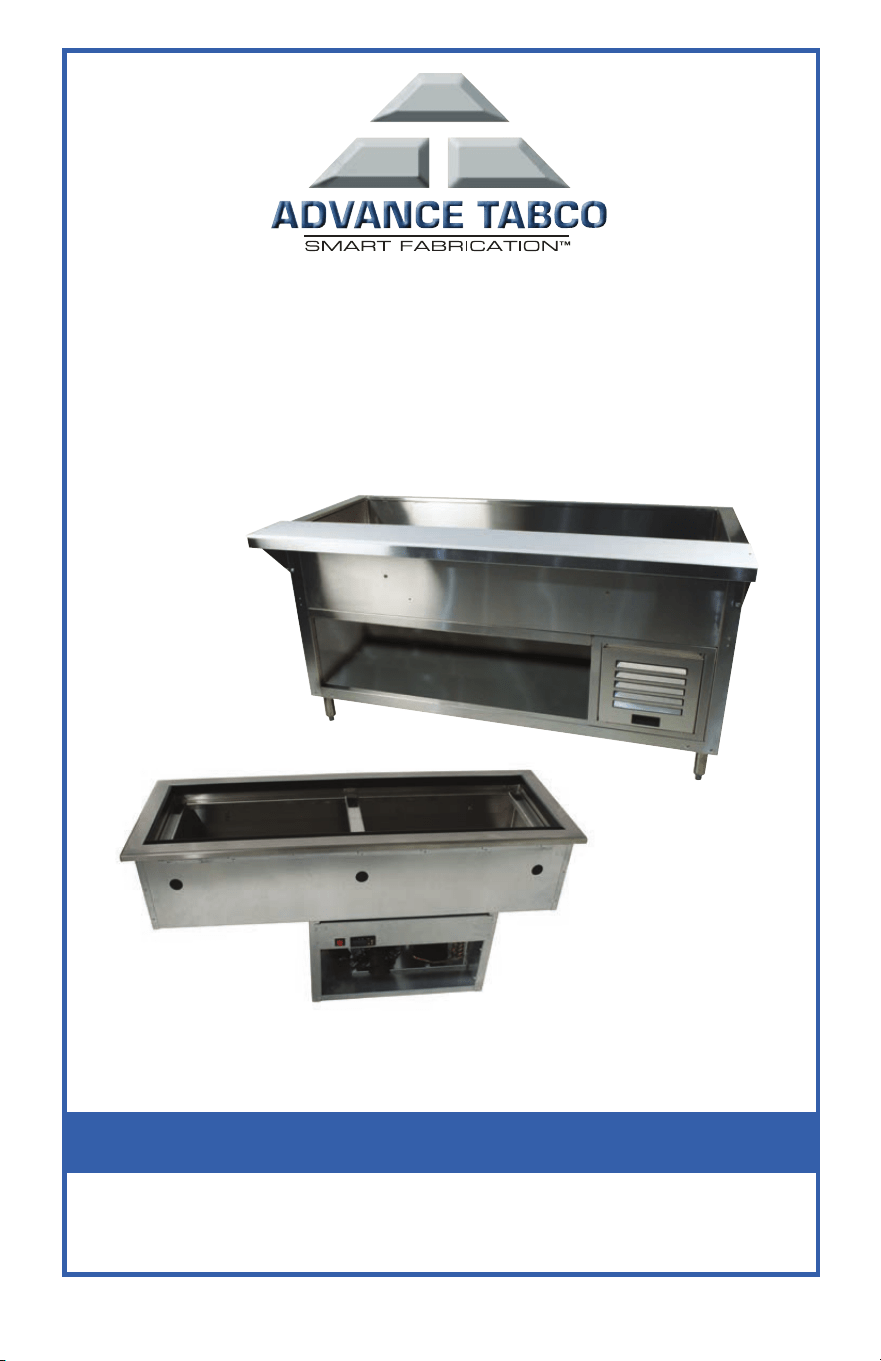
Refrigerated cold pan units manufactured by ADVANCE TABCO are designed and
constructed for maintaining food temperature. Equipment not intended to store raw food.
ADVANCE TABCO does not recommend product use for activities employing harsh and
active chemicals. Please consult factory regarding unusual applications.
© ADVANCE TABCO JANUARY 2017
Installation • Operation • Maintenance
REFRIGERATED
COLD PAN/FROST TOP MANUAL
®
Please read this manual completely prior to installation and/or operation. This unit is
designed for commercial use only. This manual must be retained for future reference.

GENERAL INSTALLATION:
These units are intended for indoor use only. A room temperature of not more than 86°F (30°C) is
recommended. For counter top units, reinforce the counter as necessary to provide maximum
loading. For drop-in (countertop) units, reinforce the counter as necessary to provide adequate
support for fully loaded unit. Drop-in units must have at least 200 sq in of unobstructed air intake
and a separate 200 sq in of air exhaust provided by the installer or cabinet maker.
CAUTION: Unit requires that the sides and bottom are not any closer than 3” to any
combustible material.
1. The temperature sensing probe must be checked to ensure it did not come loose
during shipping. This probe (black) should be inserted into a copper pipe near the fan.
Firmly push up with your finger to ensure it is fully seated. (If the probe is not seated,
when you power on the unit you will get a temperature reading above 33°F and the
compressor will not operate).
2. The unit’s drain must have an outlet to an appropriate drainage area or container.
The drain on all units is shipped loose and must be connected during installation.
NOTE: Moisture collecting from improper drainage can create a slippery surface on the floor
and a hazard to employees. It is the owner’s responsibility to provide a container or outlet for
drainage. Some units may have polyethylene insulation in the drain hole. This can easily be
cut out without any contact or damage to the units interior insulation or refrigeration lines.
3. Refer to the amperage and voltages on the serial tag and your local code to be sure the
unit is connected to the proper power source. A protected circuit of the correct
voltage and amperage must be run for connection of the line cord. All units have an
“ON/OFF” switch located behind the louvered panel in the machine compartment.
Simply turn the switch to “ON” to begin operation or“OFF” position to
power down the unit. NOTE: The unit must be disconnected from the power source whenever
performing service or maintenance functions. Never operate the unit without the louvered
panel in place!
RECEIVING & INSPECTING THE EQUIPMENT:
Even though most equipment is shipped crated, care should be taken during unloading so the
equipment is not damaged while being moved into the building.
1. Visually inspect the exterior of the package and skid or container. Any damage should
be noted and reported to the delivering carrier immediately.
2. If damaged, open and inspect the contents with the carrier.
3. In the event that the exterior is not damaged, yet upon opening, there is concealed
damage to the equipment notify the carrier. Notification should be made verbally as
well as in written form.
4. Request an inspection by the shipping company of the damaged equipment. This
should be done within 10 days from receipt of the equipment.
5. Also open the compressor compartment housing and visually inspect the refrigeration
package. Be sure lines are secure and base is still intact.
5. Freight carriers can supply the necessary damage forms upon request.
6. Retain all crating material until an inspection has been made or waived.
Uncrating the Equipment
First cut and remove the banding from around the crate. Remove the front of the crate
material, use of some tools will be required.
2
WWW.ADVANCETABCO.COM • 800-645-3166
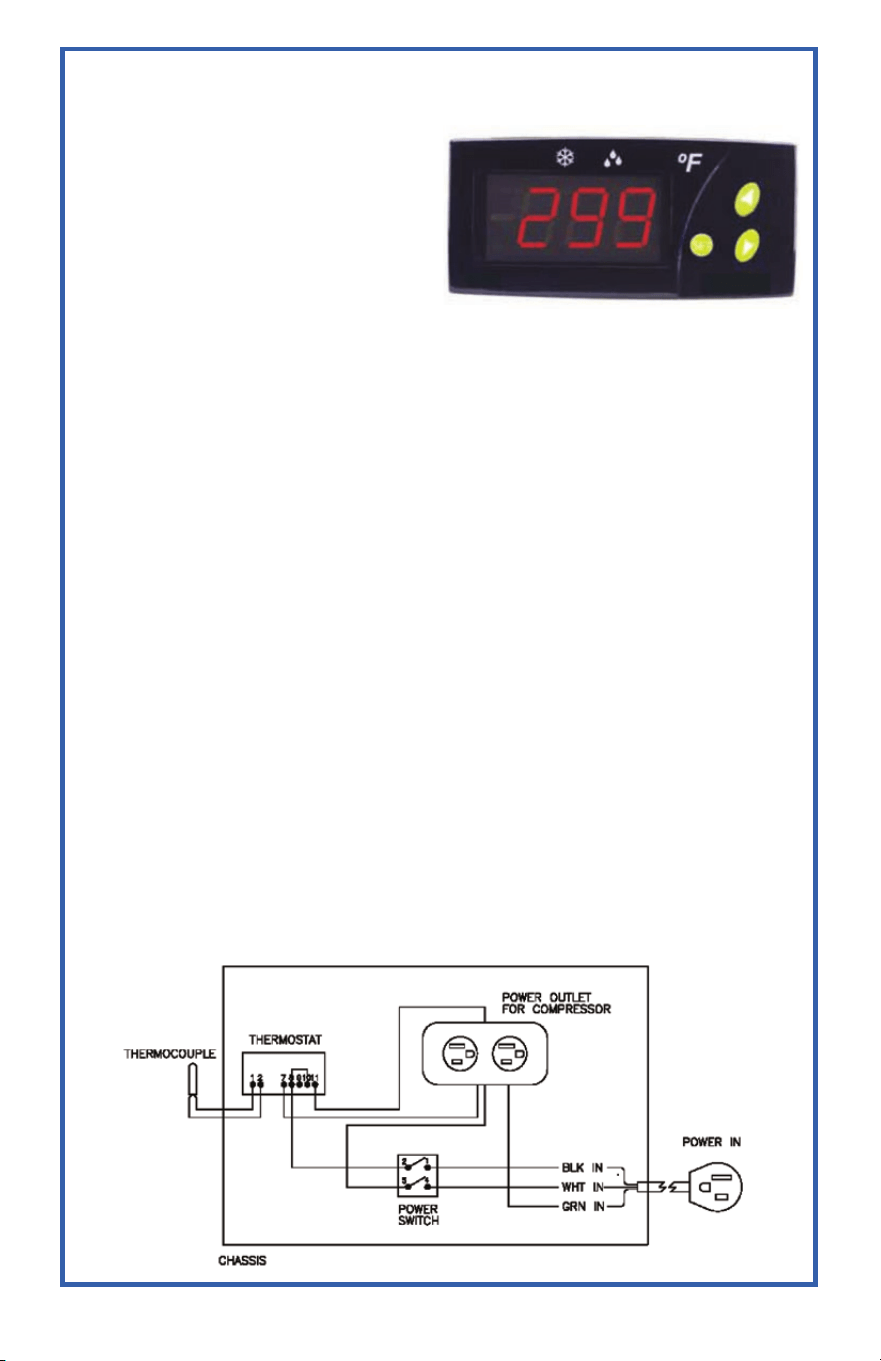
OPERATION:
Temperature Setpoint Adjustment
The factory default Set Point value (SP)
is 32°F (20°F for frost top units). To make
adjustments (if no access code parameter
set; see below if access code is set):
• Press and release SET. SP text
appears on the display.
• Press SET again. The real value is
shown on the display.
• Modify the value using the UP and
DOWN keys.
• Press SET and DOWN to quit programming, or wait 1 minute for the TIMEOUT.
To access all parameters (code protected - see codes on page 4):
• Press SET for 8 seconds. The access code value 00 is shown on the display.
• Using the UP and DOWN buttons, the code may be changed if desired.
(factory-set code is 00).
• Press SET to enter the code. If it is correct, the first parameter label will be shown on
the display (SP).
• Move to the desired parameter with the UP and DOWN keys.
• Press SET to see the value.
• Modify the value with the UP and DOWN keys.
• Press SET to enter it, and exit to text parameter.
• Press SET and DOWN to quit programming, or wait 1 minute for the TIMEOUT.
OPERATION IN CASE OF ERROR:
If the probe or thermostat memory should fail, the compressor will be connected for
5 minutes ON then 5 minutes OFF. An error code will be displayed on the controller with ei-
ther an Er=Memory Error, oo=Open probe error or __=Short Circuit Probe Error.
In either case, please contact the factory.
Wiring Diagram
3
WWW.ADVANCETABCO.COM • 800-645-3166
4
WWW.ADVANCETABCO.COM • 800-645-3166
Code Description
SP
Set Point. The set temperature to regulate the machine. The factory
default is 32°F and 20°F for frost top units.
r0
The temperature can be adjusted to fluctuate a set number of degrees
above and below the SP temperature. The factory default is 2°F.
r1*
Lower Set Point Limit. The factory default is –20°F.
r2*
Higher Set Point Limit. The factory default is 50°F.
d0*
Heat or Cooling Control. Ht = heating control, Co = cooling control.
The factory default is Co.
d2
Defrosting cycle time in minutes. If d2 = 0, defrosting will not start. The
factory default is 5 min.
d8
Defrosting cycle start time in hours. If d8 = 0, defrosting will not start.
The factory default is once (1) every hour.
c0*
Minimum time for compressor to be OFF. Minimum time from when the
compressor stops till it connects again. The factory default is 0.
c1*
Cooling cycle duration. The remaining time for a continuous cold cycle.
The factory default is 0.
c2*
On time cycle if probe is broken. The factory default is 5.
c3*
Off time cycle if probe is broken. The factory default is 5.
P1*
Ambient Probe Calibration. The factory default is –10°F.
H5
Access Code to Parameters. Factory-set as 00.
t0*
Maximum temperature display limit. The factory default is 100°F.
*Do Not Make Adjustments To These Settings
PARAMETER DESCRIPTIONS

5
WWW.ADVANCETABCO.COM • 800-645-3166
CLEANING & MAINTENANCE INSTRUCTIONS:
For Stainless Steel:
WARNING: Do not use steel wool or any caustic cleaners (bleach, ammonia, or acidic properties).
These items will damage and corrode the surface. Many food products have an acidic content,
which can deteriorate the finish. Be sure to clean the stainless steel surfaces of all food
products. Common items include, tomatoes, peppers and other vegetables.
To prevent discoloration or rust on stainless steel several important steps need to be taken.
First, we need to understand the properties of stainless steel. Stainless steel contains
70- 80% iron, which will rust. It also contains 12-30% chromium, which forms an invisible
passive film over the steels surface, which acts as a shield against corrosion. As long as
the protective layer is intact, the metal is still stainless. If the film is broken or contaminated,
outside elements can begin to breakdown the steel and begin to form rust of discoloration.
Proper cleaning of stainless steel requires soft cloths or plastic scouring pads.
Cleaning solutions need to be alkaline based or non-chloride cleaners. Any cleaner
containing chlorides will damage the protective film of the stainless steel. Chlorides are
also commonly found in hard water, salts, and household and industrial cleaners. If
cleaners containing chlorides are used be sure to rinse repeatedly and dry thoroughly upon
completion. Routine cleaning of stainless steel can be done with soap and water. Extreme
stains or grease should be cleaned with a non-abrasive cleaner and plastic scrub pad. It
is always good to rub with the grain of the steel. There are also stainless steel cleaners
available which can restore and preserve the finish of the steels protective layer. Early signs
of stainless steel breakdown can consist of small pits and cracks. If this has begun, clean
thoroughly and start to apply stainless steel cleaners in attempt to restore the passivity
of the steel.
For The Condenser Coil:
WARNING: Always disconnect power and take appropriate lock-out precautions before inspecting
or cleaning condenser coil. Never operate unit with condenser cover removed. Never use a
high-pressure water wash for this cleaning procedure as water can damage the electrical
components located near or at the condenser coil.
The condenser coil requires regular cleaning, recommended is every 90 days. In some
instances though you may find that there is a large amount of debris and dust or grease
accumulated prior to the 90-day time frame. In these cases the condenser coil should be
cleaned every 30 days. If the build up on the coil consists of only light dust and debris the
condenser coil can be cleaned with a simple brush, heavier dust build up may require a
vacuum or even compressed air to blow through the condenser coil. If heavy grease is
present there are de-greasing agents available for refrigeration use and specifically for the
condenser coils. The condenser coil may require a spray with the de-greasing agent and
then blown through with compressed air. Failure to maintain a clean condenser coil can
initially cause high temperatures and excessive run times, continuous operation with dirty
or clogged condenser coils can result in compressor failures. Neglecting the condenser
coil cleaning procedures will void any warranties associated with the compressor or cost to
replace the compressor.
In order to maintain proper refrigeration performance, the condenser fins must be cleaned
of dust, dirt and grease regularly. It is recommended that this be done at least every three
months. If conditions are such that the condenser is totally blocked in three months, the
frequency of cleaning should be increased. Clean the condenser with a vacuum cleaner or
stiff brush. If extremely dirty, a commercially available condenser cleaner may be required.

6
ADVANCE TABCO’S LIMITED WARRANTY
Thank you for purchasing a top-quality Advance Tabco product. We hope that you will be pleased
with your purchase and get many years of productive use from it. We make every effort to ensure that
our products are free of defects in workmanship and materials. In the unlikely event that you receive
an Advance Tabco product that does not meet your expectations, we offer the following warranty:
General Terms for all Advance Tabco items (including those listed below):
• Warranty applies in the 48 contiguous United States only
• ALL WARRANTY WORK MUST BE AUTHORIZED BY THE FACTORY BEFORE ANY WORK IS
PERFORMED. Work performed without prior authorization shall be covered under this warranty
only at the sole discretion of Advance Tabco
• At no time will expenses to be paid under warranty exceed the original cost of the item
• Routine maintenance and wear items are not covered by warranty.
• Repair parts are sent by surface transportation. Any expedited freight charges will be at the expense
of the end user
• Warranty applies only under conditions of normal use and does not apply to defects which result from
negligence, misuse, freight damage, improper installation or accidents.
• Warranty does not include any coverage for loss of business, damages, freight or other miscellaneous
expenses incurred due to the defect or in servicing the unit.
• This warranty is made in lieu of all other warranties express or implied and no additional warranties express
or implied, including one of merchantability or fitness for a particular purpose are given.
If defects are the result of freight or handling damage your first recourse MUST be to notify the
delivering freight carrier of the damage. If possible any damage should be noted on the delivery
receipt at the time of delivery. Defects due to freight damage should be referred to the freight carrier
for correction and compensation (this applies regardless of who was responsible for paying the freight
charges or selecting the carrier).
Refrigerated tables and drop ins are warranted for 12 months from the date of shipment from the
factory or 6 months from the date first placed into service (whichever comes first) and include the
following terms:
• Applies only to parts directly related to the refrigeration components of covered items
(see below for all other parts)
• Covers parts and labor during the warranty period (refrigeration components include labor coverage for
12 months from date of shipment or 3 months from date placed into service, with parts covered as
described above). Labor performed after hours, as overtime, on weekends or on holidays is not covered
by this warranty (end user may authorize and pay such expenses directly to service agency if
desired)
• Includes travel up to 100 miles round trip or 2 hours of travel time (additional travel will be at the end
users expense)
Refrigeration Compressors for tables and drop-ins are eligible for additional optional warranty coverage
(if purchased):
• Must be purchased at the time the covered unit is ordered from the factory
• Valid for 60 months from the date of shipment from the factory
• Covers parts only (no labor, no freight). Applies only to the compressor unit
• Excludes the cost of refrigerant
Refrigerated Tables and Drop-ins are warranted free of defects in workmanship and materials for 90
days from the date of shipment from the factory. Warranty includes parts only (no labor). At Advance
Tabco’s discretion we may repair or replace the defective item.
WWW.ADVANCETABCO.COM • 800-645-3166
Rev. 12/9/2014
PLACE PRODUCT INFO LABEL HERE
(MODEL & SERIAL NUMBERS)
PRODUCT REGISTRATION
IMPORTANT NOTICE: In order to facilitate possible warranty coverage, Advance Tabco
strongly encourages you to register your produce online as soon as possible. Be sure to fill in
all information requested, including your purchase date and serial number. Registration is not
required to receive warranty coverage, but registering will make it easier and faster to provide
warranty service, if it becomes necessary.
SCAN FOR EASY
ONLINE
REGISTRATION
REGISTER ONLINE BY VISITING
WWW.ADVANCETABCO.COM/REGISTER
OR SCAN CODE TO THE RIGHT.
Any questions, please contact our customer service at 800-645-3166.
WWW.ADVANCETABCO.COM • 800-645-3166

Edgewood, New York 11717-8380
www.advancetabco.com
800-645-3166
®