ZBDongle-E
Product User Guide
For Advanced Users
Zigbee 3.0 USB Dongle Plus
1. Product Information
1.1 Overview
Product Name
SONOFF Zigbee 3.0 USB Dongle Plus V2
Product Model
ZBDongle-E
1.2 Introduction
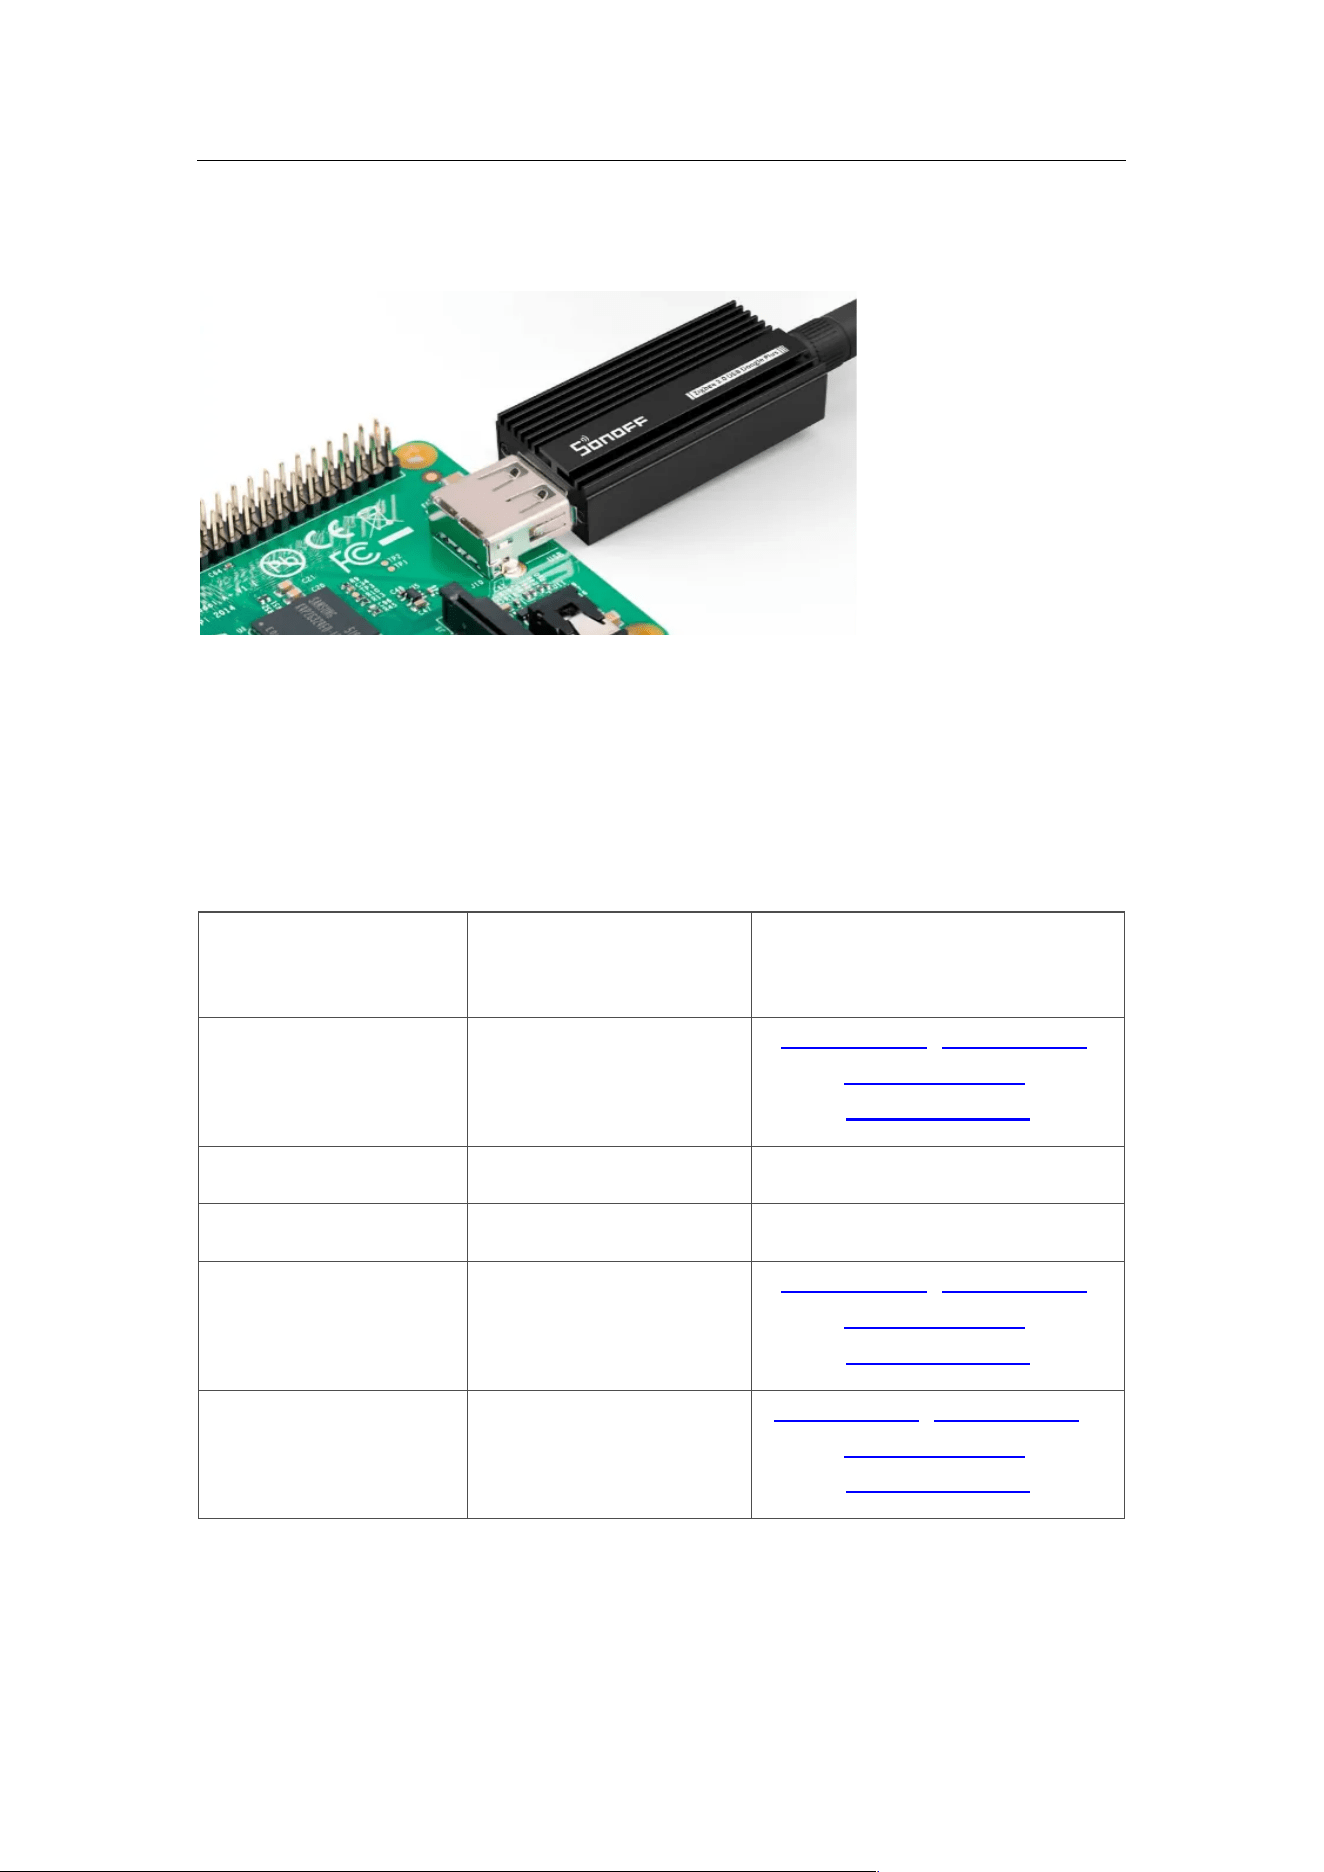
SONOFF Zigbee 3.0 USB Dongle Plus V2 is a universal Zigbee USB
coordinator, model “ZBDongle-E”. It can be used as a Zigbee gateway in
Home Assistant, openHAB, Zigbee2MQTT, or other open-source platforms to
control all your Zigbee devices locally.
Additionally, it supports easy firmware flashing using the official Dongle Quick
Flasher, allowing it to function as a Zigbee router for network extension, a
Thread coordinator with OpenThread RCP firmware, or even a MultiPAN
coordinator for multi-protocol support.
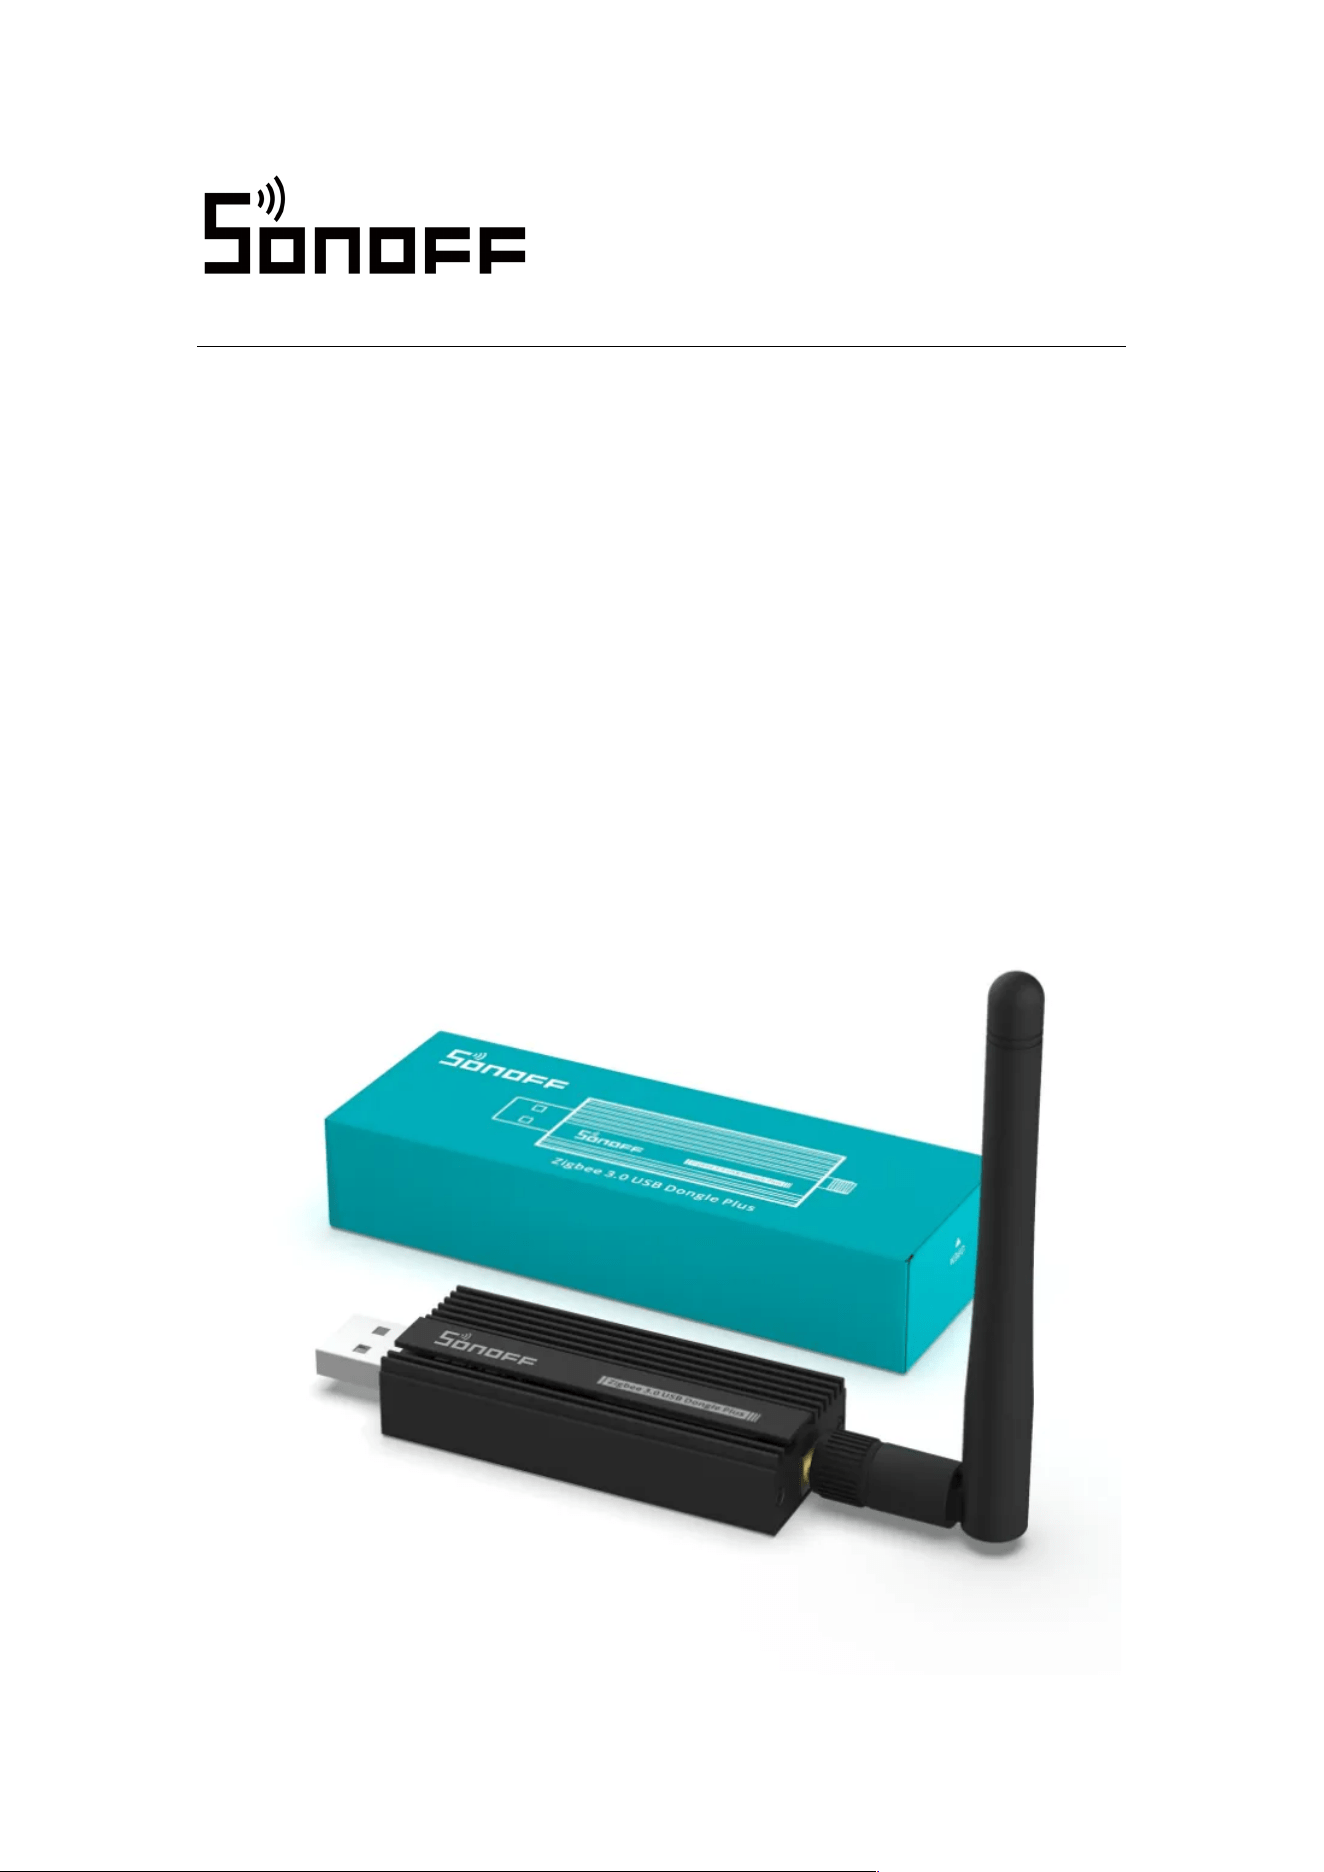
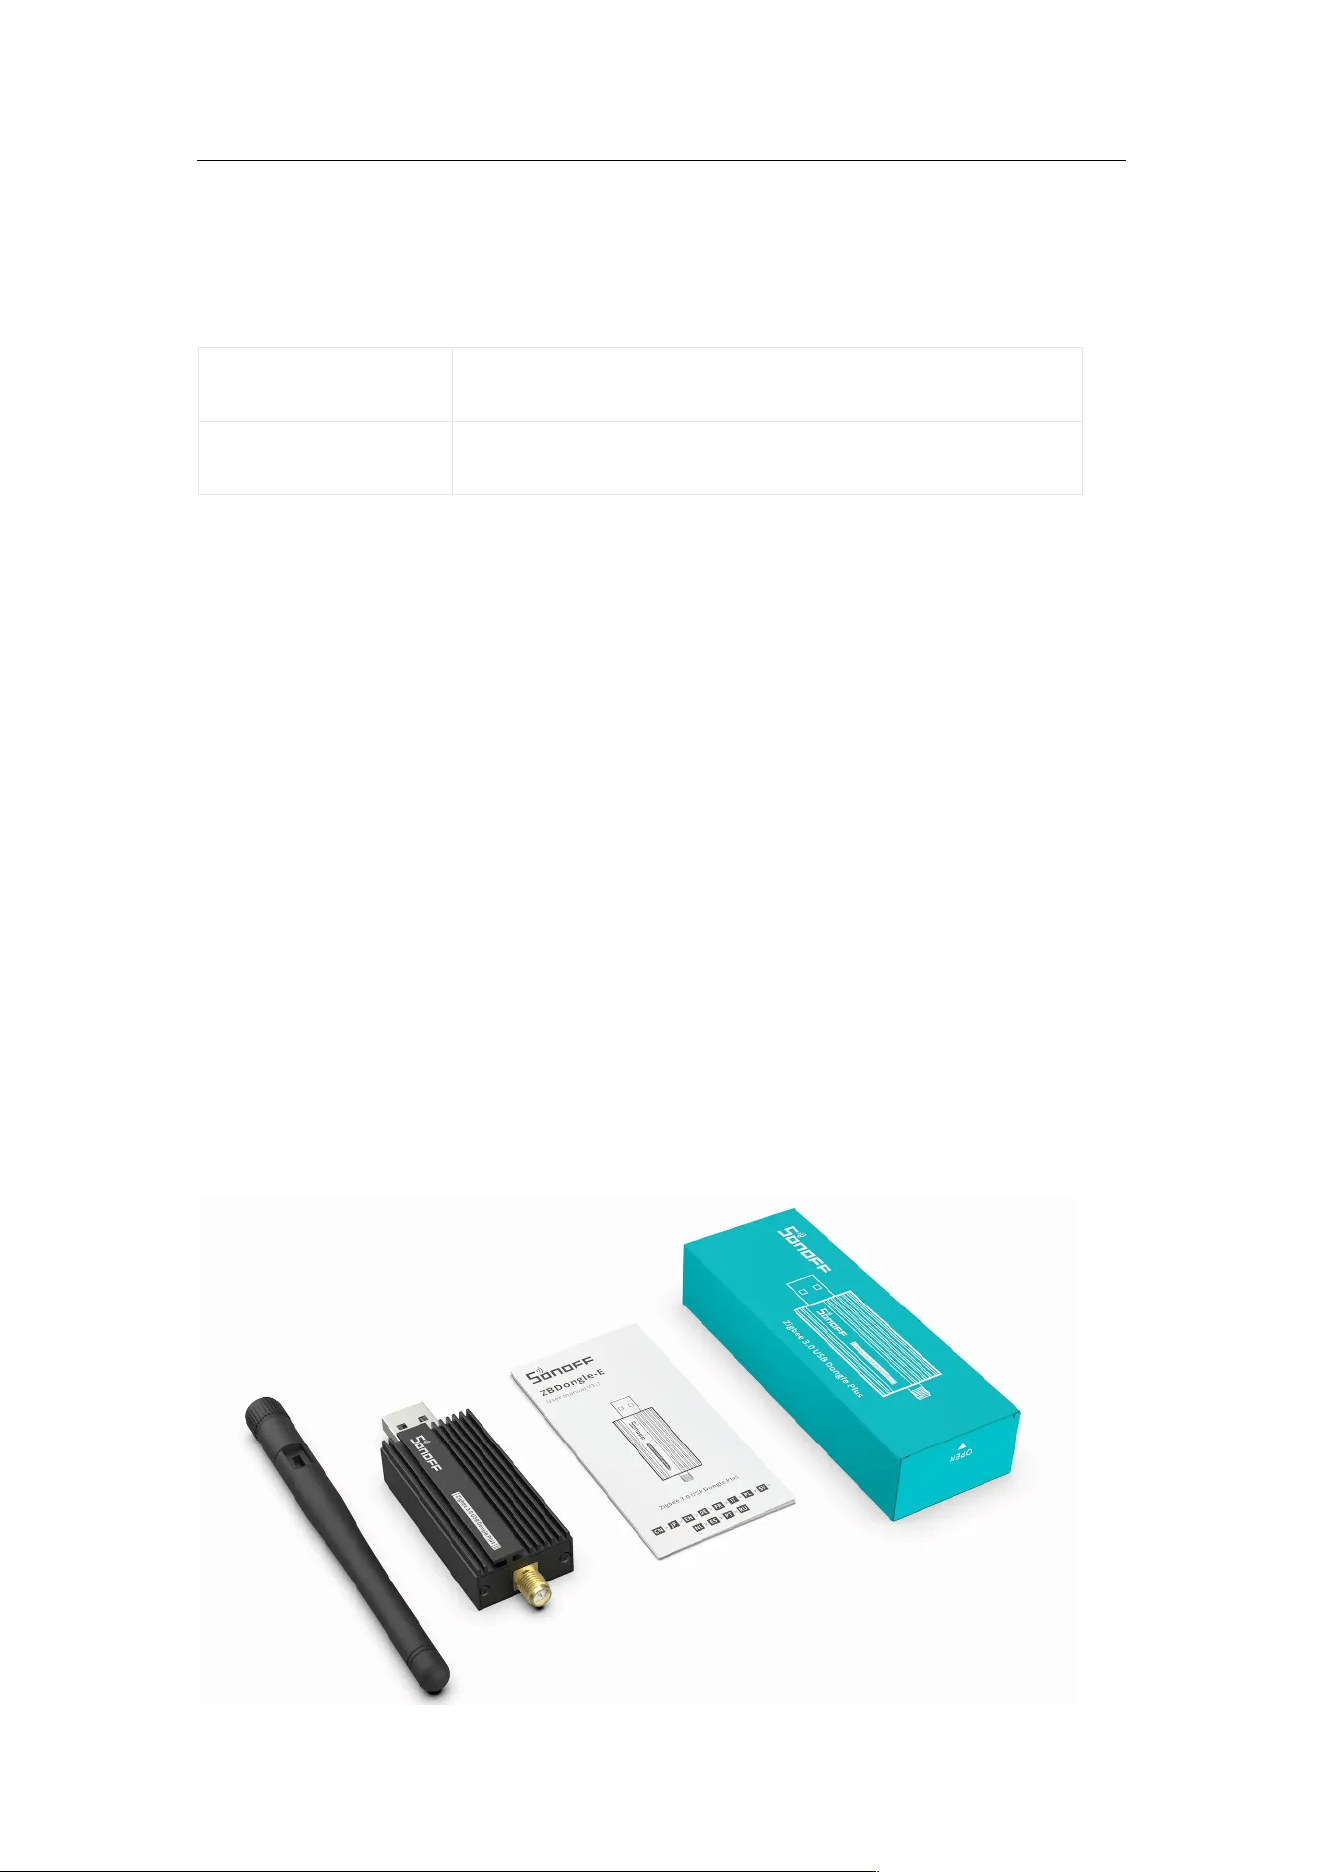
1.3 Packing List
– ZBDongle-E
– Gain antenna * 1
– Quick guide * 1
– Packaging box * 1
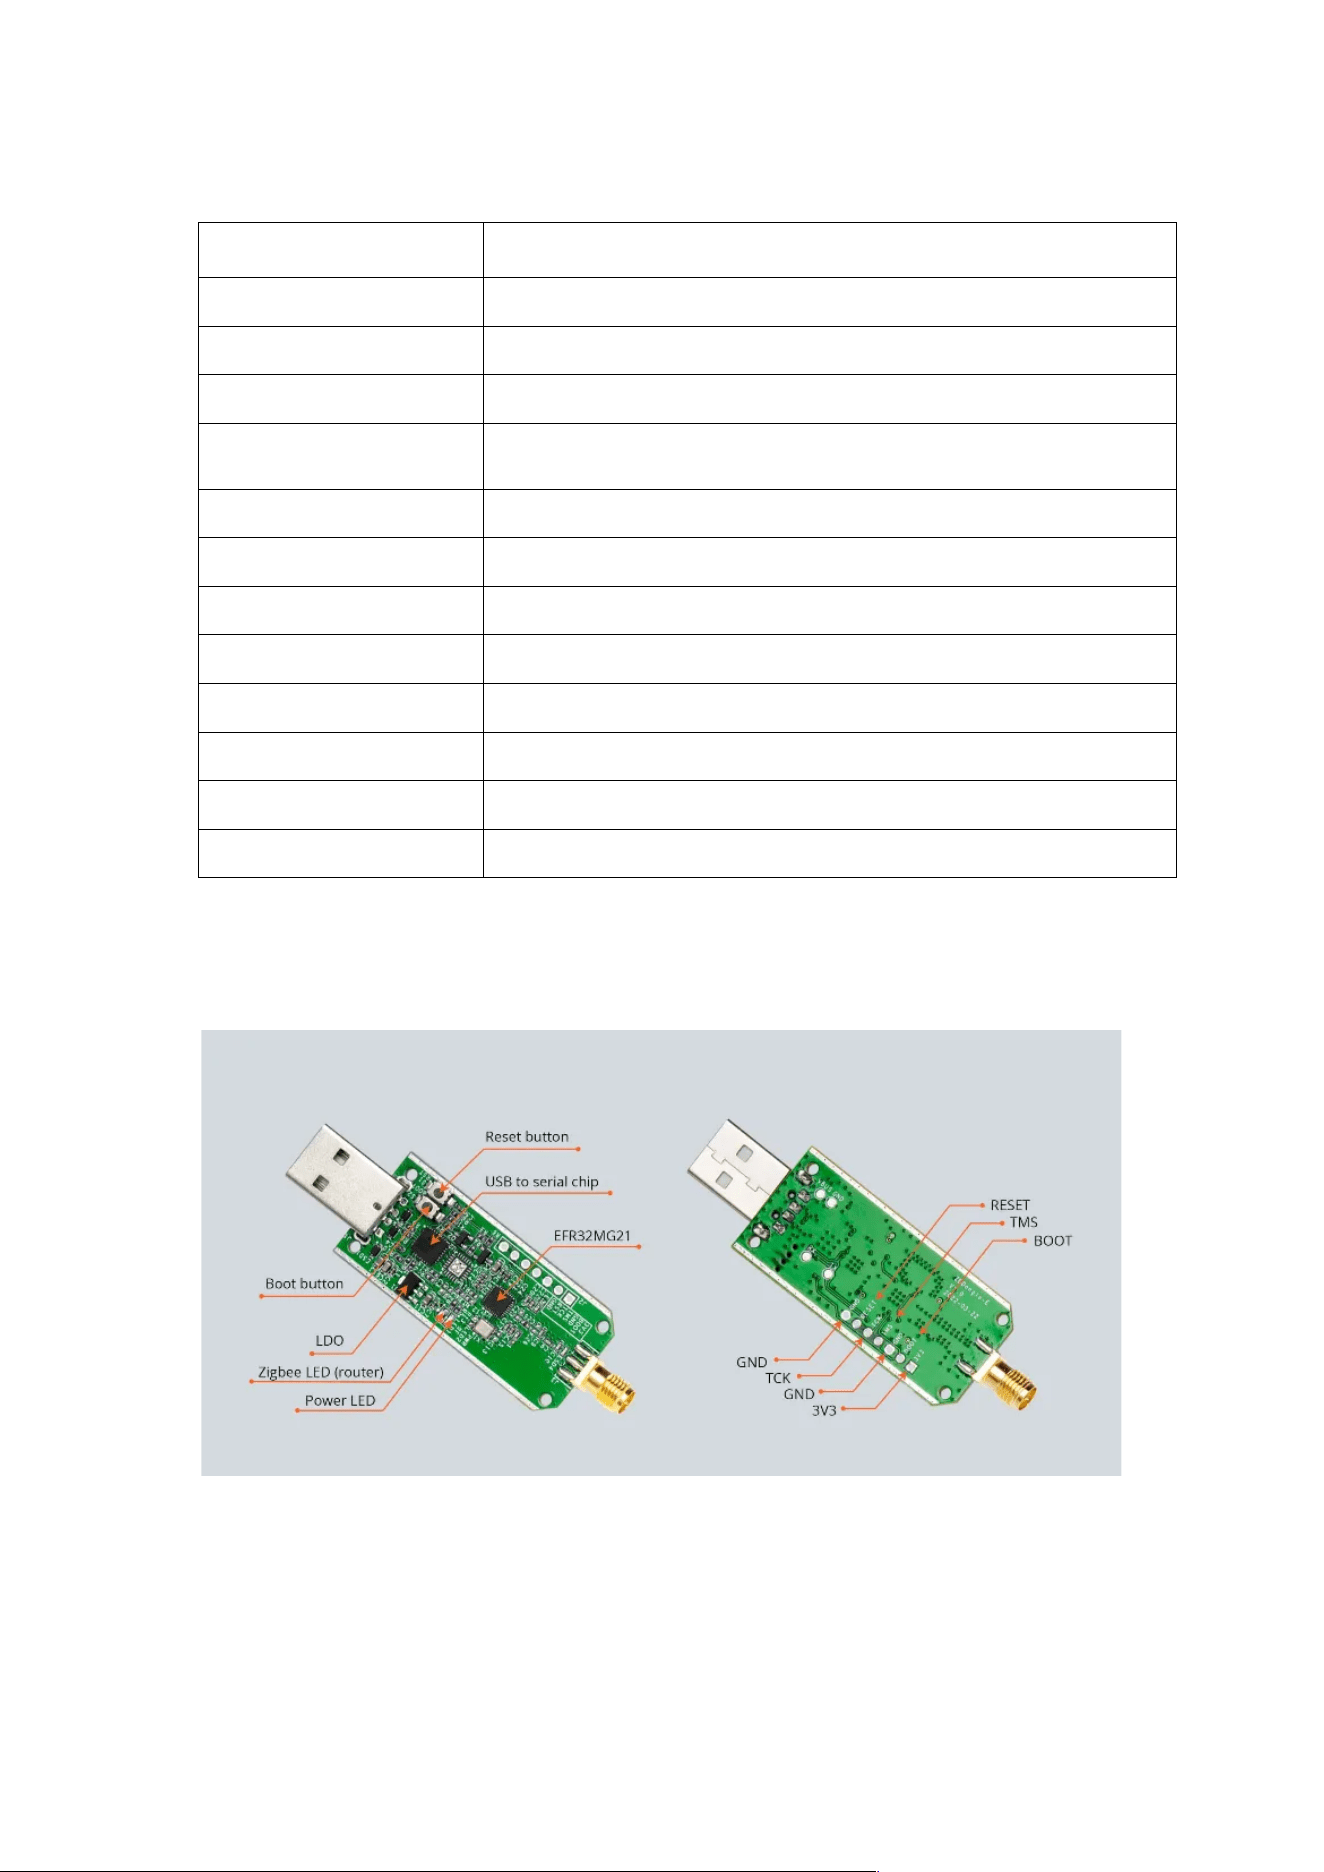
1.4 Hardware Specification
Name
Description
Zigbee SoC
EFR32MG21 ARM® Cortex®-M33
USB-Serial Chip
CP2102(N)
Input
DC 5.0 V
Stand-by power
consumption
60 mW
Signal range
135 m in free line of sight
Signal Strength
Max 20 dB + antenna gain 2 dB
RF Frequency
2.4 GHz
RF Standard
IEEE 820.15.4 / Zigbee 3.0
Working Temperature
-10 °C to 40 °C
Working Humidity
5%-95%RH
Supported OS
Windows, Ubuntu, Raspberry Pi OS / Raspbian, Docker
Dimensions
75 mm × 25.5 mm × 13.5 mm
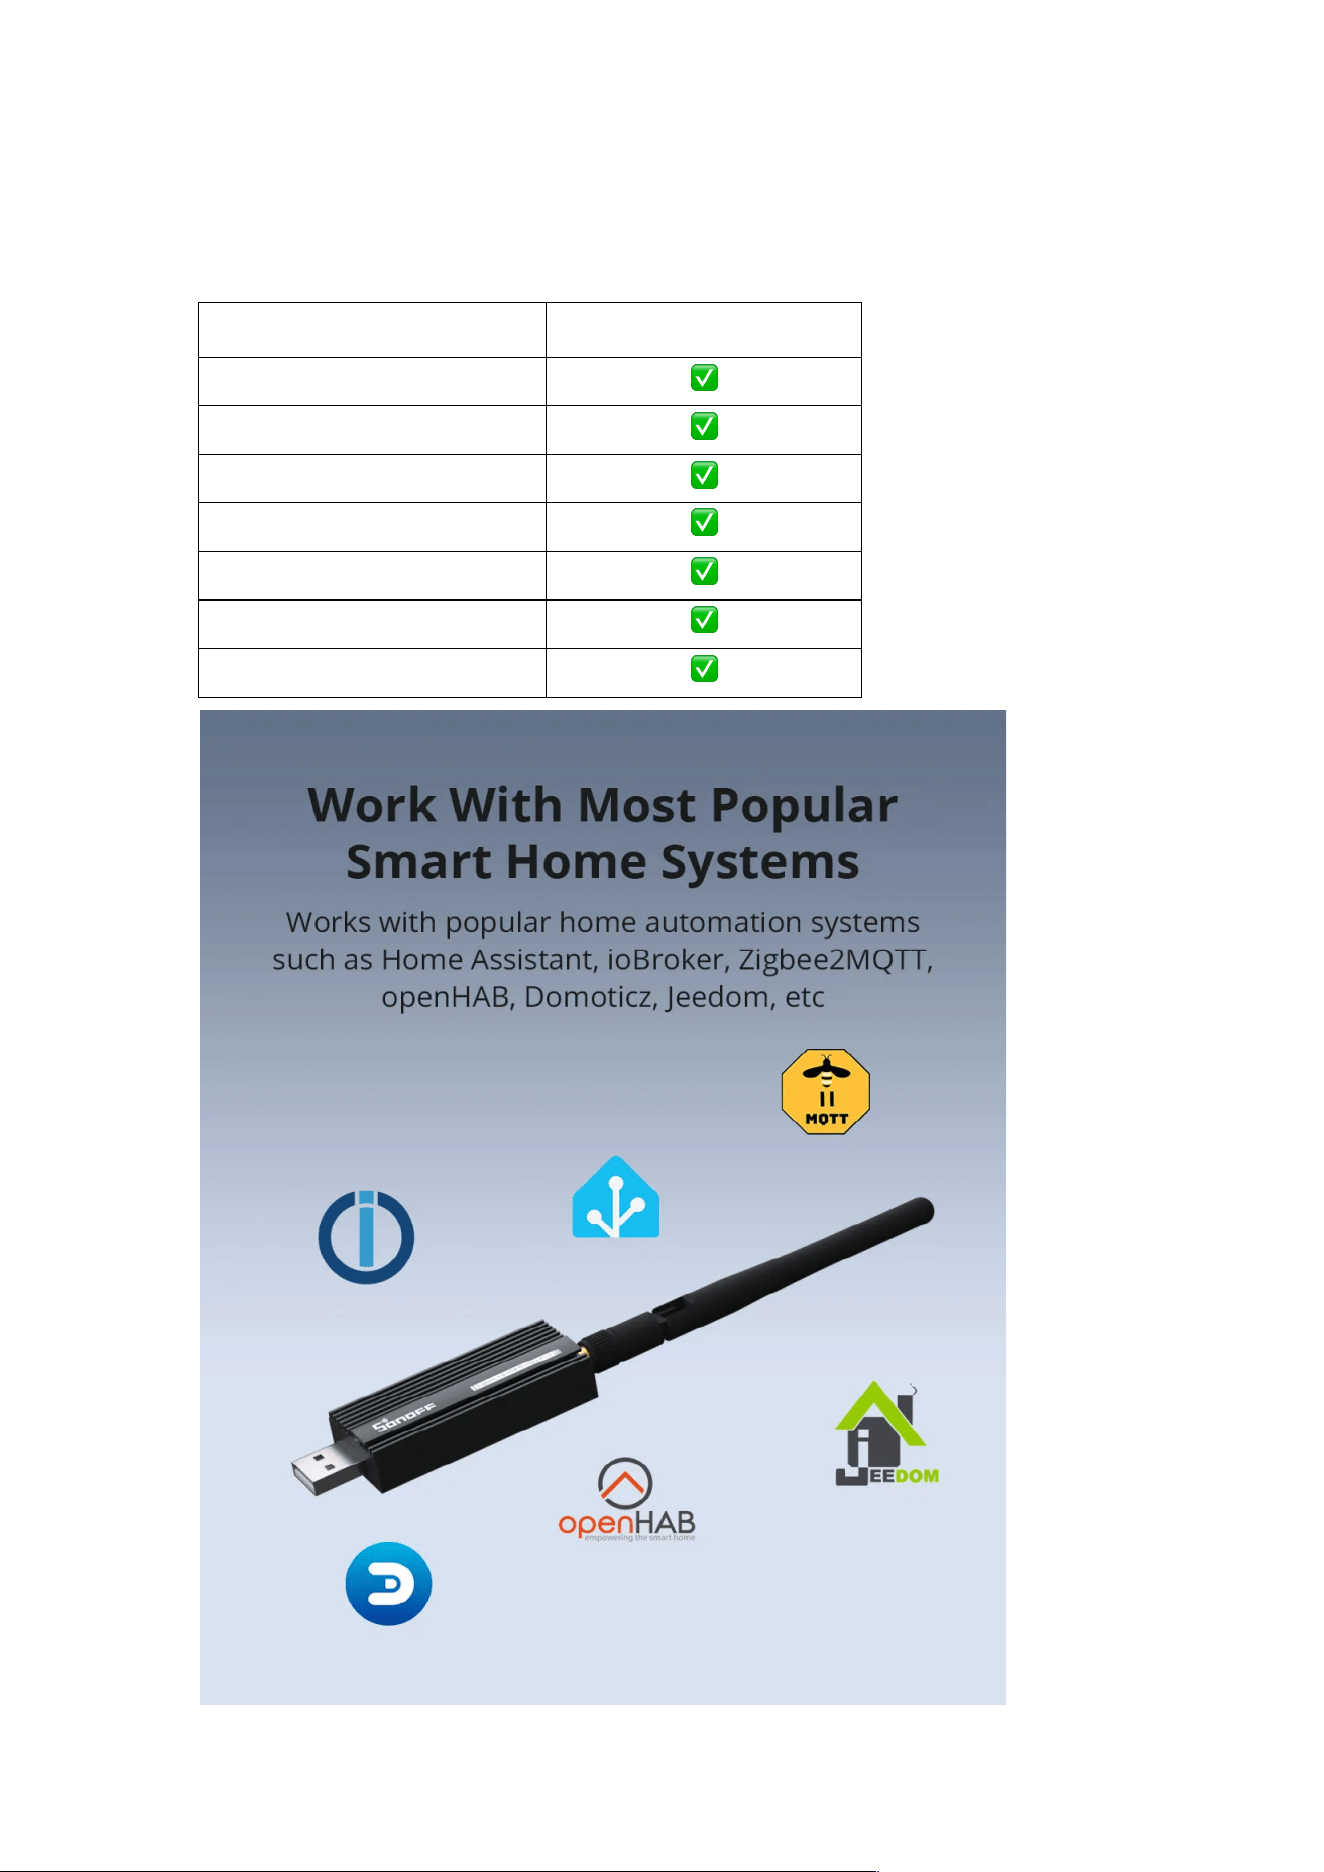
1.5 Compatibility
1.5.1 Compatible Open-Source Platforms
Open-Source Platform
Supported
Home Assistant
✅
Zigbee2MQTT
✅
OpenHab
✅
ioBroke
✅
homeseer
✅
Domoticz
✅
Jeemom
✅
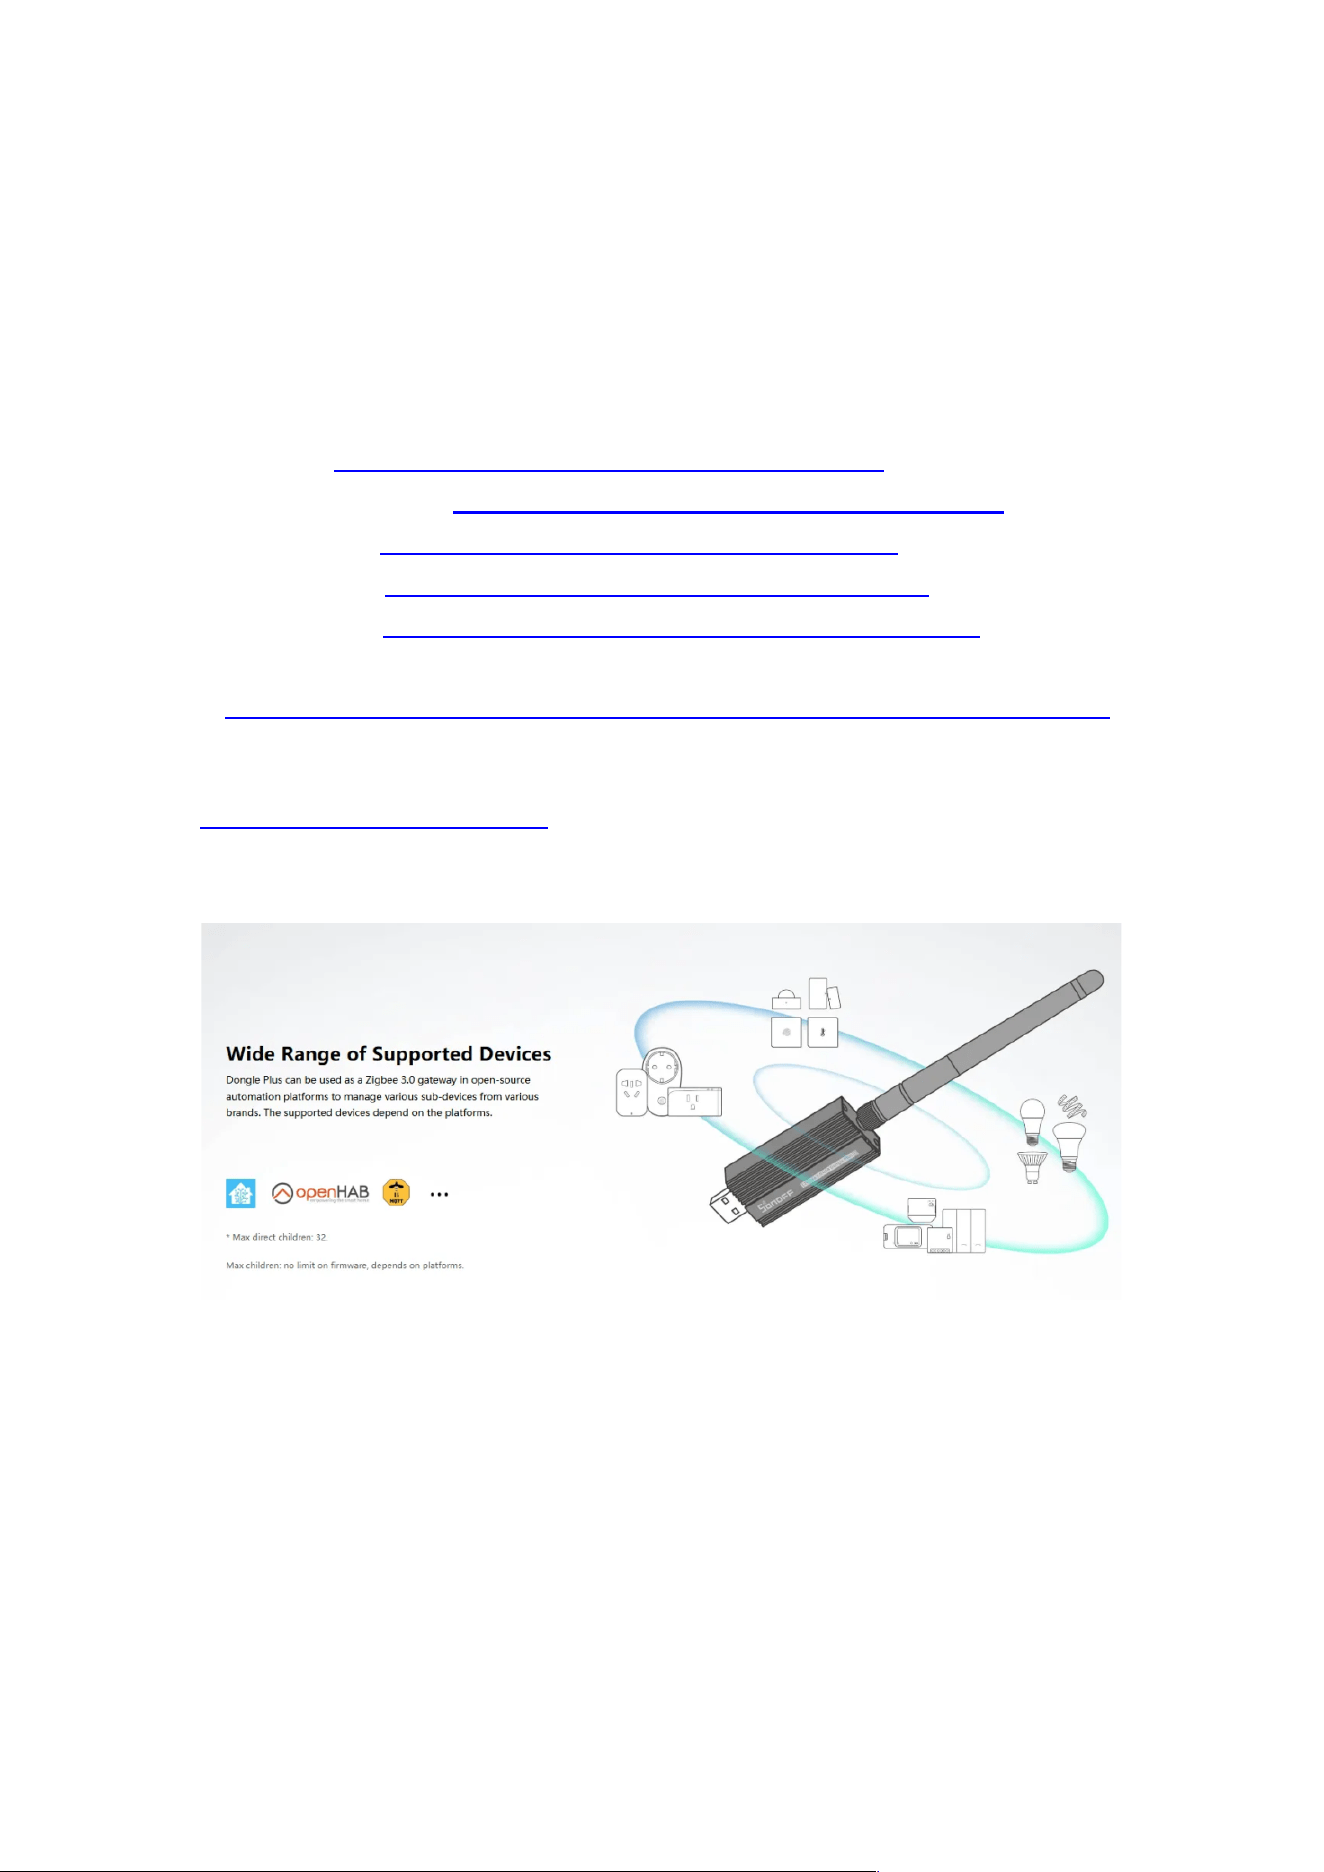
1.5.2 Compatible Devices
In theory, all Zigbee 3.0 devices are supported, including various lights,
switches, and sensors from brands such as Philips Hue, IKEA Tradfri, Xiaomi
Aqara, Ledvance Smart, Silvercrest, Schneider Electric, Nous, and SONOFF.
Actual device compatibility depends on the supported device list of each
platform.
1、ZHA: https://www.home-assistant.io/integrations/zha
2、Zigbee2MQTT: https://www.zigbee2mqtt.io/supported-devices/
3、ioBroker: https://github.com/Jey-Cee/ioBroker.deconz
4、Domoticz:https://github.com/Smanar/Domoticz-deCONZ
5、Openhab:https://www.openhab.org/addons/bindings/deconz/
6、Jeedom:
https://compatibility.jeedom.com/index.php?v=d&p=home&protocol=Zigbee
For more information on supported devices, please refer to:
https://zigbee.blakadder.com/
2. Getting Started
2.1 Overview
This article serves as a quick-start guide for the SONOFF Dongle, covering
topics such as connecting to operating systems, integrating with open-source
platforms, and firmware updates.
2.2 Step 1: Connecting to the Operating System
Operating
System
Plug & Play
Guide Link
Windows
No. Driver installation
required
ZBDongle-E, ZBDongle-P,
Dongle-LMG21,
Dongle-PMG24
Linux/Ubuntu
Yes
/
Raspberry Pi OS
Yes
/
Mac OS
No. Driver installation
required
ZBDongle-E, ZBDongle-P,
Dongle-LMG21,
Dongle-PMG24
Virtual Machine
It depends on the host
where the virtual
machine is deployed
ZBDongle-E, ZBDongle-P, ,
Dongle-LMG21,
Dongle-PMG24
Please connect the device to the USB port of the host, and install the
appropriate driver according to the host operating system.
Note: This tutorial is compatible with the SONOFF ZBDongle-E
2.2.1 Connecting to Windows
2.1.1.1 Step 1: Install Driver
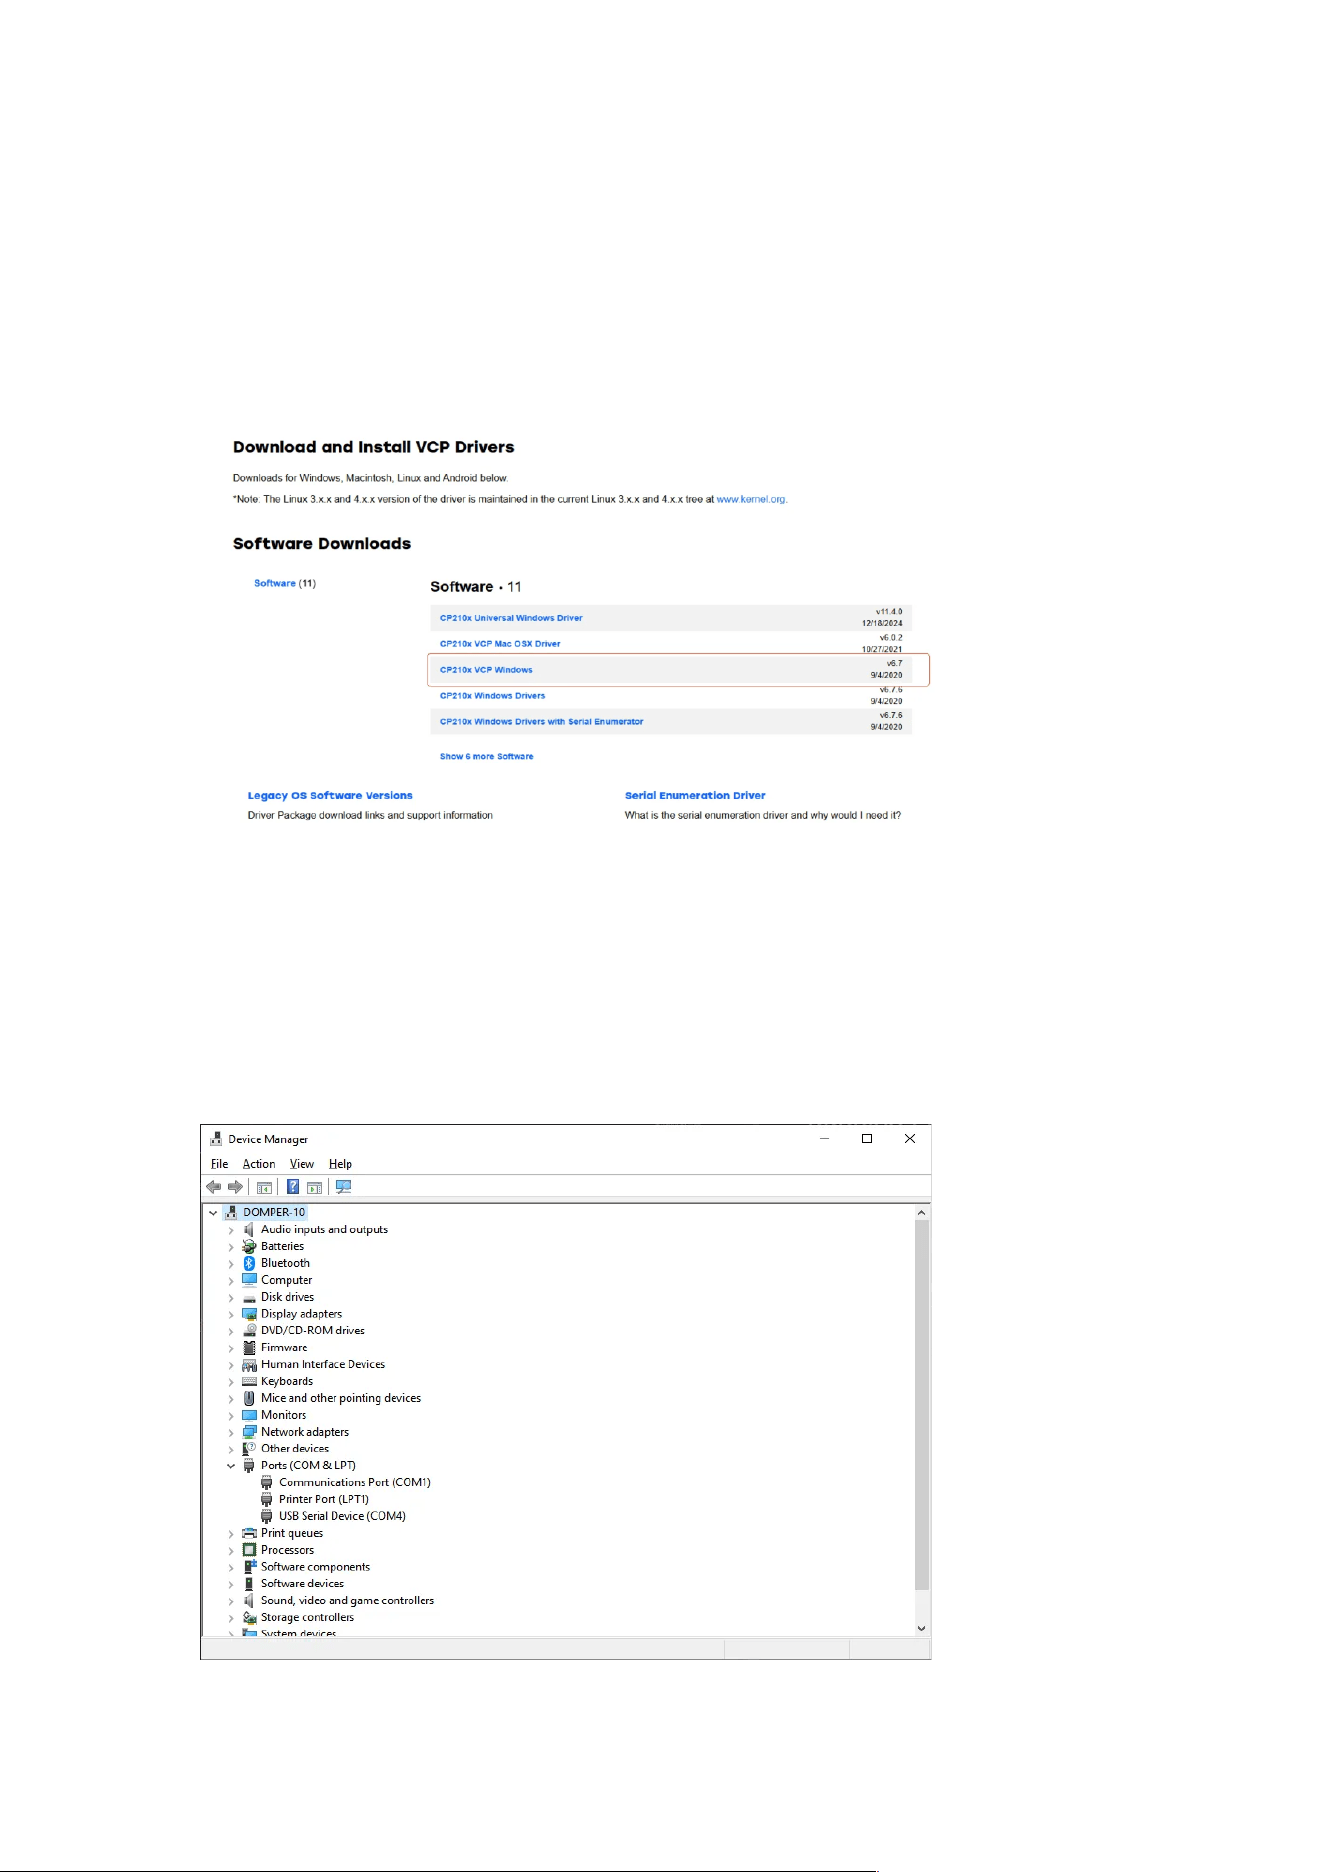
• Install the CP210x Driver: CP210x_VCP_Windows
• Or you can download and install the driver via the official Silicon Labs
website: Silicon Labs CP210x Driver Download
Note: Products purchased before 2024 use the CH9102 serial chip. Normally,
the driver is pre-installed in the operating system. If the device is not
recognized, please download and install the driver manually:CH343SER
2.1.1.2 Step 2: Confirm that the device is recognised
After the driver is successfully installed, open Device Manager and expand
Ports (COM & LPT). The corresponding USB device will be recognized.
As shown above, the serial port for the device is: COM4

2.2.2 Connecting to Linux
Most recent versions of Ubuntu or other Linux distributions already include the
CP210x driver by default, so no additional installation is required.
After connecting the ZBDongle device, you can check if it was recognized by
entering the following command in the terminal:
Plain Text
$ sudo dmesg
...
[ 534.580638] usb 3-8: new full-speed USB device number 2 using xhci_hcd
[ 534.708589] usb 3-8: New USB device found, idVendor=10c4, idProduct=ea60,
bcdDevice= 1.00
[ 534.708604] usb 3-8: New USB device strings: Mfr=1, Product=2,
SerialNumber=3
[ 534.708611] usb 3-8: Product: Sonoff Zigbee 3.0 USB Dongle Plus V2
[ 534.708616] usb 3-8: Manufacturer: Itead
[ 534.708620] usb 3-8: SerialNumber: 76536147c914ef11950378b8bf9df066
[ 534.736381] usbcore: registered new interface driver usbserial_generic
[ 534.736392] usbserial: USB Serial support registered for generic
[ 534.739907] usbcore: registered new interface driver cp210x
[ 534.739925] usbserial: USB Serial support registered for cp210x
[ 534.739948] cp210x 3-8:1.0: cp210x converter detected
[ 534.741643] usb 3-8: cp210x converter now attached to ttyUSB0
Checking the Serial Port Path
To obtain the serial port path of the connected device, use the following
command:
Plain Text
ls -l /dev/serial/by-id
Example output:
Plain Text
coolkit@coolkit-All-Series:~$ ls -l /dev/serial/by-id
total 0
lrwxrwxrwx 1 root root 13 3 月 31 18:09 usb-
Itead_Sonoff_Zigbee_3.0_USB_Dongle_Plus_V2_76536147c914ef11950378b8bf
9df066-if00-port0 -> ../../ttyUSB0
The corresponding serial port path is:
Plain Text
/dev/ttyUSB0
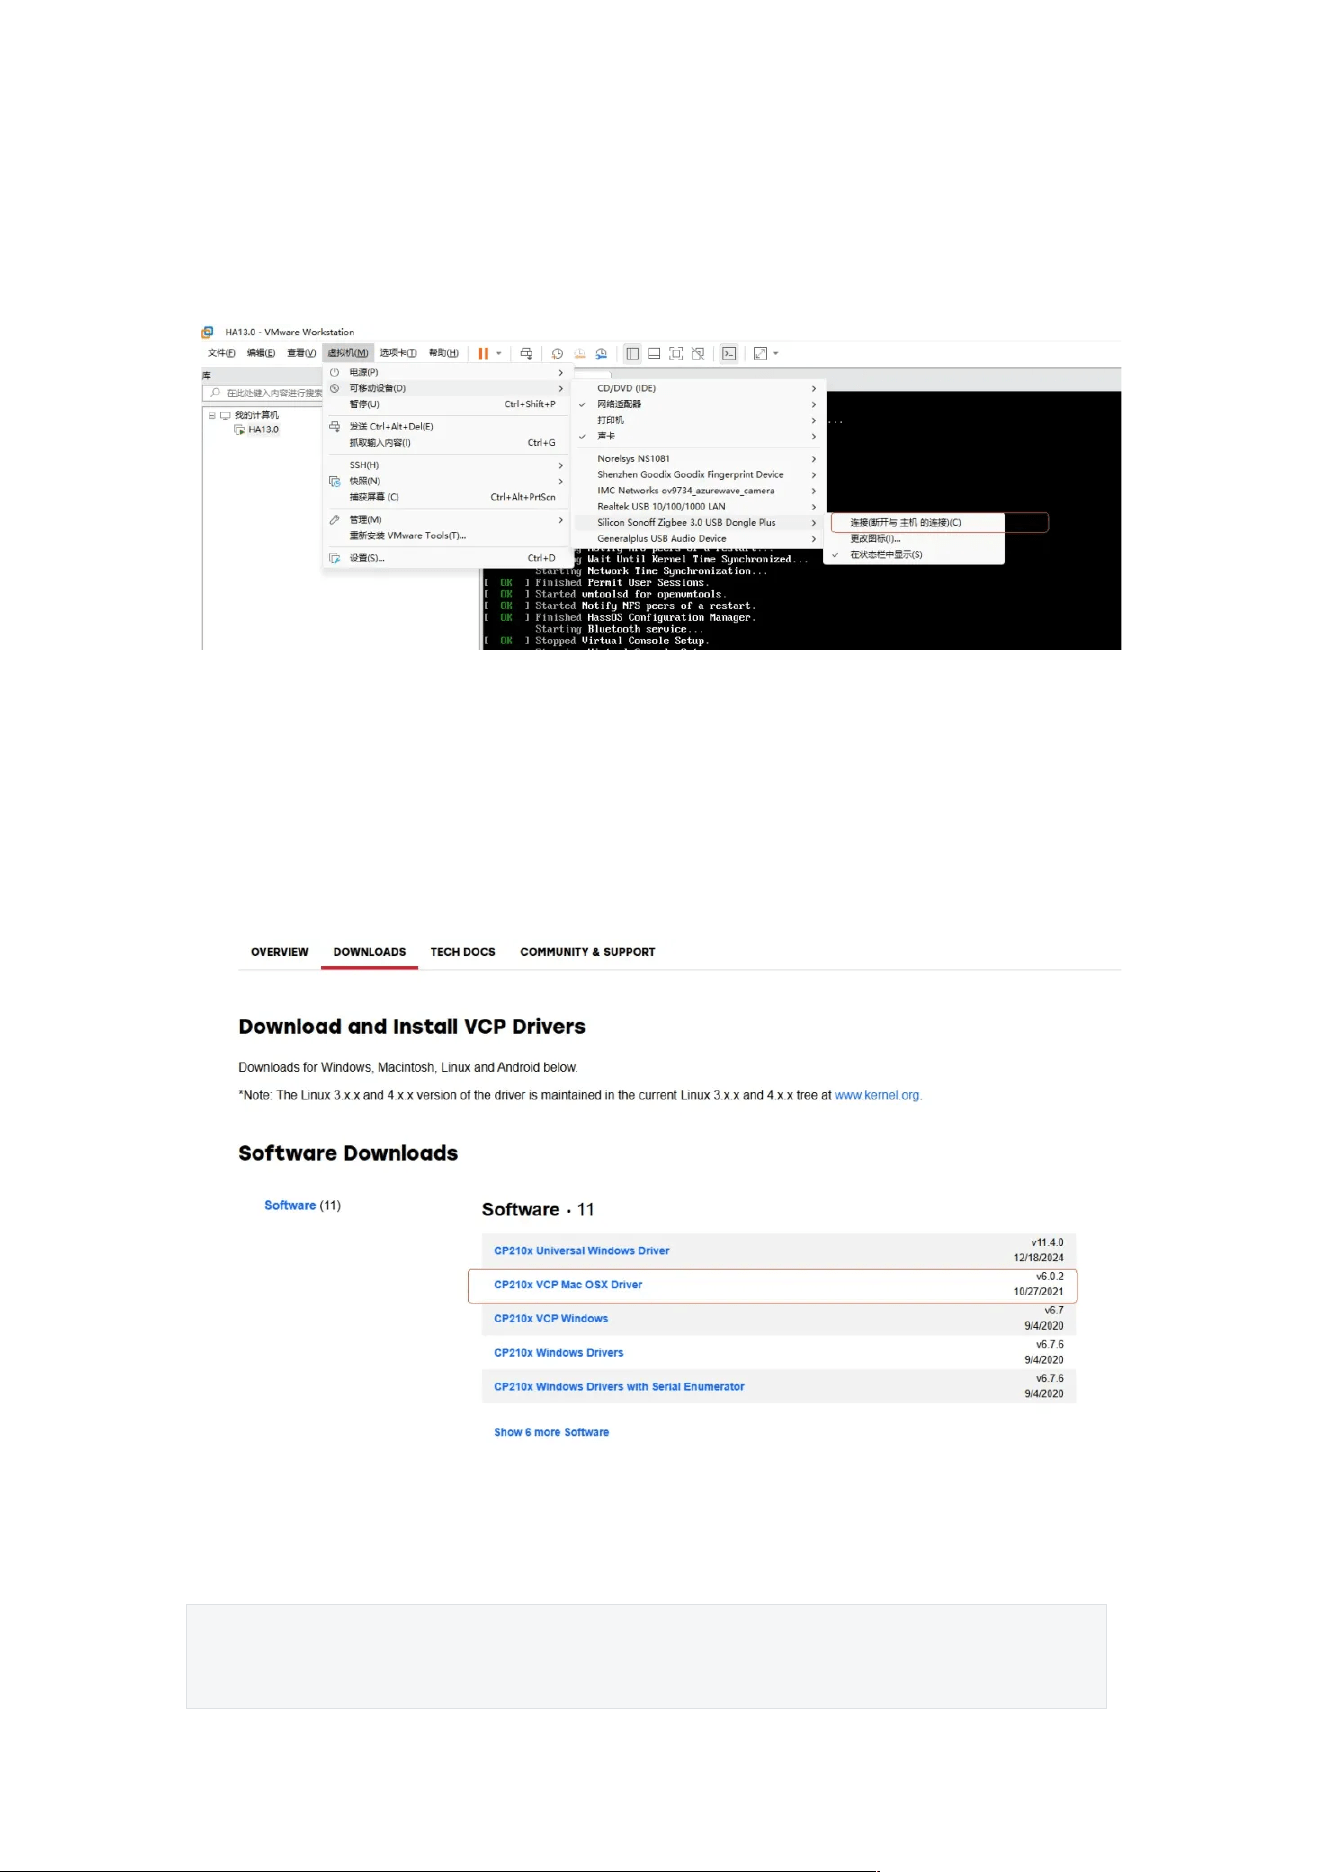
2.2.3 Connecting to Virtual Machine
If Home Assistant is running on a virtual machine, in addition to installing the
appropriate driver for the operating system, make sure to connect the device
to the virtual machine. VMware is used as an example here.
2.2.4 Connecting to macOS
2.2.4.1 Step 1: Install Driver
Install the CP20x driver: Mac_OSX_VCP_Driver
or download from: Silicon Labs CP210x Driver Download
2.2.4.2 Step 2: Confirm that the device is recognised
After successful installation, run the following command in Terminal:
Plain Text
ls /dev/tty.*

If recognized, the information will be returned after Enter:
The serial port is:
Plain Text
/dev/tty.usbserial-14220
2.2.5 Connecting to Raspberry Pi OS
Most Raspberry Pi OS typically includes the CP210x driver by default. No
installation is required.
After connecting the ZBDongle device, you can check if it was recognized by
entering the following command in the terminal:
Plain Text
$ sudo dmesg
...
[ 534.580638] usb 3-8: new full-speed USB device number 2 using xhci_hcd
[ 534.708589] usb 3-8: New USB device found, idVendor=10c4, idProduct=ea60,
bcdDevice= 1.00
[ 534.708604] usb 3-8: New USB device strings: Mfr=1, Product=2,
SerialNumber=3
[ 534.708611] usb 3-8: Product: Sonoff Zigbee 3.0 USB Dongle Plus V2
[ 534.708616] usb 3-8: Manufacturer: Itead
[ 534.708620] usb 3-8: SerialNumber: 76536147c914ef11950378b8bf9df066
[ 534.736381] usbcore: registered new interface driver usbserial_generic
[ 534.736392] usbserial: USB Serial support registered for generic
[ 534.739907] usbcore: registered new interface driver cp210x
[ 534.739925] usbserial: USB Serial support registered for cp210x
[ 534.739948] cp210x 3-8:1.0: cp210x converter detected

[ 534.741643] usb 3-8: cp210x converter now attached to ttyUSB0
Checking the Serial Port Path
To obtain the serial port path of the connected device, use the following
command:
Plain Text
ls -l /dev/serial/by-id
Example output:
Plain Text
coolkit@coolkit-All-Series:~$ ls -l /dev/serial/by-id
total 0
lrwxrwxrwx 1 root root 13 3 月 31 18:09 usb-
Itead_Sonoff_Zigbee_3.0_USB_Dongle_Plus_V2_76536147c914ef11950378b8bf
9df066-if00-port0 -> ../../ttyUSB0
The corresponding serial port path is:
Plain Text
/dev/ttyUSB0
2.3 Step 2: Connecting to Open-source Platforms
Open-source
Platforms
Guide Link
Home Assistant
ZBDongle-E, ZBDongle-P, Dongle-LMG21, Dongle-
PMG24
Zigbee2MQTT
ZBDongle-E, ZBDongle-P, Dongle-LMG21, Dongle-
PMG24
OpenHab
ZBDongle-E, Dongle-LMG21, Dongle-PMG24
ioBroker
ZBDongle-E, ZBDongle-P, Dongle-LMG21, Dongle-
PMG24
Domoticz
ZBDongle-E, ZBDongle-P, D o n gl e -PMG24
Jeedom
ZBDongle-E, ZBDongle-P, Dongle-PMG24
2.3.1 Connecting to Home Assistant via ZHA
This guide is based on Home Assistant. For more details, please visit: Home
Assistant – ZHA
2.3.1.1 Preparation
Before getting started, ensure that Home Assistant is installed and the
ZBDongle is connected to the host’s USB port. If not yet installed, please
follow the Home Assistant Installation Guide.
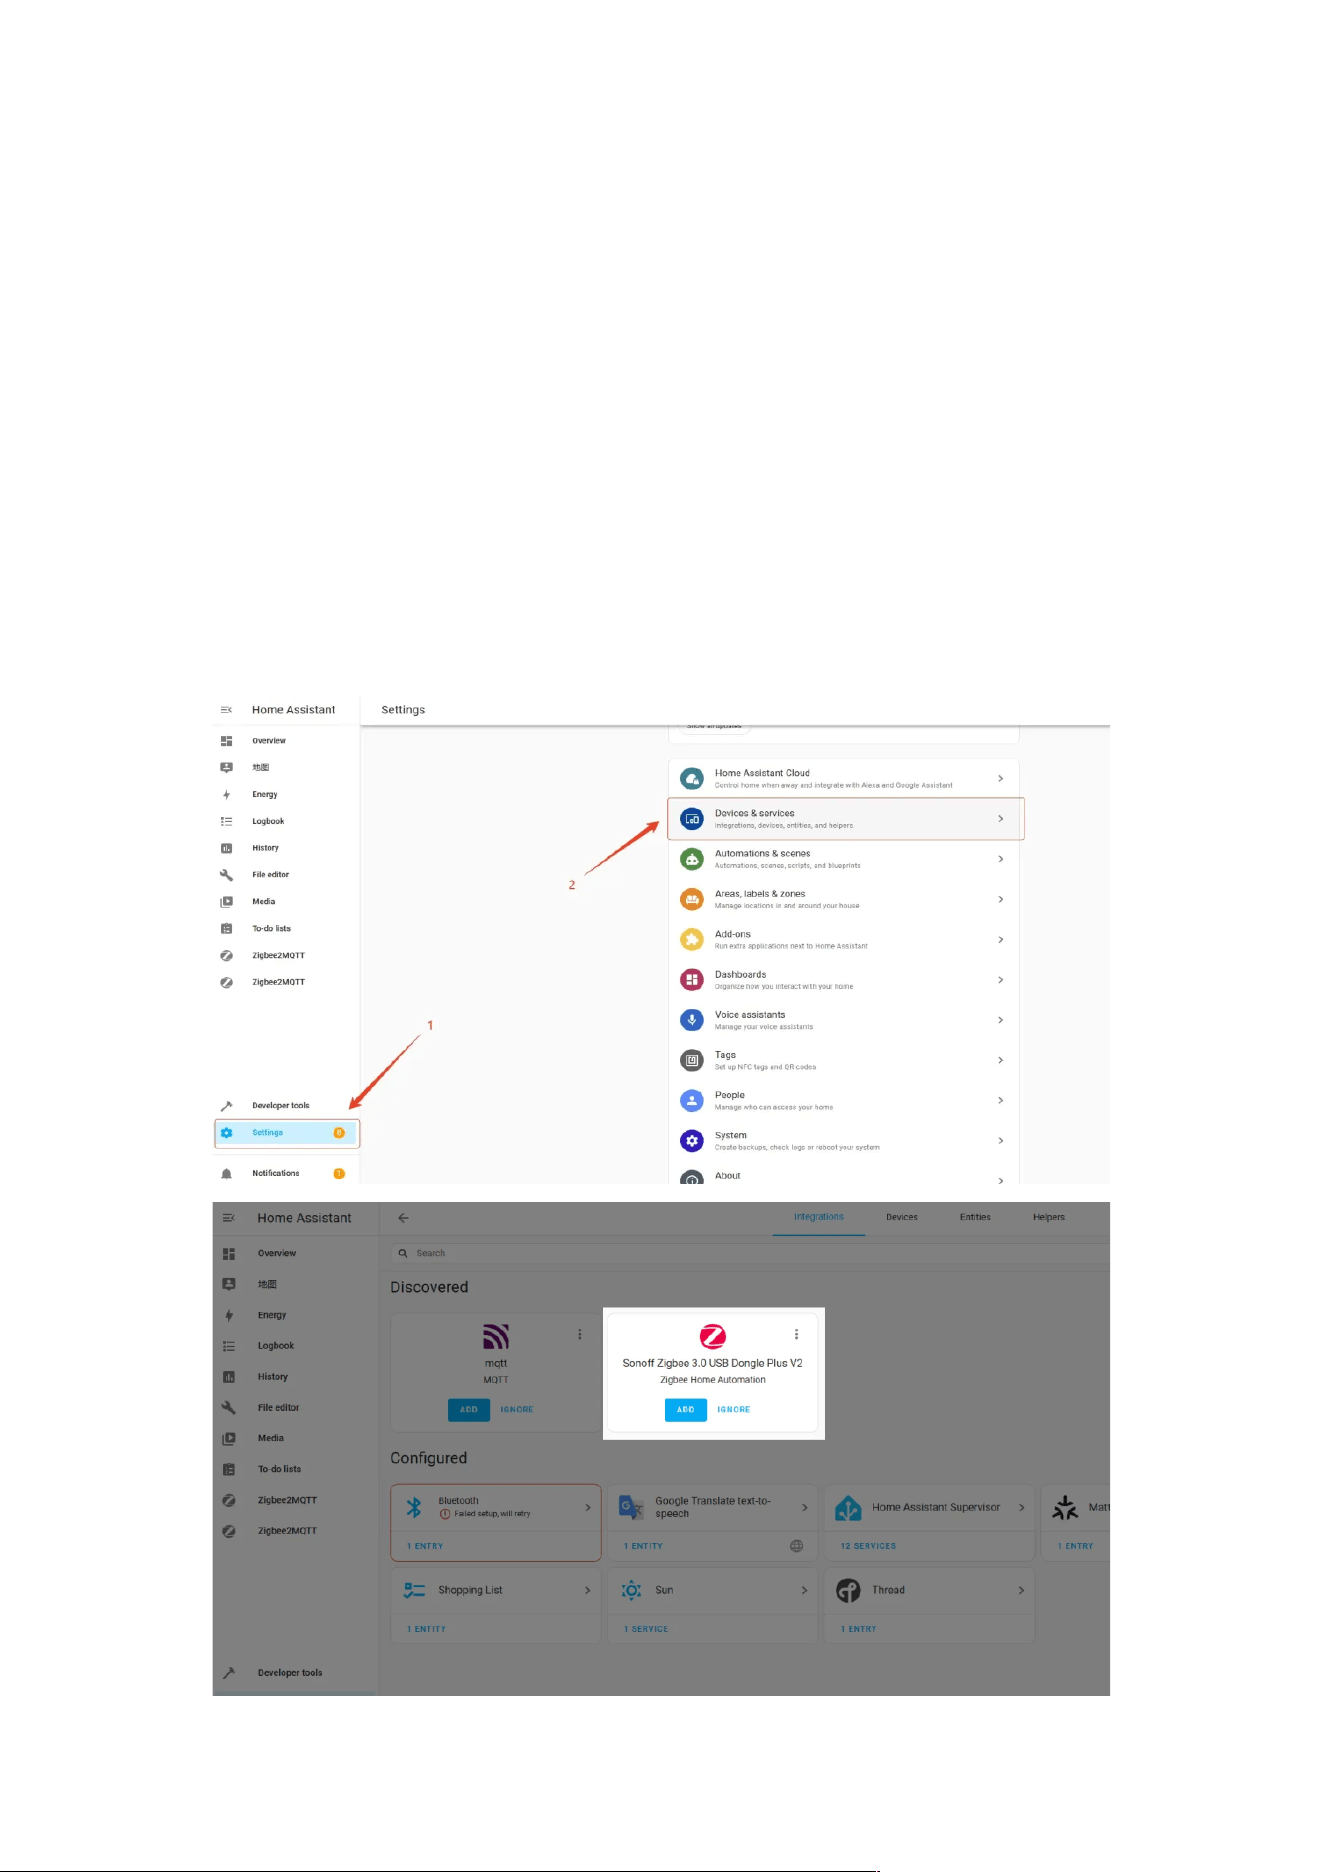
2.3.1.2 Step 1: Add Integration
In most cases, once the device is connected to the operating system, it will
be automatically discovered by Home Assistant. Go to Settings > Devices &
Services, and click “ADD” to start the configuration.
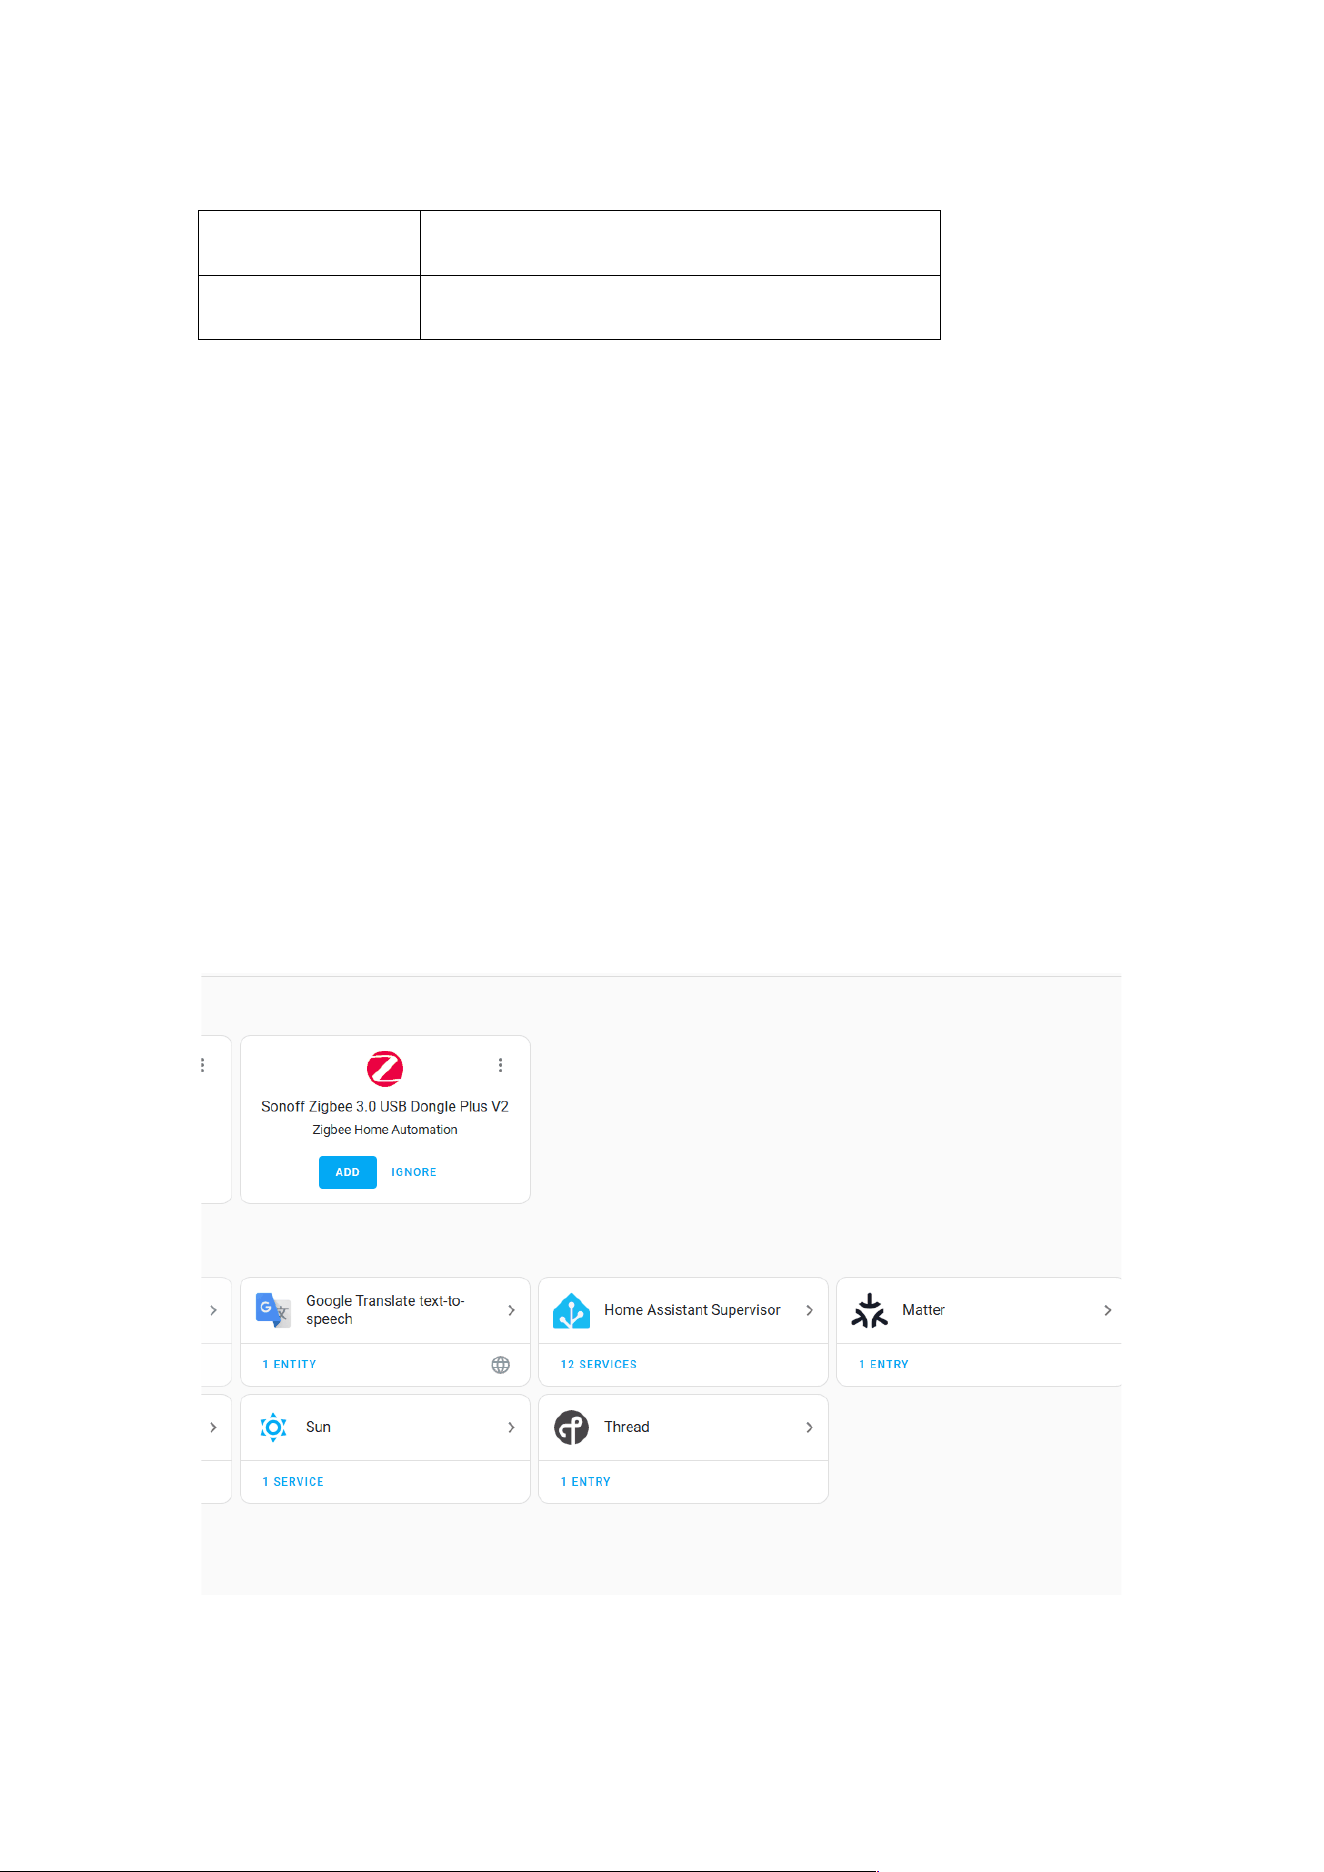
Auto Discovery Name
Product
USB Auto Disovery
ZBDongle-E
SONOFF Zigbee 3.0 USB Dongle Plus V2
2.3.1.3 Step 2: Configure the ZBDongle
After clicking the “ADD” button, follow the prompts to configure the ZBDongle.
You will need to select a network initialization method:
1、Restore from previous network backup: Used when replacing the
Zigbee coordinator. Restores based on the last available network backup.
2、Keep existing network settings: Used when the Zigbee coordinator
remains the same and ZHA integration is re-added. Generally not
recommended.
3、Manually upload network backup: Used when manually migrating
network data during HA migration.
4、Erase and create a new network: Used to create a new Zigbee network
by erasing existing network data.
1.
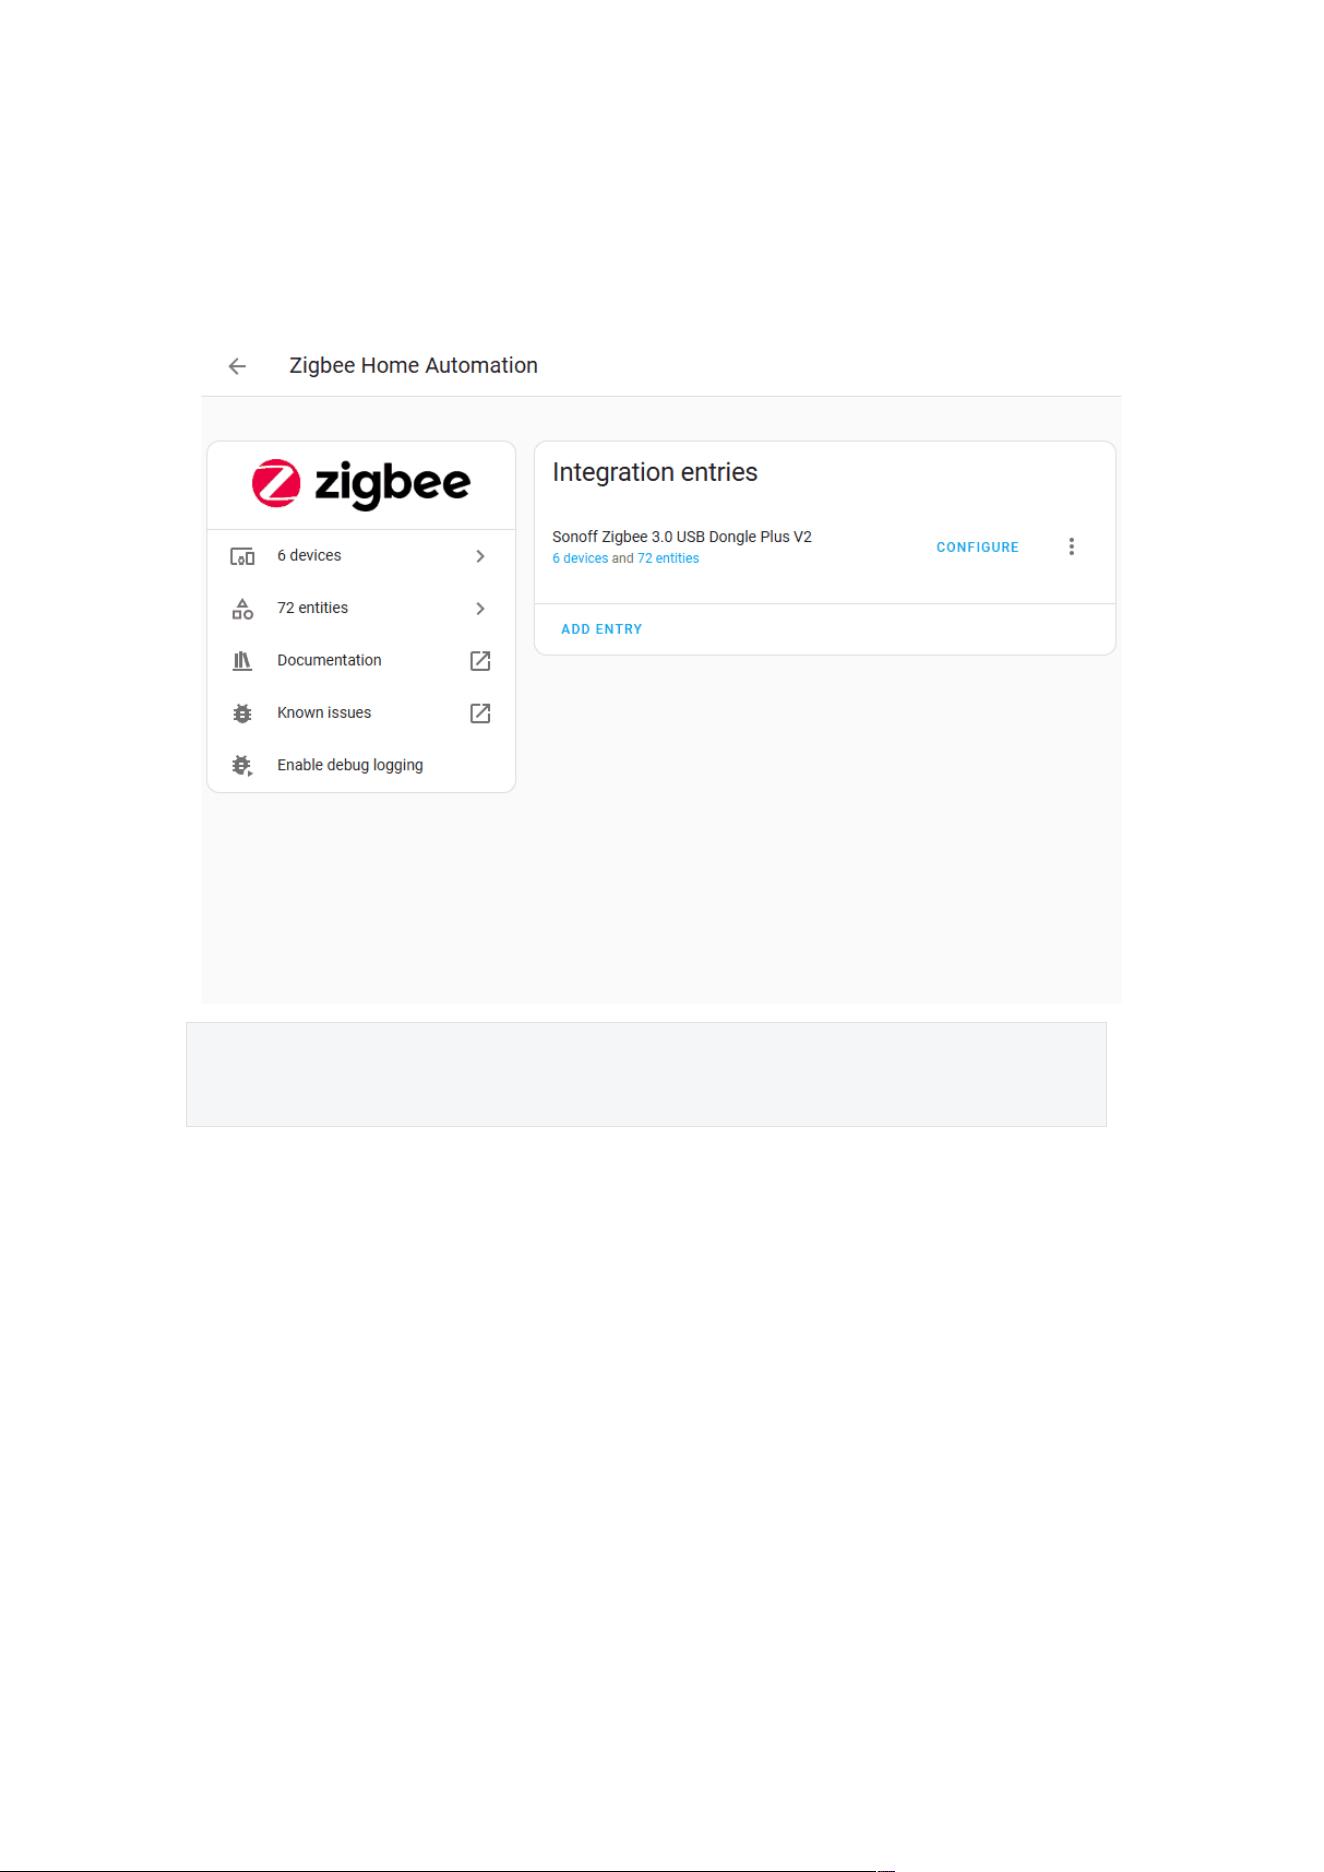
2.3.1.4 Step 3: Add a Zigbee Sub-device
Put the Zigbee sub-device into pairing mode. Then go to the ZHA Integration >
Devices page, click “Add Device“, and the integration will begin scanning
and automatically adding the Zigbee sub-device.
Plain Text
Note: The name will vary depending on the product added.
2.3.1.5 Troubleshooting
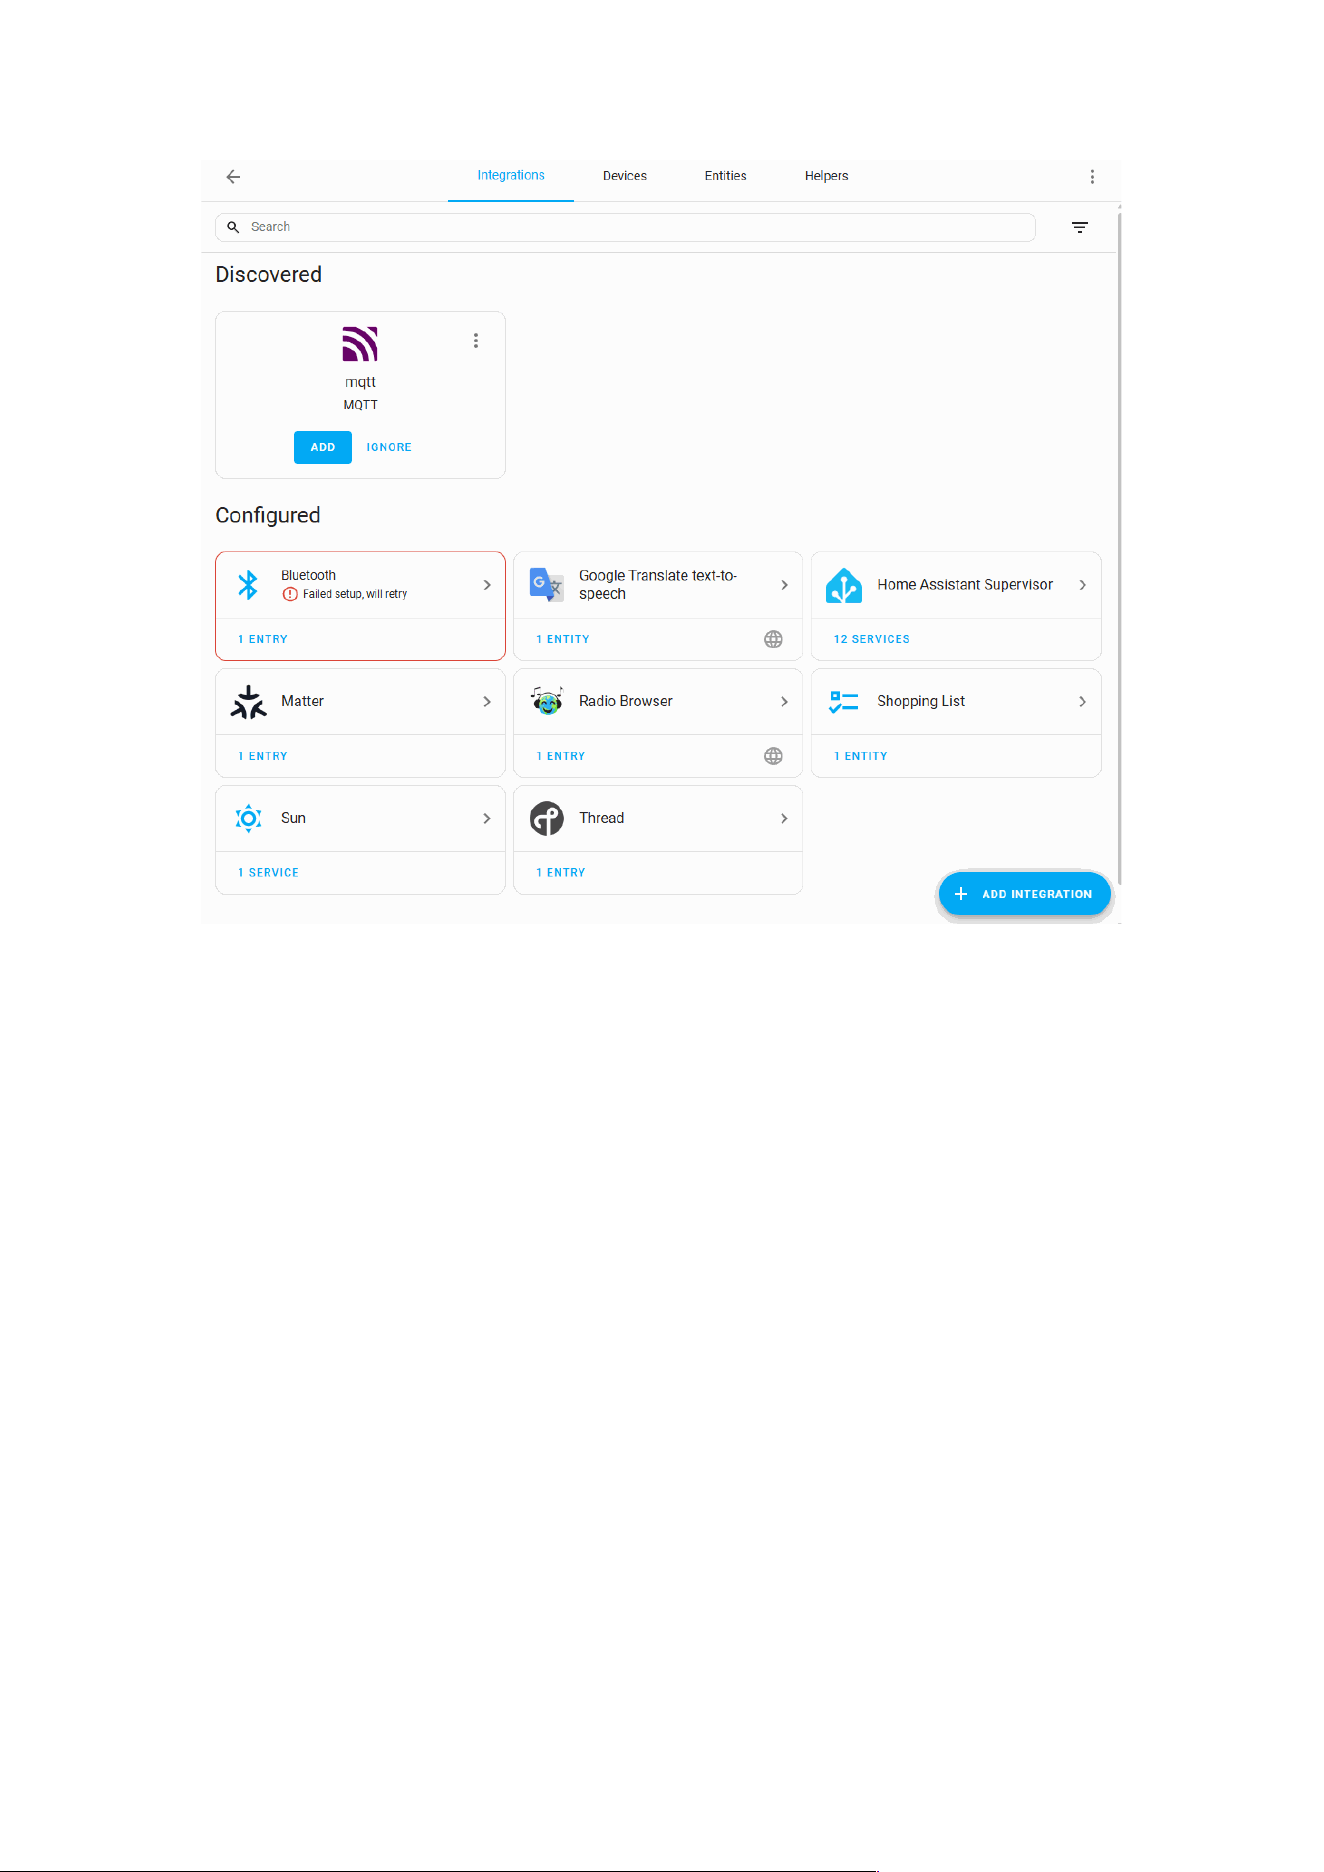
If the device is not automatically discovered due to special circumstances, you
can manually add the ZHA integration:
Settings → Devices & Services → Add Integration → Search for ZHA →
Manually select device path → Submit
2.3.2 Connecting to Home Assistant via Z2M Add-on
This guide is based on the GitHub project:
https://github.com/zigbee2mqtt/hassio-zigbee2mqtt#installation
2.3.2.1 Preparation
Before getting started, ensure that Home Assistant is installed and the
ZBDongle is connected to the host’s USB port. If not yet installed, please
follow the Home Assistant Installation Guide.
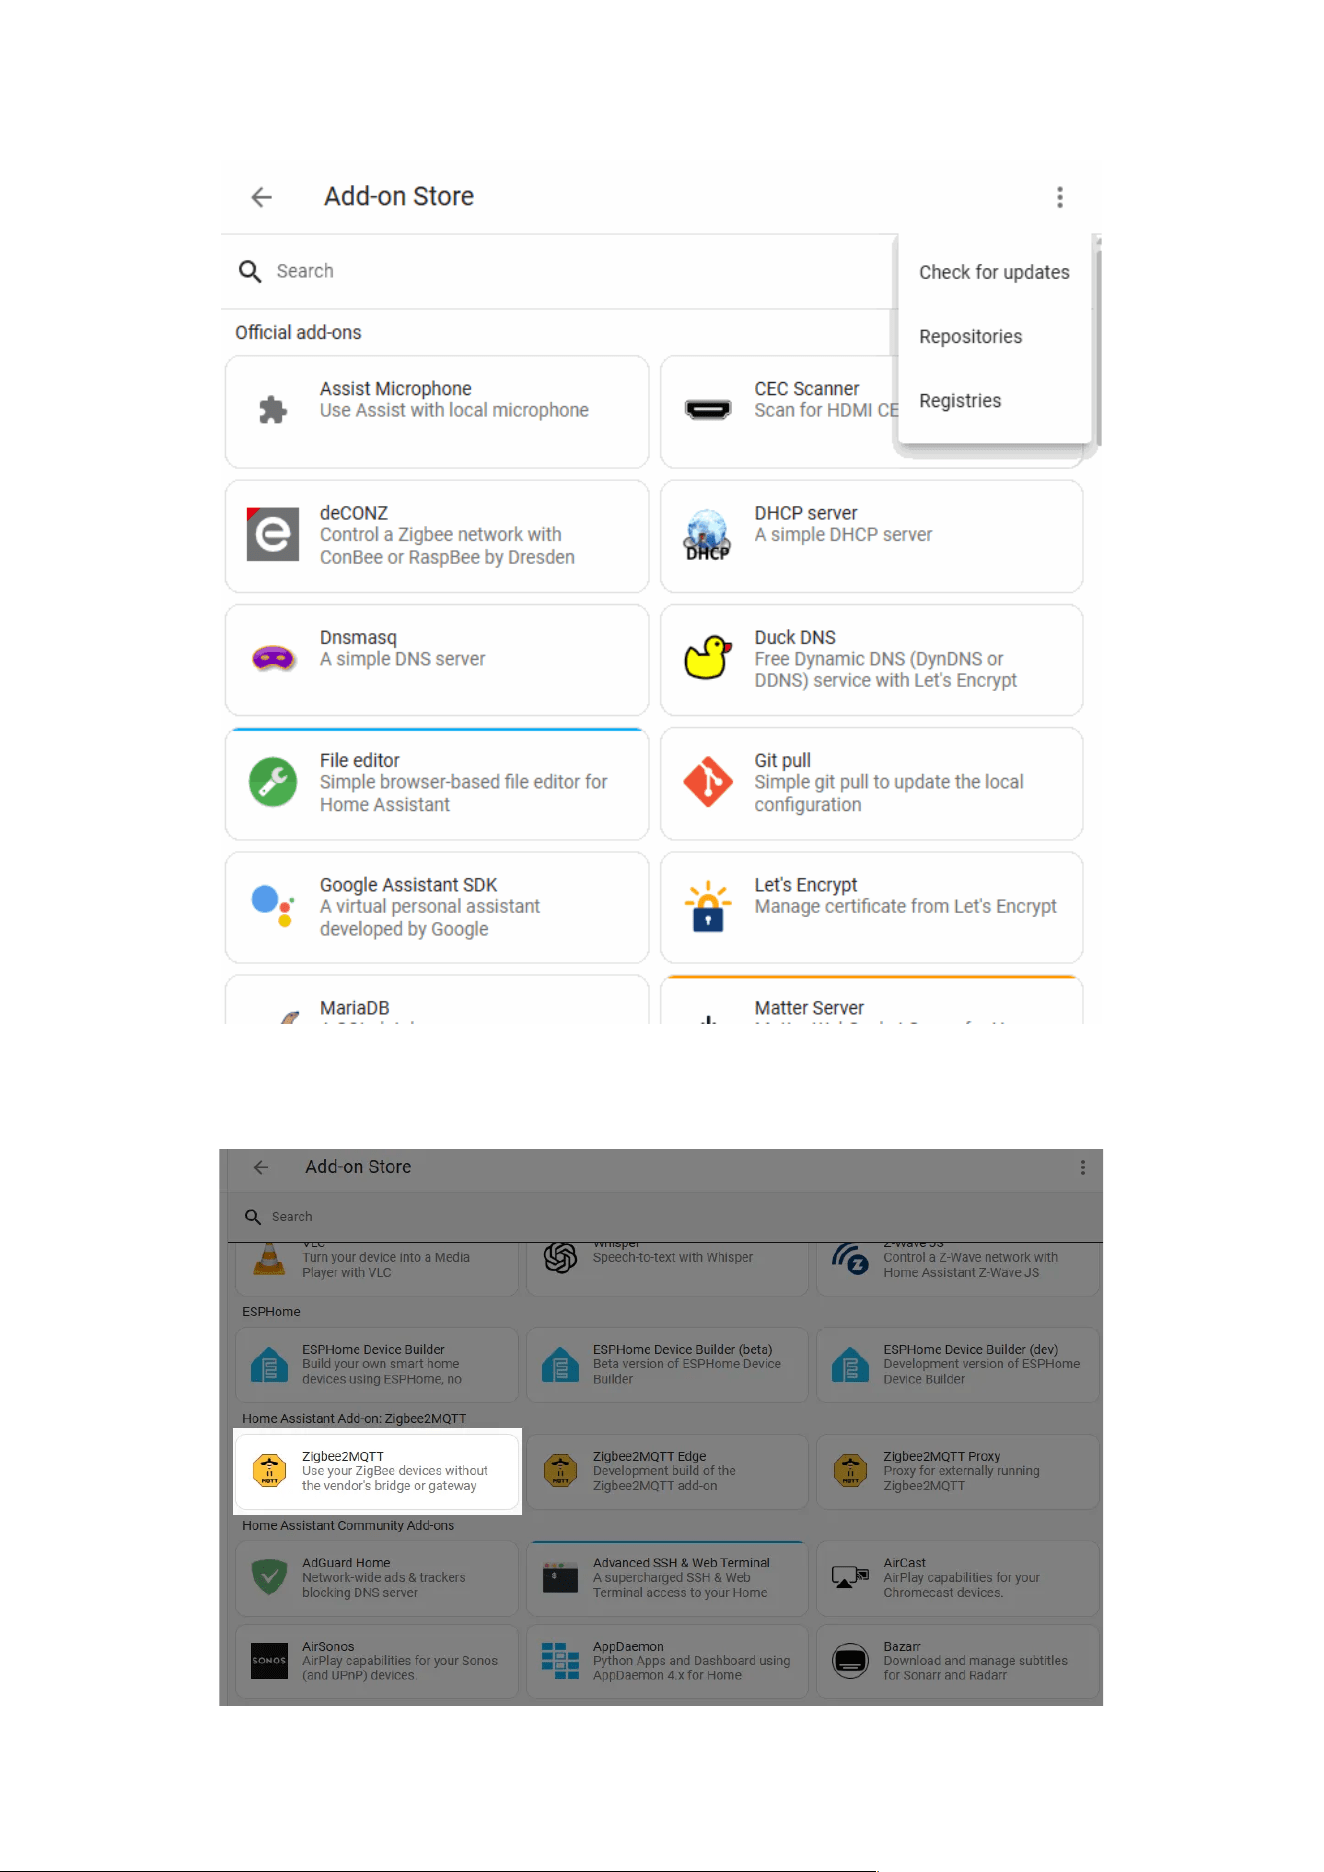
2.3.2.2 Step 1: Install Add-ons
When connecting HA through the Zigbee2MQTT Add-on, you need to install
two add-ons:
1、Mosquitto broker (MQTT Broker)
2、Zigbee2MQTT
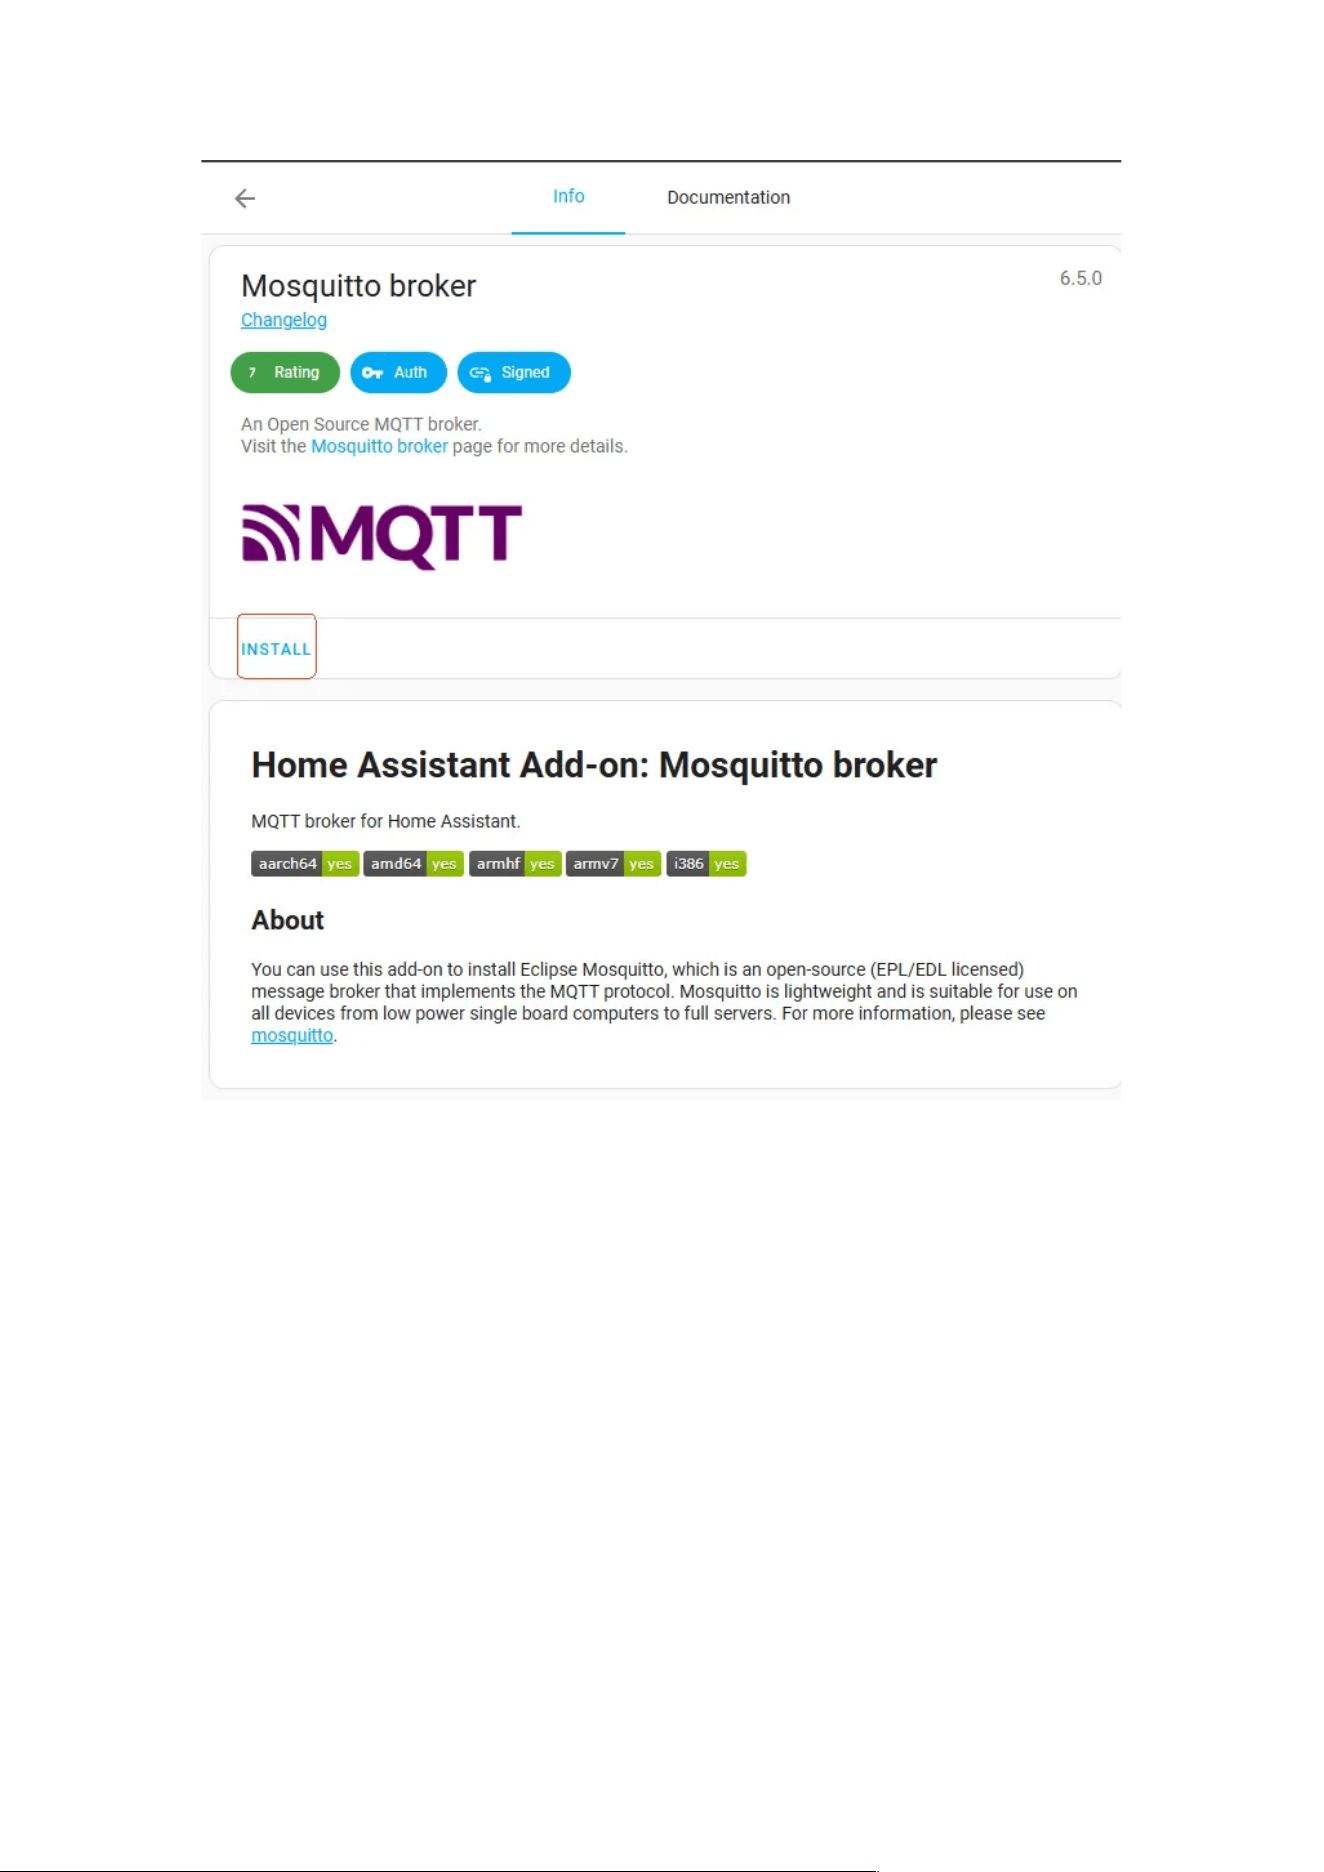
2.3.2.2.1 Install MQTT Broker
Go to Settings → Add-ons → Add-on store and install the Mosquitto broker
add-on, then start it.
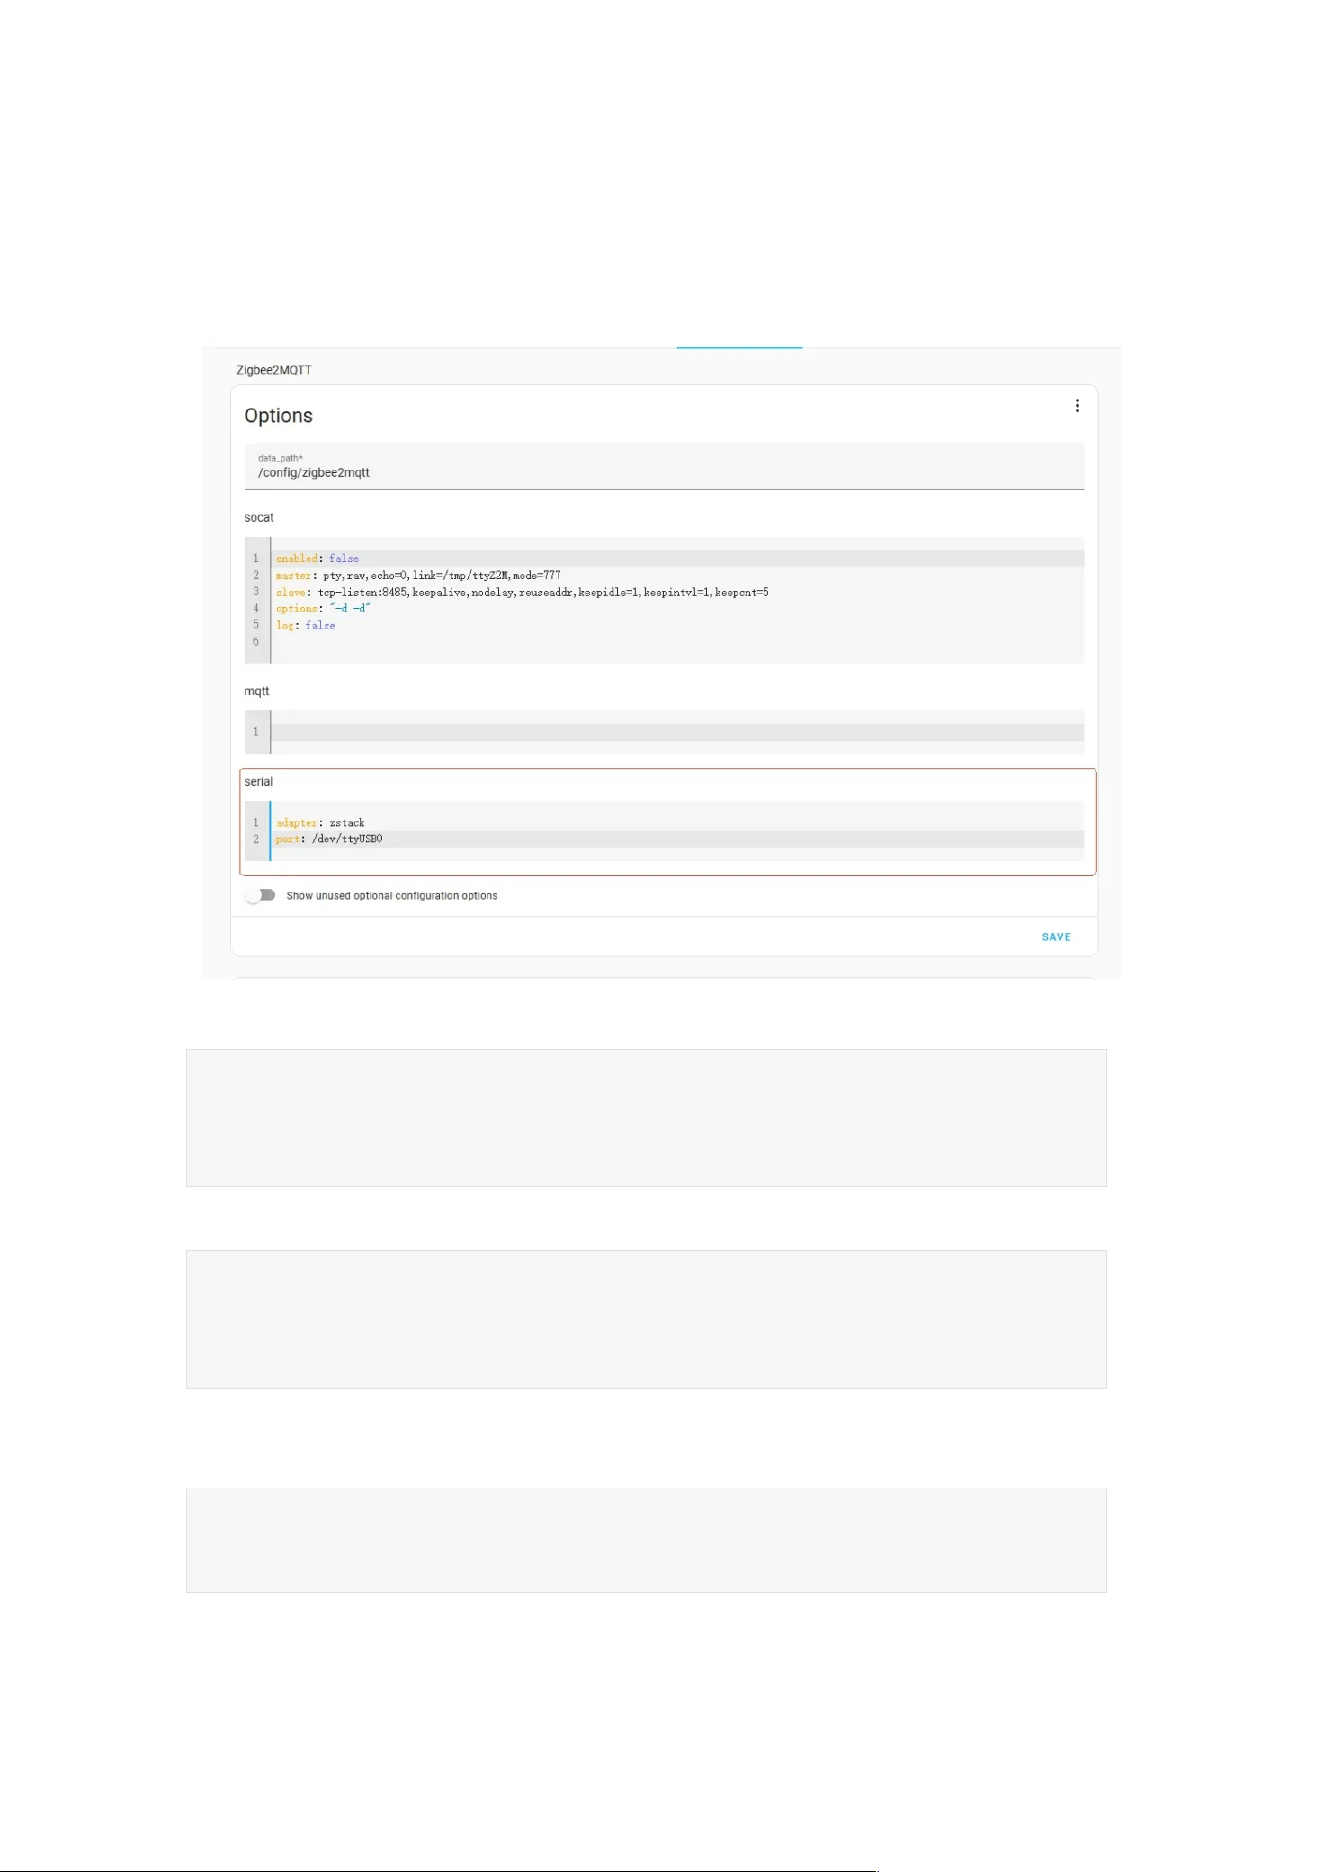
2.3.2.3 Step 2: Configure Zigbee2MQTT
Open the Zigbee2MQTT add-on → Configuration page.
You need to configure the device’s adapter type and serial port path under
serial.
The following format:
Plain Text
adapter: Adapter Type
port: ZBDongle Serial Port Path
Example Configuration For ZBDongle-E
Plain Text
adapter: ember
port: /dev/ttyUSB0
The serial port path may vary depending on the host system. On Linux, you
can find the serial path by running:
Plain Text
ls -l /dev/serial/by-id
Example output:
Plain Text
coolkit@coolkit-All-Series:~$ ls -l /dev/serial/by-id
total 0
lrwxrwxrwx 1 root root 13 3 月 31 18:09 usb-
Itead_Sonoff_Zigbee_3.0_USB_Dongle_Plus_V2_76536147c914ef11950378b8bf
9df066-if00-port0 -> ../../ttyUSB0
The serial port path in this case is:
Plain Text
/dev/ttyUSB0
For other operating systems, please refer to the respective connection
instructions.
After completing the configuration, start the Zigbee2MQTT add-on. Wait for
about two minutes, then you can click to enter the Web UI Console to add
and manage devices.
2.3.3 Connecting to Zigbee2MQTT
This guide follows the official Zigbee documentation. For more operations,
please visit Zigbee2MQTT.
2.3.3.1 Preparation
Before getting started, ensure that Zigbee2MQTT is installed and that the
ZBDongle is connected to the host’s USB port.

If Zigbee2MQTT and Mosquitto MQTT Broker have not been installed yet,
please refer to the Zigbee2MQTT Installation Guide and the Mosquitto
Installation Guide.
2.3.3.2 Step 1: Start Zigbee2MQTT
It is recommended that Zigbee2MQTT be updated to version 2.2.0, which
supports automatic discovery and configuration of ZBDongle-E.
Run the following commands to start Zigbee2MQTT:
Plain Text
cd /opt/zigbee2mqtt
sudo pnpm start
If started successfully, you will see output similar to the following, indicating
that Zigbee2MQTT has been launched correctly:
Plain Text
[2025-04-02 09:44:12] info: z2m: Logging to console, file (filename: log.log)
[2025-04-02 09:44:12] info: z2m: Starting Zigbee2MQTT version 2.2.0 (commit
#c5c07e7d)
[2025-04-02 09:44:12] info: z2m: Starting zigbee-herdsman (3.4.11)
[2025-04-02 09:44:12] info: zh:adapter:discovery: Matched adapter:
{"path":"/dev/ttyUSB0","manufacturer":"Itead","serialNumber":"76536147c914ef119
50378b8bf9df066","pnpId":"usb-
Itead_Sonoff_Zigbee_3.0_USB_Dongle_Plus_V2_76536147c914ef11950378b8bf
9df066-if00-port0","vendorId":"10c4","productId":"ea60"} => ember:
path=/dev/ttyUSB0, score=4
...
[2025-04-02 09:44:15] info: z2m: zigbee-herdsman started (restored)
[2025-04-02 09:44:15] info: z2m: Coordinator firmware version:
'{"meta":{"build":0,"ezsp":13,"major":7,"minor":4,"patch":4,"revision":"7.4.4
[GA]","special":0,"type":170},"type":"EmberZNet"}'
[2025-04-02 09:44:15] info: z2m: 0x00124b00258a5e02
(0x00124b00258a5e02): S26R2ZB - SONOFF Zigbee smart plug (Router)
[2025-04-02 09:44:15] info: z2m: Currently 1 devices are joined.
[2025-04-02 09:44:15] info: z2m: Connecting to MQTT server at mqtt://localhost
[2025-04-02 09:44:15] info: z2m: Connected to MQTT server
[2025-04-02 09:44:15] info: z2m:mqtt: MQTT publish: topic
'zigbee2mqtt/bridge/state', payload '{"state":"online"}'
[2025-04-02 09:44:15] info: z2m: Started frontend on port 8081
[2025-04-02 09:44:15] info: z2m:mqtt: MQTT publish: topic
'zigbee2mqtt/0x00124b00258a5e02', payload '{"state":"OFF"}'
[2025-04-02 09:44:15] info: z2m: Zigbee2MQTT started!

(Optional) Manually Configure Zigbee2MQTT
This section is only required if:
– Your Zigbee2MQTT version is below 2.2.0, or
– You encounter errors when starting Zigbee2MQTT.
Normally, running Zigbee2MQTT will automatically detect and configure the
dongle without manual intervention.
To manually configure, modify the configuration.yaml file. Example steps on
Linux:
Plain Text
cp /opt/zigbee2mqtt/data/configuration.example.yaml
/opt/zigbee2mqtt/data/configuration.yaml
nano /opt/zigbee2mqtt/data/configuration.yaml
The first command backs up the original configuration file. The second
command opens configuration.yaml for editing. Modify the following sections:
Plain Text
# MQTT settings
mqtt:
base_topic: zigbee2mqtt
server: 'mqtt://localhost'
frontend:
enabled: true //Enable frontend
# adapter settings
serial:
port: /dev/ttyUSB0 //Replace with the serial port path obtained in Step 1
adapter: ember
//For the ZBDongle-P, t he ad ap t er is zstack.
//For the ZBDongle-E, the firmware version below 7.4 uses ezsp, while firmware
version 7.4 and above uses ember.
After editing, press “CTRL + O” to save and “CTRL + X” to exit.
Then, restart Zigbee2MQTT:
Plain Text
cd /opt/zigbee2mqtt
sudo pnpm start
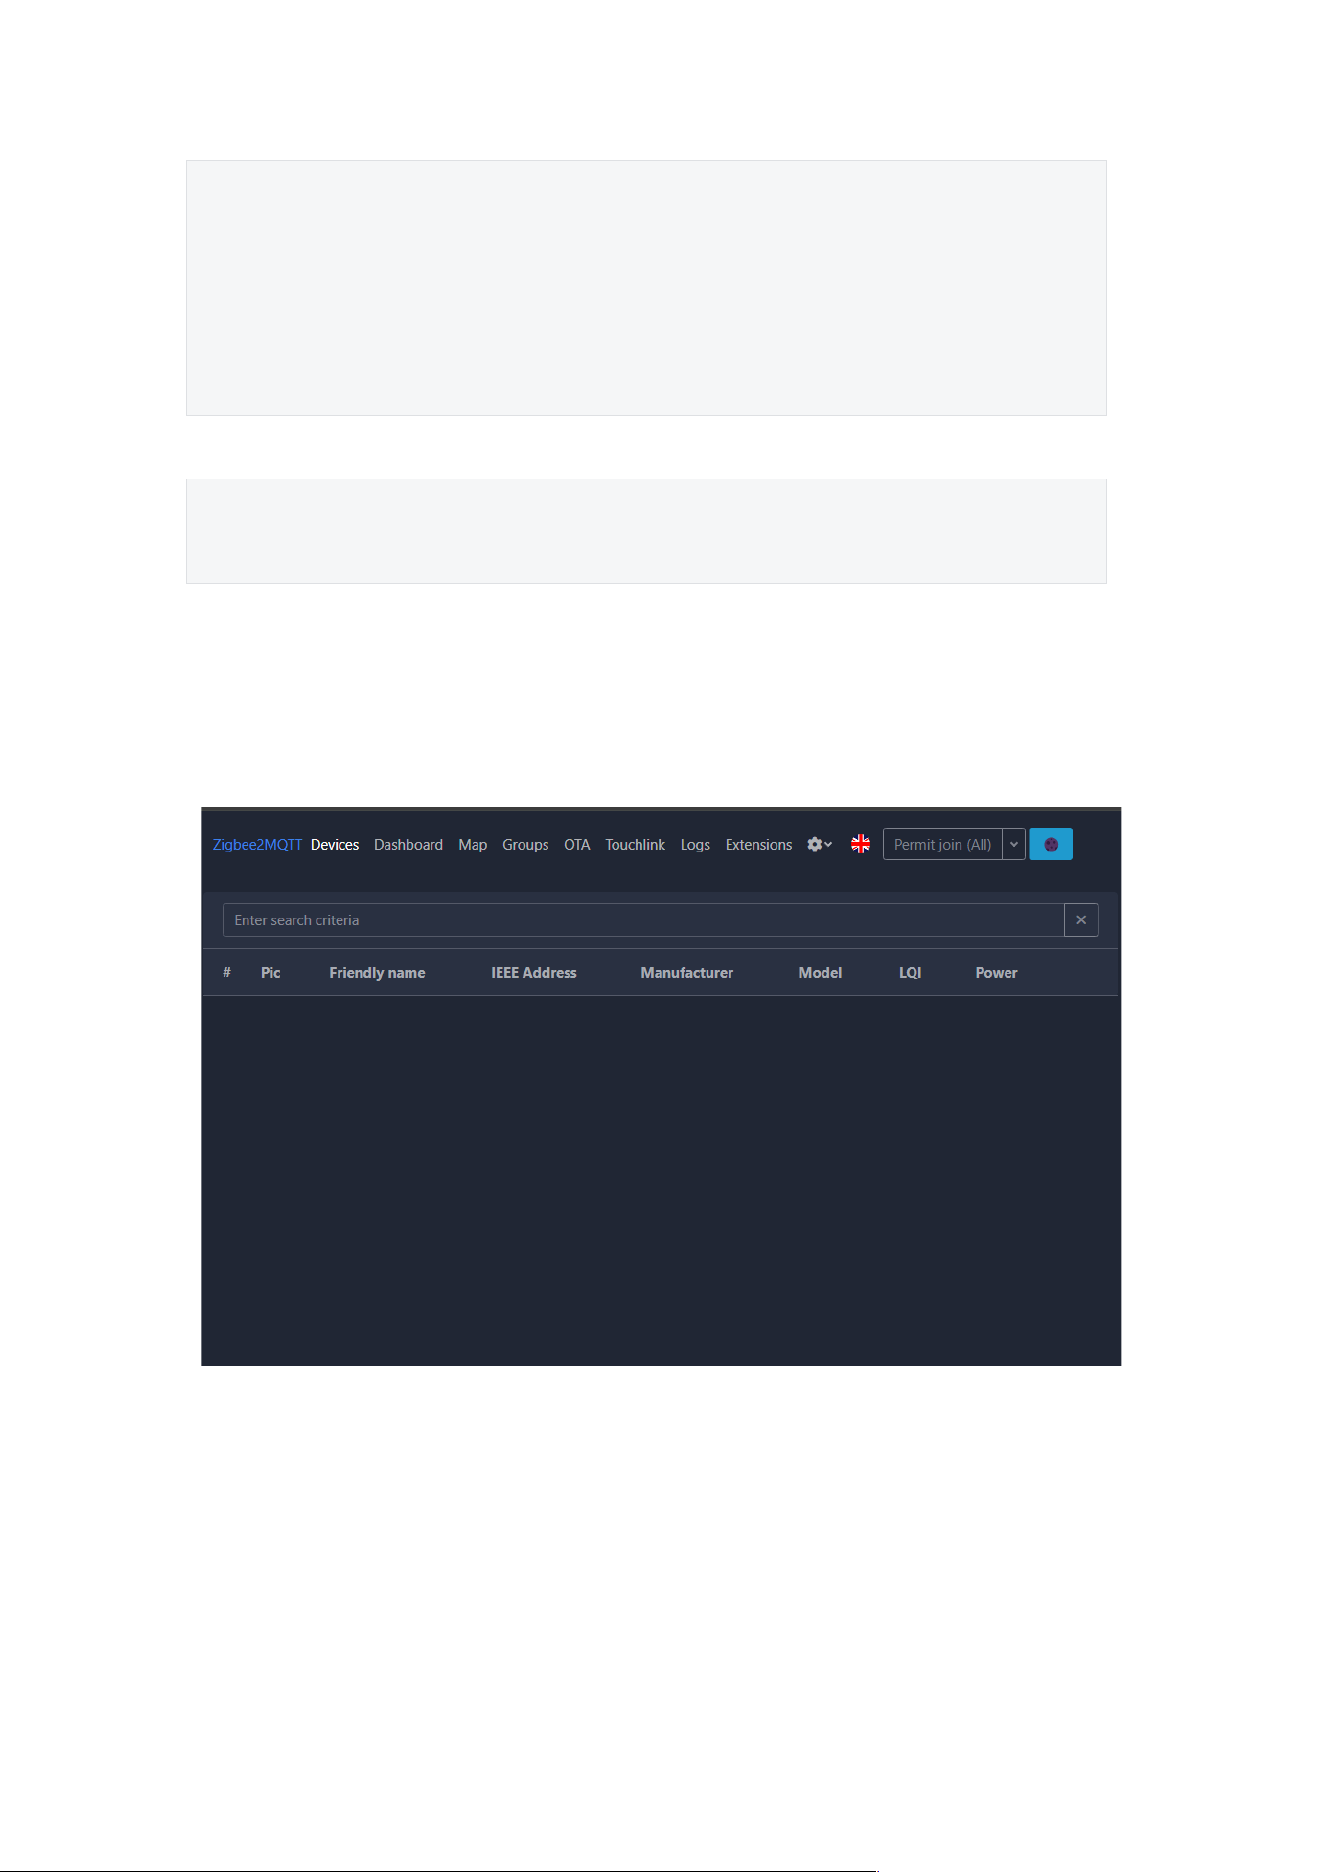
2.3.3.3 Step 2: Access the Frontend Console
You can access the Zigbee2MQTT frontend via:
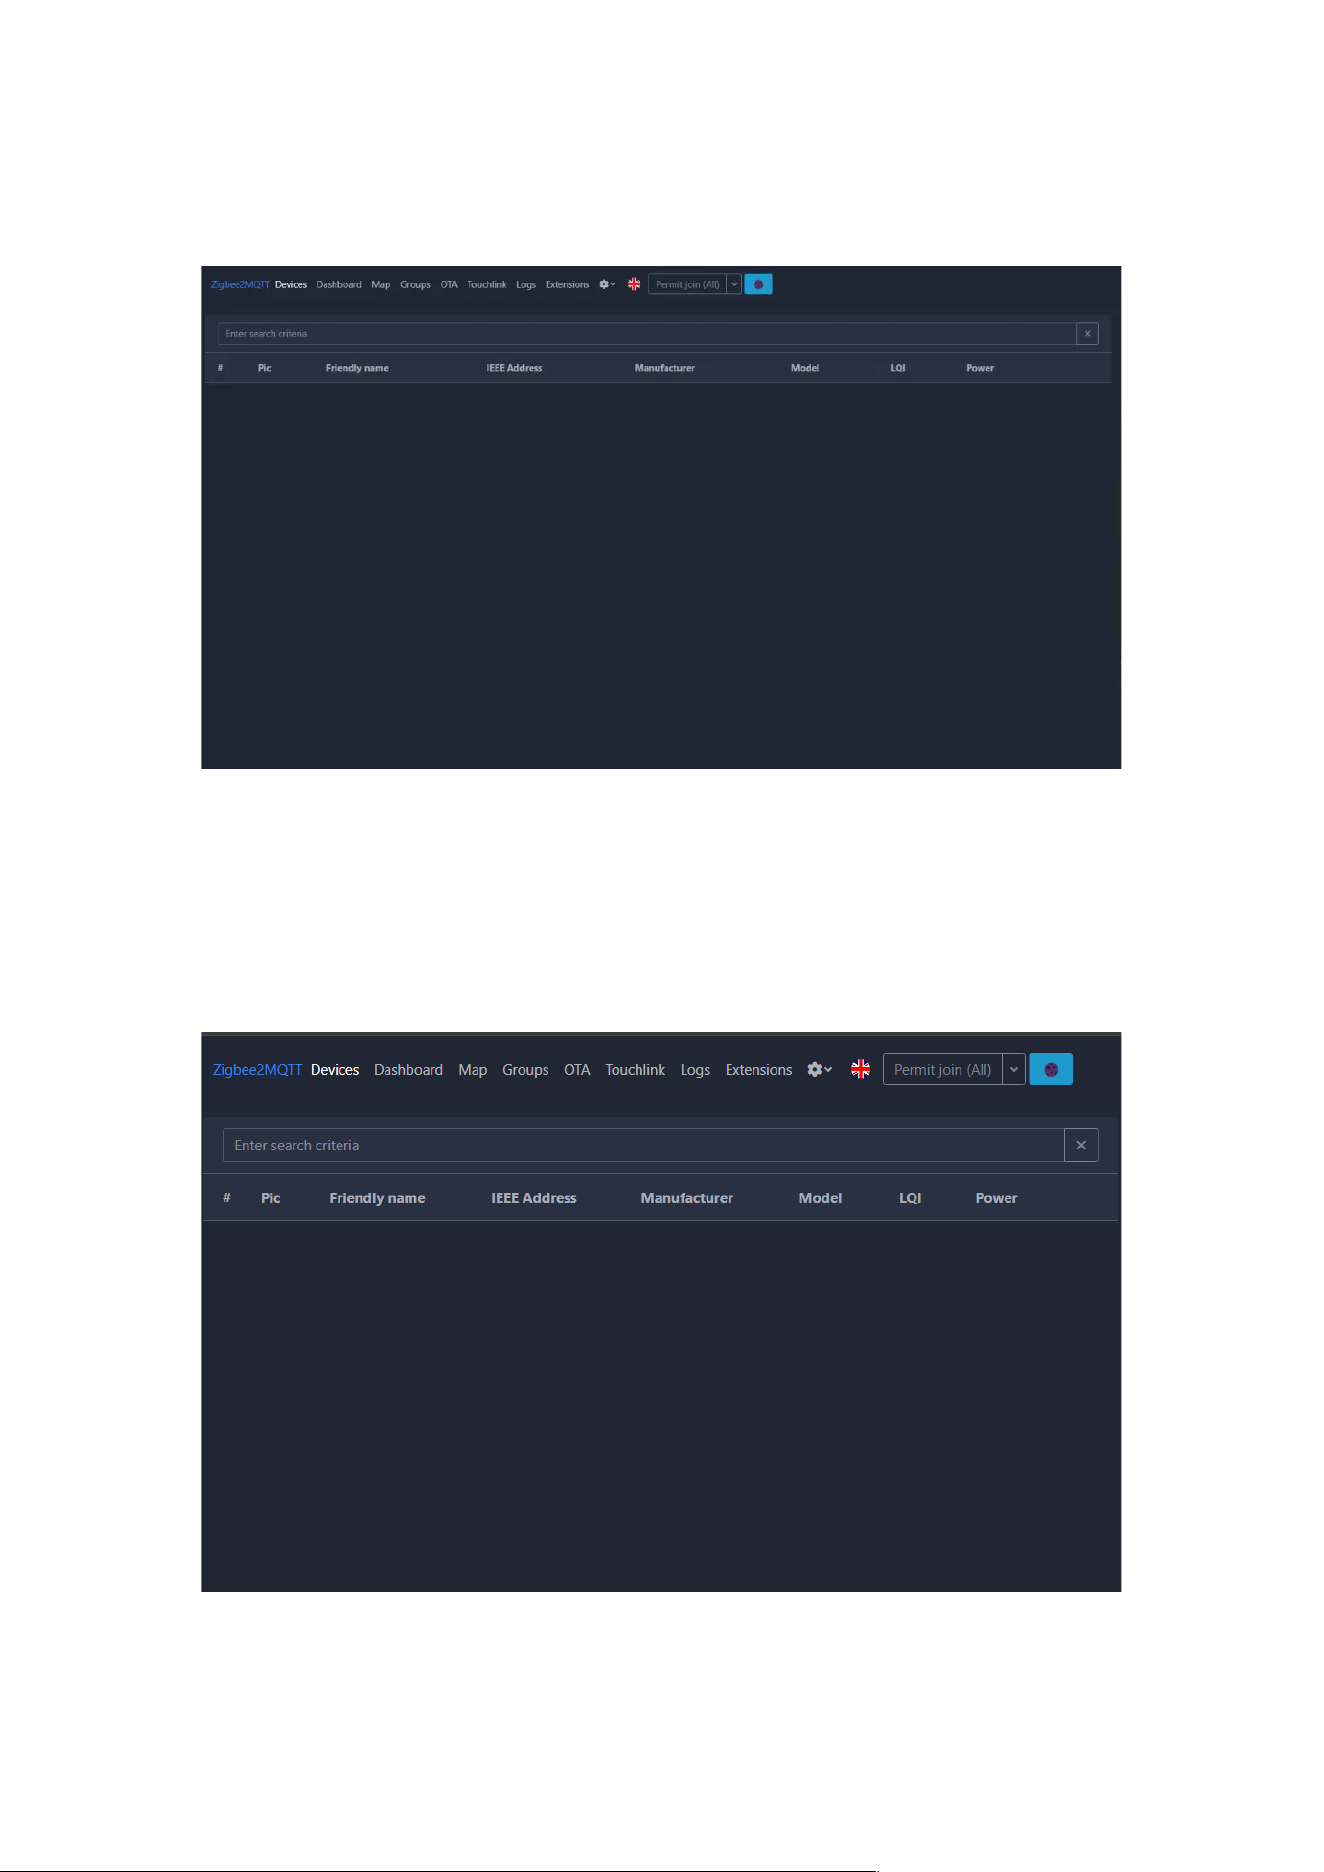
2.3.3.4 Step 3: Add a Zigbee Sub-device
Put your Zigbee device into pairing mode, then click “Permit join (All)” in the
Zigbee2MQTT frontend.
The device will be scanned and added automatically.
The Zigbee2MQTT Supported Devices List: Zigbee2MQTT Support device
2.3.4 Connecting to OpenHab
This guide is based on OpenHab. For more details, please visit OpenHab –
Zigbee Bindings.
Note: ZBDongle-P (TI CC2652P Chip) is currently not supported. For
detailed progress, please refer to GitHub.
2.3.4.1 Preparation
Before getting started, ensure that Zigbee2MQTT is installed and that the
ZBDongle is connected to the host’s USB port.
If OpenHab have not been installed yet, please refer to the OpenHab
installation guide for setup instructions.
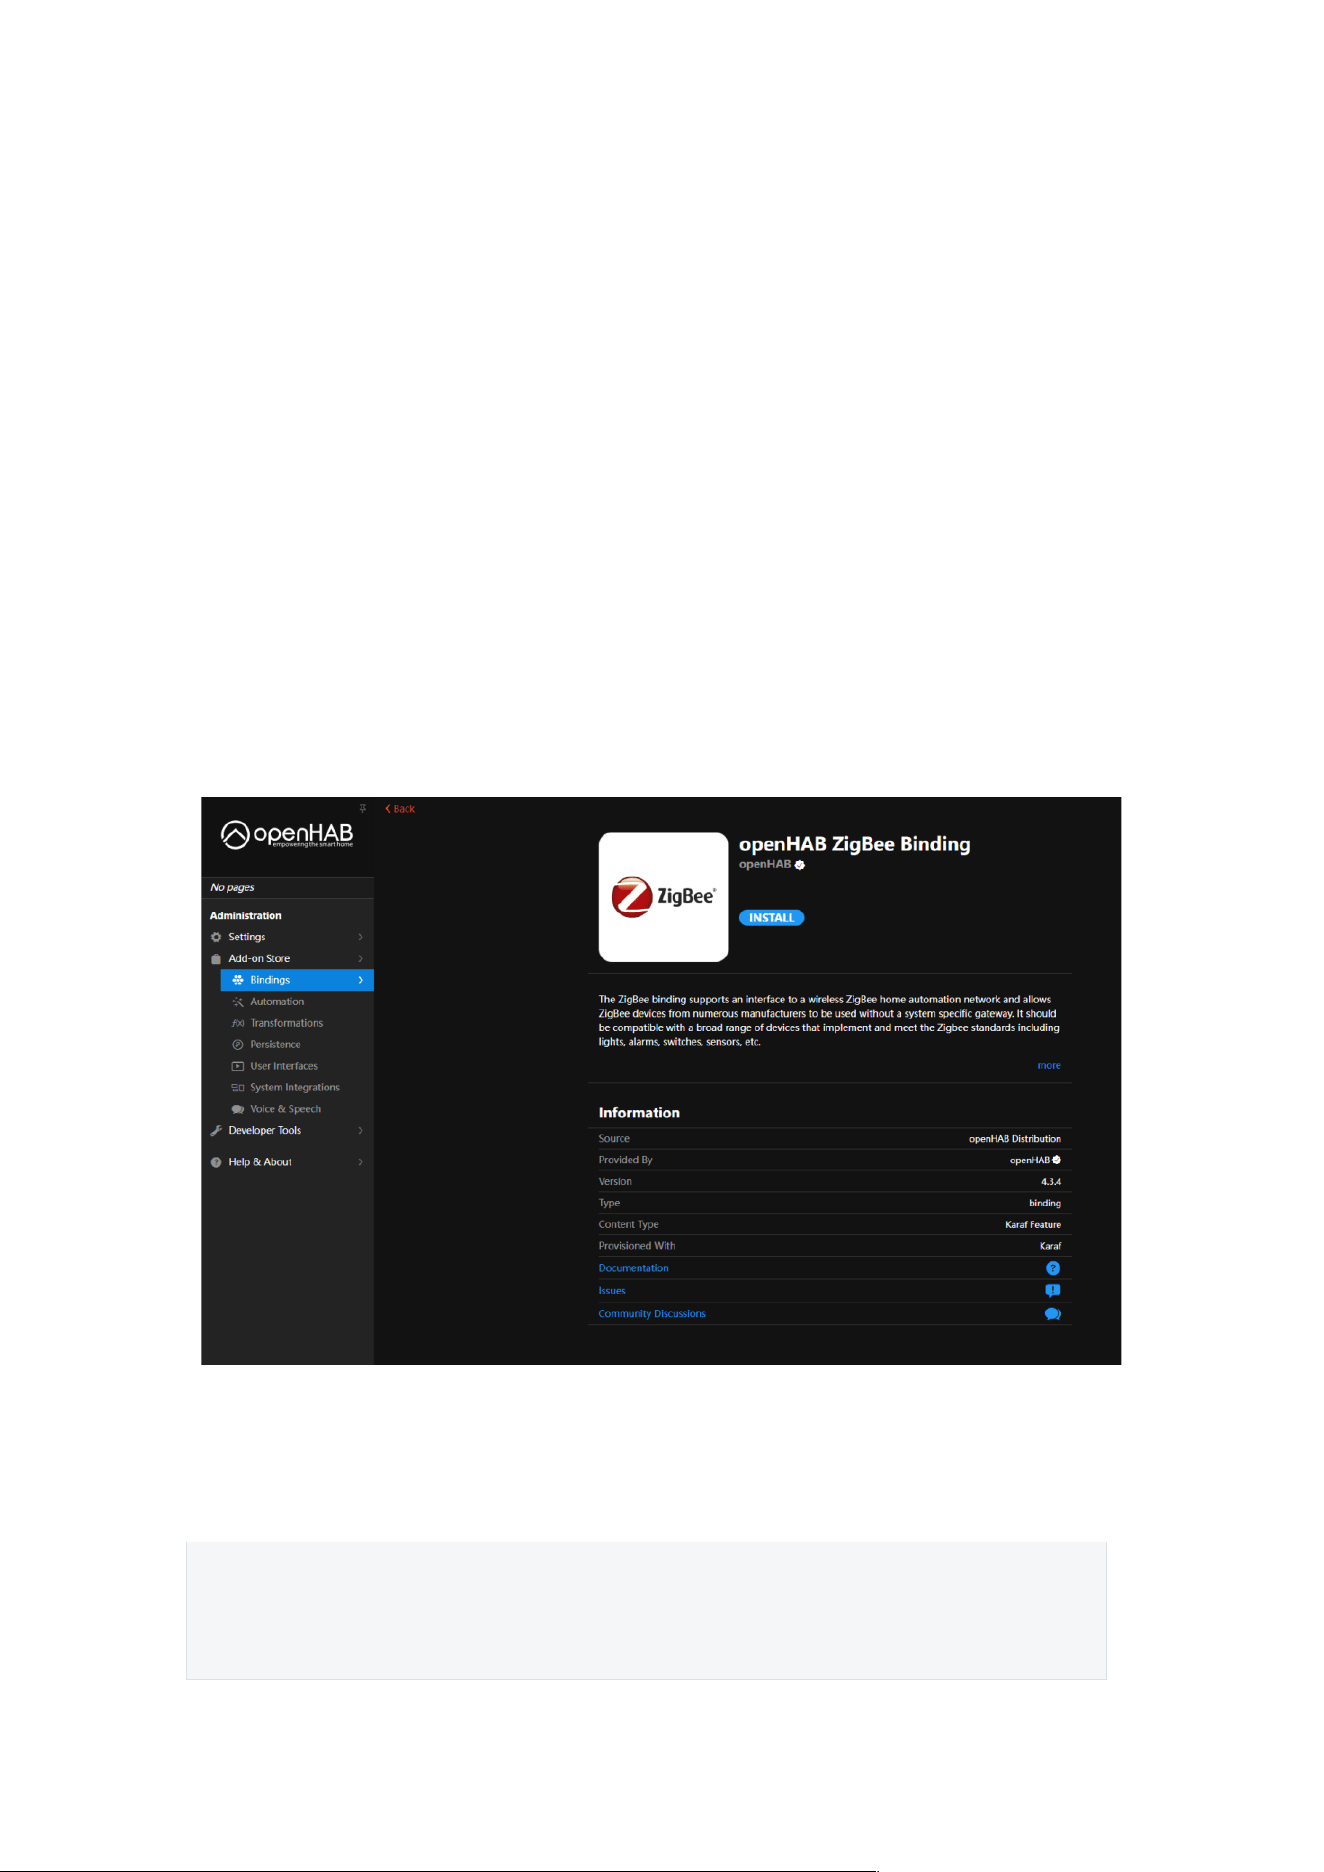
2.3.4.2 Step 1: Install Zigbee Binding
Go to the Add-on Store, search for Zigbee, and install the openHAB ZigBee
Binding.
2.3.4.3 Step 2: Add Things
Go to the Things page, click the “Add” icon, and select Ember Coordinator.
Then configure the following parameters:
Plain Text
Port: Select the usb-Itead-Sonoff-Zigbee-3.0-USB-Dongle-V2 device
Flow Control: Select None
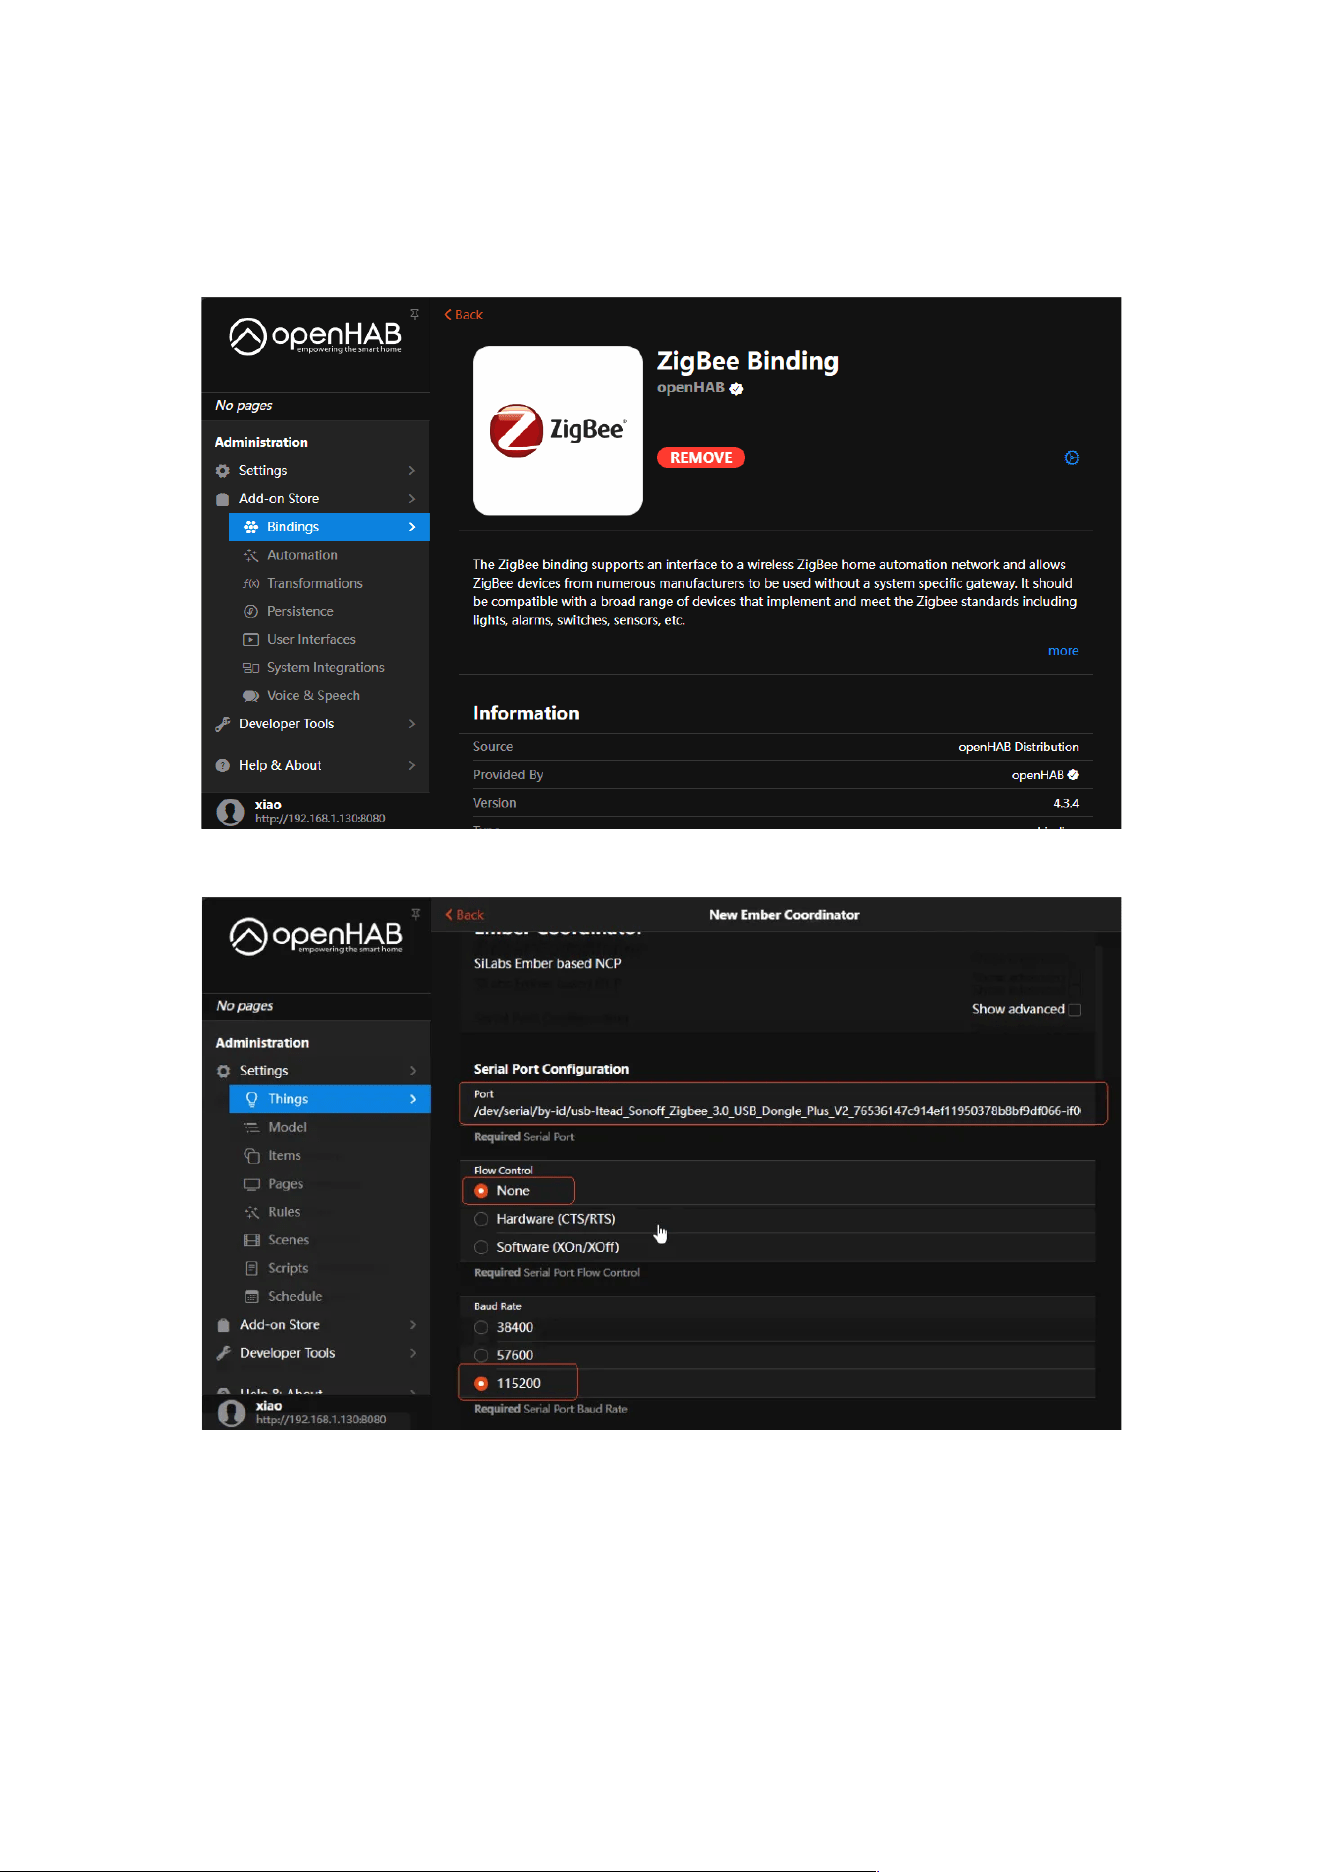
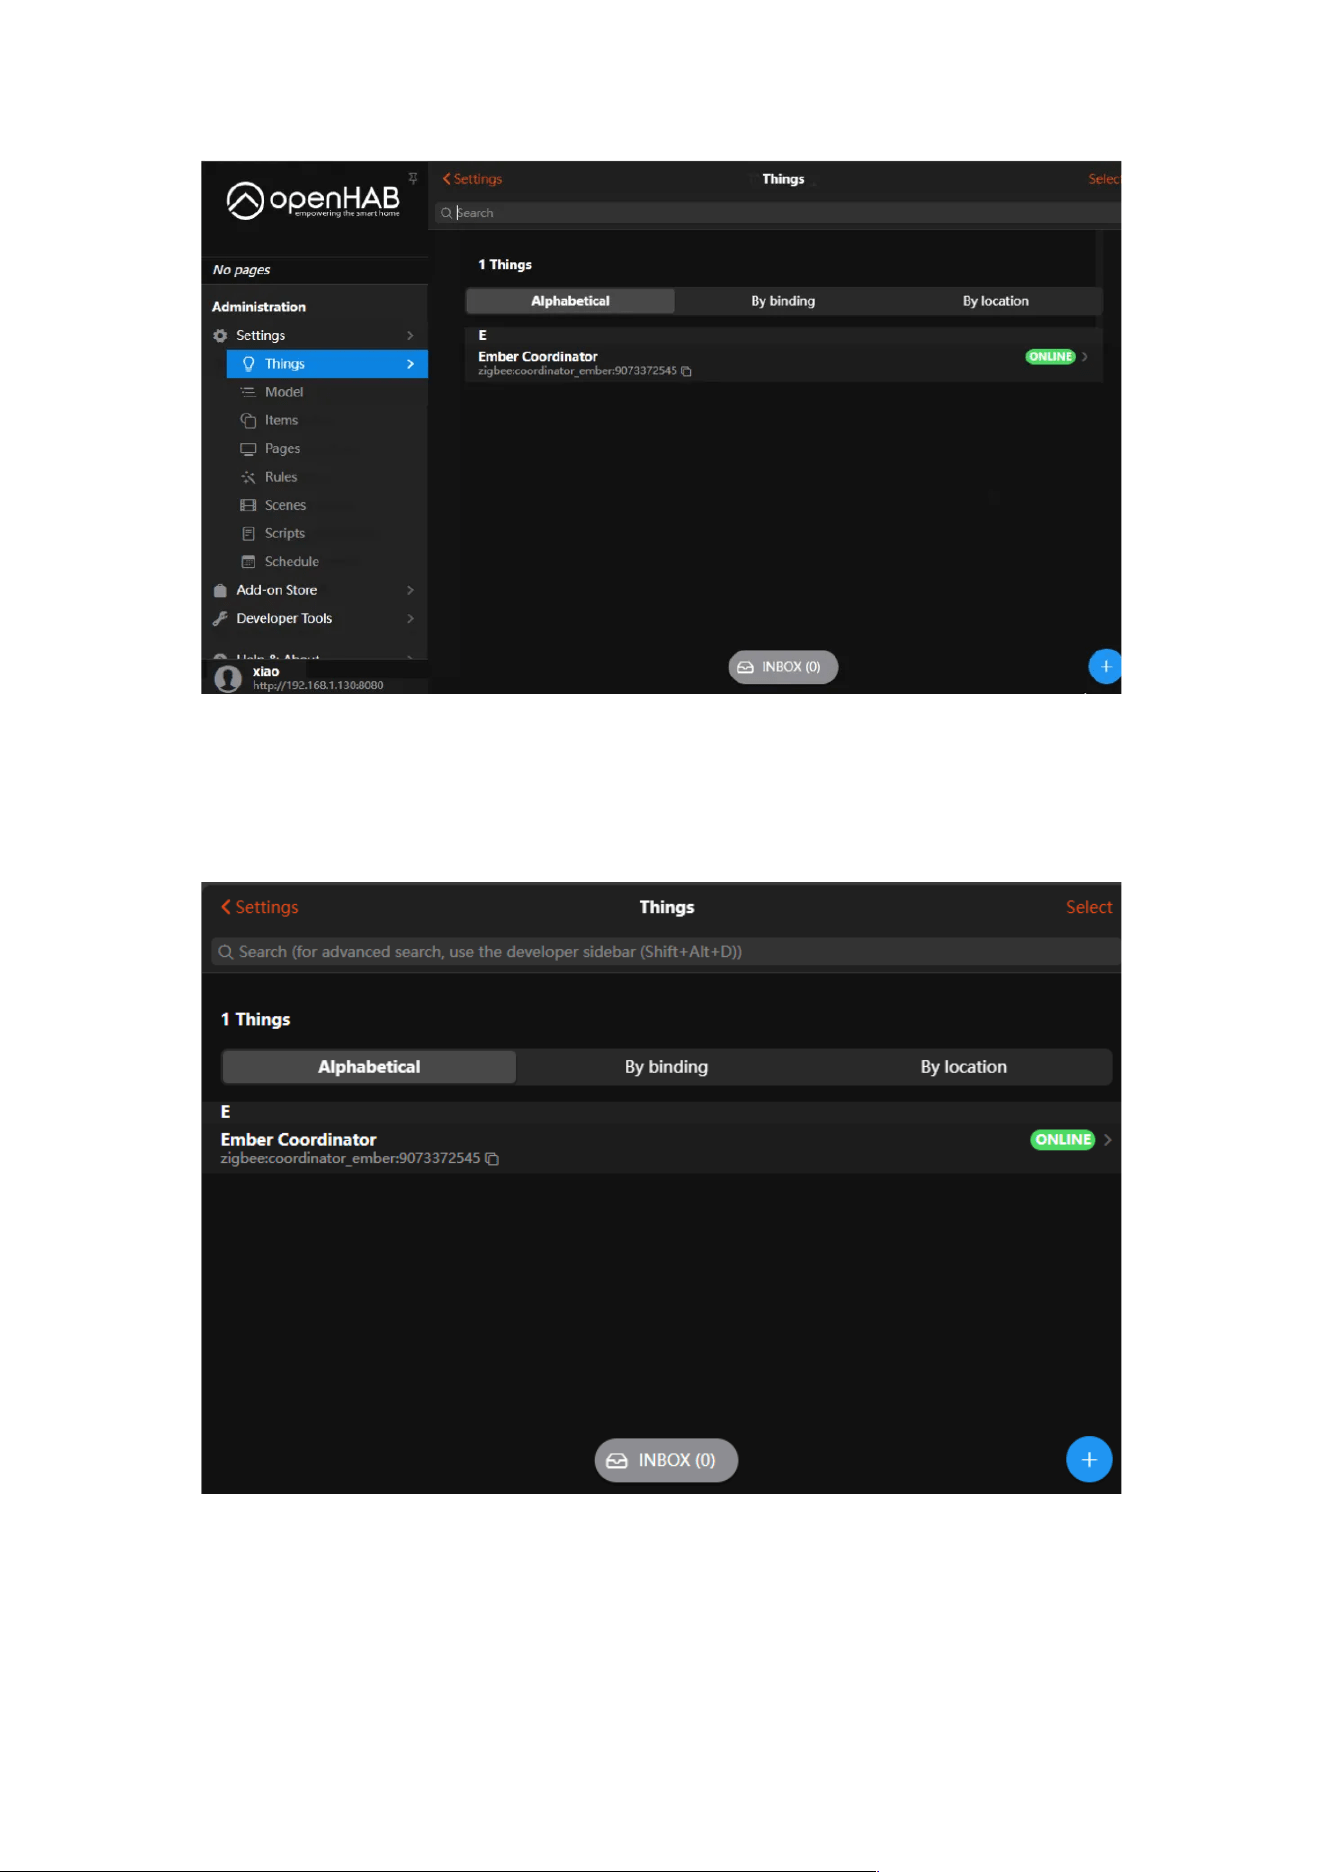
Keep other settings as default. After configuration, click “Create Things“.
Once the Thing’s status turns green (ONLINE), the setup is complete
Add Things
Configuration
2.3.4.4 Step 3: Add a Zigbee Sub-device
Put your Zigbee device into pairing mode. Then, click the “Add” button at the
bottom right of the Things page, select Zigbee Binding, and click “SCAN” to
start scanning and adding Zigbee devices.
Once added, the device can be configured as a Switch and controlled.
2.3.5 Connecting to ioBroker
This guide is based on IoBroker. For more details, please visit IoBroker –
Zigbee.
2.3.5.1 Preparation
Before getting started, make sure that IoBroker is installed and that the
ZBDongle is plugged into the host’s USB port.
If IoBroker has not yet been installed, please refer to the IoBroker installation
guide for setup instructions.
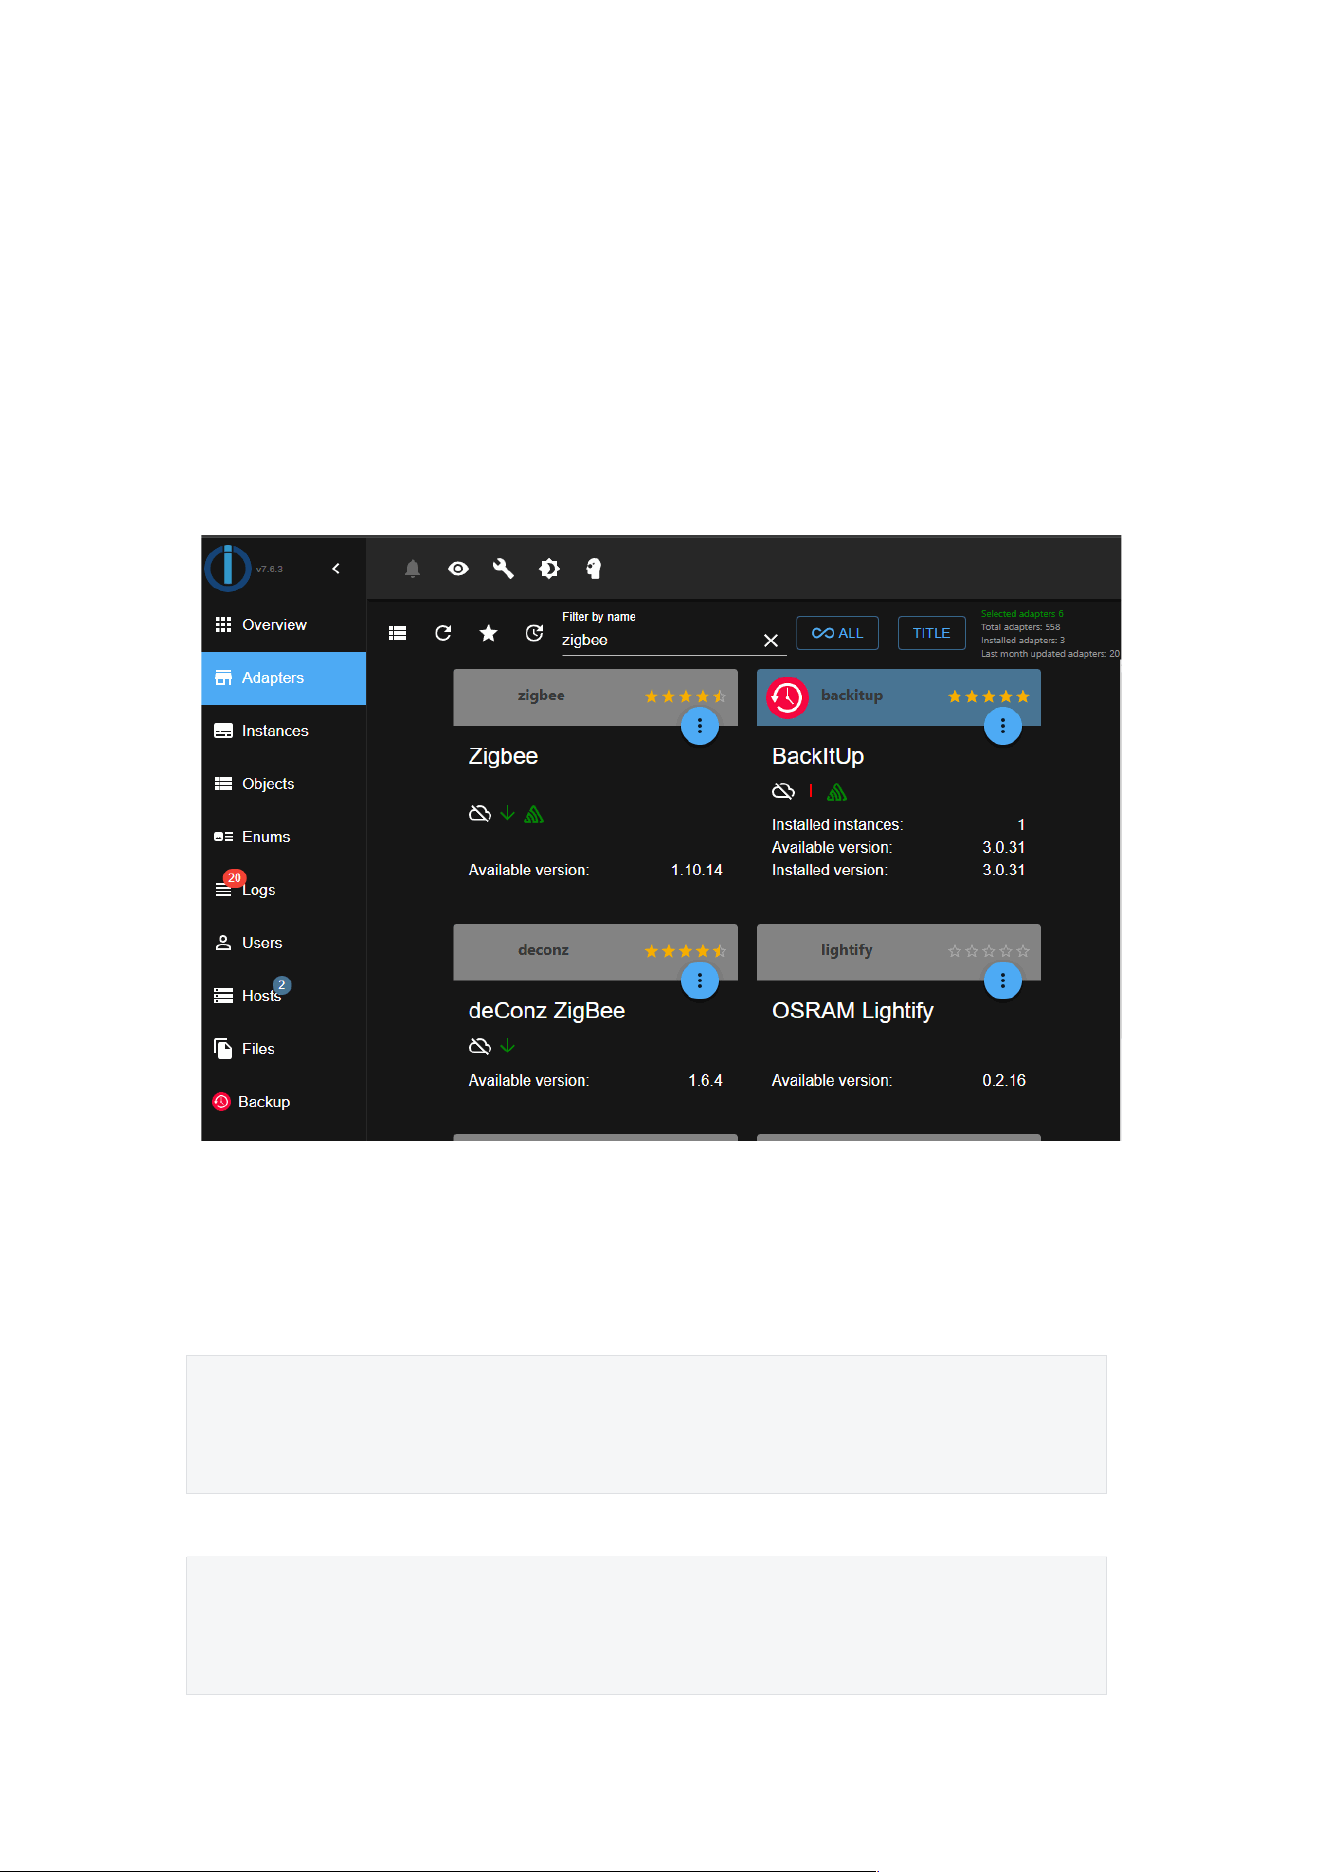
2.3.5.2 Step 1: Add Adapter
After logging into IoBroker, go to Adapters, search for zigbee, and install the
first Zigbee adapter listed.
2.3.5.3 Step 2: Configure the Adapter
Go to Instances, open the settings for the Zigbee adapter, and configure the
serial port path and device type:
For ZBDongle-E、Dongle-PMG24、Dongle-LMG21
Plain Text
COM port name: /dev/ttyUSB0 //configure according to the actual serial path
Type: SL-EFR32(EMBER) FW 7.4.x.x
For ZBDongle-P(SONOFF Zigbee 3.0 USB Dongle Plus)
Plain Text
COM port name: /dev/ttyUSB0 //configure according to the actual serial path
Type: TIZ-Stack/CCxxox
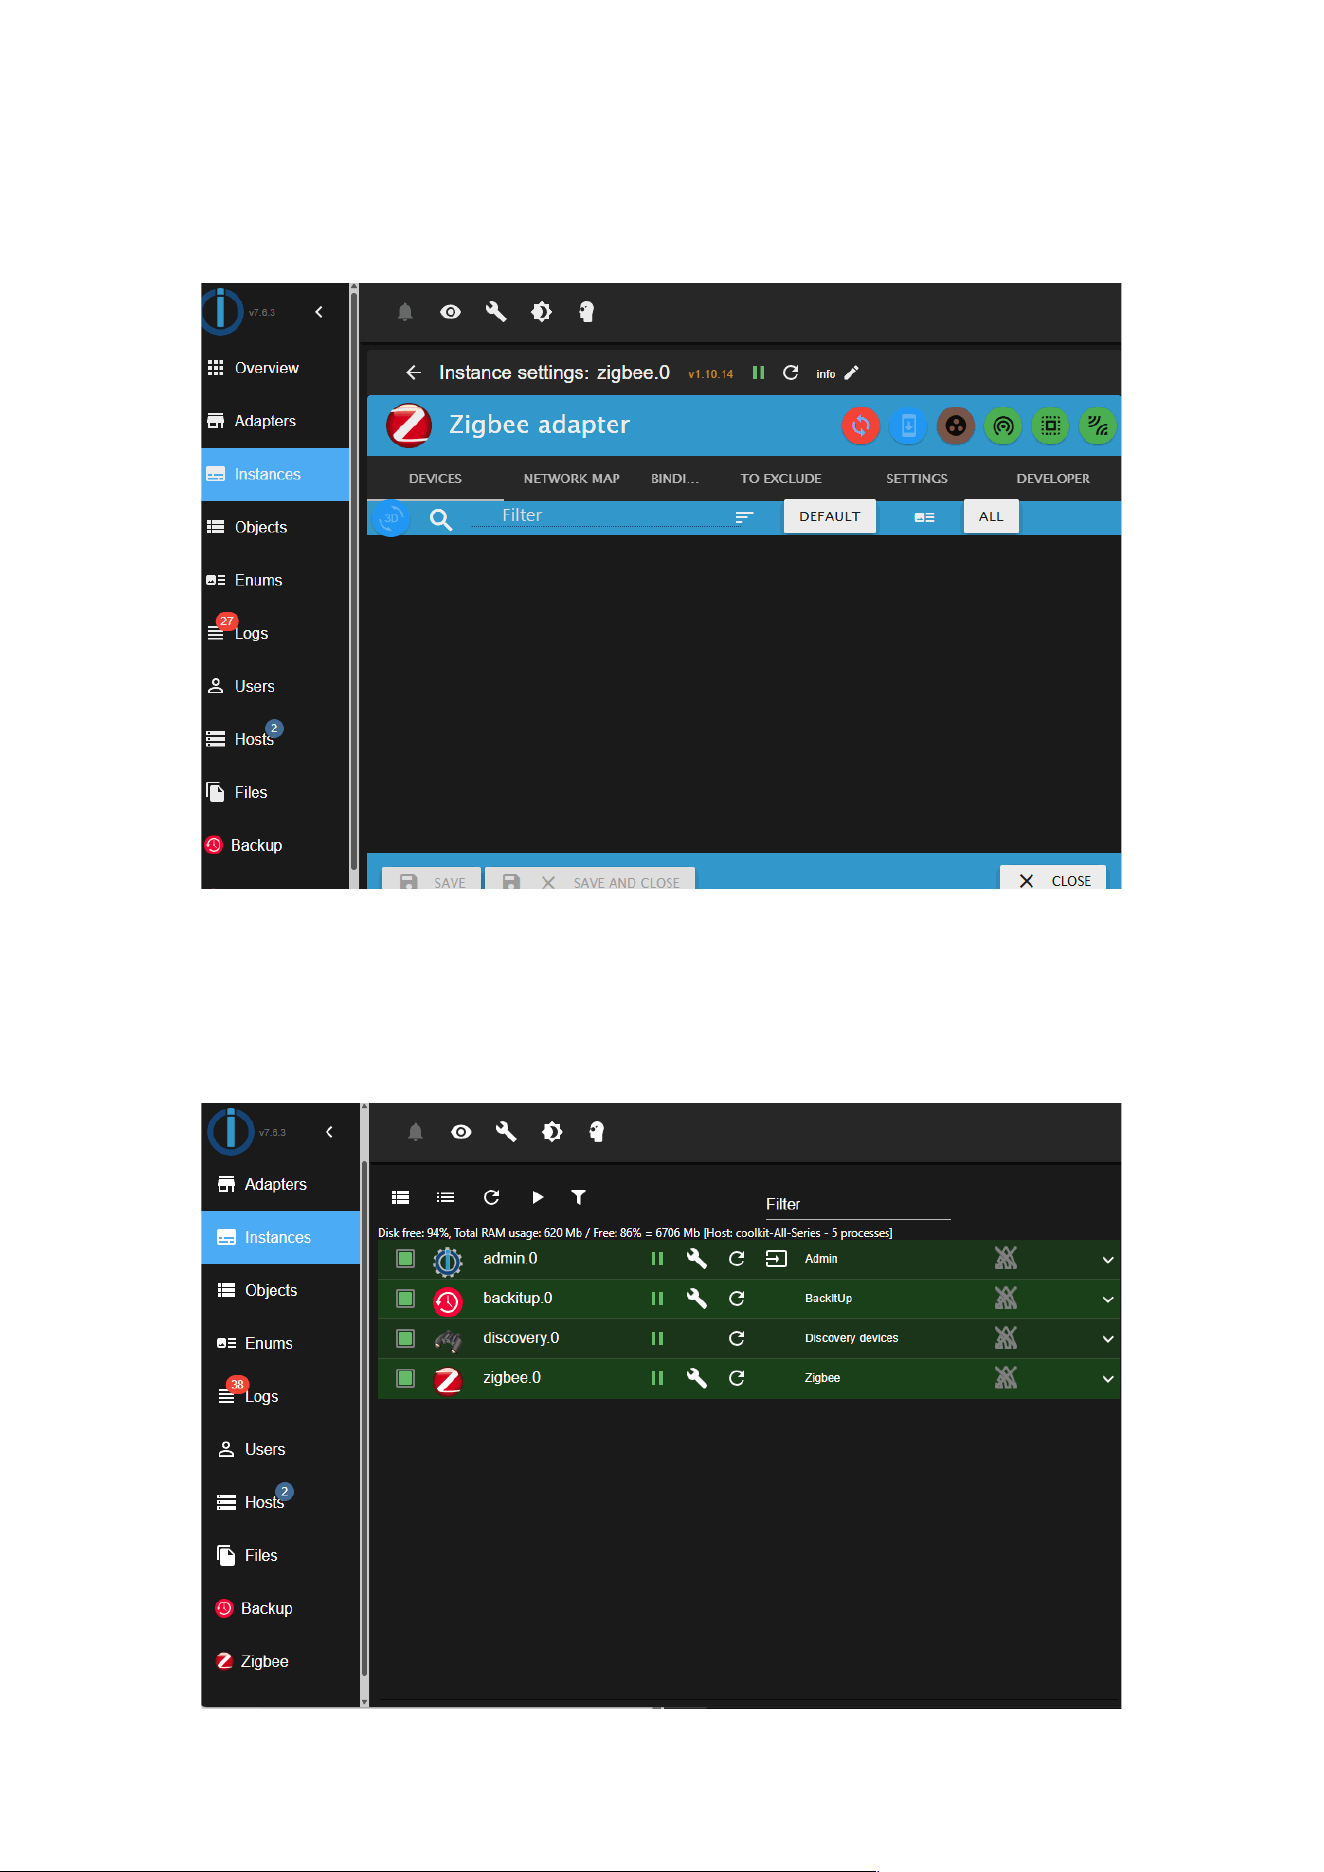
After completing the configuration, click “Save”.
Wait until the status icon turns green — this indicates that the configuration is
complete.
2.3.5.4 Step 3: Add a Zigbee Sub-device
Put your Zigbee device into pairing mode.
Then, go to the Zigbee page and click the “Pairing” icon to start searching for
and automatically adding Zigbee devices.

3. How to Upgrade/Flash Firmware
All SONOFF Dongle products support firmware switching (including Zigbee
Coordinator, Zigbee Router, and other firmware variants) through the
SONOFF Dongle Flasher tool.
• SONOFF Dongle Flasher: https://dongle.sonoff.tech/sonoff-dongle-
flasher/
• Another option: Flash firmware via Home Assistant Add-on
3.1 Supported Firmware
For ZBDongle-E(SONOFF Zigbee 3.0 USB Dongle Plus V2)
Firmware Type
Supported
Flashing Guide
Zigbee NCP
✅
Click to view
Zigbee Router
✅
Click to view
OpenThread RCP
✅
Click to view
MultiPAN RCP
✅
Click to view
Custom Firmware
✅
Click to view
3.2 How to Flash Customize Firmware
Please Check Link: https://dongle.sonoff.tech/guide/zbdongle-
e/how_to_flash_customize_firmware/
3.3 How to Upgrade Zigbee Firmware
Please Check Link: https://dongle.sonoff.tech/guide/zbdongle-
e/how_to_upgrade_zigbee_firmware/
3.4 How to Flash Zigbee Router Firmware
Please Check Link: https://dongle.sonoff.tech/guide/zbdongle-
e/how_to_flash_zigbee_router_firmware/

3.5 How to Flash OpenThread Firmware
Please Check Link: https://dongle.sonoff.tech/guide/zbdongle-
e/how_to_flash_openthread_firmware/
3.6 How to Flash MultiPAN Firmware
Please Check Link: https://dongle.sonoff.tech/guide/zbdongle-
e/how_to_flash_multipan_firmware/
3.7 Flash Firmware via Home Assistant Add-on
Please Check Link: https://dongle.sonoff.tech/guide/zbdongle-e/flash-
firmware-via-home-assistant-add-on/
When flashing with the SONOFF Dongle Flasher, choose the firmware, the
correct function, and then start flashing.