WARNING
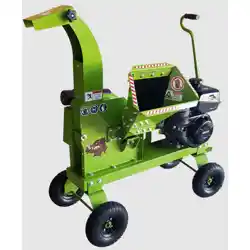
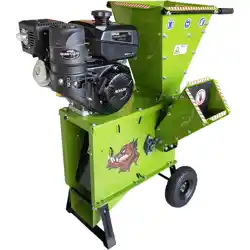
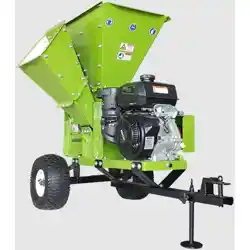
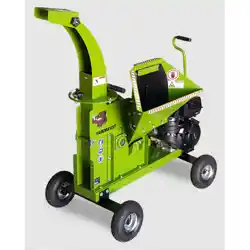
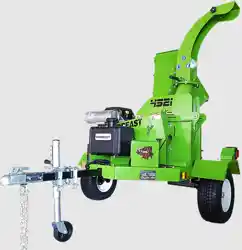
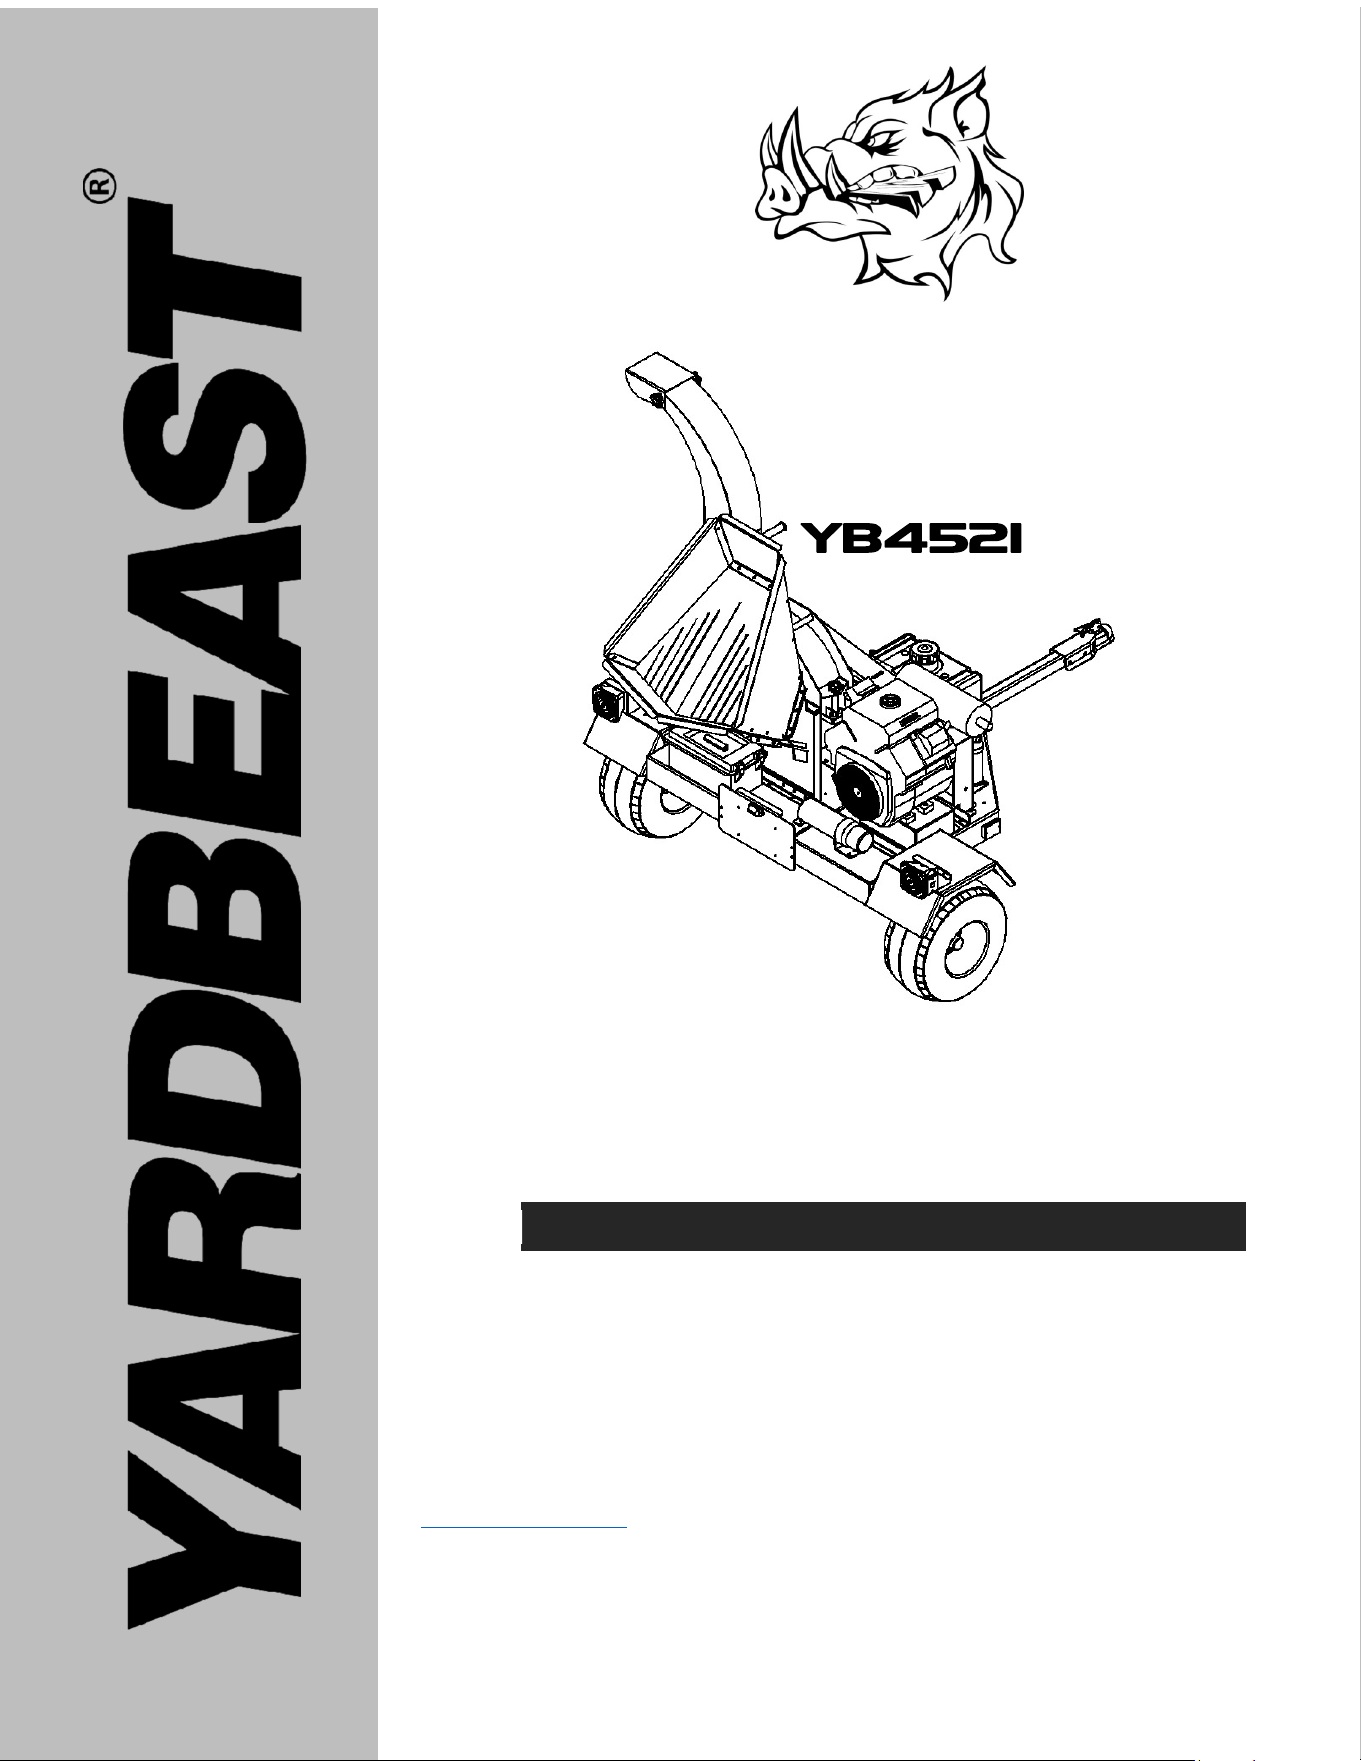
Commercial Grade Wood Chipper
V1.0
Read and follow all instructions in this manual before attempting to operate
this machine. Please keep this manual available for consultation at any
time. Read it thoroughly and become familiar with the operating
instructions, maintenance and security indications. Failure to follow these
instructions can result in serious injury to yourself and others.
4.5”
(114mm)
Rederick Metal Industries Corp.
1925 NW21st Terrace
Miami, FL 33142
www.yardbeast.com | 305.396.3396
USER MANUAL

We greatly appreciate that you have purchased a
wood chipper manufactured by us. The same has
been designed and carefully fabricated to give you
excellent performance and reliability. We truly
hope it exceeds your expectations.
Please read carefully and follow all the instructions
in this manual before operating this wood chipper.
This document tells you how to set up, operate and
maintain this machine safely and easily. Make sure
to follow all recommended safety measures, and
instruct any other person that will be operating this
chipper. Failure to comply, could result in personal
serious injury to the operators and others.
All information contained in this manual
refers to the latest product information available at
the time of printing. It is recommended that you
review the manual frequently to familiarize yourself
with the unit, operation and its features.
We are developing and improving our equipment
continuously through our Kaizen philosophy. If you
have a problem, doubt, or if any information in this
manual that does not match what is on your
wood chipper, don't hesitate to
contact your dealer or authorized service
representative, or in any case please contact us
directly. The phone numbers, web site and mailing
address of Rederick Metal Industries Corp. are
located on the next page. In the case that your
wood chipper is equipped with an engine; the
engine manufacturer is responsible for all matters
related to the performance, power output,
specifications, warranty and maintenance of it.
For more information see the Owner’s Manual/
Operator delivered by the engine manufacturer.
This is shipped in a separate packaging, together
with this unit.
INDEX
Safety Measures…..............…………………...…...3
Train Yourself / Preparations.............…….….……6
Assembly of the unit………........…………………..9
Operation..........……………………………………..10
Controls and Features……………………....……..11
Maintenance…….……………….……………...….12
Troubleshooting…………............………………….13
Spare Parts List..……………….……………..14
PRODUCT REGISTRATION
Before you assemble and use your new wood
chipper, please locate the
information plate on the unit and record the
information in the boxes located at the bottom of
this page. The plate is located in the lower left part
of the trailer base facing the tow tongue. If you
have to request technical support via our web site,
phone customer support, or a dealer/servicing
dealer, you will need this information.
VIN NUMBER:
__________________________________________
COMPLIANCE WITH STATE LAWS
This chipper complies with all FMVSS requirements
for highway towing and local registration at your
state DMV. Depending on which state you are
located, please make sure if you are required to
register the trailer and have license plates for it
before you tow it out on the streets.
This chipper is manufactured in Nicaragua, Central
America. A certificate of origin is provided with the
chipper for trailer registration purposes.
CUSTOMER SERVICE
In case you have problems to assemble this wood
chipper or have questions regarding the controls,
operation or maintenance
of the same; you may request assistance
to us writing to us, email or phone call.
1925 NW 21
st
Terrace. Miami, Fl 33142
Phone: (305)-396-3396
Website contact form available at
www.yardbeast.com
email: [email protected]
For faster service we prefer you give us call or drop
us an email, that way we can also share media
such as pictures, videos, etc.
CHIPPER SAFETY MEASURES
This machine is designed to be in compliance
with safety regulations contained in this manual. As
with any type of powered equipment, an error or
negligence on the part of the operator can cause
serious injury.
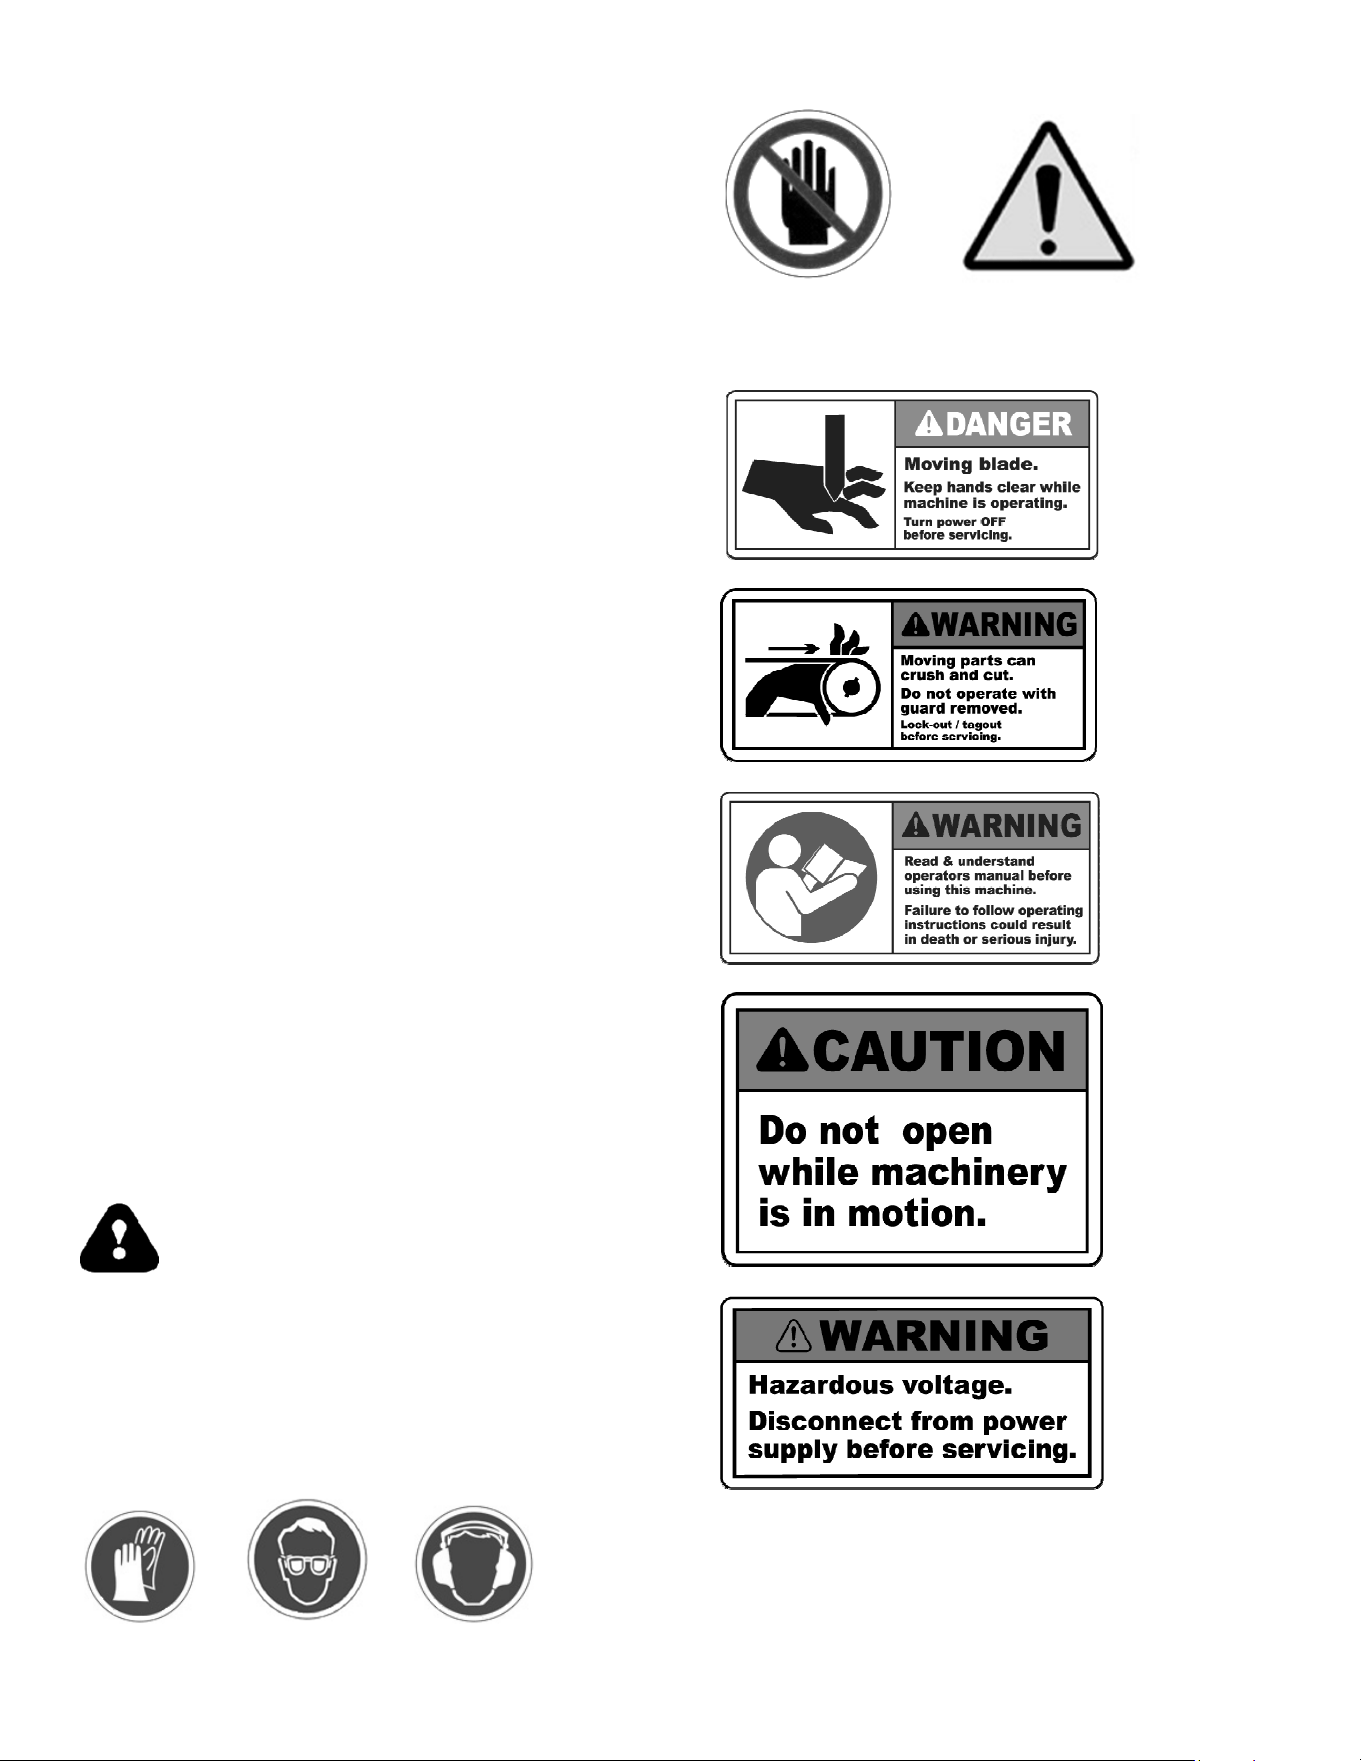
This machine is capable of amputating
fingers and hands; it also expels foreign
objects with great force, that
can cause damage to a person by facial and
body exposure. Never look directly into the
discharge area of the chipper while the rotor is in
motion.
In case of any emergency, attempt to shut down
engine and seek immediate help.
TRAILER SAFETY MEASURES
The chipper has been designed to comply with all
required FMVSS safety regulations.
If towing for the first time,please get in contact with
your local DMV about trailer towing courses.
Make sure if you are required to register and title
your trailer with your local DMV.
Never exceed road and highway speed limits.
Although this trailer has been designed for high
speed towing; we recommend not to exceed
50MPH towing speeds. Always drive on the right
lane when towing.
Always make sure you have working trailer lights.
This is required by law. When coupling the trailer to
your truck, make sure to always secure the coupler
towing pin and secure the towing safety chain.
The tires are the only components between the
machine and the ground. It is very important you
always check lube on the bearings, tire pressure,
tread condition etc.
ALWAYS USE COMMON SENSE AND EXERCISE EXTRA
CAUTION WHEN TOWING.
The presence of this symbol indicates that
these are important
safety instructions that must be followed in
order to avoid putting at risk your personal safety
and other’s. Read and follow all the instructions in
this manual before operating this equipment.
SYMBOL IDENTIFICATION
Wear safety wear safety wear safety
Gloves Goggles Ear muffs
Do not place Warning
Your hand
Beyond this
Point.

Risk of Electrical Shock
KEEP WARNINGS IN MIND
Protective equipment required for the operation of
this equipment..
Safety goggles
Safety gloves
Ear Protection (muffs or plugs) Appropriate
outwear(preferably long- sleeved shirts and jeans
for work)
Helmet (not supplied).
If you will be working in the streets, it is also
recommended you use high visibility clothing and
safety vest (not supplied).
TRAIN YOURSELF ON THE CHIPPER
1. Read, understand and comply with all
instructions included in this manual and in the
machine before assembling and putting it into
operation. Keep this manual in a safe place for
future reference, as well as for ordering spare parts
or performing service.
2. Familiarize yourself with all of the controls. Please
know how to stop the chipper when it is operating
and how to manipulate the controls quickly.
3. Persons older than 16 years of age, must
read and understand the operating
instructions as well as the safety rules contained in
this manual. We suggest no persons below 16 years
of age should operate this equipment.
4. Without receiving appropriate instructions,
do not allow anyone to operate this machine.
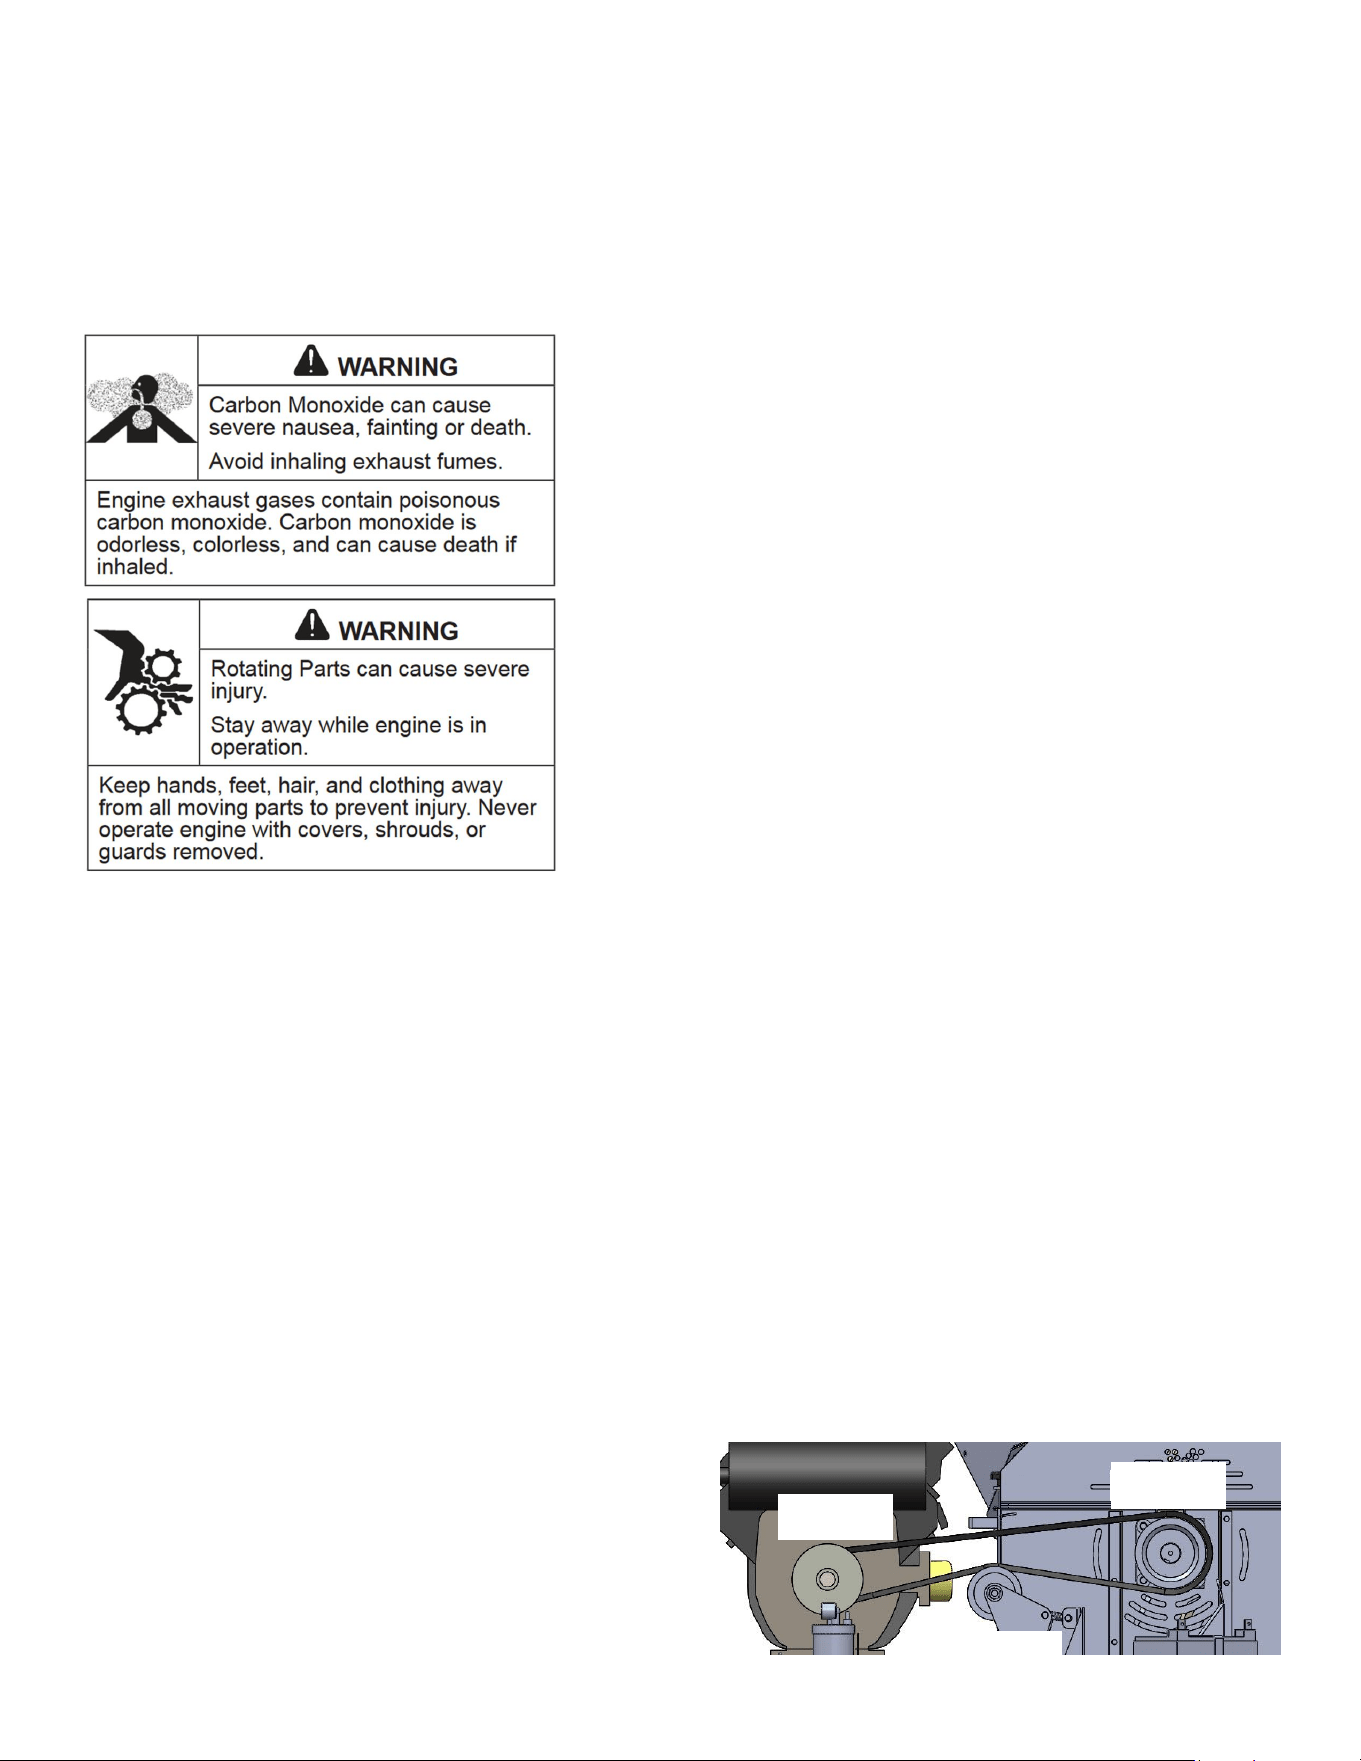
5. Do not turn ON the chipper in closed spaces or
in an area with poor ventilation. Exhaust gases
from the engine contain carbon monoxide, a
lethal gas which is odorless.
6. Use appropriate protective equipment on each
operation.
7. Don't put your hands close to the parts that
are in motion or inside the feed hopper
-as indicated in the prints - when in
operation. Be careful not to touch any surface
which is heated during the operation
and remains as such for a long time after the wood
chipper is shut down.
8. Stay away from the discharge, wood
debris is expelled with great speed that can
produce facial or body damage.
9. Do not operate the chipper if its belt guard is
removed.
10. Keep the bystanders away from the chipper
while it is running. Do not allow the
presence of minors in the work area. Stop the
machine if anyone enters the area.
11. Turn off the engine and disconnect the spark
plug before servicing the equipment.
12. Always operate the chipper coupled to the
vehicle. DO NOT operate the chipper on its trailer
jack as it is not safe; there is no way to lock the jack
in position.
13. Never stop paying attention to the chipper
while in operation. If you need to check for
something on the chipper or outside the chipping
area, throttle down engine until clutch is
disengaged, allow rotor to come to a full stop and
turn off the chipper.
TRAIN YOURSELF ON THE TRAILER
1. Always comply with the law regarding towing,
lightning and stowing of the equipment before
going on the road.
2. All trailer nuts are safety hex nut, that is, they are
fitted with a nylon seal that prevents the nut from
getting loose on time. If for any reason you must
loosen one of these nuts, please make sure you
replace with a new safety hex nut (commonly
available) as the old nylon seal is no longer reliable
to hold the nut in place.
3. Make sure to check lightning, all side marker
lights, license plate light, tail and stop/turn lights.
4. Always maintain a good tire pressure per
manufacturer specifications.
5. Always make sure the trailer jack is properly
stowed before moving.
6. Always check coupler setup and make sure the
safety tow chain is properly secured on the trailer
and the truck before moving.
7. Always make sure that the trailer is riding in level
with the road. Never tow at extreme angles.
8. Avoid towing in inclement weather unless really
necessary.
9. Always plan your trip beforehand. Make sure that
the trailer will go through tight access ways.
10. Check periodically the wheel inner bearing
lubrication, particularly on long travel services. Pay
attention if the wheels are getting abnormally hot.
11. When driving always maintain a proper speed;
and save your distance from the car upfront.
Sudden and hard braking may make your trailer
skid sideways.

Preparations checklist before chipping
1. Carefully inspect the area where the equipment
will be used.
2. Protect your eyes, always use safety
glasses while operating this machine.
Otherwise, objects thrown that bounce can
seriously injure your sight.
3. Use ear protection. This will protect you from the
engine noise and noise produced by the chipper
when you feed the material into the hopper.
4. Use work gloves with palm of leather or industrial
grade cotton/rubber when you feed the material
into the hopper. Before you turn on the
machine, check all bolts and accessories to
ensure that the machine is in safe operating
condition.
5. Perform a visual inspection of the machine in
frequent intervals to check whether the chipper has
suffered any important damage resulting from
operation.
6. Maintain and replace the safety labels and
instructions as necessary.
7. Make sure the discharge is directed at a safe
discharge zone such as truck bed, or forest greens,
or any other appropiate area away from
bystanders.
Safe Handling of Fuel
To avoid personal injury or property damage, be
very careful when handling fuel. The fuel that is
used, - gasoline- is highly flammable and the vapors
are explosive. You can be seriously injured if fuel is
spilled on yourself or your clothes which can
ignite. Wash your skin and change clothes
immediately.
1.Use only containers approved for Gasoline or
Diesel .
2. Never fill containers inside a vehicle or truck.
Always place containers on the ground away
from your vehicle before refilling.
3 . Keep the nozzle in contact with the lip of the
inlet to the engine's fuel tank or container at
all times until it is full at recommended fuel tank or
engine manufacturer specifications.
4 . No smoking should take place close to the
chipper. Turn off all cigarettes, cigars, pipes and
other sources of ignition.
5. Never refuel the machine indoors or just after
operation. Please wait 2 minutes before refueling.
6. Never remove gas cap or add fuel while the
engine is hot or running . Allow engine to cool at
least two minutes before re- fueling .
7. Never overfill the fuel tank . Fill tank to no more
than 1/ 2 inch below the base of the neck of the
thread to allow room for fuel expansion.
8. Place the fuel cap back on and tighten securely .
9. Clean up spilled fuel on the engine and
equipment. Move machine to another area. Wait 5
minutes before starting the engine.
10. The carbon vapor filter located besides the tank
contains the fuel vapor from going into the
atmosphere. This is required per CARB regulations.
This component is sealed and does not need any
maintenance.
Operating your Wood Chipper
1.Check the oil and fuel level before starting the
engine.
2 . Do not put hands near rotating parts or
power inputs . Contact with the chipper and
rotating parts –while in operation- can seriously
damage fingers, hands .
3. Before operating the machine , open it. Check
and clean the rotor of foreign debris
objects , make sure the cutting chamber is empty
and free of any foreign material.
4 . Thoroughly inspect all material to to be chipped
and remove any foreign objects - such as nails,
glass, steel wire, etc- that could cause injury to
you or damage the machine.
5 . Do not attempt to chop material larger than
specified in this manual. Puts you at risk of injury or
damaging the chipper.
6. Keep all guards and safety elements in place
and in good condition.
7. Do not operate this machine while under the
influence of alcohol or drugs.
8. Never operate this machine without good
visibility or light .
9. If the engine is hot, do not touch as it may cause
severe burns.
10. Do not attempt to move the chipper while the
engine is running .
11. never overreach over the hopper to clear a
branch with your hands. User another branch stick
instead. NEVER reach your hands past the guard
point.
12. When chipping, if for some reason the branch
gets stuck in the feed chute and rotor is held in
position, quickly throttle down the engine to
disengage the clutch.
13. To clear the branch, make sure to shut engine
off and that rotor is at a completely still. Open the
top half and attempt to clear the branch from the
feed opening.
14. Never feed the chipper anything else other than
wood. This chipper is designed to withstand impact
frequency of dry and green wood material
including leaves.
15. Always check on your blade sharpness, this is
crucial to an optimum performance.
Maintenance and Storage
1.Never tamper with the safety components. Check
periodically that they are functioning properly.
2 . Make sure all screws, bolts , pins and cotter
pins are in good condition to make sure the
machine is in safe operating condition . Also ,
visually inspect the chipper to check for damages
and determine if repair is necessary.
3. Lubricate bearings as often as maintenance
chart indicates(found below) to avoid wear ; it also
protects from corrosion and reduces heat stress
thus extending their operating life.
4. Before cleaning, repairing or inspecting
the chipper, stop the engine and check that all
moving parts have stopped.
5 . Do not change the engine governor settings or
overspeed the same. The governor controls the
maximum safe operating speed of the engine.
6. Maintain or replace safety and instruction labels
as necessary.
7. Follow the instructions in this manual for safely
storing this machine during off season.
8. Never store the chipper or fuel container
in an enclosed space where there is presence of
flame, spark or pilot light such as water heaters,
furnaces, clothes dryers, etc.
9. Allow machine to cool at least 10 minutes before
storing after shutting it down.
10. Always refer to the engine manual for proper
instructions for off-season engine storage.
11. If you need to empty the fuel tank, do it
outdoors and away from possible spark sources.
12. Observe the local rules for proper disposal laws
for oil, fuel and greased towels.
ASSEMBLY OF THE UNIT
Tools needed for the assembly of this unit:
1- Rubber mallet
1- Hammer with nail remover
2- 7/16” hex wrench
2- ½” hex wrench
2- 9/16” hex wrench
1- 11/16” hex socket
1- 3/8” hex socket
1- pliers
1- ratchet drive
1- ratchet extension
1- small scissor jack & small wood blocks
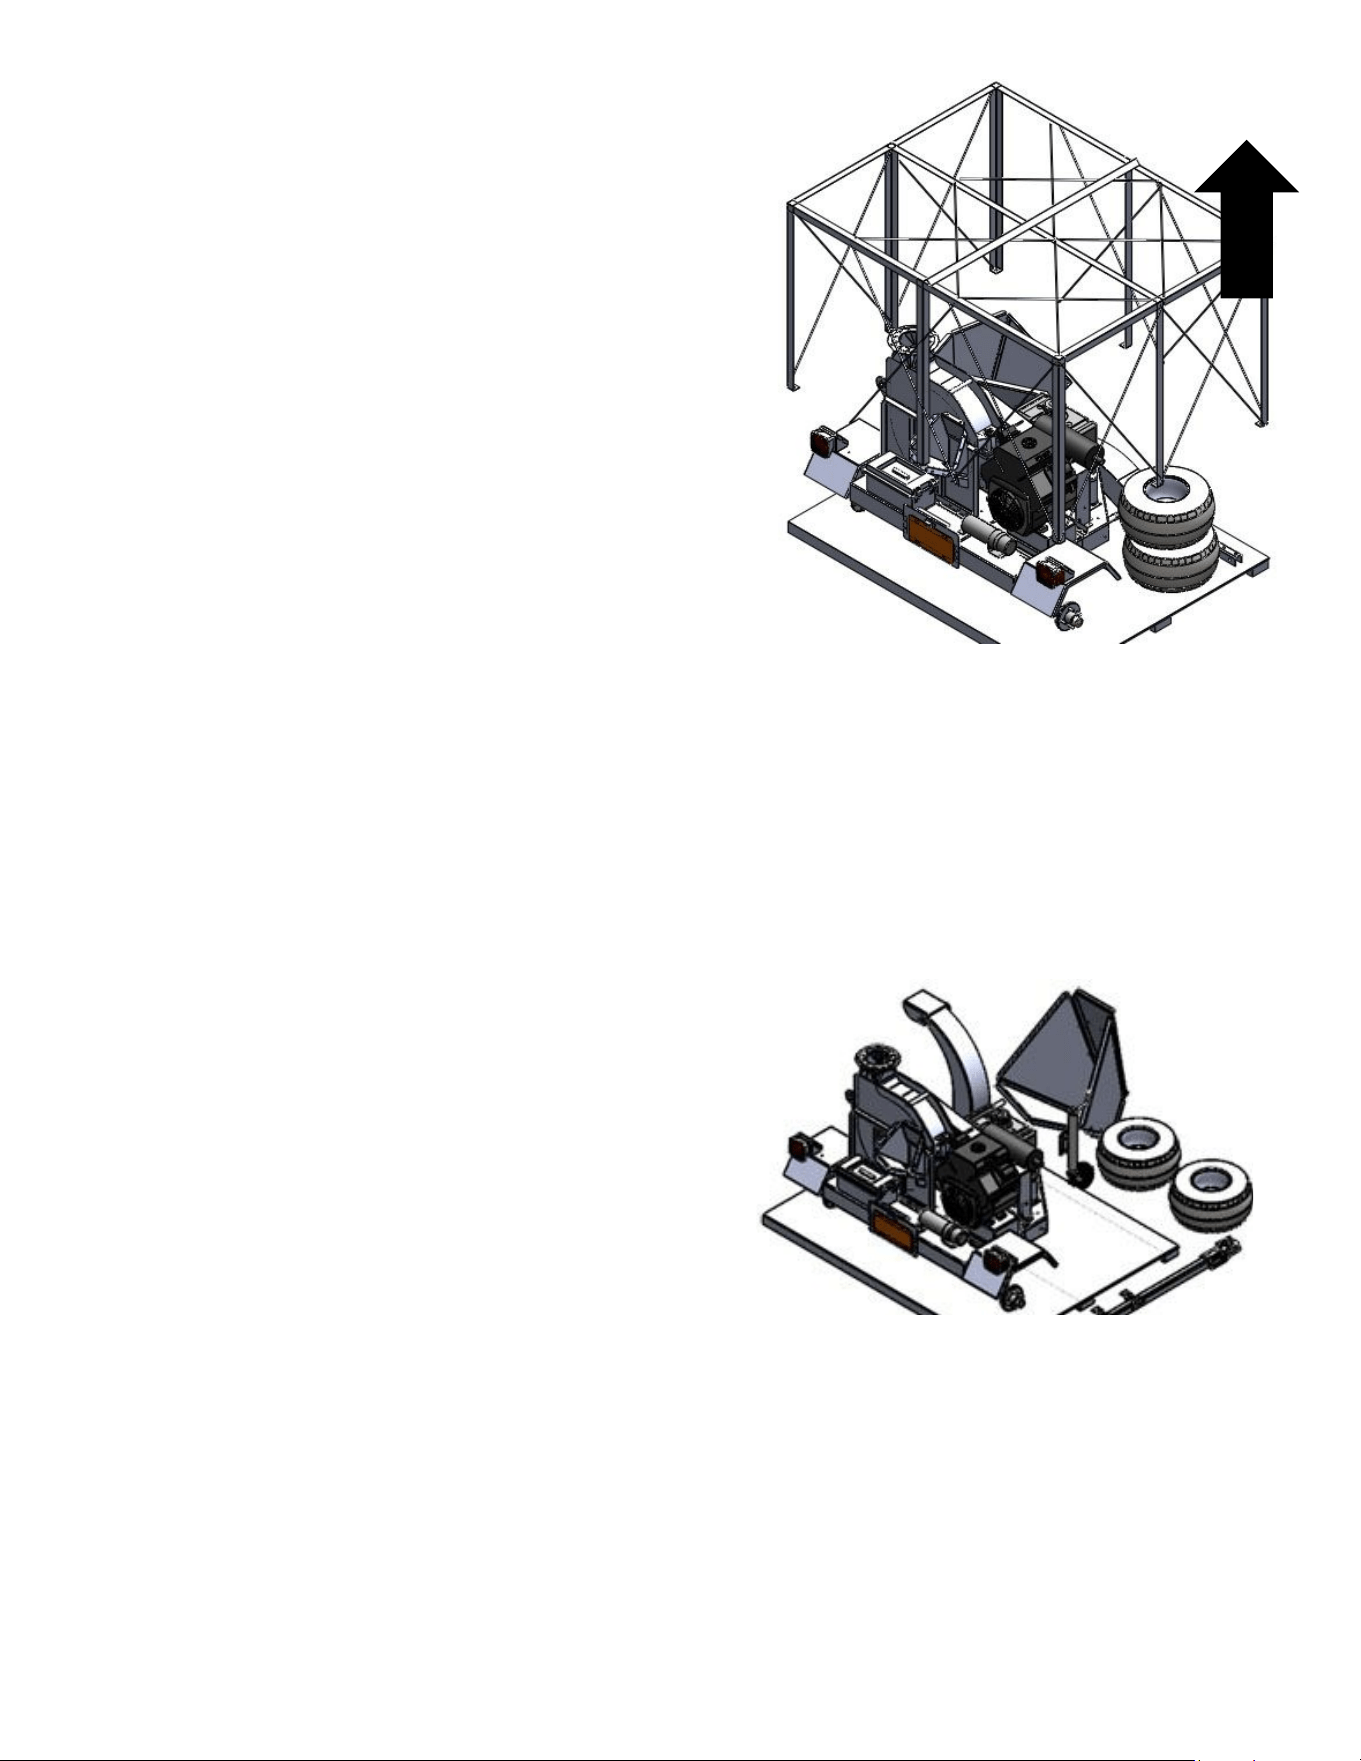
Step 1 Lifting cage out
With the 3/8” hex socket loosen the 4 screws
attaching the cage to the pallet. You can also do
this with a 3/8” hex wrench.
Make sure you have another person to help you lift
the cage up as it is too big for one person only.
Step 2 Take apart components from the pallet.
Please take out of the packaging all components
strapped with stretch wrap such as wheels, trailer
tongue, feed hopper, etc. Make sure to remove
step blocks that hold the axle in place with a
hammer (use the nail remover side).
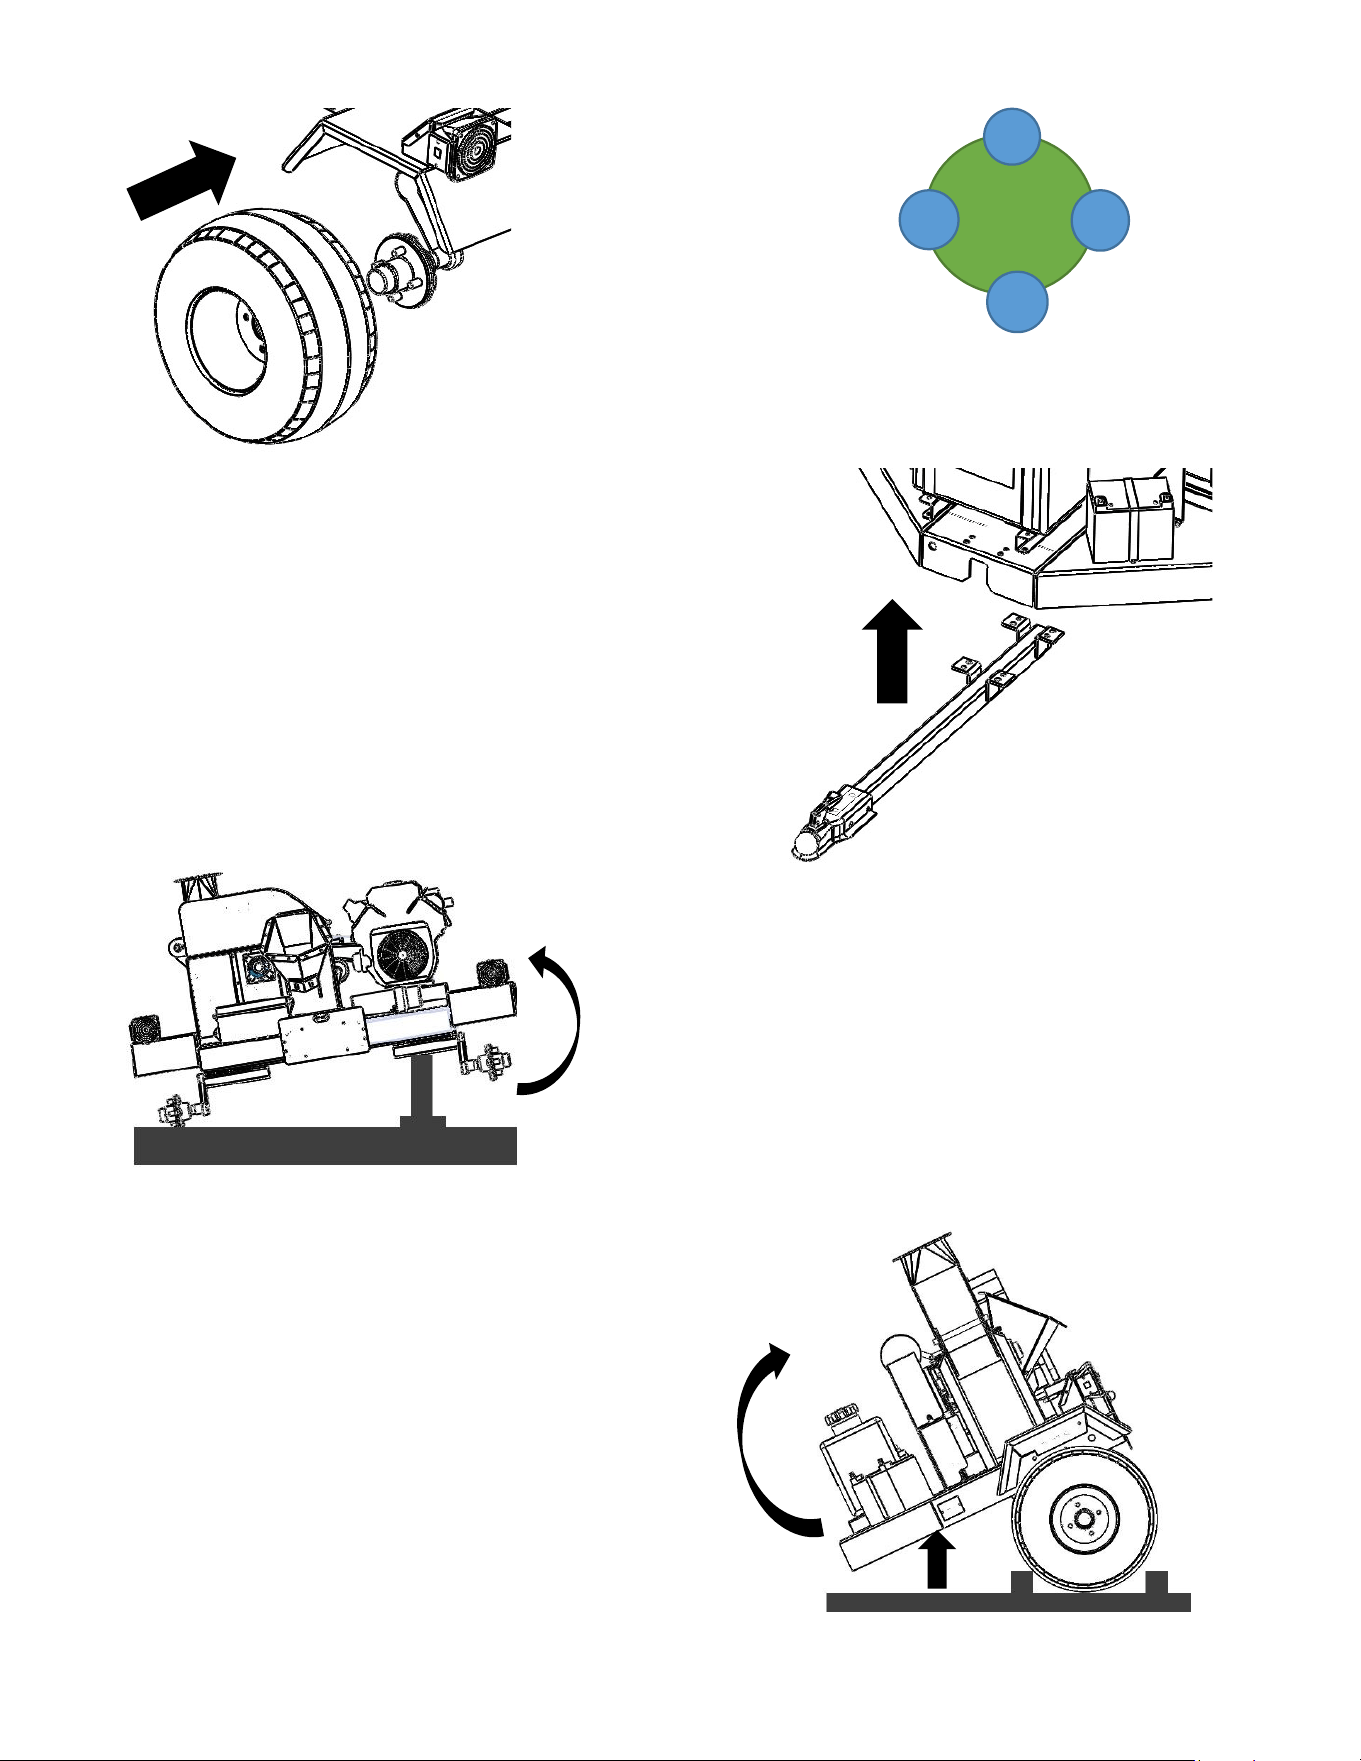
Step 3 Wheel assembly
With the help of scissor jack, place the jack
underneath the trailer close to one of the wheel
hubs. Raise the trailer high enough fo the wheel to
fit. If needed, you may increase lifting height by
adding a small wood block below the jack first.
Below is a guiding illustration. Chock the assembled
wheel when inserting the other wheel.
Do not attempt to lift the unit by yourself or
someone else, please bear in mind most of the
chipper weight, more than 700lbs, is placed over
the wheel shafts.
Once height has been reached insert wheel into
the wheel hub. Attach the wheel with the wheel
lugs. Do not tighten with drive until the unit has both
wheels fitted and the trailer is resting on the floor.
Wheel nuts must be tightened in stages. Begin
tightening by hand to prevent cross threading. Then
torque each lug nut to 20-25 ft-lbs, and then torque
to 50-60 lbs-ft. Finally, torque the lug nuts to 90-120ft-
lbs.
Tigthening
Sequence:
Step 4 Tongue assembly
Remove first the front step block that secures the
front of the chipper with a hammer (use the nail
remover side).
With the help of a another person attempt to lift the
fron of the chipper high enough to place some
wood blocks underneath. Attempt to position the
jack and lift. Make sure the jack is not blocking the
area where the tongue will be assembled. See pic
below.
1
4
2
3
With the help of another person, position the
tongue and insert fasteners (from the top down).
Insert flat washer and then safety hex nut. Tighten.
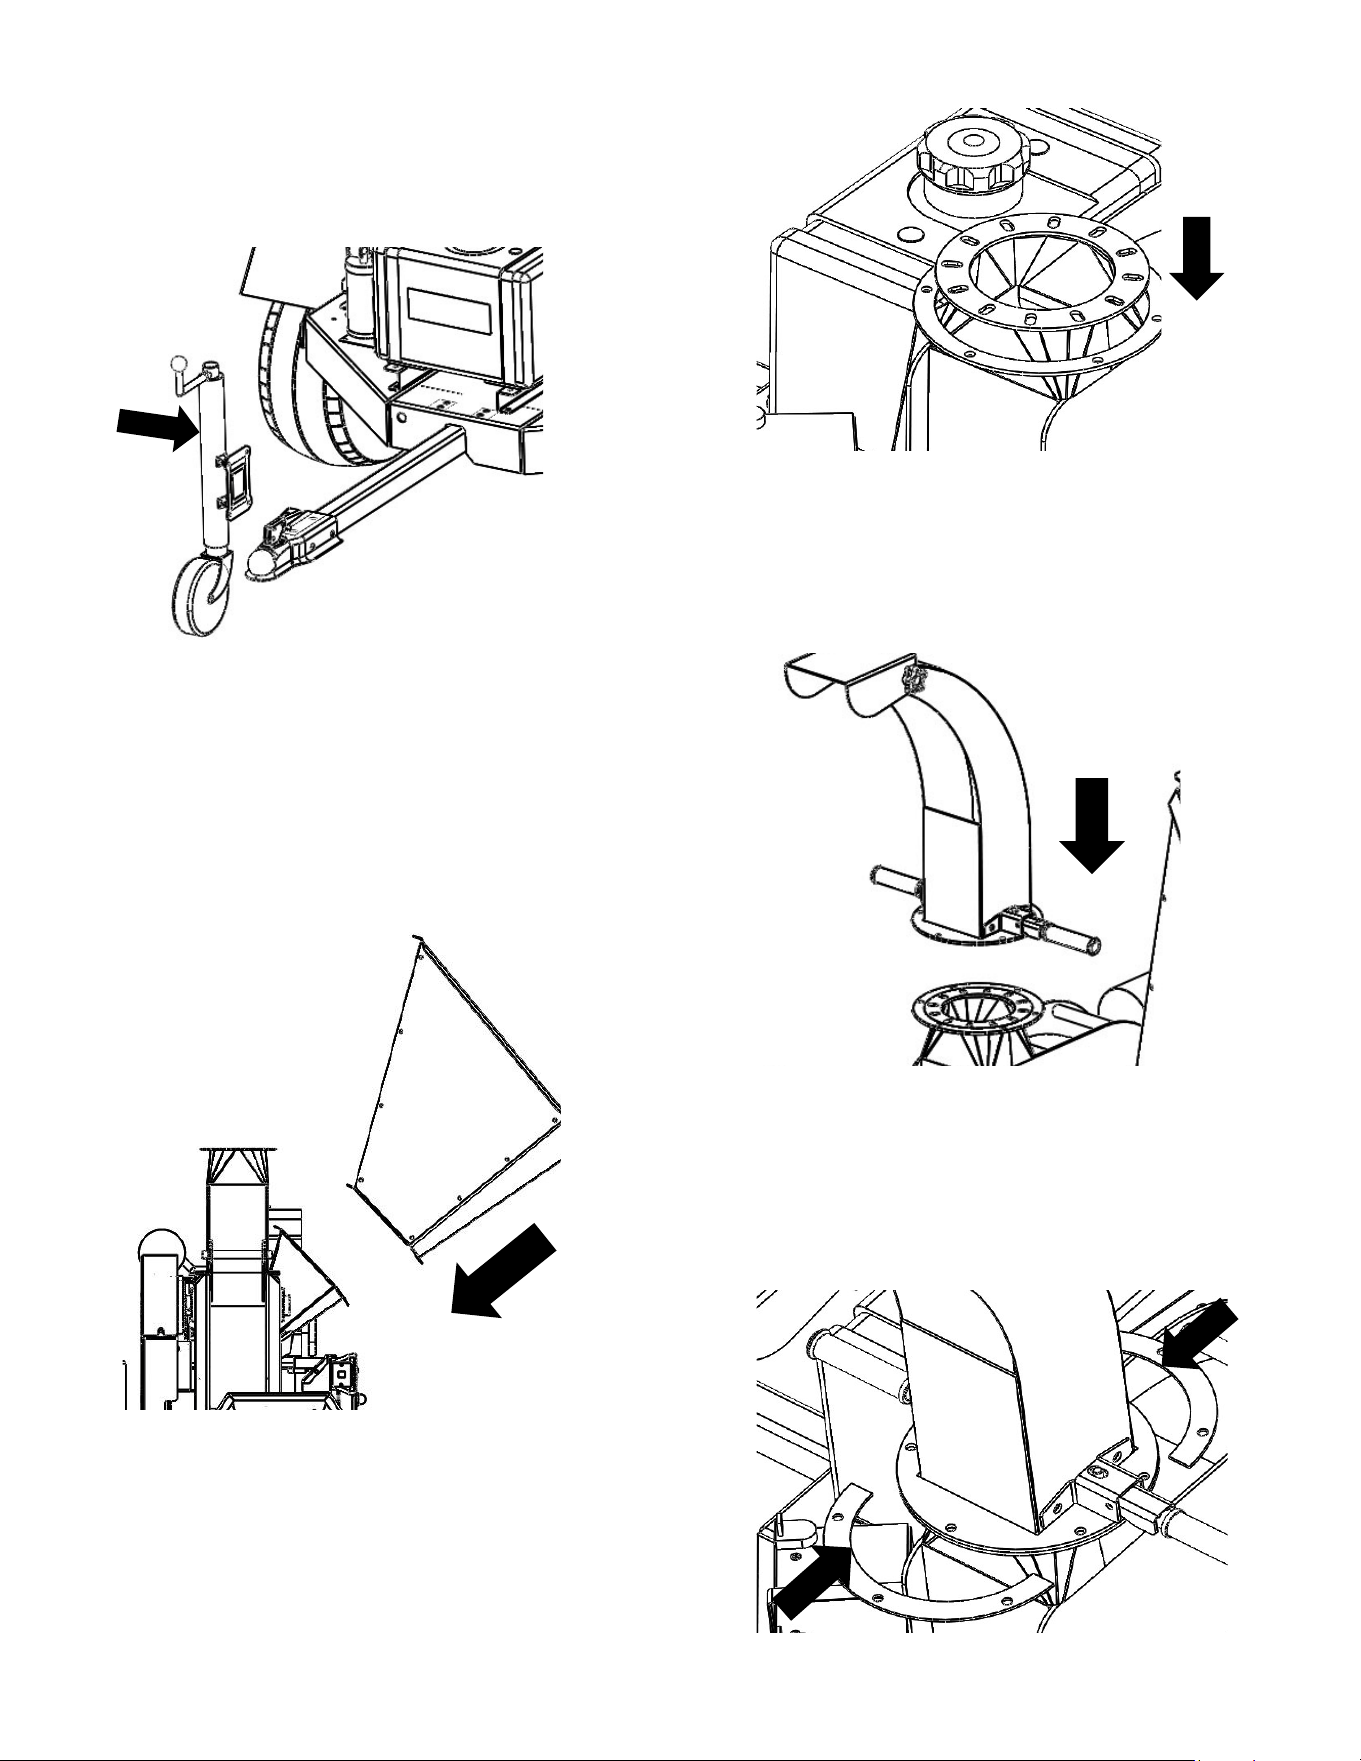
Step 5 Trailer Jack assembly
With the help of another person, position the
tongue and insert fasteners (from the top down).
Insert flat washer and the safety hex nut. Tighten.
Step 6 Feed Hopper Assembly
Hopper is already pre-assembled.
With the help of another person, position the feed
hopper into its transition-feed chute. Tighten.
Step 7 Discharge Chute Assembly
Please slide flange ring over the top neck of the
chipper. See pic above
With the help of another person, make sure to
position the discharge chute over the top neck of
the chipper correctly. Each position holding pin
must enter a hole on the top neck ring. Once this is
ready, you need to brace the chute with the
brackets below. Shown pic below.
You must tighten the brackets with the safety hex
nuts equally around the neck. You need to tighten
just enough to allow the neck to rotate while
reaching minimum play.
Tip: Grease the upper surface of the chipper neck
and the bottom ring of the discharge chute so the
discharge can rotate easier. These parts are
powder coated, they have good slipping between
surfaces, but they can get stuck under pressure.
Step 8 Connecting the battery
The only cable you need to connect to the battery
is the (+) positive one. It is generally a thick cable
(1/0 AWG) that runs from the positive terminal of the
battery to the starter motor of your engine.
To connect simply unscrew the bolt on the positive
end of the battery and place the connect as
shown on the picture below.
Slide the bolt and screw again. This connection
need to be made tight enough to ensure good
current transfer.
Step 9 Filling the engine with Oil.
In this section we give you general instructions for
for preparing your engine for starting. However it is
your responsibility to read the engine manual and
follow the instructions for preparing, starting,
operating and maintaining your engine.
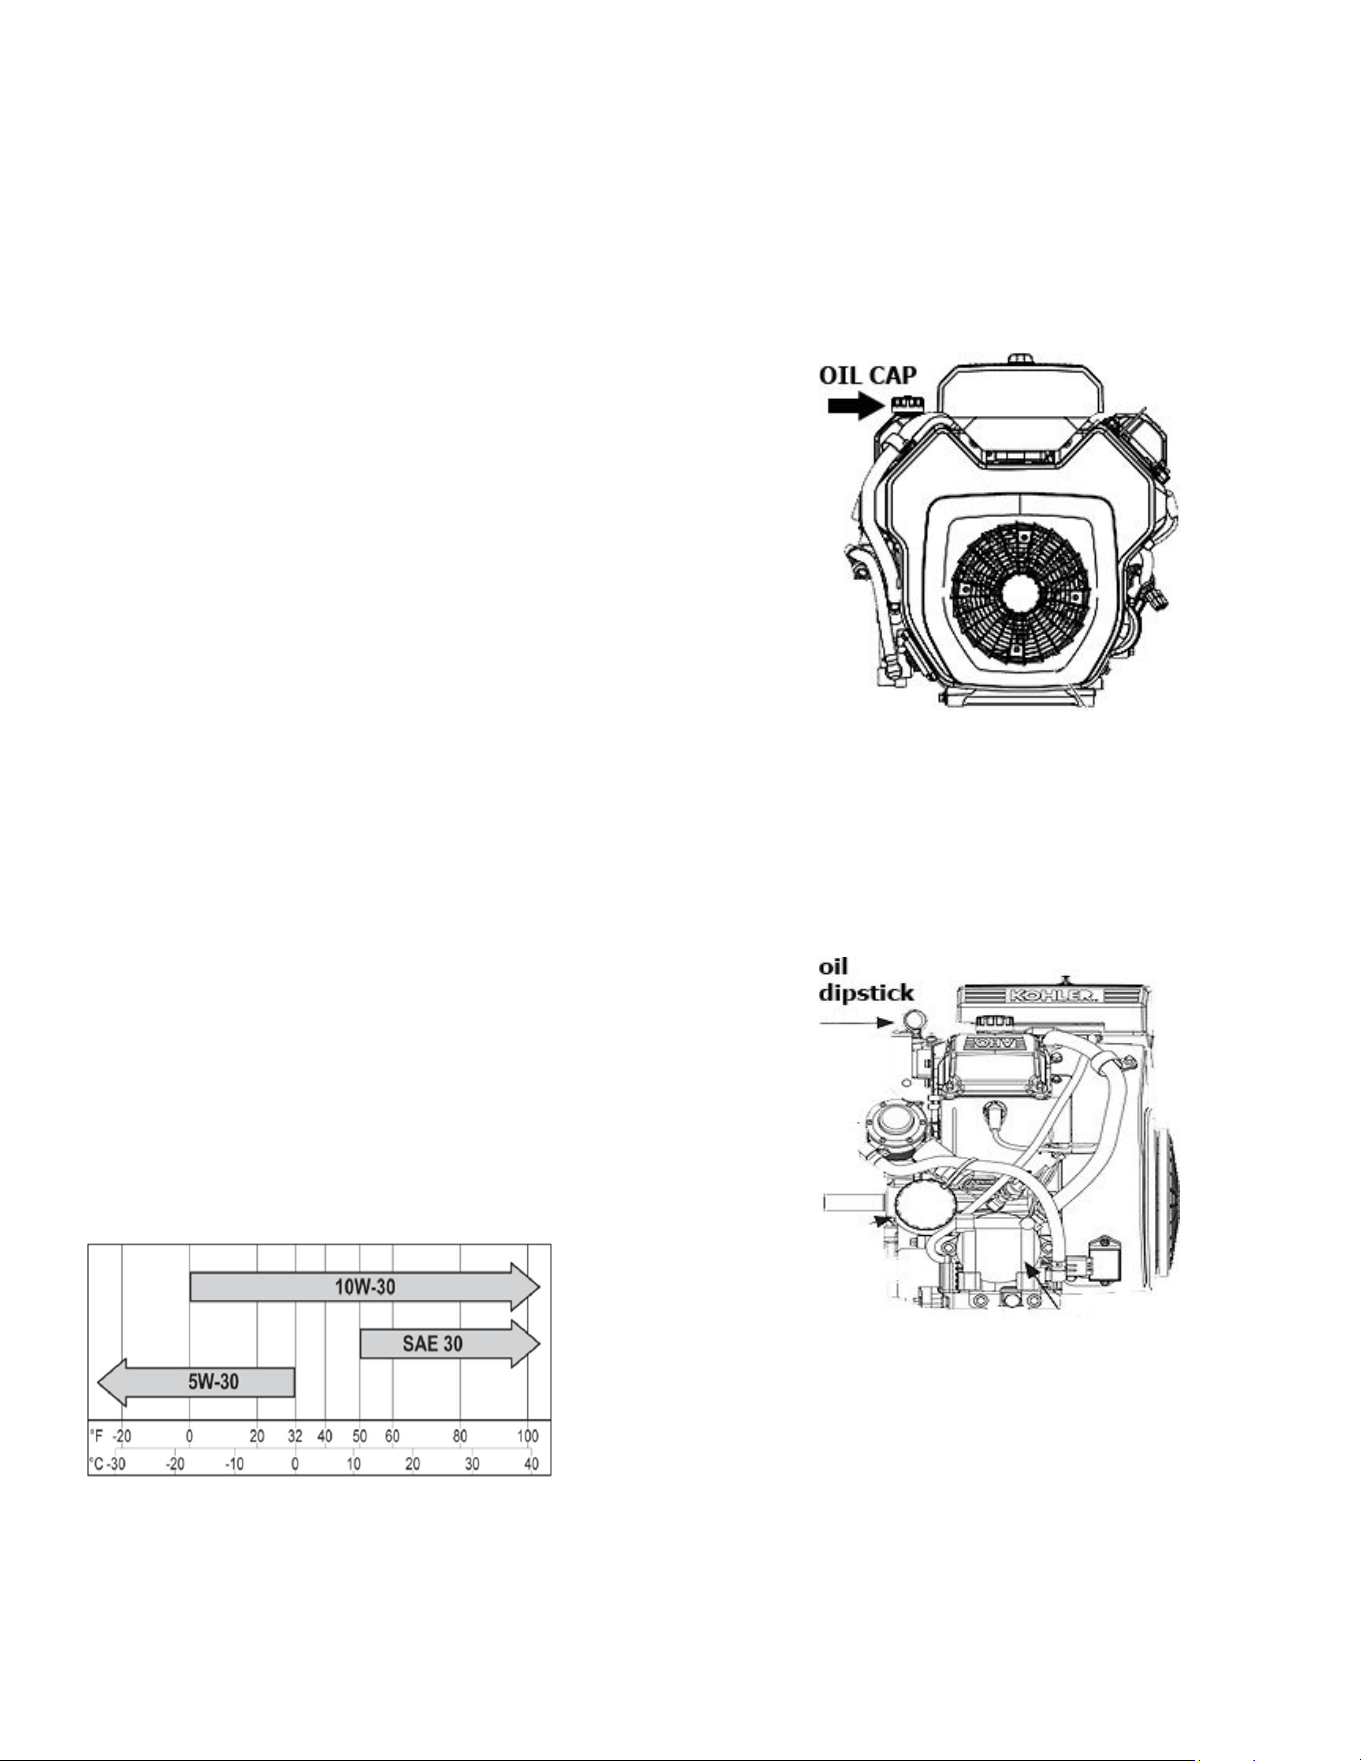
Choosing the right oil in your engine depends much
on the type of climate you will be operating. For
better reference below is a detail of the oil type
required for the working temperature range that
the engine will endure.
Therefore, we recommend using synthetic 10W-30
oil as it will be the most versatile in different types of
climate.
Please refer to your engine manual for the
amount of oil required to fill up the engine.
(if chipper is fitted with a CH640 Kohler, this
engine tipically utilizes approx. 1.9 U.S quarts
on refills. When engine is new, you may
need to add more as the oil fills up the
crankcase.
To fill the engine with oil please open the top cap of
the overhead cylinder
Add oil through a funnel at a slow pace not to spill
over. Check frequently the oil level in the dipstick.
Do not overfill.
It is important you fill the engine with proper oil
level. A low oil level will prevent engine from
starting.
Step 10 Starting the engine
CAUTION: Do not crank engine continuously for
more than 10 seconds. Allow a 60
second cool down period between
starting attempts. Failure to follow
these guidelines can burn out starter engine.
WARNING: Upon start-up, a metallic ticking may
occur. Run engine for 5 minutes. If
noise continues, run engine at mid-
throttle for 20 minutes. If noise persists,
take engine to your local Kohler
authorized dealer.
NOTE: If starter is engaged while fl ywheel is
rotating, starter pinion and fl ywheel ring
gear may clash resulting in damage to
starter.
Starting Procedure:
Place throttle control (if equipped) into idle
position. Place choke control (if equipped)
into ON position.
Turn key switch to START position. Release
switch as soon as engine starts. If starter
does not turn engine over, shut off key switch
immediately. Do not make further attempts to
start engine until condition is corrected. Do
not jump start. See your Kohler authorized
dealer for trouble analysis.
Once engine starts, we recommend allowing 5-7
minutes engine warmup. There is virtually no
external load on the engine, as the engine clutch is
disengaged at idle speed.
Step 11 Operating your wood chipper.
Once you have started the engine, at idle speed,
allow 5-7 minutes for warmup before increasing the
throttle.
Check everything is in place and that you have
completed your preparation checklist before
increasing throttle. Make sure you are utilizing
proper safety equipment.
Belt Break in
Break in of the belts to aim for maximum life and
avoid premature wear on the belts. The goal of belt
break-in is to allow some time for the belts to
properly wear and accommodate themselves to
the sheaves before applying maximum torque.
To do the belt break in, increase throttle slowly to
allow time for clutch enagement and belt break-in.
Once the rotor is gyrating and the clutch is
engaged (not slipping) keep increasing throttle up
to ¾ of the way. Please allow running the chipper
at this speed for two cycles of 20 mins each with a
cooling interval of 30 mins in between. When
slowing down the chipper, do so at a slow pace as
well.
Chipping
If chipping for the first time, it is important you start
knowing the chipper and increase your learning on
the equipment. We recommend you begin
chipping small branches and twigs and take it from
there to bigger sizes when you feel comfortable.
The chipper is able to cut branches up to 4.5”
inches in diameter. However chipping at 4.5”
requires that you feed the machine in smaller
branch pieces. This will depend on the wood
density, type of wood (softwood/hardwood) and if
green or dry.
Clutch/Engine stall
When chipping bigger or longer branches, these
will momentarily slow down the engine as the rotor
regains inertia. Sometimes, the branches will
exceed the chipper continuos chipping capacity
and take the engine RPM below the clutch
engagement speed. When this happens the rotor
will stop and the engine will get stuck at a particular
RPM (between 1800-2000RPM) where the clutch
begins to slip.
When this happens please move quickly the engine
throttle to idle position and then turn off the engine.
Open the chipper top, and try to dislodge the
branch from the blade or the opening until the rotor
is able to rotate freely.
CLUTCH
IDLER
PULLEY
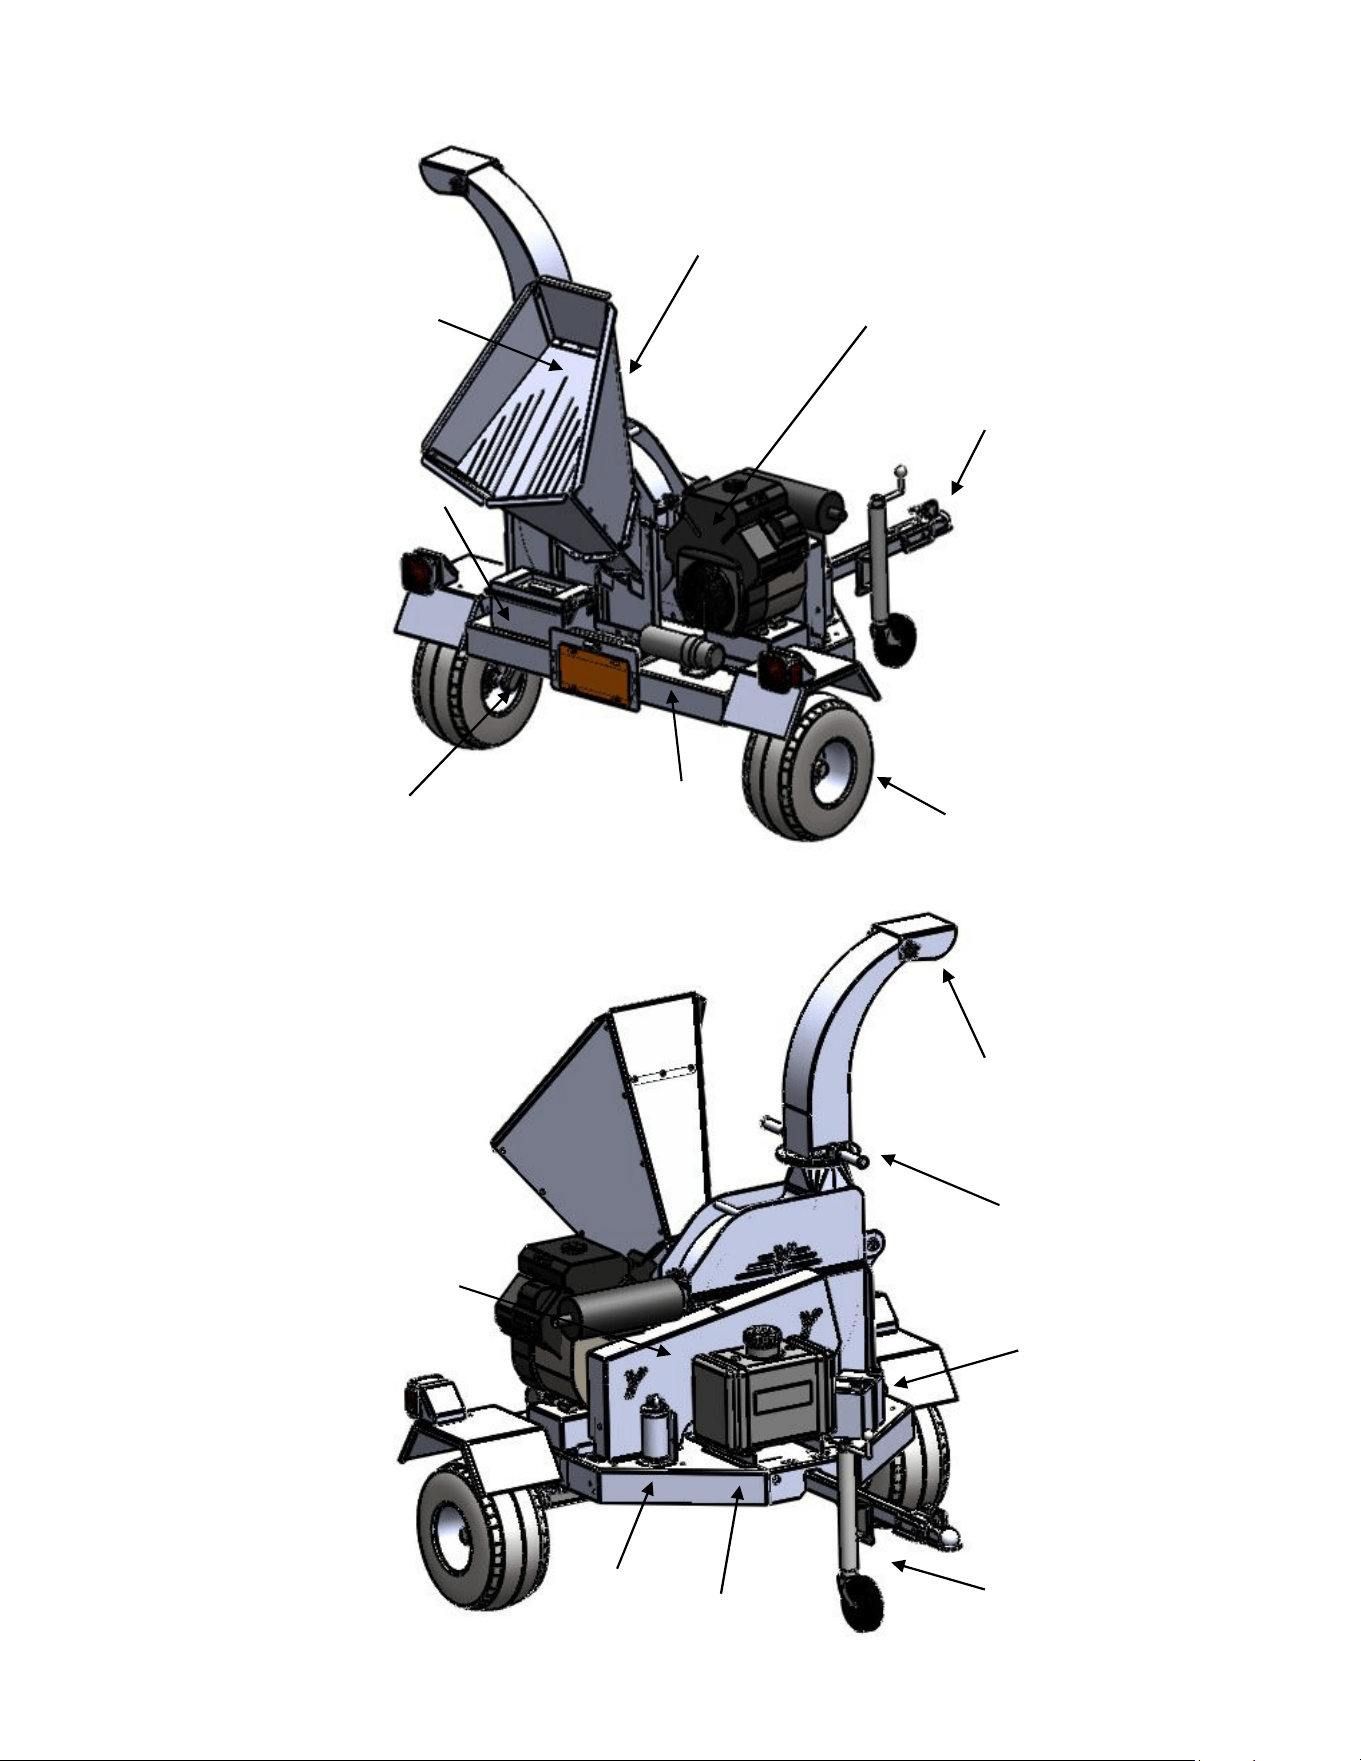
CONTROLS AND FEATURES
Fuel Tank
Trailer Jack
Carbon
Filter
Discharge
Deflector
Position
Changer
Battery
Belt
Guard
Torsion
Suspension
Highway wide
body wheel
Toolbox
Manual
Canister
Feed Hopper
Engine, Starter,
Throttle Control
Choke Control
Debris
Guard
Trailer
Coupler

MAINTENANCE
Maintenance of your trailer
It is always good practice to check your trailer
before taking each trip down the road. A round
visual inspection is a good starter to detect
anomalies such as punctured tires, foreign debris on
the trailer, open casings, tools any other material
not braced to the frame and/or prepared for
transport.
We have compiled a short list of things to check for
in the following intervals.
Before each trip:
Check for tire pressure, tire treads for
punctures and bulges.
Check that lightning accessories and trailer
cable connection are working properly.
Ensure that the coupler is working properly
and the safety pin (not provided) is in
working order.
Every 3 months or 1,000 miles:
When trailer is new please check lug bolt
torque every 10 miles, 25 miles, 50 miles and
250 miles. Then you can check every 3
months or 3,000 miles.
Check the lug bolts (wheel) and nuts.
Always tighten to recommended torque. It is
important to check for lug bolt torque to
prevent broken bolts, bearing failure, loose
wheels, and possible wheel separation.
Every 6 months or 6,000 miles:
Check the wheels for cracks or dents.
Check the hub assembly for abnormal
wear, heat load, regrease if necessary.
Check wheel bearings for wear
Check hub seals; inspect for leakages.
Replace if worn.
Check spindle nut torque values.
Maintenance of your chipper
A proper maintenance of your chipper will ensure a
good reliability of the equipment and for the
chipper to deliver its maximum performance at the
job site.
Recommendations:
Always use protective equipment such as
goggles and gloves when performing
maintenance service on the equipment.
Disconnect positive terminal of the battery
before attempting any work on the chipper.
All settings (blade, anvil, etc.) should be
checked at least once before each use.
The warranty on this wood chipper, does
not cover items that have been
subjected to wear. The warranty on this
chipper will be void if there is evidence of
misuse or negligence from the operator.
Periodically check all bolts, pins, etc.
Lubrication
Lubricate the bearings on the main rotor every 50
hours of operation.
The are two small deep groove ball bearings inside
the idler pulley that are sealed and don’t need re-
greasing. To replace when old, please call us to
reorder the items.
Fuel and exhaust gases control
Coupled to the fuel system, is a fuel vapor filter that
collects vapors and prevents them from harming
the environment (CARB requirement). This filter is
sealed and does not need maintenance. To
replace, please call us.
Please check fuel hose connections and replace
the fuel filter every 200 hours.
General Chipper Maintenance List
Lubricate rotor bearings…………..………50 hrs
Replace fuel filter…………………………..200 hrs
Replace engine oil filter…………………..200 hrs
Change engine oil….Annually or every 100 hrs
Replace engine air filter………………….100 hrs
Replace spark plugs and set gap……….500 hrs
Resharpen knives…….when dull or every 30 hrs
Check torque on fasteners…………every 3 months
Resharpening of the blade
The blade is fabricated from super durable and
wear resistant A8 steel. They are reversible blades,
meaning both sides are available for work.
We recommend you resharpen the blades when
the edge goes dull, you will see the machine will
have a harder time chipping material and the
engine will stall quicker.
Check the edge of the blades regularly. The edge

of the blades are critical for optimum performance
of the chipper. It is recommended you resharpen
the blades with a precision angle grinder. You must
always follow the same edge angle and make sure
when resharpening, not to overheat the surface as
it will affect the hardness.
When reinstalling the blade we recommend you
adjust the gap between the blade and the anvil at
a minimum of 3/16”. You may adjust the anvil for
better cutting experience (shorter gao for
hardwoods, and larger gaps for softwoods or green
branches with leaves).
When reinstalling the blade make sure to tighten
the bolts to 57ft-lbs of torque.
When reinstalling the anvil make sure to tighten the
bolts to 25 ft-lbs of torque.
TROUBLESHOOTING
Problem Cause Solution
Engine does not start
1. Spark plug is disconnected
2. the fuel tank is empty
3. Shut-off fuel valve is closed
4. Dirty air filter
5. The carburetor is dirty
6. Low-voltage battery
7. Faulty Cable connection
8. Faulty engine starter
1. Connect the cable spark plug
2. Refill fuel tank
3. Turn the fuel valve to ON
4. Clean or Replace air filter.
5. Contact your nearest engine
authorized workshop.
6. Recharge or replace battery.
7. Check cable continuity for
broken cables
8. Contact your nearest engine
authorized workshop.
Low blade performance
1. The blade is dull
1. Resharpen or reverse edge
Low engine performance
1. Blade is dull
2. Air filter is dirty
3. Worn clutch
4. Worn belts
5. Chipper operating above 3,000
ft. elevation.
1. Resharpen blade
2. Clean air filter / Replace
3. Inspect clutch shoes. Replace if
clutch is slipping excessively.
4. Check for wear, belt tension.
Replace if belts are burnt or they
wore out.
5. Reset carburetor jet (Authorized
workshop recommended).
.Engine Overheats 1. Engine is dirty
2. Low oil
1. Clean outer debris from the
engine.
2. Check and add oil if necessary.
Engine is erratical 1. Low fuel
2. Water or dirt in the fuel system.
3. Valve tolerance out of
specification.
1. Check spark plug and
connection.
2. Refill tank with fresh fuel. Drain
fuel system if water is present in
fuel.
3. Take engine to authorized
engine workshop.
SPARE PARTS LIST
These are some of the most common re-order parts. You may order parts from our website or feel free to call us
and place your order.
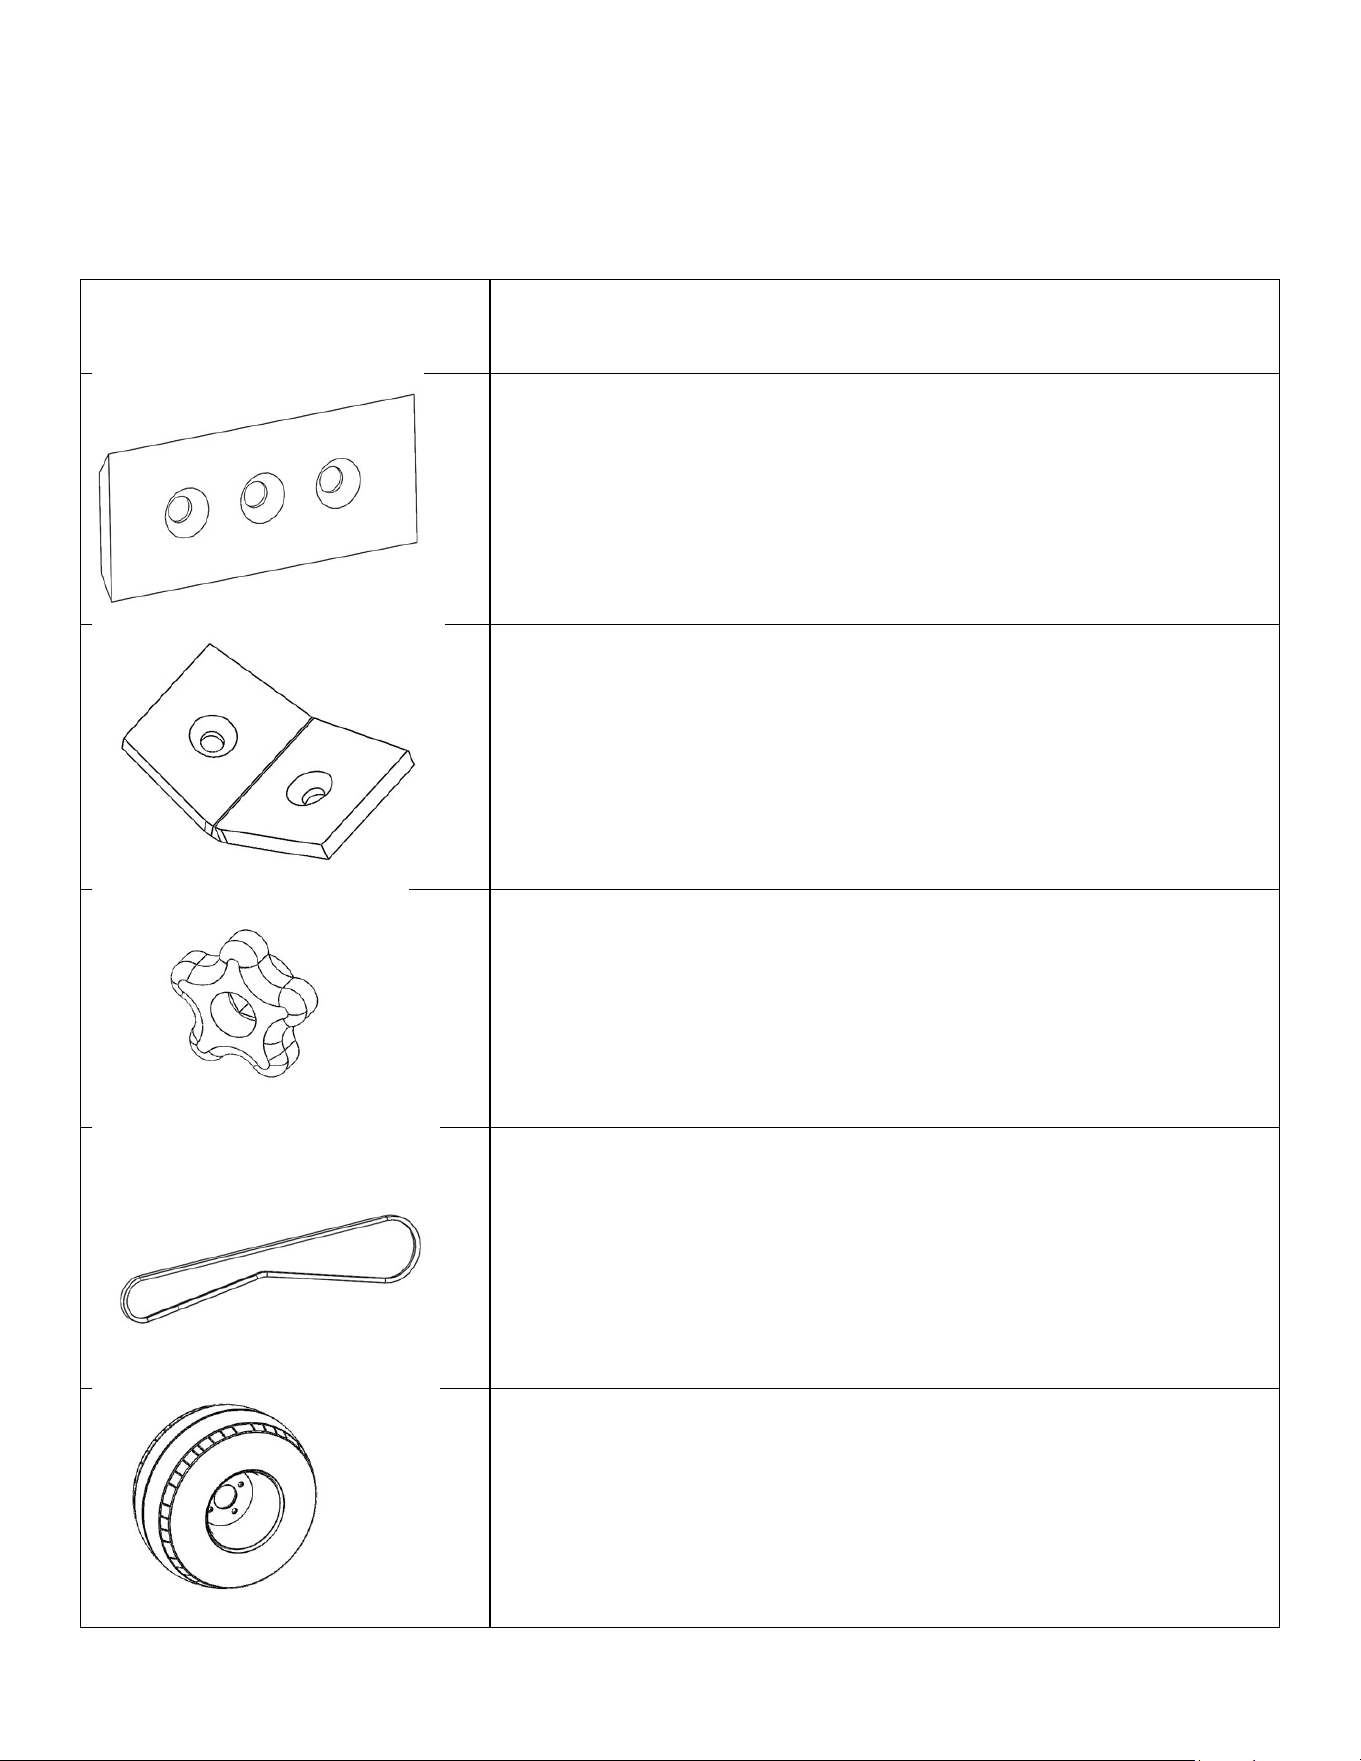
Component
Description
# PART 452101 | CHIPPER BLADE
# PART 452102 | CHIPPER ANVIL
# PART 452103 | KNOB
# PART 452104 | BELT
# PART 452105 | WHEEL ASSEMBLY