
Evidence
User manual

▪ Introduction
▪ Safety Instructions
▪ About this guide
Used expressions and symbols
▪ Unpacking the Loudspeakers
▪ Connecting
▪ Connecting the loudspeakers
▪ Bi-wiring/bi-amping
▪ Choice of loudspeaker cable
▪ Connecting surround speakers
▪ Positioning
▪ General recommendations
▪ Distance to back and side walls
▪ Floor-standing loudspeaker set-up
▪ Loudspeaker Toe-In
▪ Room and furniture influence
▪ Grille
▪ Multi-Channel Setup
▪ Loudspeakers for multi-channel setups
▪ Running-in the loudspeakers
▪ Power rating
▪ Care and Maintenance
▪ Cleaning the loudspeakers
▪ Warranty
▪ Technical Specifications
2 Evidence User manual

3

Introduction
Dear Music Lover,
Thank you for your decision to acquire these very special Dynaudio Evidence loudspeakers.
They feature advanced Dynaudio loudspeaker technology, resulting in music reproduction at a very high level,
making many familiar recordings a new listening experience altogether. This technology results from many years of
intense research and development, the highest quality standards in production, and Dynaudio’s enduring passion
for musical truth.
Dynaudio is one of very few companies who can realize such loudspeaker concepts through its own in-house
development and production facilities. These facilities are so advanced and the quality control is so strict that
Dynaudio is TS16949 certified.
Each loudspeaker is constructed by Dynaudio’s master craftsmen in Denmark to these high standards of quality.
To realize the highest sound quality from the loudspeakers, some areas should be addressed, as will be explored
on the following pages. By considering the tips and suggestions, you will achieve the maximum performance and
enjoyment of the loudspeaker and its advanced musical capabilities for a long time to come.
Please also visit our web site www.dynaudio.com. You will find additional information:
▪ Dynaudio dealers in your area
▪ Questions and answers about Dynaudio products and technical information
▪ Dynaudio events and news
We wish you many years of enjoyment experiencing music.
4 Evidence User manual
Safety Instructions
CAUTION
HIGH SOUND PRESSURE LEVELS
Listening to high sound pressure levels over a longer period of time may harm your hearing.
To avoid auditory eect do not listen to high sound levels over a longer period of time.
About this guide
Used expressions and symbols
In this operating manual following signs and symbols are used:
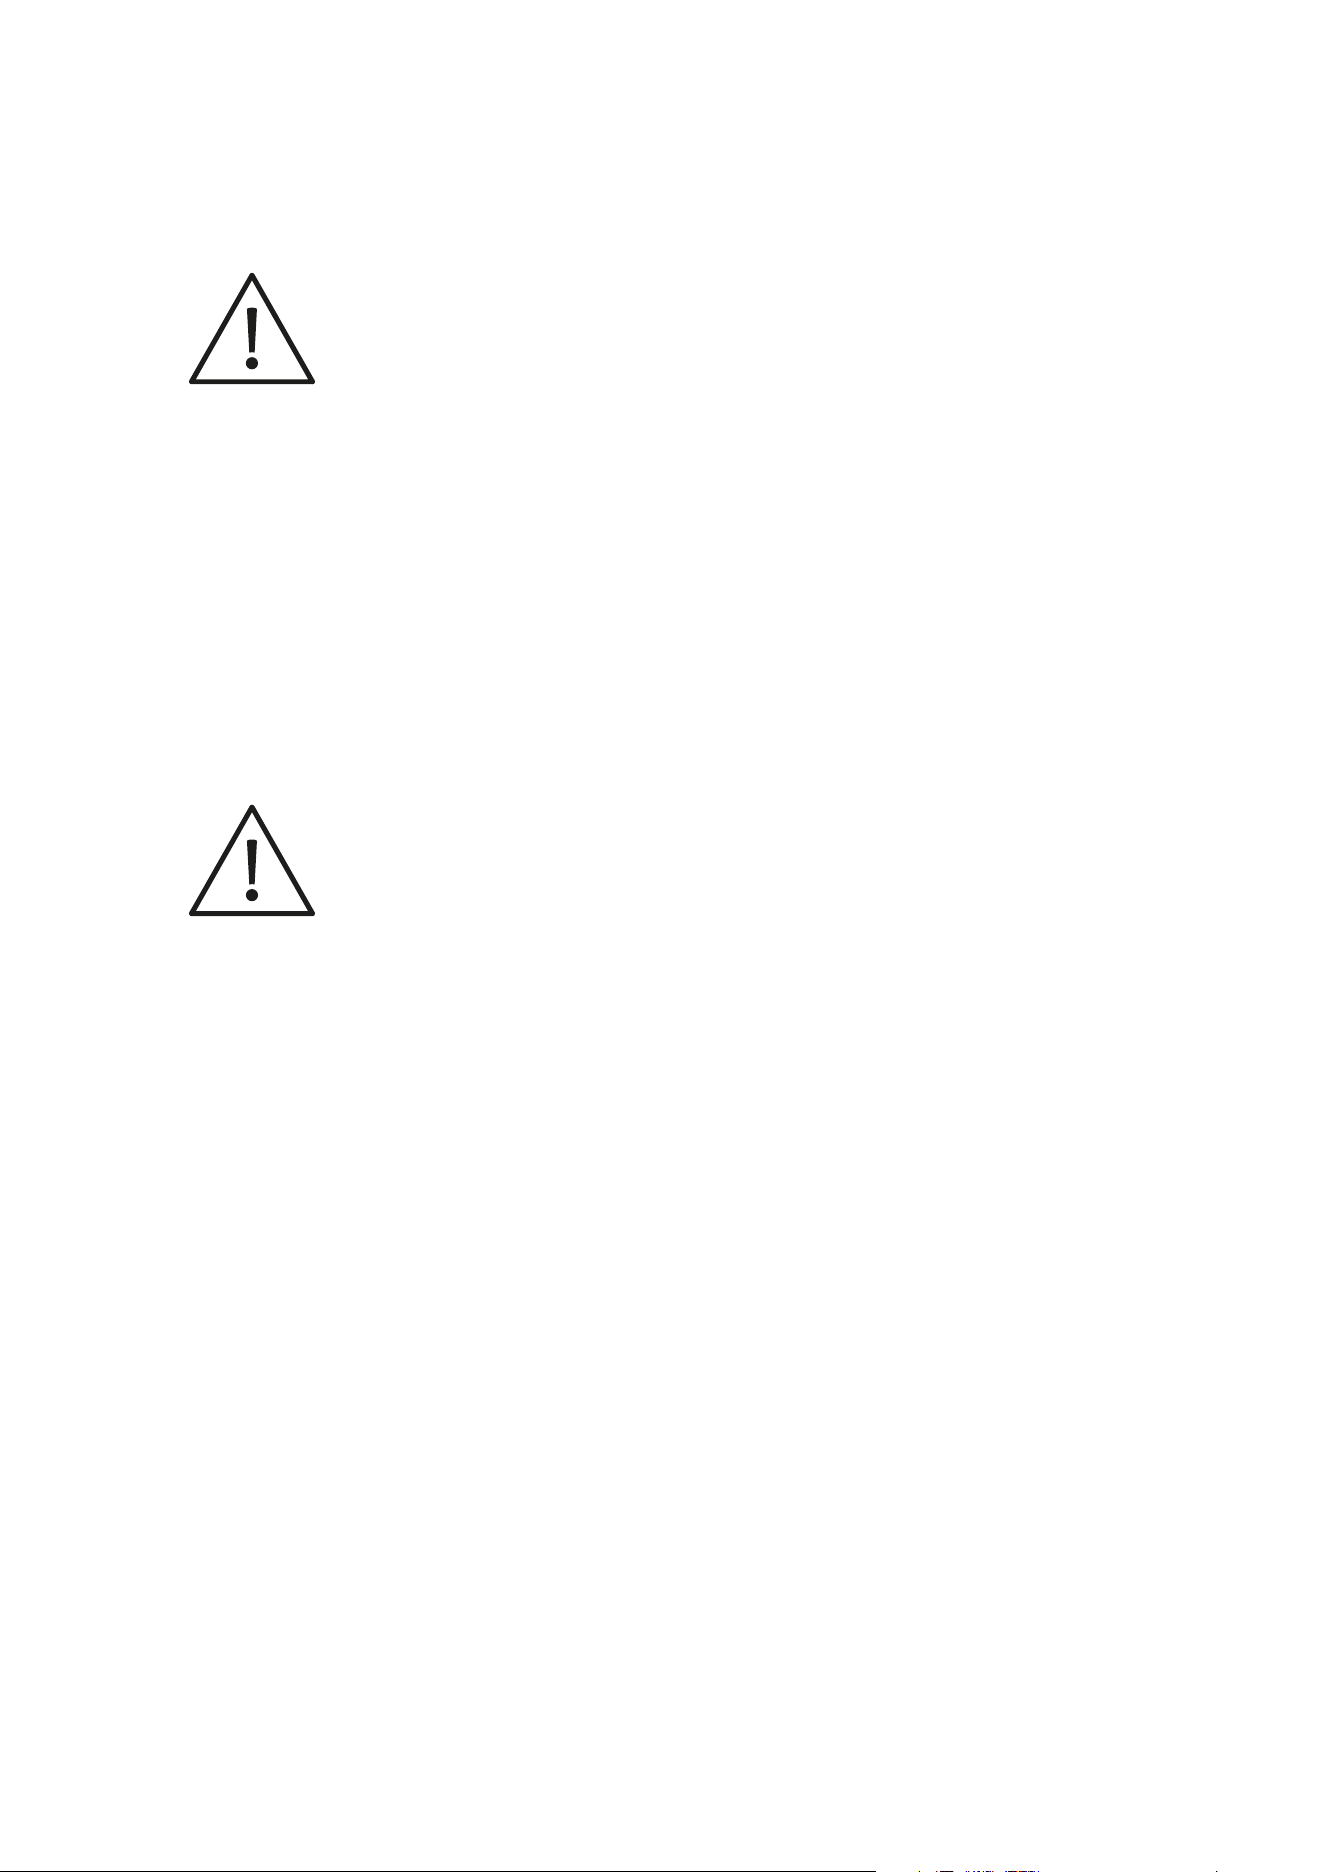
The exclamation point within an equilateral triangle is intended to alert the user to the presence of important
operating and maintenance (servicing) instructions in the literature accompanying the product.
CAUTION
Indicates (in combination with a safety sign) a potentially hazardous situation which, if not avoided, could result in
minor or moderate injury or damage to equipment.
Safety Instructions 5

Unpacking the Loudspeakers
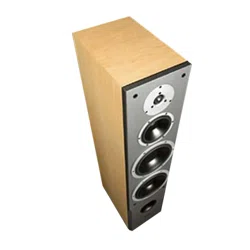
Dynaudio Evidence models are protected during transit by stable and secure packaging. Due to their weight and
dimensions, they are shipped in a special wooden crate.
CAUTION
HEAVY PARTS
Unpacking the Evidence loudspeakers without help may cause personal injuries or product damage.
▪ Consult your trained Dynaudio dealer for assistance.
▪ Two people are recommended to unpack the loudspeakers.
6 Evidence User manual
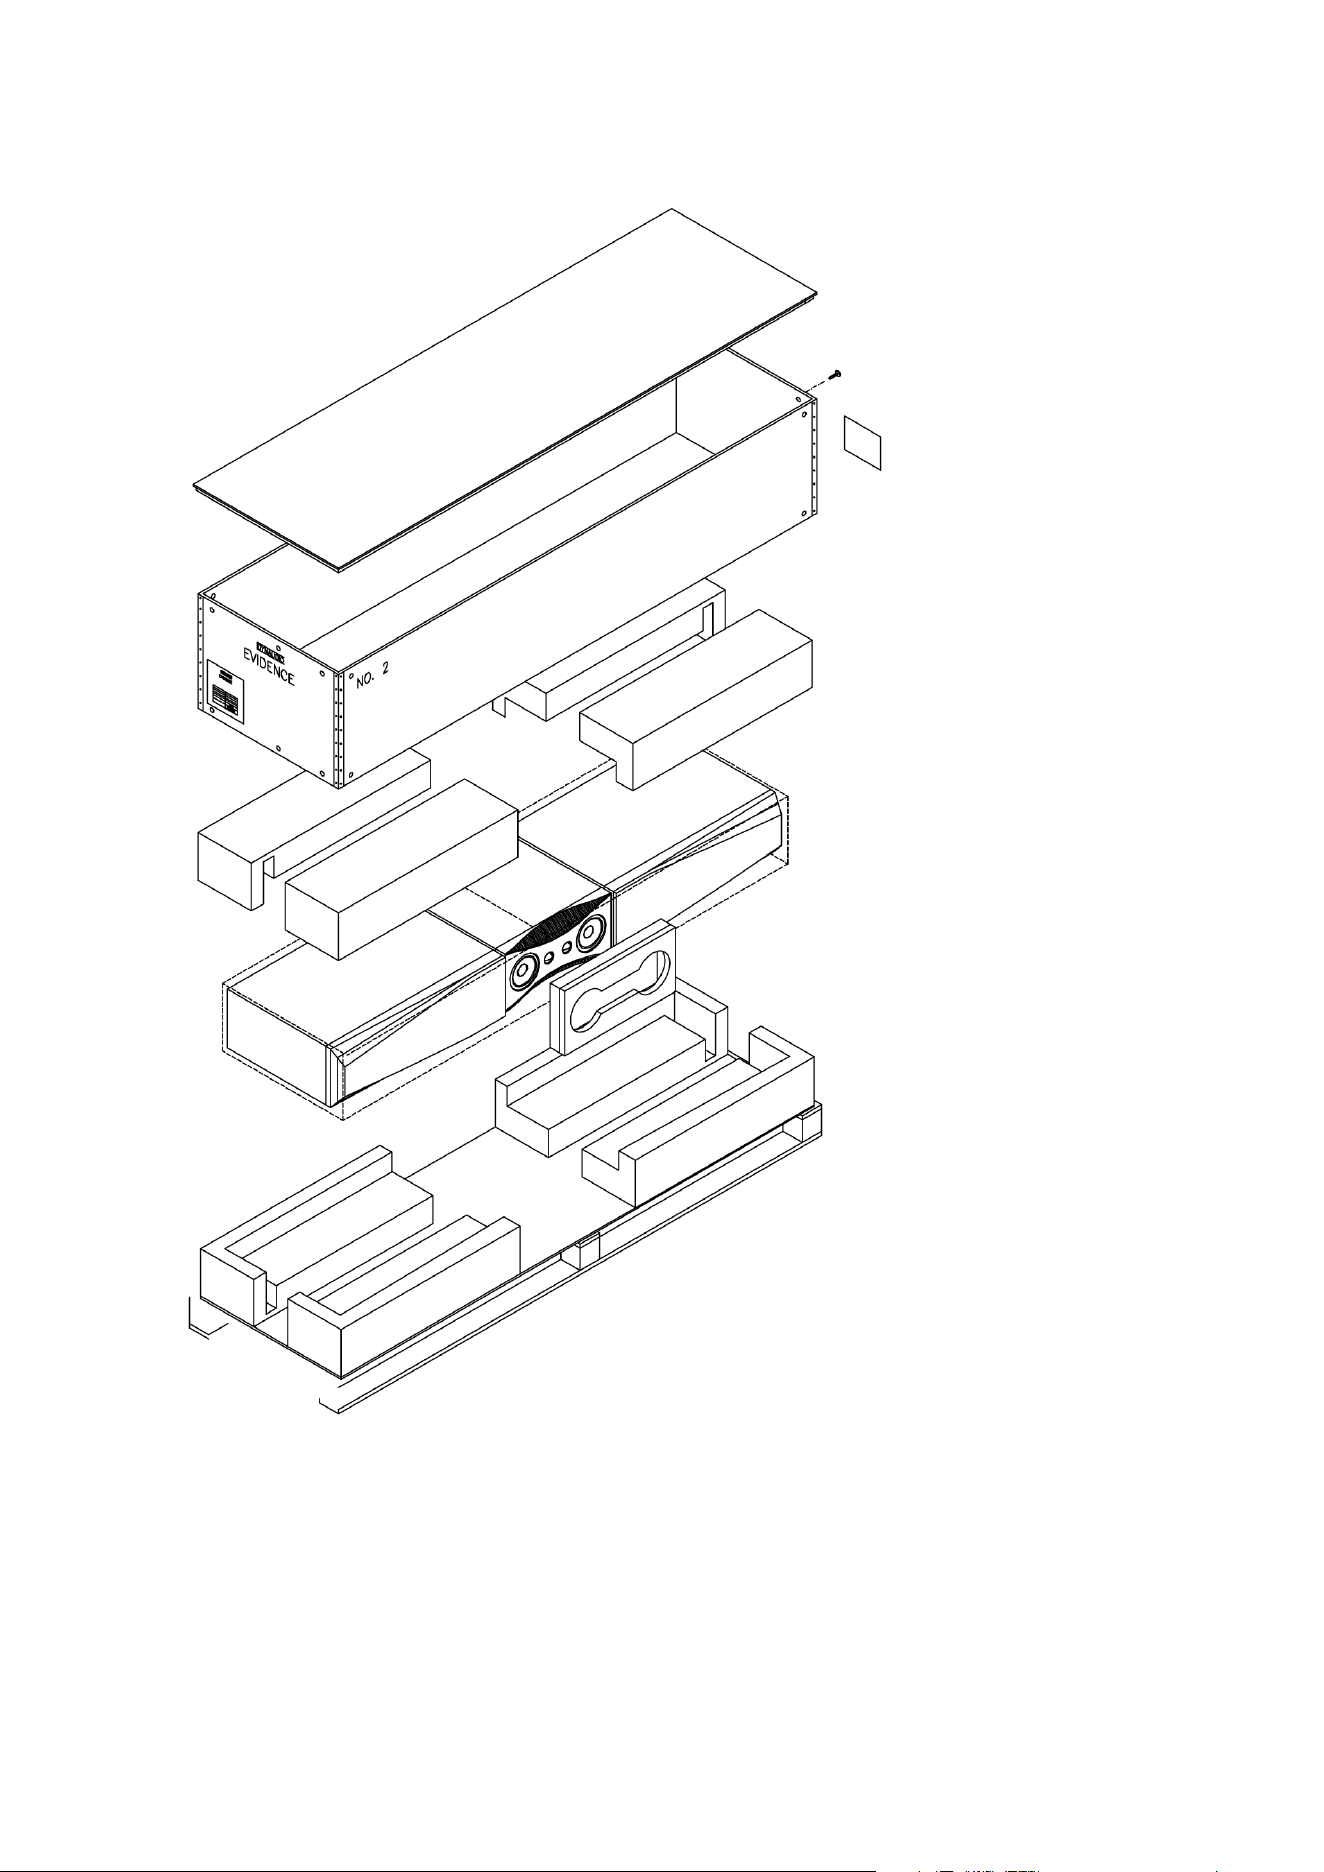
Figure 1: Packaging. Temptation and Center models only. Figure shows Temptation.
To unpack the Evidence Master loudspeakers:
▪ Please consult your Dynaudio dealer.
To unpack the Temptation and Center models:
1. Lay the transport box flat on the floor.
Unpacking the Loudspeakers 7

2. Remove the screws along the top plate, the top plate and the five safety pads.
3. Remove the screws along the bottom plate.
4. Carefully lift the sidewall frame.
5. Carefully remove the loudspeaker by lifting it up horizontally.
6. Turn the loudspeaker and slowly place it on its plinth.
7. Remove the wrapping foil by lifting it on one end and unwrap it in a clock-wise motion. Do not use blades, cutters or any
other sharp objects that will destroy the foil.
8. Fix the sidewall frame on the bottom plate again.
9. Place the wrapping and the safety pads back into the box and close the plate.
The wooden transport crates and custom cartons are intended for long-term use and should be used whenever
the loudspeakers are to be transported, and as such they should be stored for future use.
8 Evidence User manual
Connecting
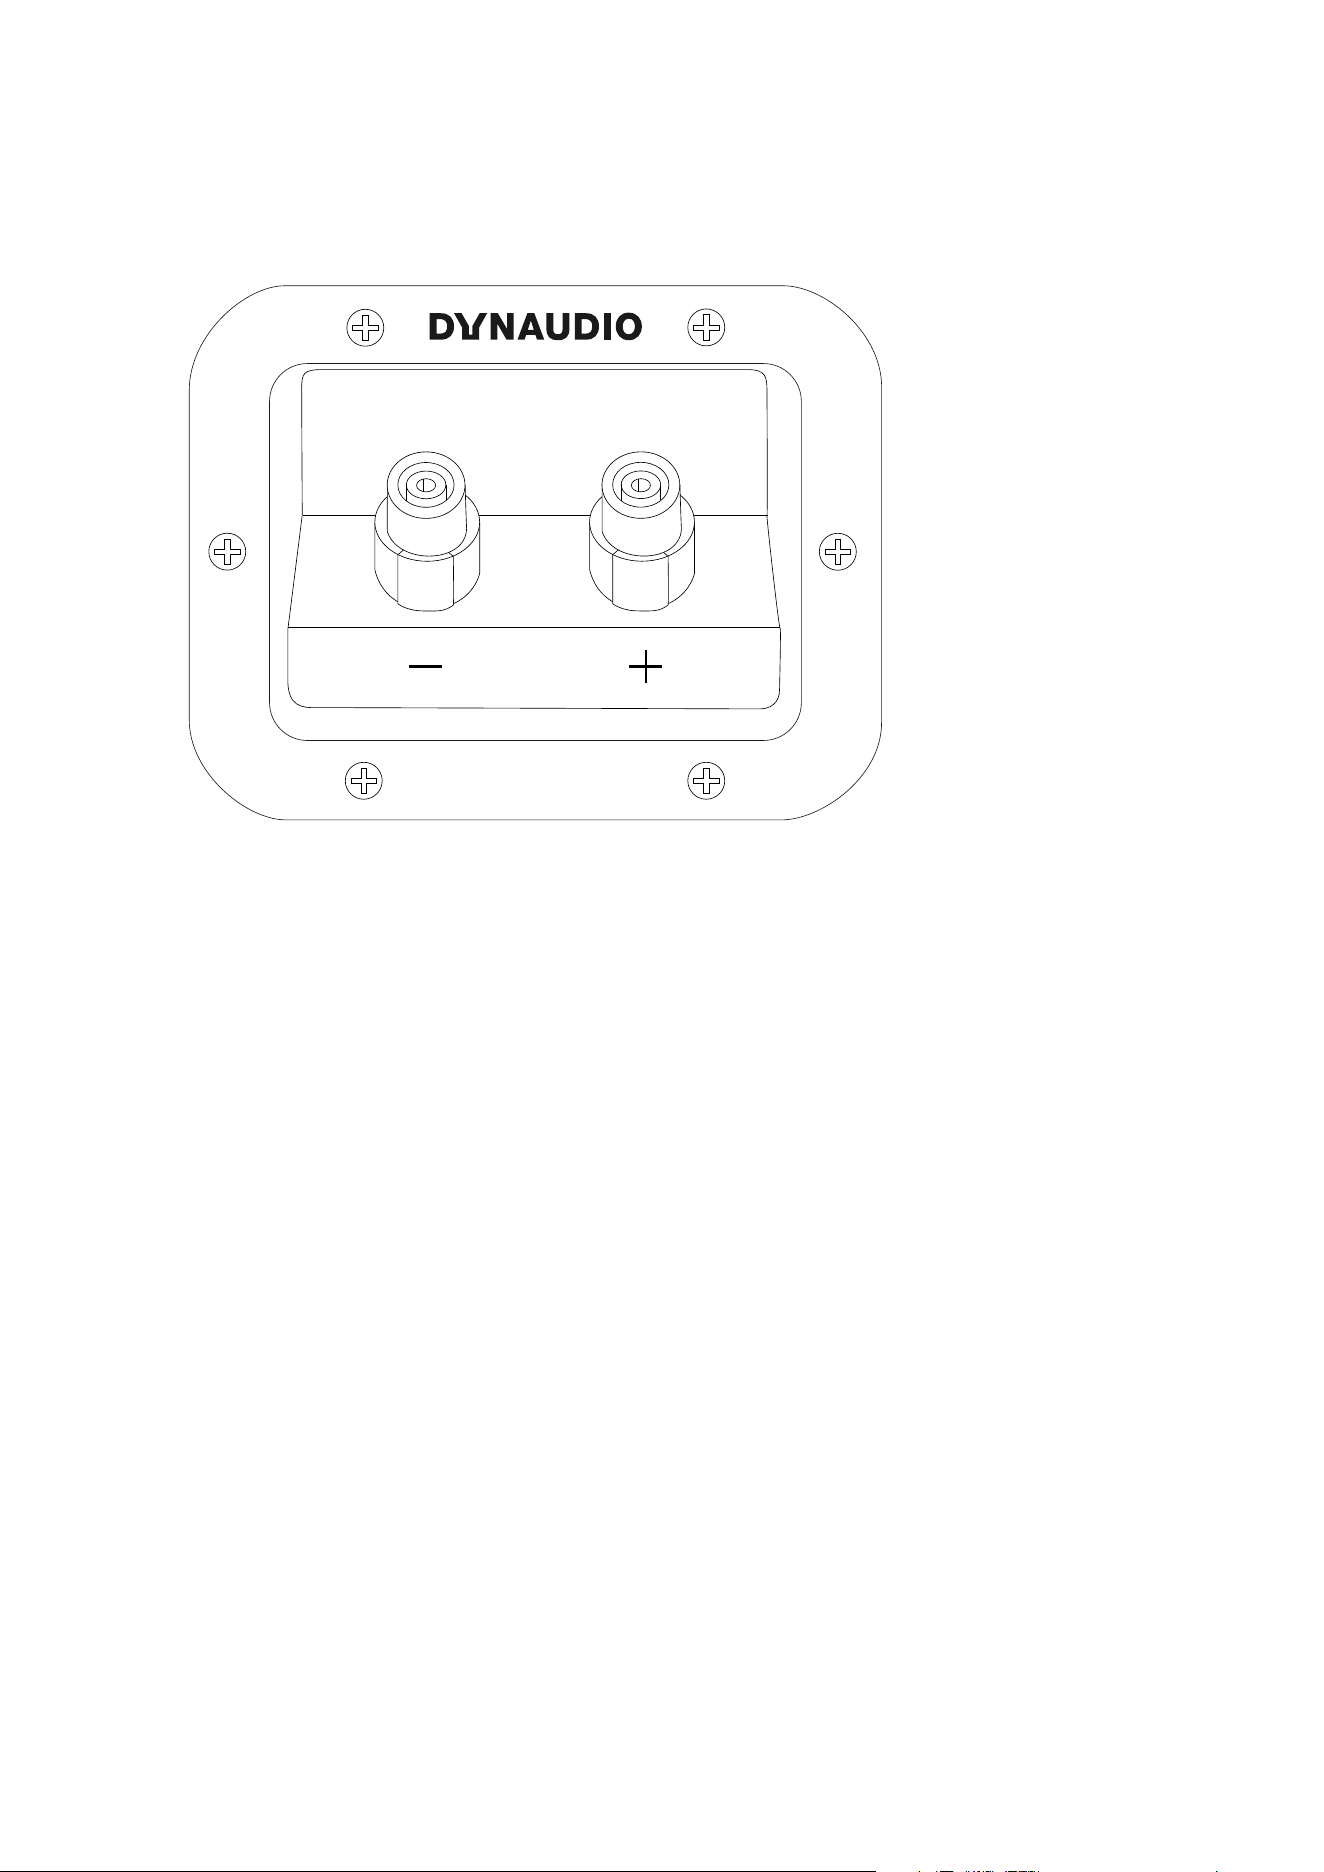
Figure 2: Binding posts at rear of cabinet.
Connecting the loudspeakers
Connect a two-pole (+/-) loudspeaker cable to the binding posts, located at rear of the cabinet (see Figure 2). The
high quality, gold plated binding posts can accommodate dierent connection systems:
▪ 4-mm-plugs (“banana plugs”): The pins can be put directly into the binding post without any tightening necessary.
▪ Cable spades: Un-tighten the binding posts, insert the spade into the opening, and secure the spade by tightening
the posts.
▪ Bare wires: Un-tighten the binding posts and place the cable into the binding posts. Tighten the posts.
Note
▪ With every connection system, ensure that the contact is tight and has a proper contact area.
▪ Connectors with similar gold plating as the loudspeakers binding posts will typically oer the best results and remain
corrosion-free.
▪ Please ensure that the positive and negative cables do not make contact with each other.
▪ Tighten the posts, and check the contact after a few days to make sure that it hasn’t loosened.
Connecting 9
SPEAKERS
R L
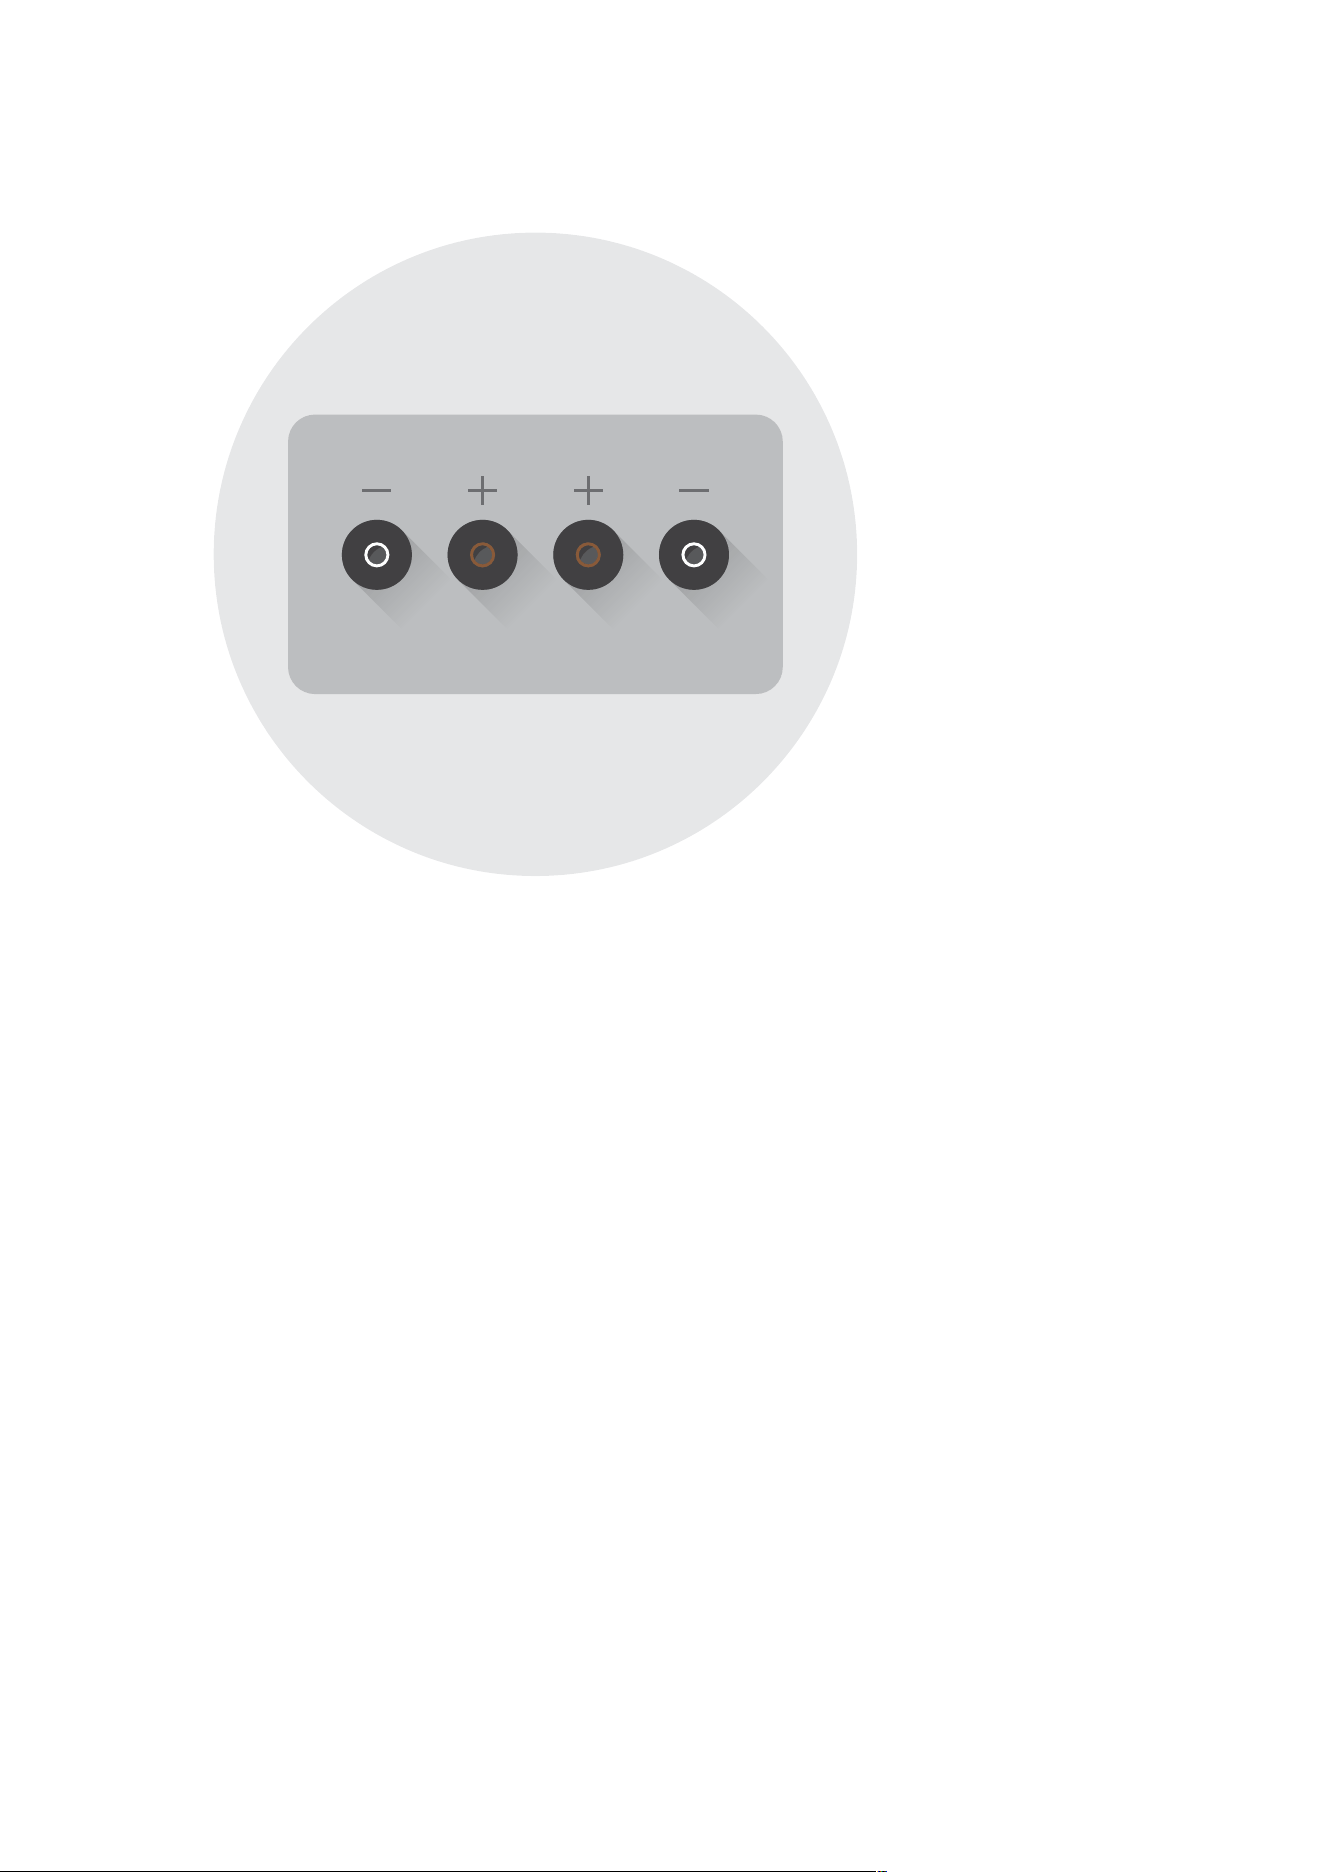
Figure 3: Amplifier loudspeaker outputs (example).
Connect the other cable ends to the loudspeaker outputs of your switched o power amp (see Figure 3).
Please make sure that both loudspeakers are connected properly. For a better distinction one of the two veins of
most loudspeaker cables are marked.
▪ Connect the red marked post of the speaker to the red marked output of the amp.
▪ Connect the white or black marked post to the white or black marked output accordingly.
Bi-wiring/bi-amping
Dynaudio loudspeakers feature a carefully fine-tuned cross-over, optimised using selected parts and an advanced
circuitry to achieve a truly balanced and smooth frequency response. Therefore, dividing the frequency sections
through bi-wiring or bi-amping is not recommended.
Choice of loudspeaker cable
In general, quality cable products will yield a quality result. Dynaudio loudspeakers are designed to be very neutral
and thus are not extremely suited to any particular type of cable. The choice of cable is as much a factor of
matching the cable to the entire audio system. Please consult your Dynaudio dealer for information about
compatible loudspeaker cables that will suit both your electronics and the Dynaudio loudspeakers.
Connecting surround speakers
When connecting a two-channel stereo system, only the right and left channels are connected to the amplifier.
In a surround set-up, centre, side or rear loudspeakers as well as a subwoofer are typically connected to provide
for a multi-channel listening experience. Please refer to the amplifier’s owner manual for particular connection
10 Evidence User manual

instructions and see chapter “Multi- channel loudspeaker setup” for further help.
Connecting 11

Positioning
CAUTION
EXCESSIVE BRIGHTNESS
Direct sunlight or excessive brightness can aect the colour of any natural wood veneer (the structural integrity of
the cabinet will not be aected).
To maintain the aesthetic quality of the loudspeakers for the long term, placing such in very warm, very cold, or
very humid environments should be avoided.
Every room will have its own particular sound characteristics. Any room is also shaped and decorated uniquely,
and therefore remains independent regarding options for positioning loudspeakers. The following steps are
general suggestions that will make the correct positioning easier to achieve.
12 Evidence User manual

A≤B
BB
A
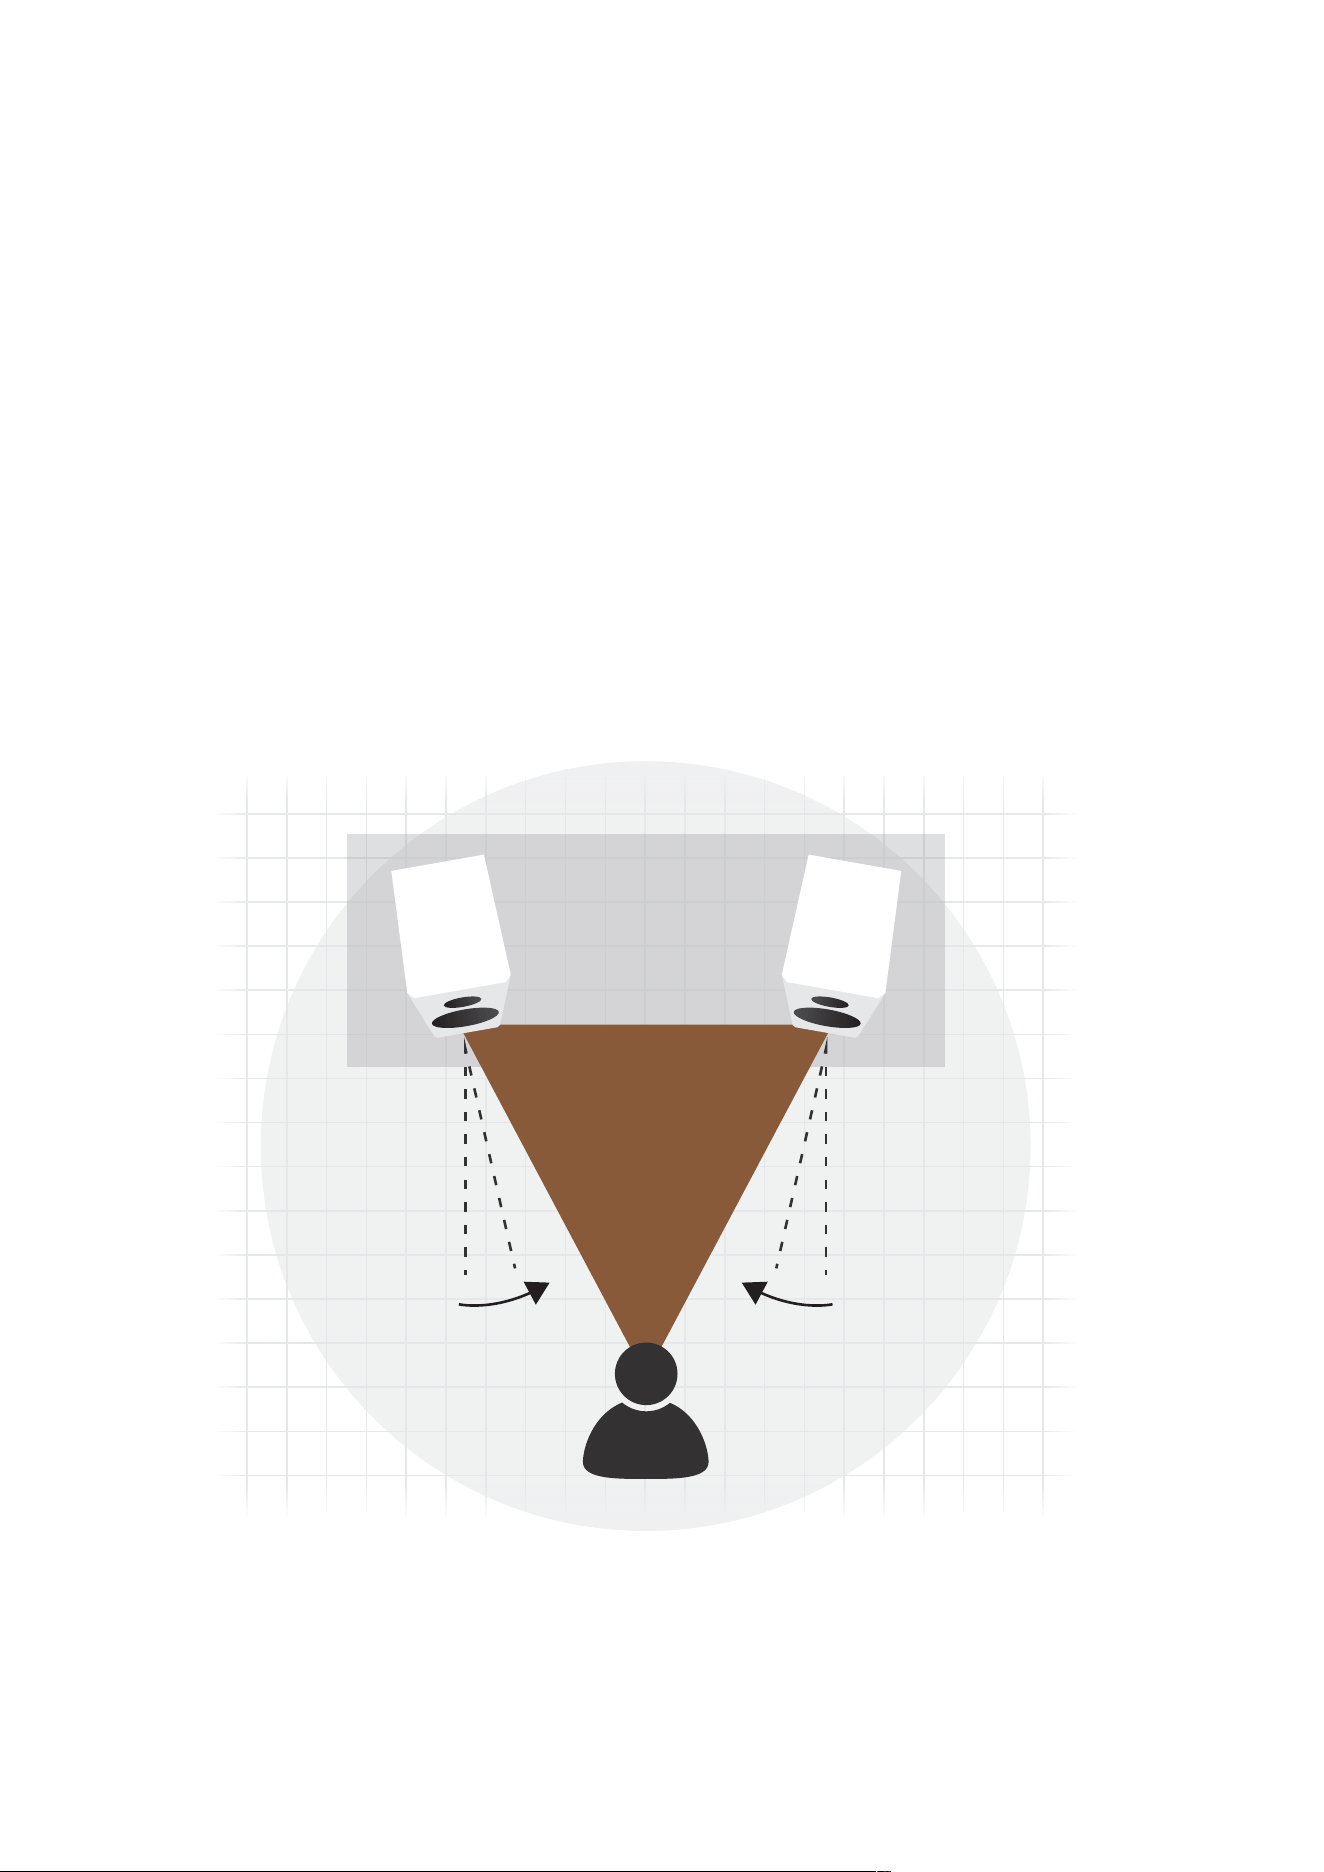
Figure 4: Positioning the loudspeakers.
General recommendations
The following explanations refer to Figure 4.
▪ The distance between each loudspeaker and your listening position should be the same (B). Try to achieve an isosceles
triangle.
▪ The distance between the loudspeakers should be the same or better slightly less than the distance between each
loudspeakers and your listening position (A, B).
▪ The closer the listening position is in relation to the loudspeakers, the closer the speakers can be positioned to each
other. As a starting point, it is recommended that the speakers be about 2 meters apart from each other for the best
results (A).
▪ If the speakers are positioned too close to each other, the stereo image will not seem realistic; if that distance is too wide,
the image may leave an acoustic hole in the middle.
▪ Paying attention to the image during listening tests will help dictate optimum placement during experimentation and set-
up.
Positioning 13
Distance to back and side walls
A, B ≥ 0.5 m
A ≠ B
B
A
Figure 5: Distance to walls
Every loudspeaker not only disperses sound energy directly into the room, but also to the side and even
backwards. As a result, time-delayed reflections occur and add to the original music signal. Thus, when
loudspeakers are positioned too close to walls, the sound quality can be restricted.
Dynaudio loudspeakers were developed to be placed free-standing, and therefore they reach their optimum
performance when positioned as clear of any walls as possible.
▪ To reduce possible influences from the back and sidewalls, the distance to these boundaries should ideally not be less
than 0.5 meter.
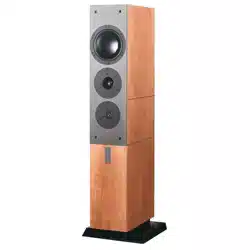
Floor-standing loudspeaker set-up
The floor-standing models feature a special base construction, which oers both an ideal performance and
mechanical basis. Integrated into the base plinth are four individual spike assemblies. These stabilise the cabinet
on an extremely small contact area, and therefore prevent any wobbling while oering optimal resonance control.
The individually adjustable spikes allow levelling of the cabinet on uneven floors.
14 Evidence User manual
CAUTION
SPIKES WITH SHARP PEAKS
The sharp peaks of the spikes may cause injuries and damage sensitive surfaces like hardwood flooring or tile.
Be careful when handling the loudspeakers.
Place plates between the spikes and the surface to protect the underlying surface.
Note
The spike will not destroy a carpet surface.
Loudspeaker Toe-In
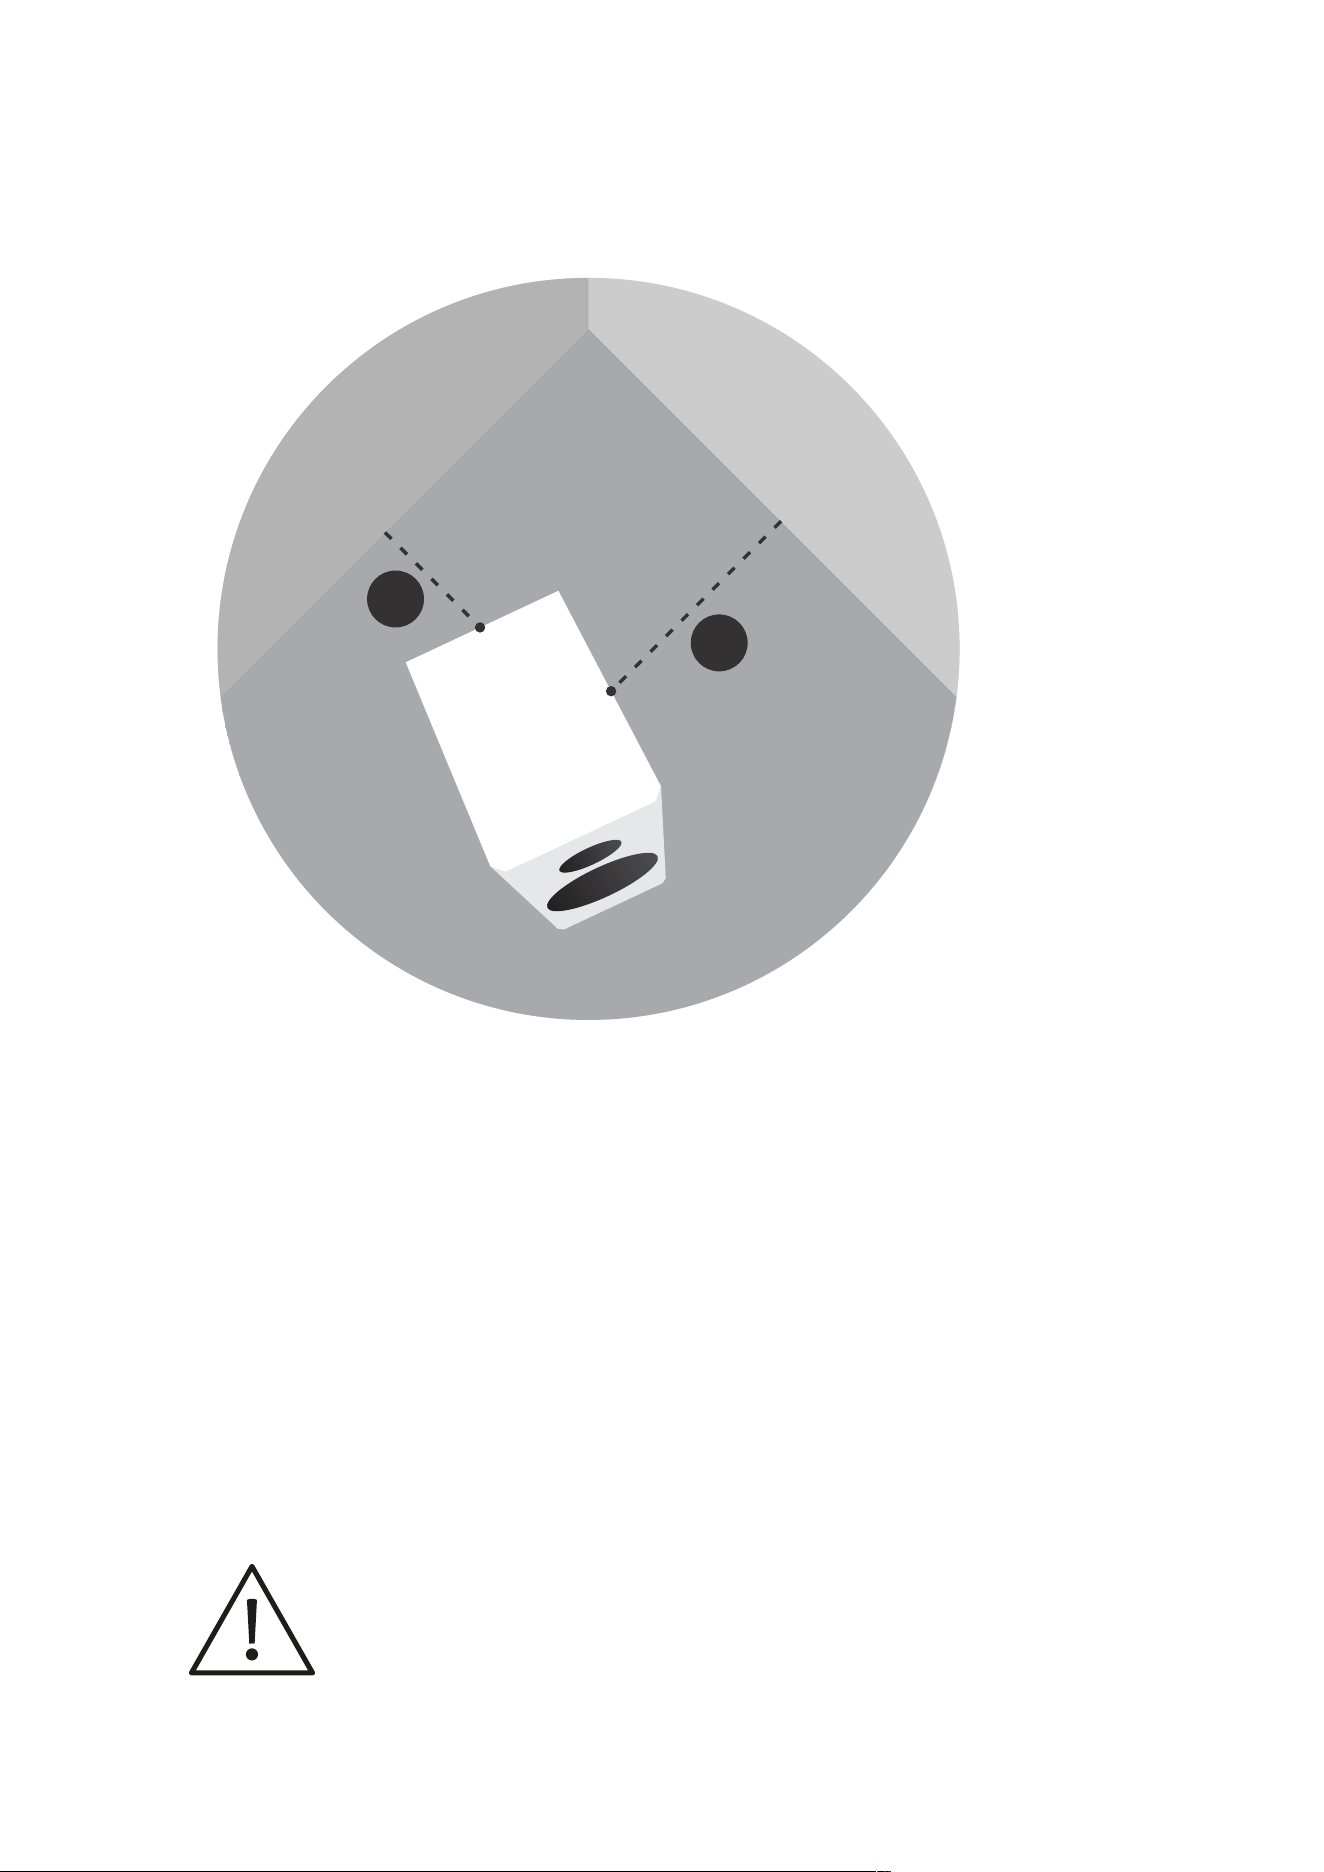
Depending on your personal listening environment and room dimensions, the loudspeakers may be angled in
towards the listening area to focus the sound radiation. This positioning will typically improve imaging and is
especially recommended by Dynaudio (see Figure 6).
Figure 6: Angle inwards loudspeakers to improve imaging.
Positioning 15

Room and furniture influence
The sound quality of any loudspeaker is influenced by the furniture, wall materials and other objects in the listening
room. For example, large rooms without much furniture and many clean, hard wall surfaces can give a bright and
diuse sound with diverse echoing frequencies. A room with thick carpet, curtains and soft furniture surfaces will
give a slightly warmer, darker and less lively sound.
Grille
A cloth grille is included and can be axed to the cabinet to help protect the drivers from dust and any other
influences. The grille is acoustically optimised, but the highest sound quality levels will be attained without any
grille covers in place during listening.
To remove the grille, gently pull the grille at all corners straight away from the front.
To fit the grille, line up the studs with the corresponding front bae holes and gently push the grille in at all
corners.
16 Evidence User manual

Multi-Channel Setup
Dynaudio loudspeaker models are designed to oer the most advanced performance in both stereo and multi-
channel applications. When connecting a loudspeaker to a multi- channel setup, in general the same guidelines
as mentioned in the text above will apply.
Note
When setting up a home theatre system, the loudspeakers should create a realistic soundstage with similar
sound characteristics on each channel. It is therefore important that any speaker used in a multi-channel setup
should match the same high quality level. This is especially important with regards to the centre channel
loudspeaker, as this is a critical aspect of any multi-channel soundstage.
Loudspeakers for multi-channel setups
For a multi-channel setup, in addition to the two main (stereo) loudspeakers, additional channels (speakers) may
be added to reproduce dialogue and surround eects.
Centre speaker
The centre is responsible for the information directed from the middle of the screen and should be positioned
between the right and left main loudspeakers.
In a home theatre/surround setup, the centre supports the images and should be placed close to the screen.
Rear speakers
The rear speakers are responsible for the rear sound eects behind the listening position. Corresponding to the
surround format 5.1, 6.1 or 7.1, you need to install additional speakers:
5.1: This is the standard multi-channel setup with two rear speakers. 6.1: An additional rear centre speaker is
placed between the two rear speakers. 7.1: Two speakers are added on both sides between the front and rear
speakers.
Subwoofer
Most often a subwoofer will be utilized for the LFE signal, especially in larger listening rooms. The position of the
subwoofer will be dependent upon the size of the room and its acoustics. Dynaudio recommends placing the
subwoofer close to the front speakers, but not too close to any walls, corners or furniture. This helps to sonically
integrate the subwoofer in the existing surround channel setup.
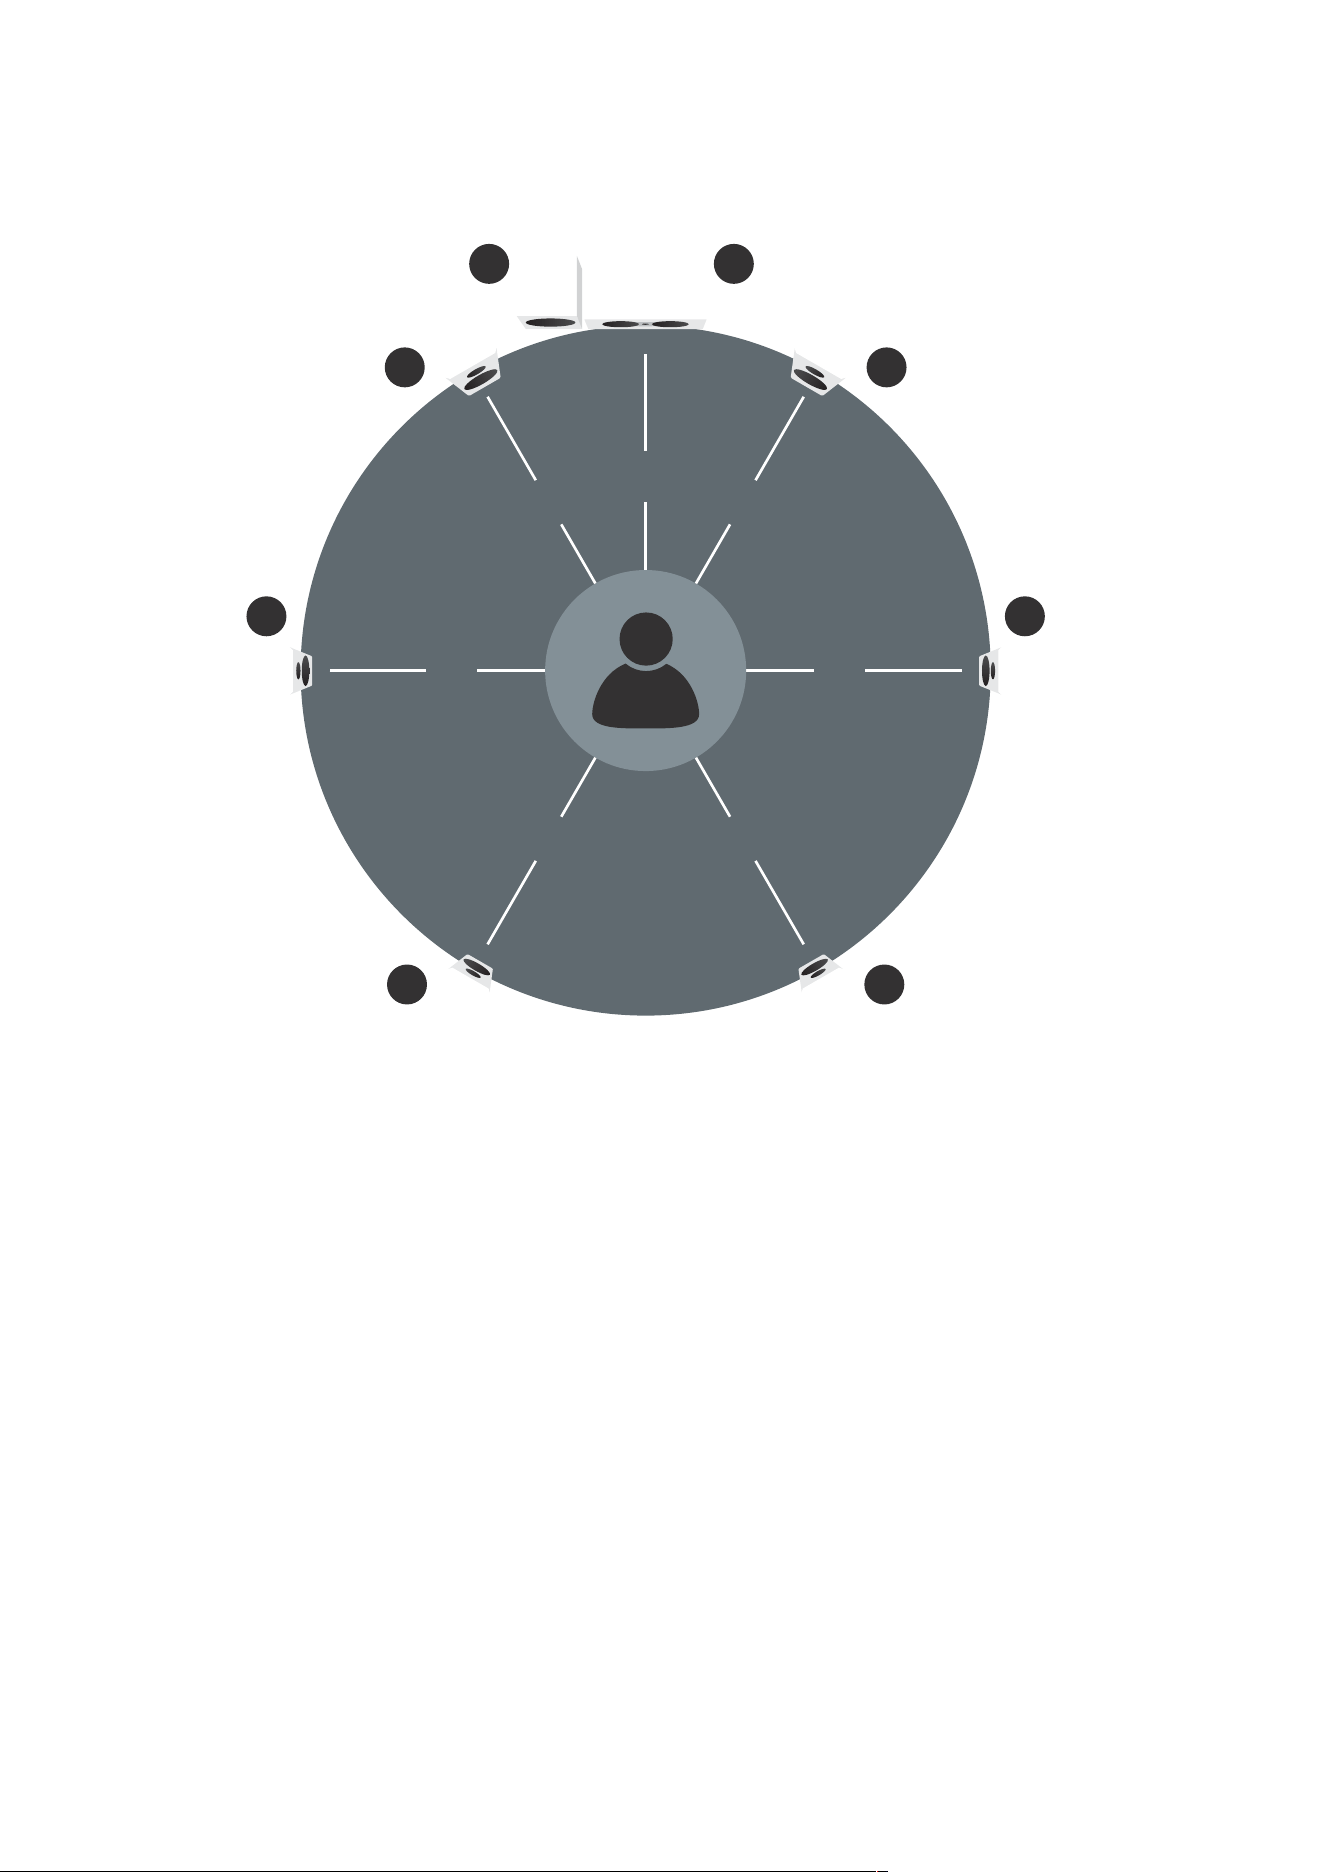
Multi-channel loudspeaker setup
A complete multi-channel setup consists of following speakers:
▪ 1: Front (stereo) speakers
▪ 2: Centre speaker
▪ 3: Side speakers
▪ 4: Rear speakers
▪ 5: Subwoofer
Multi-Channel Setup 17
1
90° 90°
150° 150°
1
33
4 4
5 2
30° 30°
0°
Figure 7: 5.1, 6.1 and 7.1 multi-channel speaker setup.
Because there are many dierent setup options – from 5.1 to 10.2 channel applications – and the fact that
loudspeaker positioning will also depend upon the room’s shape, please consult your Dynaudio dealer for special
applications and for placement options.
18 Evidence User manual

Running-in the loudspeakers
The moving parts of a newly manufactured Dynaudio loudspeaker have been acoustically checked after
production, but nevertheless are not as flexible as they need to be for optimum results to be realized. The higher
the quality of any driver system, the more demanding the loudspeaker will be regarding time for running-in the
system.
A newly unpacked Dynaudio loudspeaker therefore requires several weeks running/ playing to reach its optimum
performance capability. After that period, a couple of minutes before every listening session will be helpful to
“warm up” the loudspeakers.
Power rating
Due to the construction and the driver technology Dynaudio loudspeakers can be driven with very high power
levels. With a high quality amplifier, delivering undistorted signals, the speaker can achieve high levels without any
compromises in sound quality.
Attention must be given to amplifiers with very low power and adjustable tone controls or switches. These types
may soon overreach their own performance limits and may send distorted output signals to the speakers,
compromising even high quality technology.
Any damage caused under such circumstances is not covered by the Dynaudio warranty and is easily avoided in
the first place by consulting your Dynaudio dealer for advice regarding the choice of amplifier.
CAUTION
DISTORTED OUTPUT SIGNALS
Distorted output signals from too weak, defective or overloaded amplifiers may damage the loudspeakers.
Use high quality amplifiers only and run loudspeakers and amplifiers within specified power ratings.
Running-in the loudspeakers 19

Care and Maintenance
Dynaudio loudspeakers require no special treatment apart from the kind of careful handling you would normally
apply to any high tech product in your home.
CAUTION
AGGRESSIVE CLEANING FLUIDS
All-in-one cleaning materials, aggressive cleaning fluids or special furniture polishes may damage the cabinet
surface or other speaker parts.
Use a soft dry or slightly damp cloth when cleaning the cabinet and other plain parts.
Cleaning the loudspeakers
▪ Switch o all components of your system when cleaning any of these components.
▪ Avoid touching the tweeter domes as any change of their shape may have an impact on sound quality.
▪ Clean the cabinet and other plain parts with a soft dry or slightly damp cloth only.
▪ Remove dust on the woofer diaphragms with a fine furniture brush.
All materials used by Dynaudio are integrated with exceptional care. By taking care of your loudspeakers, you will
preserve the finish and build quality for a very long time.
20 Evidence User manual

Warranty
Dynaudio provides a transferable limited 5 year manufacturer’s warranty. This warranty only covers faults or
defects in material and production. Damage caused as a result of abuse, misuse or defective electronics is not
covered by the warranty. All warranty claims must be accompanied by a copy of the original purchase invoice and
warranties are only valid in the country or market of original origin or distribution. Should warranty service be
required, it must be arranged for in the country of purchase by an authorized Dynaudio dealer.
All performance criteria are strictly controlled. In the whole production procedure – from raw materials to the final
assembly – Dynaudio thoroughly inspects all parameters along every step of way.
Warranty 21

Technical Specifications
Model Evidence Master Evidence Temptation Evidence Center
Sensitivity (2.83 V / 1 m) 92 dB 90 dB 90 dB
IEC Long Term Power
Handling
> 600 W 500 W 350 W
Impedance (nominal) 4 Ohm 4 Ohm 4 Ohm
Weight 135 kg 113 kg 55 kg
Dimensions
(W x H x L in mm including
plinth)
240 / 450 x 2050 x 580 210 / 390 x 1933 x 490 1222 x 210 x 464
22 Evidence User manual