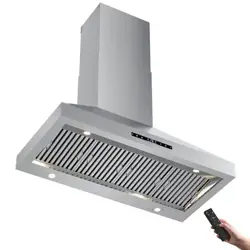

Professional Wall-Mount Range Hood
INSTALLATION GUIDE
AND USERS MANUAL
Model Name: IAW05-48
IAMSII

THANK YOU FOR YOUR PURCHASE
2
CONTACT US
service@iamsii.com
service@iamsii.com
IAMSII appliances are designed according to the strictest safety and performance
standard for the North American market. We follow the most advanced manufacturing
phiosophy. Each appliance leaves the factory after quality inspection and testing.We
are ready to answer any thorough questions you may have regarding how to install,
use and care for your products.We hope that this manual will help you learn to use the
product in the safest andmost effective manner.
If you require assistance,please contact IAMSII Range Hoods.Please have your order number
and model of the range hood ready. You must have this information in order to receive a response
to your request.
If you need replacement parts,we recommend using only genuine parts.Our accessories and
parts are engineered and designed specifically for IAMSII range hoods.Each part is rigorously
tested assur-ing the utmost in durability and reliability,providing a factory match,factory-
installed appearance and functionality tailored to each individual range hood model.
IAMSII
3
12
Rough-In
13
15
17
18
19
20
23
24
25
26
27
11
4

4
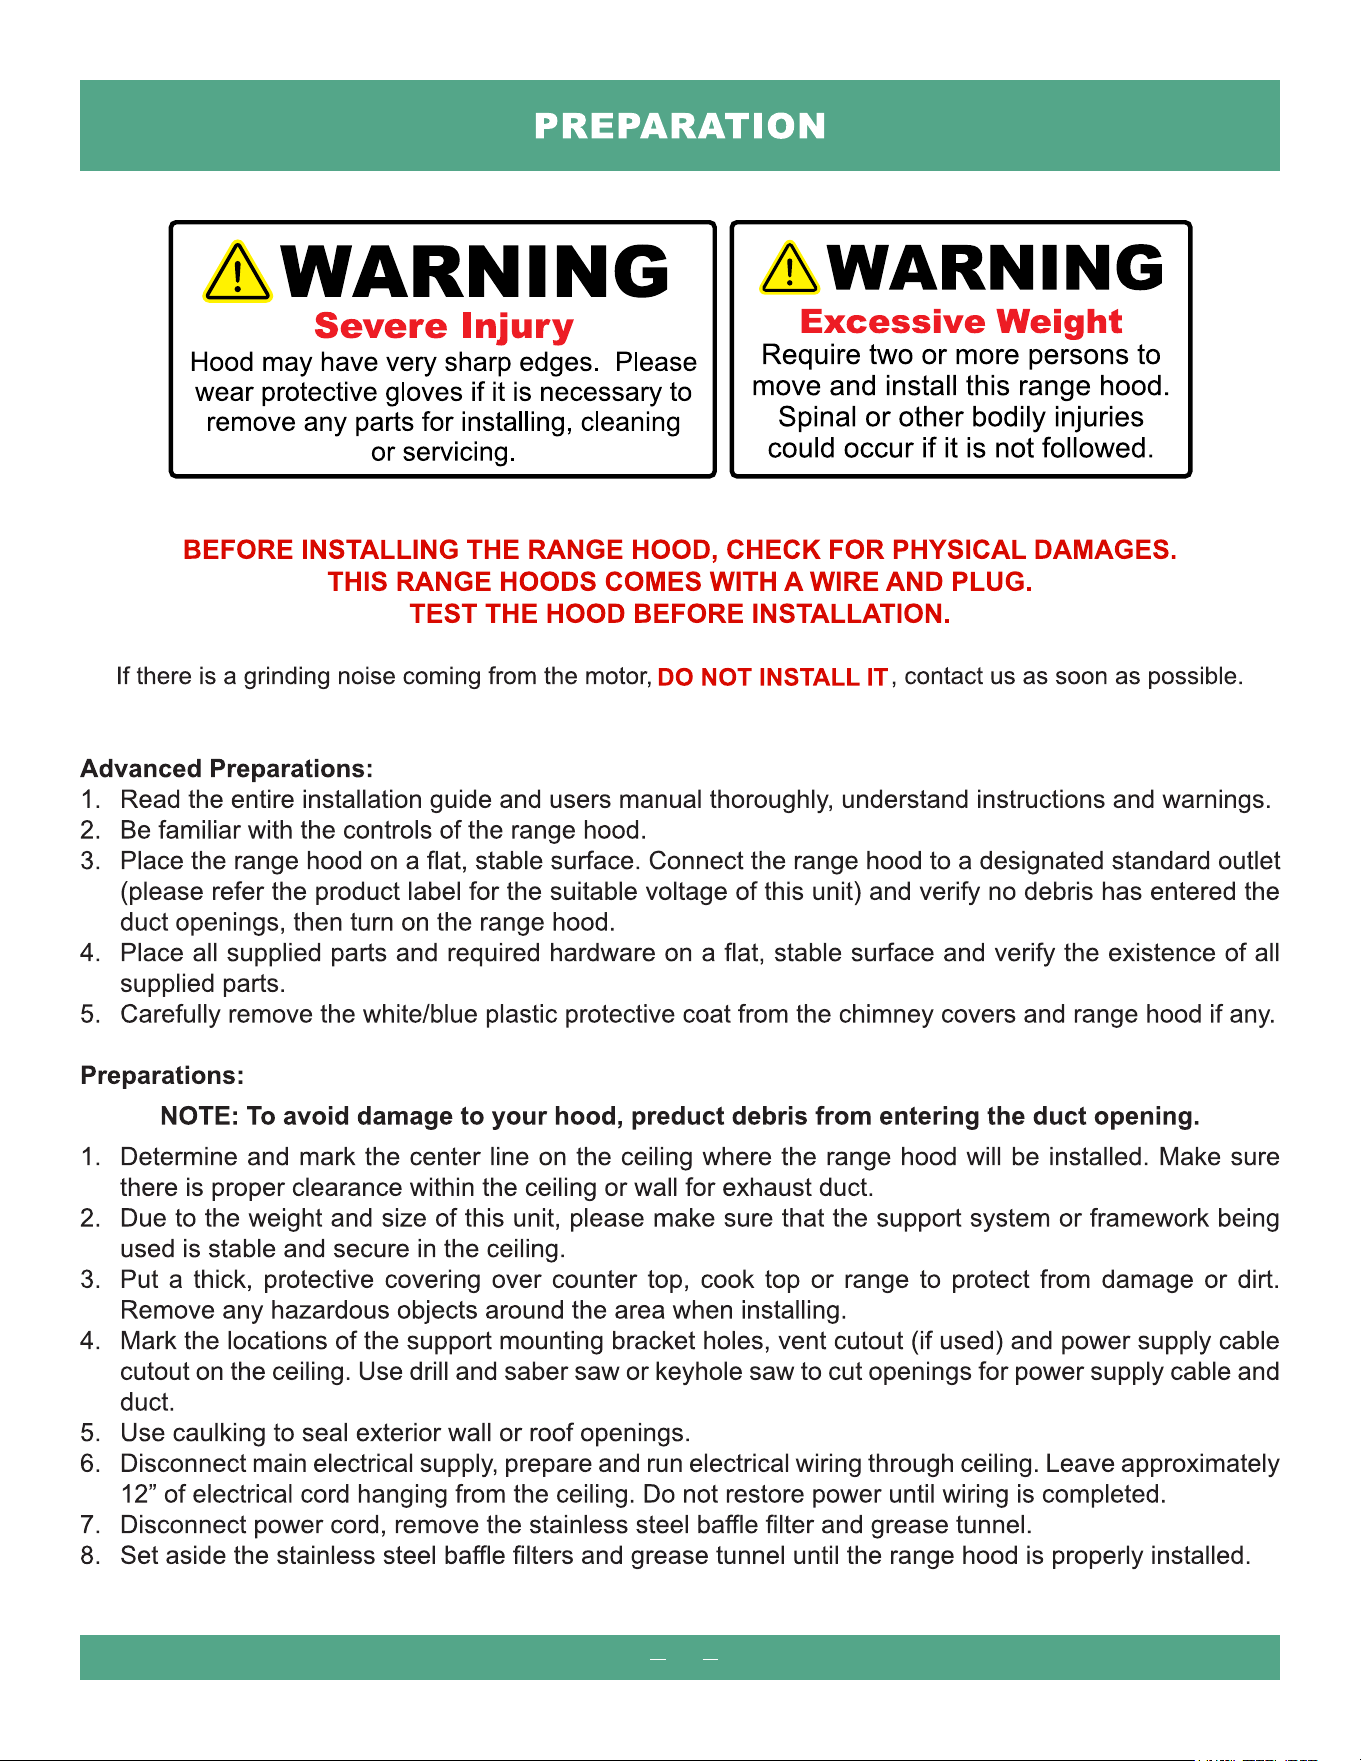
Read all instructions before installing and operating this appliance

5
Read all instructions before installing and operating this appliance

6
7
8
196W+# of Light x Votage of Light
184W
LED 3W 12V
www.iamsii.com
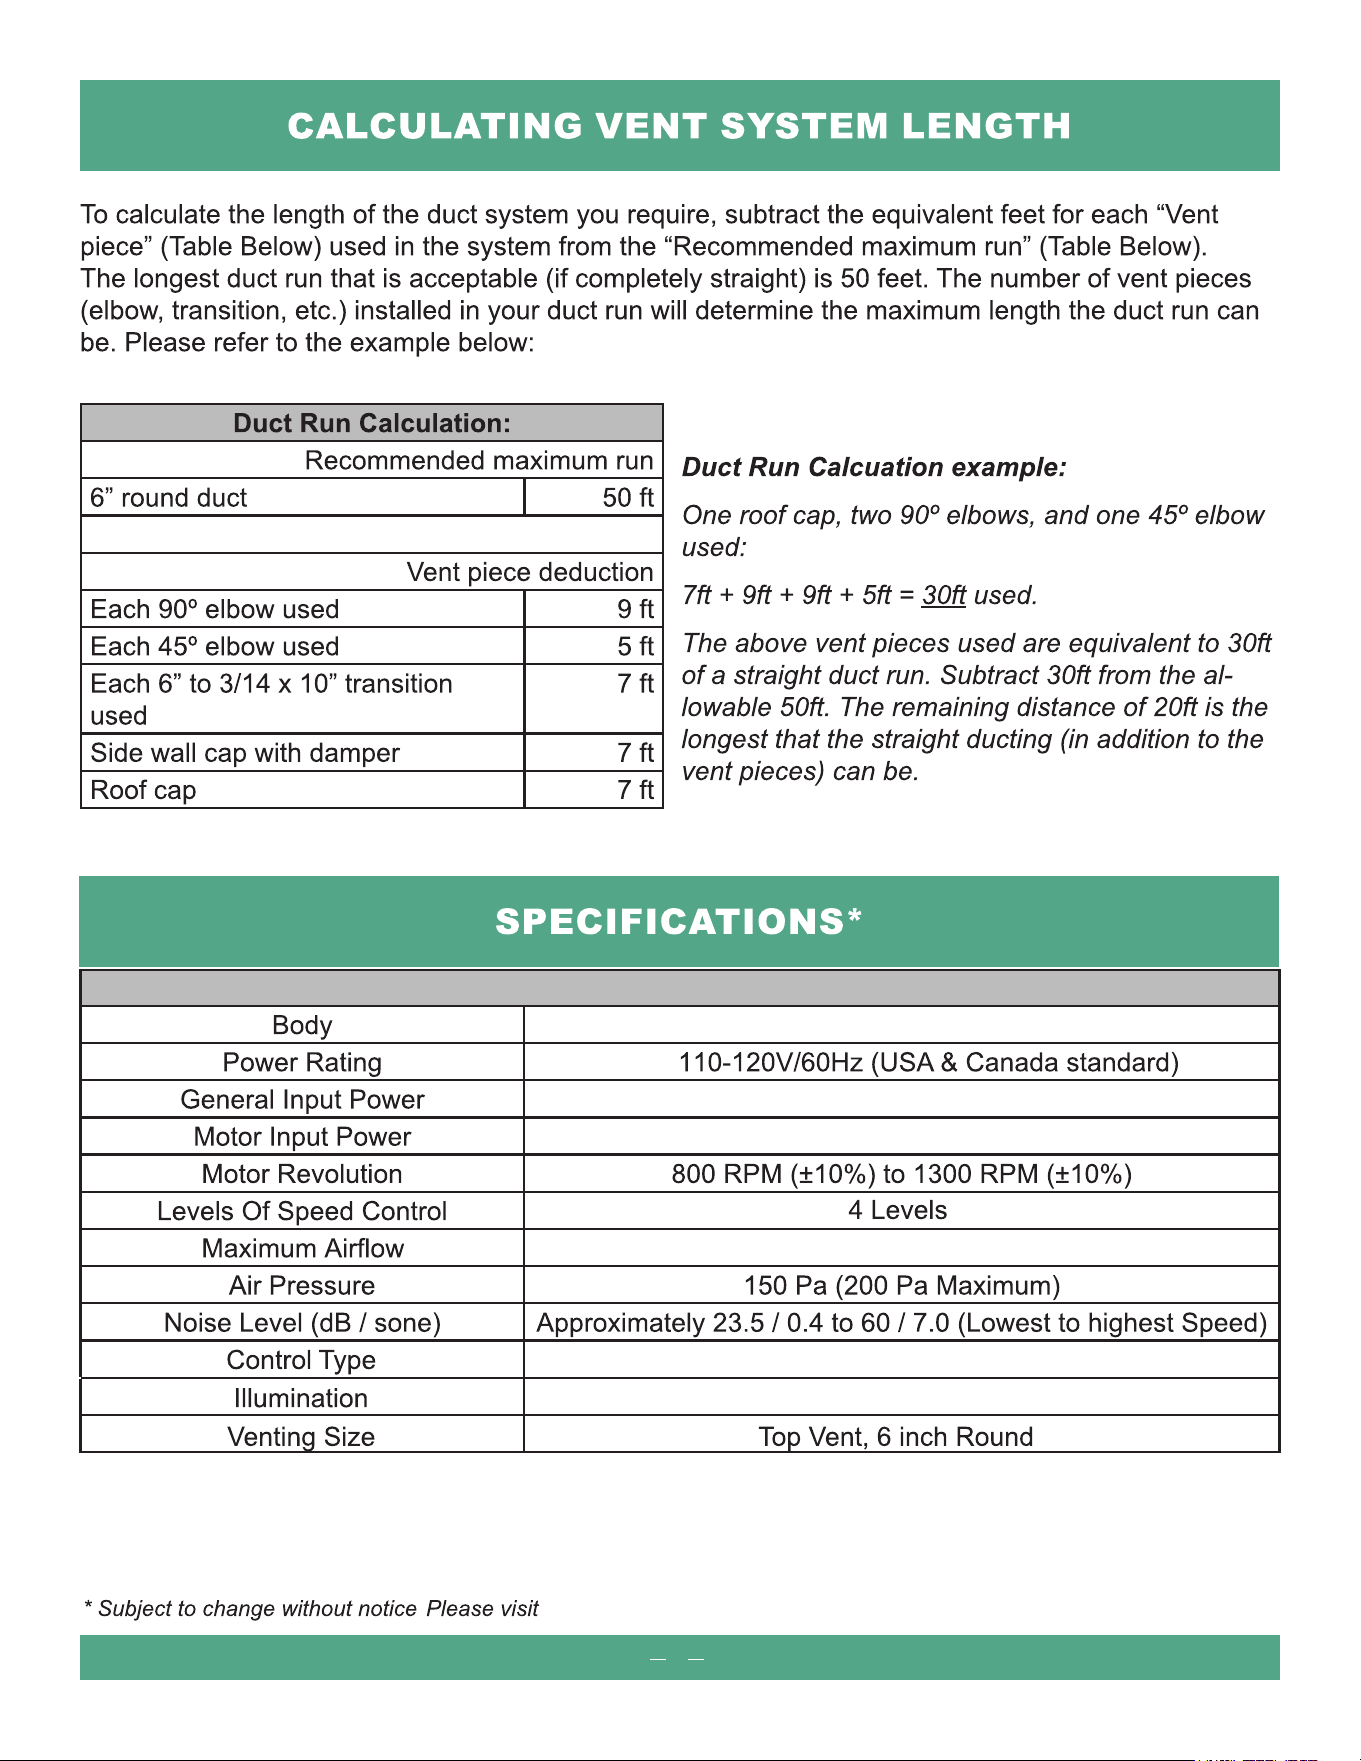
1200 CFM
Touch/Gesture/Remote Control
Stainless Steel
9
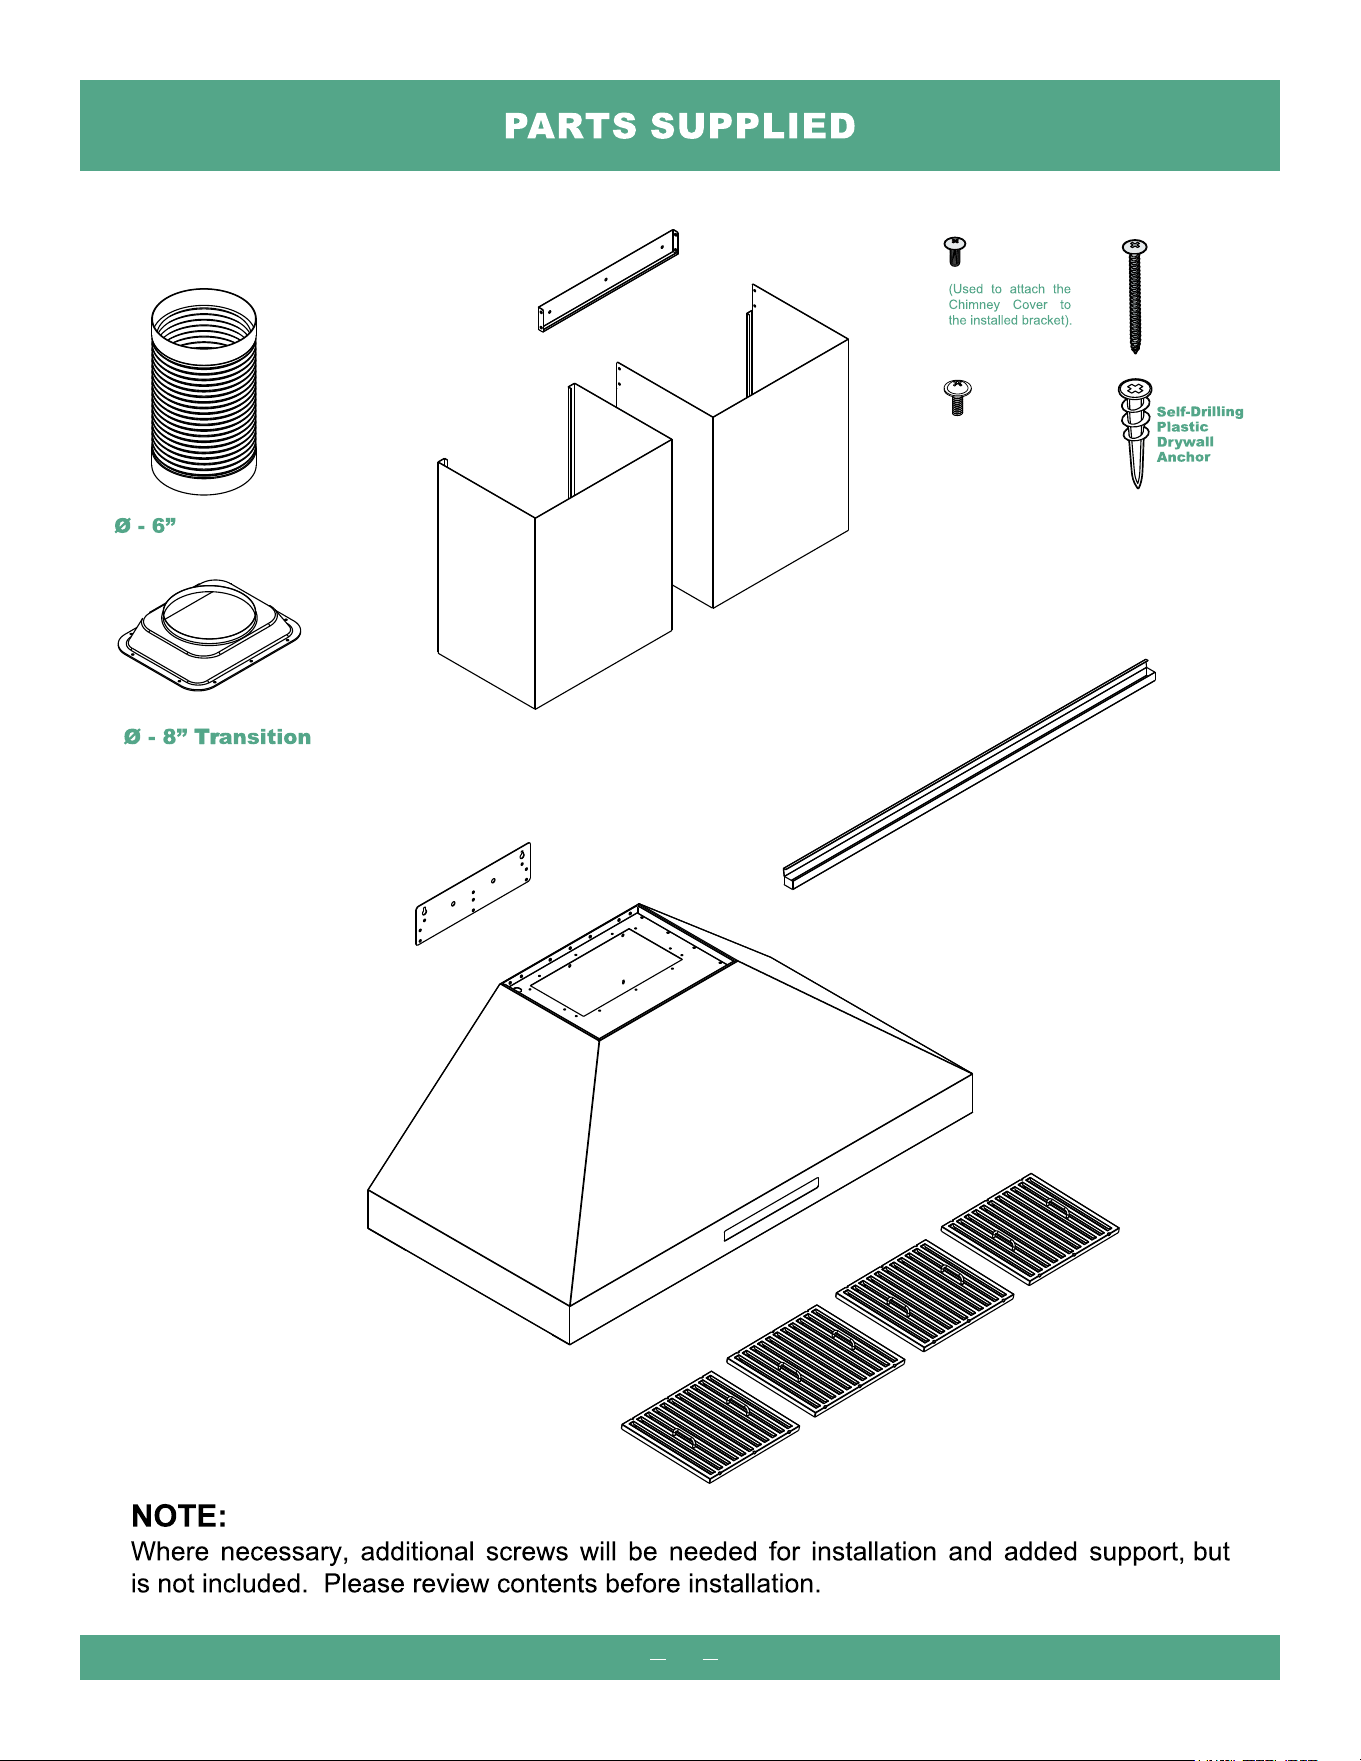
Mounting
Bracket
Lower
Chimney
Upper
Chimney
48" Baffle Filters (x4)
Grease Tunnel
Mounting
Plate
10
(x16)
M4-6mm
Anchor
Screw
(x10)
(x10)
Vent Pipe
(x8)
M4-12mm
Big Head
(screws for 8-inch duct
adapter installation)

11
12
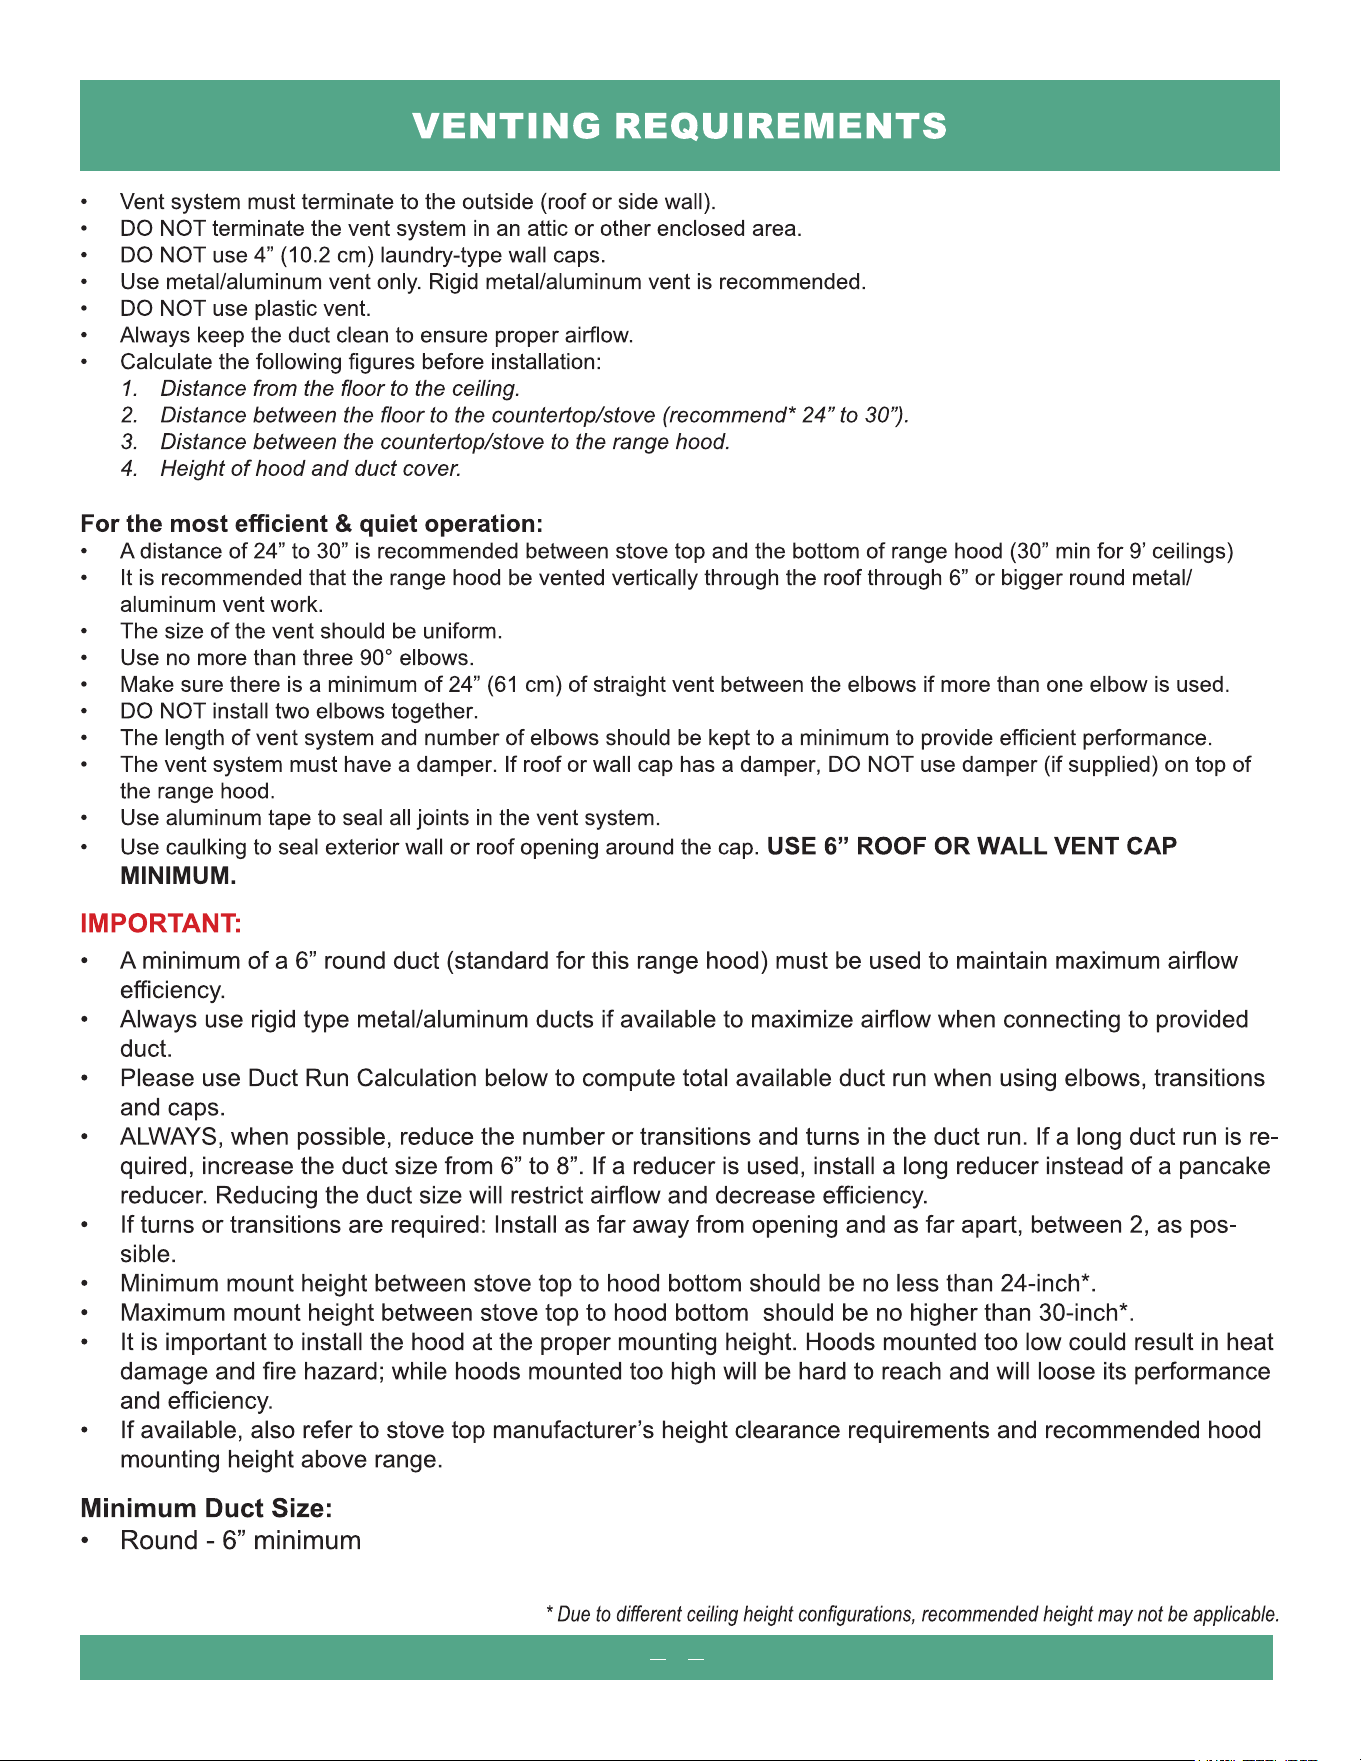
ROUGH-IN
13
ROUGH-IN (Continued)
14
(2) Use M4-12mm big head screws to fasten
on8”-Φ transition to theopening of the fan
motor exit.
(1) Use M4-6mm countersink screws to fastenon
the L-shaped install bracket to the top of therange
hood.
INSTALLATION (Continued)
15
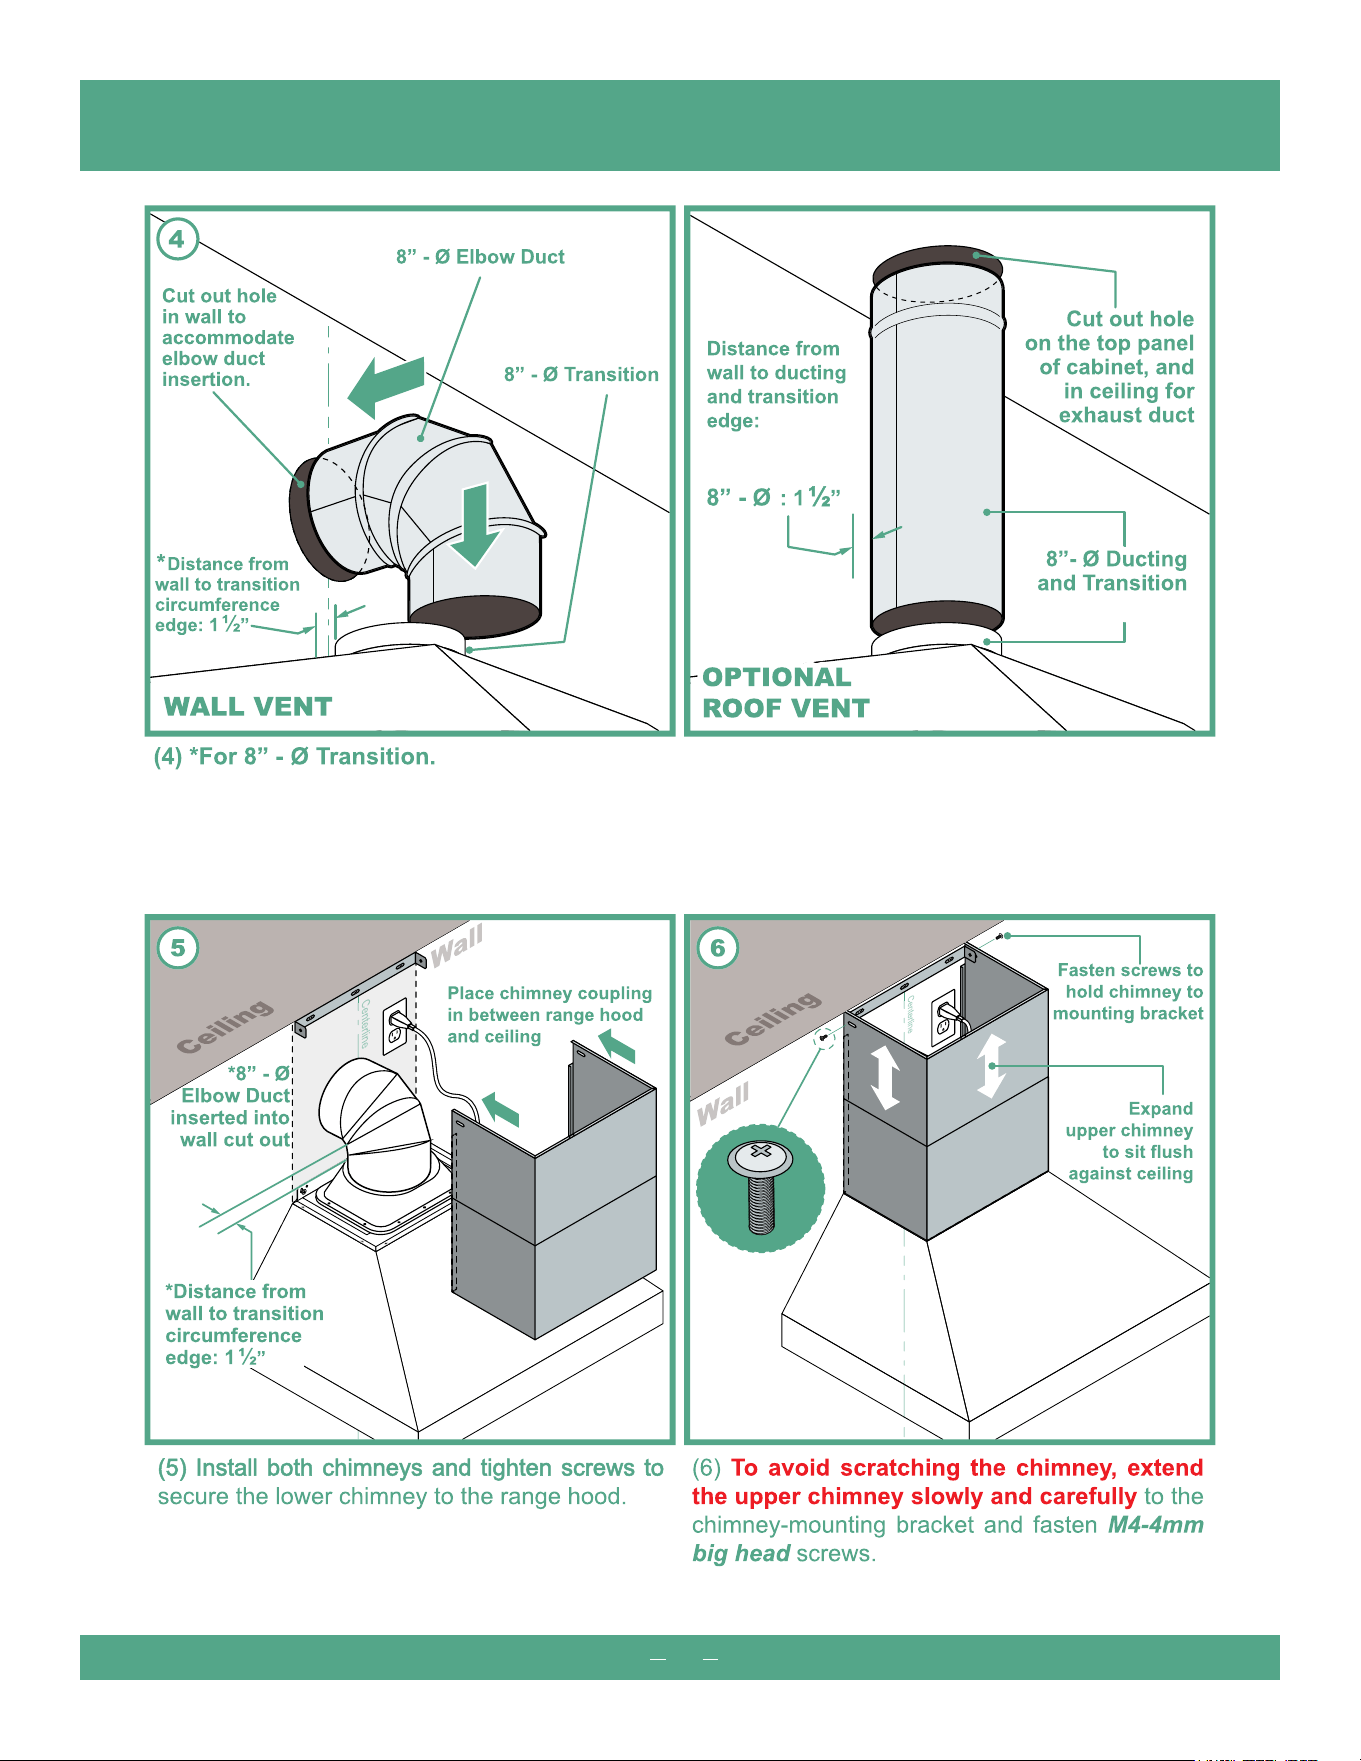
INSTALLATION (Continued)
16
Use 8”round steel pipe to connect the ex-haust on the
hood to the duct work above. Usealuminum tape to
make all joints secure and airtight.
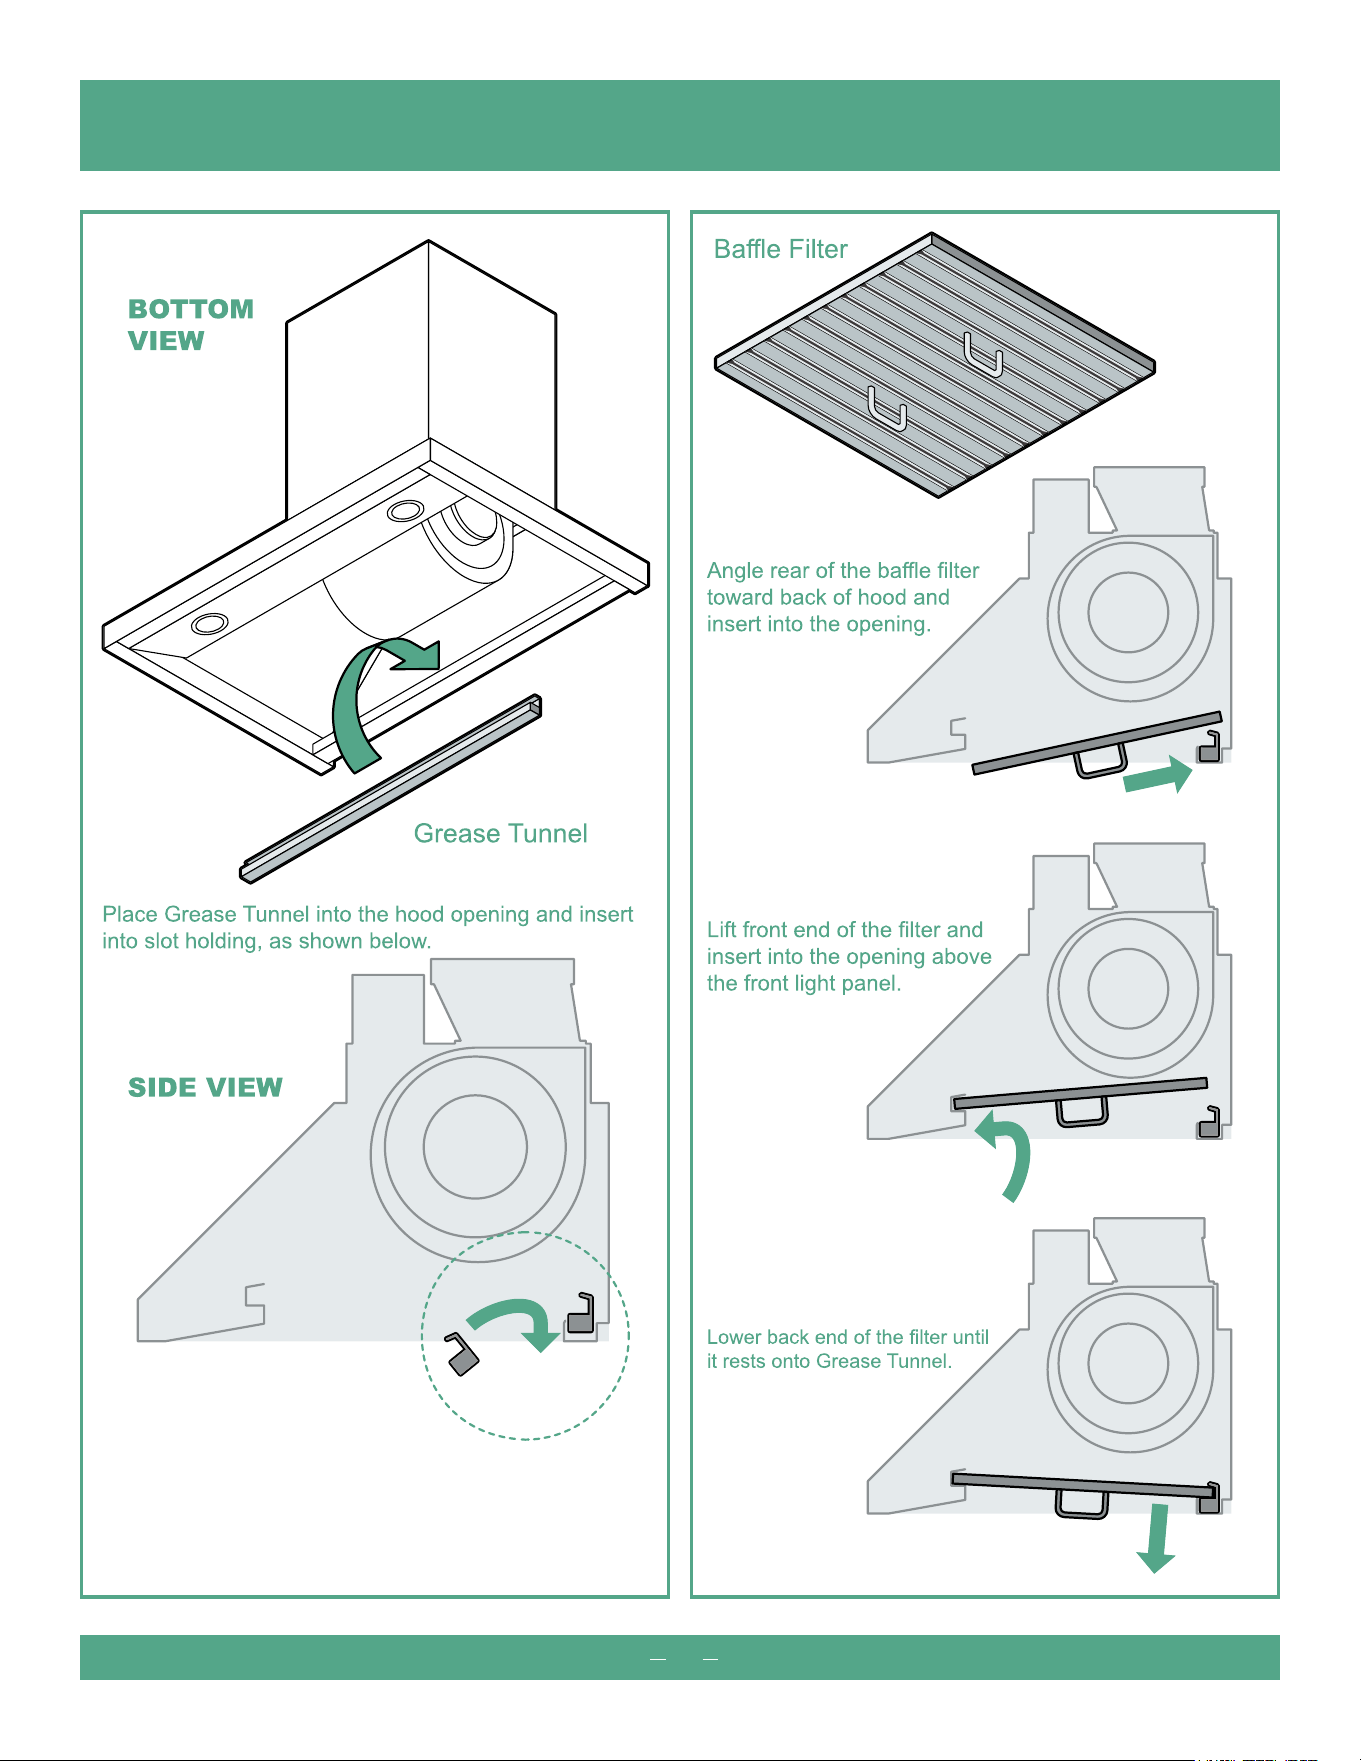
INSTALLATION (Grease Tunnel & Filters)
17
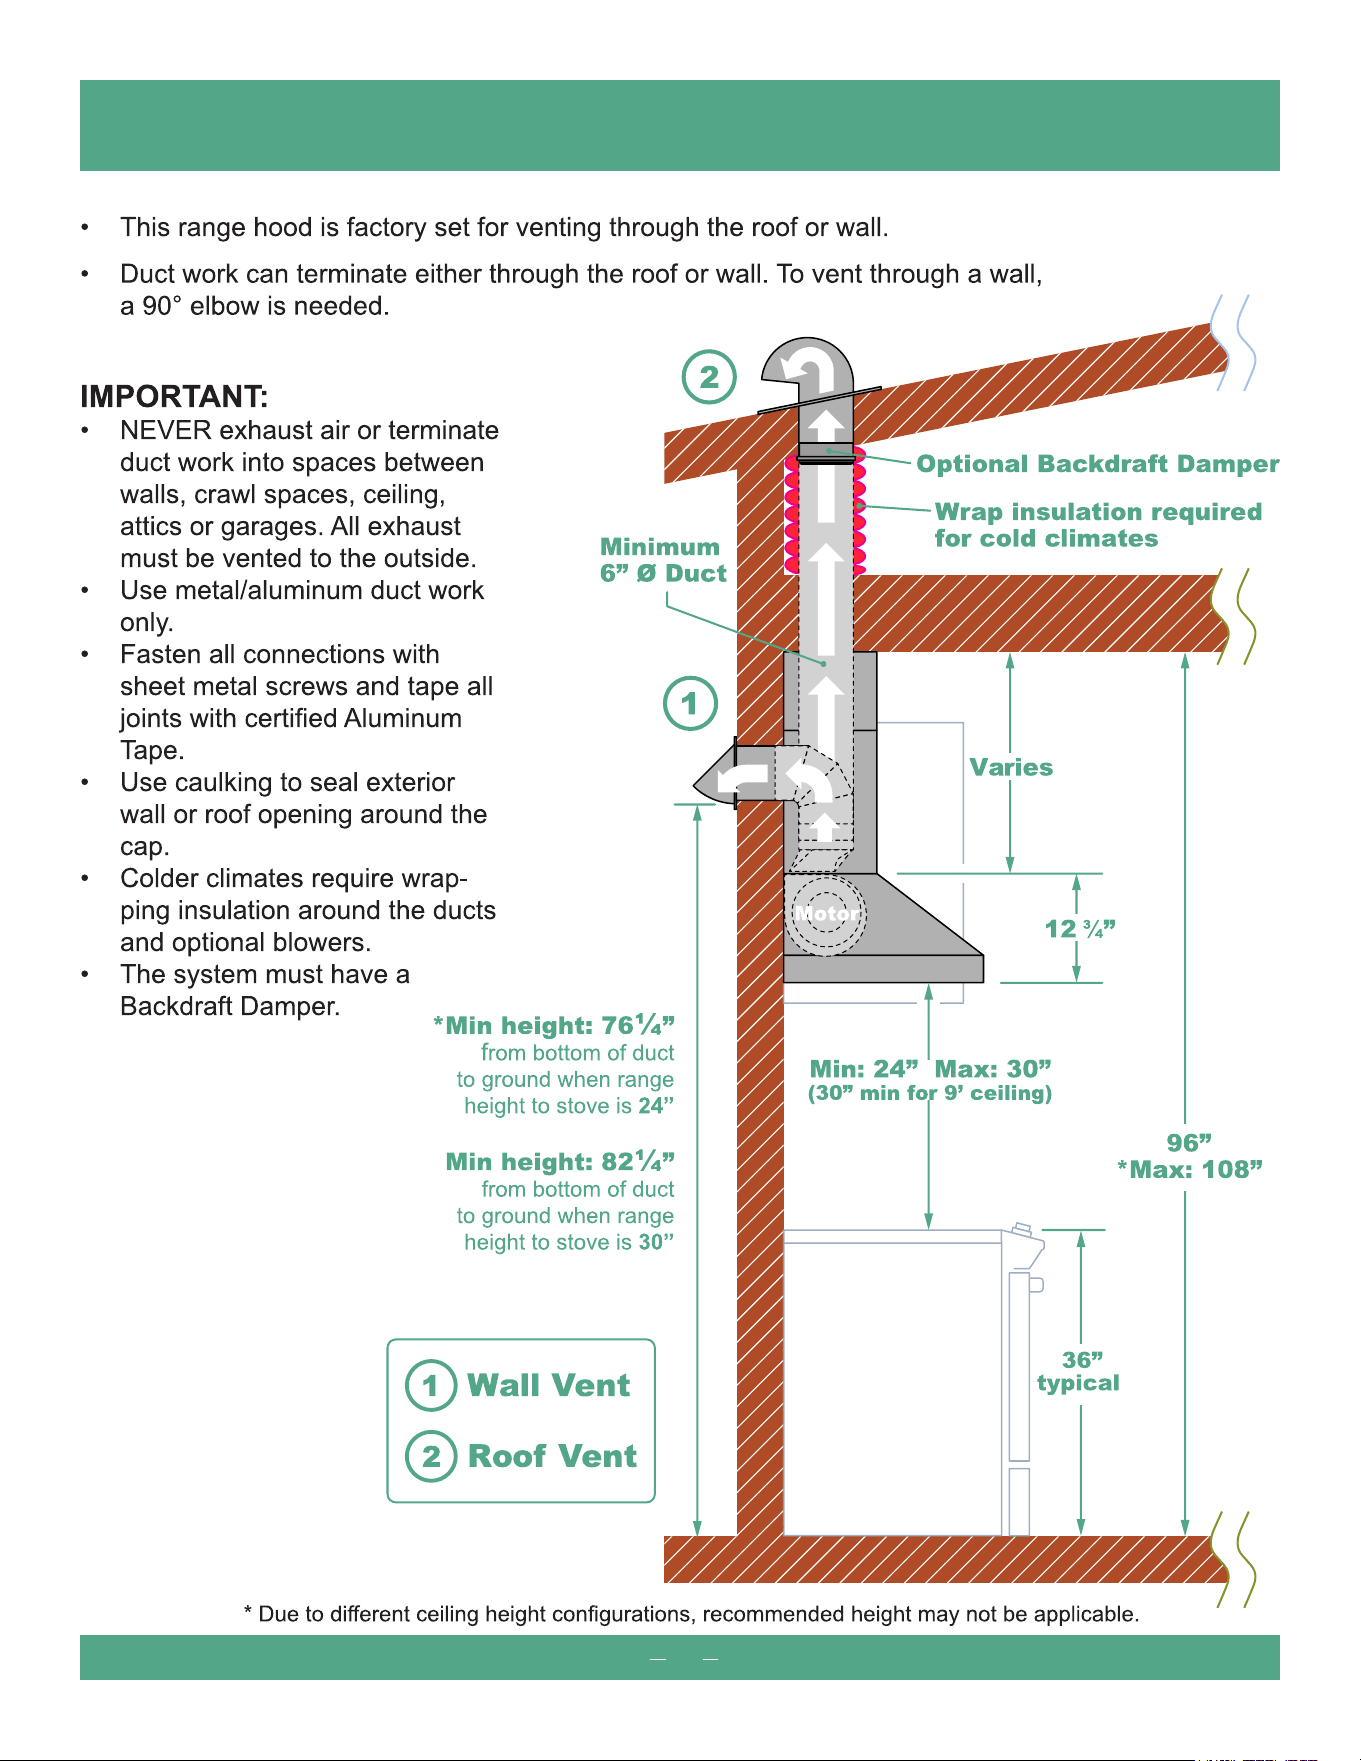
VENTING METHODS (side view)
18
19
20
21
22
5
10
15
1
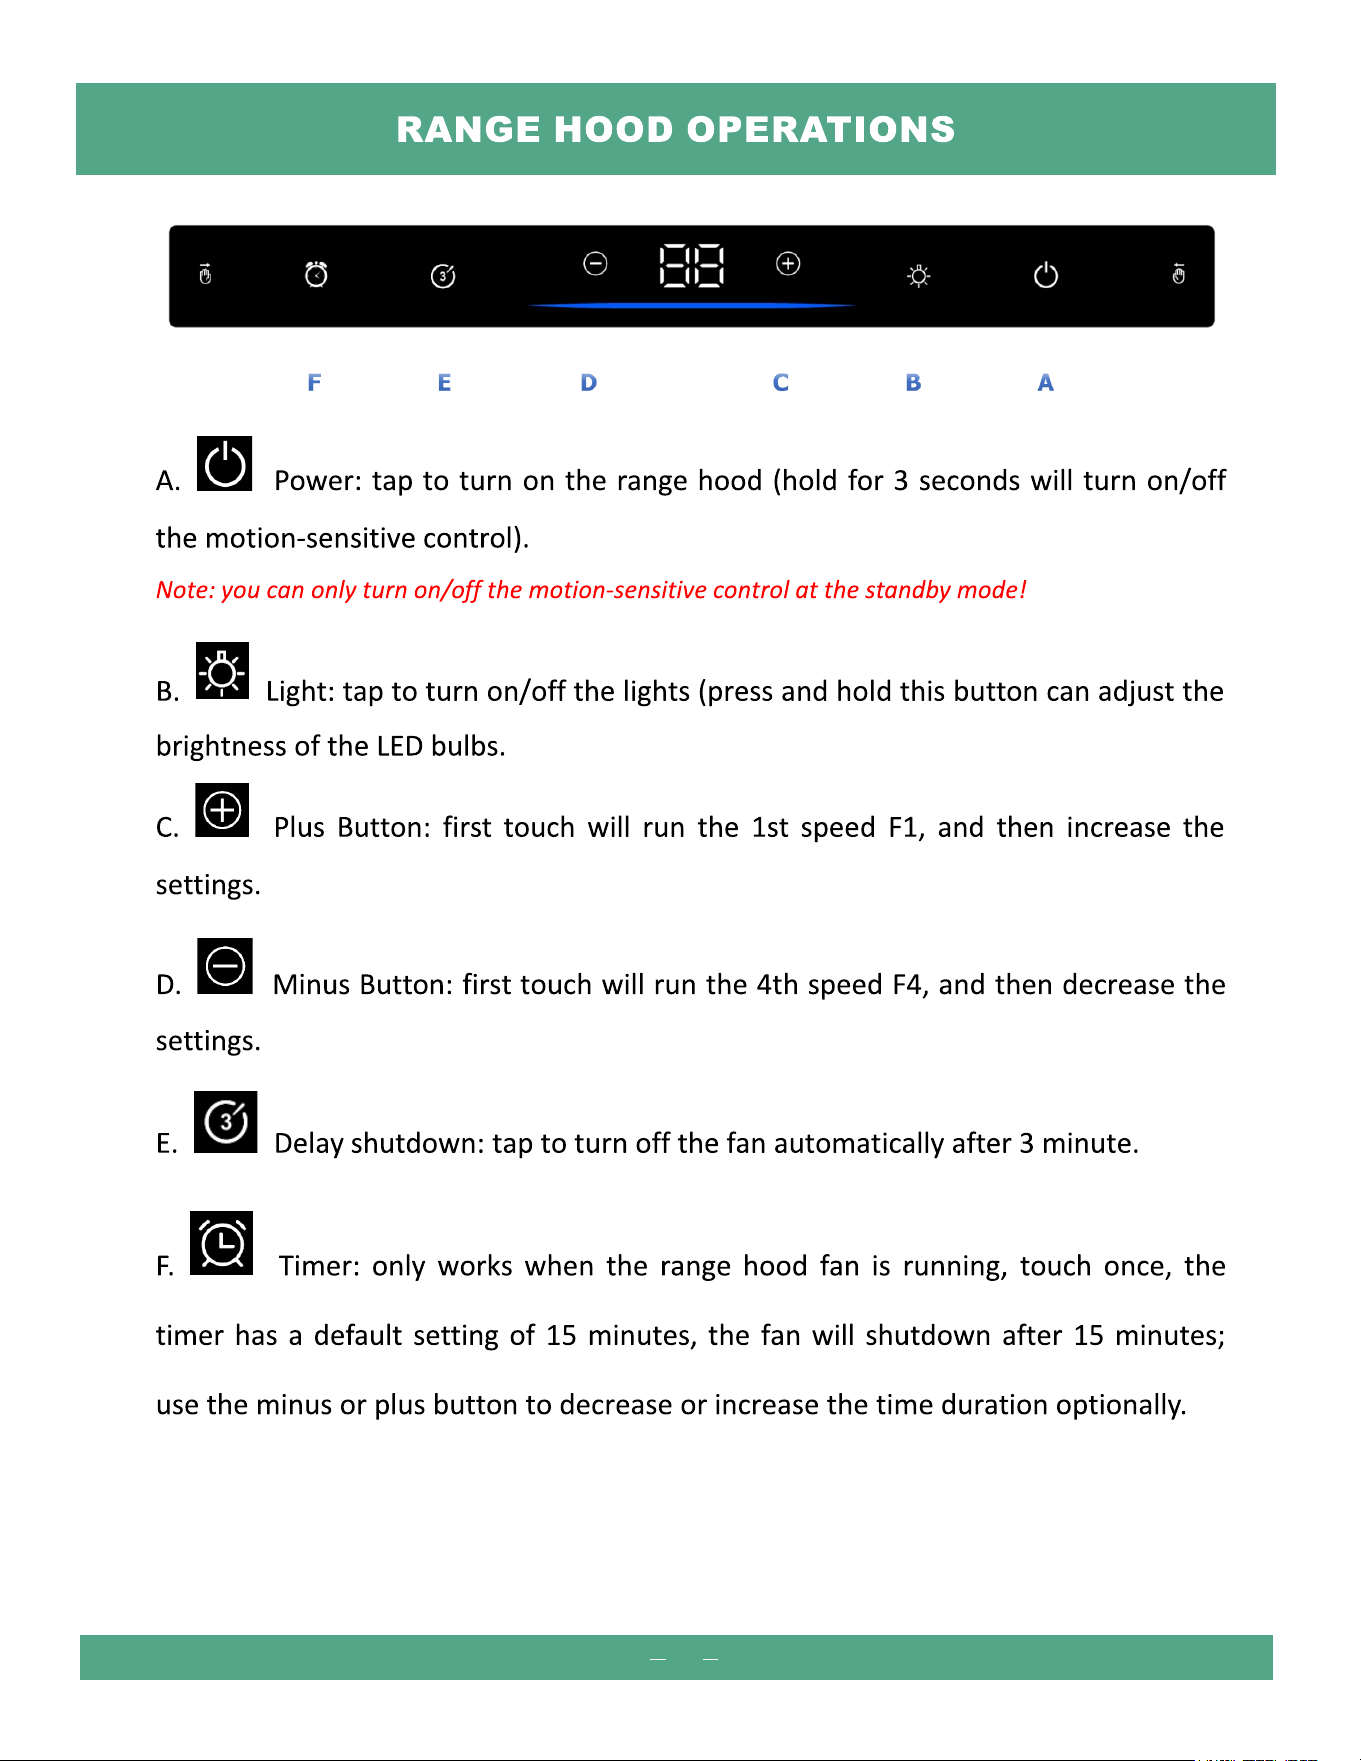
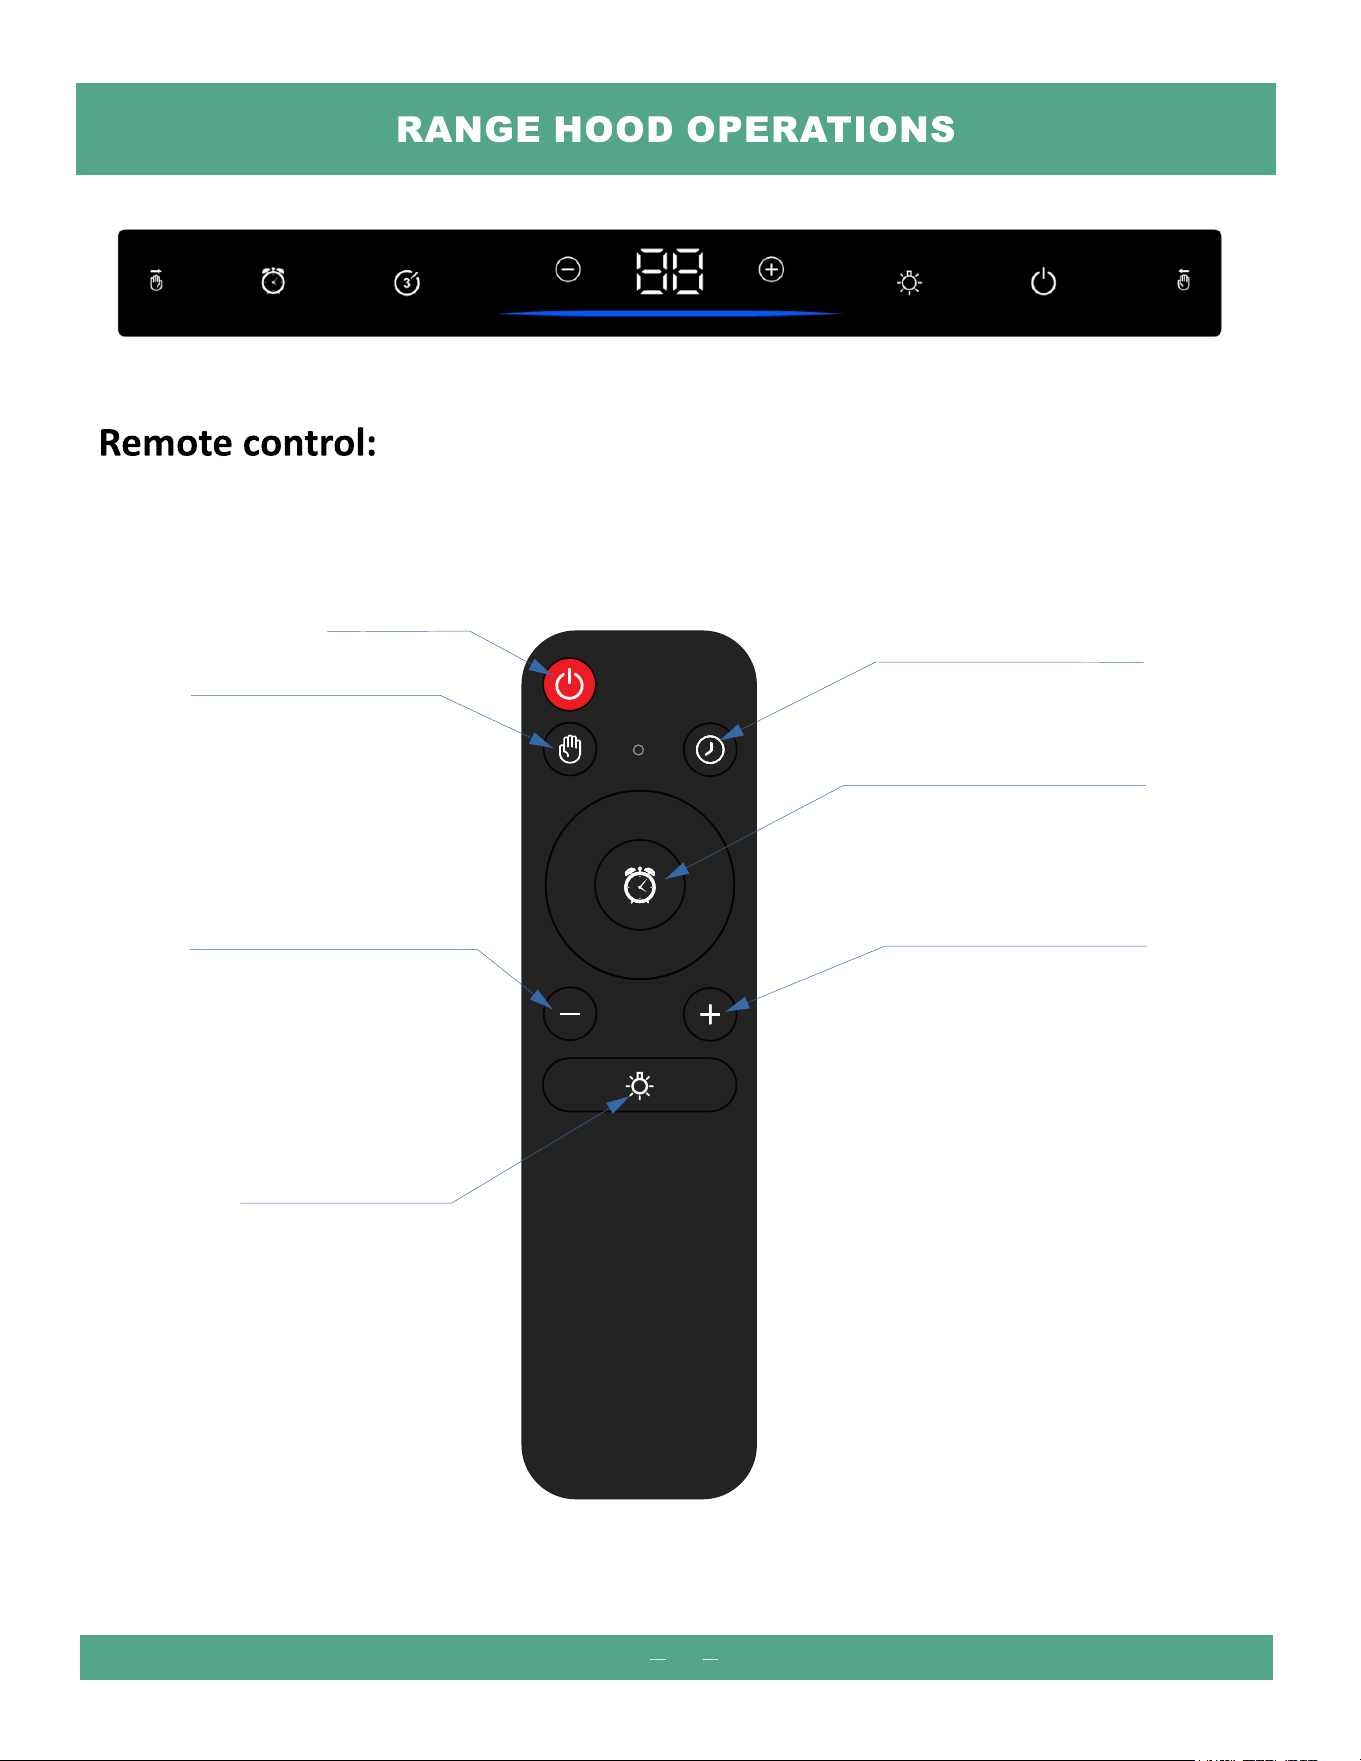
3 minutes delay shutdown
Turn on/off the motion-sensitive control
Power
Minus button to decrease the settings
Light, press and hold can
change the brightness
Timer, set the time duration as
1m, 5m, 10m, or 15m optionally.
Plus button to increase the settings

23
NOTE: For all other inquiries, please contact IAMSII Range Hoods.
24
25
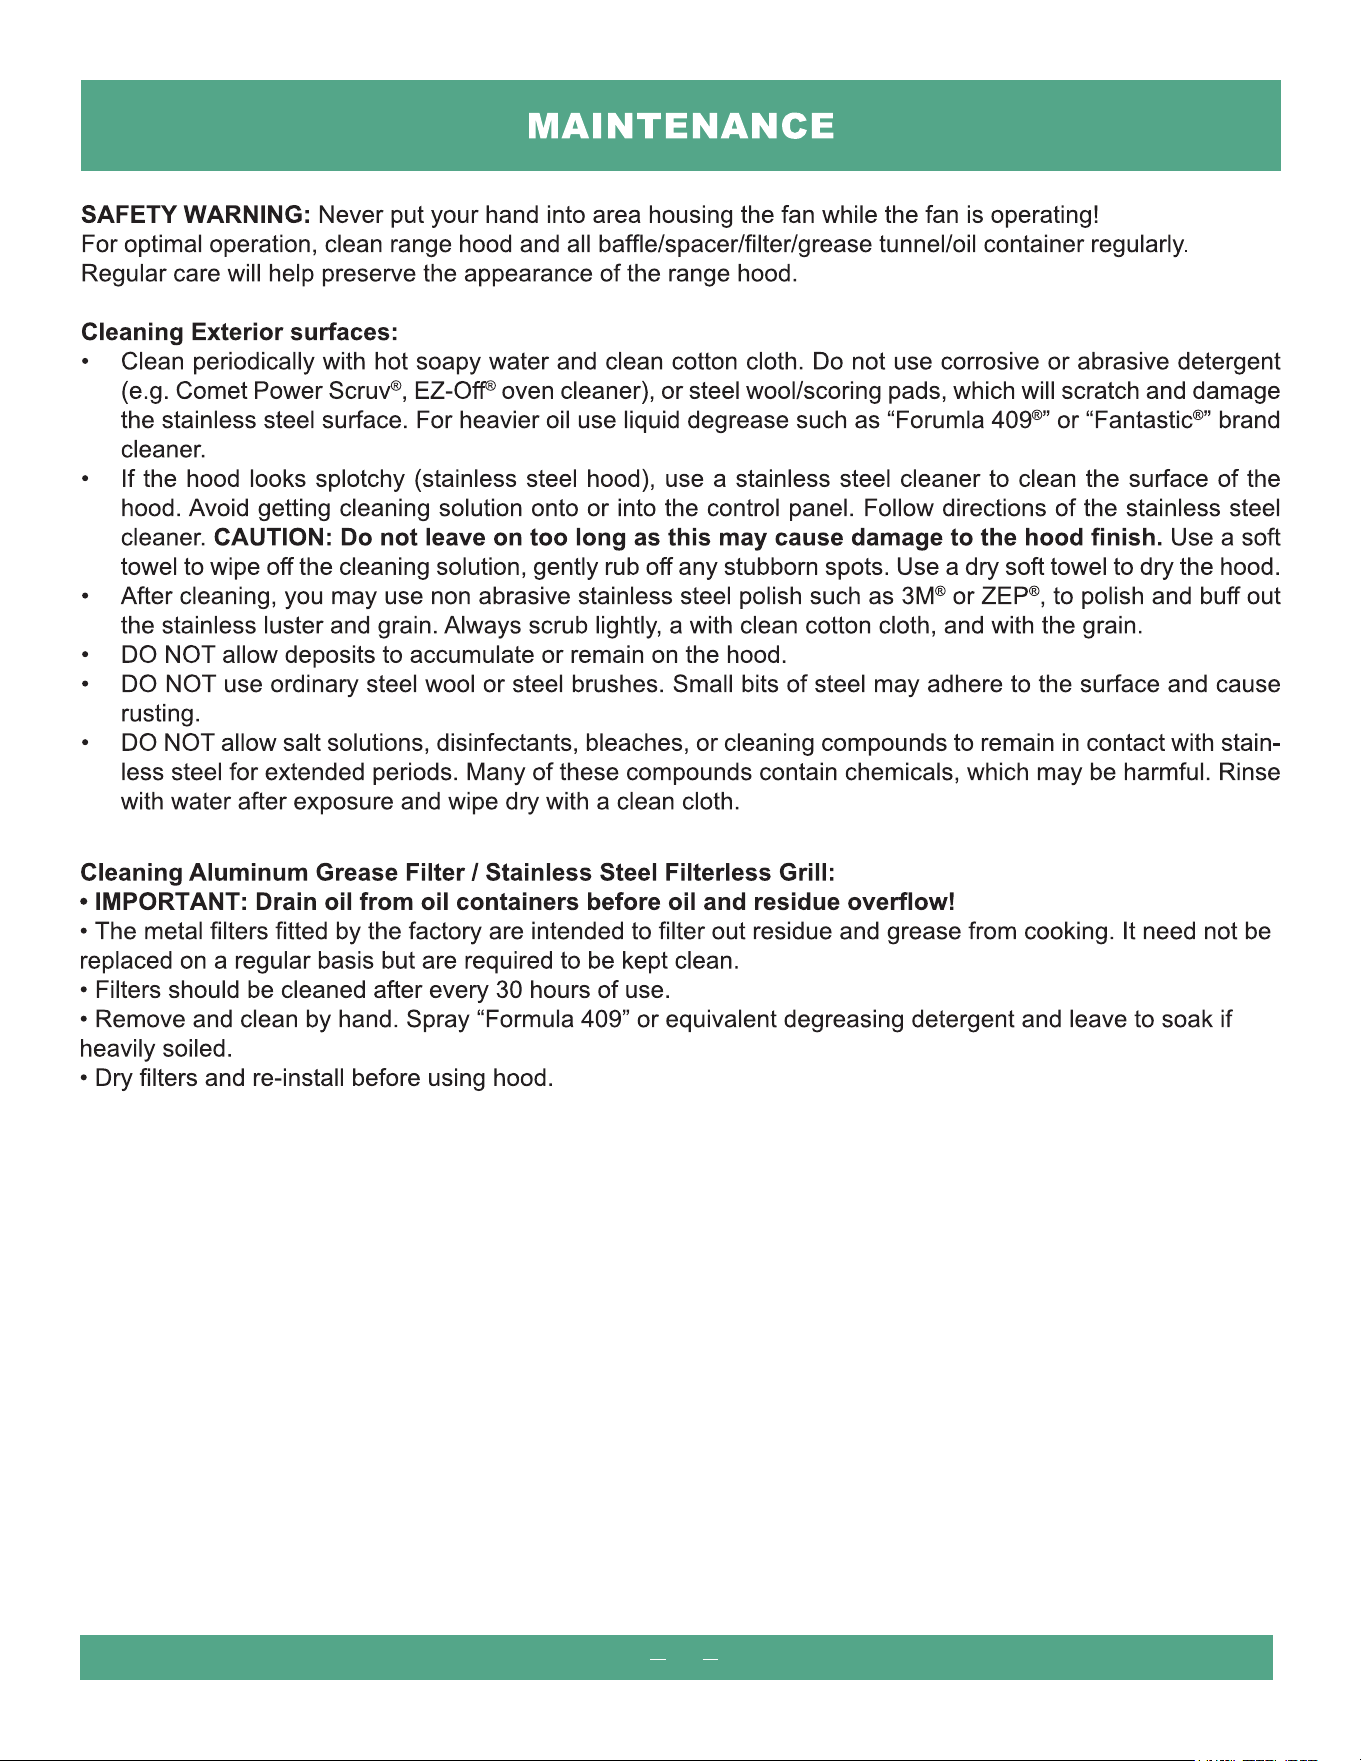
• Filters are recommended to be replaced every six months. lf you need to repurchase, please go
directly to the IAMSII store. lf youare not sure of the model number, please feel free to ask customer
service.
• NOTE:lf the received baffle is bent or broken, you can always contact customer service for
replacement.
26
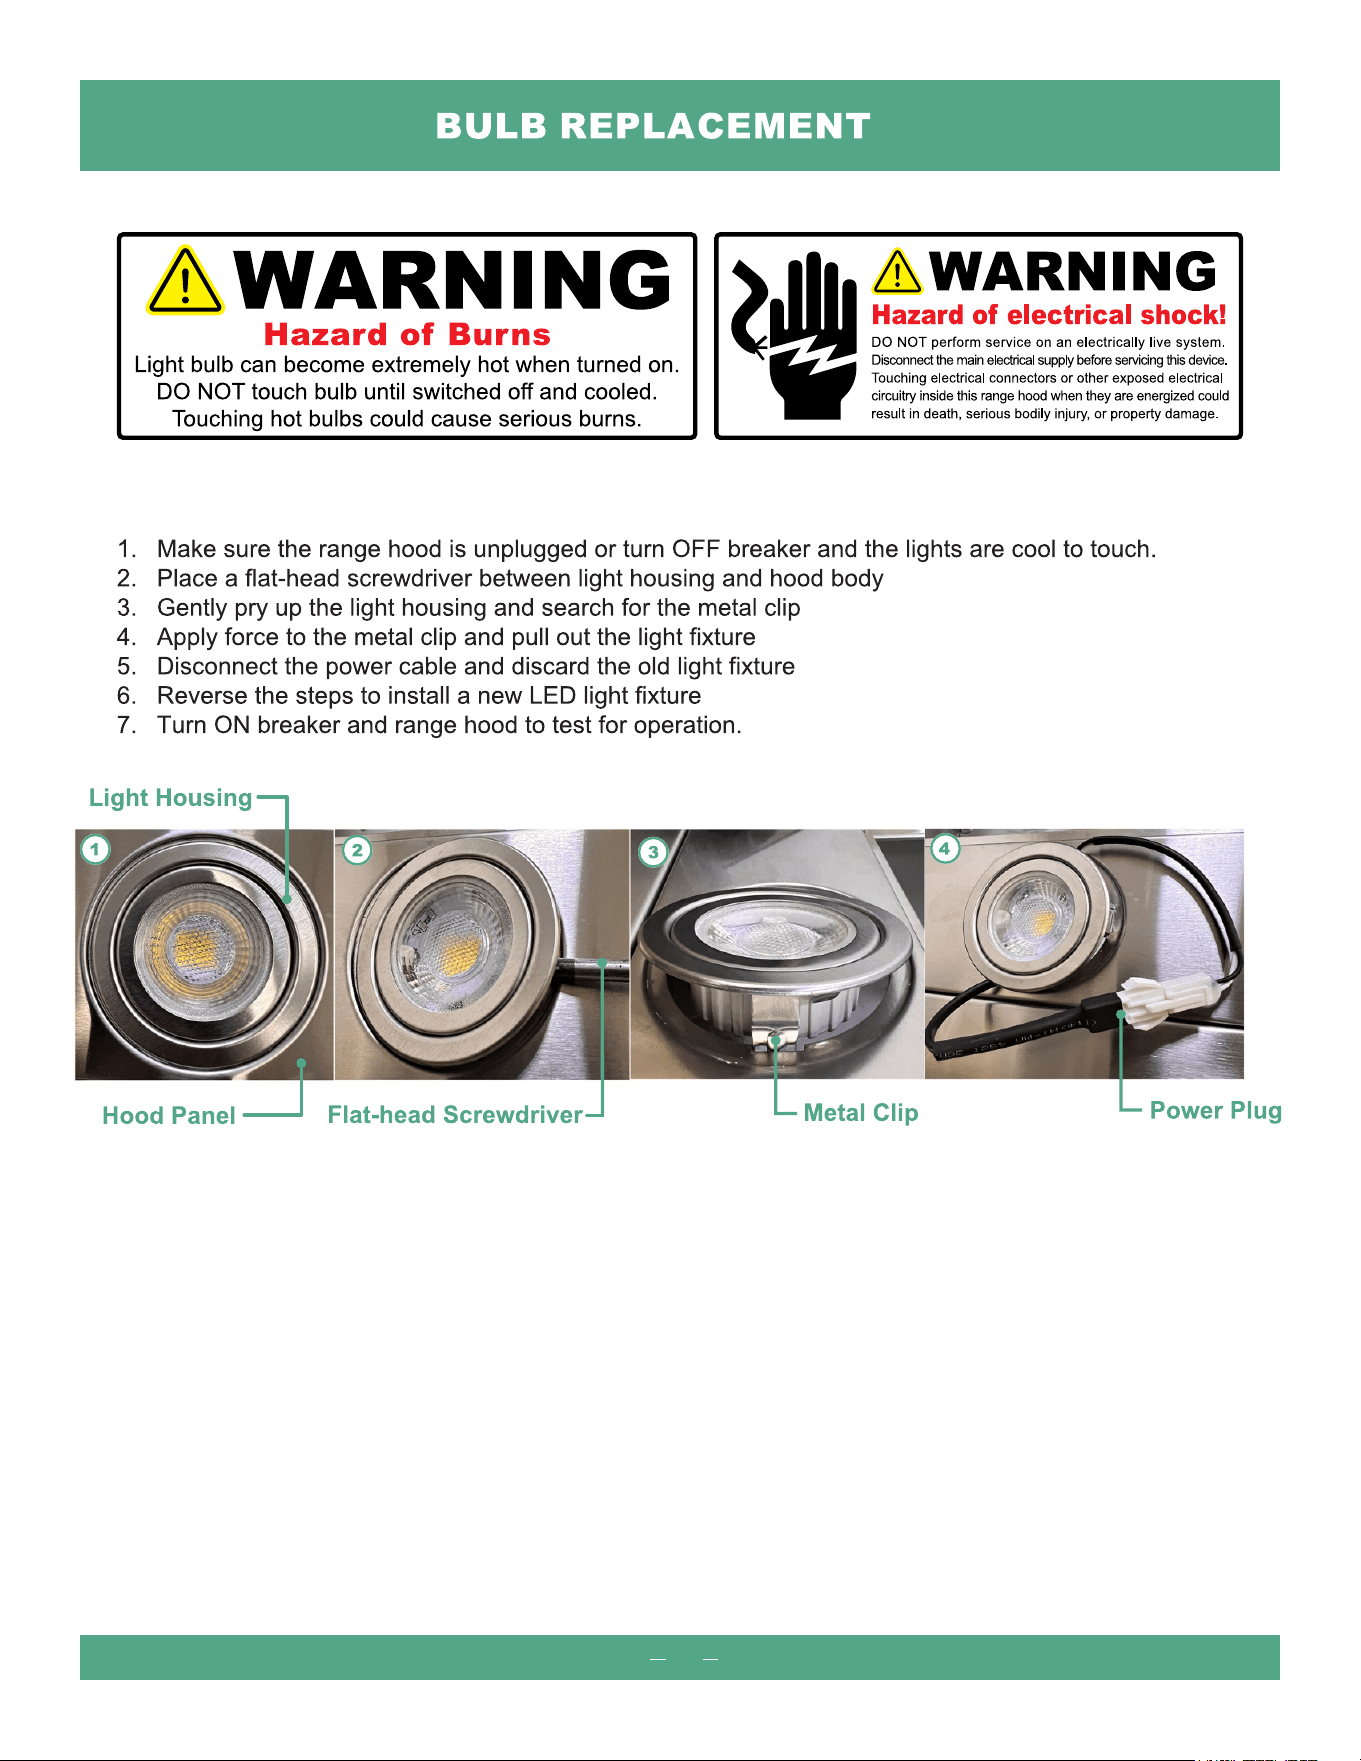
Replacing LED 3W 12V Light Fixture:
27
IAMSII
service@iamsii.com
IAMSII’sIAMSII’s
IAMSII’s
service@iamsii.com
www.iamsii.com
IAMSII
www.iamsii.com

Dispose of this product properly:
To prevent possible harm to the environment or human health from uncontrolled
waste disposal, please recycle this product responsibly to promote sustainable
reuse of material resources.