
INDUCTION RANGES
SINR MODELS
zlinekitchen.com
User Manual

ZLINE Kitchen and Bath provides Attainable Luxury, where the kitchen and bath of your dreams
is never out of reach. Through our unique designs and unparalleled quality, we’re dedicated to
providing you an elevated experience in the heart of your home. With an endless selection of
features and finishes, our inspiration is your reality.

ZLINE is fueled by a passion for innovation; A relentless pursuit of bringing the
highest end luxury designs and professional features into everyone’s homes.
Because we continually strive to improve our products, we may change
specifications and designs without prior notice.
Scan the QR code to view the most up-to-date version of the Installation
Manual and User Manual.
WARNING: This product can expose you to chemicals including nickel, which is known to the
State of California to cause cancer. For more information, go to www.P65Warnings.ca.gov.

IMPORTANT SAFETY INSTRUCTIONS . . . . . . . . . . . . . . . . . . . 1
Installation Safety . . . . . . . . . . . . . . . . . . . . . . . . . . . . . . . . . 5
Cooktop Safety . . . . . . . . . . . . . . . . . . . . . . . . . . . . . . . . . . 6
Ventilation Safety . . . . . . . . . . . . . . . . . . . . . . . . . . . . . . . . . 8
Tipping Safety . . . . . . . . . . . . . . . . . . . . . . . . . . . . . . . . . . . 9
Surface Burner Safety . . . . . . . . . . . . . . . . . . . . . . . . . . . . . . 12
Cookware Requirements for Induction Cooktops . . . . . . . . . . . . . . . 13
Cooking Safety . . . . . . . . . . . . . . . . . . . . . . . . . . . . . . . . . 13
OPERATION . . . . . . . . . . . . . . . . . . . . . . . . . . . . . . . . . . . . . . . 17
Cooktop Specifications . . . . . . . . . . . . . . . . . . . . . . . . . . . . . 17
Cooktop Operation . . . . . . . . . . . . . . . . . . . . . . . . . . . . . . . 20
Power Management . . . . . . . . . . . . . . . . . . . . . . . . . . . . . . . 22
Oven Operation . . . . . . . . . . . . . . . . . . . . . . . . . . . . . . . . . 23
CARE AND MAINTENANCE . . . . . . . . . . . . . . . . . . . . . . . . . . 29
Replacing the Oven Lights . . . . . . . . . . . . . . . . . . . . . . . . . . . 29
Cleaning Your Range . . . . . . . . . . . . . . . . . . . . . . . . . . . . . . 29
TROUBLESHOOTING . . . . . . . . . . . . . . . . . . . . . . . . . . . . . . . . 32
WARRANTY . . . . . . . . . . . . . . . . . . . . . . . . . . . . . . . . . . . . . . . . 36
TABLE OF CONTENTS

1
WARNING
WARNING:
Never Operate the Top Surface Cooking Section of this Appliance Unattended.
• Failure to follow this warning statement could result in fire, explosion, or burn
hazard that could cause property damage, personal injury, or death.
• If a fire should occur, keep away from the appliance and immediately call
your fire department. DO NOT ATTEMPT TO EXTINGUISH AN OIL/GREASE
FIRE WITH WATER.
WARNING
ATTENTION:
Ne faites jamais fonctionner la surface de cuisson, sur le dessus de cet appareil, sans
surveillance.
• Le non-respect de cette mise en garde pourrait entraîner un incendie, une
explosion ou un risque de brûlure et ainsi causer des dommages matériels, des
blessures ou la mort.
• Si l’appareil prend feu, tenez-vous à l’écart et appelez immédiatement votre
service des incendies. NE TENTEZ JAMAIS D’ÉTEINDRE UN FEU DE GRAISSE
OU D’HUILE EN L’ASPERGEANT D’EAU.
IMPORTANT SAFETY INSTRUCTIONS
General Safety
2
IMPORTANT SAFETY INSTRUCTIONS
• NOTE: This equipment has been tested and found to comply with the limits for a Class
B digital device, pursuant to part 15 of the FCC Rules. These limits are designed to
provide reasonable protection against harmful interference in a residential installation.
This equipment generates, uses and can radiate radio frequency energy and, if not
installed and used in accordance with the instructions, may cause harmful interference
to radio communications. However, there is no guarantee that interference will not
occur in a particular installation. If this equipment does cause harmful interference to
radio or television reception, which can be determined by turning the equipment off
and on, the user is encouraged to try to correct the interference by one or more of the
following measures:
• Reorient or relocate the receiving antenna.
• Increase the separation between the equipment and receiver.
• Connect the equipment into an outlet on a circuit different from that to which the
receiver is connected.
• Consult the dealer or an experienced radio/TV technician for help.
FCC DECLARATION OF CONFORMITY
Unique Identifier
Product Description ZLINE Induction Range
Model Number SINR24-A1, SINR30-A1, SINR36-A1
Trade Name ZLINE
FCC Compliance Statement
This device complies with part 15 of the FCC Rules. Operation is subject to the following
two conditions: (1) This device may not cause harmful interference, and (2) this
device must accept any interference received, including interference that may cause
undesired operation.
This device complies with Part 18 of the FCC Rules.
Responsible Party – U.S. Contact Information
Company: ZLINE Kitchen and Bath, LLC
Address:
350 Parr Circle
Reno, NV 89509
Telephone or internet
contact information:
• 1-614-777-5004
General Safety

3
General Safety
IMPORTANT SAFETY INSTRUCTIONS
• Before beginning installation, please read and follow these important instructions for the
safety of your home and the people living in it.
• The manufacturer will not be responsible for any damage to property or to persons
caused by incorrect installation, improper use of the appliance, or failure to heed the
warnings listed.
• The manufacturer reserves the right to make changes to its products when considered
necessary and useful, without affecting the essential safety and operating characteristics.
• This appliance has been designed for non-commercial, domestic use only.
• Please observe all local, state, and national codes and ordinances. Please ensure the
range is properly grounded. The plug should always be accessible.
• The installer should leave these instructions with the consumer who should retain for local
inspectors’ use and for future reference.
• In Massachusetts, installation must be performed by a Massachusetts licensed installer.
• This manual does not cover all possible conditions that may occur during installation
and/or operation. Always contact a qualified service technician or the manufacturer
about problems you may not understand.
• The installation of appliance designed for manufactured (mobile) home installation must
conform with the Manufactured Home Construction and Safety Standard, Title 24CFR,
Part 3280 [formerly the Federal Standard for Mobile Home Construction and Safety,
Title 24, HUD (Part280)] or with local codes where applicable.

4
IMPORTANT SAFETY ALERTS
DANGER
DANGER: When you see this symbol in the instructions, it indicates a hazardous
situation which, if not avoided, could result in death or serious injury.
WARNING
WARNING: When you see this symbol in the instructions, it indicates a hazardous
situation which, if not avoided, could result in minor or moderate injury.
DANGER
USE CARE WHEN UNPACKING THE PRODUCT
• Remove all tape and packaging before using the appliance, including plastic zip ties
securing the oven racks.
• Carefully dispose of the product’s shipping box, plastic bags, and all other packing
materials after the appliance is unpacked.
• Boxes covered with rugs, bedspreads, sheets, or other materials can become air-tight
chambers. Never allow children to play with packaging material.
• Remove all staples from the box. Staples can cause cuts and destroy finishes if they come
in contact with other appliances or furniture.
• Do not remove the model/serial plate attached to the appliance; doing so will not only
void the product warranty, it will limit the ability for future service to be conducted on the
range in an effective manner.
WARNING
Installation and service on this product must be performed by a qualified
installer or servicer. Ask the manufacturer to recommend a qualified technician
and authorized repair service in your area.
• Do not repair or replace any part of the appliance unless specifically recommended in
this manual. All other servicing should be done only by a qualified technician. This may
reduce the risk of personal injury and damage to the appliance.
DANGER
Always disconnect power when servicing this product, especially for larger-
scale repairs impacting important appliance functionality; failure to do so
increases the risk of fire, explosion, injury, or death.
IMPORTANT SAFETY INSTRUCTIONS
General Safety

5
IMPORTANT SAFETY INSTRUCTIONS
INSTALLATION SAFETY
• Never modify or alter the construction of the appliance by removing panels, wire covers,
or any other part of the product.
• Injuries may result from the misuse of appliance doors such as stepping, leaning, or
sitting on the doors.
• If the appliance is located near a window, NEVER hang long curtains or paper blinds on
that window. They could blow over the cooking surface and ignite, potentially causing
a fire hazard.
• Ensure the kitchen or room where the appliance is installed is well ventilated by keeping
the air intakes open and in good working order and/or by installing a ventilation
range hood above the unit. It’s recommended a hood is installed between 30" and 36"
(762 mm and 914 mm) above the cooktop to allow for optimal air flow.
WARNING
An air curtain or other overhead range/range top hood, which operates
by blowing downward airflow onto the range, shall not be used/installed
in conjunction with this range.
• If the appliance is used intensively for a long time, the effectiveness of the ventilation will
have to be increased, for example by opening a window or increasing the power of the
range hood operating above.
• Flammable materials and liquids should not be stored on the appliance or near surface
units. This includes paper, plastic, and cloth items, as well as cookbooks, plastic ware,
and towels. Do not store explosives such as aerosol cans on or near the appliance.
Flammable materials may explode and result in fire or property damage.
• Keep the appliance area clear and free from combustible materials, gasoline, and other
flammable vapors and liquids.
• Flammable materials should not be stored in the oven or near surface units.
WARNING
STATE OF CALIFORNIA PROPOSITION 65 WARNINGS
• The California Safe Drinking Water and Toxic Enforcement Act requires the Governor of
California to publish a list of substances known to the state to cause birth defects or other
reproductive harm and requires businesses to warn customers of potential exposure to
such substances.
Installation Safety

6
IMPORTANT SAFETY INSTRUCTIONS
COOKTOP SAFETY
DANGER
• Do not store items of interest to children in the cabinets above the appliance or on the
back splash of appliance.
• Children should not be left alone or unattended in the area where the appliance is in use.
Do not allow children to climb, play, sit, or stand on or around any part of the appliance.
Children climbing on the appliance to reach items could be seriously burned or injured.
• DO NOT TOUCH THE COOKING SURFACE, BURNERS, OR ANY AREAS NEAR
THEM. Cooking surface or other parts of the range may be hot.
• Areas near cooking surface or throughout the appliance may become hot enough to
cause burns. During and after use, do not touch, or let clothing or other flammable
materials touch, these areas until they have had sufficient time to cool.
• Do not wear loose-fitting or hanging garments while using the appliance. Do not let
clothing or other flammable materials contact hot surfaces.
• Smother grease fires with a pan lid, or use baking soda, a dry chemical, or foam-type
extinguisher. Use an extinguisher ONLY if:
• You have a Class A, B, or C extinguisher and you know how to operate it.
• The fire is small and contained in the area where it is started.
• The fire department is being/has been called.
• You can fight the fire with your back to an exit.
• When heating fat or grease, watch it closely. Fat or grease may catch fire if allowed to
become too hot.
• Use only dry potholders and oven mitts. Moist or damp potholders on hot surfaces may
result in burns from steam. Do not let potholders touch hot heating elements or burners.
Do not use a towel or other bulky cloth instead of a potholder.
• Do not heat unopened food containers. Buildup of pressure may cause the container to
burst and result in injury.
• Stepping, leaning, or sitting on this appliance can result in serious injuries and also
damage the appliance.
• Know which knob controls which surface burner. Visually check that the element is on.
• Clean the appliance regularly to keep all parts free of grease that could catch fire.
Exhaust fan ventilation range hoods and grease filters should be kept clean. Do not allow
grease to accumulate on hoods or filters. Greasy deposits in the fan could catch fire.
Cooktop Safety

7
IMPORTANT SAFETY INSTRUCTIONS
• When cooking food, turn the hood fan on. Refer to hood manufacturer’s instructions for
cleaning and operation.
• Pot/pan handles should be turned inward and not extend over cooking surface. To
reduce the risk of burns, ignition of flammable materials, and spillage due to unintentional
contact with the pot/pan, the handle of the utensil should be positioned so that it is
turned inward, and does not extend over adjacent cooking surface.
• Do not use aluminum foil to line any part of the appliance. Use aluminum foil only to cover
food during cooking. Improper use of these liners may result in risk of electric shock or
fire. Use of aluminum foil on any part of the range may void the manufacturer’s warranty.
WARNING
Never leave cooking surface unattended. Boilovers cause smoke and greasy
spillovers that may ignite, or a pan that has boiled dry may melt.
• Do not use decorative surface burner covers. If a burner is accidentally turned on, the
decorative cover will become hot and possibly melt. You will not be able to see that the
burner is on. Burns will occur if the hot covers are touched. Damage may also be done to
the appliance or burners because the covers may cause overheating. Air will be blocked
from the burner and cause problems.
• Always use proper pot/pan and cookware sizes. This appliance is equipped with
surface units of different sizes. Select cookware with flat bottoms large enough to cover
the surface unit.
Cooktop Safety

8
IMPORTANT SAFETY INSTRUCTIONS
VENTILATION SAFETY
WARNING
• The appliance should have proper ventilation in order to keep the unit operating
properly and maintain the temperature of immediate surroundings. Do not obstruct flow
of ventilation air.
• Observe all governing codes and ordinances, and check your local building codes as
they may vary from the general rules outlined in this manual.
• It is the installer’s responsibility to comply with installation clearances specified on the
model/serial rating plate, in addition to within this User Manual.
• The appliance should be located for convenient use in the kitchen; recessed installations
must provide complete enclosure of the sides and rear of the range.
• To eliminate risk of burns or fire by reaching overheated surface units, cabinet storage
space located above the range should be avoided. This risk can be further reduced by
installing a range hood or microwave hood combination that projects horizontally a
minimum of 5" (127 mm) beyond the bottom of the cabinets.
• If a ventilation range hood is installed with appropriate ducting, maintain a 30"
(762 mm) minimum clearance between the cooking surface and bottom of the hood.
• Always turn on the ventilation range hood when the range is in use.
• Avoid placing cabinetry directly above the appliance when possible. If cabinetry is used
above the cooking surface, use cabinets no more than 13" (330 mm) deep.
• Contact a service technician and/or a qualified floor covering installer to check that
wall coverings, countertops, and cabinets located around the appliance can withstand
at least 200 °F (93 °C).
DANGER
Explosion hazard conditions will exist unless you perform ALL of the following;
failure to do so can result in death, explosion, or fire.
• Examples of a qualified person include:
• Licensed heating personnel
• Authorized service personnel
• Observe all governing codes and ordinances.
Ventilation Safety
9
IMPORTANT SAFETY INSTRUCTIONS
TIPPING SAFETY
DANGER
防倒贴纸
技术要求
1、亚银贴纸,尺寸:120* 120m m
2、每款产品配2张,一张贴于门体上,
一张贴于腔体后板
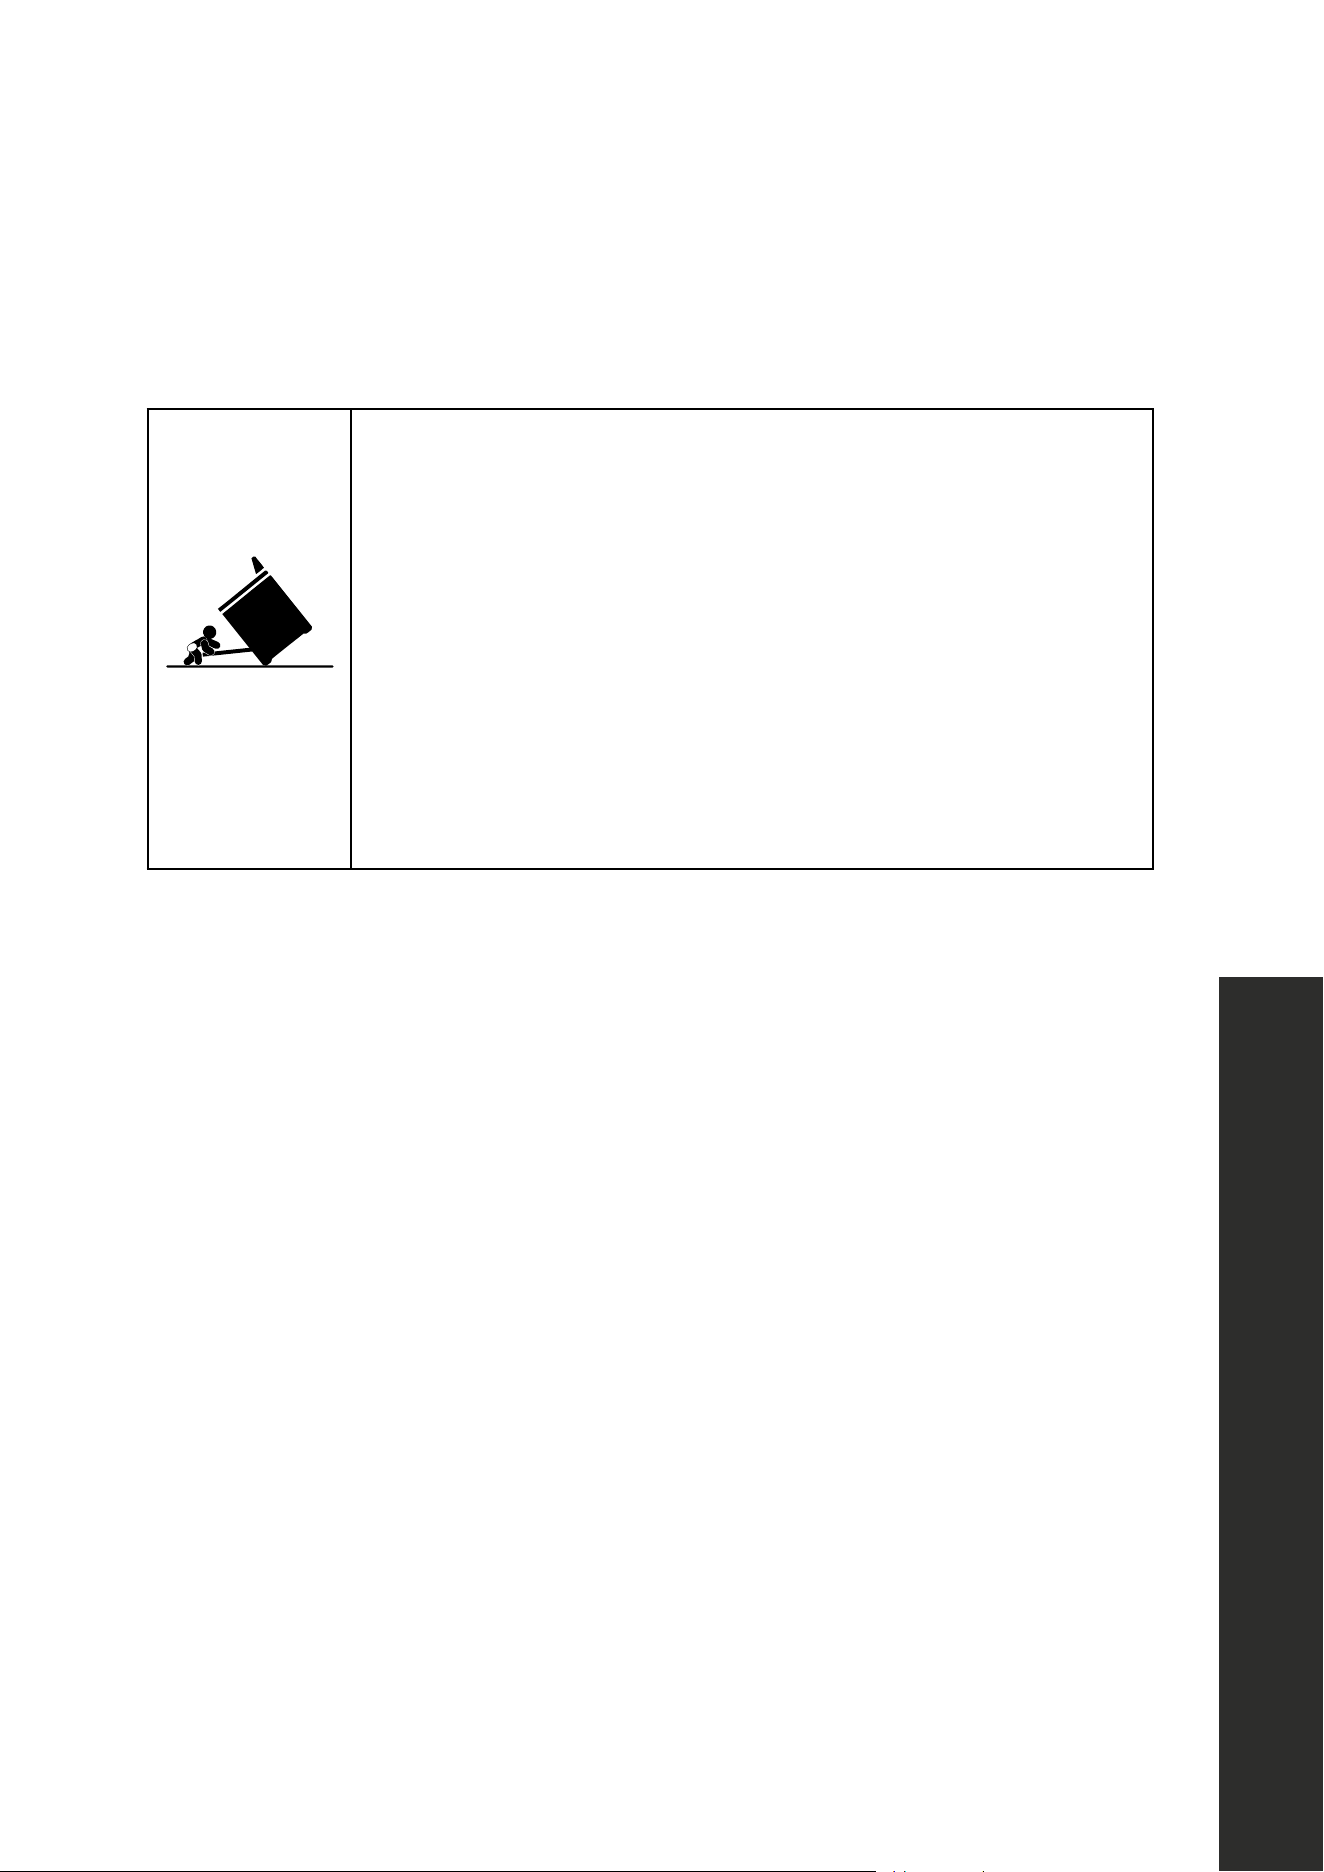
WARNING
TIP-OVER HAZARD
• A child or adult can tip the range and be killed.
• Install anti-tip device to range and/or structure per installation
instructions.
• Engage the range to the anti-tip device installed to the structure.
• Re engage anti-tip device if range is moved.
• Failure to follow these instructions can result in death or serious burns
to children and adults.
• Ensure the anti-tip device is re-engaged when the range is moved by following the same
steps outlined on this page and on page 17 of the Installation Manual.
• Carefully pull on the range from the rear. If the brackets are installed correctly, the
range will not tip more than 4" (102 mm) from the wall. If it tips forward more than 4"
(102 mm), the anti-tip device has not been installed correctly.
DANGER
DO NOT TIP THE RANGE MORE THAN 4" (102 mm) FROM THE WALL AS IT
COULD TIP OVER AND CAUSE INJURY.
• Never completely remove the leveling legs or the range may not be secured to the anti-tip
device properly. NEVER step or sit on the door.
• The range will not tip during normal use. However, without a properly fastened anti-tip
bracket, the range can tip if too much force or weight is applied to the open door.
Tipping Safety

10
IMPORTANT SAFETY INSTRUCTIONS
STORAGE AND FIRE SAFETY
• Items of interest to children should not be placed in cabinets above the appliance or on the
steel back splash vent at the back the range. Children climbing on the appliance to reach
items could be seriously injured.
• DO NOT leave children alone or unattended when the appliance is hot or in operation,
even if the burners and oven have been off for several minutes. The unit’s door, knobs, and
cooktop may still have residual heat, and children could be seriously burned.
• DO NOT let anyone climb, stand, or hang on the unit. They could damage the range or
cause it to tip over which could result in severe personal injury.
• NEVER wear loose fitting or hanging garments while using the range. Be careful when
reaching for items placed in cabinets over the appliance. Flammable material could be
ignited if it contacts hot surfaces and may cause severe burns.
• DO NOT place flammable materials in the oven or anywhere near the range.
• DO NOT place or use combustible materials such as gasoline or other flammable vapors
and liquids in the vicinity of this or any other appliance.
• DO NOT store cooking grease or other flammable materials in or near the appliance.
DANGER
Never leave burners unattended at high heat settings. Boilovers cause smoke and
greasy spillovers that may ignite, or a pan that has boiled dry may melt. DO NOT
ATTEMPT TO EXTINGUISH AN OIL/GREASE FIRE WITH WATER.
• If a grease fire occurs, never touch a flaming pan. Immediately turn the controls off. Smother
a flaming pan on a surface burner by covering the pan completely with a well-fitting lid,
cookie sheet, or flat tray.
• A grease fire can also be put out by covering it with baking soda or, if available, by using
a multi-purpose dry chemical or foam-type fire extinguisher.
• Flames inside the oven can be smothered completely by closing the oven door and turning
controls to OFF, or by using a fire extinguisher.
• Allow the surfaces to completely cool before touching them.
• Make sure your appliance is properly installed and grounded by a qualified installer,
according to instructions explained in the Installation Manual. Any adjustment and service
should be performed only by qualified range installers or service technicians.
• To prevent poor air circulation, place the appliance out of kitchen traffic path and out of
drafty locations.
Storage Safety

11
IMPORTANT SAFETY INSTRUCTIONS
DANGER
Stepping, leaning, or sitting on this range can result in injuries and damage to
the appliance. DO NOT allow children to climb or play around the range; doing
so may cause the appliance to tip, resulting in serious burns or other injury.
• DO NOT attempt to repair or replace any part of your appliance unless it is specifically
mentioned in this manual. All other service should be referred to a qualified technician.
• Make sure all packaging materials are removed — including the plastic zip ties securing
the oven racks during shipping — from the appliance before operating it to prevent fire
or smoke damage should the packaging material ignite.
• Use the appliance only for cooking tasks as outlined in this manual. When using the
appliance, do not touch the burner bases or any other parts in proximity to the heat.
These components may be hot enough to cause burns.
• During and after use, do not touch interior surfaces of the oven until cool.
• Do not use aluminum foil to line any part of the appliance. Use aluminum foil only to cover
food during cooking. Improper use of these liners may result in risk of electric shock or
fire. Use of aluminum foil on any part of the range may void the manufacturer’s warranty.
Fire Safety

12
IMPORTANT SAFETY INSTRUCTIONS
SURFACE BURNER SAFETY
WARNING
• NEVER leave the cooking surface unattended, especially at high settings.
• DO NOT use pots/pans that are unstable or easily tipped. Select cookware with flat
bottoms that are large enough to cover burners. To avoid spillovers, make sure cookware
is large enough to contain the food properly. This will save cleaning time and prevent
hazardous accumulations of food that could ignite.
• Pot/pan handles should be turned inward and not extend over adjacent cooking surface.
To reduce the risk of burns, ignition of flammable materials, and spillage, handles of pots
and pans should be positioned so that they are turned inward and do not extend over
adjacent cooking surface.
• Use only dry pot holders or oven mitts—moist or damp pot holders on hot surfaces may
result in burns from steam. DO NOT let pot holders come near open burners when lifting
cookware. DO NOT use a towel or other bulky cloth instead of a pot holder.
• Do not use decorative surface burner covers. If a burner is accidentally turned on, the
decorative cover will become hot and possibly melt. You will not be able to see that the
burner is on. Burns will occur if the hot covers are touched.
WARNING
NEVER place any items on the cooktop or the back splash of the range. Hot
air from the vent may ignite flammable items and will increase pressure in
closed containers, which may cause them to burst and increase risk of injury.
Surface Burner Safety

13
Cooking Safety
IMPORTANT SAFETY INSTRUCTIONS
COOKING SAFETY
WARNING
Before cooking in your new range, we recommend setting the oven to 400 °F (200 °C) for
1 hour, then setting the oven to broil for 1 hour. There may be a smell and/or smoke —this is
normal when the range is first heated as manufacturing oils burn off. Ensure the room where
the range is installed is well ventilated by keeping air intakes open and/or by operating a
range hood above the unit. After the oven cools, wipe it out with hot water and a kitchen-
safe cleaner. We also recommend cleaning the racks and shelves before use.
• Carefully watch foods being fried at high settings and always heat fat slowly.
• If frying combinations of oils and fats, stir together before heating, and use a deep fat
thermometer if possible to prevent overheating fat beyond the smoking point.
• Use the least possible amount of fat for effective shallow or deep-fat frying. Filling the
pan too full of fat can cause spillovers when food is added.
• NEVER cook foods directly on the burner without a pot or pan; use proper cookware.
COOKWARE REQUIREMENTS FOR INDUCTION COOKTOPS
To ensure optimal performance and safety, only use cookware that meets the following
requirements:
1. Material Requirements
• Magnetic properties required: Cookware must contain ferromagnetic materials (such as
cast iron or magnetic stainless steel). A strong magnet should adhere firmly to the bottom
of the cookware.
• Good thermal conductivity: Materials should conduct heat evenly for efficient cooking.
2. Bottom Design Requirements
• Thick, flat bottom: A thick, flat bottom improves contact with the cooktop and ensures
even heating.
• Avoid honeycomb or textured bottoms: These reduce surface contact and result in
uneven heating.
• No feet or curved bases: Cookware must sit flush on the cooktop surface.

14
Cooking Safety
IMPORTANT SAFETY INSTRUCTIONS
3. Cookware Condition
• Use new or undamaged cookware: Old or warped pots and pans can reduce
performance or damage the cooktop.
• Inspect regularly: Replace cookware with dented, bowed, or uneven bottoms.
4. Recommended Cookware Types
• Best Choice: Cast Iron
• Raw cast iron: Naturally magnetic and retains heat well.
• Enameled cast iron: Same benefits, with an easier-to-clean coating.
• Precision cast iron: Enhanced durability and surface quality.
• Other Suitable Types
• Magnetic stainless steel: Use types such as 430-grade stainless steel made
for induction.
• Iron or carbon steel pans
• Composite cookware: Includes cookware with multi-layer magnetic bottoms.
• Iron enamel teapots: Suitable if the base is magnetic and flat.
5. Unsuitable Cookware Types
• Non-Magnetic Materials
• Ceramic
• Glass
• Aluminum (unless labeled induction-compatible)
• Copper (unless part of a multi-layer magnetic design)
• Improper Shapes
• Round or curved bottoms
• Bottoms with legs or feet
• Warped or dented bases

15
Cooking Safety
IMPORTANT SAFETY INSTRUCTIONS
6. Consequences of Using Improper Cookware
• Performance Issues
• Slow or no heating
• Uneven heat distribution
• Reduced energy efficiency
• User Experience Issues
• Unusual buzzing or humming sounds
• Excessive base temperatures
• Shortened cooktop or cookware lifespan
• Safety Risks
• Damage to induction cooktop components
• Poor cooking results or food quality
7. How to Test Cookware
• Magnet Test
• Place a magnet at the bottom of the cookware.
• If it sticks firmly, the cookware is compatible.
• Weak or no attraction indicates it is unsuitable.
• Flatness Test
• Place cookware on a level surface.
• If it rocks or does not sit flush, it should not be used.
8. Usage and Maintenance Tips
• Daily Use
• Always place cookware in the center of the cooking zone.
• Keep bottoms clean and dry.
• Avoid operating the cooktop without food or liquid inside cookware (dry heating).
• Maintenance
• Regularly check the cookware’s base for warping or damage.
• Avoid scraping the bottom with sharp tools.
• Replace cookware if magnetic attraction weakens or the bottom becomes uneven.

16
Cooking Safety
IMPORTANT SAFETY INSTRUCTIONS
9. Best Practices and Precautions
• Use thick-bottomed cast iron cookware for best performance.
• Confirm magnetic compatibility before use.
• Avoid cookware with warped, dented, or protruding bottoms.
• Refer to cookware manufacturer instructions when unsure.
NOTE: Proper cookware selection is critical for achieving efficient, safe, and enjoyable
cooking results on induction cooktops.
17
Surface Burners
OPERATION
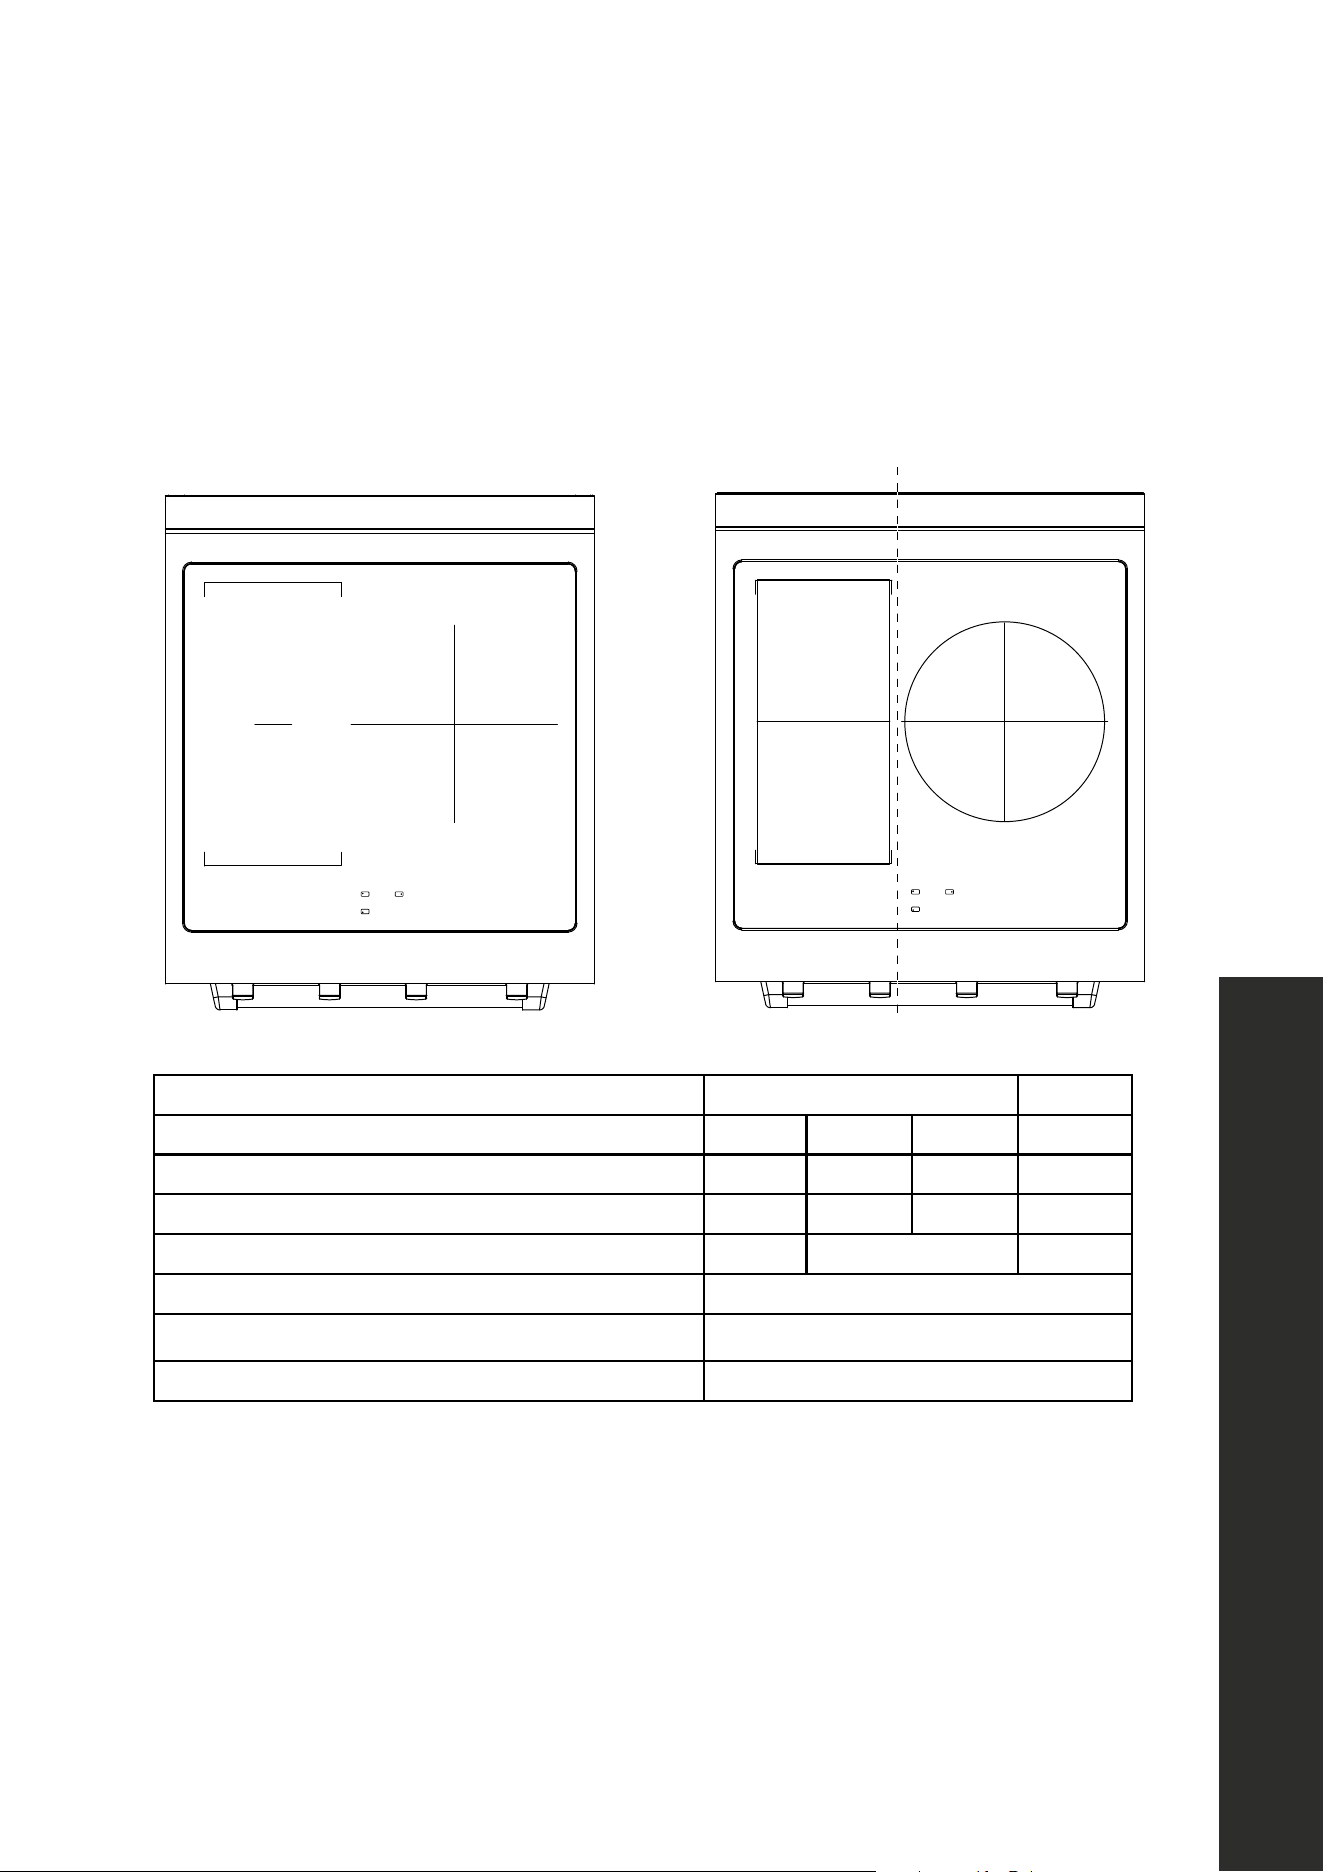
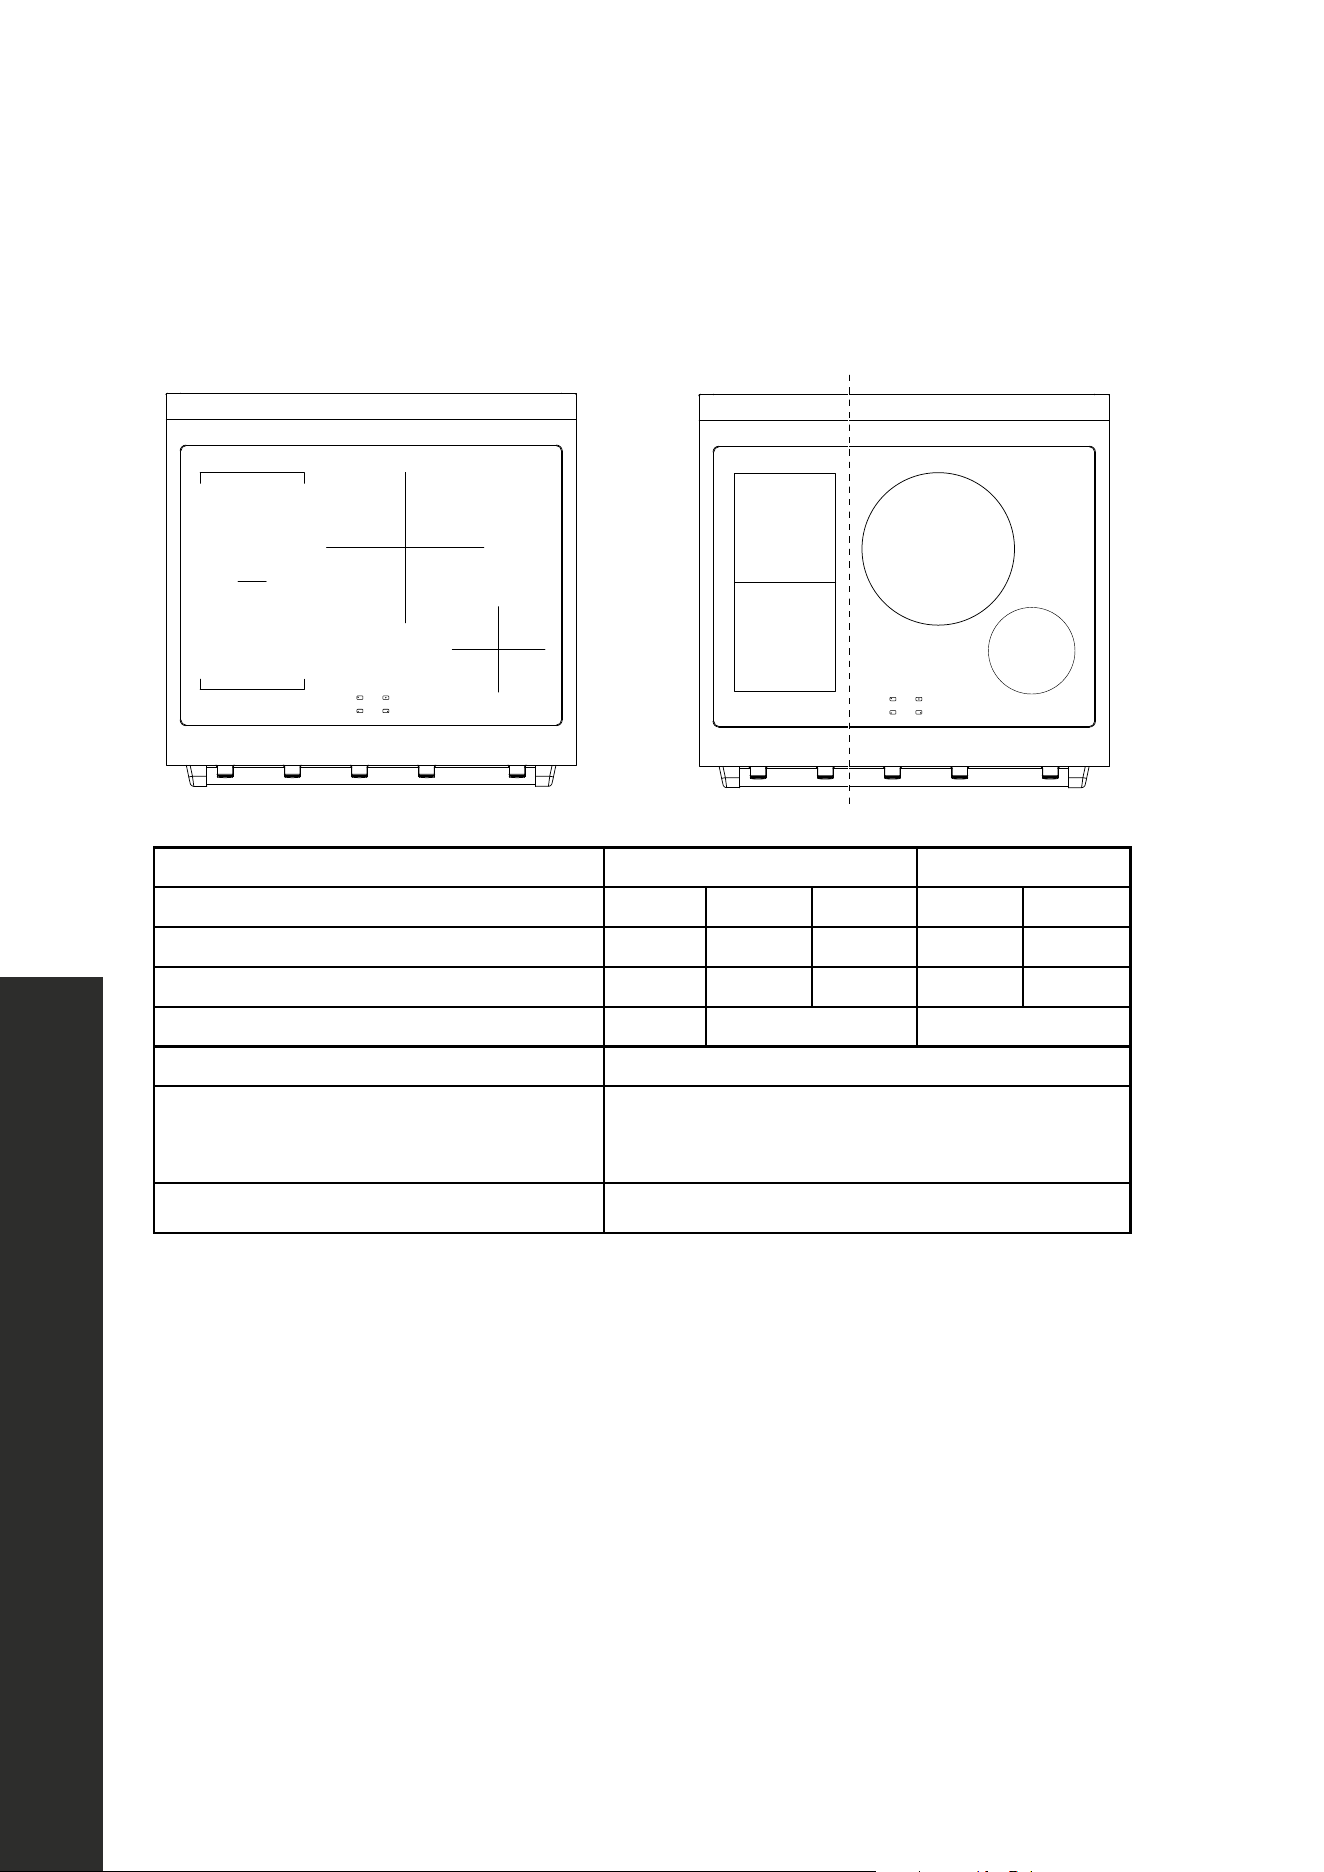
COOKTOP SPECIFICATIONS
24" (610 mm)
ø 190
Left Side Right Side
ø 190
ø 280
24" (610 mm) Left Side Right Side
Zones Bridge Ø190 Ø190 Ø280
9 Levels 3000 W 2000 W 2000 W 3000 W
Power Boost 3600 W 2600 W 2600 W 3600 W
Level 9 + 9 - 4000 W -
Maximum Power 7600 W
Maximum power of induction when the oven is working 7600 W
NOTE A maximum of 2 power boosts
18
Surface Burners
OPERATION
30" (762 mm)
ø 190
ø 190
ø 280
ø 160
Left Side Right Side
30" (762 mm) Left Side Right Side
Zones Bridge Ø190 Ø190 Ø280 Ø160
9 Levels 3000 W 2000 W 2000 W 3000 W 1200 W
Power Boost 3600 W 2600 W 2600 W 3600 W 1500 W
Level 9 + 9 - 4000 W -
Maximum Power 7600 W
Maximum power of induction when the
oven is working
7600 W
NOTE One Power Boost per side (left and right)
19
Surface Burners
OPERATION
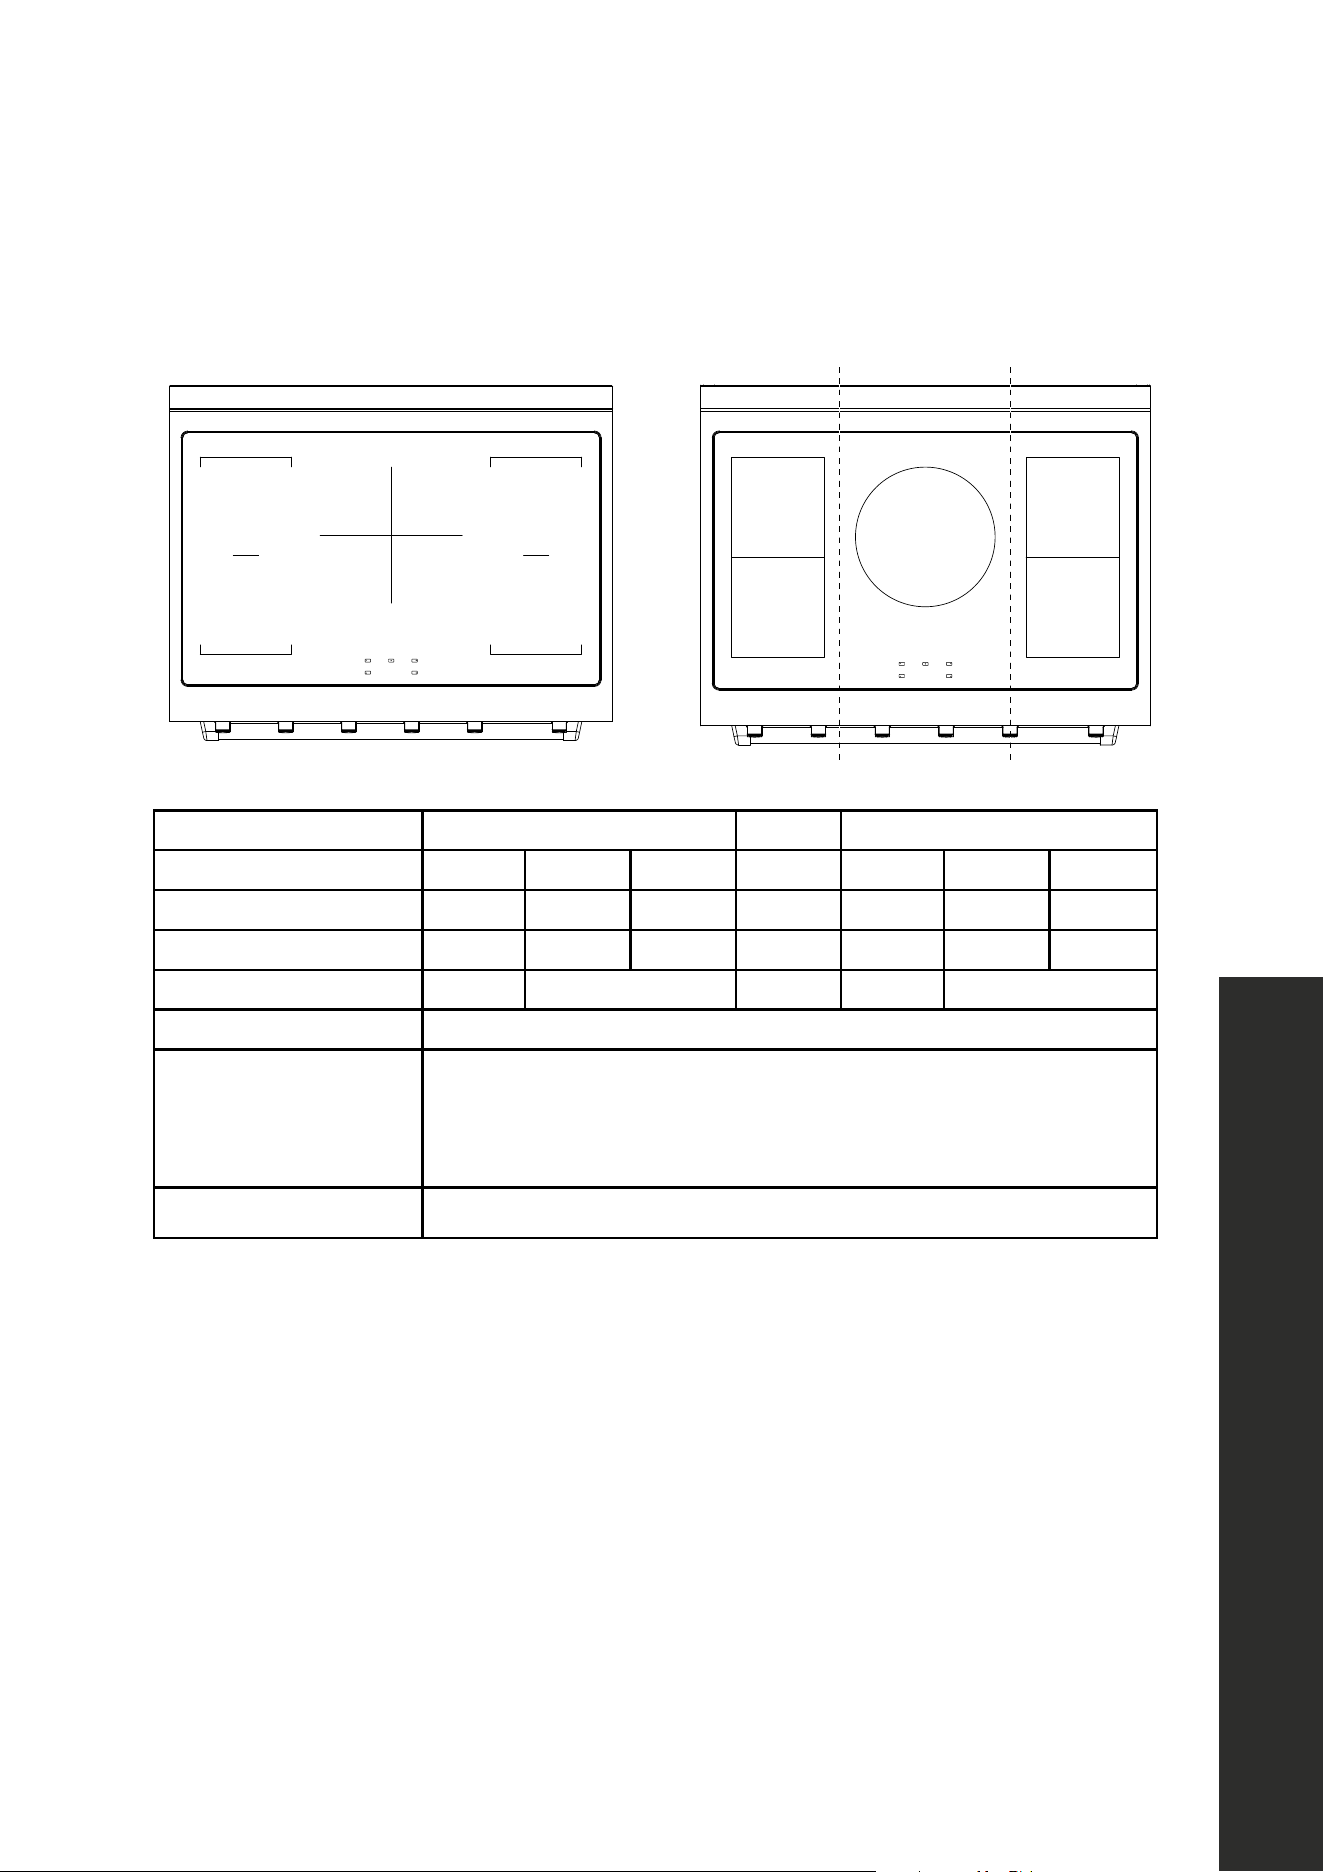
36" (914 mm)
ø 190
ø 190
ø 190
ø 280
ø 190
Left Side Middle Right Side
36" (914 mm) Left Side Middle Right Side
Zones Bridge Ø190 Ø190 Ø280 Bridge Ø190 Ø190
9 Levels 3000 W 2000 W 2000 W 3000 W 3000 W 2000 W 2000 W
Power Boost 3600 W 2600 W 2600 W 3600 W 3600 W 2600 W 2600 W
Level 9 + 9 - 4000 W - - 4000 W
Maximum Power 11600 W
Maximum power of
induction when the
oven is working
When the oven is working, the induction power is reduced by 3400 W, the
maximum induction power becomes 8200 W.
NOTE The left side, middle zone, and right side each have one Power Boost.
20
Cooktop Operation
OPERATION
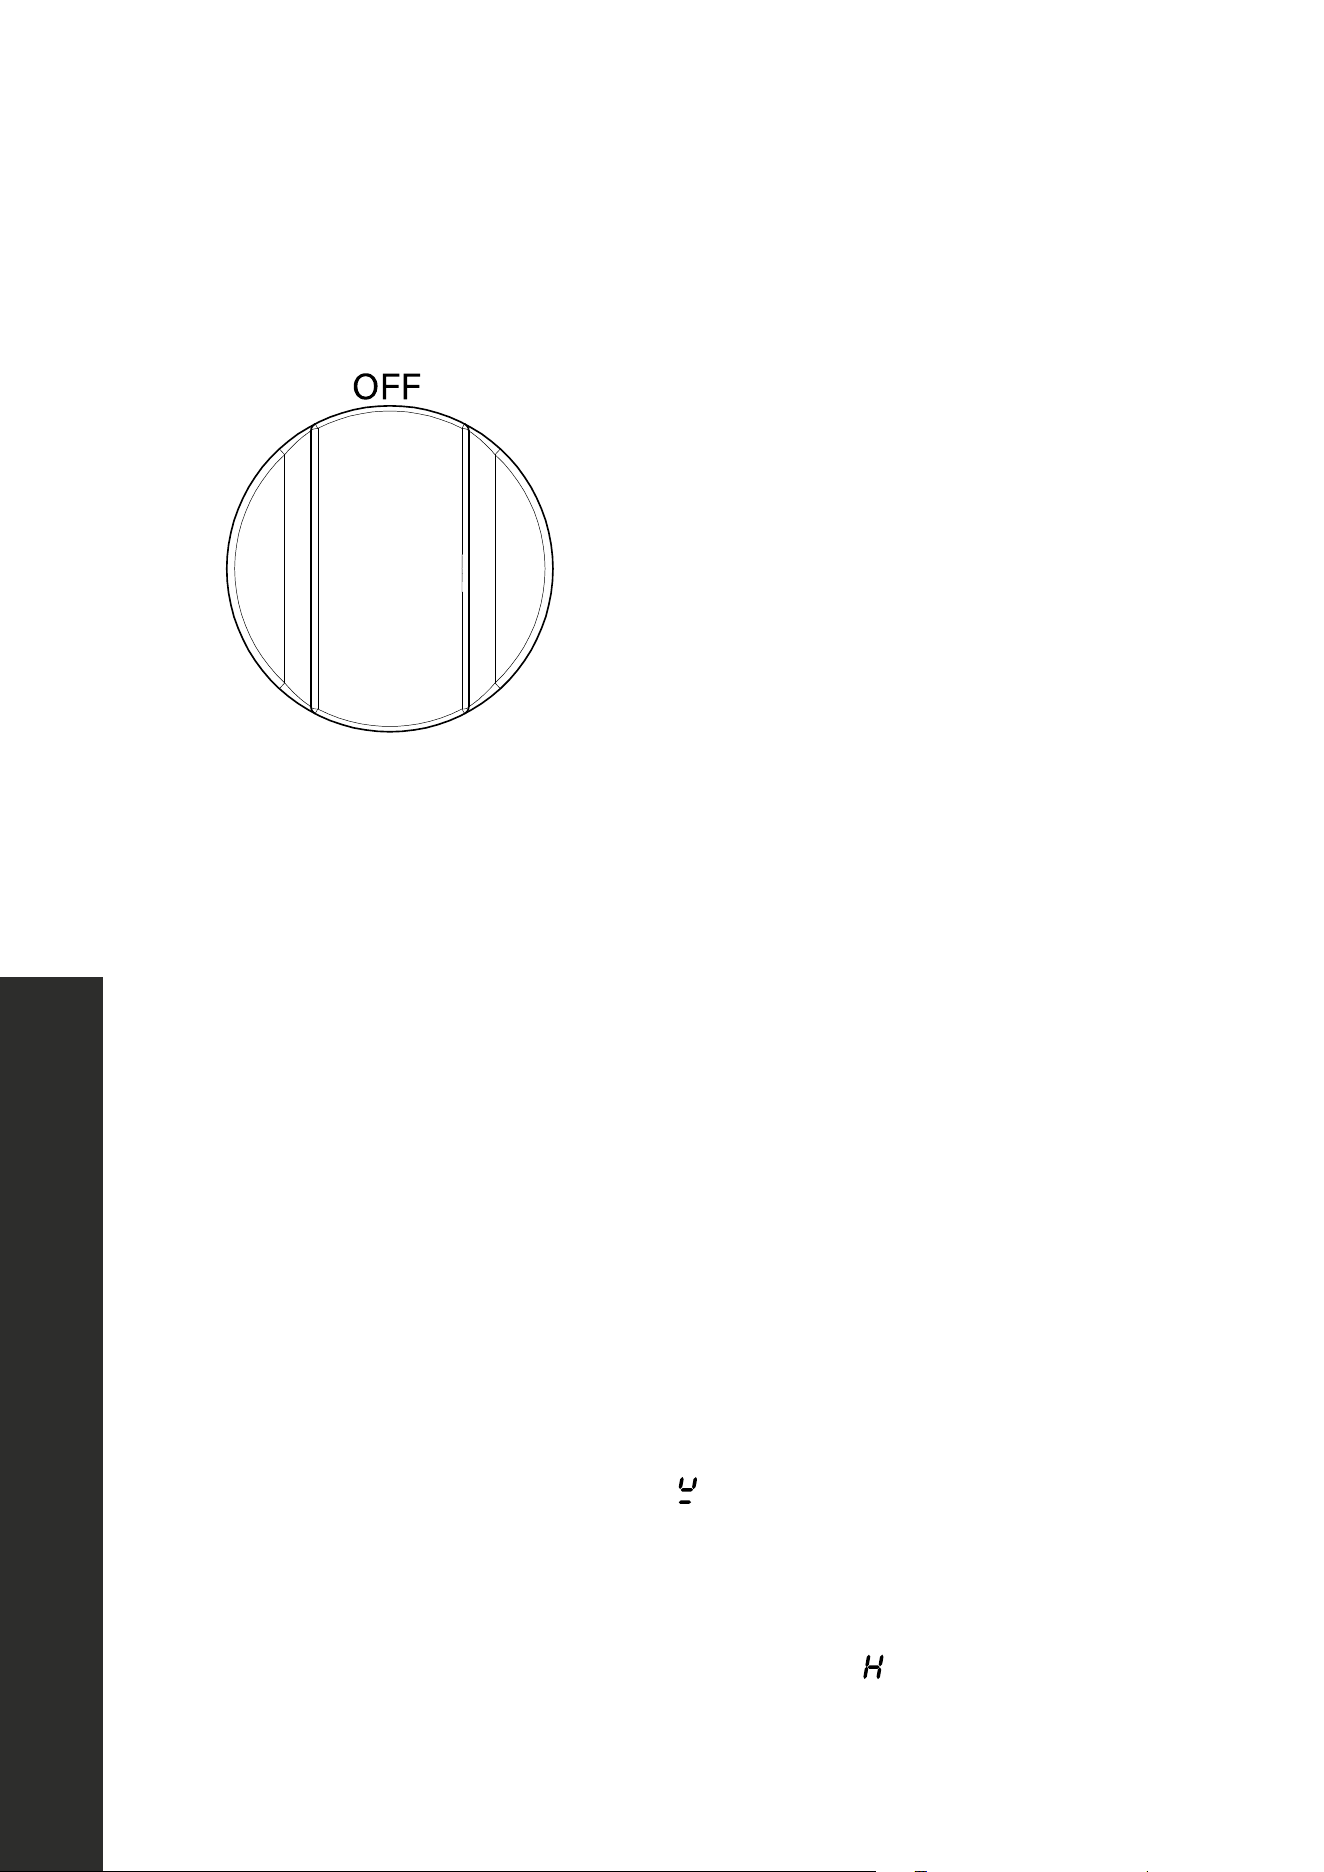
COOKTOP OPERATION
P
9
8
7
6
1
2
3
4
5
Power Levels (1–9)
Turn the control knob counterclockwise to increase the cooking level from 1 (low) to 9 (high).
The display shows the corresponding level.
Power Boost (“P”)
Rotate the knob past level 9 to activate Power Boost (“P”).
• Power Boost runs for 10 minutes and then automatically reduces to level 9.
• The knob will rebound slightly when moved into the “P” position.
Startup Requirement
After switching the cooktop ON, if the knob is not at OFF, it must first be turned to OFF
before selecting a cooking level.
Pot Detection
If no cookware is detected, the display shows “
” for that burner. Place suitable induction-
compatible cookware to begin cooking.
Hot Surface Indicator
When the cooking surface remains hot, the display shows “
.” Use caution until the
indicator disappears.

21
Cooktop Operation
OPERATION
Knob Error Protection
If a knob malfunctions or disconnects for more than 10 seconds while cooking, the affected
burner will shut off automatically.
Bridge Function
The bridge function allows two adjacent cooking zones to operate as a single larger zone.
To activate:
1. Turn both corresponding knobs to “P.”
2. Hold for 3 seconds.
3. One zone will display the bridge symbol “
” and the main control knob will display “9.”
4. Use the main control knob to adjust the bridge power level.
To deactivate:
Turn the main control knob to OFF.

22
OPERATION
Cooktop Operation
POWER MANAGEMENT
To protect the electrical system and maintain safe performance, power distribution is
automatically managed:
1. Same-Side Limitation
• Total power on one side cannot exceed 4000 W.
• If one burner is set to Power Boost, the other burner on the same side cannot exceed level 7.
2. Different-Side Operation
• Burners on opposite sides may both be set to Power Boost simultaneously.
• Example: On the 24" (610 mm) model, the left burner can use Power Boost while the
large right-side burner also operates in Power Boost.
3. Automatic Power Adjustment
• During Power Boost, the cooktop will gradually reduce power as needed to manage
temperature.
• After 10 minutes, Power Boost automatically decreases to level 9.
• At level 9, power will reduce slightly every 20 minutes—this is normal operation.
4. Simultaneous Oven Use
• When the oven and cooktop are used at the same time, oven power is maintained first.
• The cooktop will then ensure power delivery to the large burner as a priority.
WARNING
Important Safety Notes
• Always use induction-compatible cookware for proper function.
• Surfaces marked with “
” remain hot to the touch even after cooking.
• Do not rely on Auto Power Management to prevent overheating—always monitor cooking.
• Be sure to place cookware directly on the center of each burner in order to maximize
cooking efficiency; see below for more.
• If cooking with a griddle, we recommend using the bridge burners to provide more even
heating. Be careful to heat and cool the griddle slowly, as rapid changes in temperature
can cause thermal shock and crack the griddle.

23
OPERATION
OVEN OPERATION
• To turn on the oven, push in the knob and turn counter-clockwise. Once the oven has
reached the desired temperature, the white indicator light next to the knob will turn off.
• To activate the Broil function, turn the knob clockwise to Broil. The white indicator light
will illuminate once activated.
• There is 1 knob which features minimum and maximum heat settings of 200 °F to 500 °F
(93 °C to 260 °C), in addition to Broil.
Oven Operation

24
Oven Operation
OPERATION
NOTE: Your appliance uses two different cooling fans. They protect internal components
and surfaces. Sounds from these fans are normal and do not indicate a fault.
Oven Cooling Fan (not the convection fan)
• Purpose: Cools the control area, door, and electronics during/after baking or broiling.
• When it runs: Automatically turns on when internal sensors detect heat and may continue
after the oven is turned off until temperatures drop.
• What it’s not: This is separate from the convection fan used for cooking. It does not move
air inside the food cavity for cooking performance.
• What you’ll notice: A steady airflow sound from the top/rear. The fan may cycle on/off
as the oven cools.
Induction Cooktop Cooling Fan
• Purpose: Cools the induction power modules (coils and electronics) to maintain
performance and protect components.
• When it runs: May turn on quickly at high power settings, or after long cooking sessions,
and can continue briefly after the cooktop is switched off until internal temperatures are
safe. At low settings it may pulse as power cycles.
• What you’ll notice: A soft whir from below the cooktop. Sound level may change with
power and pan temperature.
Important Notes
• Normal operation: It is normal for either fan to continue running after cooking and to
change speed while cooling.
• Do not block vents: Keep intake/exhaust areas and the space beneath/behind the
appliance clear. Blocking airflow can reduce performance or trigger thermal limits.
• Service check: Contact ZLINE customer service at 1-614-777-5004 if a fan is unusually
loud, scrapes/rattles, or runs continuously when the appliance is cool and unused.

25
Oven Operation
OPERATION
OVEN VENTS
• The oven vent is located under the back splash on the back of the oven. Do not block the
ducts in the oven vent when cooking in the oven. It is important that the flow of hot air
from the oven and fresh air into the oven never be interrupted.
• Avoid touching the vent opening or nearby surfaces while the oven is on — they may
become hot, which increases the risk of injury.
• NOTE: It is normal for steam or moisture to dispel from the oven vent and collect on the
cooktop. This happens more often when baking foods that contain a lot of moisture.
Condensation is more common in colder months due to the cooktop being colder than
normal. Condensate water is a natural occurrence and is non-corrosive.
WARNING
INTERIOR OVEN SAFETY
Aluminum foil may also trap heat, causing a fire hazard. Do not use aluminum foil on any
porcelain surface within the oven wall. Doing so may irreparably damage the porcelain.
Use of aluminum foil on any part of the range may void the manufacturer’s warranty.
OVEN FUNCTIONS AND FEATURES
BAKE
• Natural airflow baking occurs when heat is transferred into the oven from the bake burners
located in the bottom of the oven cavity, below the drip pan. Heat is then circulated by
natural airflow. This is a traditional bake setting.
• To activate, turn the oven on and choose a temperature between 200 °F to 500 °F
(93 °C to 260 °C).
• NOTE: It typically takes 15–25 minutes to preheat to the desired temperature.
• To achieve optimal baking results, ZLINE recommends waiting until the oven is fully
preheated before placing food inside.

26
OPERATION
CONVECTION BAKE
• Heat is transferred from the bake burners in the bottom of the oven. The convection fan
in the rear of the oven then circulates the hot air, allowing for more even heat distribution
over and around the food. Convection cooking is faster, can be accomplished at lower
temperatures, and provides more even temperatures than regular cooking.
• To activate, turn the oven on, choose a temperature, then press the fan button on the front
of the oven.
• To achieve optimal convection baking results, ZLINE recommends waiting until the oven
is fully preheated before placing food inside.
BROIL
• When broiling, heat radiates downward from the top heating element for even coverage
and fast cooking. Use the broil function to cook tender cuts of meat or to quickly crisp
foods or brown the top of already-cooked dishes.
• Broil temperature is 500 °F (260 °C).
• NOTE: The oven door must be closed during broiling.
WARNING
Carefully monitor food being cooked under the broiler, as this function works
quickly and can burn food within only a few minutes.
1. Place the food on an oven-safe baking sheet or broiler pan.
2. Arrange the top oven rack in the location you desired and place the pan on the rack. Be
sure to center the pan and position directly under the broil burner. If preheating the broil
burner first, place the pan after the broil burner is preheated.
3. Turn the knob clockwise to Broil; the white indicator light will illuminate.
4. Preheating is suggested when searing rare steaks and other meats. To preheat, turn the oven
knob to the “Broil” position. Wait for the burner to become hot, approximately 2 minutes.
WARNING
If you choose to use a broiler pan, DO NOT use one without the insert. DO NOT
cover the broil pan insert with foil. The exposed grease could catch fire.
Oven Operation

27
OPERATION
OVEN COOKING
1. Use care when opening the oven door. Let hot air or steam escape before removing or
placing food.
2. DO NOT heat unopened food containers. Pressure build-up may cause containers to
burst and result in injury.
3. Keep oven vent ducts unobstructed at all times.
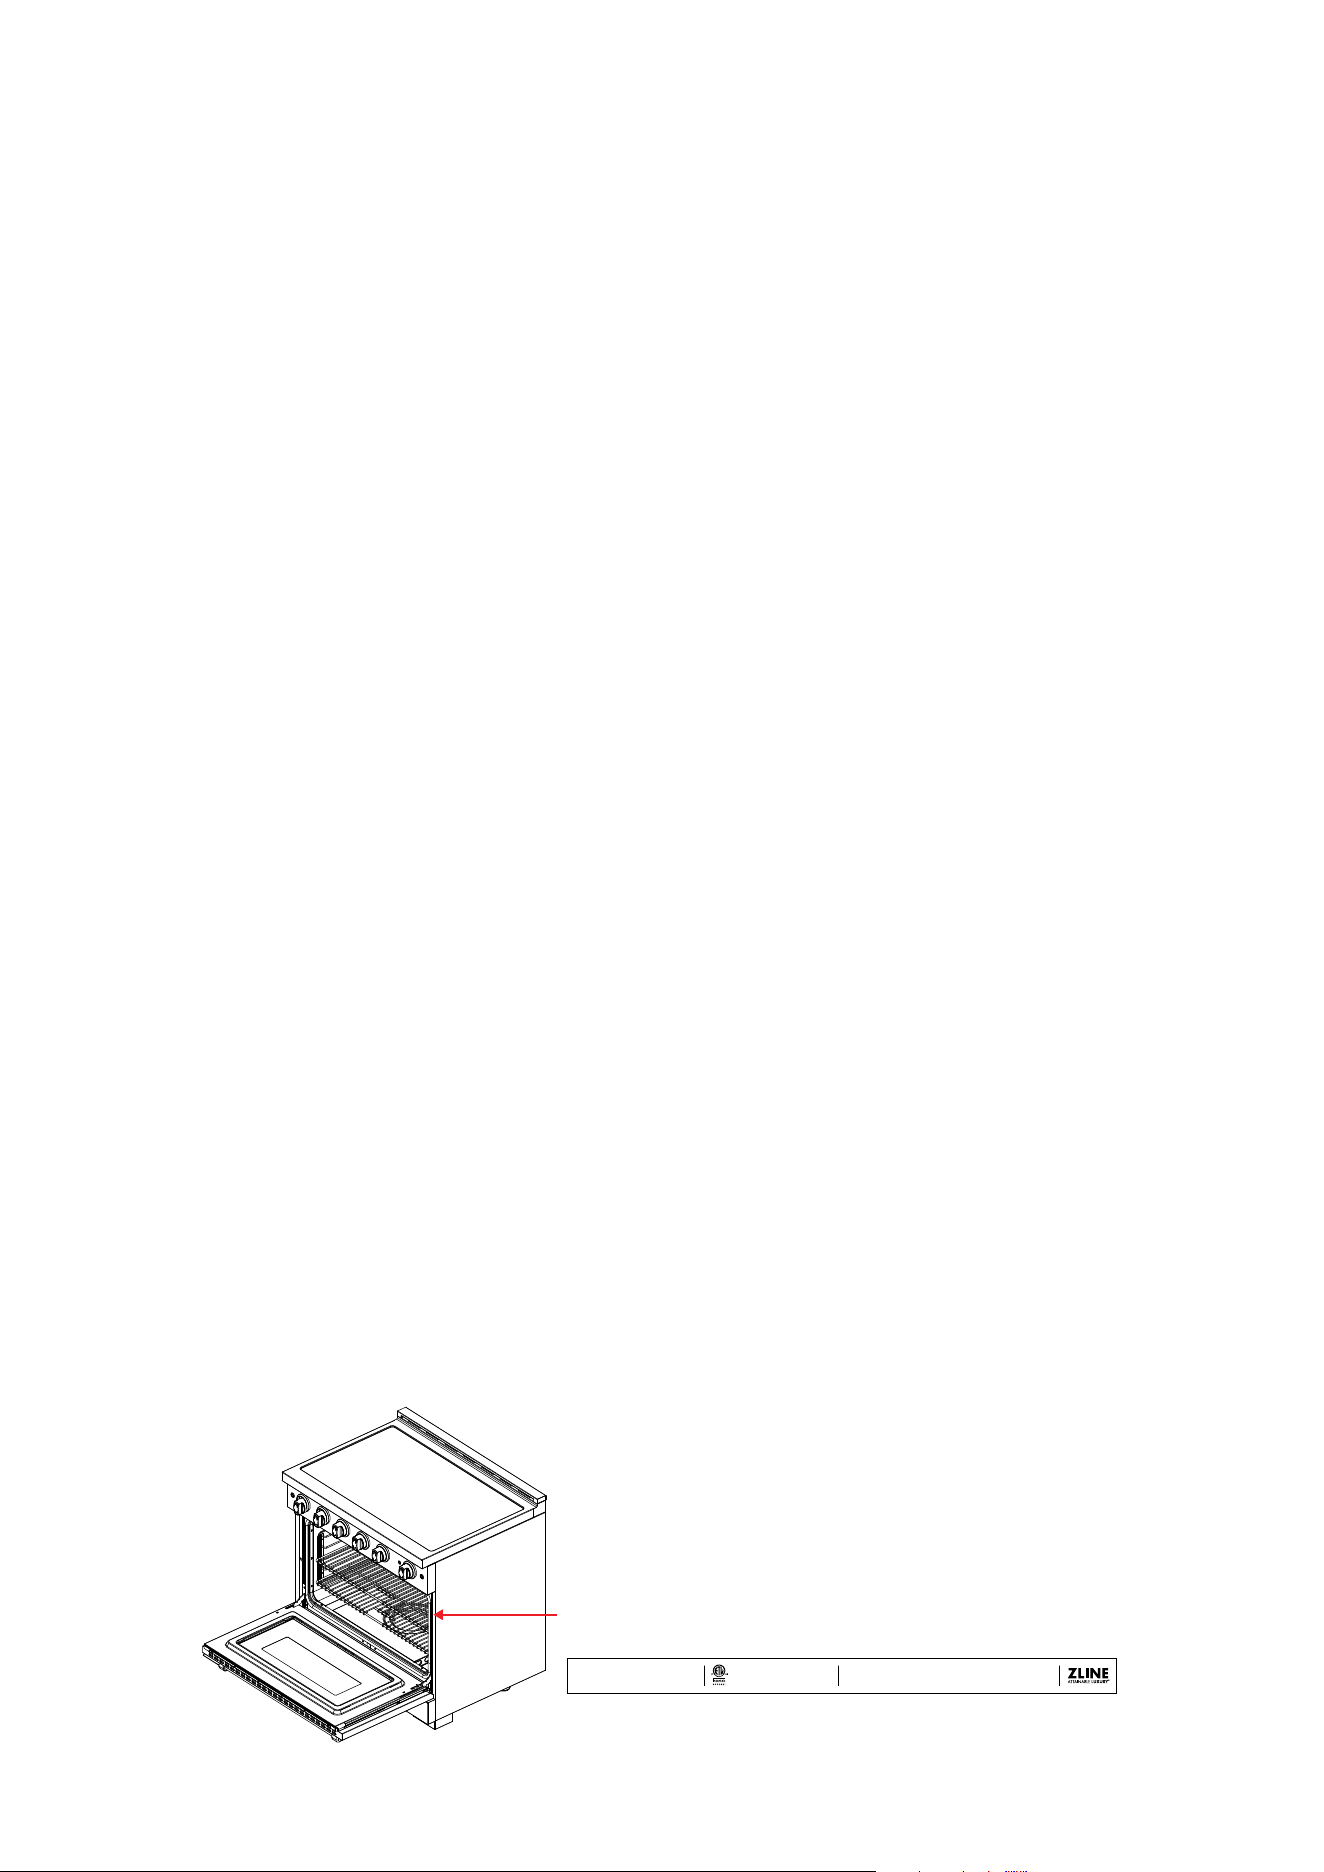
OVEN RACK PLACEMENT
• Range ovens are equipped with 2 commercial grade telescoping (sliding) racks. Racks
are mounted on the appropriate guides situated on the sides of the oven compartment.
• Insert the shelves between the top and bottom guide in any of the 5 positions available.
To do so, slide out the racks to their full extensions, and then lift them up and out of the
sliding mechanisms.
• Use care during this process, as the sliding mechanisms may have sharp edges.
• Always place racks in the desired location while the oven is cool.
• When touching and sliding out oven racks to check on hot food, DO NOT let potholders
or oven mitts make contact with heating elements inside the oven.
• Oven racks are designed to support up to 25.0 lb (11.0 kg).
WARNING
Users should use caution with heavier food loads than those outlined above to
limit risk of injury and/or damage to your range.
WARNING
HEATING ELEMENT AND DOOR SAFETY
• DO NOT CLEAN DOOR GASKETS. The door gasket is essential for a good seal. Care
should be taken not to rub, damage, or move the gasket.
• DO NOT USE ABRASIVE OVEN CLEANERS. No commercial oven cleaner or liner
protective coating of any kind should be used in or around any part of the oven. Clean
only the parts listed in the manual; before cleaning the oven, remove oven racks and
clean separately.
• In case of electric power failure, reset oven/broiler controls to the OFF position and do
not attempt to use oven/ broiler until the power has been restored.
• Other surfaces of the appliance may become hot enough to cause burns, such as oven
vent openings and surfaces near these openings, oven doors, and oven glass window.
Oven Operation

28
OPERATION
• Take care to reset all cooktop/oven/broiler burner controls to the OFF position after use
of the appliance.
• It is normal for moisture to form between the oven door’s two glass panels, especially
when cooking or baking foods with a lot of moisture. The range is designed with vents
between the panes of glass; any moisture should dissipate within 12–24 hours.
• When using the range for the first time you may notice the following:
• There may be an odor. This is quite normal when the oven is first heated as residual
oil from production of parts will be burnt off quickly.
• There may be noises. This is also quite normal as new parts move and settle into
place during the initial heating process.
Oven Operation

29
CARE AND MAINTENANCE
REPLACING THE OVEN LIGHTS
WARNING
To prevent electrical shock or injury, make sure the oven and light bulbs are cool
and power to the oven has been turned off before replacing light bulbs.
To replace the light bulbs (2) located at the upper left and
bottom right corners of the oven, unscrew the protection cap that
projects out inside the oven. NOTE: The light bulbs screw in,
rather than plug in.
NOTE: Touching bulbs with your fingers may cause them to burn out. We recommend using
protective gloves or a clean cloth for this process.
Visit www.zlineparts.com and search "SGP-108" to order a replacement.
CLEANING YOUR RANGE
WARNING
Do not attempt any of the following cleaning methods until all burners are off
and the oven is completely cool. We also recommend disconnecting power
before cleaning the unit to limit risk of electric shock.
IMPORTANT: During cleaning, never use abrasive cleaners. Scratches on the stainless steel
surfaces are permanent. DO NOT clean the range when hot. Do not use Clorox bleach or
alcohol wipes to clean stainless steel. Always follow label instructions on cleaning products.
STAINLESS STEEL
• To clean the stainless steel surface of the range, use warm sudsy water or a stainless steel
cleaner or polish. Always wipe the surface in the direction of the grain. Follow product
label instructions for cleaning stainless steel.
• DO NOT use a steel wool pad as it will scratch the surface. Do not use cleaners with
chlorides or chlorines. Do not use harsh scrubbing cleaners.
• Use a clean, hot, damp cloth to remove soap. Dry with a dry, clean cloth.
Replacing the Oven Lights

30
CARE AND MAINTENANCE
COOKTOP GLASS
• Before maintenance and cleaning, disconnect the appliance and allow cooling down.
For reasons of hygiene and safety, this appliance must always be kept clean.
• To prevent the appliance from discoloring or staining, clean cooktop after each use,
and wipe up acidic or sugary residue as soon as the appliance has cooled. Any food or
liquid spills on the cooktop — or on the sides or bottom of the oven — must be cleaned
up before cooking in order to avoid unpleasant smoke and/or the possibility of fire. See
the "Care and Maintenance" section for more information. For stuck residue, lay a warm,
soapy towel on the spill for 5–10 minutes, lift it with a plastic scraper, then wipe.
• Choose spray formulas, not creams/pastes. Take care when using cleaning products in
spray form: never direct the spray onto the electrical wiring, thermostat, and bulb.
• Clean with non-abrasive, ammonia-free spray or mild soap and water. Avoid abrasive
tools. Abrasive cleaners may permanently change the surface appearance and are not
covered under finish warranty. NOTE: Label should specify non-abrasive and ammonia-
free (ideally “safe for coated/matte glass”).
• For daily cleaning, use warm water and a drop of mild dish soap. Wipe with a soft
microfiber cloth, then rinse and dry.
• To degrease/remove fingerprints, use isopropyl alcohol (70–90%) on a microfiber
cloth and wipe dry.
WARNING
According to the U.S. Department of Agriculture: DO NOT hold foods at
temperatures between 40 °F to 140 °F (4 °C to 60 °C) more than 2 hours.
Cooking raw foods below 275 °F (135 °C) is not recommended.
CONTROL KNOBS
• Use a damp soapy cloth for everyday cleaning of the knobs. For heavier cleaning for
grease, etc., apply a nonabrasive liquid detergent to a damp cloth.
• Use care not to rotate the knobs when cleaning.
• For hard-to-reach stains, you can remove knobs by gripping them and carefully pulling
them straight out. Clean and dry knobs completely before replacing, using care to put
knobs on the correct valves where they were removed.
Cleaning

31
CARE AND MAINTENANCE
WARNING
Acidic fluids such as tomato sauce or lemon juice should not be left on the
cooktop for extended periods, as etching may occur. This type of damage is not
covered under the manufacturer’s warranty.
DOOR HANDLE
• Clean with a warm soap and water solution; dry with a soft, lint-free cloth.
• Do not use abrasive cleaners or scrubbers; they will permanently damage the finish.
OVEN DOOR
• Use soap and water to thoroughly clean the top, sides, and front of the door. Rinse
well. Use a glass cleaner to clean the glass on the outside of the door. Do not use oven
cleaners, cleansing powders, or harsh abrasives on the outside of the door.
• Do not allow excess water to run into any holes or slots in the door. Any soap left on the
liner causes additional stains when the oven is heated.
OVEN GLASS
Clean all glass surfaces with a warm soap and water solution. Use a mild glass cleaner to
remove fingerprint or smears. DO NOT use a steel wool pad as it will scratch the surface.
Dry with a soft, lint-free cloth.
OVEN RACKS
Clean oven racks with a warm soap and water solution. To clean heavy soil, use a scouring
pad such as steel wool with plenty of water.
OVEN FRAME
Clean with hot water, soap-filled steel-wool pads, or kitchen-safe cleaners. Rinse well with
clean water and dry. DO NOT clean the gasket. The fiberglass material of the oven door
gasket cannot withstand abrasion. It’s imperative the gasket remains intact.
Cleaning
32
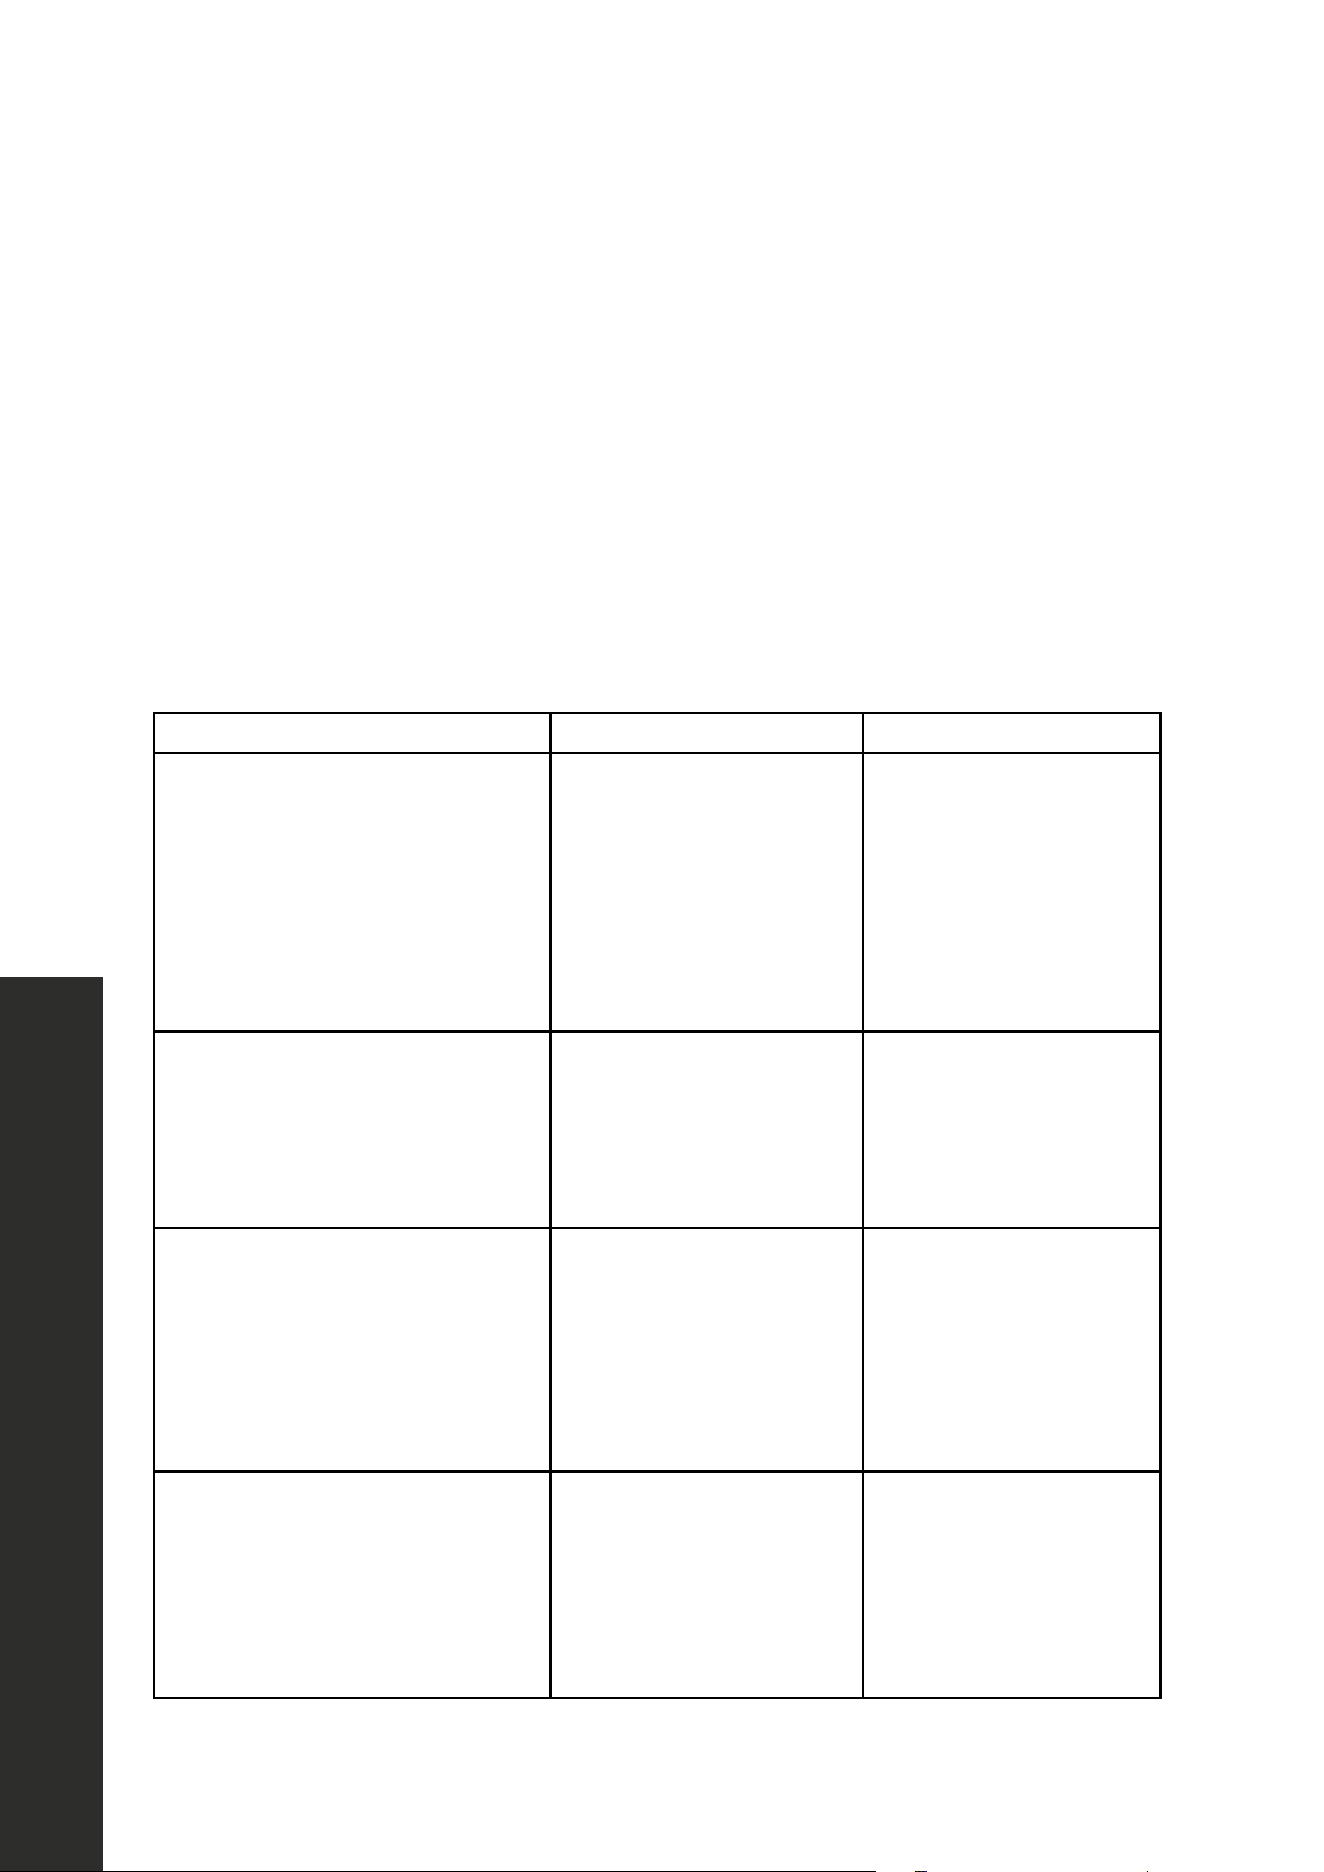
TROUBLESHOOTING
• Please review this list for common troubleshooting tips before calling for service, as this
may save you time and money.
• This list contains frequently encountered problems that are not results of faulty workmanship
or material use.
• Your product may not have some of the features described here.
If a problem cannot be resolved after following the instructions in the manuals,
please contact ZLINE customer service at 1-614-777-5004. Never attempt
to repair or disassemble the internal electrical wiring of your range.
WARNING
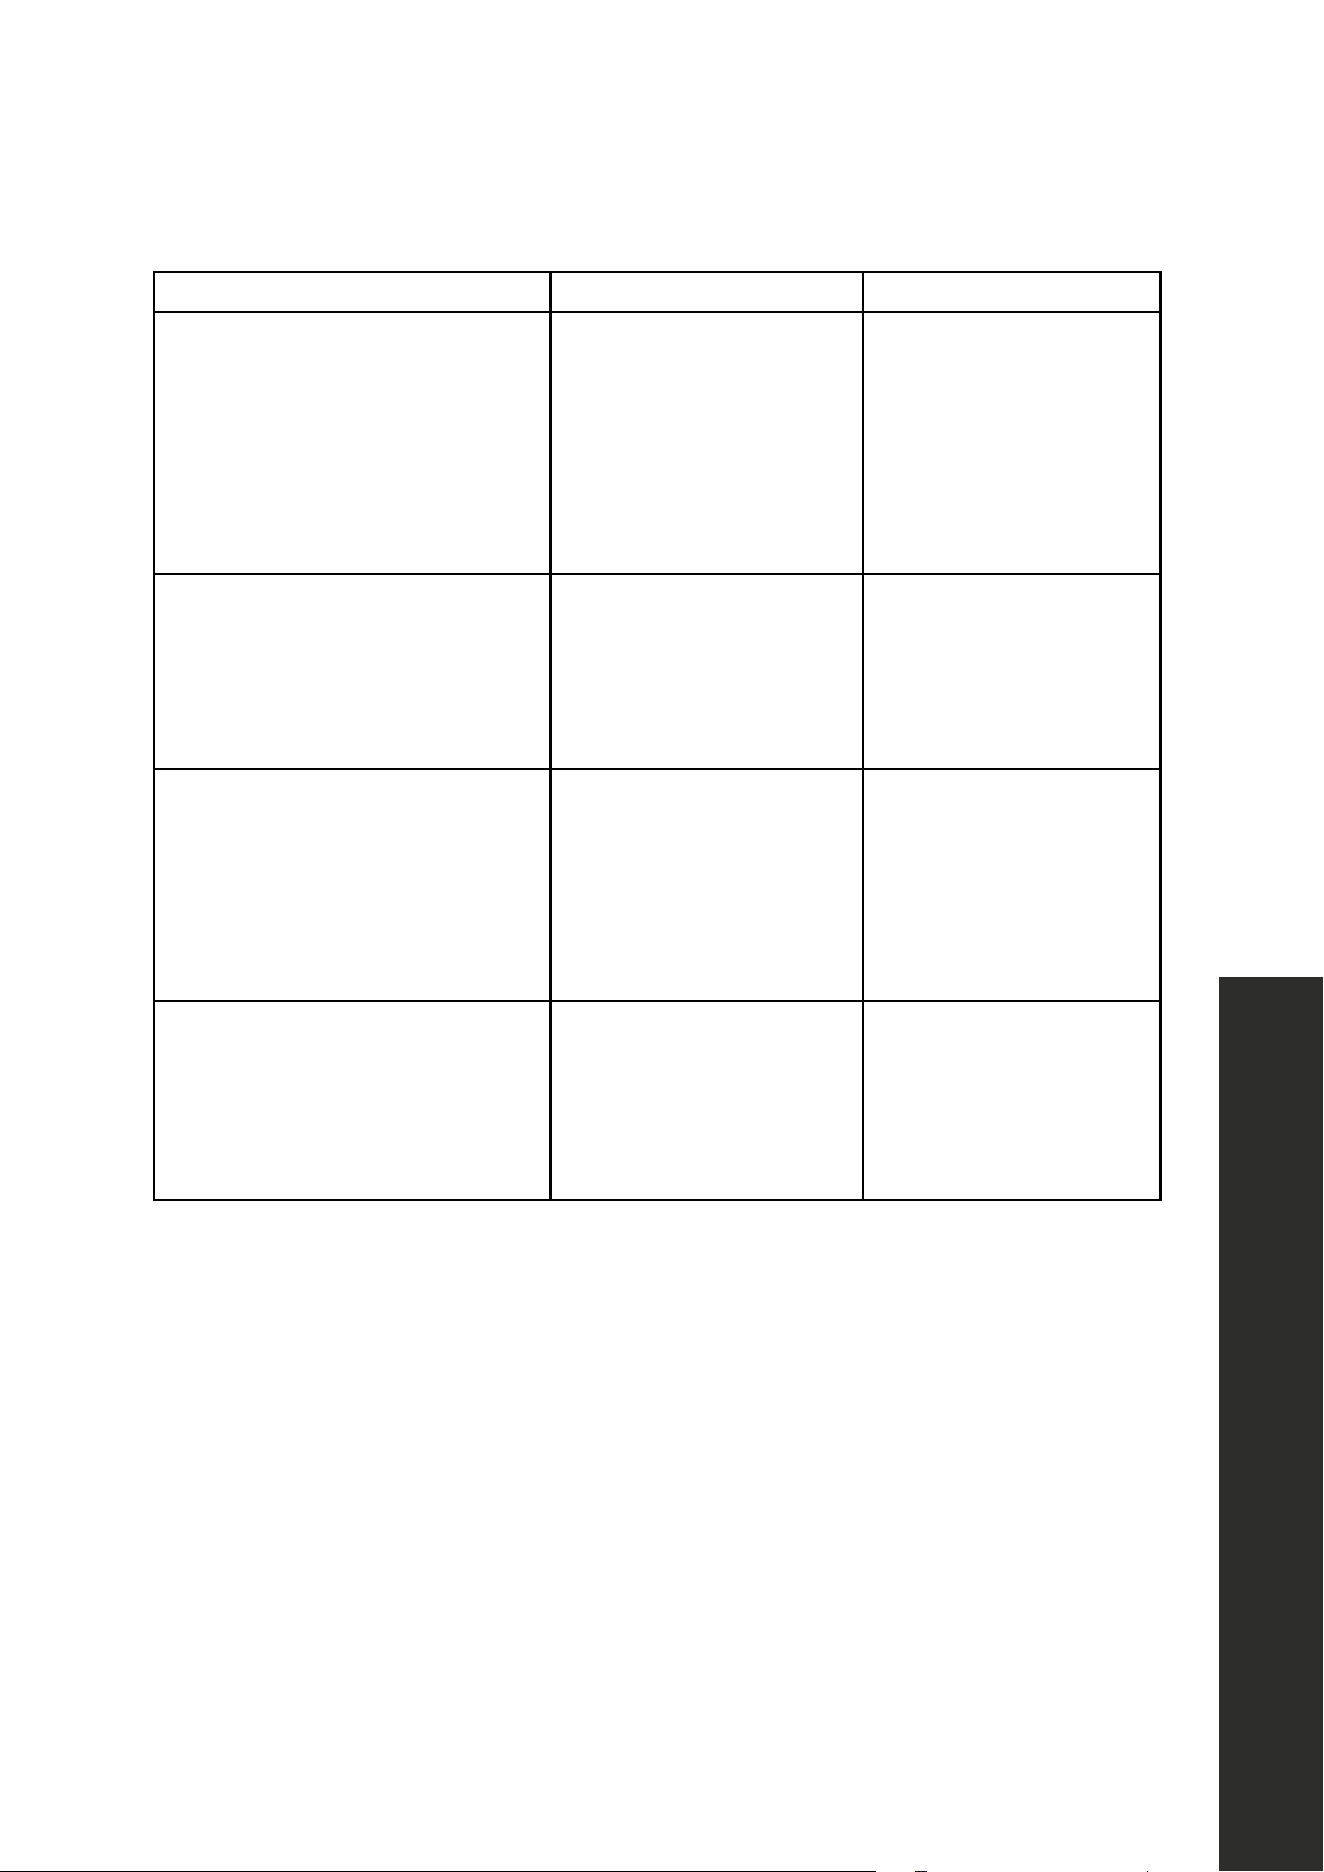
ERROR CODE POSSIBLE CAUSE POSSIBLE SOLUTION
F/1 – Power Board Fault/
Communication Error:
The main power board is
not functioning correctly or
communication between control
boards has failed.
Internal electronic failure,
loose wiring connection.
Action: Switch the
appliance off at the
circuit breaker, wait 1
minute, then restart. If
the code reappears,
contact service.
F/3 – NTC Sensor Failure
The temperature sensor
(NTC) inside the induction
coil has failed or is not
connected properly.
Do not attempt
repair. Contact ZLINE
customer service.
F/4 – IGBT Failure
The Insulated Gate
Bipolar Transistor (IGBT),
which controls power
to the induction coil, is
malfunctioning.
Turn off the range
immediately and contact
service. Continued
operation may damage
internal electronics.
E/1 – Coil Temperature
Sensor Overheated:
The temperature sensor (NTC) on
the induction coil has detected
excessive heat.
Inadequate ventilation,
cookware blocking
airflow, or prolonged
high-power operation.
Allow the cooktop to
cool. Check that air vents
are clear. If the code
persists, contact ZLINE
customer service.
Troubleshooting
33
Troubleshooting
TROUBLESHOOTING
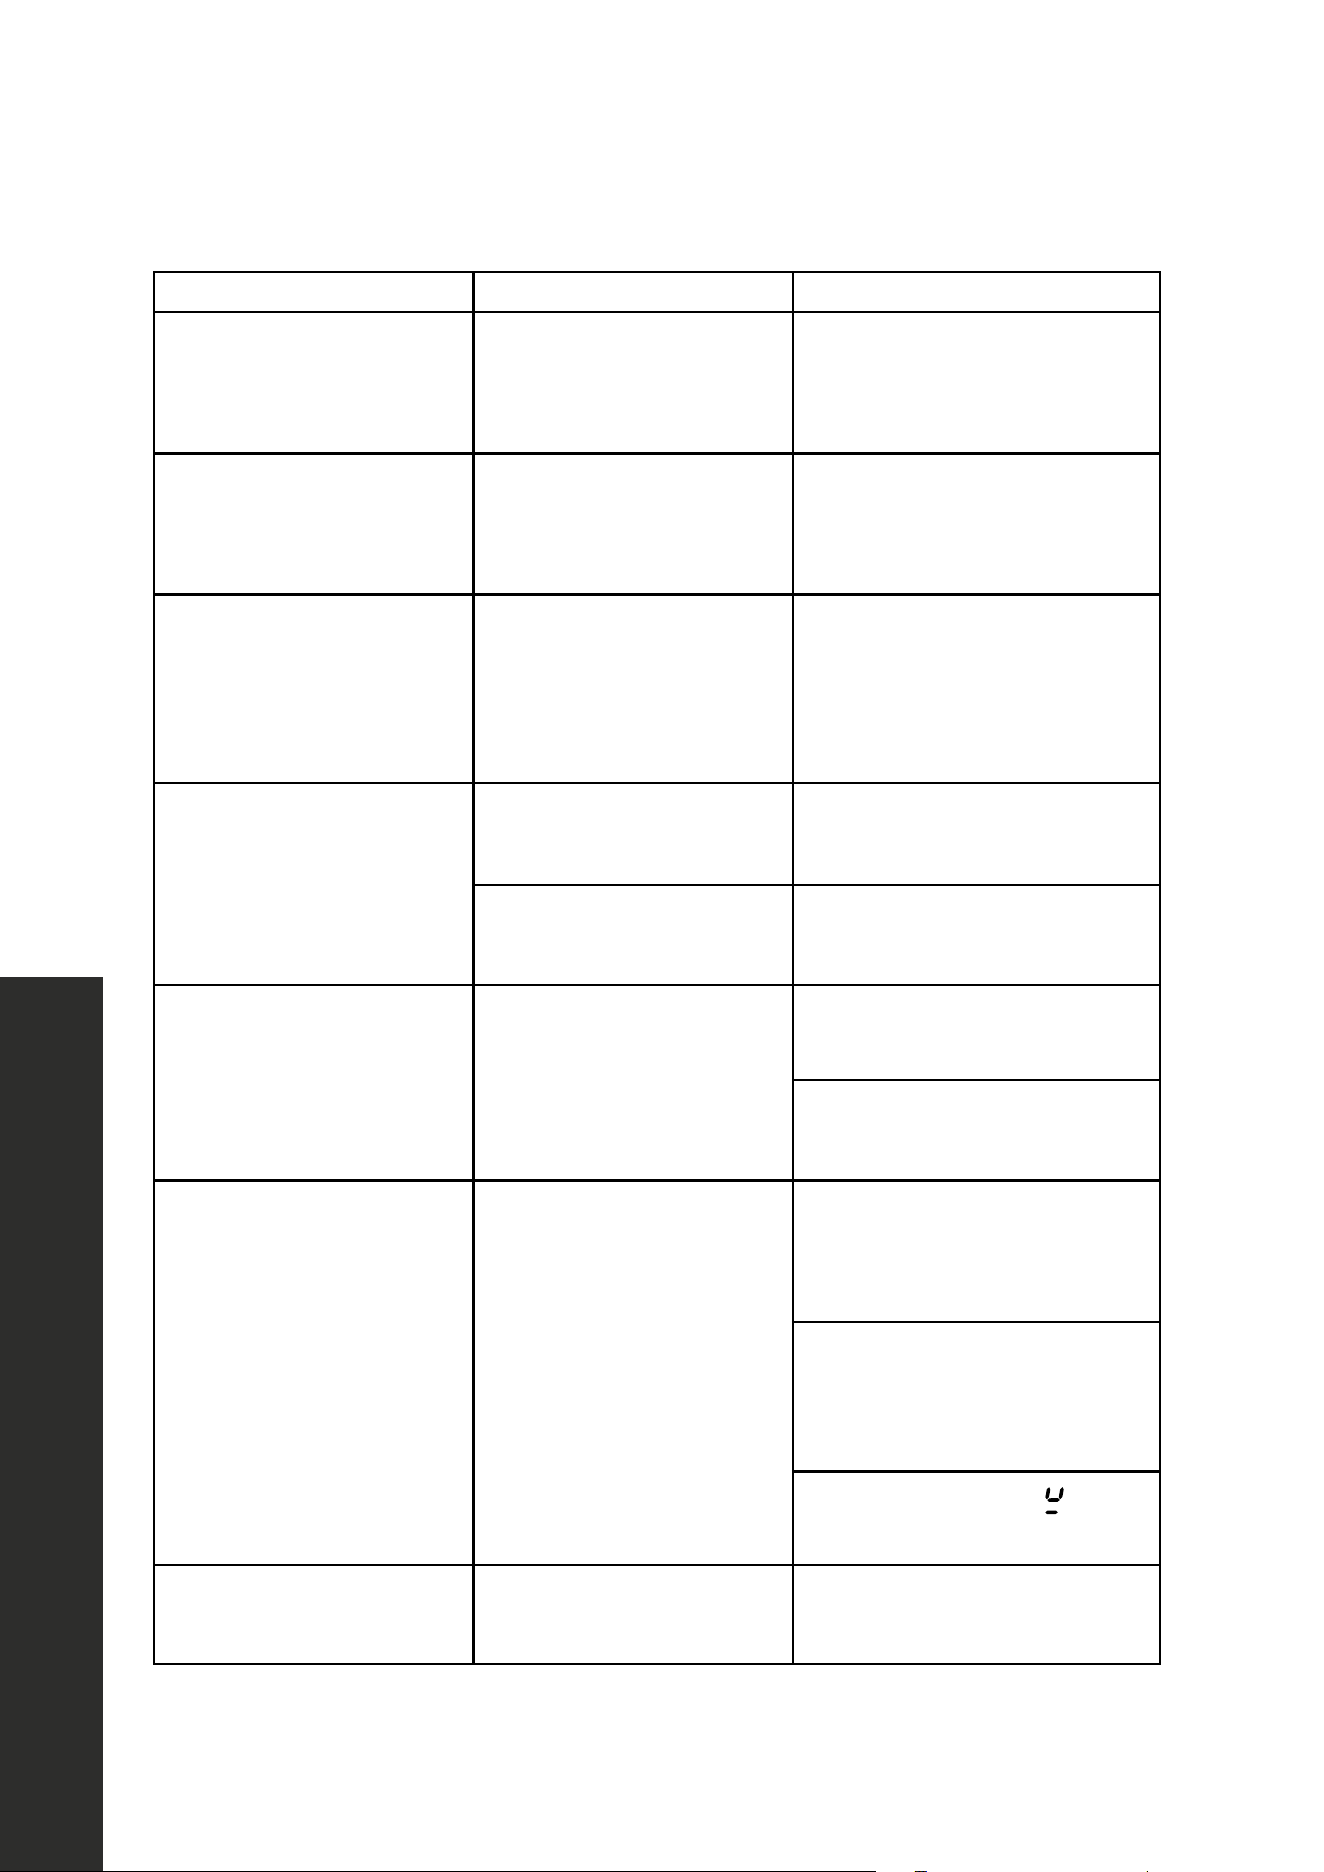
ERROR CODE POSSIBLE CAUSE POSSIBLE SOLUTION
E/2 – IGBT Overheating:
The Insulated Gate Bipolar
Transistor (IGBT), which controls
power to the induction coil,
has overheated.
Prolonged cooking
at maximum power,
insufficient cooling airflow.
Allow the cooktop
to cool and ensure
ventilation is
unobstructed. If the code
persists, contact ZLINE
customer service.
E/3 – High Voltage Protection
Input voltage is too high
for safe operation.
Turn off the appliance.
Contact a qualified
electrician to verify your
home’s electrical supply.
E/4 – Undervoltage Protection
Input voltage is too low
for safe operation.
Verify electrical supply.
Do not use the cooktop
until voltage is stable. If
the problem continues,
contact an electrician.
E/5 – Coil Temperature Sensor
(NTC) Disconnected / Moved
The sensor on the
induction coil is out
of position.
Contact ZLINE customer
service to inspect
and reposition or
replace the sensor.
34
Troubleshooting
TROUBLESHOOTING
SYMPTOM POSSIBLE CAUSE POSSIBLE SOLUTION
“Cracking” or “popping”
sound is heard coming
from appliance.
This is the sound of metal
heating and cooling.
This is normal for
oven operation.
Steam/condensation is
coming from the back
splash oven vent.
Cooking foods high in
moisture or if the ambient
temperature is cold.
Condensate water is a
natural occurrence and is
non-corrosive.
Nothing works.
Power supply is
not energized.
Have an electrician check
the power supply, including
the house circuit breaker,
wiring and fuses.
Foods over-cooked or
under-cooked.
Incorrect cooking
temperature.
Adjust temperature, or
rack position.
Calibration of oven
temperature.
Contact ZLINE
customer service.
Cooktop does
not power on.
-
Confirm the unit is properly
connected to a power supply.
Confirm the unit is properly
connected to a power supply.
Cooktop will not heat. -
Verify cookware is induction-
compatible (a magnet should
stick firmly to the bottom).
Ensure cookware is flat-
bottomed and centered on the
cooking zone.
If the display shows “
”, the
cookware is not detected.
Oven will not heat.
Faulty thermostat or
heating element.
Contact ZLINE
customer service.
35
Troubleshooting
TROUBLESHOOTING
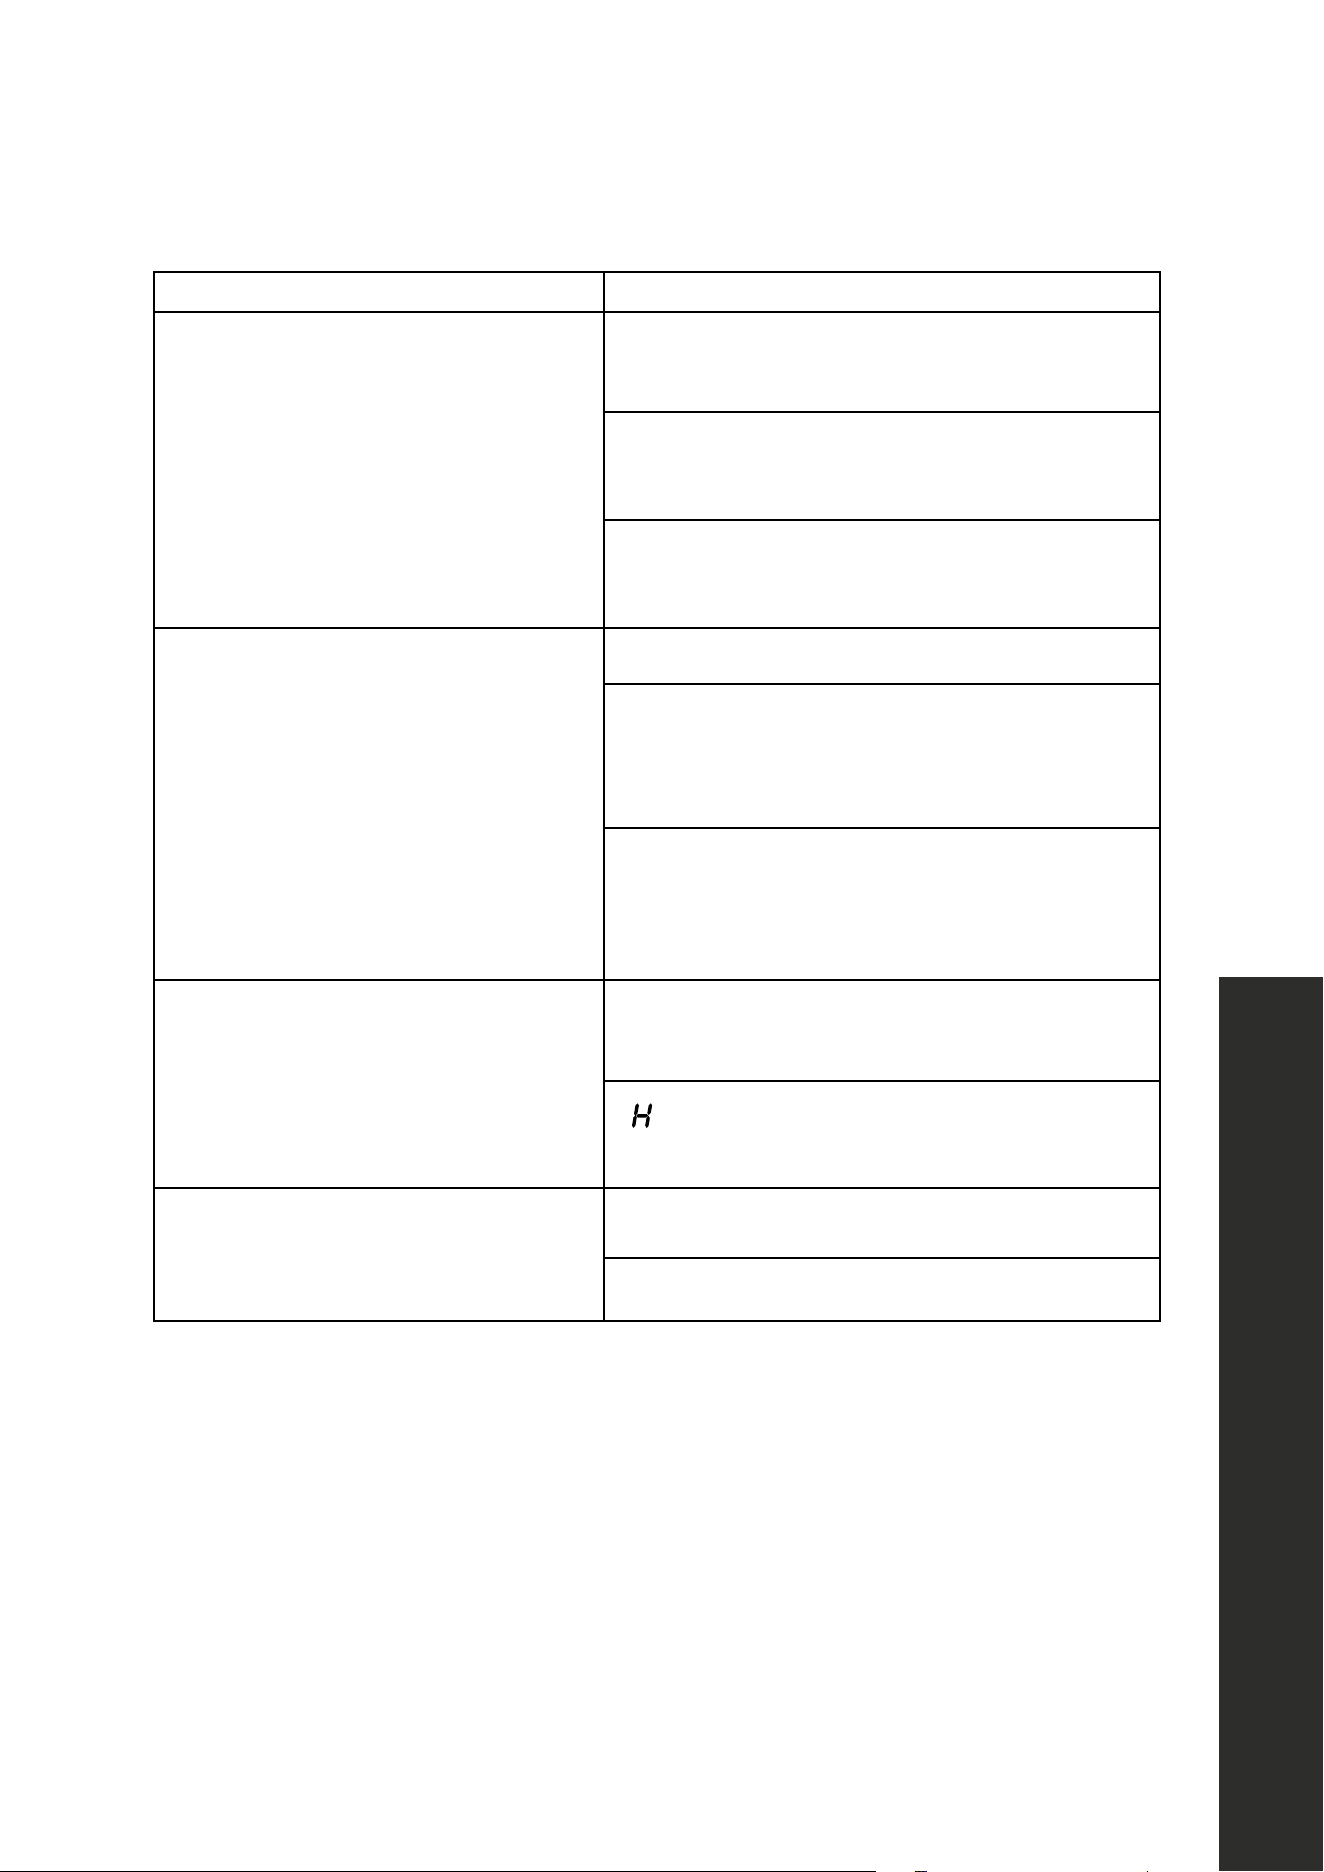
SYMPTOM POSSIBLE CAUSE/SOLUTION
Cooking takes longer than expected.
Cookware may be too thin, warped, or the
wrong size for the zone.
Using cookware smaller than the marked
cooking zone may reduce efficiency.
Verify the power level is set correctly (higher
levels for rapid heating).
Noise during operation.
Low humming, clicking, or fan noise is normal.
A high-pitched whine may occur with
lightweight cookware; try using heavier
pans instead.
The cooling fan continues after cooking—
this is normal and will stop once the internal
components cool.
Surface remains hot after use.
The cooktop surface retains residual heat
from cookware.
“
” indicator will remain active until
safe to touch.
Display flickers or dims.
May occur if the household voltage fluctuates.
Check with a qualified electrician, if persistent.

WARRANTY
COVERAGE
ZLINE Kitchen and Bath (“ZLINE”) induction ranges have a one year parts and
service warranty.
ZLINE warranty periods begin from the original date of product delivery and solely cover
the original purchaser of the product, delivered new and in its original carton. The limited
warranty covers all parts and labor for necessary repairs if any part of the product, or
the product itself, proves to be defective in materials or workmanship. The product must
be deemed serviceable via troubleshooting with the ZLINE Customer Experience team. All
service on ZLINE products under warranty must be performed by ZLINE-approved and
ZLINE-certified service providers unless otherwise specified by ZLINE. Service will be
provided during normal business hours. Products must be unobstructed and accessible to
the service provider at the time of service. ZLINE’s liability is limited to the original purchase
price of the product. Additional injuries, losses, damages, or other inconveniences caused by
product malfunction or defects in materials are not covered under the terms of this warranty.
TERMS
ZLINE warranties apply only to the original purchaser of a ZLINE product installed for normal
residential use. This is defined as a single-family, residential dwelling in a non-commercial
setting. Any warranty claim stemming from installation, operation, or any other use within a
commercial setting is not covered under this limited warranty. Commercial settings include,
but are not limited to: schools, churches, hotels, restaurants, vacation rentals such as Airbnb,
daycare centers, private clubs, fire stations, common areas in multi-family dwellings, nursing
homes, food service locations, and institutional food service locations such as hospitals or
correctional facilities.
This warranty is non-transferable and will not under any circumstance be extended based
on the date of installation — the warranty period takes effect from the date of delivery and
only covers the original purchaser. The warranty applies only to products installed in the
contiguous United States and the District of Columbia. Failure to secure certified warranty
service per these terms will result in a forfeiture of the remaining warranty. Out-of-pocket
payments will not be reimbursed unless prior approval is received from ZLINE and/or ZLINE-
certified service contract partners. Unapproved out-of-pocket payments for service will not
be reimbursed. All warranty procedures must be followed to maintain warranty coverage.

WARRANTY
If a product qualifies within the service window provided under these warranty terms, and
ZLINE is unable to repair the product or a defective part of the product after a reasonable
number of attempts, ZLINE reserves the right to offer to replace the defective part or the
product or provide the original purchaser a full refund of the purchase price of the product
(not including installation, removal, or other charges that were not included in the original
purchase price). The original purchaser of the product must provide the original proof of
purchase, including the purchase date, when filing a claim to obtain replacement parts,
service, or refunds. Additionally, the original purchaser of the product must provide the serial
number of the product when filing a claim to obtain replacement parts, service, or refunds.
This warranty shall not apply to any ZLINE product in which the original factory serial
number has been removed, altered, or cannot be readily determined for any reason. Further,
ZLINE is not responsible for damage resulting from, but not limited to: shipment, delivery, or
improper installation; negligence or improper maintenance, misuse, or abuse of the product;
unauthorized alteration, modification, or tampering with the product; accident, fire, floods,
pest infestations, pandemics, natural disasters, or any other unpreventable or unexplained
acts of nature, commonly referred to as “acts of God”; flare-up fires or damages caused
by improper electric supply, electrical line current, voltage, or power surges; and service
to correct installation not in accordance with the instructions contained in ZLINE’s product
manuals and/or with local government codes.
This warranty does not apply to aesthetic damage, scratches, or natural wear caused by
normal use; second-hand, open box products, or products purchased from an unauthorized
retailer; and damages or issues stemming from alteration or tampering with the range,
including, but not limited to, painting any portion of the product’s interior or exterior and
cutting the supplied power cord to manually hardwire the product.
In the event service is dispatched, and it is discovered that the reported issue is not covered
under warranty based on the disclaimers above, the customer will be responsible for all service
fees. Failure to pay these fees will result in the forfeiture of remaining warranty coverage.
Information contained within ZLINE’s installation and user manuals, in addition to product
information included on ZLINE’s website and all related digital listings, do not cover every
possible condition and situation that may occur during the installation or operation of
ZLINE products.
ZLINE reserves the right to make changes at any time to its products when considered safe,
necessary, and useful. Always check the ZLINE website for the most up-to-date version of its
product manuals: www.zlinekitchen.com/pages/manuals.
Do not install or operate any ZLINE product if it has missing or broken parts or if it arrives
damaged due to shipping. If ZLINE products arrive damaged, contact ZLINE Customer
Experience at 1-614-777-5004 for help. Failure to report a damaged appliance prior to
installation or operation may void the warranty.
ZLINE disclaims responsibility for damage or injury caused by improper installation or
use of any of its products. ZLINE is under no obligation, by law or otherwise, to provide
concessions, including repairs, prorates, rebates, discounts, or replacements, once the
warranty has expired.
SERIAL NUMBER LOCATION
Please write down the model number (highlighted in the image below as the “SKU”) and
serial number of your appliance. Both numbers are located on the rating tag located on
the right front edge of your range. Do not remove permanently affixed labels, warnings, or
plates from the product. This will void the warranty. You may also consider attaching your
receipt or proof of purchase to this manual.
11 " (279 mm)
11/16" (18 mm)
11 " (279 mm)
11/16" (18 mm)
Voltage: Voltage
Frequency: Frequency
SKU: SKU
Model No.: MODEL NUMBER
Date: Month Year
Serial No.: SERIAL NUMBER
PRODUCT TITLE
Conforms to:
• Standard for Safety Household Electric Ranges
[UL 858-2014 Ed. 16+R.02Aug2023]
• Household Cooking Ranges (R2021) (CSA
C22.2861-2016 Ed.94U1)
This device complies with part 15 of the FCC Rules.
Operation is subject to the following two conditions:
(1) This device may not cause harmful interference, and
(2) this device must accept any interference received, including
interference that may cause undesired operation.
Voltage: 240/208 VAC
Frequency: 60 Hz
SKU: SINR36
Model No.: SINR36-A1
Date: May 2024
Serial No.: SINR36SE240500001CN-00
ZLINE 36" INDUCTION RANGE
Conforms to:
• Standard for Safety Household Electric Ranges
[UL 858-2014 Ed. 16+R.02Aug2023]
• Household Cooking Ranges (R2021) (CSA
C22.2861-2016 Ed.94U1)
This device complies with part 15 of the FCC Rules.
Operation is subject to the following two conditions:
(1) This device may not cause harmful interference, and
(2) this device must accept any interference received, including
interference that may cause undesired operation.
Project name: Rating Labels
Notes: Text presented in RED, with the exception of warning labels, should not be
printed. RED is to indicate information that needs to be filled out per product specifics.
This is a template. Once the artwork is approved for this sticker, please apply the template to all stickers
and send the artwork to the ZLINE Team for review. Thank you!
Date: September 12th, 2025Version: 1.0.0Page: 1/2
Manufacturer: Seng
Scale: 1:1
Product(s): SINR models in all variants
Typeface: Futura PT (various weights)
Material(s): Vinyl sticker
Trim: Square
This is a template. Text presented in RED should not be printed.
RED is to indicate information that needs to be filled out per product specifics.
Example
Appliance Tag
WARRANTY

WARRANTY
SERVICE
For warranty service, please contact our Customer Service team at
1-614-777-5004 or visit www.zlinekitchen.com/contact to utilize our
online Customer Experience Portal.
Scan the QR code to view the most up-to-date version of our Installation
Manual and User Manual.
Need to purchase a part or accessory for your ZLINE product?
Visit www.zlineparts.com, ZLINE’s official parts distribution partner.