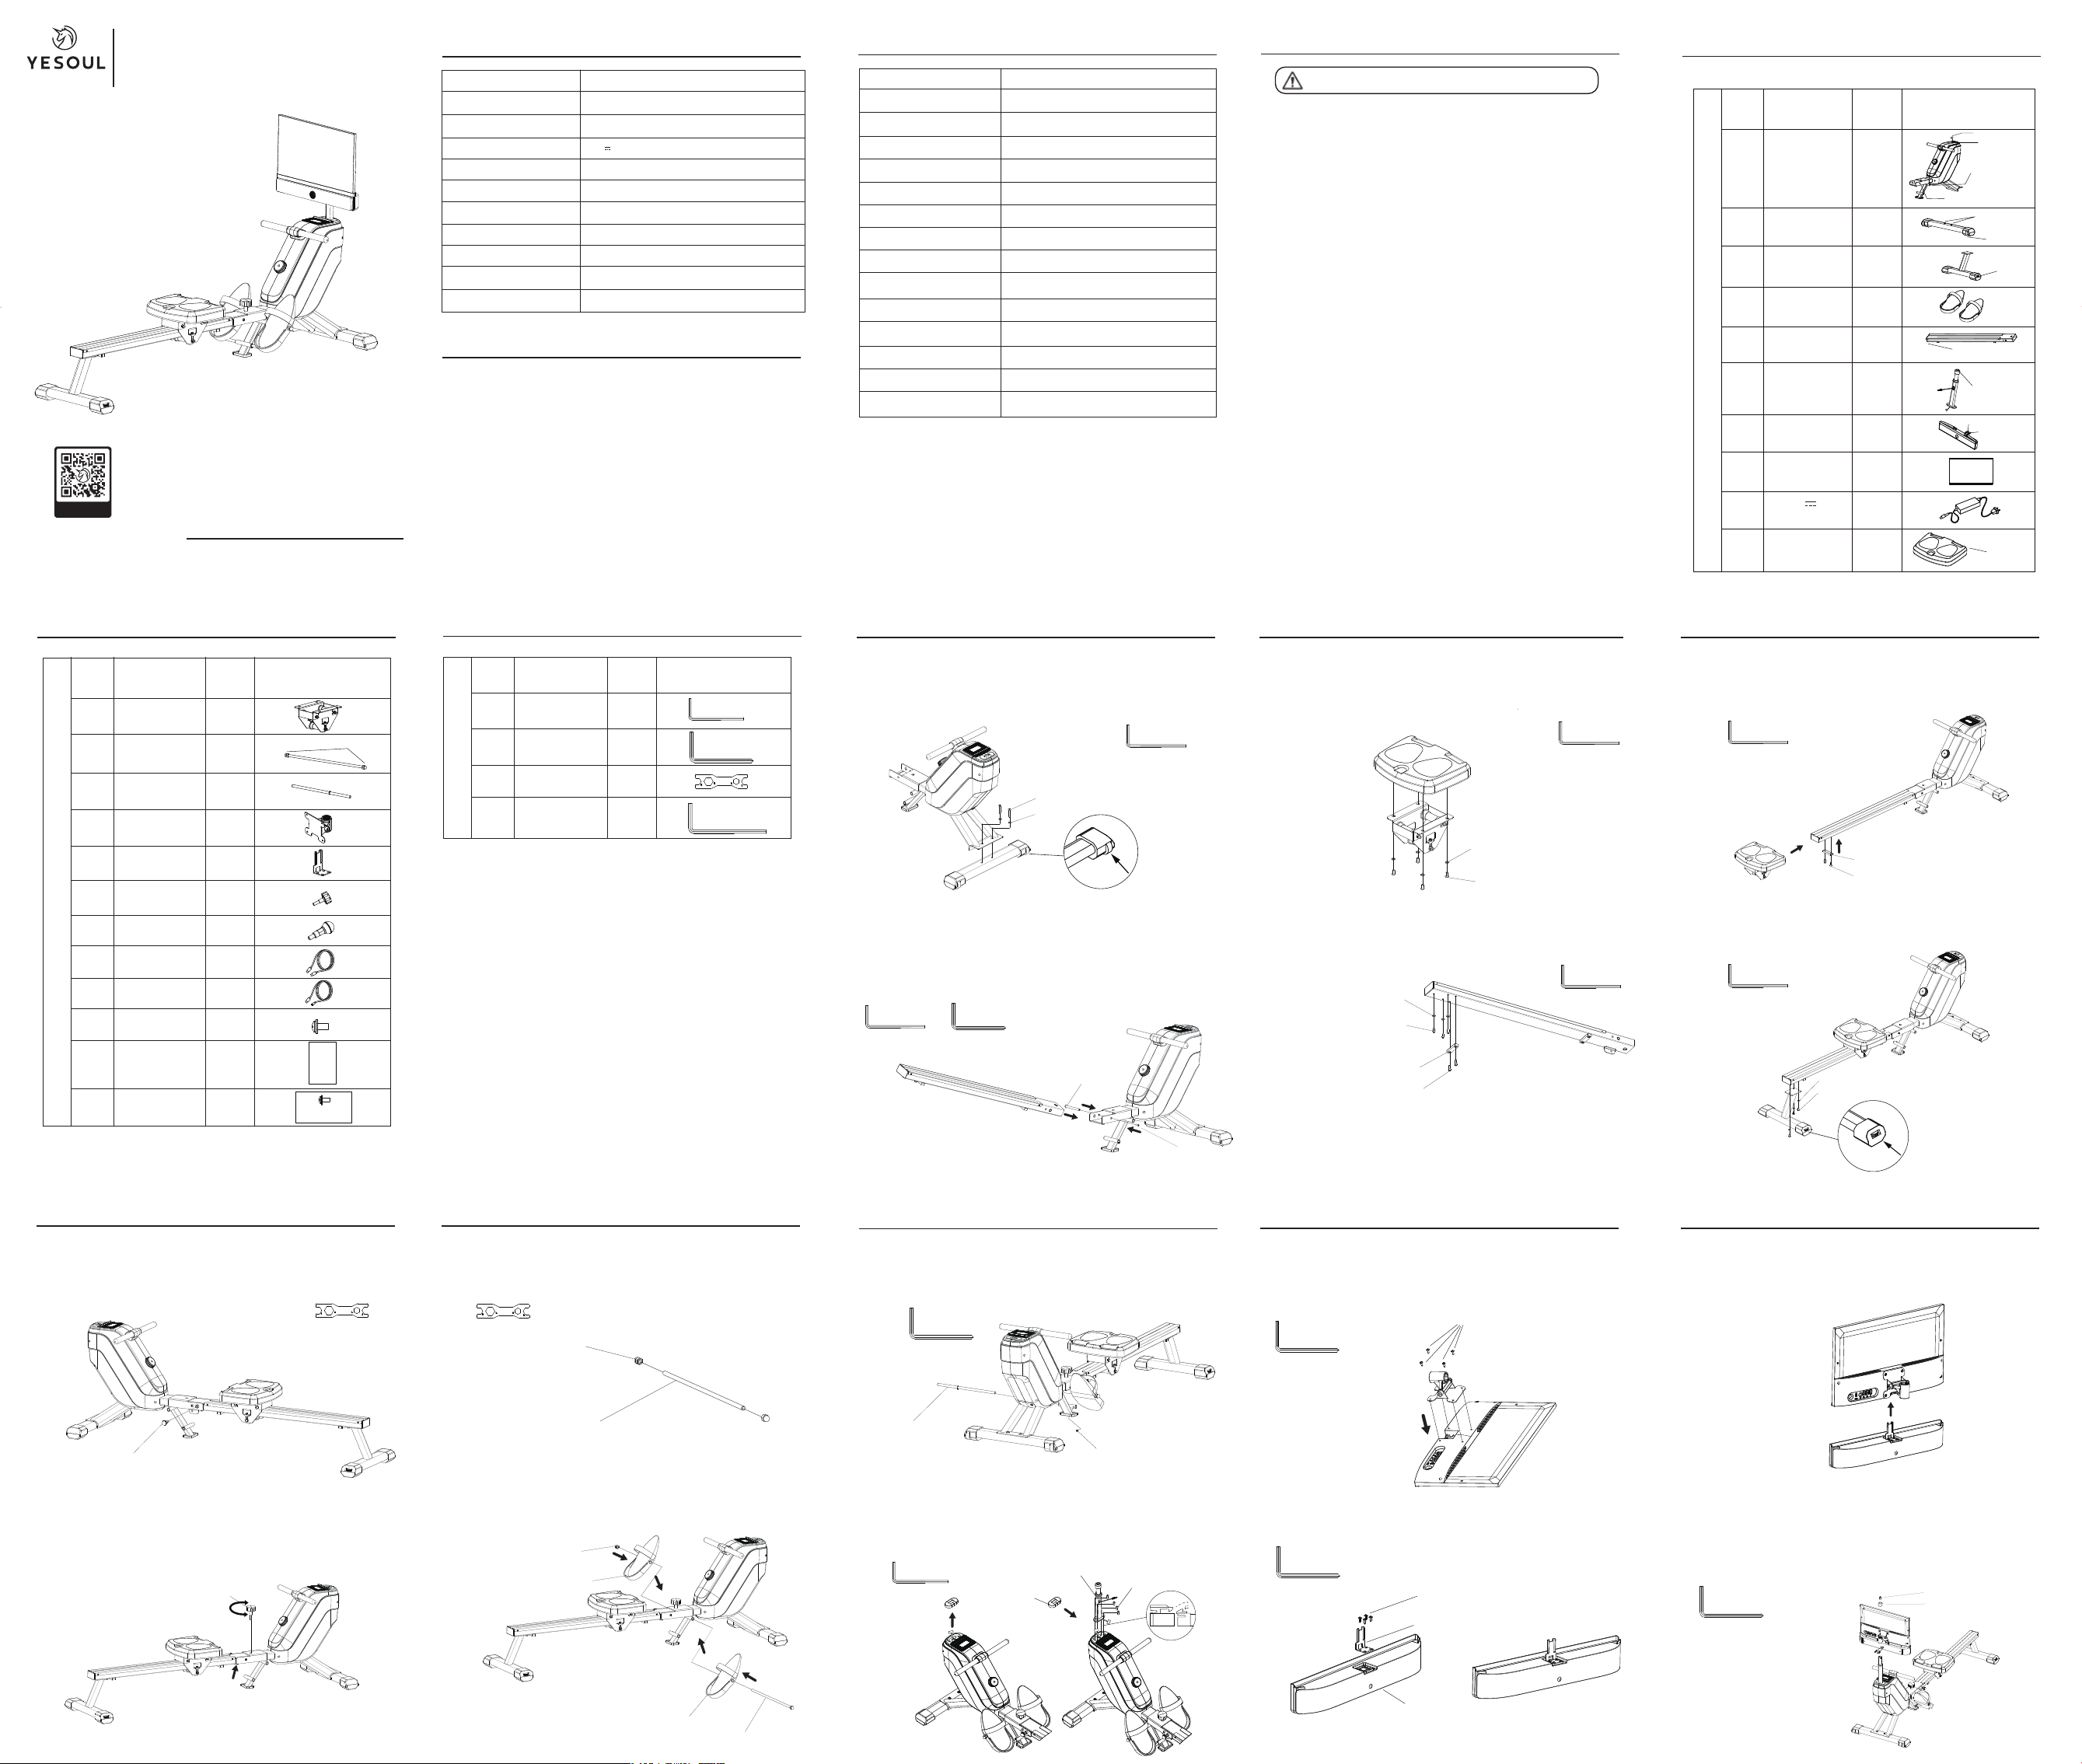
4.Install the seat cushion sliding assembly ⑪ into the slide rail ⑤ in the direction of the arrow,
and then use the L-shaped hexagonal wrench 5# (A) to tighten the hexagon socket ruond screw
(M8×16) and the buffer block.
1. Align the rear foot tube ③ with the hole of the slide rail ⑤, and tighten the three hexagon socket
head screws (M8×16) and flat washers D8 with an L-shaped hexagon wrench #5 (A).
3. Use L-shaped hexagon wrench 5# (A) to remove the hexagon socket head screw (M8×16),
flat washer D8, hexagon socket round screw (M8×16) and buffer block pre-locked on the
slide rails ⑤;
STEP 4: Install the seat cushion sliding assembly
Seated cushion
⑩
⑨
1
⑦
1
2×Hexagon socket head
screw M8×45/Flat washer D8
Moving pulley
4× Hexagon socket head
screw M8x16/Flat washer D8
Main frame
Slide rails
②
③
④
1
1
1
①
1
⑤
⑥
1
1
⑧
1
1
24V 2A
STEP 9: Install the pedal limit rod
STEP 11: Installing screen and speakers
1. Use L-shaped hexagonal wrench 5# (A) to remove the 2 hexagon socket head
screws (M8×45) and flat washers D8 pre-locked on the front foot tube ②;
2 Align the holes of the front foot tube ② with the holes at the bottom of the main frame ①,
screw the removed hexagonal round head screws (M8×45) and flat washers D8 in
sequence by hand, and then tighten them with L-shaped cross head hexagonal wrench 6# (B).
1. Use L-shaped hexagon wrench 5# (A) to remove the 4 hexagon socket head screws (M8×16)
and flat washers D8 pre-locked on the seated cushion ⑩;
2. Align the seat cushion ⑩ and the seat cushion sliding assembly ⑪ with the holes,
and use L-shaped hexagon wrench 5# (A) to tighten the 2 hexagon socket head screws (M8×16)
and flat washers D8.
STEP 2: Install the front foot tube
STEP 3: Install the rail assembly STEP 5: Install the rear foot tube
Screen connecting cable
4× Hexagon socket head
screw M8×16/Flat washer D8
1× Hexagon socket flat round head screw
(female screw) (10×90)/Hexagon socket flat
round head screw (sub screw) (M8×12)
Cross pan head screw M6×10
3×Hexagon socket head screw M8×16/Flat washer D8,
2×Hexagon socket round screw M8×16、 1×Buffer block
1× Hexagon socket head screw M8×16
1. Use an L-shaped cross head hexagon wrench 6# (B) to remove the cross pan head
screw (M6×10) pre-locked on the main frame ①, insert the pedal limit lever⑬ into the
main frame ① in the direction of the arrow, push the retaining ring into place, and then
use an L-shaped cross head hexagon wrench (B) to tighten the cross pan head screw
(M6×10).
L-shaped hexagon wrench 5#(A)
L-shaped hexagon wrench 5#(A)
L-shaped hexagon wrench 5#(A)
L-shaped hexagon wrench 5#(A)
L-shaped hexagon wrench 5#(A)
L-shaped hexagon wrench 5#(A)
L-type cross head
hexagon wrench 6#(B)
L-type cross head
hexagon wrench 6#(B)
L-type cross head
hexagon wrench 6#(B)
L-type cross head
hexagon wrench 6#(B)
⑪
⑫
⑬
⑭
1
1
1
1
Monitor fixing parts
⑮
⑯
⑰
⑱
Seat cushion
sliding assembly
Pedal rotating
bar pole
Pedal limit lever
⑲
㉑
⑳
1
1
1
1
1
1
Speaker Mount
Plum blossom knob
Ball head elastic pin
Hexagon socket screw M8x45
Hexagon socket head screw M8x16
Hexagon socket head screw M8x16
Flat Washer D8
Flat Washer D8
Flat Washer D8
Flat Washer D8
Hexagon socket flat round head
screw (female screw) (10×90)
Hexagon socket flat round head
screws (sub screws) (M8×12)
Ball-head elastic pin (M12×1.75)
Plum blossom knob(M12×1.75)
Hexagon socket head screw M8x16
Buffer block
Hexagon socket head screw M8x16
Buffer block
Hexagon socket round screw M8x16
Hexagon socket round screw M8x16
Pedal limit lever
Cross pan head screw M6x10
Acorn nut M12
8
Pay attention to distinguish
the front and rear foot tube.
The front foot tube is equipped
with a moving pulley.
Please install it outward.
Pay attention to distinguish
the front and rear foot tube.
The rear foot tube is equipped
with a foot pad adjustment
knob.
Foot pad adjustment knob
STEP 10: Install the monitor stand
1. First remove the upper decorative cover, use L-shaped hexagon wrench 5# (A) to
remove the 4 hexagon socket head screws (M8×16) pre-locked on the main frame ①,
Connect the wires and insert them into the sheet metal holes. Align the monitor holder⑥
with the holes on the main frame ① and use the L-shaped hexagon wrench 5# (A) to
tighten the 4 hexagon socket head screws (M8×16). Finally, slightly open the notch
of the upper decorative cover and snap it into place.
Upper decorative cover
Monitor stand
STEP 6: Install the ball head elastic pin
STEP 7: Install the plum blossom knob
STEP 8: Install the pedals
Screw the ball-head elastic pin (M12×1.75) ⑰ into the round hole on the slide rail,
following the direction of the arrow. If it gets stuck, shake it up and down to help the
pin's head enter the hole. Then, tighten it with a multi-function wrench (C).
Use two multi-function wrenches (C) to remove the M12 cap nut pre-locked on the
pedal rotating bar pole⑫. Only one side needs to be unscrewed.(Although both sides
can be unscrewed if necessary)
2.Insert the foot pedal rotating pole⑫ into the hole of the right pedal assembly, and then
into the hole of the main frame ①. Insert the left pedal into the hole of the pedal rotating
pole⑫.Finally, use two multi-function wrenches (C) to tighten the 2 M12 cap nuts.
1. First, hold the arrow with your left hand and screw the plum blossom knob
(M12×1.75) ⑯ into the hole with your right hand. (Note: When you fold and
use it again, you must repeat this installation step)
Multifunctional wrench (C)
Multifunctional wrench (C)
Foot pedal rotating bar
Cap nut M12
Cap nut M12
Foot pedal rotating pole
Right pedal
Left pedal
Left
(loose)
Right
(tight)
Scan for Installation Guide
Routine Maintenance
Product Specifications
Screen size
Resistance system
Power supply input
Bluetooth
Applicable Height
Rated maximum load
Net weight
Gross weight
Overall dimensions
21.5 inch (1920*1080 pixels)
Magnetron resistance system
Supported software version
iOS 12.0 or above, Android 5.1 or above (inclusive)
24V 2A
Wireless connection method
WiFi2.4Ghz/BT/BLE
Rowing Machine: V4.2, Speaker: V5.3
140 ~ 195cm
120kg
27kg
31kg
(Length) 1746mm × (Width) 550mm × (Height) 1035mm
1. Keep the rowing machine on an arid, ventilated and flat floor. Cover the machine to keep the body clean
if inactive for a long period.
2. Wipe off sweat on the machine body with dry cleaning cloth after exercise. Do not use a wet cleaning cloth
to avoid rusting.
3. Regularly check the screws of various body parts for loosening or falling out, and tighten or replace them
without delay if anything.
4. Regularly check the resistance knob for looseness or dislodgement and reasonable resistance
valles so that the resistance value can be calibrated in time.
5. Regularly check if the seat cushion is loose. Tighten it promptly if necessary. Use a cotton cloth to wipe
the seat cushion and keep it dry.
6. Regularly inspect the power cord for any cracks or damage, and replace it promptly if needed.
7. Regularly check the screw of the pedal, if loosens, tighten it promptly.
Scan the QR code to get the
installation guide video to watch
Product model:YS-R1PLUS
Item NO.:R1PLUST
R1 PLUST
ROWING MACHINE
Befo re using this product,
carefully read and properly
keep this manual.
YESOUL ROWING MACHINE
R1 PLUST Product Manual
Panel type
Curvature
Aspect ratio
Size
Backlight type
Display size (H*V)
Resolution
Refresh rate
Port version
Indicator mode (power on, standby)
Storage temperature
Operating temperature
Operating humidity
Storage humidity
Control method
Monitor Specifications
VA
Flat screen
16:9
21.5 inches
LED
476mm*268mm
1920*1080
Max:60HZ
1*USB+Type-c+TTL+Audio out+DC-IN
Blue light indicates power on, light turns off when power
is off, and blinks every 0.5 seconds in standby mode.
-20ºC~60ºC
0ºC~40ºC
10~90%RH
10~90%RH
Five-way joystick buttons
1. This product is for household use (Class H) and not medical fitness equipment.
2. This product must not be used for medical rehabilitation.
3. Keep children and pets away from this product. This product is for those over 16 years old only.
4. Do not place the equipment in damp or wet environments.
5. Do not use this product while barefoot or wearing inappropriate footwear.
6.Please wear cloth suitable for exercise when using our product, do not wear baggy cloth to
prevent stuck.
7. Use this product on a flat and clean ground.
8.Lift the slidings in the back and front can move the product freely or be placed in a suitable
position.
9. To avoid hurting your back and guarantee your safety, please use the proper way or ask for help
when lifting or moving this product.
10. Do not use this product when malfunction happens.
11. Please check whether the rowing machine is loose or damaged before each use.
12. Never stretch any object or body part into the openings of the rowing machine.
13. When using the screen holder, ensure the device on the holder is centered to prevent it from
falling off.
14. Never refit this machine or use non-original accessories without permission. The casing must
be opened by professionals, to avoid damage.
15.For the product's emergency disengagement, passage, and simplicity of use, the product
should have at least 0.6 meters of free space all around.
16. Incorrect or excessive training may cause injury.
17. Use this product according to the instructions . Warm up fully before exercise.
18. Keep the body hydrated as needed during exercise.
19. Without the preliminary determination of baseline fitness level and medical certificate signed
by a doctor, never be engaged in high-intensity sports. Before attempting any intense sprints, be
careful with the body state and posture, and adjust a comfortable speed.
20. If you experience any discomfort while using the equipment, stop immediately and consult a
doctor.
21. Those pregnant or with high blood pressure, heart disease, lumbar spondylosis or disabled
disabled must not use this product without the permission of doctors.
22. The weight of the user must not exceed the maximum load.
23. Carry out preventive maintenance regularly.
24. Please use the equipped power adapter. Replacement of the power adapter without
consultation may cause serious consequences.
Important Safety Instructions
Please read them carefully. Improper use may result in body
injury or death!
Installation Guide - List of Parts
STEP1: Check of parts
NO.
Name Quantity Picture
Monitor holder
Front speaker
Pedal set left/right
Front foot tube
Rear foot tube
Display screen
power adapter
(left)
(right)
Power port
Signal port
C to C data cable
C to Lightning
data cable
Phillip head screw
with pad M4 × 10
Instructions
Instructions
Parts List (Components List)
Parts List (Components List)
Installation Guide - List of Parts Installation Guide - List of Parts
Installation Guide
Installation Guide
Installation Guide Installation Guide
Installation GuideInstallation Guide Installation Guide Installation Guide
Align the port to connect to the
screen connection cable,
and retract the excess wire
into the tube.
* Please make sure that the
connection direction is correct.
Please do not connect it with
violence!
Cross pan head screw with washer M4×10
1.Take out the monitor fixing piece ⑭(The side with the sticker is facing up),
and use the L-type cross head
hexagon
wrench 6# (B) to lock the 4 cross pan head
screw with washer(M4×10) ⑳ until they are tight (* Please placethe screen flat on
the desk and avoid contact with hard objects to prevent damage to the screen);
Cross pan head screw with washer M4×10
Speaker holder
Front speaker
2. Align the speaker holder ⑮ with the slot of the front speaker ⑦, use a L-type
cross head
hexagon
wrench 6# (B) to tighten the remaining 4 cross pan head
screws with washers (M4×10) ⑳ until they are secure.
3. Align the speaker assembly with the slot of the screen assembly and insert the
buckle connection;
Hexagon socket
haed screw M8×16
Upper connection seat
4. Loosen the hexagon socket head screw(M8×16) pre-installed on the monitor
holder ⑥ with an L-type cross head
hexagon
wrench 6#(B), and then remove the
upper connecting seat;
5. Insert the screen and speaker components assembled in the previous step into the
monitor holder ⑥.Next, place the upper connecting seat and secure it with the
hexagon socket head screws (M8×16). Use a
L-type cross head
hexagon
wrench 6# (B) to tighten the screws until they are secure.
NO.
Name Quantity Picture
L-type cross head
hexagon wrench 6#
A
B
C
D
1
1
1
2
L-shaped hexagon
wrench 5#
L-shaped hexagon
wrench 8#
Multifunctional wrench
Implements List (Tools List)
NO.
Name Quantity Picture
1. Use L-shaped hexagon wrenches 5# (A) and L-shaped cross head hexagon wrench 6# (B)
to remove the hexagon socket flat round head screws (female screws) (10×90) and the hexagon
socket flat round head screws (sub screws) (M8×12) pre-locked on the main frame ①;
2. Install the slide rail ⑤ into the main frame ① in the direction of the arrow,
and finally use L-shaped hexagon wrenches 5# (A) and
L-shaped cross head hexagon
wrench 6# (B)
to tighten the hexagon socketflat round head screws (female screws) (10×90)
and the hexagon socket flat round head screws (sub screws) (M8×12).
L-shaped hexagon
wrench 5#(A)
L-type cross head
hexagon wrench 6#(B)
2×Cross pan head screw
with washer M4 × 10
1
Spare parts
㉒
*Some fixing screws are pre-locked on the corresponding parts at the factory.
Please remove them before installing the corresponding parts during assembly.
Spare parts are subject to actual conditions.
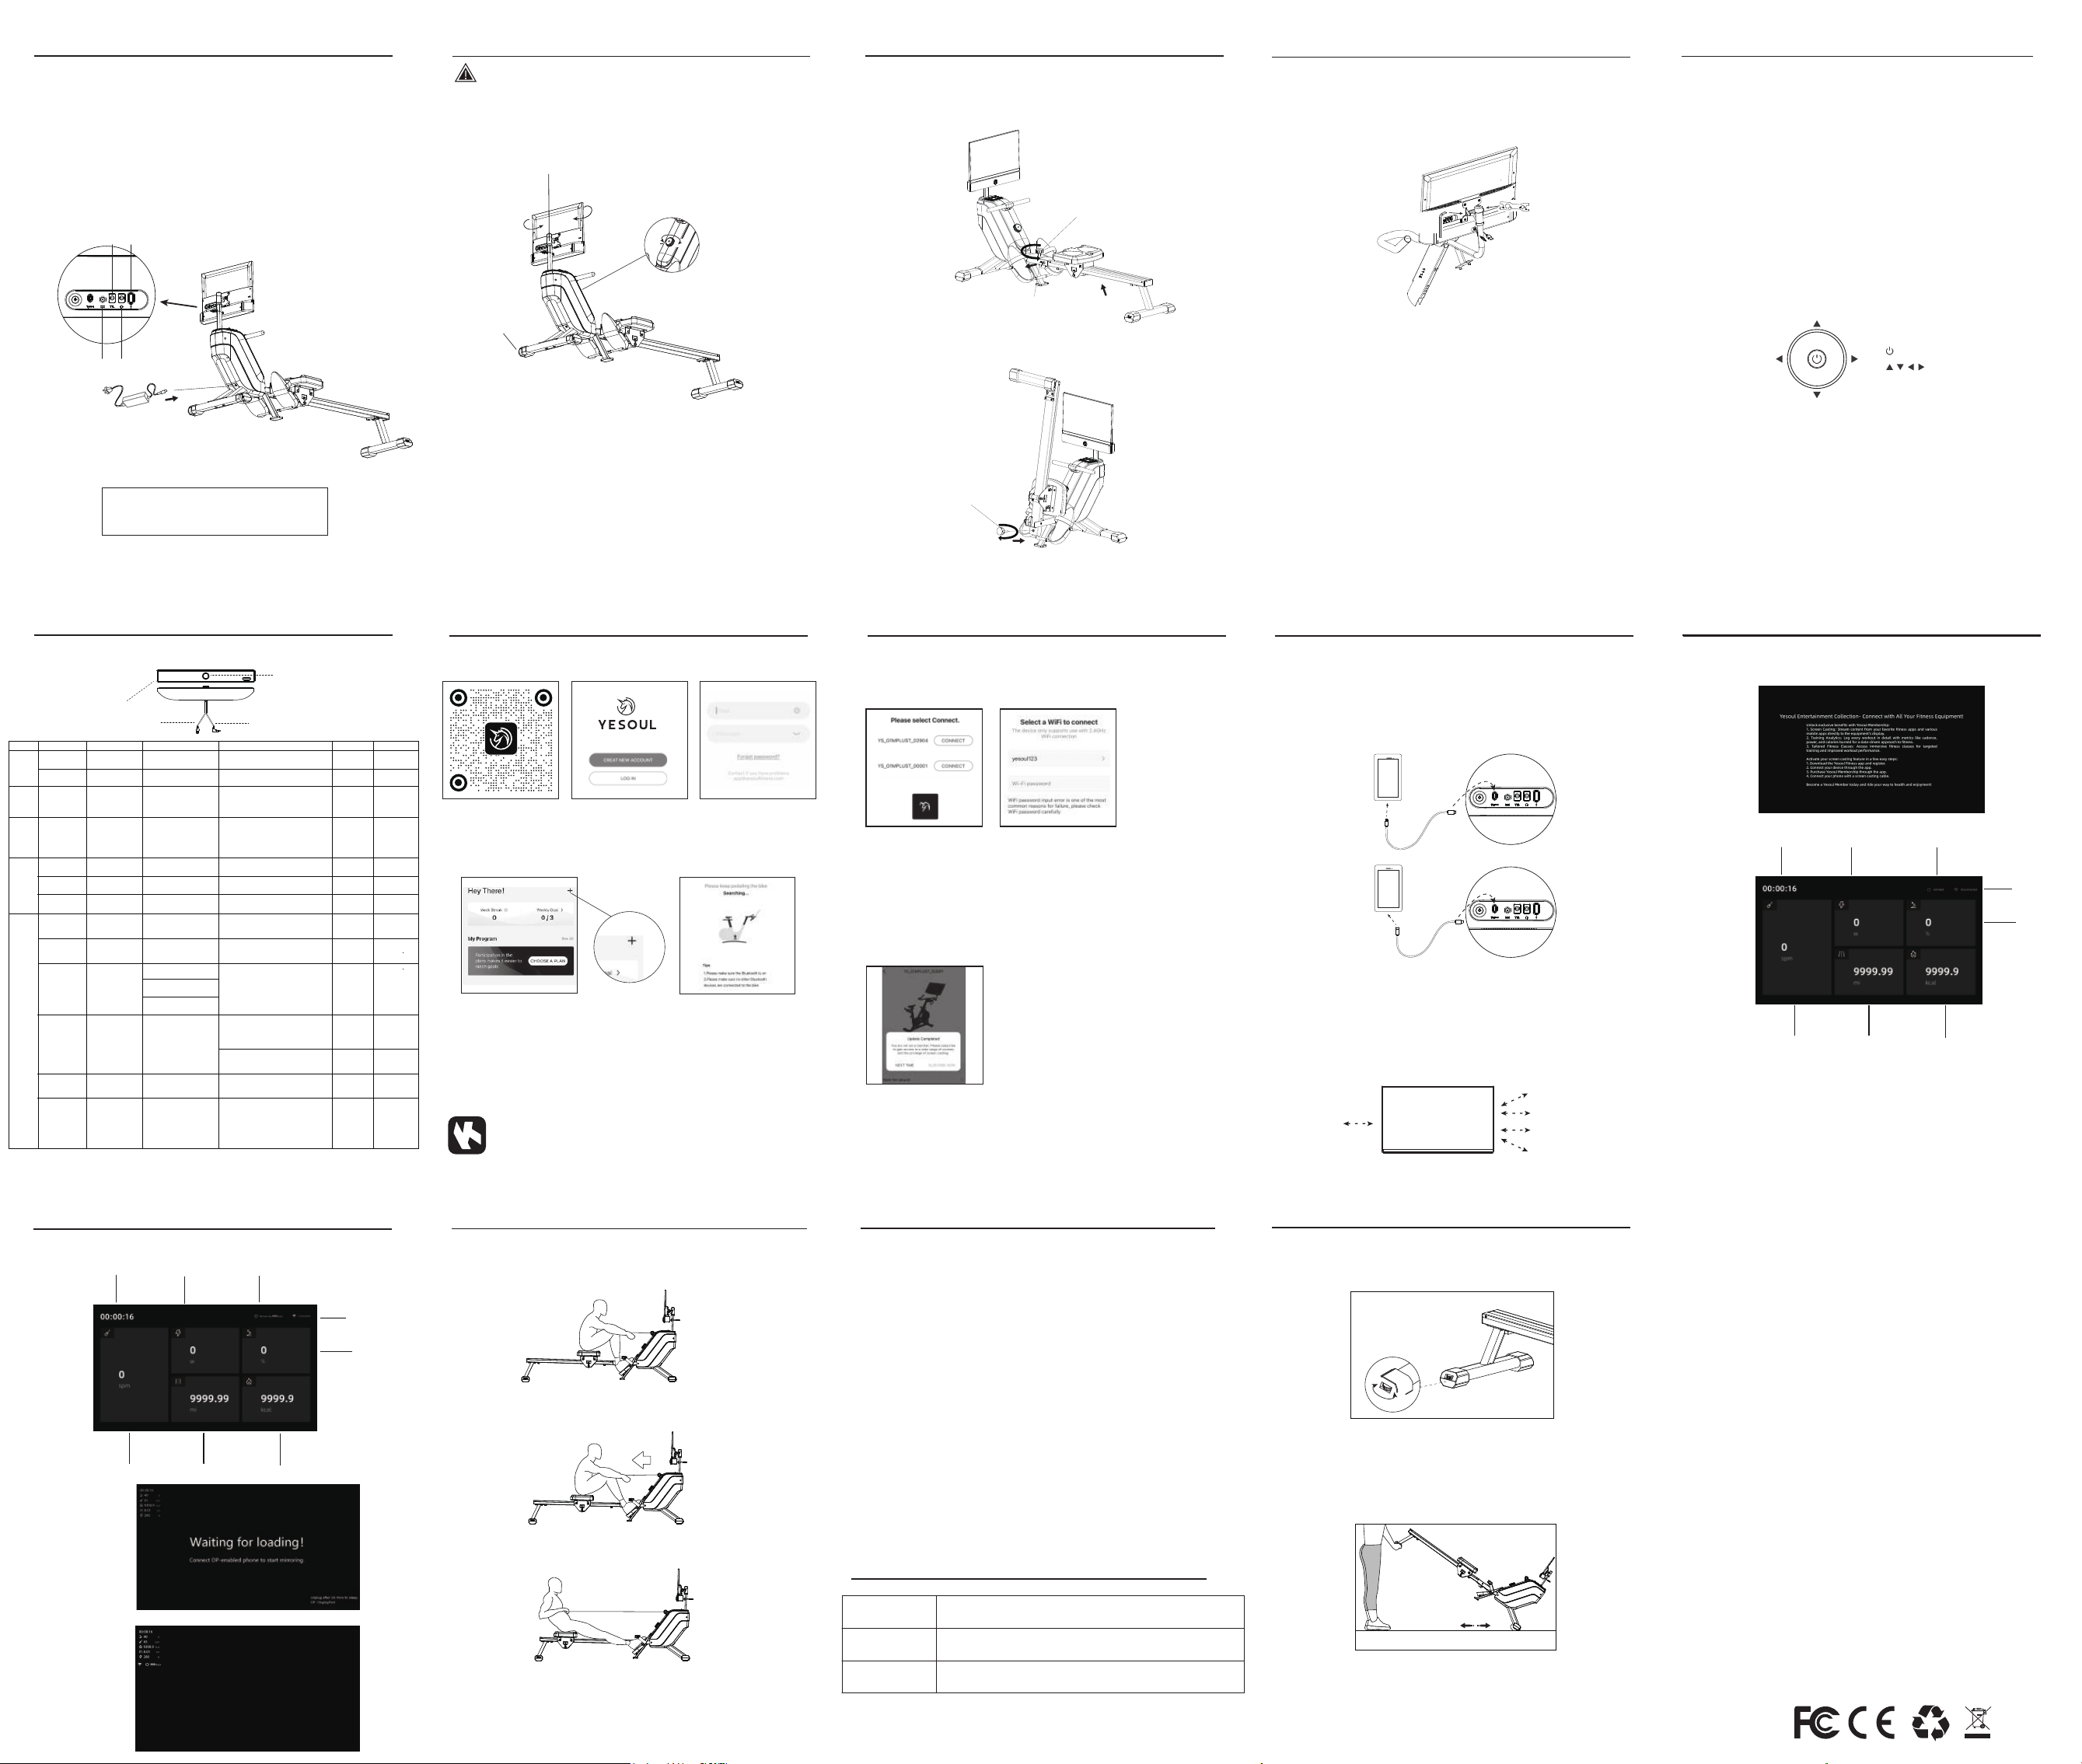
1. Turn the plum blossom knob (M12×1.75)⑯ counterclockwise, pull up the ball-head
elastic pin (M12×1.75)⑰ with your left hand and hold it, lift the slide rail assembly⑤ with
your right hand, then release the ball-head elastic pin (M12×1.75)⑰, lift the slide rail
assembly⑤ with your right hand, and hear a "tap" sound, indicating that it is in place;
Note: When folding and storing, please hold the seat well to prevent it from slipping
suddenly; please place it out of reach of children, and the tail of the fuselage can stand
against the wall.
How to store
Resistance
2. After folding, turn the removed plum blossom knob(M12×1.75) ⑯ clockwise to prevent it
from being lost.
Note: When unfolding the rowing machine, please hold the handle of the slide rail
firmly to prevent it from slipping suddenly and causing injury.
Correct usage
Wrong usage
Paddle frequency
Resistance
Paddle frequency
Non-member logo
1.Preparation stage
Relax the shoulders, straighten the arms and back, and bend the knees until the calves are
perpendicular to the slide rail.
2.Start stage
Push the pedals with the soles, with the arms straightened.
3.Operation stage
Pull the handle to under the ribs and fully straighten the legs.
4.Repetition stage
When the body leans completely forward and the arms are relaxed and straightened,
slowly bend the knees again and repeat the previous steps.
+
Safety tips:
Please check whether the screws in various parts of the machine are
tightened before use.
Unprojected
screen interface
Member screen
casting connection
Members not
casting screen
interface
STEP 12: Installation of connection cable
1.Insert the monitor's power port (a)、signal port (b)、audio's signal port (c) and
power port (d) into the jacks at the bottom of the back of the monitor. Be sure to
plug them in tightly (Pay attention to the colors and specifications of the sockets.
Match plugs of the same color to the corresponding sockets. Ensure the power
cord is properly inserted and securely tightened.);
2. Select the appropriate full-featured C to C data cable (which supports DisplayPort
(DP) signal output)and insert it intothe Type C jack under the monitor(Secure the
excess wire with Velcro);
3.Connect the power adapter ⑨ to the power jack at the rear under the frame ①.
Make sure the indicator light is on continuously.(Use only the standard power
adapter; using an unauthorized adapter may lead to serious consequences)
Monitor's power port(a)
Audio's signal port(c)
Signal port(b) Power port (d)
Note: Do not plug or unplug the monitor's
interface without cutting off the power supply.
Please unplug the power when not in use.
The screen supports 360 degrees of rotation,
allowing it to rotate 180 degrees clockwise or
counterclockwise.
180 degrees clockwise
180 degrees
counterclockwise
Movable pulley
Resistance knob
(Please adjust the resistance appropriately
according to your exercising needs.)
Statement:
This manual contains the functional introduction and operating instructions as
much as possible when printed. owever, due to ongoing improvements in hardware,
software, and design, there may be differences between this manual and the product
you purchased.
In the event of any discrepancies in appearance, interface, or color,
please refer to the actual product.
Precautions
Check screen
How to adjust the speakers
APP usage instructions APP usage instructions
*The above illustrations are for reference only. Since the software is
constantly updated and iterated, please refer to actual use.
Connect devices
·When using for the first time, click the 「+」 in the upper right corner of the「Home」
or enter the course and connect the device according to the interface prompts.
Device connected to Wi-Fi
·After connecting the device, follow the page prompts and select the corresponding
Wi-Fi to complete the network connection to the device.
·The device only supports connecting to 2.4G networks.
Purchase APP membership
·For first time use, after completing the network configuration, the page will
automatically jump to the membership purchase page, and follow the page
prompts to complete the membership purchase.
·If you need to purchase a membership again in the future, please open the APP
and find 「Homepage」 - 「Settings」 - 「Member Rights」, and follow the interface
prompts to complete the membership purchase.
APP installation registration
·You can scan the QR code below to download the APP and register an APP account.
·For subsequent use, just pull the device and open the sports mode or course of
the APP to automatically connect.
·The device does not support simultaneous connection of multiple mobile phones.
Please confirm that no other users are connected to the device at this time before use.
·After shutting down, Bluetooth will be automatically disconnected.
·In addition to connecting with YESOUL FITNESS APP, Bluetooth can also be connected
with Kinomap and software.
Kinomap
2. Enter the APP login page
1.Scan the QR code and
download the APP
4. Enter the APP homepage
6. Select the device to connect 7. Select the corresponding
Wi-Fi connection device
8. Follow the interface prompts to complete the membership purchase.
3. Register an APP account
5.Search for devices
About wired projection screen
Installation instructions for wired screen projection:
1. Take out the data cable,
Note: There are two data cables for Android and iOS included in the package.
Please use the appropriate one according to your phone model;
2. Connect the Type-C interface of the data cable to the screen;
3. Connect the Type-C or Lightning interface of the data cable to the phone.
Note: Android phones need to support DisplayPort (DP) signal output in order
to use the wired screen projection function normally.
Screen casting permissions (Membership):
1. After registering on the app and becoming a member, connecting the equipment will
activate screen casting permissions, allowing you to use the screen casting function.
2. Once the equipment has activated screen casting function permissions, it can share
the function with up to 4 other non-member accounts (a total of 5 shared accounts).
Note: (1) Among the 5 most recently paired accounts with the equipment, at least 1
must be a member; otherwise, the screen casting function will be disabled.
(2) Member accounts can only activate the equipment they are initially paired with.
For any changes, please contact customer service.
Android:
IOS:
Non-member 1
Member
Non-member 2
Non-member 3
Non-member 4
About display interface
Display interface description:
About display interface
Display interface description:
The screencasting
device has been
connected.
No membership
purchased.
Excercise time
WI-FI signal
Instantaneous power
Single exercise mileage Calories per exercise
This interface will appear under
the following circumstances:
1. Waiting for screen casting.
2. The access device does not
support screencasting.
3.ipad or iPhone first time
access untrusted devices.
Excercise time
Number of remaining days
of membership
WI-FI signal
Instantaneous power
Single exercise mileage Calories per exercise
Error 1: Rowing with the forces of arms only
Error 2: Simultaneous forces of both legs and arms and hip
Error 3: Curved back
Error 4: Excessive stretching
Common faults and troubleshooting
Common Fault
Obstruction of slide
rail
Abnormal noise
during use
Solution
Clean dust or foreign matters on the surface of the slide rail or the
pulley in contact with the slide rail under the seat.
Check whether the screws of the body are loose.
Correct action analysis: 60% of the rowing force comes from the legs, utilizing the explosive
power of the feet. Of the remaining 40%, 20% comes from the lower body, and only 20%
comes from the arms.
Correct action analysis: In fact, rowing consists of three steps: both legs - hip - both arms.
Apply forces first via the legs, and then slowly move the hip back. When the shoulders
exceed the pelvis, pull the handle via both hands, keep the body a little backward, and
straighten your legs slightly, until both ends are close to the chest. Return to the starting
point and repeat the aforesaid steps.
This is particularly likely to occur to those who are prone to hunchback while standing.
Correct action analysis: Keep the back straight, engage the abdominal muscles, and relax
the shoulders to maintain a neutral spine position.
For extreme stretching, the operator may keep the hip too close to heels, thus making the
calves not perpendicular to the ground and the head and shoulders exceeding toes.
Correct action analysis: Keep the calves perpendicular to the ground, straighten and relax
both arms, and make the body a little forward.
Installation Guide
(for reference only, subject to the actual product)
Installation Guide
Ball-head elastic pin (M12×1.75)
Plum blossom knob(M12×1.75)
Plum blossom knob(M12×1.75)
Disconnect tone
(Pairing)
Disconnect tone
(Pairing)
Red LED
flash quickly
Red LED
flash quickly
Red LED
flash quickly
The tone of
successful
connection
(Paired (dong))
The tone of
successful
connection
(Paired )
The tone of
successful
connection
(Paired)
Red LED
always on
Red LED
always on
Red LED
always on
Red LED
always on
Red LED
always on
Red LED
always on
Red LED
always on
Red LED
always on
Red LED
goes out
Red LED
goes out
Volume up to
maximum with
a tone (beep)
/
/
/
Switch to Bluetooth
mode with beep
(Bluetooth pairing on)
1.AUX mode: red light
always on
2. Bluetooth mode:
red light flashes quickly
Power-on beep
(hello)
Shutdown tone
(Shutdown sound
effect)
Shutdown tone
(Shutdown sound)
Audio function operation
Knob keys
AUX audio input cable
USB 5V power cable
Front speaker
/
/
/
/
/
Short press the
Rotary switch
Power On
Sleep
state
On/Off
Sleep mode Sleep state
Wake-up
function
Volume up
Turn the switch Clockwise
The volume increases
gradually as your rotation
Volume down
Turn the switch anticlockwise
The volume decreases
gradually as your rotation
Mode Switch
Power on
Short press the Rotary switch
Switch AUX mode and Bluetooth mode
Power on
Click the knob button to
switch the mode to
Bluetooth mode
1. Pairing search status, red light flashes quickly
2. If pairing times out in 10mins, it will enter
sleep state
S
witch to Pairing mode
(
the bluetooth can be
f
ound by other devise)
Power on
Open the bluetooth and
Search on the devise
Bluetooth device searches for "Speaker"
and connects, successful pairing
announces a tone
Close your devise
bluetooth function
Cancel the pairing
by the devise
Disconnect the bluetooth
connection by Devise
1. After over-distance disconnection,
the speaker enters the pairing state and
the red light flashe quickly
2. After 10 mis, no device is connected and
the speaker enters sleep state
Reconnected successful with devise
Reconnected
Bluetooth mode
(paired with
devise before)
Switch to bluetooth mode,
spkeaker try to reconnect
with the last devise
If unable to reconnect within 10mins,
enter sleep state
F
(In Bluetooth
mode)
actory Reset
Power On
In Bluetooth mode,
triple-click the button on
one of the front and rear
speakers
1. Restore to the default boot state
(enter AUX mode)
2. Clear Bluetooth connection records and
clear front and rear speakers
Pairing record, volume restored to default
volume (maximum volume 50%)
3. Enter AUX state
Power On
Power On
Tone
LED
Pre-Condition
Effect
Control
Fuction
Pairing
function
Disconnected
Reconnected-
back to BT range
Connected
Disconnected
1. Connected with devise,
the bluetooth disconnected
after move the devise out
of the BT range
2. It reconnected successful if
back in BT range within 10mins
1. Announcement tone (
Pairing
)
2. Speaker enter the pairing mode
Power ffO
Press and hold the
knob button for 3 seconds
The speaker has no AUX
signal or Bluetooth signal
input for more than
10 mis
When clicking the knob
button (clicking does not
switch modes), inputting
audio signals、adjusting
the volume and connecting
Bluetooth can wake up
Power off
The speaker goes to sleep
Enter pre-wake state
Recovery
success tone
(hello)
Note: When your phone is connected to the speaker via Bluetooth and connected to wired screen projection,
please switch the speaker to AUX mode.
Operation steps
Project
Bluetooth
pairing
There are two adjustable foot pads at the bottom of the rear foot tube.
Rotate the foot pads to adjust the height the device is balanced and does
not wobble.
How to adjust rowing machine
Body level adjustment
Position adjustment
Low
High
Lift the rear foot tube and use the moving pulley of the front foot tube
to move the product freely or place it in a suitable position.
30°
How to adjust the screen
Screen Adjustment:
1. Press and hold the "OK" key for 6 seconds to power off the phone,
and for 1-2 seconds to power it on.
2. When the monitor is powered on and a signal is detected, press the "OK" key
press the "OK" key within 1 second to open the main menu.
3. Use the "Directional" key to navigate the main menu and select the desired item
for adjustment. After selecting the item, press the "OK" key to adjust it. Press the
"OK" key again to save changes and return to the previous menu.
4.Press and hold the left shortcut key for 10 seconds to display the version number.
5. After confirming the adjustment, move the joystick to the left to exit the
current option.
Operations to close the data window during screen projection:
1. Connect the screen projector and start projecting.
2. Press the "OK" key to access the main menu.
3. Use the remote to scroll down and select settings, then scroll right to enter the
settings menu.
4 Scroll down using the remote to select "BikeOsd," and then scroll right to enter
the "BikeOsd" setting interface.
5. Choose "OFF" and press the "Confirm" key to select this option.
6. Scroll left three times continuously using the remote to exit the main menu.
(Five-way joystick buttons)
(OK key)
②
①
(Arrow key)
After installation, check whether the screen falls when turned upside down.
If this happens, use the L-shaped hexagonal wrench 8# (D)and the multi-function
wrench (C) to tighten it as shown in the figure. (If it is loose during use or the joint
needs to be adjusted, follow these steps to make the necessary adjustments.)
Multi-function wrench(C)
L-shaped hexagonal wrench 8# (D)
(Here,the L-shaped hexagonal wrench 8# (D)
can be used to tighten/loose).