www.PyleUSA.com
Features:
Installation
MOUNTING THE BRACKET MOUNTING
1. Remove the bracket knobs and the bracket
from the speaker.
2. Hold the bracket up to the mounting surface.
"PYLE" can be mounted either horizontally
or vertically. Hold the bracket so that the speaker
wire ts through the large, circular wire hole in
the bracket. Align the bracket to be square with
the surrounding. (Use a level for accuracy)
3. Mark the locations of the three shaped screw holes.
Use all of the holes.
4. Drill pilot holes into the mounting surface.
5. Gently pull the speaker wire through the wire hole
in the center of the mounting bracket.
Align the bracket so that the holes all line up.
6. Use your hardware to attach the bracket to the mounting surface.
Visit Our Website
SCAN ME
PyleUSA.com
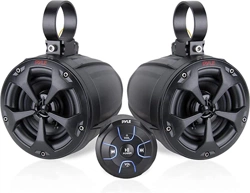
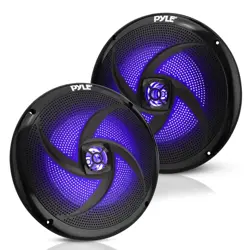
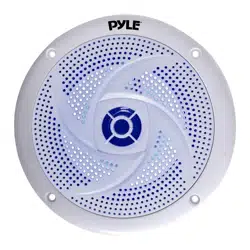
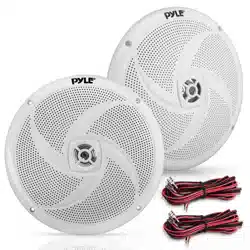
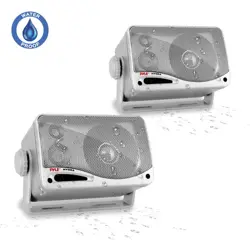
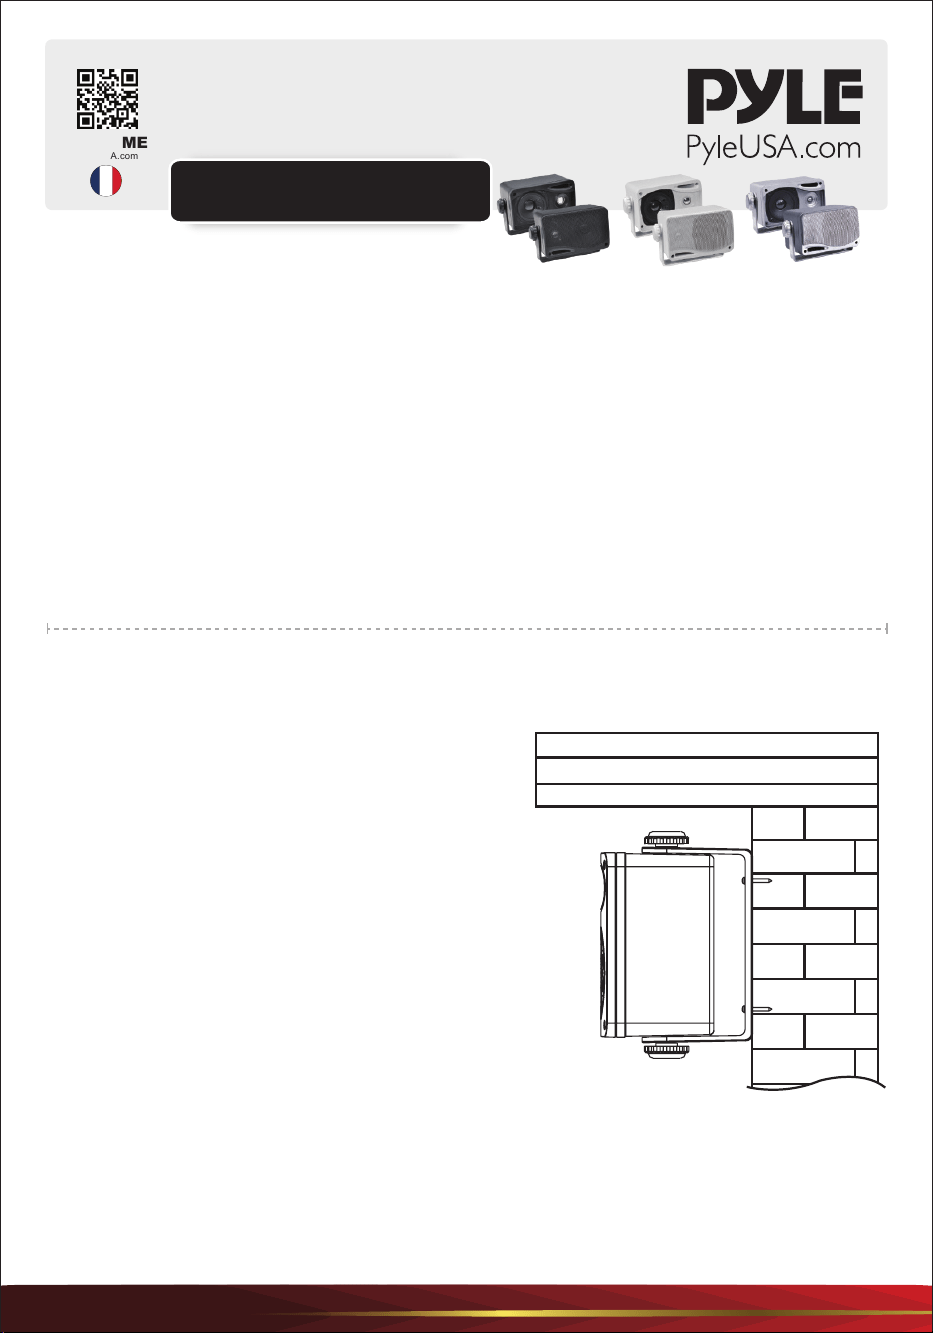
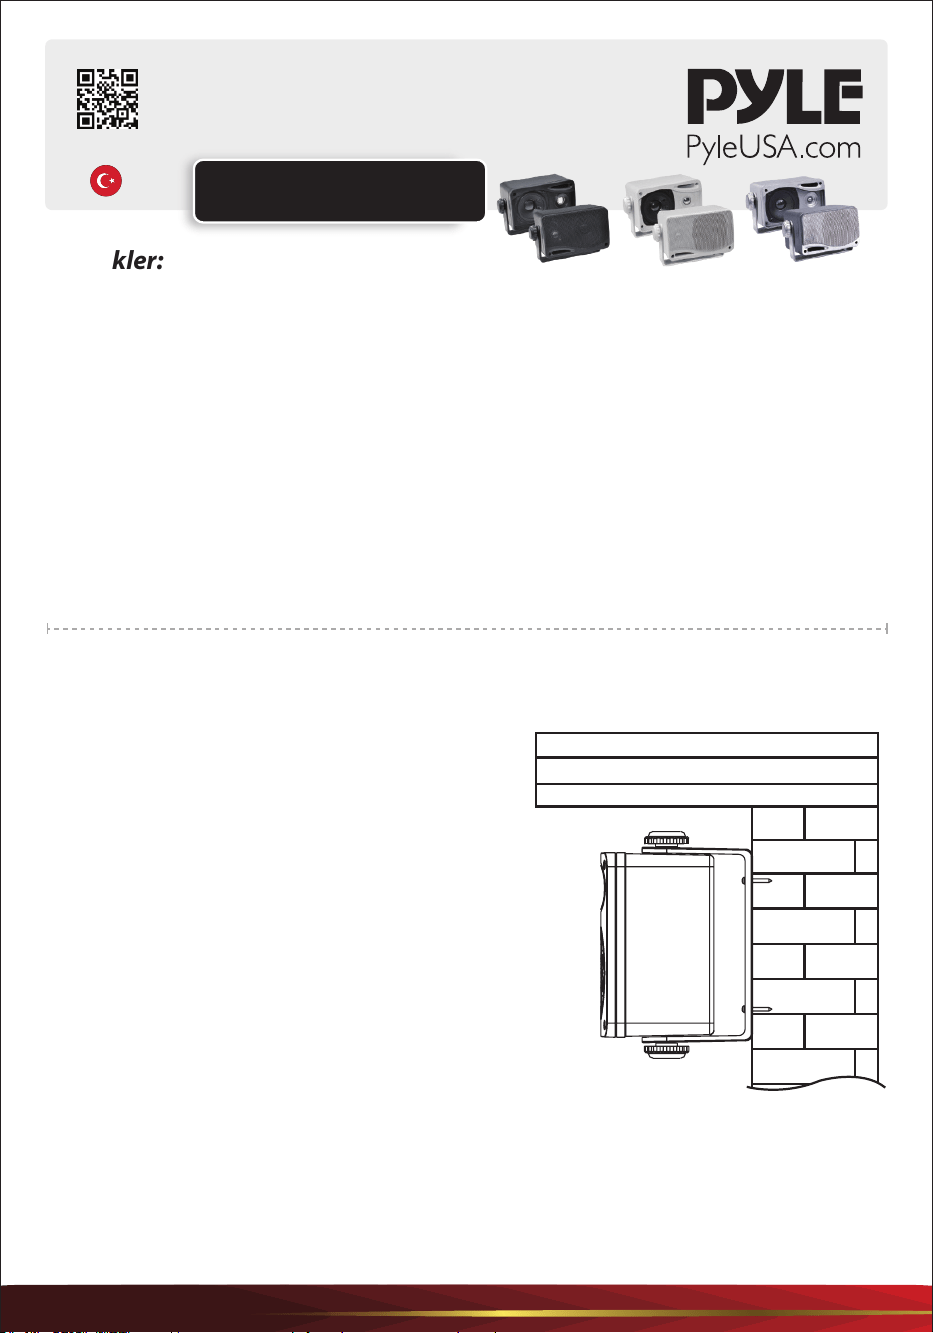
3.5” 200 Watt 3-Way Weather
Proof Mini Box Speaker System
USER GUIDE
• Excellent for Use On Boats/Marine/
• Decks/patios/Poolside/Outdoors
• Completely Weather Proof
• 3.5” Aluminum Injection Cone Woofer
• 24 Oz. Magnet Structure
• 1.75” Wide Dispersion Cone Midrange
• 1” Super Dome Tweeter
• Capacitor Crossover Network
• Bass Reex Vent for Added Bass Response
• Heavy Duty ABS Construction
• Quick Connect/Disconnect Speaker
Terminals
• Removable Rustproof Mesh Grills
• Power: 100Watts RMS/200Watts Peak
• Frequency Response: 70-21K Hz
• Impedance: 4 Ohms
• Complete Mounting Kit &Wires
• Dimensions: 5.25”(W)x3.75”(H)x3.75”(D)
ENG
www.PyleUSA.com
FINAL ADJUSTMENTS
1. After checking that the speaker is in phase and works correctly, angle the speaker for the
best sound.
2. Hand-tighten the bracket knobs only. Power tools may over-tighten the knob and strip
the threads of the insert.
3. Check that the entire installation is safe and secure.
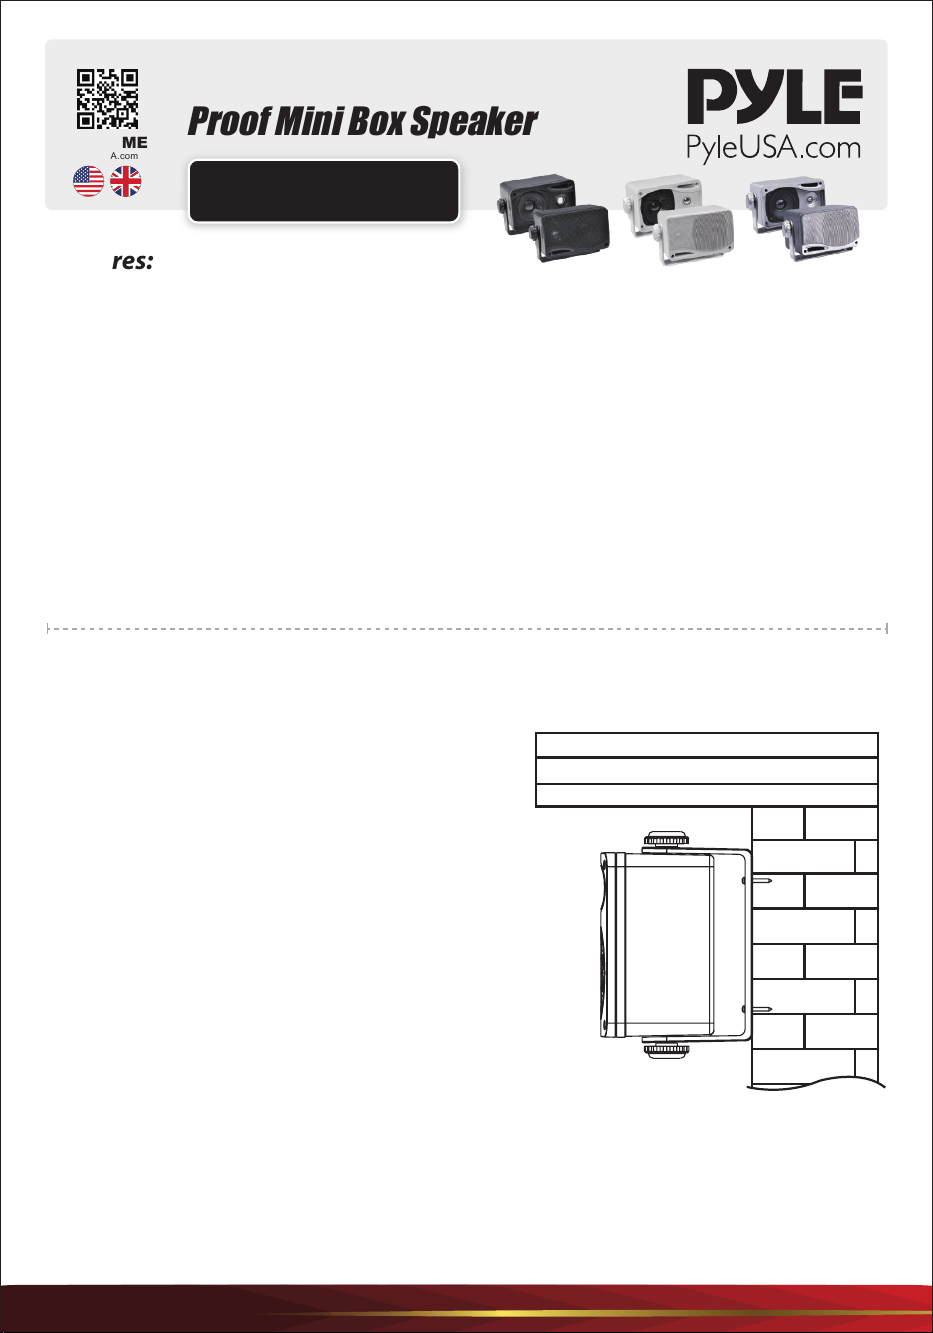
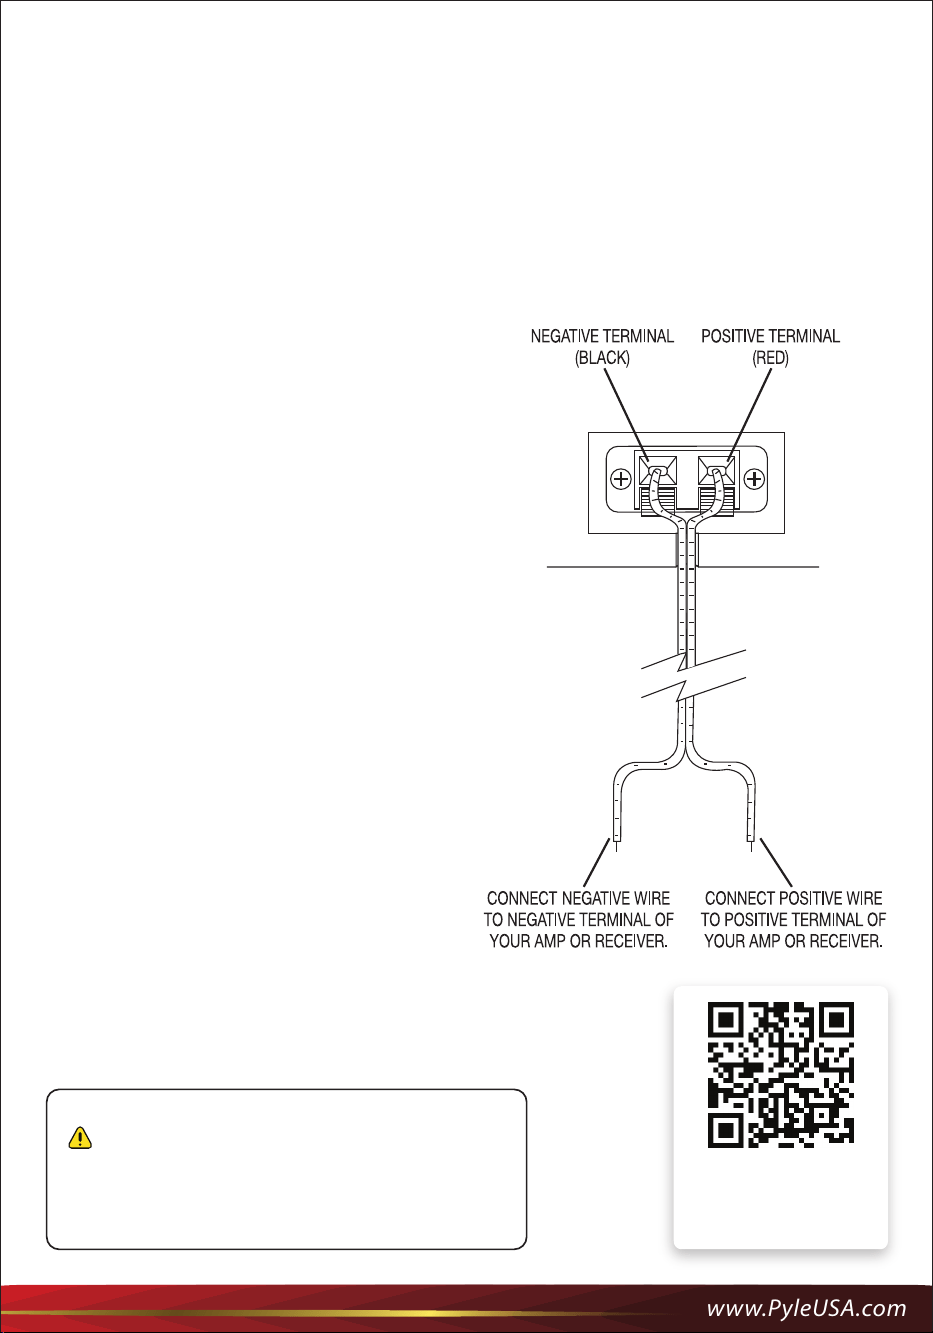
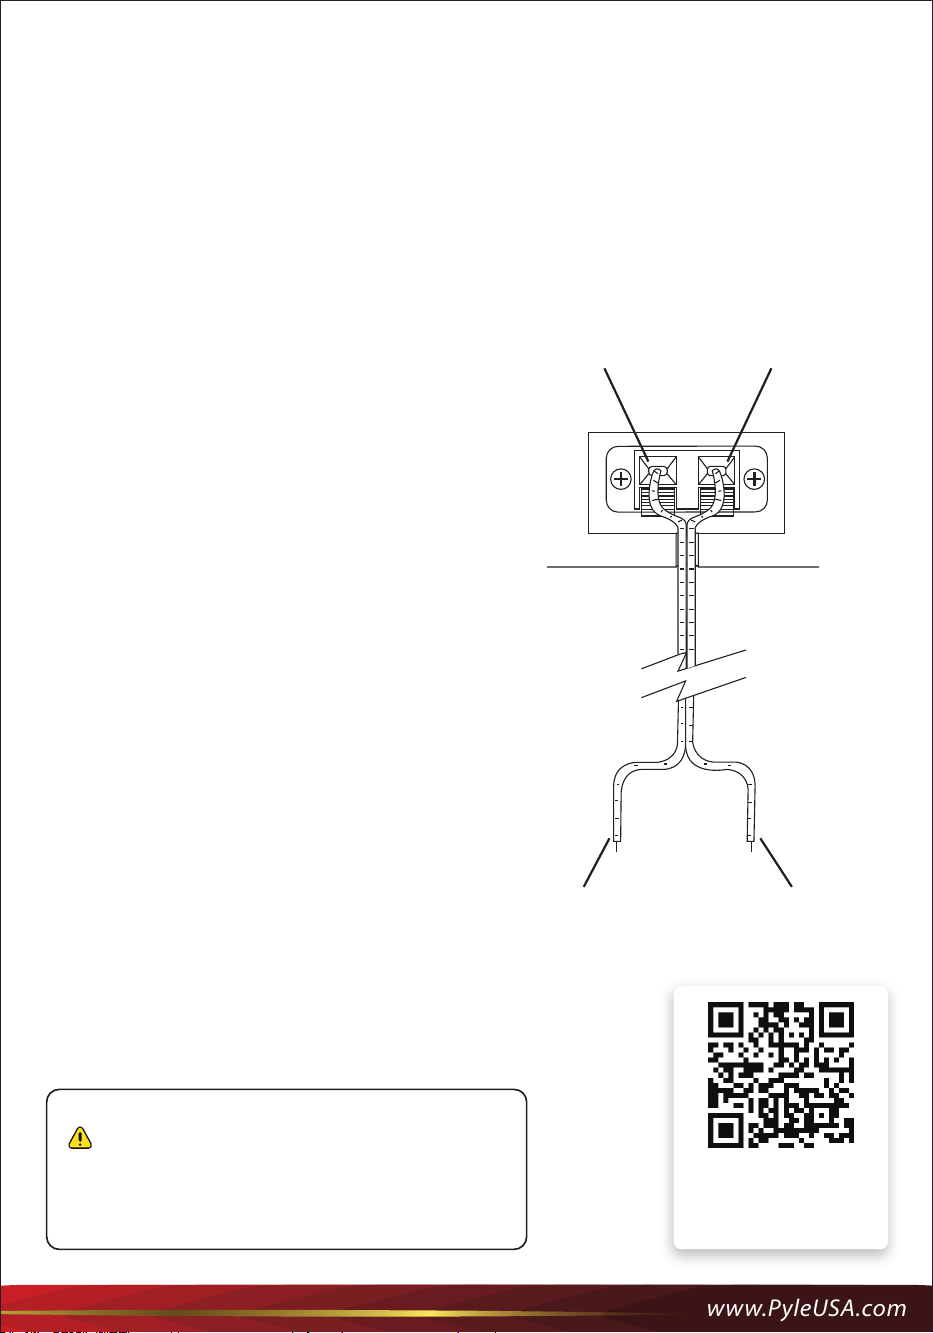
Connecting Your Speakers
California Prop 65 Warning
WARNING:
This product can expose you to chemicals, which is known to
the state of California to cause cancer birth defects and other
reproductive harm. Do not ingest.
For more info go to: www.P65warnings.ca.gov
Questions or Comments?
We are here to help!
Phone: 1.718.535.1800
PyleUSA.com/ContactUs
Connecting the speakers to your amplier
or receiver.
•
First, turn your amplier o to avoid
damage which may result from accidental
shorting of the speaker leads.
•
Correct phase polarity is critical for proper
stereo imaging and bass performance.
The red (+) terminal on your amplier or
receiver must be connected to the red (+)
terminal on your speaker; the same applies
to the black (-) terminal.
•
Connect one loudspeaker at a time to
ensure proper connection of left and right
channels. Make sure all wires are rmly
fastened.
•
If you notice a high level of bass or central
image focus, double-check your connections
for proper polarity.

www.PyleUSA.com
Instalación
MONTAJE DEL SOPORTE
1. Retire los botones del soporte y el soporte del
altavoz.
2. Sujete el soporte contra la supercie de montaje.
"PYLE" puede montarse tanto horizontal como
verticalmente. Sujete el soporte de forma que el
cable del altavoz pase por el oricio grande y
redondo para el cable del soporte. Alinee el soporte
de forma que quede perpendicular a su entorno.
(Utilice un nivel de burbuja para mayor precisión)
3. Marque las posiciones de los tres oricios moldea-
dos para tornillos. Utilice todos los oricios.
4. Taladre agujeros piloto en la supercie de monta-
je.
5. Pase con cuidado el cable del altavoz por el
oricio para el cable situado en el centro del
soporte. Alinee el soporte de forma que los oricios
queden todos alineados.
6. Utilice sus herrajes para jar el soporte a la
supercie de montaje.
MONTAJE
Visit Our Website
SCAN ME
PyleUSA.com
GUIA DEL USUARIO
Sistema de altavoces en mini caja de 3,5" y
200 vatios, 3 vías y resistente a la intemperie
• Excelente para su uso en barcos/Marina/
• Cubiertas/patios/piscina/exterior
• Completamente resistente a la intemperie
• Bae de cono de inyección de aluminio de 3,5
• Estructura magnética de 24 oz
• Transductor de medios de cono de dispersión
ancha de 1,75”
• Altavoz de agudos de super cúpula de 1
• Red divisora de condensadores
• Ventilación reejo de graves para una mayor
respuesta de graves
• Construcción en ABS de alta resistencia
• Terminales de altavoz de conexión/-
desconexión rápida
• Rejillas de malla antioxidante
extraíbles
• Potencia: 100 vatios RMS/200 vatios
pico
• Respuesta en frecuencia: 70-21K Hz
• Impedancia 4 Ohmios
• Kit completo de montaje y cables
• Dimensiones: 5.25” (A) x 3.75” (L) x
3.75” (P)
Características:
SPA
www.PyleUSA.com
AJUSTES FINALES
1. Después de asegurarse de que el altavoz está en fase y funciona correctamente, incline el
altavoz para que suene de forma óptima.
2. Apriete los pomos del soporte sólo con la mano. Si se utilizan herramientas eléctricas, los
pomos podrían apretarse en exceso y dañar las roscas del soporte.
3. Compruebe que toda la instalación es segura y está bien apretada.
Conexión de los altavoces
Advertencia de la Proposición 65 de California
ADVERTENCIA:
Este producto puede exponerle a sustancias químicas que,
según el estado de California, causan cáncer, defectos de
nacimiento y otros daños reproductivos. No lo ingiera.
Para más información, visite: www.P65warnings.ca.gov
¿Preguntas o comentarios?
¡Estamos a su disposición!
Teléfono: 1.718.535.1800
PyleUSA.com/Contacto
Conecte los altavoces a su amplicador o
receptor.
• En primer lugar, apague el amplicador
para evitar daños que podrían derivarse
de un cortocircuito accidental de los
cables de los altavoces.
• La polaridad de fase correcta es crucial
para una buena reproducción estéreo y
una buena respuesta de graves. El terminal
rojo (+) de su amplicador o receptor
debe conectarse al terminal rojo (+) de su
altavoz; lo mismo se aplica al terminal
negro (-).
• Conecte un altavoz a la vez para garantizar
la correcta conexión de los canales
izquierdo y derecho. Asegúrese de que
todos los cables están rmemente sujetos.
• Si observa un nivel de graves elevado o
una nitidez de imagen centralizada,
compruebe que sus conexiones tienen la
polaridad correcta.
POLO NEGATIVO (NEGRO)
CONECTE EL CABLE
NEGATIVO AL POLO
NEGATIVO DE SU
AMPLIFICADOR O
RECEPTOR
CONECTE EL CABLE
POSITIVO AL POLO
POSITIVO DE SU
AMPLIFICADOR O
RECEPTOR.
POLO NEGATIVO (ROJO)
www.PyleUSA.com
Visit Our Website
SCAN ME
PyleUSA.com
MANUEL DE L'UTILISATEUR
Système d'enceintes mini box 3 voies
étanche de 3,5” (8,9 cm), 200 watts
• Excellent pour une utilisation sur les bateaux-
/marines, terrasses/patios, au bord de la
piscine/en extérieur
• Entièrement étanche
• Woofer à cône en aluminium injecté de 8,9 cm
• Structure d'aimant de 680 g
• Médium à cône de dispersion large de 4,45 cm
• Tweeter super dôme de 2,54 cm
• Réseau de crossover à condensateur
• Évent Bass Reex pour une réponse accrue des
basses
• Construction en ABS robuste
• Bornes d'enceinte à connexion/dé-
connexion rapide
• Grilles amovibles antirouille
• Puissance : 100 watts RMS / 200 watts
de crête
• Réponse en fréquence : 70-21 kHz
• Impédance : 4 ohms
• Kit de montage complet et câbles
inclus
• Dimensions : 13,34 (L) x 9,53 (H) x 9,53
cm (P)/5.25”(W)x3.75”(H)x3.75”(D)
FRE
Caractéristiques :
Installation
MONTAGE DU SUPPORT
1. Retirez les boutons du support et le support de
l'enceinte.
2. Tenez le support contre la surface de montage. Le
"PYLE" peut être monté horizontalement ou
verticalement. Tenez le support de manière à ce
que le l de l'enceinte passe par le grand trou
circulaire du support. Alignez le support pour qu'il
soit perpendiculaire aux environs. (Utilisez un
niveau pour plus de précision)
3. Marquez les emplacements des trois trous de vis
en forme. Utilisez tous les trous.
4. Percez des trous pilotes dans la surface de
montage.
5. Tirez doucement le l de l'enceinte à travers le
trou de l au centre du support de montage.
Alignez le support de manière à ce que les trous
soient tous alignés.
6. Utilisez votre matériel pour xer le support à la
surface de montage.
MONTAGE

www.PyleUSA.com
AJUSTEMENTS FINAUX
1. Après avoir vérié que l'enceinte est en phase et fonctionne correctement, inclinez
l'enceinte pour obtenir le meilleur son.
2. Serrez les boutons du support à la main uniquement. Les outils électriques peuvent trop
serrer le bouton et endommager les letages de l'insert.
3. Vériez que toute l'installation est sûre et sécurisée.
Connexion de vos enceintes
California Prop 65 Warning
WARNING:
This product can expose you to chemicals, which is known to
the state of California to cause cancer birth defects and other
reproductive harm. Do not ingest.
For more info go to: www.P65warnings.ca.gov
Questions or Comments?
We are here to help!
Phone: 1.718.535.1800
PyleUSA.com/ContactUs
Connexion des enceintes à votre
amplicateur ou récepteur
1.Tout d'abord, éteignez votre amplica-
teur pour éviter les dommages
pouvant résulter d'un court-circuit
accidentel des ls des enceintes.
2.Une polarité de phase correcte est
essentielle pour une imagerie stéréo et
une performance des basses appro-
priées. La borne rouge (+) de votre
amplicateur ou récepteur doit être
connectée à la borne rouge (+) de
votre enceinte ; il en va de même pour
la borne noire (-).
3.Connectez une enceinte à la fois pour
assurer une connexion correcte des
canaux gauche et droit. Assurez-vous
que tous les ls sont fermement
attachés.
4.Si vous remarquez un niveau élevé de
basses ou une concentration de
l'image centrale, vériez à nouveau vos
connexions pour une polarité correcte.
POLE NÉGATIF (NOIR)
CONNECTEZ LE FIL
NÉGATIF À LA BORNE
NÉGATIVE DE VOTRE
AMPLIFICATEUR/RÉCEP-
TEUR.
CONNECTEZ LE FIL
POSITIF À LA BORNE
POSITIVE DE VOTRE
AMPLIFICATEUR/RÉCEP-
TEUR.
POLE NÉGATIF (ROUGE)
www.PyleUSA.com
GUIDA UTENTE
Sistema di mini altoparlanti compatti da 8,9 cm
200 watt e 3 vie resistenti alle intemperie
• Eccellente per l'uso su navi/imbarcazioni
• Deck/patio/piscina/esterni
• Completamente resistente alle intemperie
• Bae a cono da 8,9 cm in alluminio
pressofuso
• Struttura magnetica da 0,6 kg
• Trasduttore midrange a cono da 4,4 cm ad
ampia dispersione
• Tweeter da 2,5 cm a supercupola
• Rete divisoria di condensatori
• Ventilazione riettore di suoni bassi per
una maggiore risposta dei bassi
• Struttura in ABS ad alta resistenza
• Terminali degli altoparlanti a collega-
mento/scollegamento rapido
• Griglie rimovibili in rete antiruggine
• Potenza: 100 watt RMS/200 watt di
picco
• Risposta in frequenza: 70-21K Hz
• Impedenza 4 Ohm
• Kit di montaggio completo e cavi
• Dimensioni: 13,3 cm (L) x 9,5 cm (L) x
9,5 cm (P)
Visita il nostro sito web
SCANSIONAMI
PyleUSA.com
ITA
Installazione:
MONTAGGIO DELLA STAFFA
1. Rimuovere i pulsanti dalla staa e la staa
dall'altoparlante.
2. Tenere la staa contro la supercie di montaggio.
"PYLE" può essere montato sia in orizzontale che in
verticale. Tenere la staa in modo che il cavo
dell'altoparlante passi attraverso l'ampio foro
rotondo per il cavo della staa. Allineare la staa in
modo che sia perpendicolare all'ambiente circostan-
te (per la precisione, utilizzare una livella).
3. Segnare le posizioni dei tre fori per le viti stam-
pate. Utilizzare tutti i fori.
4. Eseguire i fori pilota sulla supercie di montaggio.
5. Far passare con cautela il cavo dell'altoparlante
attraverso il foro del cavo al centro della staa.
Allineare la staa in modo che i fori siano tutti
allineati.
6. Utilizzare l'attrezzatura per ssare la staa alla
supercie di montaggio.
Características:
MONTAJE

www.PyleUSA.com
AGGIUSTAMENTI FINALI
1. Dopo essersi assicurati che l'altoparlante sia in fase e funzioni correttamente, inclinarlo
per ottenere un suono ottimale.
2. Serrare le manopole della staa solo a mano. Se si utilizzano utensili elettrici, le manopole
potrebbero serrarsi eccessivamente e danneggiare le lettature della staa.
3. Vericare che l'intera installazione sia sicura e salda.
Collegamento degli altoparlanti
Avvertenza sulla proprosta 65 della California
ATTENZIONE:
Questo prodotto può esporre a sostanze chimiche note allo
Stato della California che potrebbero causare cancro, difetti di
nascita e altri danni riproduttivi. Non ingerire.
Per ulteriori informazioni, visitare il sito: www.P65warnings.ca.gov
Domande o commenti?
Siamo a tua disposizione!
Numero di telefono: 1.718.535.1800
PyleUSA.com/ContactUs
Collegare gli altoparlanti all'amplicatore o
al ricevitore.
- Prima di tutto, spegnete l'amplicatore per
evitare danni che potrebbero derivare da un
cortocircuito accidentale dei cavi degli
altoparlanti.
- La corretta polarità di fase è fondamentale
per una buona riproduzione stereo e una
buona risposta dei bassi. Il polo rosso (+)
dell'amplicatore o del ricevitore deve essere
collegato al polo rosso (+) dell'altoparlante;
lo stesso vale per il polo nero (-).
- Collegare un altoparlante alla volta per
garantire il corretto collegamento dei canali
destro e sinistro. Assicurarsi che tutti i cavi
siano ssati saldamente.
- Se si nota un livello di bassi elevato o una
nitidezza centralizzata dell'immagine,
vericare che i collegamenti abbiano la
polarità corretta.
POLO NEGATIVO (NERO)
COLLEGARE IL CAVO
NEGATIVO AL POLO
NEGATIVO DELL'AMPLIFI-
CATORE O DEL
RICEVITORE.
COLLEGARE IL CAVO
POSITIVO AL POLO
POSITIVO DELL'AMPLIFI-
CATORE O DEL
RICEVITORE.
POLO POSITIVO (ROSSO)

www.PyleUSA.com
BENUTZERHANDBUCH
3,5" 200 Watt 3-Wege wetterfestes
Mini-Boxen-Lautsprechersystem
• Excellent for Use On Boats/Marine/
• Decks/patios/Poolside/Outdoors
• Completely Weather Proof
• 3.5” Aluminum Injection Cone Woofer
• 24 Oz. Magnet Structure
• 1.75” Wide Dispersion Cone Midrange
• 1” Super Dome Tweeter
• Capacitor Crossover Network
• Bass Reex Vent for Added Bass Response
• Hochbelastbare ABS-Konstruktion
• Schnellanschluss/Lautsprecherklemmen
zum Trennen der Verbindung
• Abnehmbare rostfreie Maschengitter
• Leistung: 100Watt RMS/200Watt Peak
• Frequenzgang: 70-21K Hz
• Impedanz: 4 Ohm
• Komplettes Montageset &Kabel
• Abmessungen: 5.25”(W)x3.75”(H)x3.75”(D)
Besuchen Sie
unsere Webseite
SCAN MICH
PyleUSA.com
GER
Einbau :
MONTAGE DER HALTERUNG
1. Entfernen Sie die Knöpfe der Halterung und die
Halterung vom Lautsprecher.
2. Halten Sie die Halterung an die Montageäche.
"PYLE" kann entweder horizontal oder vertikal
montiert werden, halten Sie die Halterung so, dass
das Lautsprecherkabel durch das große, runde
Kabelloch in der Halterung passt, richten Sie die
Halterung so aus, dass sie rechtwinklig zur Umge-
bung ist (verwenden Sie eine Wasserwaage für die
Genauigkeit)
3. Markieren Sie die Positionen der drei geformten
Schraubenlöcher, verwenden Sie alle Löcher.
4. Bohren Sie Vorbohrungen in die Montageäche.
5. Ziehen Sie das Lautsprecherkabel vorsichtig durch
das Kabelloch in der Mitte der Halterung, so dass die
Löcher alle in einer Linie liegen.
6. Befestigen Sie die Halterung mit Ihren Befesti-
gungsmitteln an der Montageäche.
Merkmale:
MONTAGE

www.PyleUSA.com
LETZTE EINSTELLUNGEN
1. Nachdem Sie sich vergewissert haben, dass der Lautsprecher gleichphasig ist und richtig
funktioniert, richten Sie den Lautsprecher so aus, dass er optimal klingt.
2. Ziehen Sie die Knöpfe der Halterung nur mit der Hand an. Bei Verwendung von Elektrow-
erkzeugen können die Knöpfe zu fest angezogen werden, wodurch das Gewinde des
Einsatzes beschädigt wird.
3. Prüfen Sie, ob die gesamte Installation sicher und fest ist.
Anschließen der Lautsprecher
Kalifornische Prop 65 Warnung
WARNUNG:
Dieses Produkt kann Sie Chemikalien aussetzen, die im Bundesstaat
Kalifornien als krebserregend und fruchtschädigend bekannt sind.
Nicht einnehmen.
Für weitere Informationen besuchen Sie: www.P65warnings.ca.gov
Fragen oder Kommentare?
Wir sind hier, um zu helfen!
Telefon: 1.718.535.1800
PyleUSA.com/Kontakt
Verbinden Sie die Lautsprecher mit Ihrem
Verstärker oder Receiver.
• Schalten Sie zunächst Ihren Verstärker aus,
um Schäden zu vermeiden, die durch
versehentliches Kurzschließen der
Lautsprecherkabel entstehen könnten.
• Die korrekte Phasenpolarität ist entschei-
dend für die richtige Stereowiedergabe und
Bassleistung. Die rote (+) Klemme Ihres
Verstärkers oder Receivers muss mit der
roten (+) Klemme Ihres Lautsprechers
verbunden werden; dasselbe gilt für die
schwarze (-) Klemme.
• Schließen Sie jeweils einen Lautsprecher
an, um den korrekten Anschluss des linken
und rechten Kanals sicherzustellen. Verge-
wissern Sie sich, dass alle Kabel fest
angezogen sind.
• Wenn Sie einen hohen Basspegel oder eine
zentrale Bildschärfe feststellen, überprüfen
Sie die Anschlüsse auf korrekte Polarität.
MINUSPOL (SCHWARZ)
Schließen Sie das Minuskabel
an den Minuspol Ihres
Verstärkers oder Empfängers
an. - Connect negative wire
to negative terminal of your
amp or receiver
Schließen Sie das Pluskabel
an den Pluspol Ihres
Verstärkers oder Empfängers
an. - Connect positive wire
to positive terminal of your
amp or receiver
PLUSPOL (ROT)
www.PyleUSA.com
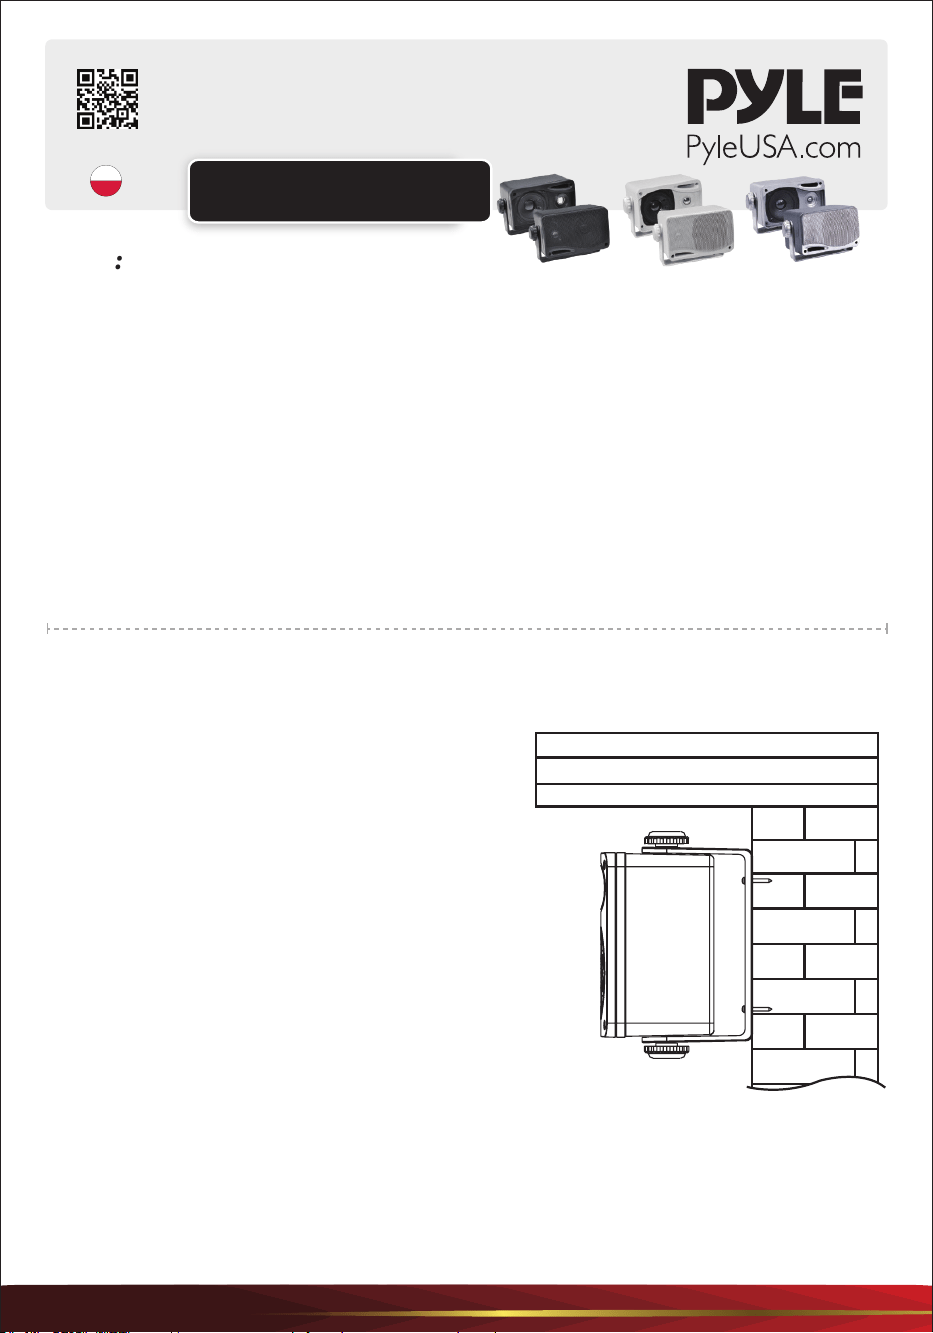
Cechy:
INSTRUKCJA OBSŁUGI
3,5-calowy, 3-drożny,odporny na
warunki atmosferyczne mini system
głośnikowy o mocy 200 W
• Doskonały do użytku na łodziach/marinach/
• pokładach/patiach/nad basenem/na zewnątrz
• Całkowicie odporny na warunki atmosfery-
czne
• 3,5-calowy aluminiowy stożek niskotonowy
• Struktura magnesu 24 Oz.
• 1,75" membrana stożkowa o szerokiej
dyspersji średniotonowej
• 1" Super kopułka wysokotonowa
• Zwrotnica kondensatorowa
• Otwór wentylacyjny Bass Reex zapewniający
dodatkowe pasmo przenoszenia
• Wytrzymała konstrukcja ABS
• Szybkie podłączanie/odłączanie
terminali głośnikowych
• Zdejmowane, nierdzewne kratki z
siatki
• Moc: 100 W RMS/200 W szczytowa
• Pasmo przenoszenia: 70-21K Hz
• Impedancja: 4 Ohm
• Kompletny zestaw montażowy i
przewody
• Wymiary: 5.25”(W)x3.75”(H)x3.75”(D)
Visit Our Website
SCAN ME
PyleUSA.com
POL
Instalacja:
MONTAŻ WSPORNIKA
1. Zdejmij pokrętła wspornika i wspornik z głośnika
2. Przytrzymaj wspornik do powierzchni
montażowej. "PYLE" można zamontować poziomo
lub pionowo, przytrzymaj wspornik tak, aby
przewód głośnika pasował do dużego, okrągłego
otworu na przewód we wsporniku, wyrównaj
wspornik tak, aby był prostopadły do otoczenia (użyj
poziomicy A, aby uzyskać dokładność).
3. Zaznacz położenie trzech otworów na śruby,
wykorzystaj wszystkie otwory.
4. Wywierć otwory pilotażowe w powierzchni
montażowej
5. Delikatnie przeciągnij przewód głośnikowy przez
otwór na przewód w środku wspornika montażowe-
go, wspornik tak, aby wszystkie otwory były w
jednej linii.
6. Użyj sprzętu, aby przymocować wspornik do
powierzchni montażowej.
MONTAŻ
www.PyleUSA.com
KOREKTY KOŃCOWE
1. Po sprawdzeniu, że głośnik jest w fazie i działa prawidłowo, ustaw głośnik pod kątem, aby
uzyskać najlepszy dźwięk.
2. Pokrętła wspornika należy dokręcać wyłącznie ręcznie, elektronarzędzia mogą nadmier-
nie dokręcić pokrętło i zerwać gwint wkładki.
3. Sprawdź, czy cała instalacja jest bezpieczna.
Podłączanie głośników
California Prop 65 Warning
WARNING:
This product can expose you to chemicals, which is known to
the state of California to cause cancer birth defects and other
reproductive harm. Do not ingest.
For more info go to: www.P65warnings.ca.gov
Questions or Comments?
We are here to help!
Phone: 1.718.535.1800
PyleUSA.com/ContactUs
Podłączanie głośników do wzmacniacza lub
amplitunera.
• Najpierw należy wyłączyć wzmacniacz,
aby uniknąć uszkodzeń, które mogą
powstać w wyniku przypadkowego
zwarcia przewodów głośnikowych.
• Prawidłowa polaryzacja fazowa ma
kluczowe znaczenie dla prawidłowego
odwzorowania dźwięku stereo i odtwarza-
nia basów. Czerwony zacisk (+) wzmacni-
acza lub amplitunera musi być podłączony
do czerwonego zacisku (+) głośnika; to
samo dotyczy czarnego zacisku (-).
• Podłączaj jeden głośnik na raz, aby
zapewnić prawidłowe połączenie lewego i
prawego kanału. Upewnij się, że wszystkie
przewody są dobrze zamocowane.
• Jeśli zauważysz wysoki poziom basów lub
ostrość centralnego obrazu, sprawdź
dwukrotnie połączenia pod kątem
prawidłowej polaryzacji.
ZACISK UJEMNY (CZARNY)
PODŁĄCZ PRZEWÓD UJEMNY DO
UJEMNEGO ZACISKU
WZMACNIACZA LUB ODBIORNIKA
- CONNECT NEGATIVE WIRE TO
NEGATIVE TERMINAL OF YOUR
AMP OR RECEIVER
PODŁĄCZ PRZEWÓD DODATNI
DO DODATNIEGO ZACISKU
WZMACNIACZA LUB ODBIORNIKA
- CONNECT POSITIVE WIRE TO
POSITIVE TERMINAL OF YOUR
AMP OR RECEIVER
ZACISK DODATNI (CZERWONY)
www.PyleUSA.com
Özellikler:
KULLANICI KILAVUZU
3,5" 200 Watt 3 Yönlü Hava Koşullarına
Dayanıklı Mini Kutu Hoparlör Sistemi
• Teknelerde/Marinalarda Kullanım için Mükem-
mel/
• Güverteler/Çatılar/Havuz Kenarı/Dış Mekanlar
• Tamamen Hava Koşullarına Dayanıklı
• 3,5" Alüminyum Enjeksiyon Konili Woofer
• 24 Oz. Mıknatıs Yapısı
• 1,75" Geniş Dağılımlı Koni Orta Kademe
• 1" Süper Dome Tweeter
• Kondansatör Çapraz Geçiş Ağı
• Ek Bas Tepkisi için Bas Reeks Havalandırması
• Ağır Hizmet Tipi ABS Yapı
• Hızlı Bağlantı/Bağlantı Kesme Hoparlör
Terminalleri
• Çıkarılabilir Paslanmaz Hasır Izgaralar
• Güç: 100Watts RMS/200Watts Peak
• Frekans Tepkisi: 70-21K Hz
• Empedans: 4 Ohm
• Komple Montaj Kiti & Kablolar
• Boyutlar: 5.25”(U)x3.75”(G)x3.75”(Y)
Web Sitemizi
Ziyaret Edin
BENİ TARA
PyleUSA.com
Kurulum:
BRAKETİN MONTAJI
1. Braket düğmelerini ve braketi hoparlörden çıkarın.
2. Braketi montaj yüzeyine doğru tutun. "PYLE"
yatay ya da dikey olarak monte edilebilir. Hoparlör
kablosu braketteki büyük, dairesel kablo deliğinden
geçecek şekilde braketi tutun. Braketi çevresiyle kare
olacak şekilde hizalayın. (Doğruluk için bir terazi
kullanın)
3. Üç şekilli vida deliğinin yerlerini işaretleyin. Tüm
delikleri kullanın.
4. Montaj yüzeyine pilot delikler açın.
5. Hoparlör kablosunu montaj braketinin ortasındaki
kablo deliğinden yavaşça çekin. Deliklerin hepsi
aynı hizada olacak şekilde braketi hizalayın.
6. Braketi montaj yüzeyine takmak için donanımınızı
kullanın.
MONTAJ
TUR

www.PyleUSA.com
SON AYARLAMALAR
1. Hoparlörün fazda olduğunu ve doğru çalıştığını kontrol ettikten sonra, en iyi ses için
hoparlöre açı verin.
2. Braket düğmelerini yalnızca elle sıkın. Elektrikli aletler düğmeyi aşırı sıkabilir ve ek
parçanın dişlerini sıyırabilir.
3. Tüm kurulumun güvenli ve sağlam olduğunu kontrol edin.
Hoparlörlerinizin Bağlanması
Kaliforniya Prop 65 Uyarısı
DİKKAT:
Bu ürün, Kaliforniya Eyaleti tarafından kansere, doğum
kusurlarına ve diğer üreme zararlarına neden olduğu bilinen
kurşun ve kadmiyum içerir. Yutmayın.
Daha fazla bilgi için bkz: www.P65warnings.ca.gov
Sorularınız mı var? Sorununuz mu var?
Yardım etmek için buradayız!
Telefon: (1) 718-535-1800
PyleUSA.com/ContactUs
Hoparlörlerin amplikatörünüze veya
alıcınıza bağlanması.
• Öncelikle, hoparlör uçlarının yanlışlıkla
kısa devre yapmasından kaynaklanabi-
lecek hasarı önlemek için ampli-
katörünüzü kapatın.
• Doğru faz polaritesi, doğru stereo
görüntüleme ve bas performansı için kritik
öneme sahiptir. Amplikatörünüz veya
alıcınız üzerindeki kırmızı (+) terminal
hoparlörünüz üzerindeki kırmızı (+)
terminale bağlanmalıdır; aynısı siyah (-)
terminal için de geçerlidir.
• Sol ve sağ kanalların doğru şekilde
bağlandığından emin olmak için her
seferinde bir hoparlör bağlayın. Tüm
kabloların sıkıca bağlandığından emin
olun.
• Yüksek seviyede bas veya merkezi görüntü
odağı fark ederseniz, doğru polarite için
bağlantılarınızı iki kez kontrol edin.
NEGATIF KABLOYU AMFINIZIN
VEYA ALICINIZIN NEGATIF
TERMINALINE BAĞLAYIN
NEGATIF TERMINAL (SIYAH)
POZITIF KABLOYU AMFINIZIN
VEYA ALICINIZIN POZITIF
TERMINALINE BAĞLAYIN
POZITIF TERMINAL (KIRMIZI)