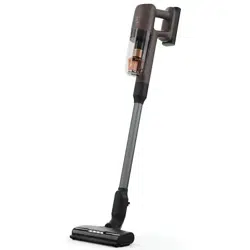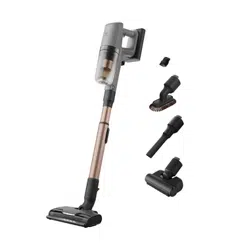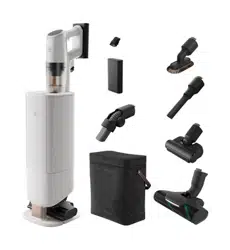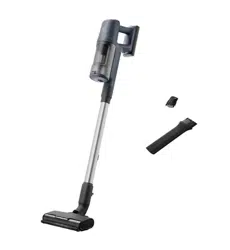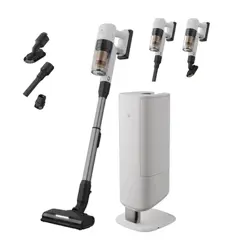
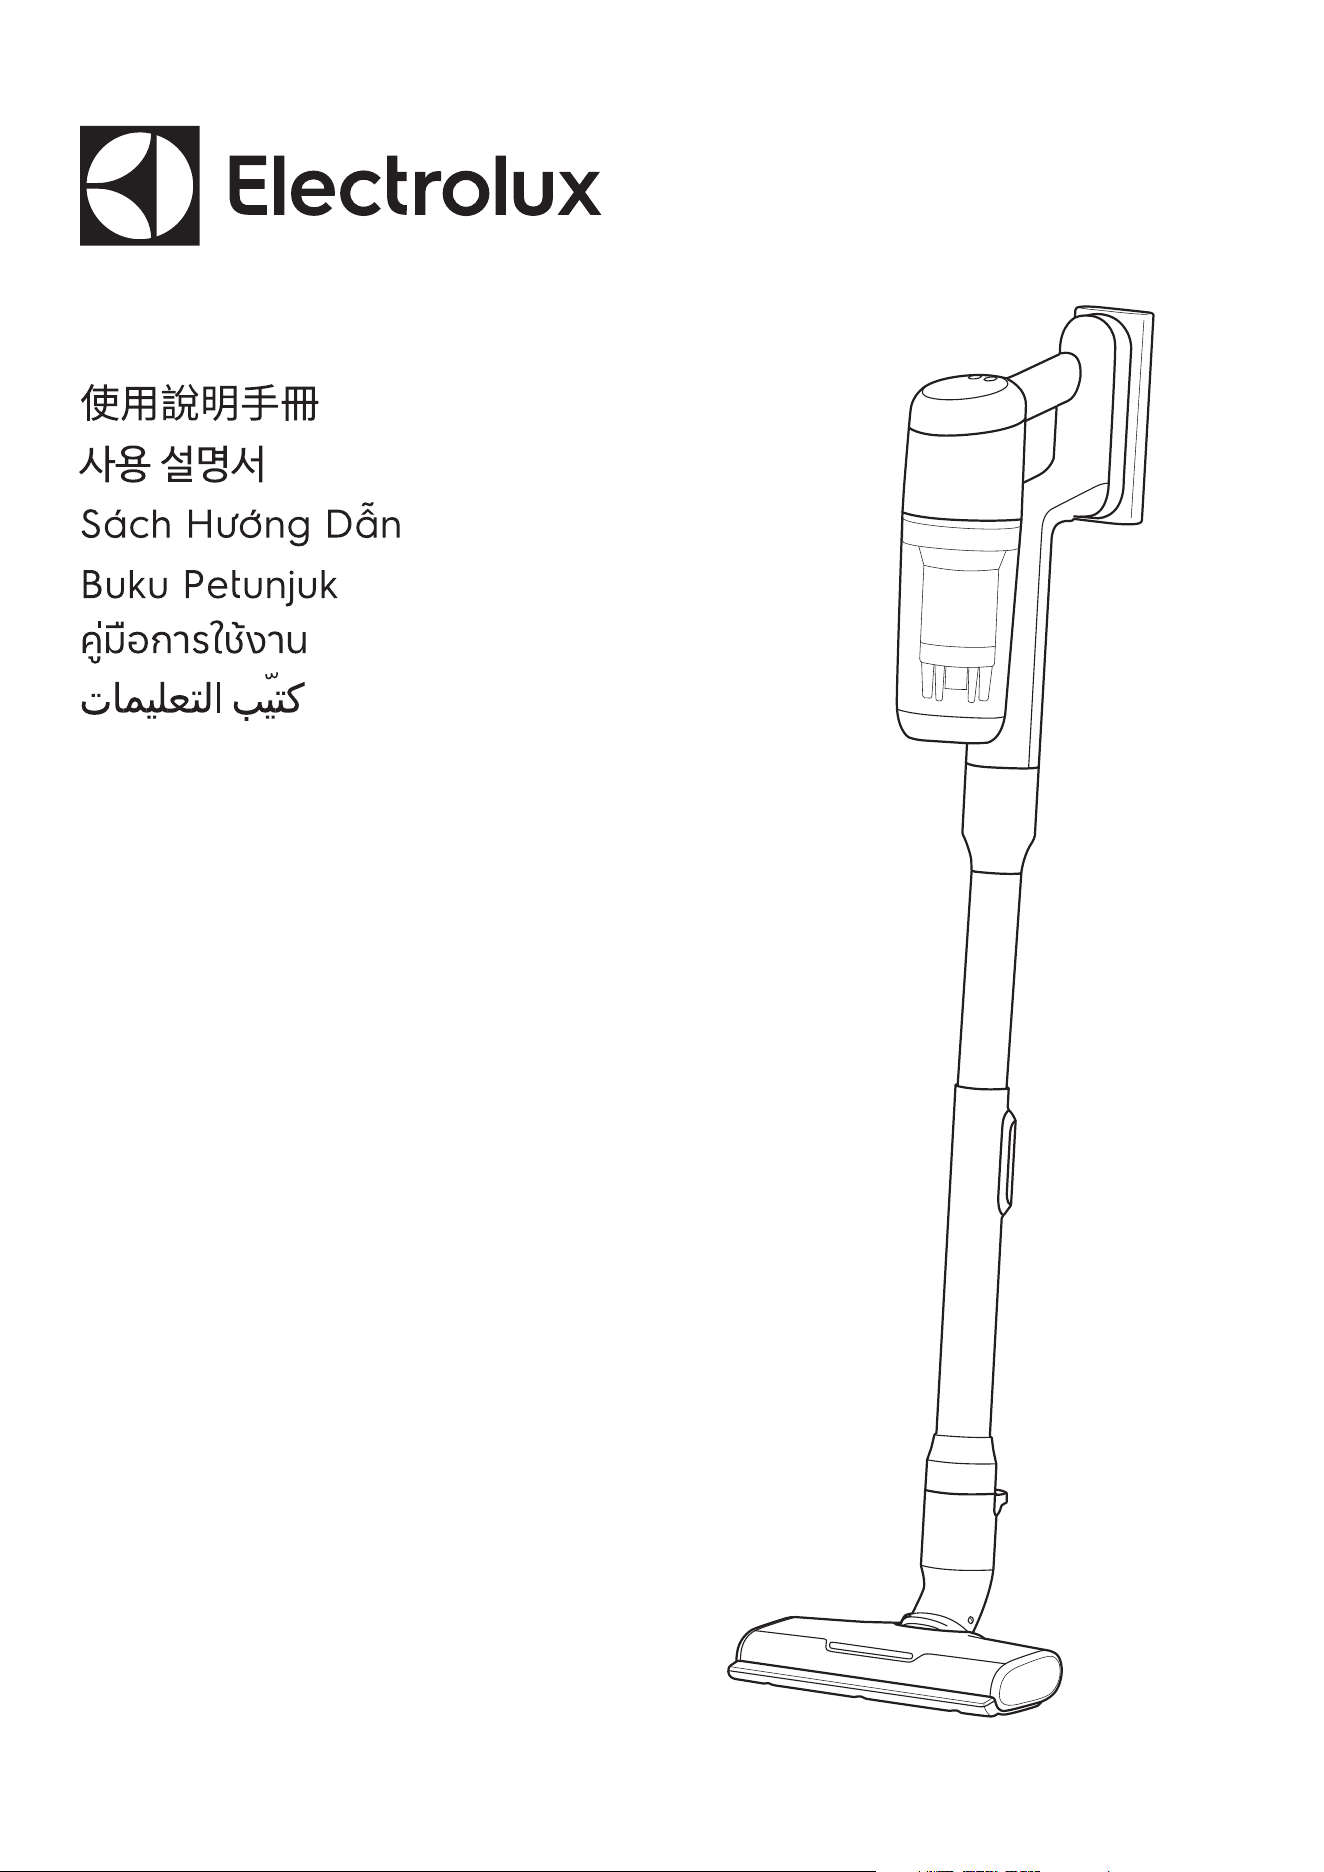
700 CORDLESS CLEANER
*Actual product may differ from illustration.
Instruction Book
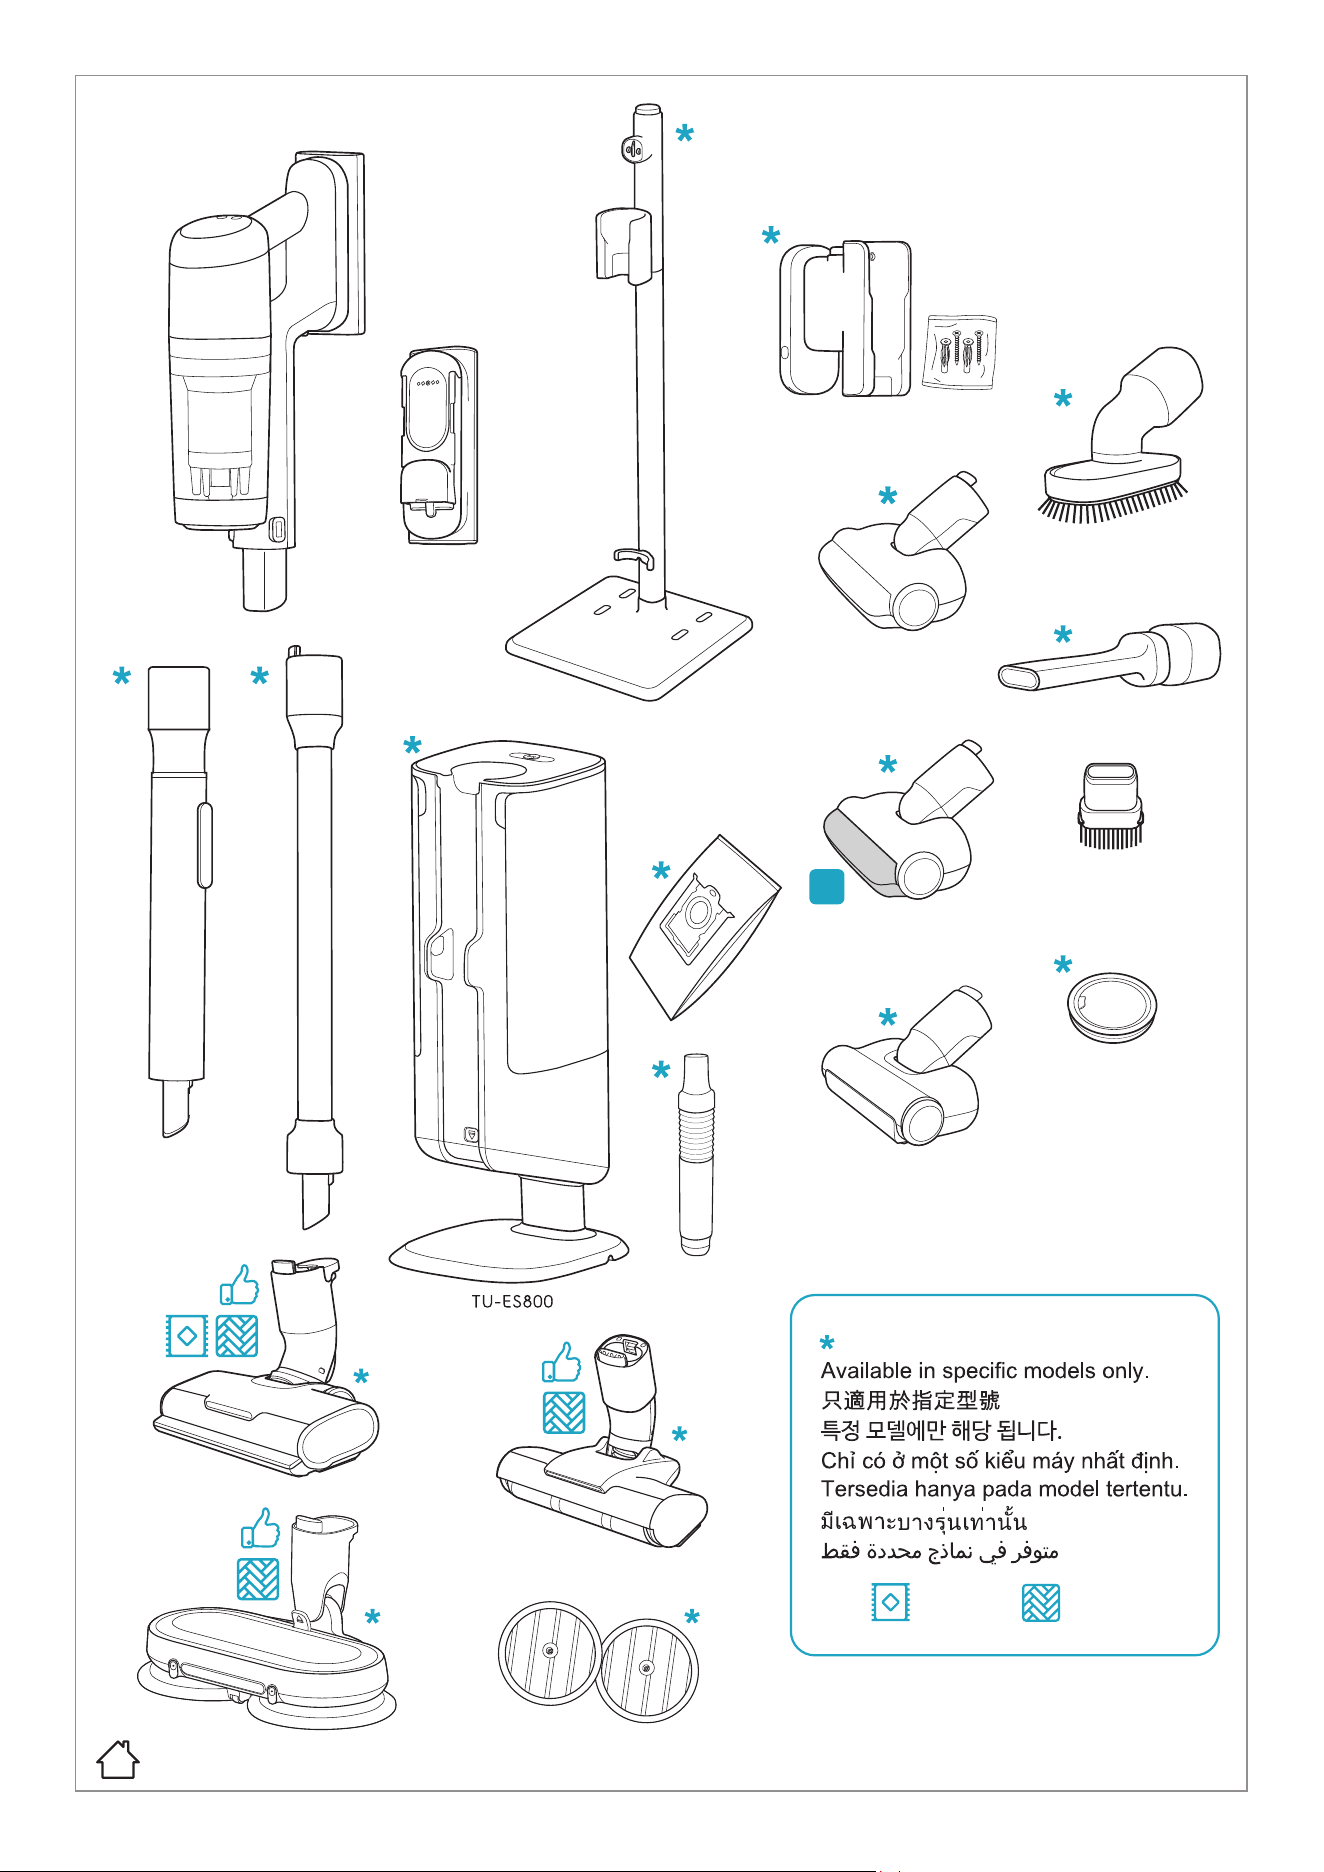
UV
.
Carpet Hard Floor
www.electrolux.comNote: This instruction book should be read together with safety precaution booklet.For indoor use only.
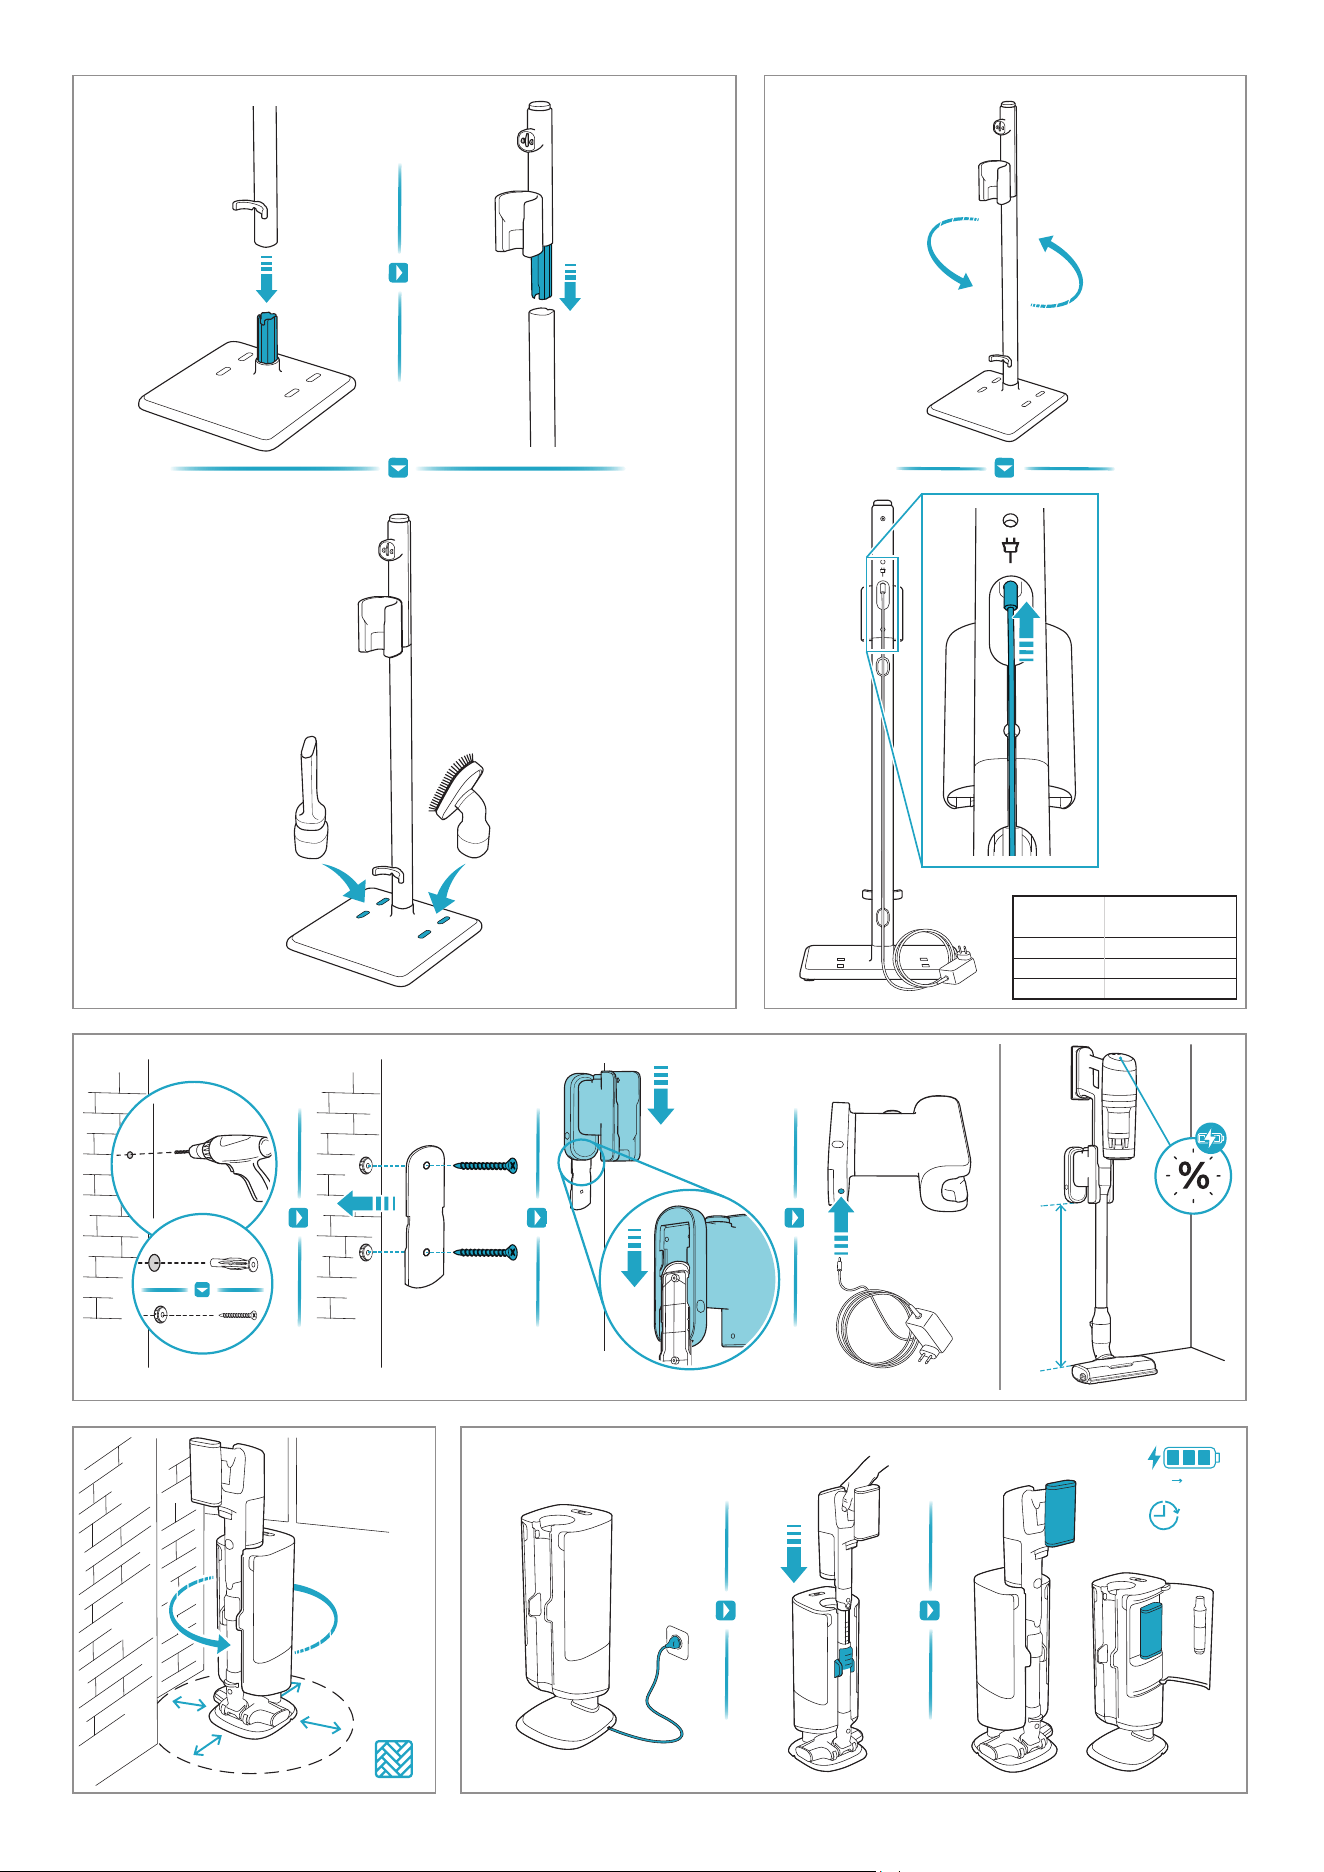
MIN
61cm
TWH
KSD-18W-265060HU
KSD-18W-265060HK
KSD-18W-265060HO
KSD-18W-265060HT
SG/ MY/HK/
MENCA (UAE)
THE/VNE/IDH
KRH
0 100%
4.5h
20cm
3
6
0
°
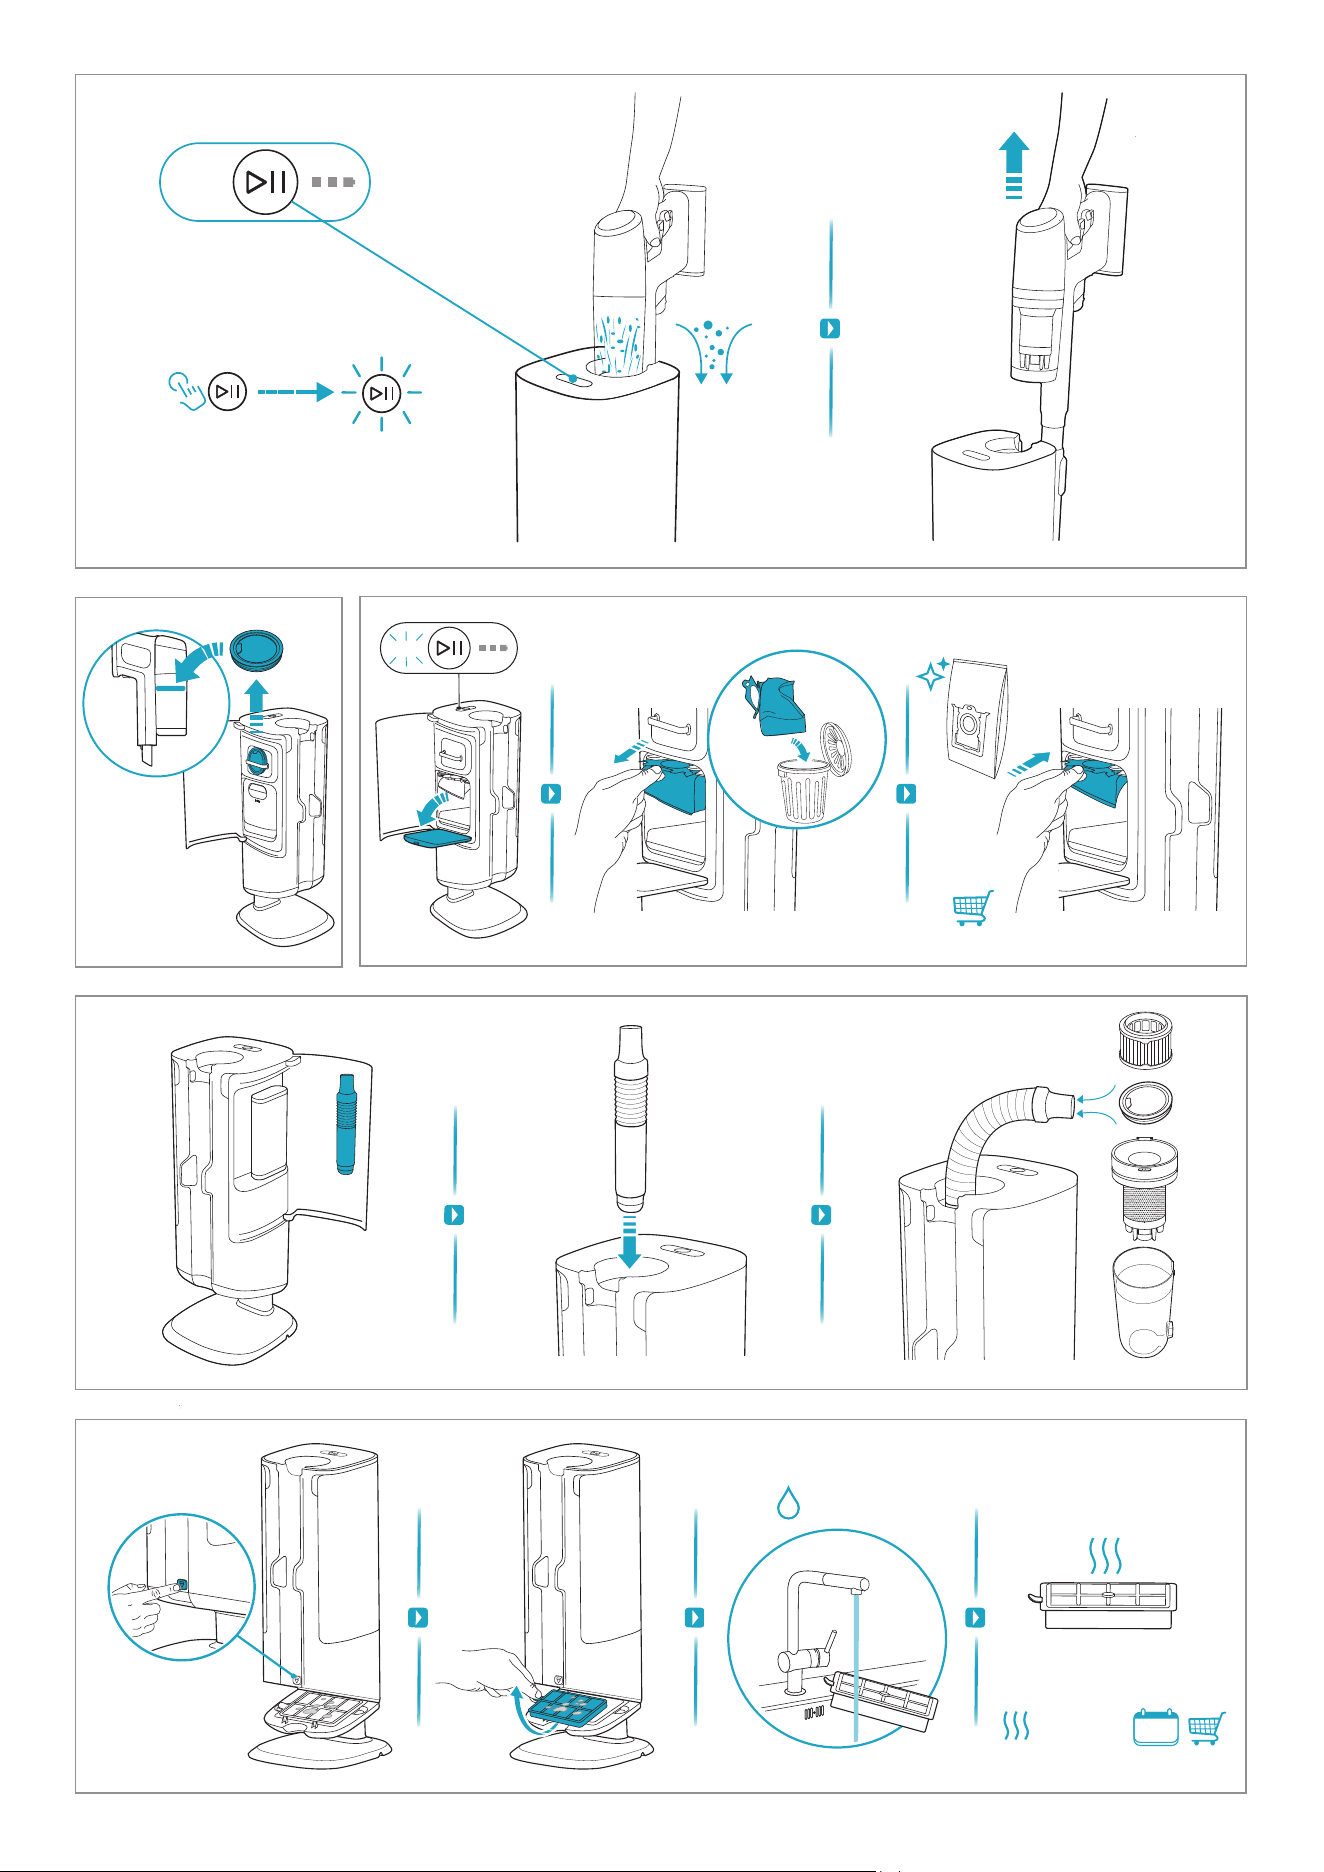
15s
S-BAG
3sec
S-BAG
AUTO ON/OFF
Max 40°C
E206S/E203S
24h+
12M
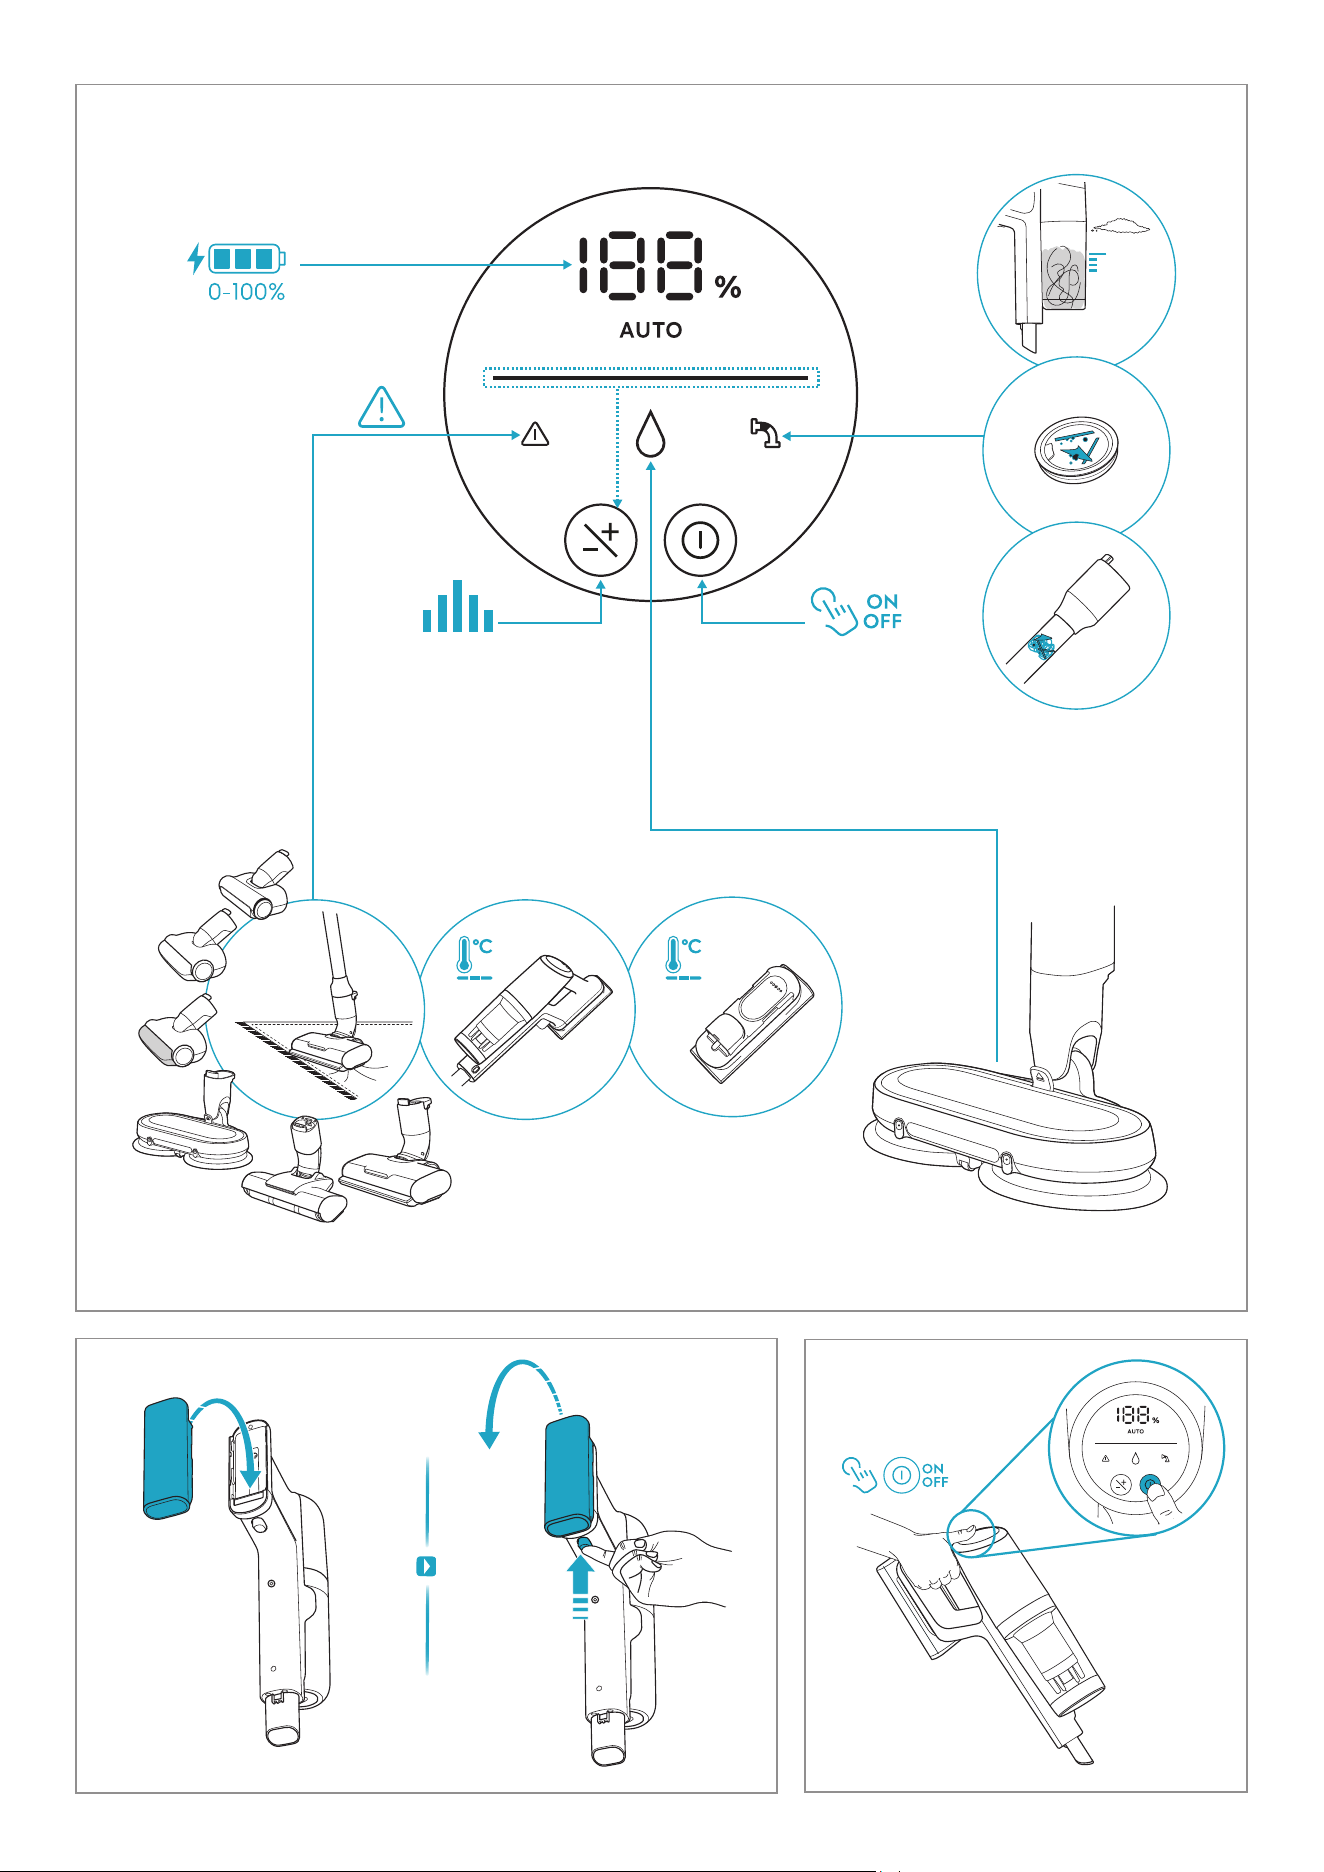
Max
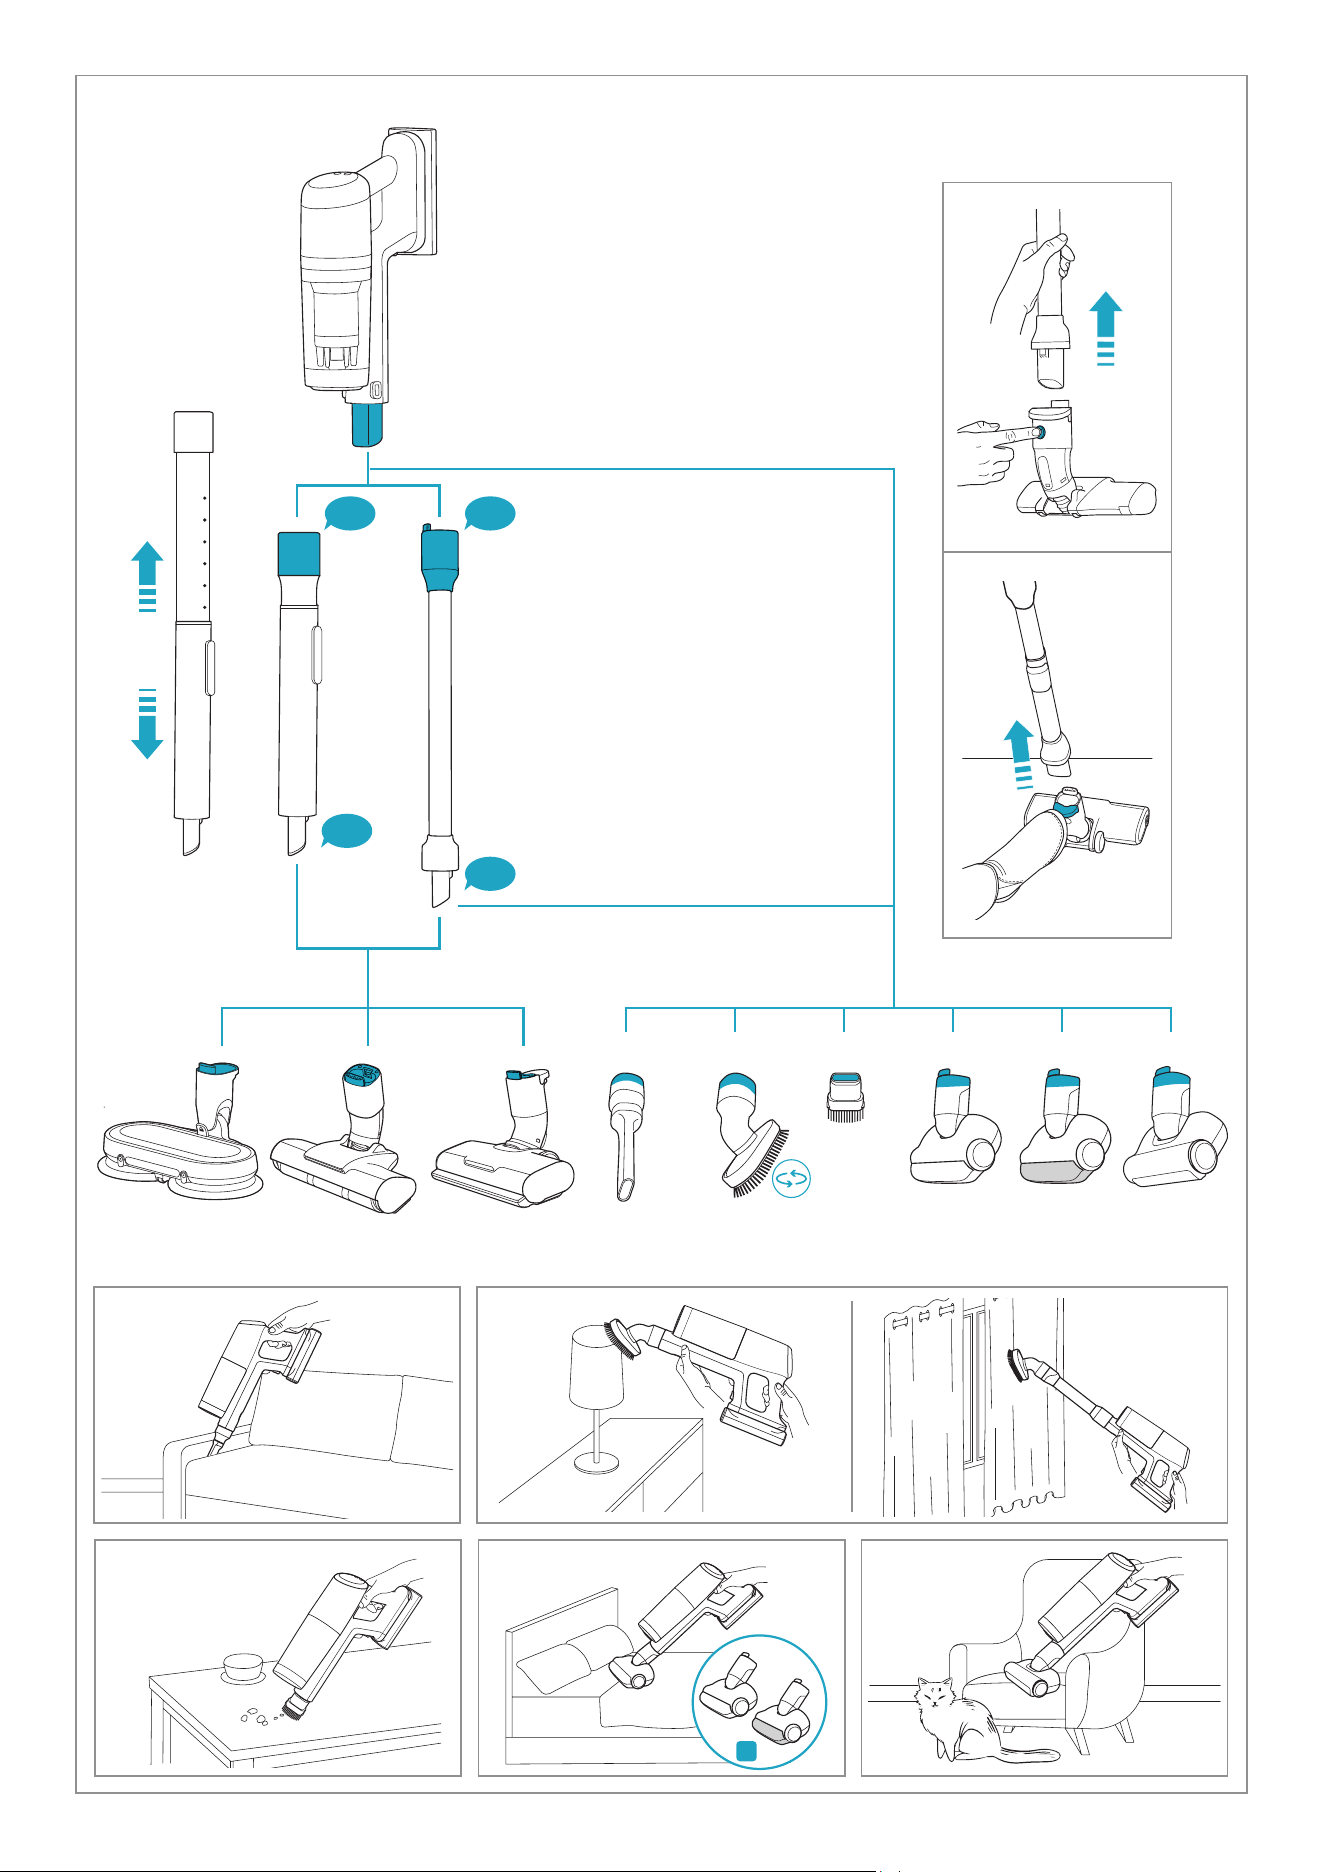
1 2
3
4&5 6
UV
CLICK
CLICK
CLICK
CLICK
1 2 3 4 5 6
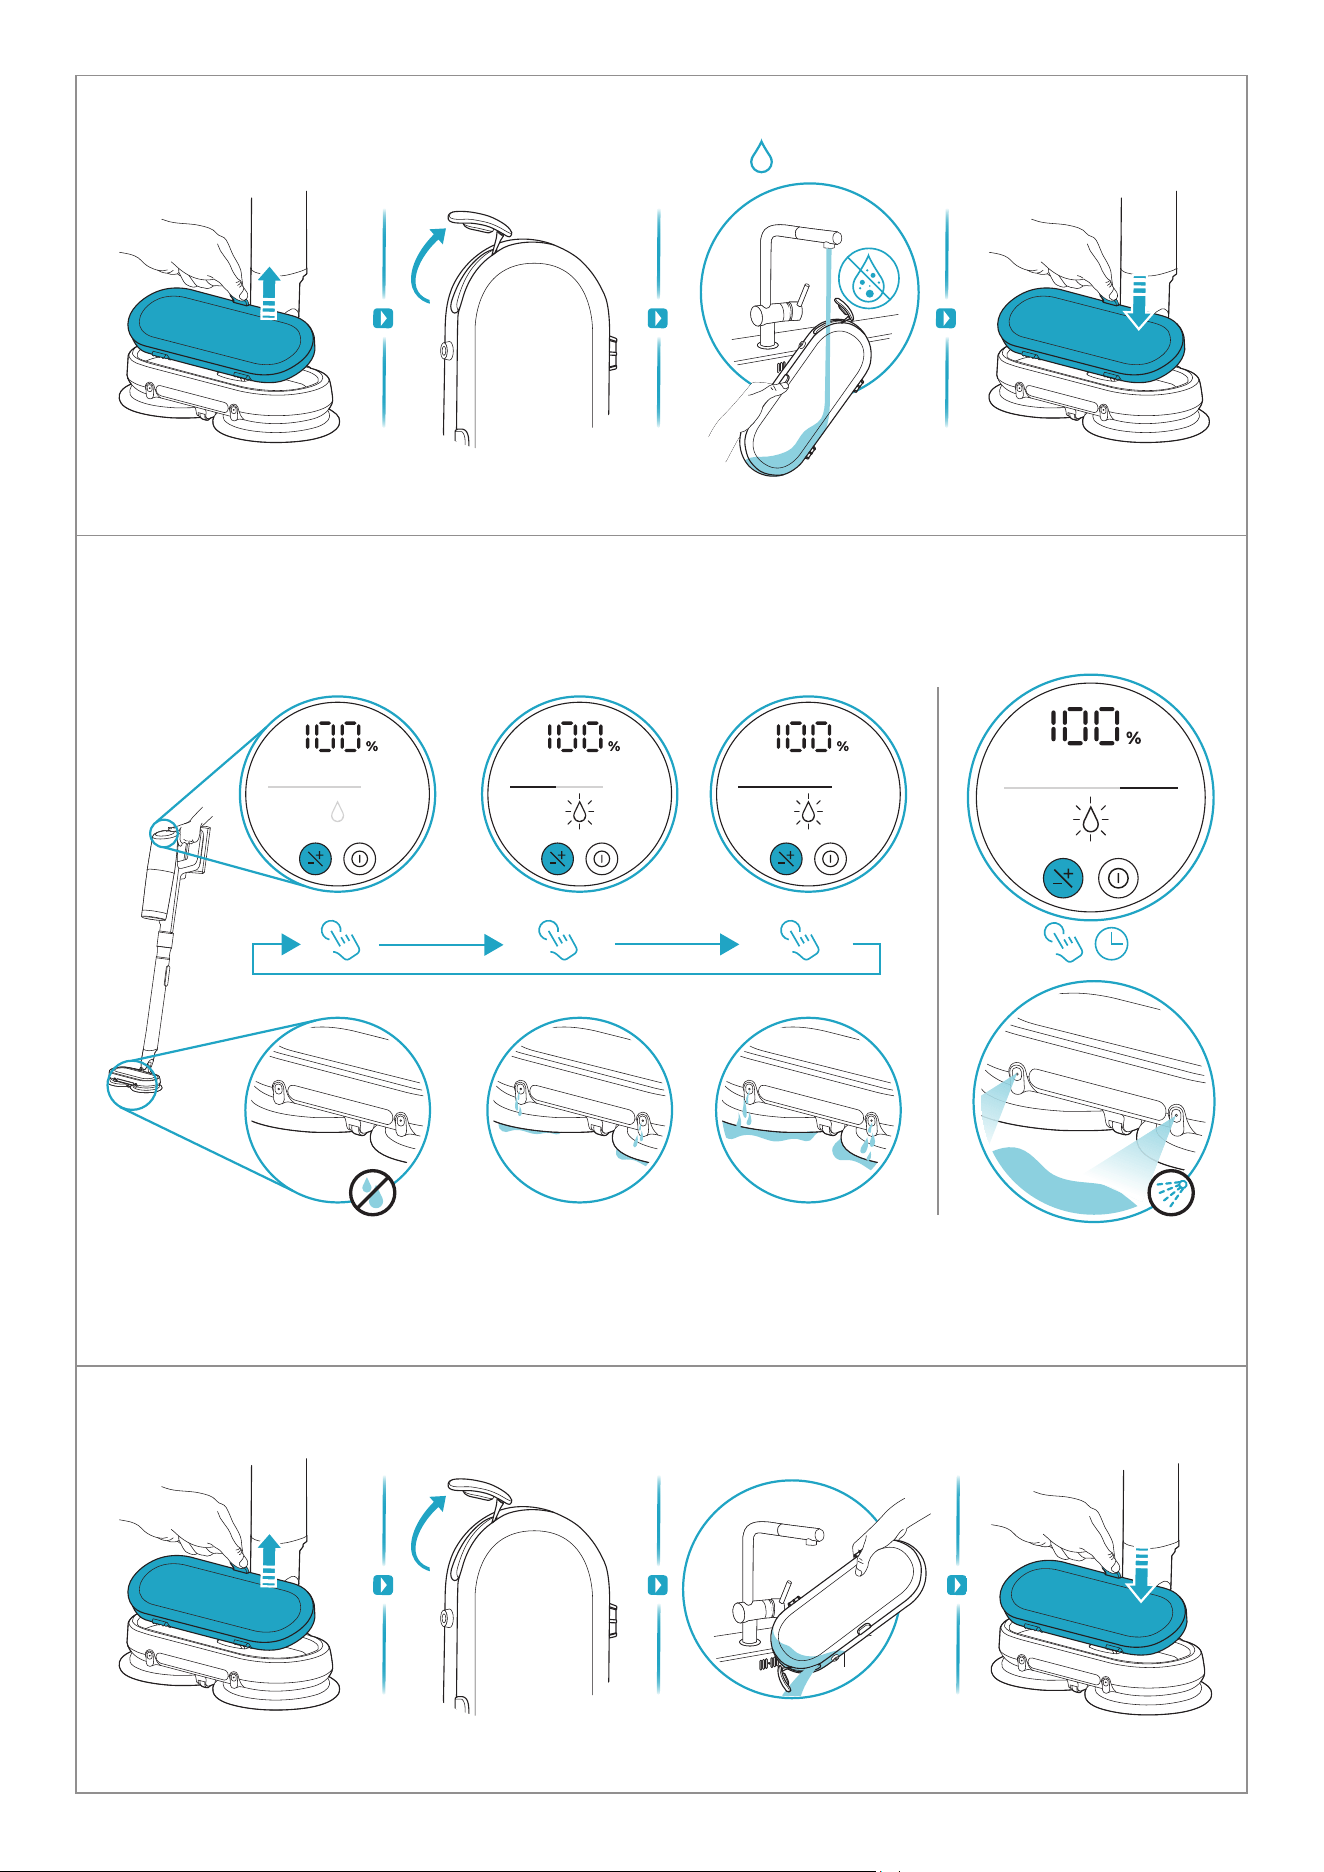
Max 40°C
5sec
Max
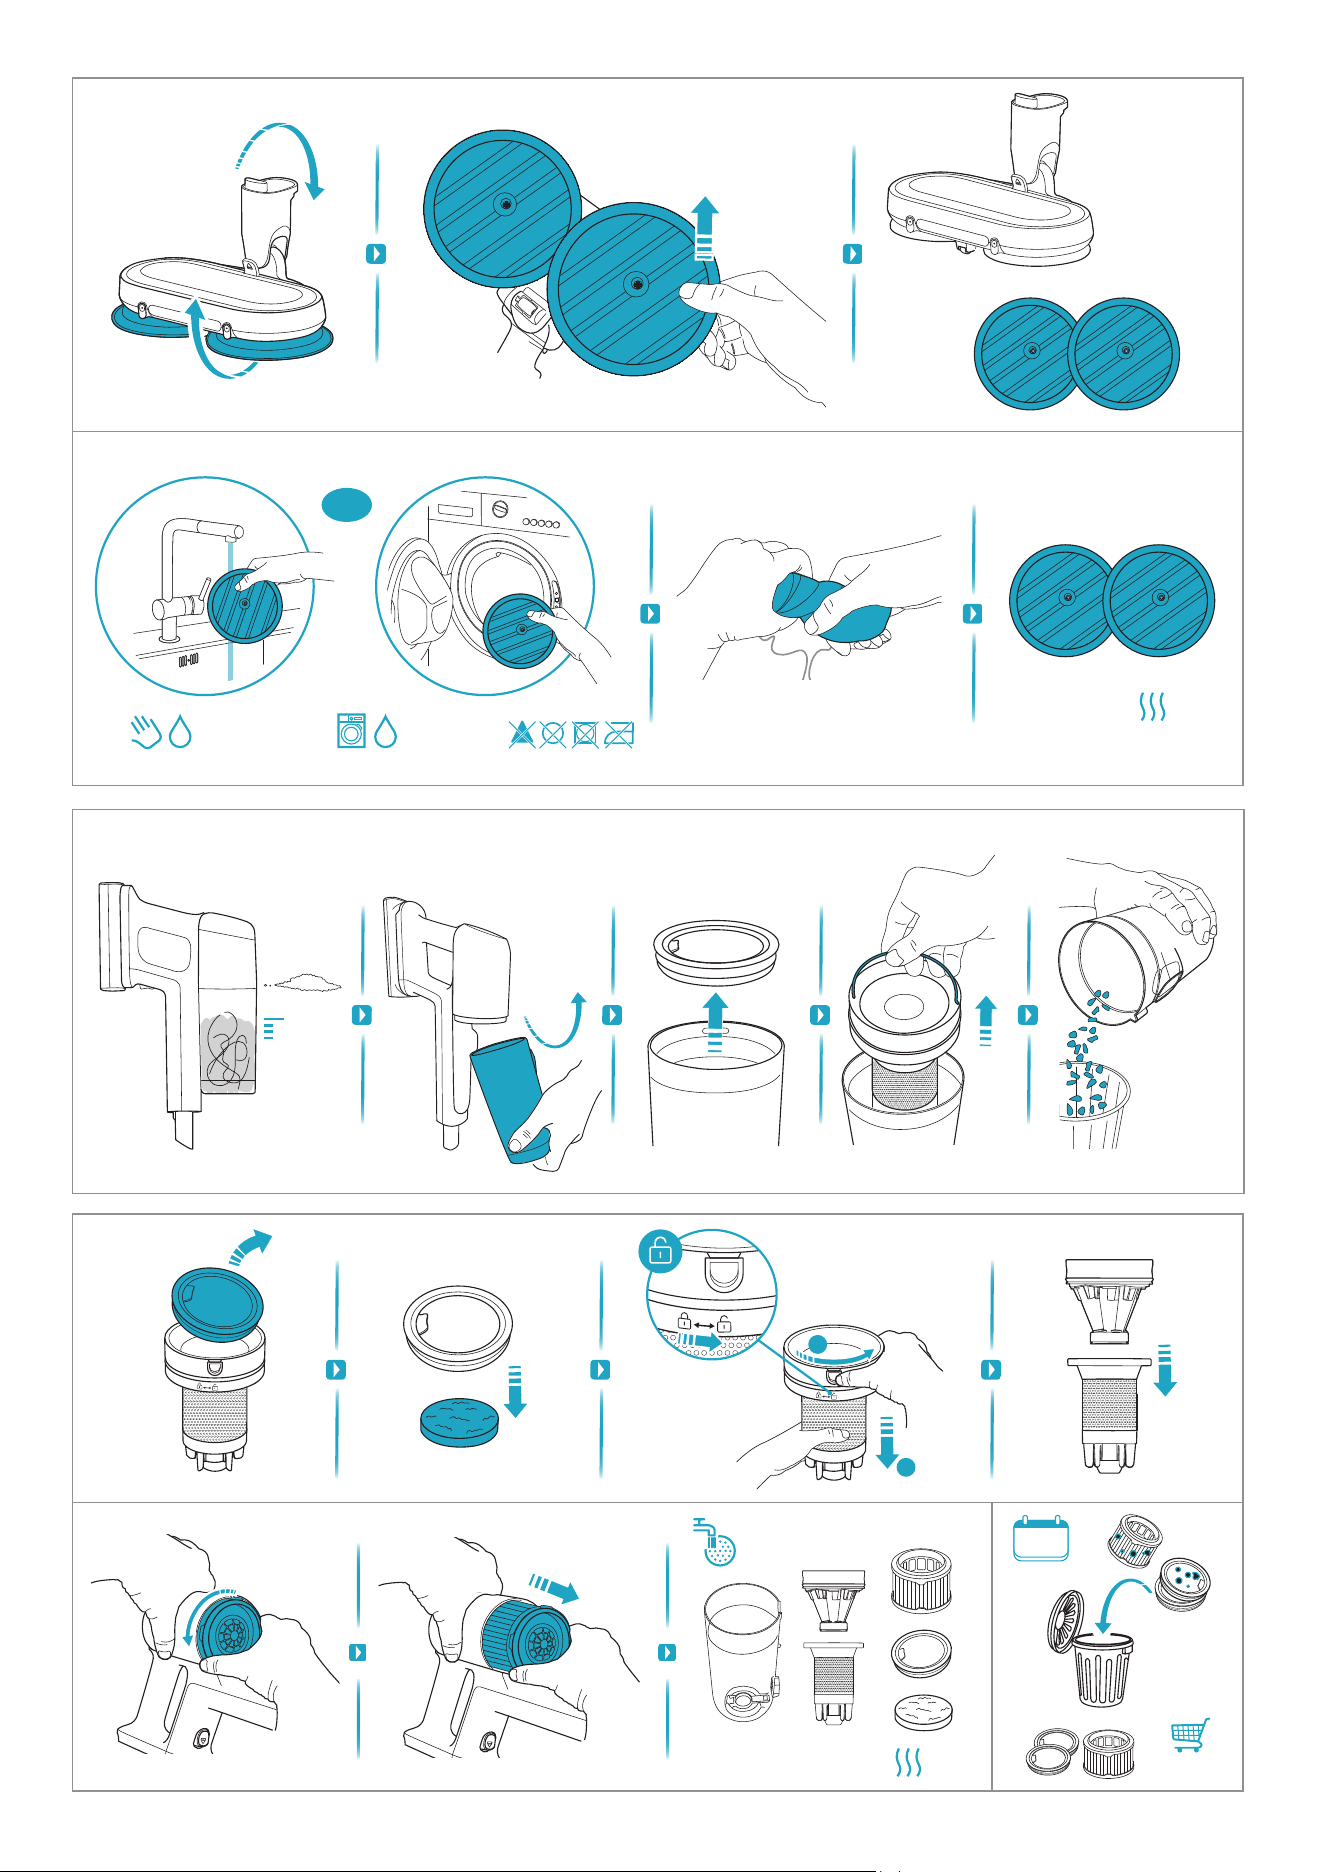
OR
Max
2
Max 40°C
12M
ESKW7
1
Max 40°C Max 40°C
24h+
24h+
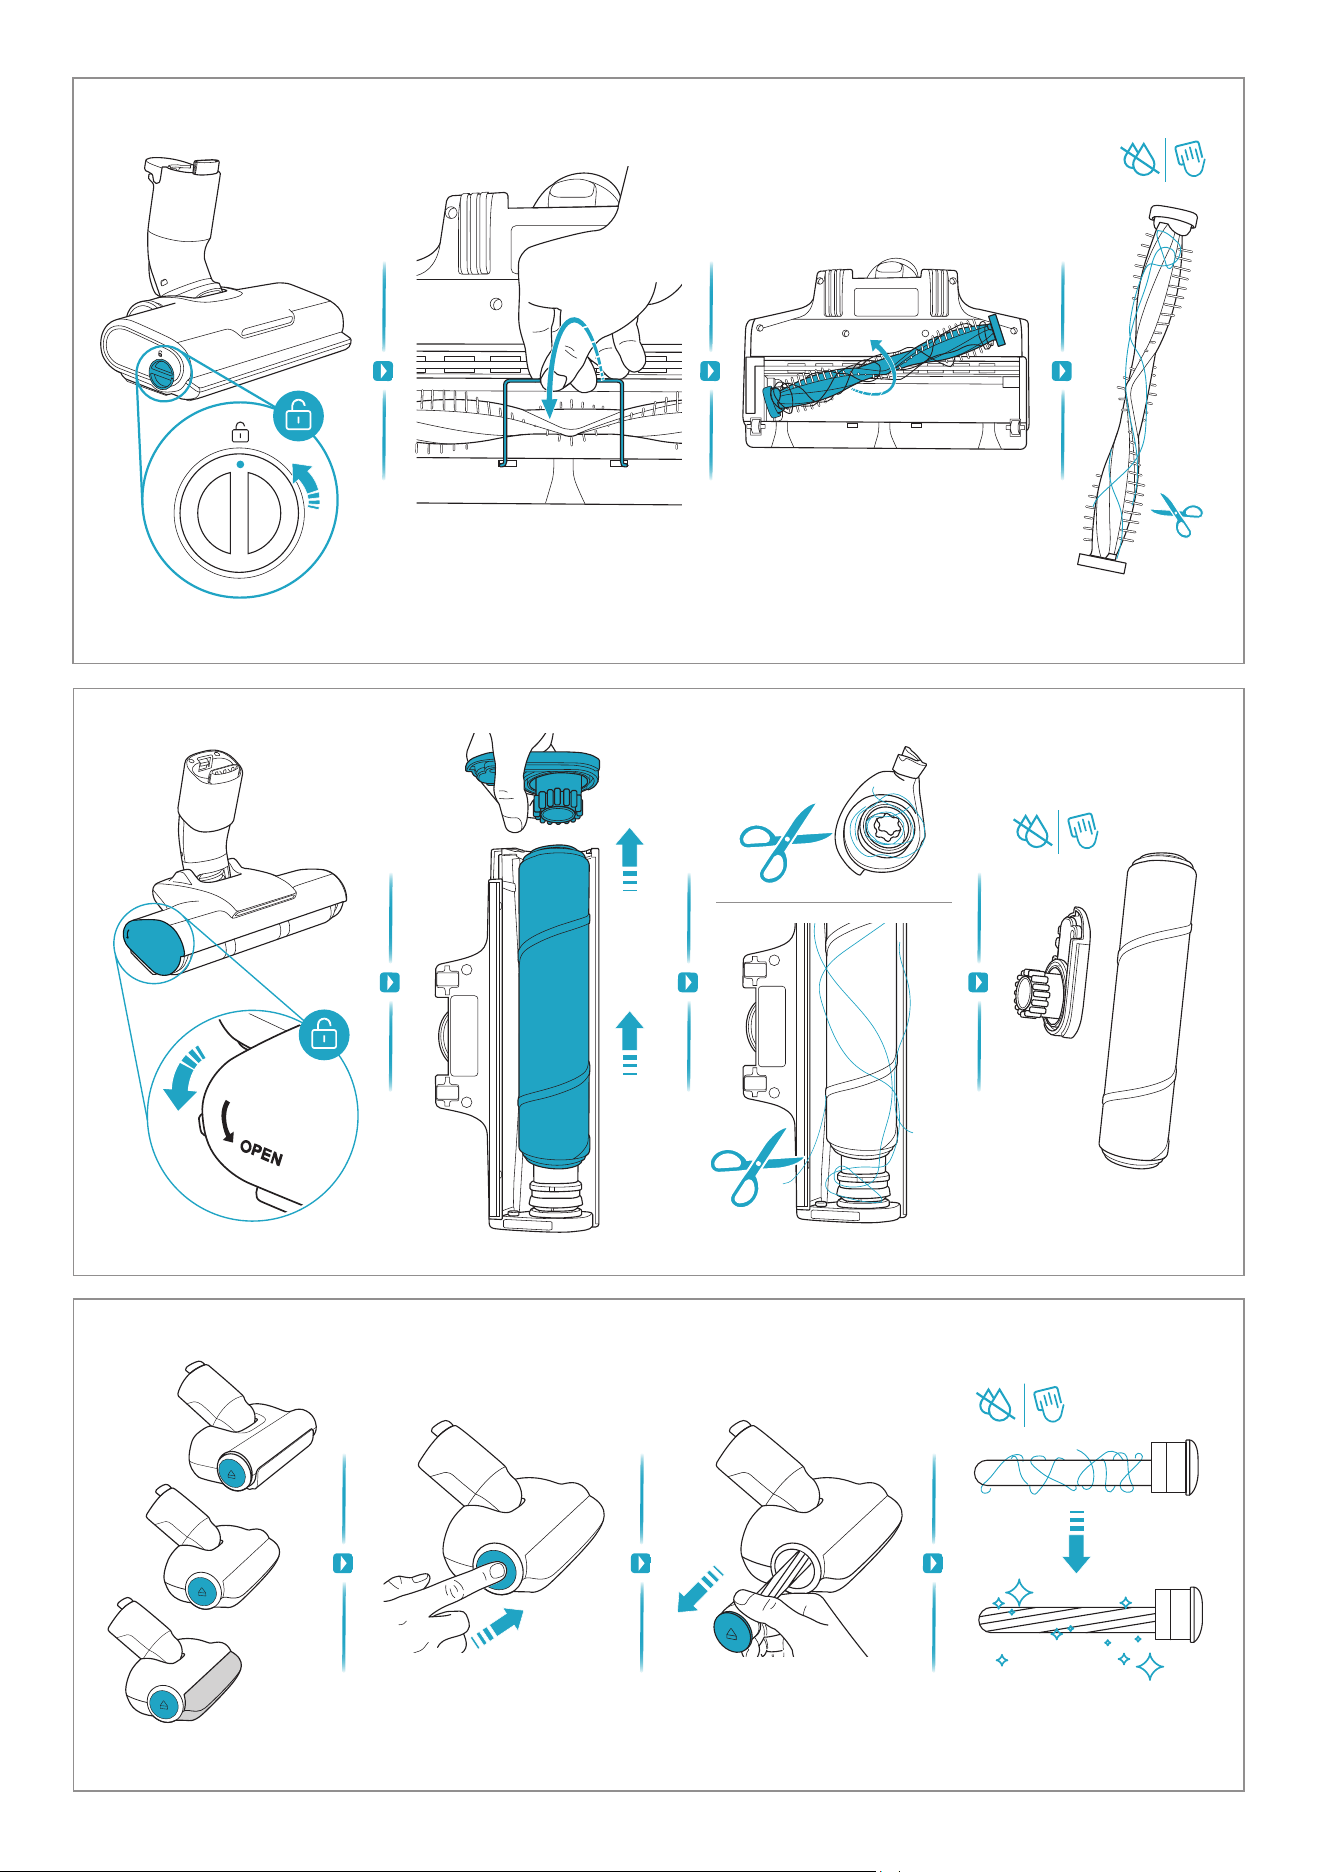
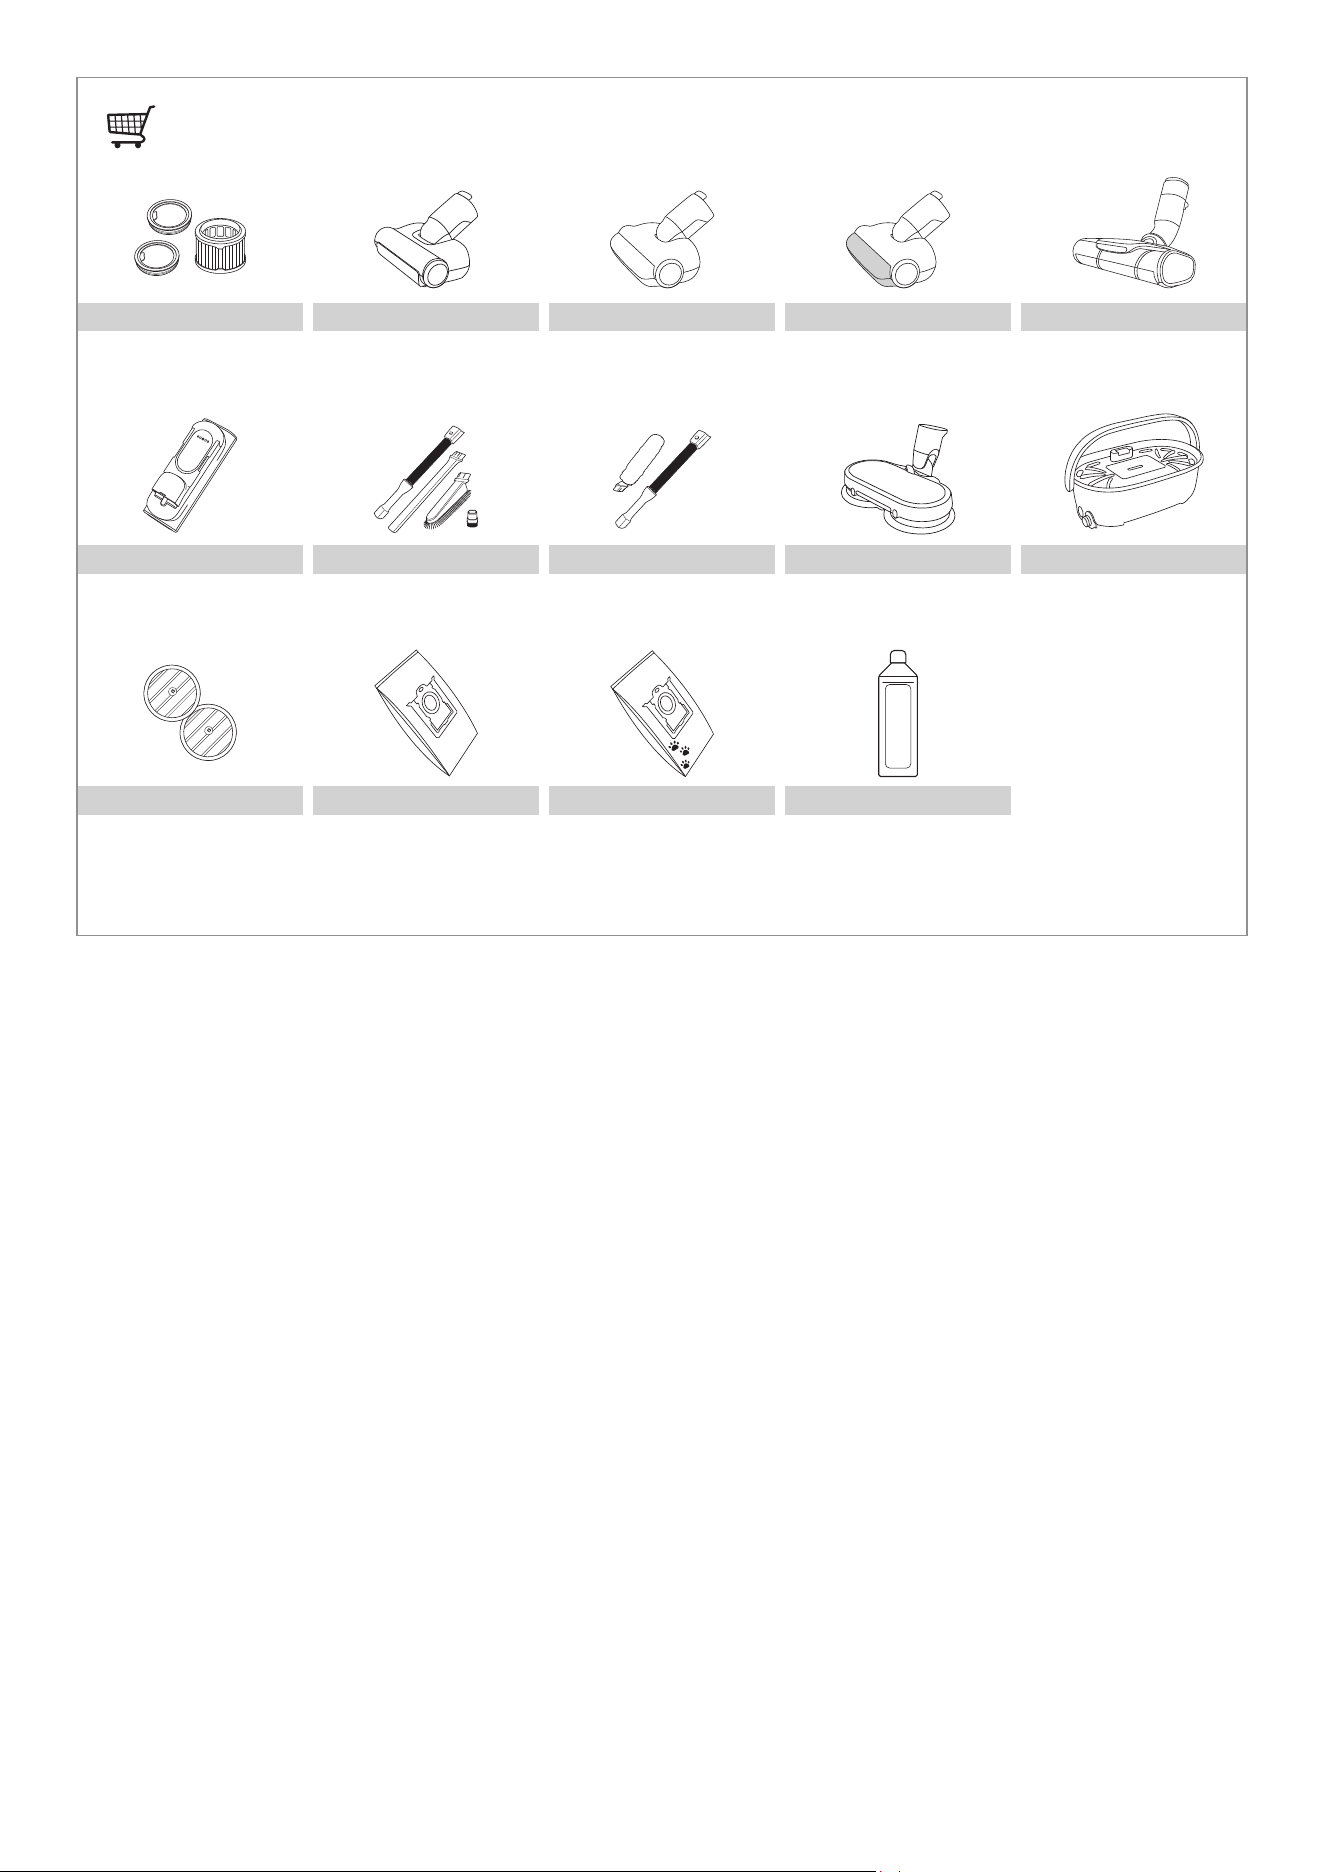
ESKW7
900 923 814
www.shop.electrolux.com
Performance Kit
ZE155
900 923 379
PetPro+
ZE149
900 923 380
BedProPower+
ZE149A
900 923 381
BedProPowerUV+
ZE156
900 923 369
PowerPro
Hard Floor Nozzle
ZE196
900 923 816
Extra Battery
KIT23
900 923 383
Home and Car Kit
KIT22
900 923 354
Duster Kit
ZE177
900 923 744
PowerProMop+ Nozzle
EPPCS2
900 923 726
Cleaning Station
ZE158
900 923 440
Standard Pads
E206S
900 168 460
E203S
900 168 459
*Accessories may vary by market.
S-bag® Hygiene Anti-Allergy
for Emptying Station
S-bag
® Anti-Odour
for Emptying Station
EFHLC3
900 923 819
Detergent
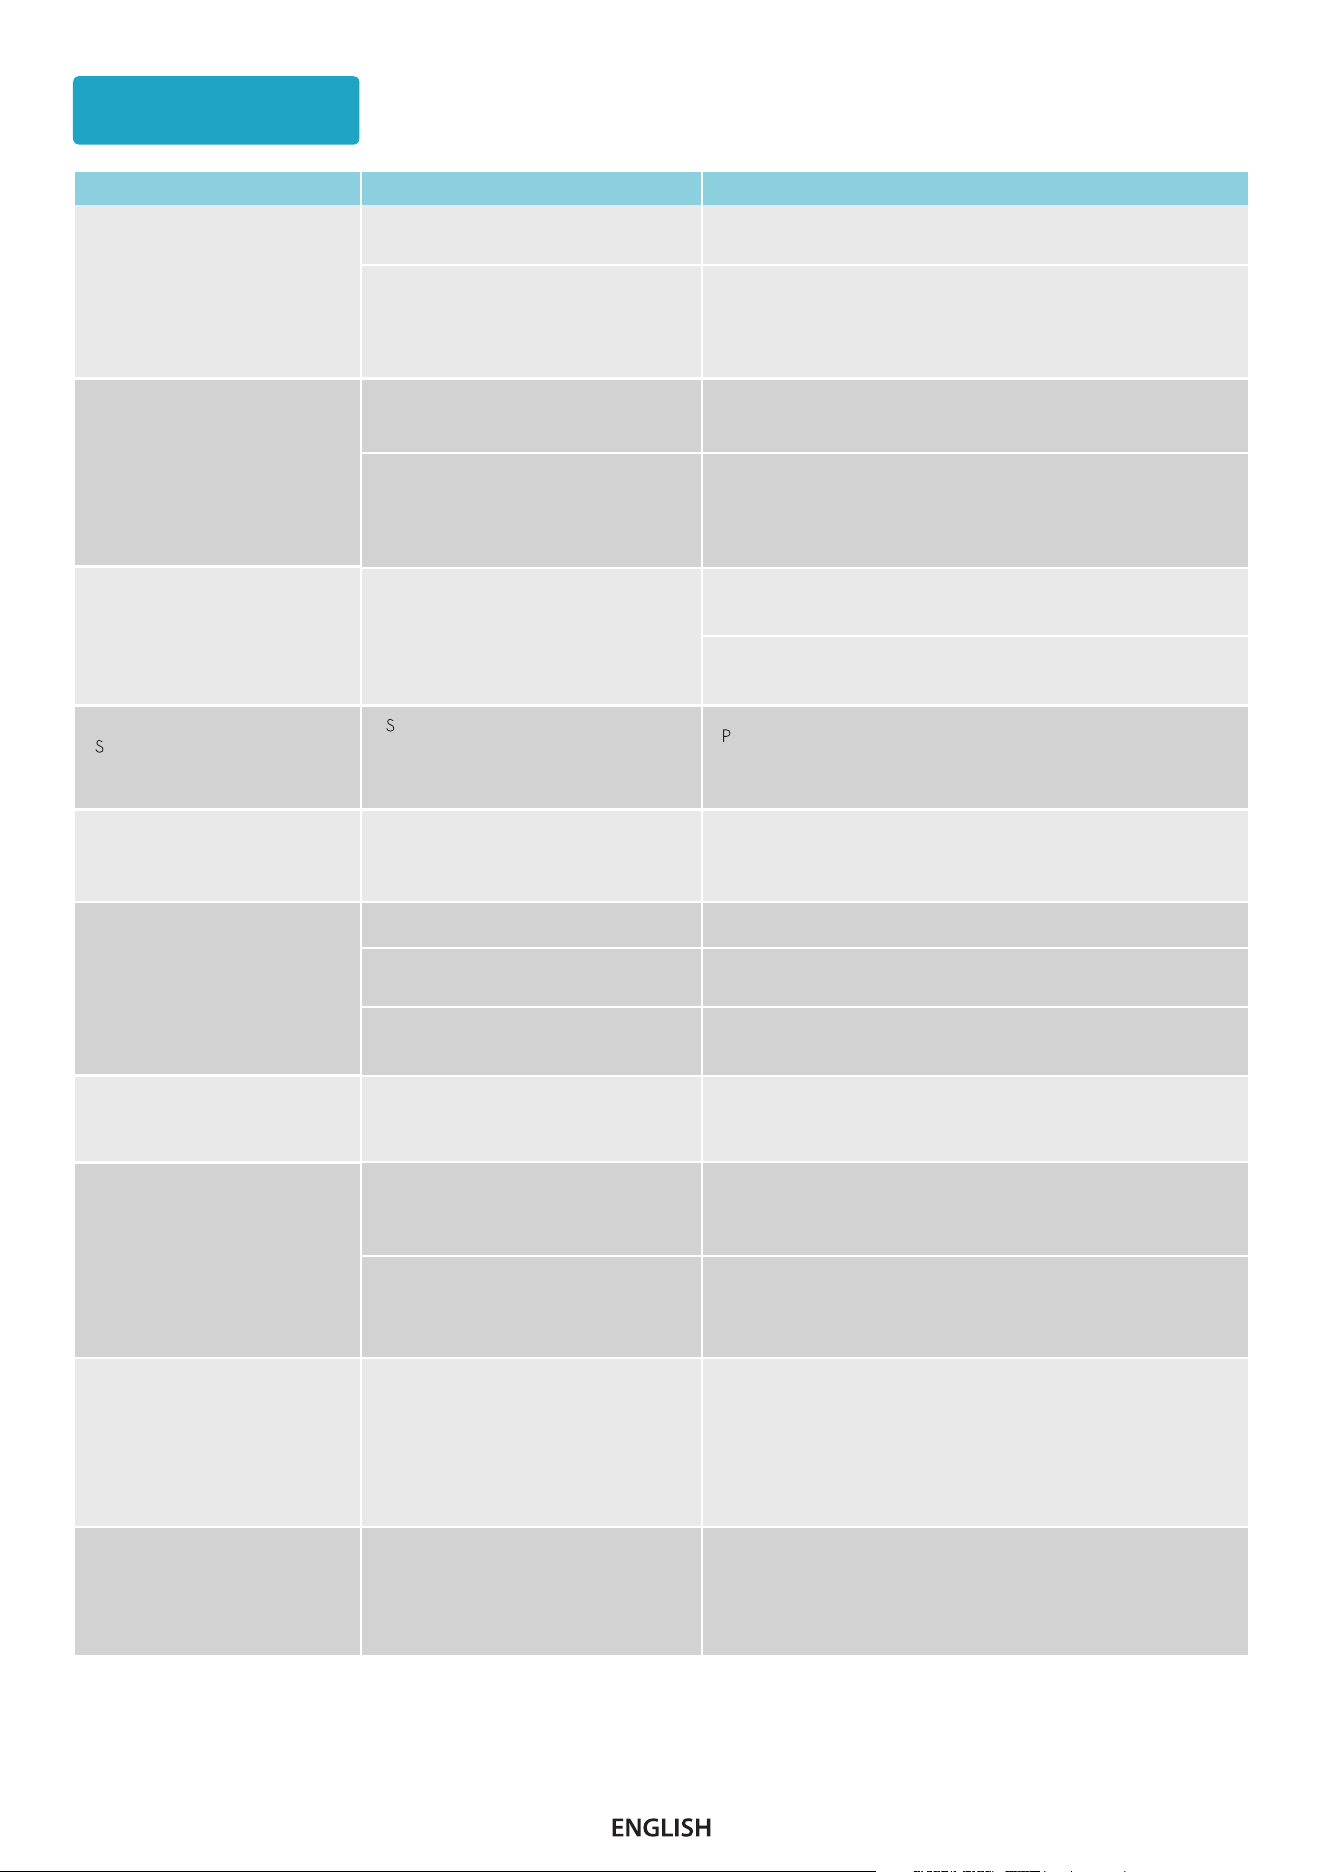
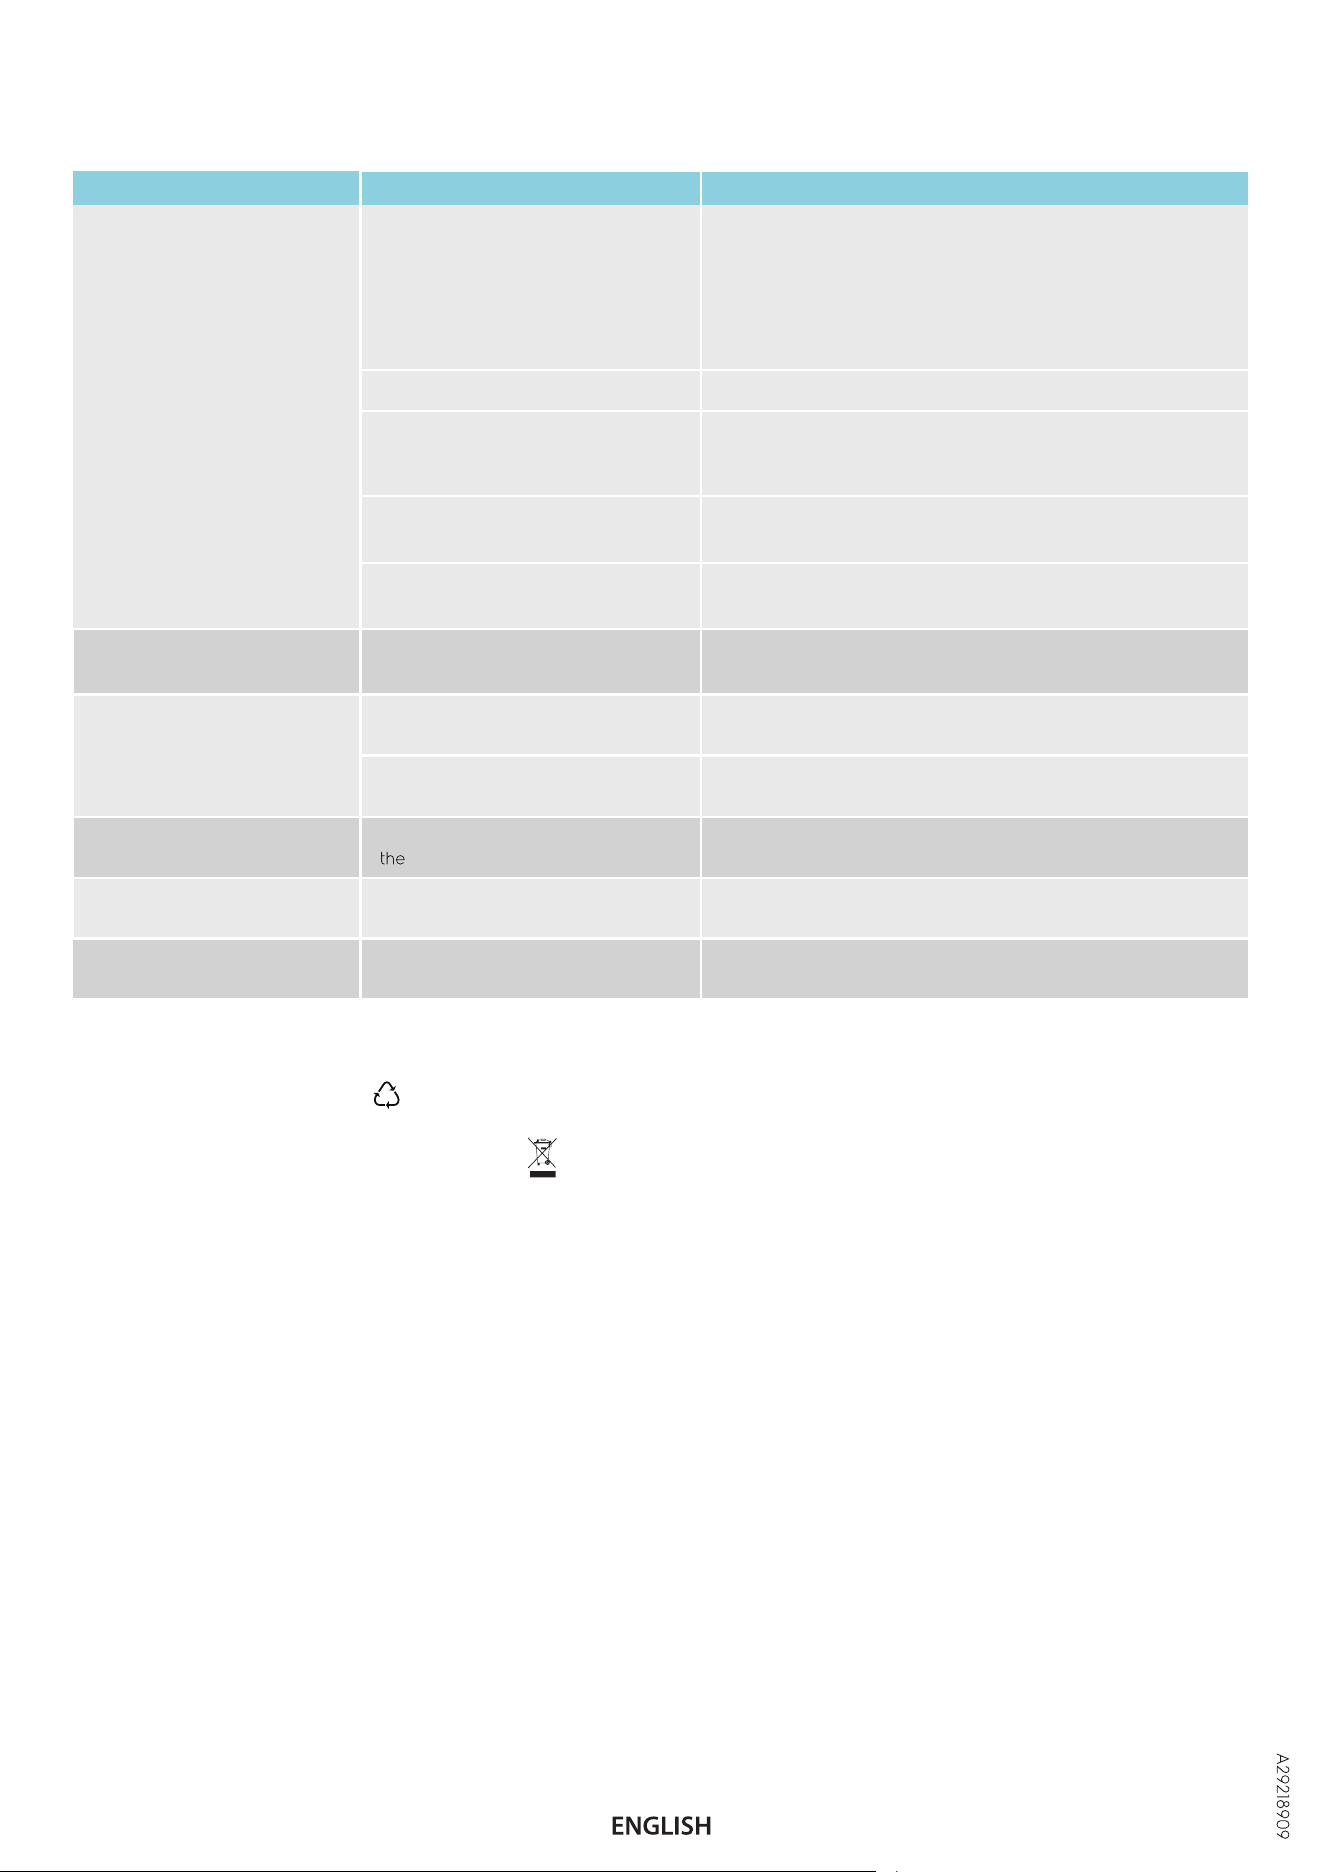
Problem Cause Solution
The S-bag icon appears on the
display and emptying function
doesn’t work after the main unit
is inserted into emptying
station, even when the Start
button is pressed
The S-bag is full
Replace it with a new S-bag
The S-bag or the door of S-bag
cabin is not in place
Ensure that the S-bag is properly positioned and that the door
is closed properly.
The station is in manual mode
Press and hold the Start/Pause button on the station until it
starts blinking to switch between manual and auto mode.
The station does not start
emptying automatically when
the cleaner is inserted
The battery within the station
appears to be unable to
charge
The duration for which the cleaner
was lifted was too short; it's likely
unnecessary to empty it
If emptying is necessary, press the Start/Pause button on the
station, or wait more than 15 seconds before returning the
cleaner to the station
The station gives priority to charging
the battery on the cleaner
tick unit cannot be
charged on Empty station
tick unit was not placed back to
Empty station properly, female and
male contact plate didn't touch with
each other
Wait until the battery on the cleaner is fully charged;
afterward, the station will commence charging.
Exchange the batteries to prioritize the alternate one.
ush the stick unit downward with some extra force. rotate
the unit a little bit unit you see charging indication on HU
display pops out
Troubleshooting
The mop is not sufficiently
humid to effectively remove
stains or dirt
Water dripping is insufficient to
effectively remove stains or dirt
Use the spray function to directly apply water to the stain.
Press and hold the speed button to activate the spray for
maximum 5 seconds
No water is dripping from the
wet nozzle
The water tank is empty
The water inlet is obstructed by large
articles
There is air in the inner hose
Add water in the water tank
Examine the water inlet and ensure that only clean water is
being loaded into the water tank
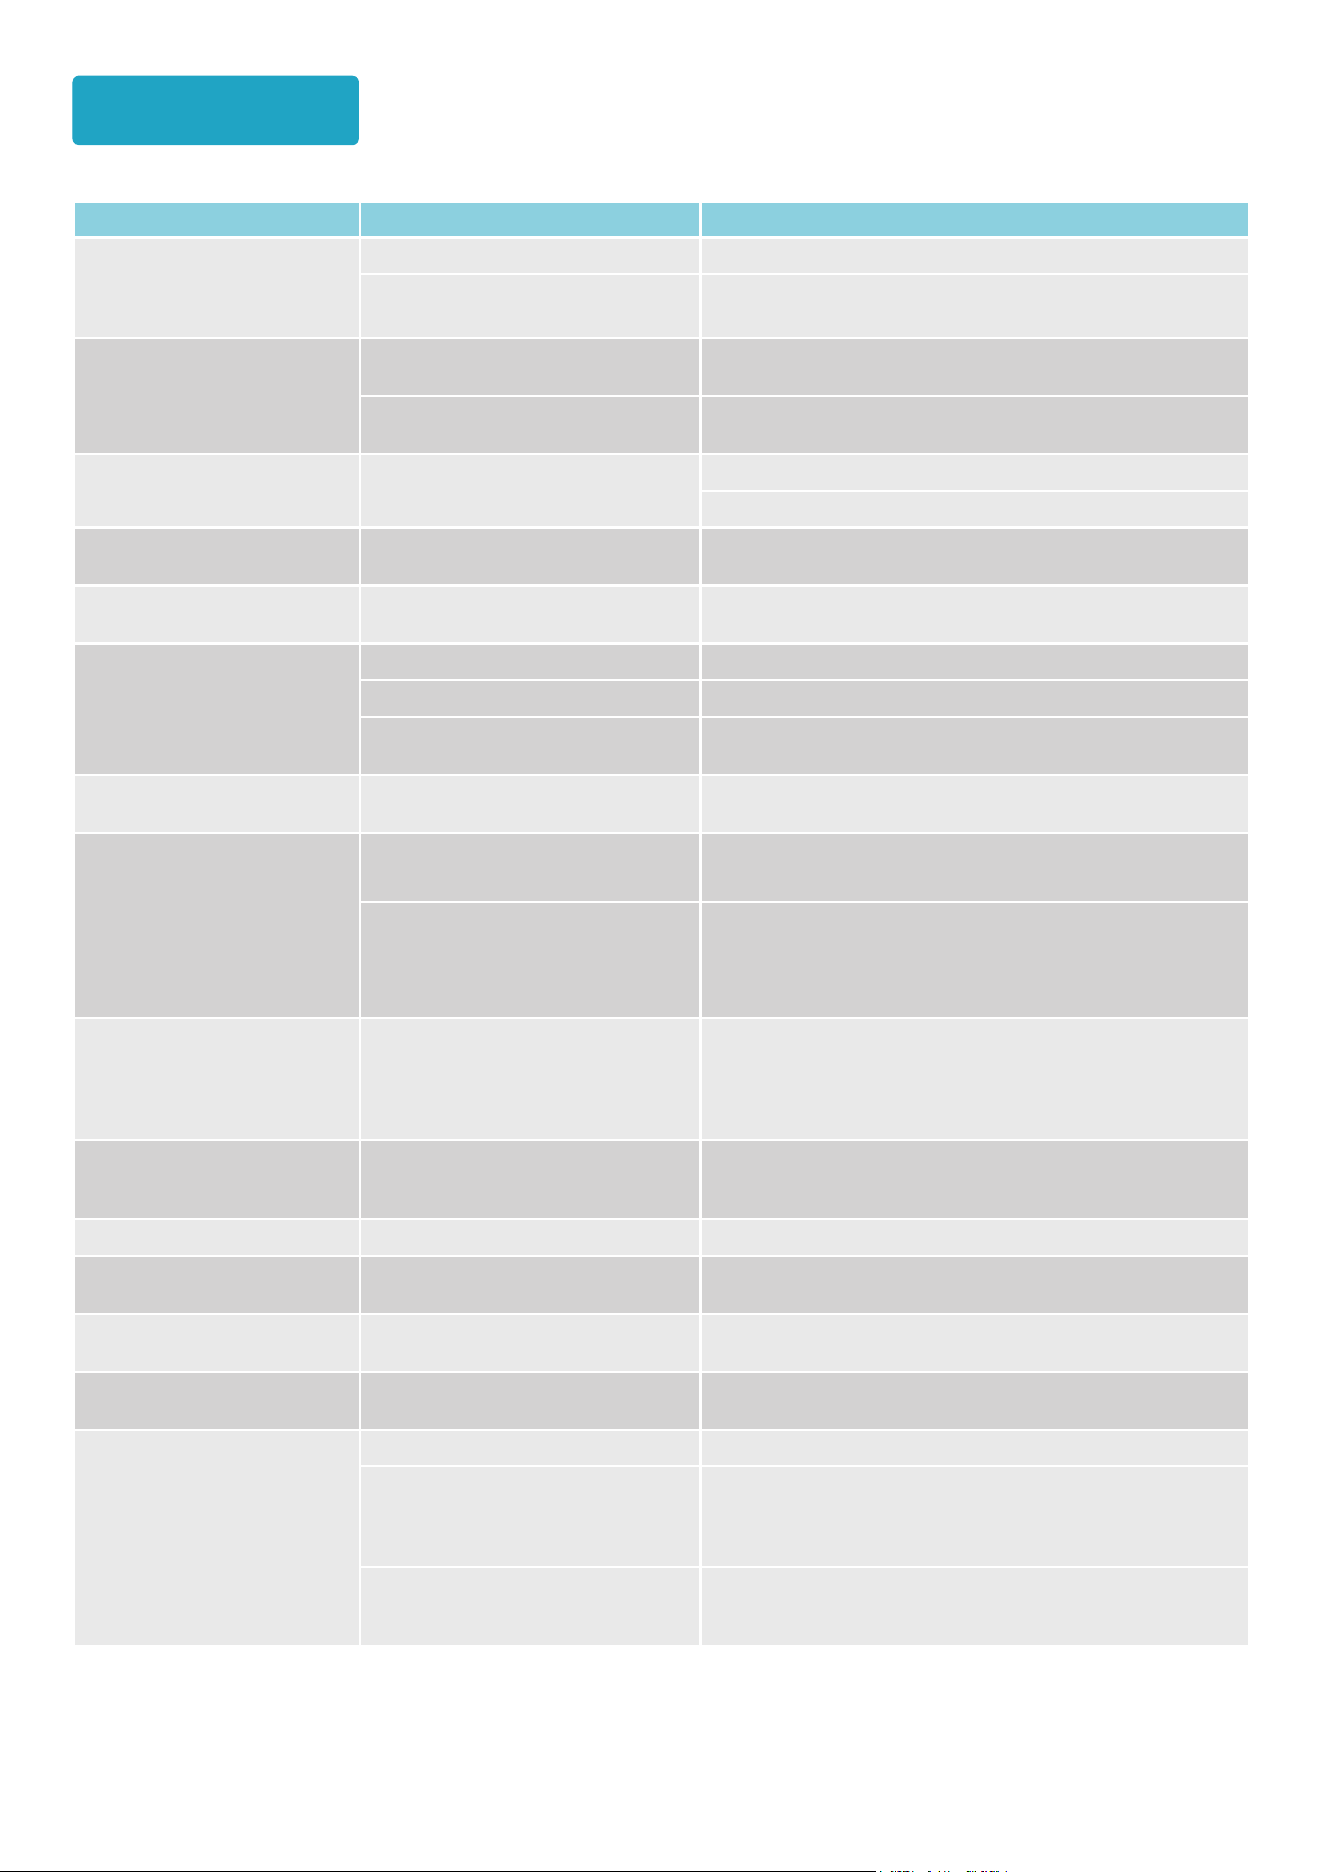
Dust/hair inside dust bin
cannot be thoroughly
cleaned
After multiple cycles of cleaning long
hair, hair became tangled around the
metal mesh inside the dust bin.
After prolonged use, hair and
debris accumulated around the
dust bin inlet, while the filters
became clogged with fine dust.
The S-bag is full, or the dust bin is
overloaded, with contents reaching
or exceeding the maximum
indicated level
1. Clean the dust bin more frequently and clean dustbin with the
hose. Regular cleaning before the bin is full enhances the
overall performance.
2. If the S-bag is nearly full, replace it with a new one to
maintain optimal functionality.
3. Clean or replace the disaster filter (located below S-bag) to
ensure effective cleaning.
Remove the metal mesh and manually clear any hair tangled
around it.
Remove the hair/rubbish manually and clean or replace the
filters as instructed. Use a new S-bag if it is close to full.
Water is leaking from the wet
nozzle tank after it has been
installed onto the nozzle
Performance degradation
The water tank is not completely
sealed
Ensure the inlet is properly sealed before reinstalling it onto
the wet nozzle
Use the spray function at the beginning. Press and hold the
speed button to activate the spray for maximum 5 seconds
The lower lid of dust bin failed
to open or close properly.
1. Small metal chips got stuck around
the magnet
2.The main unit had been lifted up
from emptying station before
emptying cycle finished.
1. Remove the metal chips around the magnet and clean that
area thoroughly
2. Ensure the main unit to be lifted up from emptying station
after emptying cycle has finished.
1. Small metal chips got stuck around
the magnet
2.The main unit had been lifted up
from emptying station before
emptying cycle finished.
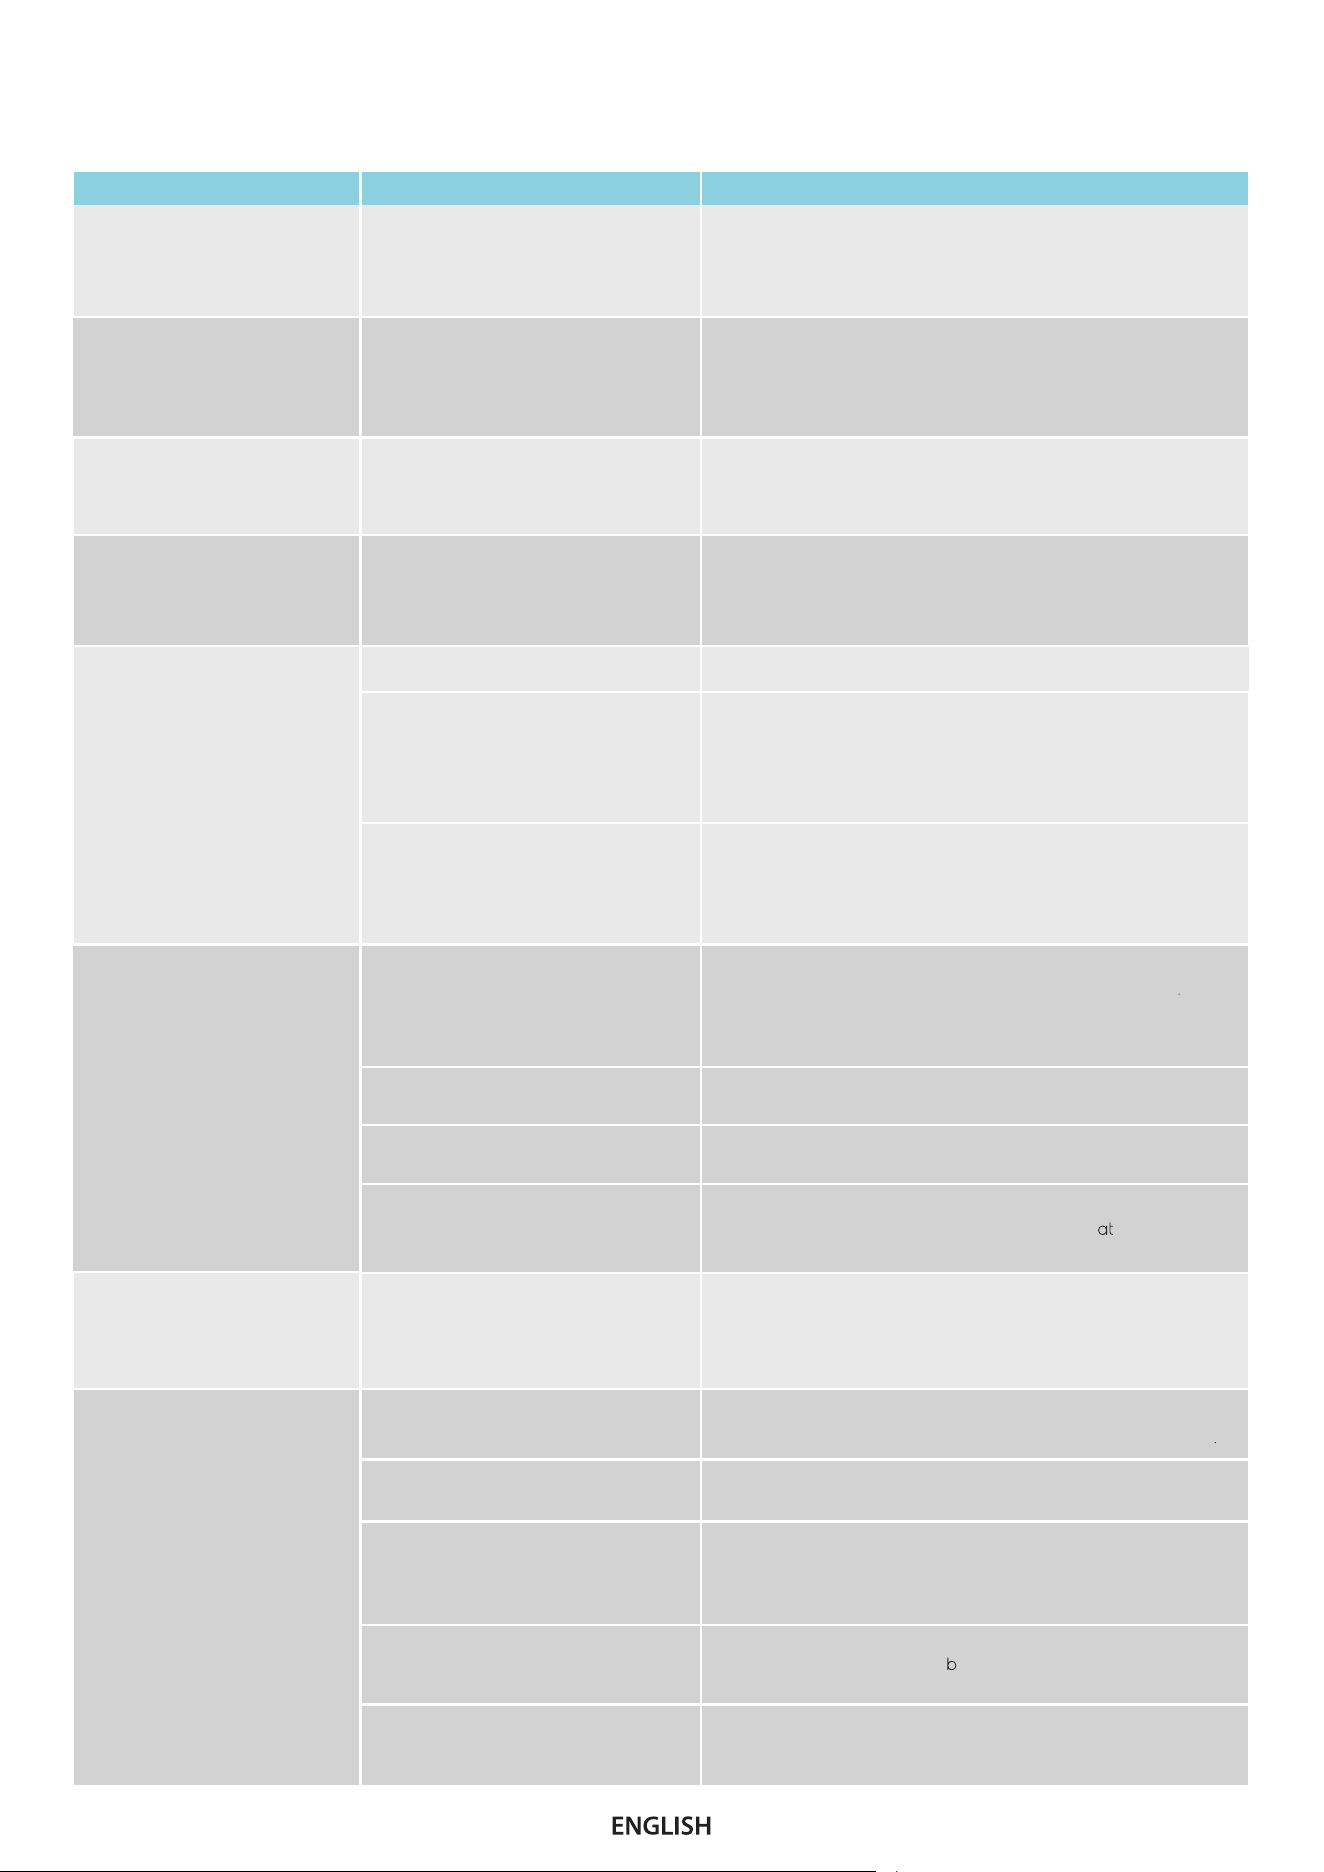
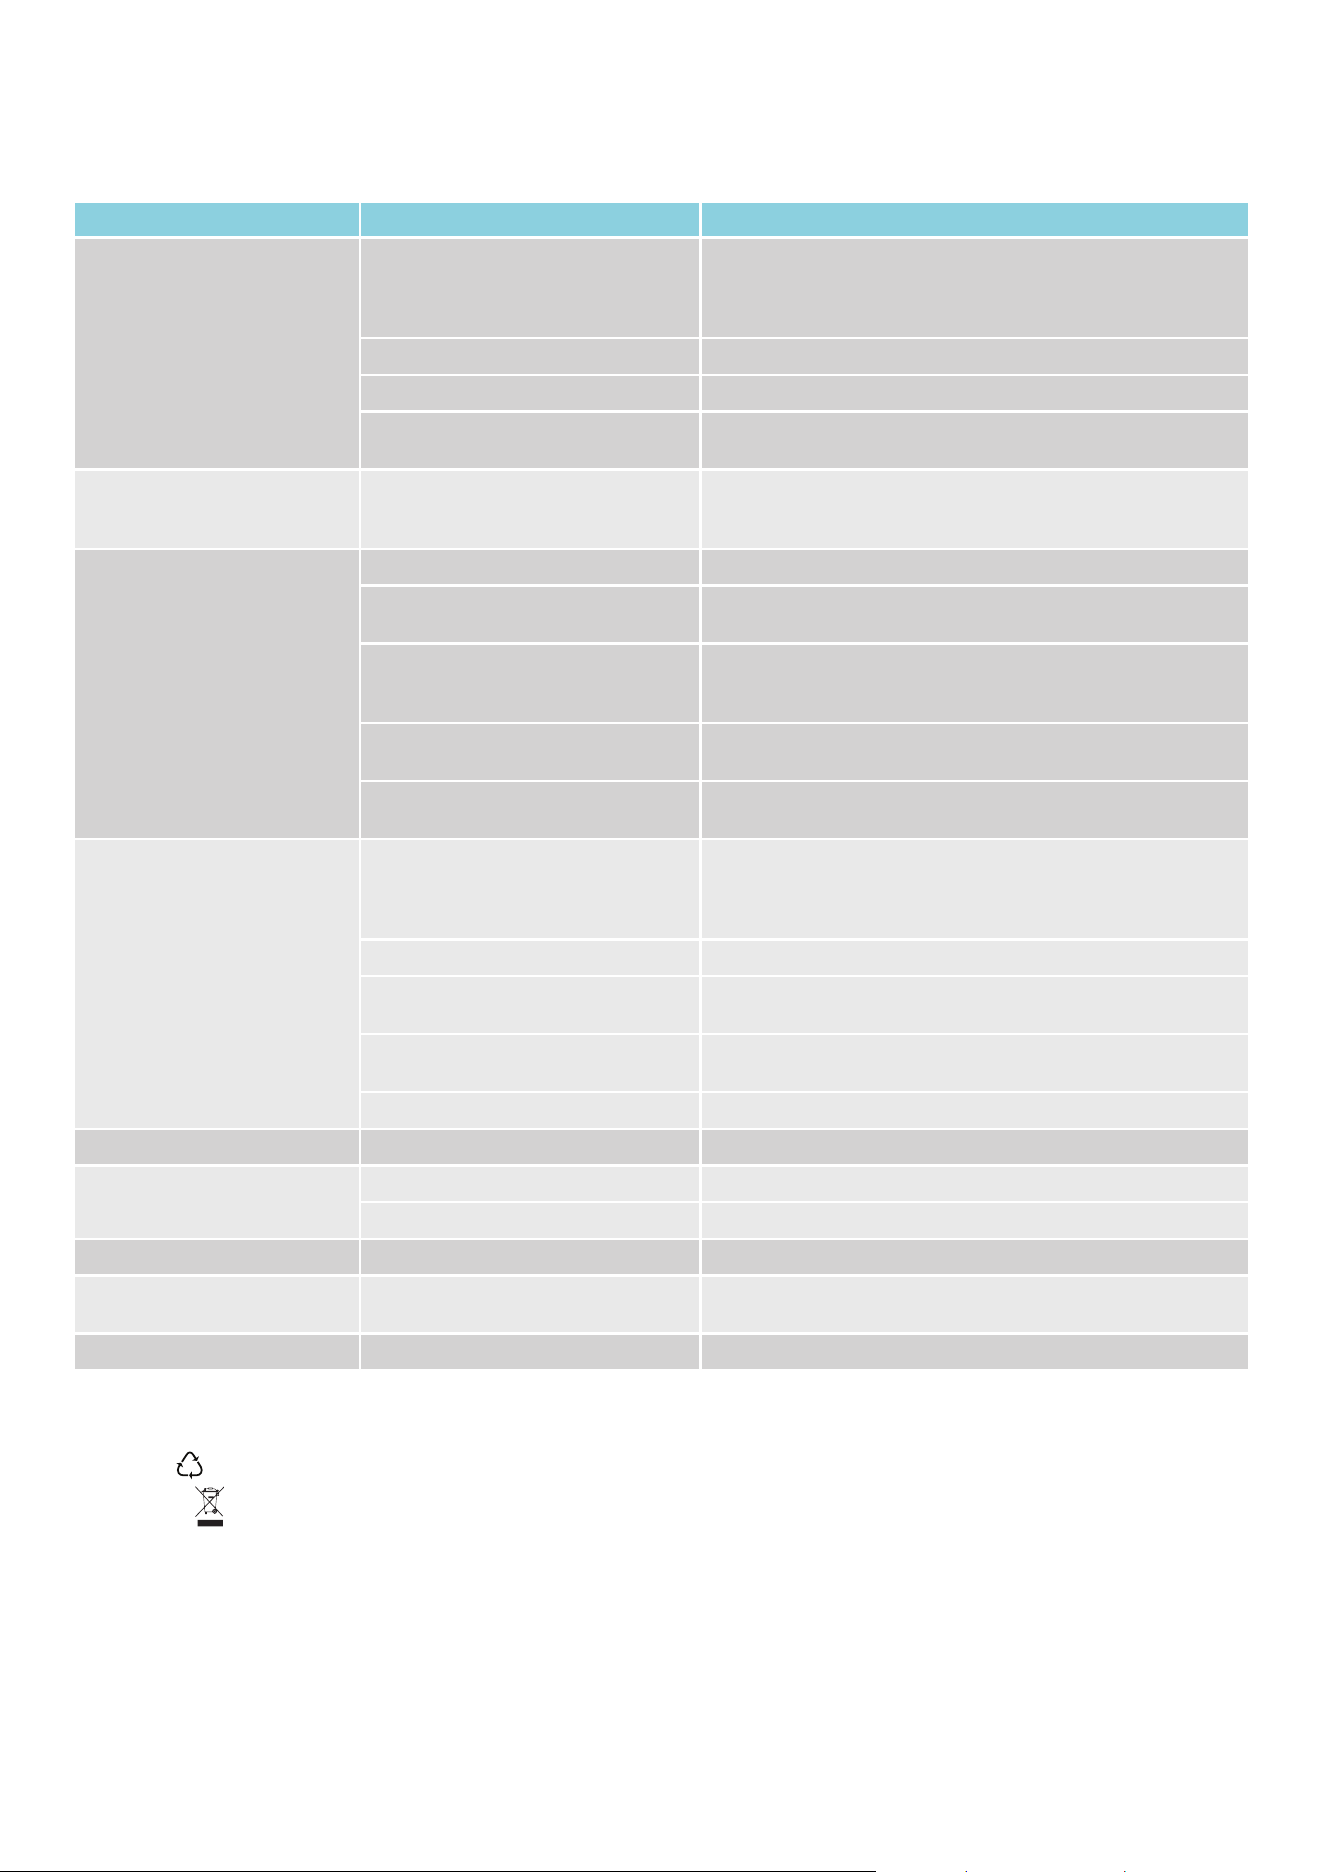
Problem Cause Solution
Long hair is tangled around the
metal mesh inside dust bin
Cut the stuck hair or remove tangled hair manually
Long hair is caught between
The elastic hose in the
emptying station disconnects
from the suction port during
vacuum cleaning
The hose was not properly
inserted in the suction port.
Insert the hose firmly until it securely connects with the
suction port.
the bottom lid and the skirt of
the dust bin
Over current/temperature protection
Was triggered (especially after
running on carpet for some minutes)
was triggered
1. Rest for some minutes, allow nozzle motor to cool down
2. Carpet is too thick or with too long hair, try lower down
speed setting
Nozzle stops automatically
(mainly on carpet)
Metal mesh and lower skirt part was
locked firmly with snap hook to
Achieve better performance
Pull out skirt a little bit, bent it sideways and then pull it out
Charge the cleaner
Stop use of product and take out filters and let it dry for 48h.
Do not put the product in the charging stand. If the product is
still not working after 48h contact authorized Electrolux service
center. Note: Damage to the motor caused by water or
liquids is not covered by the warranty.
1. to hold hand unit firmly while using the appliance
2. to lay the unit on wall or any other holding shelf firmly,
before releasing it from Hand
3. to place the appliance back to charging stand always
while it is not running.
Hard to detach skirt from metal
mesh inside dust bin
The product stops or doesn't
start
Brush roll doesn't rotate
Loss of suction power
The battery is empty
Water/Liquid has been sucked into
Cleaner has fallen onto the floor
unintentionally (Do note there
is no self stand function for the
product).
the product
Nozzle does not pick up dust or dirt
as aspected
Nozzle brush or fluffy roll is blocked
with hair and dirt.
Make sure to use a correct nozzle for each floor type.
Some models may contain the PowerPro Multi-surface nozzle
and/or the PowerPro Hard Floor nozzle. The PowerPro Hard Floor
nozzle is not recommended for thick carpets, but it is ideal for hard
floors. The PowerPro Multi-surface nozzle is suitable for all floors.
Remove floor nozzle and clean brush roll according to
instruction manual
Tube and/or nozzle neck is blocked.
Pre-filter and/or fine dust filter
have been clogged or are dirty.
Dust bin is full.
Check if any clogging happened in nozzle/tube
Empty dust bin and wash filters according to instruction
manual. If need to replace and buy new filters
(www.electrolux.com)
Brush roll stops when user detaches
the previous nozzle & changes to
another nozzle while the vacuum
cleaner is still on. This is a protection
mode.
Turn off cleaner and re-start "ON" button to activate the
Make sure that the contact plates on the back side of vacuum
cleaner are in contact with contact plates on charging stand.
Make sure the adaptor plug is connected to the charging stand
socket and the charging adaptor is plugged into a wall socket.
brush roll spinning.
Product is not charging/No
charging indication on hand
unit display
Product is not placed correctly in the
charging stand.
Charger plug is not plugged in
Charging will not occur if room
temperature is below 5ºC or over
35ºC to protect battery and
electronics
Store/charge the product indoor and in room temperature
between 5-35ºC
Hand unit display is dark and all LED
are off after battery pack is fully
charged
Take out cleaner from charging stand, press the on/off button
or +/- speed button to view
attery level indication. Put
cleaner back in charging stand.
Battery Pack temperature is too high
(~45ºC)/low (~5ºC),charging not yet
started
Put appliance at ambient temperature condition, wait until
temperature cool down/ raised up
ENVIRONMENTAL CONCERNS
Recycle materials with the symbol . Put the packaging in relevant containers to recycle it. Help protect the environment and
human health by recycling waste of electrical and electronic appliances.
with the household waste. Return the product to your local recycling Do not dispose appliances marked with the symbol
facility or contact your municipal office.
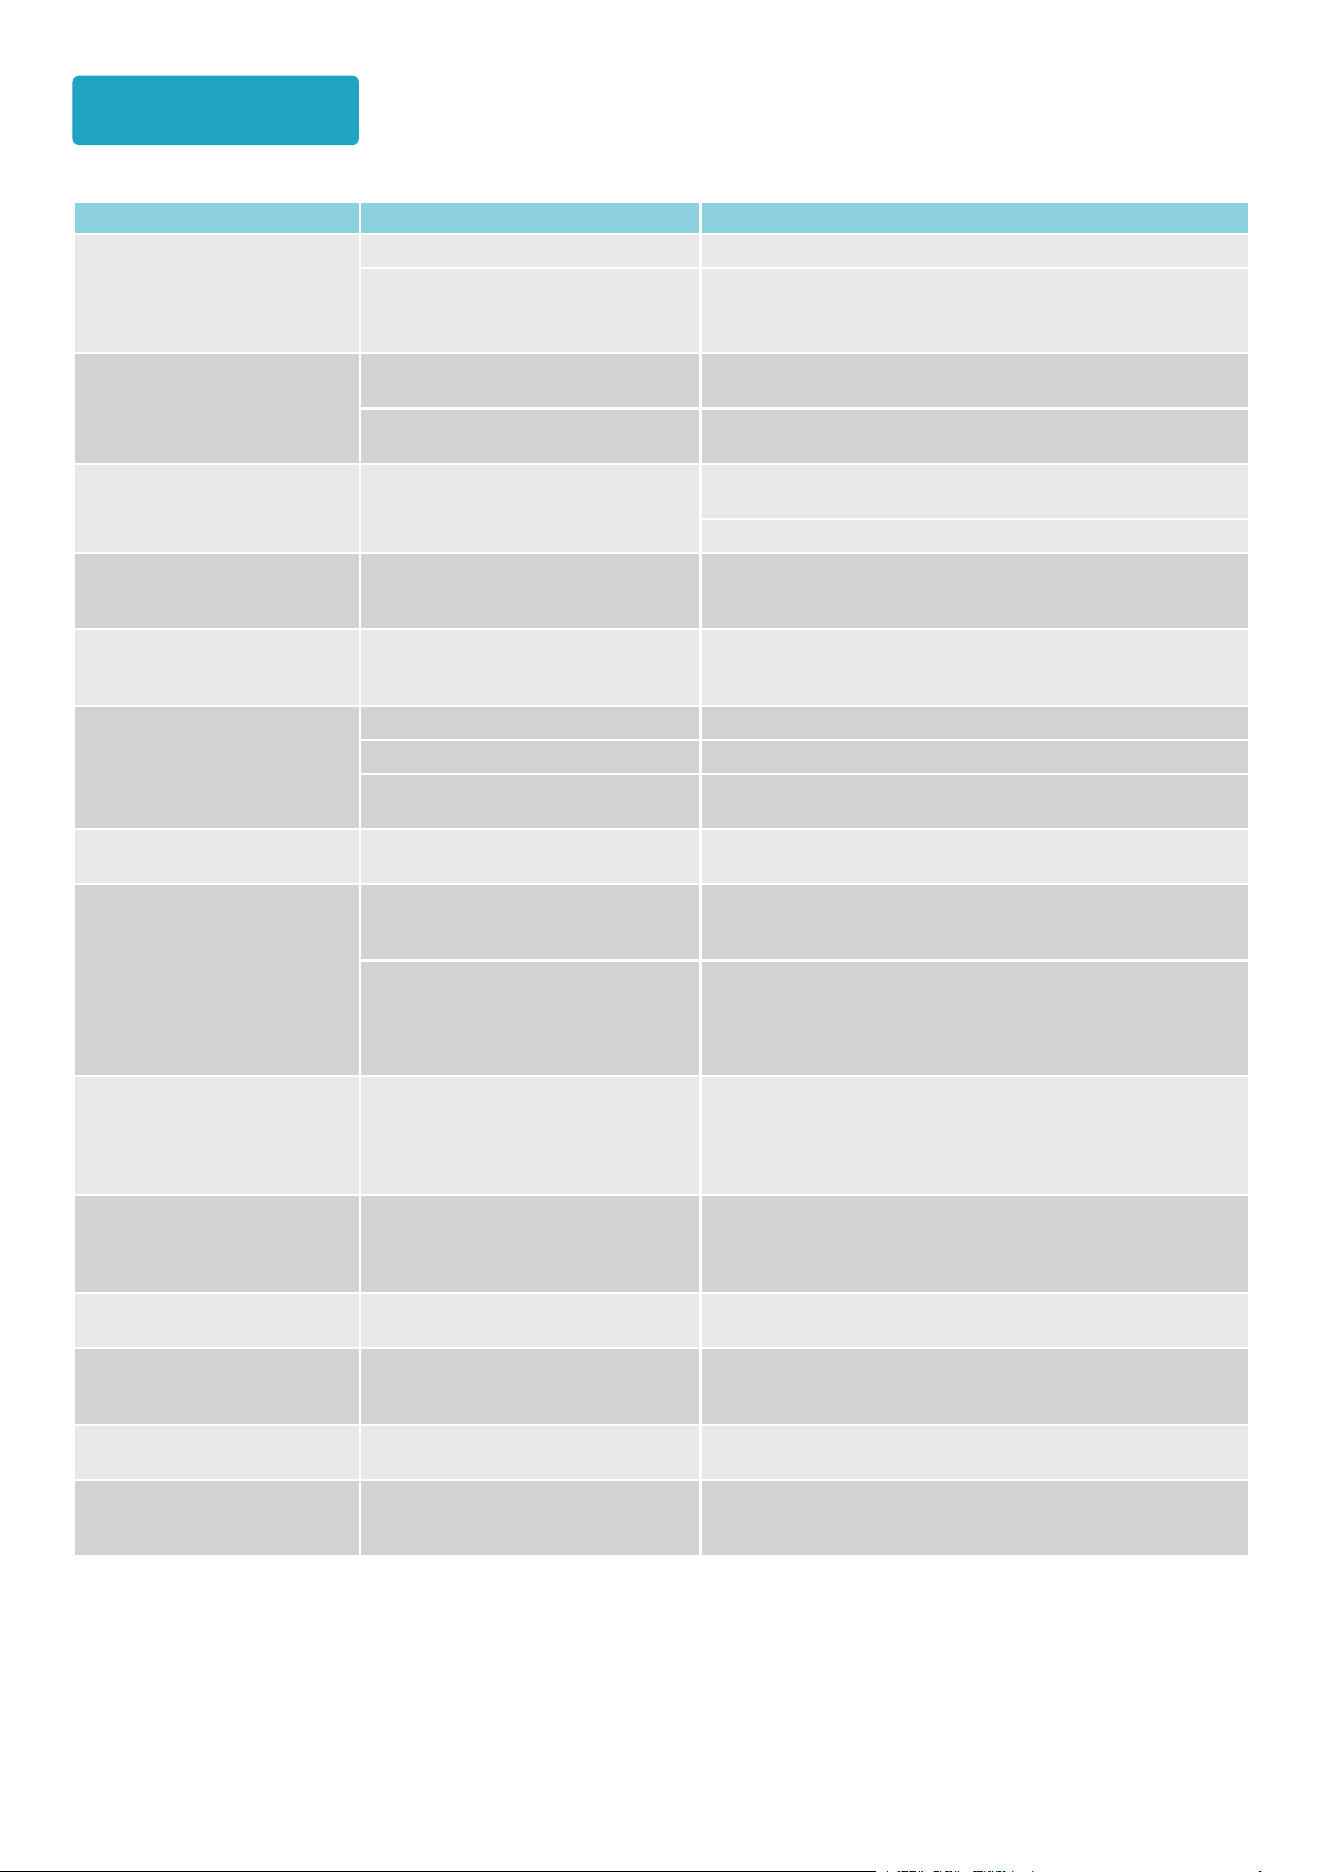
Problem Cause Solution
Hand unit battery pack is not fully
charged and will not start charging
extra battery pack on charging stand
until hand unit battery pack is fully
charged ( up to 2.5 hours)
This can only happen to products with possible to charge in
the base plate of charging stand.
Battery pack on hand unit will always start charging first and
then charging will start for the battery pack in charging stand
base and the LED indication should start to light up.
Battery pack not fully inserted
Take out battery pack and insert again
Battery Pack temperature is too high
(~45ºC)/low (~5ºC), charging not yet
started
Put appliance at ambient temperature condition, wait until
temperature cool down/ raised up.
Battery pack is broken, need to be
replaced.
Contact Electrolux service center. If need to replace and buy
new battery pack (www.electrolux.com)
Wrong battery pack is being used for
this product.
Make sure correct battery pack is being used.
Clogging indication that filters needs
to be cleaned
Clean/Replace the filters according to the instruction manual.
Clogging indication appear
on hand unit display
No charging indication on
charge stand
The product may be overheated in
motor or battery pack
Let product rest and cool down
Nozzle or tube can be clogged
Check if any clogging happened in nozzle/tube
Warning triangle appear on
hand unit display
Mopping pads are not attached in
center of rotation discs.
Re-attach the pads in the center of rotation discs.
Wet nozzle is wobbling/
jumping on floor
Room temperature is over 35ºC
Charging time will be longer if temperature is high, which is
normal, Store/charge product in a normal room temperature.
Charging is taking more than
longer than 4.5 hours
Brush roll is jammed Remove brush roll and clean brush roll from hair and fibers.
Headlights on floor nozzle do
not work
中文
常見問題 可能原因 解決方法
顯示幕上出現 S-bag 圖示,
將主機插入清空站後,即使按
Start 按鈕,清空功能也無法
運作
S-bag 已滿。 將 S-bag 換新。
S-bag 或 S-bag 室的門未就位。 確保 S-bag 位於正確位置且門已正確關閉。
清空站未在插入吸塵器時自動開
始清空
清空站處於手動模式。
按住清空站上的 Start/Pause 按鈕直到開始閃爍,以在手動與自
動模式之間切換。
拿起吸塵器的時間太短;可能不必清空。
如果必須清空,請按清空站上的 Start/Pause 按鈕,或等待超過
15 秒再將吸塵器放回清空站上。
清空站中的電池似乎無法充電 清空站優先為吸塵器的電池充電。
等到吸塵器的電池充飽電;之後,清空站將開始充電。
更換電池,以備用電池為優先。
桿式主機無法在空的充電站上
充電
桿式主機沒有正確放回空的充電站,
公接點板和母接點板沒有互相碰觸。
用額外的力量將桿式主機向下壓,稍微轉動裝置,即可看到抬頭
顯示器上的充電指示出現
拖把不夠濕,無法有效去除污漬
或髒污
滴水不足,無法有效去除污漬或髒污。
使用噴霧功能直接將水噴在污漬上。按住速度按鈕啟動噴霧,
最長 5 秒。
濕吸頭未滴水
水箱是空的。 在水箱中加水。
進水口被大型物體堵塞。 檢查進水口並確保只有乾淨的水被裝入水箱。
內軟管裡有空氣
一開始就使用噴灑功能,按住速度按鈕不放以啟動噴灑動作,
最多 5 秒鐘
將濕吸頭水箱安裝在吸頭上後,
濕吸頭水箱漏水
未正確密封水箱。 請確保進水口已正確密封,然後將它重新安裝在濕吸頭上。
性能下降
多次吸起長髮後,毛髮纏在集塵盒內的
金屬網上。
拆下金屬網並手動清除纏在金屬網上的毛髮。
長時間使用後,毛髮和碎屑積聚在集塵
盒入口周圍,濾網則被微塵堵塞。
手動清除毛髮/垃圾,並依照指示清潔或更換濾網。如果 S-bag
快滿了,請使用新的 S-bag。
無法徹底清除集塵盒內的
灰塵/毛髮
S-bag 已滿或集塵盒過載,內容物達到
或超過最大指示程度。
1. 請增加集塵盒的更換頻率,並使用軟管來清潔集塵盒。
在集塵盒裝滿前定期清潔可提高整體性能。
2. 請增加集塵盒的更換頻率,並使用軟管來清潔集塵盒。
在集塵盒裝滿前定期清潔可提高整體性能。
3. 清潔或更換濾網(位於 S-bag 下方)以確保有效清潔。
集塵盒下蓋無法正常開啟或
關閉。
1. 小金屬碎片卡在磁鐵周圍。
2. 在清空循環完成之前從清空站拿起
主機。
1. 移除磁鐵周圍的金屬碎片並徹底清潔該區域。
2. 務必等到清空循環完成後,再從清空站拿起主機。
長髮卡在集塵盒底蓋與邊緣之間 長髮纏在集塵盒內的金屬網上。 剪斷卡住的頭髮或手動移除纏住的頭髮。
吸塵時,清空站中的彈性軟管與
吸入口中斷連接
未正確將軟管插入吸入口。 用力插入軟管,直到確實與吸入口連接。
噴嘴自動停止(主要在地毯上)
特別是在地毯上運轉過幾分鐘,
過電流/過高溫度保護被觸動
1. 休息幾分鐘,讓噴嘴馬達降溫
2. 地毯太厚或毛太長,請嘗試降低速度設定
很難從集塵盒內部的金屬網將裙
邊拆下來
金屬網和低裙邊零件用卡鉤牢牢鎖定,
以得到更佳的效能
稍微拉出裙邊,向側面摺彎,然後拉出來
產品停止或無法啟動
電池沒電 為吸塵器充電。
產品吸入水/液體。
停止使用產品,取出濾網並讓濾網風乾 48 小時。請勿將產品
放置在落地支架上。如果 48 小時後產品仍無法運作,請聯絡
Electrolux 授權服務中心。
附註:水或其他液體造成的馬達損壞不在保固範圍內。
吸塵器意外掉落到地上(請注意,產品
沒有自行站立功能)。
1. 使用器具時,牢牢抓住手持主機
2. 在放手之前,將主機牢牢靠在牆上或任何其他保持架上
3. 沒有運轉時,務必將主機放回充電座。
故障排除
中文
常見問題 可能原因 解決方法
失去吸力
吸頭未如預期吸起灰塵或污物。
請務必針對地板類型使用正確的吸頭。
某些型號可能包含 PowerPro 多表面吸頭及/或 PowerPro 硬質
地板吸頭。不建議將 PowerPro 硬質地板吸頭用於厚地毯,但適
用於硬質地板。PowerPro 多表面吸頭適合所有地板。
吸頭滾刷或滾輪被毛髮和髒污堵塞。 依照說明書拆下吸頭並清潔刷桿。
管子及/或軟管頸部堵塞。 檢查吸頭/管子是否發生堵塞。
前置濾網及/或微塵濾網堵塞或變髒。
集塵盒已滿。
依照說明書清空集塵盒並清洗濾網。如果需要,請從
www.electrolux.com 購買新濾網並更換。
滾刷未旋轉
滾刷在使用者拆除原來的噴嘴並更換成
另一個噴嘴時會停止,同時間真空吸塵
器仍然為開啟狀態,這是保護模式。
關掉吸塵器並重新啟動「開啟」按鈕,以啟動滾刷旋轉。
產品無法充電/手持主機顯示幕
上無充電指示
未正確將產品放入充電座中。 確定真空吸塵器背面的接點板與充電座上的接點板接觸。
未插入充電器插頭。
確保變壓器插頭已連接到手持主機上的插槽,且充電變壓器已插
入牆壁插座。
如果室溫低於 5
ºC
或高於 35
ºC
,
則不會進行充電,以保護電池和電子
元件。
在室溫介於 5-35
ºC
之間的室內存放產品/為產品充電。
電池組充飽電後,手持主機顯示幕
變暗,所有 LED 都熄滅。
將吸塵器從充電座取出,按下開/關按鈕或 +/- 速度按鈕,以查
看電池電量顯示,將吸塵器放回充電座。
電池組溫度過高 (~45
ºC
) /過低
(~5
ºC
),尚未開始充電。
將產品置於環境溫度條件下,等到溫度下降/上升。
充電座上沒有充電指示
手持主機電池組沒有充飽電,並且不會
開始為充電座上的其他電池組充電,
直到手持主機電池組充飽電為止
(最多 2.5 小時)
這種情形只會發生在可能在充電座底板上充電的產品。
手持主機上的電池組一定會先開始充電,然後再替充電座底座上
的電池組充電,LED 指示應該會開始亮起。
電池組未完全插入 取出電池組重新插入
電池組溫度過高 (~45
ºC
) /過低
(~5
ºC
),尚未開始充電
將器具放在室溫條件下,直到溫度下降/升高為止。
電池組破損,需要更換。
如果需要更換及購買新的電池組,請洽 Electrolux 客服中心
(www.electrolux.com)
在本產品上使用錯誤的電池組。 確定使用正確的電池組。
手持主機顯示幕上出現堵塞指示 堵塞指示代表濾網需要清潔。 依照說明書清潔/更換濾網。
手持主機顯示幕上出現警告
三角形
產品的馬達或電池組可能過熱。 讓產品休息並降溫。
吸頭或管子可能堵塞。 檢查吸頭/管子是否發生堵塞。
濕吸頭晃動/在地板上跳動 未將濕拖布裝在旋轉圓盤的中心。 將濕拖布重新裝在旋轉圓盤的中心。
充電時間超過 4.5 小時 室溫高於 35
ºC
。
如果室溫高,充電時間會較長,這是正常現象,請在正常室溫下
存放產品/為產品充電。
地板吸頭上的頭燈不亮 滾刷卡住。 拆下滾刷並清除毛髮和纖維。
環境關懷
回收有標誌 的材料。請將包裝材料放到適當的容器中予以回收。回收電子和電氣器具廢棄物有利於保護環境及人類健康。
請勿將有標記
的器具與家用廢棄物一同處理。請將產品送至當地回收廠或聯絡市政府辦公室。
한국어
일반적 문제점 가능한 원인 해결책
본체를 비우기 스테이션에 삽입한
후 Start(시작) 버튼을 눌러도
디스플레이에 S-bag 아이콘이
나타나고 비우기 기능이 작동하지
않습니다
S-bag이 가득 찼습니다. 새 S-bag으로 교체합니다.
S-bag 또는 S-bag 캐빈 도어가 제자리에
위치하고 있지 않습니다.
S-bag이 제대로 위치했고 도어가 제대로 닫혔는지 확인합니다.
청소기를 삽입해도 스테이션이
자동으로 비우기 시작하지
않습니다
스테이션이 수동 모드에 있습니다.
스테이션의 Start(시작)/Pause(일시정지) 버튼이 깜박이기 시작할
때까지길게 눌러 수동 모드와 자동 모드 사이를 전환합니다.
청소기를 들어 올린 시간이 너무 짧아,
그것을 비울 필요가 없을 가능성이 큽니다.
비워야 하는 경우 스테이션의 Start(시작)/Pause(일시정지) 버튼을
누르거나 청소기를 스테이션에 다시 놓기 전에 15초 이상 기다립니다.
스테이션 내의 배터리를 충전할 수
없는 것 같습니다
스테이션은 청소기의 배터리를 우선적으로
충전합니다.
청소기의 배터리가 완전히 충전될 때까지 기다린 다음 스테이션에서
충전을 시작합니다.
배터리를 교환하여 대체 배터리의 우선순위를 지정합니다.
스틱 장치를 빈 스테이션에서
충전할 수 없음
스틱 장치를 빈 스테이션에 제대로 꽂지
않았습니다. 암수 접촉판이 서로 닿지
않았습니다
스틱 장치를 아래로 살짝 밀어 넣으세요. 장치를 살짝 돌리면 HU
디스플레이에 충전 표시가 나타납니다
걸레가 충분히 습기가 없어
얼룩이나 먼지를 효과적으로
제거할 수 없습니다
물방울로는 얼룩이나 먼지를 효과적으로
제거하기에 충분하지 않습니다.
스프레이 기능을 사용하여 얼룩에 직접 물을 뿌립니다. 속도 버튼을 길게
눌러 최대 5초 동안 분사를 활성화합니다.
물걸레 노즐에서 물이 떨어지지
않습니다
물 탱크가 비어 있습니다. 물 탱크에 물을 넣습니다.
물 주입구가 큰 물체로 막혔습니다. 물 주입구를 검사하여 물 탱크에 깨끗한 물만 주입되는지 확인합니다.
내부 호스에 공기가 있음
처음에는 분사 기능을 사용합니다. 속도 버튼을 길게 눌러 최대 5초 동안
분사를 활성화합니다
노즐에 설치한 후 젖은 노즐
탱크에서 물이 새어 나옵니다
물 탱크가 완전히 밀봉되지 않았습니다.
젖은 노즐에 다시 설치하기 전에 주입구가 제대로 밀봉되었는지
확인합니다.
성능 저하
긴 머리카락을 여러 번 청소하다 보니
먼지통 내부의 금속망에 머리카락이 엉키게
되었습니다.
금속망을 분리하고 엉킨 머리카락을 수동으로 제거합니다.
장시간 사용 후 머리카락과 이물질이
먼지통 입구 주위에 쌓였고 필터가 미세
먼지로 막혔습니다.
머리카락/이물질을 수동으로 제거하고 지침에 따라 필터를 세척하거나
교체합니다. 가득 찼을 경우 새 S-bag을 사용합니다.
먼지통 안의 먼지/머리카락을
깨끗이 청소할 수 없습니다
S-bag이 가득 찼거나, 먼지통이
과부하되어 내용물이 표시된 최대 수준에
도달하거나 초과했습니다.
1. 먼지통을 더 자주 청소하고 호스로 먼지통을 청소합니다.
2. S-bag이 거의 가득 찼다면 최적의 기능을 유지하기 위해 새것으로
교체합니다.
3.효과적인 청소를 위해 필터(S-bag 아래 위치)를 청소하거나
교체합니다.
먼지통의 하단 뚜껑이 제대로
열리거나 닫히지 않았습니다
1. 작은 금속 조각이 자석 주위에
끼었습니다.
2. 비우기 주기가 끝나기 전에 본체를
비우기 스테이션에서 들어 올렸습니다.
1. 자석 주위의 금속 조각을 제거하고 해당 부분을 깨끗이 청소합니다.
2. 비우기 주기가 끝난 후 본체를 비우기 스테이션에서 들어 올려야
합니다.
긴 머리카락이 먼지통의 하단
뚜껑과 먼지통 아래에 걸렸습니다
긴 머리카락이 먼지통 안의 금속망에 엉켜
있습니다.
엉킨 머리카락을 자르거나 엉킨 머리카락을 수동으로 제거합니다.
진공 청소 중 비우기 스테이션의
탄성 호스가 흡입구에서
분리됩니다
호스가 흡입구에 제대로 삽입되지
않았습니다.
호스를 단단히 삽입하여 흡입구에 단단히 연결되도록 해야 합니다.
노즐이 (주로 카펫 위에서)
자동으로 멈춤
과전류/과열 차단 기능이 작동했습니다(특히
카펫 위에서 몇 분 동안 작동한 후)
1. 몇 분간 휴식을 취하고 노즐 모터가 식을 때까지 기다리세요
2. 카펫이 너무 두껍거나 털이 너무 길면 속도를 낮게 설정해 보세요
먼지통 내부의 금속 메시에서
스커트가 잘 분리되지 않음
금속 메시와 하단 스커트 부분이 스냅
후크로 단단히 고정되어 있어 성능이
향상되었습니다
스커트를 약간 당겨 옆으로 구부린 후 빼내세요
문제 해결
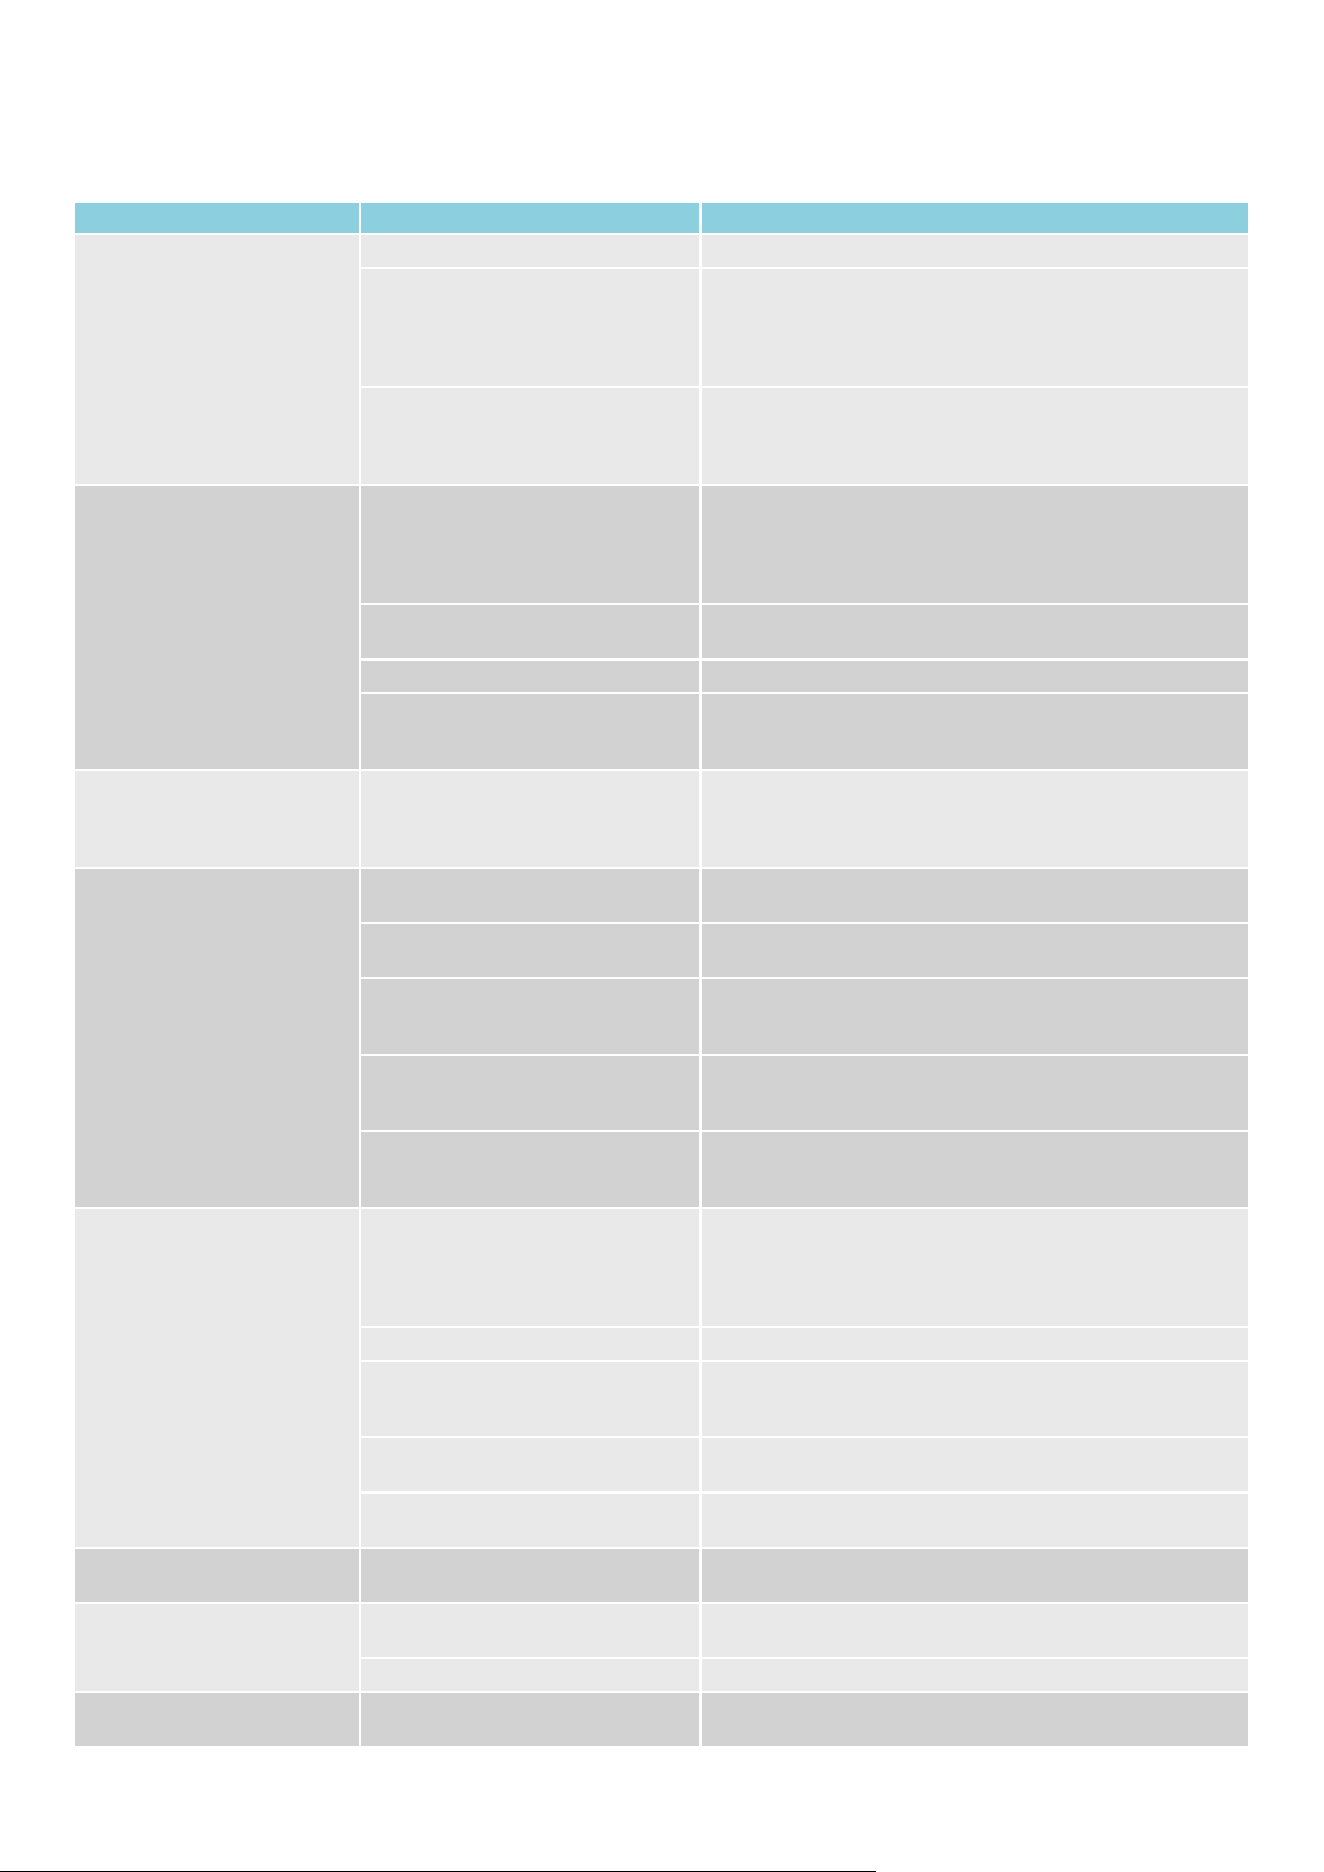
한국어
일반적 문제점 가능한 원인 해결책
제품이 멈추거나 시작되지
않습니다
배터리가 방전되었습니다. 청소기를 충전합니다.
물/액체가 제품에 빨려 들어갔습니다.
제품 사용을 중단하고 필터를 꺼내 48시간 동안 말립니다.
제품을 바닥 스탠드에 두지 마십시오.
48시간 후에도 제품이 여전히 작동하지 않으면 공인 Electrolux 서비스
센터에 문의하십시오.
참고: 물이나 기타 액체로 인한 모터 손상은 보증 대상이 아닙니다.
청소기가 우발적으로 바닥에 떨어졌습니다
(제품에 셀프 스탠드 기능이 없음에
유의하십시오).
1. 기기를 사용하는 동안 핸드 유닛을 단단히 잡습니다
2. 핸드 유닛을 벽이나 기타 거치대에 단단히 올려놓았다가 손에서
놓습니다
3. 기기를 사용하지 않을 때는 항상 충전 스탠드에 다시 놓습니다.
흡입력 손실
노즐이 예상한 대로 먼지나 이물질을
빨아들이지 않습니다.
각 바닥 유형에 맞는 올바른 노즐을 사용합니다.
일부 모델에는 PowerPro Multi-surface 노즐 및/또는 PowerPro
Hard Floor 노즐이 포함되어 있을 수 있습니다. PowerPro Hard Floor
노즐은 두꺼운 카펫에는 권장되지 않지만 단단한 바닥에는 이상적입니다.
PowerPro Multi-surface 노즐은 모든 바닥에 적합합니다.
노즐 브러시 또는 롤러가 머리카락과 먼지로
막혔습니다.
노즐을 분리하고 사용 설명서에 따라 브러시 롤을 청소합니다.
튜브 및/또는 노즐 목이 막혔습니다. 노즐/튜브에 막힘이 발생했는지 확인합니다.
사전 필터 및/또는 미세 먼지 필터가
막혔거나 더럽습니다. 먼지통이 가득
찼습니다.
먼지통을 비우고 사용 설명서에 따라 필터를 세척합니다. 필요한 경우
www.electrolux.com 에서 새 필터를 구입하여 교체합니다.
브러시 롤이 회전하지 않습니다
진공 청소기가 켜져 있는 동안 사용자가
이전 노즐을 분리하고 다른 노즐로
교체하면 브러시 롤이 멈춥니다. 이것은
보호 모드입니다.
청소기를 끄고 ‘ON’ 버튼을 다시 눌러 브러시 롤 회전을 활성화합니다.
제품이 충전되지 않음/핸드 유닛
디스플레이에 충전 중이 아님으로
표시됨
제품이 충전 스탠드에 올바르게 놓이지
않았습니다.
진공 청소기 뒷면의 접촉판이 충전 스탠드의 접촉판과 접촉했는지
확인합니다.
충전기 플러그가 꽂혀 있지 않습니다.
어댑터 플러그가 핸드 유닛 스탠드 소켓에 연결되어 있는지 그리고 충전
어댑터가 벽면 소켓에 꽂혀 있는지 확인합니다.
실내 온도가 5°C 미만이거나 35°C를
초과하면 배터리와 전자 제품을 보호하기
위해 충전이 이루어지지 않습니다.
실내 온도가 5~35°C 사이인 실내에 제품을 보관/충전합니다.
배터리 팩이 완전히 충전되면 핸드 유닛
디스플레이가 어둡고 모든 LED가
꺼집니다.
충전 스탠드에서 청소기를 꺼낸 후 전원 버튼이나 +/- 속도 버튼을 눌러
배터리 잔량 표시를 확인합니다. 청소기를 충전 스탠드에 다시 넣으세요.
배터리 팩 온도가 너무 높음(~45°C)/낮음
(~5°C)일 경우, 아직 충전이 시작되지
않습니다.
제품을 주변 온도 조건에 두고 온도가 식을 때까지/올라갈 때까지
기다립니다.
충전 스탠드에 충전 표시가
나타나지 않음
핸드 유닛 배터리 팩이 완전히 충전되지
않았으며 핸드 유닛 배터리 팩이 완전히
충전될 때까지(최대 2.5시간) 충전
스탠드의 추가 배터리 팩 충전이 시작되지
않습니다.
이 문제는 충전 스탠드 바닥판에서 충전이 가능한 제품에서만 발생할 수
있습니다.
핸드 유닛의 배터리 팩이 먼저 충전을 시작한 후 충전 스탠드 바닥의
배터리 팩이 충전을 시작하고 LED 표시등이 켜지기 시작합니다.
배터리 팩이 완전히 삽입되지 않음 배터리 팩을 꺼냈다가 다시 삽입합니다
배터리 팩 온도가 너무 높음(~45 °C)/낮음
(~5 °C)일 경우, 아직 충전이 시작되지
않습니다
기기를 주변 온도 조건에 두고 온도가 식을 때까지/올라갈 때까지
기다립니다.
배터리 팩이 파손되어 교체해야 합니다.
Electrolux 서비스 센터에 문의합니다. 배터리 팩을 교체하고 새 배터리
팩을 구매해야 하는 경우(www.electrolux.com)
이 제품에 잘못된 배터리 팩이
사용되었습니다.
올바른 배터리 팩을 사용하고 있는지 확인합니다.
제품 디스플레이에 막힘 표시가
나타납니다
필터 청소가 필요하다는 막힘 표시 사용 설명서에 따라 필터를 청소/교체합니다.
핸드 유닛 디스플레이에 경고
삼각형이 표시됩니다
제품 모터 또는 배터리 팩이 과열되었을 수
있습니다.
제품을 쉬게 하고 열을 식힙니다.
노즐이나 튜브가 막혔을 수 있습니다. 노즐/튜브에 막힘이 발생했는지 점검합니다.
물걸레 노즐이 흔들리거나
바닥에서 뜁니다
물걸레 패드가 회전 디스크 중앙에
부착되지 않았습니다.
회전 디스크 중앙에 패드를 다시 부착합니다.
한국어
일반적 문제점 가능한 원인 해결책
충전하는 데 4.5시간 이상 걸립니다 실내 온도가 35°C를 초과했습니다.
온도가 높으면 충전 시간이 길어지지만 이는 정상적인 현상이므로 제품을
일반 실내 온도에서 보관/충전합니다.
바닥 노즐의 헤드라이트가
작동하지 않습니다
브러시 롤이 걸렸습니다. 브러시 롤을 분리하고 머리카락과 섬유를 제거합니다.
환경 고려사항
기호 가 표시된 재료는 재활용하십시오. 포 장재는 해당 용기에 넣어 재활용하십시오. 전기 제품 및 전자 제품 폐기물을 재활용하여 환 경과
인류 건강을 보호하십시오.
가정용 폐기 물 기호
가 표시된 제품을 폐기하지 마십시오. 가까운 재활용 시설에 제품을 보내거나 가까운 시청에 문의하십시오.