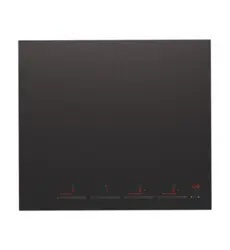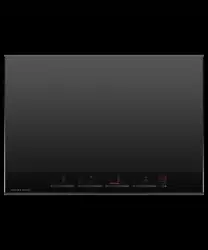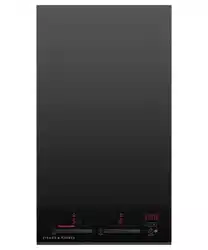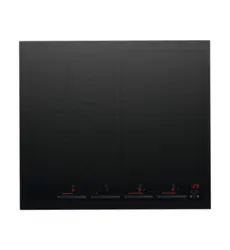


INDUCTION COOKTOP
CI905ZZDTB5, CI905ZZDTG5, CI905ZDTB5, CI804ZZDTB5,
CI804ZZDTG5, CI804ZDTB5, CI604ZZDTB5, CI604ZZDTG5, CI604ZDTB5,
CI604ZDTBP5, CI302ZDTB5.
3
GET TO KNOW YOUR APPLIANCE
How to get the best results from your cooktop
z
Check that your cookware material is suitable for the cooktop.
z
Ensure that you use the base of your finger not the tip when
operating touch controls.
z
Do not place metal objects on the top of the control panel when
the cooktop is on.
z
Carry out regular cleaning of the cooktop using a soft cloth.
AA Market cooktop
USCA Market cooktop
AA Market cooktop
USCA Market cooktop
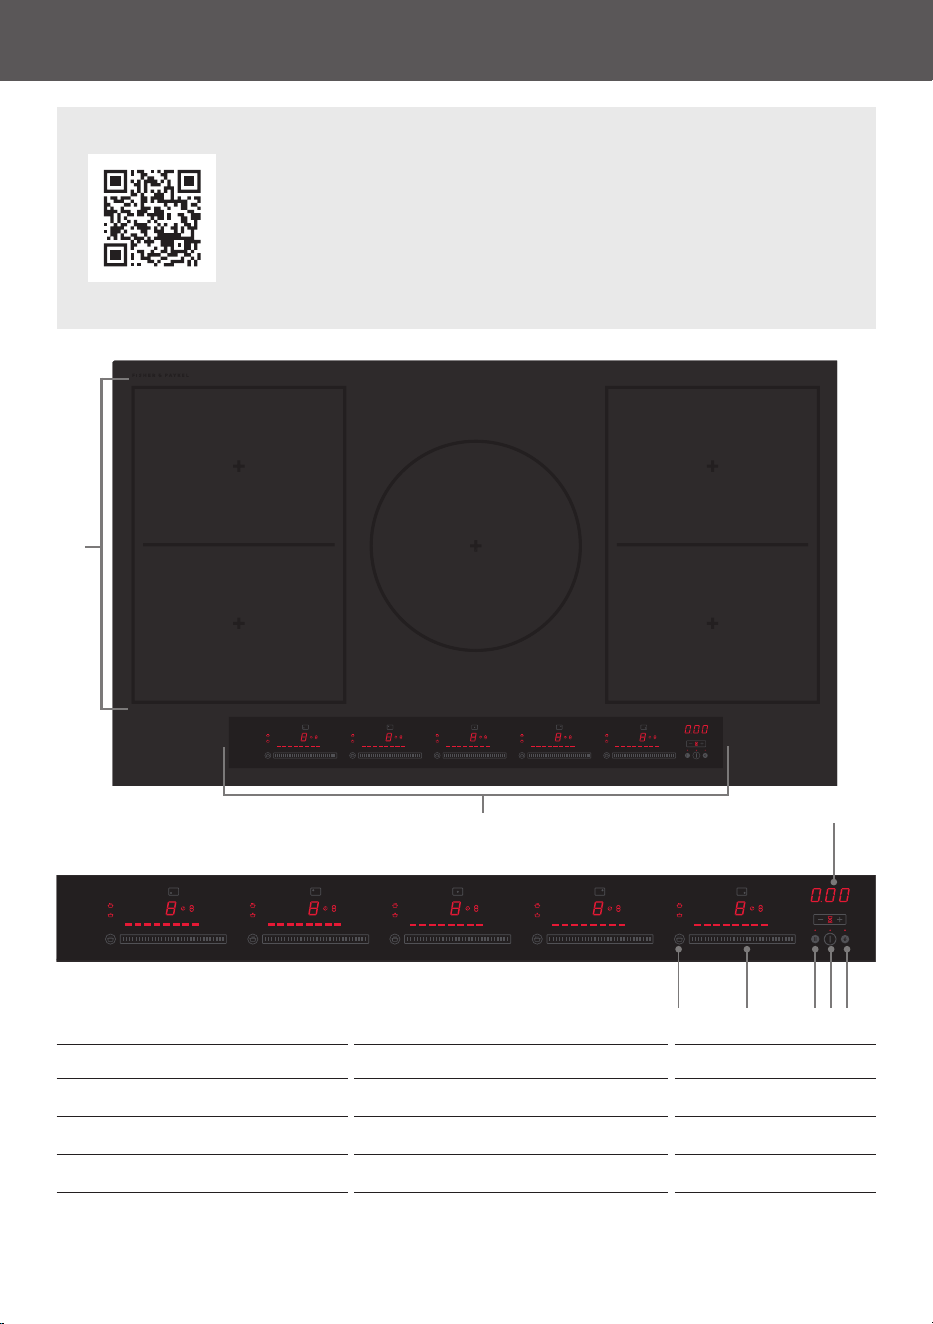
FEATURES
1 Cook zones* 4 Cook zone power slider 7 Key Lock
2 Control panel 5 Pause & recall** 8 Timer
3 Gentle heat 6 Power on/o
*Cook Zones layout varies depending on model. Refer to 'Get to know your appliance'
**Recall function allows settings to be restored if the User Interface is accidentally switched o. Refer to
'Using the cooktop'
Model: CI905ZZDTB5
1
2
67
8
53 4
4
GET TO KNOW YOUR APPLIANCE
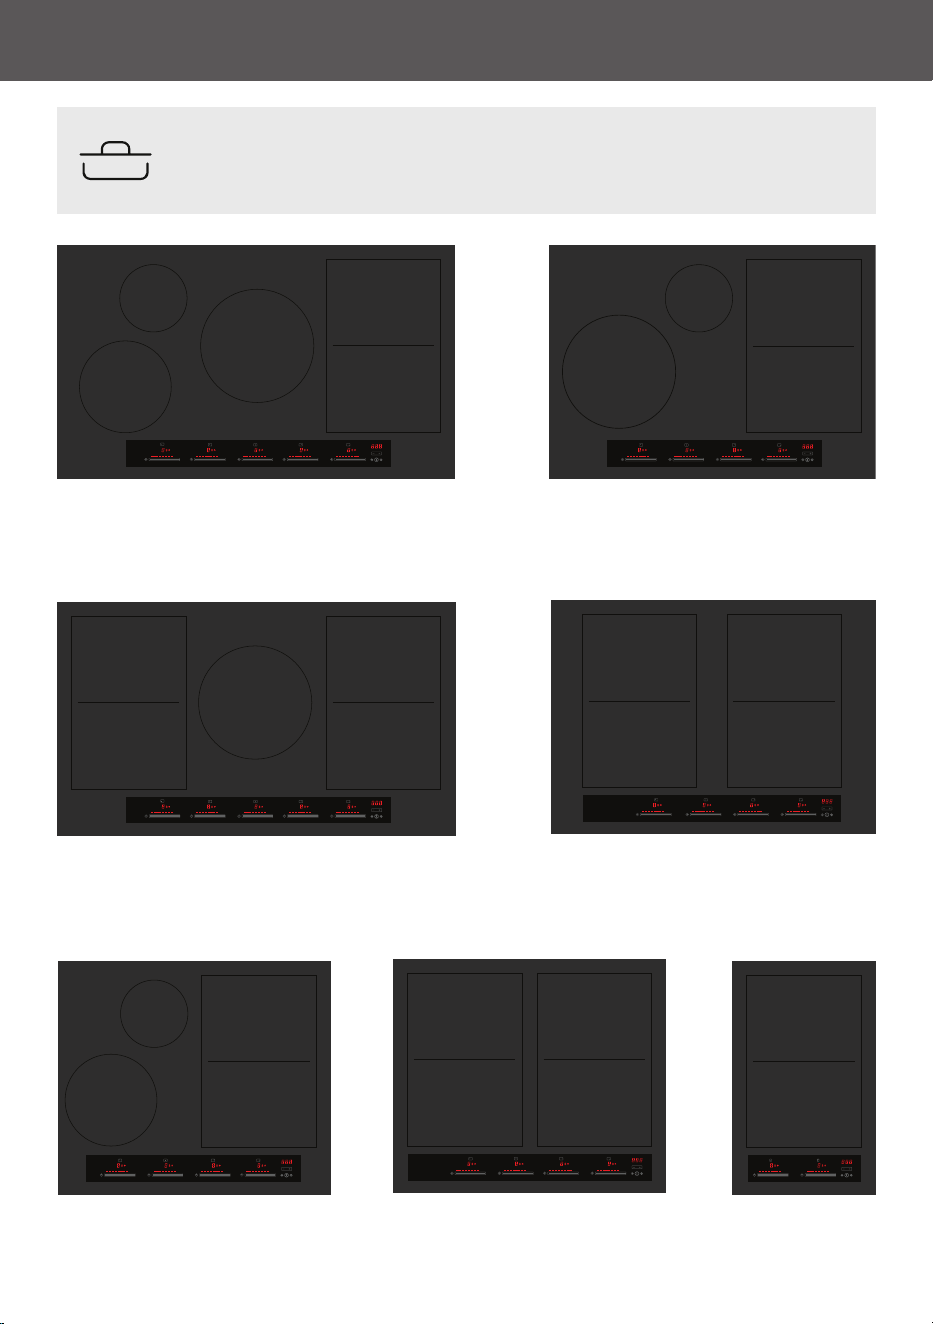
Different cooktop models have varying cook zone configurations to suit
your desired cooking.
CI905ZDTB5
CI905ZZDTB5, CI905ZZDTG5
CI804ZDTB5
CI804ZZDTB5, CI804ZZDTG5
CI604ZZDTB5, CI604ZZDTG5
CI604ZDTB5, CI604ZDTBP5 CI302ZDTB5
1
1
1 1 1
11
1
1
1
1
1
1
1 1 1
11
1
1
2
2
2
4
4
4
3
3
5
GET TO KNOW YOUR APPLIANCE
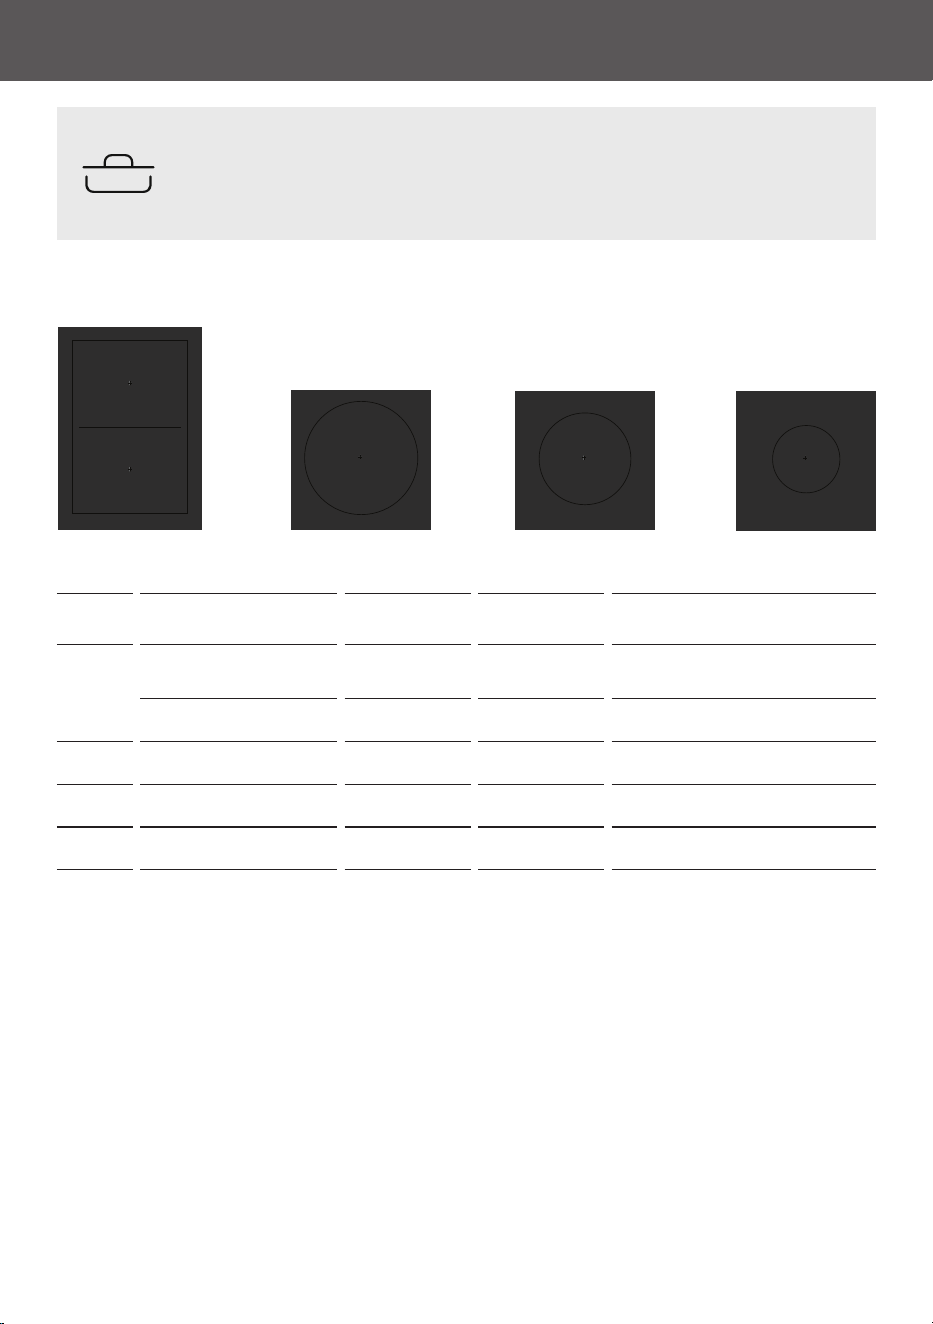
Different cook zones have different size, power and Powerboost functions
to help you choose the best cookware and cook zone for your desired
cook.
ZONE ZONE DIAMETER POWER POWER BOOST
RECOMMENDED MINIMUM PAN
SIZE
1
Smartzone:
210x190mm
2100 W 3000 W* 120mm
Bridged Smartzone 3000 W - 250mm
2
250mm 2300 W 3000 W* 220mm
3
200mm 2300 W 3000 W* 180mm
4
145mm 1400 W 1850 W* 120mm
1
2 3 4
* Maximum output when set on Powerboost
6
GET TO KNOW YOUR APPLIANCE
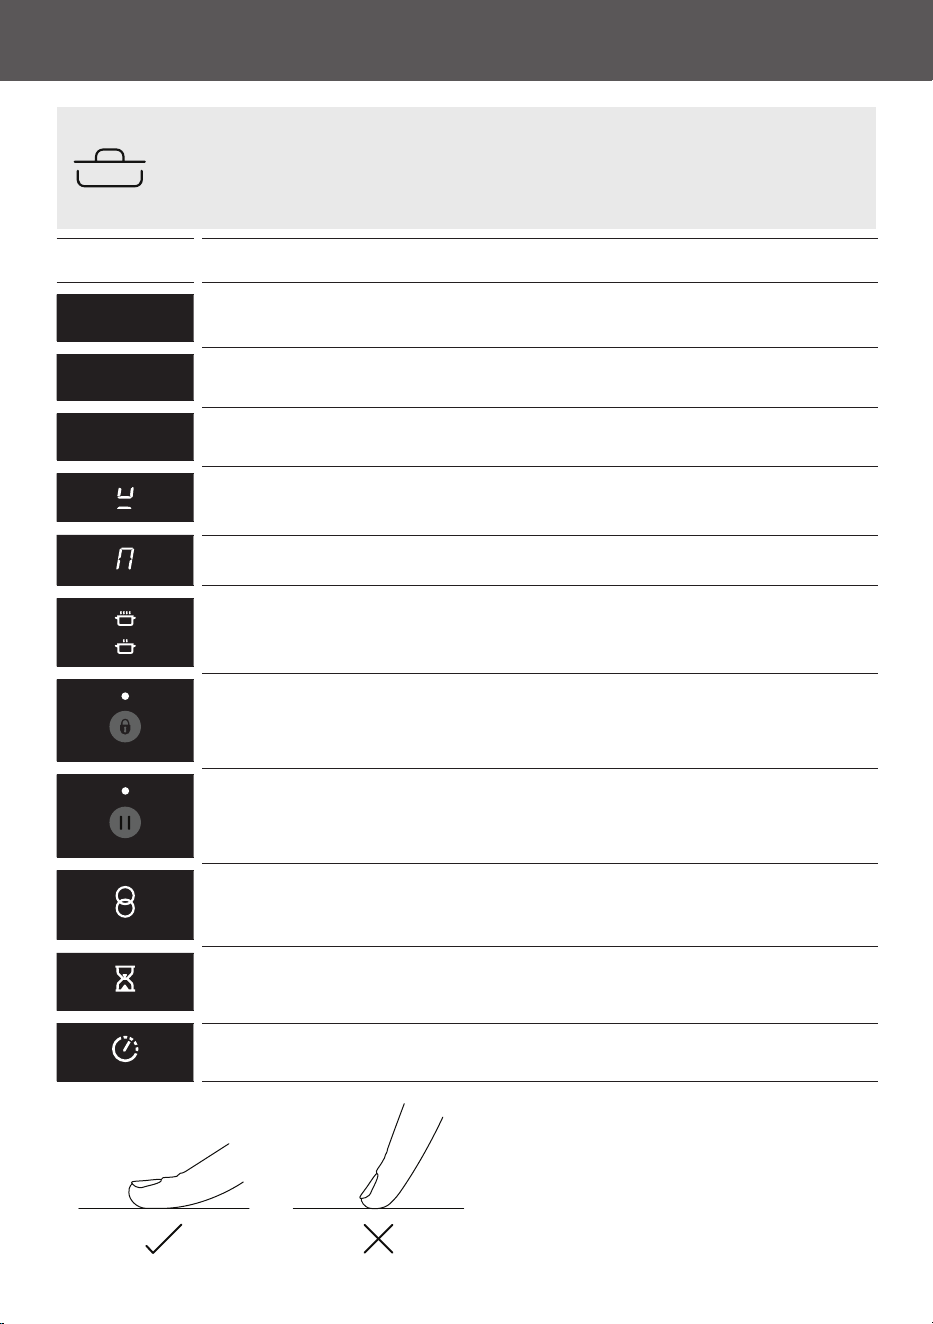
The cooktop will display different numbers and icons when cooktop
functions have been selected.
Zone display Description
Power levels
1-9
Power boost
p
Hot surface
H
Pan not detected/ Pan not suitable for induction.
Cookzone bridged
Gentle heat indicator
Locked
Paused
Bridged zone indicator
Minute minder indicator
Zone timer indicator
Using the touch controls
The controls respond to touch,
ensure you are using the ball
of your finger instead of the tip
when selecting operations.
7
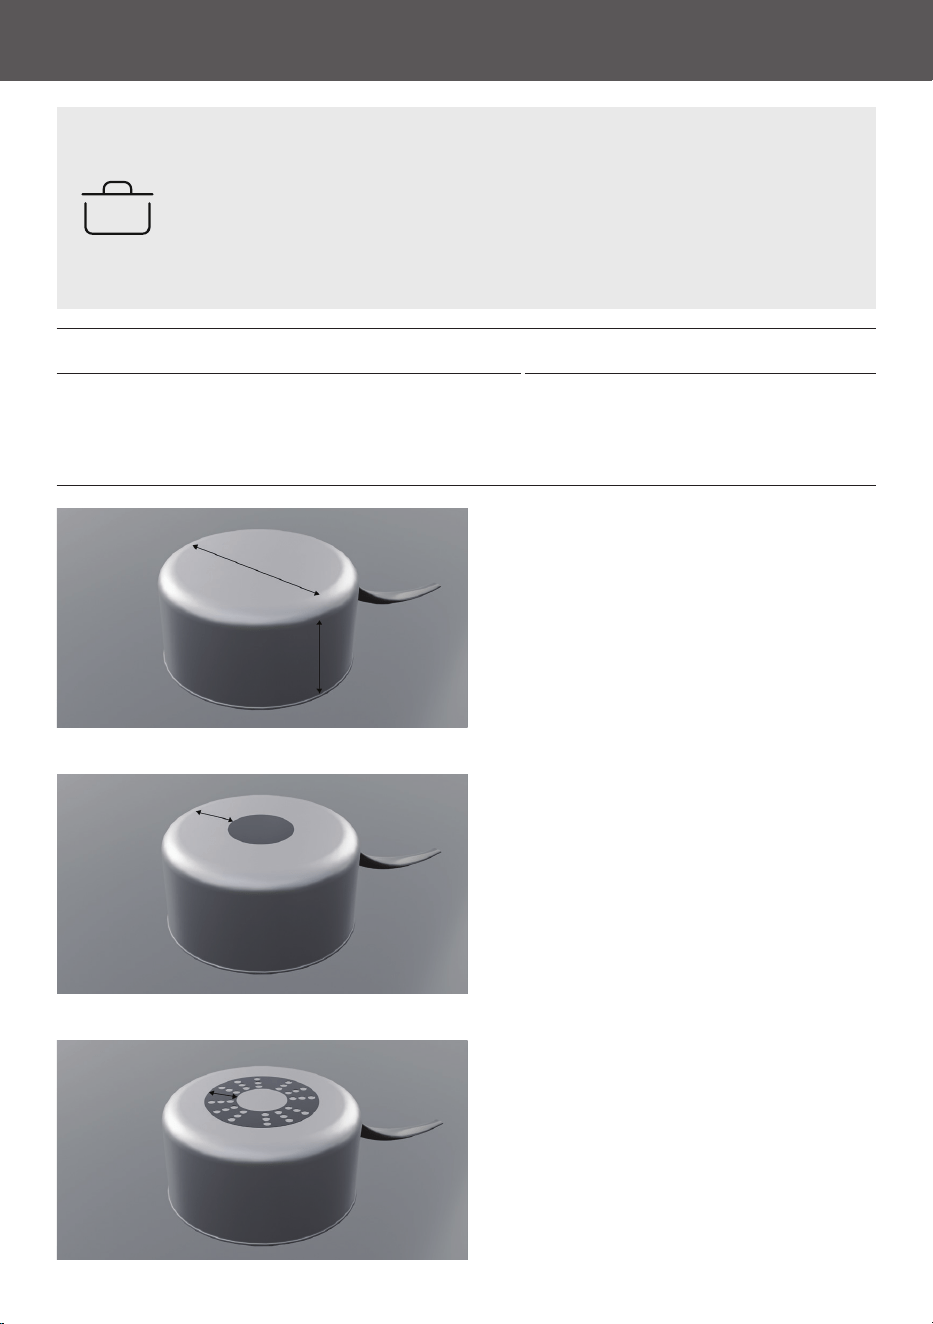
Use induction-compatible cookware with a smooth, flat base and similar
size to the cook zone to ensure optimal performance. If cookware is not
compatible or not detected, the cooktop will display the pan not detected
icon.
COOKWARE
SUITABLE COOKWARE MATERIALS
• Stainless steel
• Aluminium and cooper with magnetic base
• Carbon steel
• Cast iron
• Enamelled cast iron
• Enamelled steel
Quickest heating performance
High magnetic content
provides a consistent heating
area across the base and up
the sides of pan.
Average heating performance
Medium magnetic content
reduces the heating zone and
results in slower heating.
Slow heating performance
Limited magnetic content
results in very slow heating
performance.
8
USING THE COOKTOP
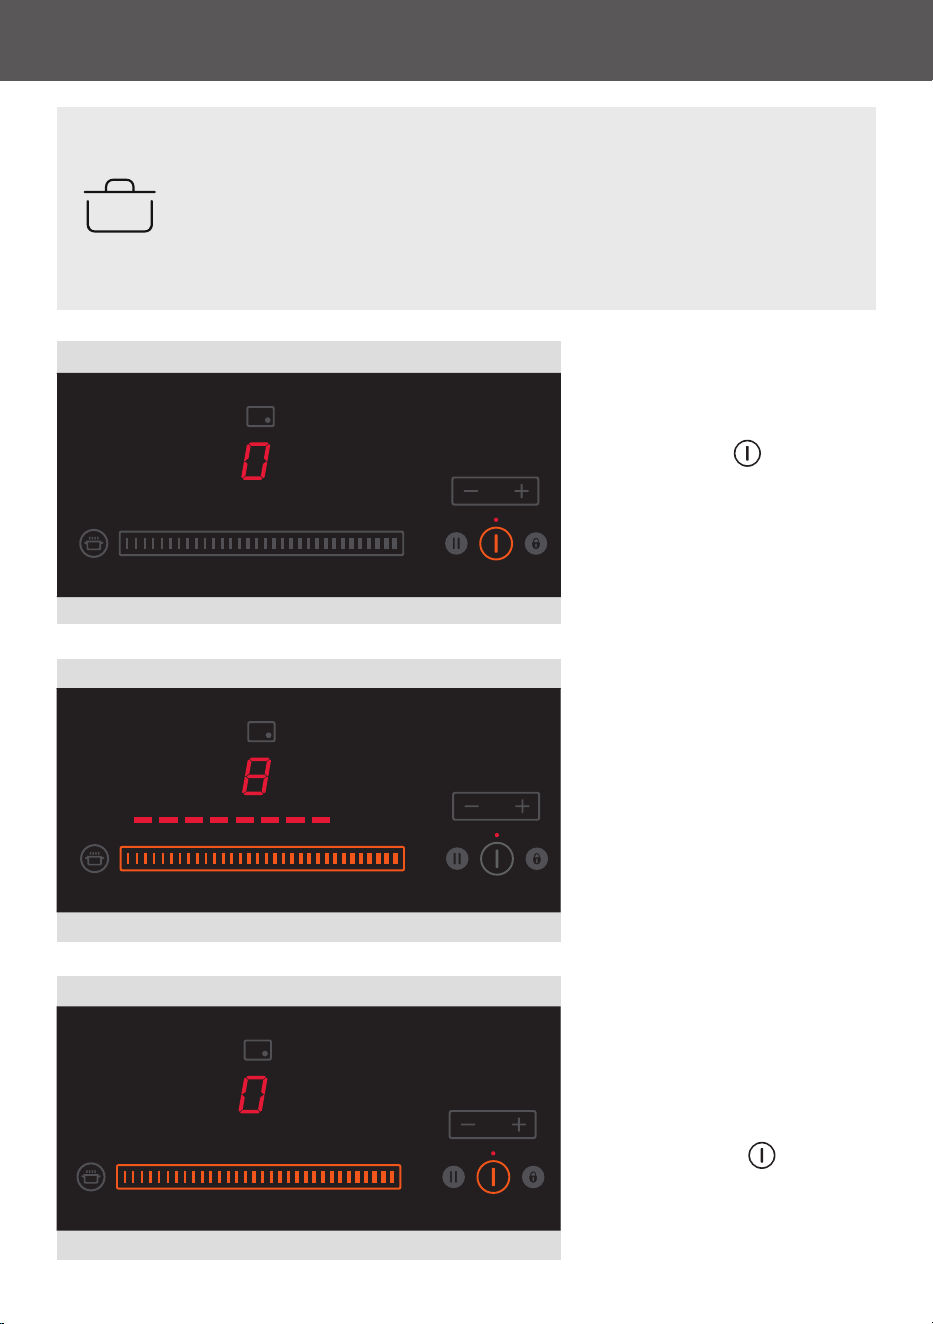
Turning cook zones on/off
1. Press
ON/OFF to turn the
cooktop on. Place cookware
on a cook zone, and select the
corresponding power slider on
the display.
2. Press on the slider and
slide finger along to select a
heat setting from 1-9 or p for
Powerboost.
3. Turn the cook zone off by
touching or sliding down to
0.
Turn the whole cooktop off by
touching
ON/OFF .
To start cooking
• Follow steps below to begin using your cooktop.
• After turning cooktop on, if a heat setting is not selected within 20
seconds, the cooktop will automatically turn off.
• Heat setting is able to be modified during cooking.
Using the cook top
Using the cook top
Using the cook top
9
USING THE COOKTOP
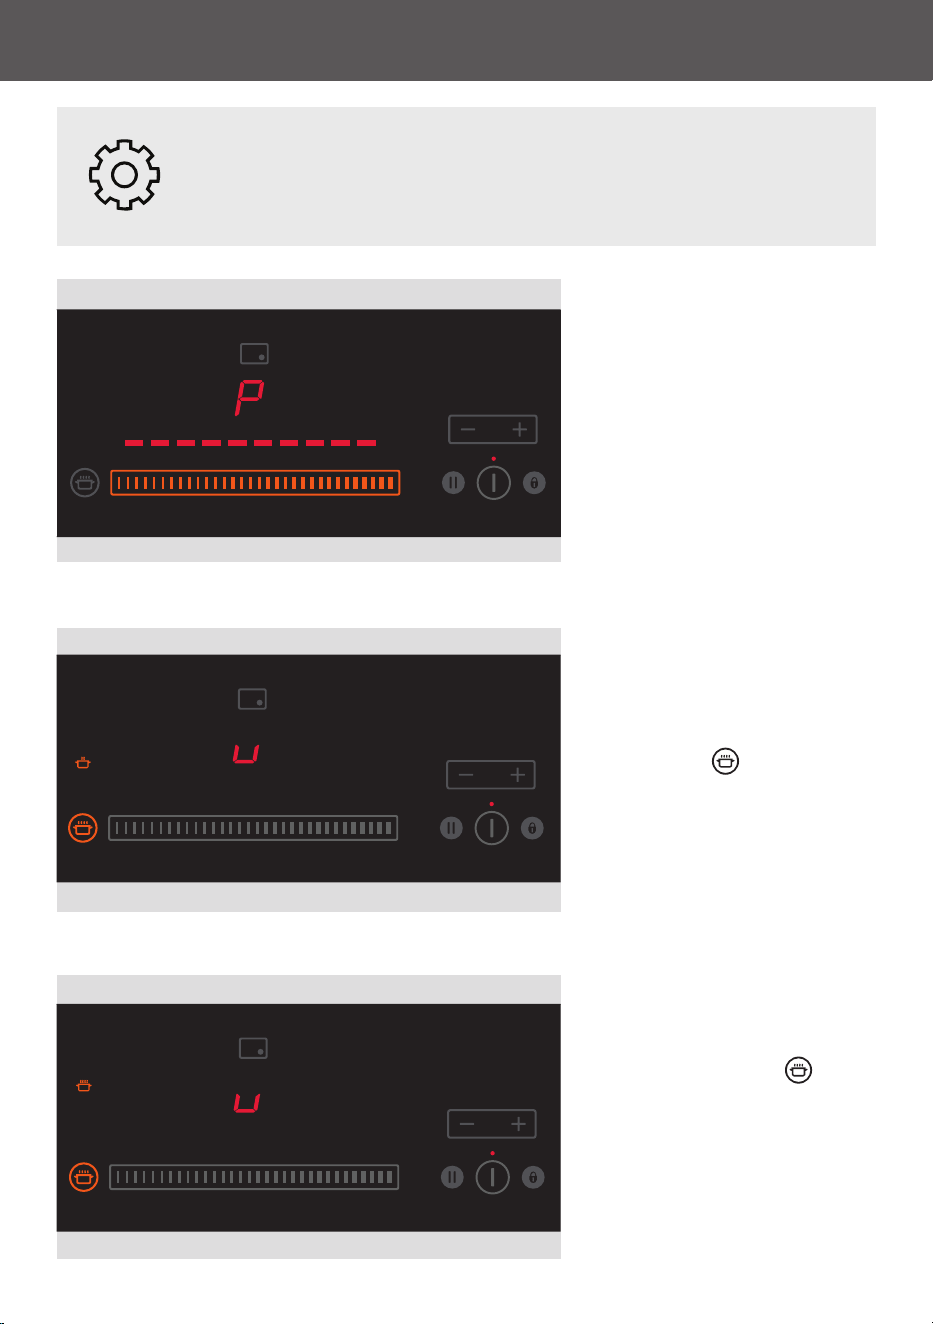
POWERBOOST
Use
POWERBOOST to cook
above maximum power for up
to 10 minutes.
Reverts to level 9 after 10
minutes.
Set the slider to maximum until
P shows on the display.
Reduce heat setting to turn
POWERBOOST off.
GENTLE HEAT
1. With product turned on press
GENTLE HEAT for a very low
heat setting.
Ideal for delicate cooking tasks
like melting butter or chocolate.
2. Press
GENTLE HEAT again
for medium heat setting.
Ideal for after cooking to keep
food warm at a low heat.
Press again to turn it off.
Cooktop settings.
The cooktop has different settings depending or your cooking needs.
They can be accessed from the control panel.
Using the cook top
Using the cook top
Using the cook top
10
USING THE COOKTOP
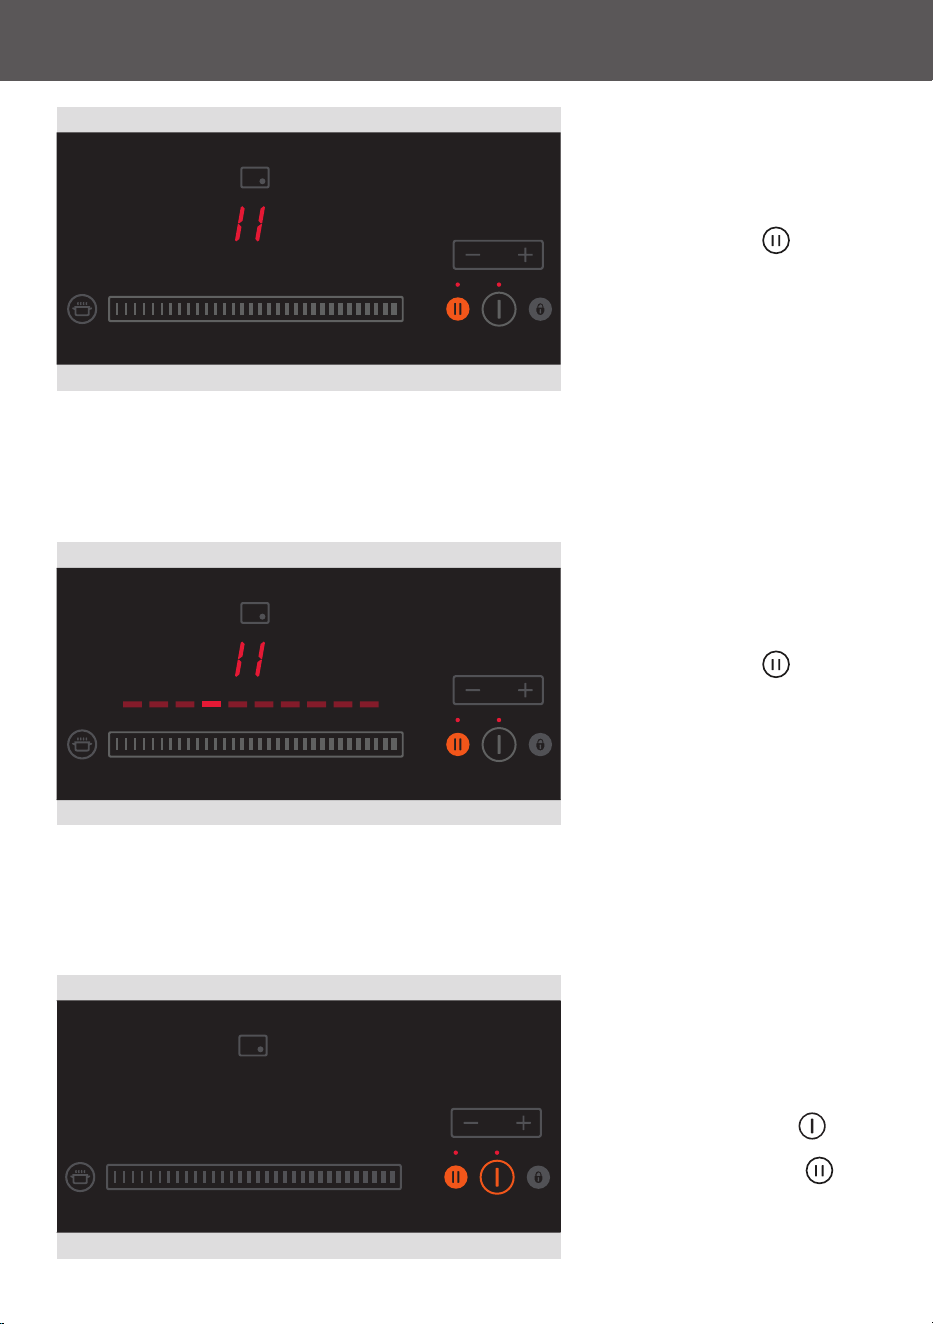
Recall function
Allows heat settings to be
restored if the control panel is
accidentally turned off.
Press and hold
ON/OFF to
turn control panel back on,
then press START/PAUSE
within 6 seconds to restore
previous settings.
Pausing cook zones
Press
START/PAUSE to pause
cooking on all cook zones at
once.
Unpausing cook zones
Press
START/PAUSE then
slide finger the entire length of
heat setting slider to unpause
cook zone.
11
USING THE COOKTOP
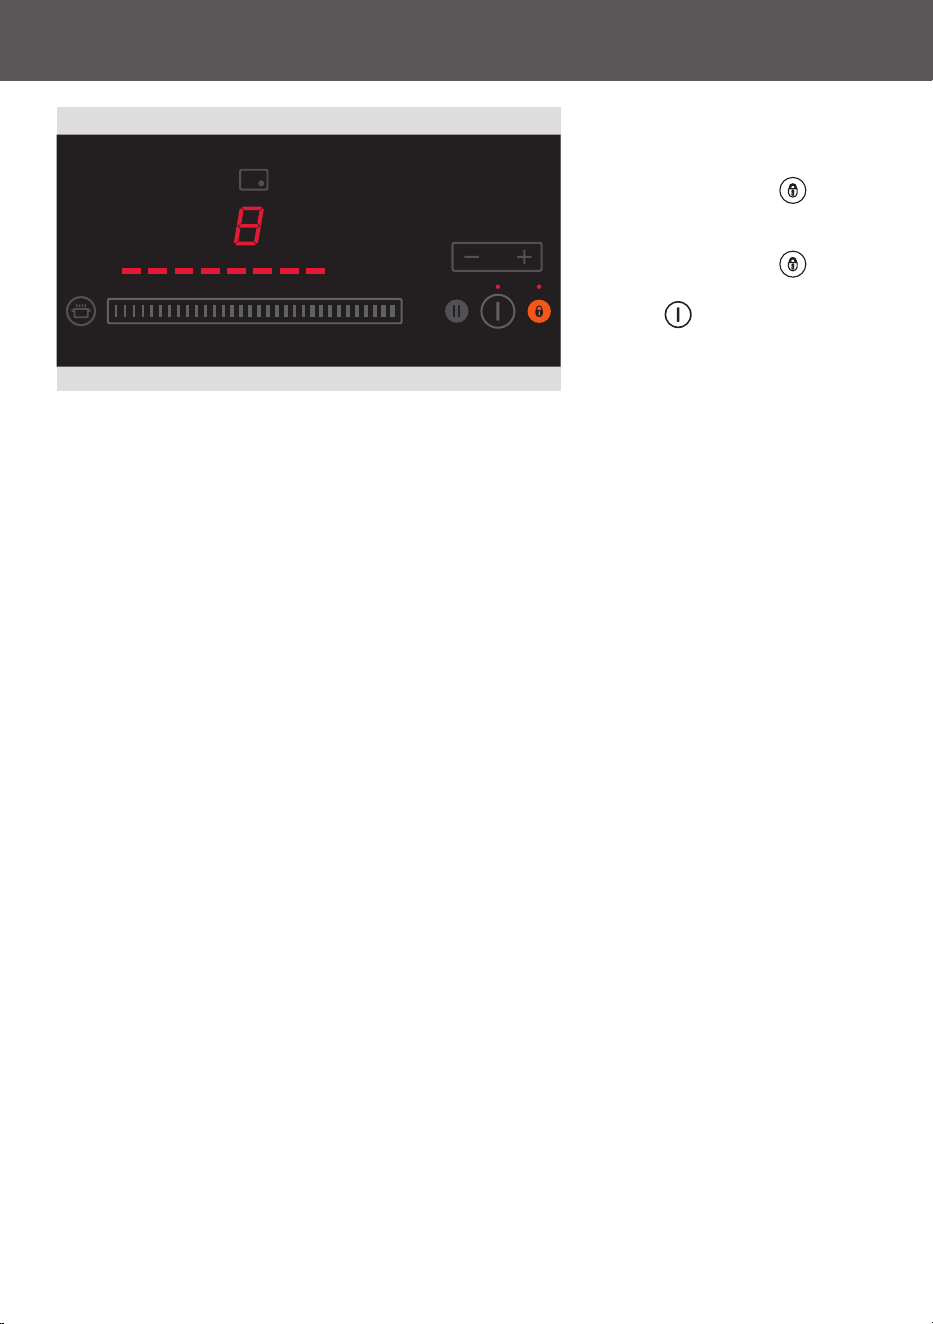
Locking the controls
Press and hold
LOCK for 3
seconds to lock the controls
and prevent accidental use.
Press and hold
LOCK for 3
seconds again to unlock.
ON/OFF remains available
while lock is on.
12
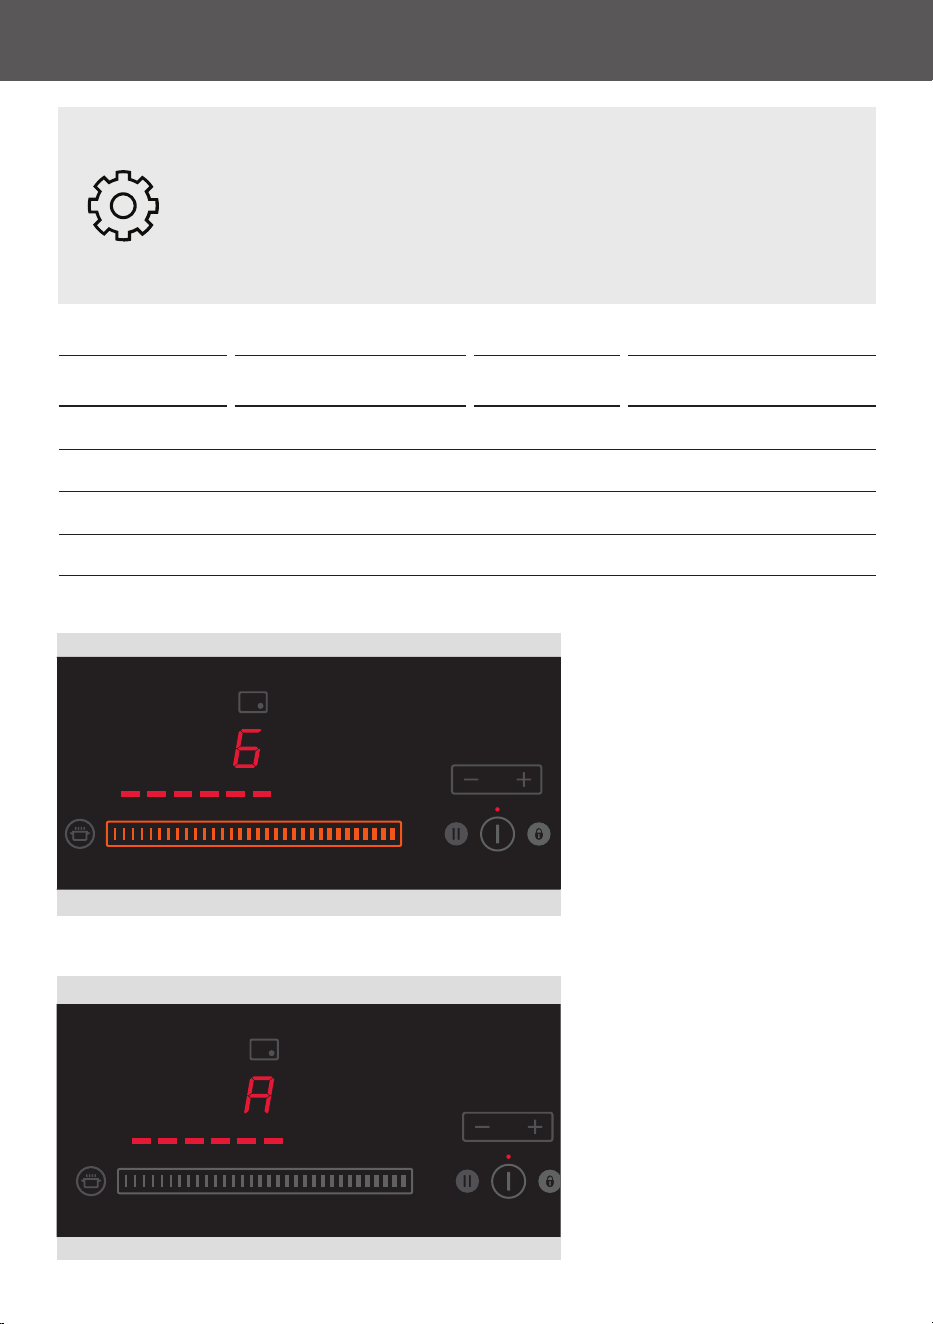
AUTO RAPIDHEAT
AUTO RAPIDHEAT
1. With cook top turned on,
touch and slide the setting
selector to the desired level of
reduced heat for the cooking
zone.
Keep your finger on the
selector.
2. Hold your finger on the
selector for 3 seconds until
the letter
A starts to flash
alternately with the selected
temperature.
Lift up your finger once setting
is complete.
Auto RapidHeat
Enables the cooking zone to heat up food or liquid quickly at the highest
settings and then reduce the temperature automatically to a pre-selected
heat setting. Rapid heating time varies based on the chosen heat setting.
The Auto RapidHeat and Powerboost features cannot be used together.
HEAT SETTING
APPROXIMATE TIME AT RAPID
HEAT
HEAT SETTING
APPROXIMATE TIME AT RAPID
HEAT
1
40 seconds
5
4 minutes
2
1 minute
6
7 minutes
3
2 minutes
7
2 minutes
4
3 minutes
8
3 minutes
13
AUTO RAPIDHEAT
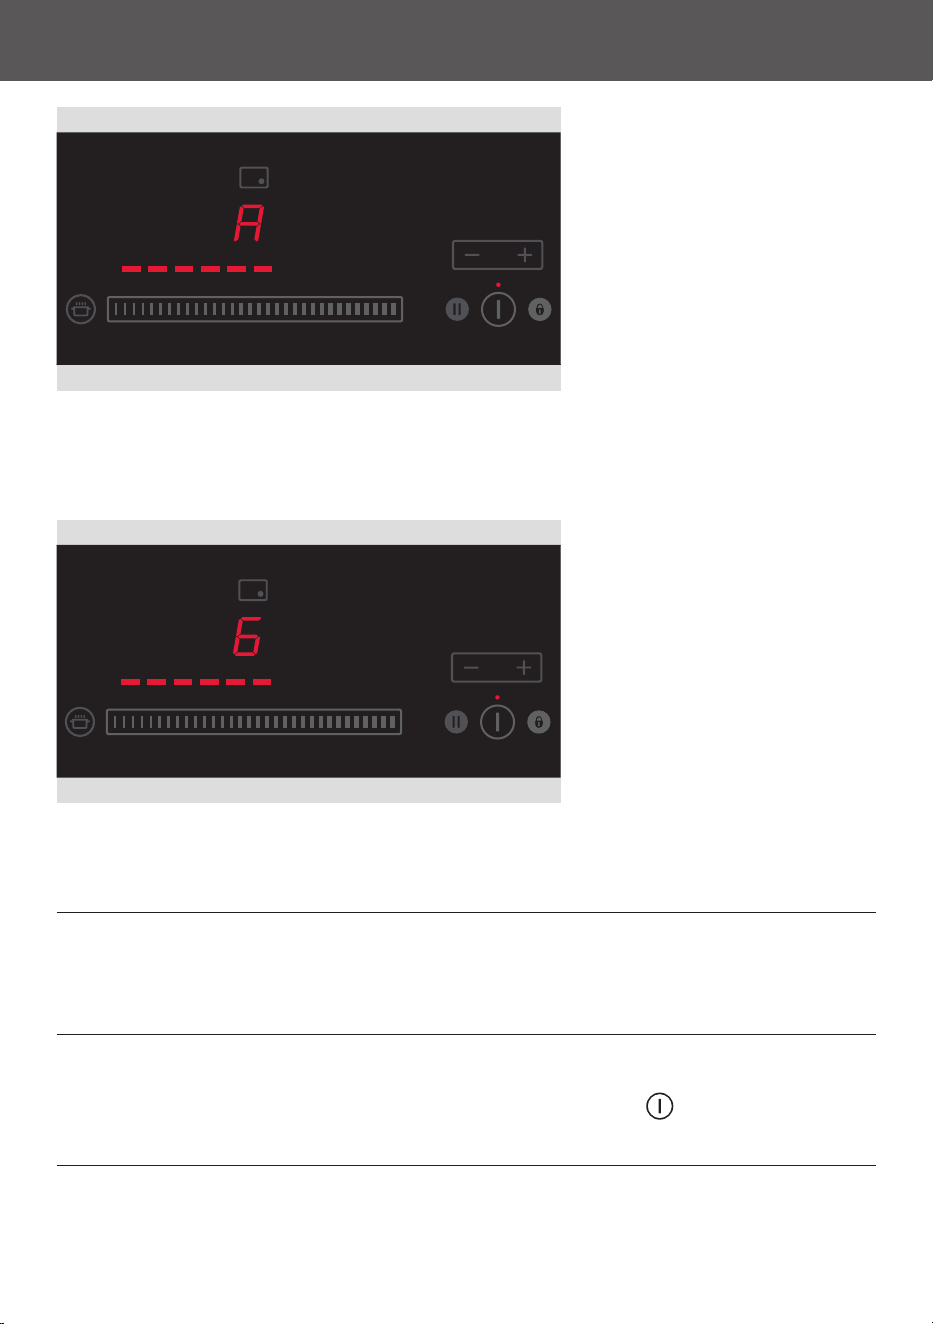
3. Initially, while the cooking
zone is at the highest setting,
A will flash alternately with
your selected lower setting.
The length of time at the
highest setting depends on the
selected lower heat setting.
4. Then, when the period of
highest setting is over,
A will
stop flashing and the cooking
zone will automatically reduce
the heat to your pre-selected
lower setting.
If you would like a lower or higher heat setting than you originally selected, simply slide to
the new setting and hold until the A starts flashing. Alternatively, wait until A stops flash-
ing and then modify the heat setting.
To quit Auto RapidHeat setting while
A is flashing.
Slide the setting selector to a new setting, to
0, or press ON/OFF to turn the cooktop
off.
14
SMARTZONE
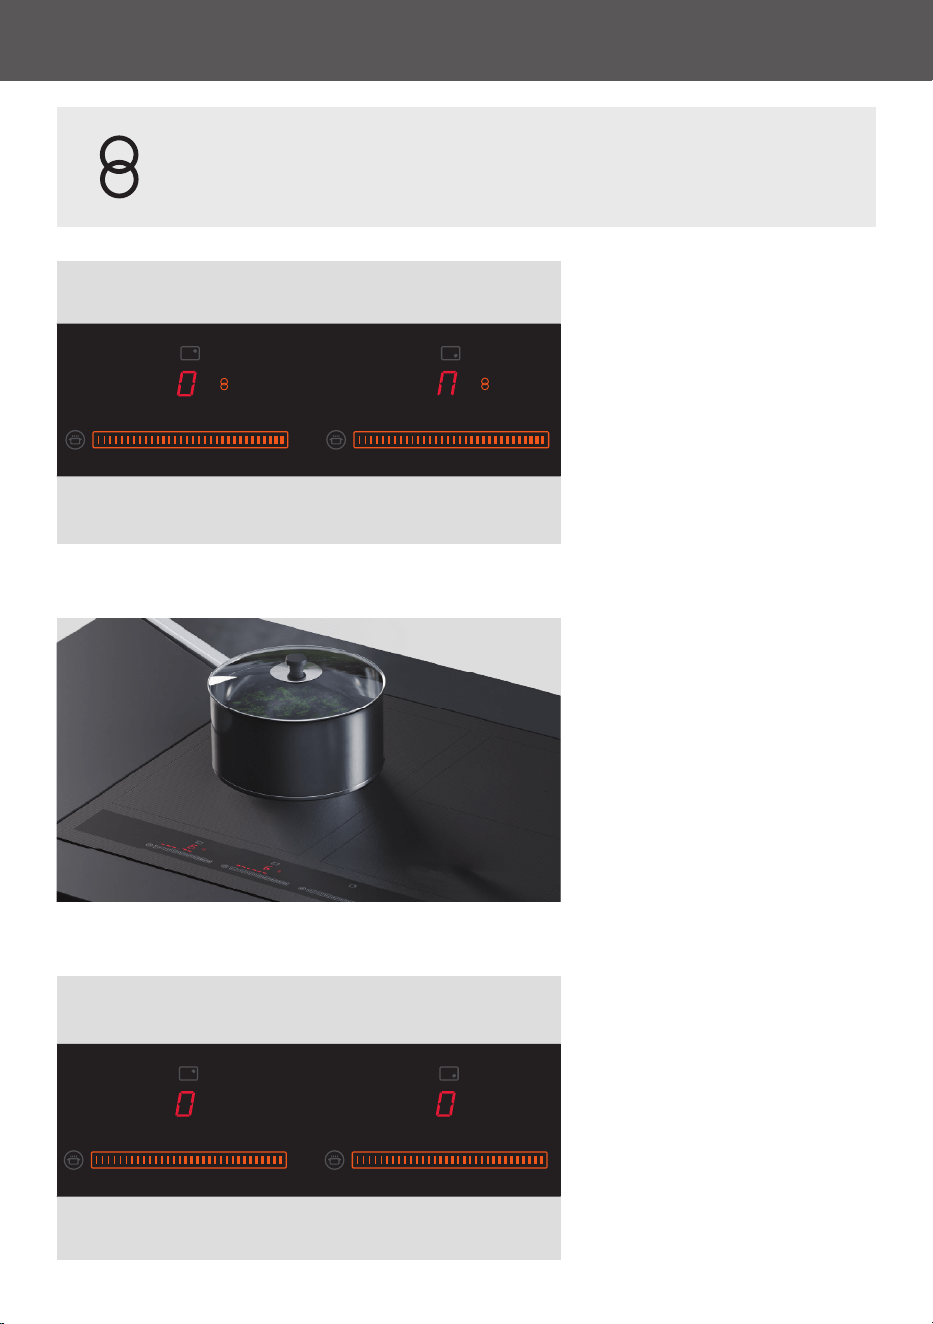
You can join front and rear SmartZones to create a large cook zone with
single temperature control. SmartZones must be set to 0 before bridging.
1. Touch the heat selectors
(anywhere) of both cooking
zones at the same time.
2. Place your cookware on the
bridged zone, and select a heat
setting from 1-9.
Ensure the cookware covers the
centre of both zones.
3. To unbridge, press and
hold the heat selectors of
both cooking zones until the
SmartZone indicator turns off.
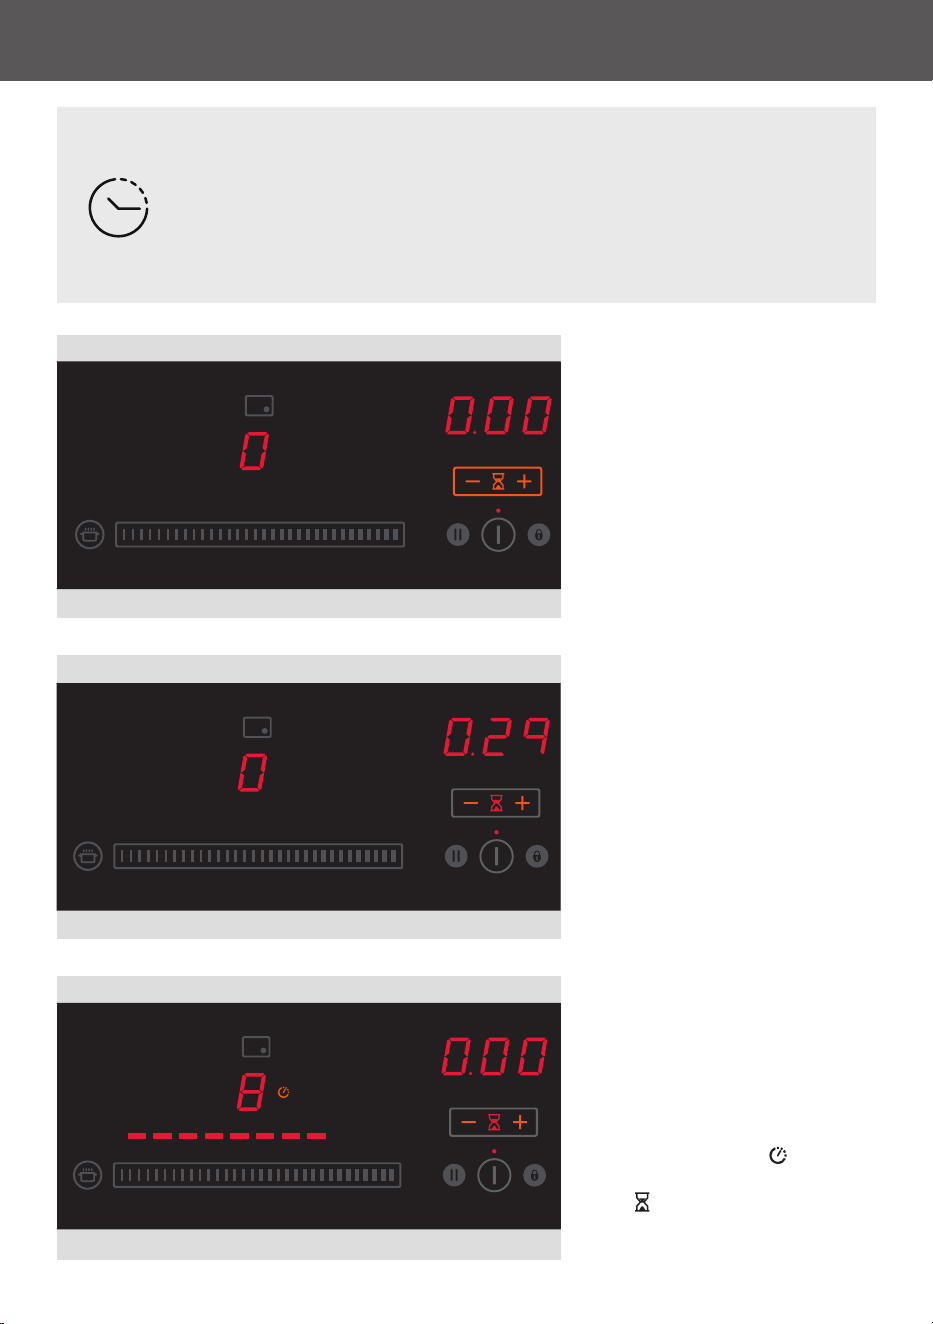
15
SETTING THE TIMERS
You can use the timer in two ways:
• As a minute minder, even when cooktop is not being used.
• Set individual timers for multiple cooking zones that are in use.
The timer can be set for up to 1 hour and 59 minutes. For settings over 10
minutes, the time is shown in hours and minutes.
Setting the minute minder
1. With the cooktop on, using
two fingers press and hold the
MINUS - and PLUS + at the
same time. The icon will glow
and the
0.00 will display.
2. Press PLUS
+ or MINUS - to
set the time. A few seconds
later the countdown will begin.
The cooktop turns off
automatically after a few
seconds, while the timer
continues to count down.
Setting minute minder while
using multiple cook zones.
1. Using two fingers repeatedly
tap MINUS - and PLUS + at the
same time to cycle through
the individual timers
for the
cooking zones until the egg
timer glows.
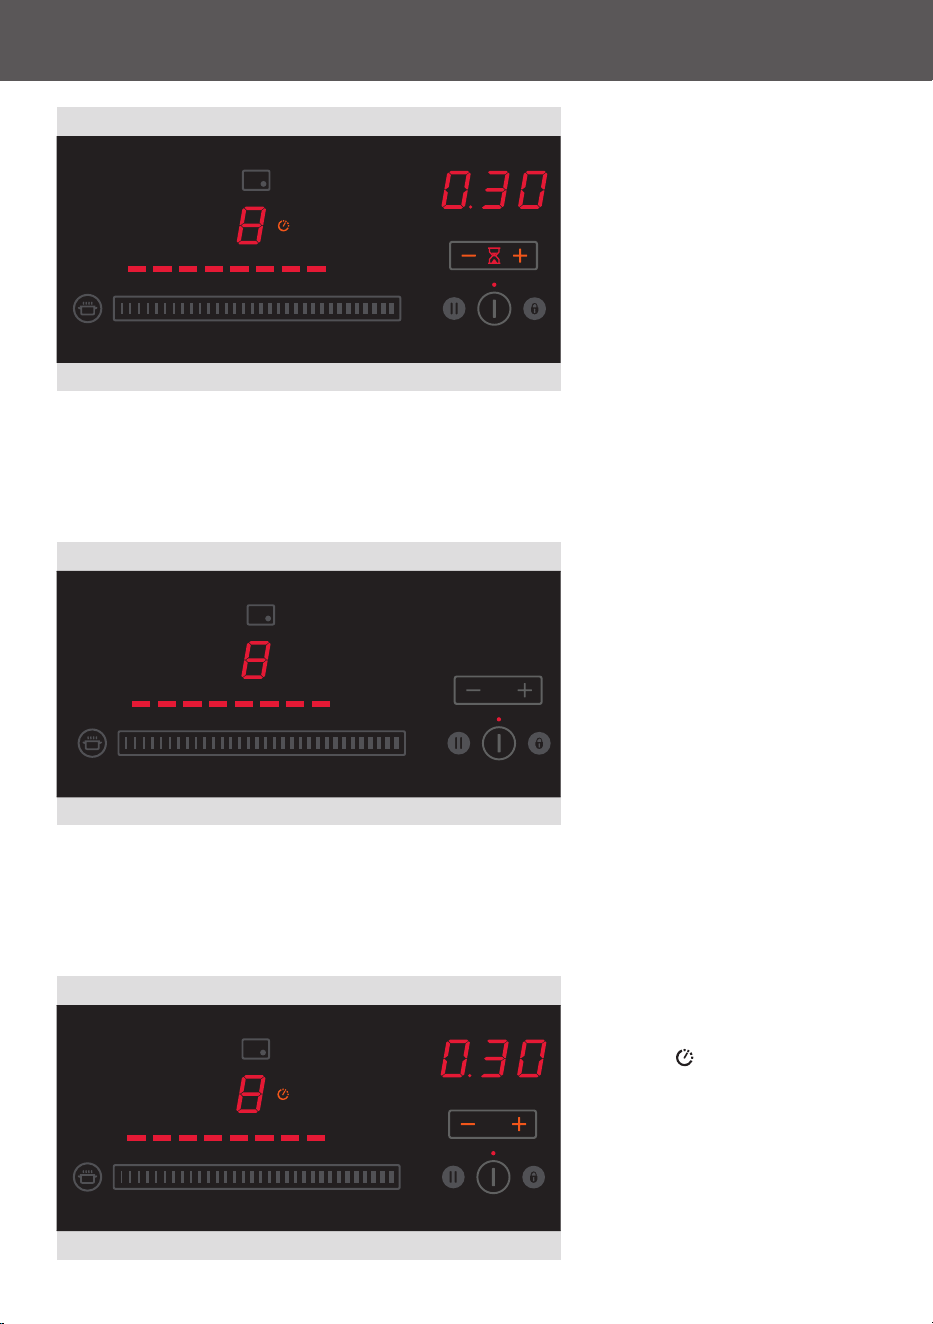
16
2. Press PLUS + or MINUS - to
set the time. A few seconds
later the countdown will begin.
When countdown finishes timer
will beep.
Setting the timer for individual
cook zones.
1. Ensure the cooking zone or
zones you want to set a timer
for are in use.
SETTING THE TIMERS
2. Tap MINUS - and PLUS
+ together until the timer
indicator of the desired
cooking zones comes on.
Tap MINUS - or PLUS + to set
the time. A few seconds later
the countdown will begin.
When countdown finishes timer
will beep and cooktop will turn
off.
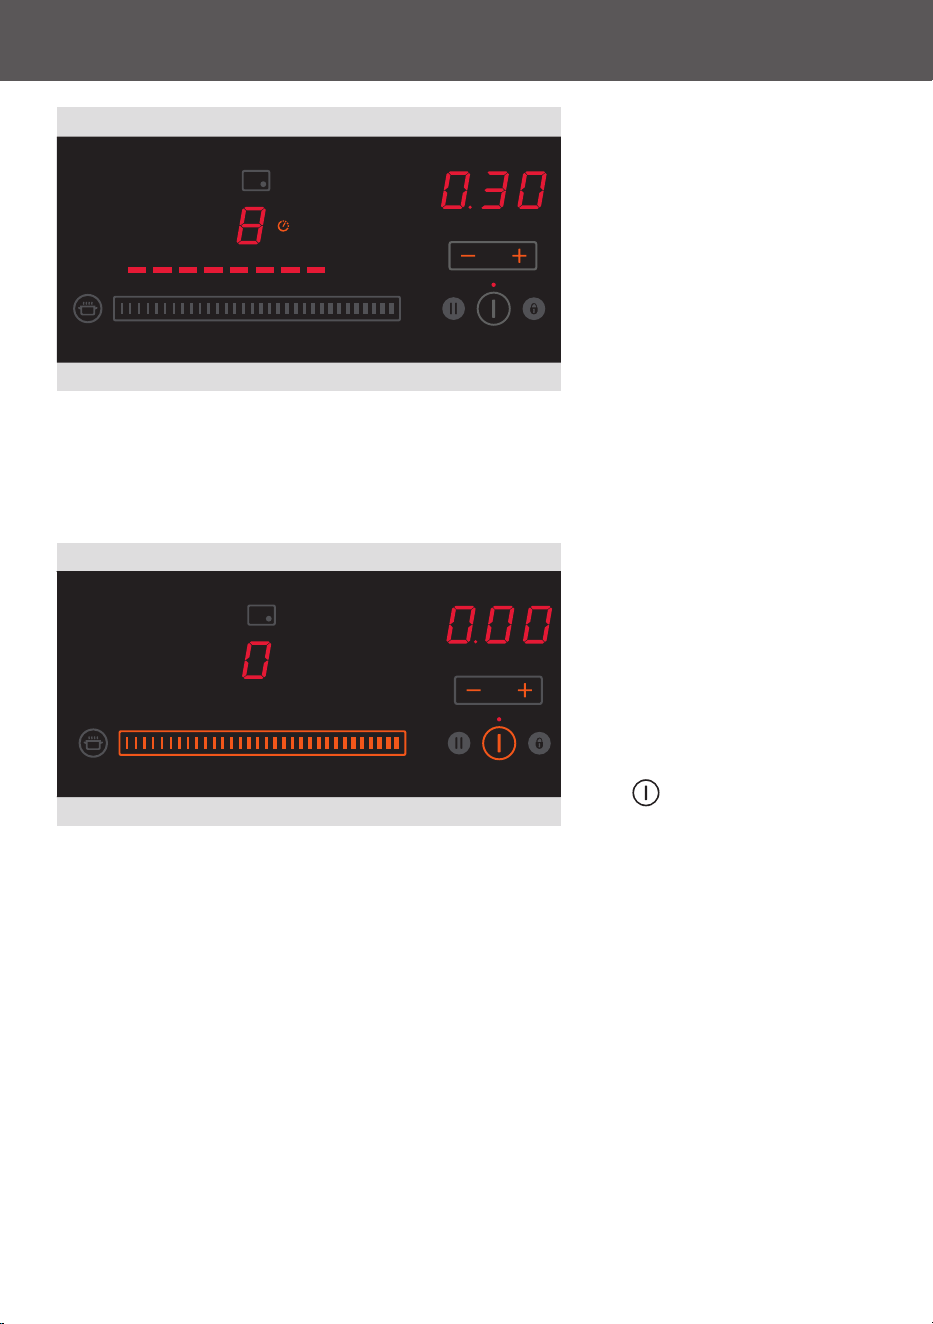
17
SETTING THE TIMERS
To change or cancel a timer
setting.
1. With cooktop turned on,
repeatedly tap the MINUS - and
PLUS + timer controls together
until the indicator light in the
desired cook zone window
glows brightly.
2. To change time, press MINUS
- or PLUS +.
To cancel, press MINUS – and
hold until the minute display
shows
0.00
When you have finished
cooking, either touch or slide
the heat setting selector to a
new setting, to 0 or press ON/
OFF
to turn cooktop off.

18
Setting different times for each of the cooking zones.
Setting the minute minder when other timers are set.
z
Repeatedly tap the MINUS – and PLUS + controls of the timer together as you cycle
through the individual timers for the cooking zones until the egg timer glows. 0.00
will steadily show in the minute display.
z
Touch the MINUS - and PLUS + controls to set the timer. It will then countdown. Note
the indicator lights of the previously set cook zones will be dimly lit, showing you that
the timers are set and counting down.
When the timer is set.
z
If more than one timer is set (including the minute minder), the indicator belonging to
the cooking zone or minute minder with the shortest remaining time setting will glow
brightly. Other timer indicators will be dimly lit.
To check the remaining time for another cook zone.
z
Touch both the MINUS – and PLUS + controls of the timer at the same time and
repeat until the indicator in the desired cook zone window glows brightly.
When the set time is up.
z
0.00 will flash in the minute display.
z
The timer will beep. Touch MINUS - or PLUS + control to stop the beeping. The timer
indicator of the relevant cooking zone will go out. The display will show 0.00
If the timer is still set and counting down for another cook zone.
The cooking time for the timer with the shortest remaining time left will be displayed and
the corresponding timer indicator will glow brightly.
SETTING THE TIMERS

19
Care and maintenance information
For full troubleshooting advice and guidance on how best to
use, clean and maintain your appliance, scan the QR code or visit
fisherpaykel.com and search for your model code.
MAINTAIN COOK PERFORMANCE
Cleaning small spills or dirt
Wipe cooktop with a damp cloth and mild detergent. Dry with a clean, lint free cloth
or paper towel. If further cleaning is required, apply cooktop cleaner following the
manufacturers instructions. We recommend locking the controls if you're cleaning near
them.
For boilovers, melts and hot sugary spills while cooking;
Remove cookware from cook zone and turn off cooktop. Using a glass scraper move the
spill to a cool area of the cooktop and wipe clean with damp cloth of paper towel. Beware
of hot surface.
We don't not recommend using the following cleaning products
• Plastic or stainless steel scouring pads
• Abrasive, solvent, household cleaners
• Acid or alkaline cleaners
• Hand washing liquids or soap
• Stainless steel cleaners or polishes
• Laundry detergents or disinfectants
Make these steps a regular part of your cleaning routine to get the best results from
your appliance.

433255B 01.26
© Fisher & Paykel Appliances 2026. All rights reserved.
The models shown in this guide may not be available in all markets
and are subject to change at any time.
The product specifications in this guide apply to the specific products and models
described at the date of issue. Under our policy of continuous product improvement,
these specifications may change at any time.
For current details about model and specification availability in your country,
please go to our website or contact your local Fisher&Paykel dealer.
FISHERPAYKEL.COM