Operator’s Manual
www.mechmaxx.com
WARRANTY


TABLE OF CONTENTS
INTRODUCTION
PARTS DIAGRAM
2
2
2
6
7
PARTS LIST
AS A TEDDER
AS A RAKE
FEATURES
INSTALLATION
1
www.mechmaxx.com
2
3
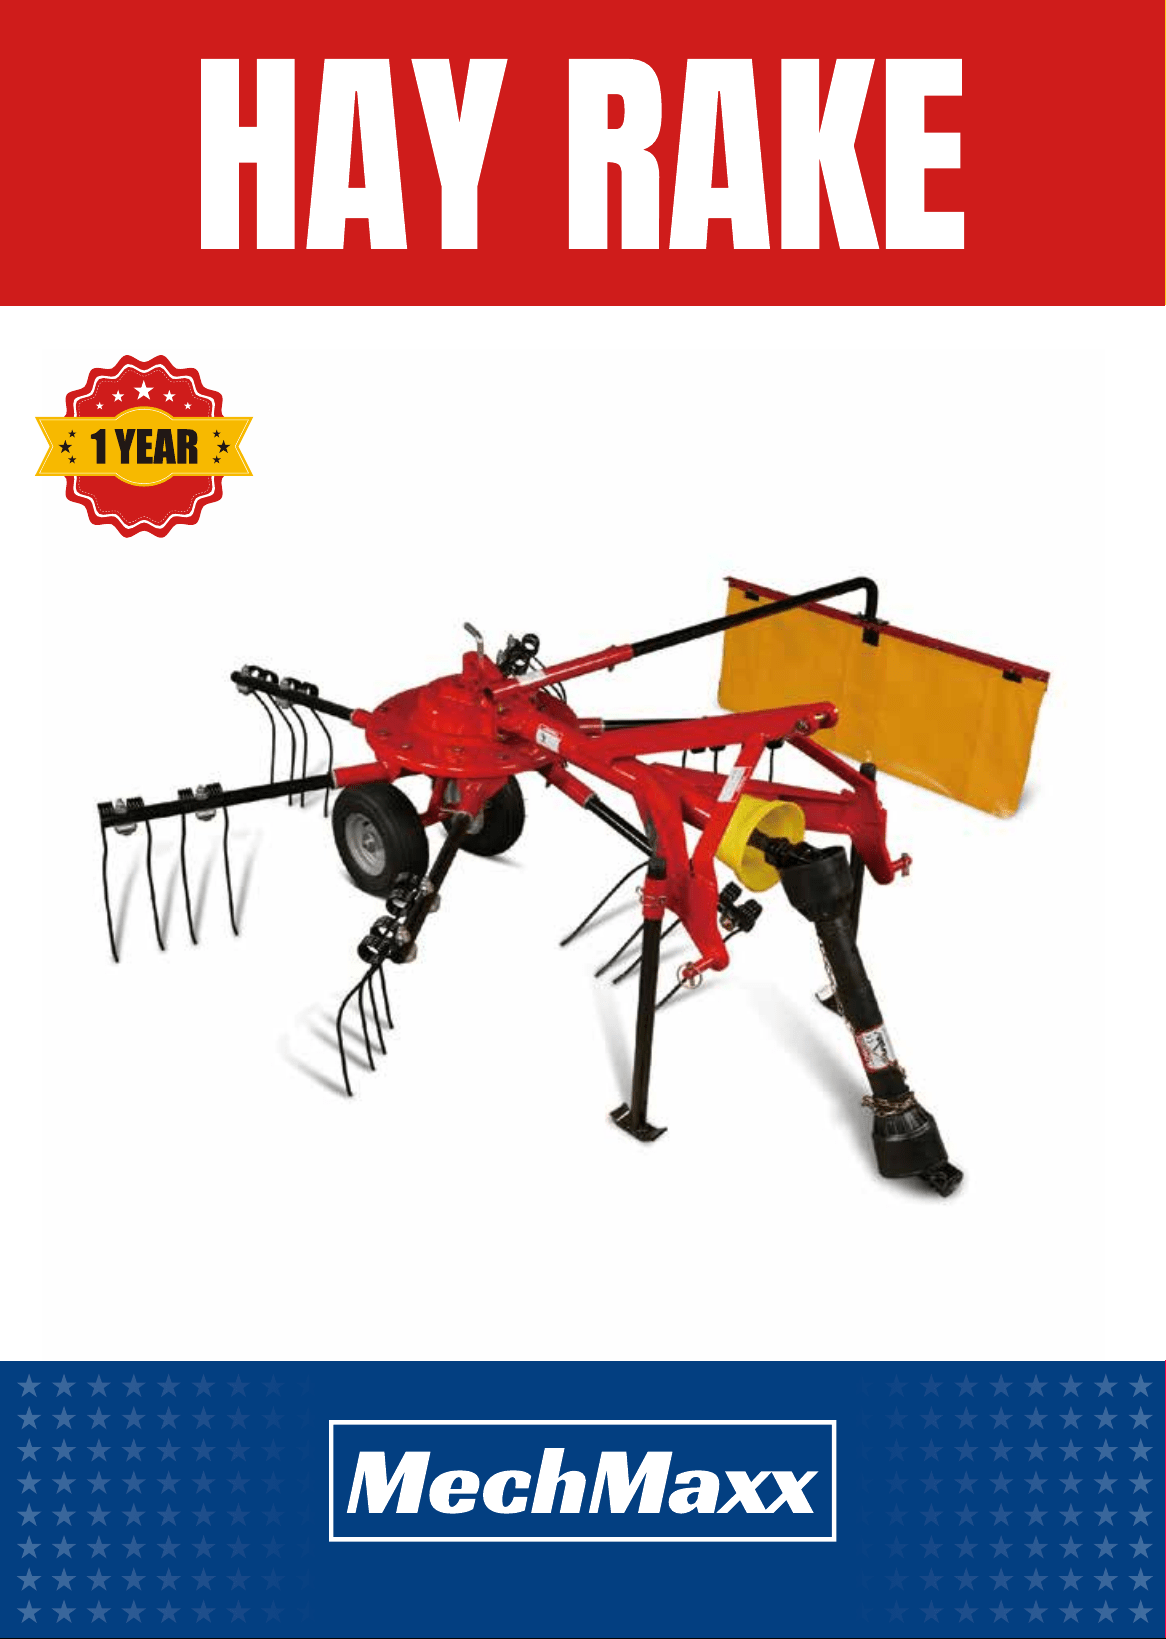
THE WAY OF THE HAY RAKE ROTATES
OUT OF SEASON FOR STORAGE
4
DETACHING FROM A TRACTOR
4
2
TABLE OF CONTENTS

INTRODUCTION
2
www.mechmaxx.com
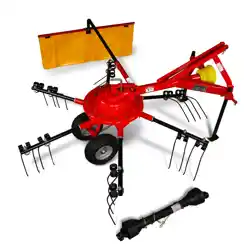
HT100 hay rake tedder is a new developed product of our hay equipments, by using the tines, the machine can be used
as rake or tedder.
AS A TEDDER:
1). Spread, swath or windrow so crops dry down faster,
2). Tailor your tedding operations to a variety of crops and conditions by varying PTO speed or tine position,
3). Fixed-tine position provides aggressive tedding and is ideal for use in fresh-cut material or crops where leaf and
shatter losses are not a concern.
4). Cam-operated tine position allows the tine bar rollers to follow the cam track to lift and release crop gently and save
valuable leaves.
AS A RAKE:
1). Precise raking action produces fluffy, uniform windrows that dry evenly.
2). Self-centering wheels provide extral maneuverability by allowing you to make sharp turns and back up easily without
lifting the machine.
FEATURES:
1. Strong, rugged frame provides years of dependable performance.
2. Rotor tilt can be adjusted easily with a convenient crank for maximum crop handling.
3. Torque limiting clutch on the heavy-duty PTO provides overload protection. PTO speed is variable, so you can match
ground speed to crop and field conditions.
4. Three wheel-height position let you adjust for different crops, conditions and operations.
5. Vertical tines pick up fewer stones and less debris than horizontal tines for cleaner tedding and raking.
6. Cam track adjustment allows you to quickly tailor tedding/raking action to varying crops and conditions without tools.
7. Convenient jack simplifies three-point hitch arrangements.
8. one machine, three functions, tedding, raking, and reversing multi-functions.
INSTALLATION:
The packing of the hay rake is relatively complete, take out all the spares parts, and install the machine according to the
photo below, and use the prop to settle the machine before attach on the tractor.
There is a FREE PTO shaft inside the package, before attaching, adjust the tractor to an even place, no slope or slide
spots, stop the engine before attaching.
Make sure all the screws are fasten attached before using, and adjust the cloth cover according to the place you favored
to.
INTRODUCTION
3
www.mechmaxx.com
THE WAY OF THE HAY RAKE ROTATES:
INTRODUCTION
Diffuse
Convey
Reverse
Collect

4
www.mechmaxx.com
OUT OF SEASON FOR STORAGE:
Maintain the machine for keeping long life.
Caution: never try to move the blocked material when the machine is running.
Disengage clutch of PTO driven, stop tractor engine and make sure all movable parts stop.
1. Clean every parts of the machine.
2. Inspect moving parts and connecting parts in accordance with inspection and maintenance points table.
3. If any damaged or worn parts are found, they must be replaced with new ones.
4. Apply grease or oil in accordance with lubrication points table.
5. Apply oil to rotating, pivoting parts and sliding parts such as clump pin of power joint.
6. Apply grease on PTO shaft, PIC shaft and spine holes of power joint yoke.
7. Paint or apply oil on damaged surface of parts to prevent from the rust.
8. Store the machine in well ventilating indoor.
9. If there is no choice but to keep the machine in out door, cover the machine with a plastic sheet.
1. Slid down stand and insert pin into the highest position of a hole.
2. Lower hydraulic control lever of a tractor until tires of the machine contact with the ground.
3. Stop the tractor engine and apply parking brake.
4. Detach power joint from the tractor PTO shaft.
5. Detach right side of lower link, left side of lower link and top link.
DETACHING FROM A TRACTOR
INTRODUCTION
5
www.mechmaxx.com
This symbol precedes specific safety instructions throughout this manual. When reading the manual, pay close attention
to the information that follows this symbol.
FAILURE TO FOLLOW INSTRUCTIONS IN THIS MANUAL COULD RESULT IN PERSONAL INJURY OR DEATH.
READ ENTIRE MANUAL BEFORE OPERATING ROTARY RAKE.
INTRODUCTION
Keep hands, feet and clothing away from the machine’s input power take-off( PTO) and any other moving
parts until the machine has been shut down and the power source has been locked out.( Refer to power
source safety)
Do not adjust, unclog, lubricate, or service the machine until it has been shut down and the power source
has been locked out.( Refer to power source safety)
Do not stand between the tractor and the rake while attaching or detaching the rake unless the tractor
engine is shut off and the parking brake has been set.
Be certain all bystanders and animals are a safe distance away from the rake before raising or lowering it.
Never allow anyone to ride on the rake or the tractor.
When transporting, never exceed a speed of 20MPH and avoid sudden turns which may compromise the
operator’s control of the tractor.
When moving the machine on public roads, use the proper reflectors, lights, and slow moving vehicle signs
required by local government agencies.
Be constantly aware of the location of the ends of the rake to avoid collision with other objects.
Do not lubricate or adjust the machine while it is in motion.
Support the rake securely while working under it.
6
www.mechmaxx.com
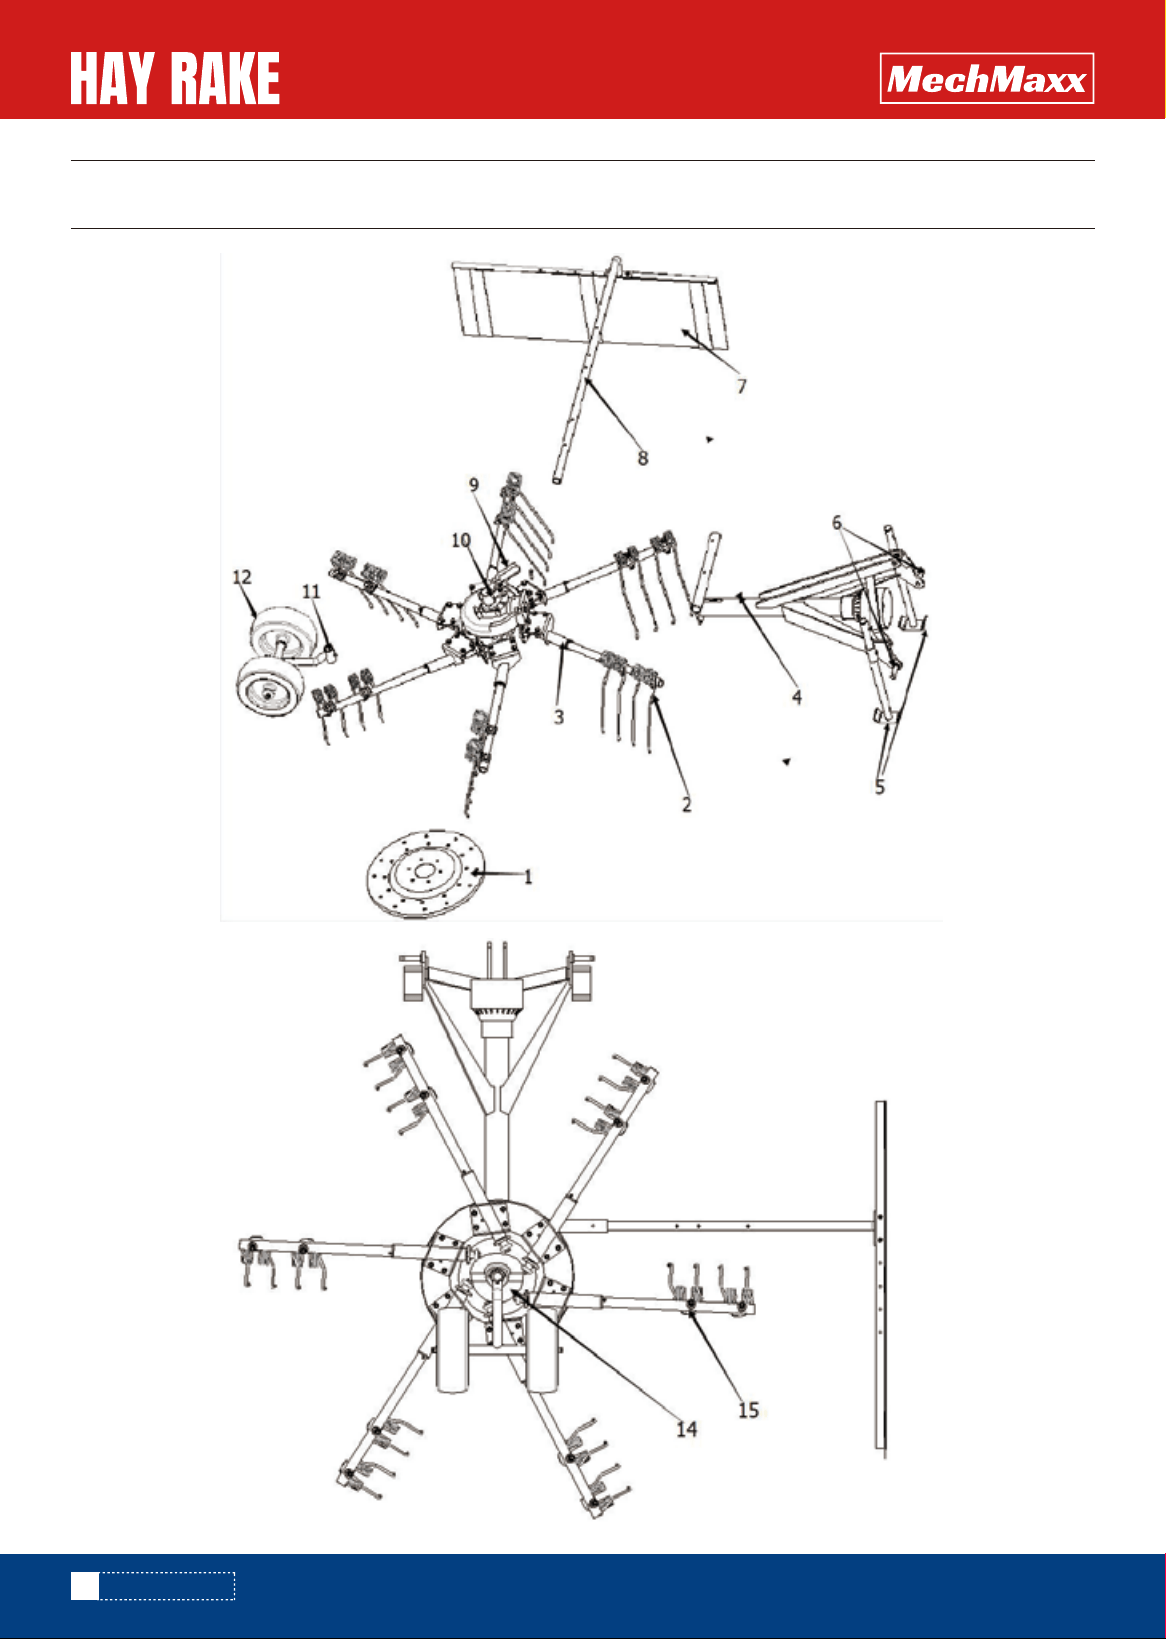
PARTS DIAGRAM
PARTS DIAGRAM

7
www.mechmaxx.com
No. Drawing No.
1
2
3
4
5
6
7
8
9
10
11
12
14
15
HT100 -001
HT100 -002
HT100 -003
HT100 -004
HT100 -005
HT100 -006
HT100 -007
HT100 -008
HT100 -009
HT100 -010
HT100 -11
HT100 -12
HT100 -14
HT100 -15
DESCRIPTION
Hay rake plate
Spring teeth
Tine fixing holder
3PT linkage
Supporting leg
Connecting pin
Bolck cloth
Holding bar
Holding bar
Upper gear holder
Wheel axis
Tires
Bottom gear
Tine holding screw
PARTS LIST
PARTS LIST