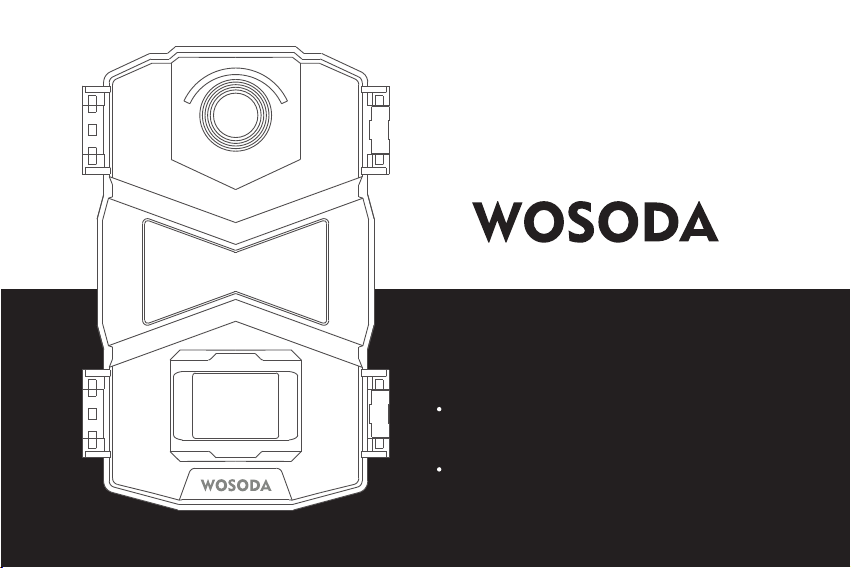
Thanks for purchasing this trail camera
Please read before using this eguipment
If you have any questions or problems
Please contact us by email: support@wosports.com
G200 Trail Camera

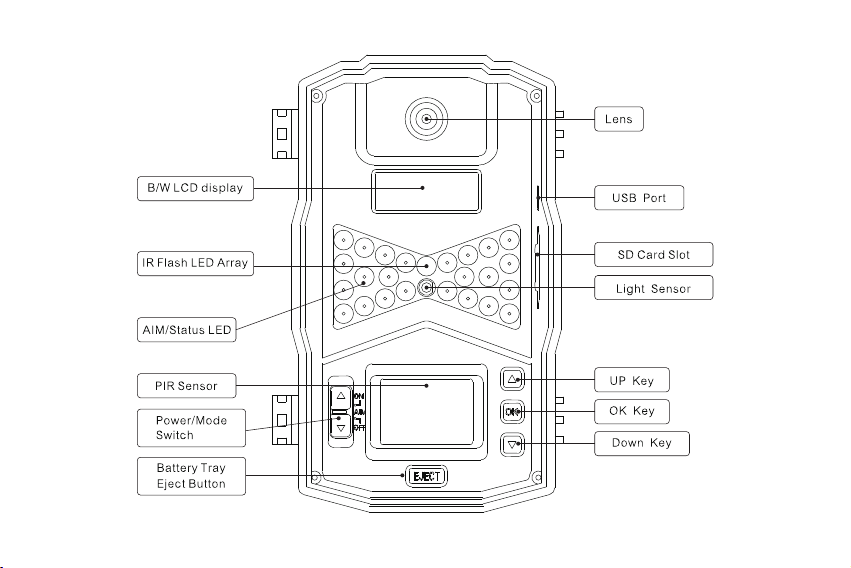

Specifications
Camera Size 142x85x75mm
Camera Weight 275g
Image SensorType 1/2.7-inch CMOS, 2 million pixels
Lens F=2.4; FOV=40 degree; Auto IR-Cut
Max IR Flash Range 60feet (850nm )
Txt Screen 34x16MM 1/4 Duty 1/3 BIAS
Storage SD /SDHC Card, up to 32GB; Capacity, Class 4 or higher
lmage Resolution LOW: 5MP: 2592x1944
Photo Mode HIGH: 30MP:6400x4800
Video Resolution 1920x1080@15FPS:1280x720@30FPS:
PIR Detection Distance 60 feet (77°F)
PIR Detection Angle 42 degrees(+/-2degress)
Working mode Day and Night
Trigger Time 0.3 second
Interval Time 5s,15s,30s ,1min,5min
Burst Mode lmage 1-3
Video Clip time 10 seconds
Stamp Camera lD, Date and Time
Device Serial No.Set 4 numbers, digits set by yourself
Power Supply 8AA batteries (alkaline or lithium)
Camera Operation Steps
Please loading the batteries and inserting the SD Card before using this camera.
1. Open the front cover, you can see the "EJECT " button.
2. Please be sure that switch the camera's power OFF when loading/unloading batteries or inserting SD
card
3. Press the Battery Tray EJECT button to release the battery tray and pull it out for loading.
4. Be sure to inset each battery so its polarity(+/- direction) matches the polarity indications at the
bottom of the battery tray. A full set of 8AA Alkaline or Lithium batteries should be used
5. Press the battery tray into the host, you will hear a slight "click" sound, which means the battery
compartment is locked.
Stand -by Power Less than 0.15ma
Stand -by time 12 months(8AA alkaline batteries)
Power Consumption <200ma(550ma w/LED flash )
Low power alarm Yes
Exposure Auto
WaterResistant Rated lP54
Operating Temperature 14°F-122°F
Operating Humidity 5%~95%
Security Authentication FCC & CE & ROHS
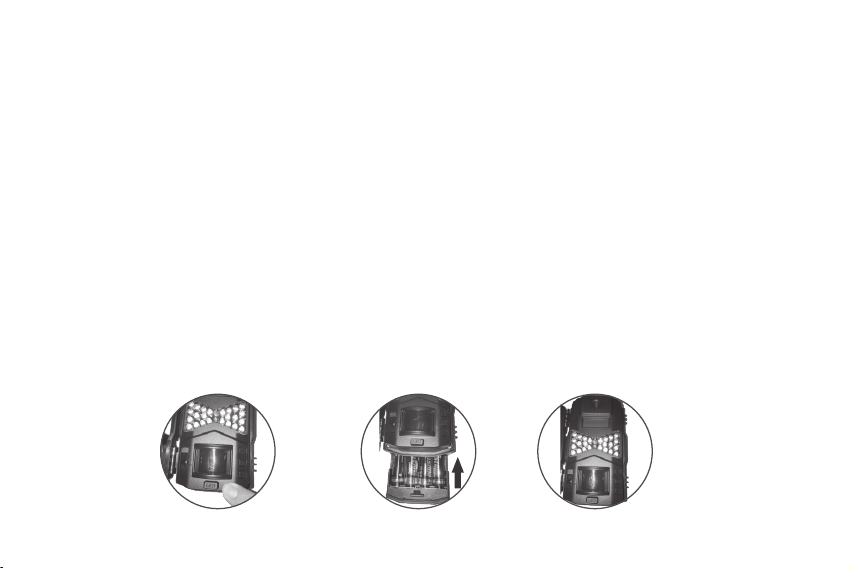
Fig.3Fig.2Fig.1
Loading Batteries
Press the Battery Tray EJECT button to release the battery tray and pull it out for loading(Fig.1). Switch
the camera's powerOFF when loading/unloading batteries.
Be sure to insert each battery so its polarity(+/- direction)matches the polarity indications at the bottom
of the battery tray. A full set of 8AA Alkaline or Lithium batteries should be used. (Fig.2).
Press the battery tray into the host, you will hear a slight "click" sound, which means the battery
compartment is locked(Fig.3)
6. inserting the SD Card, and make sure that the SD card is insert correctly. lf you hear "click" sounds that
means it has be inserted correctly.
7. Switch the camera’s power AIM, you are ready to go into the setup mode to get the camera ready to
use, with all options set to your preference.
8. Moving the mode switch to ОМ mode. The notion indicator LED will blink red for about 10 seconds .
This interval allows time for you to close the Cam’s front cover, lock it, and leave the monitored area. The
camera will take pictures or videos automatically. (According to its current slide switch settings) when
itis triggered by the PIR sensors detection of activity in the area it covers.

Note:
NiMH Rechargeable batteries are not recommended.
8 new batteries are recommended. Mixed old and new batteries are not recommended.
Be sure to insert each battery so its polarity(+/-direction) matches the polarity indications at the
bottom of the battery tray, lf the batteries are be installed improperly, the camera won't work normally.
Battery scrapping and recycling, please strictly abide by local government policies and laws. We are
not responsible for any incidents of danaer and violation of local regulations due to improper battery
disposal.
Note:
Formatting the SD card before using it for the first time is recommended. it can be completed using
the "format" function. Make sure you have backed up (saved to your computer) any files you want to
keep on a previously used card, as formatting erases all files.
Make sure that the write-protect switch on the side of the card is "off" (not in the "Lock" position).
To take out the SD card ,just gently push in the card (do not try to pull it out without pushing in first).
Switch the camera's power OFF when removing or inserting SD card.
Inserting SD Card
Make sure that the SD card is insert correctly, lf you hear "click" sounds that means it has be inserted
correctly. The camera uses a standard SD memory card to save your photos or videos, SD and SDHC
(high capacity)class 4 or higher seed cards, up to a maximum 32GB are supported. A class 10 memory
card is recommended when the camera works at burst mode.
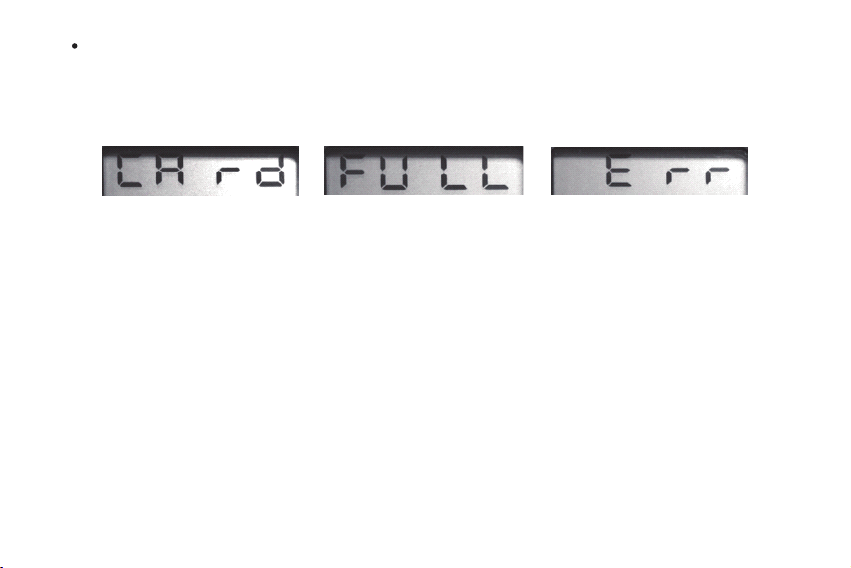
Fig.6Fig.5Fig.4
lf the SD card is nol insert correclly, or no card is in the slot, "CArd" will appear on the LCD display
(Fig.4 ). and please reinsert the SD card. Other card stalus display message:"FULL" indicates the card's
memory is full. with no remaining room to slore files (Fig. 5). "Err" means there is a card reading error
(please try a diflerent SD card ,Fig.6 ).
Power/Mode Switch Operation instruction
OFF Mode: The camera's power switch is in the OFF position.
ON Mode: The camera's power switch is in the ON position,(The screen will turn off after 10 seconds)
AIM Mode: The camera's power switch is in the All position(The screen is on, it can setup the camera's
parameter)
OFF Mode
The OFF mode is the safe mode when any action must be taken, Please be sure the camera's power is
switched. OFF before you replacing the battery, removing or inserting SD card, ortransporting the device.
And of course. when you are storing or not using the camera, you will switch it OFF. Please note that
even in OFF mode the AUTOPlLOT camera stil consumes power at a very low level. Therefore, it's a good
idea to take the batteries out the battery compartment if the camera will not be used for a long time
(Fig.7).

ON Mode
Please be sure the batteries were loaded and SD card was inserted, and placed the camera to the right
induction height or area ,then, move the mode switch to ON mode, The notion indicator LED will blink red
for about 10 seconds (Fig.8). This interval allows time for you to close the Cam's front cover, lock it ,and
leave the monitored area. Please note that you can't manually setup parameters once in ON mode. The
camera will take pictures or videos automatically.(According to its current slide switch settings) when it
is triggered by the PlR sensor's detection of activily in the area il covers. You can either move the power
swilch direclly move from OFF to ON mode, or slop at the setup position first lo change one or more
setings, then move the switch to ON after you have finished doing so.
AIM Mode
You can check and change the settings ofthe camera in the setup mode, such as the image resolution,
the video resolution, and the interval time etc (Fig,9),
NOTE
Always move the power switch from OFF to AlM mode. lt is possible that the camera could would lock
up if it is switched from ON to AlM mode. lf this occurs, simply move the switch to OFF and then push it
over to AlM again.
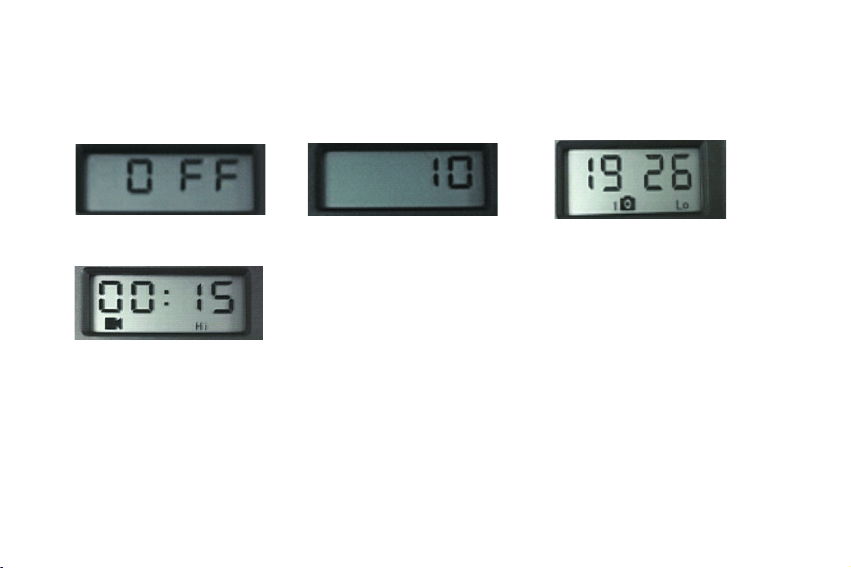
Fig.9Fig.8
Fig.10
Fig.7
Setup Mode
Once batteries are installed and an SD card is inserted, you are ready to go into the setup mode to get
the camera ready to use, with all options set to your preference. There are only a few settings to make,
so the process is quick and easy. To start setting up your camera.
1. To enter Setup mode, move the power switch to the middle(AlM) position, You can see that the display
will come on and show the initial setup screen. So that you can set and change the camera parameters
as you want.
2. Press the OK key to begin. You can press UP or Down keys to change the setting of the currently
selected option or item. Press OK to confirm that you choice. When you finish changing a setting, press
OK to lock in the setting and move on to the next option, lf there is a setting that you don't need or want
to change from the default or current setting, simply press OK to confirm and skip to the next item.
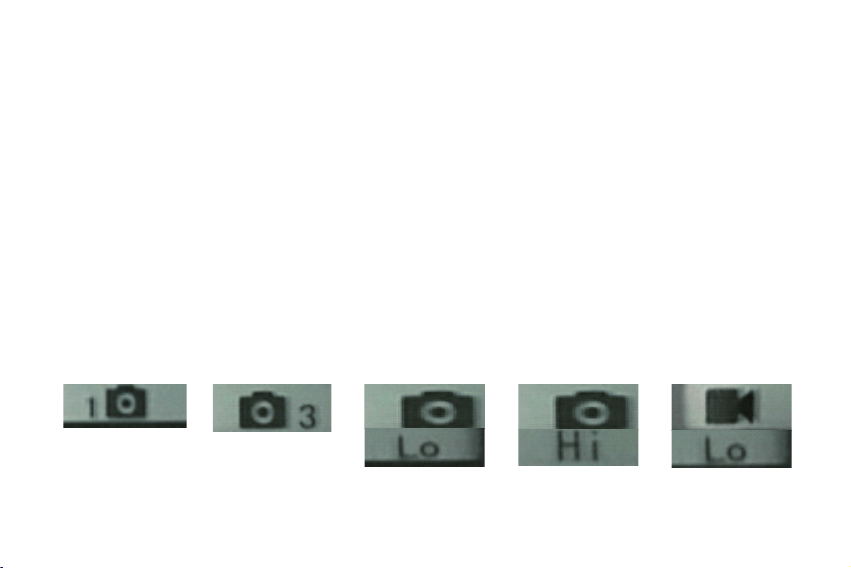
Fig.11 Fig.12
Fig.13 Fig.14 Fig.15
Setting Time and Date
After the lnitial setup screen, the next few display screens will allow you to set the current time and date,
so the time/date stamp imprinted on all your photos and videos will be accurate when captured by the
camera to change the time and date to be current, starting at the default “12:00"screen.
1. Press OK and use UP/DOWN to set the hour, Press OK to confirm.
2. Use UP/DOWN to set the minute. Press OK to confirm.
3. Use UP/DOWN to set the month. Press OK to confirm.
4. Use UP/DOWN to set the date. Press OK to confirm.
5. Use UP/DOWN to set the vear. Press OK to confirm and move on to the next setup item.
Setting Interval Time
The lnterval option lets you set the time between captured images or videos when animal remains within
the camera's sensor range after it is first detected and the camera is triggered. Use UP/DOWN to select the
intervaltime as you want 5sec, 15sec(default value), 30 sec, 1min or 5min. Press OK after setting (Fig.10).
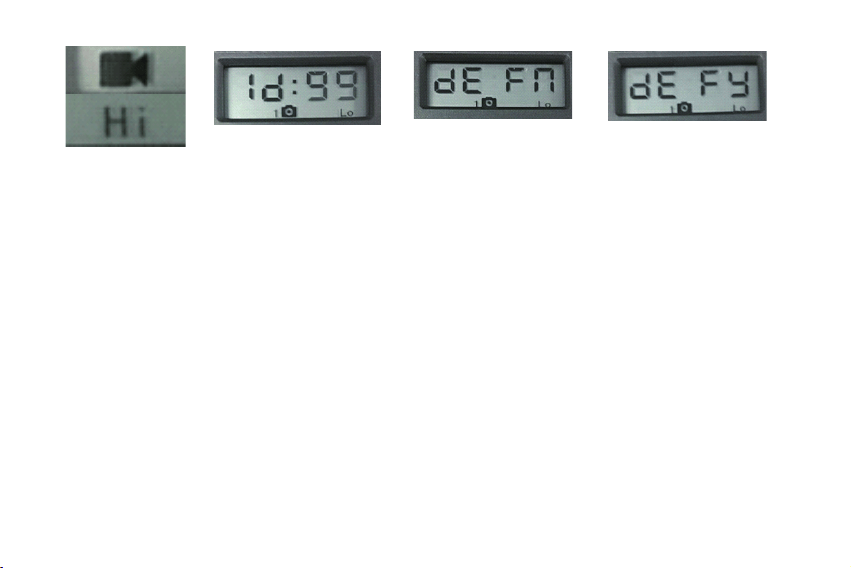
Fig.16
Fig.17 Fig.18 Fig.19
Setting Capture Mode and lmage /Video Resolution
Use UP/DOWN to select your preferred image capture mode: single photo per trigger (display shows 1+
a still camera icon, Fig.1), rapid sequence of 3 photos per trigger (display shows 3+ a still camera icon,
Fig.12). Press UP/DOWN arrow to select image resolution (low photo frequency-5MP, display shows Lo+
a stil camera icon, Fig.13. High pohto frequency-30MP. display shows Hi+ a still camera icon, Fig.14).
Press OK to confirm and skip to next item. Press UP/DOWN arrow to select video resolution(low video
frequency-720P, display shows Lo+ a stil video icon, Fig.15. High photo frequency. 1080P, display shows
Hi+ a still video icon, Fig.16). Press OK to confirm.
Setting CameralD
Use UP/DOWN to select a reference lD# (from "01" to "99" ) for this camera, which will be imprinted on
all photos videos along with the time and date, Set a second camera that will be used in a aroup of
multinle camera to "02" etc. Press OKafter setting.(Fig.17).
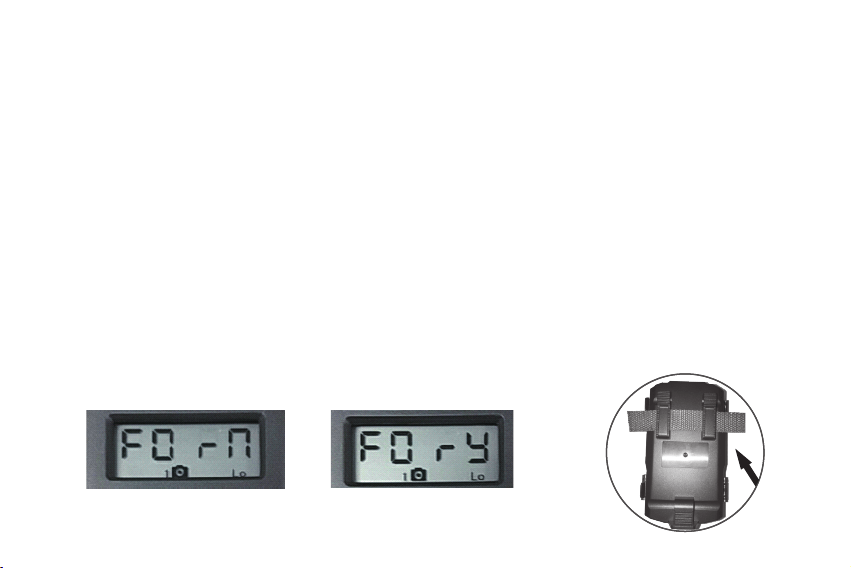
Fig.21
Fig.20
SD Card Format(delete all files)
The display will show “FOrn" (Fig.20 ). Use UP/DOWN to change the "N" after "FOrn_"to "Y" (yes, Fig.21),
then press OK to confirm.
Note: Please be sure to backup and save all files you want to keep first, as formatting will clear the card
completely of all first-they will then be difficult or impossible to recover form the card.
Using the adjustable web belt: Push one end of the belt through the two brackets on the back of the
camera Thread the end of the strap through the buckle. Fasten the belt securely around the tree trunk by
puling the end of the strap firmly so there is no slackleft.
Restore Default Settings
The display will show "dEFN" (Fig.18). To return the interval, Capture Mode, and Camera lD# to their
original, factory default" settings, use UP/DOWN to change the "N" after "dEF_"to "y" (yes, Fig.19),then
press OK to confirm.
Note: your time and date setting and camera lD# will not be change from their current setting to the
original defaults. only the interval and capture mode settings will be restored to their defaults.
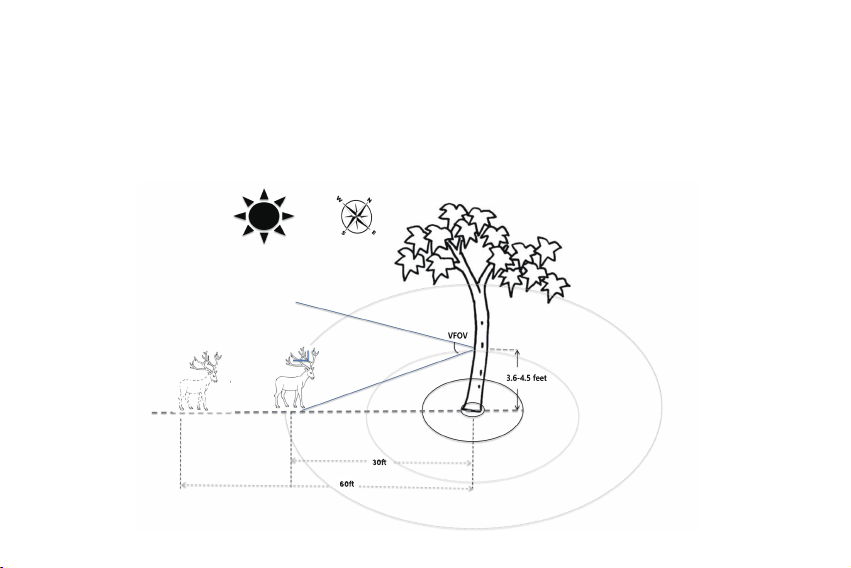
Mounting
After the setting the camera's time/date and other options to your preference, you 're ready to take it
outside and begin capturing images of animals in the area you want to monitor, When mounting the
camera to a tree, use the adjustable web belt provided. Please be sure to mount it in place correctly and
securely. To get the optimal picture quality, the tree should be about 10-30ft, away from the place to be
monitored, with the camera placed at a height of placed at a height of 3.6-4.5ft.

Attention
1. Please keep the lens clean. lf it is dirty, please clean it with Non-dust cloth and machine cleaner.
2. Please keep the PiR sensor clean. lf it is dirty, please clean it with Non-dust cloth and machine cleaner.
3. Please keep the IR lens clean. lf it is dirty, please clean it with Non-dust cloth and machine cleaner.
4. To keep the good performance for water resistant, please keep the battery compartment seal ring
clean.
5. Do not touch LCD, lens lens, PiR sensor and iR lens with your hands or sharp objects.
6. To prevent battery were to leak and rupture to result the camera was broken. Therefore it's a good idea
to take the batteries out the battery compartment if the camera will not be used for a lona time or low
power.
7. Battery scrapping and recycling, please strictly abide by local government policies and laws. We are
not responsible for any incidents of danger and violation of local regulations due to improper battery
disposal

Camera won't power up
FAQ
1. Make sure that you have installed all batteries in the battery compatment, filling all battery spaces
with no "gaps"
2. We recommend using a full set of 8 Energizer® alkaline AA batteries.
3. Make sure that the batteries are installed correctly, observing proper polarity.
4. Do not move the switch directly from "ON" to "AIM" always move the switch all the way down to
"OFF"first. then back up to "AIM".
5. Please be sure to switch the power "OFF" and remove the batteries if necessary. Trying to reopen the
camera after 1 min.
Camera stops taking images or won't talk images
1. Please make sure that the SD card is not full. lf the card is full (display indicates"FULL",the camera will
stop talking images.)
2. Make sure that the power/mode switch is in the ON position and not set to OFF or AIM.
3. Make sure that you are using a good quality $D card in your camera. We recommends SanDisk@ SD
cards up to 32GB.
4. lf the SD card has its write protect switch in the lock position, the camera will not take images.
5. Formatting the SD card before using it for the first time is recommended. it can be completed using
the "format' function. Make sure you have backed up (saved to your computer) any files you want to
keep on a previously used card,as formatting erases all files.
6. Please make sure that the battery have the enough power to support to work.

Battery life is shorter than expected
1. Check to make sure you have used new alkaline or lithium batteries. We recommends using a full set
of 8 Energizer® alkaline AA batteries to obtain maximum battery life.
2. These are several variables that will determine the batery life including type of batteries, temperature
outside recording settings, frequency of camera activity, etc. Colder temperatures, night photos and
photo frequency (low camera delay) will result in shorter battery life. Note: capturing video clips and
time lapse uses more power and will result in shorter battery life than capture motion detected
photos, 5S interval mode will use more power as more photos and videos will be taken. We
recommends setting the Interval time for more longer time to maximize battery life.
3. Make sure that you are using a good quality SD card in your camera. We recommends San Disk® SD
cards up to 32GB. Our experience indicates that poor quality SD cards can sometimes reduce your
camera battery life.
Camera PlR won't work
1. Check the interval time you setings. lt won't take images for a long time if you setting the Interval time
is too longer. You can figure out that by restore the camera to factory settings.
2. Check if something stuff on the PlR sensor, please be sure the PlR sensor is clean.
3. Higher temperature will make the PlR detection distance become shorter, So that sometimes the will
not be monitored even it is through by the PlR sensor's detection of activity in the area it covers.
Please be sure to mount the camera in place correctly and securely. The height is need to keep the
same between the animal and camera.

Camera takes continuous images of no subject
A camera has what is know as a "false trigger" if the PlR sensor thinks that there is motion and heat in
front of the camera lens when there is no subject in the images. These "false triggers" are the result of
placing the camera in an environment where there is motion associated with tree branches creating
motion in front of the camera or an area where there is high heat in the foreground and any motion
from wind cloud set off the camera. Setting a camera up over water is also a potential cause for this
issue.To remedy this situation.
1. Try moving the camera to an area that does not have any of these issues or remove potential
obstacles near the lens if possible.
2. lf the camera continuous to take images when there is no subject in them, test the camera by
placing it in an inside environment and aiming at a location where there is no motion.
3. lf the camera continuous to show issues, then there is probably an electronic component issue,
lfthis the case, please contactservice team.
Photo and video quality problems
1. The image is blurred or out of focus, check if something stuff on the lens, please be sure the lens is
clean.
2. Daytime photos or videos appear too bright/dark, make sure that the camera is not aimed at the sun
or other light sources during the day.
3. Night photos or video appear too bright, you will get the best results when the subject is within the
ideal flash range no closer than 3m from the camera, Subjects may appear too light at closer
distances.
0924 V1.2