5 IN 1 Slim Panel
LED Recessed Downlight
IC Rated
Junction Box
EASY INSTALLATION
WARNING
CAUTION
1.2. 3. 4.5.
6. 8.9.
GROUND GREEN
BLACK
WHITECOMMON
LINE
SUPPLY
DRIVER
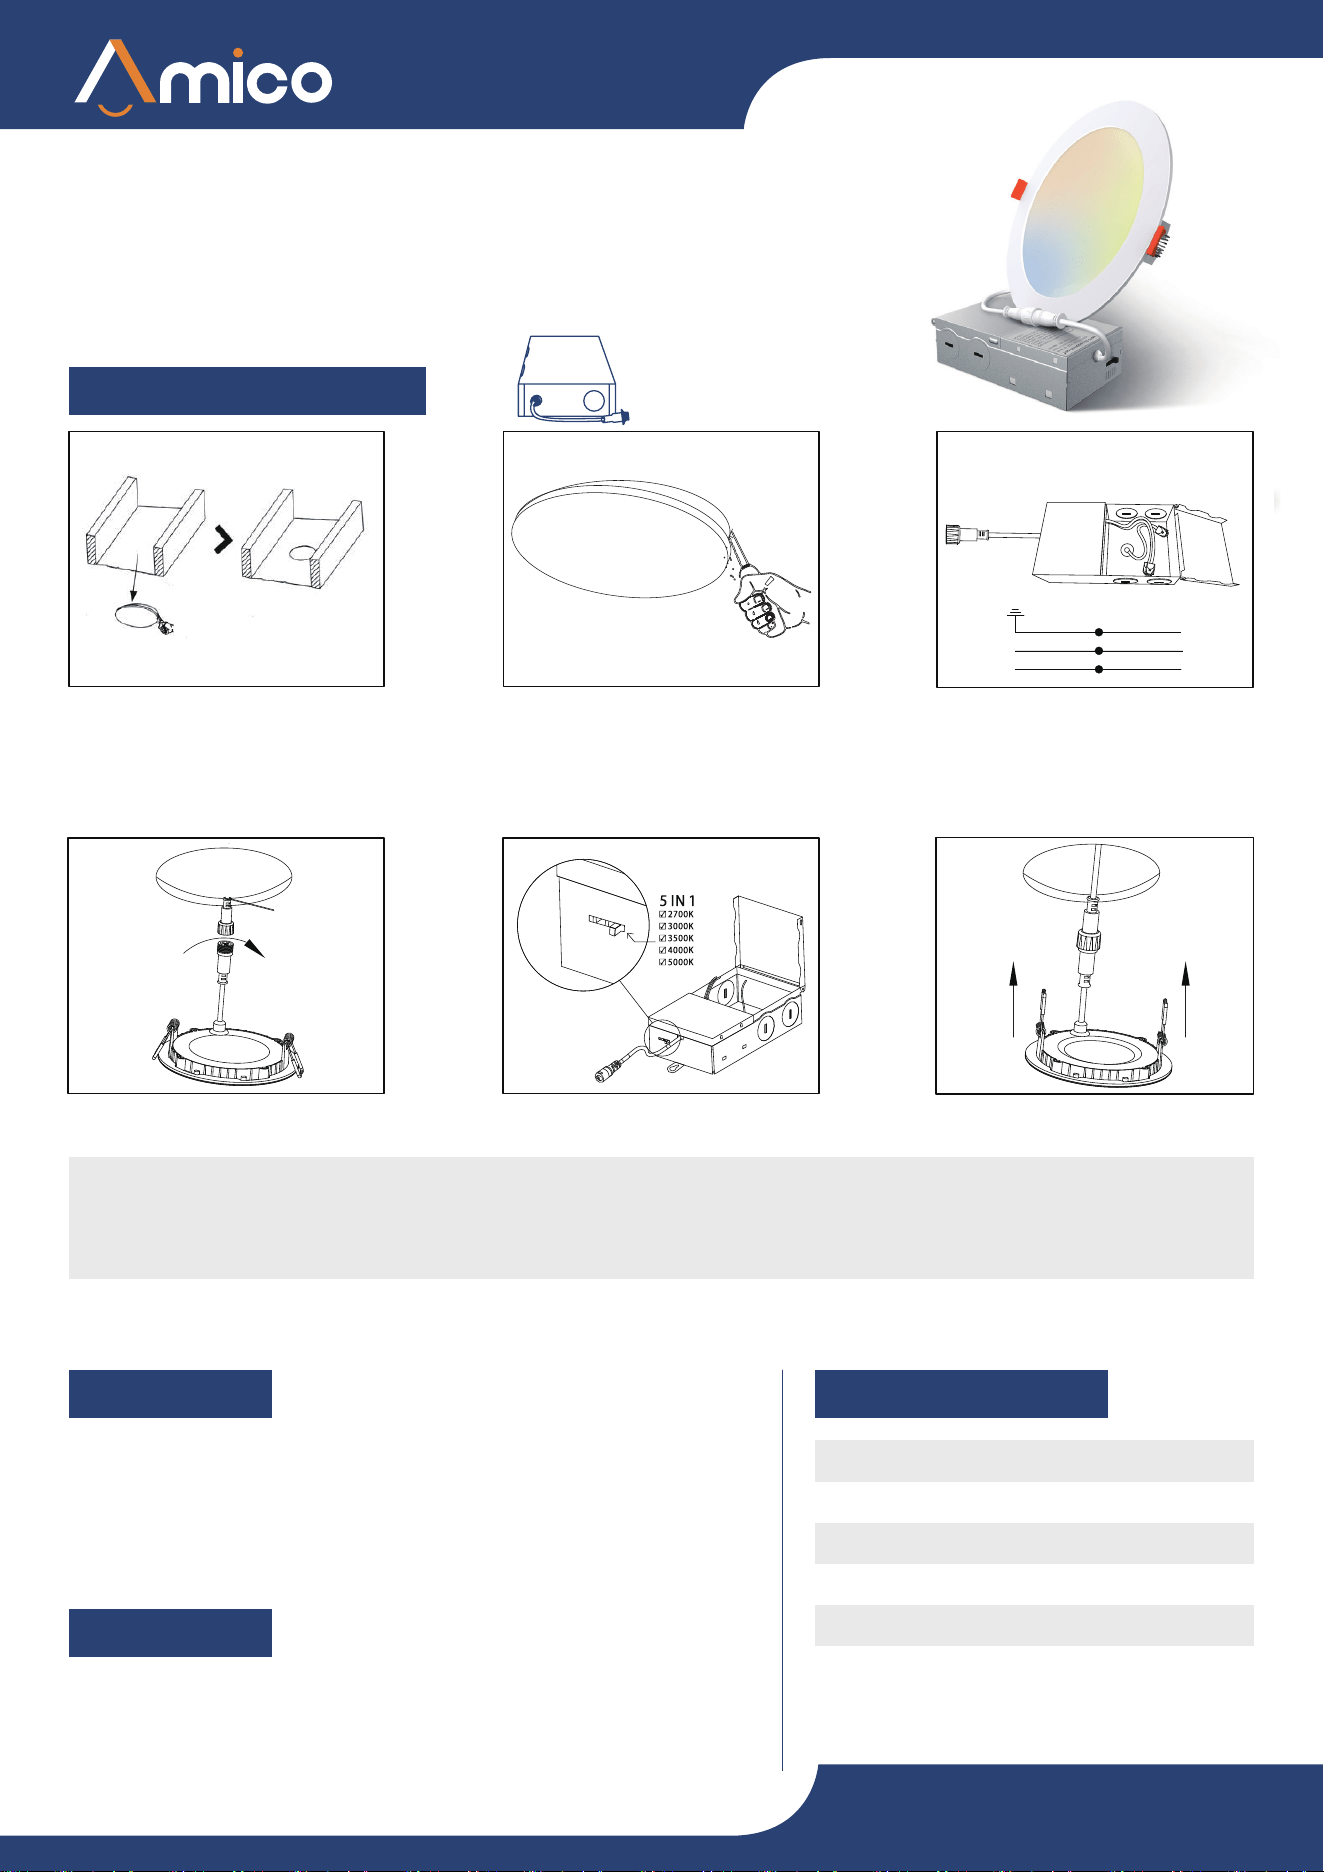
7. Turn on power and test light.
6. Connect the J-BOX to light module.
7.
BEFORE PROCEEDING:
On back of j-box, slide the CCT Selection Switch to choose from five color temperatures (2700K, 3000K,3500K, 4000K, 5000K).
Try each CCT to determinewhich suits your room.
• Light will use the preferred setting whenever you turn on switch.
• Turn off light switch and continue install.
SPECIFICATIONS
Voltage
Wattage
Damp
Aluminum
0.86lbs
5 years
120V
W
Housing
Weight
Warranty
Suitable for Locations Ingress
- RISK OF FIRE OR ELECTRIC SHOCK
CONSULT A QUALIFIED ELECTRICIAN TO ENSURE CORRECT BRANCH CI CUIT
CONDUCTOR.
- RISK OF FIRE MIN 90°C SUPPLY CONDUCTORS.
- DO NOT make or alter any open holes in an enclosure of wiring or electrical components
during kit installation.
- To prevent wiring damage or abrasion, do not expose wiring to edges of sheet metal
or other sharp objects.
- Edges may be sharp. Please wear gloves while handing.
- Product designed for dimming with many 120V TRIAC/ELV phase cut control dimmers.
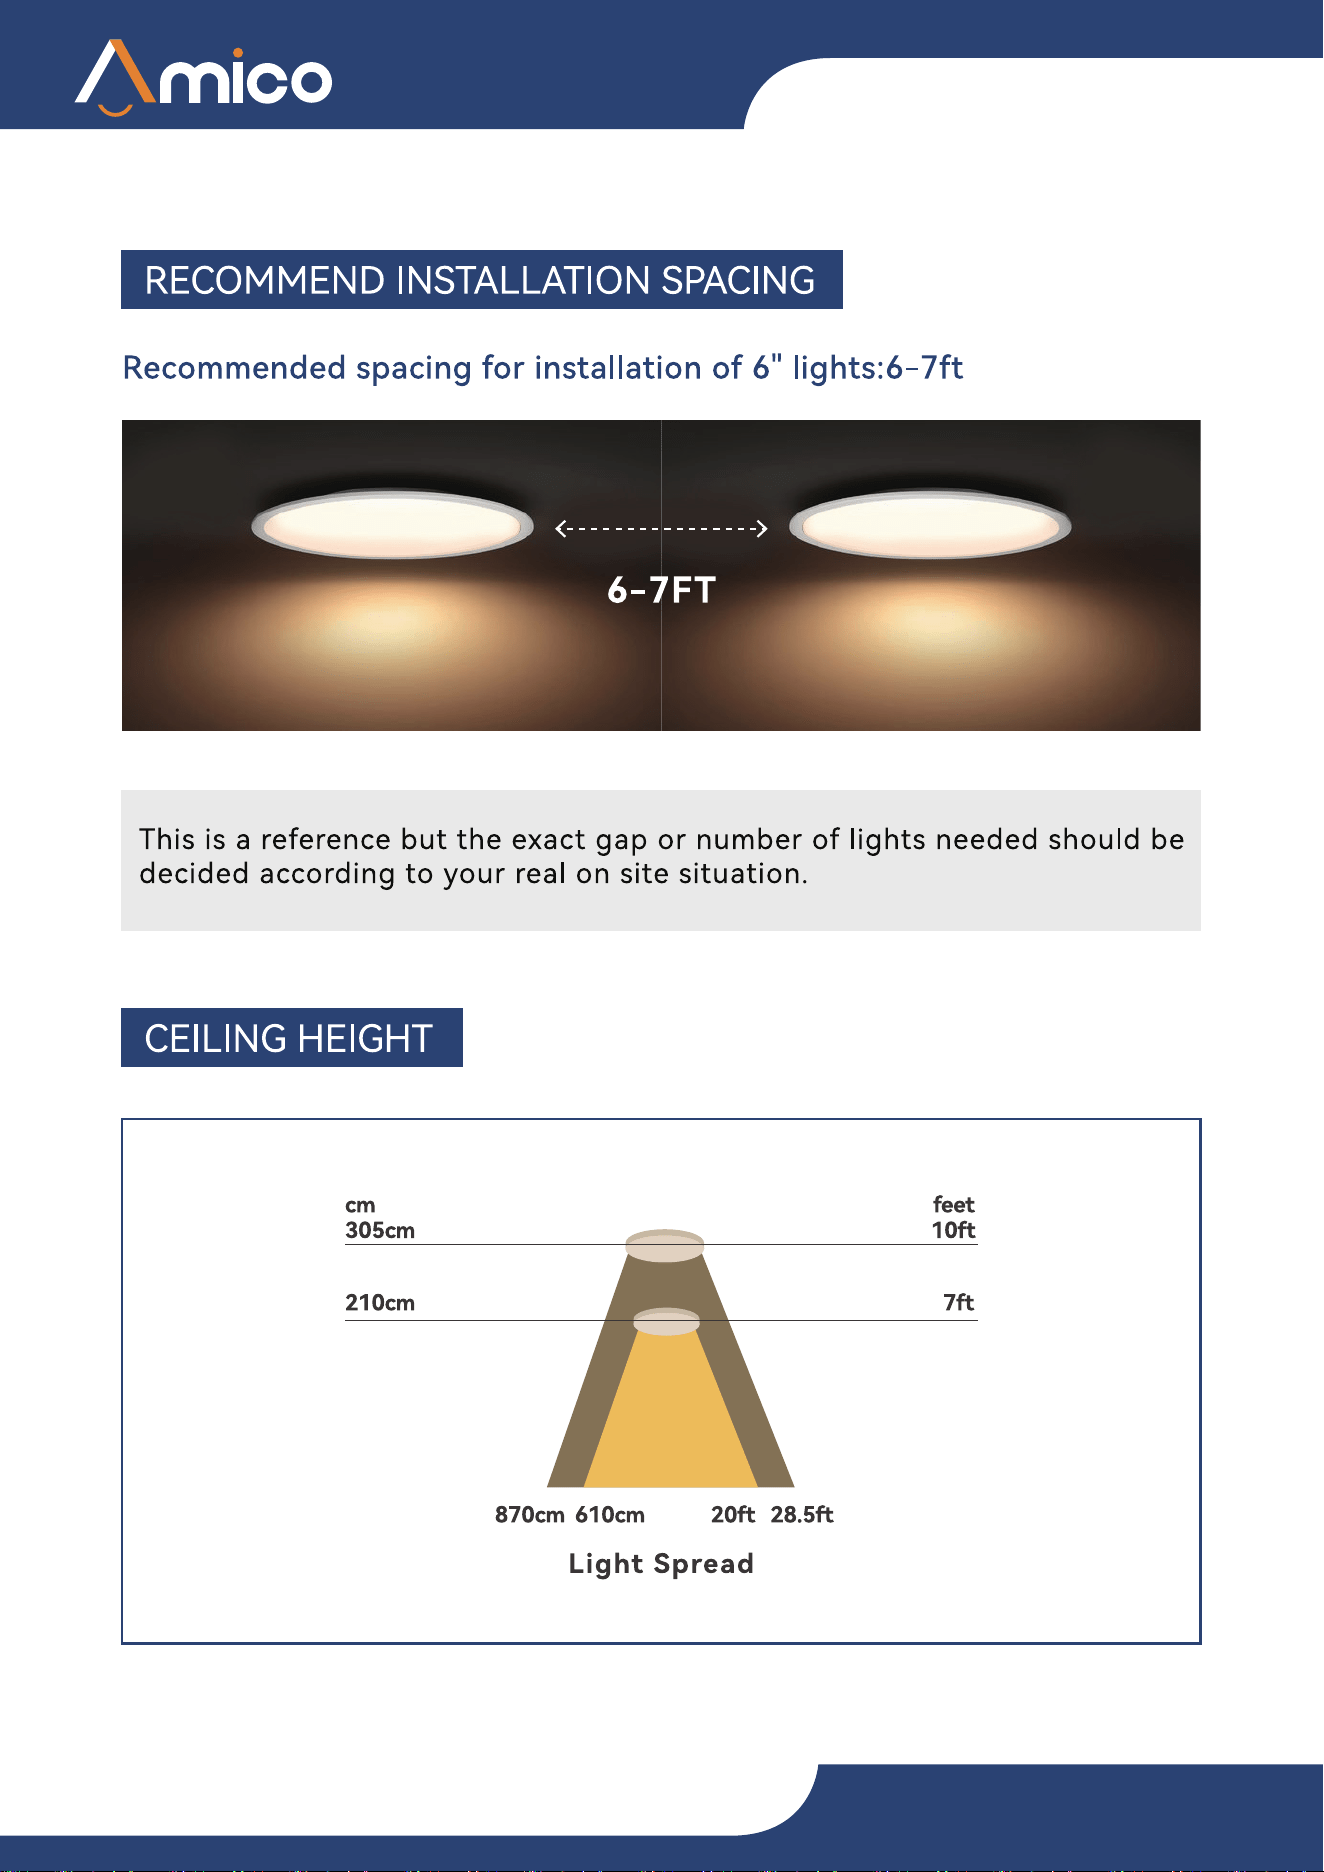
- Product can be installed directly into a ceiling without requiring separate J-box or
recessed housing.
- Connect fixture to a 120V 60Hz power source, any other connection voids the warranty.
1. After selecting a desired method of cutting, cut a 6.25" hole in the mounting surface.
2. Install drywall directly over rough-in paper. NOTE: use some method of locating the center of the aperture hole.
3. Select desired method (i.e. hand saw, hole saw) to cut an opening in the ceiling by using the provided template.
CAUTION: do not cut hole larger than the paper opening.
4. Make sure the POWER IS TURNED OFF at the source to the location in which you are mounting the luminaire.
5. Open the cover of the provided J-BOX and use wire nuts to make connections with power supply. Place splices in J-BOX before closing cover.
8. Place the J-BOX through the cut-out hole and mount according to local electrical code compliance.
9. Rotate and hold both spring clips upward to allow passage though the cut-out in the ceiling, continue to press the light module through the
cut-out hole until securely fixed and flush with ceiling.
12