INSTRUCTIONS FOR USE
BUILT-IN OVEN
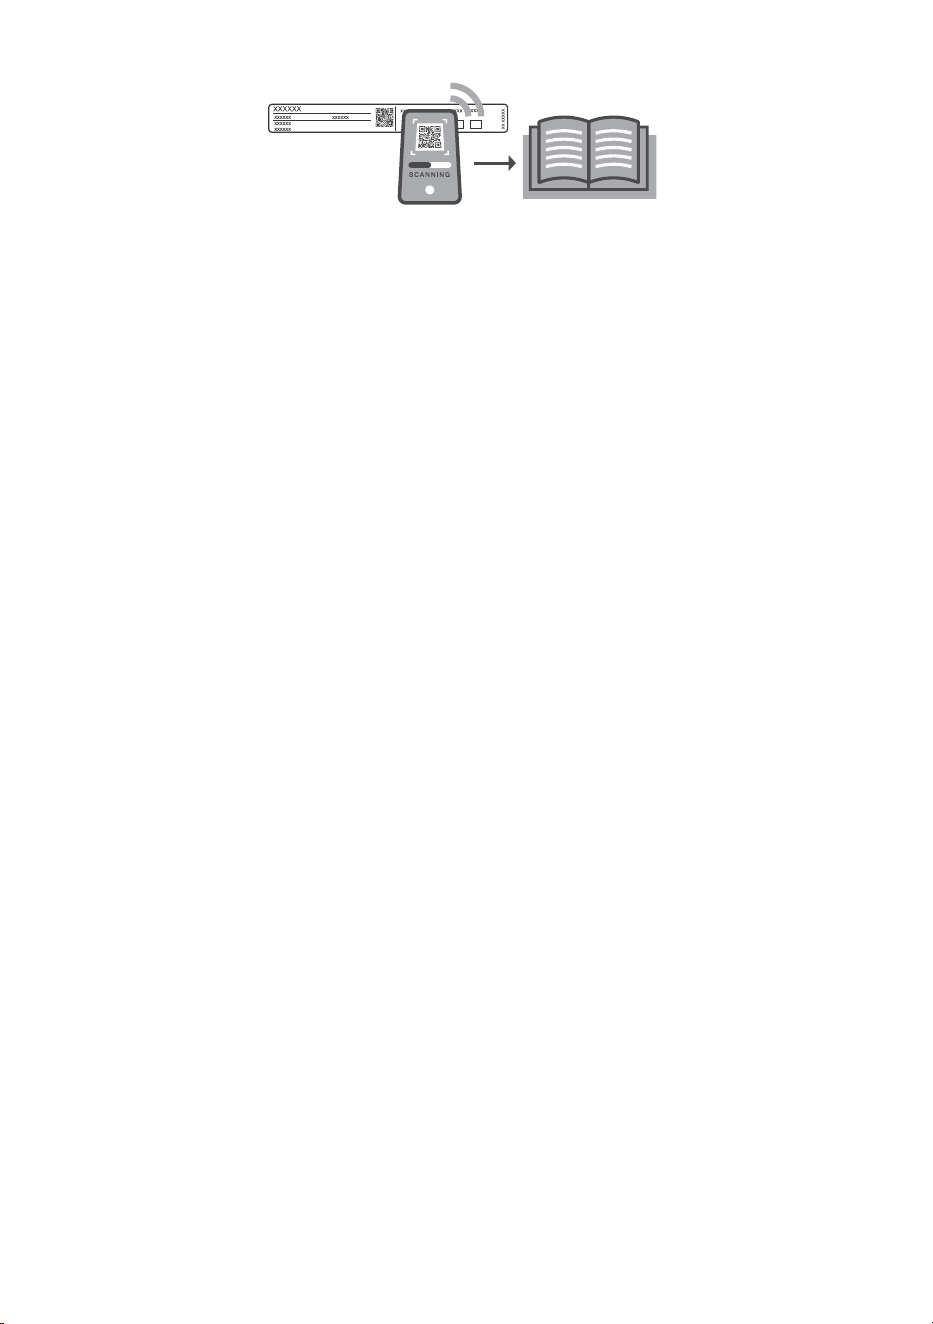
For more detailed instructions and tips, please visit http://www.gorenje.com or scan the QR code
on the rating plate.
Carefully read the instructions for use before connecting the appliance. Repair or any warranty
claim resulting from incorrect connection or use of the appliance shall not be covered by the
warranty.
1. Safety precautions
IMPORTANT SAFETY PRECAUTIONS – CAREFULLY READ
THE INSTRUCTIONS AND SAVE THEM FOR FUTURE
REFERENCE.
The appliance may only be connected to the power mains by
an authorized service technician or expert. Tampering with the
appliance or nonprofessional repair thereof may result in risk
of severe injury or damage to the product.
Appliance must be connected to fixed wiring which has
incorporated means of disconnection. Fixed wiring must be
made in accordance with the wiring rules.
The appliance must not be installed behind a decorative door
in order to avoid overheating.
If the supply cord is damaged, it must be replaced by the
manufacturer, its service agent or similarly qualified persons in
order to avoid a hazard (only for appliances supplied with
connection cord).
2

This appliance can be used by children aged 8 years and above,
and by persons with reduced physical, sensory or mental
capabilities or lack of experience and knowledge, if they have
been given supervision or instruction concerning the use of the
appliance in a safe way, and if they understand the hazards
involved. Children shall not play with the appliance. Cleaning
and user maintenance shall not be done by children without
supervision.
WARNING: Accessible parts may become hot during use.
Young children should be kept away.
WARNING: The appliance and some of its accessible parts
may become very hot during use. Care should be taken to avoid
touching heating elements. Children less than 8 years of age
shall be kept away unless continuously supervised.
The appliance is not intended to be controlled by external timers
or separate remote control system.
Only use the temperature probe recommended for use in this
oven.
Do not use harsh abrasive cleaners or sharp metal scrapers to
clean the oven door glass/ the glass of hinged lids of the hob
(as appropriate), since they can scratch the surface, which may
result in shattering of the glass.
Do not use steam cleaners or high-pressure cleaners to clean
the appliance as this may result in an electric shock.
WARNING: Before replacing the light bulb, make sure the
appliance has been disconnected from the mains power, in
order to prevent the hazard of an electric shock.
3

Never pour water directly on the bottom of the oven cavity.
Temperature differences could result in damage to the enamel
coating.
Do not use the appliance if it is damaged. Unplug the appliance
from the power mains and call an authorized service centre.
2. Other important safety warnings
We recommend that (due to appliance weight) at least two persons carry and install the appliance.
Do not lift the appliance by holding it by the door handle.
Do not stand or sit on the open oven door, and do not lean against it. Also, do not place any heavy
objects onto the oven door.
Make sure the vents are never covered or obstructed in any other way.
Do not line the oven cavity with aluminium foil, and do not place any baking trays or other cookware
on the oven bottom.
At the end of the baking process, and during baking, be careful when opening the oven door, as there
is danger of scalding.
Do not use the appliance if it is damaged. Unplug the appliance from the power mains and call an
authorized service centre.
The oven can be safely used with or without baking pan guides.
Do not store items in the oven, which could cause danger when the oven is switched on.
Before connecting the appliance to the power mains, leave it at room temperature for some time to
allow all components to adapt to room temperature.
Do not operate the appliance in an environment colder than 5 °C.
When baking with steam injection, always fully open the oven door when the baking process is
completed. If you do not do so, the steam rising from the oven cavity could affect the operation of
the control unit.
Only place the evaporating dish in the appliance when baking with a steam injection. When not using
the steam injection function, remove it.
Only remove and replace the evaporating tray when the oven has completely cooled down.
4
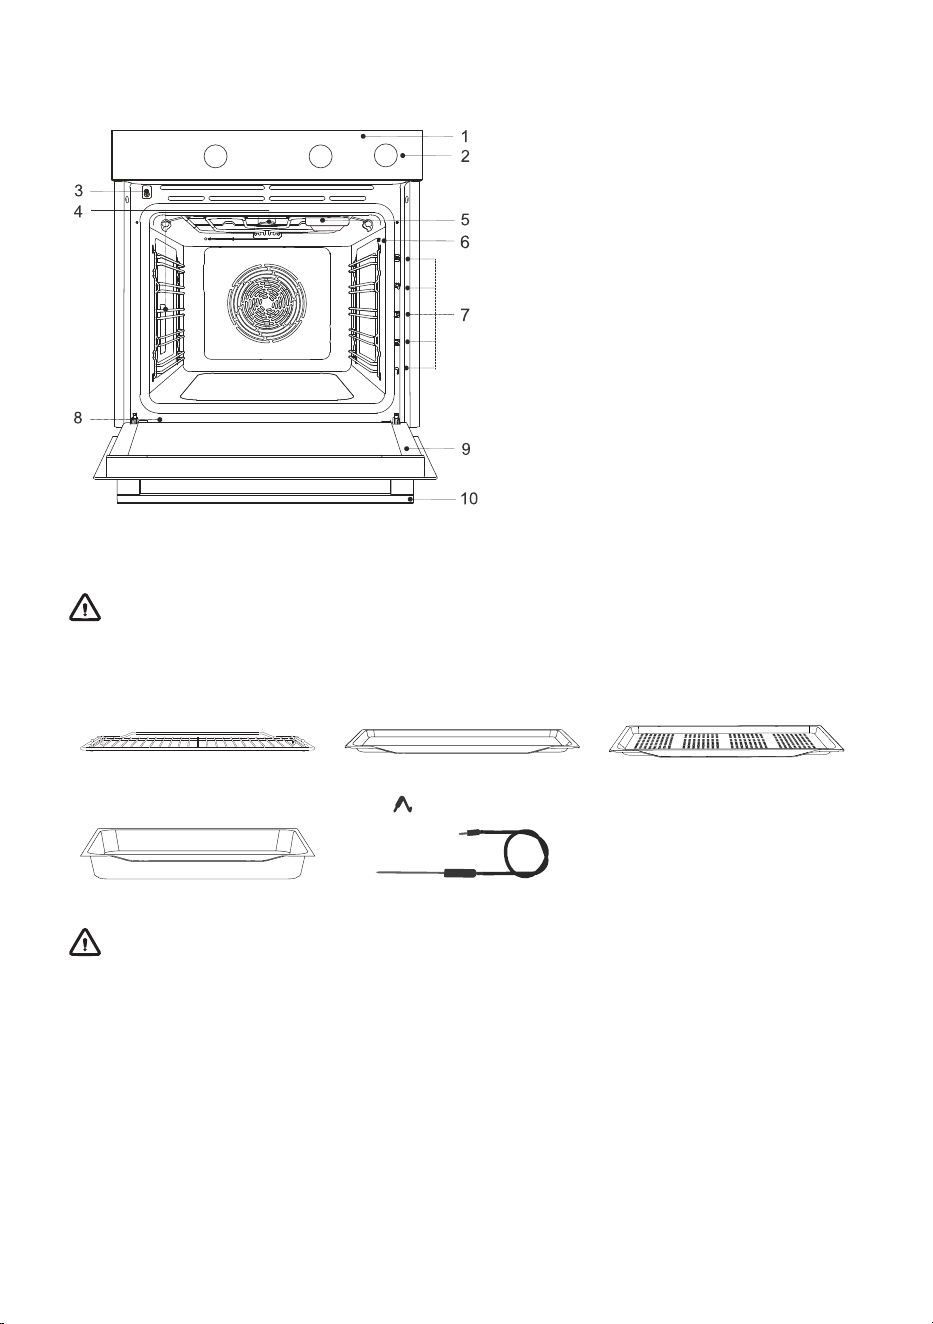
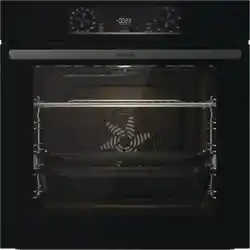
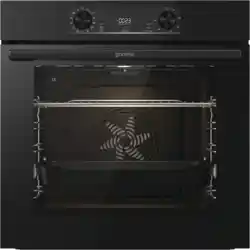
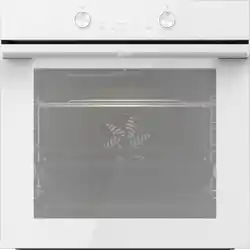
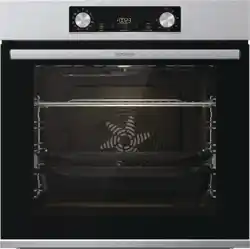
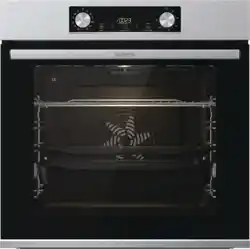
3. Appliance description
1. Control unit
2. Water tank knob
3. Door switch
4. Lighting
5. Evaporating tray
6. Temperature probe socket
7. Rack levels (1–5)
8. Rating plate
9. Oven door
10. Door handle
3.1 Oven equipment and accessories
WARNING!
Appliance functions and equipment depend on the model.
PERFORATED SHALLOW
BAKING SHEET
SHALLOW BAKING SHEETWIRE RACK
TEMPERATURE PROBE
( BAKESENSOR)
ALL-PURPOSE DEEP BAKING
TRAY
WARNING!
When inserting the wire rack into the guide, always make sure its elevated part is at the
back and on the top side.
The shallow baking tray may deform as it heats up in the oven. Once it cools down, it
returns to the initial shape. Such deformation does not affect its function.
5
4. Before first use
• Remove oven accessories and any packaging (cardboard, polystyrene foam) from the oven.
• Wipe the oven accessories and interior with a damp cloth. Do not use abrasive or aggressive
cloths or cleaners.
• Heat an empty oven for approximately one hour with the top and bottom heater system at a
temperature of 250 °C. The characteristic "new oven scent" will be released; therefore, ventilate
the room thoroughly during this process.
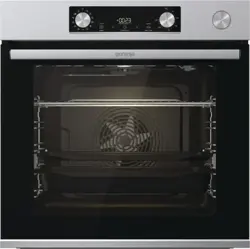
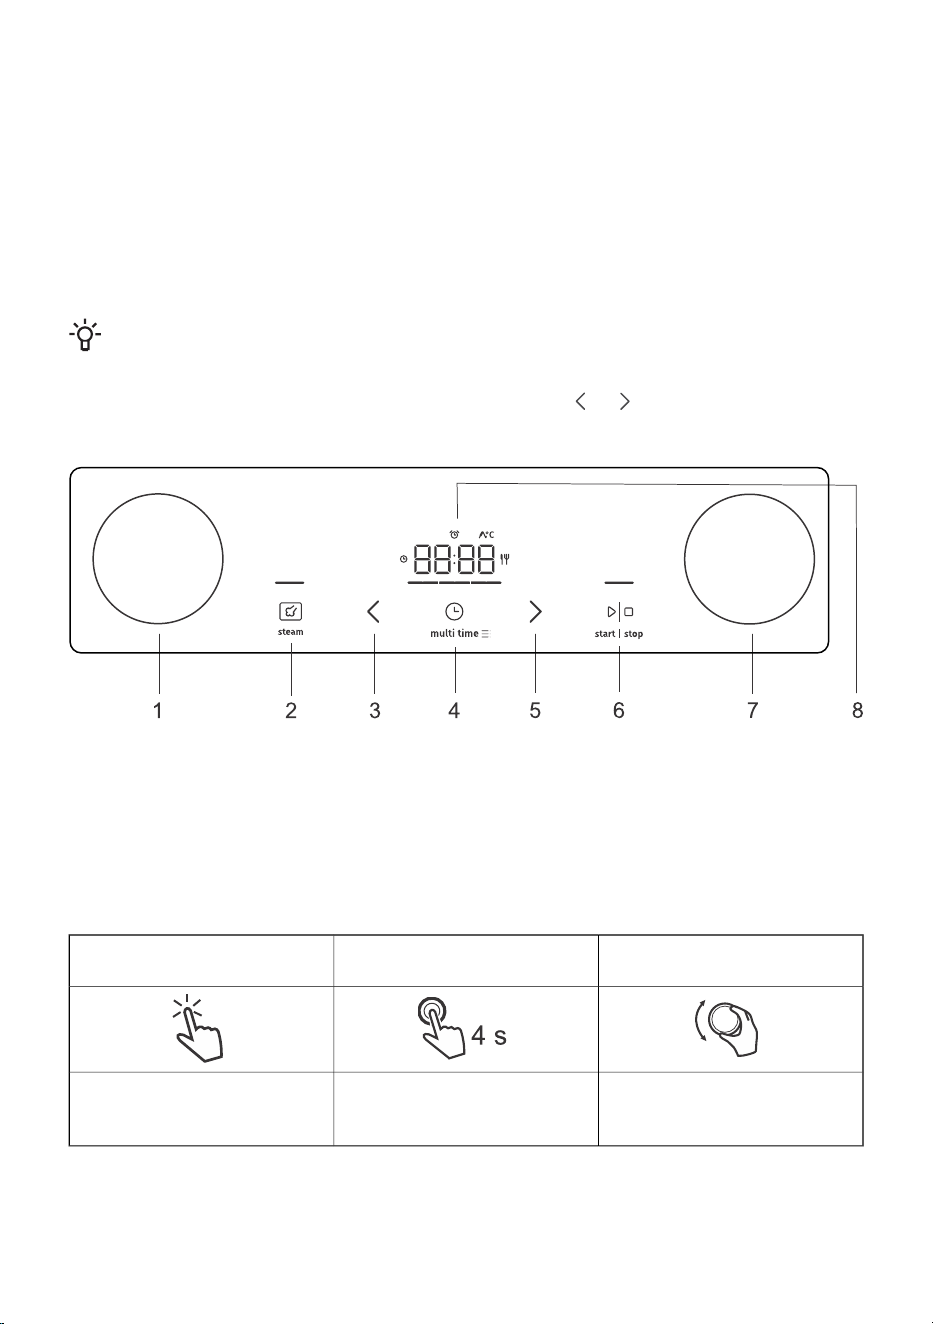
5. Operating the appliance
INFORMATION!
For better key responsiveness, try touching them with as much of your fingertip as possible.
Each time you touch a key, an acoustic signal is emitted.
You can change the selected setting by touching the keys or . Confirm the desired setting
by pressing start I stop.
1. System selector knob
2. Steam injection key, cancel or back key
3. Value decrease key
4. Timer function and settings key
5. Value increase key
6. start I stop key for starting or pausing a program
7. Temperature settings knob
8. Display
Explanation of shortcuts in the
manual:
Rotate the button – to switch
between settings and select
settings.
Press and hold the key (4 sec.)
– for additional settings.
Briefly touch the key – to
confirm the setting.
6
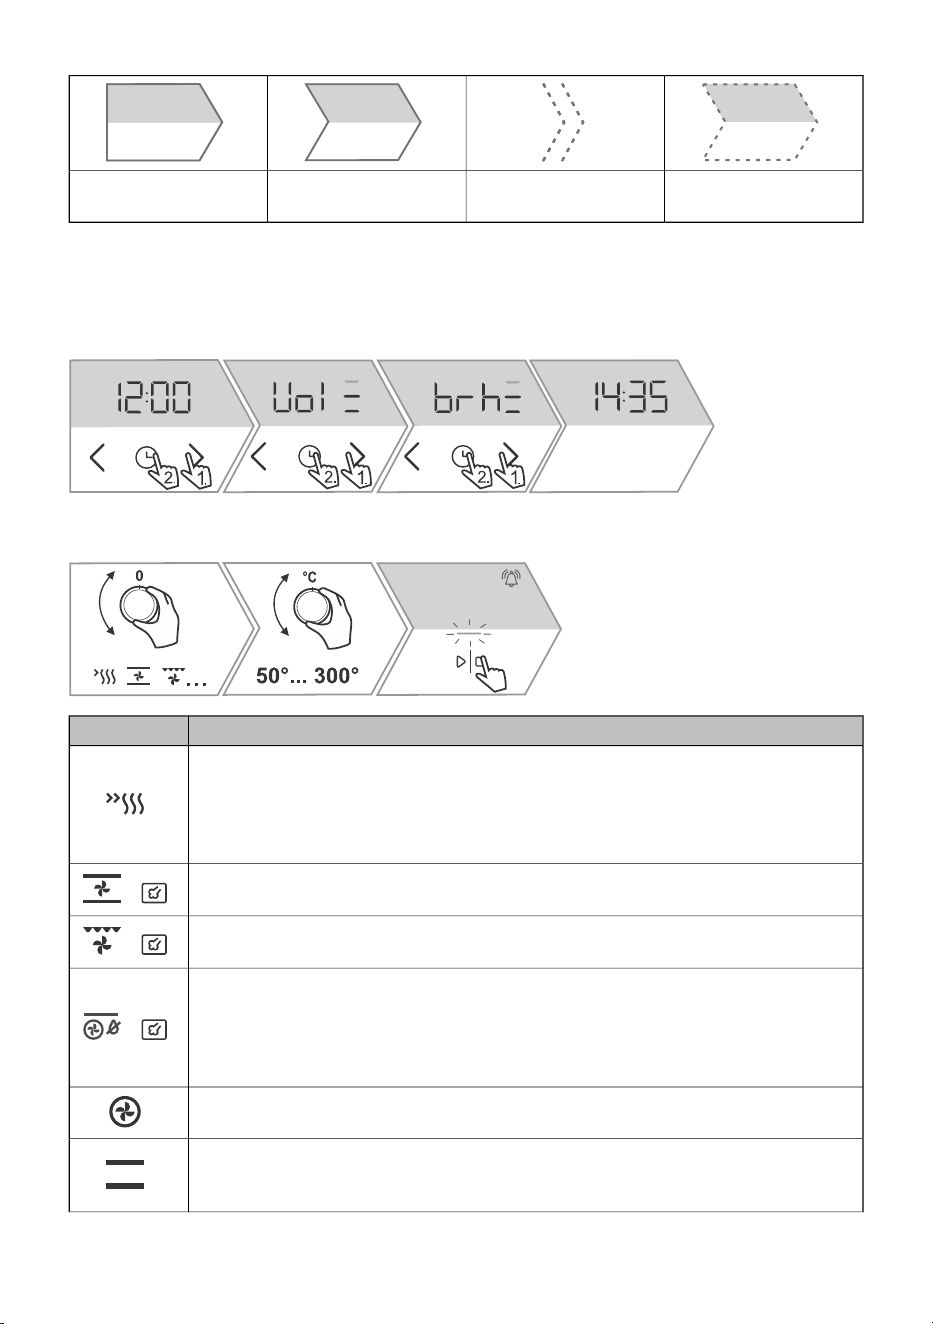
Optional step
Passed time (exp. oven
is operational)
Intermediate stepFirst step
5.1 Switching on for the first time
First select and confirm the basic settings: time of day (CLoc), acoustic signal volume (Vol), display
brightness (brh).
5.2 Selecting the basic baking settings
UseSymbol
QUICK PREHEATING OF THE OVEN
To reach the set temperature as quickly as possible. When the oven is preheated to
the set temperature, a short beep will sound and the dash below the clock will light
up. Then you can select the system setting you want to use to prepare the food. This
function is not suitable for baking.
TOP AND BOTTOM HEATER WITH FAN
1)
For even baking of food on a single rack, and for making soufflés.
+
LARGE GRILL WITH FAN
1)
For roasting poultry and larger cuts of meat under a broiler.
+
INTENSIVE BAKING (AIR FRY)
1)
This cooking method results in a crunchy crust without added fat. This is a healthy
version of fast-food frying, with fewer calories in the cooked food. Suitable for smaller
cuts of meat, fish, vegetables, and frozen products ready for frying (French fries,
chicken nuggets).
+
HOT AIR
For roasting meat and vegetables or baking pastry.
TOP AND BOTTOM HEATER
Use this system for conventional baking on a single rack, making soufflés, and baking
at low temperatures (slow cooking).
7
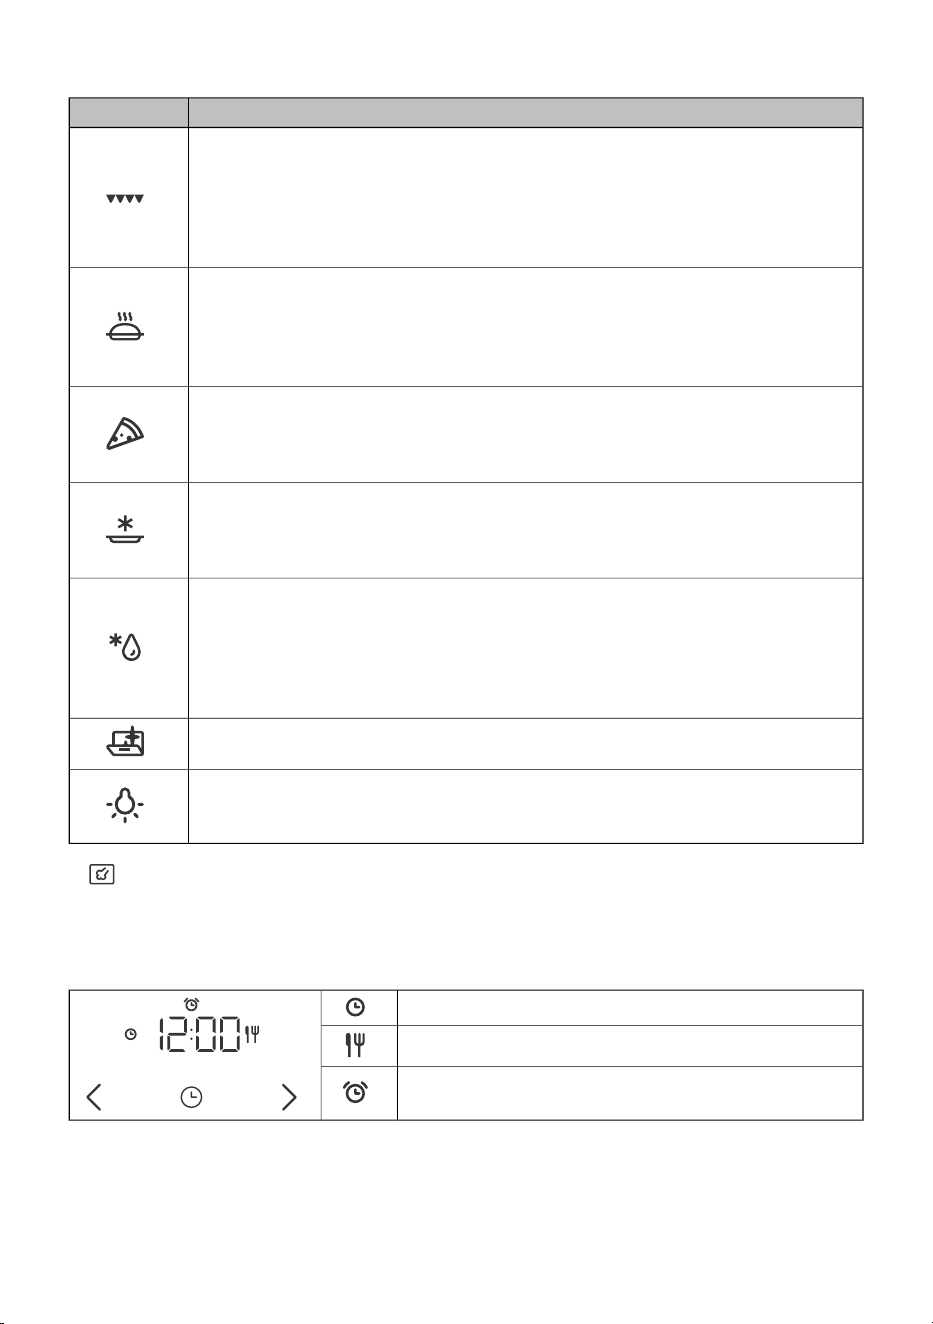
Table continued from last page
UseSymbol
LARGE GRILL
Use this system to grill large amounts of flat-shaped food like toast, open sandwiches,
grill sausages, fish, skewers etc., as well as for cooking au gratin and for browning
the crust. The heaters mounted on the top of the oven cavity evenly heat the entire
surface.
Maximum allowed temperature is 240 °C.
SLOW BAKING
2)
For gentle, slow and even cooking of meat, fish and pastry on a single rack. This
cooking method will leave the meat with a higher water content, making it juicier and
more tender, while pastry will be evenly browned/baked. This system is used in the
temperature range between 140 °C and 220 °C.
PIZZA SYSTEM
This system is optimal for baking homemade pizza and pastry with higher water
content. Use it to bake on a single rack, when you want the food to be done faster
and to be crunchy.
BAKING FROZEN FOOD
This method allows baking frozen food in a shorter period of time without pre-heating.
Optimum for pre-baked frozen products (bakery products, croissants, lasagne,
French fries, chicken nuggets), meat and vegetables.
DEFROSTING
Use this function for controlled defrosting of frozen food (cakes, pastry, bread, rolls,
and deep-frozen fruit). During the defrosting process, turn the pieces of food over,
stir the food, and separate any chunks that are frozen together. For microbiological
safety, we recommend slowly defrosting meat and other delicate foods in the
refrigerator.
AQUA CLEAN
This program makes it easier to remove any stains from inside the oven.
OVEN LIGHT
Oven light is switched on when a system is selected or when the knob is turned to
the light position.
1)
The systems allow steam injection during cooking (see chapter Steam addition).
2)
This function is used for determining the energy efficiency class pursuant to the EN 60350-1 standard.
5.3 Time functions
Setting cooking
Setting delayed end
Setting Egg timer
8
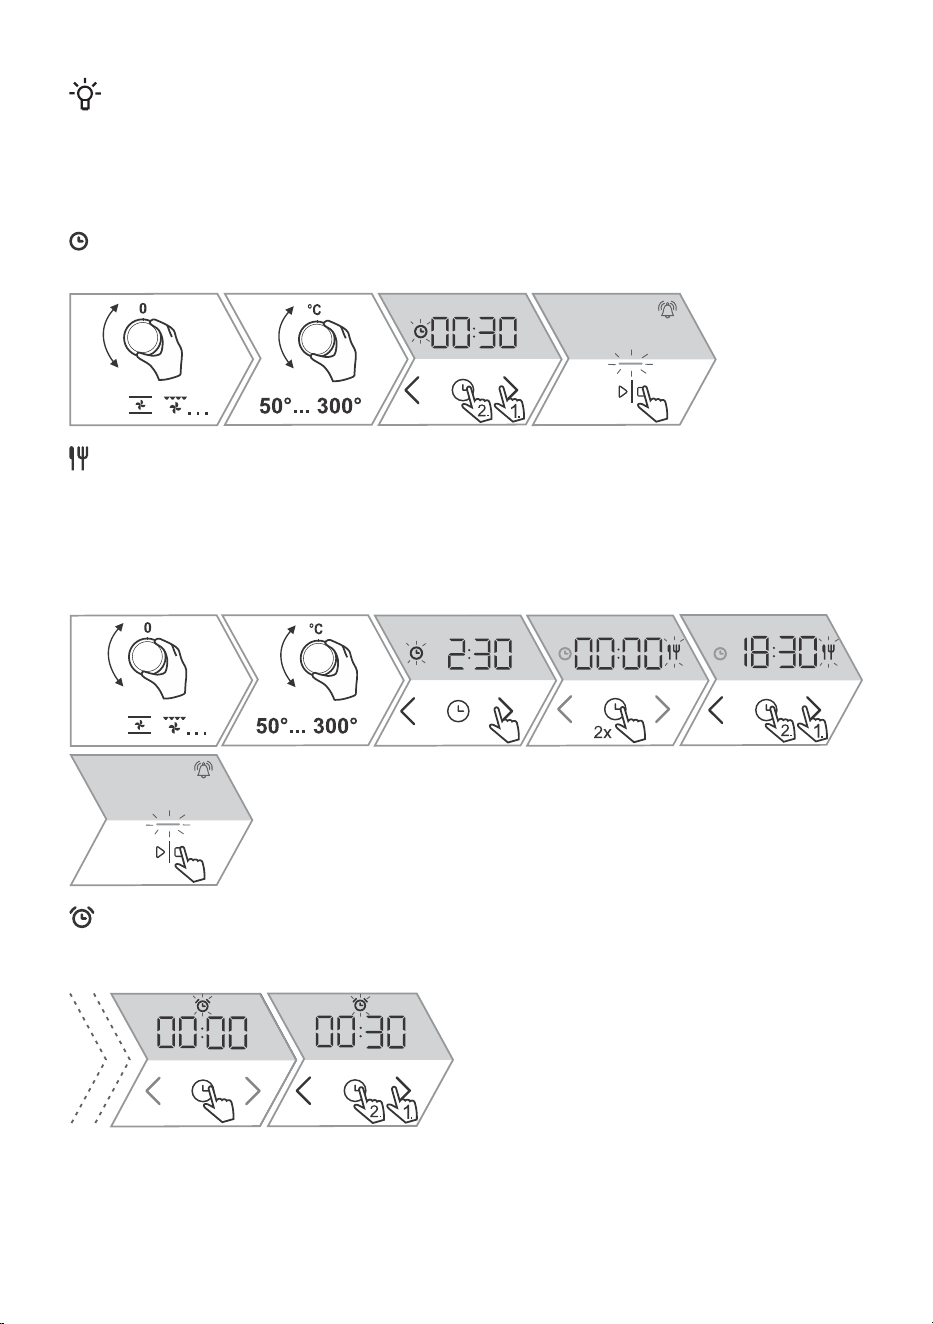
INFORMATION!
When setting the cooking time or delayed start, the oven stops operating automatically. The
display will show End.
When the set cooking time expires, an acoustic signal will be heard which you may turn off by
touching any key. After one minute, the acoustic signal will be switched off automatically.
Setting cooking
In this mode, you can specify the duration of oven operation (cooking time).
Setting delayed end
Use this function when you wish to start cooking the food in the oven after a certain period of time.
Place the food into the oven, then set the system and temperature. Then, set the cooking time and
the time when you wish your food done (end of cooking).
Example:
Current time: 12:00 (noon); Cooking time: 2 h 30 min; End of baking: 6.30 p.m.
Setting the minute minder
The minute minder may be used when the oven is not operating or during the baking process (touch
the multi time key twice).
9
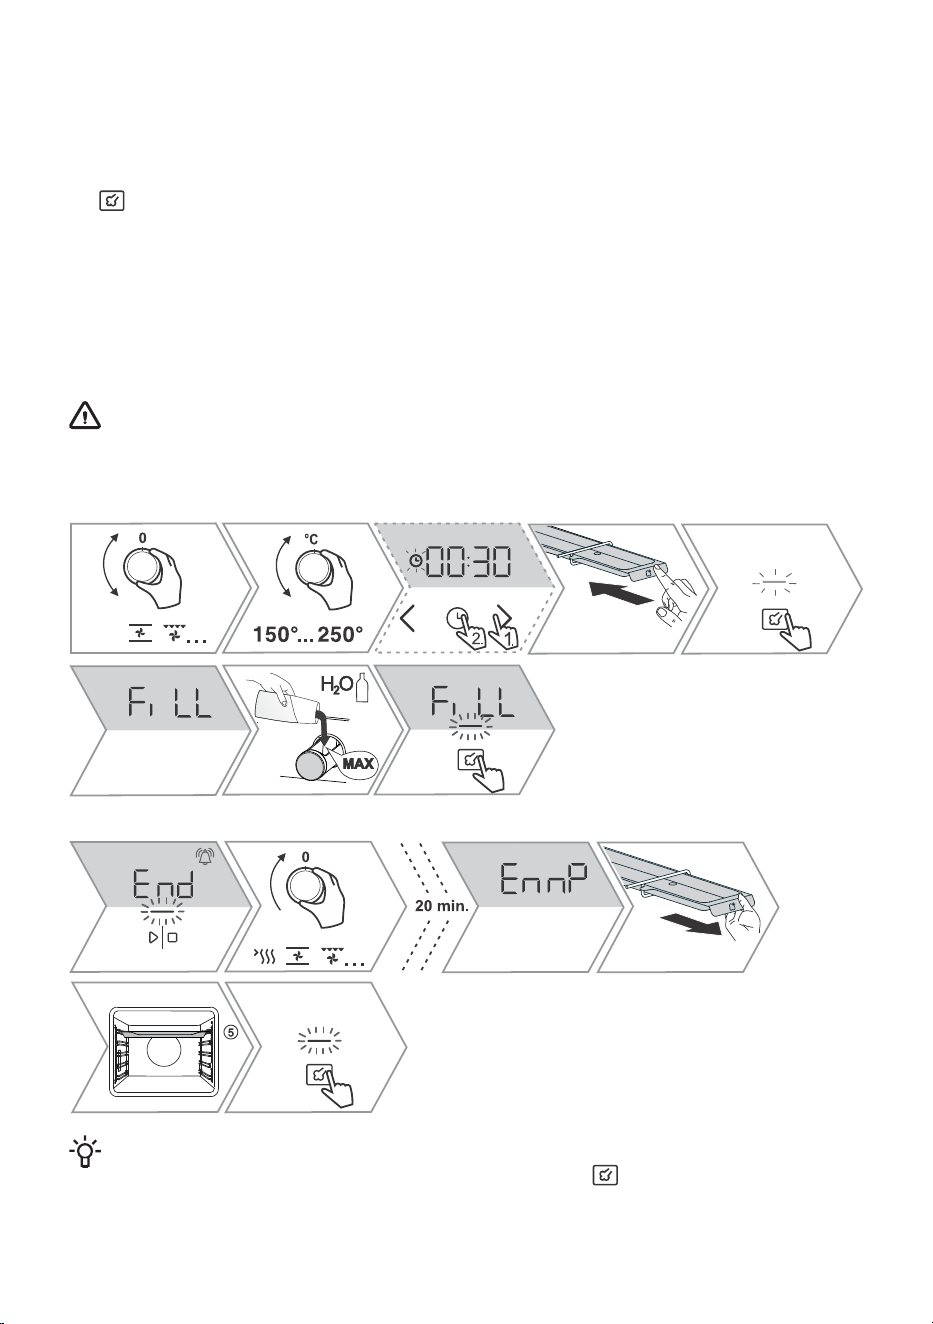
5.4 Steam injection
Start the function before starting or during the first minutes of cooking. The steam creates a better
crust and improves crunchiness.
This function can be used if you have selected a system with the addition of steam (the dash above
the key is partially illuminated). Preheating in systems with steam injection is not recommended.
While this function is active, you may hear the sound of the pump, which is a part of normal appliance
operation.
Always fill the tank with clean water from the water supply network or bottled water, without additional
admixture. The water that is poured into the tank must have a room temperature of about 20 °C (+/–
10 °C).
After 20 minutes, if there is leftover water still in the tank after cooking, the display shows EnnP. The
system selector KNOB must be in position "0".
WARNING!
Do not use distilled water, tap water with high chlorine content, or other similar liquids.
Use only fresh tap water, softened water or non-carbonated mineral water.
Start of the process:
End of the process:
INFORMATION!
The water tank can be emptied at any time by long-pressing . The system selector KNOB
must be in position "0".
10
INFORMATION!
During oven heating, the evaporating tray may deform, but this does not affect its function.
5.5 Start and end of cooking
INFORMATION!
During oven heating, the evaporating tray may deform, but this does not affect its function.
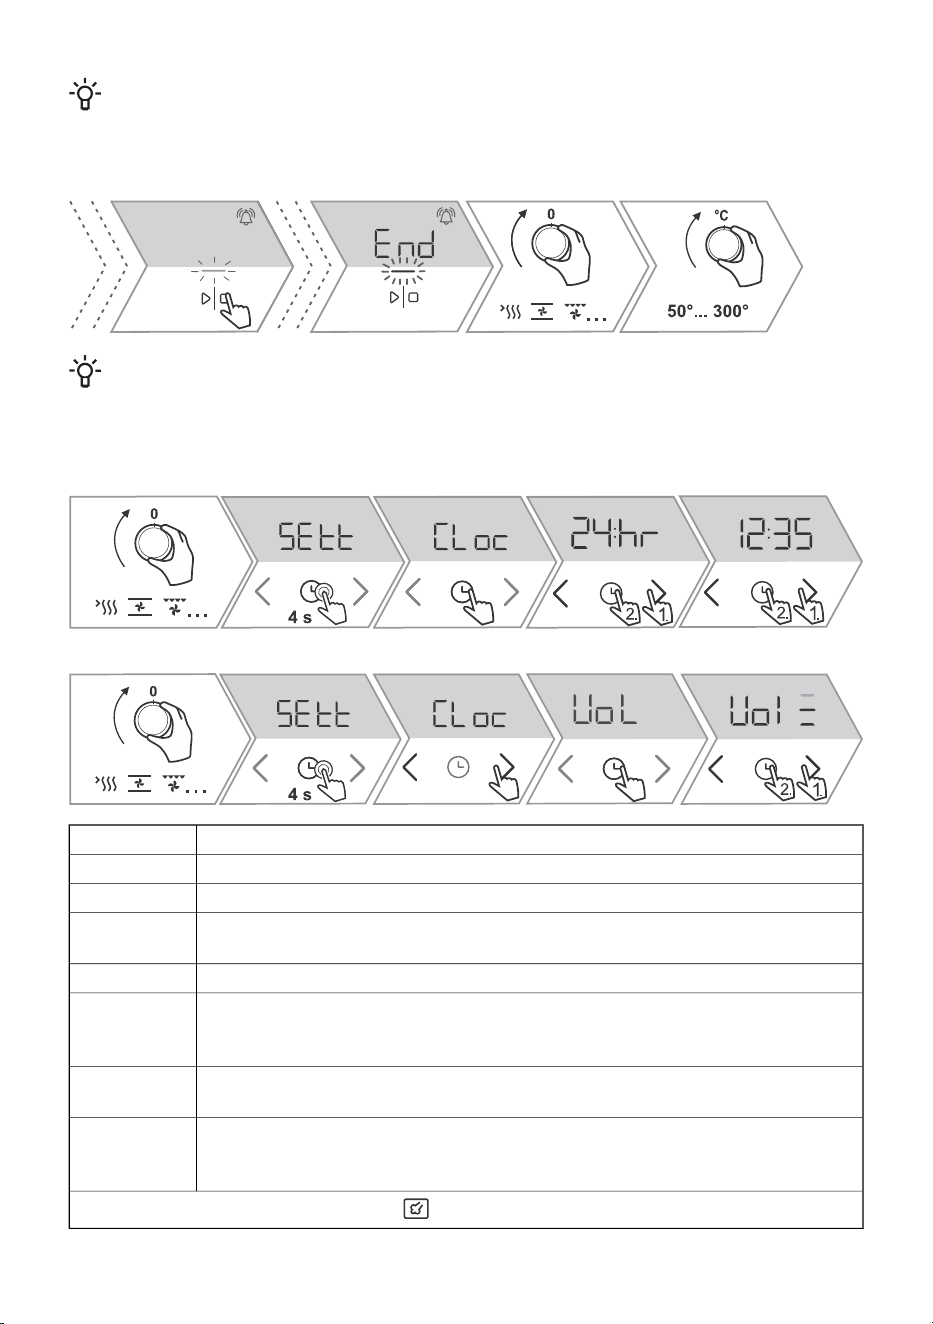
6. General settings
Example of time setting:
Example of adjusting the signal volume:
ClockCLoc
Acoustic signal volumeVol
Display brightnessbrh
Display night mode – function will automatically dim the display (switch from higher
to the lowest display brightness) during night time (8:00 p.m. to 6:00 a.m.)
nGht
Standby – this function automatically switches the clock display on or off.hidE
Reset to factory defaults – Select rES to choose the factory default settings, and
confirm by pressing and holding the start I stop key. Hold the key until all lit dashes
disappear.
FAct
Water hardness - you can choose between five water hardness levels. The default
setting is level 5.
Wh5
Descaling - you can activate this yourself; otherwise it will be suggested by the
oven after a certain number of steam function cycles (the display shows dEcL). To
turn on the function, select YES, and to turn it off select no.
dEcL
To leave the extra functions menu, touch .
11
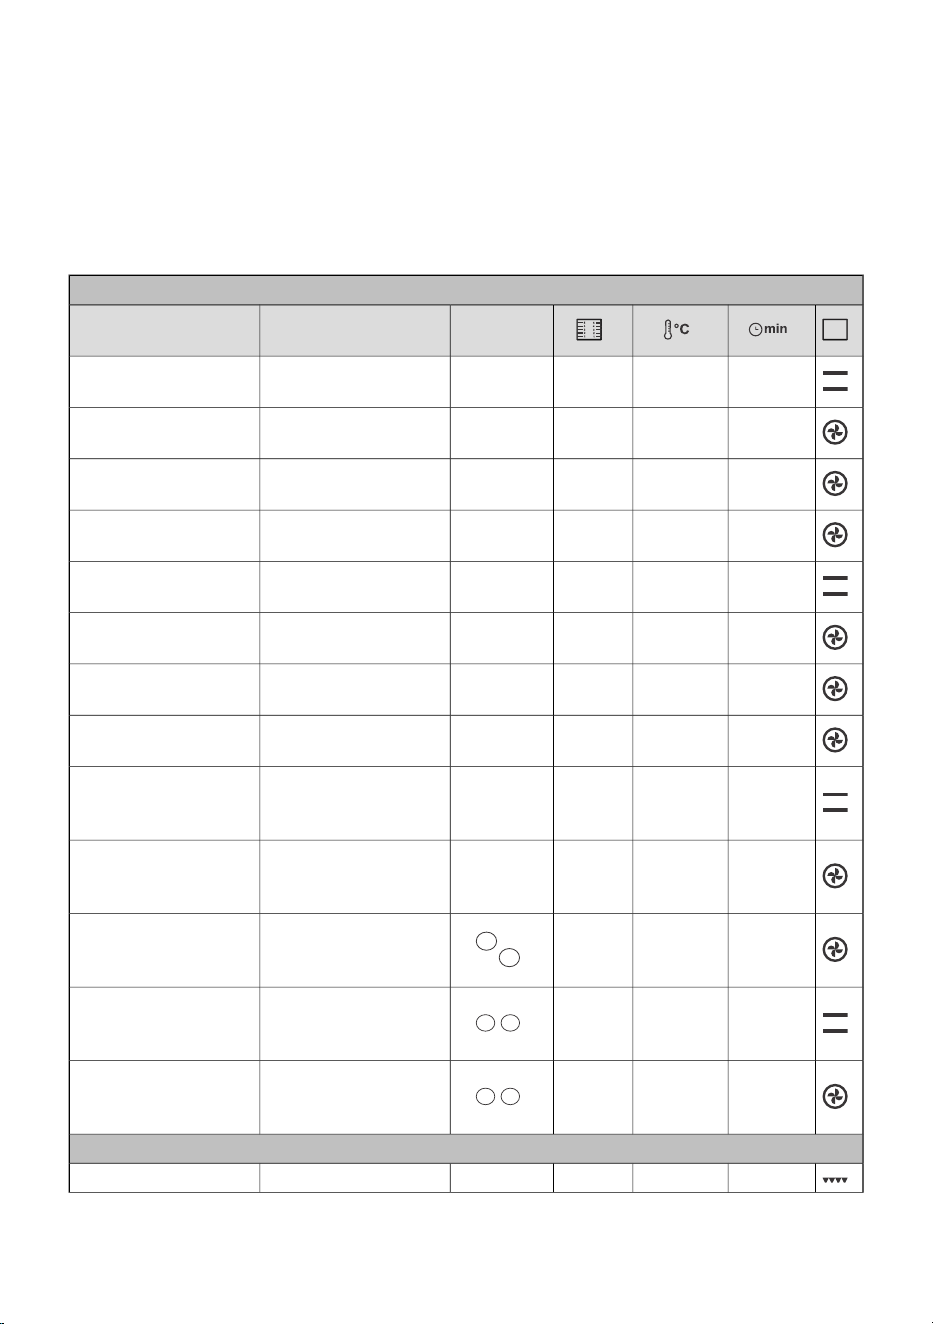
7. Cooking table
NOTE: Dishes requiring a fully pre-heated oven are indicated with a single asterisk * in the table.
Dish
PASTRY AND BAKERY PRODUCTS
pastry/cakes in moulds
30-401503
sponge cake
90-1201801
pie with filling
60-70180-1902
strudel
20-30160 *3
cupcakes
17-22180 *2
yeast-leavened small pastry
30-401703
puff pastry
30-401403
piped cookies
20-301403
cookies/biscuits
40-55190-200
+
2
bread on a baking tray
30-45190-2002
bread in a tin
10-15200-210
+
3
fresh bread rolls
(Semmel/morning rolls)
4-72305toast
4-7300 *1
homemade pizza
130-160160-1702
beef roast (loin, rump), 1.5 kg
90-110170-1803
pork roast, rump, 1.5 kg
60-80200-220
+
2
poultry, 1.2–2.0 kg
30-45210-2204chicken wings
12-20230-240
+
4
whole fish, 350 g
30-40210-220 *
+
3
baked potatoes, wedges
20-25210-2203
French fries
35-45180-1902
lasagne
40-60160-1802
sweet baked pudding
301802
preservation
/60-953
reheating
15752
plate warming
12
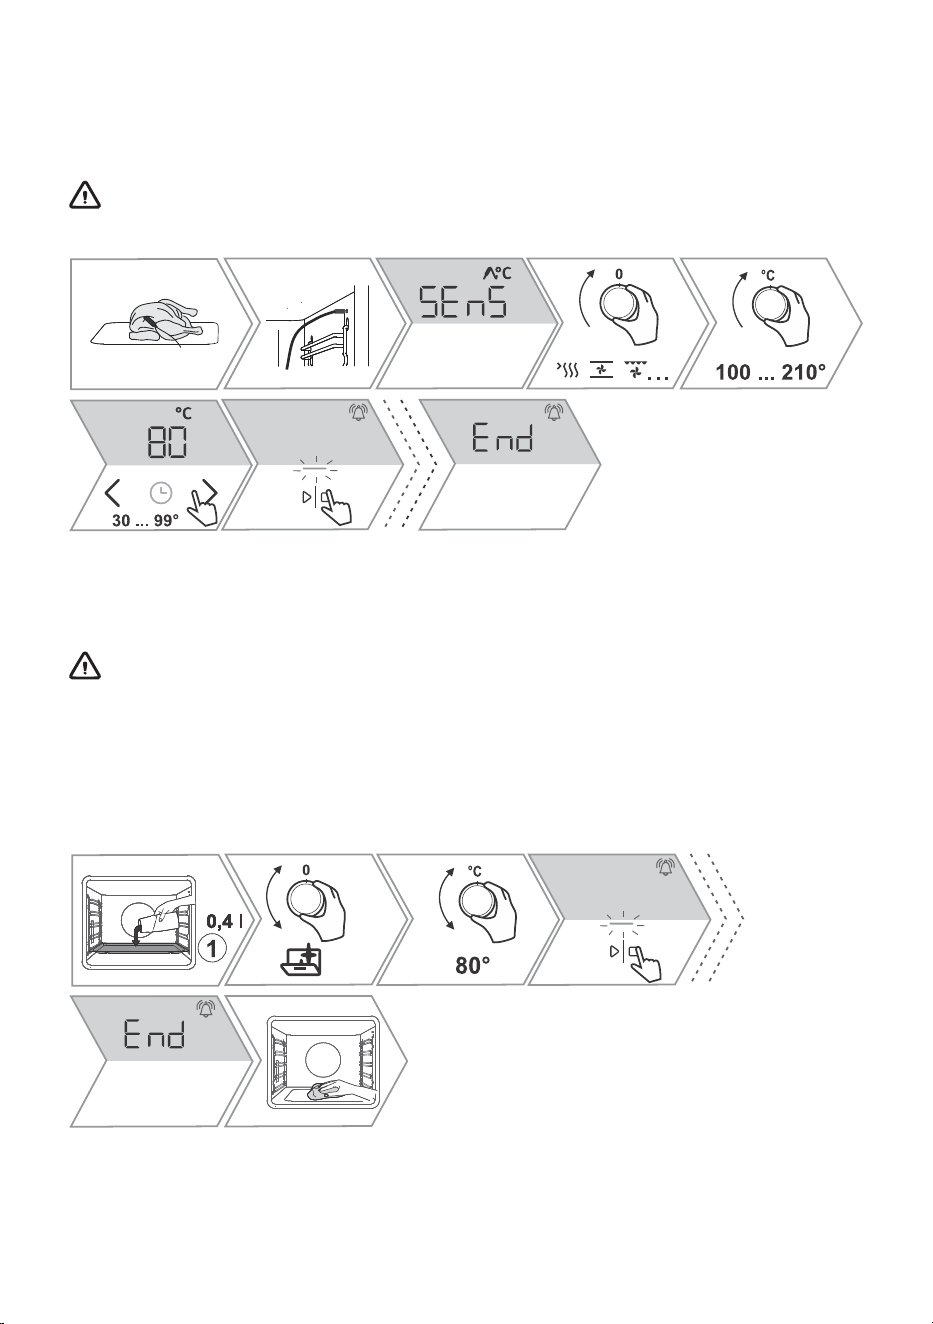
7.1 Cooking with a temperature probe
The food probe allows for accurate monitoring of the core temperature of the food during cooking.
NOTE: More detailed instructions can be found on the appliance's website (see page 2).
WARNING!
The food probe should not be in direct vicinity of the heating elements.
8. Cleaning and maintenance
Regularly clean the appliance and use warm water and hand dishwashing liquid to remove larger
impurities and limescale. Use a clean soft cloth or sponge cloth.
WARNING!
Be sure to unplug the appliance from the power supply and wait for the appliance to cool
down.
Children should not clean the appliance or perform maintenance tasks without proper
supervision.
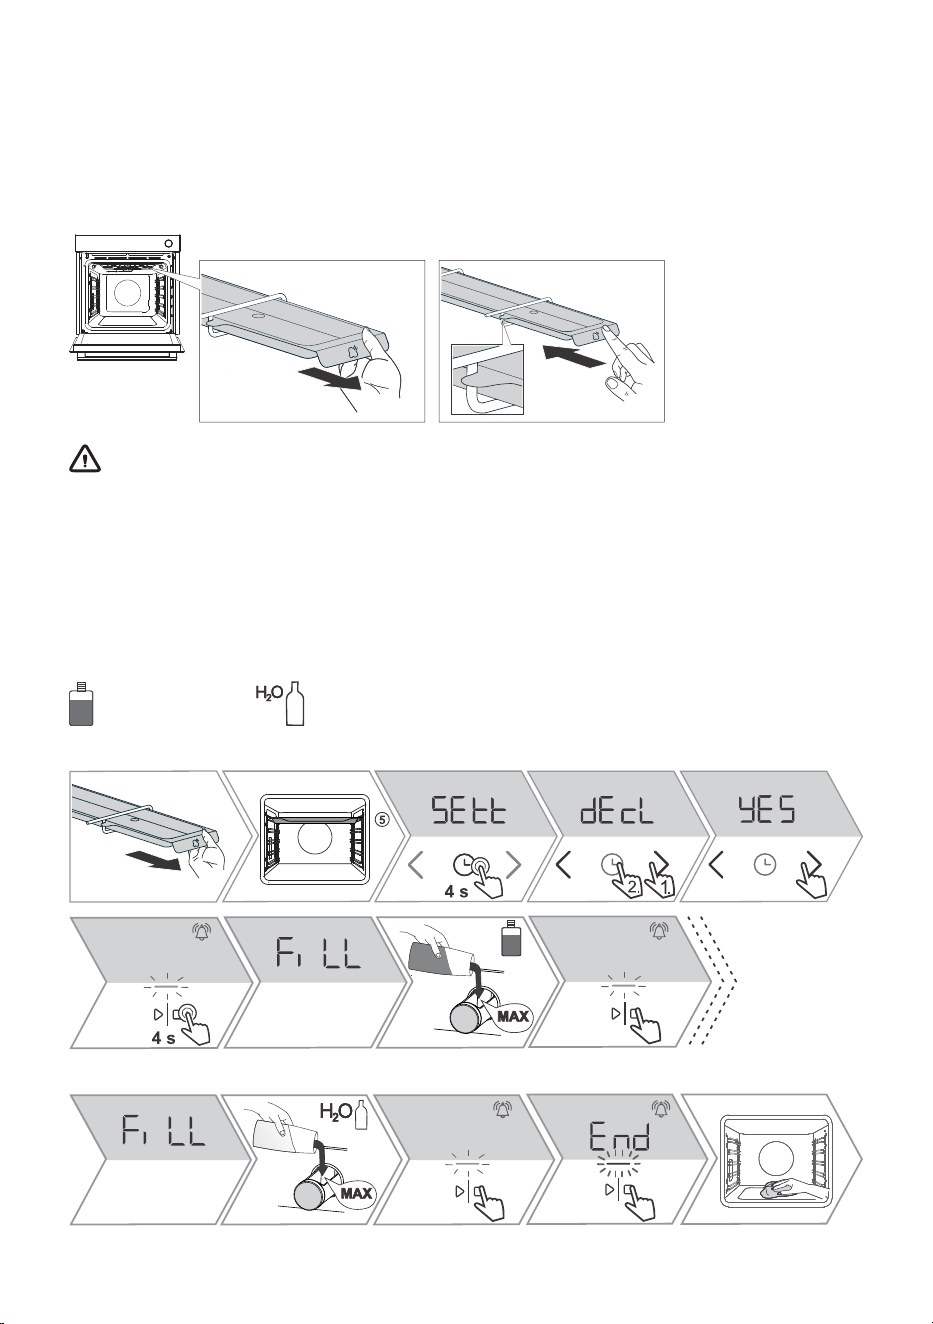
8.1 Using the Aqua Clean program to clean the oven
13
8.2 Cleaning the evaporator tray
Remove the container and clean it manually with detergent or in the dishwasher. If limescale has
accumulated in the container, you can soak it in a descaling agent (use according to the descaling
agent manufacturer's instructions) or in alcoholic vinegar. The container must be rinsed thoroughly
after cleaning and before reinstallation. Before cooking with steam injection again, insert the evaporating
dish back into the guides and gently push it all the way in.
WARNING!
After use, the evaporator tray can be hot, and there can still be some water in it. To avoid
scalding, wait for the oven to cool down completely.
If you do not reinstall the tray, water will drip on the food when cooking with steam injection.
8.3 Cleaning the steam system
Cleaning of the steam system depends on both frequency of baking with steam injection and on the
hardness of the water used.
- Descaling agent - Water
Start of the process:
End of the process:
14
INFORMATION!
If you do not wish to clean the steam system in the moment when proposed by the oven, this
can be terminated by selecting OFF. You may cancel the descaling program up to three times.
After that, the oven will disable the operation of the steam function.
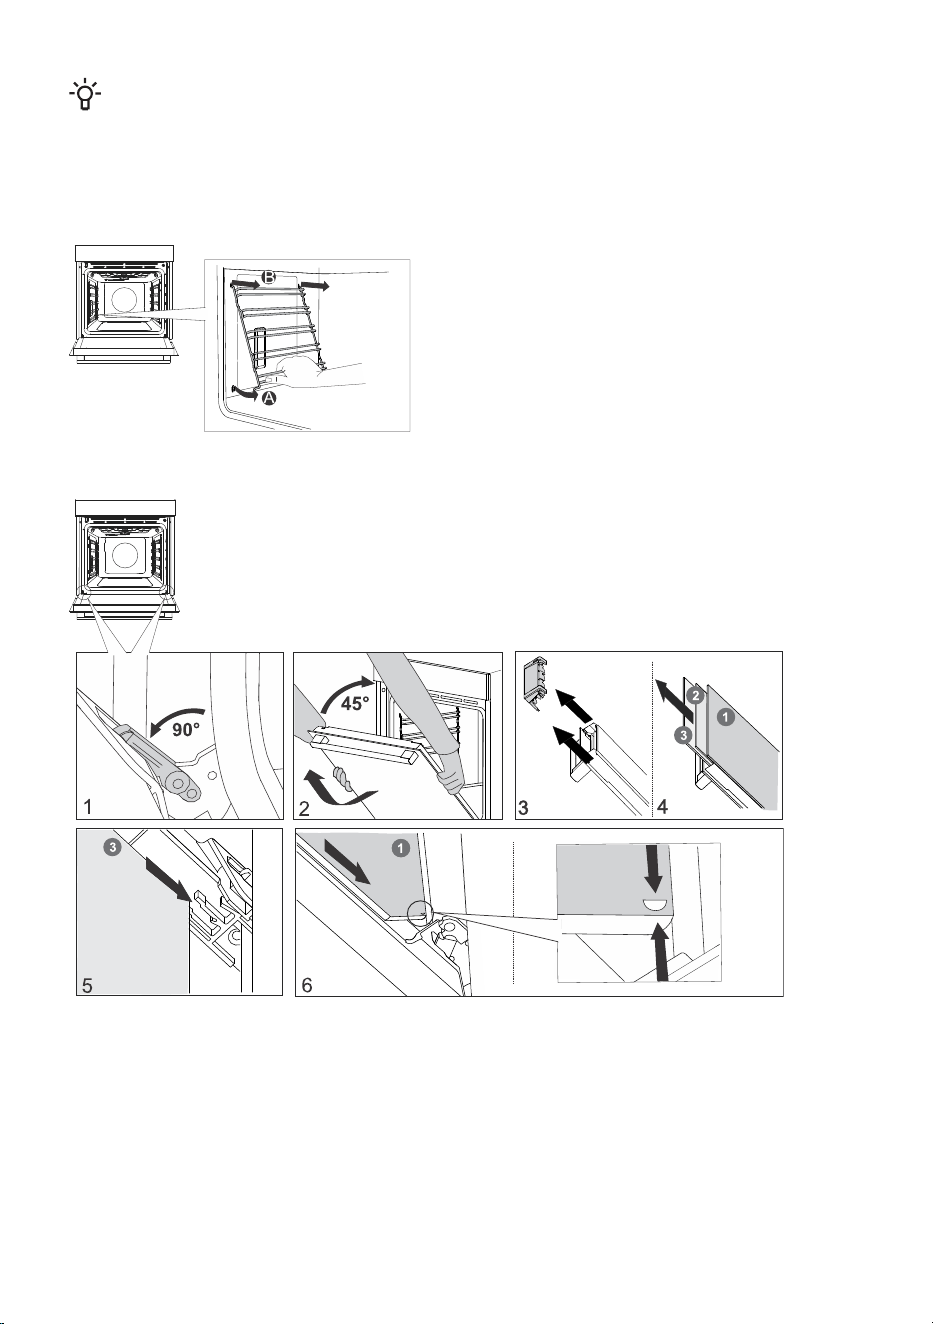
8.4 Removing wire and fixed pull-out (extendible) guides
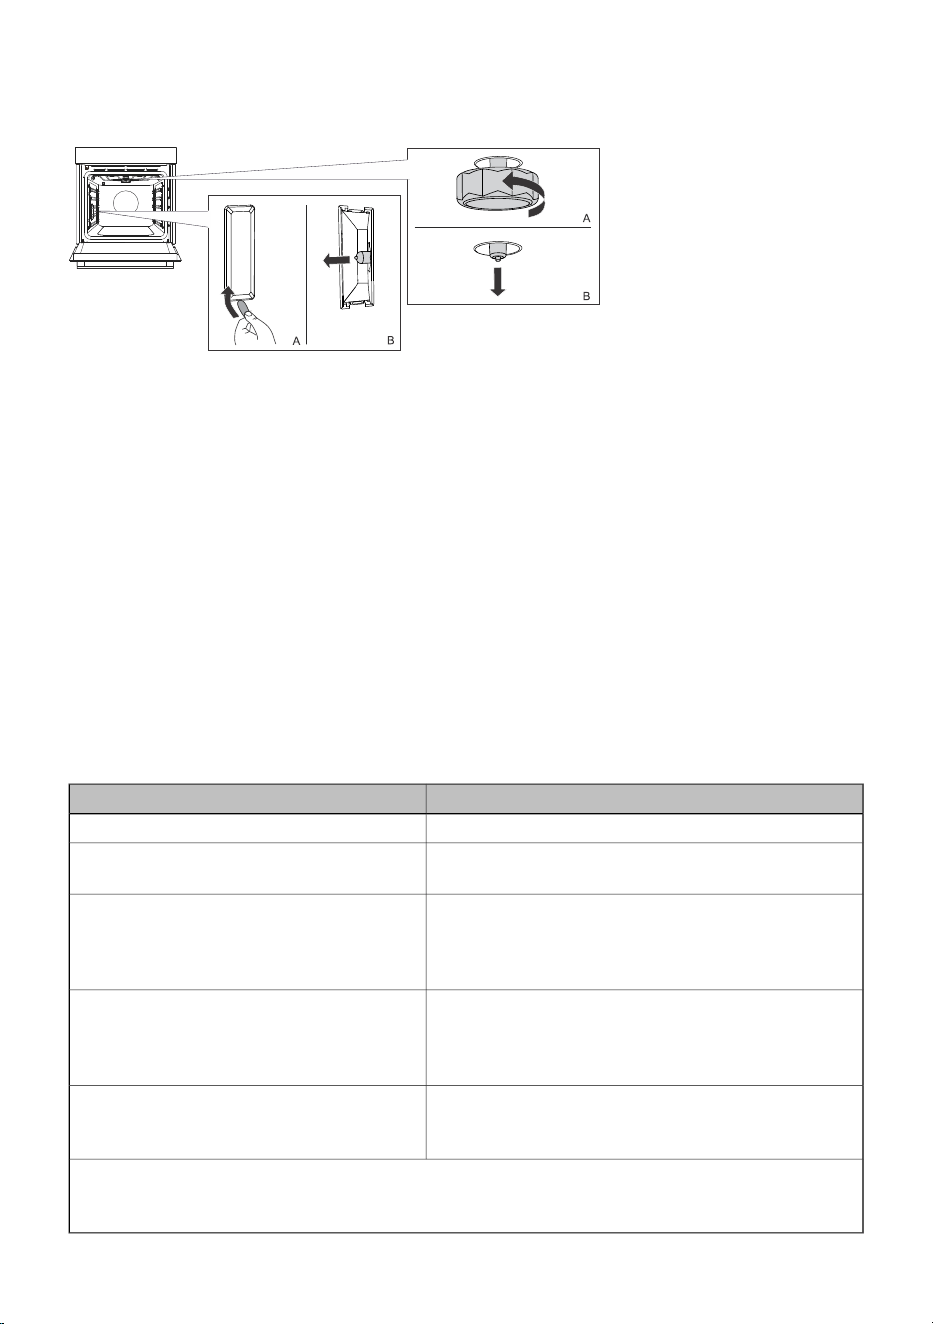
8.5 Removing and replacing the oven door and glass panes
15
8.6 Replacing the bulb
Halogen lamp: G9, 230 V, 25 W
9. Special warnings and fault reporting
During the warranty period, only a service center authorized by the manufacturer may carry out
any repairs.
Before making any repairs, make sure the appliance is disconnected from the power mains either by
removing the fuse or by disconnecting the power plug from the wall outlet.
Any unauthorized repairs of the appliance may result in electric shock and short circuit hazard; therefore,
do not perform them. Leave such work to an expert or a service technician.
In case of minor problems with appliance operation, check this manual to see if you can fix the problem
yourself.
If the appliance is not operating properly or at all due to inappropriate operation or handling, a visit
from a service technician shall not be free of charge, even during the warranty period.
Type plate with basic information about the appliance is attached to the edge of the oven.
9.1 Troubleshooting table
CauseProblem/error
Call a service technician.The main fuse in your home trips often.
The process of changing the light bulb in the oven is
described in the chapter Replacing the bulb.
The oven lighting does not work.
Disconnect the appliance from the power mains for a
few minutes (undo the fuse or switch off the main
switch); then, reconnect the appliance and switch it
on.
Control unit is not responding, the screen
is frozen.
There is an error in the electronic module operation.
Disconnect the appliance from the power mains for a
few minutes.
Error code ErrX is displayed.
In case of a double-digit error code, the
display will show ErXX.
If the error is still indicated, call a service technician.
Clean the socket.
Try to connect and disconnect the temperature probe
several times in succession.
The display will show SEnS when the
temperature probe is not connected.
If the problems persist despite observing the above advice, call an authorized service technician.
Repair or any warranty claim resulting from incorrect connection or use of the appliance shall not
be covered by the warranty. In this case, the user will cover the cost of repair.
16

10. Environment protection
Our product packaging is made of environmentally friendly materials that
can be recycled, disposed of, or destroyed without any hazard to the
environment. To this end, packaging materials are labelled appropriately.
The symbol on the product or its packaging indicates that the product
should not be treated as normal household waste. Take the product to
an authorized collection centre for waste electric and electronic
equipment processing.
Correct disposal of the product will help prevent any negative effects
on the environment and health of people, which could occur in case of
incorrect product removal. For detailed information on removal and
processing of the product, please contact the relevant municipal body
in charge of waste management, your waste disposal service, or the
store where you bought the product.
We reserve the right to any changes and errors in the instructions for use.
17
11. Cooking test
EN60350-1: Only use equipment supplied by the manufacturer.
Always insert the baking tray all the way to the end position on the wire guide. Place pastry or cakes
baked in moulds as shown in the image.
* Preheat the appliance until it reaches the set temperature. Do not use the rapid preheat mode.
** Preheat the appliance for 10 minutes. Do not use the rapid preheat mode.
*** Turn after 2/3 of cooking time.
BAKING
mould
placement
EquipmentDish
30-401403shallow baking tray
shortbread – single
rack
30-401503shallow baking tray
shortbread – single
rack
45-551402, 4shallow baking tray
shortbread – two
racks/levels
50-601351, 4, 5shallow baking tray
shortbread – three
racks/levels
20-30160 *3shallow baking tray
small cakes – single
rack
30-401603shallow baking tray
small cakes – single
rack
40-501452, 4shallow baking tray
small cakes – two
racks/levels
30-50140-1501, 3, 5shallow baking tray
small cakes – three
racks/levels
45-551501
round metal mould,
diameter 26 cm/wire
rack
sponge cake
45-551603
round metal mould,
diameter 26 cm/wire
rack
sponge cake
45-55160 **2, 4
2 × round metal
mould, diameter
26cm/wire rack
sponge cake – two
racks/levels
90-1201701
2 × round metal
mould, diameter
20cm/wire rack
apple pie
80-1101702
2 × round metal
mould, diameter
20cm/wire rack
apple pie
BROILING
4-72305wire racktoast
18
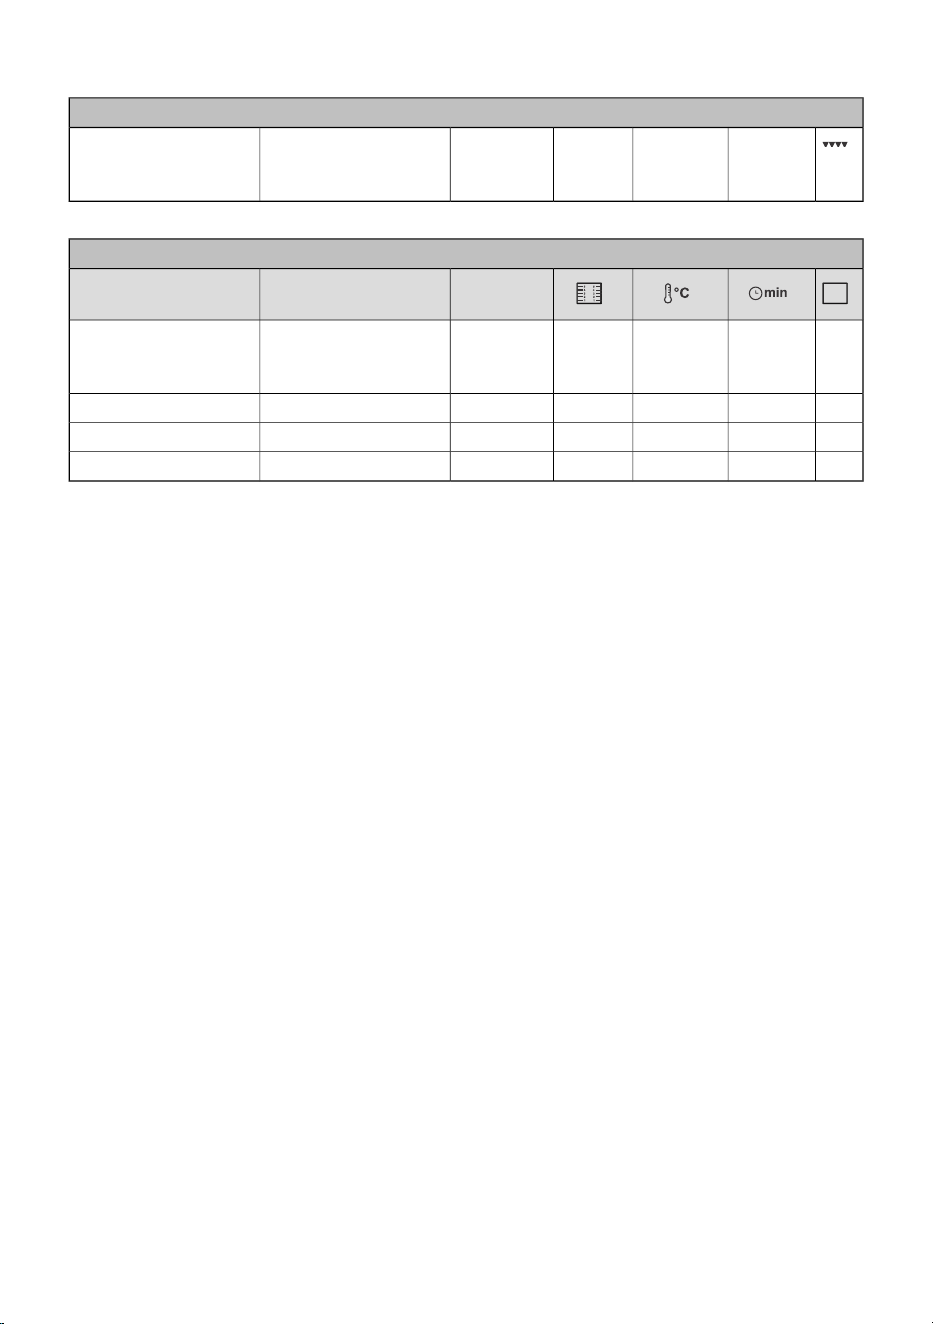
Table continued from last page
BAKING
20-35 ***2305wire rack + shallow
baking sheet as drip
tray
beef burgers
COOKING WITH STEAM
mould
placement
EquipmentDish
round metal mould,
diameter 26 cm/wire
rack
cake
shallow baking traybread with seeds
shallow baking traybuns
shallow baking traybread
19

843444-a5