1
Everest Refrigeration | 201 W. Artesia Blvd., Compton, CA 90220
310.323.6586 | [email protected] | www.EVERESTref.com
Overshelf Spec Sheet
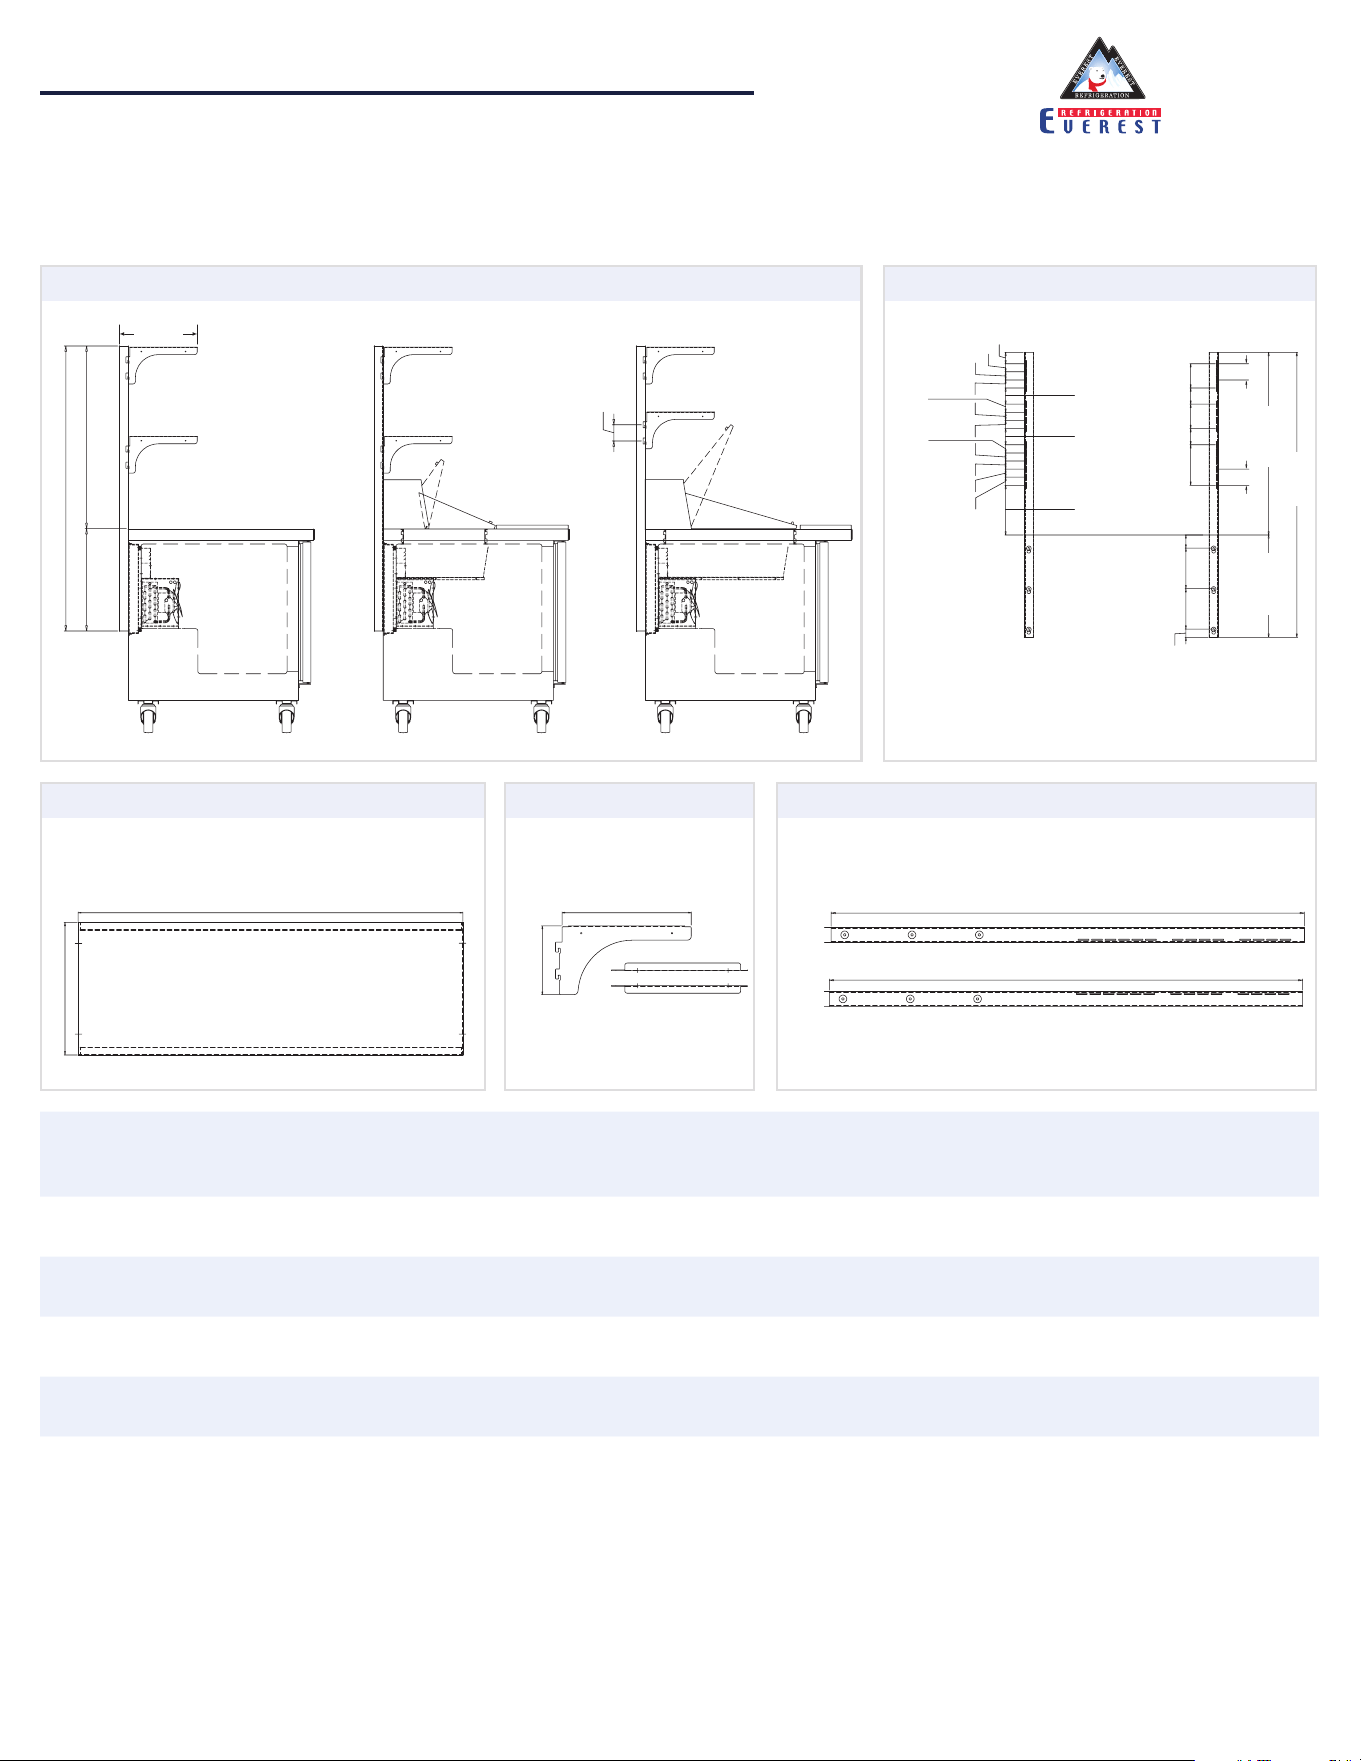
For Back Mount Undercounters & Prep Tables
Overshelf Part # Shelf QTY Weight Capacity Length Depth Height Added Height Applicable Models
OS20-00 2 66 lbs per shelf 27" 13 1/2" 48 2/5" 31 1/10"
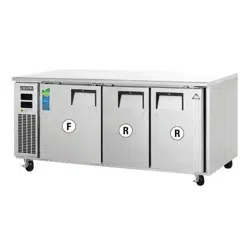
ETBR1, ETBR1-D2, ETBR1-LAB, ETBF1, ETBF1-LAB,
EPBNR1, EPBNR1-D2, EPBR1, EOTP1
OS21-00 2 66 lbs per shelf 35" 13 1/2" 48 2/5" 31 1/10"
ETBSR2, ETBSR2-D2, ETBSF2, EPBNSR2,
EPBNSR2-D2, EPBSR2, EOTPS2
OS22-00 2 55 lbs per shelf 47" 13 1/2" 48 2/5" 31 1/10"
ETBR2, ETBR2-D4, ETBF2, EPBNR2, EPBNR2-D4,
EBPR2, EOTP2
OS23-00 2 55 lbs per shelf 59" 13 1/2" 48 2/5" 31 1/10"
ETBWR2, ETBWR2-D4, ETBWF2, EPBNWR2,
EPBNWR2-D4, EPBWR2, EOTPW2
OS24-00 2 44 lbs per shelf 71" 13 1/2" 48 2/5" 31 1/10"
ETBR3, ETBR3-D2, ETBF3, EPBNR3, EPBNR3-D2,
EPBR3, EOTP3
13 1/2"
31 1/10"
2 4/5"
1 2/5"
1 2/5"
1 2/5"
1 2/5"
1 2/5"
1 2/5"
1 2/5"
1 2/5"
1 2/5"
2"
1 2/5"
13 1/5" 48 2/5" (left)
48 2/5" (right)
1 3/5"
1 3/5"
2 4/5"
4 1/10"
4 1/10"
2 4/5"
2 4/5"
7"
2 4/5"
2 4/5"
2 4/5"
8 2/5"
1 1/5"
17 3/10"
48 2/5"
31 1/10"
1 2/5"
7"
7"
1 2/5"
17 3/10"
48 2/5"
13 1/2"
7 3/64"
Length varies by part #. See table for details.
Equipped with 2 shelves.
Equipped with 2 left arms
and 2 right arms.
Equipped with 1 left pilaster and 1 right pilaster.
Length varies by part #.
See table for details.
Side View
Shelf Supporting Arm Pilaster
Shelf Spacing
2
Everest Refrigeration | 201 W. Artesia Blvd., Compton, CA 90220
310.323.6586 | [email protected] | www.EVERESTref.com
Overshelf Spec Sheet
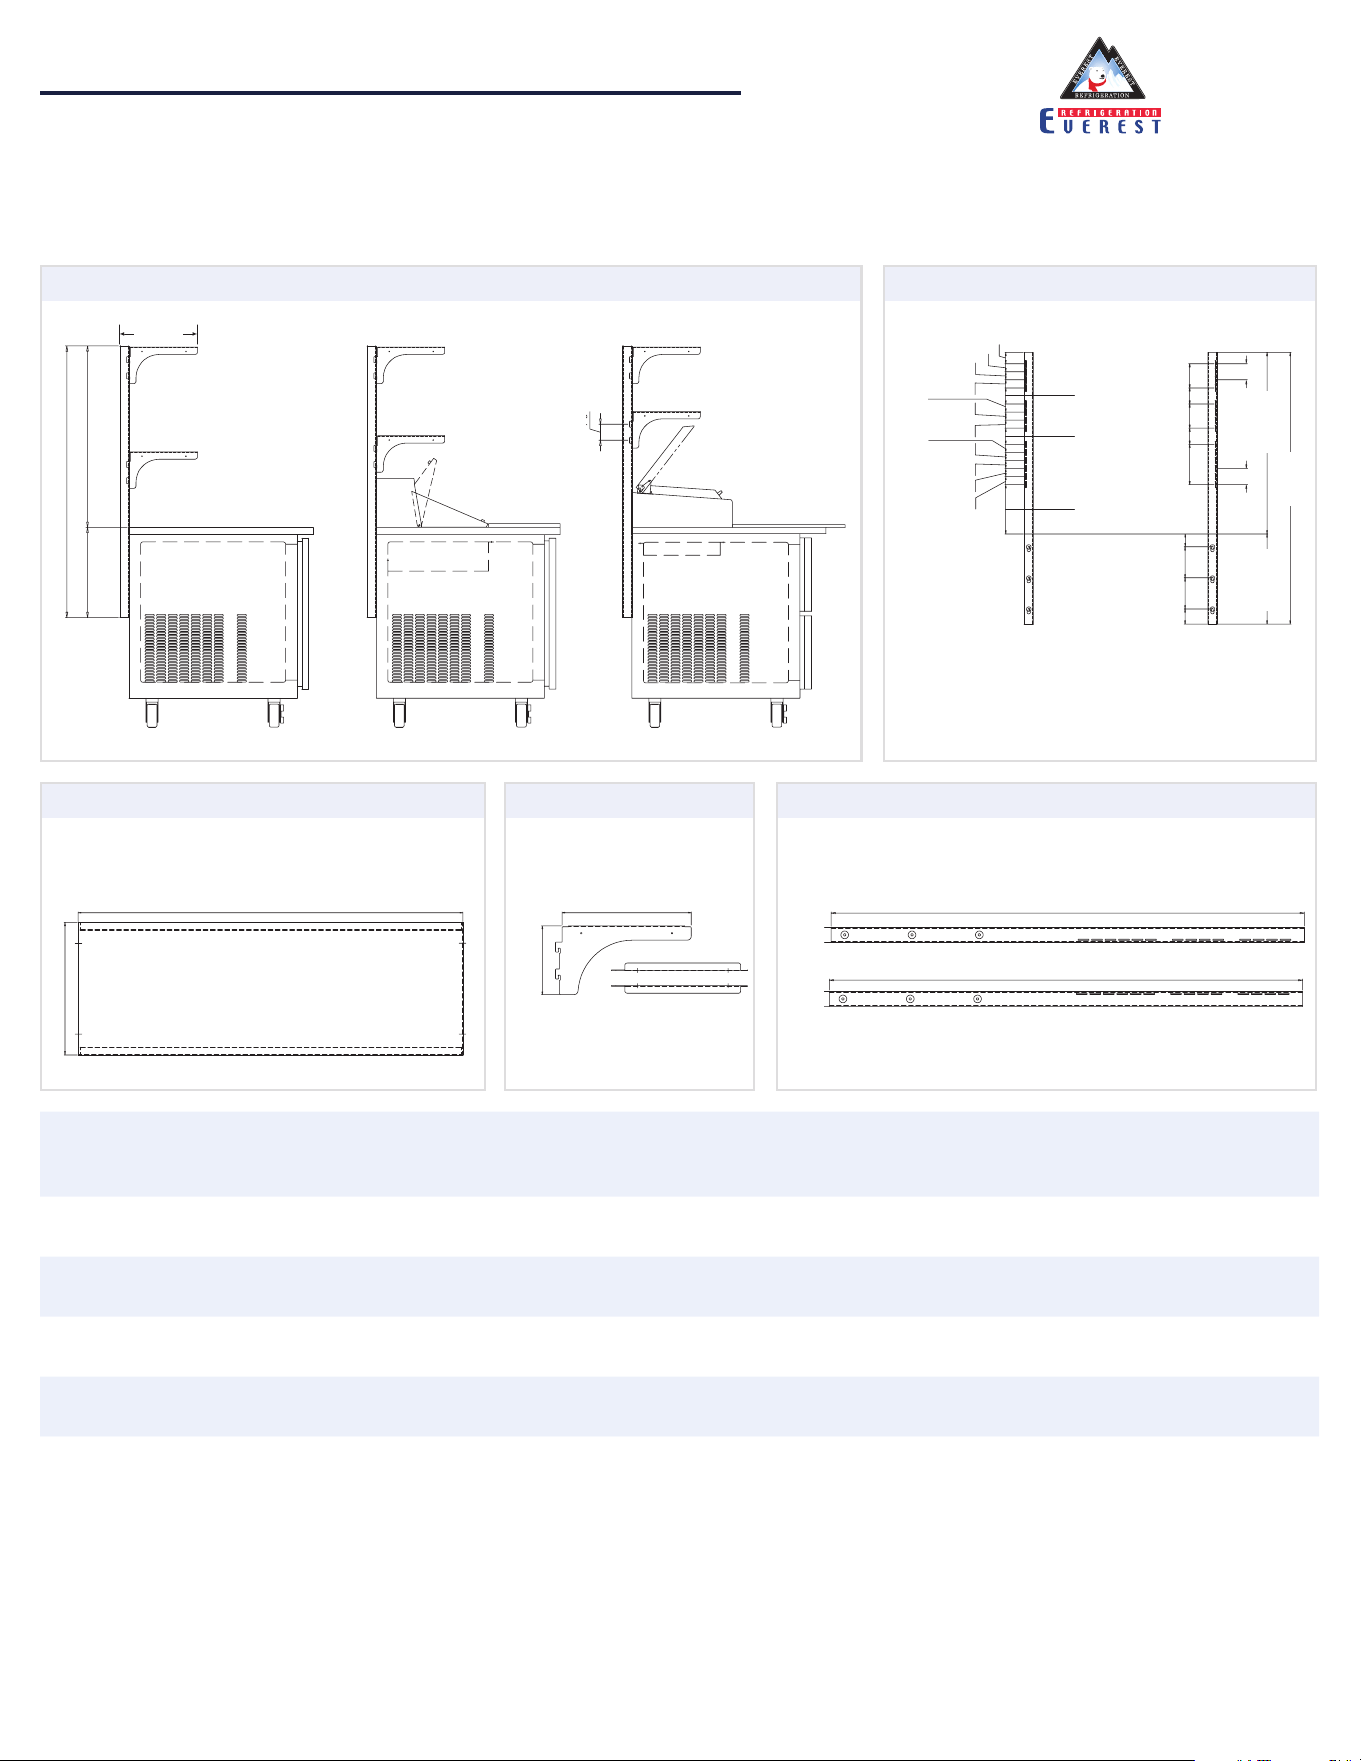
For Side Mount Undercounters & Prep Tables
Overshelf Part # Shelf QTY Weight Capacity Length Depth Height Added Height Applicable Models
OS25-00 2 66 lbs per shelf 33" 13 1/2" 46 2/5" 31 1/10"
ETR1, ETR1-24, ETF1, ETF1-24, EPR1, EPR1-24,
EPPR1, EPPR1-D2
OS26-00 2 66 lbs per shelf 45" 13 1/2" 46 2/5" 31 1/10"
ETR2, ETR2-24, ETF2, ETF2-24, ETGSR2,
EPR2, EPR2-24
OS27-00 2 55 lbs per shelf 57" 13 1/2" 46 2/5" 31 1/10" ETWR2, ETWF2, ETRF2, ETGR2, EPWR2, EPPSR2
OS28-00 2 44 lbs per shelf 69" 13 1/2" 46 2/5" 31 1/10"
ETR3, ETF3, ETRF3, ETGWR2, EPR3, EPPR2,
EPPR2-D2, EPPR2-D4
OS29-00 4 44 lbs per shelf 90" 13 1/2" 46 2/5" 31 1/10" EPPR3, EPPR3-D2, EPPR3-D4
13 1/2"
31 1/10"
2 4/5"
1 2/5"
1 2/5"
1 2/5"
1 2/5"
1 2/5"
1 2/5"
1 2/5"
1 2/5"
1 2/5"
2"
1 2/5"
13 1/5" 46 1/2" (left)
46 1/2" (right)
1 3/5"
1 3/5"
2 4/5"
4 1/10"
4 1/10"
2 4/5"
2 4/5"
7"
2 4/5"
2 4/5"
2 4/5"
8 2/5"
1 1/5"
15 3/10"
46 1/2"
31 1/10"
3 3/5"
5 3/10"
5 3/10"
1 2/5"
15 3/10"
46 1/2"
13 1/2"
7 3/64"
Length varies by part #. See table for details.
Equipped with 2 shelves.
Equipped with 2 left arms
and 2 right arms.
Equipped with 1 left pilaster and 1 right pilaster.
Length varies by part #.
See table for details.
Side View
Shelf Supporting Arm Pilaster
Shelf Spacing
3
Overshelf Assembly Instructions
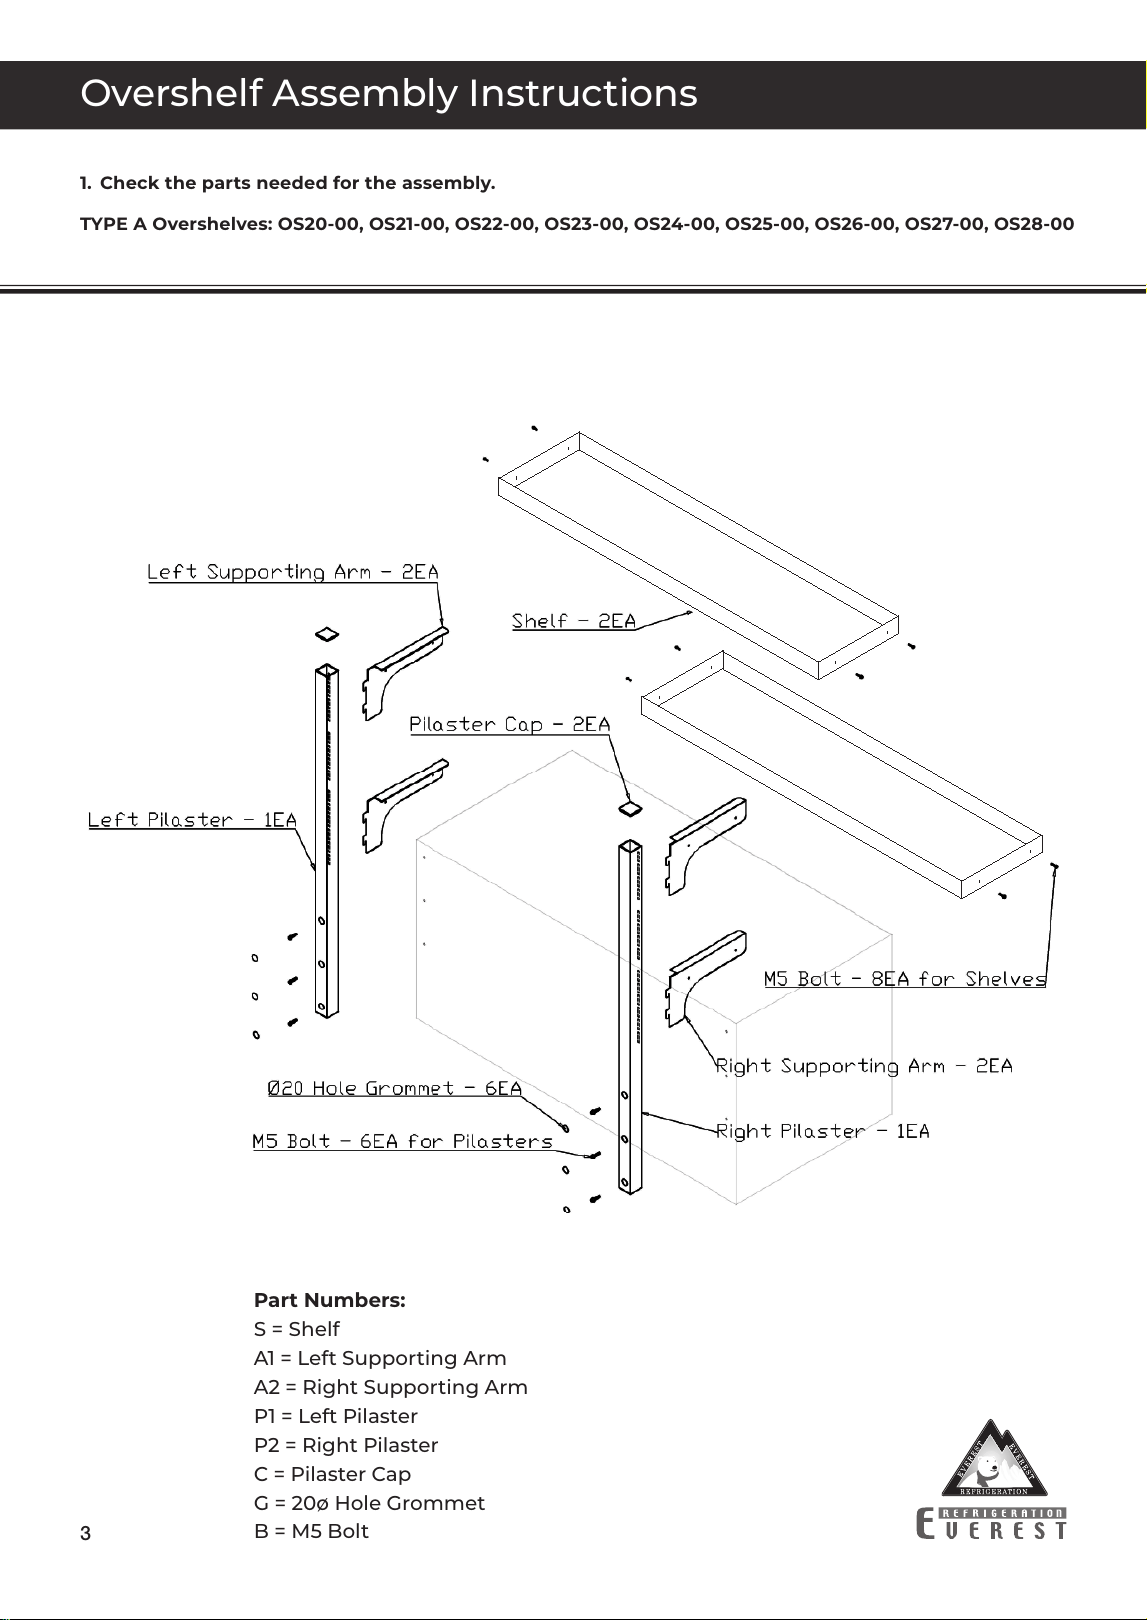
1. Check the parts needed for the assembly.
TYPE A Overshelves: OS20-00, OS21-00, OS22-00, OS23-00, OS24-00, OS25-00, OS26-00, OS27-00, OS28-00
Part Numbers:
S = Shelf
A1 = Left Supporting Arm
A2 = Right Supporting Arm
P1 = Left Pilaster
P2 = Right Pilaster
C = Pilaster Cap
G = 20ø Hole Grommet
B = M5 Bolt
4
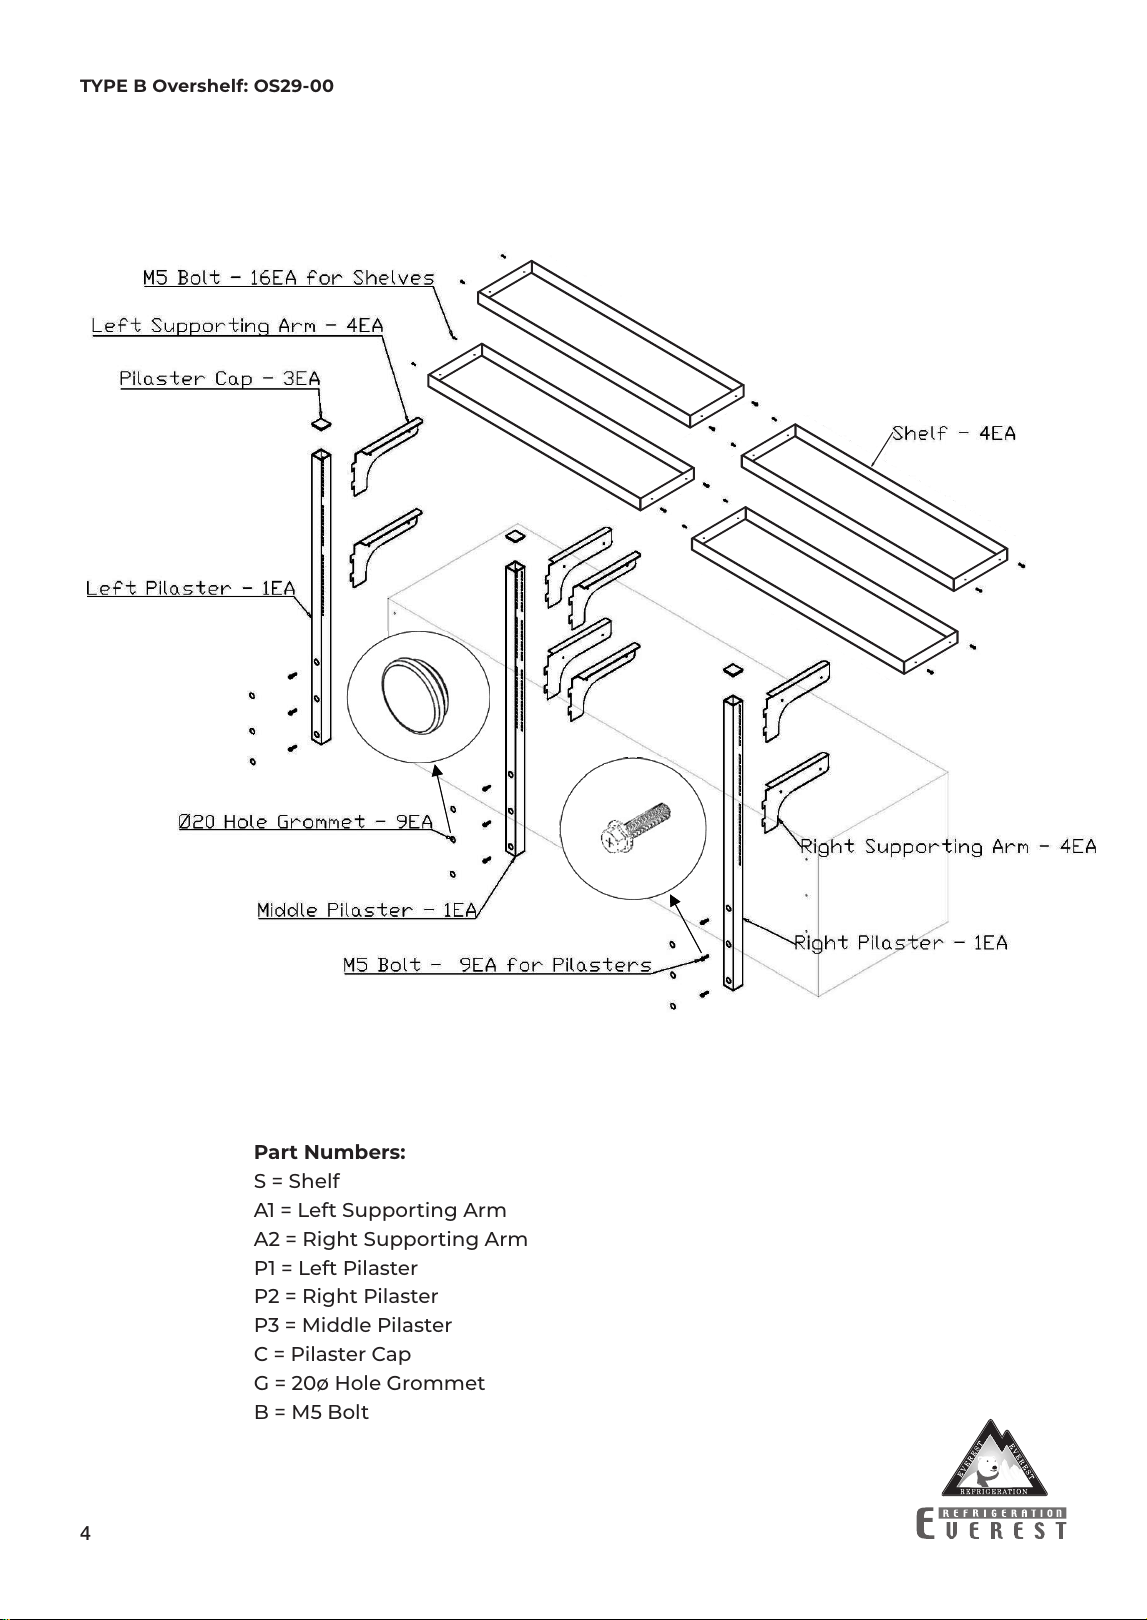
TYPE B Overshelf: OS29-00
Part Numbers:
S = Shelf
A1 = Left Supporting Arm
A2 = Right Supporting Arm
P1 = Left Pilaster
P2 = Right Pilaster
P3 = Middle Pilaster
C = Pilaster Cap
G = 20ø Hole Grommet
B = M5 Bolt
5
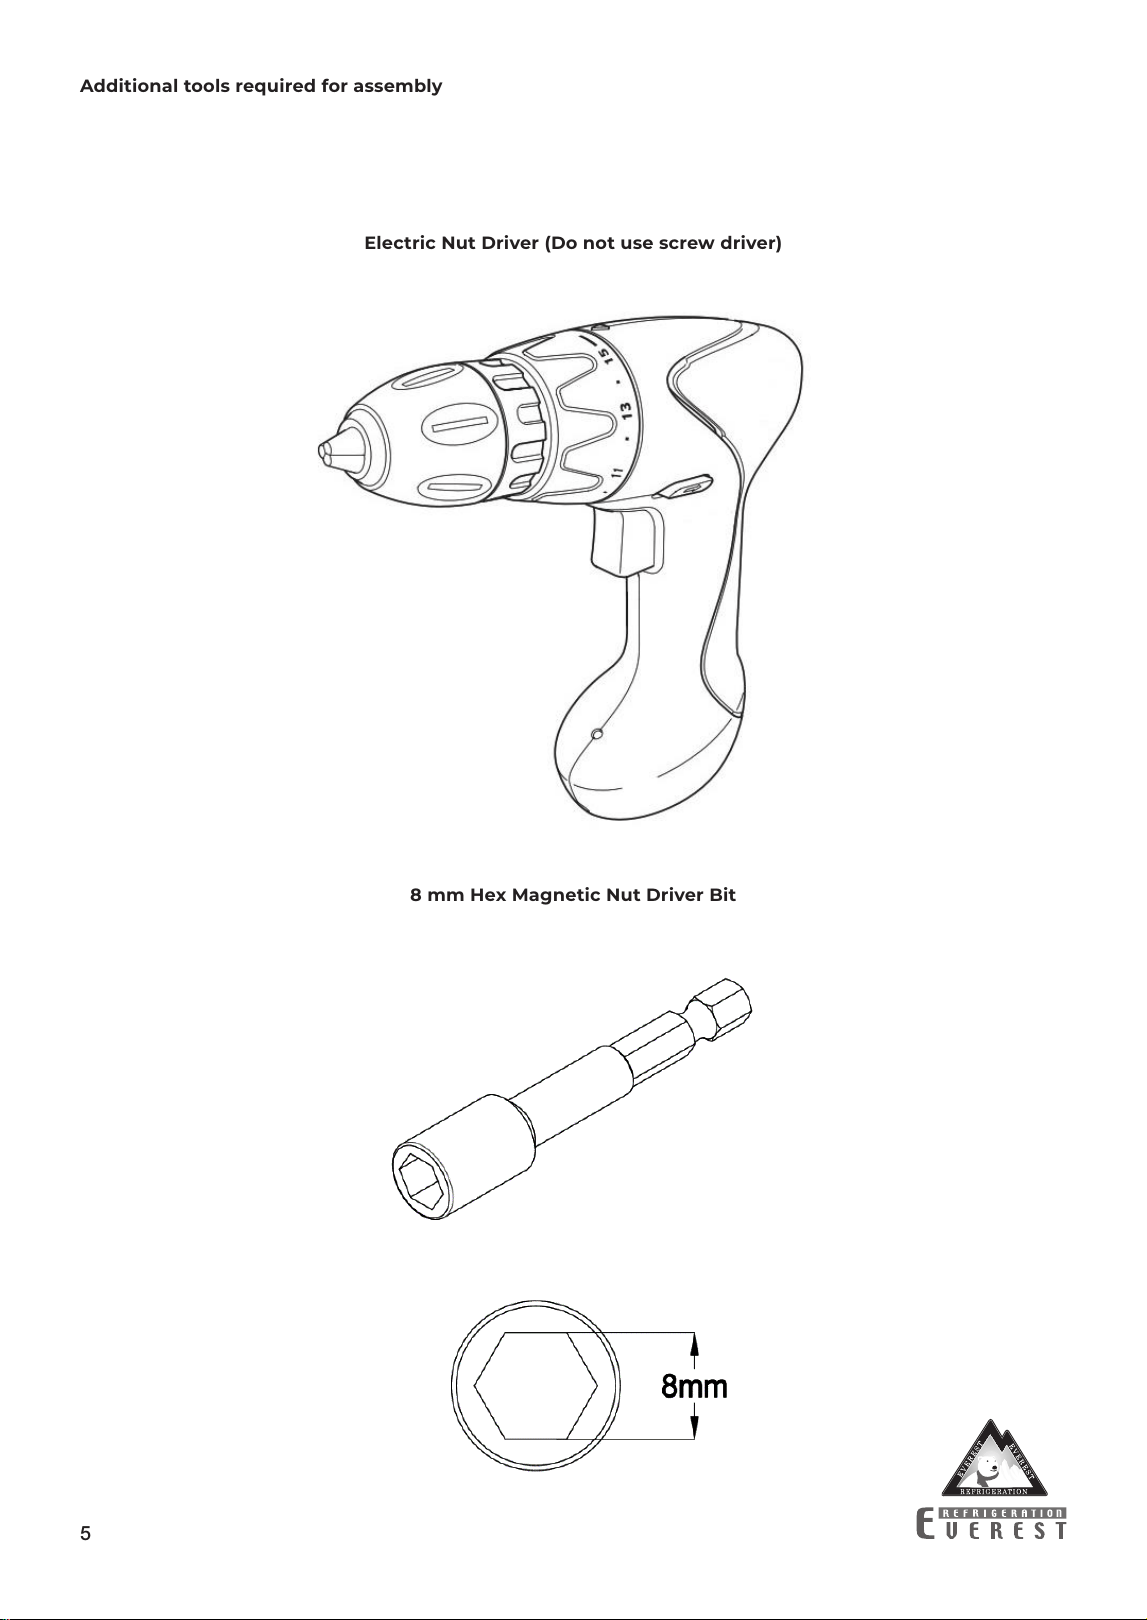
Additional tools required for assembly
Electric Nut Driver (Do not use screw driver)
8 mm Hex Magnetic Nut Driver Bit
B
B
B
B
B
B
P1
P2
P1
P2
6
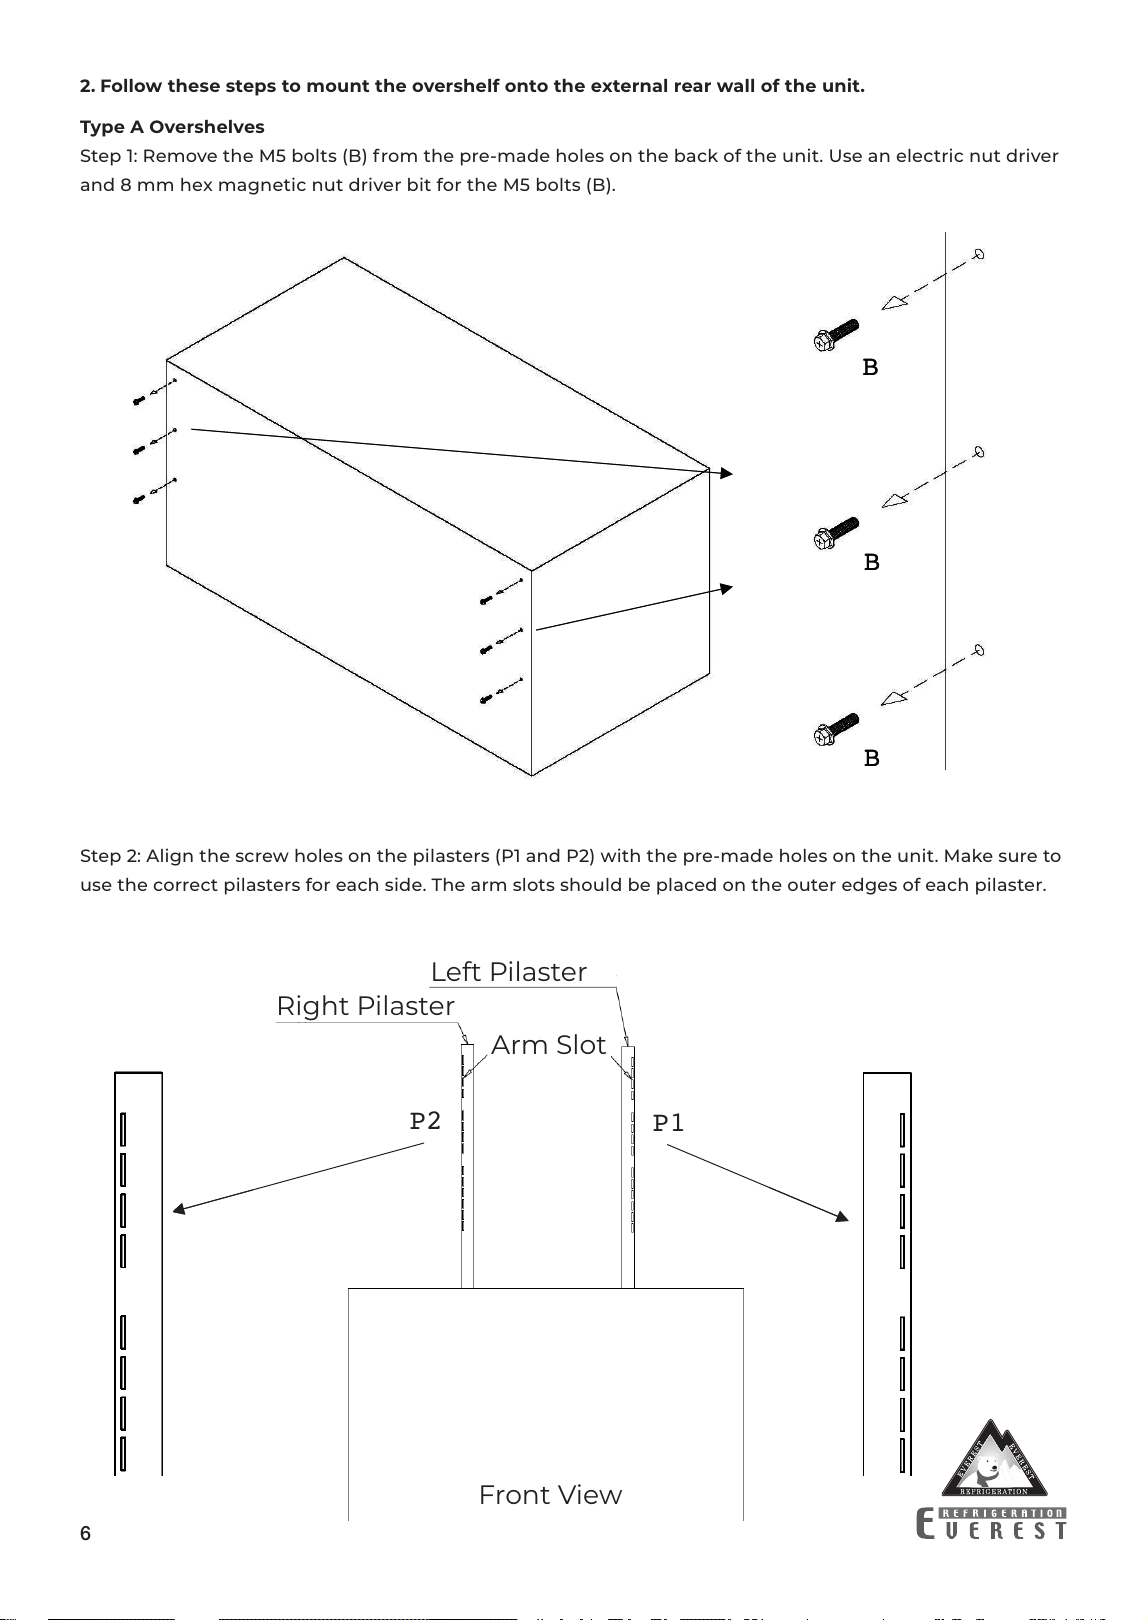
2. Follow these steps to mount the overshelf onto the external rear wall of the unit.
Type A Overshelves
Step 1: Remove the M5 bolts (B) from the pre-made holes on the back of the unit. Use an electric nut driver
and 8 mm hex magnetic nut driver bit for the M5 bolts (B).
Step 2: Align the screw holes on the pilasters (P1 and P2) with the pre-made holes on the unit. Make sure to
use the correct pilasters for each side. The arm slots should be placed on the outer edges of each pilaster.
Front View
Left Pilaster
Arm Slot
Right Pilaster
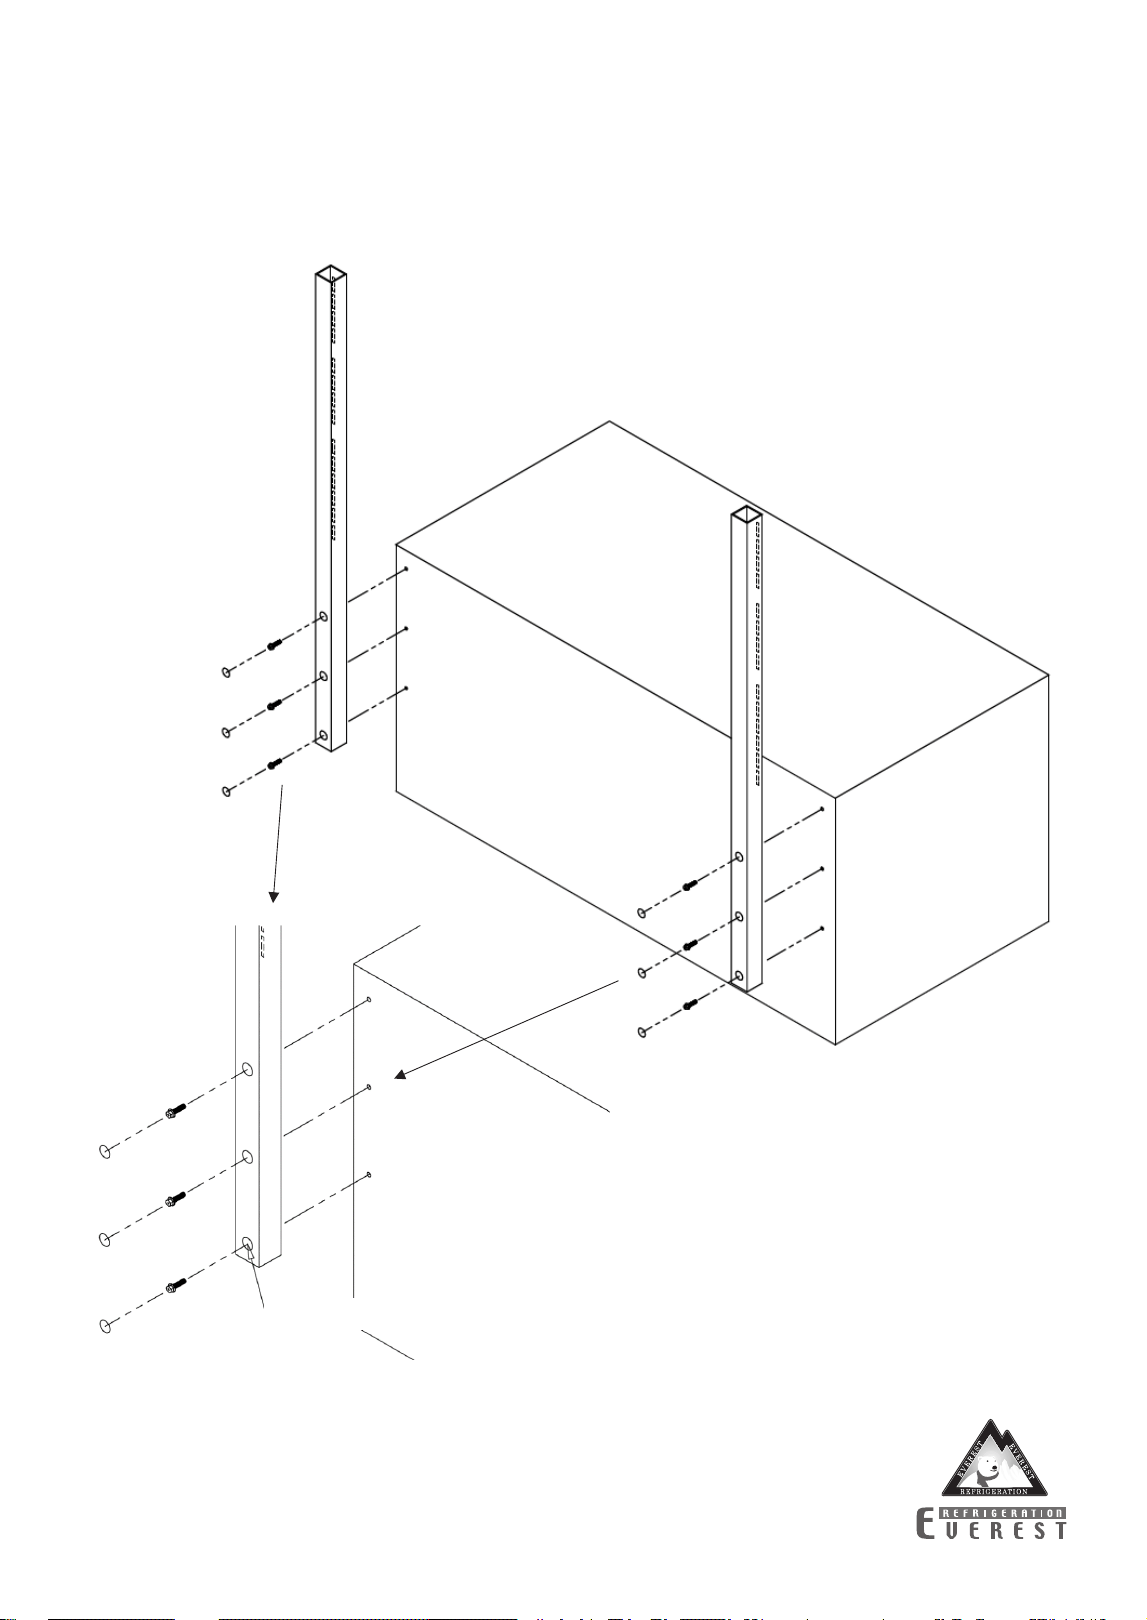
7
Step 2: Mount the pilasters (P1 and P2) on the unit with the M5 bolts (B) and cover the holes with the
grommets (G). Use an electric nut driver and 8 mm hex magnetic nut driver bit for the M5 bolts (B).
B
B
B
G
G
G
P1
P2
Nut Driver Hole
B
B
B
G
G
G
P1
P2
Nut Driver Hole
C
C
A1
A2
P1
P2
P1
P2
C
C
A1
A2
P1
P2
P1
P2
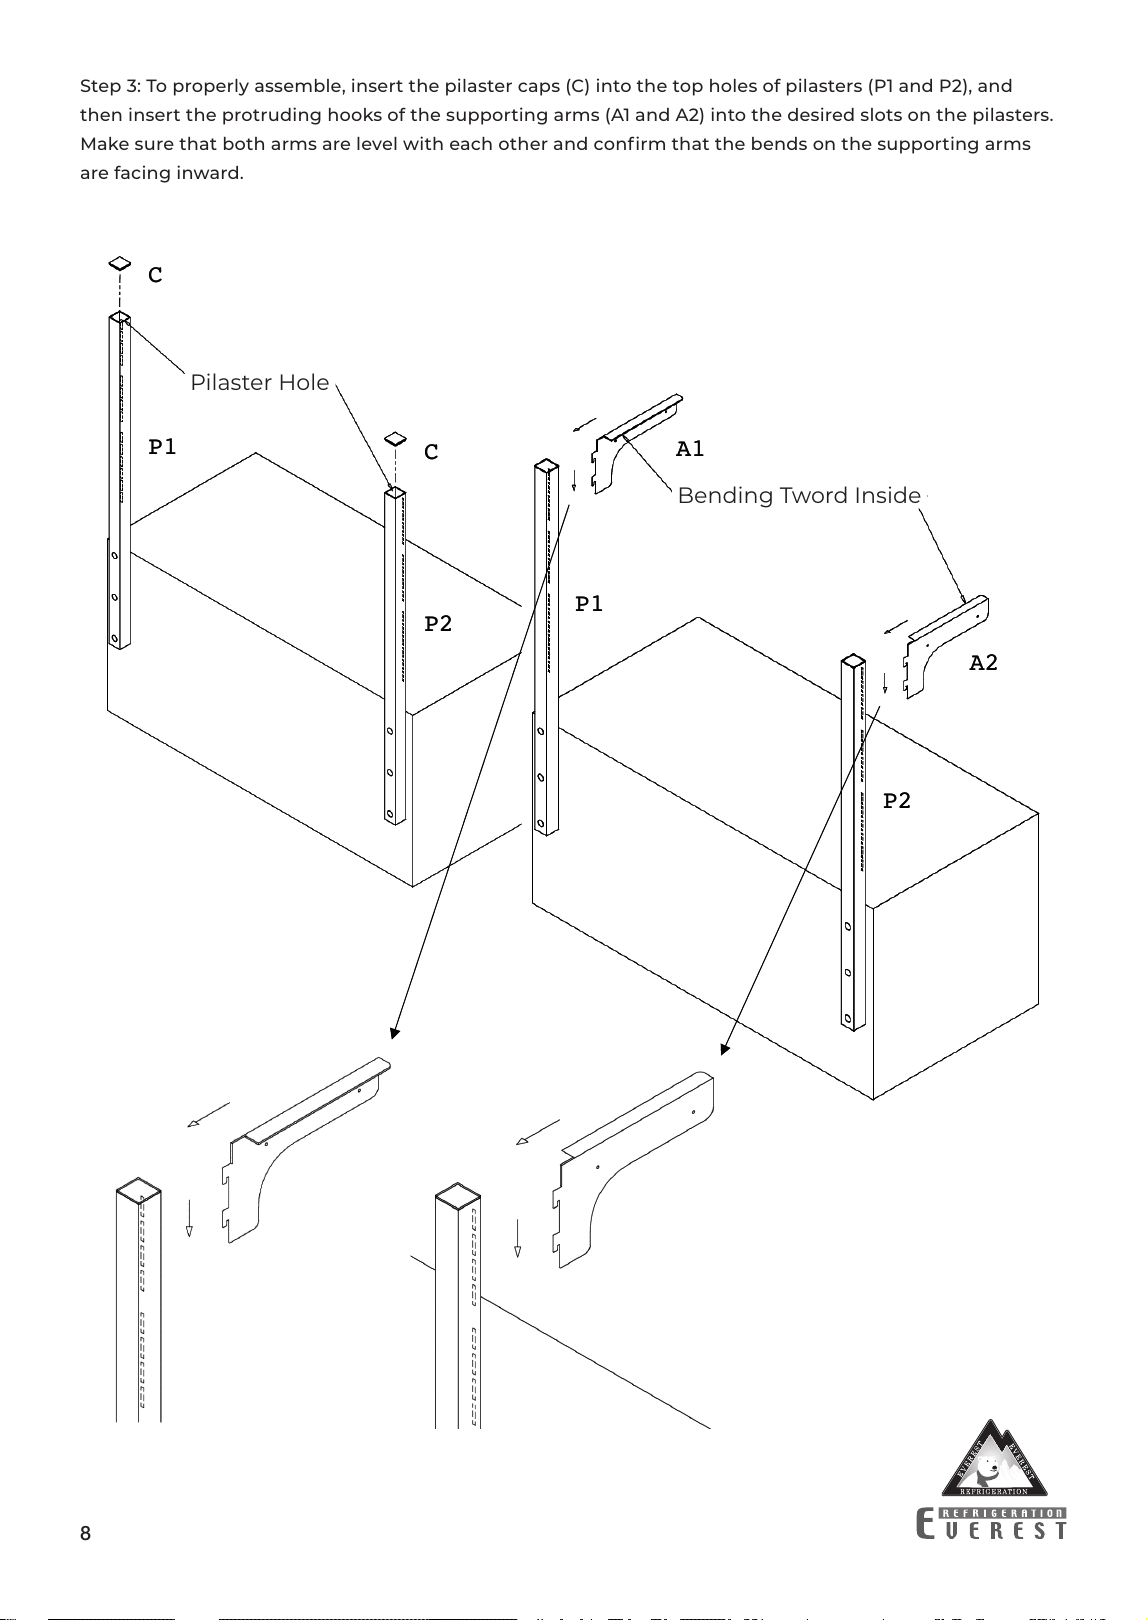
8
Step 3: To properly assemble, insert the pilaster caps (C) into the top holes of pilasters (P1 and P2), and
then insert the protruding hooks of the supporting arms (A1 and A2) into the desired slots on the pilasters.
Make sure that both arms are level with each other and confirm that the bends on the supporting arms
are facing inward.
Pilaster Hole
Bending Tword Inside
S
A1
A2
S
A1
A2
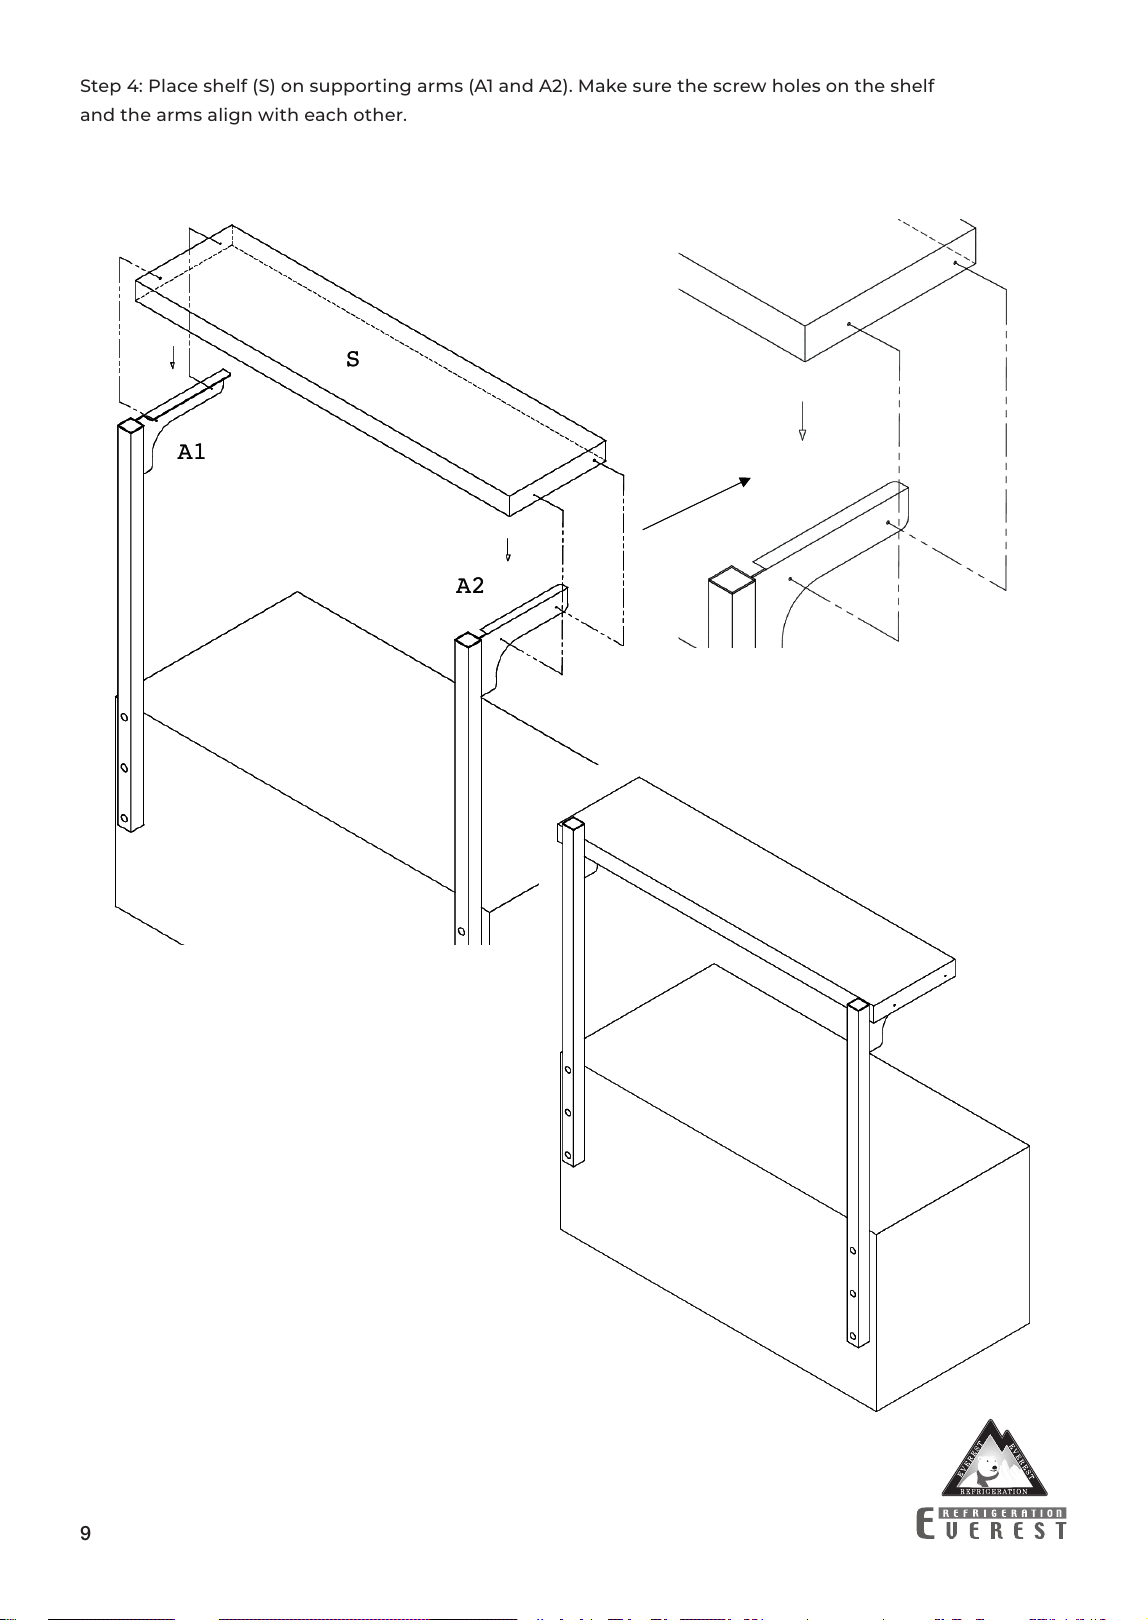
9
Step 4: Place shelf (S) on supporting arms (A1 and A2). Make sure the screw holes on the shelf
and the arms align with each other.
B
B
S
A1
A2
10
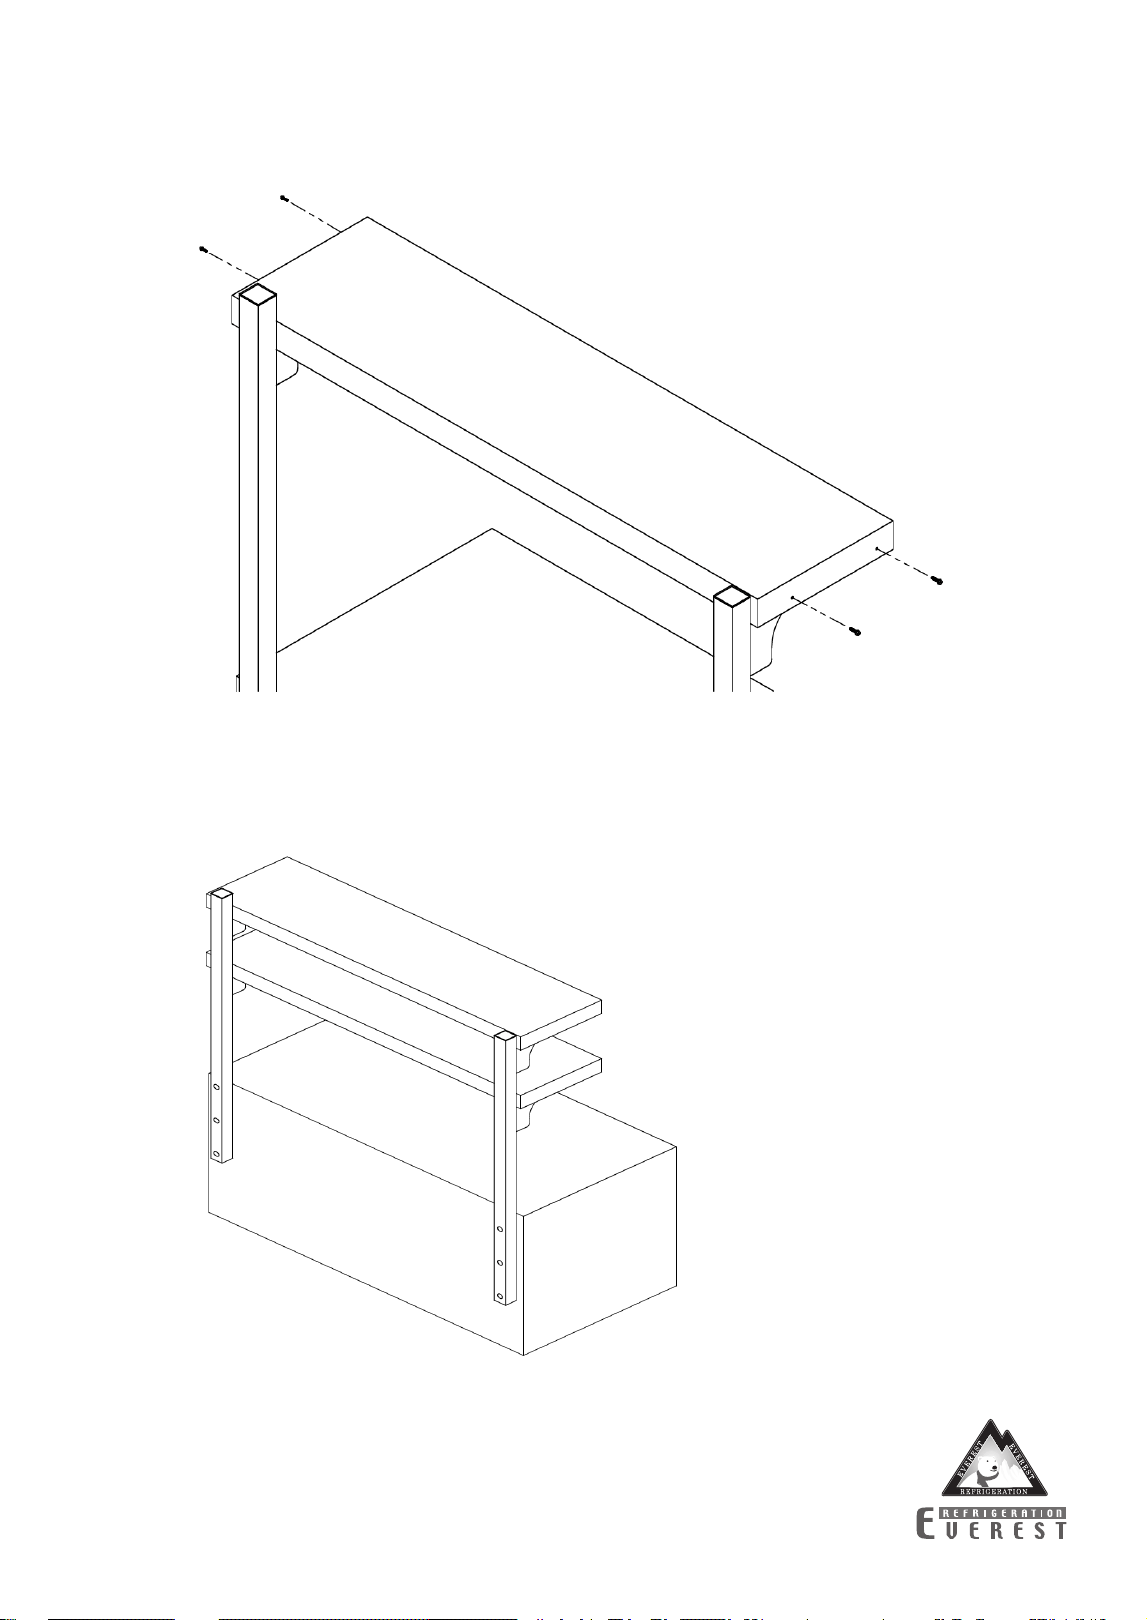
Step 5: Fasten shelf (S) onto supporting arms (A1 and A2) using M5 bolts (B). Utilize an electric nut driver
and an 8 mm hex magnetic nut driver bit specifically designed for M5 bolts (B).
Step 6: Repeat steps 4 and 5 for the second shelf (S).
The assembly of the TYPE A overshelf is now complete.
P3
P3
11
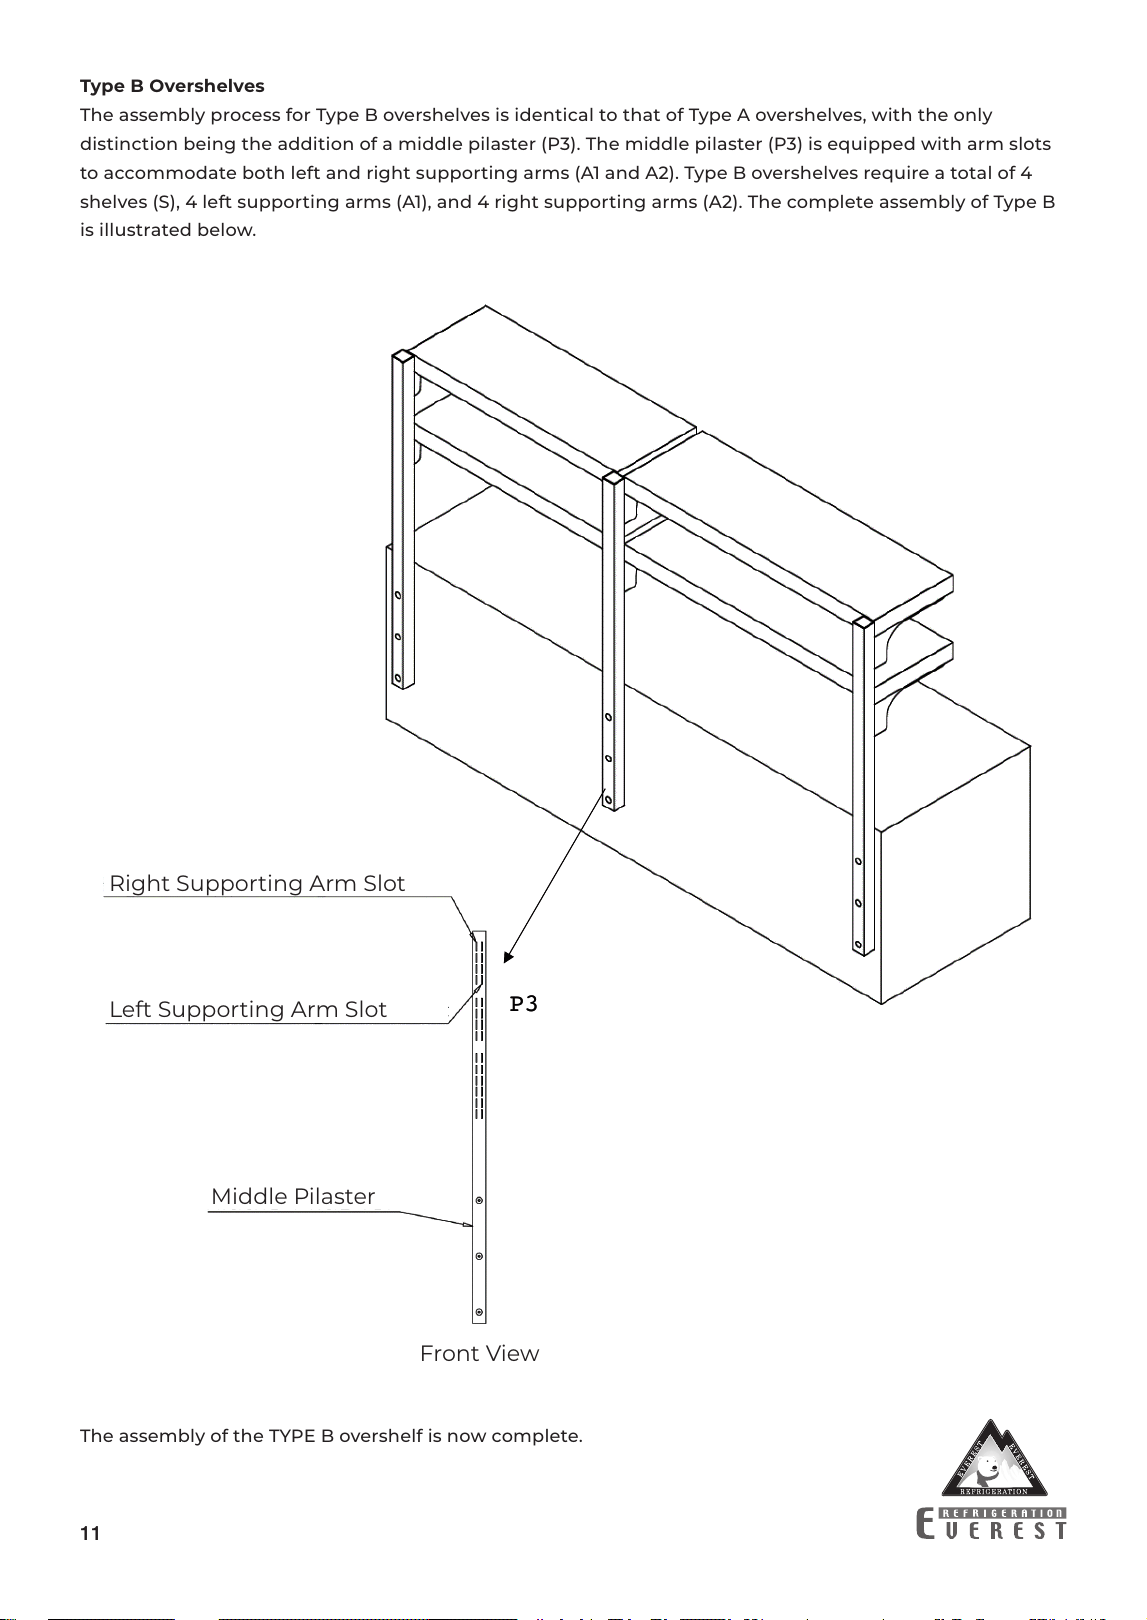
Type B Overshelves
The assembly process for Type B overshelves is identical to that of Type A overshelves, with the only
distinction being the addition of a middle pilaster (P3). The middle pilaster (P3) is equipped with arm slots
to accommodate both left and right supporting arms (A1 and A2). Type B overshelves require a total of 4
shelves (S), 4 left supporting arms (A1), and 4 right supporting arms (A2). The complete assembly of Type B
is illustrated below.
The assembly of the TYPE B overshelf is now complete.
Middle Pilaster
Left Supporting Arm Slot
Right Supporting Arm Slot
Front View