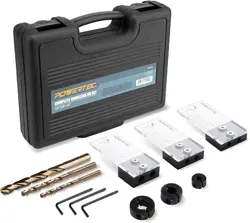
MODEL NO. 71714
INSTRUCTION SHEET
Complete Doweling Jig Kit
QUESTION...
1•847•780•6120
NOTE: These doweling jigs can be used
with any size stock, but each individual jig
is designed for a specific size stock.
71715: 1/4" doweling jig to center dowels in
1/2" stock
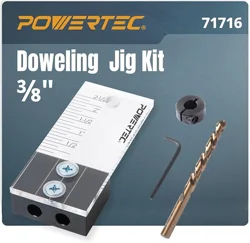
71716: 3/8" doweling jig to center dowels in
3/4" stock
71717: 1/2" doweling jig to center dowels in
1" stock.
NOTE: Failure to follow these instructions
could result in misalignment
PACKAGING CONTENTS
1 - 71715:1/4" dowel drilling jig with
alignment mark, included depth scale,
cobalt M-35 drill bit and split ring
stop collar
1 - 71716: 3/8" dowel drilling jig with
alignment mark, included depth scale,
cobalt M-35 drill bit and split ring
stop collar
1 - 71717: 1/2" dowel drilling jig with
alignment mark, included depth scale,
cobalt M-35 drill bit and split ring
stop collar
WARNING
• To avoid serious injury, keep hands and
fingers away from the spinning bit during
drilling operations. Always be aware of
the bit when drilling.
• Before drilling, make sure the dowel
drilling jig is clamped securely to the
workpiece and the workpiece is secured
in a vise or clamp. Failure to do so
could result in unexpected shifting of the
project during drilling, which could cause
damage to the project.
TO USE
1. Align the workpieces exactly as they
will be joined. Make sure all faces and
edges are flush.
2. Decide how many dowels will be
needed to join the workpieces.
NOTE: The dowel drilling jig has
reference lines on the jig body for
centering two dowel holes or aligning
single dowel holes. In most cases,
two dowels are centered on the
narrowest workpiece.
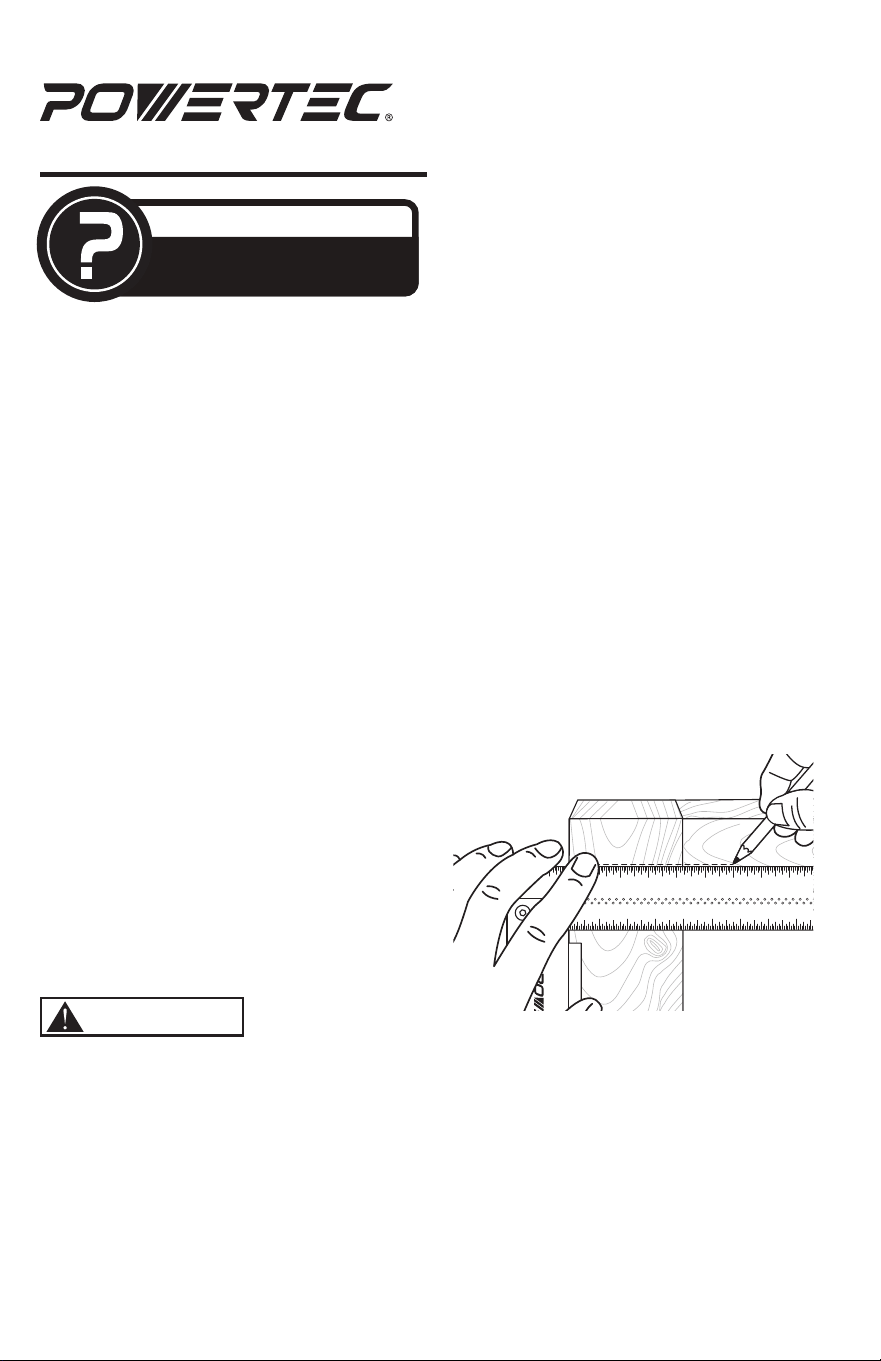
3. Use a combination or try square to
draw a straight line where the two
workpieces will be joined. This will be
the line used to align the dowel drilling
jig to the workpieces. See Figure1.
NOTE: A straight edge can be used if a
square is not available.
1/21/4 3/4
1
1/21/4 3/4
2
1/21/4 3/4
3
1/21/4 3/4
4
1/21/4 3/4
5
1/2
1/4
1/21/4 3/4
1
1/21/4 3/4
2
1/21/4 3/4
3
1/21/4 3/4
4
1/4
7
5
3
1
9 11
13
15
753
1
9
11
13
15
7
53
1
9
11
13
15
7
5
31
9 11
13
15
5
3
1
l
ll
l
l l
l
l
l
l
l
l
l
l l
l
ll
l
l
l l
l l
l
ll
l
l
l l
l
l
l
l
ll
l
l l
l l
l
ll
l
l l
l
l
l
l
ll
l
l
l
l
ll
l
l
l
l
l
l
l
ll
Figure 1
4. Determine the depth of the hole to
be drilled based on the length of the
dowel being used.
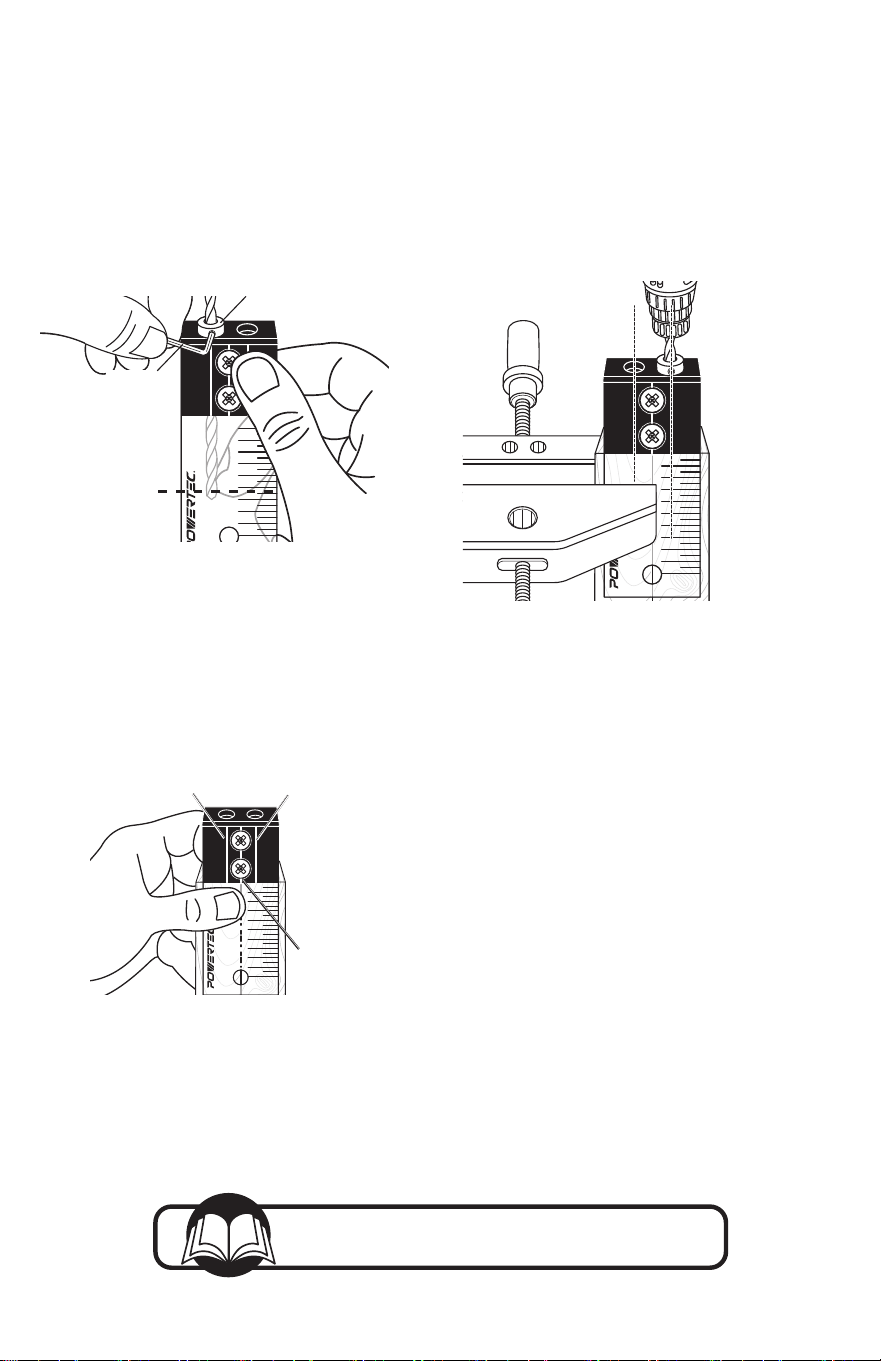
5. Slide the stop collar onto the bit (do not
tighten) and place the stop collar onto
the jig body. Adjust the tip of the bit
to align with the desired drilling depth
on the depth scale and tighten the set
screw. See Figure 2.
2-1/2
1-1/2
1/2
2"
1"
Figure 2
Stop Collar
Tighten
to Lock
Tip of bit
aligned with
drilling depth
on depth scale
NOTE: When drilling two holes, place the
body flat on the workpiece, align the central
line on the body with the pencil mark. See
Figure 3.
NOTE: When drilling single holes, place the
body flat on the workpiece, align one of the
two outside lines with the center of the hole
being drilled.
2-1/2
1-1/2
1/2
2"
1"
Figure 3
Central Line
Outside LineOutside Line
Southern Technologies, LLC
Waukegan, IL 60087
Put these instructions and the original sales invoice in a safe,
dry place for future reference.
Visit us on the web at powertecproducts.com
21-0819
6. Clamp the jig to the workpiece. MAKE
SURE the line and pencil mark are
still aligned.
7. Drill the hole. MAKE SURE the set up
and drill are as straight as possible.
See Figure 4. NOTE: Make several
plunges, retracting the drill bit to clear
away chips in between plunges. DO
NOT force the bit.
2-1/2
1-1/2
1/2
2"
1"
Figure 4
IMPORTANT:
Keep setup
and drill as
straight as
possible
8. Repeat the steps to drill holes in the
other workpieces.
9. After all holes are drilled, glue and
assemble the pieces as per the
dowel instructions.