Power On and Off
Press and hold the button for ¾ second to power on or off the
flashlight. The flashlight will turn on in the same intensity
setting it was last used. The default factory brightness
intensity setting is ‘Eco’.
Adjust Brightness
With the flashlight powered on, briefly press the button to
change the brightness intensity setting.
LUMINUS LED
Helmet mounting bracket (not shown)
Battery Charging Indicator
Flashing red light – the battery is charging
Solid blue light – the battery is fully charged
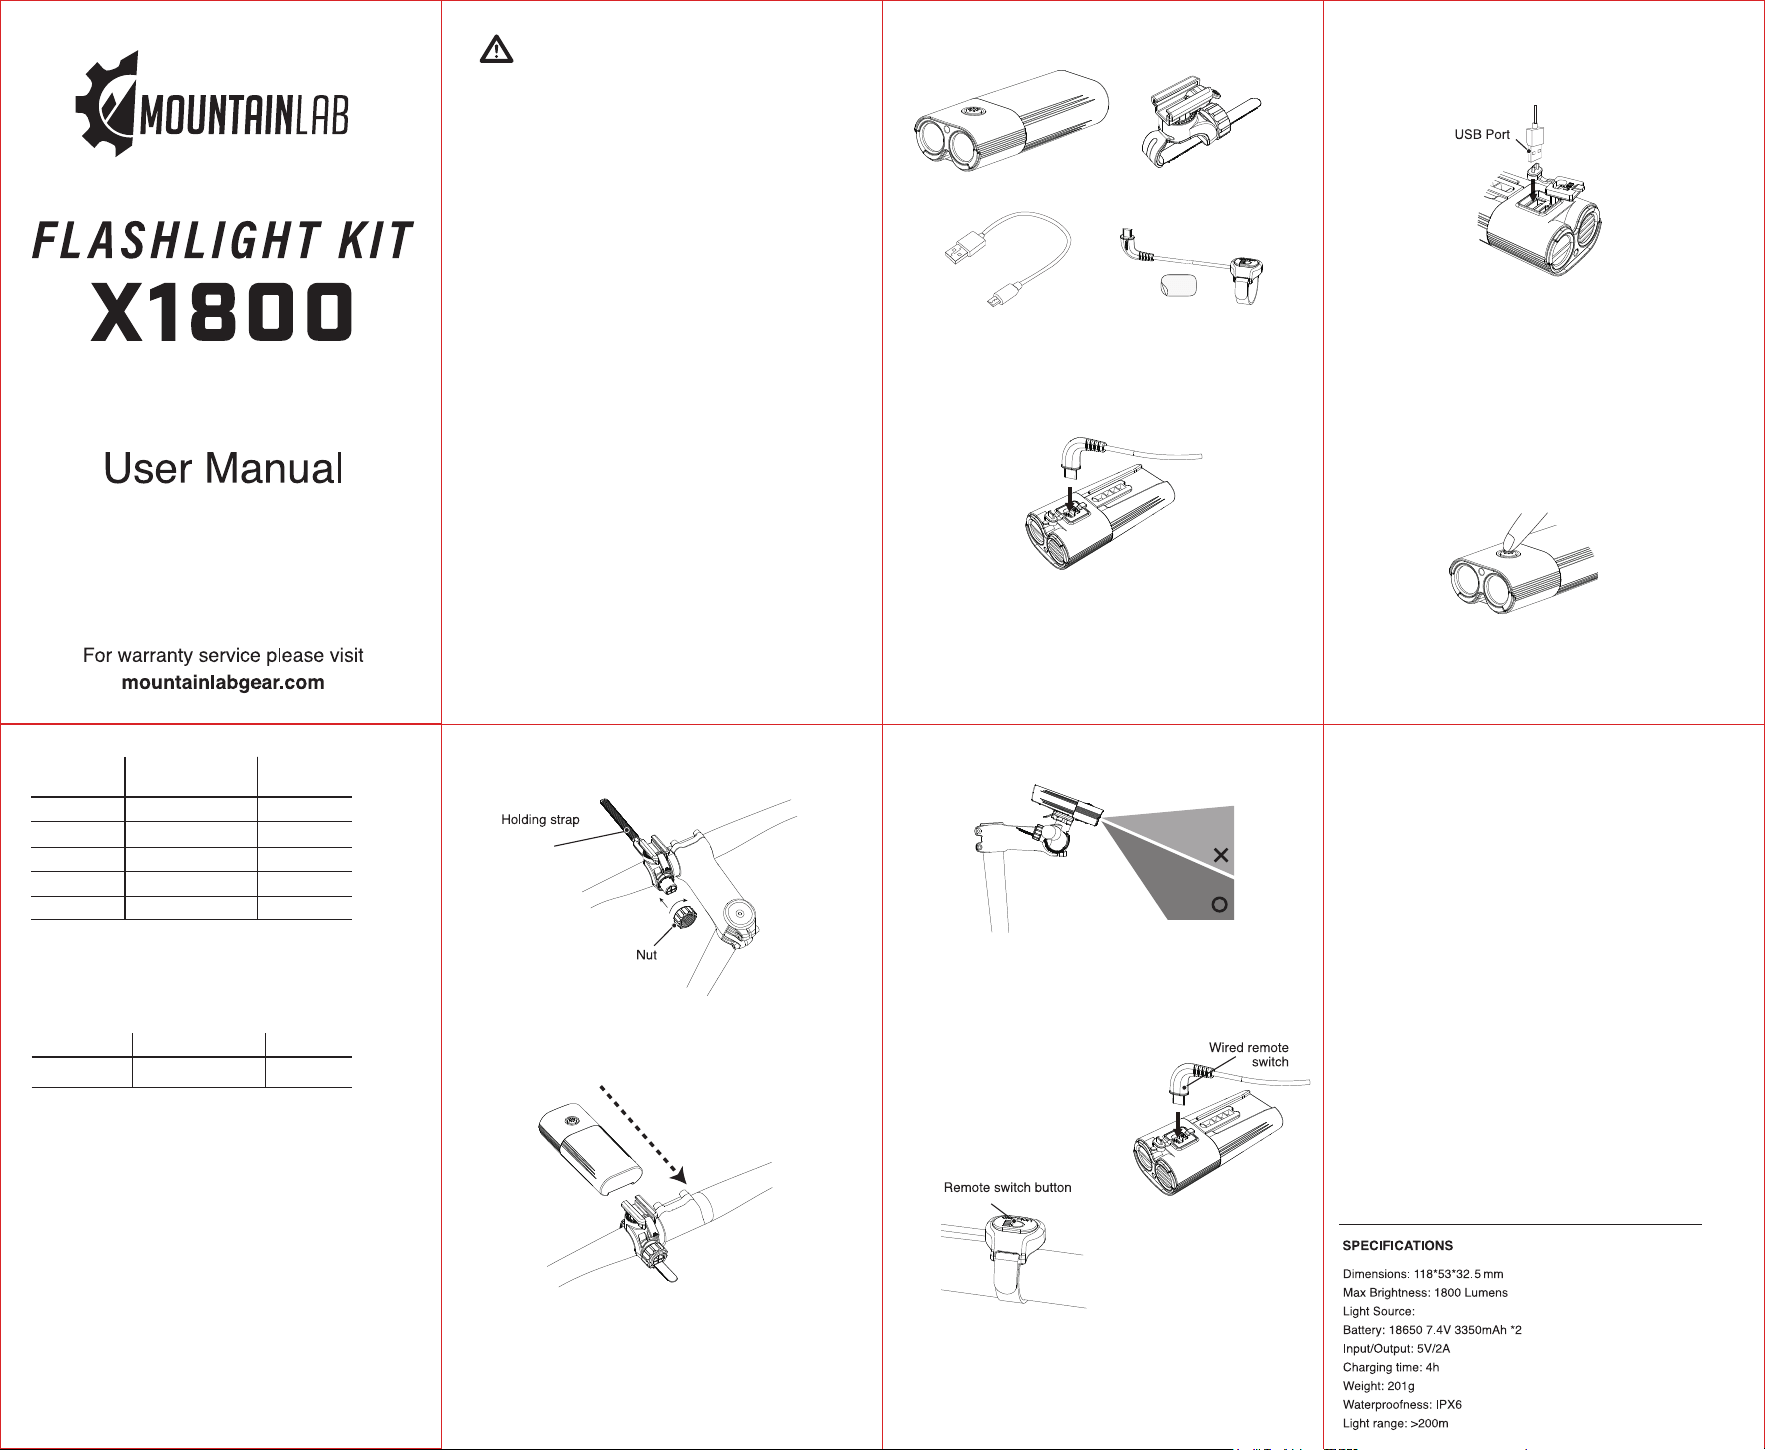
To mount the flashlight bracket to handlebars, first remove the
nut, then wrap the strap around the bars and insert it back
through the slot in the bracket. Slide the nut over the end of
the strap and tighten it onto the threads.
To attach the flashlight to the bracket, slide flashlight onto the
bracket until it clicks. Check to see that it is secured. To
remove, press down on the release tab and slide the flashlight
off the bracket.
Strobe Mode
To enter Strobe Mode, press and hold the button for two
seconds. The flashlight will strobe continuously at full power.
Press and hold the button for two seconds to exit strobe mode.
Setting Lumens Battery Life
Strobe 1800 2h 45m
Lockout Mode
To prevent the flashlight from being powered on unintentionally
(for example, when carried inside a backpack), the flashlight
may be placed into Lockout Mode.
To enter Lockout Mode, press and hold the button for 10
seconds while the flashlight is powered on. The flashlight will
power off and become locked out.
In Lockout Mode, the flashlight cannot be powered on normally.
Lockout Mode must be exited before normal operation can
resume.
To exit Lockout Mode, press and hold the button for 10 seconds.
The flashlight will power on and resume normal operation in the
lowest intensity setting.
Intensity Brightness Battery
Setting (lumens) Life
Turbo 1800 1h 55m
High 900 4h 30m
Medium 500 6h 25m
Low 200 12h 30m
Eco 50-100 50h
Charge the flashlight battery fully before first use.
To charge the battery, insert the included micro-USB charging
cable plug into the micro-USB port on the bottom of the
flashlight. Then, insert the USB plug on the other end of the
charging cable into a household USB charging adapter or
computer USB port.
Power Bank Function
The X1800 may be used as a power bank to charge your
smartphone or other electronic devices.
To do so, insert the USB plug of your device’s charge cord into
the USB port on the bottom of the flashlight.
To adjust the beam angle of the handlebar mount, loosen the
nut slightly. Rotate the bracket on the handlebar so that the
light does not shine directly into oncoming traffic, then tighten
the nut firmly to secure the bracket in place.
Insert the micro-USB plug of the
remote switch into the port on the
bottom of the flashlight. Ensure the
micro-USB plug is fully inserted into
the plug in order to prevent
moisture from entering the unit.
Secure the remote switch firmly to the handlebar using
the included sticky pad and the hook-and-loop strap.
The remote switch can be used to turn the light on or off
or change intensity settings while riding.
Never look directly at or shine the flashlight into the eyes
of a person or animal.
The flashlight should be used under adult supervision only.
Avoid contact with the area near the lens of the flashlight after
periods of use, as it may be extremely hot.
Avalanche transceivers can experience interference from all
electronic devices in close proximity, including flashlights
—even when they are powered off. Do not use your flashlight
in close proximity to an avalanche transceiver in use. For more
informat ion on avalanche transceiver interference, refer to the
manufacturer of your transceiver.
Charge the flashlight battery in temperatures between 5˚C and
40˚C. Do not charge or store the battery in extreme
environments.
This product should be charged before first use and at least
once every three months in storage. Failure to do so may result
in damage to the battery.
WARNING
When the flashlight is powered off, briefly press the button.
The button will become illuminated.
Blue light – 60% to 100% battery life remaining
Orange light –20% to 60% battery life remaining
Red light – 1% to 20% battery life remaining
Heat Warning
The Mountain Lab Gear X1800 is an incredibly bright flashlight
that produces more than twice the light output of a 60 watt
incandescent light bulb. Heat is a natural and unavoidable
byproduct of such intense energy output, and the generation of
heat should be expected with normal use of the product.
For safety, the X1800 is marked with a “HOT” warning in the
area near the flashlight lens, where the heat is generated.
WARNING: Avoid contact with the area near the lens of the
flashlight after periods of use, as it may be extremely hot.
Circuit Protection
Should the internal components of the X1800 Flashlight reach
75˚C as a result of extended use at a bright intensity setting, the
flashlight will automatically switch to the Medium intensity
setting. Once the temperature drops to 65˚C, the flashlight will
revert back to the higher intensity setting.
High Temperature Protection
If the temperature of the internal components reaches 85˚C, the
light will automatically shut down as a safety measure.
X1800 Flashlight
micro-USB charging cord
Handlebar bracket
Wired remote