
17.11.2025 rev1
FX Pocket Chronograph D1
Quick Start Guide
Revision 1 – 17 Nov 2025
Overview
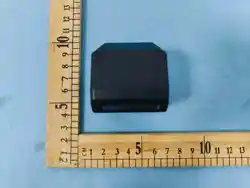
The FX Pocket Chronograph D1 is a Doppler radar chronograph designed for barrel or Picatinny
rail mounting. It features a color display, on-device configuration, and Bluetooth connectivity
with the FX Radar App.
Power button: located on the side of the unit
• Press once to turn ON.
• Press and hold for a few seconds to turn OFF.
• The chronograph will automatically power down after a period of inactivity to save battery.
The device includes two mounting options:
• Barrel mount bracket (with elastic bands)
• Picatinny rail mount bracket (with optional 90° adapter)
Quick Start
1.
Charge the chronograph to at least 75 % using a USB-C cable.
2.
Mount the chronograph using the quarter-turn quick-attach mount:
◦
Barrel: secure the barrel bracket with the elastic bands, positioned 2–5 in (50–125
mm) behind the muzzle. Align the tabs on the back of the chronograph with the slots
in the bracket, press it flat, then rotate the unit about 90° until it locks.
◦
Rail: attach the Picatinny rail mount bracket (and optional 90° adapter if used).
Align the tabs, press the chronograph flat against the bracket, then rotate about 90°
until it locks.
3.
Power ON the device using the side button. The display will show READY.

4.
(Optional) Open the FX Radar App with Bluetooth enabled — it will automatically
discover the chronograph.
5.
Fire a shot. The radar detects the projectile, shows a short calculation animation, then
displays the measured velocity.
Controls and Indicators
• Power button: press to power ON, hold to power OFF. The unit shuts down automatically
after inactivity.
• Up / Select button (front upper): opens configuration mode and confirms menu selections.
• Down / Next button (front lower): scrolls through menu items, advances digits, and exits
value entry when held.
• Display: shows live velocity, statistics, battery level, and menus. The layout rotates based
on configuration.
Charging and Battery Care
The D1 uses an internal lithium-ion battery.
Charge fully before first use with any USB-C cable and charger.
While charging:
• The LED near the USB port lights solid red (charging).
• The LED turns off when charging is complete.
Battery indicator: visible in the top-right corner of the live display (not shown in menus).
Battery care recommendations:
• Store with ≈ 75 % charge if unused for long periods.
• Avoid fully discharging the battery.
• If unused for months, perform a few charge/discharge cycles to restore capacity.
• Avoid charging or storing in extreme temperatures.
◦
Recommended storage temperature: 15 °C – 25 °C (59 °F – 77 °F).
◦
Do not leave in hot vehicles or direct sunlight.
◦ Avoid use in extremely cold conditions.

Mounting Guidelines
Mount using:
• Elastic bands (around the barrel), or
• Picatinny rail mount (with optional adapter).
Placement:
Start 2–5 in (50–125 mm) behind the muzzle and close to the barrel.
Performance depends on caliber — for example, a .22 cal often works on a rail mount, but a .177
cal may require closer placement.
Moving the chronograph slightly farther from the muzzle can sometimes improve accuracy by
reducing cosine error, which occurs when the radar beam angle deviates from the projectile
’
s path.
If shots fail to register, move the device closer to the muzzle.
Avoid:
• Mounting on a table or distant surface (increases angle error).
• Blocking the radar beam with other devices (e.g., another chronograph).
• Mounting on the air bottle without rotating it close to the barrel.
Quick-Attach Mount (Quarter-Turn Interface)
The Pocket Chronograph D1 uses a quick-attach, quarter-turn interface between the chronograph
body and the mounting brackets.
Attaching the chronograph
1. First mount the bracket:
– Barrel: secure the barrel bracket with the elastic bands.
– Rail: secure the Picatinny rail bracket (and optional 90° adapter if used).
2. Align the two tabs on the back of the chronograph with the matching slots in the bracket.
3. Press the chronograph flat against the bracket.
4. Rotate the chronograph body approximately 90° in the direction of the arrow on the mount
until it stops and you feel it lock in place.
5. Gently pull on the unit to confirm it is locked and cannot slide off the bracket.
Removing the chronograph
1. Hold the bracket firmly.

2. Rotate the chronograph body back 90° until the tabs line up with the slots again.
3. Lift the chronograph straight off the bracket.
Notes
• Always verify the chronograph is fully locked before firing.
• When using the side mount without the 90° adapter, set the ORIENTATION in the
configuration menu to RIGHT SIDE or LEFT SIDE so the display is easy to read.
Operating Modes
Two user interface options are available:
• Basic Mode – simplified display with large velocity readout and essential settings (unit,
pellet weight, sensitivity, orientation, mode).
• Advanced Mode – full interface with session management, detailed statistics, and the same
settings as Basic Mode.
(Factory default)
Change modes via the MODE setting in the configuration menu.
All menu changes are stored in flash memory.
Live Display
Common Elements
• READY (green): radar armed and waiting.
• SHOTS: total detections in the current session.
• Battery icon & percentage: top-right corner.
• Velocity units: according to configuration.
Advanced Mode Layout
• Velocity shown near top; units printed vertically beside it.
• Bottom row: MIN / AVG / MAX statistics.
• Energy units show one decimal precision.
• Data accumulates until a new session is started.
Basic Mode Layout

• Velocity displayed in large font.
• Only battery and shot counter visible.
• Unit label appears along bottom edge.
Rotated orientations (LEFT SIDE / RIGHT SIDE) rearrange these elements for easy reading when
mounted sideways.
Entering Configuration
Press Up / Select from the live screen to enter configuration.
Five menu items are shown per page. Arrows indicate additional pages; firmware version is at the
bottom of the last page.
Navigation
• Down / Next: move through items (wraps around).
• Up / Select: open or confirm.
• Value lists: Down = next option, Up = confirm.
• Numeric fields (e.g., pellet weight):
◦ Up = increment digit.
◦
Down = next digit.
• Exit: choose EXIT (or NEW SESSION) and confirm.
Settings are always saved automatically.
Configuration Menu Reference
Advanced Mode (9 items)
1.
NEW SESSION – Saves current string (if shots recorded), clears statistics, starts a new
session.
2.
SUMMARY – Shows MIN / AVG / MAX / EXS / STD / COUNT. Press Down to exit.
3.
SAVES – Browse stored session summaries (e.g., 1/5).
4.
VELOCITY UNIT – Choose FPS / MPS / JOULES / FT-LBS / PF.
5.
PELLET WEIGHT – Enter 0.25–199.99 gr (0.01 gr resolution).

6.
SENSITIVITY
The sensitivity setting controls how easily the chronograph detects a shot.
Think of it as how
“
strong” the radar signal must be before the unit counts a shot.
•
HIGH – Most sensitive
•
NORMAL – Default
•
LOW – Less sensitive
•
LOWEST – Least sensitive
The caliber examples in the menu (.177, .22, .30, etc.) are only guidelines.
They help you pick a starting point: small projectiles usually need higher sensitivity,
and large projectiles usually need lower sensitivity.
Increase sensitivity
Use a higher setting (e.g., NORMAL
→
HIGH) if:
•
The chronograph does not register every shot
•
The device is mounted far from the muzzle
Higher sensitivity makes the unit react to weaker radar reflections.
Decrease sensitivity
Use a lower setting (e.g., NORMAL → LOW) if:
•
You get ghost shots (false detections)
•
You are shooting large calibers
•
The chronograph is mounted very close to the muzzle
Lower sensitivity helps ignore weak reflections and prevents false triggers.
Simple rule
•
Start with NORMAL
•
Turn sensitivity up if shots don’t register
•
Turn it down if you get ghost shots
7.
ORIENTATION – Adjust display rotation:

◦
BARREL (default)
◦
RIGHT SIDE
◦
LEFT SIDE
(Tripod orientation reserved for future versions.)
◦
FLIPPED
8.
MODE – Switch between BASIC and ADVANCED layouts.
9.
EXIT – Save and return to live view.
Basic Mode (6 items)
1. VELOCITY UNIT
2. PELLET WEIGHT
3. SENSITIVITY
4. ORIENTATION
5. MODE – Switch to Advanced mode.
6. EXIT
Session Management and Saved Summaries
Each shot updates the current session statistics.
Selecting NEW SESSION archives results (if shots exist) and resets counters.
SAVES lists stored summaries in reverse order, showing:
• Shot count
• Min / Avg / Max velocity
• Extreme spread
• Standard deviation
FX Radar App Connection
1. Download the FX Radar App from the Google Play Store or Apple App Store.

2. Enable Bluetooth on your phone.
Do not pair manually in Bluetooth settings — the app handles pairing automatically.
3. Launch the app and follow the on-screen quick start.
4. Select a default or create a new profile via
“
Add Profile”.
5. Turn on the chronograph, then tap Add Device when prompted.
6. Confirm pairing when asked — no need to unpair older devices.
Note:
BLE may require Location Services enabled on some Android devices, even though the FX Radar
App itself does not use location data.

TROUBLESHOOTING
NOT CONNECTING
For Android
Begin by closing and reopening the application. Here's how you can do it:
The steps can slightly vary depending on the version of Android, the brand, and the model of the
device, but here is a general guide:
1. Tap the square, recent apps, or app overview icon, which is typically at the bottom of the
screen. On some devices, you may need to swipe up from the bottom of the screen or tap a
dedicated recent apps button.
2. Find the "FX Radar" app in the list of recent apps. You can usually scroll through the list by
swiping left or right or up or down, depending on your device.
3. Swipe the "FX Radar" app off the screen to close it. This usually involves swiping up, but on
some devices, you might swipe right or left.
Accessing device settings:
For Android 8.0 (Oreo) and newer: Swipe down from the top of the screen to open the
notification shade, and then tap on the gear-shaped Settings icon. Alternatively, open your App
Drawer (typically accessed via the button at the center-bottom of the home screen) and locate the
'Settings' app.
For Android 7.0 (Nougat) and older: Depending on the specific device and custom skin from the
manufacturer, the 'Settings' app can typically be accessed from the App Drawer, or from a shortcut
that is often located on one of the home screens.
For Android versions 6.0 (Marshmallow) to 10 (Q), applications using Bluetooth Low Energy (BLE)
also require location permissions to be granted for proper functioning. This is because BLE

can be used to derive your location by looking at what devices are nearby. This is no longer the
case starting with Android 11 (R), which separated Bluetooth and Location permissions.
Here's how you can check your Android version and app permissions:
Checking Android version
1. Check your Android version:
2. Open your device's main Settings app.
3. Scroll down and select About phone or About device. These options might vary
depending on your device.
4. Scroll down to Android version. The number listed here should be your Android version.
If your Android version is between 6.0 (Marshmallow) to 10 (Q):
1. Open your device's main Settings app.
2. Tap Apps & notifications.
3. Tap See all apps or App info. This will display a list of all applications on your device.
4. Scroll down and select the "FX Radar".
5. Tap Permissions.
6. Here, ensure the app has permissions to use Bluetooth and Location. If a permission
is off, tap it, then turn on the switch next to the permission you want to grant.
If your Android version is 11 (R) or above:
1. Open the 'Settings' menu. You can do this by swiping down from the top of the screen to
reveal the notification panel and clicking on the gear icon, or by locating the 'Settings' app
in your app drawer and clicking on it.
2. Tap Apps & notifications.
3. Tap See all apps or App info.
4. Scroll down and select the "FX Radar".
5. Tap Permissions.
6. Here, ensure the app has permissions to use Bluetooth. If a permission is off, tap it,
then turn on the switch next to the permission you want to grant.
If you still have issues with the app, please ensure that your device's operating system and the app
are both updated to the latest versions, as this can help solve many common problems.

For iOS
Begin by closing and reopening the application. Here's how you can do it:
1. From the Home screen, swipe up from the bottom of the screen and pause slightly in the
middle of the screen. On an iPhone 8 or earlier, double-click the Home button to show your
most recently used apps.
2. Swipe right or left to find the "FX Radar" app that you want to close.
3. Swipe up on the app's preview to close the app.
1. Open the Settings app on your device.
2. Scroll down and find the "FX Radar" from the list of apps.
3. Tap on the app name to view its permissions.
4. Make sure that the Bluetooth permission is toggled on. If you're using an older version
of the app, you might also need to ensure that Location Services is set to "While Using the
App" or "Always".

NO AUDIO
For Android
If the audio from your "FX Radar" is not playing correctly, you may want to check the volume
settings on your Android device. Here's how:
1. First, ensure that the audio is enabled within the app. To do this, navigate to the app
settings, select 'Application Settings', and then choose 'Audio'. Either the 'Primary' or
'Secondary' audio should be enabled.
2. Press the volume button on the side of your device. This will usually be on the right
side of the device.
3. A slider should appear on your screen showing the current volume level. If it's too low or
completely muted, increase the volume using the volume up button.
4. If you don't see the volume slider or if pressing the volume buttons doesn't affect the app's
volume, you'll need to check the settings. Swipe down from the top of your screen to open
the notification shade.
5. Look for a gear icon, which represents the Settings menu, and tap on it.
6. Scroll down and select Sound & vibration.
7. Here, you'll see options for different types of volumes including "Media volume", "Call
volume", "Ring volume", and "Alarm volume". Slide the button next to "Media volume" to the
right to increase the volume.
Remember that "Media volume" controls the volume for music, videos, games, and other media.
Make sure that the volume level is high enough to hear sound from the "FX Radar".
For iOS
If you notice that your device isn't producing any sound, you might want to check the status of this
switch. Here's how:
1. First, ensure that the audio is enabled within the app. To do this, navigate to the app
settings, select 'Application Settings', and then choose 'Audio'. Either the 'Primary' or
'Secondary' audio should be enabled.

2. Look on the left side of your iOS device, above the volume buttons. You'll see a small
switch.
3. If the switch is pushed towards the back of the device (showing a red mark), this
means your device is in silent mode. This will mute calls and notifications but doesn't
usually affect media and app audio.
4. To turn off silent mode, flip this switch towards the front of your device (the screen
side). The red mark should no longer be visible.
Please note that the mute switch controls the ringer and alert sounds but doesn't typically mute
audio playing from apps or media. However, it's always good to ensure it's not in the silent mode if
you're having sound issues.
Once you've turned off silent mode, try adjusting the volume again using the side buttons while the
"FX Radar" is open.
1. On the left side of your iOS device, there are two buttons: one for increasing the volume
(the one on top), and one for decreasing the volume (the one below).
2. While you have the "FX Radar" open, press the top button to increase the volume or
the bottom button to decrease the volume. This should adjust the volume of the app directly
if you're currently using it.
3. If you press these buttons and the ringer volume indicator appears (it looks like a bell), then
your side buttons are currently set to control ringer volume. To change this so that they
control your app's volume instead, go to Settings, then Sounds & Haptics, and then turn off
the switch next to "Change with Buttons" under the "Ringer and Alerts" section.
Now, when you press the volume buttons while using an app, they should control the app's volume
instead of the ringer volume. Remember, the physical buttons will control the volume of sounds
and music when apps are in use, but they will control the ringer volume when no apps are actively
used or during the lock screen state.

Federal Communication Commission Interference Statement
This equipment has been tested and found to comply with the limits for a Class B digital device,
pursuant to Part 15 of the FCC Rules. These limits are designed to provide reasonable protection
against harmful interference in a residential installation. This equipment generates, uses and can
radiate radio frequency energy and, if not installed and used in accordance with the instructions,
may cause harmful interference to radio communications. However, there is no guarantee that
interference will not occur in a particular installation. If this equipment does cause harmful
interference to radio or television reception, which can be determined by turning the equipment off
and on, the user is encouraged to try to correct the interference by one of the following measures:
● Reorient or relocate the receiving antenna.
● Increase the separation between the equipment and receiver.
● Connect the equipment into an outlet on a circuit different from that to which the receiver is
connected.
● Consult the dealer or an experienced radio/TV technician for help.
FCC Caution: Any changes or modifications not expressly approved by the party responsible for
compliance could void the user’s authority to operate this equipment.
This device complies with Part 15 of the FCC Rules. Operation is subject to the following two
conditions: (1) This device may not cause harmful interference, and (2) this device must accept
any interference received, including interference that may cause undesired operation.
IMPORTANT NOTE:
FCC Radiation Exposure Statement:
This equipment complies with FCC radiation exposure limits set forth for an uncontrolled
environment. This equipment should be installed and operated with minimum distance 20cm
between the radiator & your body.