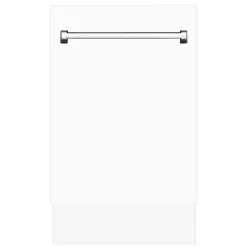

User Manual
TALLAC DISHWASHERS
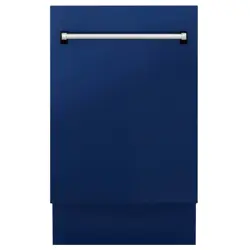
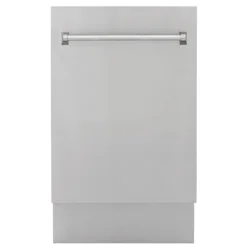
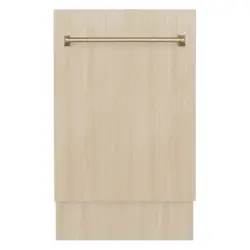
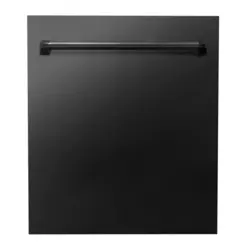
DWV MODELS
zlinekitchen.com

ZLINE Kitchen and Bath provides Attainable Luxury, where the kitchen and bath of your dreams
is never out of reach. Through our unique designs and unparalleled quality, we’re dedicated to
providing you an elevated experience in the heart of your home. With an endless selection of
features and finishes, our inspiration is your reality.
ZLINE is fueled by a passion for innovation—a relentless pursuit of bringing the
highest end luxury designs and professional features into everyone’s homes.
Because we continually strive to improve our products, we may change
specifications and designs without prior notice.
Scan the QR code to view the most up-to-date version of the Installation
Manual and User Manual.
WARNING: This product can expose you to chemicals including Diisononyl phthalate
(DINP) which is known to the State of California to cause cancer. For more information
go to www.P65Warnings.ca.gov.

This page left intentionally blank.

IMPORTANT SAFETY INSTRUCTIONS . . . . . . . . . . . . . . . . . . . . . . 1
OPERATION . . . . . . . . . . . . . . . . . . . . . . . . . . . . . . . . . . . . . . . . . . . 6
Controls and Specifications - DWV-18 Models . . . . . . . . . . . . . . . . . . . 6
Controls and Specifications - DWV-24 Models
. . . . . . . . . . . . . . . . . . . 7
Befor
e Using the Appliance . . . . . . . . . . . . . . . . . . . . . . . . . . . . . .
8
Deter
gent Usage . . . . . . . . . . . . . . . . . . . . . . . . . . . . . . . . . . . . 10
Loading the Dishwasher . . . . . . . . . . . . . . . . . . . . . . . . . . . . . . . .
15
Pr
ogram Selection . . . . . . . . . . . . . . . . . . . . . . . . . . . . . . . . . . .
29
MAINTENANCE AND CLEANING . . . . . . . . . . . . . . . . . . . . . . . . 37
TROUBLESHOOTING . . . . . . . . . . . . . . . . . . . . . . . . . . . . . . . . . . .40
WARRANTY . . . . . . . . . . . . . . . . . . . . . . . . . . . . . . . . . . . . . . . . . . .43
TABLE OF CONTENTS
1
General Safety
IMPORTANT SAFETY INSTRUCTIONS
WARNING
If the information in this manual is not followed exactly, a fire or explosion
may result causing property damage, personal injury, or death.
When using the dishwasher, carefully follow the precautions in this manual. These are provided
in order to save time and effort and to help ensure optimum dishwasher performance. Be
sure to observe all listed warnings and cautions. Look carefully at WARNING icons with an
exclamation mark inside.
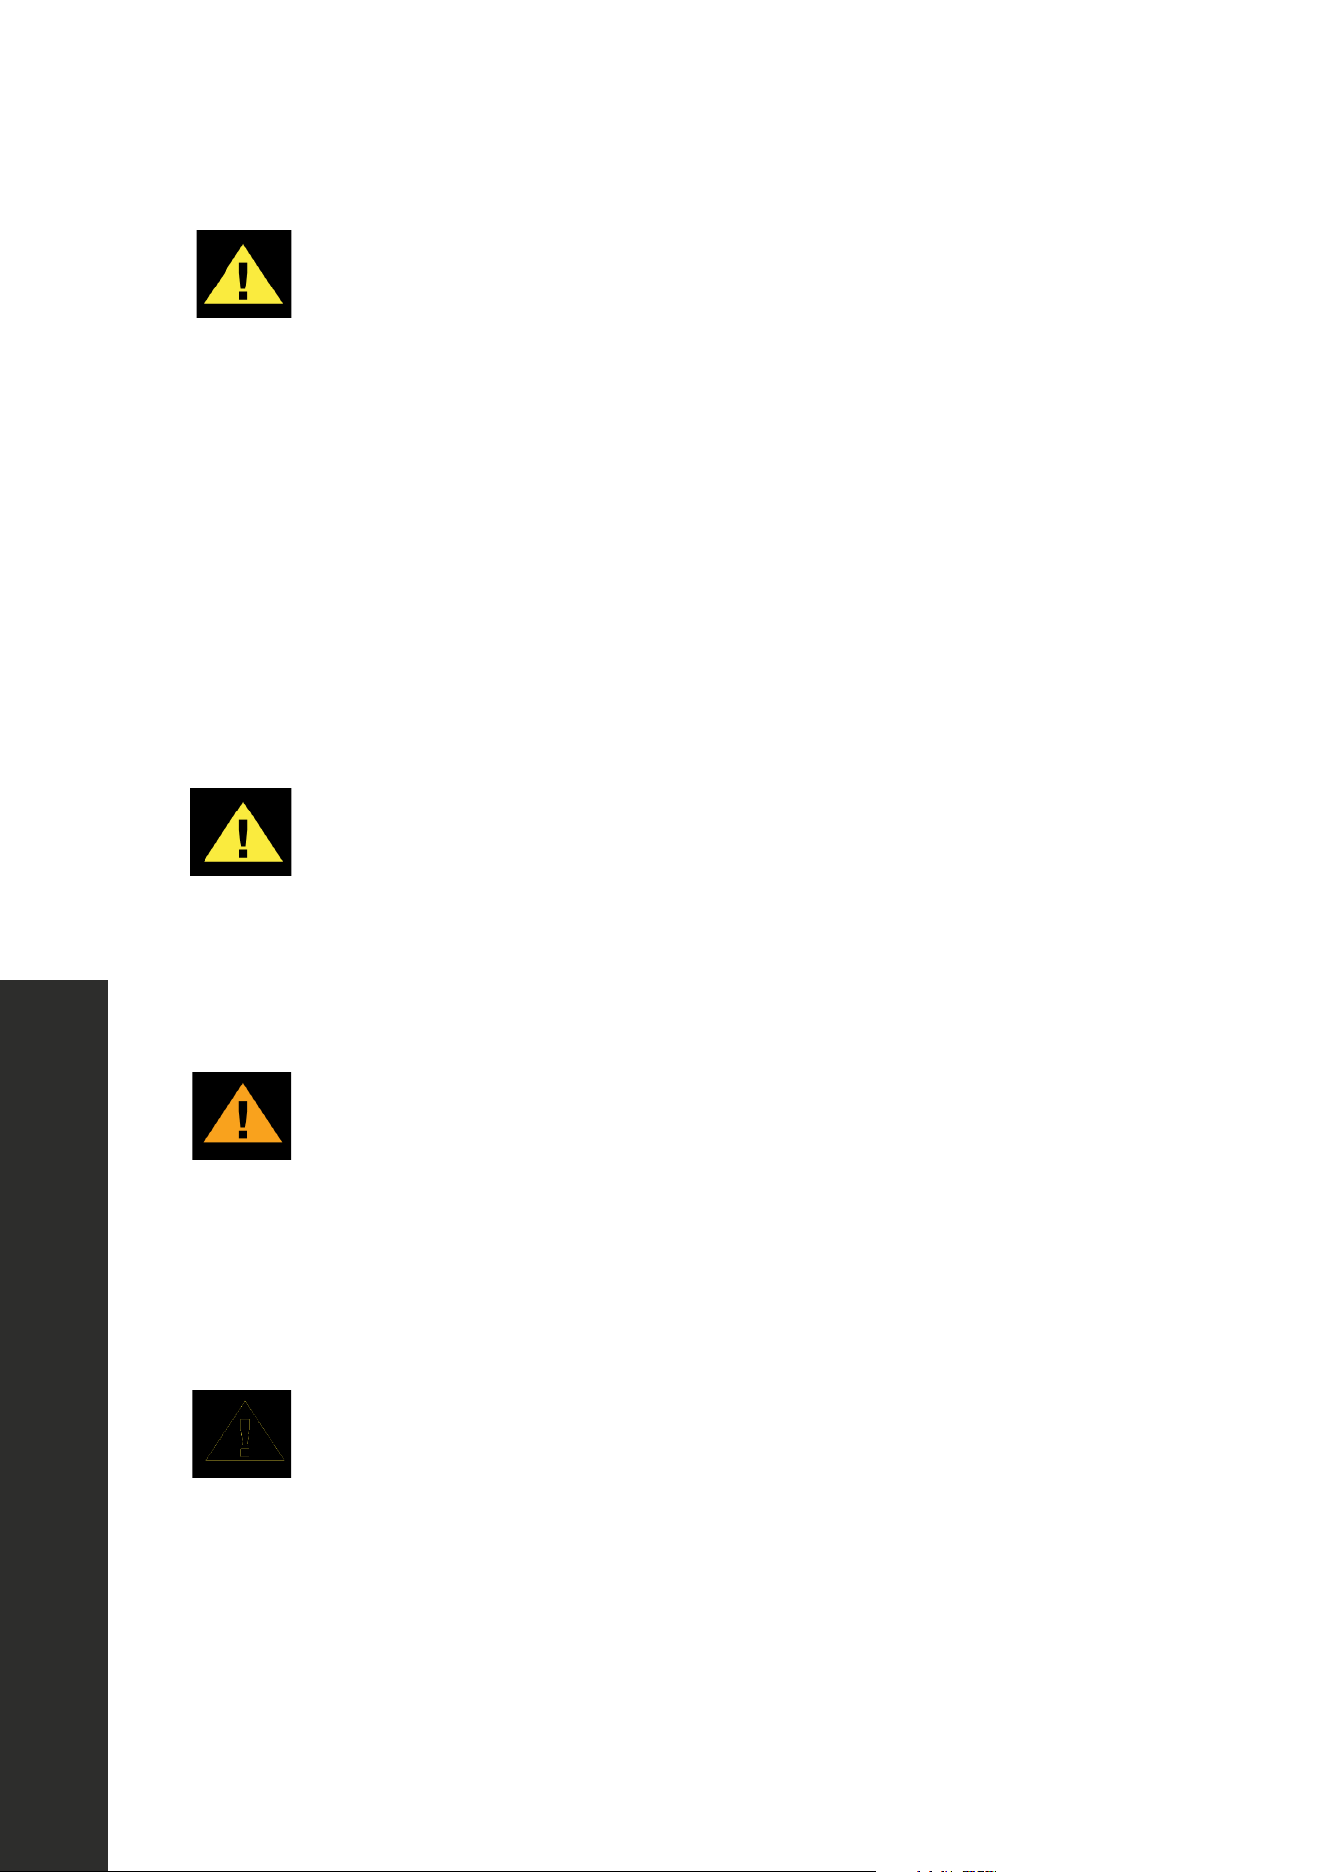
WARNING:
WARNING
Indicates a potentially hazardous situation which, if not avoided, could
result in death or serious injury.
CAUTION:
CAUTION
Indicates a potentially hazardous situation which, if not avoided, may
result in injury. It may also be used to alert against unsafe practices.
NOTICE:
NOTICE
Indicates a potentially hazardous situation which, if not avoided, may
result in damage to the dishwasher, the tableware, the equipment, or the
environment.

2
General Safety
Read these safety instructions completely before installation and operation and follow them
carefully. Save these instructions and pass them on to any future user.
WARNING CAUTION NOTICE
• In addition to these instructions, the dishwasher shall be installed in accordance with all
local codes, or in absence of a local code:
• In the United States, with the National Electric Code ANSI/NPA70-latest edition.
• In Canada, with the Canadian Electric Code C22.1-latest edition/Provincial and
Municipal codes and/or local codes.
When installing the dishwasher, follow basic precautions, including:
• Please check the standards and local codes for dishwasher placement.
• Installation and repair should be performed by a qualified installer, such as an insured
licensed plumber or contractor. Installation performed by non-professionals could be
dangerous and result in improper installation and property damage, which may void
the warranty.
• The information in this user manual must be followed to minimize the risk of fire or
explosion and to prevent property damage, personal injury, or loss of life.
• To reduce the risk of electric shock, fire, or injury, the installer must ensure that the
dishwasher is completely enclosed at the time of installation.
• Never connect the ground wire to gas lines, hot water pipes, or plumbing lines.
• Only connect the dishwasher to the power supply when all installation and plumbing
work is complete.
• Before installation or service, disconnect the power supply to the work area by unplugging
the unit, “tripping” the circuit breaker, or removing the fuse.
• If the dishwasher is installed in a location that experiences freezing temperatures (e.g. in
a vacation home, cabin, etc.), drain all the water from the unit's interior if not using the
unit for extended periods. Water system ruptures that occur as a result of freezing are not
covered by warranty.
• The dishwasher must be secured to adjacent cabinetry using the brackets provided.
Failure to do this may cause damage to property or bodily injury.
• Ensure that any plastic wrappings, bags, small pieces, etc., are disposed of safely and
kept out of the reach of children to prevent risk of suffocation or other serious injury.
IMPORTANT SAFETY INSTRUCTIONS

3
General Safety
• Remove the door to the washing compartment when removing an old dishwasher from
service or discarding it. Ensure that the appliance presents no danger to children while
being stored for disposal.
• The dishwasher drain hose must be installed with a drain loop at least 30" (762 mm) off
the cabinet floor or an appropriate air gap device. Otherwise, the dishwasher may not
drain properly.
• This dishwasher is intended for residential use only and should not be used in commercial
establishments. This appliance is not applicable for outdoor usage. The manufacturer
disclaims responsibility for damage or injury caused by improper use of this appliance.
• Do not operate the appliance if it's damaged, malfunctioning, partially disassembled,
or has missing or broken parts. If the unit arrives damaged, contact ZLINE at
1-614-777-5004 for help.
• If the dishwasher is a new installation, please note that most of the work must be done
before the dishwasher is moved into place.
• If the dishwasher is replacing another dishwasher, check the existing dishwasher
connections for compatibility with the new dishwasher and replace parts as necessary.
• Use only detergents or wetting agents recommended for use in a dishwasher and keep
them out of the reach of children.
• The manufacturer reserves the right to make changes to its products when considered
necessary and useful, without affecting the essential safety and operating characteristics.
• Refer to the Installation Manual provided with your dishwasher for additional installation
details and safety measures.
• The serial number information is located on the right-hand side of the inner door of
the dishwasher.
Example serial number label:
IMPORTANT SAFETY INSTRUCTIONS

4
General Safety
IMPORTANT SAFETY INSTRUCTIONS
• When loading items into the dishwasher:
• Locate sharp items so that they are not likely to damage the door seal.
• Load sharp knives with the handles up to reduce the risk of cut-type injuries.
• Do not wash plastic items unless they are marked “dishwasher safe” or the equivalent.
For plastic items not marked, check the manufacturer’s recommendations.
• Do not touch the heating element during or immediately after use.
• Do not operate the dishwasher unless all enclosure panels are properly in place.
• Do not tamper with controls.
• Do not abuse, sit on, or stand on the door or dish rack of the dishwasher.
• The cup racks are designed to support cups, glasses, and kitchen utensils. When the
cup racks are in the dishwasher, do not lean on or use the cup racks to support your
body weight.
• Some dishwasher detergents are strongly alkaline. They can be extremely dangerous
if swallowed. Avoid contact with the skin and eyes and keep children away from the
dishwasher when the door is open.
• Consult Poison Control or a doctor if detergent has been swallowed or inhaled.
• Do not remove dishes from the appliance until the program is complete. Some detergent
may remain on the dishes.
• Check that the detergent dispenser is empty after the completion of each wash program.
• Do not drink or play with the water in the appliance. Harmful residues could be present.
• To reduce the risk of injury, do not allow children to play in or on the dishwasher.
• Do not leave the appliance with the open door unattended to avoid stepping
accidentally onto it.
• Do not use high pressure water sprays and/or steam to clean the appliance.
• Ensure that there are no visible water leaks during and after the first use of the appliance.
• To avoid floor damage and possible mold growth, do not allow wet areas to remain
around or under the dishwasher.

5
Recycling
IMPORTANT SAFETY INSTRUCTIONS
CAUTION
To avoid risk of injury, always use caution when opening the door during or
following a wash cycle, as hot water or steam may escape.
• Do not store or use flammable liquids or vapors in the immediate surrounding area of the
dishwasher or on the appliance.
• Under certain conditions, hydrogen gas may be produced in a hot-water system that has
not been used for two weeks or more. HYDROGEN GAS IS EXPLOSIVE. If the hot-water
system has not been used for such a period, before using the dishwasher, turn on all
hot-water faucets and let the water flow from each for several minutes. This will release
any accumulated hydrogen gas. As the gas is flammable, do not smoke or use an open
flame during this time.
• Please check the water supply line periodically. It is susceptible to breakage. It becomes
less flexible as time goes by. Replace it immediately when it is torn, cut, swollen, or if
there is water leakage.
• Please keep the dishwasher packaging out of the reach of children after unpacking it.
RECYCLING
• Old appliances may contain materials that can be recycled. Please contact the local
recycling authority about the possibility of recycling these materials.
• Remove the door to the washing compartment when removing an old dishwasher from
service or discarding it. Ensure that the appliance presents no danger to children while
being stored for disposal. Before disposing the dishwasher:
• Disconnect the appliance from the main supply.
• Cut off the main cable and discard it.
• Remove the door catch to prevent children and pets from getting trapped in
the appliance.
6
Product Specifications
OPERATION
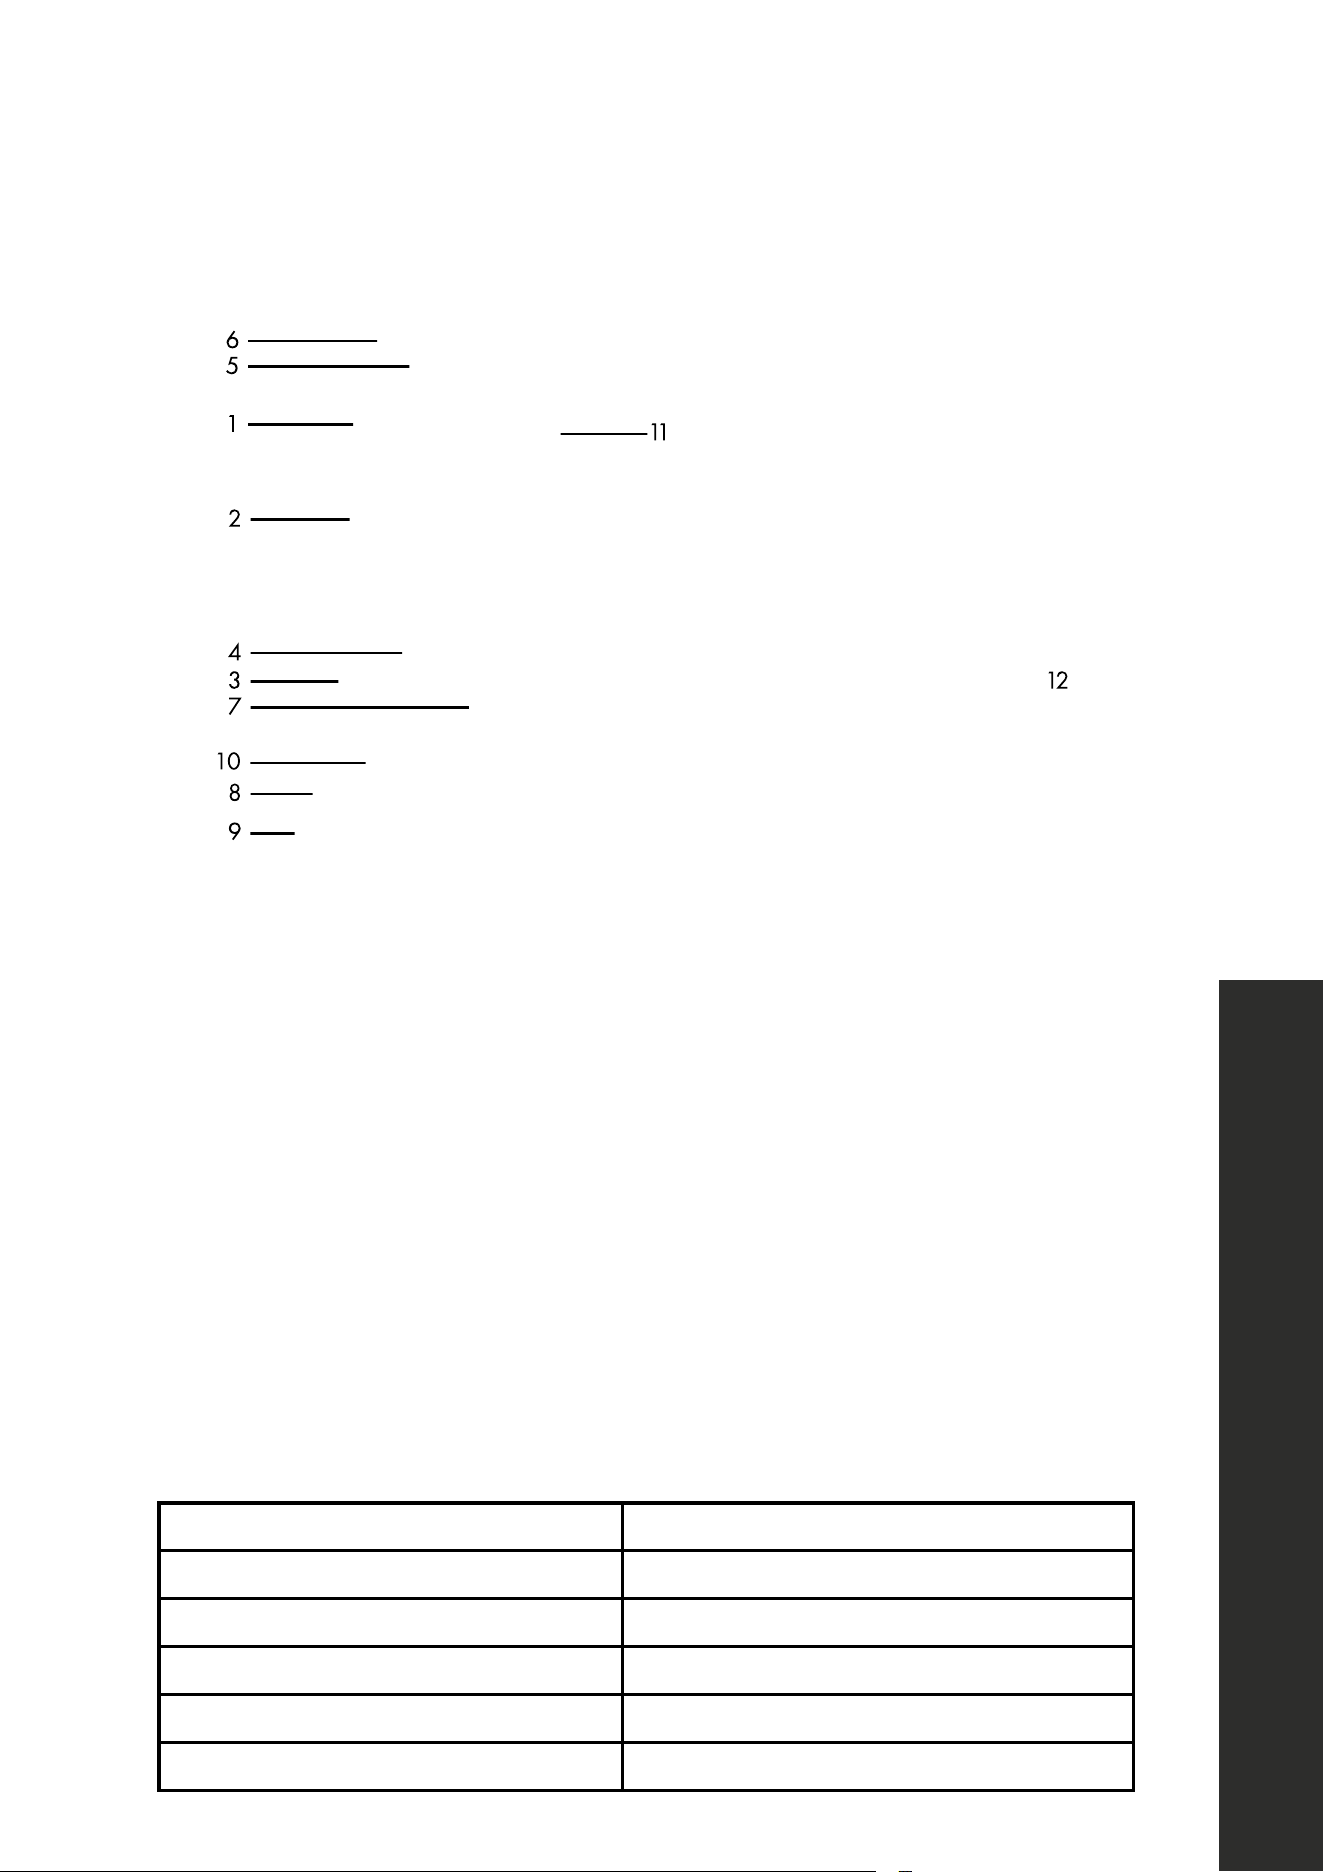
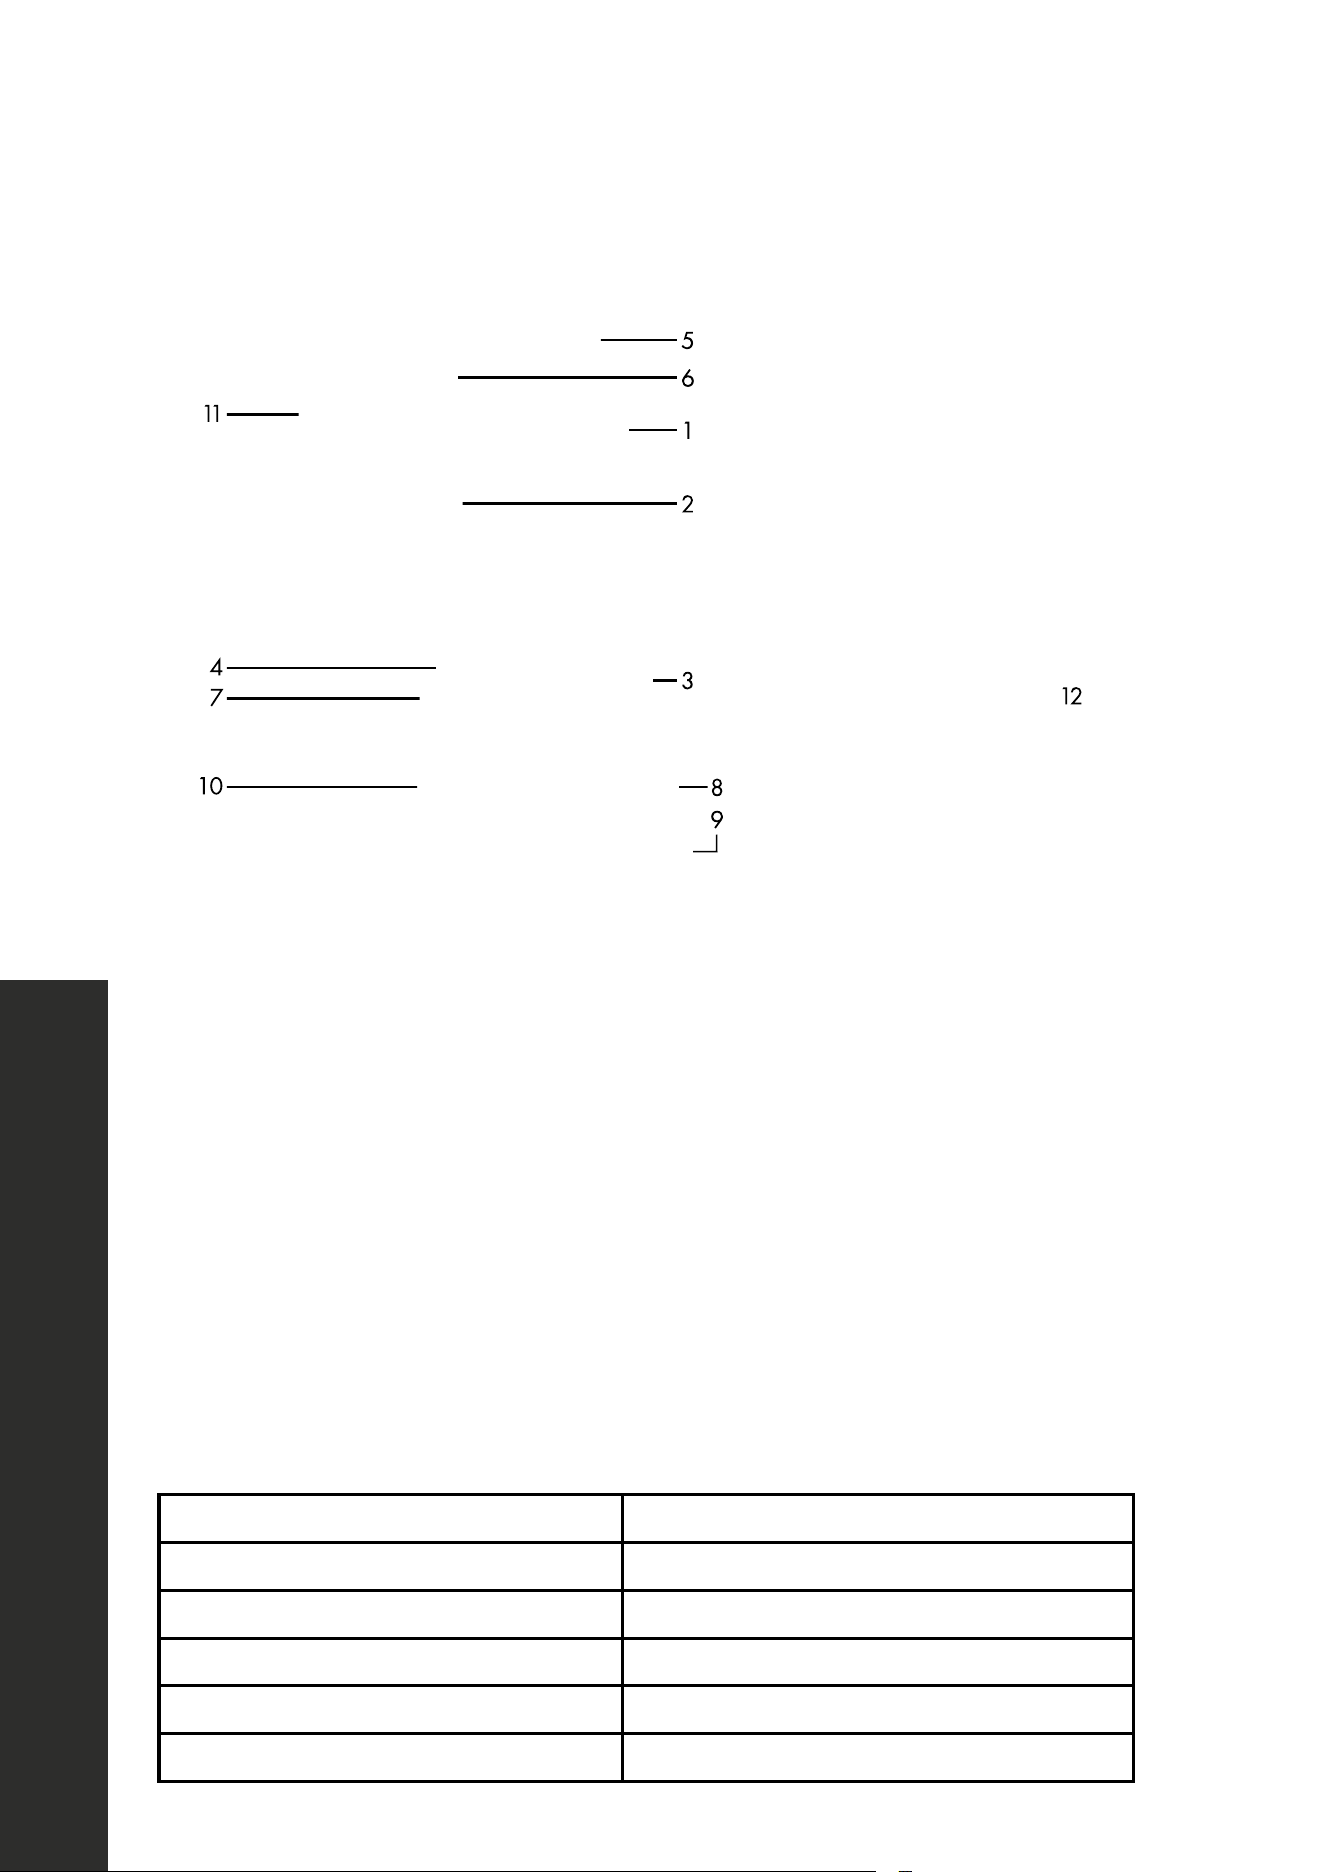
CONTROLS AND SPECIFICATIONS - DWV-18 MODELS
6
5
1
2
4
3
7
8
10
9
11
12
1. Upper Basket with Racks
2. Upper Spray Arm
3. Lower Basket
4. Lower Spray Arm
5. 3rd Basket
6. Top Nozzle
7. Filters
8. Rating Plate Location
9. Control Panel
10. Detergent and Rinse-Aid Dispenser
11 . Upper Basket Track Latch
12. Drying Unit: This system provides better drying performance for the dishes
Load capacity 10 place settings
Permissible water pressure 20 psi–125 psi (138 kPa–862 kPa)
Electrical connection 120 VAC/15 A/60 Hz
Total power 1400 watts
Heater power 1100 watts
Water consumption per cycle 3.2 gallons
7
OPERATION
Product Specifications
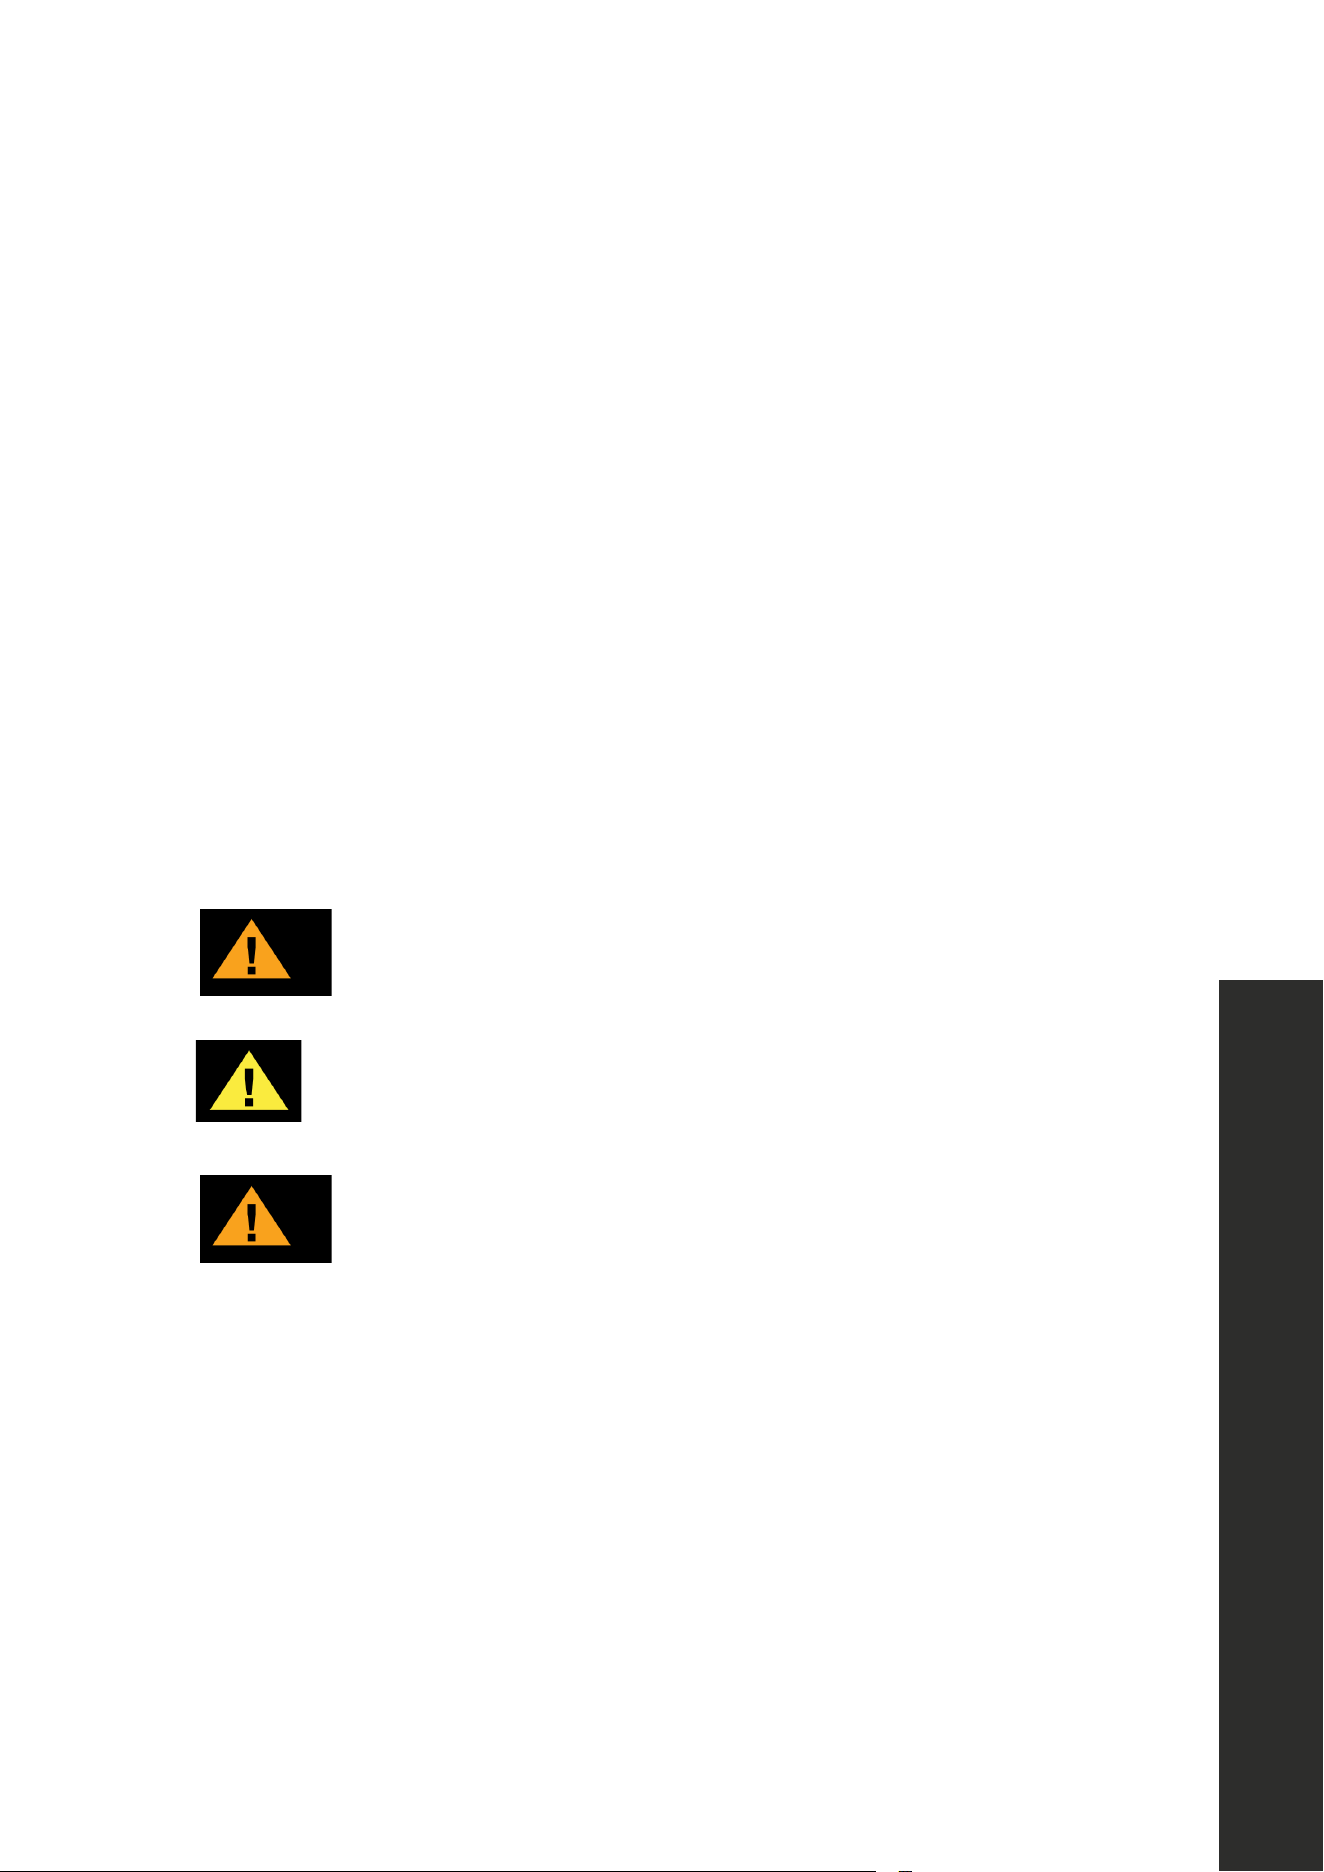
CONTROLS AND SPECIFICATIONS - DWV-24 MODELS
11
5
6
1
2
3
8
9
10
7
4
12
1. Upper Basket with Racks
2. Upper Spray Arm
3. Lower Basket
4. Lower Spray Arm
5. 3rd Basket
6. Top Nozzle
7. Filters
8. Rating Plate Location
9. Control Panel
10. Detergent and Rinse-Aid Dispenser
11 . Upper Basket Track Latch
12. Drying Unit: This system provides better drying performance for the dishes
Load capacity 14 place settings
Permissible water pressure 20 psi–125 psi (138 kPa–862 kPa)
Electrical connection 120 VAC/15 A/60 Hz
Total power 1400 watts
Heater power 1100 watts
Water consumption per cycle 3.4 gallons
8
Before Using the Appliance
OPERATION
BEFORE USING THE APPLIANCE
PREPARING THE DISHWASHER FOR FIRST USE
• Make sure the electricity and supply water specifications match the values indicated in
the installation instructions for the dishwasher.
• Open the door of the dishwasher.
• Remove all packaging material inside the dishwasher.
• Set the rinse-aid per load quantity.
• Fill the rinse-aid compartment.
• Place the dishes in accordance with the instructions in this manual.
• Put adequate amount of detergent into the detergent dispenser.
• Make sure that the upper and lower spray arms rotate freely.
• Select the wash program best suited to the soil level and type of dishes.
• Close the door of the dishwasher. Push the baskets in, then lift the door upwards and
push until it clicks into position.
CAUTION
To prevent injuries, ensure that your hand is not jammed or crushed
between the door and appliance.
WARNING
All functions are automatically interrupted if the door is opened while the
appliance is running.
CAUTION
If the dishwasher door is opened immediately after a wash completes,
hot steam will escape, potentially causing injury.

9
Operation Tips
MAINTENANCE INFORMATION
1. If the dishwasher isn’t going to be used for an extended amount of time:
• Disconnect the plug and close the tap.
• Leave the door slightly open to prevent odor formation.
2. Select the Dry option to reduce the amount of time to air dry residual water droplets.
3. Place dishes in the dishwasher properly to achieve the best energy consumption,
washing, and drying performance. Please see the program and consumption table later
in this manual for more information.
4. For the best results, rinse heavily soiled dishes prior to placing them in the dishwasher.
5. Only use the Rinse program when necessary.
6. Due to high temperatures generated by the dishwasher, do not install the dishwasher
near a refrigerator.
7. If the dishwasher is located in an area that is at risk of freezing, close the tap, disconnect the
inlet hose from the tap, and drain the water inside the hose and the dishwasher completely.
OPERATION

10
Detergent Usage
OPERATION
DETERGENT USAGE
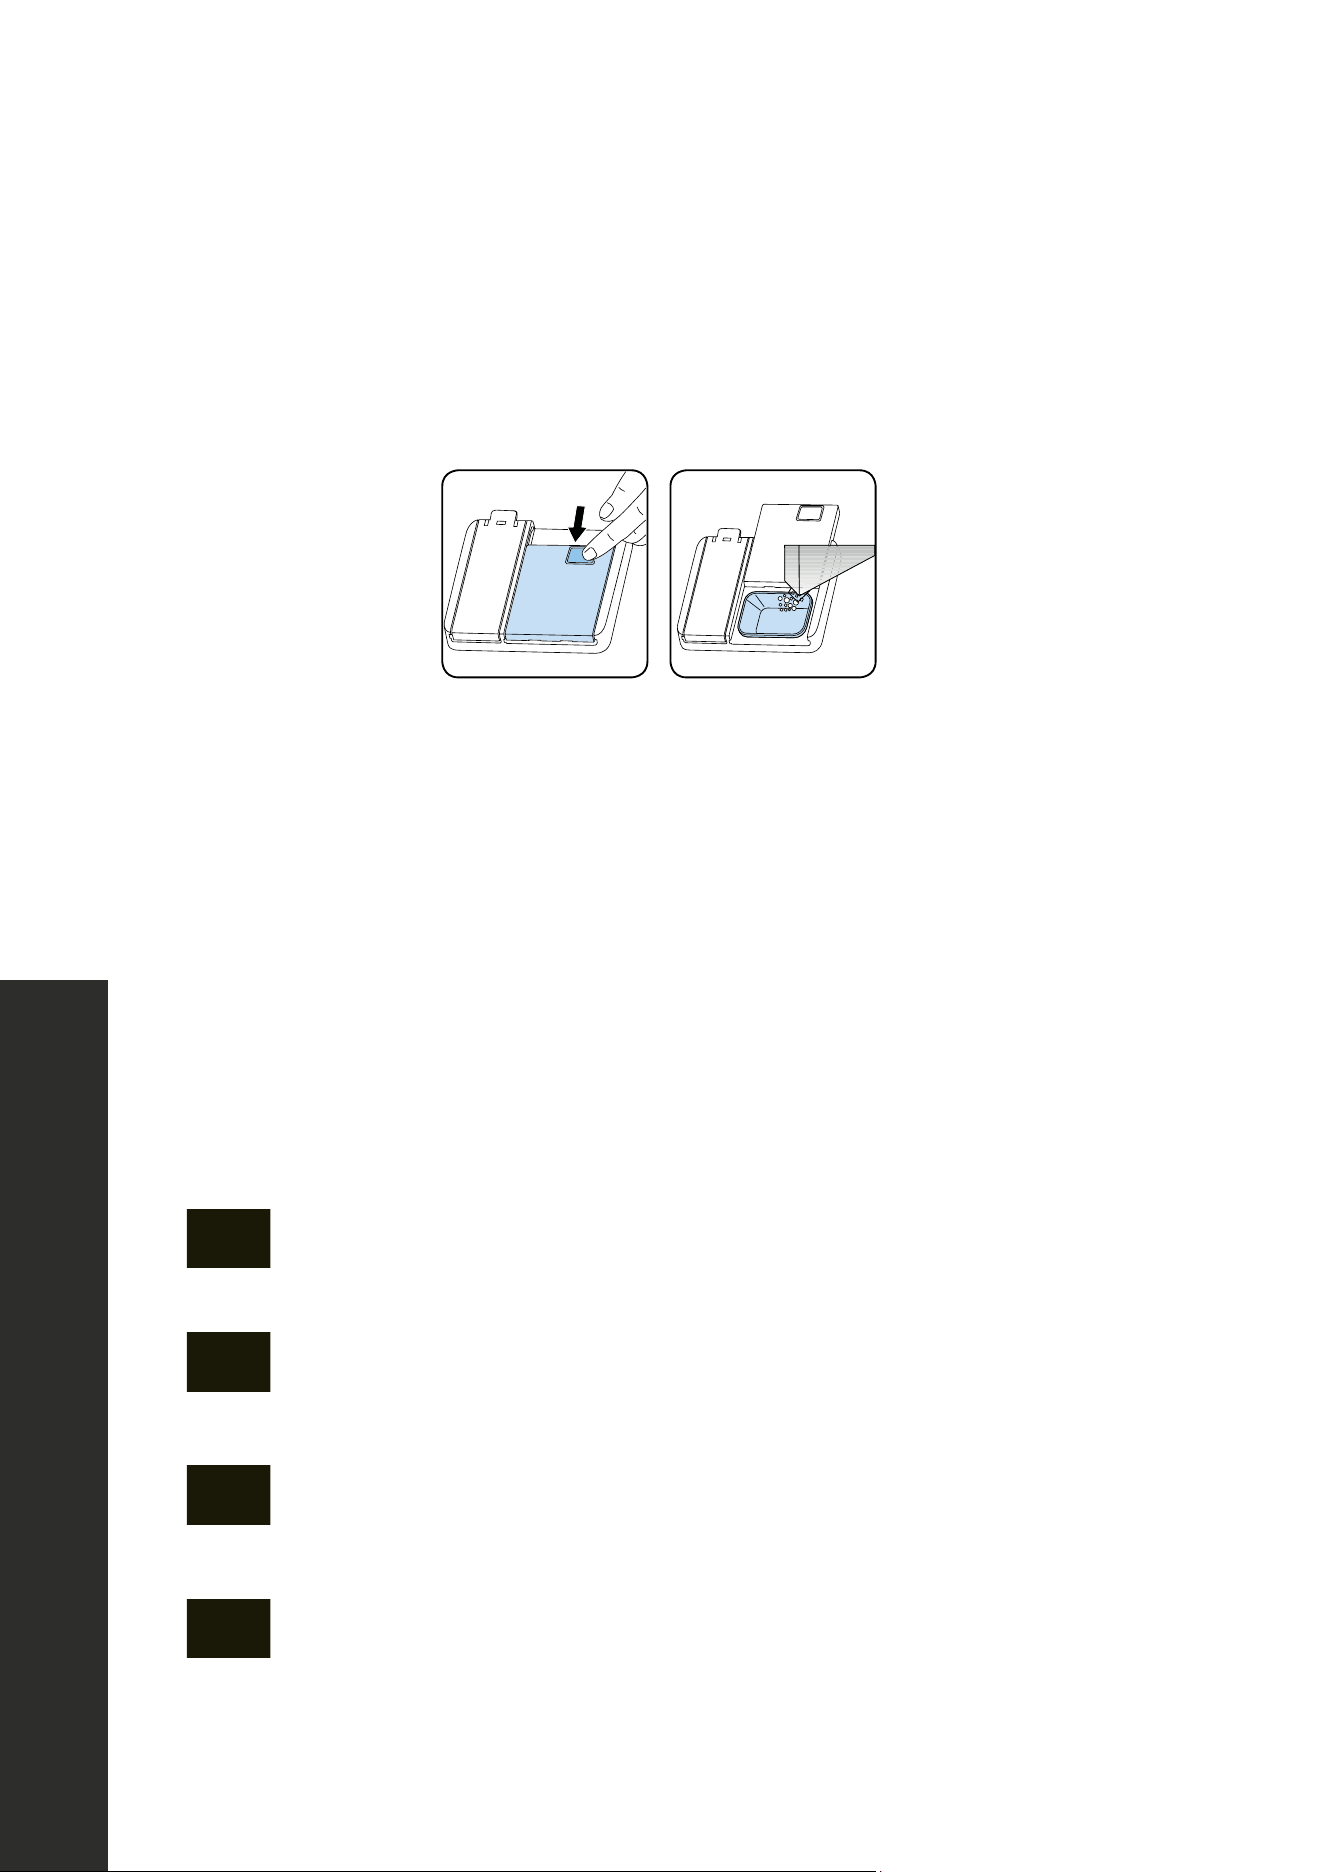
WARNING
Use a detergent specifically designed for use in domestic dishwashers.
• Use powder, gel, and tablet detergents that have been appropriately designated for use
in household dishwashers.
• Detergent should be put into the compartment prior to starting the dishwasher.
• Add the proper detergent for the selected program to ensure best performance.
• Use less detergent if the dishes are only lightly soiled. Using excess detergent can leave
a film on dishes and in the dishwasher, resulting in poor wash performance.
• Do not use detergent tablets for shorter wash cycles. The tablet may not dissolve
completely, causing detergent residue on dishes and inefficient cleaning.
NOTE: The amount of detergent needed depends on the cycle, load size, and soil level
of dishes. Too much detergent in soft water may cause glass corrosion and does not
dissolve in water.
WARNING
Do not use too much detergent if your water supply is soft.
WARNING
Keep detergents in cool, dry places and out of reach of children. See the
detergent manufacturer’s instructions for further information.
WARNING
Detergent tablets do not fully dissolve with short programs. To prevent detergent
residues on the tableware, use tablets with long programs.
WARNING
Do not use detergent in the Rinse cycle. If you do not know the hardness of your
water supply, use 3 teaspoons of detergent. Increase the amount of detergent
if there are white water marks, especially on the surface of the glassware.
NOTE: If more information is needed concerning appropriate detergents, contact detergent
manufacturers directly. Check that the detergent dispenser is empty after the completion of
each wash program.
11
Detergent Usage
OPERATION
FILLING THE DETERGENT
NOTE: The dispenser should be refilled just before the start of each program.
1. Push the latch to open the detergent container as shown in the image.
NI G: Use a ete g nt
market tha hav been
o ar g
t el
cess detergent ca
5
N : e pe s ho
n ainer as shown n the mage( g 1)
DETERGENT
2. Put the detergent into the dispenser.
3. The detergent cup has level lines inside. Measure the right detergent amount using these
lines. The detergent cup can hold up to 1.35 ounces.
4. Pour roughly 1 oz of detergent into the detergent compartment (noted in blue above; see
page 14 for filling the rinse-aid reservoir) if the dishes are heavily soiled. Pour 0.50
oz if they are less soiled. Add more detergent depending on the degree of soil and on
the water hardness level in your area.
5. Close the door of the detergent dispenser.
NOTE: The dispenser door will always be open at the end of a wash cycle.
WARNING
Follow instructions on the package of the detergent when using liquid
dishwasher detergent, concentrated powder detergent, or tablet detergent.
WARNING
Amounts may vary using liquid or concentrated powder detergent. Tablet
detergents should be placed in the detergent container.
WARNING
Your results may vary depending on how soiled the dishes are and how hard
the water is in your location.
WARNING
Use only the proper amount of detergent. Continued use of too much detergent
may cause dishwasher damage.

12
Detergent Usage
OPERATION
USING COMBINED DETERGENTS
• Detergent manufacturers also manufacture combined detergents that are called 2-in-1,
3-in-1, 5-in-1, etc.
• The 2-in-1 detergents contain detergent salt or rinse-aid. While using the 2-in-1
detergents, be sure you know what the tablet consists of.
• The other tablet detergents also have detergent, rinse-aid, salt, and various extra
functions/ingredients.
• Generally, combined detergents produce sufficient results under certain usage conditions
only. Such detergents contain rinse-aid and/or salt in preset amounts.
THINGS TO CONSIDER WHEN USING DIFFERENT DETERGENTS
• Always make sure to check the specifications of the detergent and whether or not it is a
combined detergent.
• Check if the detergent used is appropriate for the hardness of the water that the
dishwasher will use.
• Observe the instructions on the package when using such products.
• When using tablet detergents, never put them into the interior section or the cutlery
basket of the dishwasher. Always put the tablets into the detergent compartment in the
detergent dispenser.
• Combined detergents produce good results for certain types of usage only. If using these
types of detergents, contact the manufacturers and learn about suitable conditions of use.
• When the conditions of use of such products and the dishwasher settings are appropriate,
they ensure savings in rinse-aid consumption.
• Contact the detergent manufacturers if wash results are not optimal (if the dishes stay
cloudy and wet) after using 2-in-1 or 3-in-1 detergents. The scope of warranty for the
dishwasher does not cover any complaints caused by the use of these types of detergents.
• Recommended usage: To obtain better results while using combined detergents, add
rinse-aid into the dishwasher and adjust the rinse-aid setting to the lowest position.

13
Detergent Usage
OPERATION
NOTE: If using a detergent pod from brands like Tide, All, etc., it’s recommended to place
the pod in the detergent dispenser and close the dispenser door before starting a cycle.
Consult the detergent pod manufacturer if wash results are not optimal.
CAUTION
Solubility of the tablet detergents produced by different companies can vary
depending on the temperature and time. Therefore, it is not recommended to
use such detergents in short programs. It is more suitable to use powder
detergents in such programs.
WARNING
Should any problem that has not been encountered before arise with the use of
these types of detergents, contact the detergent manufacturers directly.
If no longer using combined detergents:
• Fill the rinse-aid compartment.
• Select a suitable rinse-aid setting.
RINSE-AID USAGE
• Rinse-aid makes dishes sparkle and helps them to dry without spotting. Rinse-aid is
required for stain-free utensils and clear glasses.
• Filling the rinse-aid reservoir with detergent will damage the reservoir. Only pour rinse-
aid formulated for residential dishwashers into the reservoir.
NOTE: When the rinse-aid indicator lights up, the rinse-aid reservoir contains sufficient
rinse-aid for 2-3 programs only. When using combined detergents, rinse-aid is not needed.
14
Detergent Usage
OPERATION
FILLING THE RINSE-AID AND SETTING
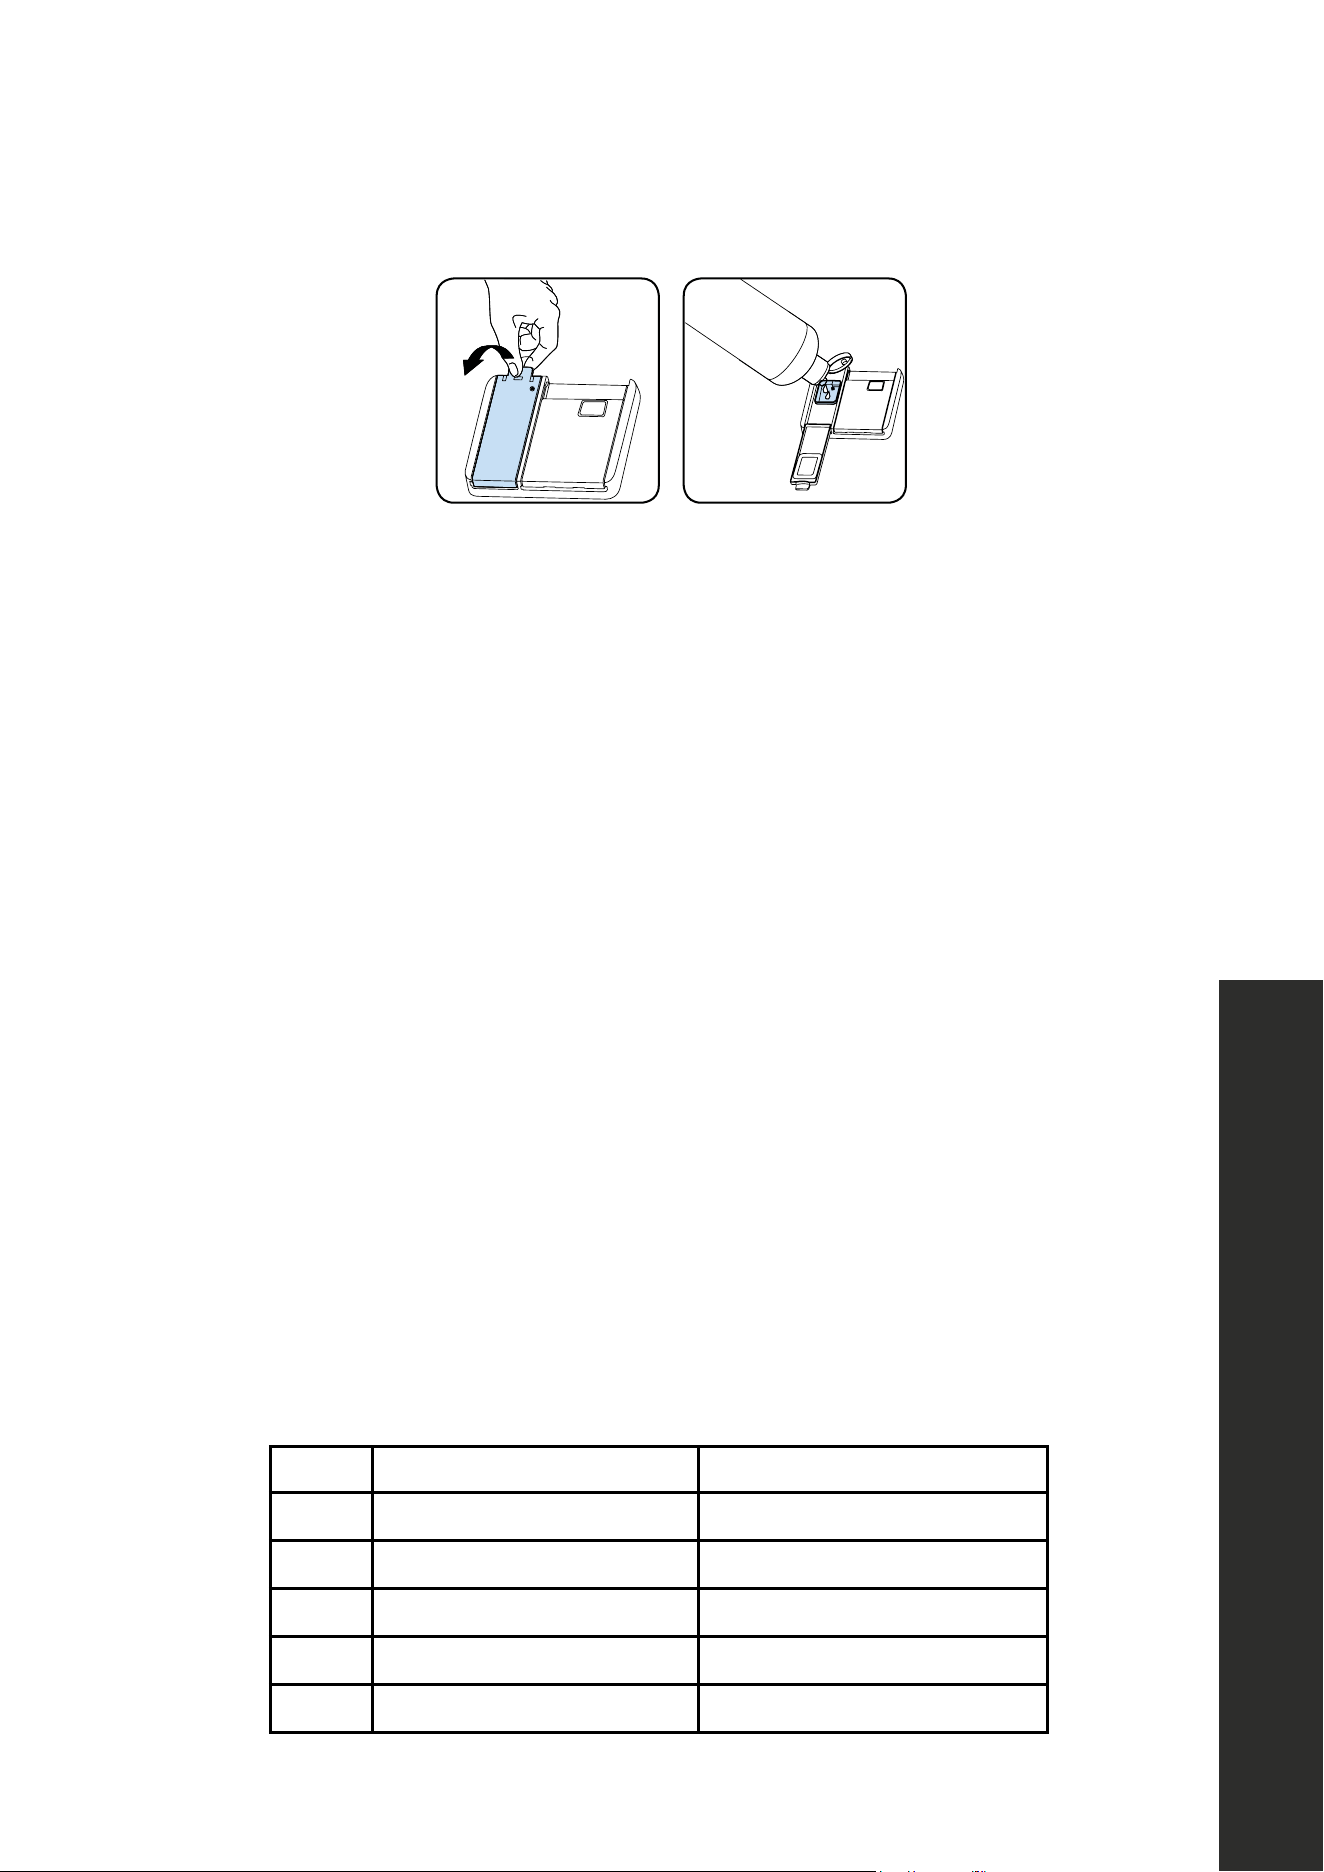
1.
5 9 il ing he
To fill the rinse-aid compartment, open the rinse-aid compartment door.
2. Fill the compartment with rinse-aid to the Max level and then close the door. Be careful
not to overfill the rinse-aid compartment and wipe up any spills.
3. Close the door until it clicks. Otherwise, water can enter the rinse-aid reservoir
during a program.
In order to change the rinse-aid setting, follow the below steps before turning on
the dishwasher:
1. Open the door of the dishwasher,
2. Press and hold “Start/Pause + On/Off” button for 3 seconds.
3. Immediately after ”--” is seen on the display and the dishwasher gives an audible
warning, release ”Start/Pause + On/Off” button, press and hold ”Program Selection +
Cancel” button until ”rA” is represented on the display. The dishwasher will display the
last setting.
4. The amount of rinse-aid is adjusted by pressing “Program Selection + Cancel” button.
5. After the adjustment, turn off (by pressing ”Start/Pause + On/Off” button) the dishwasher
to save the selected rinse-aid amount.
NOTE: If the dishes are not drying properly or are spotted, increase the level. If blue stains
form on the dishes, decrease the level.
LEVEL BRIGHTENER DOSE INDICATOR
1 Rinse-aid not dispensed r1 is shown on the display
2 1 dose is dispensed r2 is shown on the display
3 2 doses are dispensed r3 is shown on the display
4 3 doses are dispensed r4 is shown on the display
5 4 doses are dispensed r5 is shown on the display

15
Loading the Dishwasher
OPERATION
LOADING THE DISHWASHER
Placing dishes into the dishwasher properly is best for energy consumption, as well as
washing and drying performance.
• Load round and deep items, such as pots with long handles, pot lids, plates, salad
plates, and cutlery sets into the lower basket.
• The upper basket is designed for dessert plates, salad bowls, cups, and glasses.
• When placing long-stem glasses and goblets, lean them against the basket edge, rack,
or glass supporter wire and not against other items.
• Do not lean long glasses against one another as they cannot remain steady and
may receive damage. It is better to arrange the thin narrow parts into the middle
sections of baskets.
• Place spoons among other cutlery sets in order to prevent them from sticking to one
another. Use the cutlery grid in order to obtain the best result.
• To avoid any possible injuries, always place long-handle and sharp-pointed dishes, such
as serving forks, bread knives, etc., with their sharp points facing down or horizontally
on the baskets.
WARNING
Place dishes into the dishwasher in a way that they will not prevent the upper
and lower spray arms from spinning.
NOTE: Place all large and very soiled items in the lower rack.
WARNING
Do not put items that can absorb water (sponges, household cloths, etc.) into
the dishwasher.
NOTE: Place all containers such as cups, glasses, and pots into the dishwasher with the
opening facing downwards (so that no water can collect).
NOTE: Dishes and cutlery should not be placed above each other.

16
Loading the Dishwasher
OPERATION
NOTE: Do not overload the dishwasher; pay attention to manufacturer instructions regarding
which dishes and utensils are appropriate for use in a dishwasher. Only with suitable dishes
will there be optimal washing results and appropriate use of energy.
NOTE: High temperature water and dishwasher detergent may form a chemical reaction
that can damage certain items.
WARNING
Be careful when loading and unloading sharp items. Load sharp knives with
the handles up to reduce the risk of personal injury.
Follow the below steps before loading dishwasher.
1. Open the door.
2. Remove stuck-on food left on dishes.
3. Load the dishwasher.
NOTE: If the dishwasher door is opened while it is running, all functions are automatically
interrupted. Once the door is closed functions will continue to work.
DRYING DISHES
• Please note that while the dishwasher is equipped with a premium drying system, some
dishes may still be wet after a full drying cycle.
• In particular, dishes that have small reservoirs, such as the bottom of coffee mugs, may
hold water after a full drying cycle. This is normal for all dishwashers.
• Dishes will dry in a shorter time if the door is left ajar after a wash cycle and the dishes
are left inside for 15 minutes. This allows steam to escape and will increase the drying
effectiveness of the dishwasher.
17
Loading the Dishwasher
UPPER RACK
Load the upper rack with dessert plates, cups, glasses, etc.
cups glasses etc
LOWER RACK
Load the lower basket with items that are round and deep, such as pots with long handles,
pot lids, plates, salad plates, and cutlery sets. The lower rack should not be used for small
items, such as cups and wine glasses.
OPERATION (DWV-18 MODELS)
18
Loading the Dishwasher
EXAMPLES OF INCORRECT LOADS
OPERATION (DWV-18 MODELS)

19
Loading the Dishwasher
UPPER RACK
Load the upper rack with dessert plates, cups, glasses, etc
Load t e p
han les
Top rac loa
OPERATION (DWV-24 MODELS)

20
Loading the Dishwasher
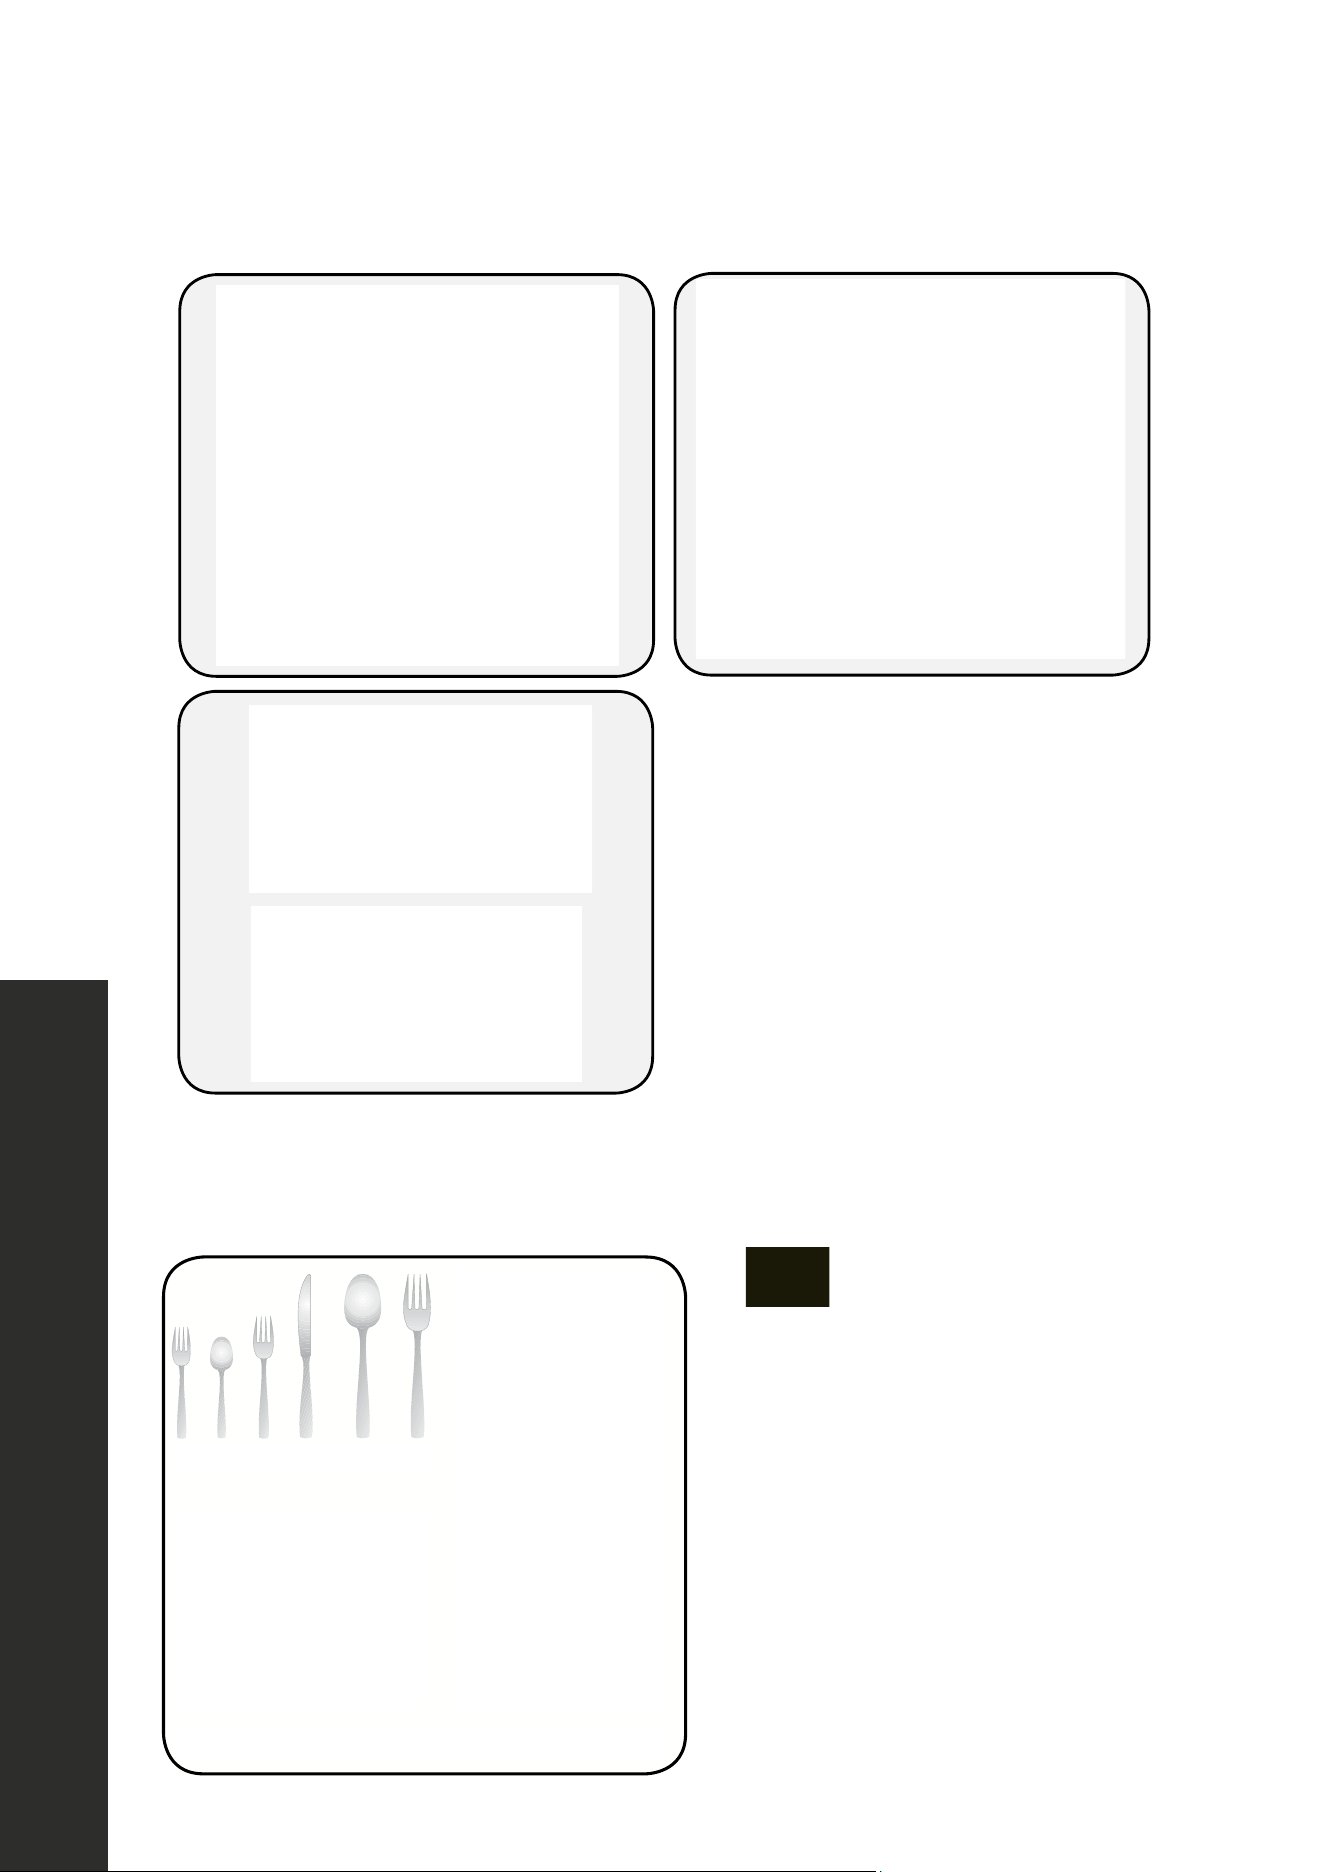
LOWER RACK
Load round and deep items, such as pots with long handles, pot lids, plates, salad plates,
and cutlery sets into the lower rack. The lower rack should not be used for small items such
as cups and wine glasses.
ound and de
T l ld
sed for sma l items such as cu s wine
gla ses
NOTE: Place all large and very soiled items in the lower rack.
WARNING
Large knives and other utensils with sharp tips and edges must be placed
horizontally onto the upper rack to minimize the risk of injury. Other smaller
knives and sharp utensils should be placed with sharp side down in the
cutlery basket.
NOTE: Make sure that large items do not interfere with the rotation of the spray arms and do
not prevent the detergent dispenser from opening.
OPERATION (DWV-24 MODELS)
21
Loading the Dishwasher
EXAMPLES OF INCORRECT LOADS
. . nco ect Loads
S r ng rk
CUTLERY BASKET
OPERATION (DWV-24 MODELS)
WARNING
Sharp cutlery may have
shifted position during the
wash operation and can be
also wet and slippery.
Carefully remove utensils to
prevent injury.
NOTE: Small items should be placed
in the cutlery basket because small
items can fall through the holders from
the baskets.
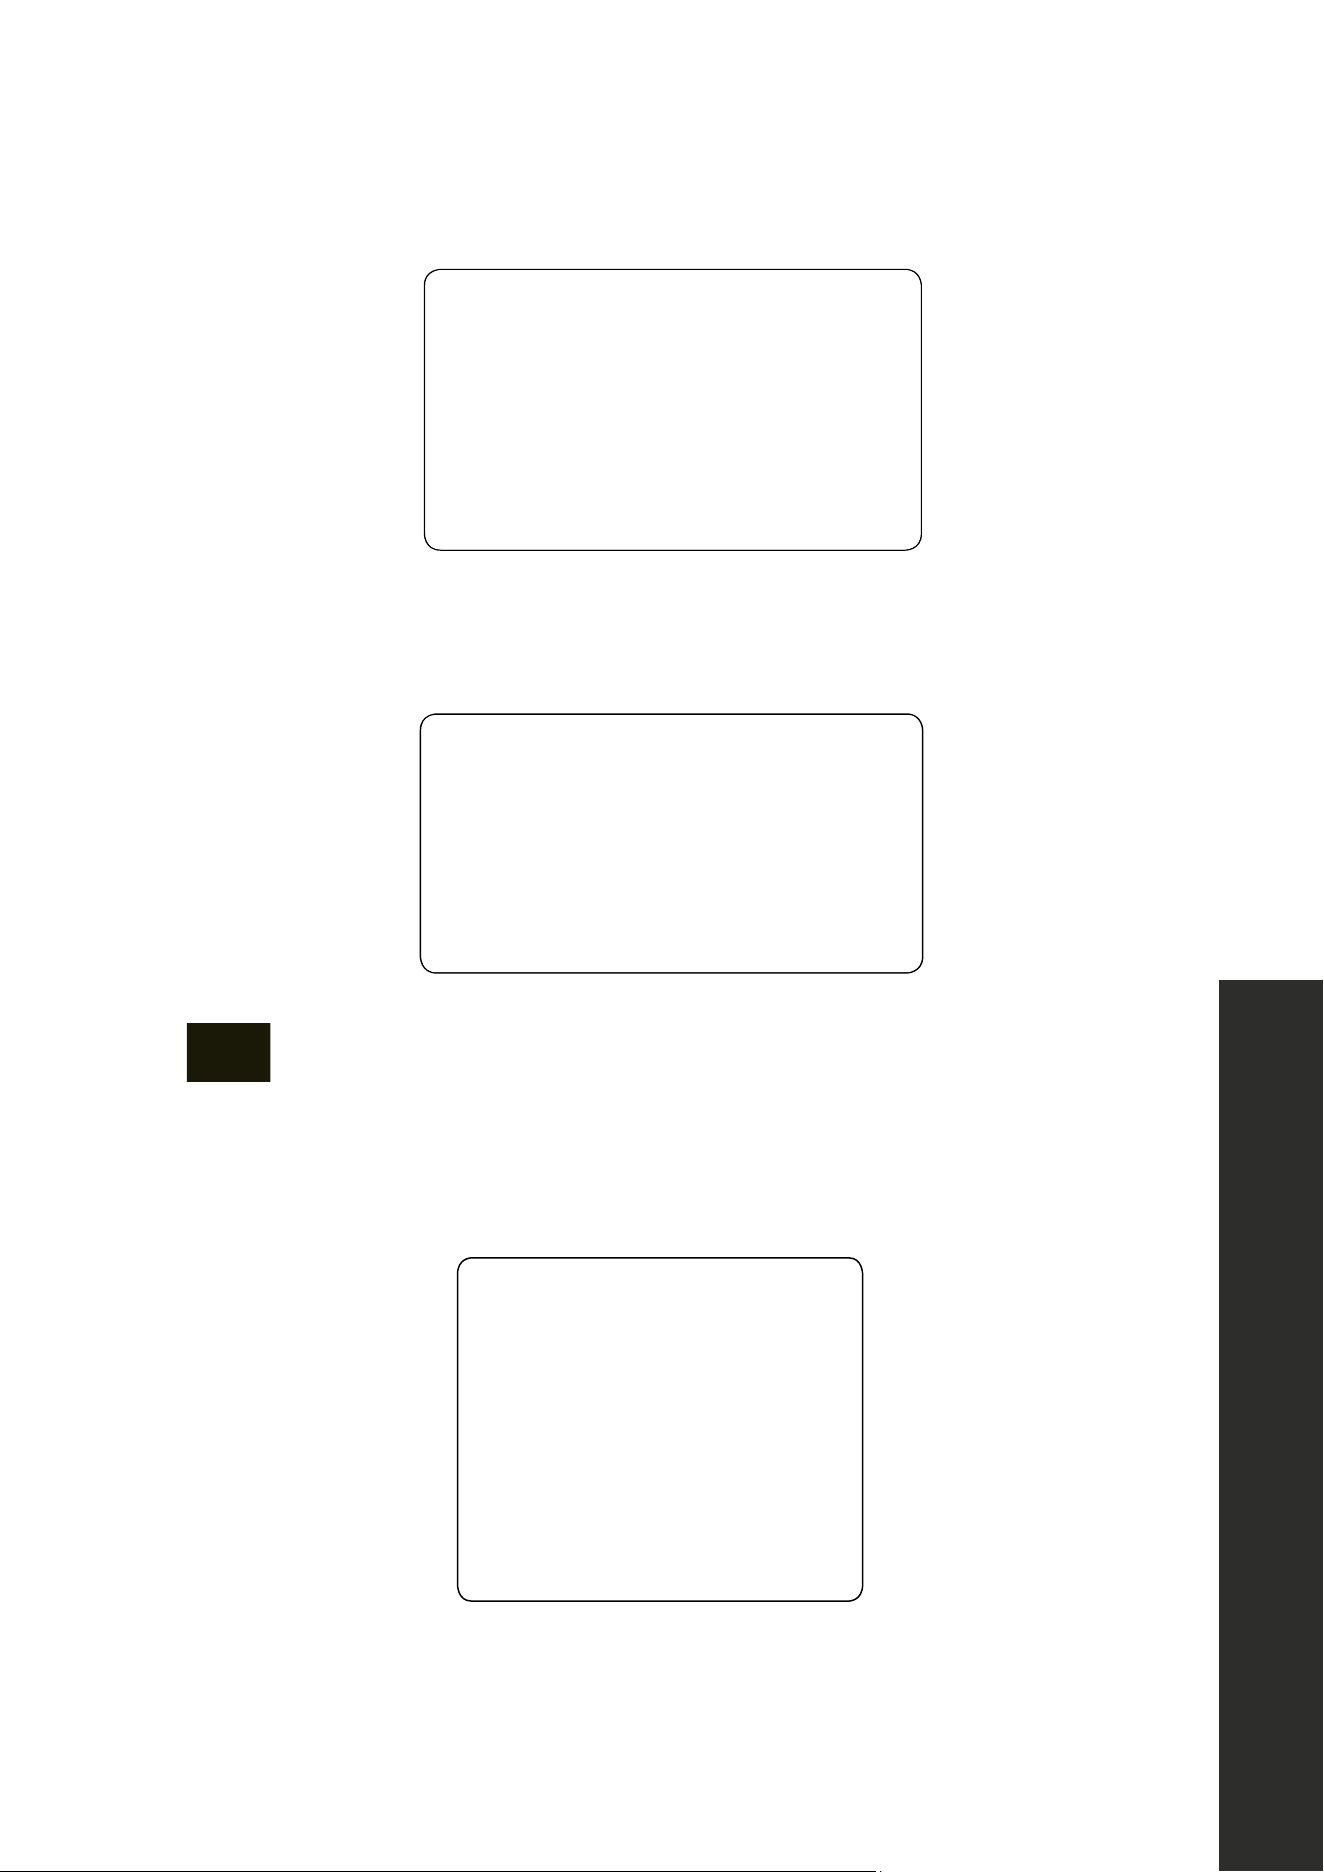
( Model Depend
Cutlery basket load pattern for 8 place settings.
1. Salad Fork
2.
Teaspoon
3.
Dinner Fork
4.
Solid Handle Knife
5.
Serving Spoon
6.
Serving Fork
1 2 3 4 5 6
22
Loading the Dishwasher
The upper cutlery basket is designed for the placement of large and small cutlery and utensils.
ens ls.
It is easily removed from the dishwasher, allowing ease of use when removing items, along
with the basket, after washing.
therefore al ows ease of use when
ft
WARNING
Knives and other sharp objects must be placed horizontally in the cutlery
basket to avoid risk of injury.
SILVERWARE BASKET
•
and sma cutlery an
r k o
dish s suc as
The silverware basket is designed to wash dishes such as knives, forks, spoons, etc., in
a cleaner manner.
• The cutlery basket can be moved, creating a wider space in the lower basket for dishes
of different sizes.
OPERATION
23
Loading the Dishwasher
OPERATION
TOP BASKET
Rack with height adjustment:
• These racks are designed to increase the capacity of the top basket. Place cups and
glasses on these racks. These racks are adjustable and can accommodate glasses of
different sizes.
• Height adjustment brackets mounted on the basket allow racks to be in two
different positions.
• Place long knives, forks, and spoons on these racks horizontally for them not to block the
movement of spray arms.
c s
la e la e of e ent s z r th
rack
ition
z n
rms
24
Loading the Dishwasher
OPERATION
The horizontal wires located on the top basket allow for placement of plates and bowls. You
can wash various-sized kitchenware such as pots and pans by flipping the height adjustment
brackets closed (see DWV-24 model for reference).
OPER ATION
The horizont l wires l cated on the top basket allow or placement of plates and bow s
You a wash variou s zed kitche ware s ch as pots an p s by p ng the hei ht
adjus ment bracket clo ed (see 4" m del or refe
DWV-18 DWV-24
NOTICE
Bringing the wires to the horizontal position by holding them from the tips may
cause them to bend. Therefore, it is appropriate to move the wires by holding
them by their stems and pushing into the desired location.
LOWER RACK BOTTLE WIRE
Some DWV models may include a lower rack bottle wire that is used to clean water bottles
and other tall cylindrical products by keeping them upright during wash cycles. This piece
can be easily removed by hand and moved to different locations on the lower rack.
25
Loading the Dishwasher
LOWER BASKET FOLDING RACKS
Folding racks consisting of four parts that are located on the lower basket of the dishwasher
are designed to more easily fit large items, such as pots, pans, etc. If desired, each part can
be folded separately or all of them can be folded to create larger spaces. Use folding racks
by raising them upwards or by folding.
US
olding racks co sisting of fou p r s
r o y u
i t
l e big ems asie su h as ots a s
tc I equest d, ea pa t can be olde
r r a n ta ed Y ca
p a
n ht f t t
be ad usted up ( ) o down (2) without
a g e e e Ho
ush t down en urin bo h id s of the
c d s e f
p ace b g items ea er such as pots, pans
e I r uest d, c be l e
l
DWV-18 DWV-24
OPERATION
26
HEIGHT SETTING (WHEN BASKET IS FILLED)
The upper basket includes a mechanism that enables the height of the basket to be adjusted
up or down without having to remove the basket. Hold the basket on both sides and pull it
up or push it down, ensuring both sides of the upper basket are in the same position.
2 H ight settin - when ba ke i l ed
wh c enab es t e heig of he bas et
avi o r mov h ba t. d the
i
Fol ing acks con ist ng o fou part th t
mac in a e des gned n o der to et you
etc If req es ed each par can be olded
2) Heig t se ing - w en b ske is led
g
T p b s e n l d i
n s
to be a usted up 1) or own 2) with u
Low r Basket o
g a co si
l
c
place b g
DWV-18 DWV-24
2
1
•
The basket height adjustment mechanism on the top basket of the dishwasher is designed
to let the height of the top basket move upwards or downwards without removing it
from the dishwasher when it is full. It's also designed to create large spaces at the top or
bottom area of the dishwasher as needed.
• The dishwasher basket is set to the upper position by default. In order to raise the basket,
hold it from both sides and pull upwards. In order to lower it, hold it from both sides
again and lower it. When using the basket adjustment mechanism, make sure that both
sides are in the same position (up or down).
NOTICE
Make sure that both levers catch in the same height position.
OPERATION
Height Setting
27
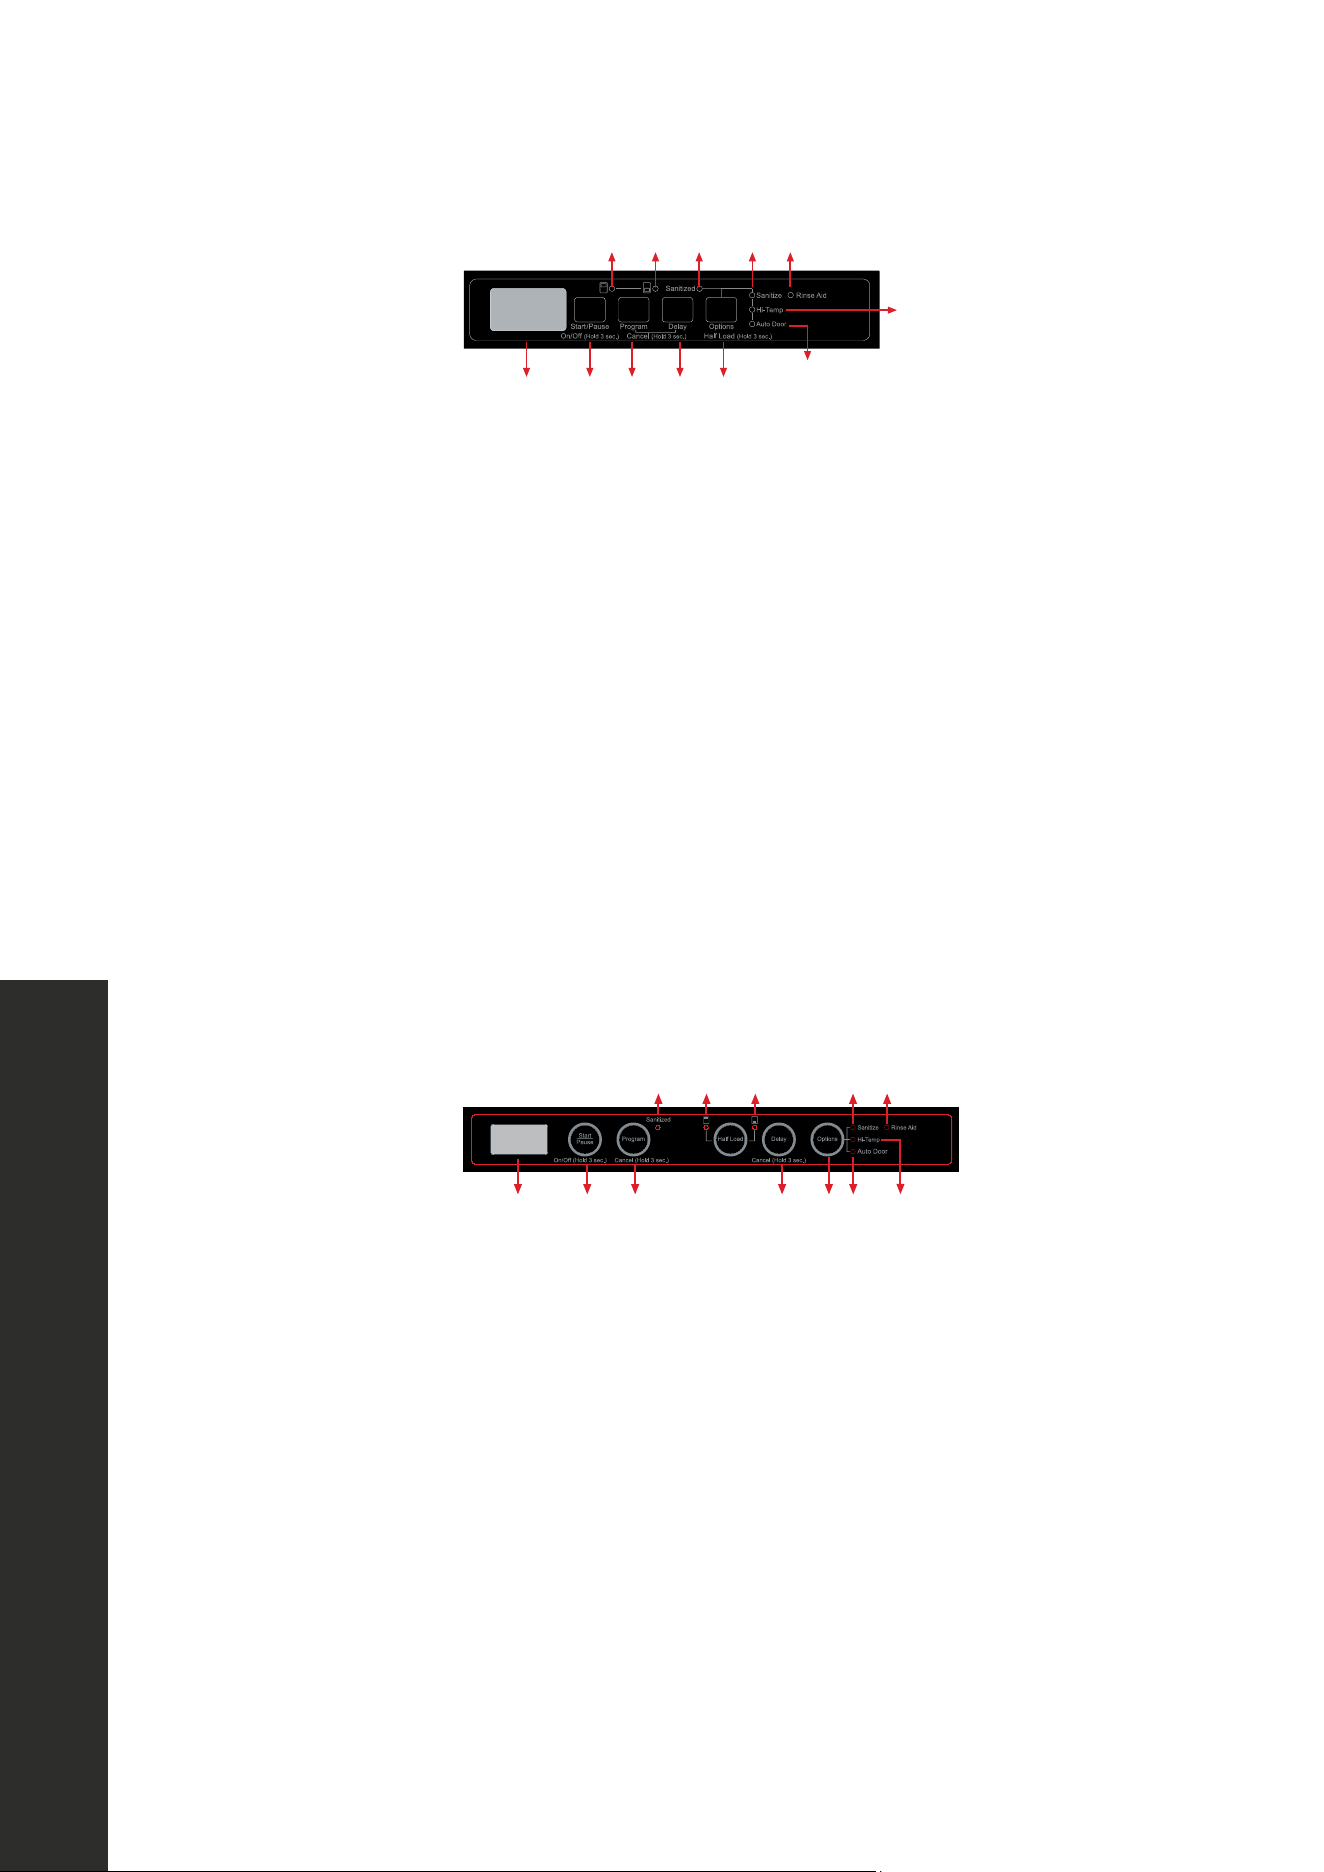
1 Display
2. On/Off Start/Pause Button
3 Program Selection + Cancel Program
4 Delay Time Button + Cancel Delay Timer
5. Extra Options Button
6. Rinse-A d Indicator
i. Sanitize Options
ii. Hi-Temp Options
iii. Auto Door Options
iv. Half Load Upper Basket
v Half Load ower Basket
vi San tized Indic to
27
OPERATION
Disp ay
2. On Off + Star Pause Button
3 Prog am Se ectio + Cance Button
4 De a e B t on
o
o
o
v
T
3
B t
5 x O s on
d cator
i z O o
i em ns
i xtr y p o s
v a d U p Ba
v a a k
On
o r
a e ec on + ance ey
4 De ay e e
x p o y
E D i
v H d p
a o
pl
t
o ra e c on + an e Key
Op o
S tize pt ons
i x tions
-
. e A
1
O / e
a
r d n f
d w
P e s e
iv v vi i 6
ii
iii
1 2 3 4 5
PER T T E P
DU
p
D
t
a i
r
i an z p on
ii O ons
Ex a D pt o s
v oad Up er
Di
2 f P
S K
E i n
i e
tem
x
f U
l d - owe Bas
R se A
e c on + C ce K
e K
i
. H e pt
a d o
s
e
T
on
a
27
OPERATION
1. Display
2. On/Off + Star /Pause But on
3. Progra Selection + Cance Button
4. Delay T er B t
5. Extra Op ions B tton
6. Rinse-Aid Indicator
i. Sanitize Options
ii. Hi-Temp Options
iv. Half Load - Upper Basket
v. Half Load - Lower Baske
vi. San tized Indicator
OPE TI
y
3 r C l
4 T B tt
5 xt a O t s t on
6 inse A Ind cator
i an tize Options
i i- em Op ions
ii xtra Dr Op on
iv a a pper Ba
al o L e
On/O
P ogr m e ection + Cance Key
4. elay imer e
E p
H
i i E tr Dr O ti
iv Half oad U
v. Ha Lo d - Lo
i I
pl
/ f S
P gram Se c on + Cance Key
E r Options Key
i S itiz Opt ns
ii Extra Dry Options
l o - p
L
. se A d Indi a or
1
n ff Ke
y s a e
o pond ng bu n is he d down f
tar P se ke t s ed t
iv v vi i 6
ii
iii
1 2 3 4 5
8 PERATING THE P
On
p o
vi iv v i 6
1 2 3 4
5 iii ii
ii Auto D
oo opt o
ti c
3 r g i
e imer
x io
e d ndi at
i. n ize o s
ii. - emp O ons
ii xt a Dry Op ions
iv al Load - Upper
Di
2 O /Off t t K
Pr S ect n anc l K
4 Delay T mer K
5 x r Option
i aniti e O
ii. Hi-temp O
ii Ext a Dry O
iv alf Lo Upper Bask
v. al Lo d - Lower Bask
6 Ri se Aid Ind
D p y
P o ram Se ect on + C el Key
D ay Timer Key
it O t
i. Hi-temp Opti
i a
v alf L ad - Low
se A d nd a or
. Keys
c
a m b
of
PERAT G TH
o
sh
rat
4
DWV-18
DWV-24
1. Display
2. On/Off + Start/Pause Button
3. Program Selection + Cancel Program
4. Delay Timer Button + Cancel Delay Timer
5. Extra Options Button
6. Rinse-Aid Indicator
i. Sanitize Options
ii. Hi-Temp Options
iii. Auto Door Options
iv. Half Load - Upper Basket
v. Half Load - Lower Basket
vi. Sanitized Indicator
Buttons

28
OPERATION
BUTTONS
ON/OFF BUTTON
• This button is used as the On/Off button if it is held down for 3 seconds. Otherwise, it
can be used as the Start/Pause button. It is used to turn on or turn off the dishwasher.
• The dishwasher will turn on with the Regular program, and the number and the duration
of the Regular program will appear on the display.
• Each of the program numbers and their duration will sequentially represent for 2 seconds
on the display. In Off position, the display will turn off.
START/PAUSE BUTTON
Used to start or pause a selected program and functions.
PROGRAM SELECTION/CANCEL BUTTON
Used to select the washing program determined from the programs table. The cancel button
is activated when Program Selection/Cancel Button is held down for 3 seconds.
DELAY TIMER BUTTON
Used to set the delay timer. Press to cycle through the available delay times. Press and hold
for 3 seconds to cancel the delay timer.
HALF LOAD BUTTON
Used to add Half Load functions to the selected program.
OPTIONS BUTTON
Used to add optional functions to the selected program.
SCREEN
When the unit is running and the door is closed, the display will show 188. This is due to the
design of the display panel and is a normal function.
Buttons

29
PREPARING THE DISHWASHER
1. Open the door of the dishwasher.
2. Place dishes in accordance with the instructions detailed on previous pages.
3. Make sure that the upper and lower spray arms rotate freely.
4. Put adequate amount of detergent into the detergent dispenser.
5. Check if the rinse-aid indicator light is on and add rinse-aid if needed.
PROGRAM SELECTION
6. Press the On/Off button to turn on the dishwasher. Note that the door of the dishwasher
is in the OPEN position.
7. Refer to the “Programs Table” to determine a washing program suitable for the dishes.
8. Press program selection button until the number of the program selected appears on
the display.
STARTING THE PROGRAM
• Open the door of your dishwasher. Select the program and optional functions. The program
duration and program number will appear on the display alternately. Press “Start/Pause
+ On/Off” button. Close the door within 4 seconds, and the program will start.
• If the door is not closed within 4 seconds, the dishwasher will not start. In this case,
to start the selected program, the door must be opened, the Start/Pause button must
be pressed and the door must be closed again within 4 seconds after the Start/Pause
button is pressed.
• The total time can change while the program is running depending on the ambient
temperature where the dishwasher is installed, temperature of the supply water, and
amount of the dishes.
• If the door is opened while the dishwasher is running, the dishwasher will switch to
the standby mode. Press Start/Pause button and close the dishwasher door within 4
seconds, and the program will resume.
OPERATION
Program Selection
30
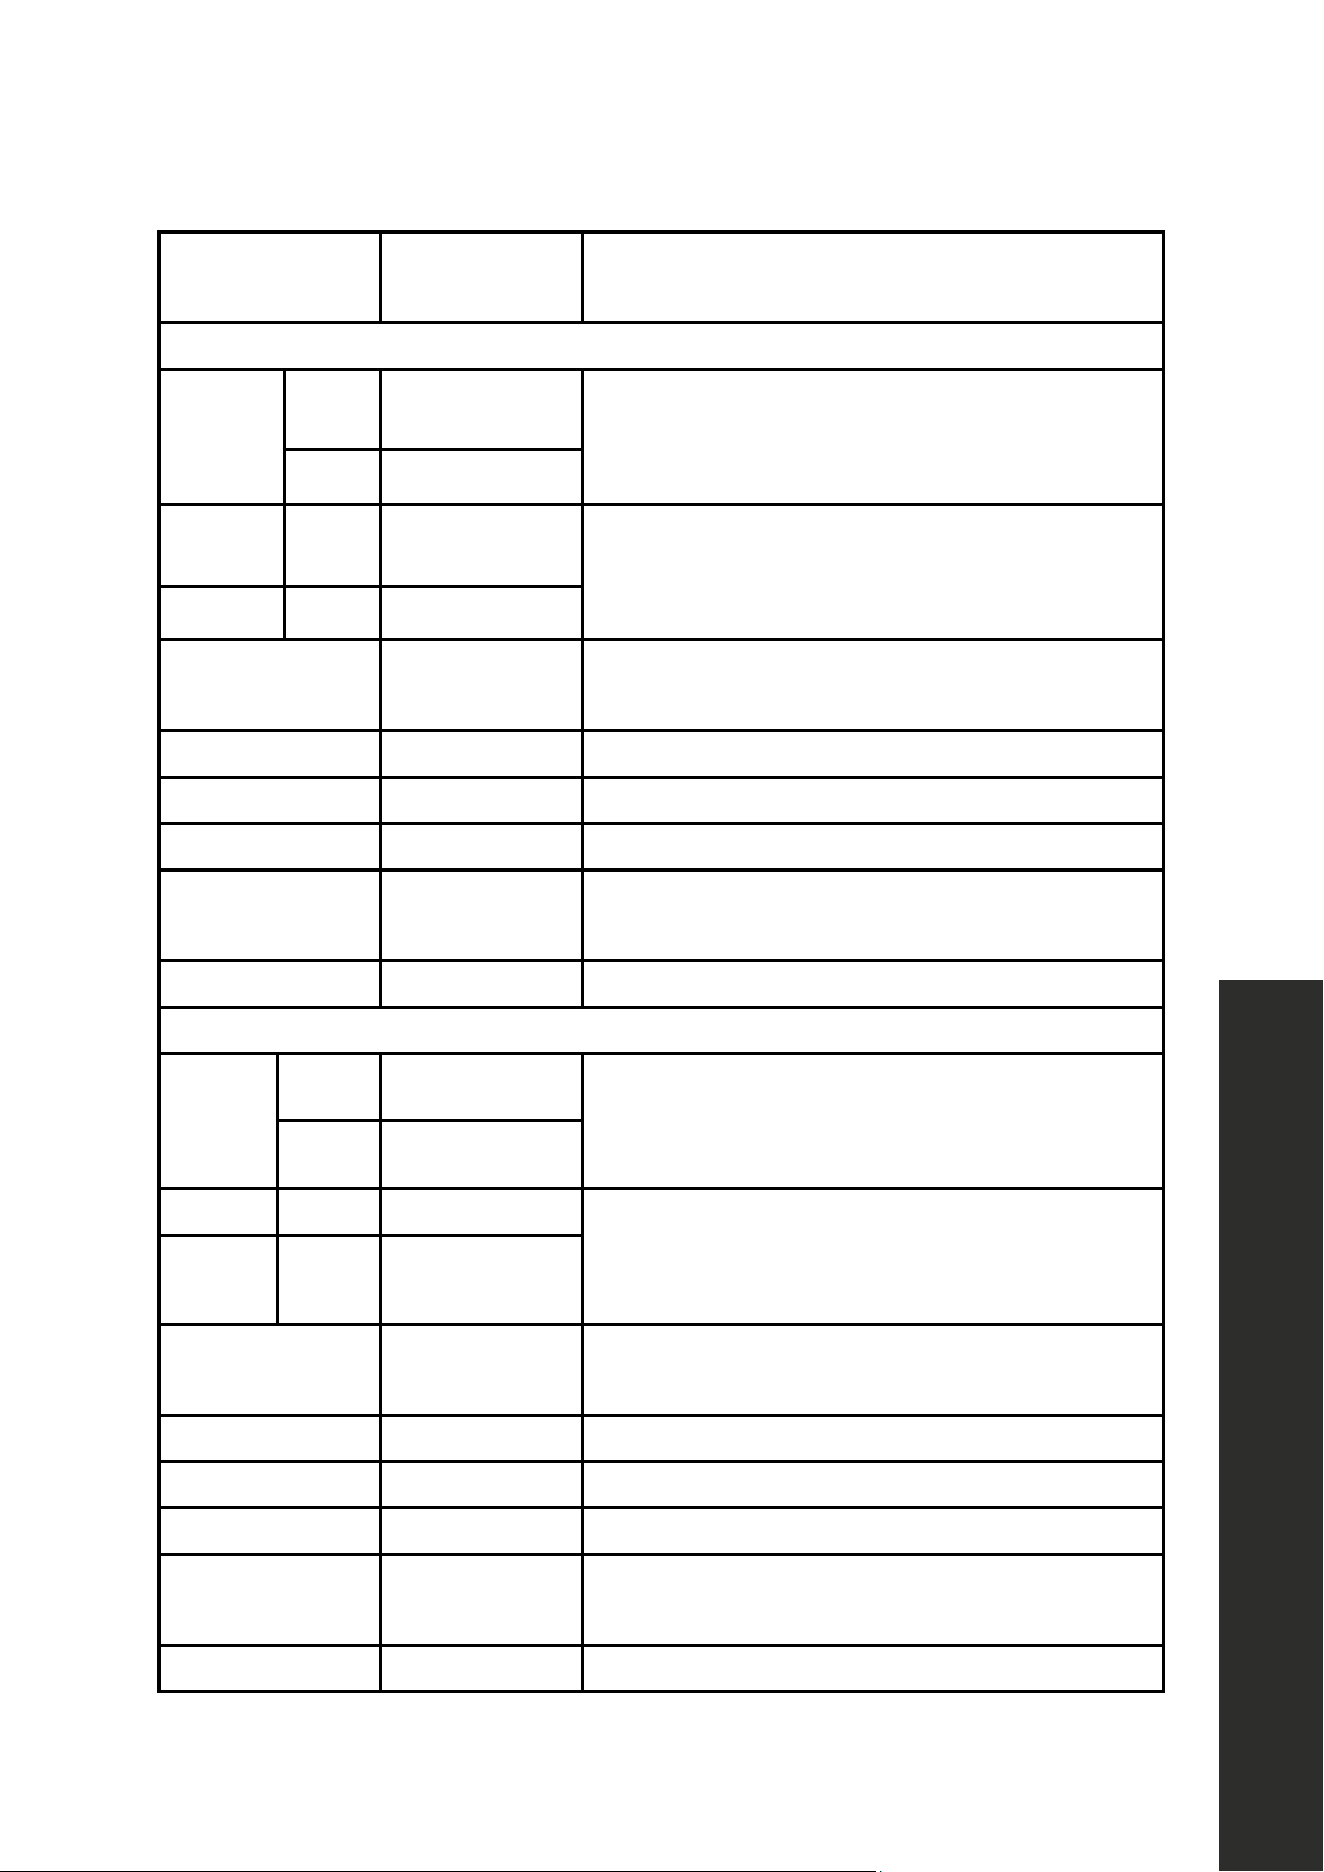
PROGRAMS
DURATION
(MIN)
DESCRIPTIONS
DWV-18
Regular
Soiled 227
Standard program for daily, regular, or typical
use to completely wash a load of normally
soiled dishes.
Clean 182
Auto Soiled 15 5
This program automatically adjusts the
temperature and the quantity of water, the energy
consumption, and the program duration.
- Clean 11 0
Intensive Plus 165
Suitable for heavily soiled dishes that are
kept waiting.
Intensive 13 0 Suitable for heavily soiled dishes.
Light Wash 117 Suitable for freshly soiled daily dishes.
Delicate 90 Suitable for lightly soiled delicate dishes.
Super 50
Suitable for normally soiled daily dishes with
faster program.
Rinse 15 Suitable to rinse dishes that you plan to wash later.
DWV-24
Regular
Soiled 227
Standard program for daily, regular, or typical
use to completely wash a load of normally
soiled dishes.
Clean 182
Auto Soiled 15 5 This program automatically adjusts the
temperature and the quantity of water, the energy
consumption, and the program duration.
- Clean 11 0
Intensive Plus 165
Suitable for heavily soiled dishes that are
kept waiting.
Intensive 13 0 Suitable for heavily soiled dishes.
Light Wash 117 Suitable for freshly soiled daily dishes.
Delicate 90 Suitable for lightly soiled delicate dishes.
Super 50
Suitable for normally soiled daily dishes with
faster program.
Rinse 15 Suitable to rinse dishes that you plan to wash later.
OPERATION
Program Selection
31
OPERATION
Program Selection
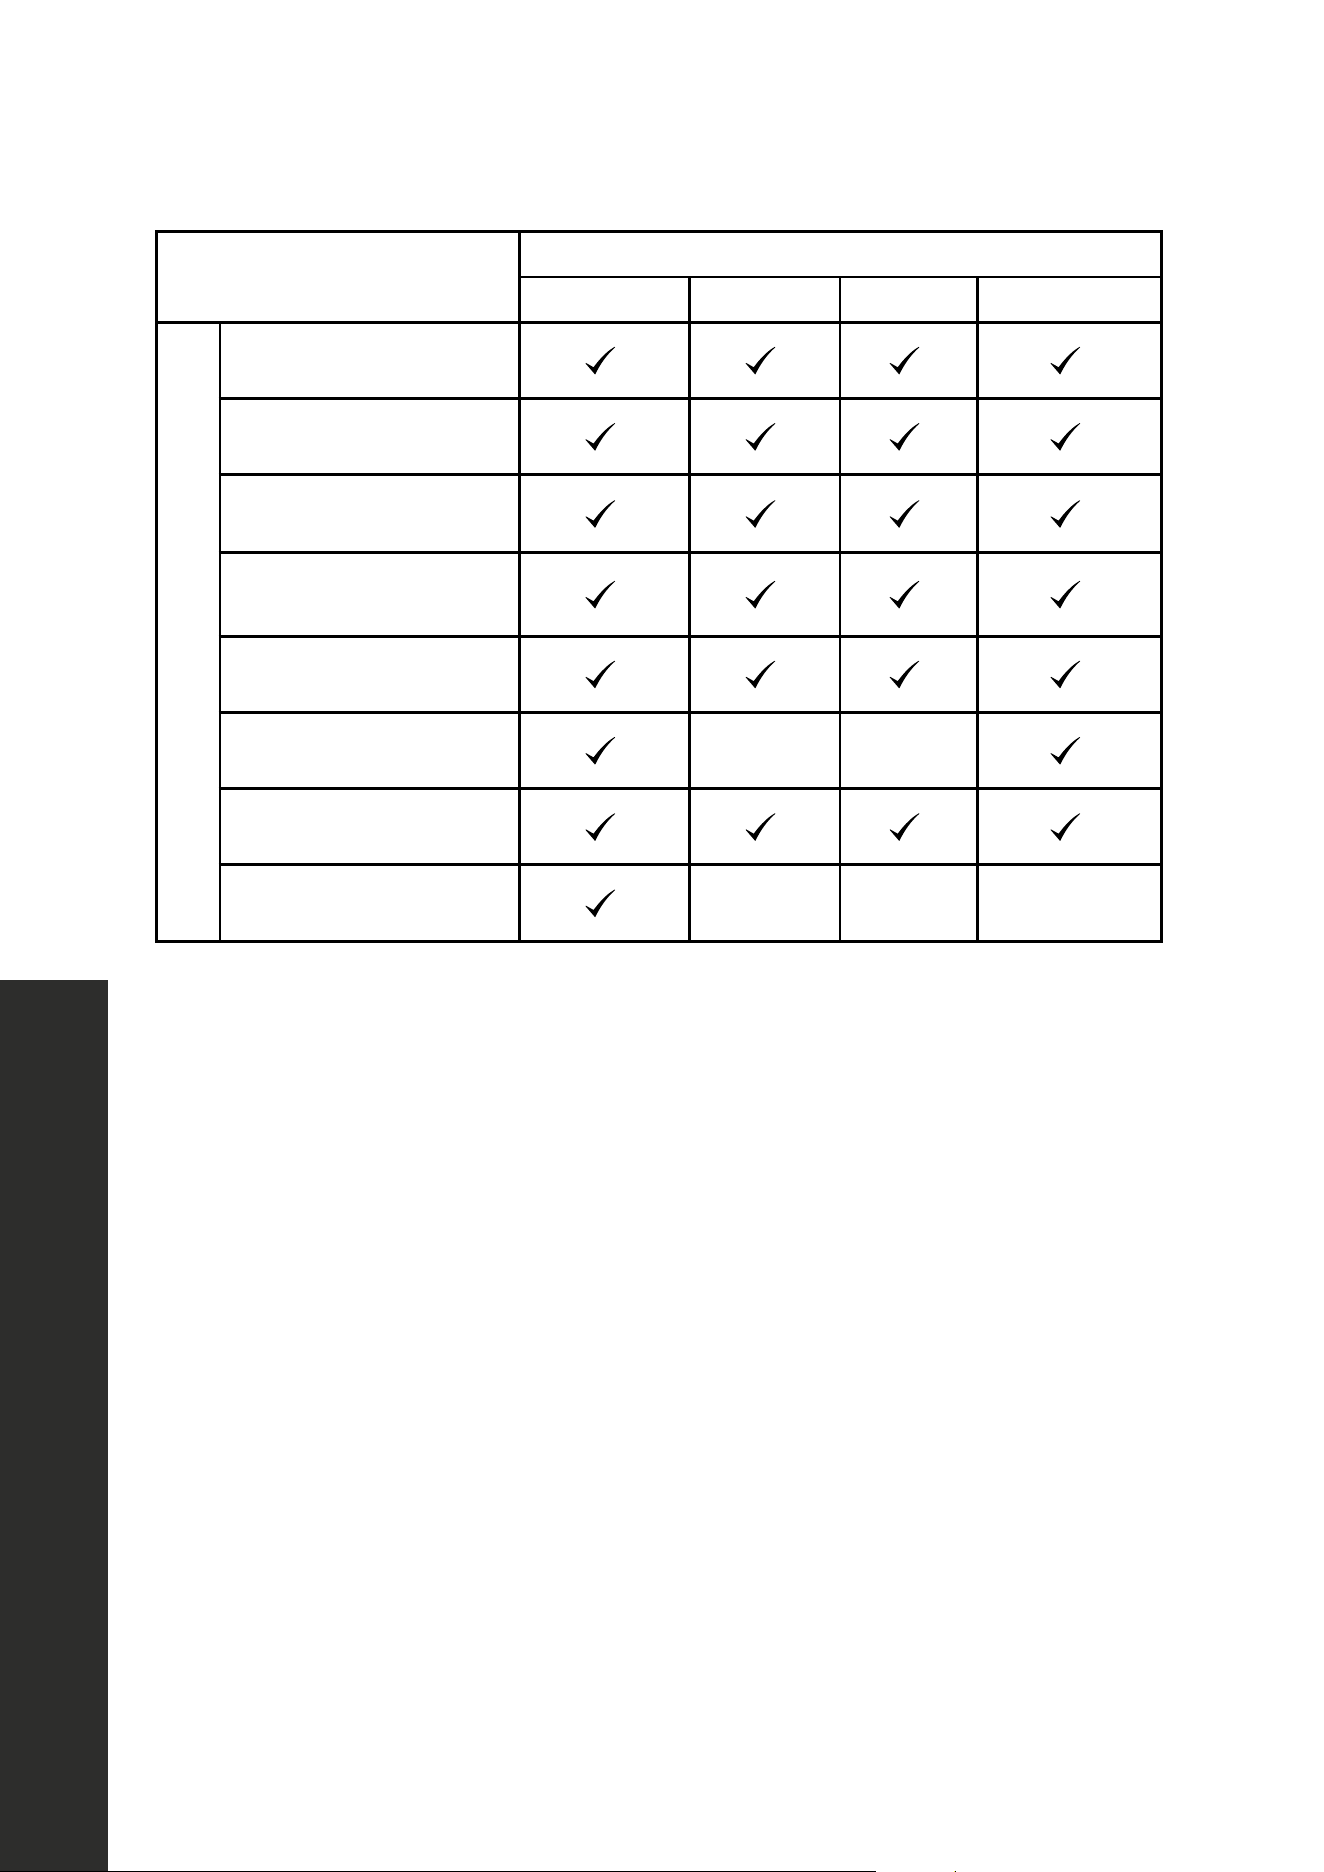
COMPATIBILITY OF
PROGRAMS AND OPTIONS
OPTIONS
HALF LOAD SANITIZE HI-TEMP AUTO DOOR
PROGRAMS
Regular
C
Programs and Op io
n
Hal ad a Dr S n H T m
Pro m an O t on
O
Ha oad a y S tize T mp
Progra and Opt ons
f Lo d xtra Dry S ni z
P ogr s a d Opt o
alf a E
Auto
Intensive Plus
Intensive
C
Lightwash
no ma y s e
R nse 5 S b to rinse es th t you n ash a r
ui bl
R nse 15 table to ins s es th t you p a
Rinse 15 uitable o r e dis
Supe
R nse 15 S
Delicate
In
oil d
P
o
tions
X
o
i n
X
i
R
Super
Auto
y
Daily 7 a l or n rm ed da ly hes
P
t
Da ly 7 i ab e f r no l y oiled dai y di
D l 17 u able f r normal
o
Da y 17 S
i
Rinse
g a
nten hea i so led
3 i
s
X
o s
X
X
NOTE: The program duration may change according to the amount of dishes, the water
temperature, the ambient temperature, and selected additional functions.
NOTE: The energy-usage label is based on the “Regular” program. This program is the most
efficient in terms of its combined energy and water consumption at cleaning normally soiled
dishes. The Energy Guide Label is based on the normal soil detection cycle. In this cycle,
the dishwasher was tested without any rinse-aid in the rinse-aid dispenser, with a single
dose of detergent in the detergent dispenser and detergent used for the prewash step. For
cycles with prewash, a dose of detergent can be added on the inside of the cabinet door.
We recommend that the rack position for earthenware or china loads be set to the highest
position as in the energy certificate test.
• Only use powder detergent for short programs.
• Short programs do not include drying.
• To assist drying, we recommend slightly opening the door after a cycle is complete.

32
OPERATION
OPTIONAL FUNCTIONS
The dishwasher's washing programs are designed to give the best cleaning effect based
on the type of the soil, soiling degree, and properties of the dishes to be washed. Optional
functions are provided in order to save time, water, and energy and to perform a more
comfortable washing cycle with conditions specific to every customer.
• Optional functions may cause changes in the program duration.
• Optional functions are not suitable for all washing programs. The dishwasher will buzz if
a program is not compatible. The compatibility of the programs and options is shown on
the Programs and Options table on previous pages.
TO ADD OPTIONAL FUNCTIONS TO THE PROGRAM (DWV-18)
1. Select the desired washing program by pressing the Program Selection button.
2. In the selected washing program, if an optional function is selected, the corresponding
indicator will be active. If the Extra Function button is pressed again, the corresponding
indicator of another optional function will be active.
3. The selection of the optional function will be canceled if the Extra Function button is
pressed 6 times.
TO ADD OPTIONAL FUNCTIONS TO THE PROGRAM (DWV-24)
1. Select the desired washing program by pressing the Program Selection button.
2. In the selected washing program, if an optional function is selected, the corresponding
function LED will be on. If the Half Load or Options button is pressed again, the
corresponding LED of another optional function will be on.
3. The selection of the optional function will be canceled when the Half Load or Options
button is pressed until the selected option LED turns off.
Optional Functions

33
SANITIZE OPTION
The Sanitize function raises the water temperature in the final rinse. If the program selected
with the Sanitize option is successfully sanitized, Sanitized Indicator lights up at the end
of the program. If the washing cycle is interrupted or adequate water heating cannot be
achieved, the Sanitized Indicator may not light.
HI-TEMP OPTION
When this option is selected, both the water temperature and the washing time are increased.
AUTO DOOR OPTION
Select the Auto Door option to enable the door of the unit to open at the end of the program
to increase drying efficiency. This function also saves energy by operating at a lower
temperature. The Auto Door LED will illuminate.
• 24 seconds after the end of the washing cycle, the unit beeps for 2 seconds, stops for 2
seconds, then beeps for 2 seconds. This repeats 30 seconds later.
• 5 minutes after the door opens, the unit will beep for 1 second, then 4
seconds later the unit will beep again for 1 second. The unit will do this
5 times before stopping. This signals the end of the drying cycle..
HALF LOAD OPTION
It is used to operate the dishwasher without loading it completely:
1. Load dishes in the dishwasher.
2. Turn the dishwasher on with On/Off button.
3. Select the desired program and press the Half Load button. The Half Load indicator will
light on the display.
4. Press Start/Pause button to start the selected program and close the door of the dishwasher.
5. With the Half Load function, save power while using the lower and/or upper baskets of
the dishwasher.
DRYING DISHES
• Please note that while the dishwasher is equipped with a premium drying system, some
dishes may still be wet after a full drying cycle.
• In particular, dishes that have small reservoirs, such as the bottom of coffee mugs, may
hold water after a full drying cycle. This is normal for all dishwashers.
• Dishes will dry in a shorter time if the door is left ajar after a wash cycle and the dishes
are left inside for 15 minutes. This allows steam to escape and will increase the drying
effectiveness of the dishwasher.
OPERATION
Program Options

34
Delay Timer
OPERATION
PROGRAMMING THE WASHING TIME
DELAY TIMER
If you live in a region that uses peak/off-peak power schedules, use the Delay Timer function
to wash dishes during appropriate hours. The start of the selected program can be delayed
up to 19 hours. Delay Timer cannot be set after the program starts.
1. Press the Delay Timer function button after selecting the washing program and other
optional functions.
2. Once the Delay Timer button is pressed, Display will show “1h” and Display will show
program number, program duration, and delay time alternately for 2 seconds.
3. Set the desired time by pressing the Delay Timer button. Time will increase with the
increments of 1 hour every time the button is pressed.
4. In order to start the selected program with delay, Start/Pause button should be pressed
and the door of the dishwasher must be closed within 4 seconds.
CHANGING SETTINGS WHILE DELAY TIMER IS ENABLED
While the Delay Timer is activated, changes cannot be made. To change the settings, open
the door of the dishwasher and change the program, optional functions, or duration of
the delay time.
TO CANCEL THE DELAY TIMER FUNCTION
1. Open the door of the dishwasher.
2. Press and hold Delay Timer button for 3 seconds.
3. At the end of 3 seconds, delaying process will be canceled.
• If the program is changed, the Delay Timer is canceled.
• Delay Timer function can not be set after the program starts.

35
Starting the Program
OPERATION
CANCELING THE PROGRAM
1. Press Program Selection for 3 seconds to cancel the program.
2. After 3 seconds, “1” will appear on the display. For a couple of minutes the dishwasher
will fulfill the necessary operations required to cancel the program.
NOTE: There might be residues of detergent or rinse-aid left in the dishwasher and/or on the
pieces being washed depending on what step the canceled program was in.
RINSE-AID INDICATOR
Please check the rinse-aid indicator on the control panel to see whether there is adequate
amount of rinse-aid in the dishwasher or not. Refill the rinse-aid reservoir with rinse-aid
whenever the rinse-aid warning indicator appears on the control panel of the dishwasher.
END OF PROGRAM
“0” will be displayed when the washing program is over.
1. Open the door of the dishwasher.
2. Press Start/Pause + On/Off button to turn off the dishwasher.
NOTE: Leave the dishes in the dishwasher for about 15 minutes to cool down after they are
washed. The dishes will dry in a shorter time if the door is left ajar during this period. This
process will increase the drying effectiveness of the dishwasher.
WATER CUT-OFF WARNING
If main water is cut or water inlet tap is turned off, the dishwasher cannot take water in and
“FF” will flash continuously on the display. As long as the problem continues, the washing
program will be stopped. If the water inlet is fixed and water is provided, the dishwasher will
get ready to start a new program.
PERFORMING A DRAIN CYCLE
It may be necessary at times to perform a drain cycle to empty water in the dishwasher. This
can be done by canceling any cycle or program. Press the Program Selection + Cancel button
for 3 seconds to cancel a program. After a cancellation has been initiated and the door has
been closed, the unit will prompt a 60 second drain cycle.

36
OPERATION
OVERFLOWING WARNING
If the dishwasher intakes too much water or there are leaks, the dishwasher will detect
this and “F1” will flash on the display. As long as overflowing continues, the dishwasher's
overflow protector will remain active. If overflowing stops and safety is assured, “F1” will
disappear. If “F1” does not disappear, there is a permanent fault. In this case, an authorized
service provider should be contacted.
MAINTENANCE AND CLEANING
WARNING
Before cleaning or carrying out maintenance, switch off the appliance,
disconnect the main plug, and turn off the water tap.
NOTE: The dishwasher should only be repaired by an authorized service agent. Do not try
to repair the dishwasher beyond Troubleshooting recommendations in this manual.
WARNING
All surfaces are susceptible to scratching. Contact with unsuitable cleaning
agents can alter or discolor all surfaces.
WARNING
Keep the floor around the dishwasher clean and dry to prevent any possible
injury. Keep the dishwasher clean and empty and the door cracked open to
allow air to circulate in case of any extended unused time.
• The dishwasher door can be damaged by abrasive cleaners, scouring pads, and
abrasive cloths. Cleaning the dishwasher in regular intervals prolongs the dishwasher’s
service life.
• Unplug the dishwasher and turn off its tap before starting any cleaning.
• Do not use any cleaning supplies that contain metals or any type of abrasives when
cleaning the dishwasher. Wipe with a fine cleaning material and a dampened cloth.
End of Program
37
Cleaning the Dishwasher
MAINTENANCE AND CLEANING
• Oil and lime may accumulate in the dishwasher’s washing section. In case of such
accumulation: Fill the detergent compartment without loading any dishes into the
dishwasher, select a program that runs at high temperature, and start the dishwasher. If
this does not work, there are specialized dishwasher cleaning products available from
your various retailers (please follow the manufacturer’s directions to avoid any damage
to your dishwasher).
• Cleaning the seals on the dishwasher door: Be sure to regularly check the door seals for
any damage. To clean them, wipe them down with a damp, non-abrasive cloth or sponge.
• Cleaning the dishwasher: Clean the filters and spray arms at least once a month.
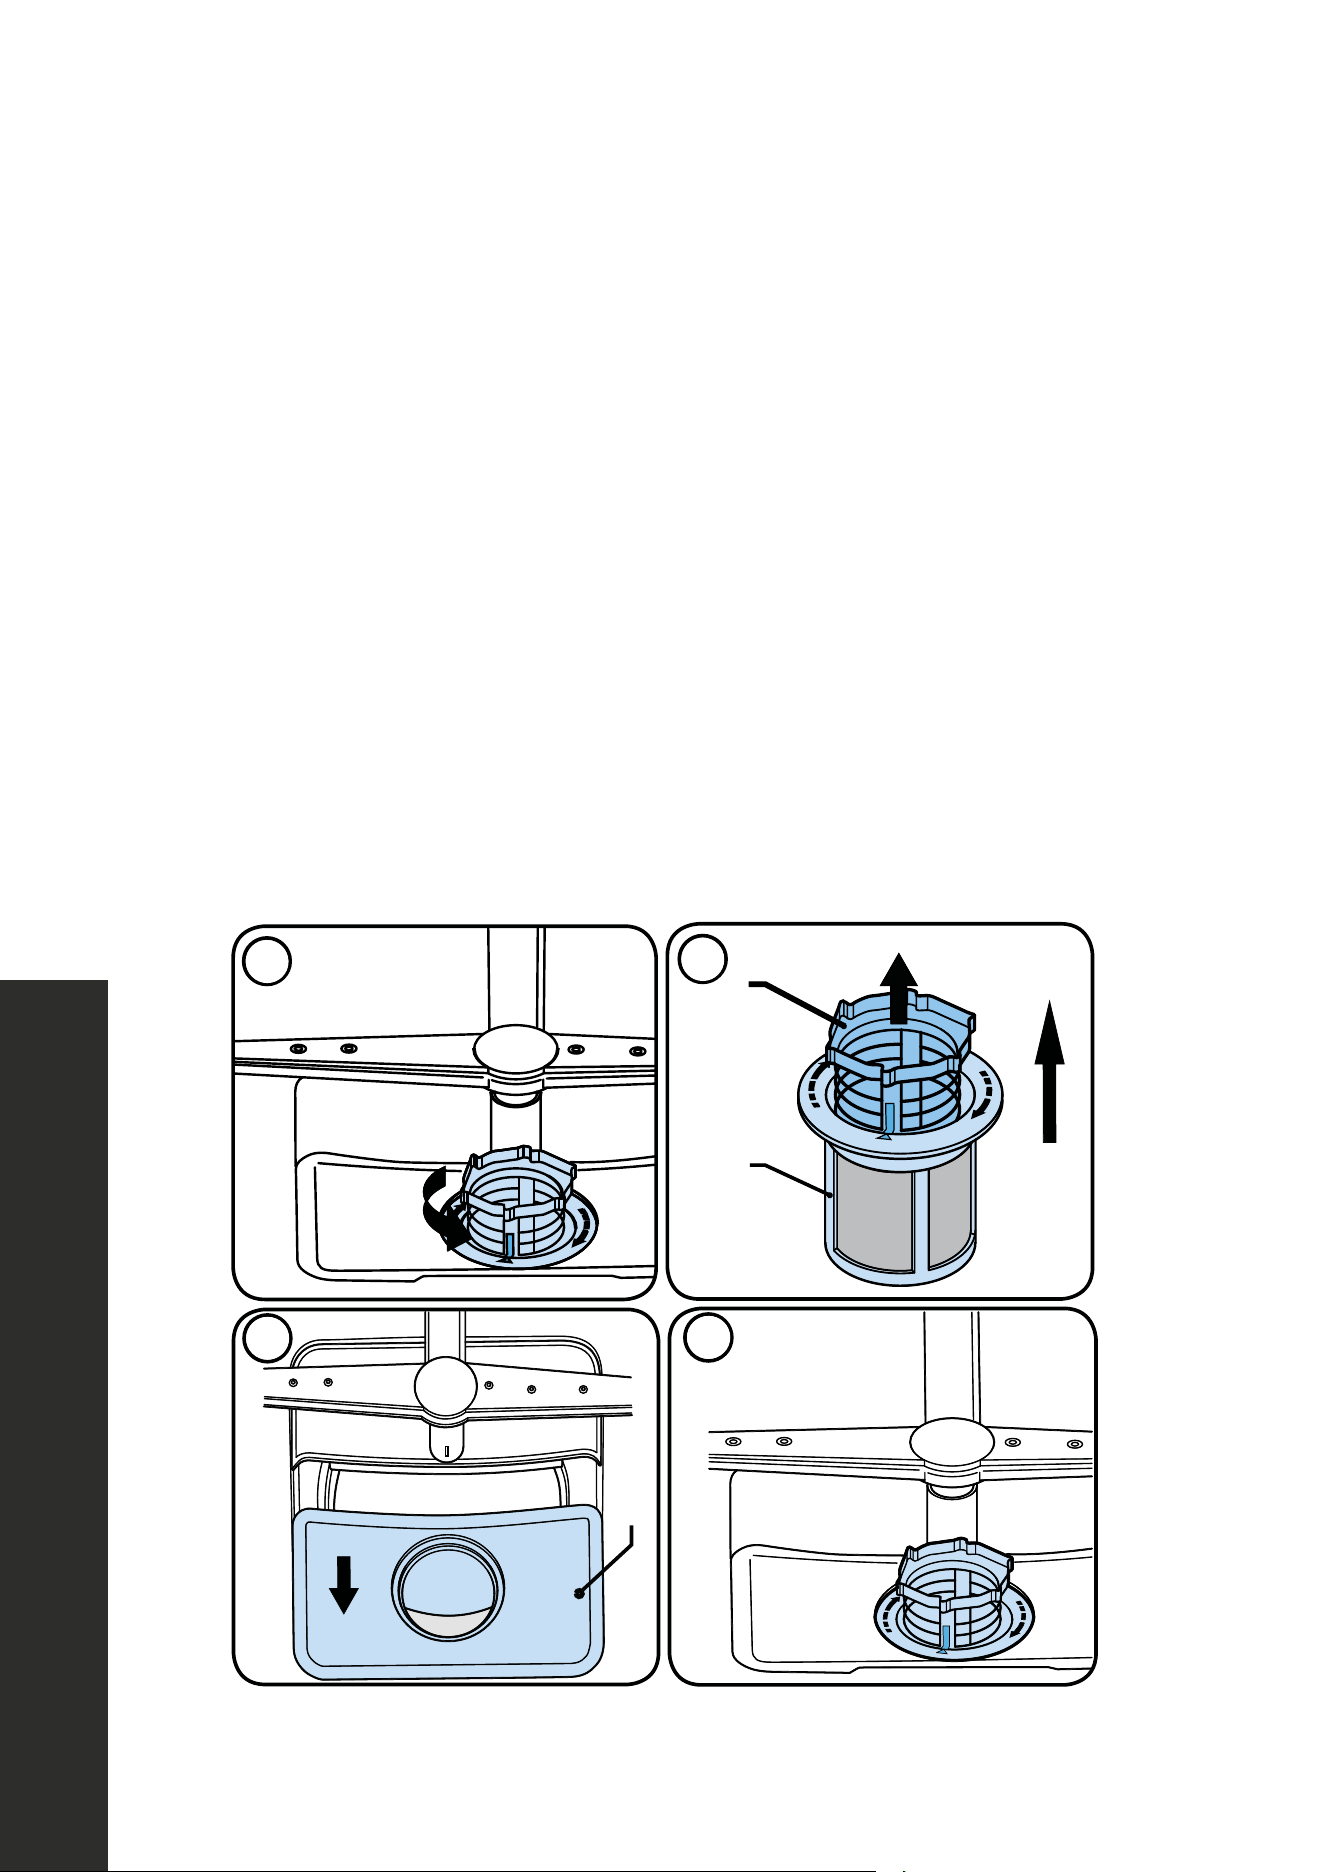
• Filters: Check if any food scraps/residue or debris have remained on the coarse and
fine filters. If there is any food scraps/residue present, remove the filters and clean them
thoroughly under running water.
a. Micro Filter
b. Coarse Filter
c. Metal/Plastic Filter
1
1
3
a
b
1
2
1 2
a
b
c
1
3
2
4

38
Cleaning the Dishwasher
MAINTENANCE AND CLEANING
CLEANING THE SPRAY ARMS
Clean the spray arms at least once a week in order for the dishwasher to operate efficiently.
Lower Spray Arm
Check if the holes on the lower spray arm (1) are clogged. If they are clogged, remove and
clean the spray arm. Pull the lower spray arm up to remove it (A, B.)
WARNING
Lower spray arm is metal; after removing the lower spray arm for maintenance
and cleaning, do not disassemble the plastic part from the spray arm. This may
cause injury due to possibility of sharp edge on the metal
spray arm when plastic part is removed.
WARNING
Only the DWV-24 model dishwasher has a metal lower spray arm.
39
Cleaning the Dishwasher
MAINTENANCE AND CLEANING
Upper Spray Arm
Remove blue film before use.
perat s eff ien
MAINTENANCE AND CLE
f l b
Check if the holes on the upper spray arm (1) are clogged. If they are clogged, remove and
clean the spray arm. Turn its nut left to remove the upper spray arm (A, B). Make sure that
the nut is tightened well when installing the upper spray arm.
d
th ower
IM ELLE
and cl n the imp r T rn its n t o left t
r o e e uppe i pel e (A, )
when nstall ng he upper impe ler
40
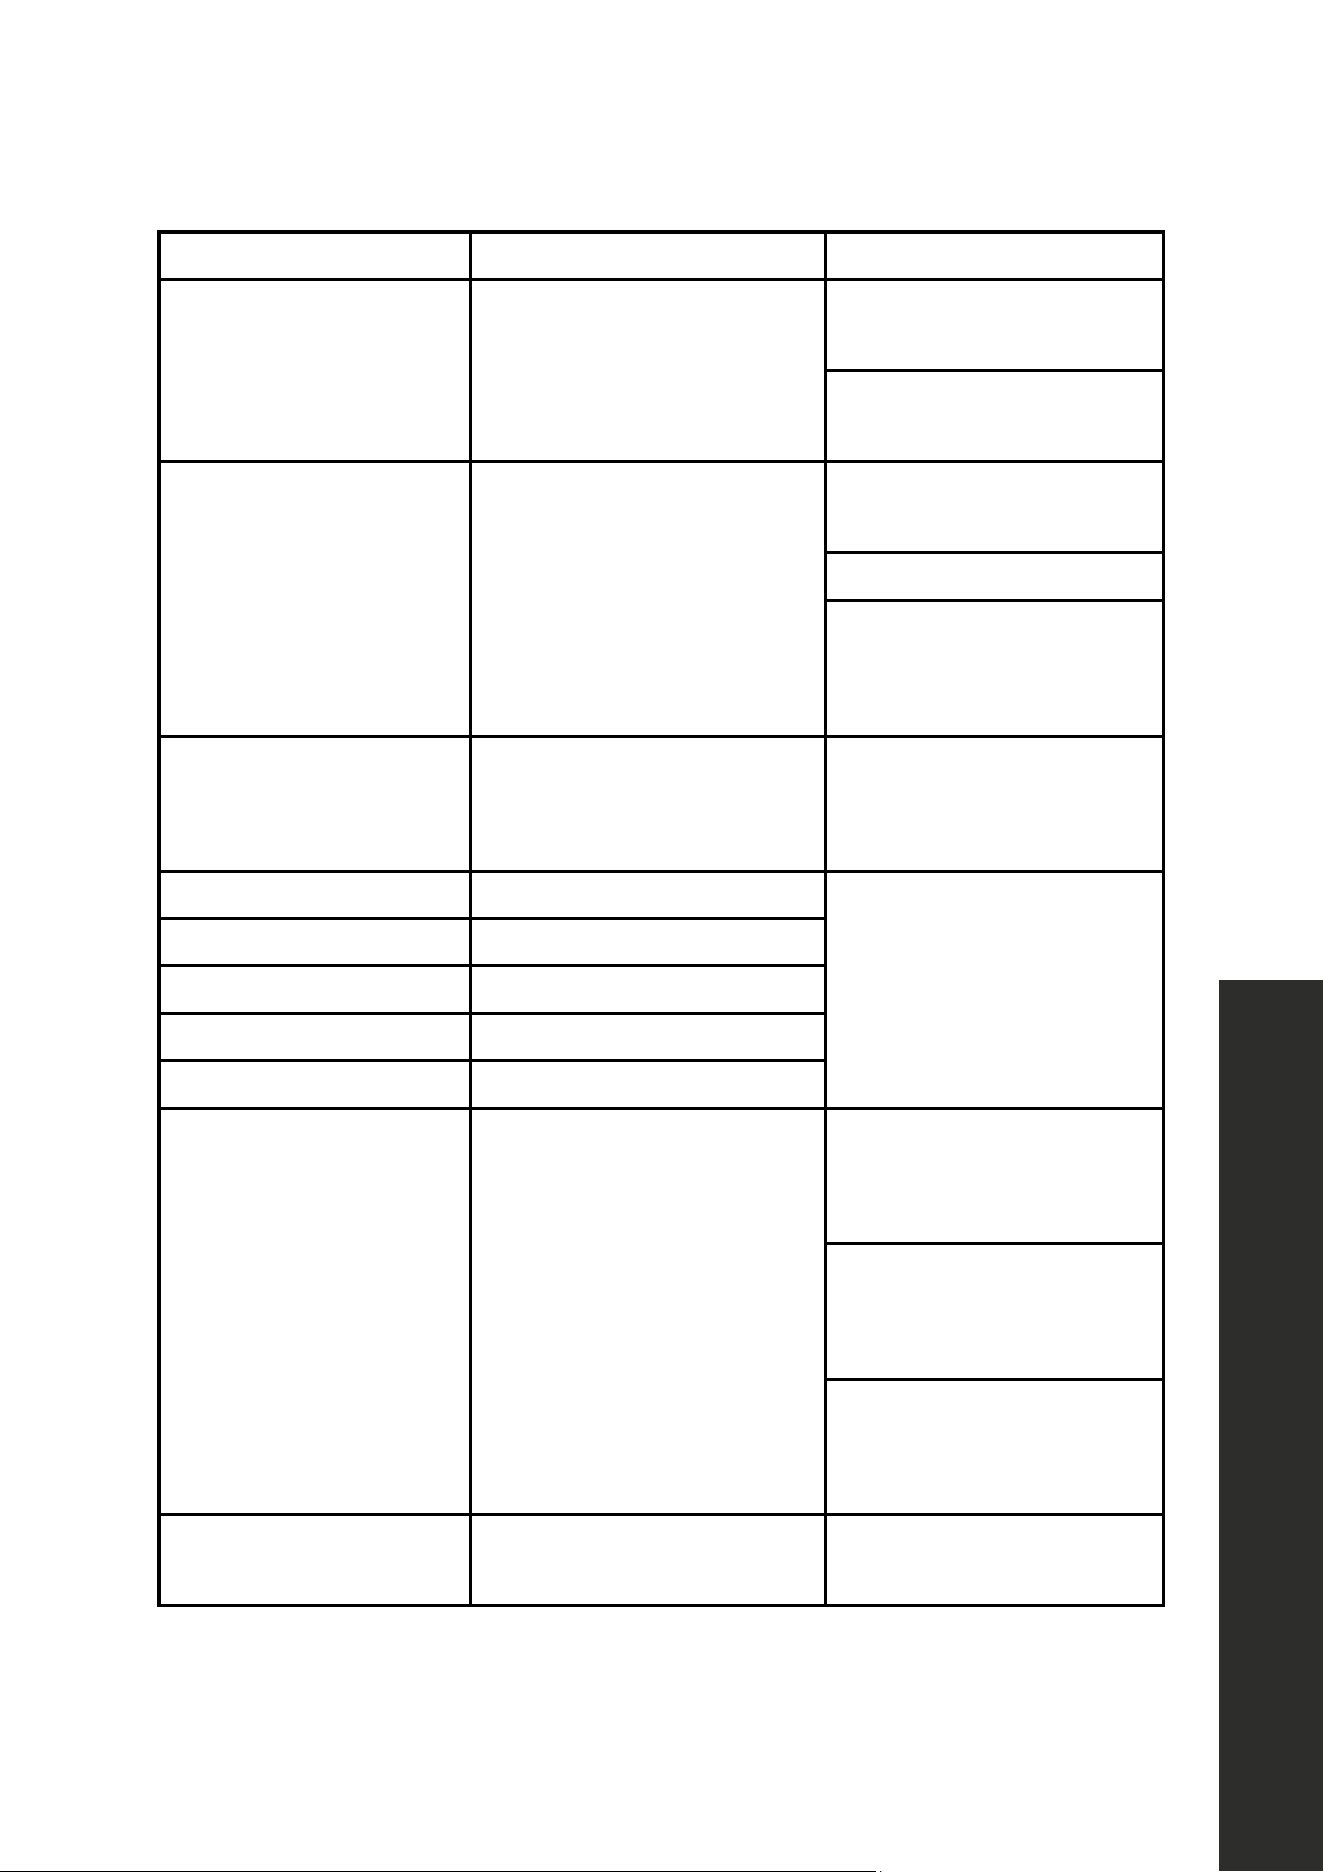
Troubleshooting
ERROR MESSAGE POSSIBLE FAULT WHAT TO DO
F1 Overflow
Unplug the dishwasher and
close the tap.
Contact customer service at
1-614-777-5004.
F2 Inability to discharge water
Water discharge hose and
filters may be clogged.
Cancel the program.
Contact customer service
at 1-614-777-5004 if the
error continues.
F3 Continuous water input
Close the tap and contact
customer service at
1-614-777-5004.
F5 Pressure system failure
Contact customer service at
1-614-777-5004.
F6 Faulty heater sensor
F7 Overheating
F8 Heater error
F9 Divisor position error
FF Water inlet system failure
Make sure the water
inlet tap is open and
water is flowing.
Separate the inlet hose from
the tap and clean the filter
of the hose.
Contact customer service
at 1-614-777-5004 if the
error continues.
HI High voltage failure
Contact customer service at
1-614-777-5004.
TROUBLESHOOTING
41
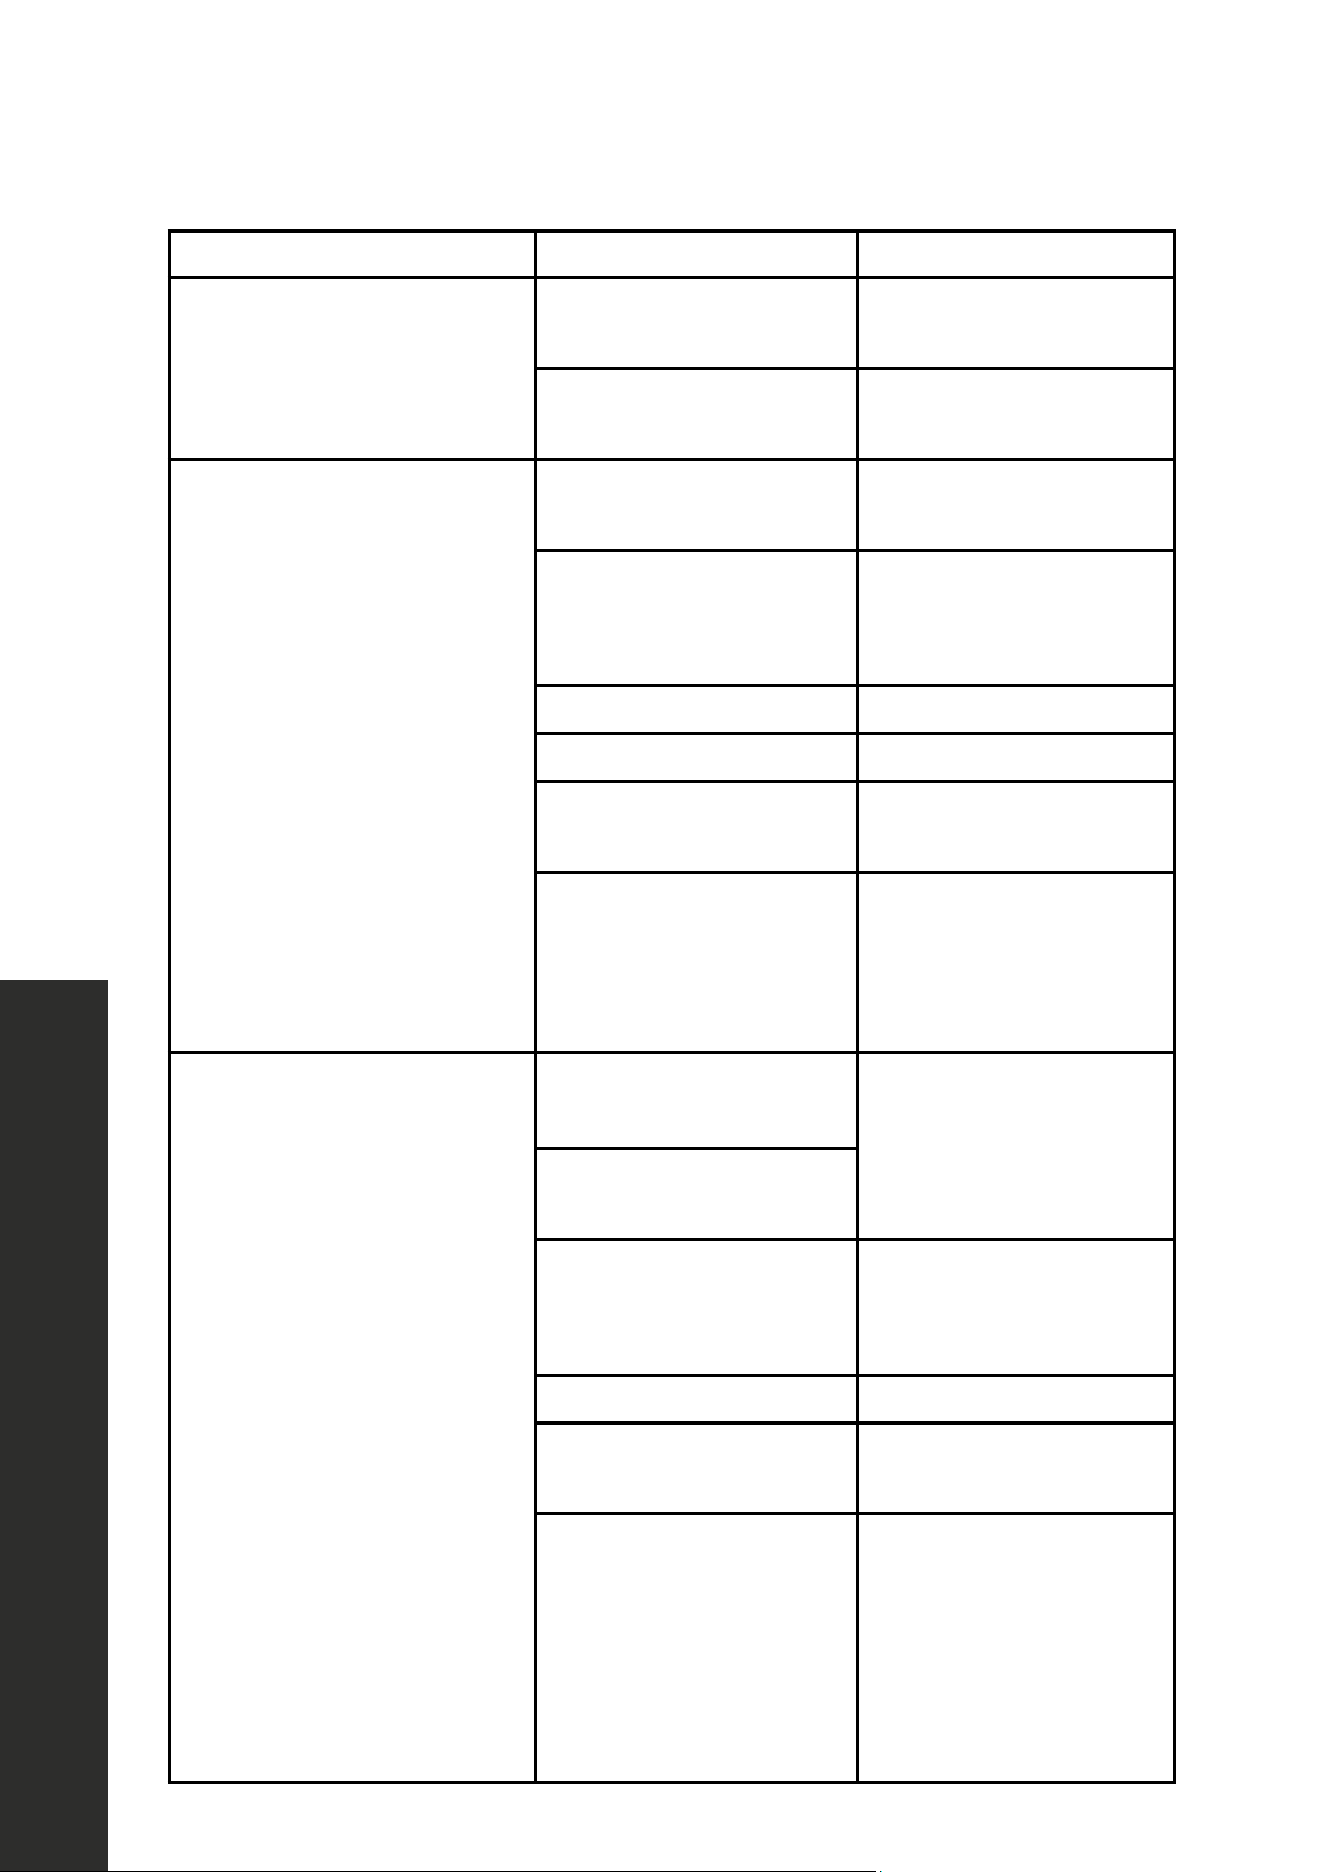
FAULT POSSIBLE CAUSE TROUBLESHOOTING
The screen does not come on.
The breaker is not in the
on position.
Switch the breaker to the
on position.
The supply cord is
not plugged in.
Plug in the supply cord.
The program does not start.
Your dishwasher is
not plugged in
Plug your dishwasher in.
Your dishwasher is not
switched on.
Switch your dishwasher
on by pressing the
On/Off button.
Fuse blown. Check your indoor fuses.
Water inlet tap is closed. Turn on the water inlet tap.
Your dishwasher
door is open.
Close the
dishwasher door.
Water inlet hose and
dishwasher filters
are clogged.
Check the water inlet hose
and dishwasher filters
and make sure they are
not clogged.
Water remains inside
the dishwasher.
Drain hose is
clogged or twisted.
Check the drain hose,
then either clean
or untwist it.
Drain hose comes out of
air gap next to sink.
Drain hose blocked.
Remove drain hose from
disposal, making sure
plug is removed.
The filters are clogged. Clean the filters.
The program is not
finished yet.
Wait until the program
is finished.
A drain cycle may need to
be performed
Cancel any cycle
by holding Program
Selection + Cancel for
3 seconds and close the
door. This will prompt a
60 second drain cycle.
TROUBLESHOOTING
Troubleshooting
42
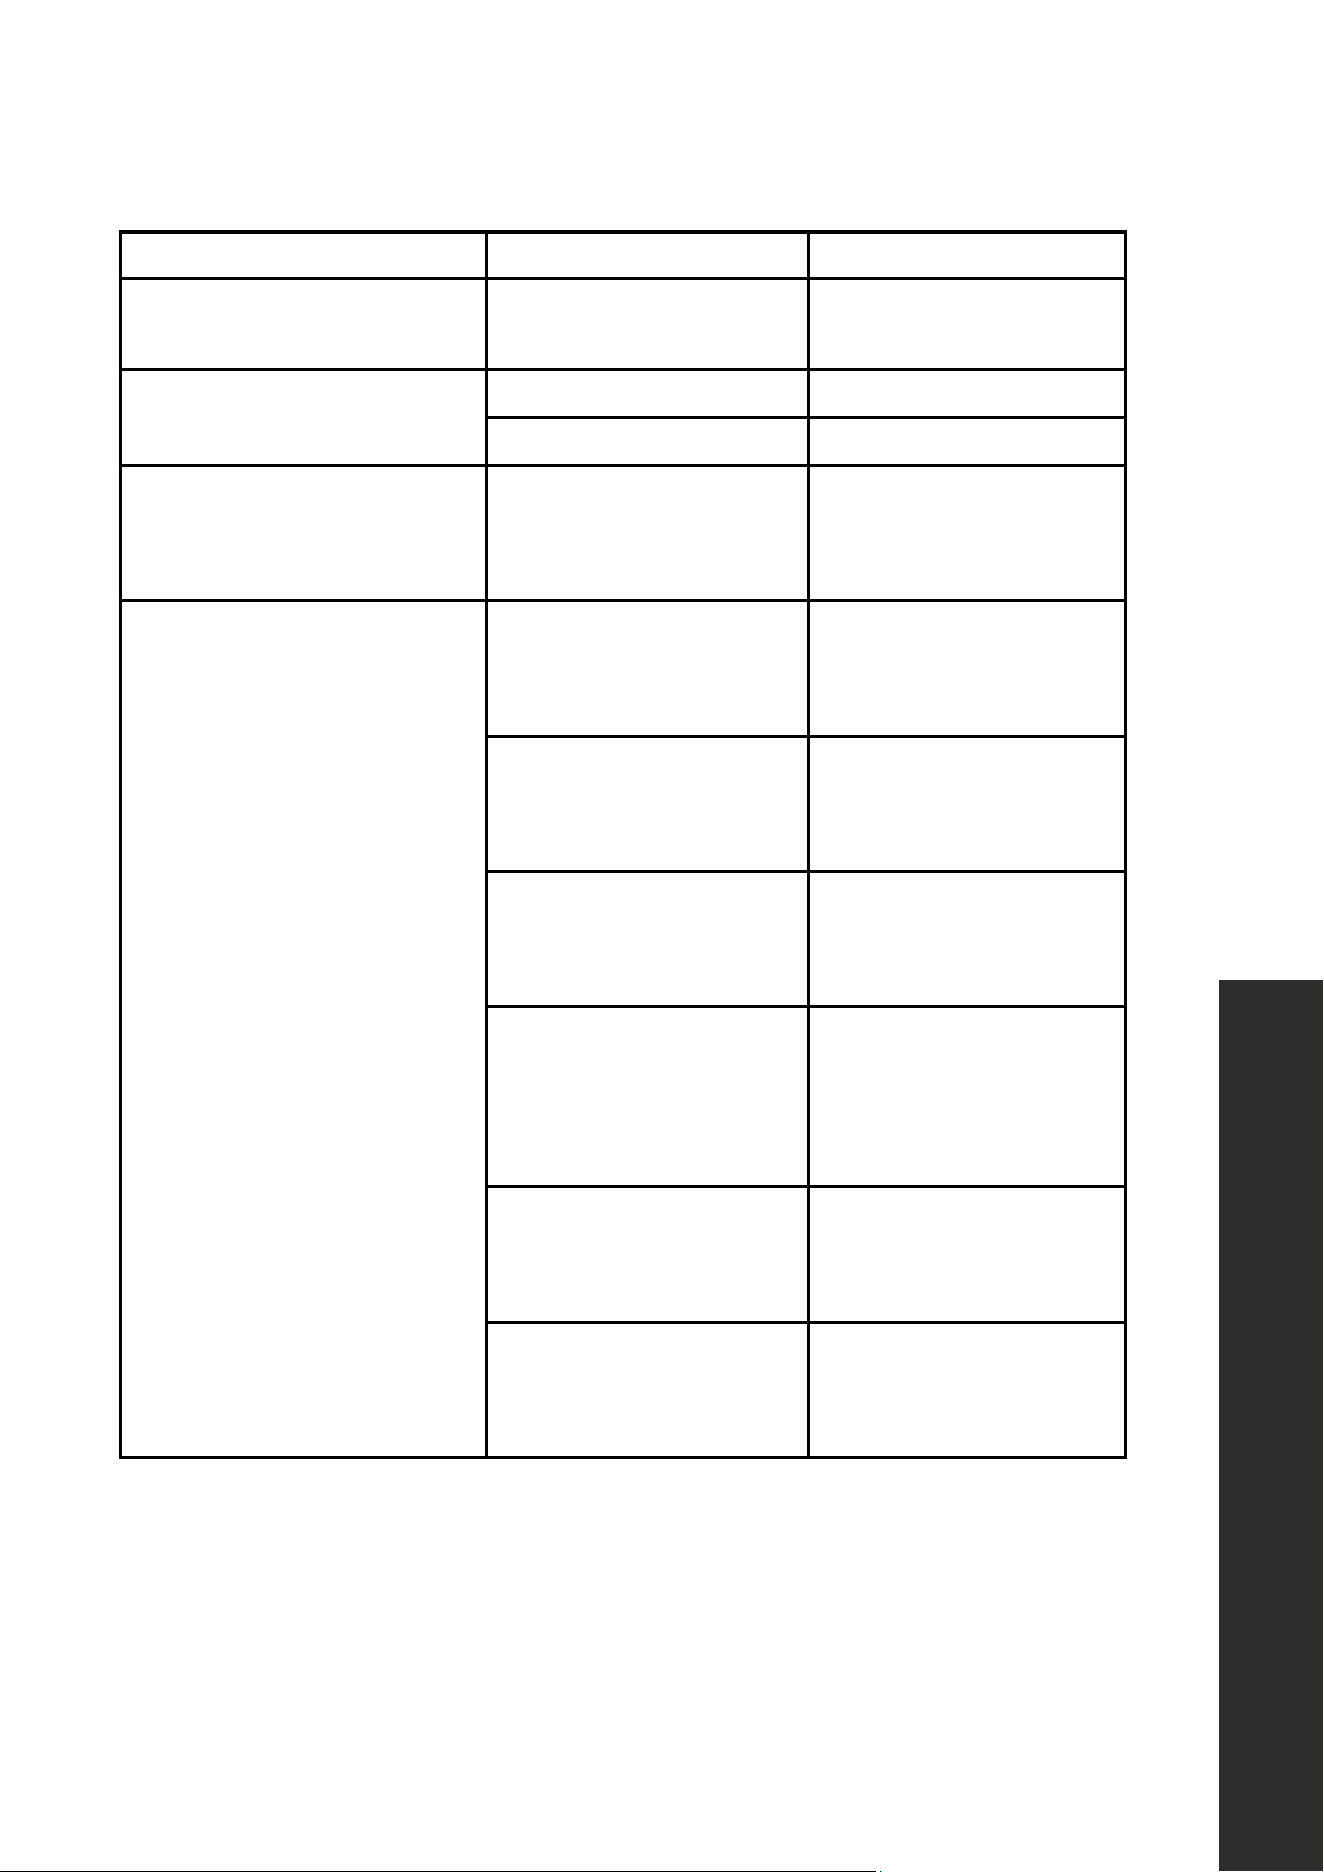
FAULT POSSIBLE CAUSE TROUBLESHOOTING
No water is coming into
the dishwasher.
The water shut-off is in the
on position.
Switch the water shut-off
to the off position.
Dishwasher stops
during washing.
Power failure. Check main power.
Water inlet failure. Check water tap.
Shaking and hitting
noises are heard during a
wash operation.
The spray arm is hitting the
dishes in the lower basket.
Move or remove items
blocking the spray arm.
Partial food scraps/residue
remain on the dishes.
Dishes placed incorrectly,
sprayed water not
reaching affected dishes.
Do not overload baskets.
Dishes leaning on
each another.
Place dishes as instructed
in the section on loading
your dishwasher.
Not enough
detergent used.
Use the correct amount of
detergent, as instructed in
the program table.
Wrong wash
program selected.
Use the information
in the program table
to select the most
appropriate program.
Spray arms clogged
with food waste.
Clean the holes in
the spray arms with
thin objects.
Filters or water drain
pump clogged or
filter misplaced.
Check the drain hose and
filters are correctly fitted.
TROUBLESHOOTING
Troubleshooting

WARRANTY
COVERAGE
ZLINE Kitchen and Bath (“ZLINE”) dishwashers have a one year parts and service warranty.
ZLINE warranty periods begin from the original date of product delivery and solely cover the
original purchaser of the product, delivered new and in its original carton. The limited warranty
covers all parts and labor for necessary repairs if any part of the product, or the product itself,
proves to be defective in materials or workmanship. The product must be deemed serviceable
via troubleshooting with the ZLINE Customer Experience team. All service on ZLINE products
under warranty must be performed by ZLINE-approved and ZLINE-certified service providers
unless otherwise specified by ZLINE. Service will be provided during normal business hours.
Products must be unobstructed and accessible to the service provider at the time of service.
ZLINE’s liability is limited to the original purchase price of the product. Additional injuries,
losses, damages, or other inconveniences caused by product malfunction or defects in materials
are not covered under the terms of this warranty.
TERMS
ZLINE warranties apply only to the original purchaser of a ZLINE product installed for normal
residential use. This is defined as a single-family, residential dwelling in a non-commercial
setting. Any warranty claim stemming from installation, operation, or any other use within a
commercial setting is not covered under this limited warranty. Commercial settings include,
but are not limited to: schools, churches, hotels, restaurants, vacation rentals such as Airbnb,
daycare centers, private clubs, fire stations, common areas in multi-family dwellings, nursing
homes, food service locations, and institutional food service locations such as hospitals or
correctional facilities.
This warranty is non-transferable and will not under any circumstance be extended based on
the date of installation — the warranty period takes effect from the date of delivery and only
covers the original purchaser. The warranty applies only to products installed in the contiguous
United States and the District of Columbia. Failure to secure certified warranty service per these
terms will result in a forfeiture of the remaining warranty.
Out-of-pocket payments will not be reimbursed unless prior approval is received from ZLINE
and/or ZLINE-certified service contract partners. Unapproved out-of-pocket payments
for service will not be reimbursed. All warranty procedures must be followed to maintain
warranty coverage.

WARRANTY
If a product qualifies within the service window provided under these warranty terms, and ZLINE
is unable to repair the product or a defective part of the product after a reasonable number
of attempts, ZLINE reserves the right to offer to replace the defective part or the product or
provide the original purchaser a full refund of the purchase price of the product (not including
installation, removal, or other charges that were not included in the original purchase price).
The original purchaser of the product must provide the original proof of purchase, including the
purchase date, when filing a claim to obtain replacement parts, service, or refunds. Additionally,
the original purchaser of the product must provide the serial number of the product when filing
a claim to obtain replacement parts, service, or refunds.
This warranty shall not apply to any ZLINE product in which the original factory serial
number has been removed, altered, or cannot be readily determined for any reason. Further,
ZLINE is not responsible for damage resulting from, but not limited to: shipment, delivery, or
improper installation; negligence or improper maintenance, misuse, or abuse of the product;
unauthorized alteration, modification, or tampering with the product; accident, fire, floods,
pest infestations, pandemics, natural disasters, or any other unpreventable or unexplained
acts of nature, commonly referred to as “acts of God”; flare-up fires or damages caused by
improper electric supply, electrical line current, voltage, or power surges; and service to correct
installation not in accordance with the instructions contained in ZLINE’s product manuals and/
or with local government codes.
This warranty does not apply to aesthetic damage, scratches, or natural wear caused by normal
use; second-hand, open box products, or products purchased from an unauthorized retailer;
and damages or issues stemming from alteration or tampering with the dishwasher, including,
but not limited to, painting any portion of the product’s interior or exterior and altering or
otherwise manipulating the power cord.
In the event service is dispatched, and it is discovered that the reported issue is not covered
under warranty based on the disclaimers above, the customer will be responsible for all service
fees. Failure to pay these fees will result in the forfeiture of remaining warranty coverage.

WARRANTY
Information contained within ZLINE’s installation and user manuals, in addition to product
information included on ZLINE’s website and all related digital listings, do not cover every
possible condition and situation that may occur during the installation or operation of
ZLINE products.
ZLINE reserves the right to make changes at any time to its products when considered safe,
necessary, and useful. Always check the ZLINE website for the most up-to-date version of its
product manuals: www.zlinekitchen.com/pages/manuals.
Do not install or operate any ZLINE product if it has missing or broken parts or if it arrives
damaged due to shipping. If ZLINE products arrive damaged, contact ZLINE Customer
Experience at 1-614-777-5004 for help. Failure to report a damaged appliance prior to
installation or operation may void the warranty.
ZLINE disclaims responsibility for damage or injury caused by improper installation or use of
any of its products. ZLINE is under no obligation, by law or otherwise, to provide concessions,
including repairs, prorates, rebates, discounts, or replacements, once the warranty has expired.
SERIAL NUMBER LOCATION
Please write down the model number and serial number of
your appliance. Both numbers are located on the rating tag
located on the right-hand side of the inner door of the
dishwasher. The tag is visible when the dishwasher door is
open. Do not remove permanently affixed labels, warnings,
or plates from the product. This will void the warranty. You
may also consider attaching your receipt or proof of purchase
to this manual.
WARRANTY
SERVICE
For warranty service, please contact our Customer Service team at
1-614-777-5004 or visit www.zlinekitchen.com/contact to utilize our
online Customer Experience Portal.
Scan the QR code to view the most up-to-date version of our Installation
Manual and User Manual.
Need to purchase a part or accessory for your ZLINE product?
Visit www.zlineparts.com, ZLINE's official parts distribution partner.