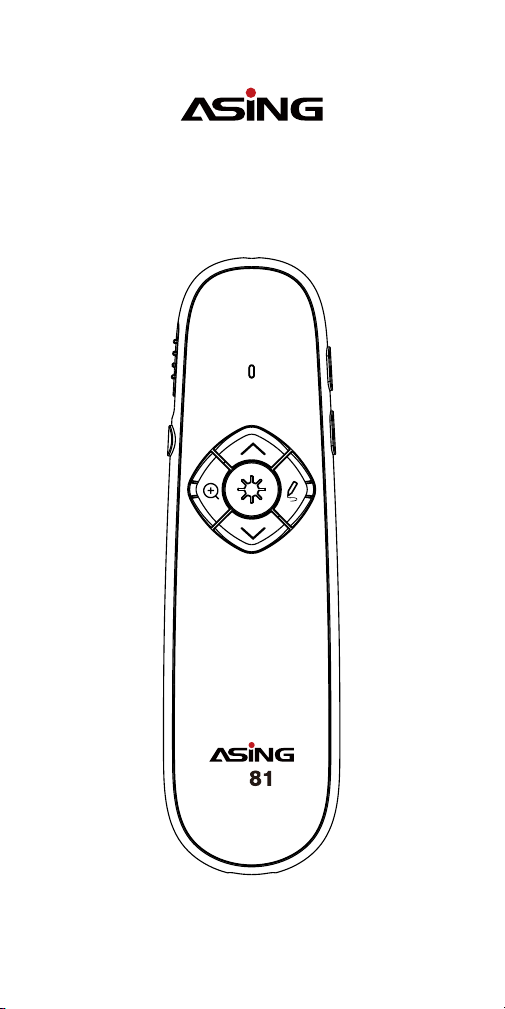
A81 User Manual
09:10
A
Support Email: service@asingshop.com
1
Product Description
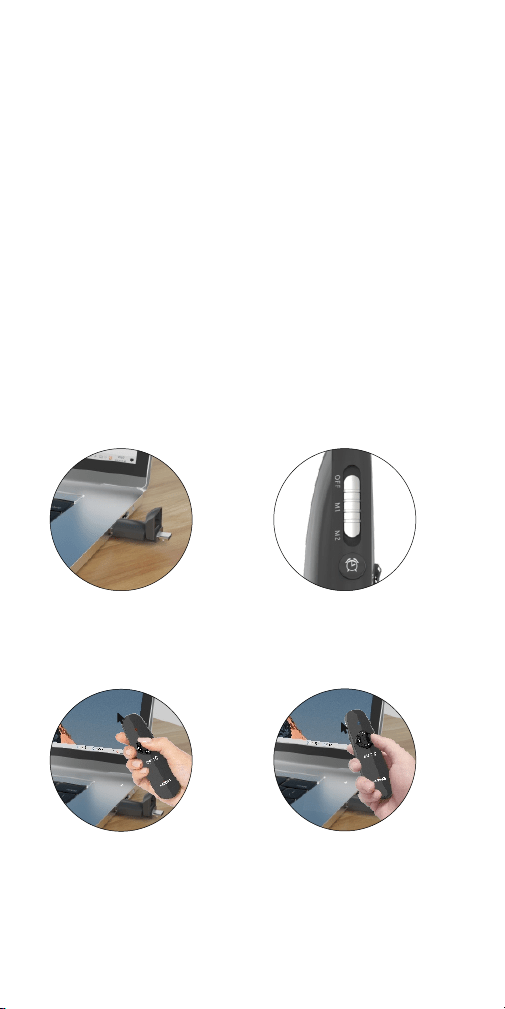
Step 1: Plug the USB
receiver in the USB or
Type-C port.
Step 2: Turn on the A81
presenter and switch to
the M1 mode.
Step 4: The Magnifier button
works as the mouse's left
button and one click of the
Marking button works as one
click of the mouse's right button.
Step 3: Double click
the Laser button to
open/turn off the air
mouse function.
Quick Setup
M1 Physical Laser Mode
A
A
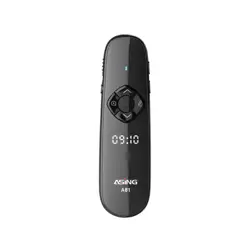
A81 is a multi-functional presentation remote with 2 modes,
compatible for Windows and MAC OS systems. It adopts 2.4 GHz
wireless technology and has 100m long control range. Its USB receiver
is USB & Type-C in-one design, and also works as flash drive.
This product has M1 physical laser mode & M2 digital laser mode, with
functions as spotlight/magnifier/volume adjustment/full scene
marking/timer, etc.
This product is widely used for electronic whiteboards/all-in-one PCs,
and class teaching/office meeting/academic exchanges and other
occasions.
2
A
A
A
M2 Digital Laser Mode (Windows)
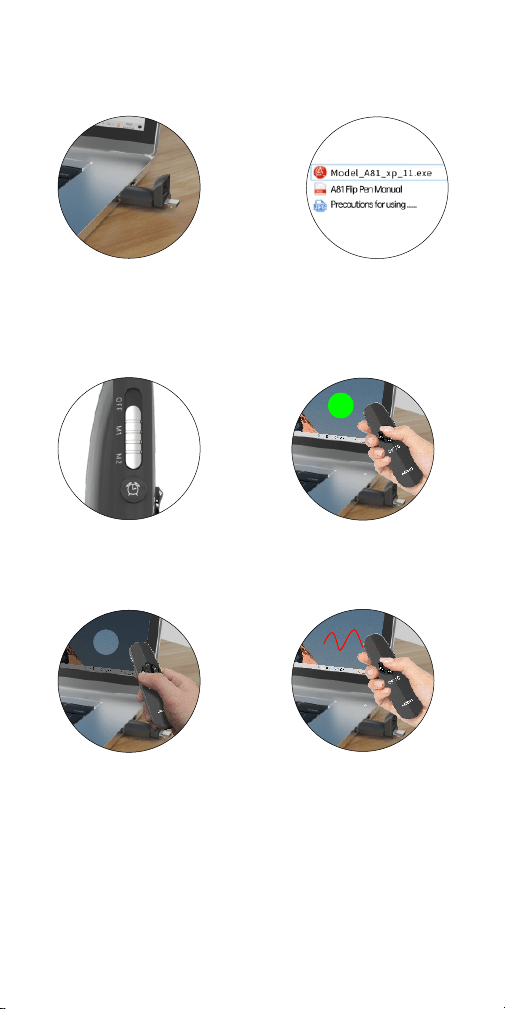
Note: First double-click the Laser button to open the air mouse function,
then long press the Marking button to mark, and one-click it to erase the marks.
Step 1: Plug the USB
receiver in the USB
or Type-C port.
Step 2: Open the USB flash
drive on the device, and
double-click to run the
Model_A81_xp_11.exe
program.
Step 3: Turn on the
A81 presenter and
switch to the M2 mode.
Step 4: Long-press the
Laser button to use the
digital laser.
Step 5: Long-press the
Magnifier button to
use the magnifier/
spotlight, and double-
click to switch them
Step 6: Long press the
Marking button to use
the full scene marking.
3
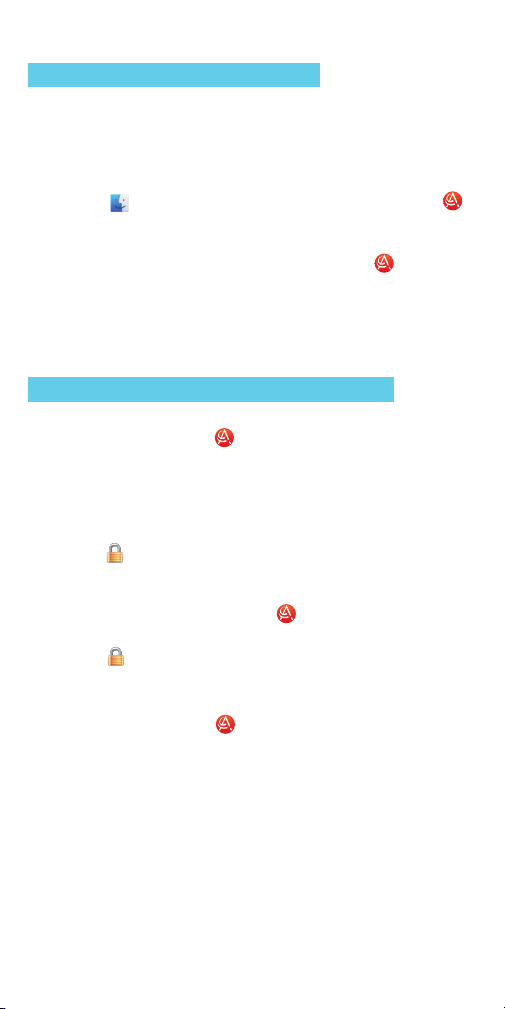
M2 Digital Laser Mode (MAC OS)
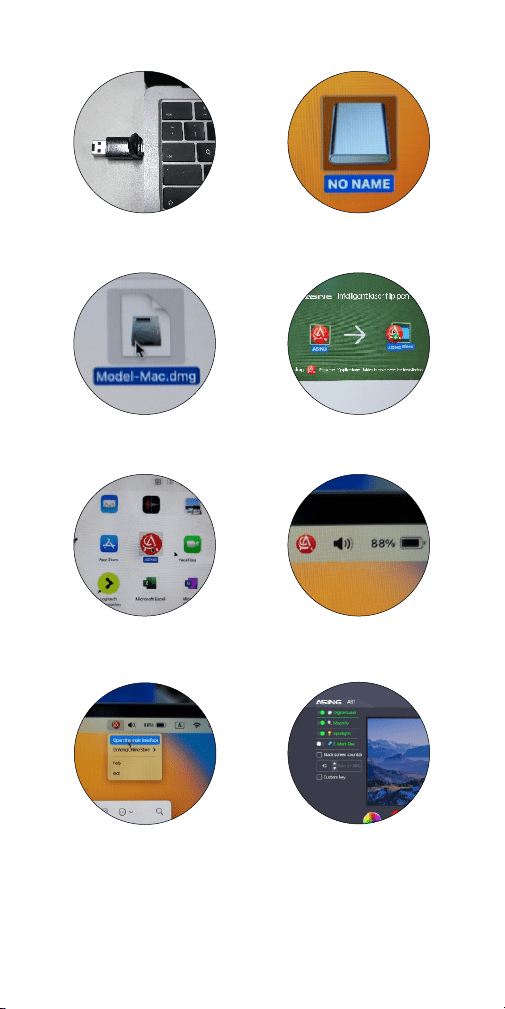
Step 1: Plug the USB
receiver(Type-C port)
in a MAC.
Step 3: Double-click
the Model-Mac.dmg
program.
Step 5: Double-click the
"ASiNG" program icon
in the Application.
Step 7: Right-click the
icon to enter the program's
main interface.
Step 2: Open the
USB flash drive on
the device.
Step 4: Drag the
program into the
Applications file folder.
Step 6: The icon will light
up in the upper right corner
of the computer, and the
setup is successful.
Step 8: Customize
the functions and
buttons at your will.
To use the Mode 1, just plug in the USB receiver.
The program is not needed to install.
Note: First double-click the Laser button to open the air mouse function, then long
press the Marking button to mark, and one-click it to erase the marks.
4
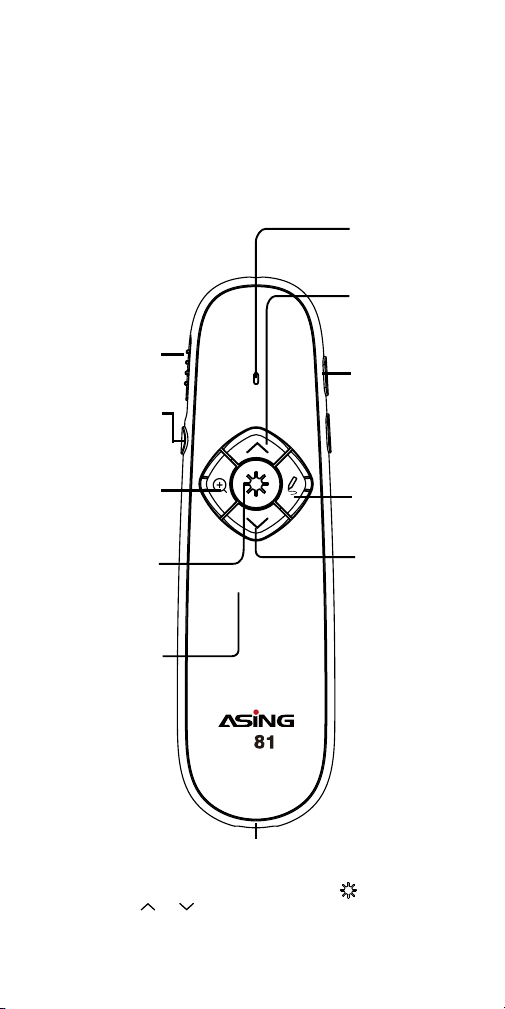
"Unidentified" Prompt Window:
1) It's normal that most MAC OS will appear an "Unidentified" prompt
window for any program not downloaded from the App Store. Follow
the steps below and the prompt will not appear.
2) Enter the , select "Applications" on the left, and find the
icon.
3) Press and hold the Ctrl button, then left-click the icon to
display a prompt window. Select "Open" and a new prompt window
will appear. Select "Open" again.
"Turn on accessibility" Prompt Window:
This is a requirement of the program. It will only appear when
running for the first time. Once set, it will not appear again.
If you want this prompt box to not appear every time you run it in the
future, click "OK" and a Permission settings dialog box will appear.
Follow the steps:
2) Select the checkbox in front of the program.
3) Click the icon again to lock the settings.
1) Click the icon in the left corner to make changes. (Login
password needed)
4) After the permissions are set, the ASiNG program needs to be
run again. ("Launchpad"--> icon)
5
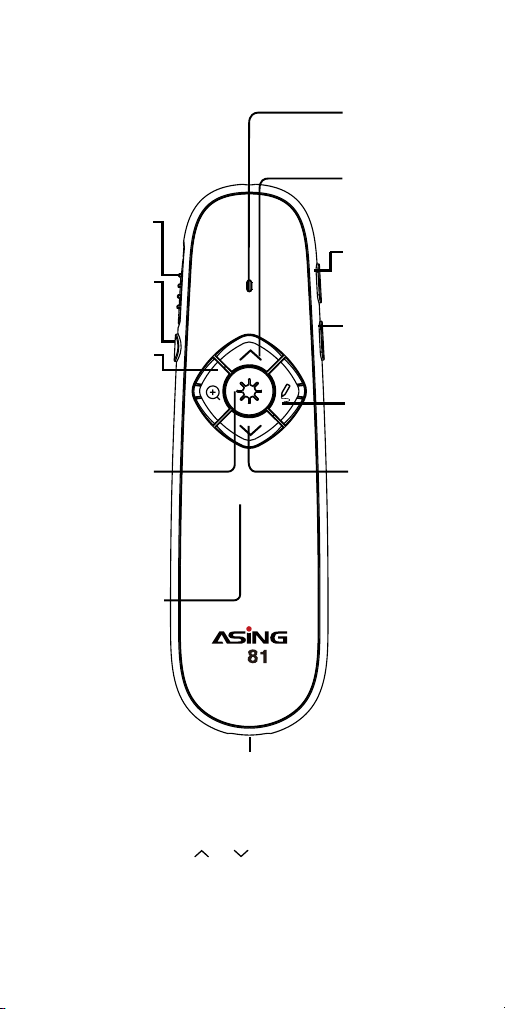
1. Button Overview
M1 Physical Laser Mode
09:10
Switch button
Type-C Charging Port
Signal & battery
indicator light
Working status: b lue light is on
Magnifier button
Timer Button
One-click:open the timer setting
window/start the timer
A
Long press for 3s: exit
the timer countdown
Laser button
Long press: physical laser
Time display
Screen light off every 5s, and flip
around to show the time.
One-click: work as mouse left click
Double-click: work as mouse left
double click
Long press: work as mouse left button
to drag content
Double-click: open/turn off the
air mouse function
Charging status: flash like
running light
Full-charged status: always on
Button combination: Long-pressing the " " button,
click " "/" " button to increase/decrease the
laser brightness level.
Page Up
One-click: Page up
Marking button
One-click: work as mouse
right click
Page Up
One-click: Page down
Low battery: red light flas hes quickly
Long press for 3s: enter/
exit full screen
Volume Adjust
One-click: Volume +2/-2
Long press: Volume
gradually increases/decreases
Long press for 3s: enter/ex it
blackscreen
6
09:10
A
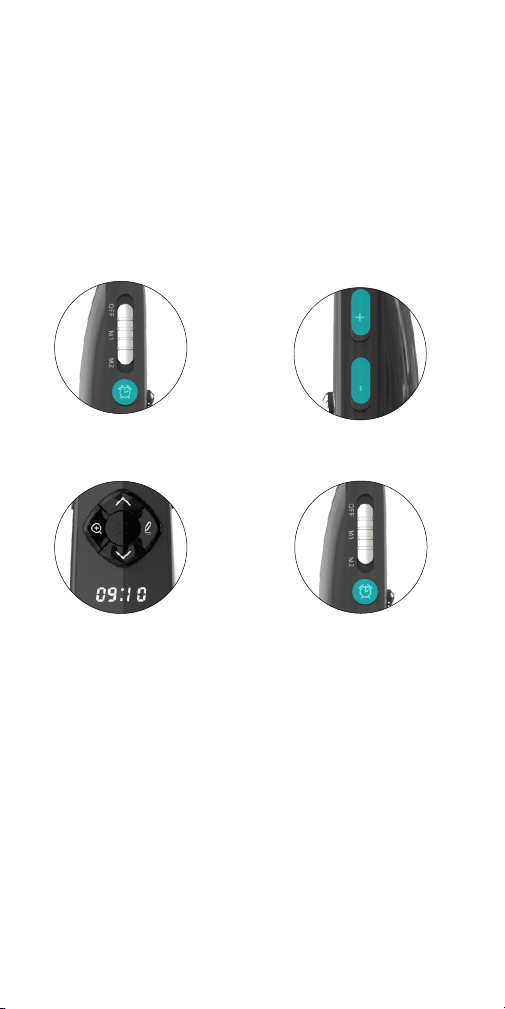
M2 Digital Laser Mode
Switch button
Magnifier button
Timer Button
One-click: open the timer setting
window/start the timer
Long press for 3s: exit the
timer countdown
Laser button
One-click: exit the digital laser
Time display
Screen light off every 5s, and flip
around to show the time.
One-click: exit the Magnifier/Spotlight
Long press: to use Magnifier/Spotlight
Double-click: switch to use
Magnifier/Spotlight
Long press: use and move
digital laser
Charging status: flash like
running light
Full-charged status: always on
Double-click: open/turn off the
air mouse function
Signal & battery
indicator light
Working status: b lue light is on
Page Up
One-click: Page up
Marking button
One-click: erase the marking
Page Up
One-click: Page down
Low battery: red light flas hes quickly
Long press for 3s: enter/
exit full screen
Timer Time Adjust
One-click: timer time +5/-5 min
Long press: time gradually
increases/decreases by 1 min
Long press for 3s: enter/ex it
blackscreen
Type-C Charging Port
Using Tips: When long-pressing the Magnifier button,
click the " "/" " to shrink/expand the
function areas. Same for Digital Laser.
7
2. Timer Function
① Click the Timer button. ② Click the +/- button to
adjust the time.
④ Click the Timer button
again to start the timer.
③ Once set, the time
display flashes for 3s.
Timer time can be set manually without running the ASiNG
program, for up to 99 minutes. Click the Timer button to enter
the setting interface (the initial time is 1 min), and click the +/-
button to adjust the time. The time display flashes for 3s to
indicate a successful timer setting. Click the Timer button
again to start the timer, and the timer time will display for 4s.
Long-pressing the Timer button can disable the timer.
Notes:
1) If the timer is set but does not start, the interface will flash for 4s. The +/-
button is disabled until clicking the Timer button again or flipping around
the presenter to display the time, and then clicking the Timer button to
start the timer, the +/- button will be functional.
2) The timer will vibrate once every 1 minute for the last 5 minutes of the
time and will vibrate 3 times continuously when ends.
3) The current timer will be disabled when switching from M1 to M2. You
can start the last set timer by clicking the Timer button.
4) The timer function is available even without plugging the USB receiver.

8
5. Pairing Instruction
Steps:
1) Turn off the presenter;
2) Long-press the Down button, and then turn it on. The blue & red lights
will flash;
3) Plug the USB receiver into a computer, and the lights will be off with a
vibration. The paring is successful.
6. About Up & Down Button
1
2
3
Up key value: Page Up
pag e up
page
down
↑
↑
↑
↑
Up key value: ↑
Down key value: ↓
↑
↑
↑
↑
Note: It will vibrate once when switching, indicating that the
switch is successful. The three key values can be switched cyclically.
● The red & blue lights are always on......Pairing.
● The blue light flashes... Normally working.
● The red light flashes...... Low battery.
● The digital tube light flashes like a running light.... Charging.
● The digital tube light is on.........Fully charged.
3. Indicator Lights & Charging
First, slide the Switch button to the M1 mode, and then place the
presenter on a flat surface for 3 seconds (no shaking at all). It will
automatically calibrate successfully.
4. Gyroscope Calibration
(For Prezi page turning)
Down key value: Page Down
(PowerPoint/Keynote) (default key value)
(For PowerPoint/Keynote page turning)
Up key value: ↑
Down key value: ↓
(For browsers and image
software page turning)
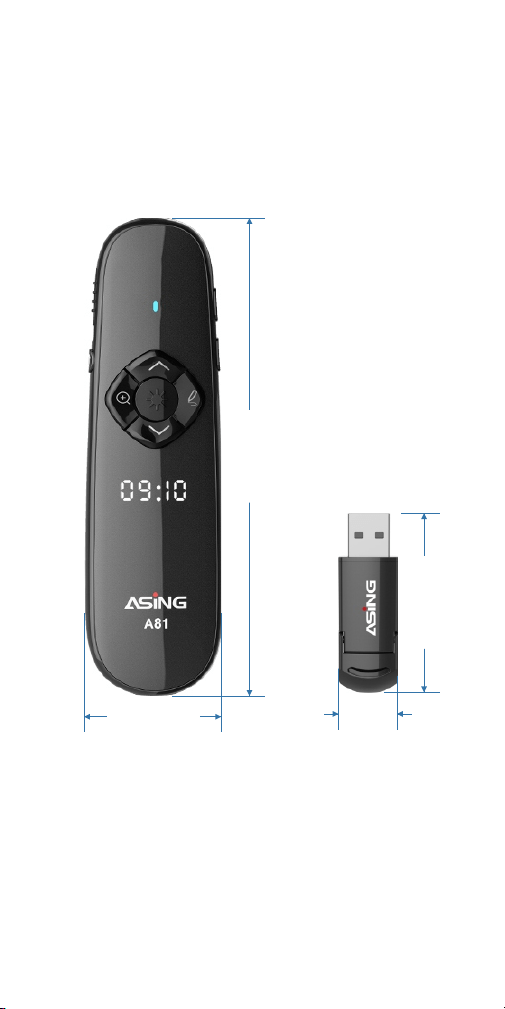
75.85 mm
21.75 mm
28.42 mm
9.28 mm

9
7. Technical Specification
Transmission
Frequency
Laser Range
Sender Part
2.4Ghz
Receiver Part
100m
Laser
Wavelength
Red laser 650nm/Green laser 520nm
Laser Power
<20mw
Battery Type
Soft Pack Lithium Battery
500mAh
<20uA
Size
34.3*120*25.6mm
Weight
41.8g
Battery
Capacity
Standby
Current
Compatible
Systems
Compatible
Port
Working
Voltage
Size
Weight
Windows/Mac OS/Android
(not supporting M2)
USB1.1, USB2.0, USB3.0
4.5V-5.5V (Powered by USB cable)
17.6*53.3*9mm
6.2g

10
Q1. Presenter no response after a long time of unuse.
8. FAQs
A1. It may be a connection failure between the sender part and the
receiver. Re-paring action is needed. Steps: 1) turn off the presenter;
2) Long-press the Down button, and then turn it on. The blue & red
lights will flash; 3) Plug the USB receiver into a computer, and the
lights will be off with a vibration. The paring is successful. If it's still
not working, please contact us via service@asingshop.com.
Q2. Air Mouse function does not follow with hand movement.
A2. It maybe mouse drift and just need a gyroscope calibration.
Steps: put the presenter on a flat desk and make it stand still
(no shaking). For about 3 seconds, it will automatically calibrate.
Q3. Can not use the Magnifier/Spotlight/Digital Laser functions.
A3. Those functions are only available in Mode 2. Please check if the
switch button is on M2, and if the mini-client is running. Note: the icon
color is red while it's running successfully. If it's still not working,
please try with another computer.
Warning:
1) When using this product's USB flash drive, please do make copies
as we do not provide data repair.
2) This product has a class 3R laser and DO NOT shine the laser in the
eyes of humans or animals!
If any questions, please feel free to contact us.
Site: www.asingshop.com
Email: service@asingshop.com
YouTube: ASiNG Shop
Shenzhen Ruisicong Technology Co, Ltd., Shenzhen, China