-1- -2-
Notes
Read this instruction carefully before starting installation.
Proper tools will improve the quality of installation and reduce the time
required.
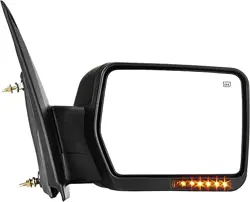
All mirrors are asymmetrical design for better view range.
For vehicles without factory heat and signal light functions require an addi-
tional wiring.
Power fold/Memory/Auto-Dimming functions are not available.
If missing parts or any damage found, please take a picture and contact us.
Reference the vehicle owner’s manual to adjust the new mirrors.
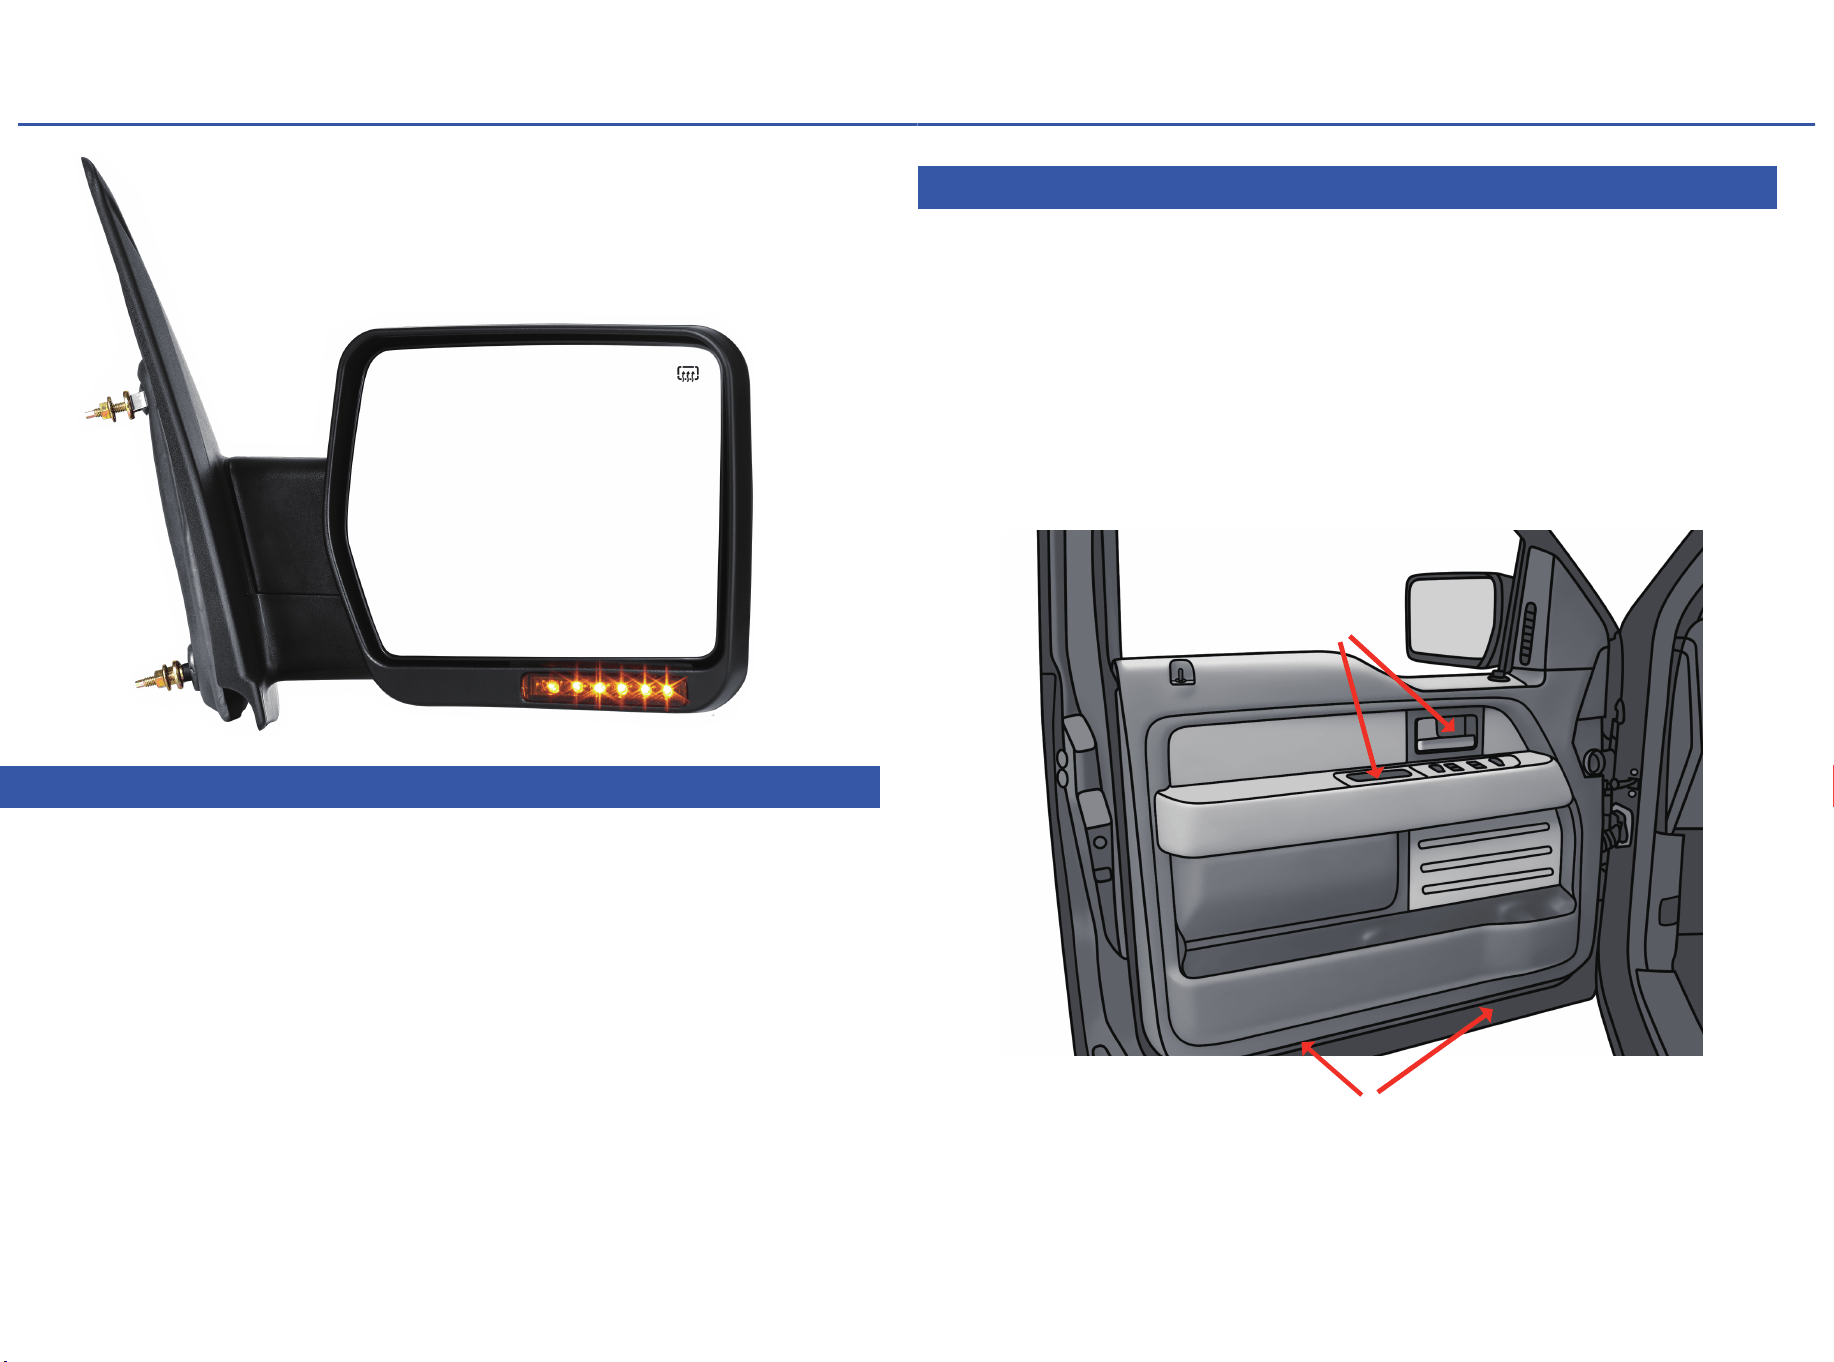
Step 1:
1. Open the front door, remove (2) small covers from door handle bowl
and inner door lever.
2. Remove (2) 8mm bolts behind the covers.
3. Remove (2) 6mm bolts from the bottom of the door trim panel.
4. Carefully pull the door trim panel up and release door handle cable.
5. Disconnect mirror switch harness and door switch harness.
6. Remove the door trim panel.
INSTALLATION INSTRUCTIONS
CETMTM-����
CETMTM-����
INSTALLATION INSTRUCTIONS
(2) 8mm Bolts
(2) 6mm Bolts
-3- -4-
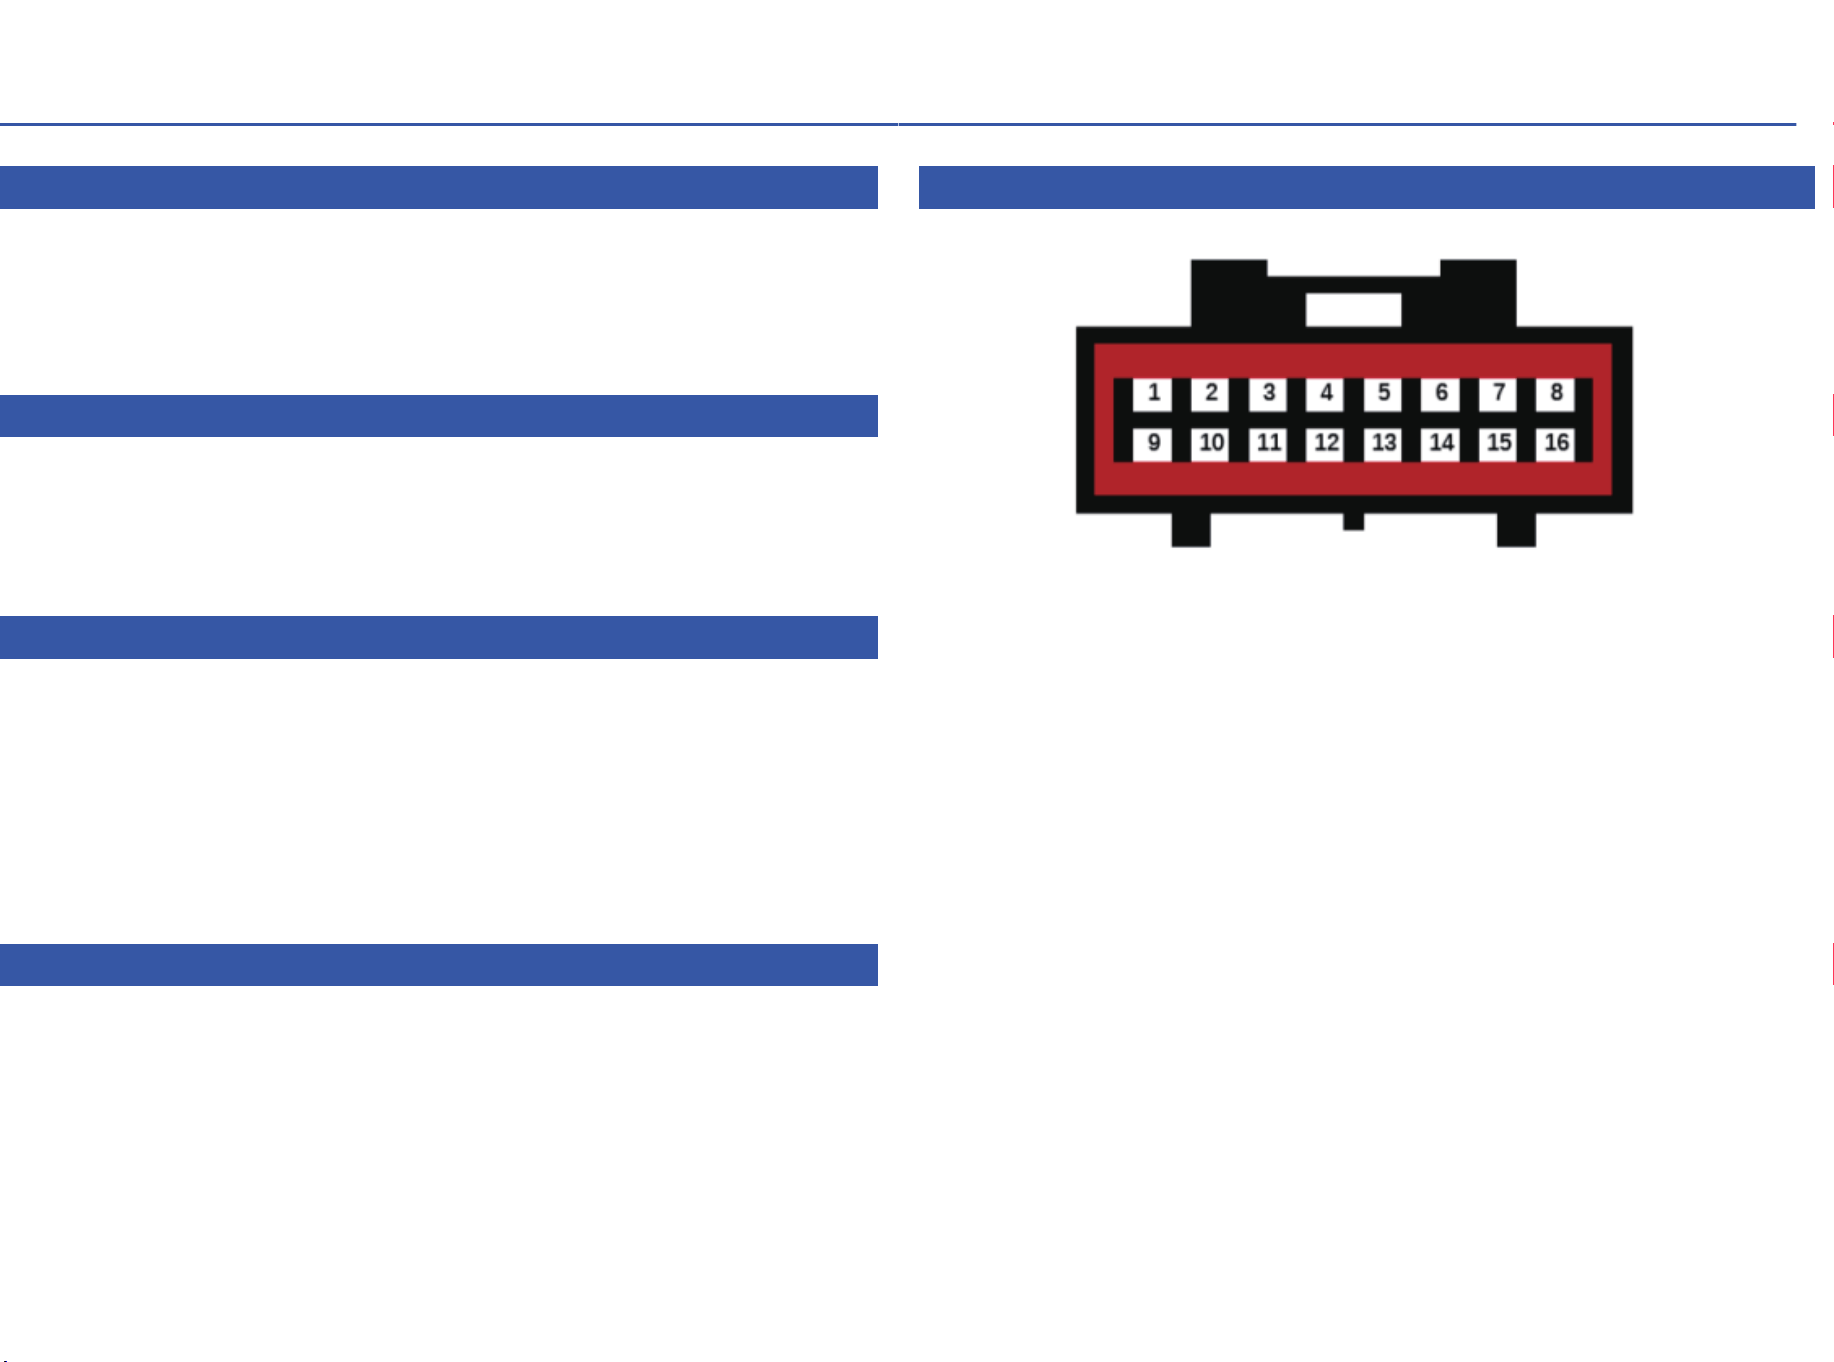
Step 2: Reference Wire Diagram:
1. Peel up the weather shield (do not remove), and disconnect mirror
harness.
2. Remove (3) 11mm hex nuts securing the factory mirror.
3. Carefully remove factory mirror.
Step 3:
1. Take the new mirror, feed studs through the holes on door panel.
2. Install (3) provided hex nuts to secure the new mirror. Torque to 80 lb in.
3. Connect mirror harness.
Step 4:
1. Take the door trim panel, and connect mirror switch harness and door
switch harness.
2. Reinstall door release cable.
3. Feed the door lock tab through the hole on door trim panel, engage clips
and hooks behind door trim panel.
4. Secure the door trim panel using (2) 8mm bolts and (2) 6mm bolts.
5. Reinstall covers back to the door handle bowl and the inner door lever.
Step 5:
1. Repeat above steps on the passenger side.
2. Carefully check all mirrors functions before first drive.
Female Socket on Mirror Side
1: Mirror Heater
3-6: Mirror Motor
8: Ground (Lights/Heater)
10: LED Turn Signal
2: Not Used
7: Not Used
9: Not Used
11-16: Not Used
INSTALLATION INSTRUCTIONS INSTALLATION INSTRUCTIONS