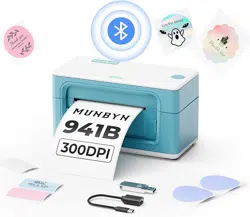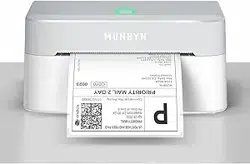
Thermal Label
Printer
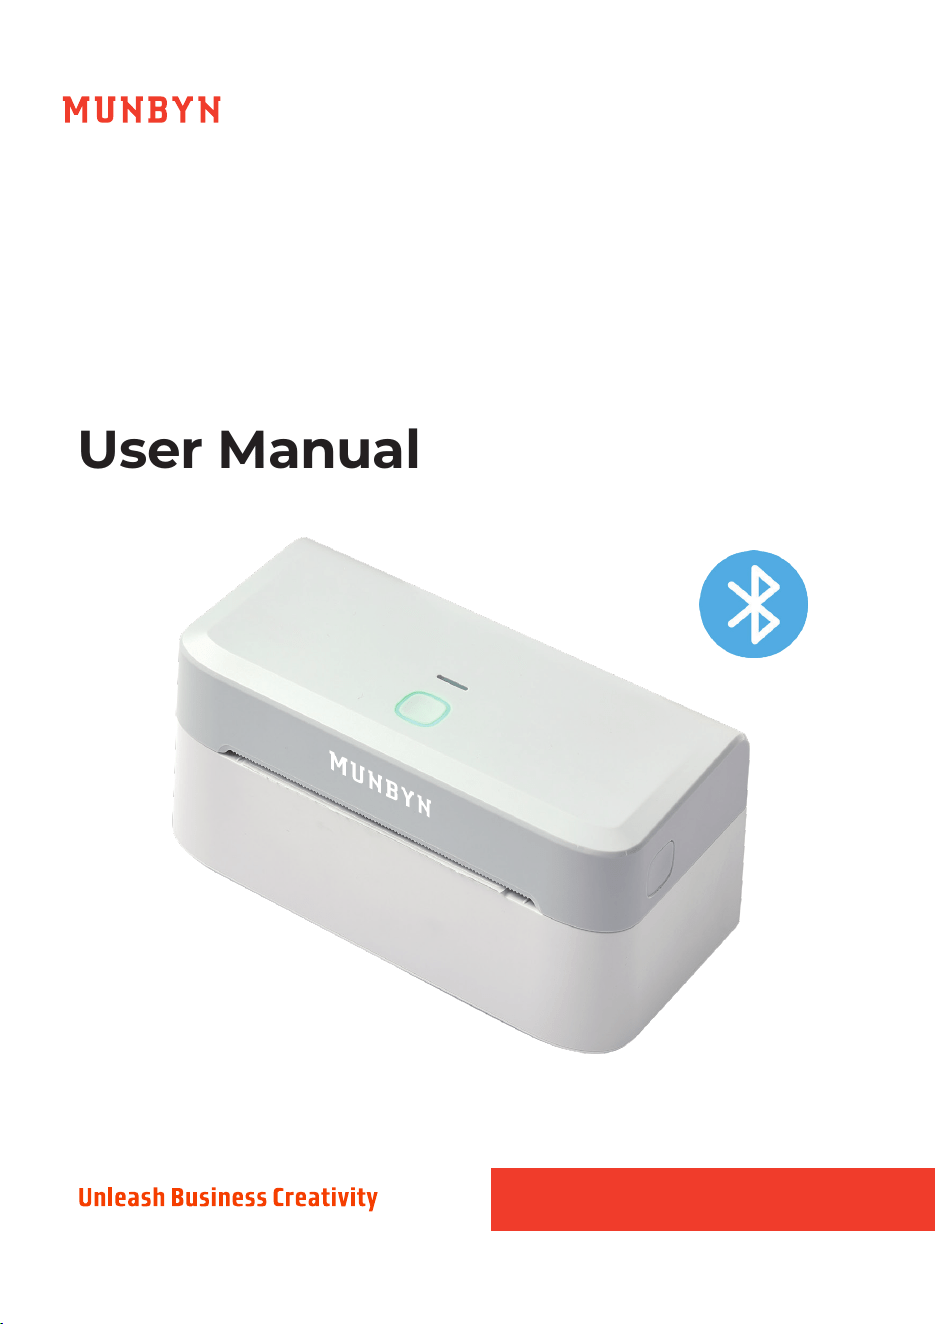
User Manual
RealWriter 403 Bluetooth
Version 1.00
System setup
Scan the QR code
for the video tutorial
Video Tutorial
APP-Bluetooth Connection Mode
Munbyn Editor-Bluetooth Printing
(no-driver required)
Munbyn Editor-System Printing
(USB driver required)
Munbyn Editor-PDF Cropping
macOS-Bluetooth Connection Mode
Windows-Bluetooth Connection Mode
macOS-USB Connection Mode
Windows-USB Connection Mode
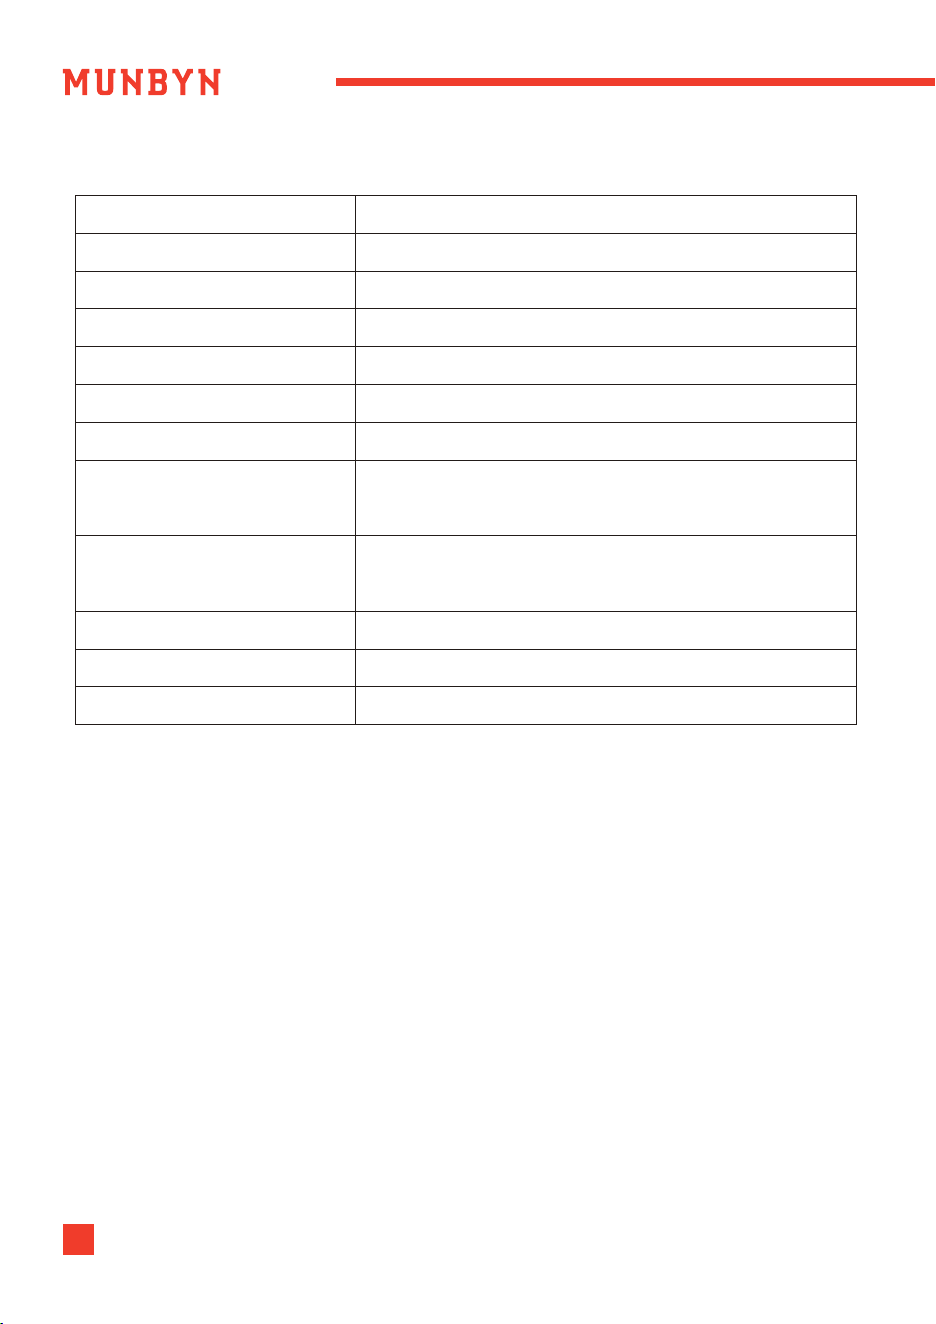
Content
1.0 Product Introduction
···································································································
1
1.1 What’s in the Box? ··················································································································
1.2 Printer Features ·······················································································································
2.0 LED Status
···············································································································
2
1
2
4
5
3.0 Feed Button Instruction
··························································································
3
4.0 Set Up the Printer
······································································································
3
4.1 Quick Printer Connection ····································································································
4.2 Label Setup ·····························································································································
5.0 Mobile Phone/Pad Printing
·······················································································
5
6.0 Munbyn Editor Printing
(Supports Bluetooth-enabled Mac, Windows, and Chrome devices
for driver-free printing/cutting/DIY labeling)
·······························································
9
7.0 Installation for Mac System
······················································································
10
8.0 Installation for Windows System
············································································
14
9.0 Pro Tips
·························································································································
18
10.0 FAQ
······························································································································
18
11.0 Specifications
·············································································································
19
12.0 Safety Notices
············································································································
19
13.0 FCC Statement
···········································································································
20
Deutsches Benutzerhandbuch
Manual de usuario en español
Manuel d'utilisation en français
Manuale dell'utente in italiano
Scan the QR code or visit the link below to access user manuals in other languages.
User manuals included (German, French, Spanish, Italian)
A
B
C
D
E
F
G
H
1 24-hour Munbyn after-sales service on working days
1.0. Packing Open and Installation
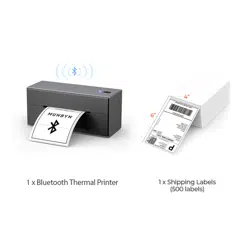
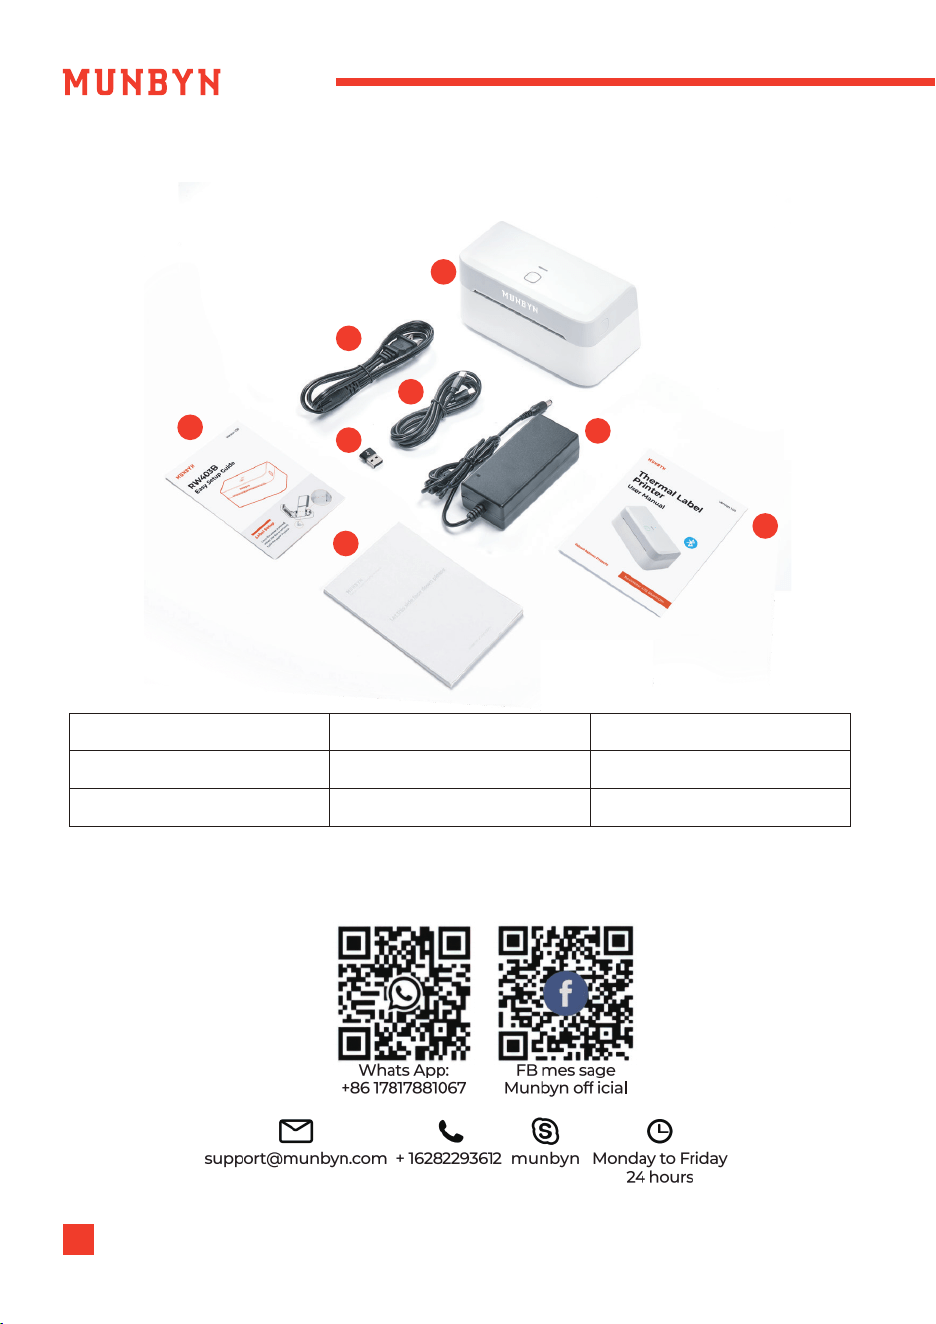
1.1. What's in the Box
If any accessories are missing or damaged, please contact us for assistance via the
contact details below
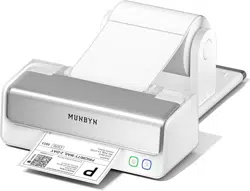
A. Printer
C.Type-C Cable
F.User Manual
B. Power Cord
E.Power Adapter
D.Type-C to USB Adapter
G.Easy Setup Guide
H.Test Label
2WhatsApp: +86 17817881067 E-mail: [email protected]om
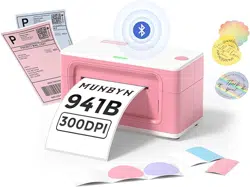
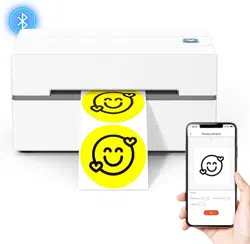
1.2. Printer Features
2.0. LED Status
Bluetooth Connection
Status Light
Cover Button
Power Switch
Feed Button and
Printer Status Light
DC Power Connector
Type-C Connector:
For PC Data Transfer
Paper Slot
LED Status Troubleshoot
/
/
Check that the cover
is completely closed
Cover is
not closed
Printer head is
overheated
Label paper is
not identified
DescriptionLight
Normal
operation
Bluetooth
connected
Blue Light
(always on)
Red Light
(always on)
Flashing
Green and Red
Green Light
(always on)
Organize the papers,
then press and hold on
the feed button for
one beep to run label
identification
Printer will
automatically resume
once the printer head
has cooled down
3
3.0. Basic Operation
4.0. Set Up the Printer
24-hour Munbyn after-sales service on working days
Scan the QR code on the right for more video tutorials:
munbyn.biz/403bv
Note: Please enter the link with letters and numbers in
lowercase only.
More Setup Videos
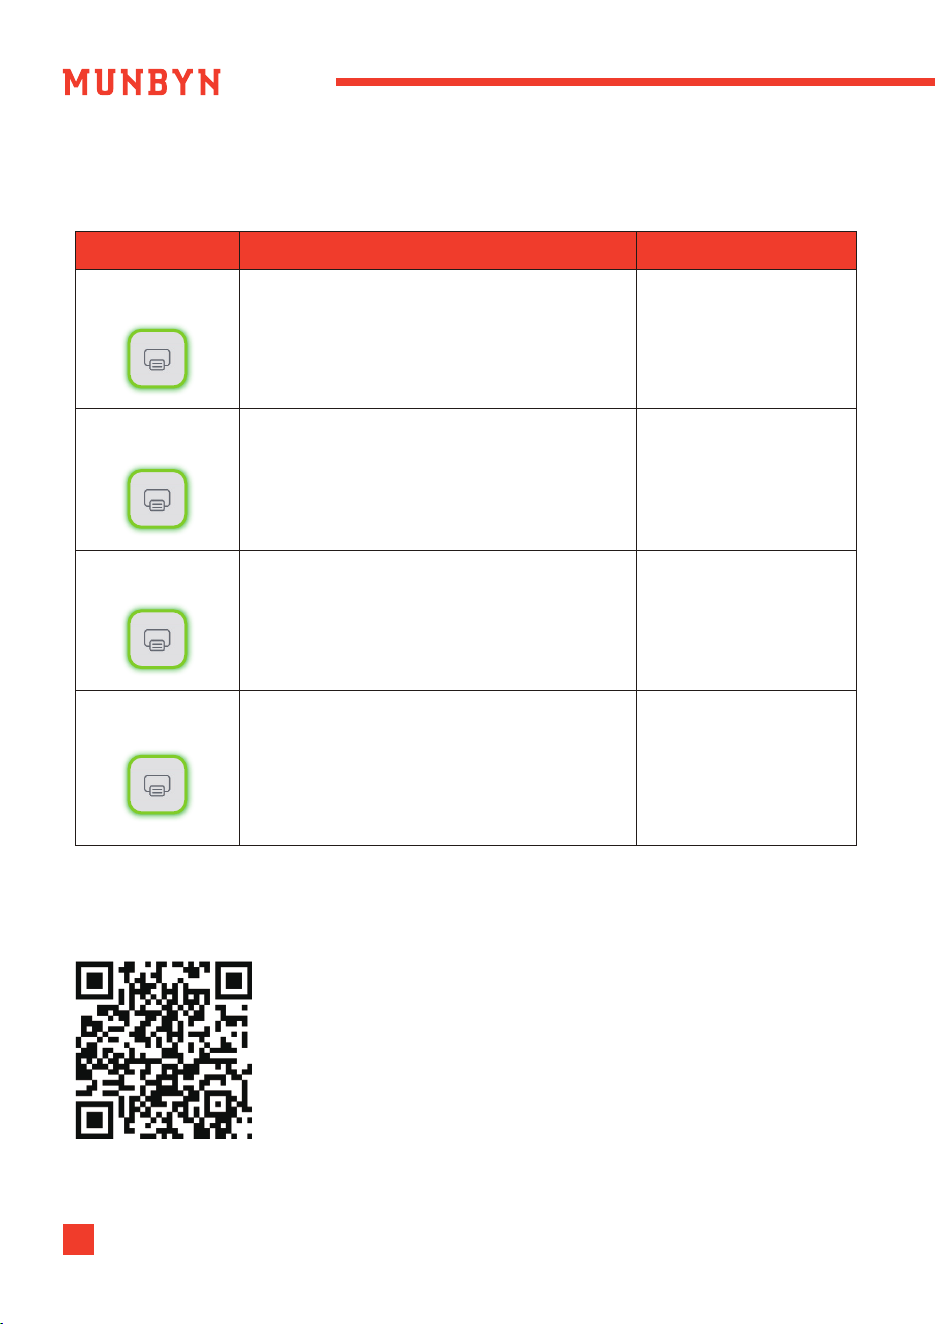
Printer status Feed button Function
Feed Paper
Print Self-test
Single Click
Standby
Standby
Double Click / Press and hold on
until you hear two consecutive beep
Automatic label
identification
Standby
Press and hold on until you
hear one beep
Reset Printer
Standby
Press and hold on until you
hear three consecutive beeps
(for 6 second)
4WhatsApp: +86 17817881067 E-mail: [email protected]om
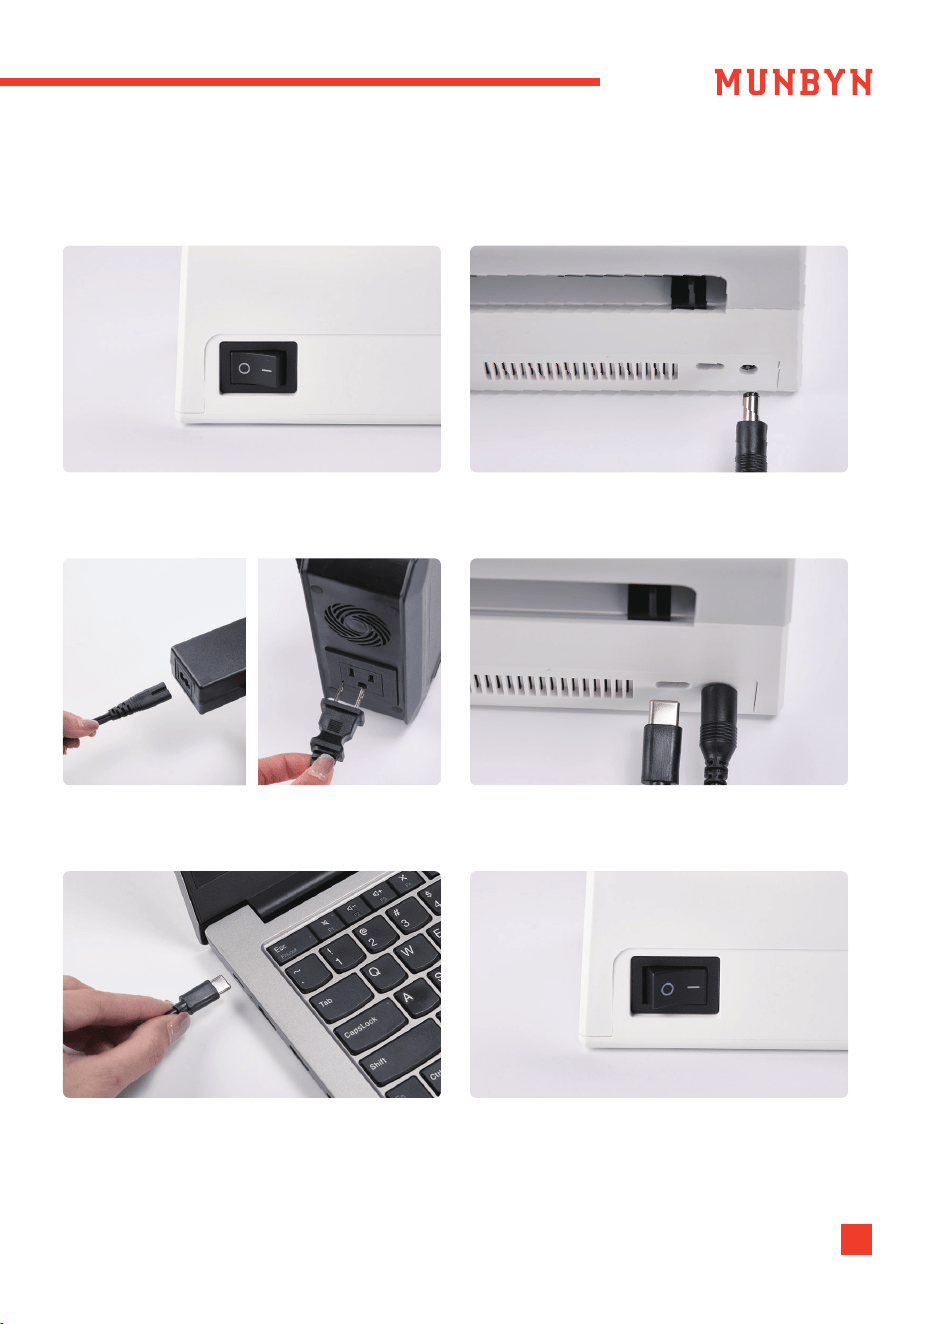
4.1. Quick Printer Connection
Please follow the sequence shown in the picture below to operate.
1. Ensure the printer is power off 2. Connect the power adapter to the printer
3. Connect the power cord and plug in the
power supply
4. Connect the Type-C cable to the printer.
(Skip this step for Bluetooth connection)
5. Connect the Type-C cable to the printer.
(Skip this step for Bluetooth connection)
6. Turn the printer on
5
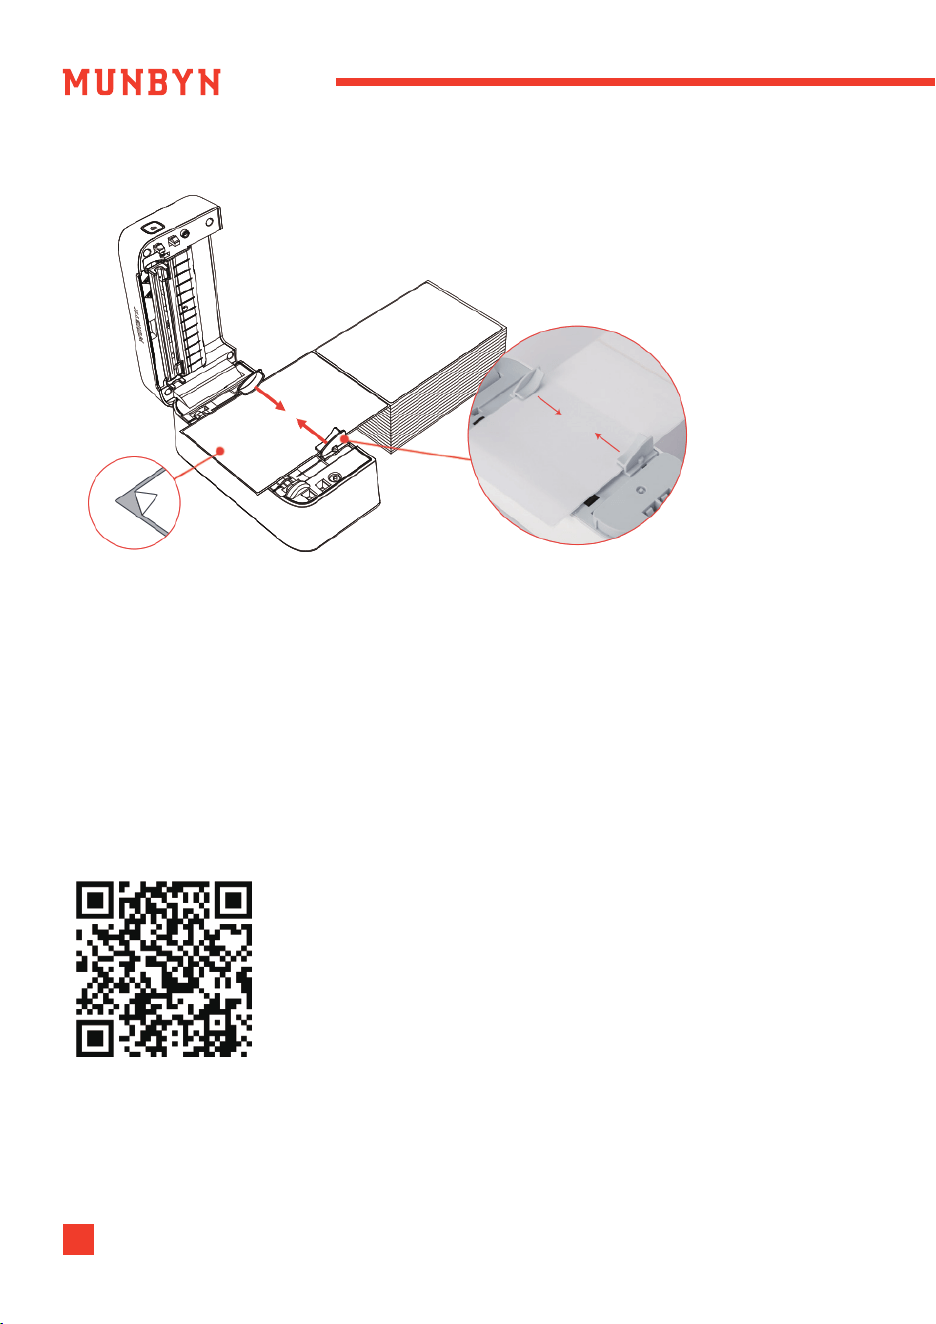
4.2. Label Setup
Load no less than 4 consecutive labels into the printer.
Once the cover is closed, the machine will automatically attempt to feed the paper.
If it fails to do so, please manually calibrate the paper: press and hold the feed button
until you hear a "beep" sound.
The printer will then perform label calibration.
Automatic label identification:
5.0. Mobile Phone/Pad Printing
Scan the QR code on the right for the video tutorial:
munbyn.biz/403bphone
Note: Please enter the link with letters and numbers in
lowercase only.
Once the paper is placed,
adjust the slot to securely
hold the paper in place.
1. Search "Munbyn Print" on your mobile device's App Store or Google Play to get the
App or scan the QR code below to download.
24-hour Munbyn after-sales service on working days
App Setup Video

Note: It is Google's rule. Our App needs to abide by this rule on the Google platform. But
please rest assured that we will firmly protect user privacy.
3. Find and tap "RW403B", and click "OK" as shown in the picture:
6
Tips: If your mobile phone needs a PIN password, please enter "0000".
2. Open the "Munbyn Print" APP, and open permission.
The app requires local file access and Bluetooth function to run properly. Please follow
the guide to grant the necessary permissions to the app.
WhatsApp: +86 17817881067 E-mail: [email protected]om
1
2

Note: Before you print, make sure the printer's hooked up like in Figure 1. If you spot the
error from Figure 2, double-check that the printer's powered on and look at steps 4.to
6. for how to reconnect.
Once your device is connected, you can start creating and printing:
6. Click Create on the Home page.
7. Create a label or customize one.
7 24-hour Munbyn after-sales service on working days
4. Select the "RW403B" device.
5. The App will display a pop-up confirming the successful Bluetooth connection, as
shown in the figure below.
Tips: At this time, the Bluetooth status light on the printer will turn blue.
Figure-1 Figure-2
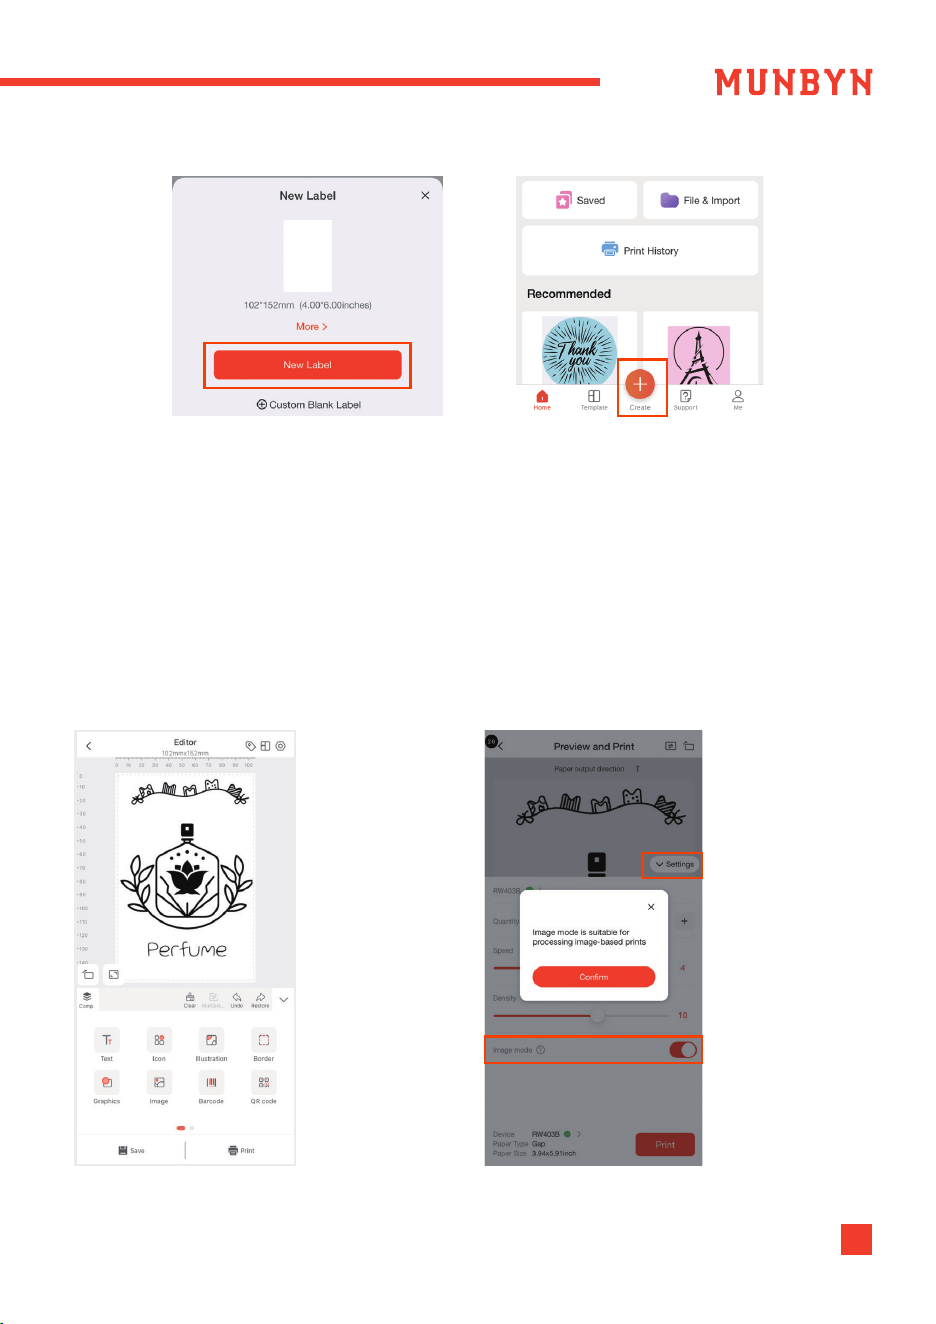
Note: The default size selected in the APP is 102*152mm (4*6inches). Please verify
dimensions for any alternative labels and ensure the app's label size setting matches
your paper's actual size.
8. Design label
Then click "Print" to check that the
label preview matches the preset.
Note: Design within the template area,
content outside will not print.
9. Print label
Tap "Settings" to adjust the print density
and number and tap "Print".
Tips: For better print quality, you can open
Image mode when printing pictures.
8WhatsApp: +86 17817881067 E-mail: [email protected]
(Supports Bluetooth-enabled Mac, Windows, and Chrome devices for driver-free
printing/cutting/DIY labeling)
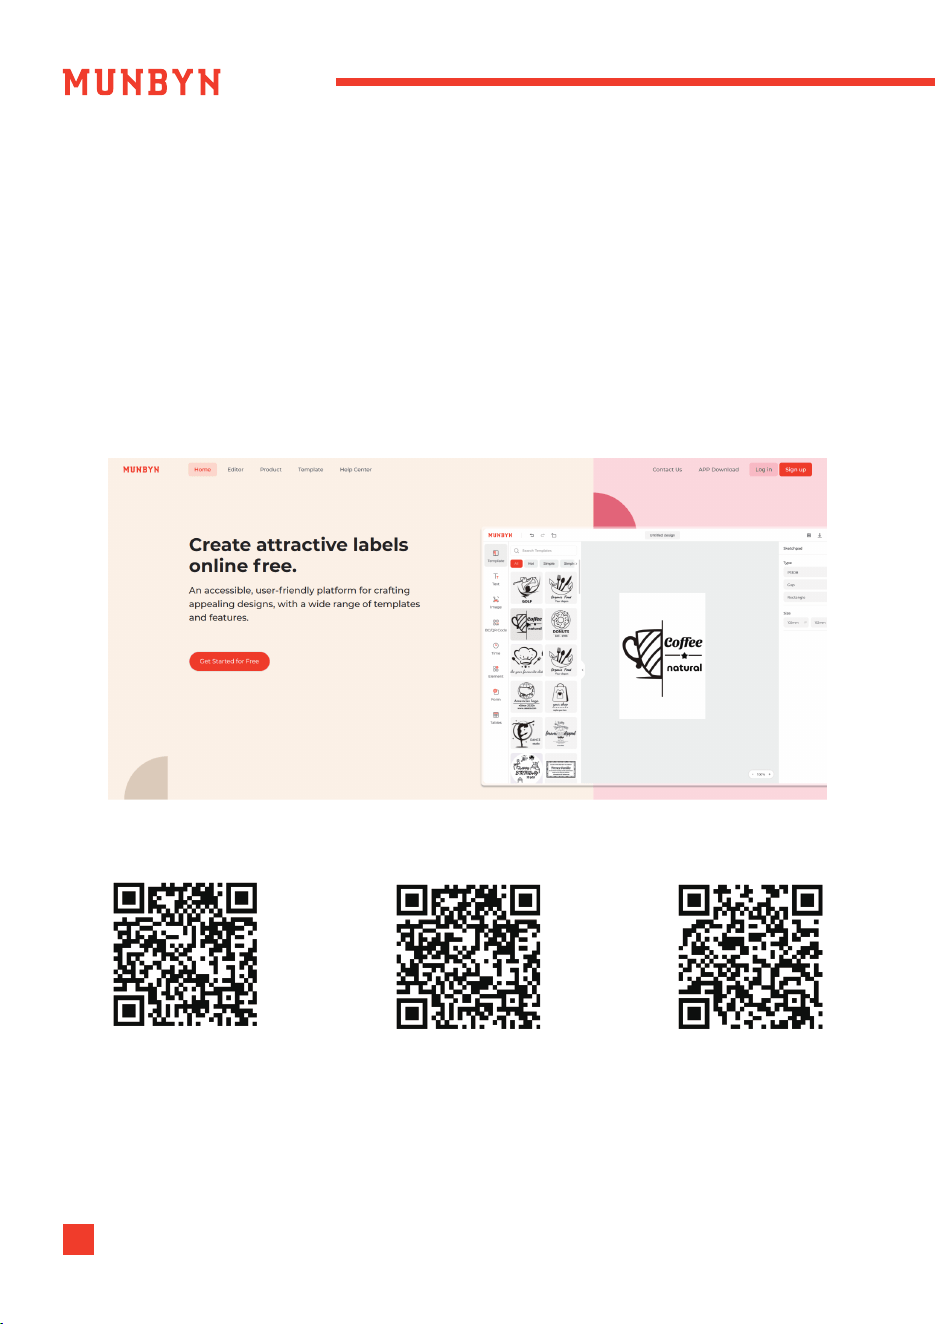
Tips: Munbyn Editor is an accessible, user-friendly platform that allows you to easily
design, personalize, precisely crop, and print attractive designs on Google Chrome. It
supports printing for Windows, Mac, and Chrome devices.
Website Link: editor.munbyn.com
6.0. Munbyn Editor Printing
Scan the QR code to get printing tips:
Bluetooth Printing Tutorial
(no-driver required)
munbyn.biz/wbp
System Printing Tutorial
(USB driver required)
munbyn.biz/wbp
PDF Cropping Tutorial
munbyn.biz/pdf
9 24-hour Munbyn after-sales service on working days

10WhatsApp: +86 17817881067 E-mail: [email protected]om
For Direct Bluetooth Connection:
Scan the QR code on the right for the video tutorial:
munbyn.biz/403bmacbc
7.0. Installation for Mac System
Tips: You can print via Bluetooth directly using Munbyn Editor without the need to
install drivers. For details, please refer to section 6.0.
1. Turn your printer on.
2. You can get the driver by accessing this link: munbyn.biz/403bmacd
3. Run the driver you downloaded. Follow the installation steps until you receive the
"The installation was successful" message shown below.
Bluetooth Setup Video
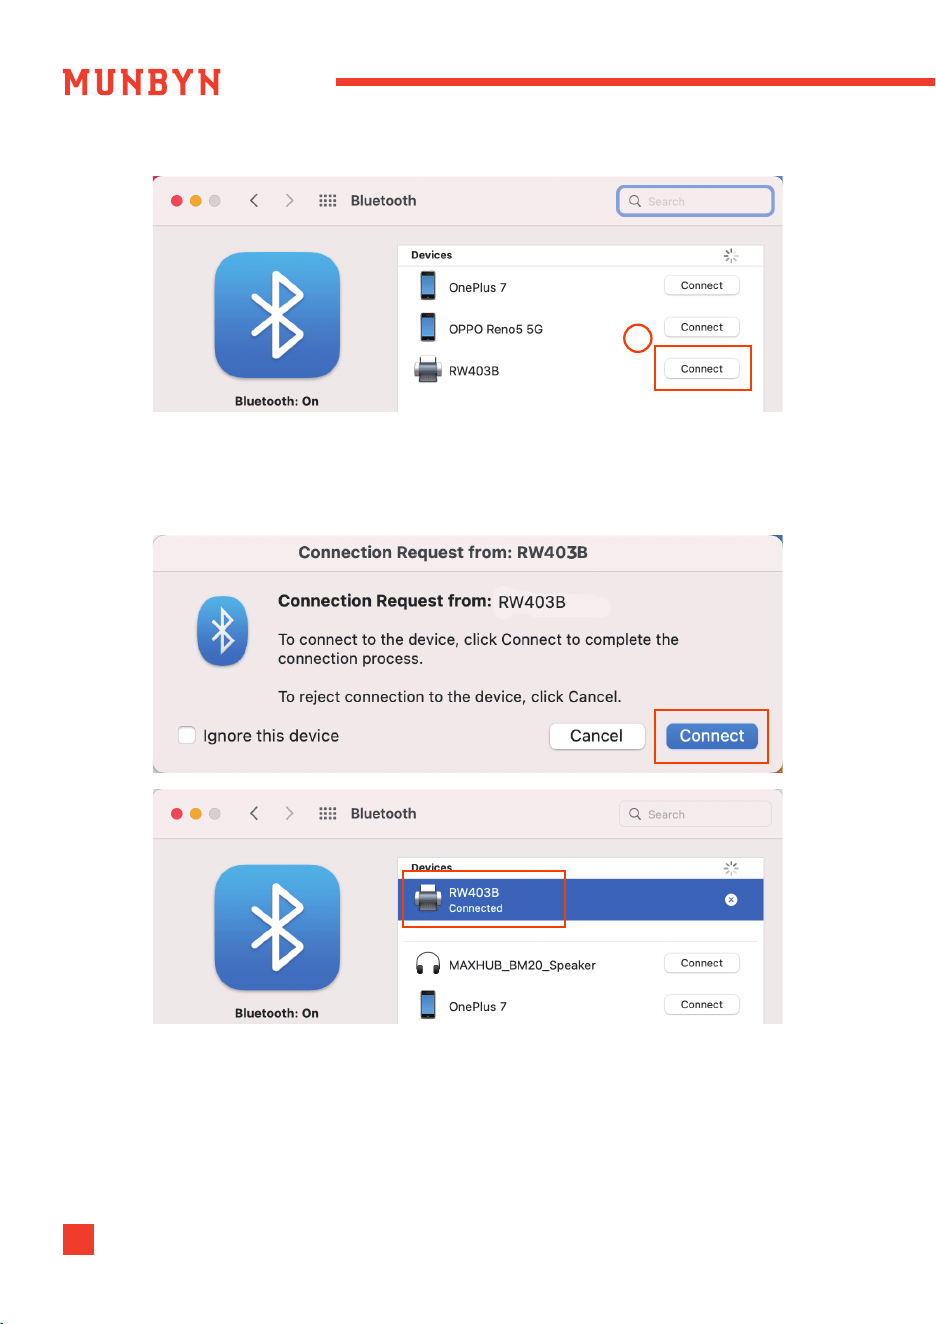
4. Turn on the computer's Bluetooth in the system preferences.
5. Click "Bluetooth Preferences..." and choose your printer to connect it.
01
02
03
04
11 24-hour Munbyn after-sales service on working days
6. Click "Connect", and the printer will successfully connect. .
Tips: If it displays "Not Connected", please double-click on your device to reconnect
until it shows "Connected".
05
12WhatsApp: +86 17817881067 E-mail: [email protected]om
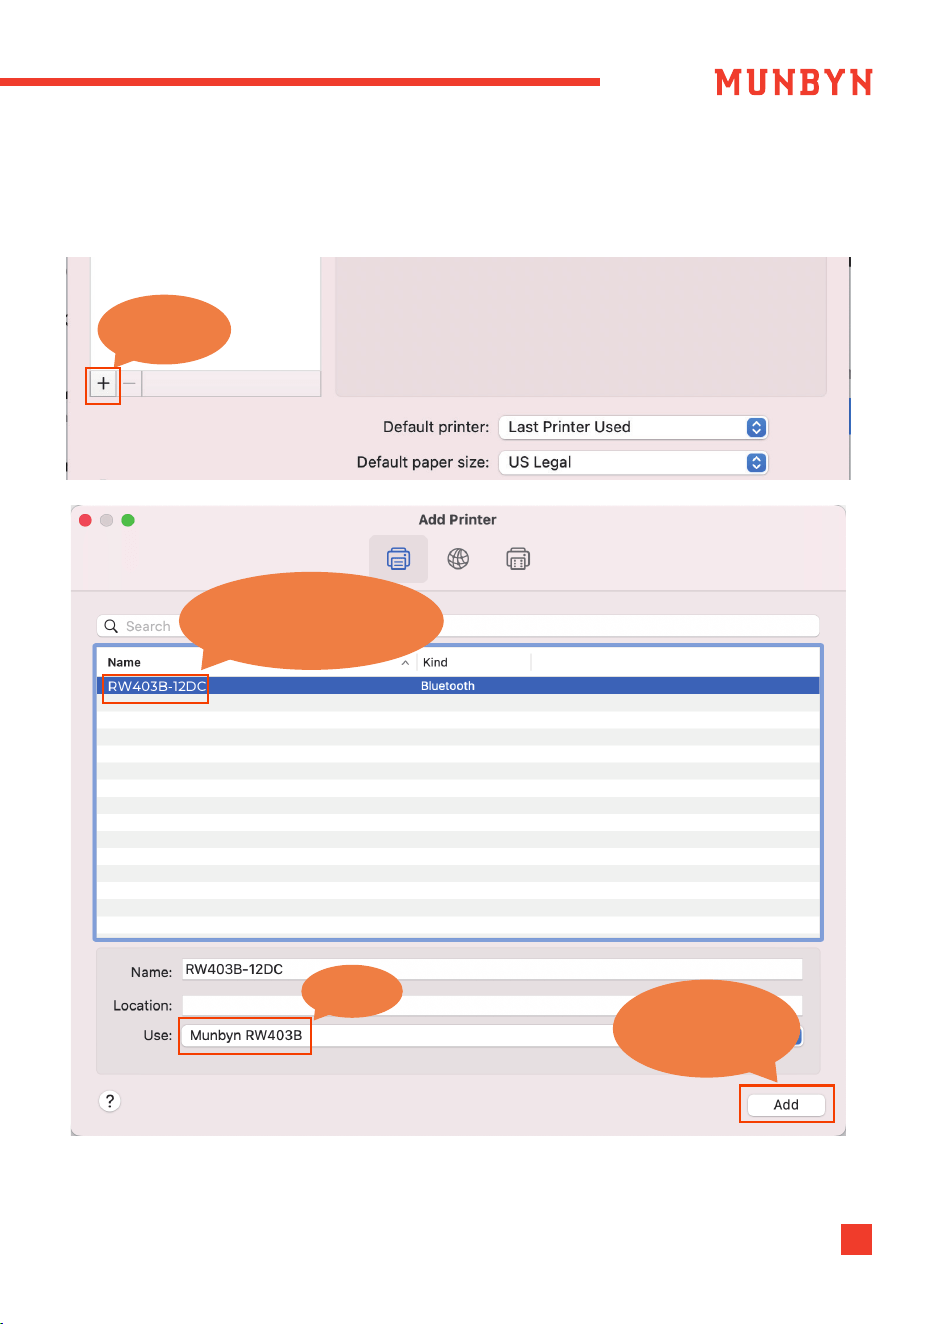
7. Go to System Preferences -> Printers & Scanners -> Click the "+" icon in the bottom left
corner or “Add Printer” to add the printer.
1.Click [+]
2. Select [RW403B Bluetooth]
3.Click [Add]
Notice
24-hour Munbyn after-sales service on working days13
For USB Connection:
Scan the QR code on the right for the video tutorial:
munbyn.biz/403bmacv
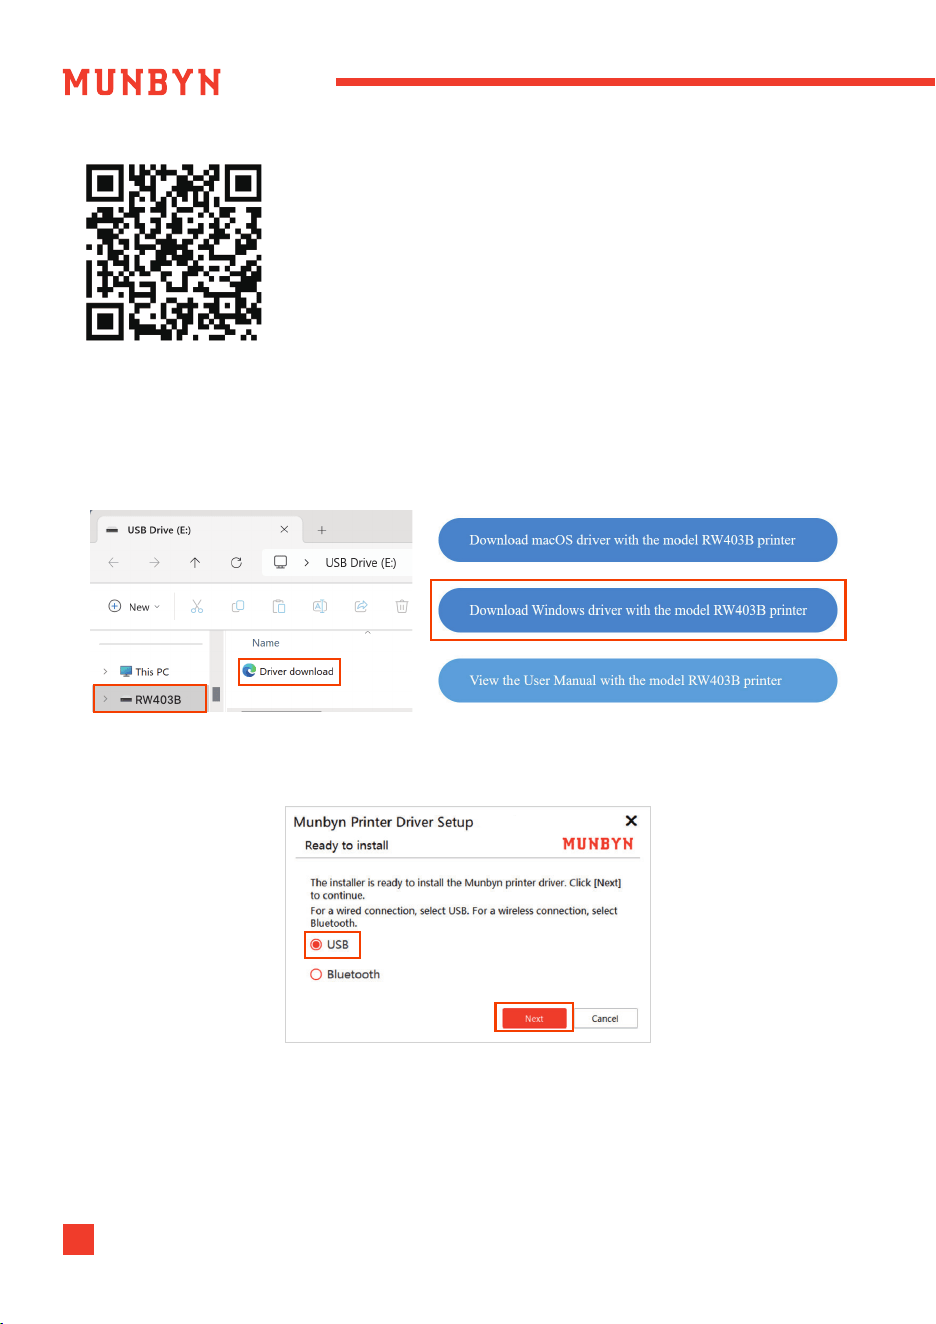
1. Connect the printer to your computer with the original Type-C cable.
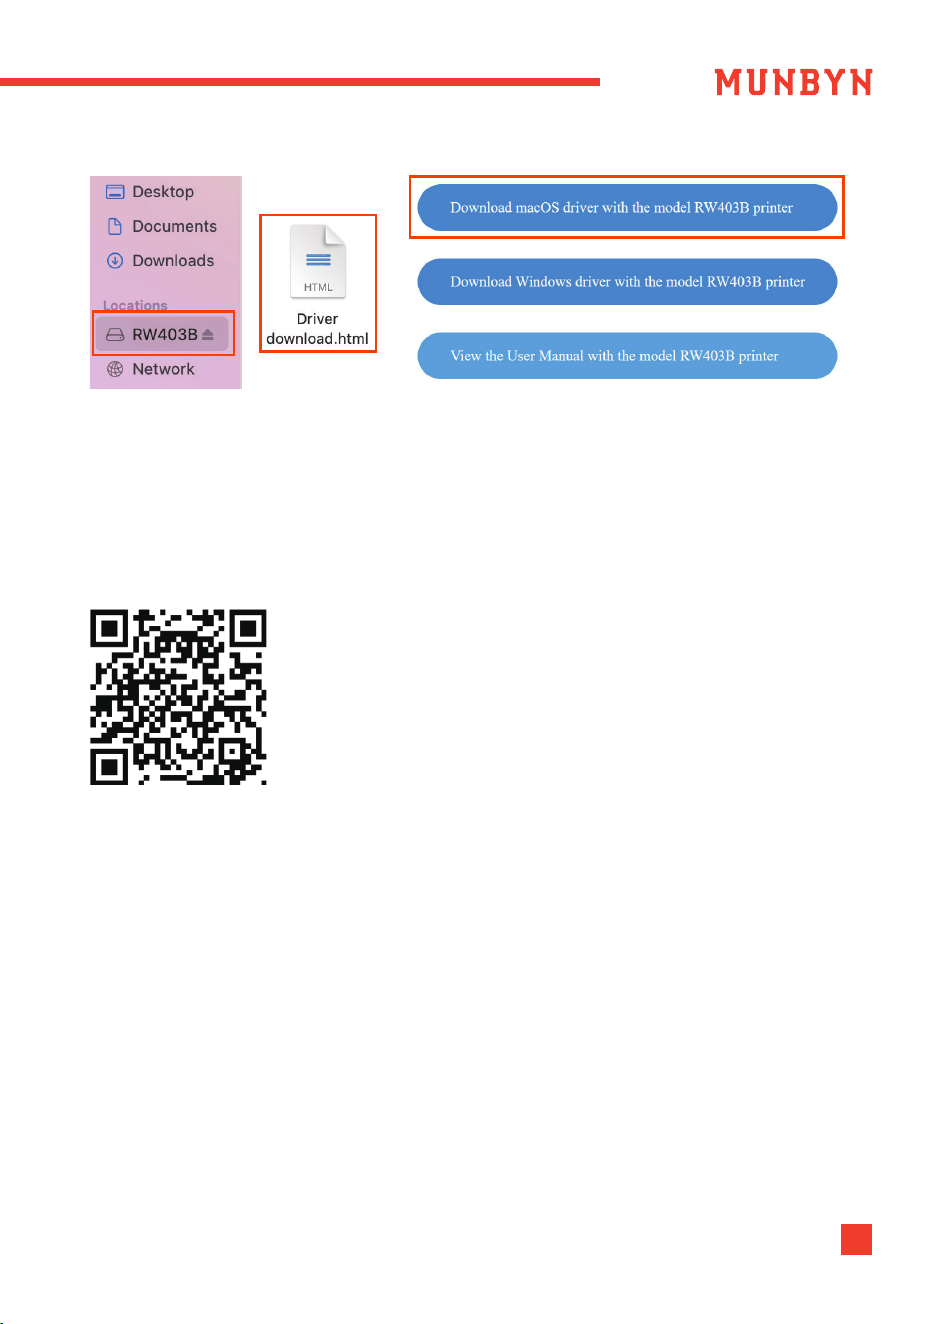
2. Once connected, find the removable disk named "RW403B" on your computer,
open it, and run the
driver file that matches your operating system to install.
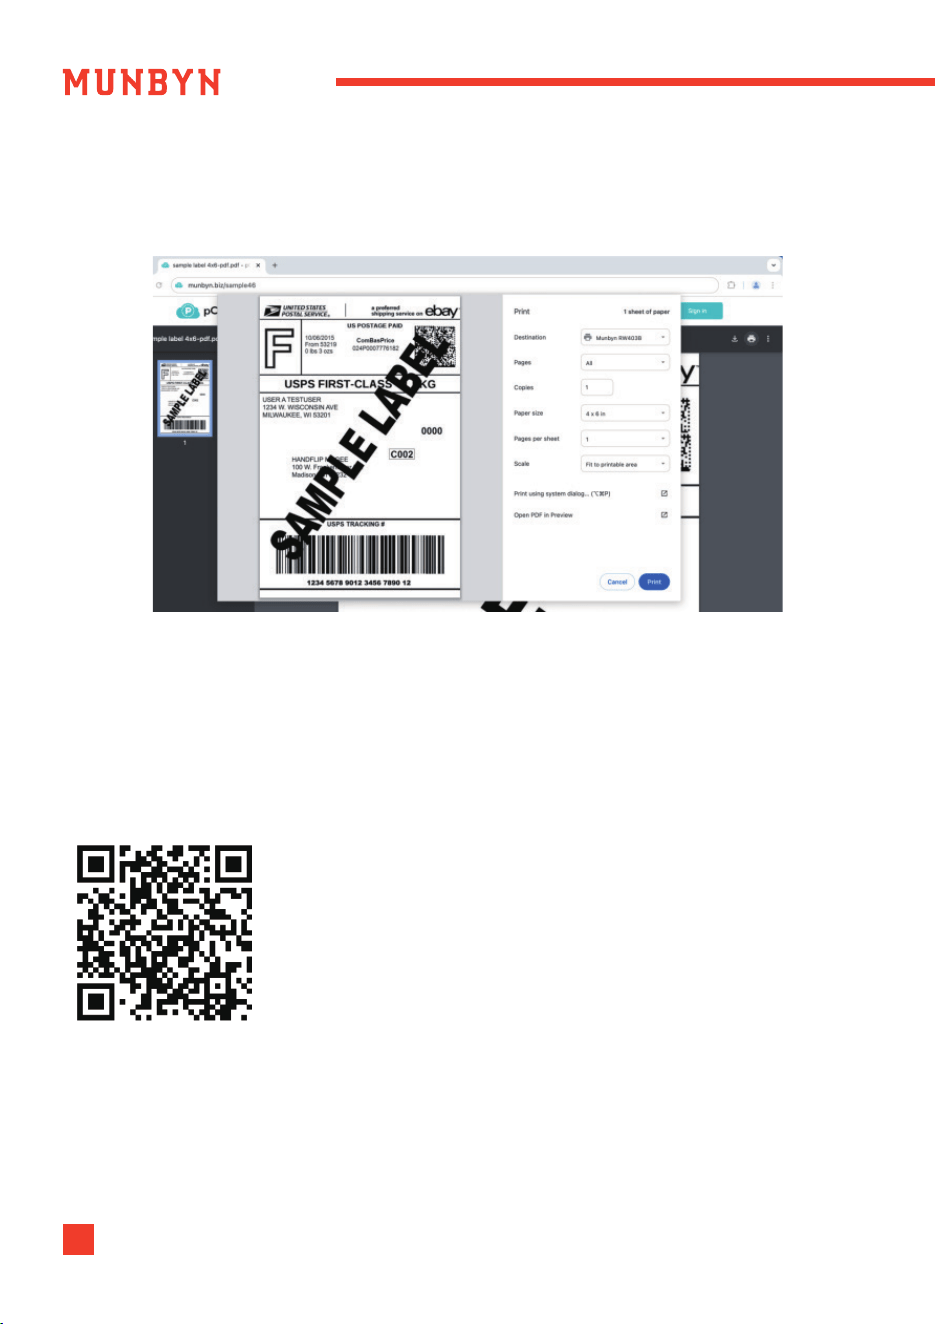
8. Now, you can visit this link to print a label template and test if your printer is
printing properly: munbyn.biz/sample46
8. Great, your printer is up and running!
Ready to create your own custom labels and personalize your designs?
Check out Section 6.0 for a smooth start with our Munbyn Editor.
For cropping tips, check out Section 6.0 — it has everything you need
USB Setup Video
3. Run the driver you downloaded. Follow the installation steps until you receive the
"The installation was successful" message shown below.
8.0. Installation for Windows System
For Direct Bluetooth Connection:
Scan the QR code on the right for the video tutorial:
munbyn.biz/403bwindbc
Note:
1. The direct Bluetooth connection feature is available for Windows / Mac systems.
2. Enjoy a hassle-free printing process with the MUNBYN Editor, which supports
driver-free Bluetooth printing as detailed in Section 6.0.
3. For users of ARM Architecture, we recommend our Munbyn editor for an optimal
printing experience.
Please follow the steps below:
1. Turn your printer on.
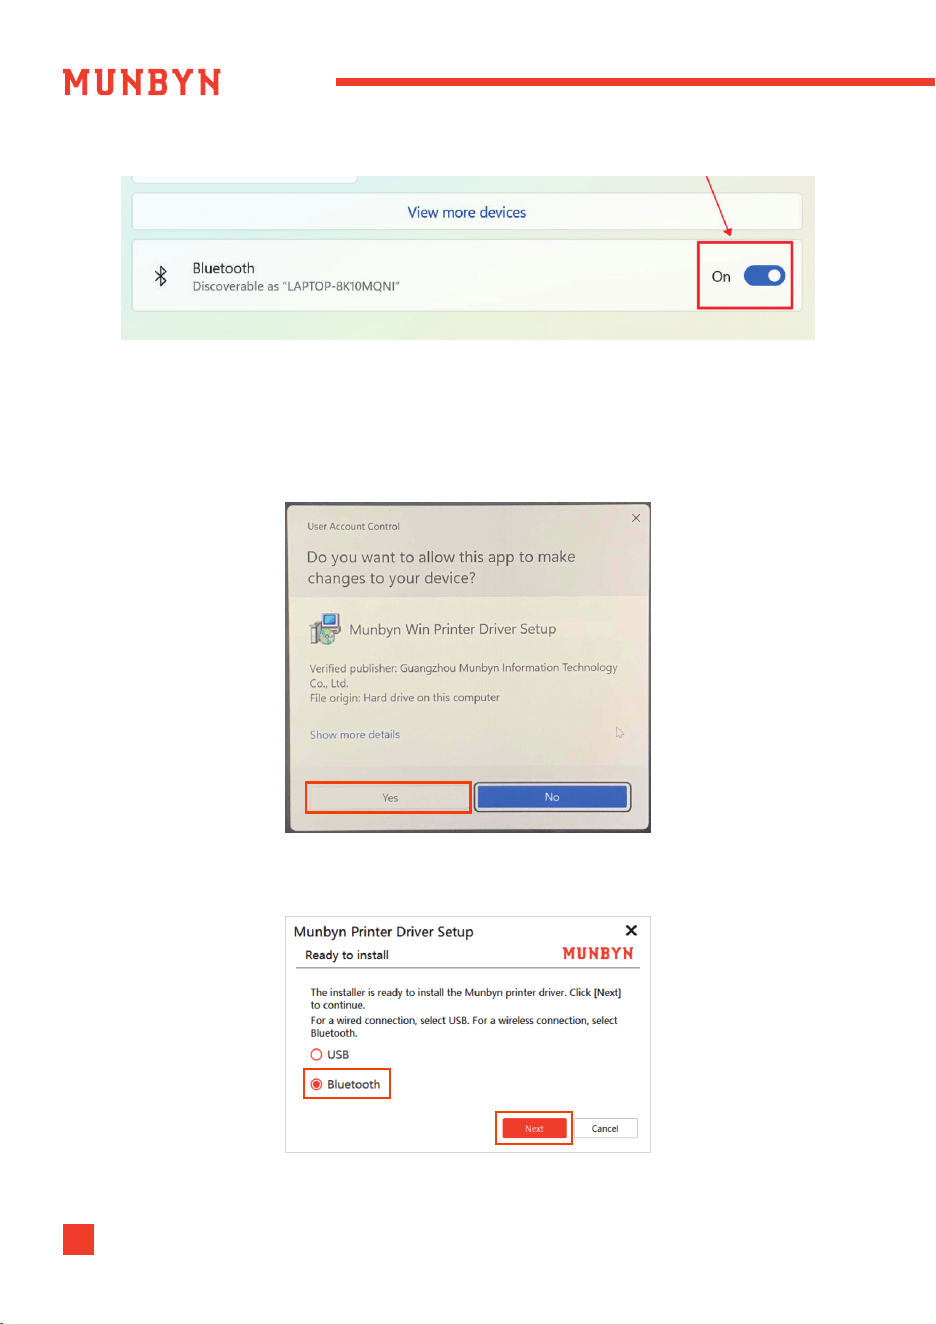
2. Turn on the computer's Bluetooth in the system settings.
Tips: Please do not connect devices directly through the system's Bluetooth search
interface.
Bluetooth Setup Video
24-hour Munbyn after-sales service on working days15
3. You can get the driver by accessing this link: munbyn.biz/403bwind
4. Run the driver you downloaded.
5. During Windows driver installation, you might see a security warning. Click "Yes" to
agree to continue. Please don't worry, this is normal.
6. Click "Bluetooth" -> "Next".
16WhatsApp: +86 17817881067 E-mail: [email protected]
9. Great, your printer is up and running!
Ready to create your own custom labels and personalize your designs?
Check out Section 6.0 for a smooth start with our Munbyn Editor.
For cutting tips, check out Section 6.0 — it has everything you need.
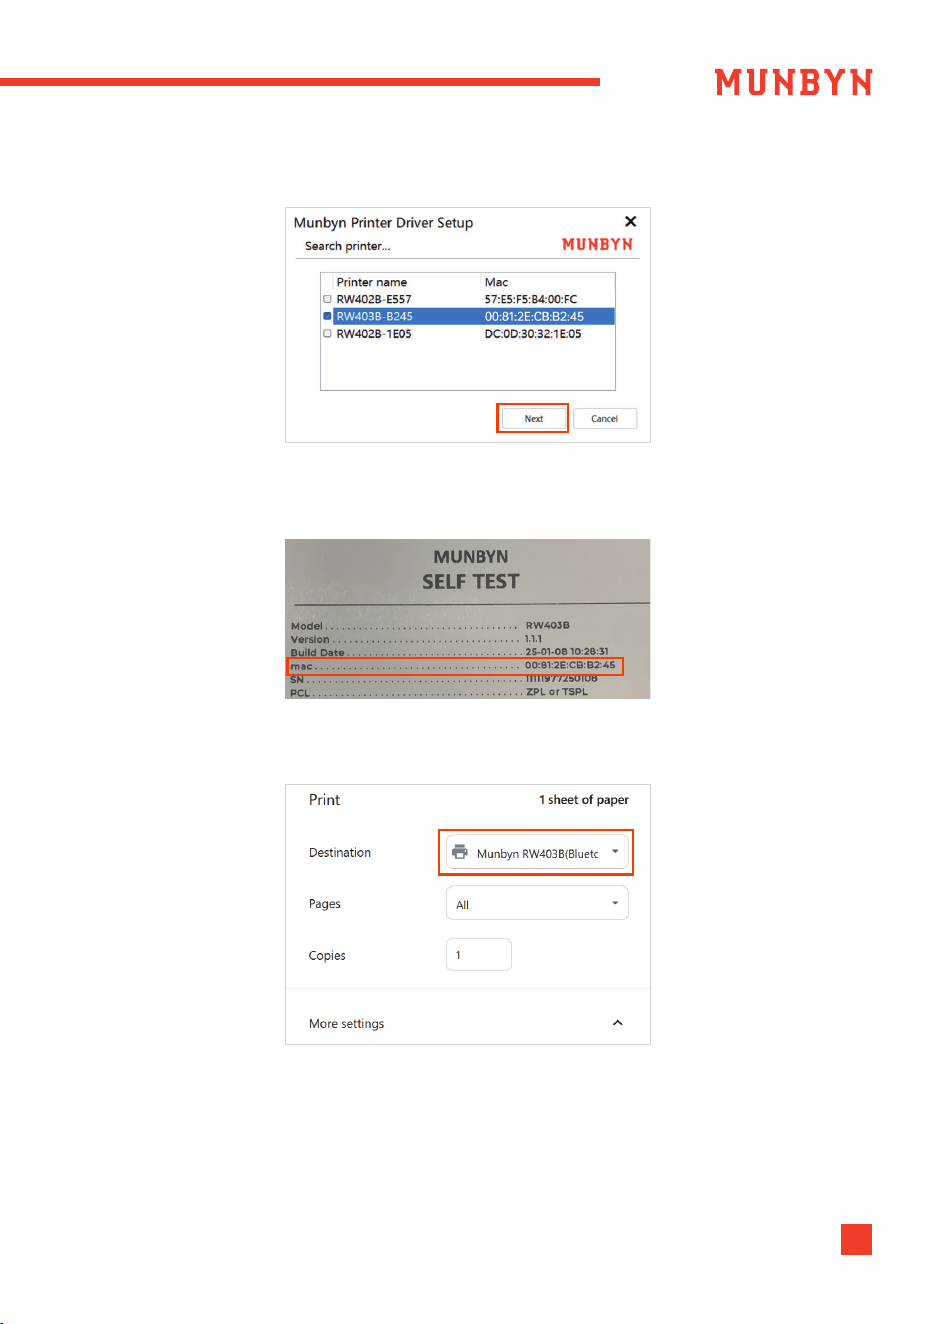
Note: If you have multiple devices, please press the Feed Button twice to print a
self-test page, then check the last four digits of the MAC address to connect to your
specific device.
7. Select the connection printer, and click "Next".
8. Open the file to be printed, click the Print button, and select Munbyn RW403B on
the Print preview page.
24-hour Munbyn after-sales service on working days17
Note: If the USB port fails to recognize the printer, please follow these steps:
● Unplug the USB cable from both the computer and the printer, then reinsert it,
ensuring the cable is securely connected.
● Restart the printer by shutting it down and then turning it back on.
For USB Connection:
Scan the QR code on the right for the video tutorial:
munbyn.biz/403bwindv
1. Connect the printer to your computer with the original Type-C cable.
2. Once connected, find the removable disk named "RW403B" on your computer,
open it, and run the driver file that matches your operating system to install.
3. Run the driver you downloaded.
4. Click "USB" -> "Next".
USB Setup Video
9.0. Pro Tips
10.0. FAQ
● Anytime you change your label, please adjust the slot to securely hold the paper in
place after placing it, and then run the automatic label identification.
● Press the feed button on the printer to skip a blank label.
● To run a self-test, double-click the feed button.
● Avoid poor quality labels as they can damage the printer.
● Regularly clean the printer head, especially after printing 500 sheets.
● If the paper is jammed and the red light flashes, please first clear the jammed
paper before running the Automatic label identification.
● Insert Munbyn into the same USB port on your computer every time. This will avoid
creating duplicate copies of the printer in your operating system.
For the RW403B FAQ file, please visit: munbyn.biz/403bfaq
Tips: For the Munbyn Editor latest FAQ information, we recommend you visit our
Help Center through this link: munbyn.biz/hpweb
QA Link
Scan the QR code for
the troubleshooting tips
munbyn.biz/403bclean
How to maintain the
print head?
Why is the printed
label not clear?
Why is the printer
printing blank labels?
Why doesn't my label
print correctly (Use 8*11
inches file for printing)?
munbyn.biz/403bpc
munbyn.biz/403bpb
munbyn.biz/403bpnc
24-hour Munbyn after-sales service on working days19
11.0. Specifications
Direct Thermal
203 dpi
150 mm/s
40 -110 mm (1.57-4.3 inches)
0.06 - 0.25 mm
24V / 2A
TPH 150 KM
Temperature: 0 to 45°C
Humidity: 10-90% (non-condensing)
Temperature: -10 to 50°C
Humidity: 10-80% (non-condensing)
Bluetooth / USB
1.4 kg / 3.06 lbs
186×91×92mm ( L*W*H)
Method
Resolution
Max Printing Speed
Paper Width
Paper Thickness
Power Adapter
Printing Life
Operating Environment
Storage Environment
Connection
Packaging Weight
Dimensions
12.0. Safety Notices
● The printer head can become very hot after printing labels. Do not touch the printer
head.
● Do not bend the power cord excessively or place objects on the cord.
● Do not use the printer if you find any irregularities as these could result in fire or
electrocution.
● Keep the printer out of reach of children.
● Use only approved accessories and do not try to disassemble, repair the unit by
yourself.
● Keep the printer away from water and other objects that could penetrate the components.
● Please unplug the printer when it is not in use for long periods.
● If you have problems connecting to the printer with the Munbyn Print App, you can
try to restart the App or reinstall the App. If your problem is still not resolved, please
contact us.

This device complies with Part 15 of the FCC Rules. Operation is subject to the following
two conditions:
1. This device may not cause harmful interference, and
2. This device must accept any interference received, including interference that may
cause undesired operation.
Warning: Changes or modifications not expressly approved by the party responsible for
compliance could void the user's authority to operate the equipment.
NOTE: This equipment has been tested and found to comply with the limits for a Class B
digital device, pursuant to Part 15 of the FCC Rules. These limits are designed to provide
reasonable protection against harmful interference in a residential installation.
This equipment generates uses and can radiate radio frequency energy and, if not
installed and used in accordance with the instructions, may cause harmful interference
to radio communications. However, there is no guarantee that interference will not occur
in a particular installation. If this equipment does cause harmful interference to radio or
television reception, which can be determined by turning the equipment off and on, the
user is encouraged to try to correct the interference by one or more of the following
measures:
-Reorient or relocate the receiving antenna.
-Increase the separation between the equipment and receiver.
-Connect the equipment into an outlet on a circuit different from that to which the
receiver is connected.
- Consult the dealer or an experienced radio/TV technician for help.
13.0. FCC Statement
FCC Radiation Exposure Statement
This equipment complies with FCC radiation exposure limits set forth for an uncon-
trolled environment. This equipment should be installed and operated with minimum
distance 20cm between the radiator & your body.

24-hour Munbyn after-sales service on working days21
ISED Statement
English: This device contains licence-exempt transmitter(s)/receiver(s) that comply
with Innovation, Science and Economic Development Canada’s licence-exempt
RSS(s). Operation is subject to the following two conditions:
(1) This device may not cause interference.
(2) This device must accept any interference, including interference that may cause
undesired operation of the device.
The digital apparatus complies with Canadian CAN ICES-3 (B)/NMB-3(B).
French: Cet appareil contient des émetteurs/récepteurs exempts de licence qui
sont conformes aux RSS exemptés de licence d'Innovation, Sciences et Développe-
ment économique Canada.
L'exploitation est soumise aux deux conditions suivantes :
(1) Cet appareil ne doit pas provoquer d'interférences.
(2) Cet appareil doit accepter toute interférence, y compris les interferences
susceptibles de provoquer un fonctionnement indésirable de l'appareil.
l'appareil numérique du ciem conforme canadien peut - 3 (b) / nmb - 3 (b).
This device meets the exemption from the routine evaluation limits in section 2.5 of
RSS 102 and compliance with RSS 102 RF exposure, users can obtain Canadian
Information on RF exposure and compliance.
cet appareil est conforme à l'exemption des limites d'évaluation courante dans la
section 2.5 du cnr - 102 et conformité avec rss 102 de l'exposition aux rf, les utilisa-
teurs peuvent obtenir des données canadiennes sur l'exposition aux champs rf et
la conformité.
This equipment complies with Canada radiation exposure limits set forth for an
uncontrolled environment.
Cet équipement est conforme aux limites d'exposition aux rayonnements du
Canada établies pour un environnement non contrôlé.
This equipment should be installed and operated with minimum distance 20cm
between the radiator & your body.
Cet équipement doit être installé et utilisé à une distance minimale de 20 cm entre
le radiateur et votre corps.
Model: RW403B


Email: [email protected]
WhatsApp: +86 17817881067
Phone:
Skype: munbyn
Support time:
Monday to Friday 24 hours
MUNBYN provides 24 months warranty and lifetime free service.
If you encounter any issues with the product, please contact the MUNBYN team to
promptly receive troubleshooting tips or a replacement
WhatsApp:
+86 17817881067
FB message
Munbynofficial