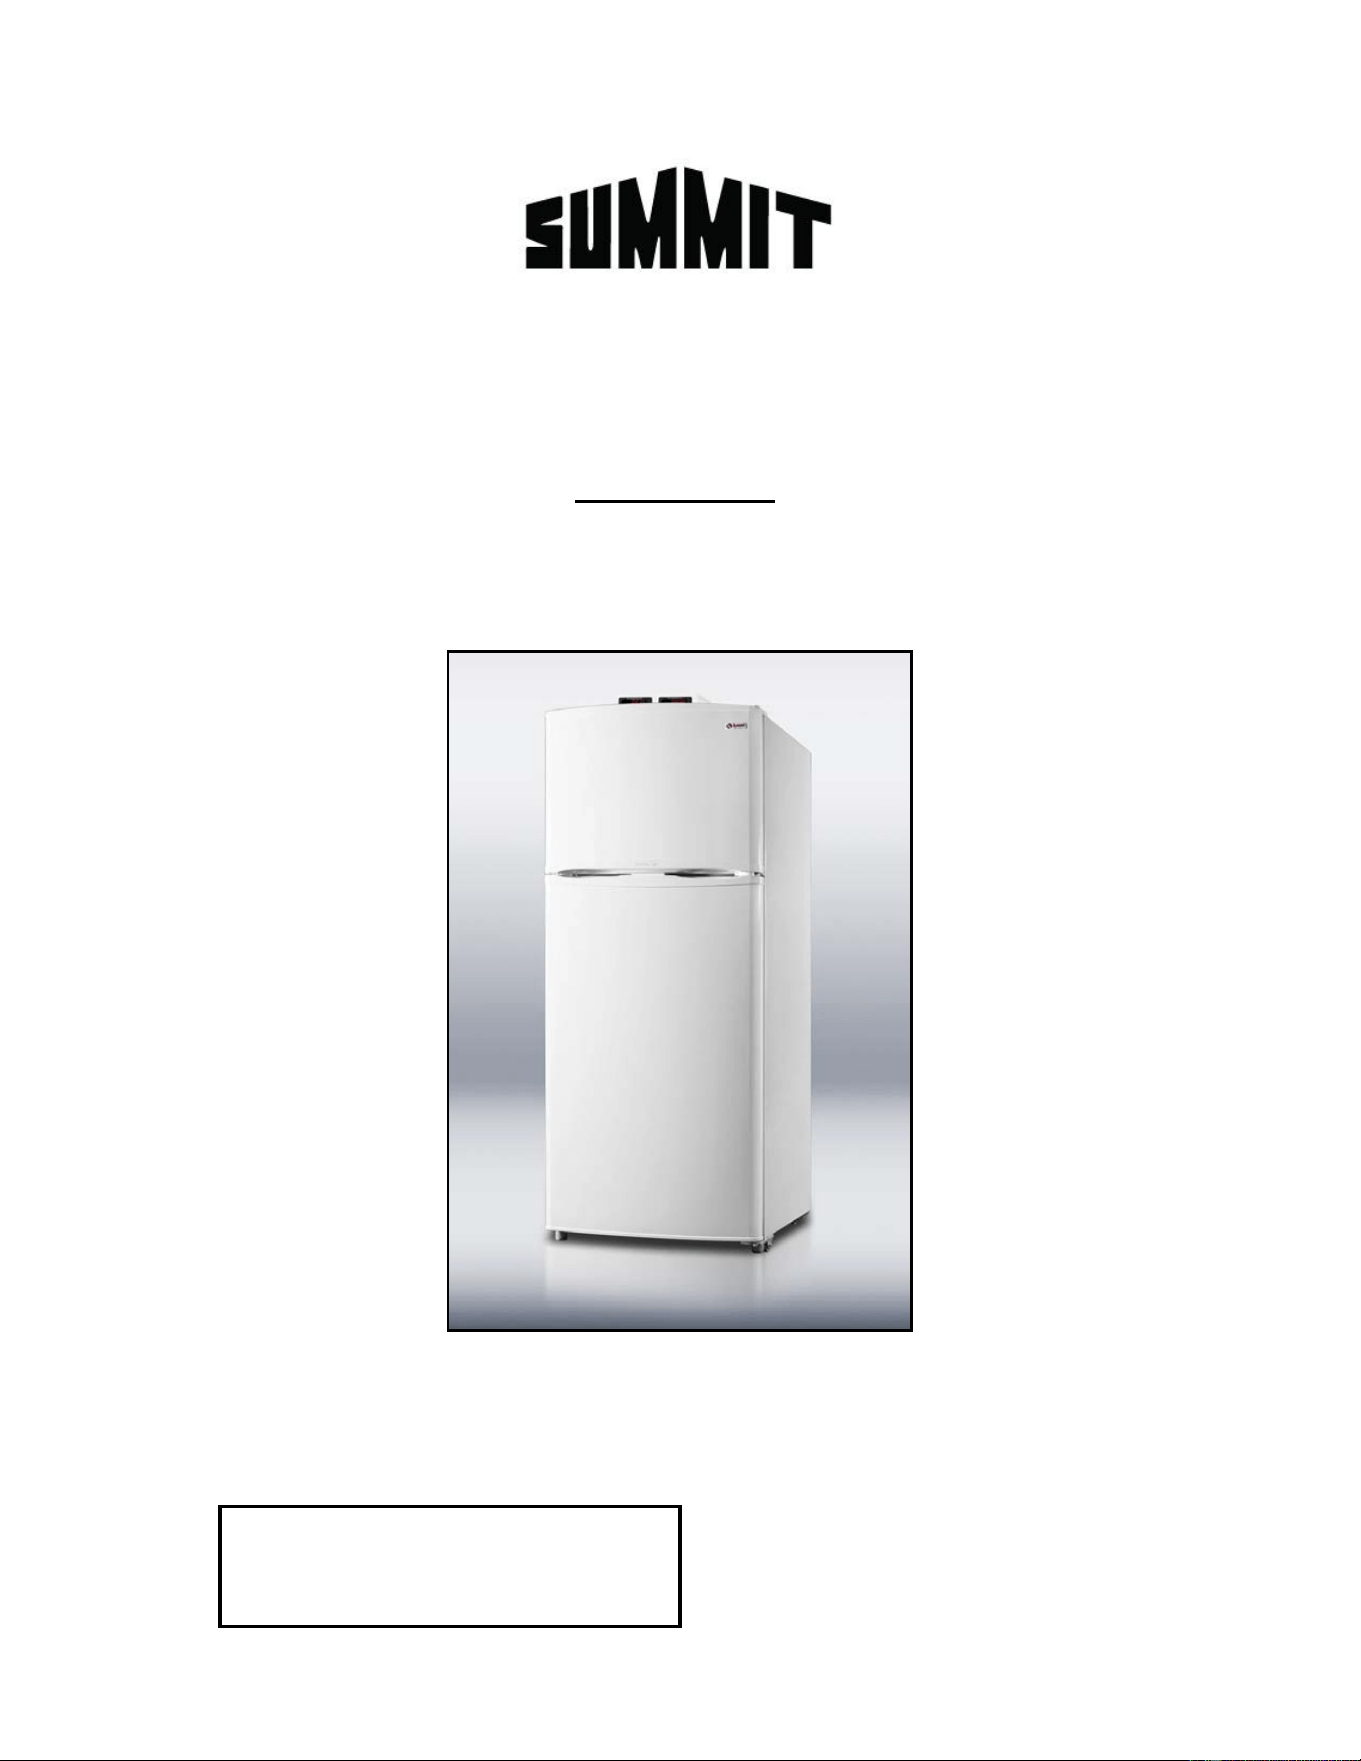
FROST-FREE MEDICAL REFRIGERATOR-FREEZERS
with DUAL DIGITAL THERMOSTATS
Owner's Manual
Read this guide before installing your appliance.
Write Serial No. (on back of unit) here:
_______________________________
Felix Storch, Inc.
Summit Appliance Division
770 Garrison Avenue
Bronx, New York 10474
www.summitappliance.com
Model Numbers
FF1418DT FF1418DTLLF2
FF1620DT FF1620DTLLF2
1
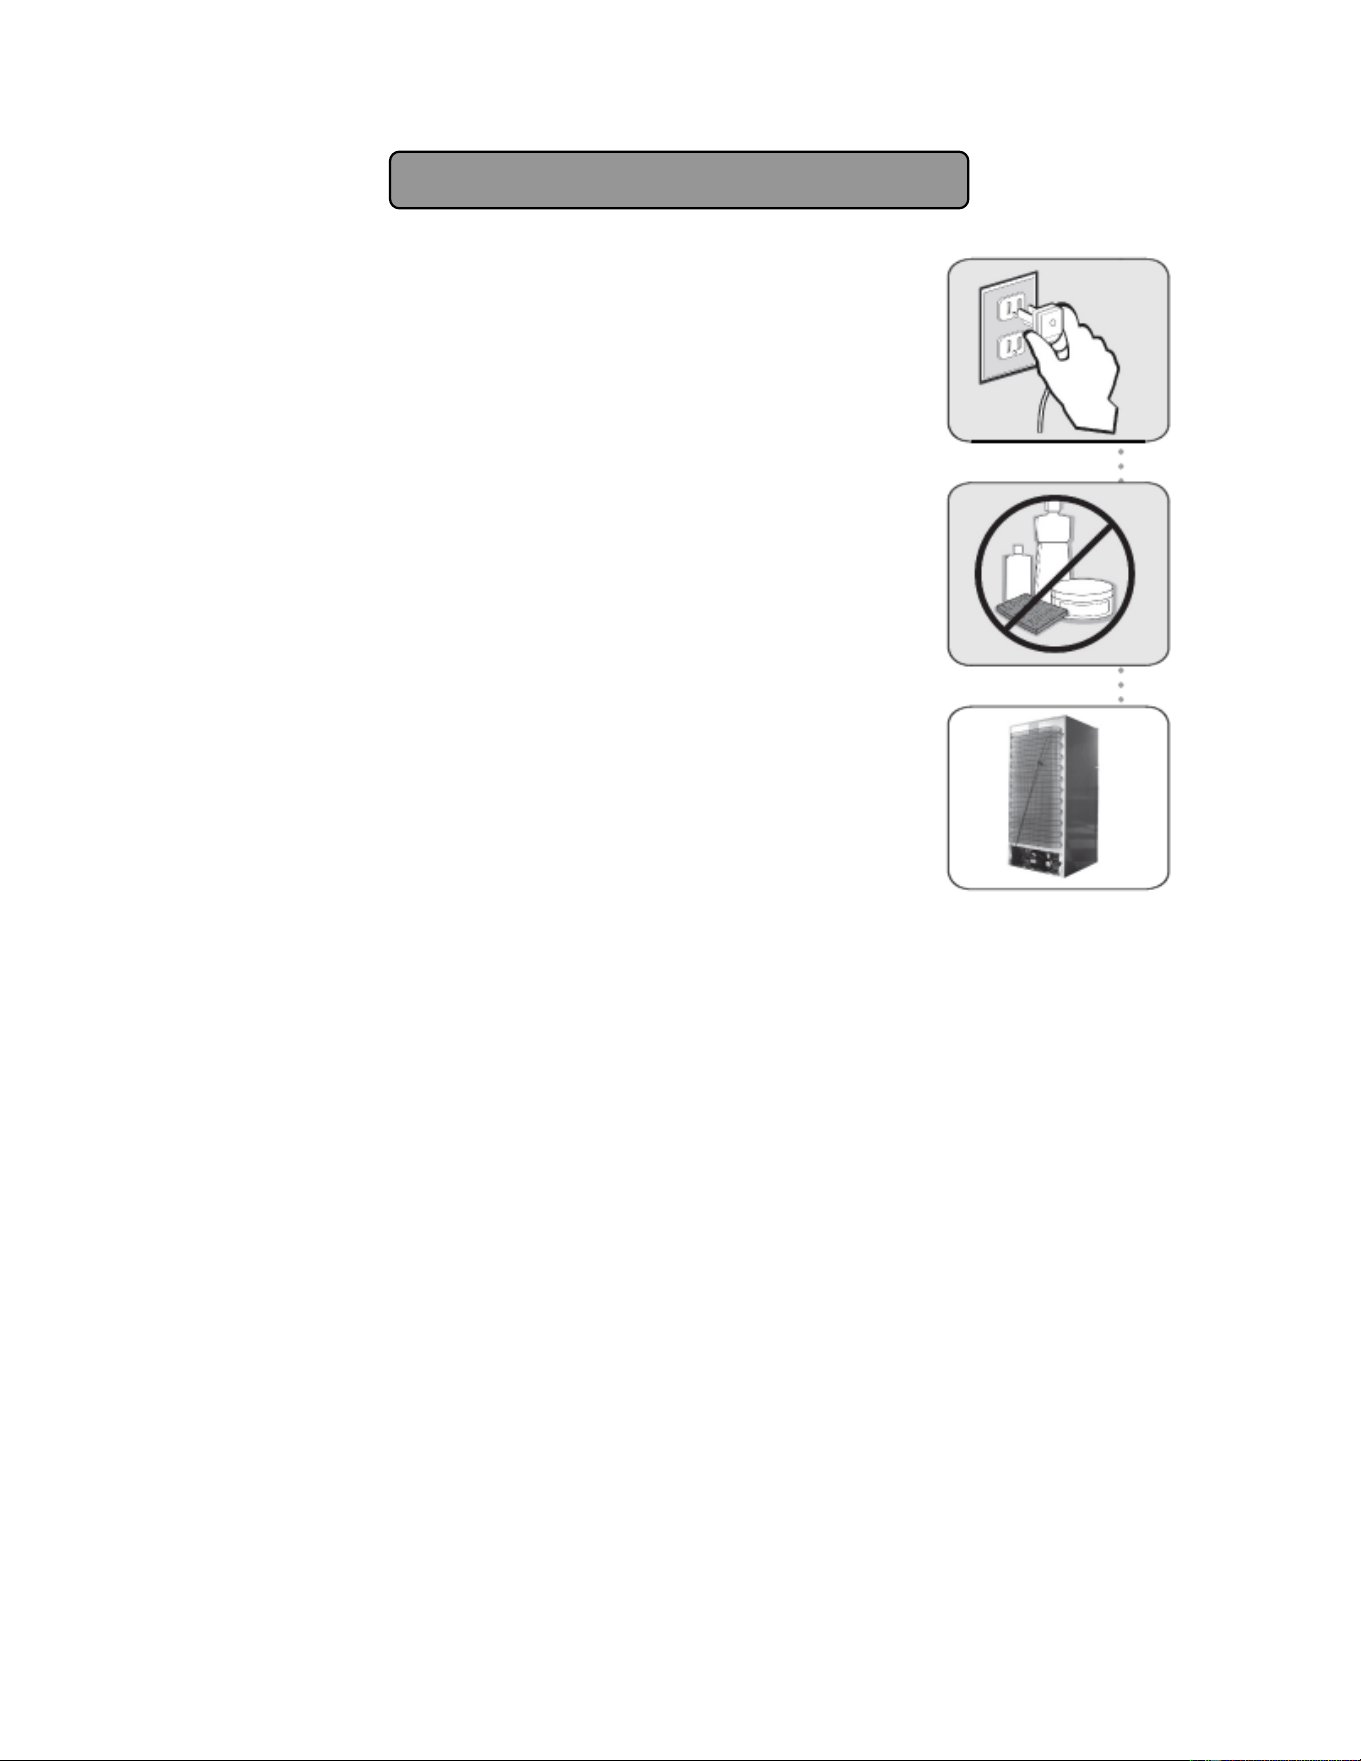
IMPORTANT SAFEGUARDS
• Your unit is not designed to operate in enclosed spaces. When placing your
unit, make sure you allow adequate airflow on all sides.
• Plug into a grounded 3-prong outlet, do not remove grounding prong, do not use an
adapter, and do not use an extension cord.
• Replace all panels before operating.
• It is recommended that a separate circuit serving only your appliance be provided.
Use receptacles that cannot be turned off by a switch or pull chain.
• Never clean appliance parts with flammable fluids. These fumes can create a fire
hazard or explosion. And do not store or use gasoline or other flammable vapors and
liquids in the vicinity of this or any other appliance. The fumes can create a fire
hazard or explosion.
• Before proceeding with cleaning and maintenance operations, make sure the power
line of the unit is disconnected.
• Do not connect or disconnect the electric plug when your hands are wet.
• Unplug the appliance or disconnect power before cleaning or servicing. Failure to do
so can result in electrical shock or death.
• Do not attempt to repair or replace any part of your appliance unless it is specifically
recommended in this manual. All other servicing should be referred to a qualified
technician.
Risk of child entrapment!
Child entrapment and suffocation are not problems of the past. Junked or abandoned
appliances are still dangerous, even if they will “just sit for a few days”.
Before discarding your old appliance:
Take off the doors.
Leave the shelves in place so that children may not easily climb inside.
• Use two or more people to move and install the appliance. Failure to do so can result
in back or other injury.
• To ensure proper ventilation for your appliance, the front of the unit must be
completely unobstructed. Choose a well-ventilated area with temperatures above
60°F (16°C) and below 90°F (32°C). This unit must be installed in an area protected
from the elements, such as wind, rain, water spray or drips.
•
The appliance should not be located next to ovens, grills or other sources of high heat.
• A standard electrical supply (115 V AC only, 60 Hz), properly grounded in
accordance with the National Electrical Code and local codes and ordinances, is
required.
• Do not kink or pinch the power supply cord of the appliance.
• The size of the fuse (or circuit breaker) should be 15 amperes.
• It is important that the appliance be leveled in order to work properly. You may need
to make several adjustments to level it.

2
• Never allow children to operate, play with or crawl inside the appliance.
• Do not use solvent-based cleaning agents or abrasives on the interior. These
cleaners may damage or discolor the interior.
• This appliance is intended for use in medical facilities. Use it only for its intended
purpose as described in this Owner's Manual.
• Keep fingers out of the “pinch point” areas. Clearances between the doors and
between the doors and cabinet are necessarily small. Be careful closing doors when
children are in the area.
Table of Contents
Important Safeguards ................................................................................... 1 - 2
Location of Parts ................................................................................................ 3
Before Connecting Your Appliance .................................................................. 4
General instructions
Placement
Leveling
Installing Your Appliance ............................................................................. 5 - 6
Electrical connection ............................................................................ 5 - 6
Warming of areas near the appliance ....................................................... 6
First connection ......................................................................................... 6
Operation ....................................................................................................... 6 - 7
To change the Temperature Set Point ...................................................... 6
Defrosting and air circulation ..................................................................... 7
To remove the drawer ............................................................................... 7
Door bins ................................................................................................... 7
Shelves ..................................................................................................... 7
Tips for Using the Refrigerator-Freezer ........................................................... 8
Cleaning Your Appliance .................................................................................. 9
General Information .................................................................................. 10 - 11
Trips and absences ................................................................................. 10
Moving ..................................................................................................... 10
Problems with the electrical supply ......................................................... 10
To replace the light bulb .......................................................................... 10
Normal operating sounds ................................................................. 10 - 11
Safety Reminders ............................................................................................. 11
Troubleshooting ........................................................................................ 12 - 13
Limited Warranty .............................................................................................. 15
3
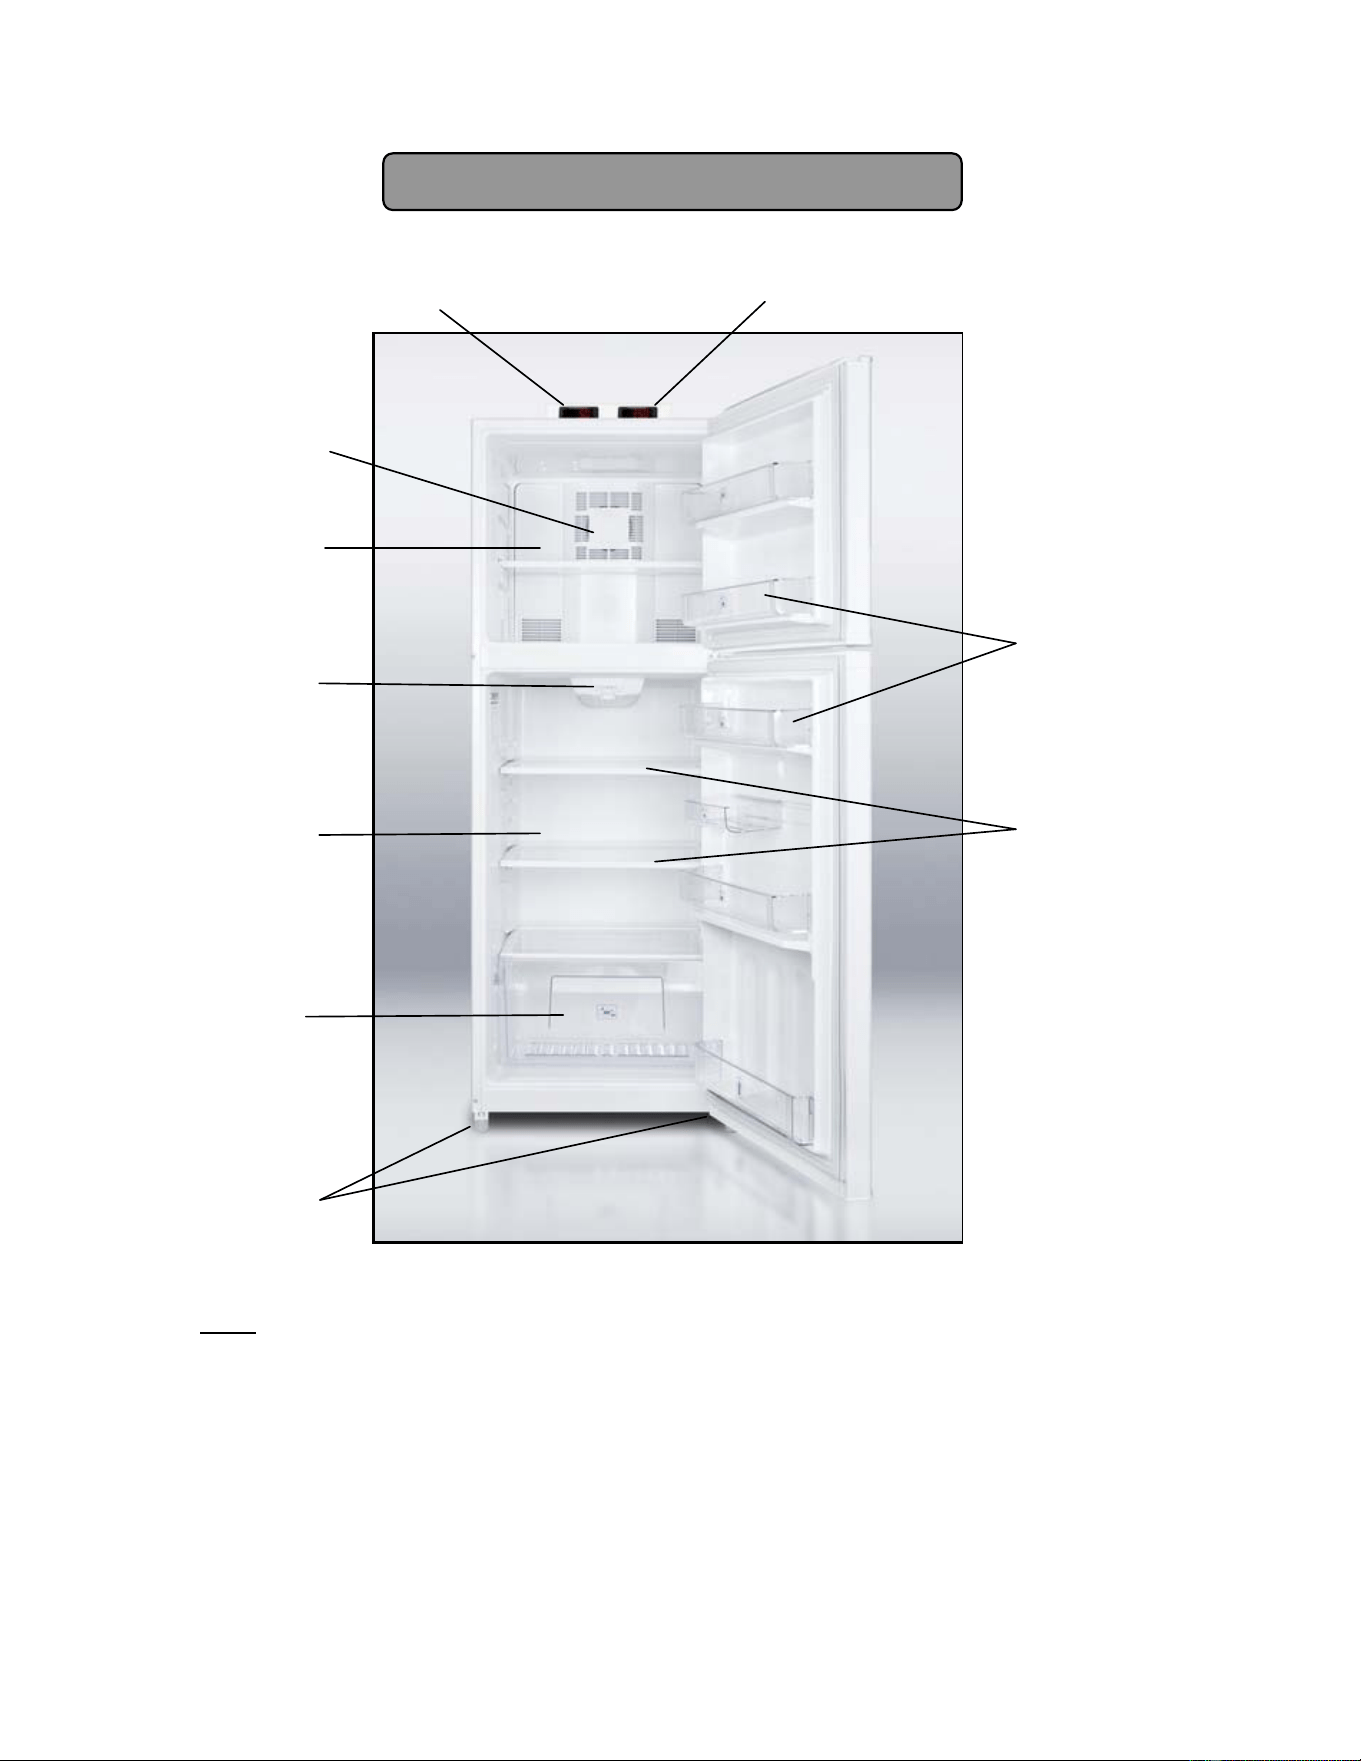
Location of Parts
Note: Models with “LLF2” in the model number have a combination lock on the
front which secures both the refrigerator and freezer sections. Two keys are
included to override the combination.
Digital thermostat
(refrigerator)
Door storage
bins
Digital thermostat
(freezer)
Refrigerator
compartment
Freezer
compartment
Interior light
Glass shelves
Cooling system
Leveling legs
Drawer(s)
4
Before Connecting Your Appliance
General instructions:
Remove the base, packaging and accessories.
Remove the adhesive tape residue with a cloth soaked in a solution of water and
a mild liquid soap.
Choose the location for the appliance. The area should be kept clean and dry to
avoid rust.
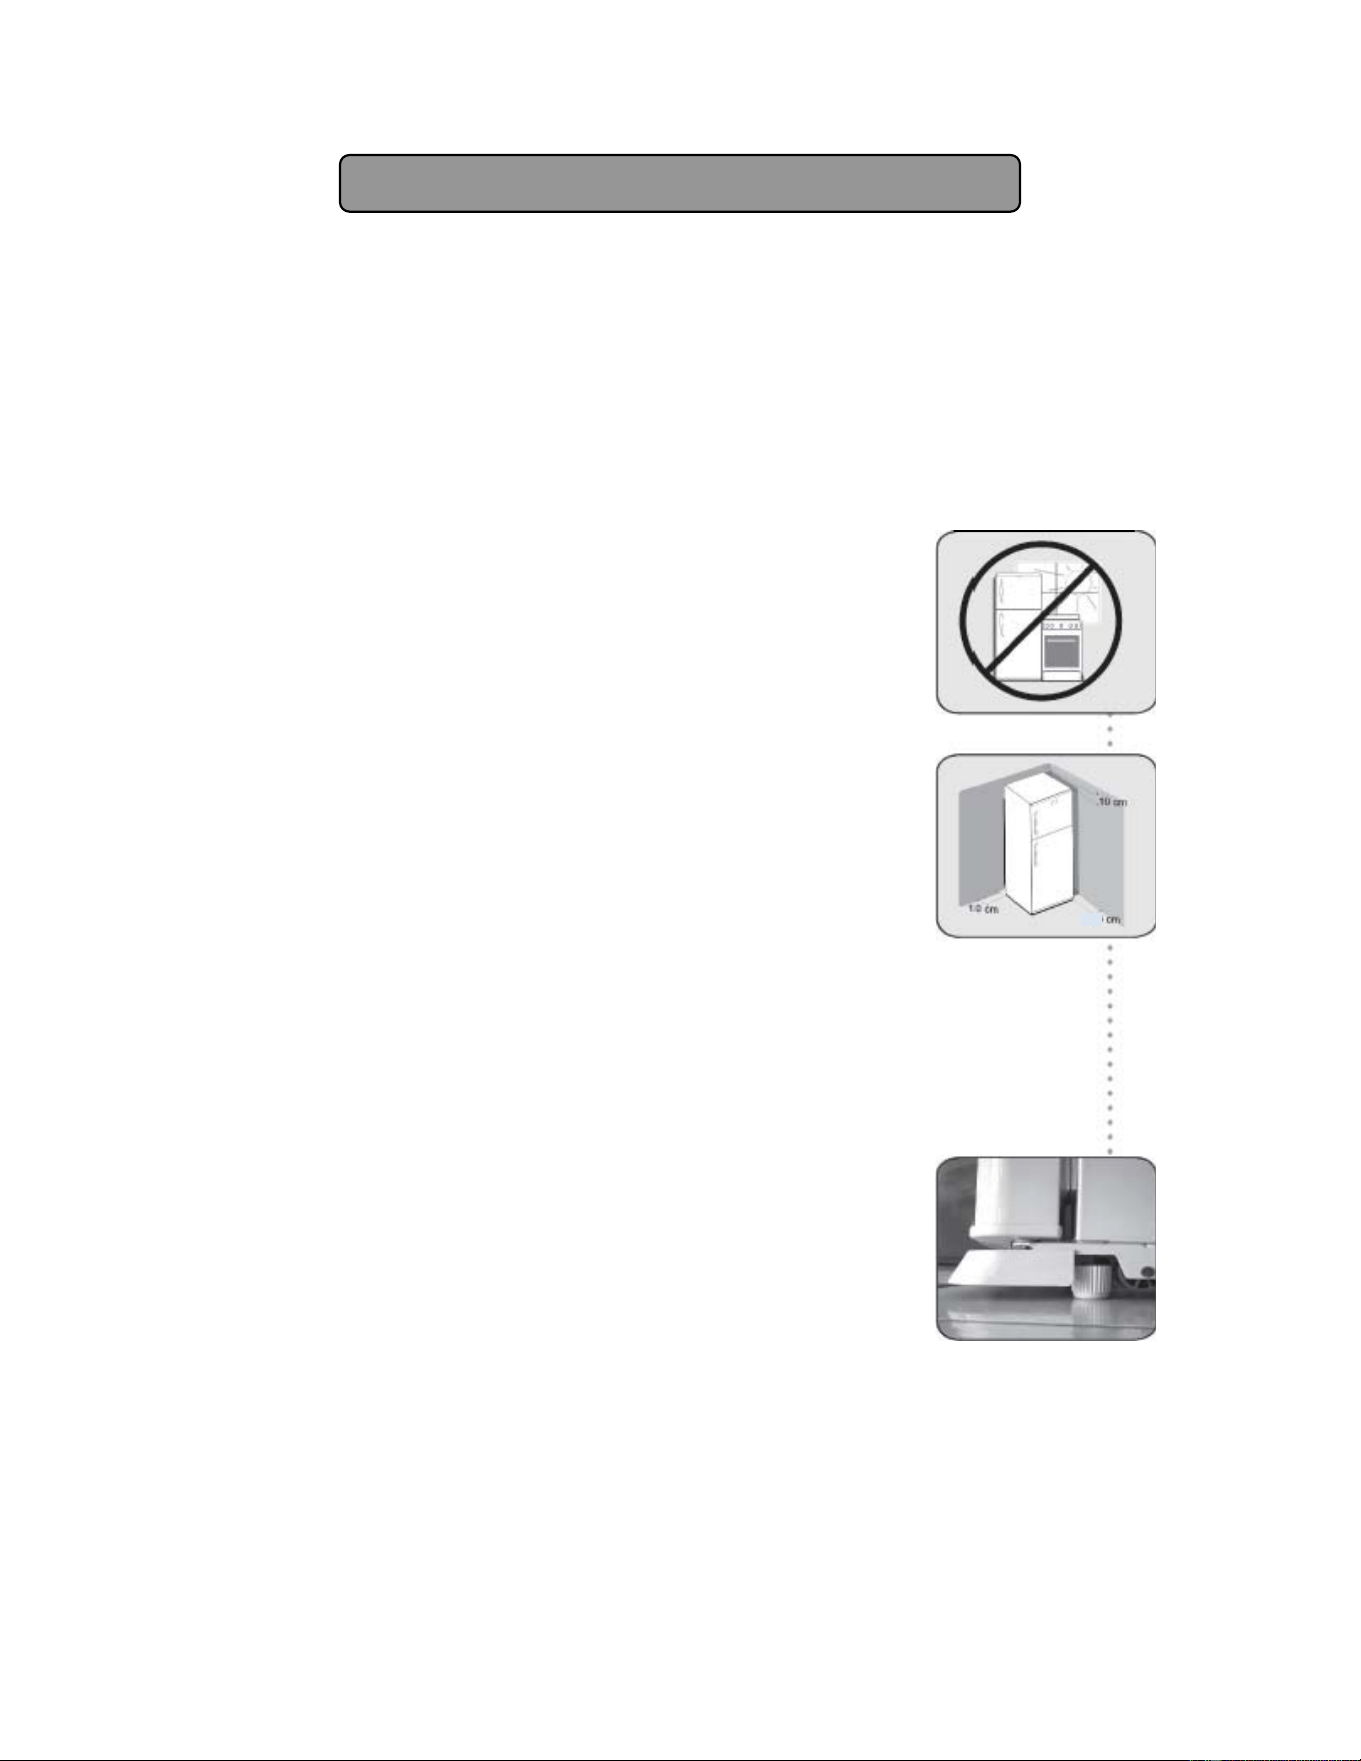
Placement:
Allow the following minimum spacing to ensure adequate air
circulation: 4” (10 cm) on each side, 4" at the back and 4" on
top. Be sure that airflow under the appliance is not blocked.
Do not install the appliance near heat sources like stoves
or radiators or in direct sunlight, as this will cause it to
overwork and be less efficient, thereby increasing its
consumption of electrical energy.
Do not lean the appliance against a wall. By complying
with this, you will help ensure the correct positioning of the
product, preventing the appliance from coming directly
into contact with walls or furniture and thereby avoiding
disagreeable noise and allowing for adequate air circulation.
Leveling:
Use the two leveling screws to level the appliance. Insert
and adjust them so that they rest firmly on the floor.
The front of the appliance should be a little higher than the
rear, which should lean slightly backwards. This facilitates
the automatic closing of the doors and helps maintain the
temperature inside the unit.
10
5
Installing Your Appliance
Before inserting the plug into the AC outlet, clean the interior of the appliance
using a cloth or soft sponge and mild soap, or a solution of bicarbonate of soda
and water.
Electrical connection:
For proper operation of this appliance, a 120V AC 60Hz power
source is required. Ideally your set-up should be equipped with
a main switch and separate balanced circuit, protected by fuses
and/or a circuit breaker with a maximum of 15 to 20 amps.
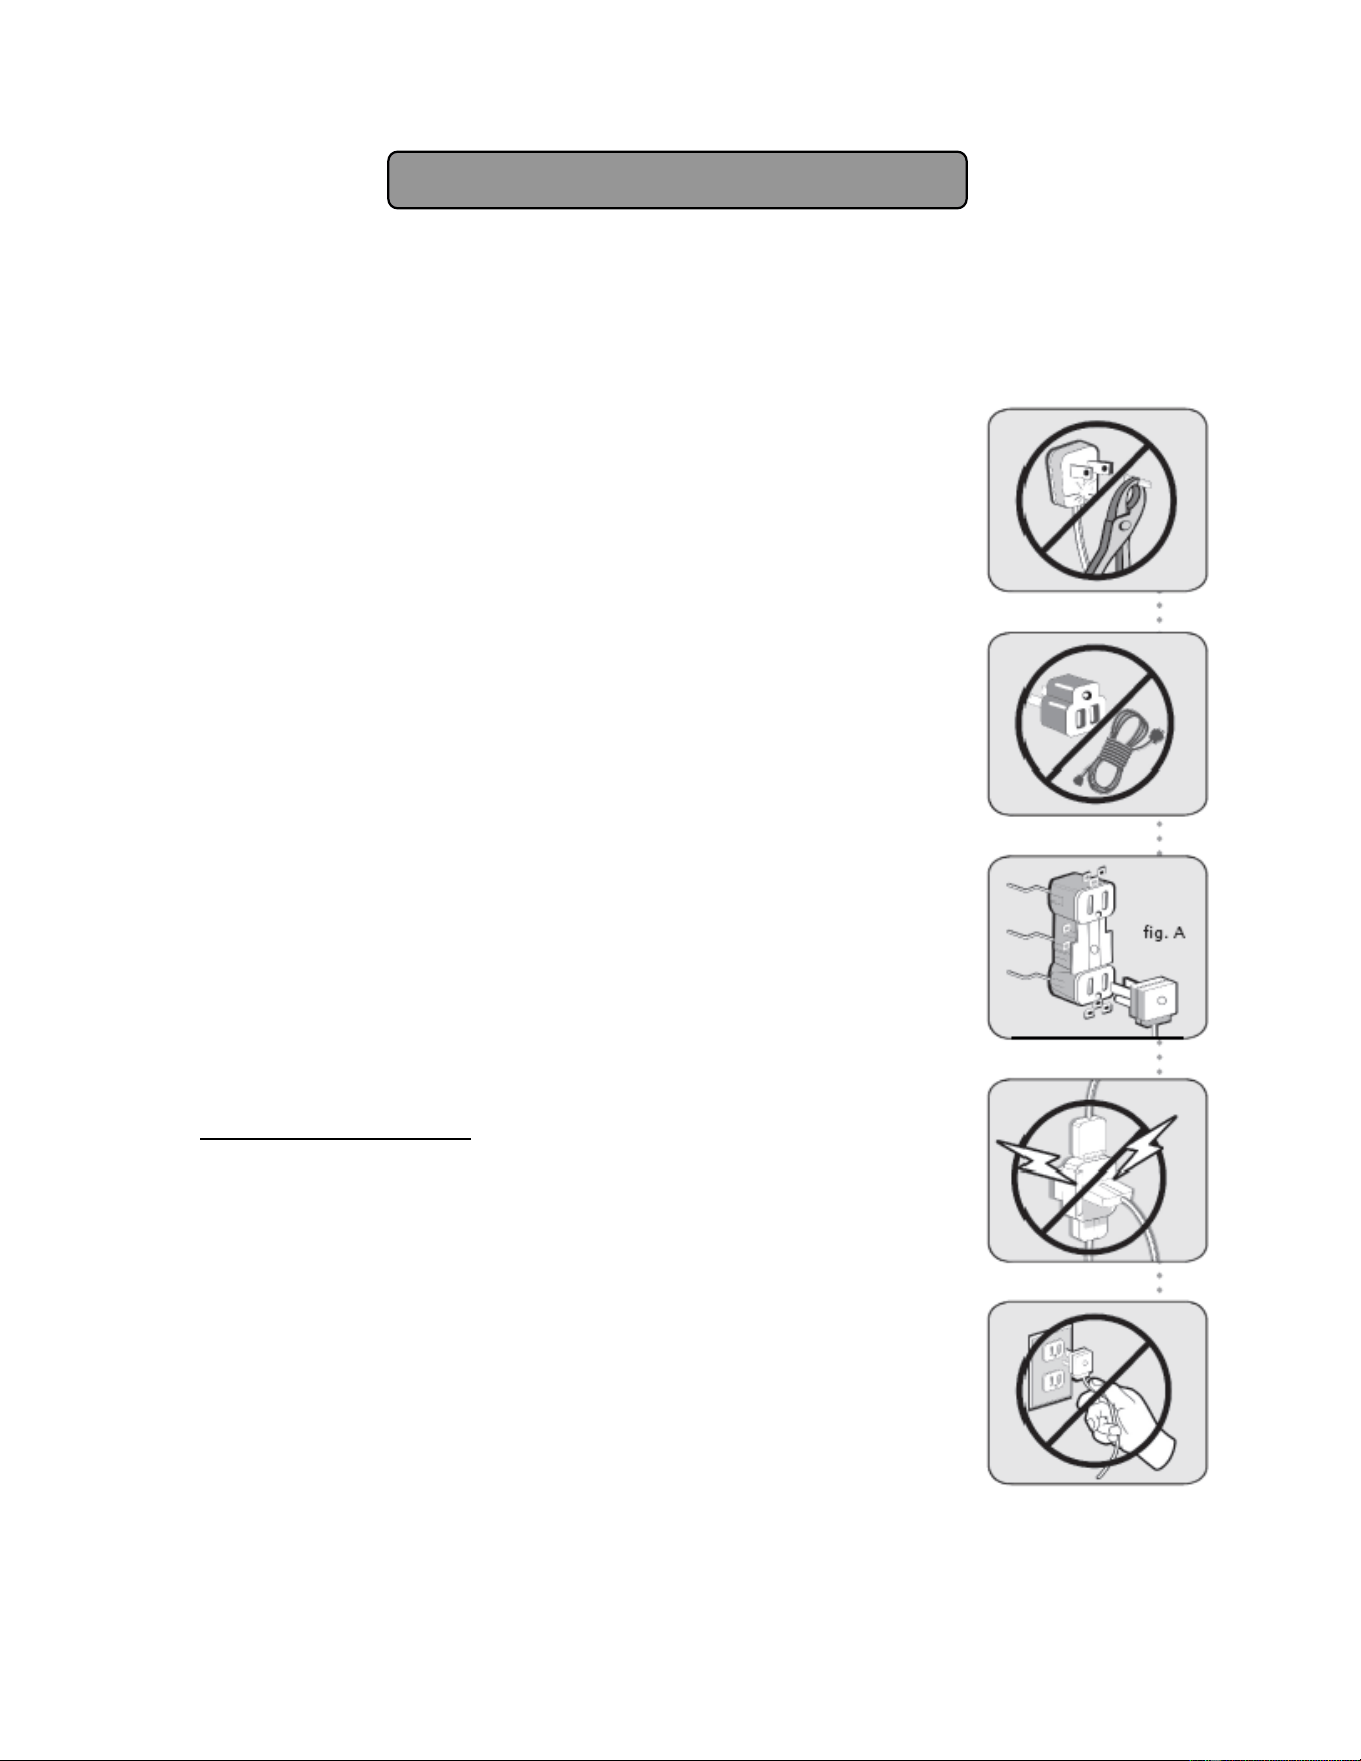
Your appliance comes equipped with an AC power cord with
integrated grounding. Under no circumstances should the
grounding be removed to connect an adapter plug, nor should
the grounding be cut and/or replaced by a 2-prong plug.
For your safety when installing the appliance, refer to Figure A.
If your electrical installation is not equipped with this kind of AC
outlet, obtain one and have it installed by a qualified electrician.
Any personal accidents and/or material damage caused by the
product resulting from failure to do this will be the full responsi-
bility of the client.
Read the instructions printed in red on the
label attached to the power cable.
Connect your appliance to the closest AC outlet. Avoid using
an extension cord. If you must use an extension cord, consult a
qualified electrician so that he can advise you on the type of
cord that can be used for maximum safety.
Use of extension cords: Because of potential hazards under
certain conditions, we strongly recommend against the use of
an extension cord. However, if you still choose to use an
extension cord, it is absolutely necessary that it be a UL-listed,
3-wire grounding type plug and outlet and that the electrical
rating of the cord be 15 amperes (minimum) and 120 volts.
Do not connect another electrical appliance to the appliance’s
AC outlet while the appliance is in use. By doing this you will
avoid power surges and the overheating of your appliance.
To disconnect your appliance, grip the plug firmly and pull
straight out from the AC outlet. Never pull on the electrical cord.

6
Ask a qualified electrician to inspect the wall outlet and the electrical circuit, to
ensure that the circuit is properly grounded.
If the power cord is damaged, it must be replaced by an electrician from an
authorized service center in order to avoid any risk of accident.
Warming of areas near the appliance:
Your appliance comes equipped with a device that inhibits condensation. The
heating of some external zones of your appliance is normal. This acts to prevent
condensation of drops of water on the exterior of the appliance. However, in
conditions where there is high atmospheric temperature and humidity, a light film
of condensation could form. Dry this with a soft cloth.
First connection:
1. Once your appliance is in place, wait 4 to 6 hours before connecting it so that
the gas and compressor oil have a chance to settle.
2. Connect the plug to the wall AC outlet.
3. Allow it to operate empty and with the doors closed for 4 hours before loading
with items to be stored.
4. Avoid opening the door so that the unit can reach the desired temperature.
5. If you want to relocate your appliance, disconnect it before moving.
6. Once it is in its new location, repeat the previous steps.
Operation
This refrigerator/freezer comes equipped with two digital thermostats which are
set on top of the unit (see page 3). The thermostat on the left controls the
temperature of the freezer compartment and the one on the right separately
controls the temperature of the refrigerator compartment.
The operating temperatures of the freezer and refrigerator are pre-set, but you
may want to change the set temperature for either the freezer or the refrigerator
or both. Each thermostat normally displays the current temperature inside its
corresponding compartment.
To change the Temperature SET POINT:
Press the SET key, then push the UP or DOWN arrow until the desired setting is
reached.
Note: The minimum and maximum range of each thermostat is pre-set and
locked by us, so it cannot easily be accidentally moved between freezer
and refrigerator temperatures. To reset this range lock, either call us at
1-800-932-4267 or find information under Troubleshooting on our website:
www.summitappliance.com/support
7
Defrosting and air circulation:
It is not necessary for you to defrost the appliance since it defrosts automatically.
The cooling system guarantees the even circulation of cold air and its distribution
to all parts of your appliance, thus maintaining the optimum temperature
throughout.
It is important that the air vents are never obstructed.
To remove the drawer:
You can remove the drawer at the bottom of the refrigerator compartment by
lifting it slightly to remove it from its tracks and then pulling it out.
If you want to remove the drawer and its cover together, open the drawer slightly,
grasp the cover, lift and pull out.
Door bins:
The bins on the doors can be used to store various items which you want to keep
within easy reach.
Note: Do not store temperature-sensitive items in the door bins or in the drawer
at the bottom of the refrigerator compartment.
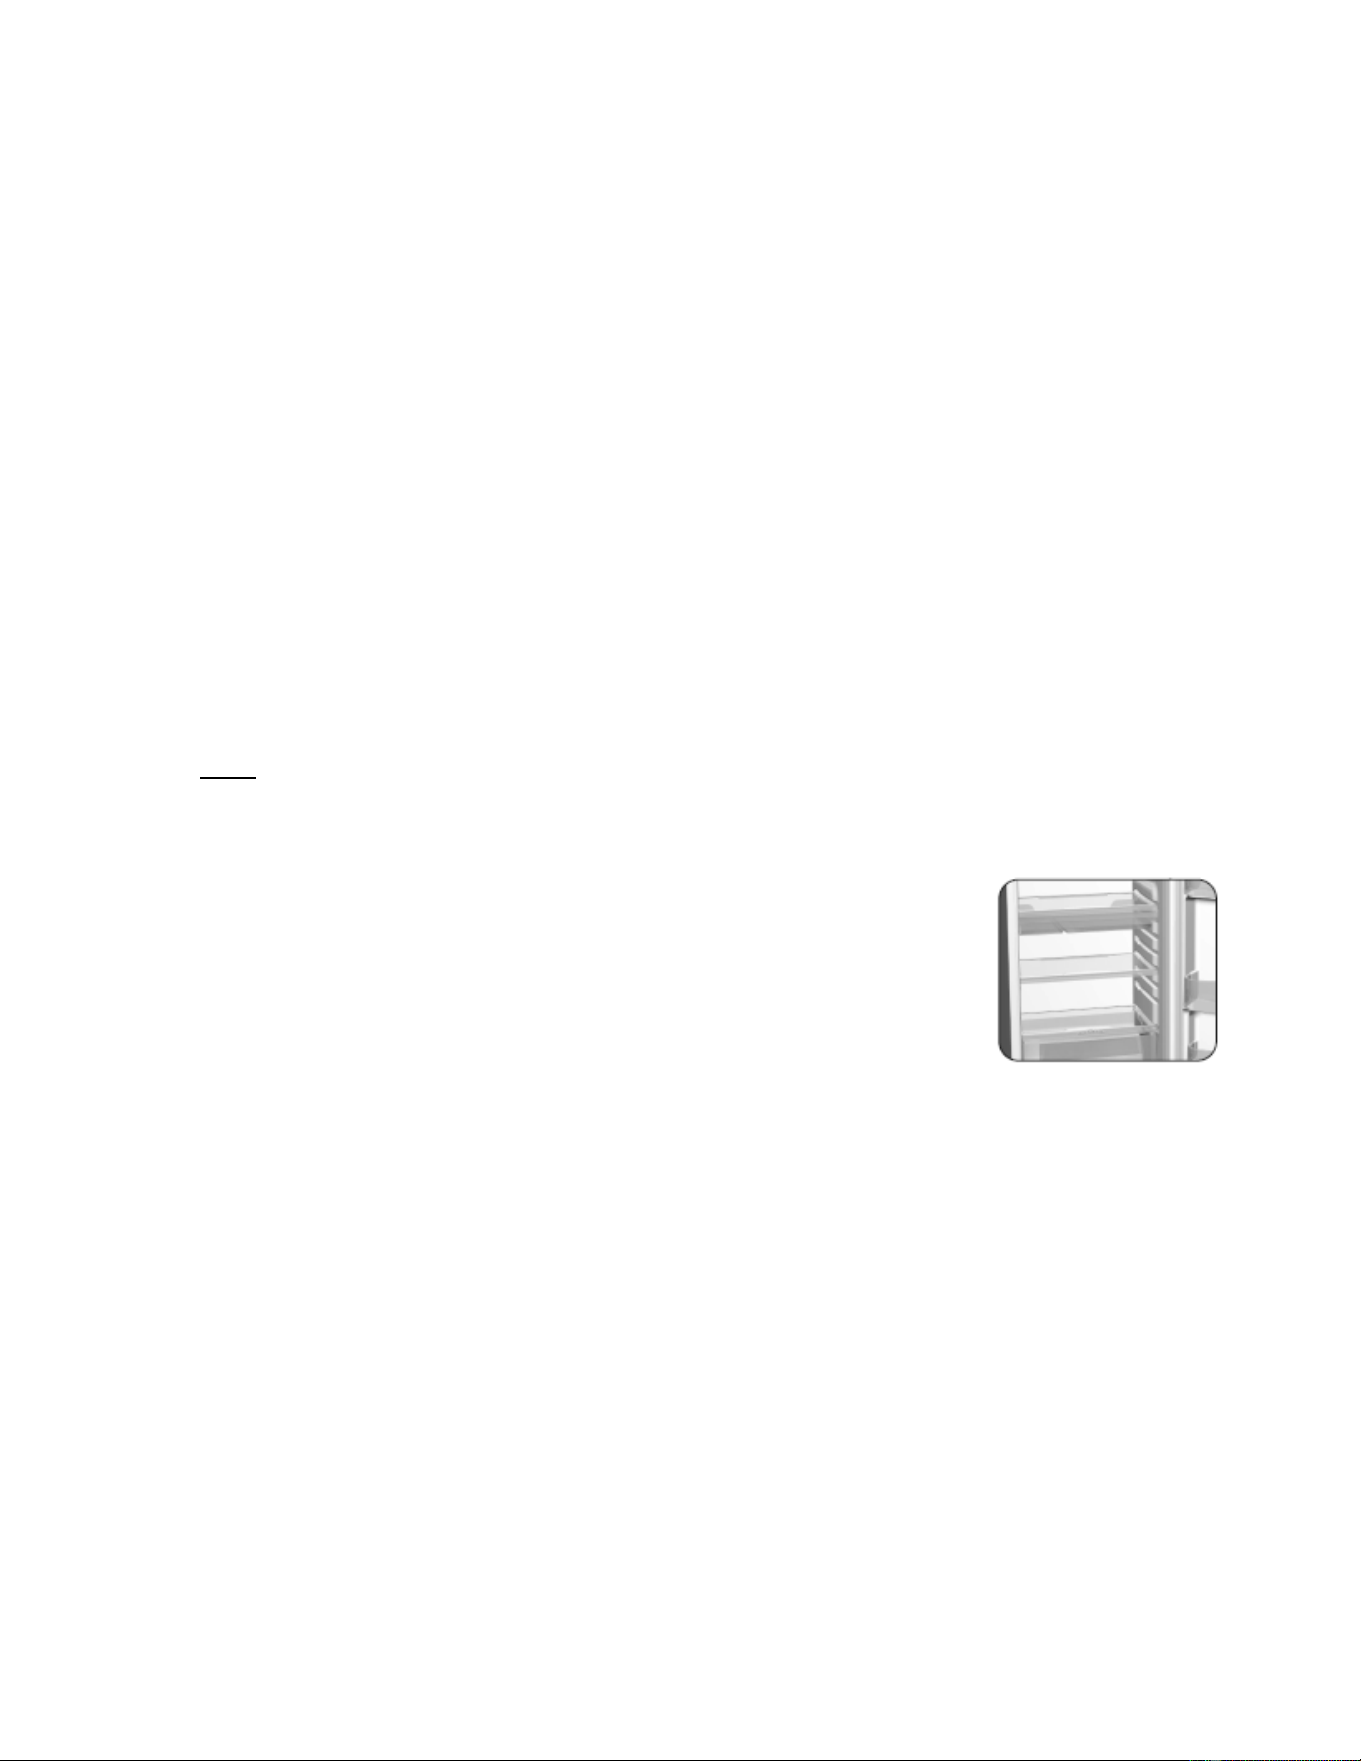
Shelves:
The shelves are multi-positional.
If you wish to move a shelf:
1. Remove all objects placed on it.
2. Place both hands on the front edge of the shelf with fingertips
underneath, and lift while gently pulling the shelf toward you.
Be sure to have a firm grasp.
3. To replace the shelf in another location, hold it as before and maneuver it
over the tracks toward the back until you feel it snap into position.

8
Tips for Using the Refrigerator-Freezer
• We recommend storing items in containers with lids or wrapped in airtight
materials such as aluminum foil, plastic containers or plastic wrap.
• It is also a good idea to place ice cubes and items that you would like to
freeze rapidly on the freezer shelf.
• Do not store hot or warm materials in the refrigerator or freezer
compartments. You should wait until they have cooled down to room
temperature.
• Only open the doors for the time necessary to store or remove items. By
doing this you will reduce energy consumption and improve the performance
of your appliance.
• It may be difficult to open the door again after having opened and closed it.
This is normal due to the vacuum that forms in the interior of the compartment
caused by the exchange of air at different temperatures. If this happens, wait
10 to 15 seconds before trying again and the doors should open easily.
• Always take note of the expiration date on frozen products.
• Liquids increase in volume when frozen. For this reason, do not fill containers
up to the brim with liquids.
• Do not store closed glass containers containing liquids in the freezer. The
breakage of glass containers could badly damage the freezer.
9
Cleaning Your Appliance
Always disconnect the plug from the outlet before cleaning or
before starting a maintenance procedure.
Never use toxic products (ammonia, bleach, etc.), abrasive
substances (pastes) or fibers as they can damage the
appliance.
Use a soft sponge or a cloth that has been soaked in a
solution of mild soap in water. Rinse and dry well with a
clean, dry cloth. You can also use a solution of one spoon of
bicarbonate of soda and two quarts of warm water to clean
the interior.
Do not use fibers or sharp or pointed objects which can
scratch your appliance or the interior shelves.
To clean the condenser coils (on the models that have
them), use a brush, cloth or sponge to eliminate accumulated
dust. Do this at least every six months.
To periodically clean the freezer:
1. Disconnect the plug from the wall.
2. During the cleaning, do not let accumulated liquid filter into the interior of the
refrigerator as this could damage the unit. Dry all surfaces well.
3. After cleaning, reconnect the unit to the electric socket.

10
General Information
Trips and absences:
For prolonged absences, disconnect the plug from the wall outlet.
Leave your appliance empty and clean. This includes the ice trays.
Leave the door ajar, placing an object behind it to prevent it from closing. This
facilitates air circulation and discourages the formation of mold and odors.
During short absences, your appliance can stay connected. But be aware that
there is always the possibility of power outages while you are away.
Moving:
If you need to place the appliance in a horizontal position in
order to transport it, place it only on its left side (when viewed
from the front).
Before changing your appliance's location, screw the leveling
legs in as far as they will go.
Problems with the electrical supply:
The majority of power outages are corrected in a few hours. The interior
temperature of your appliance will not be affected for 4 hours. If the electrical
failure persists for more that 6 hours, we suggest that you place ice bags in both
compartments to help preserve the contents.
To replace the light bulb:
1. Disconnect power to the appliance.
2. Lift the light shield.
3. Remove the old bulb and replace with a new one of the same size, shape and
power rating as the original bulb.
4. Reconnect power.
Normal operating sounds:
Some sounds are normal when your appliance is operating. The following list
describes the different sounds that are characteristic of its functioning.
Crunching
Crunching is heard when ice breaks. This is the same noise that is heard when
ice trays are removed from the freezer and exposed to room temperature.

11
Compressor hum
This is a normal sound caused by the running of the motor. It means the
compressor is functioning.
Gas expansion
The expansion of gas is characteristic of a refrigeration system. It is similar to
the noise heard when filling a gas cylinder.
Defrosting
This sounds like running water. It occurs when the refrigerator is going through
the defrosting process.
Gurgling sound
This is a normal part of the refrigeration cycle caused by the refrigerant flowing in
your appliance.
Safety Reminders
• Do not touch the interior walls of the freezer with wet hands.
• Do not allow children to hang from the doors and/or play near the appliance
when the door is open as they could get injured or trapped inside.
• When changing light bulbs, disconnect the appliance from the power supply.
Failure to do so could result in personal injury.
12
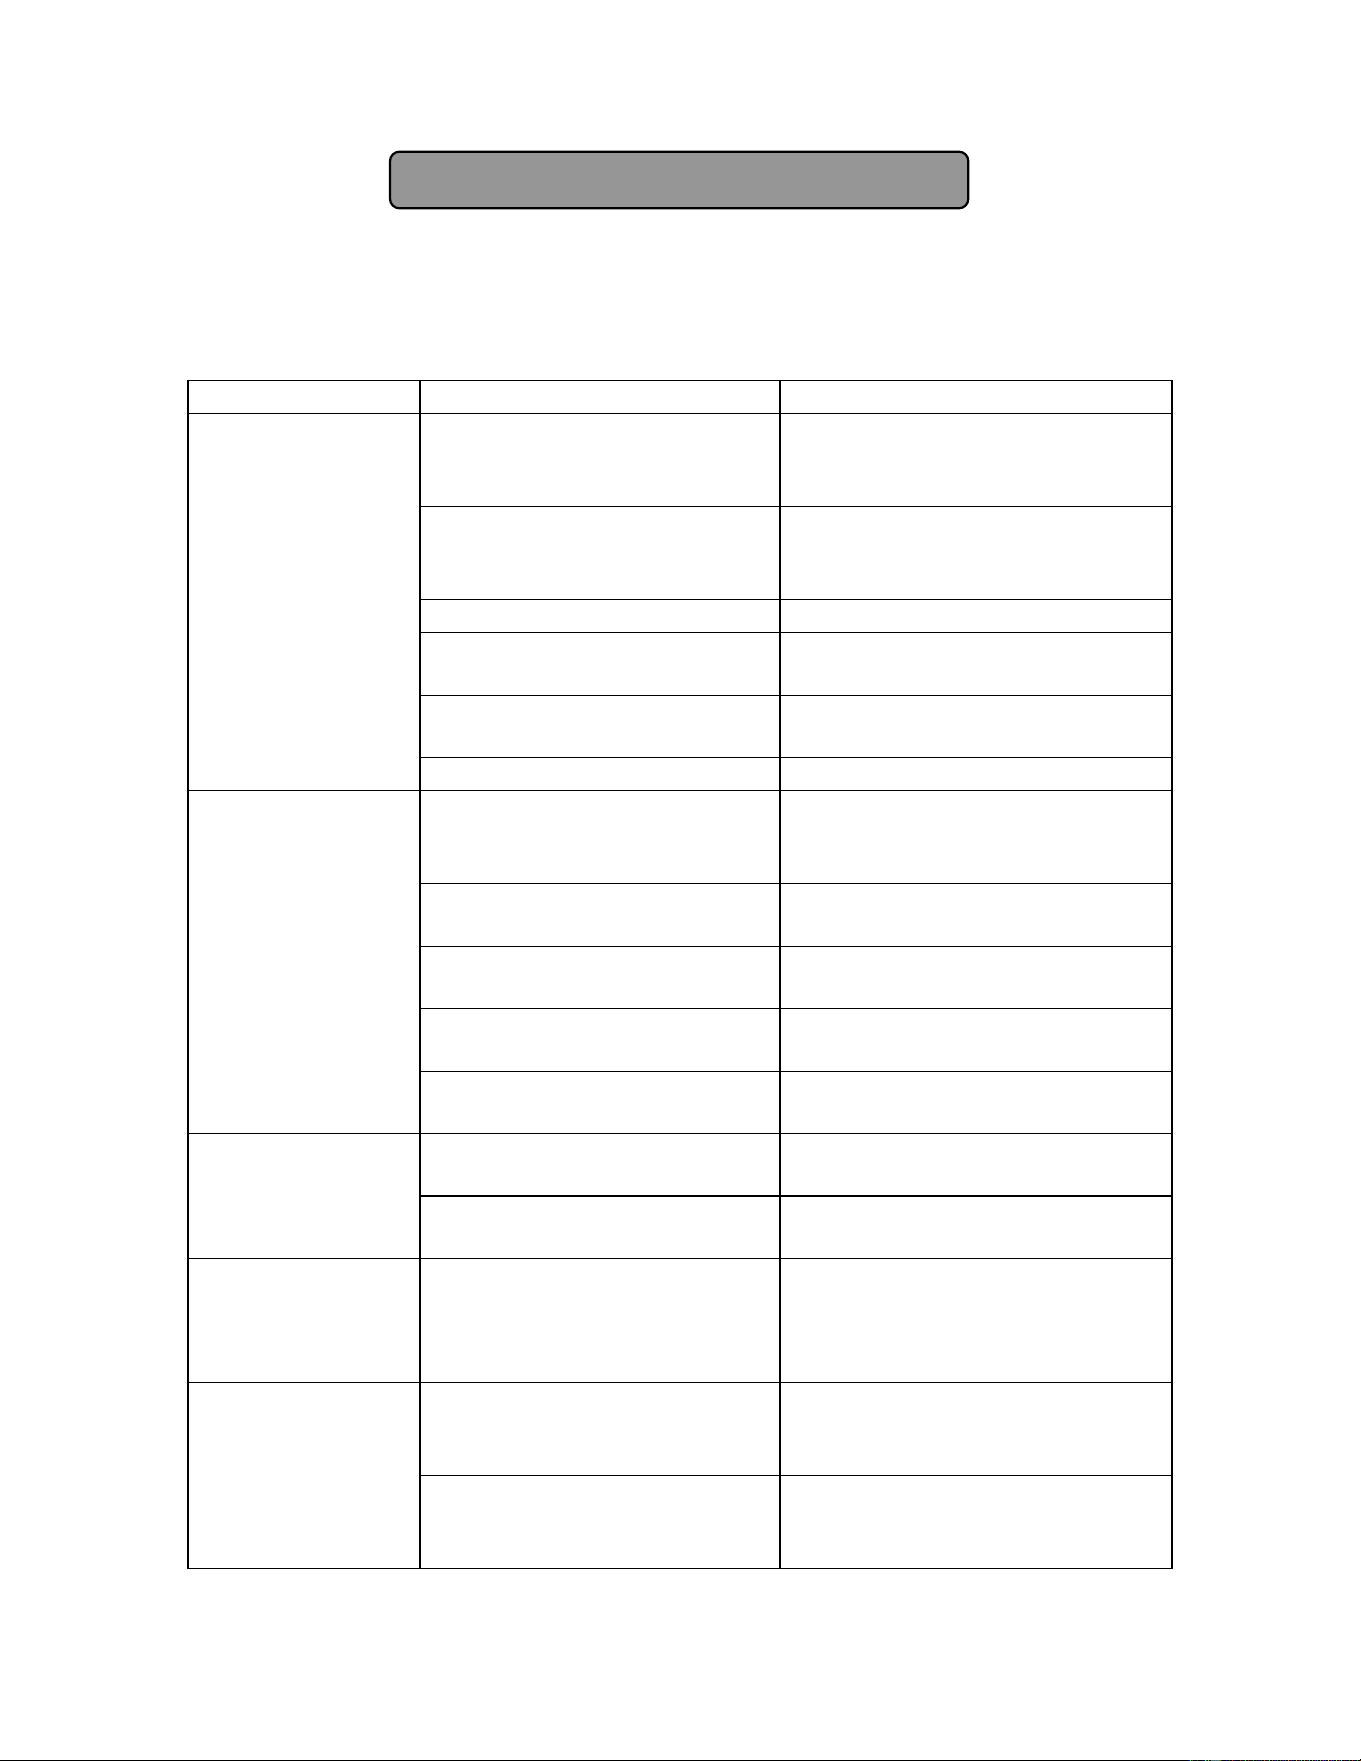
Troubleshooting
If there is a problem with your appliance, before calling an authorized service
center, carry out an investigation by consulting the following table. If after
performing these tests you are still in doubt, you can contact our service center at
800-932-4267 and it will be our pleasure to assist you.
Problem
Probable Cause
Possible Solution
Appliance does
not run.
There is no current.
Check fuses in electric system.
Make sure plug is tightly
pushed into the outlet.
Defective outlet
Connect another appliance to
the outlet to confirm
whether outlet is defective.
Plug disconnected
Connect the plug.
Power cord damaged
Call an authorized service
center.
Installed in an unsuitable
location
See "Installation" instructions.
Appliance is not level.
Adjust the leveling screws.
Abnormal sounds
Crunching sound
See "Normal operating
sounds" under General
Information.
Compressor sound
See "Normal operating
sounds".
Gas expansion sound
See "Normal operating
sounds".
Defrosting sound
See "Normal operating
sounds".
Ventilation system sound
See "Normal operating
sounds".
Appliance does
not get cold.
Air does not seems to be
circulating efficiently.
Remove air vent obstructions.
Doors are opened
frequently.
Instruct people to open doors
only when necessary.
External
condensation
High humidity in the
atmosphere (normal in
certain climates and
seasons).
Install the appliance in a well-
ventilated location.
External
condensation
near the
magnetic seal
Magnetic door seal does not
adhere properly.
Adjust the leveling legs to
gently tilt the refrigerator
backwards.
The doors are opened
frequently.
Instruct people to open doors
only when necessary.

13
Internal
condensation
Items are not in airtight
containers or are hot.
Liquids may be in
containers without lids, thus
generating excessive
moisture.
Put lids on containers of
liquids.
Do not store hot items.
Ice crystals form
in the freezer.
Moisture filtration through
the door
Make sure that nothing is
preventing the door from
closing correctly. If
necessary, reorganize the
contents of the freezer. If
formation of ice continues,
call your authorized service
center.
The internal light
bulb does not
come on.
Light bulb has blown. Replace light bulb.

14
Notes
15
Limited Warranty
ONE-YEAR LIMITED WARRANTY
Within the 48 contiguous United States, for one year from the date of purchase, when this appliance is
operated and maintained according to instructions attached to or furnished with the product, warrantor will
pay for factory-specified parts and repair labor to correct defects in materials or workmanship. Service must
be provided by a designated service company. Outside the 48 states, all parts are warranted for one year
from manufacturing defects. Plastic parts, shelves and cabinets are warranted to be manufactured to
commercially acceptable standards, and are not covered from damage during handling or breakage.
5-YEAR COMPRESSOR WARRANTY
1. The compressor is covered for 5 years.
2. Replacement does not include labor
.
ITEMS WARRANTOR WILL NOT PAY FOR:
1. Service calls to correct the installation of your appliance, to instruct you how to use your appliance, to
replace or repair fuses or to correct wiring or plumbing.
2. Service calls to repair or replace appliance light bulbs or broken shelves. Consumable parts (such as
filters) are excluded from warranty coverage.
3. Damage resulting from accident, alteration, misuse, abuse, fire, flood, acts of God, improper installation,
installation not in accordance with electrical or plumbing codes, or use of products not approved by
warrantor.
4. Replacement parts or repair labor costs for units operated outside the United States.
5. Repairs to parts or systems resulting from unauthorized modifications made to the appliance.
6. Expenses for travel and transportation for product service in remote locations.
7. The removal and reinstallation of your appliance if it is installed in an inaccessible location or is not
installed in accordance with published installation instructions.
DISCLAIMER OF IMPLIED WARRANTIES; LIMITATION OF REMEDIES
CUSTOMER'S SOLE AND EXCLUSIVE REMEDY UNDER THIS LIMITED WARRANTY SHALL BE
PRODUCT REPAIR AS PROVIDED HEREIN. IMPLIED WARRANTIES, INCLUDING WARRANTIES OF
MERCHANTABILITY OR FITNESS FOR A PARTICULAR PURPOSE, ARE LIMITED TO ONE YEAR.
WARRANTOR SHALL NOT BE LIABLE FOR INCIDENTAL OR CONSEQUENTIAL DAMAGES. SOME
STATES DO NOT ALLOW THE EXCLUSION OR LIMITATION OF INCIDENTAL OR CONSEQUENTIAL
DAMAGES, OR LIMITATIONS ON THE DURATION OF IMPLIED WARRANTIES OF MERCHANTABILITY
OR FITNESS, SO THESE EXCLUSIONS OR LIMITATIONS MAY NOT APPLY TO YOU. THIS WARRANTY
GIVES YOU SPECIFIC LEGAL RIGHTS AND YOU MAY ALSO HAVE OTHER RIGHTS, WHICH VARY
FROM STATE TO STATE.
FELIX STORCH, INC.
770 Garrison Avenue
Bronx, NY 10474
Phone: (718) 893-3900
Fax: (718) 842-3093
www.summitappliance.com
For parts and accessory ordering,
troubleshooting and helpful hints, visit:
www.summitappliance.com/support
WARNING! This product may contain chemicals known to the state of California
to cause cancer or birth defects or other reproductive harm. For more information,
visit: www.summitappliance.com/prop65
Chemicals known by the manufacturer to be present in this product in concentrations
higher than threshold limits: NONE.