EG9845 Revised 02/24
Units are to be field wired at site.
2 well 240V 3000W 12.5A 1PH 208V 3000W 14.4A 1PH
3 well 240V 3000W 12.5A 1PH 208V 3000W 14.4A 1PH
4 well 240V 4000W 16.7A 1PH 208V 4000W 19.2A 1PH
5 well 240V 5000W 20.8A 1PH 208V 5000W 24.1A 1PH
VOLTS
WATTS AMPS PHASE VOLTS WATTS AMPS PHASE
OPERATORS MANUAL AND INSTRUCTIONS
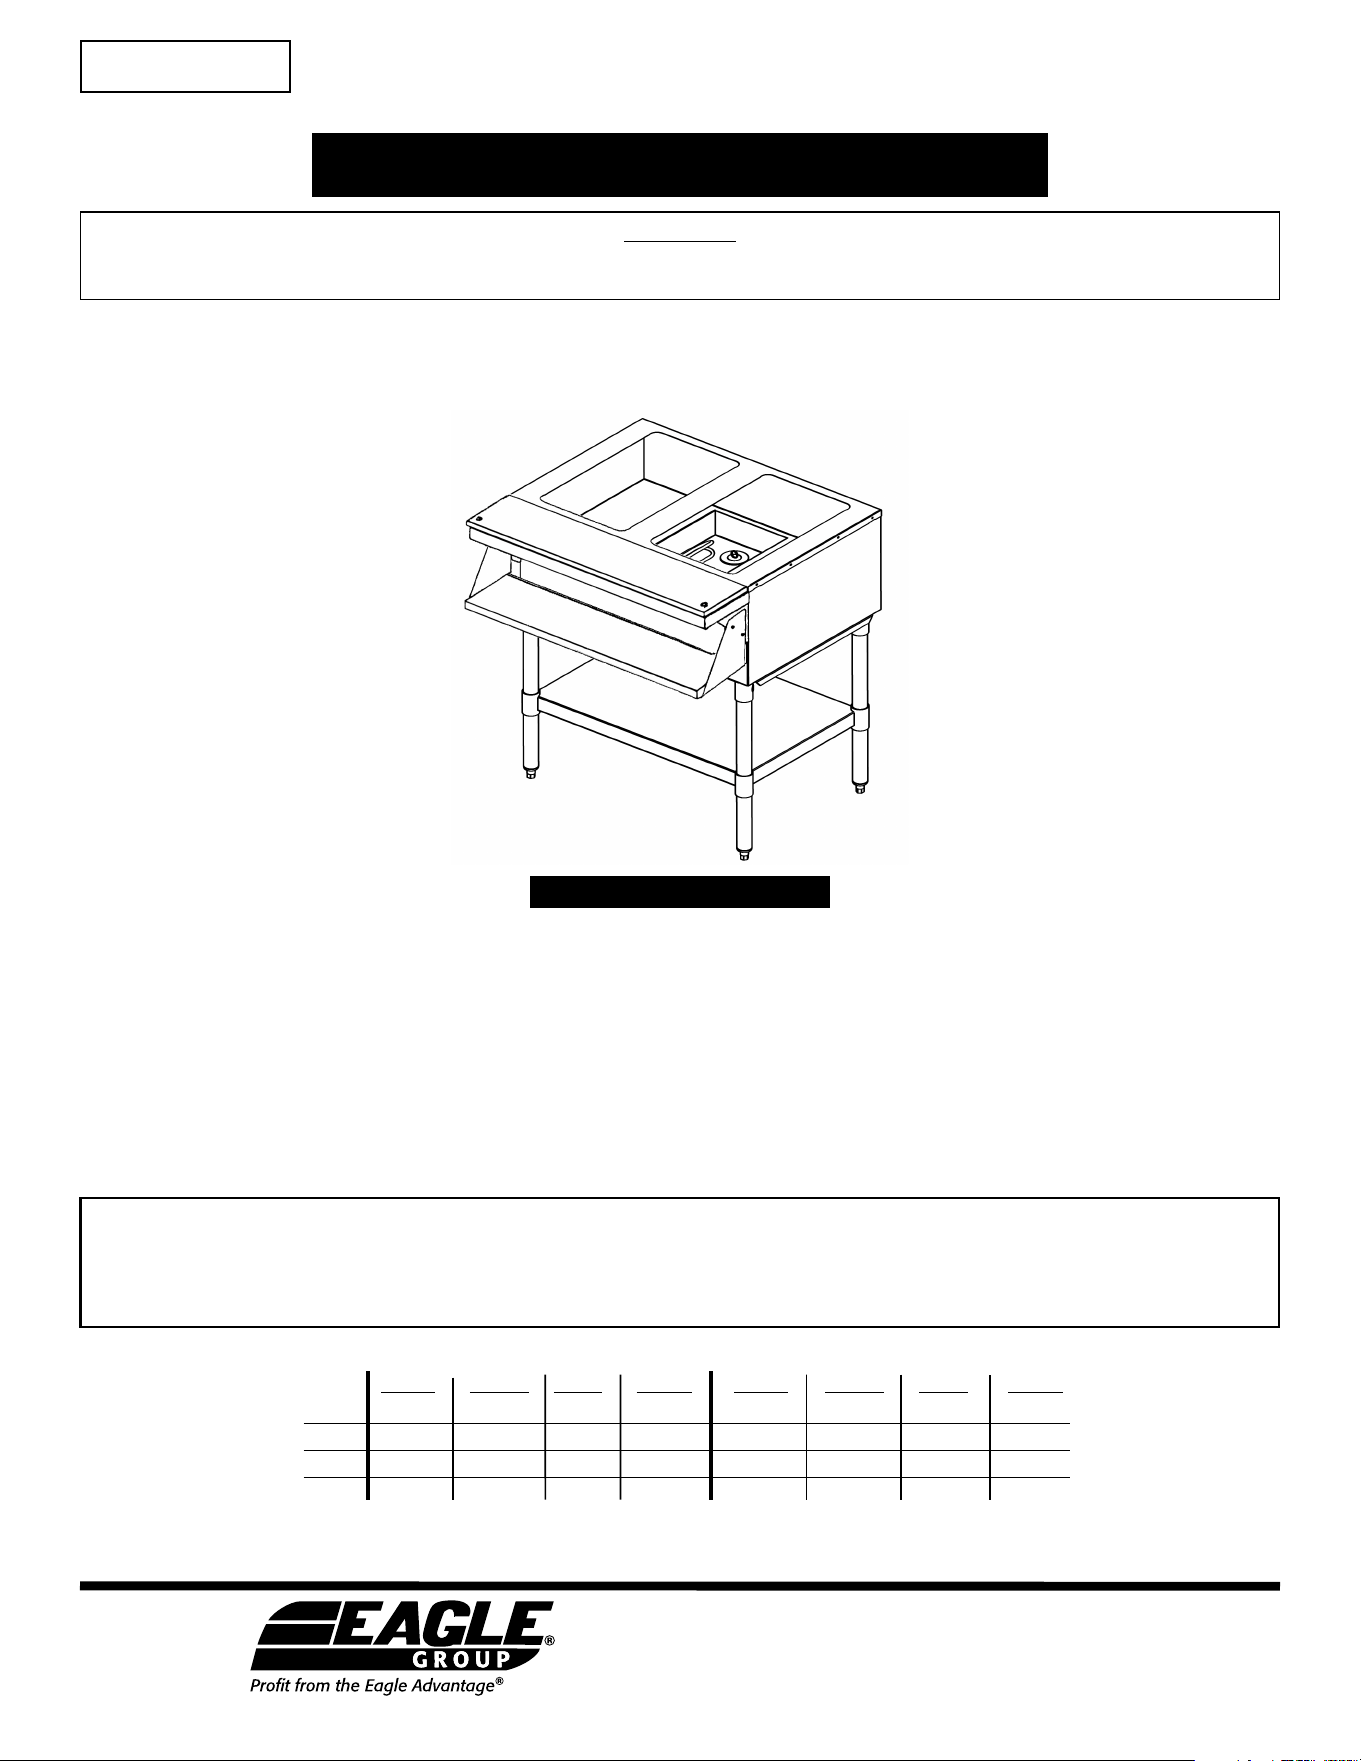
Electric Water Bath
Hot Food Table
Retain this manual
for future reference.
CAUTION
INSPECT CONTENTS IMMEDIATELY AND FILE CLAIM WITH DELIVERING CARRIER FOR ANY DAMAGE. SAVE YOUR BOX AND
ALL PACKING MATERIALS.
YOU ARE RESPONSIBLE FOR DAMAGE TO YOUR UNIT IF RETURNED IMPROPERLY PACKED.
Contact the factory, the factory representative or Eagle’s authorized service center in your area.
THIS UNIT IS DESIGNED FOR WET OPERATION ONLY
It is not designed for cooking foods, but merely to keep hot foods at desired temperatures for serving.
DRAINS: The table is equipped with a brass drain stopper. We recommend that the drain be piped to floor or that a drip pan be used.
IMPORTANT NOTE:
The immersion heater is equipped with a high temperature limit switch. The switch will cut off power to heater if water level drops
below top of heater. If this occurs add hot water to compartment and bring up to proper level. Depress reset button located on side
of heater junction box under table to reset.
1. Fill water compartment with hot water (minimum 185˚F) so water is
1
⁄4˝ above bottom of food pans.
2. Set dial to highest position for 45 minutes with well covered to preheat unit. Place food pan with precooked food (minimum 150˚)
into spillage pans, and cover food pans with lids. Note: Indicator light is the set point for each control knob.
3. Adjust to desired setting for proper food temperature. This will vary with the type of food, type of pans and individual serving
temperature. NSF requires a minimum temperature of 150˚F in food product.
4. To increase temperature turn knob toward highest setting, to decrease turn knob toward lowest setting.
5. Change water, clean well and wipe dry after every 24 hours of operation. Water may have to be added to pan during operation
depending on operating time and temperature setting.
6. Food pans must be covered to maintain temperature when food is not being served and to prevent food from drying out.
7. Check water level frequently and add hot water as necessary.
Please note:
All hardware
referenced
is included.
OPERATION
Eagle Foodservice Equipment, Eagle MHC, and SpecFAB
®
are divisions of Eagle Group. ©2024 by the Eagle Group
• 100 Industrial Boulevard, Clayton, Delaware 19938-8903 U.S.A.
• Phone: 302/653-3000 • 800/441-8440 • Fax: 302/653-2065
• www.eaglegrp.com • www.eaglemhc.com
INSTRUCTION SHEET
#309206
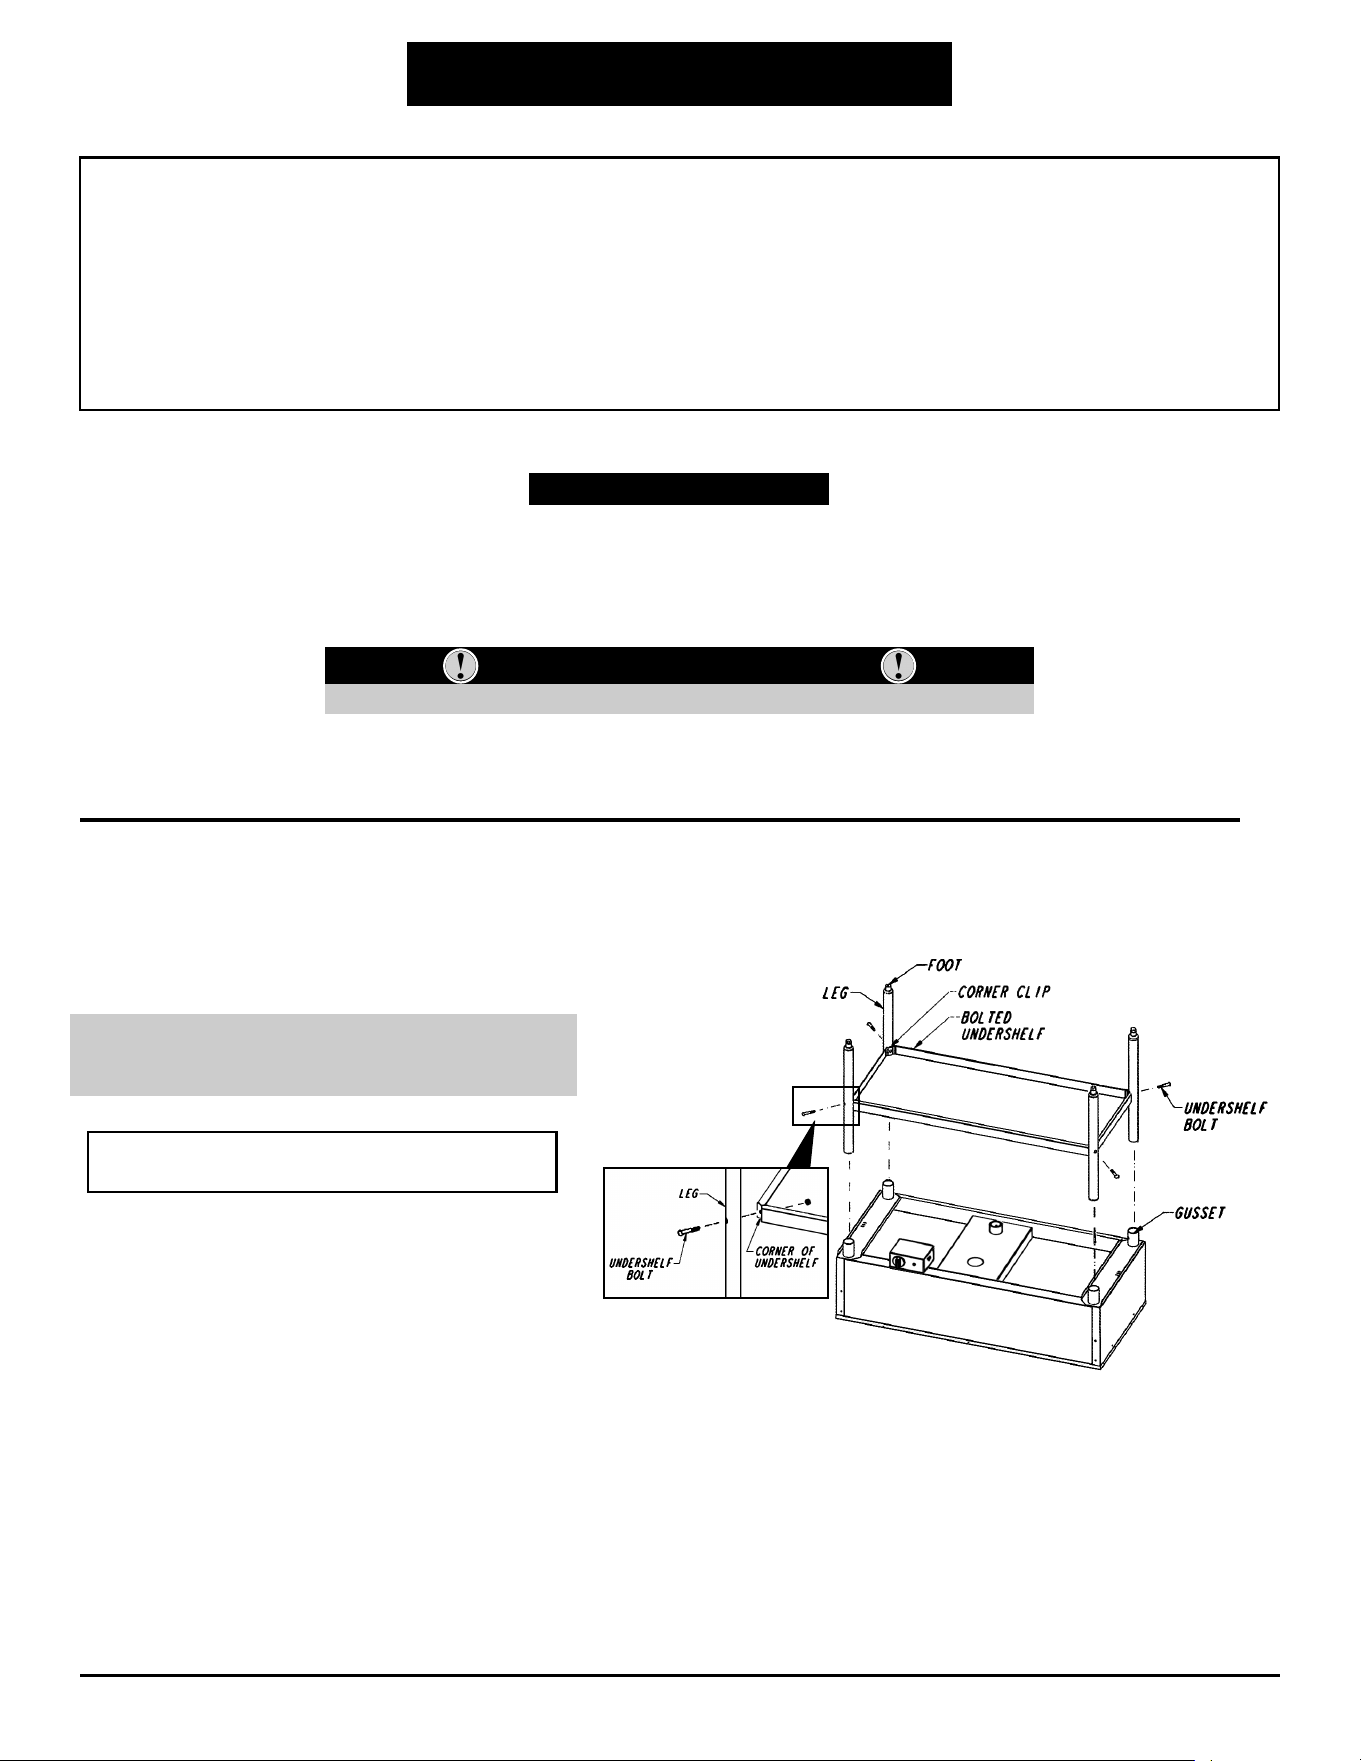
Units with Optional Bolted Undershelf
ASSEMBLY INSTRUCTIONS
2
CAUTION
1. This equipment is designed and sold for commercial use only by personnel trained and experienced in its operation and is not sold
for consumer use in and around the home nor for use directly by the general public in food service locations.
2. Do not immerse unit in water.
3. All repairs should be done by an authorized service center.
4. Unit should be turned off when not in use-it is recommended that unit be disconnected from power supply by removing plug from
receptacle or shutting off power disconnect supply to the unit.
5. Unit should be operated with legs provided to prevent overheating and damage to surface below or cord.
1. The inside of the water compartment and outer shell should be washed daily using a clean cloth or sponge and mild detergent.
2. Use a plastic scouring pad to remove any hardened food particles of mineral deposits. DO NOT use chemicals, steel wool, or scrapers
to clean the unit.
MAINTENANCE
WARNING
ELECTRICAL SHOCK HAZARD
• Do not splash or pour water into or over any control panel or wiring.
1. Place table on top with gussets facing up.
Caution: Use cardboard or other material to
prevent scratching top.
2. Install legs into gussets. Make sure hole in leg is
closer to foot end than gusset.
3. Mount undershelf to legs by inserting bolt thru hole
in leg and thru hole in corner of undershelf, and
tighten with hex nut (see Figure 1).
4. Tighten set screws in gussets to secure legs
to table.
5. Place table topside up.
6. See cutting board mounting instructions on
page 3.
Figure 1
NOTE: Legs and undershelf must be
assembled BEFORE securing legs to table.
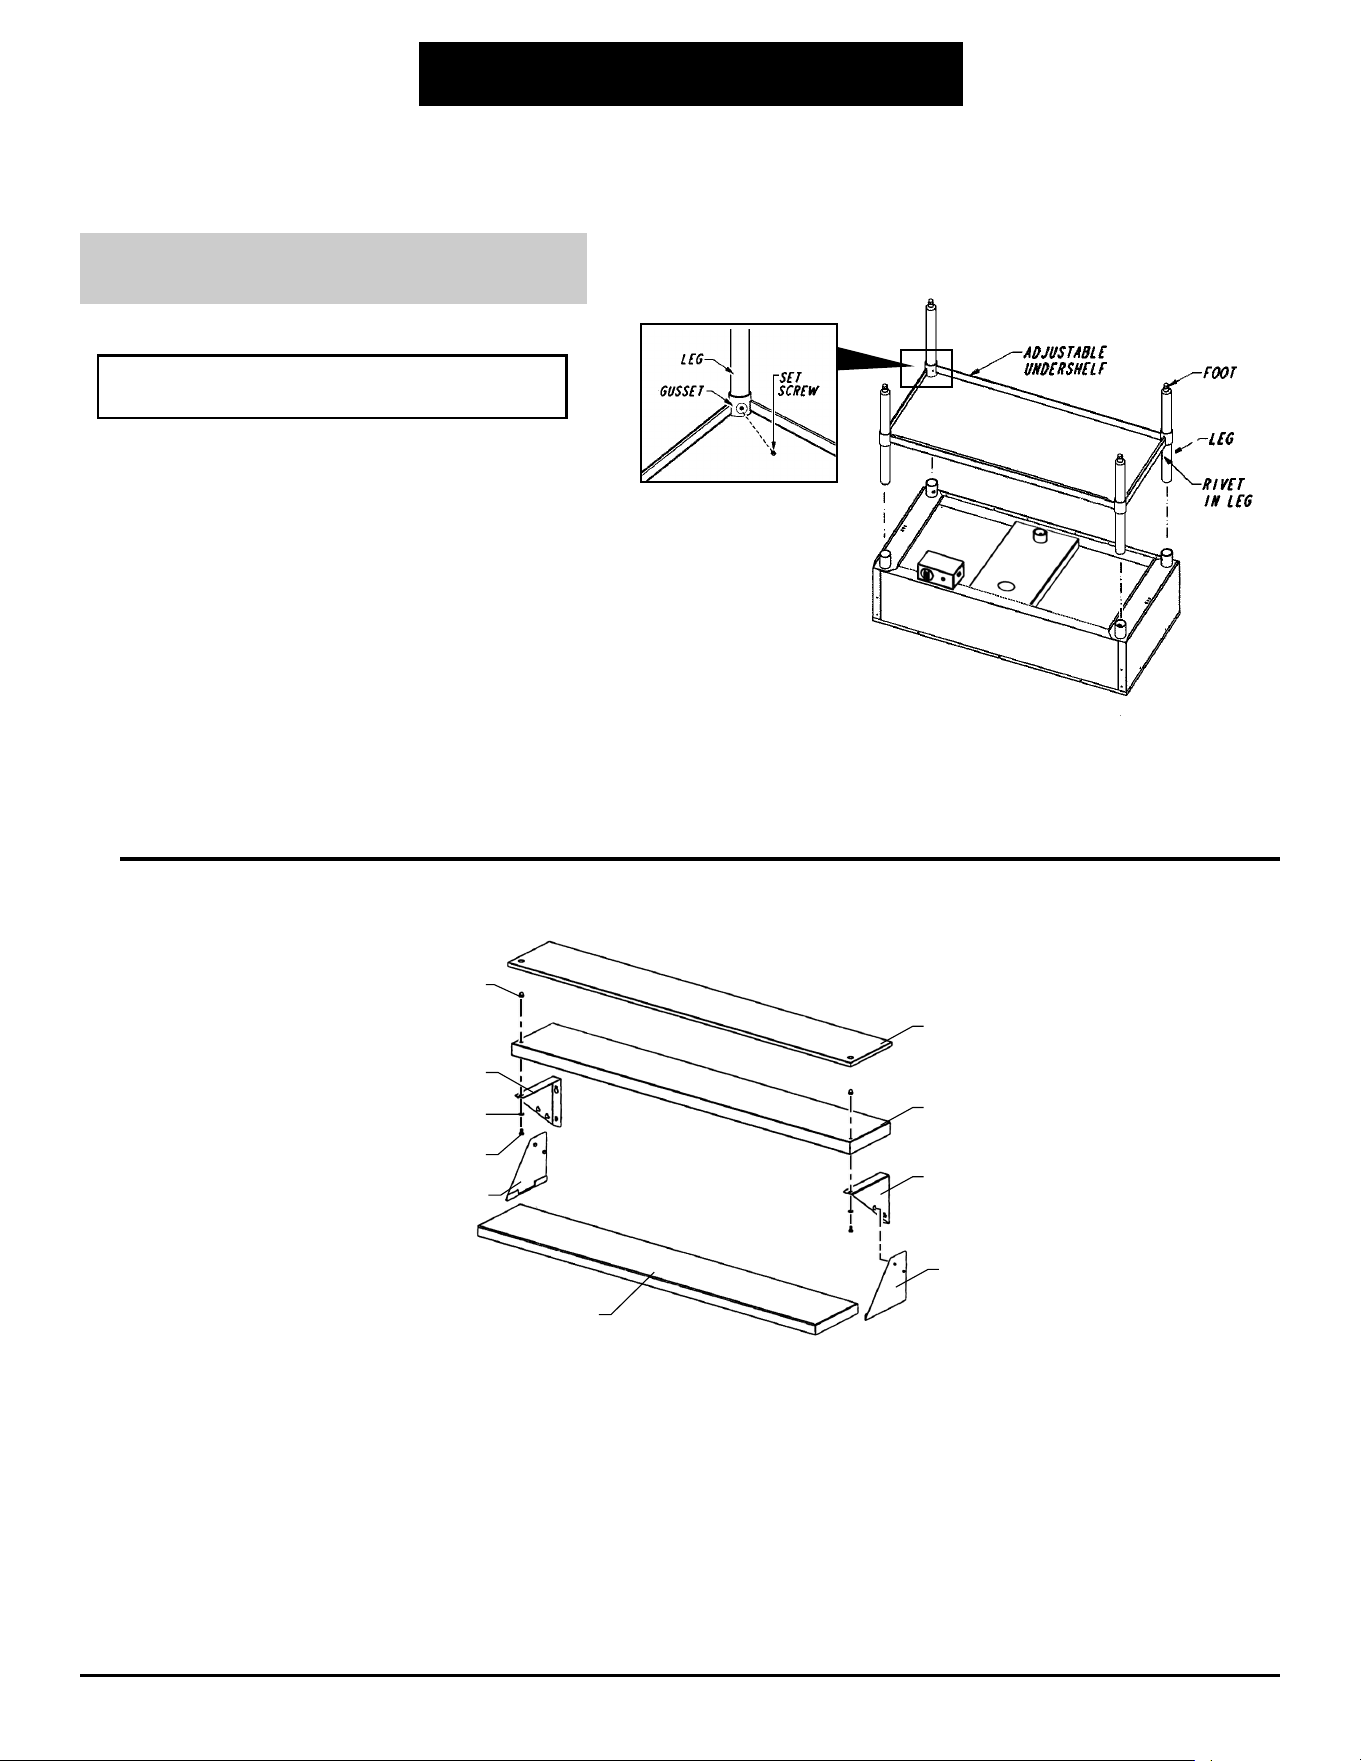
1. Attach support shelf brackets to support shelf, using acorn nuts, washers, bolts and predrilled
holes. Note: acorn nuts must be at the top.
2. Install machine screws into threaded fasteners on table. Do not tighten.
3. Align keyholes in mounting brackets with screws and mount support shelf/bracket assembly to
table. Tighten screws.
4. Hook metal plate shelf into bottom flange of plate shelf brackets.
5. Using keyholes on support shelf brackets, mount plate shelf/bracket assembly onto support
shelf/bracket assembly.
6. Align holes in poly cutting board with acorn nuts, and place cutting board onto support shelf.
Units with Standard Adjustable Undershelf
ASSEMBLY INSTRUCTIONS
3
Cutting Board Assembly
1. Place table on top with gussets facing up.
Caution: Use cardboard or other material to
prevent scratching top.
2. Install legs into gussets. Make sure rivet in leg is
closer to gusset than to the foot end.
3. Align undershelf gussets with legs, and slide
undershelf down legs to desired position.
Recommended height is 10˝.
4. Tighten set screws in undershelf gussets to secure
undershelf (see Figure 1) and install feet into legs,
using a rubber mallet.
5. Tighten set screws in gussets to secure legs
to table.
6. Place table topside up.
7. See cutting board mounting instructions below.
Figure 1
NOTE: Legs and undershelf must be
assembled BEFORE securing legs to table.
support shelf bracket
plate shelf bracket
plate shelf
bracket
hex bolt
washer
acorn nut
support shelf
bracket
stainless steel support shelf
metal plate shelf
poly cutting board
(End)
INSTRUCTIONS
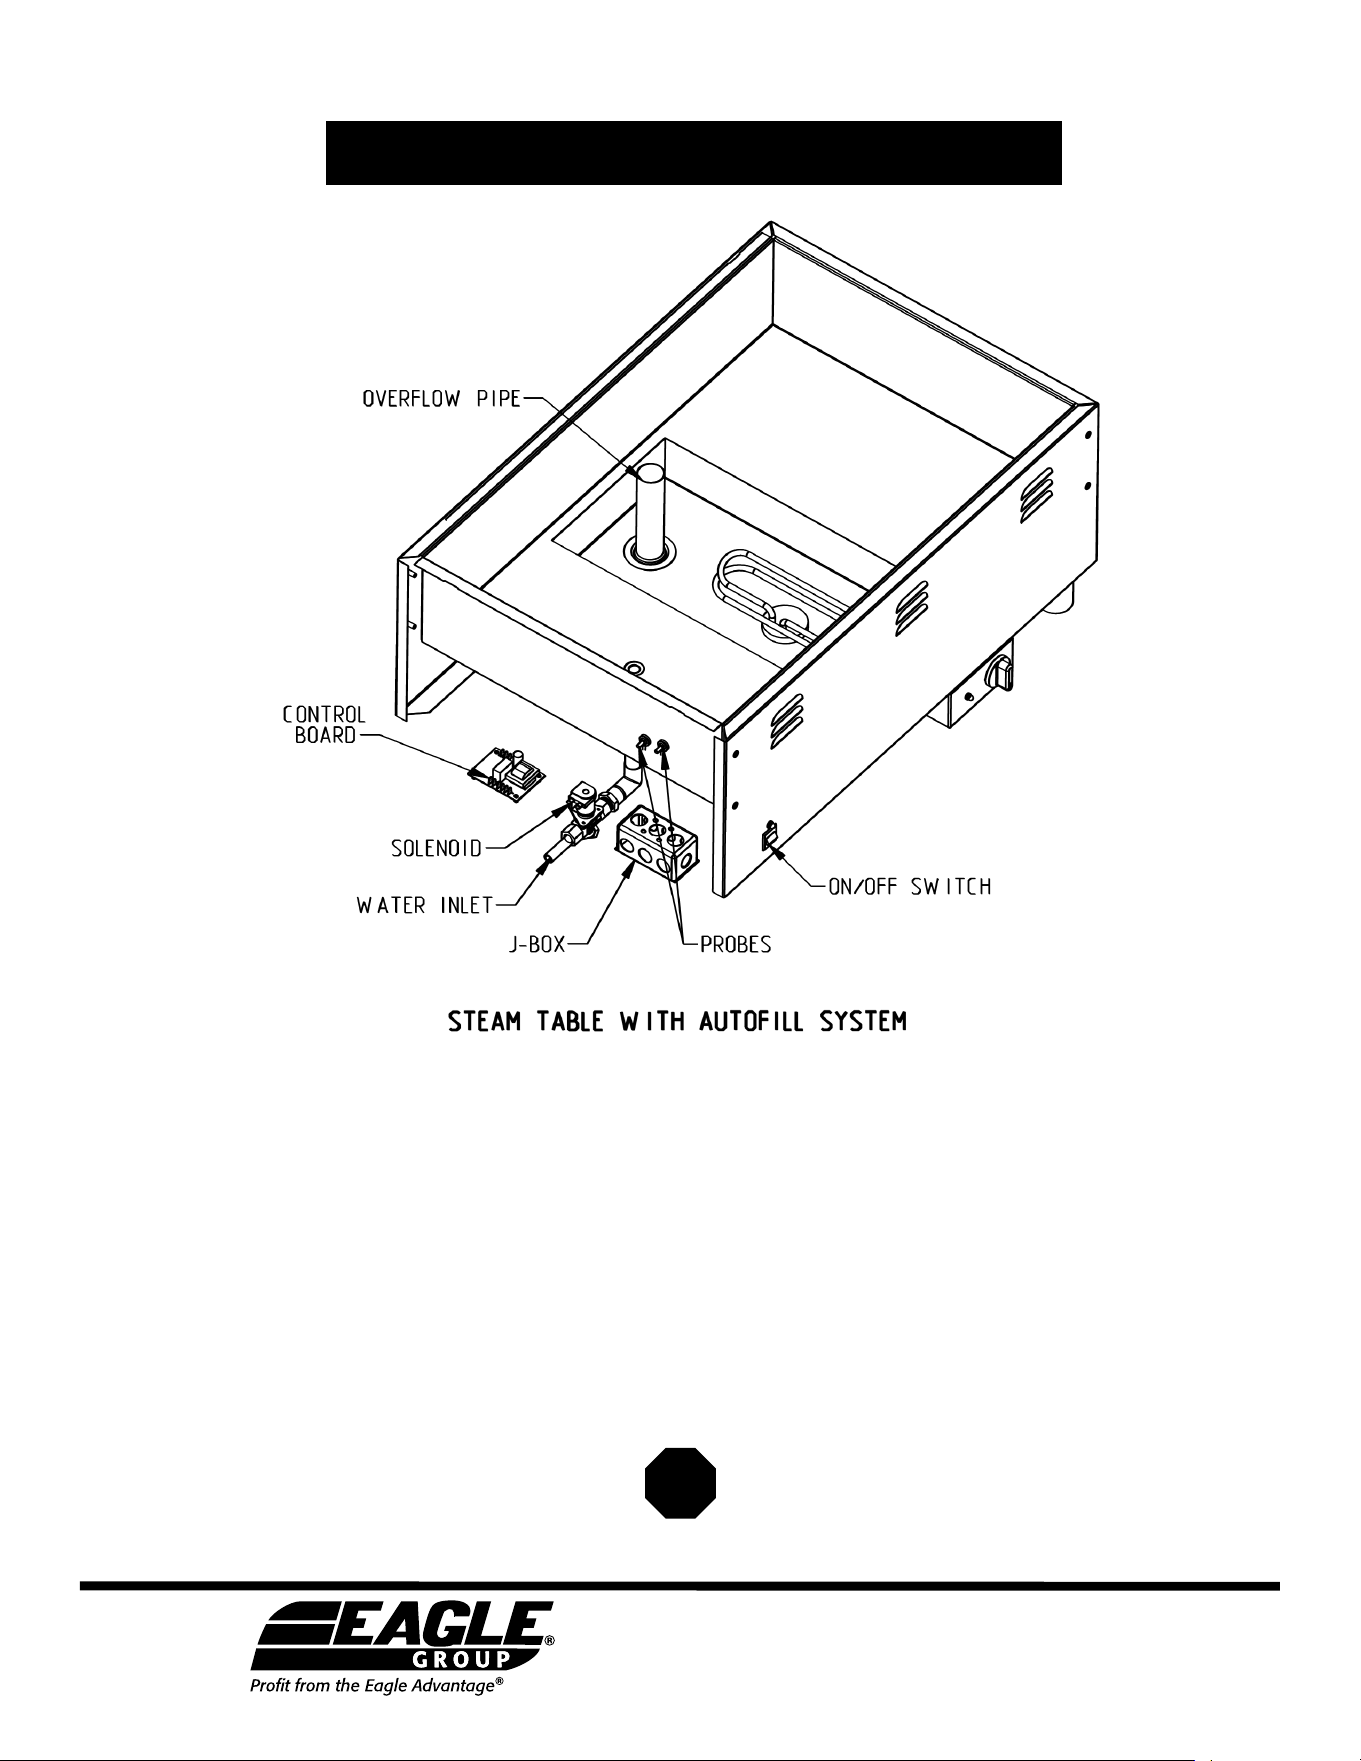
AutoFill
®
Water System
1. Check unit left to right and front to back to make sure unit is leveled. Adjust the adjustable feet as necessary. Note - If unit is not
leveled, the amount of water will differ in wells.
2. Attach a continuous flowing hot water source to the
1
⁄4˝ NPT water connection inlet.
3. Connect the drain to a vented waste drain.
4. Plug unit into proper power source stated on model/serial plate. Turn water source on and the AutoFill
®
on/off switch to on.
(Remember that the solenoid will make a “pop” sound the first time this is turned on.) The AutoFill
®
system will fill and maintain the
proper water level in all wells. If there is a desire to run the unit without automatically filling the wells with water, simply turn the
on/off switch to the “off” position. The AutoFill
®
system runs independently of the hot wells, so the wells are still operational.
Eagle Foodservice Equipment, Eagle MHC, and SpecFAB
®
are divisions of Eagle Group. ©2024 by the Eagle Group
• 100 Industrial Boulevard, Clayton, Delaware 19938-8903 U.S.A.
• Phone: 302/653-3000 • 800/441-8440 • Fax: 302/653-2065
• www.eaglegrp.com • www.eaglemhc.com