INSTALLATION INSTRUCTIONS
for
REGALINE SINKS
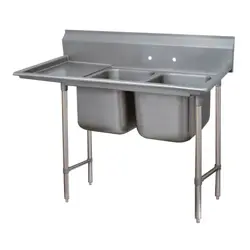
94 Series With
2 Drainboards
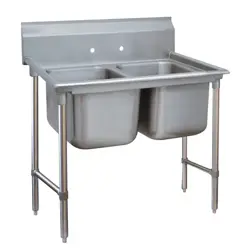
94 Series With
No Drainboards
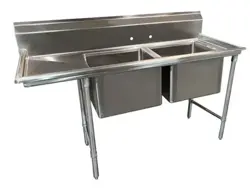
93 Series With
Left Drainboard
Sinks manufactured by ADVANCE TABCO
®
are designed and constructed for the use of
liquid containment. Suggested applications include Food Preparation, Manufacturing,
Cooking, Laboratory and Service and the like. ADVANCE TABCO
®
does not recommend
product use for activities employing harsh and active chemicals. Please consult factory
regarding unusual applications.
CHECK FOR CONCEALED DAMAGE
FILE CLAIM WITH DELIVERING FREIGHT CARRIER
STEP 1
Remove contents of carton/crate and position sink upside
down on a protective floor covering.
THIS CARTON CONTAINS:
• Sink Unit
• Drains (1 For Each Sink Bowl)
• 94 Series: Four 1-5/8” Dia. Tubing For Legs
Two 1-1/4” Dia. Tubing For Side Braces
One 1-1/4” Dia. Front Tubing For Front Cross Brace
2 Single Hole (Rear) & 2 Double Hole Clamps (Front)
93/9 Series: Four 1-5/8” Dia. Tubing For Legs
Two 1-1/4” Dia. Tubing For Side Braces
4 Single Hole Clamps
Tools Required: Allen Key Wrench
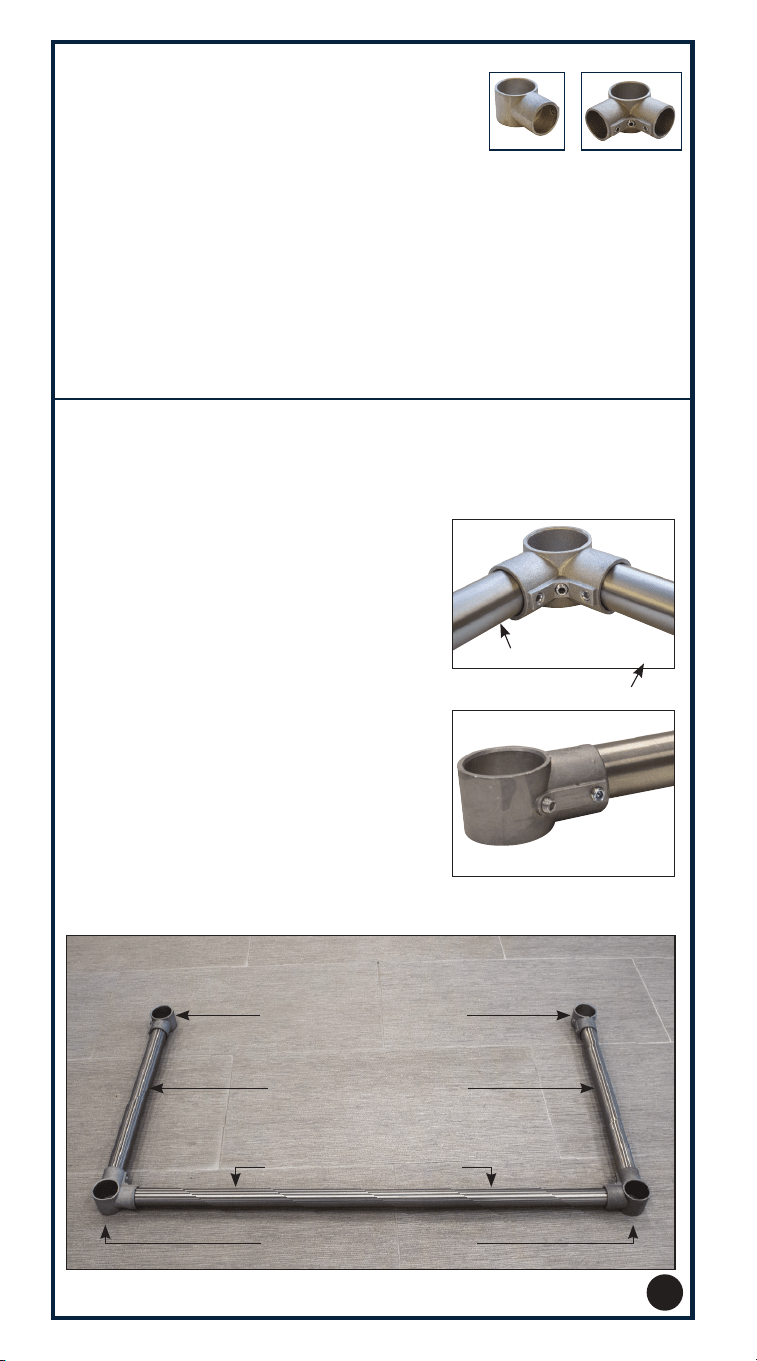
STEP 2 FOR 94 Series
(For 93 and 9 Series, See Step 2A)
Slide one “Double” Hole Clamp on
each end of the long 1-1/4” tubing
brace and tighten with Allen Wrench,
just enough to hold in place. Do not
over-tighten at this time (Figure 1).
Then, Insert the two smaller 1-1/4”
brace tubing into the “Double” Hole
Clamps and lightly tighten as well
(Figure 1).
Next, Insert the two “Single” Hole
Clamps on each end of the smaller
tubing and lightly tighten (Figure 2).
Single Clamp Double Clamp
Figure 2
Note: Tubing lengths will vary based on sink size.
Figure 1
1-1/4” Side Brace
Double Hole Clamp
Single Hole Clamp
1-1/4” Front Brace
94 Series Cross-Bracing Assembly
1-1/4” Front Brace
1-1/4” Side Braces
Single Hole Clamp
Double Hole Clamps
2
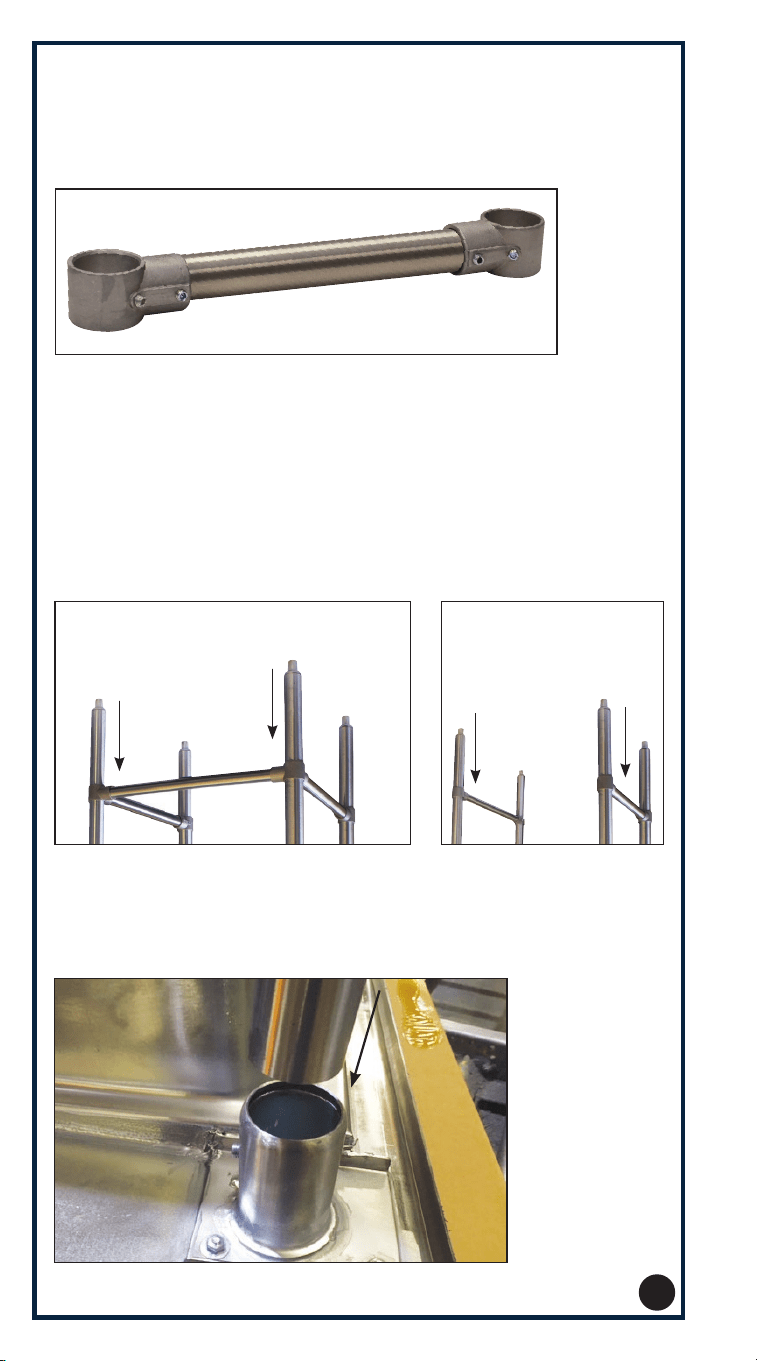
STEP 4
Insert all 4 legs into each gusset on bottom of sink (Figure 5).
STEP 2A FOR 93 & 9 Series
Slide “Single” Hole Clamps on each end of the 1-1/4” tubing
braces & tighten with Allen Wrench, just enough to hold in
place. Do not over-tighten at this time (Figure 3).
STEP 3
Slide each leg through each leg clamp (Figure 4 & 4A).
Lightly tighten set screws just enough to hold braces in place.
Figure 5
Figure 3
Note: Make sure set screws in each clamp are either
flush or set back so they do not interfere while sliding the
clamps on the legs.
Single Hole Clamps Shown
94 Series Bracing Shown
93 & 9 Series
Bracing Shown
Figure 4 Figure 4A
3
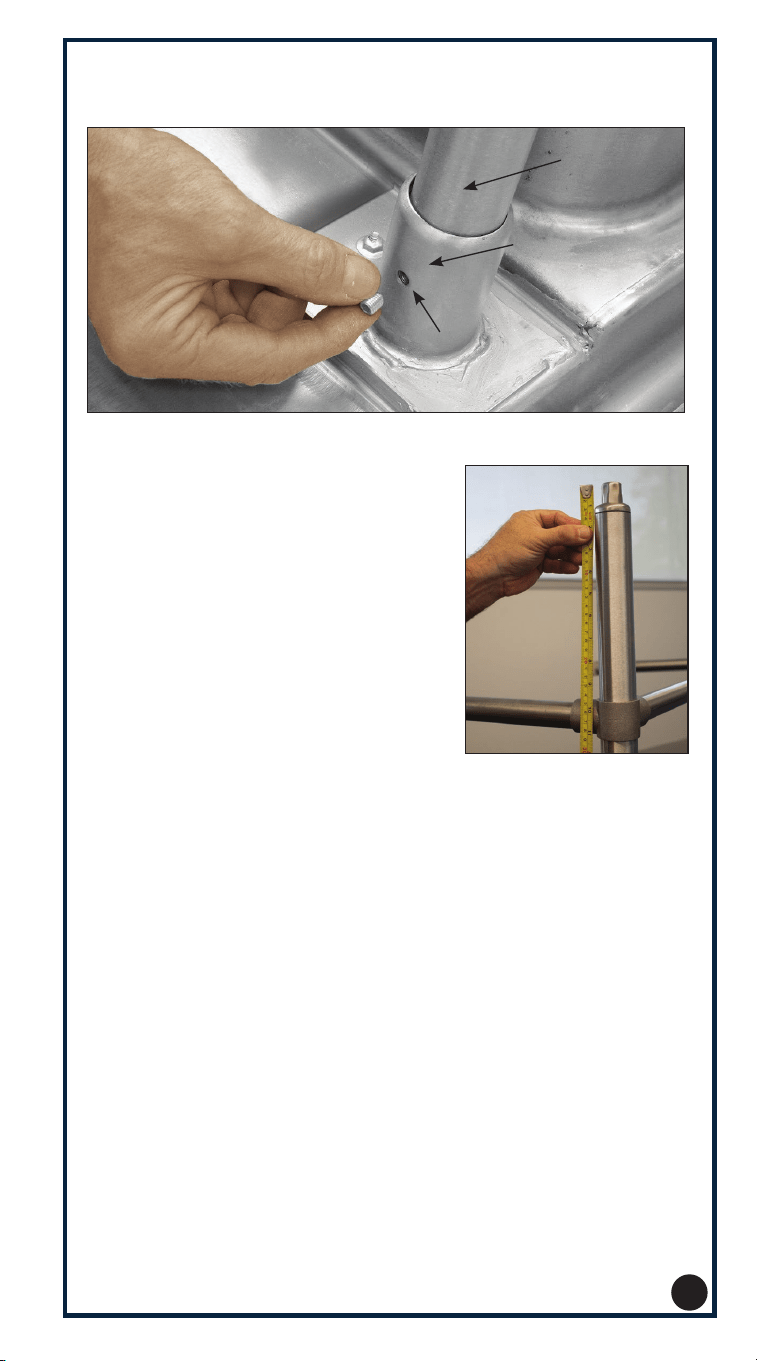
STEP 6
Lower all bullet feet into the legs
so they are all the same length.
Measure the distance from the
bottom of each bullet foot to the
clamp, ensuring all clamps are
same length. Adjust each clamp as
necessary (Figure 6).
Tighten all set screws on all clamps.
STEP 7
With help, stand up sink on its legs. Check for stability and
adjust or tighten if needed.
STEP 8
IMPORTANT NOTE: For NSF Compliance, it is required that
ALL Set screws are filled with an approved silicone sealer.
Continue To Drain Installation >>
STEP 5
Secure legs with supplied set screws & tighten (Figure 6).
Leg
Gusset
Set screws located
on inside of gussets
Figure 6
Underside of Sink
Figure 6
4

STEP 9
Install drains and faucet. Your knowledgeable
plumbing contractor is responsible for local code
requirements.
OPTION: May be furnished with remote
operated lever drains or specialty faucets.
Sink
Bottom
K-6 Basket
Drain shown
1/4” continu-
ous bead of
Plumber’s Putty
or Silicone
Sealer.
Rubber Washer
Paper Washer
Die Cast Nut
Spout
Tile Edge
Flanged
Washer
Teflon Tape or Thread
Sealer on 1/2’ x Close
Nipple.
These pieces are supplied
in an optional Mounting Kit
K-06-X or by the plumber.
Faucet Body
Faucet Mounting
Flange
Splash
Rubber
Washer
90º Sink
Elbow
Spout
Tile Edge
These pieces are supplied
in an optional Mounting Kit
K-06-X or by the plumber.
90º Sink
Elbow
Rubber
Washer
Faucet Body
Splash
5
Continue
Installation >>
HAUPPAUGE, NY 11788
© ADVANCE TABCO, NOVEMBER 2021
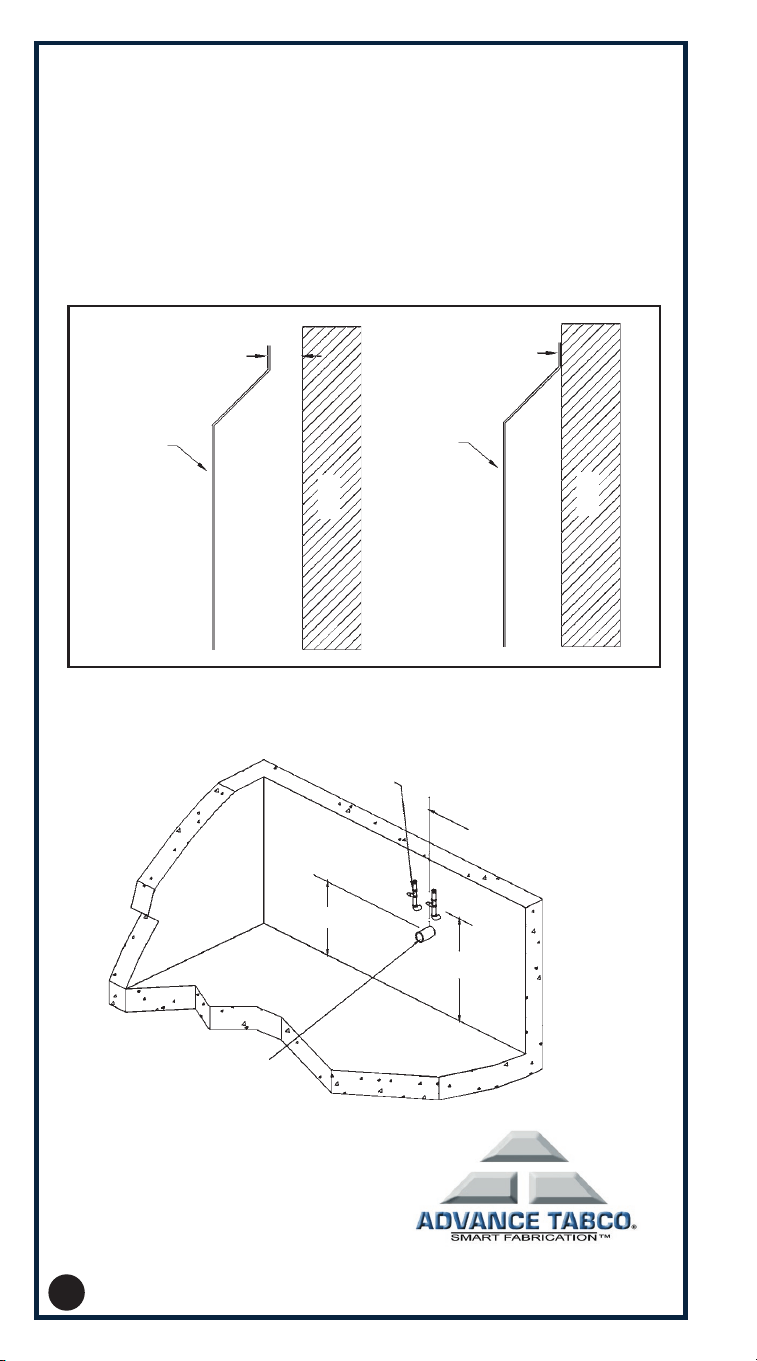
Suggested Rough Plumbing Dimensions
STEP 10
Set Unit in place and level by means of adjustable
bullet feet.
STEP 11
NSF Installations require Sink Unit to be sealed to
wall or installed at least 1-1/4” off the wall.
Splash
Splash
Silicone Sealer
Waste Line 2” IPS
1/2” Supply Line
H/C with Valve stops
8”
16”
Center Line of right Hand
or left Hand sink Bowl
1”
Wall
Wall
6