
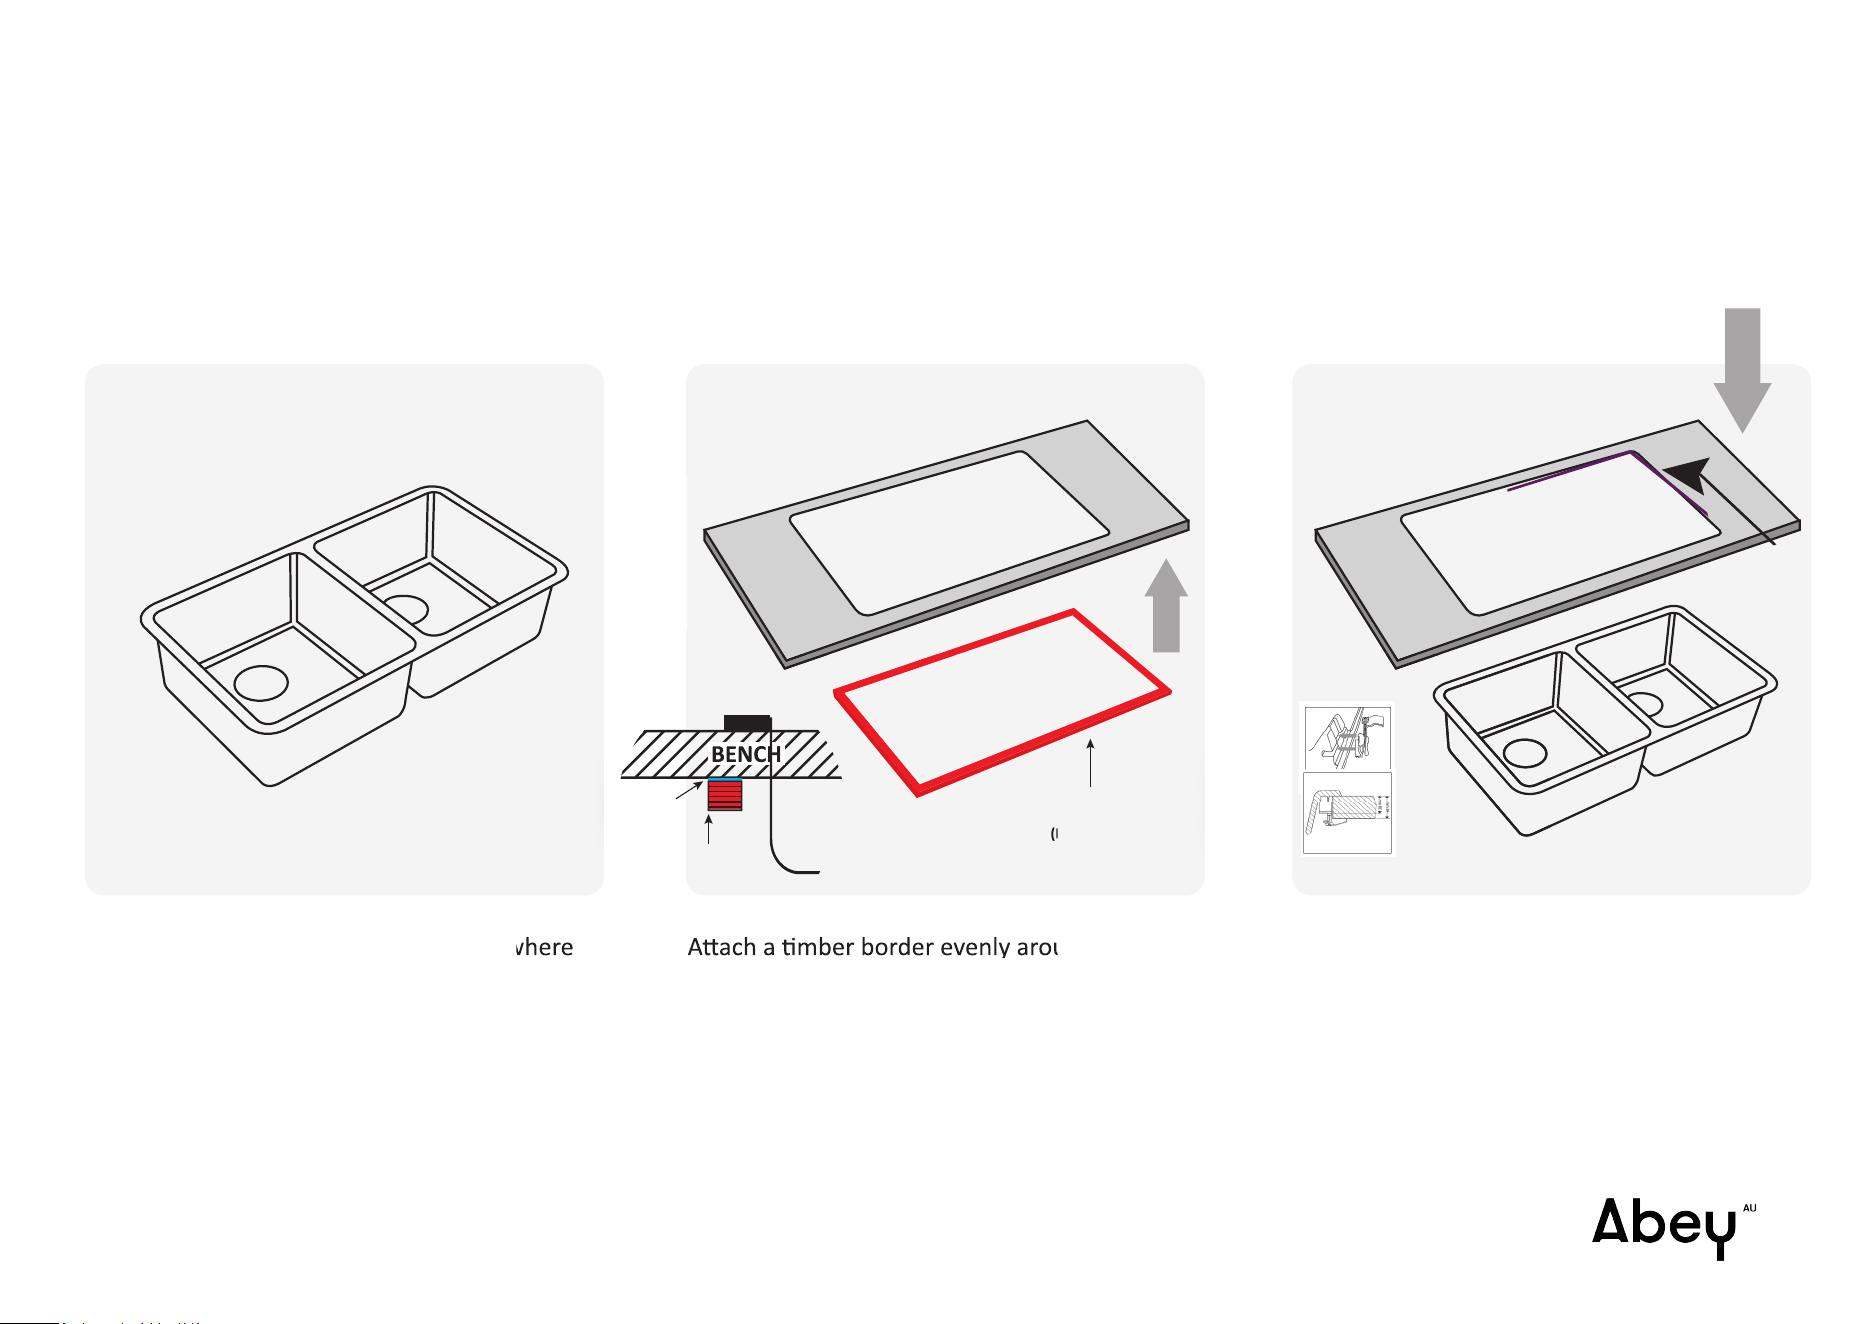
NOTE: paper and cardboard templates where
supplied are only to be used as a guide.
Using the actual sink ensures a more
accurate cutout.
Clean both the counter top surface and the
underside of the sink’s flange (or lip) with
methylated spirits. Apply a bead of silicone
along the top and side edges of the counter top
cutout. Position the sink in place, then secure it
by screwing the brackets to the timber support
frame.
Aach a mber border evenly around the
perimeter of the countertop cutout to
accommodate the size of the sink.
This should be epoxied/adhered to the
underside of the countertop.
Templates are provided as a general guide only. For the most accurate cutout, we recommend using the actual sink during installation. Do not over tighten the
bracket screws, as this may cause damage. The sink must be screwed to the timber support frame using the supplied brackets. Use of epoxy or adhesive to directly
secure the sink to the benchtop will void the warranty.
SCHOCK TOPMOUNT SINK
INSTALLATION INSTRUCTIONS
1 3
TIMBER
BORDER
(MIN 25mm
THICK)
2
NOTE: paper and cardboard templates where
Aach a mber border evenly around the
(MIN 25mm
Flange
(or lip)
Timber
Border
Epoxy/
Adhesive
SILICONE
SEALANT
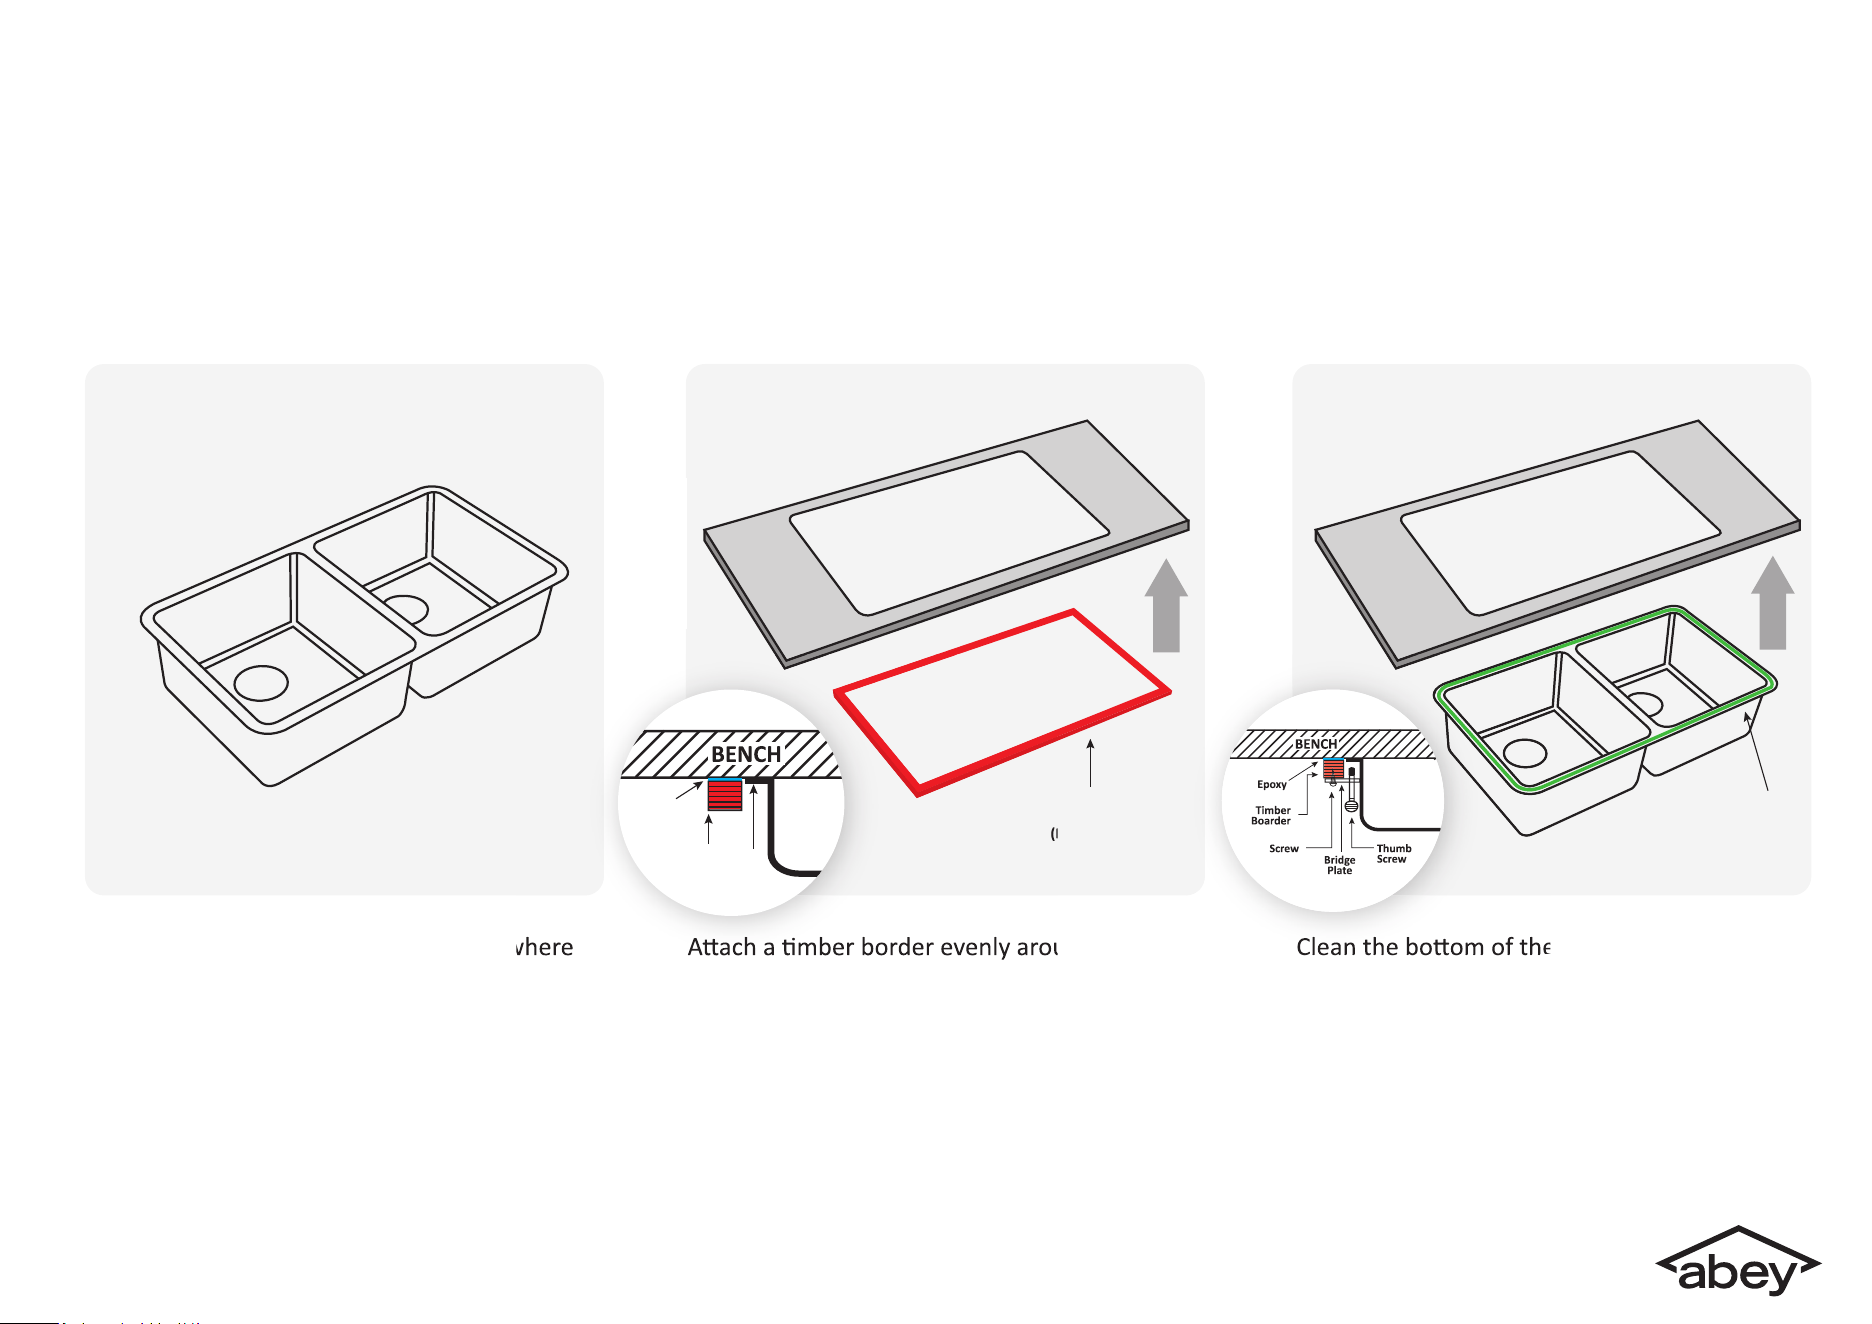
NOTE: paper and cardboard templates where
supplied are only to be used as a guide.
Using the actual sink ensures a more
accurate cutout.
Clean the boom of the countertop and the
top flange (or lip) of the sink with methylated
spirits. Then apply a bead of silicone to the
top edge of the bowl. Posion sink in place
then screw the bridge plate to the mber
border using the thumb screws to secure
the sink in correct posion.
Aach a mber border evenly around the
perimeter of the countertop cutout to
accommodate the size of the sink.
This should be epoxied/adhered to the
underside of the countertop.
Templates are supplied only as a guide. The physical use of the sink will ensure a more accurate cutout. Abey recommends that undermount sinks and routering of your solid
surface material should be installed by a professional installer for best results. Warranty is voided if epoxy or adhesive is used to secure the sink to the bench.
SCHOCK UNDERMOUNT SINK
INSTALLATION INSTRUCTIONS
1
SILICONE
SEALANT
3
TIMBER
BORDER
(MIN 25mm
THICK)
2
NOTE: paper and cardboard templates where
Aach a mber border evenly around the
(MIN 25mm
Flange
(or lip)
Timber
Border
Epoxy/
Adhesive
Clean the boom of the countertop and the