Operator’s Manual
www.mechmaxx.com
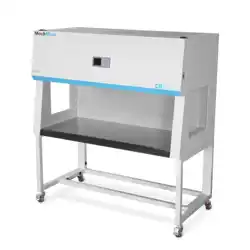
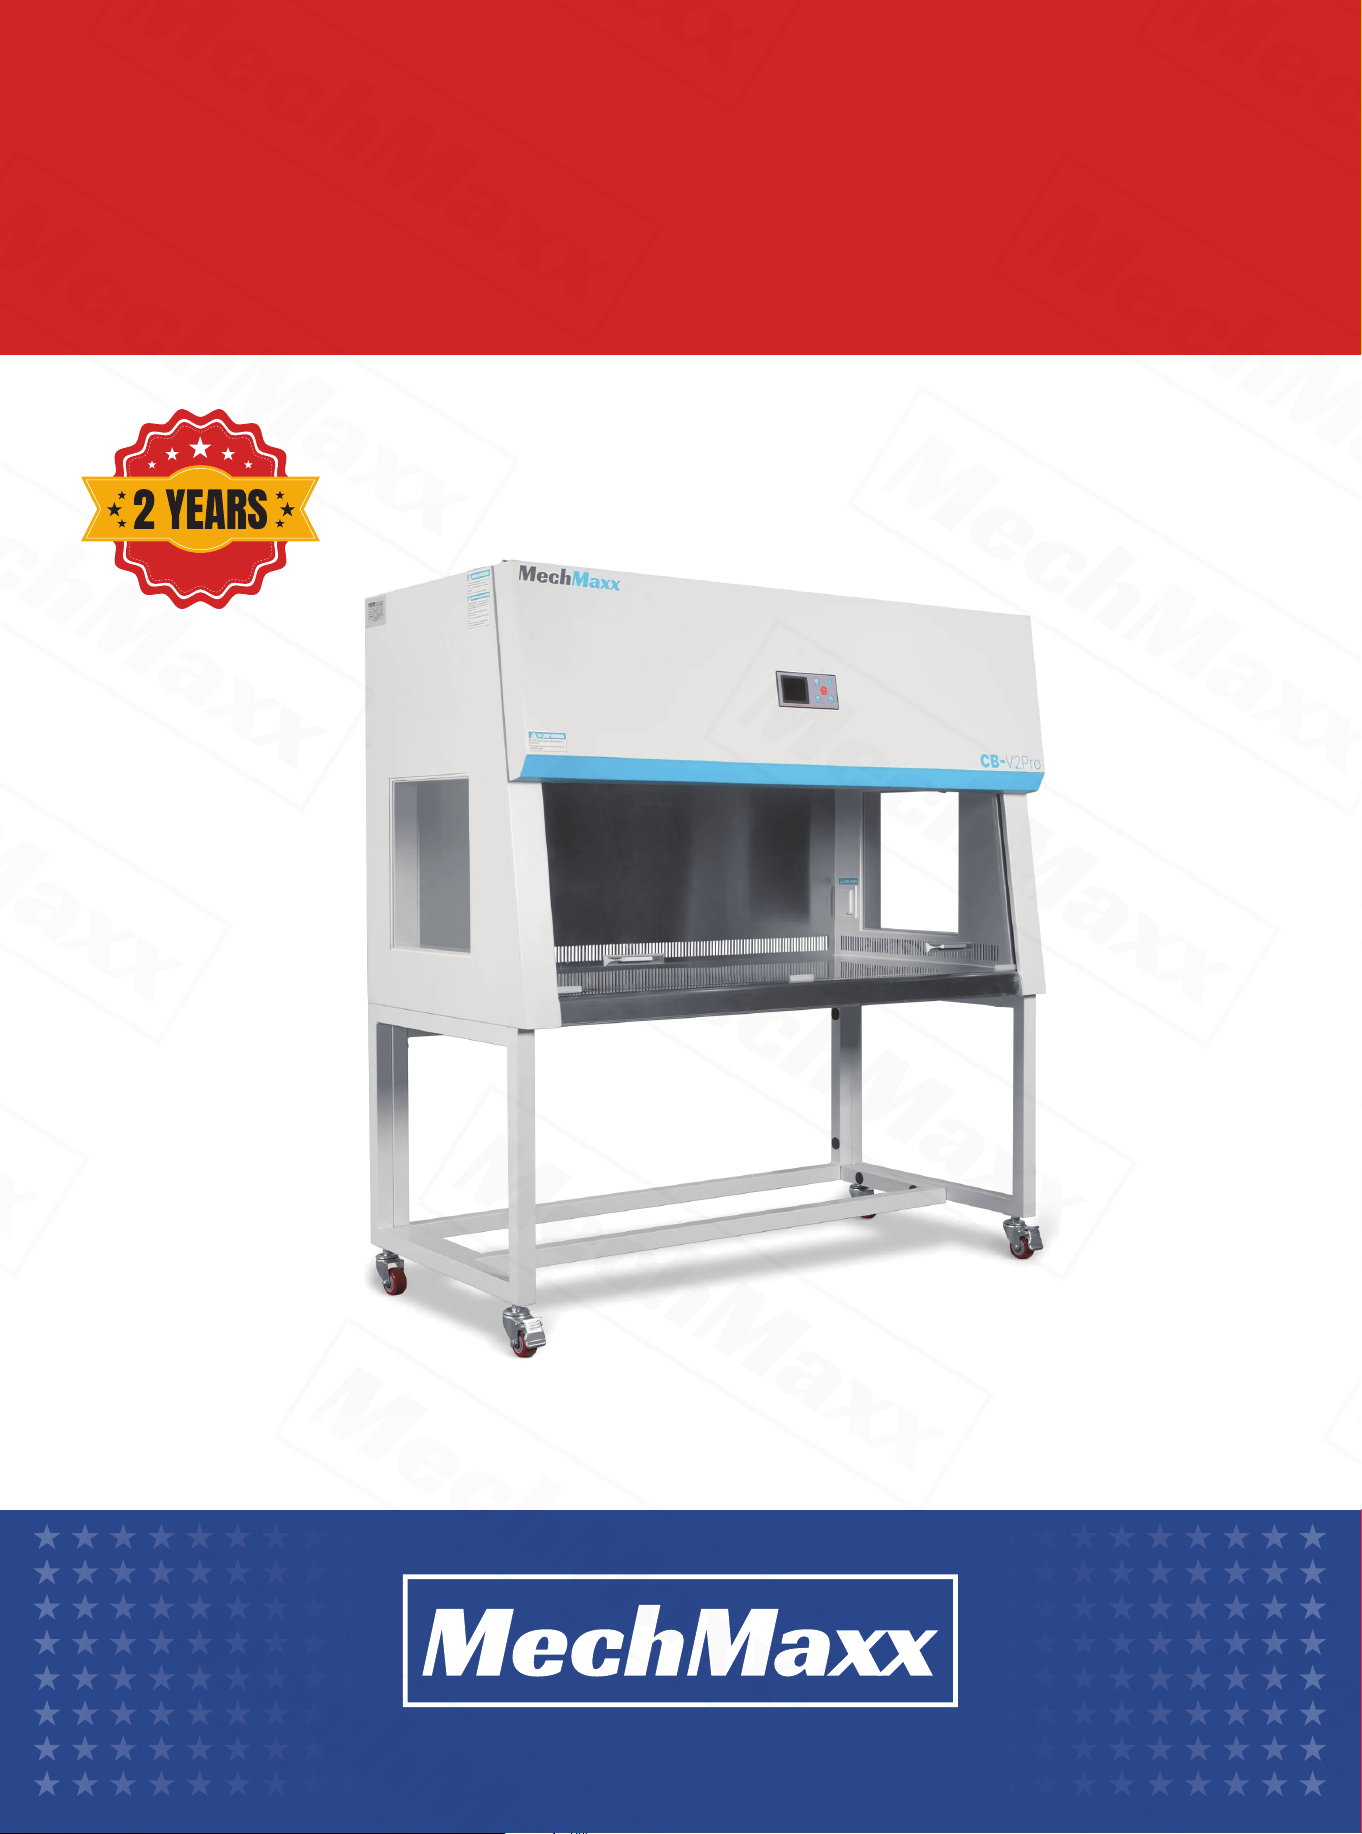
CLEAN BENCH
CB-H1PRO
CB-V1PRO
CB-H2PRO
CB-V2PRO
WARRANTY

1
www.mechmaxx.com
The clean bench is a purification device designed to create a clean and controlled local working environment. With the
advancement of science and technology, it is now widely used in various fields, including:
•Electronics and precision machinery – for dust control and product quality assurance.
•Agriculture and forestry – for preventing contamination in experiments and production.
•Colleges and research institutions – for teaching, research, and laboratory applications.
•Medical and healthcare – for controlling dust, bacteria, and viruses to ensure a sterile working environment.
The PRO series clean bench is a newly designed product using advanced production technology, available in both vertical
and horizontal types to meet various needs. Key features include:
1.Durable Construction – The bench is made of high-quality cold-rolled steel with a powder-coated finish, resistant to
scratches and visually appealing. The work area is made of stainless steel, ensuring easy cleaning and maintenance.
2.Intelligent Control – Equipped with a microcomputer control system and integrated instruments, the unit is easy to
operate. The control panel displays working conditions clearly, allowing simple adjustments.
3.Efficient Filtration – Features both a primary filter and a high-efficiency filter, achieving cleanliness levels of Class 100
or better.
4.Ergonomic Design – The front panel is tilted 10° for convenient operation.
5.Ultraviolet Sterilization – The work area includes UV lamps to facilitate sterilization for experimental or laboratory use.
APPLICATION SCOPE
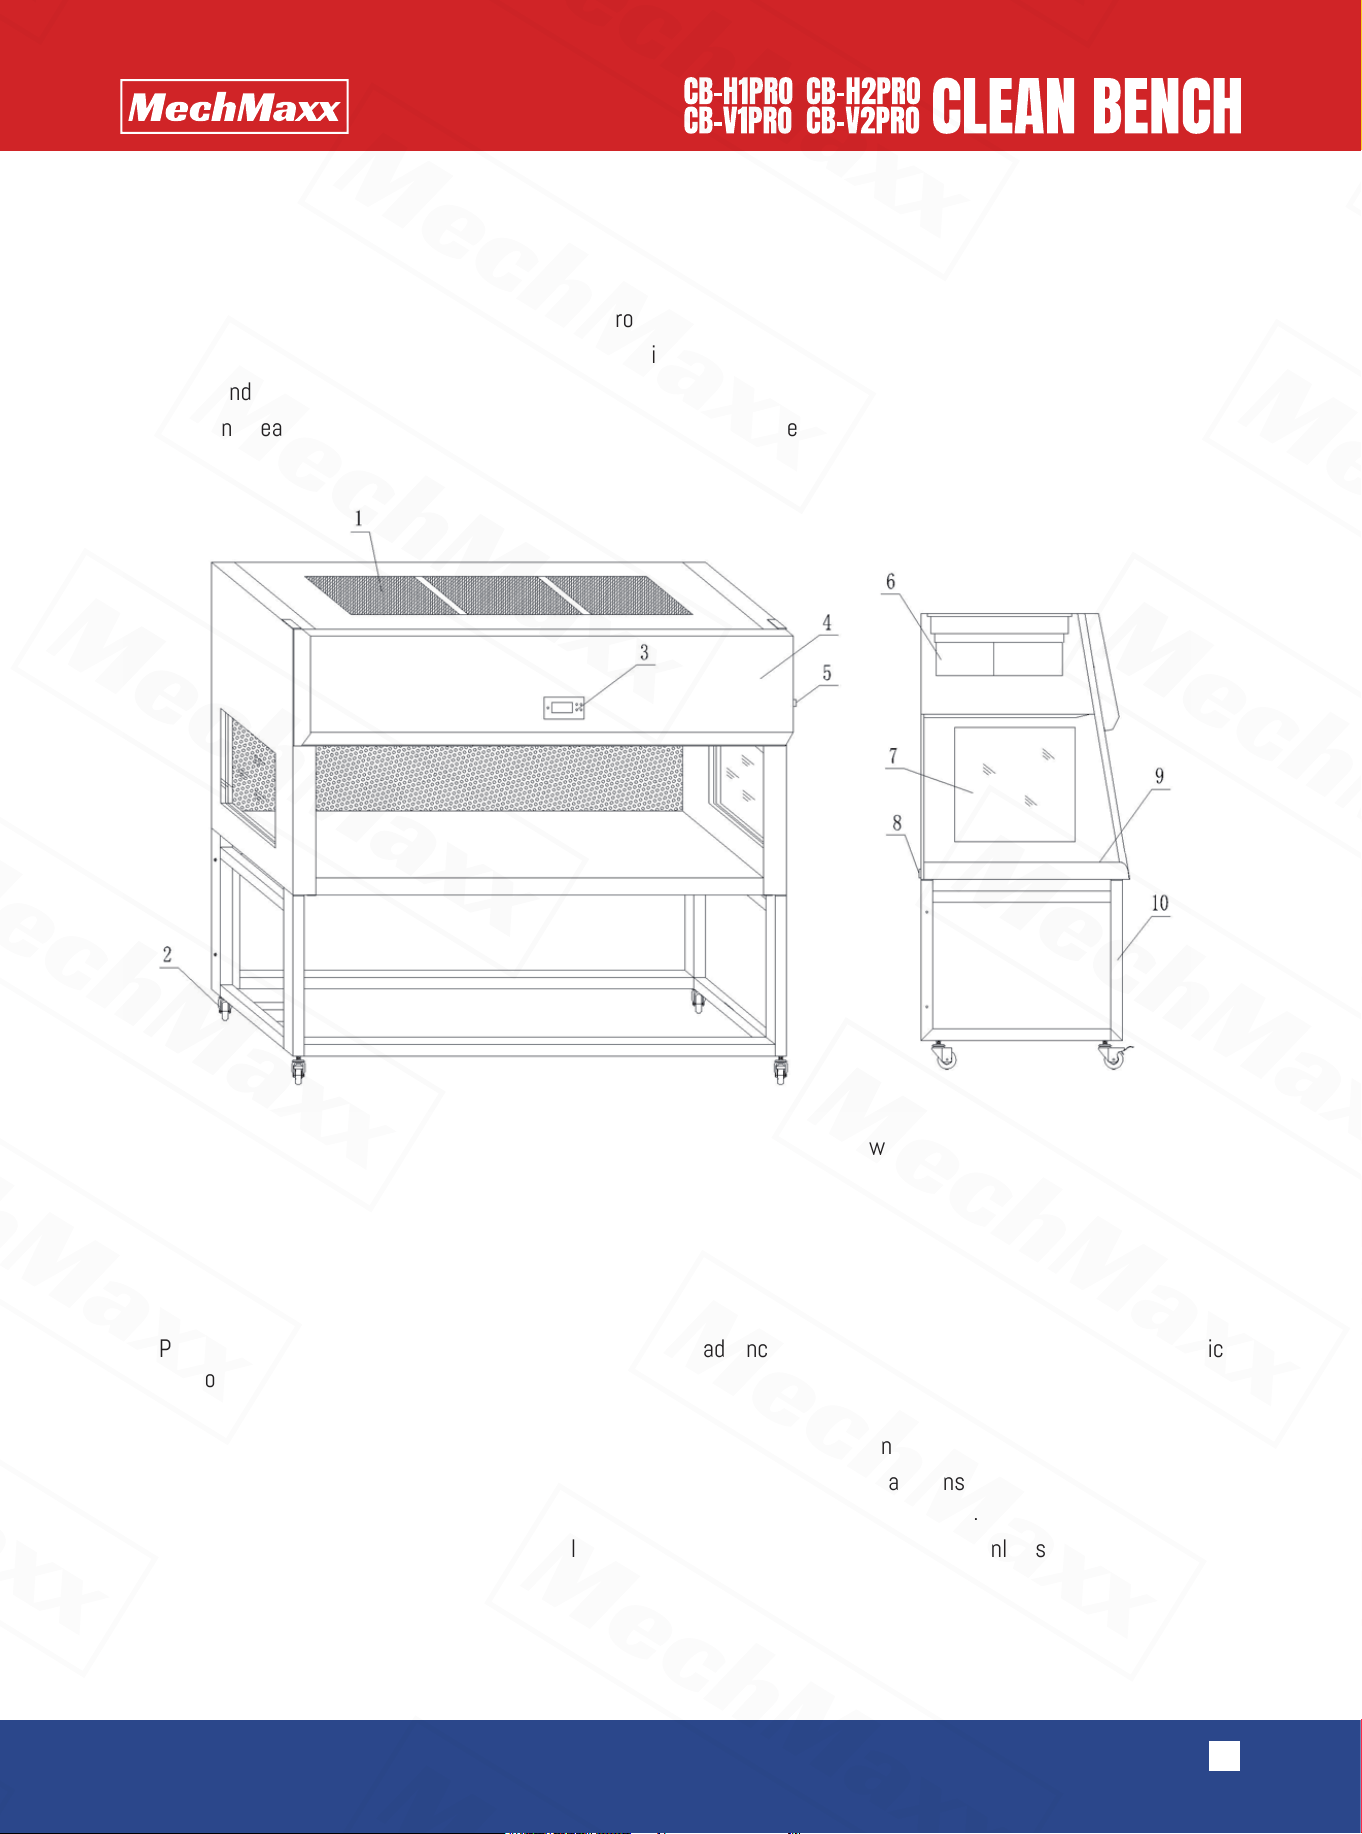
1.Primary filter
2.Wheels
3. Control Panel
4.Front cover
5.Power switch
6.Fan
7.Side glass window
8.Power supply
9.Work surface
10.Stand
STRUCTURE
FEATURES
2
www.mechmaxx.com
1.Cleanliness: ISO Class 5 (Class 100; particles >0.5µm ≤3.5 per liter)
2.Vibration/Amplitude: ≤2µm (≤0.00008 in)
3.Airflow Velocity (Working Area): 59–118 ft/min (0.3–0.6 m/s)
4.Noise Level: ≤62 dB (typical operating condition)
5.Sterilization: After 30 minutes of UV lamp operation, the working area achieves a bacteria-free condition
6.Operating Environment: Temperature 50–86℉(10–30℃), Relative Humidity ≤75% RH
7.Power Supply: AC 110 V ±10%
8.Ensure minimal vibration and dust; avoid installation near strong airflow sources
1.Installation Location
The installation location affects the performance and service life of the equipment. Install the clean bench in a clean
facility with a plastic or terrazzo floor for easy cleaning. Ensure doors and openings are properly sealed to prevent dust
ingress and prolong the equipment’s lifespan.
2.Unpacking and Assembly
•Check all parts against the packing list to ensure completeness.
•Open the accessory package and remove the stand components. Assemble the stand according to the provided drawing
and secure it with eight M10 Allen screws.
•Place the upper chamber onto the assembled stand according to the drawing. Adjust the casters and lock the nuts in
position.
•When moving the equipment, release the front wheel brakes.
3.Placement Considerations
Place the clean bench away from areas with vibration or excessive noise, especially from machinery that could affect
performance.
4.Working Environment
To extend service life and reduce filter replacement frequency, install the clean bench in a GMP-compliant workshop or
laboratory. In ordinary laboratories, the filter should be replaced every 2 years. Avoid installing in areas with high-speed
dust or strong particulate contamination.
5.Airflow Requirements
Ensure normal airflow within the purification area. Do not install the unit in locations subject to strong external airflow
that could disrupt laminar flow.
6.Leakage Testing (Optional)
If a testing instrument is available:
•Move the probe along the airflow outlet section and observe the meter. Any deflection indicates a leak.
•Repeat the test to locate the leak, which may be caused by an improperly sealed edge cushion, damaged cushion, or a
leaking high-efficiency filter.
•Using a hot-ball anemometer: start the fan, place the probe approximately 200 mm above the work surface, move the
probe along the airflow, and observe the pointer to verify airflow uniformity.
TECHNICAL SPECIFICATIONS
INSTALLATION
3
www.mechmaxx.com
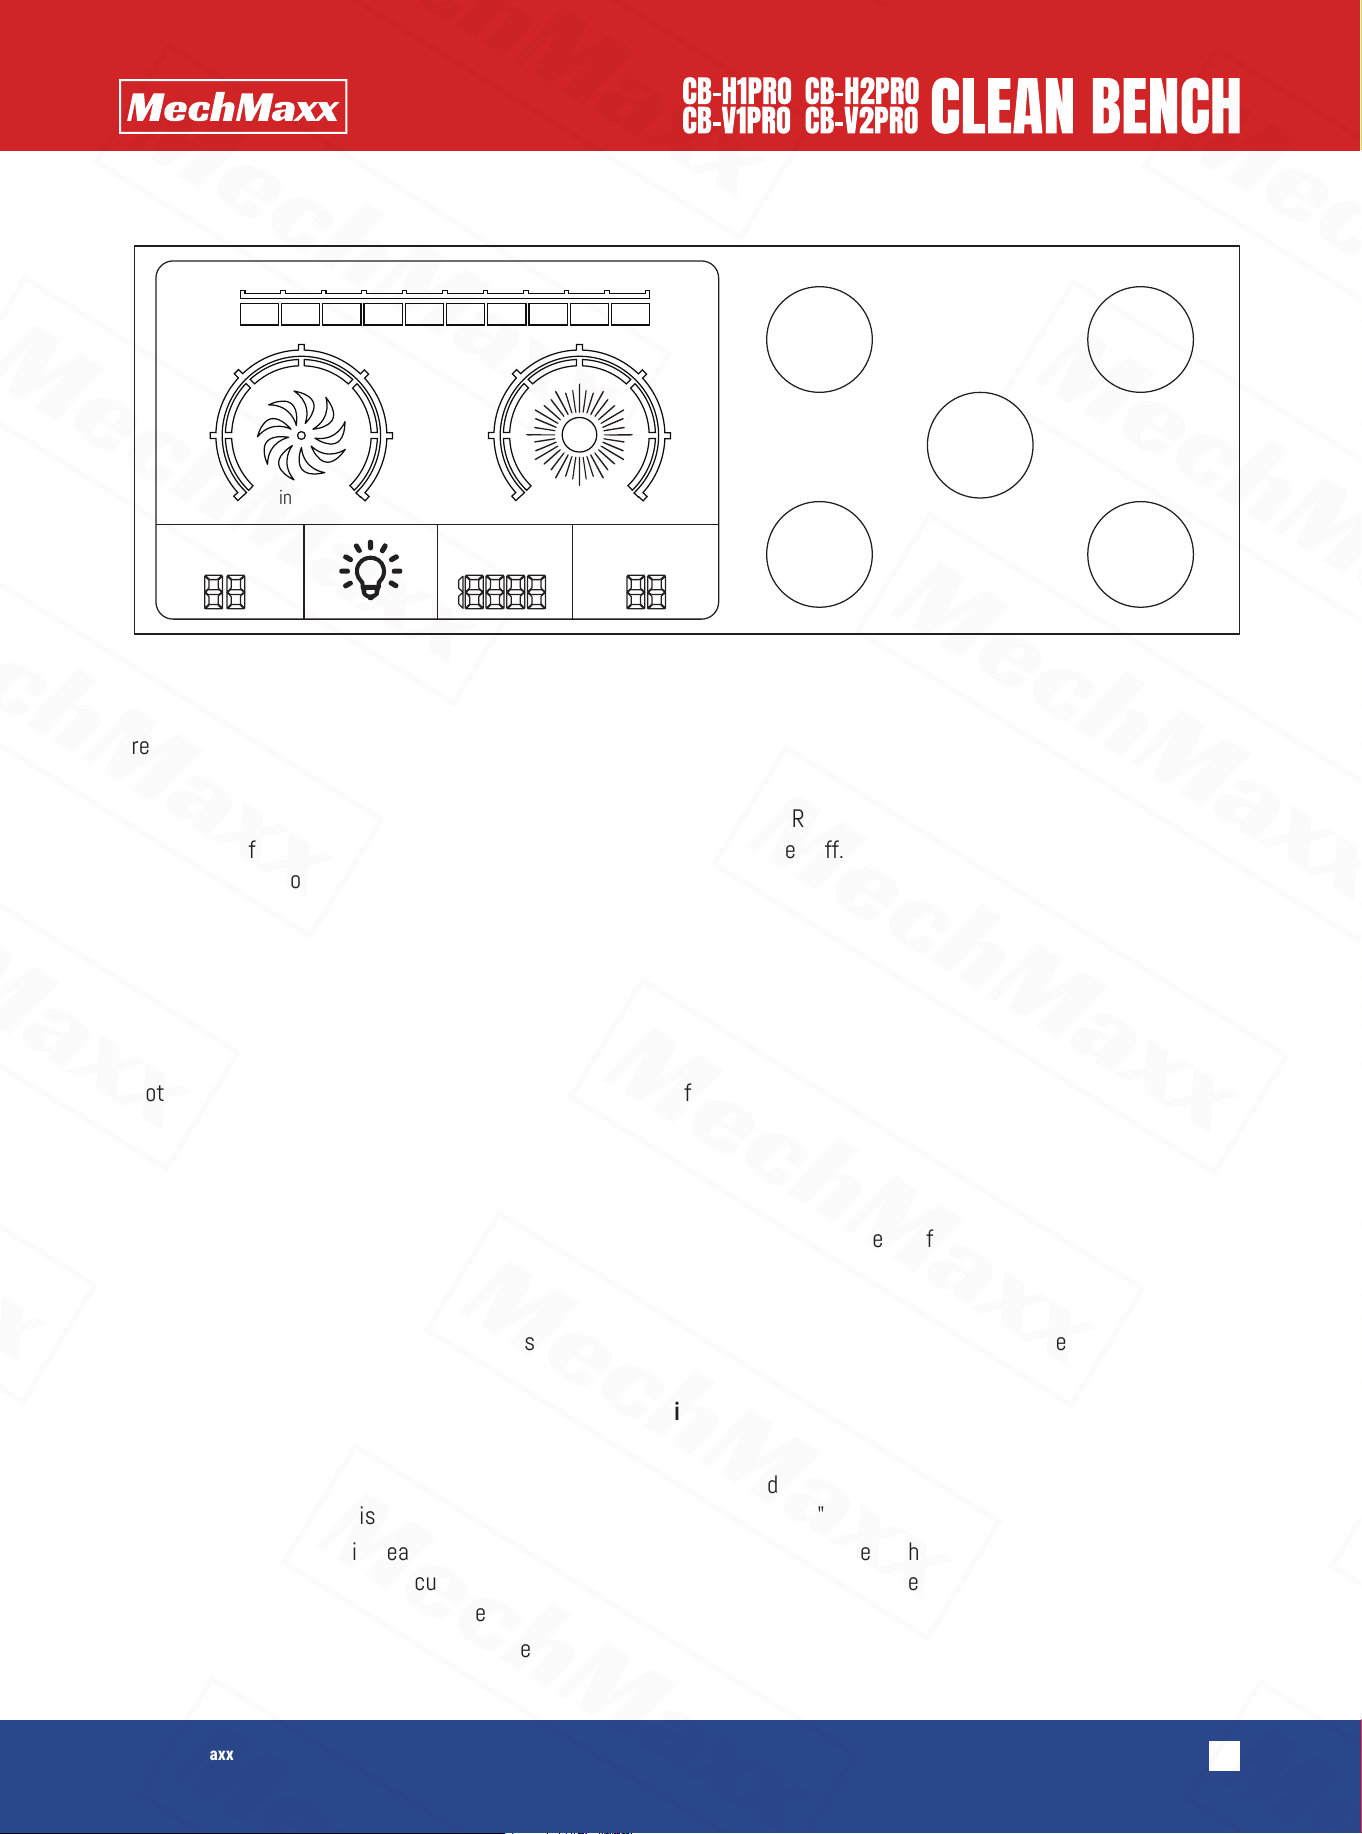
【Switch】
Press to power on the LCD controller and enter normal operation.
【Fan】
Press to start the fan. Wind speed can be adjusted to three levels. Repeatedly pressing cycles through the speed
settings. The fan will remain running even when the controller is powered off. The controller has a memory function and
automatically restores the last wind speed upon restart.
【Disinfection】
Press to activate the UV lamp. Each press adds 20 minutes to the timer. After a few seconds, the UV light will flash
briefly, then operate normally. When the set time expires, the lamp will automatically turn off.
•Press and hold for 3 seconds to switch to “continuous on” mode.
•Press briefly again to turn off the lamp.
•Note: The UV lamp cannot operate simultaneously with the fan or the lighting.
【Lighting】
Press to turn the lighting on. Press again to turn it off.
【Reservation】
Press to set a delayed start for the fan. Each press adds 1 hour. The timer can be set from 0 to 99 hours. When the set
time is reached, the fan will start automatically.
【Pressure Calibration】
When the fan is off, press and hold Fan + Reservation + Disinfection + Lighting simultaneously for 3 seconds to complete
calibration.
The operation for clearing the setting of cumulative working time is as follows:
1.In the screen-off state, long press the [Reservation] key for 3 seconds to enter the "LC 0000" interface.
2.Use the [Fan] key to increase, the [Disinfection] key to decrease, and the [Lighting] key to shift and adjust the parame-
ters. When "LC 0008" is displayed, briefly press the [Reservation] key, and "Pt 0000" will appear.
3.Press the [Fan] key to increase, and "Pt 0001" will be displayed. Then long press the [Reservation] key until a beep is
heard, which indicates that the cumulative working time has been reset to zero successfully. (Note: You must press and
hold the [Reservation] key until the beep sounds, otherwise the reset will not take effect.)
4.Press the [Switch] key and wait for the beep, then the setting mode will be exited.
INSTRUCTION OF CONTROLLER KEYS
KEY FUNCTIONS
ON/OFF
Light
Fan
Disinfection
Disinfection
UV
Wind speed
0
1
2
3
4
5
6
Pressure
difference
0 50 100 150 200 250 300 350 400 450 500
Pa
Temperature
°C
Scheduled
startup
Cumulatve
working hours
Reservation
0
20
40
60
80
100
120
4
www.mechmaxx.com
5.Use the [Fan] key to increase, the [Disinfection] key to decrease, and the [Lighting] key to shift and adjust the parame-
ters. When "LC 0003" is displayed, briefly press the [Reservation] key, and "P 000X" will appear.
- Set to "0000": No differential pressure function.
- Set to "0001": Detects only one set of outlet air pressure.
- Set to "0002": Detects the pressure difference between two sets, one being ambient air pressure and the other outlet
air pressure.
Setting the Upper Limit of Cumulative Working Hours
1.In the screen-off state, long press the [Reservation] key for 3 seconds to enter the "LC 0000" interface.
2.Use the [Fan] key to increase, the [Disinfection] key to decrease, and the [Lighting] key to shift and adjust the parame-
ters. When "LC 0018" is displayed, briefly press the [Reservation] key, and "St XXXX" will appear.
3.Use the [Fan] key to increase, the [Disinfection] key to decrease, and the [Lighting] key to shift, then set the number
after “St” to the desired hour limit. Long press the [Reservation] key until a beep is heard — the beep indicates that the
setting has been saved successfully. Then press the [Switch] key to return to the menu.
Note: If you exit the setting directly without hearing the confirmation beep, the new value will not be saved. When the
cumulative working time exceeds the set limit, the buzzer will sound an alarm each time the device is turned on.
1.Primary Filter Cleaning – To ensure long-term use, remove and clean the primary filter every 4–6 months according to
the provided diagram.
2.HEPA Filter Replacement – If the airflow velocity in the working area falls below (0.08 m/s), the high-efficiency filter
must be replaced. Replacement filters can be purchased from our company. When installing, ensure the arrow on the filter
points in the direction of laminar airflow.
3.Primary Filter Details – Made of 5–8 mm non-woven fabric and secured with a metal mesh, installed at the air inlet.
4.Post-Replacement Inspection – After replacing filters, clean any debris or dust, then run the fan to check airflow and
ensure proper operation.
5.Prohibited Modifications – Do not alter the internal structure. For any quality issues, please contact our after-sales
service.
6.Handling – Move the equipment carefully to avoid damage.
7.Long-Term Storage – When the equipment will not be used for an extended period, unplug the power cord.
MAINTENANCE
PACKING LIST
Serial Name Quantity Remarks
1
2
3
4
5
6
7
Clean bench
Caster bracket
M8 Allen wrench
17-19 open end wrench
Manual
Power cord
Hexagon socket head screws, rubber plugs, gaskets
1
1
1
1
1
1
with M8 hexagon screw
For carster adjustment
14 for each variety.