Claryum
®
Under Sink
Water Filter
Owner’s Manual
Claryum
®
2-Stage Claryum
®
3-Stage Claryum
®
3-Stage Max Flow

AQ-6200
Scan or click to view AQ-6200
product and installation videos.
AQ-6300
Scan or click to view AQ-6300
product and installation videos.
AQ-6300M
Scan or click to view AQ-6300M
product and installation videos.
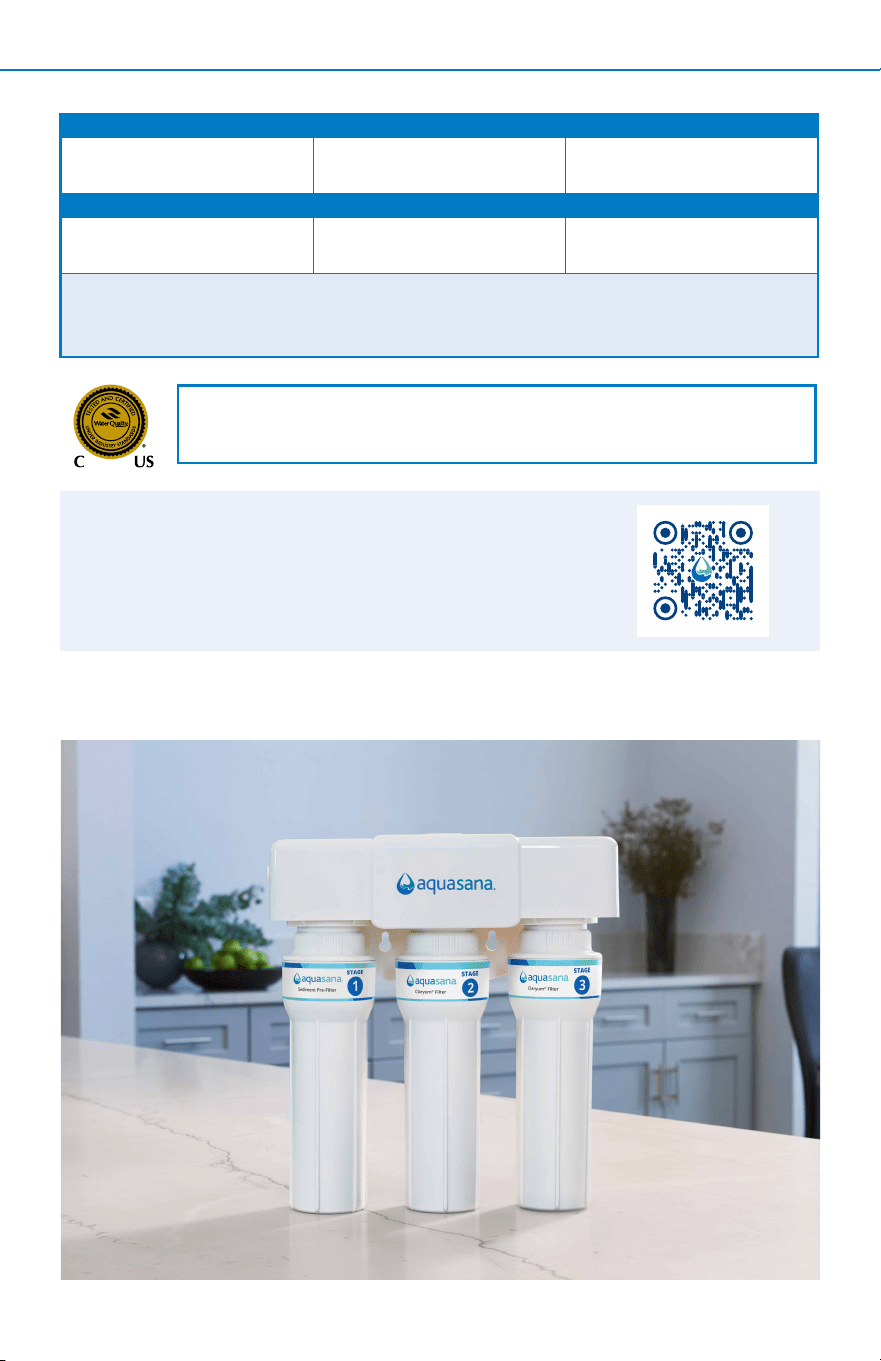
AQ-6200, AQ-6300, AQ-6300M
Claryum
®
Under Sink
Water Filter
TABLE OF CONTENTS
Box Contents ................................................................................................................ 1
Care & Safeguards ....................................................................................................... 2
Installation Steps ....................................................................................................... 3-6
Filter Replacement .................................................................................................... 7-8
Troubleshooting Guide ............................................................................................... 9
Performance & Certications ..............................................................................10-11
Warranty ..................................................................................................................... 12
Water for Life
®
Program ............................................................................................ 13
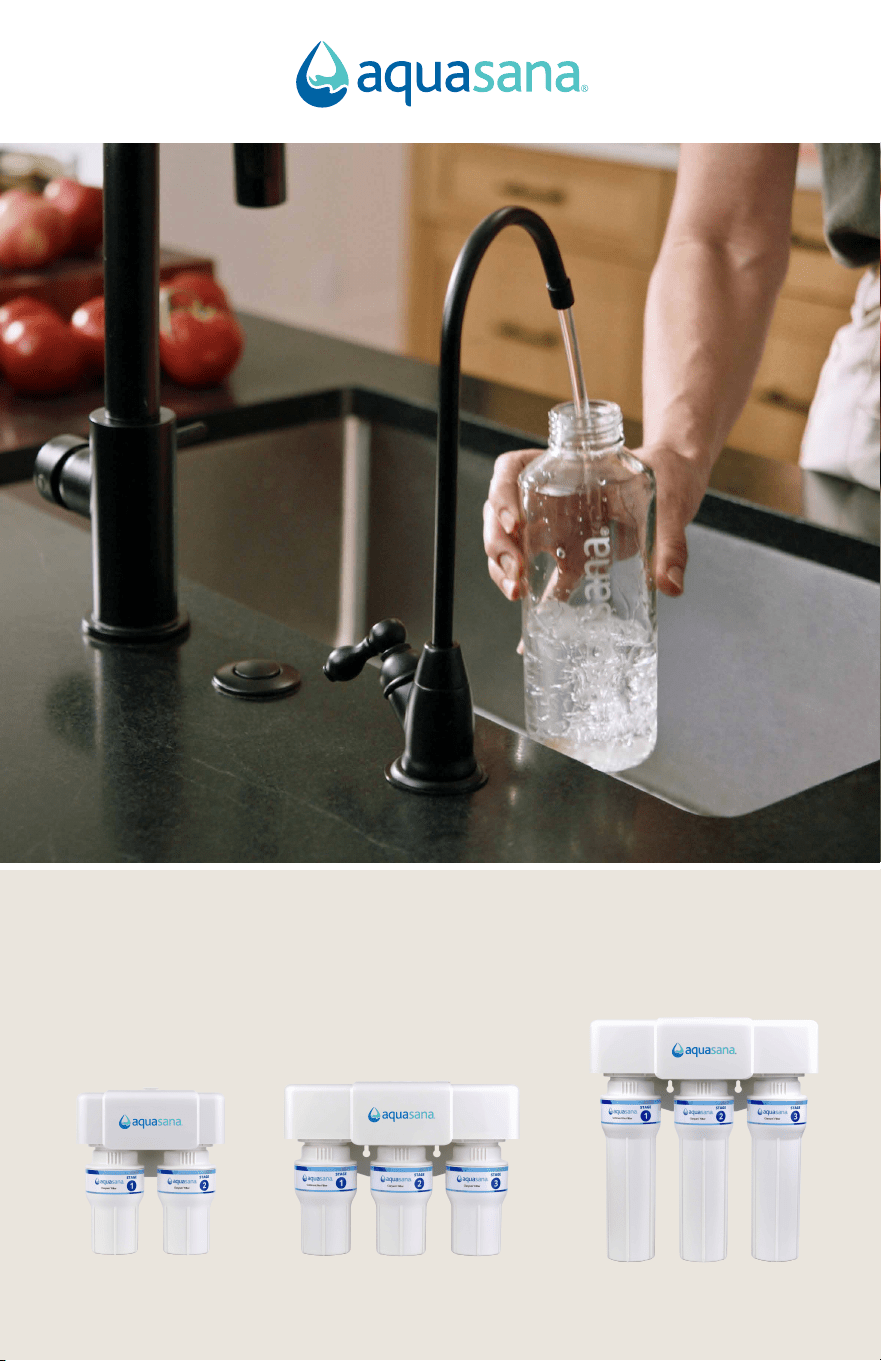
Meet clean, healthy water. Your new Aquasana system features Claryum
®
ltration that removes up to 99.99% of 78 contaminants including
microplastics, lead, PFOA/PFOS, pesticides, pharmaceuticals, and chlorine.*
Enjoy the peace of mind that comes from knowing our award-winning lter
technology is working for you.
*See Performance & Certications (page 10-11) for specics about contaminants reduced.
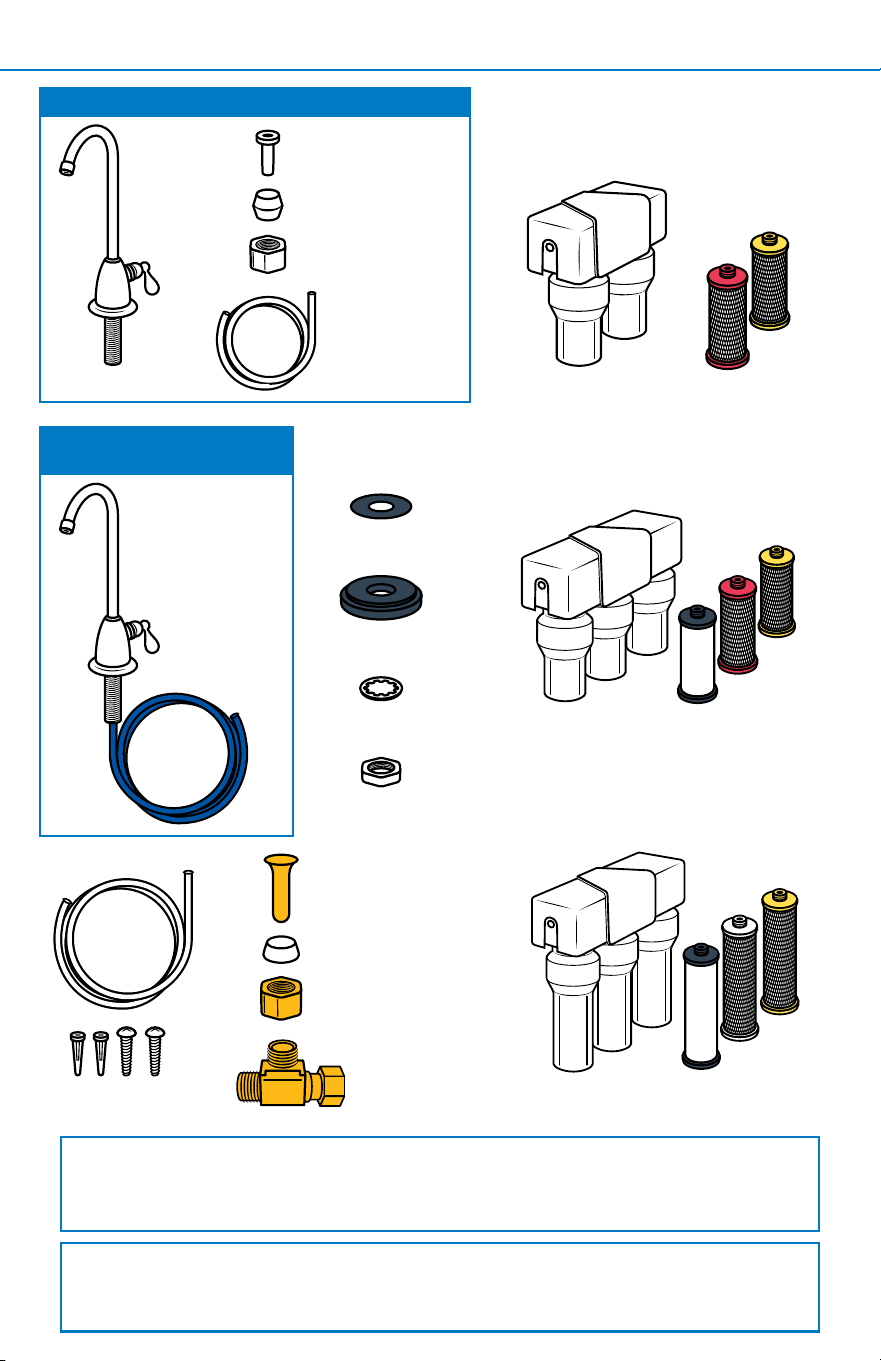
BOX CONTENTS 1
Tubing
Tubing
Screws & Anchors
Before beginning installation, please ensure all parts listed are present.
If any part is missing or damaged, do not attempt to install the lter.
Please contact Customer Support for replacement parts at 866-662-6885.
Models with a Regular Dedicated Faucet
Models with a Pre-Assembled
Dedicated Faucet
Rubber Washer
Faucet Spacer
Lock Washer
Faucet Nut
Chrome Nut
Plastic Collar
Plastic Tube Insert
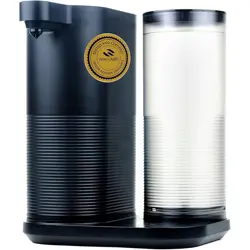
AQ-6200 System with System
Manifold, Filter Housings & Filters
AQ-6300M System with System
Manifold, Filter Housings & Filters
Plastic Collar
Brass
Tube Insert
Brass Nut
Brass
Tee
AQ-6300 System with System
Manifold, Filter Housings & Filters
A
B
C
NOTE: If you purchased a system without a dedicated faucet, contents will not include
the faucet assembly. If your dedicated faucet comes with tubing attached, then the faucet
nut, plastic tube insert, and plastic collar are pre-installed.

2
CARE & SAFEGUARDS2
Use and Care
• To clean your system, wipe down the
exterior with a damp cloth.
• Do not use any strong or abrasive
cleaning agent or solvent cleaner.
NOTICE
Important Safeguards
• Do not install this system where the
line pressure may exceed 80 psi. The
operating pressure range for this lter
is between 20-80 psi.
• Install on COLD water lines only
(40° - 90°F).
• Use caution when installing the system
manifold on a cabinet wall that backs
up to a dishwasher. Screws may exceed
cabinet width.
• It is recommended that your system
be installed inside and out of direct
sunlight. The system must be protected
from both direct sunlight and freezing
temperatures.
• Filter usage must comply with all state
and local laws.
• Do not operate without the
lters installed.
• Must replace housing every 5 years or
risk property damage from leaks. Visit
aquasana.com or aquasana.com/water-
lter-products to order.
• Do not use with water that is
microbiologically unsafe or of unknown
water quality without adequate
disinfection before or after the system.
• Systems certied for cyst reduction may
be used on disinfected waters that may
contain lterable cysts.
Battery Notices
• Compatible battery type: CR2450 Lithium
Coin Battery
• Compatible battery voltage: 3V
• Ensure batteries are installed correctly
according to polarity (+ and -).
• Do not mix old and new batteries,
dierent brands or types of batteries,
such as alkaline, carbon-zinc, or
rechargeable batteries.
• Non-rechargeable batteries are not
to be recharged.
• Do not force discharge, recharge,
disassemble, heat above 90°F, or
incinerate. Doing so may result in injury
due to venting, leakage, or
explosion resulting in chemical burns.
• Remove and immediately recycle or
dispose of batteries from equipment
not used for an extended period of time
according to local regulations.
• Always completely secure the
battery compartment. If the battery
compartment does not close securely,
stop using the product, remove the
batteries, and keep them away from
children.
• Remove and immediately recycle or
dispose of used batteries according to
local regulations and keep them away
from children. Do NOT dispose
of batteries in household trash or
incinerate them.
• Even used batteries may cause injury
or death.
• Call a local poison control center for
treatment information.
Please read all precautions and instructions carefully before using.
WARNING
• INGESTION HAZARD: This product contains a button cell or coin battery.
• DEATH or serious injury can occur if ingested.
• A swallowed button cell or coin battery can cause Internal Chemical Burns in as little as 2 hours.
• KEEP new and used batteries OUT OF REACH of CHILDREN.
• Seek immediate medical attention if a batter is suspected to be swallowed or inserted inside
any part of the body.
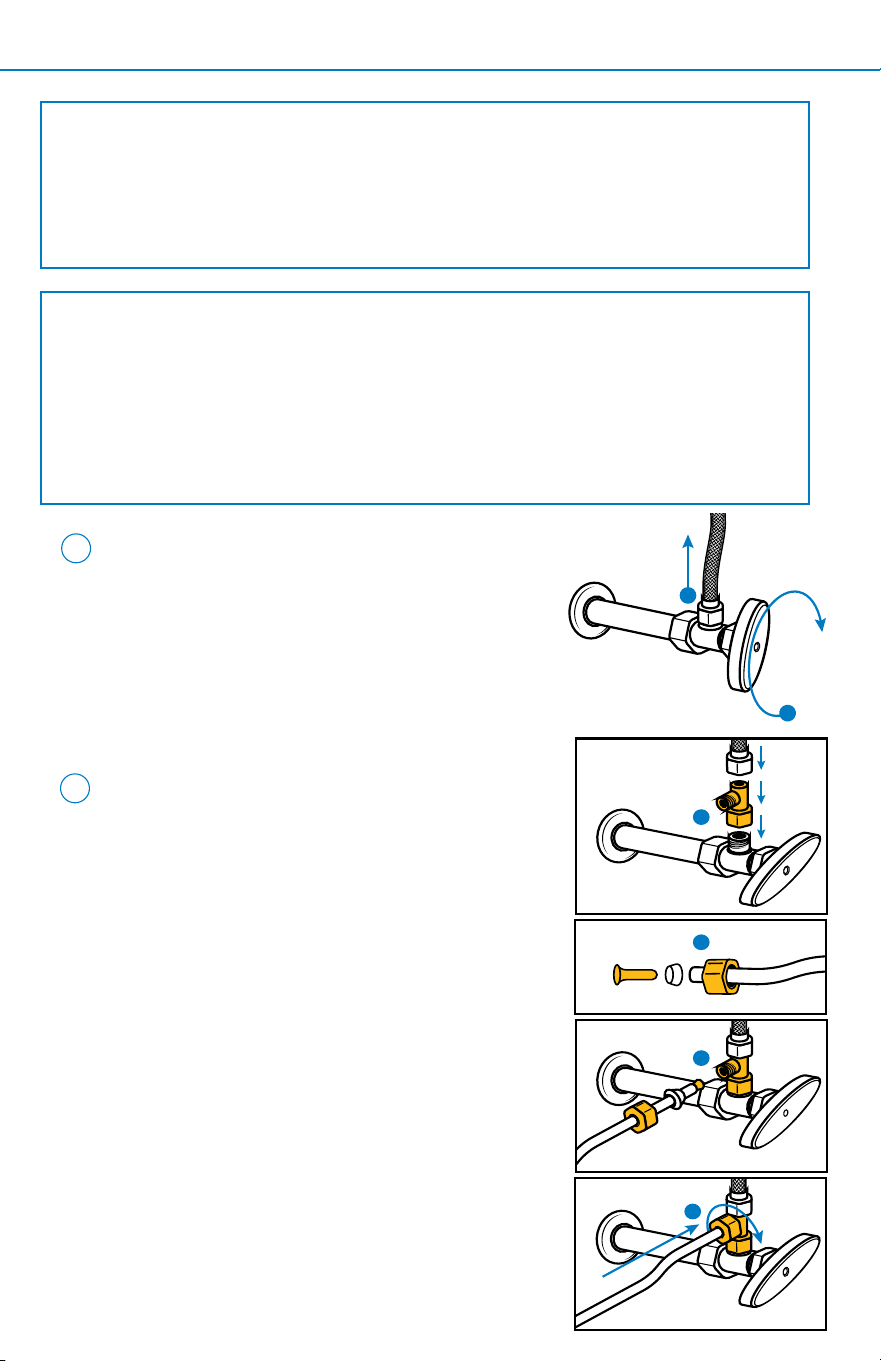
INSTALLATION STEPS 3
Attach Brass Tee and Tubing
A. Attach threaded ends of brass tee to the
cold water supply line and shut-o valve.
Tighten with wrench.
B. Prepare the tubing by sliding the
compression nut on the thicker (if
applicable) white tubing with the threads
of the nut facing the end of the white
tube. Next, add the plastic collar (if
applicable, wider side should be facing
the nut). Finally, insert the brass tee
insert into the opening of the tube.
C. Push the prepared white tubing (with the
compression nut, plastic collar, and brass
tee insert installed) into the opening of
the brass tee.
D. Slide the compression nut over the
plastic collar, then attach to the brass
tee. Tighten with a wrench.
1
2
NOTE: This system requires an existing faucet hole at least 1/2” in diameter in the sink
or countertop to install the supplied dedicated faucet. You may also replace an existing
kitchen sink sprayer, soap dispenser, or use pre-existing hole on the sink or countertop.
If using a hole from a current dedicated faucet, ensure the hole is at least 1/2” in
diameter.
If drilling a new hole, ensure faucet body will mount at against surface and there is
sucient tubing between faucet body and system manifold. If drilling, we strongly
recommend using a professional. Please wear safety glasses when drilling.
Set Up
A. Unpack and unwrap box contents.
B. Turn o the cold water supply. Turn on
the kitchen faucet to release pressure
and allow water to drain from the line.
C. Disconnect the cold water supply using
a wrench.
B
C
A
B
D
A
C
C
B
• Variable Speed Drill w/ 1/8" or 7/32" Bit
• Adjustable Wrench
• Philips Head Screwdriver
• Level
• Pencil
• Measuring Tape
• Bucket
• Hammer
• Safety Glasses
Tools Recommended for Installation:
2
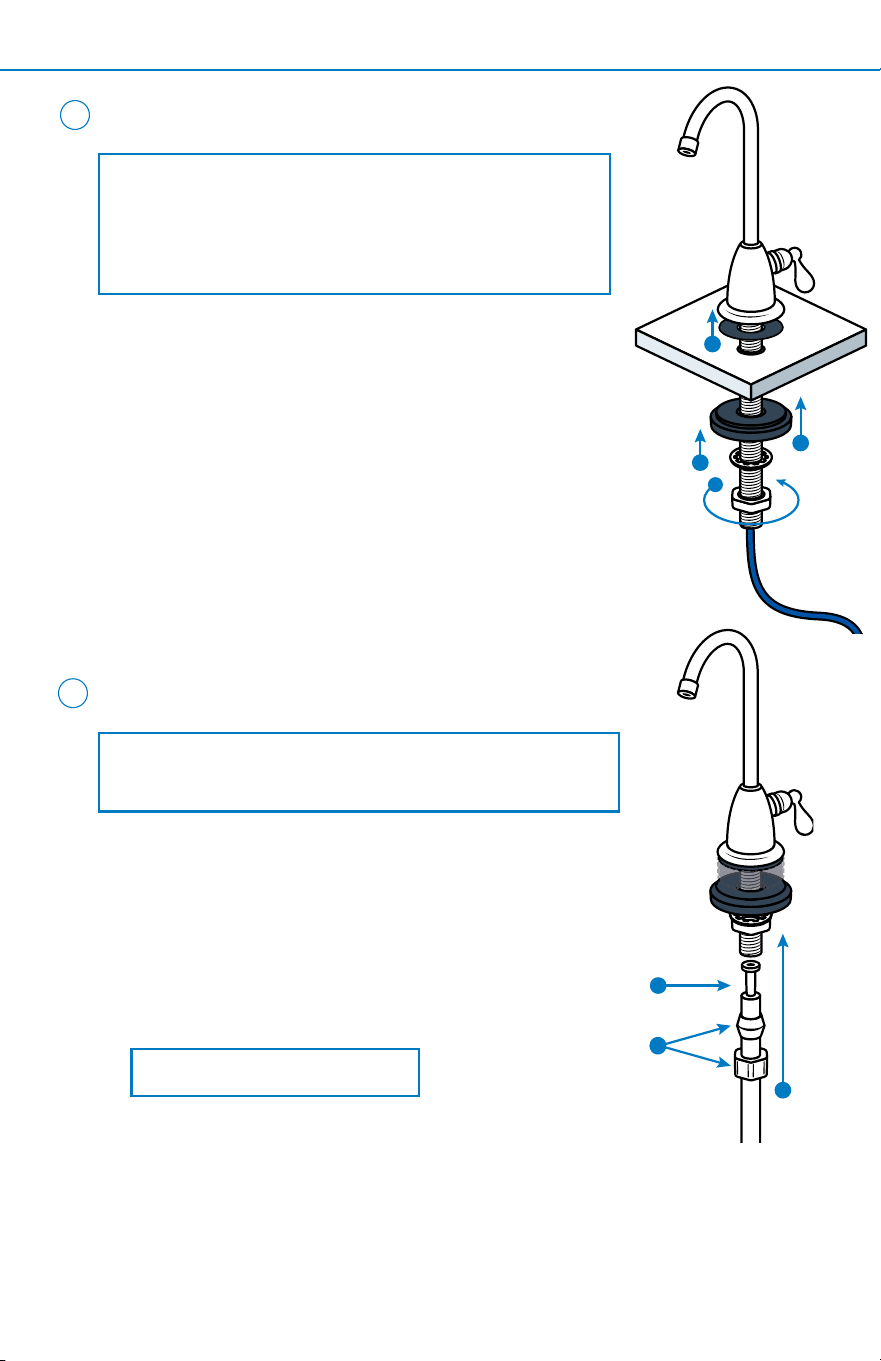
INSTALLATION STEPS4
Install Dedicated Faucet
A. Slide rubber washer onto dedicated faucet and
insert into drilled hole.
B. From underneath the sink, slide faucet spacer
onto dedicated faucet.
C. Slide lock washer onto dedicated faucet.
D. Tighten faucet nut to secure faucet to sink.
Connect Dedicated Faucet
A. Slide the chrome nut onto the thinner (if applicable)
white tubing, followed by the plastic collar.
B. Press the plastic tube insert into the end of the tubing.
C. Press the tubing against the faucet base, and slide the
chrome nut and plastic collar up to the threads of the
faucet. Use wrench to tighten.
4
D
B
C
A
C
A
B
NOTE: Do not over tighten.
3
NOTE: For Separate Faucet - If you purchased a faucet
separately, skip step 3 (Install Dedicated Faucet) and
follow the faucet manufacturer's installation manual.
Once the faucet is installed, proceed to step 5 (Install
System Manifold).
NOTE: Pre-Assembled Faucets: Skip step 4 if your faucet
has blue tubing attached.
Pre-Assembled Faucets:
Slide parts A-D over blue tubing.
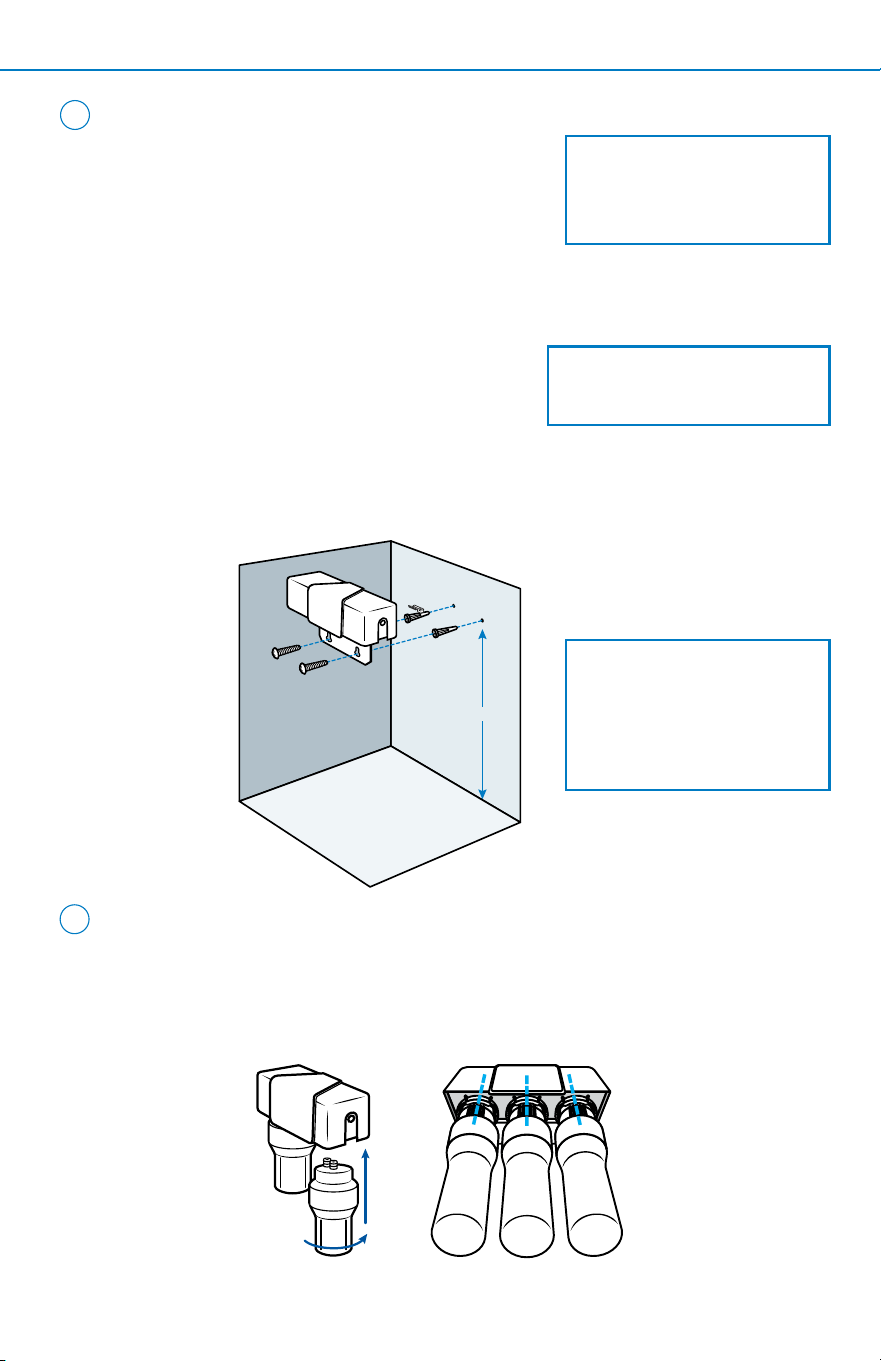
INSTALLATION STEPS 5
5
Install System Manifold
A. Select a location under the sink that is at
least 12" from the bottom of the cabinet to
access system for scheduled lter changes.
Do not install lter cartridges at this time.
B. Use mounting holes located on the back
of the system manifold to mark screw placements with pencil.
AQ-6200: 2.6" • AQ-6300: 3.9" • AQ-6300M: 3.9"
C. Drill pilot holes using a 1/8" bit.
D. Insert screws into the pilot holes, but do
not screw into the wall completely. Hang
the manifold on the screws, then tighten the screws.
E. Pull the protective plastic strip from battery compartment. LED will ash
red and beep 5 times to indicate correct battery installation.
12" min
NOTE: Select a location
that allows easy access
to cold water supply and
lter replacing.
NOTE: If installing the
system inside a cabinet
next to your dishwasher,
use caution when drilling
into the cabinet wall.
NOTE: If using anchors, drill
pilot holes using a 7/32" bit.
6
B
Attach Filter Housings
A. Attach each lter housing to the bottom of the system manifold.
Ensure the connection points are correctly aligned, then push the
lter housing up while turning to the right. Turn until you feel a 'click'
and the lter housing is locked into place.

7
8
Connect Water Supply Lines
A. Mark a line 1” from the end of
each tube and push the tubing
from the brass tee end into the
inlet side (left side).
B. Mark a line 1” from the end of
each tube and push the tubing
from the faucet side into the
outlet side (right side).
Flush System
A. Turn on cold water and check for leaks.
B. Flush water for 10 minutes to remove carbon nes.
NOTE: Ensure tubing is completely
inserted (to a minimum of 1”) so leaking
does not occur. Wet end of tubing for
an easy install into inlets and outlets.
Cut excess tubing to prevent crimping,
kinks, loops or folds.
NOTE: Do not drink ushed water.
2
INSTALLATION STEPS6
A
B
1 2
AQ-6200 AQ-6300 AQ-6300M
1 2 1 2 3
1 2 3
B. Continue this step for the additional lter housing(s) in the sequence
noted below for your specic model.
NOTE: Ensure all lter housings are attached and locked in place as pictured
above. Ensure the lter housings are not on an angle while attaching, as this
could result in leakage or damage to the o-rings. Do not lubricate the o-rings.
Red • Yellow Black • Red • Yellow Black • White • Yellow
1”
Depth to insert tubing
(actual size)
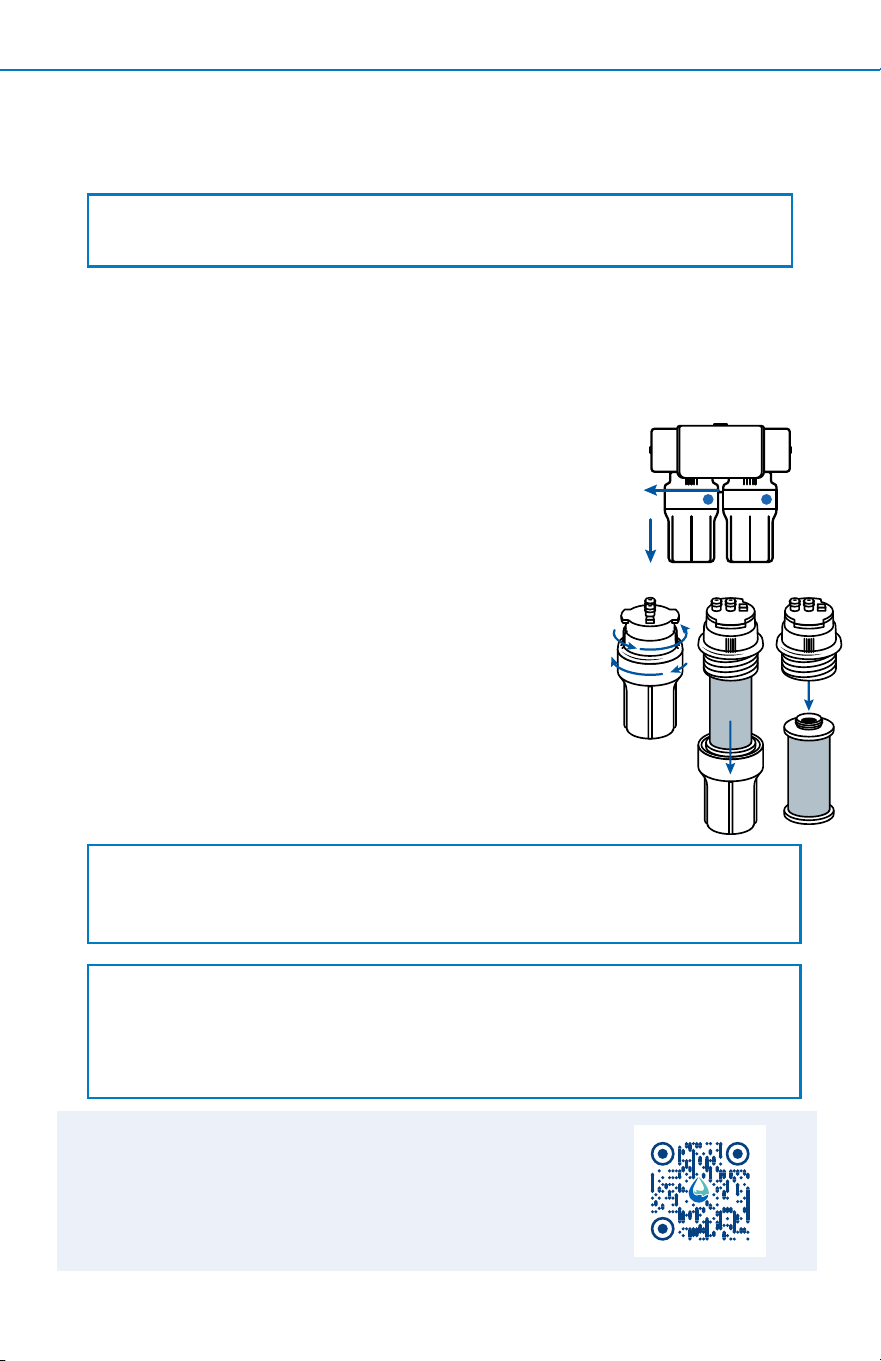
FILTER REPLACEMENT 7
Once lters are at 95% capacity (about every 6 months), the battery alarm will
sound and indicator light will turn red when water is owing then will continue
to sound for 15 seconds after water is turned o.
1. Shut o the cold water valve under the sink. Release the pressure from
the system by turning on the dedicated faucet. Once there is no longer
any water owing, you can proceed with replacing the lters.
2. Unbox lter replacements and remove plastic. Each lter is color coded
to match the color shown on the lter housing.
3. Remove each lter housing from the system manifold
by turning the lter housing to the left. Pull down to
detach. Ensure the lter housings are not on an angle
while removing. This may result in damage to the o-ring.
4. Holding the lter housing over the sink, open it by
turning the bottom to the left and the cap to the right.
Pour excess water down sink drain. Pull down on
dirty lter to disconnect it from the lter housing.
Continue this step for each lter housing. While the
housing is open, inspect each o-ring for damage. If
misaligned, gently move the o-ring into place.
NOTE: If lter housing is too tight to disconnect by hand, please use the plastic
wrench included with original system.
NOTE: The battery will need to be replaced every time the lters are replaced.
A battery is included with the lter replacement cartridges.
NOTE: The lter housing sumps must be replaced every ve years. Failure to do
so could result in potential leaks due to product deterioration. To order, visit
aquasana.com/water-lter-products.
1 2
Scan or click to view the Claryum
®
Under Sink
Replacement video.
B
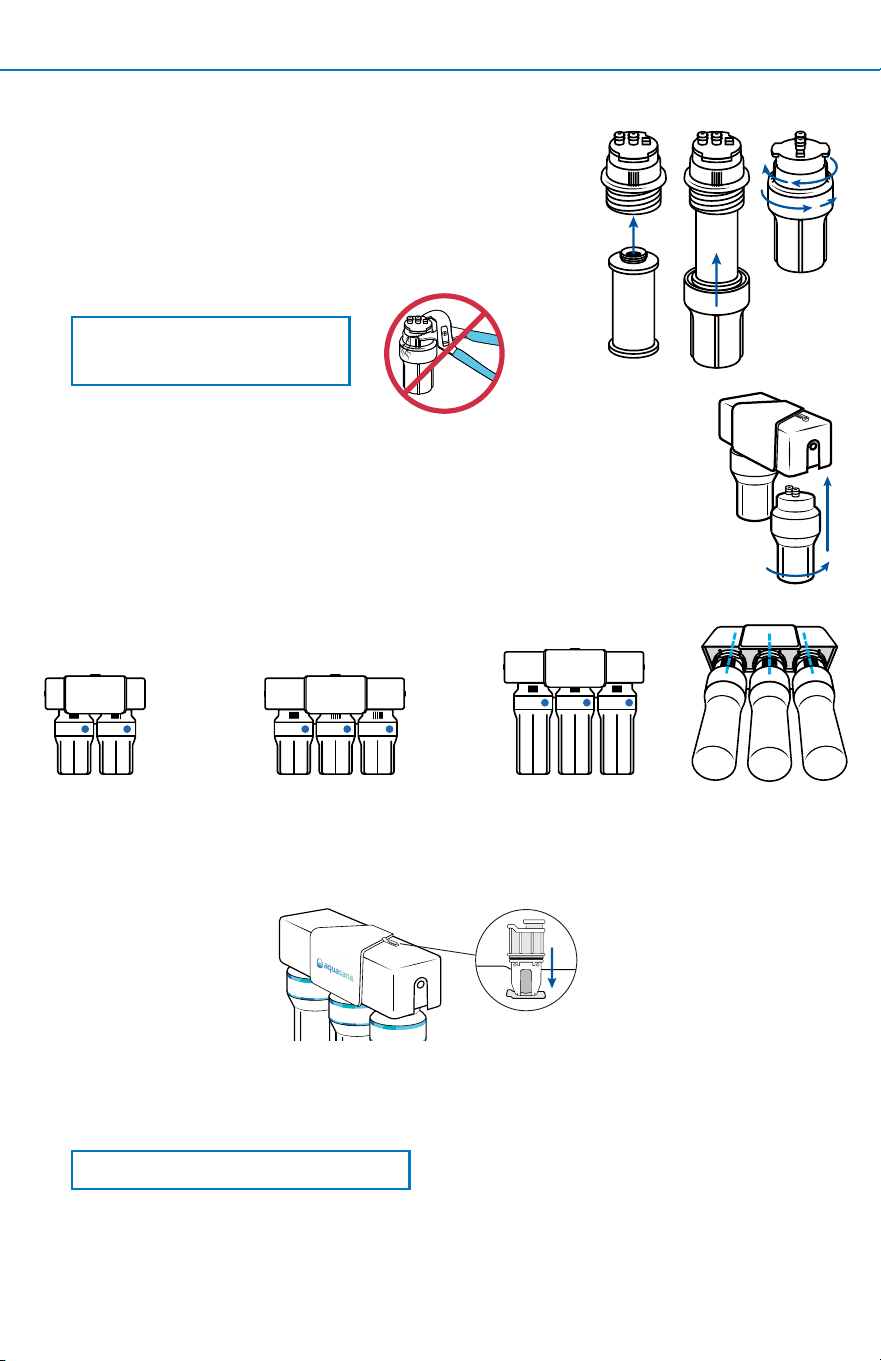
5. Press new replacement lter to the top cap of the
lter housing using the appropriate color coded lters.
Then, reconnect the bottom of the lter housing to the
top cap. Ensure the threads are correctly aligned, then
turn the bottom to the right and the cap to the left to
tighten. Continue this step for each lter housing.
6. Reattach each lter housing to the bottom of the system manifold.
Ensure connection points are correctly aligned, then push the lter
housing up while turning to the right. Turn until you feel a 'click'
and the lter housing is locked into place. Continue this step for
the additional lter housing(s). Ensure all lter housings are locked
in place, are not on an angle, and are aligned as pictured. Improper
placement may result in damage to the o-ring or leakage.
7. Open battery compartment and remove old battery tray. Dispose of battery tray
per instructions on page 2. Insert new battery tray into battery compartment.
When inserted correctly, system will beep ve times and blink red.
8. Once all lter housings have been replaced and attached, slowly turn water
valve on. Turn o faucet and inspect for leaks. Then, ush system for 10 minutes
before drinking.
2
FILTER REPLACEMENT8
NOTE: Do not use tools to
tighten. Hand tighten only.
NOTE: Do not drink ushed water.
AQ-6200
Red • Yellow
AQ-6300
Black • Red • Yellow
AQ-6300M
Black • White • Yellow
1 2 1 2 3
1 2 3
–
+
–
–

TROUBLESHOOTING GUIDE 9
TOPIC ISSUE RESOLUTION
Water Quality
Filter Disposal
Vacation
& Long
Absences
How do I know the
system is ltering my
drinking water?
How do I dispose of
or recycle the lter
cartridges?
I’m going on vacation
— what should I do
with my ltration
system?
What’s the micron
rating for each stage of
the ltration system?
Why is my system
beeping?
I live in a two-person
household. Do I still
need to replace the
lters every 6 months?
The best way to check is to use a water quality test kit or have a
licensed professional test your water. This can conrm the system
is eectively reducing contaminants.
Our lters are designed to minimize environmental impact:
• They’re made with over 95% biodegradable carbon and recyclable
polypropylene plastic (Class 5).
• To recycle: Remove the plastic ends and recycle them, then discard the
carbon. It's landll-safe and will degrade naturally.
If you’ll be away for less than 2 weeks, it’s generally okay to leave the
system as-is.
For longer trips or added peace of mind, we recommend winterizing
the system using the steps provided in your product manual or by
contacting our support team.
• Pre-lter (if included): 5 microns
• Carbon lters: 0.5 sub-micron mechanical ltration
A beeping system means it’s time to change your lters. The AQ-6300M system
includes a built-in alert that takes the guesswork out of lter replacement.
Yes. Even in smaller households, we recommend replacing the lters
every 6 months to ensure optimal ltration and great-tasting water.
Tubing
Included
Faucet Fitting
Sizes
How much tubing
comes with the
system?
What is the size of the
chrome nut on the
faucet?
What is the size of the
faucet mounting nut?
The amount of tubing included depends on the faucet type you received
with your system:
Faucet with Tubing Pre-Attached
• 2-Stage System: (1) 1/4” x 36” tubing
• 3-Stage System: (1) 3/8” x 36” tubing
• 3-Stage Max Flow System (MF): (1) 3/8” x 36” tubing
Faucet with No Tubing Pre-Attached
• 2-Stage System: (2) 1/4” x 36” tubing
• 3-Stage System: (1) 3/8” x 36” tubing and (1) 1/4” x 36” tubing
• 3-Stage Max Flow System (MF): (1) 3/8” x 36” tubing and (1) 1/4” x 36” tubing
The chrome compression nut that connects the tubing to the faucet (for
versions without tubing pre-attached) is approximately 13mm (about 0.51”).
The small nut used to secure the faucet to your sink or countertop is
approximately 14mm (about 0.552”).
This size is the same for all versions, whether or not the faucet has tubing
pre-attached.
Refrigerator
Compatibility
Can I connect my
fridge water line to
the ltration system?
Yes! You can either run the line directly to the fridge or use a tee tting at
the outlet going to the faucet. Keep in mind:
• There may be a drop in water pressure
• Use a quick connect tting, available at stores like Home Depot or Lowe’s
• Since our systems aren’t specically designed for fridges, we can’t provide
detailed recommendations beyond this general guidance.
Filter
Installation
Filter
Replacement
How do I know I
connected the lter
correctly?
How do I know when
to change my lters?
Make sure the lter is properly aligned in the system manifold. There is an
arrow on the top cap of the lter that should line up with the center tick mark
on the manifold. You should feel a tactile “click” when it’s properly in place.
Your system will alert you when it’s time to change the lters — usually every
6 months or after they reach 95% capacity. At that point:
• The indicator light will turn red when water is owing.
• A beeping sound will occur while water is running and continue for 15
seconds after it stops.
2
PERFORMANCE & CERTIFICATIONS10
Model Replacement Rated Capacity
AQ-6200 AQ-C2-R
500 gallons
1,892 liters
Operating Temp. Range Operating Pressure Range Service Flow
40-90° F
4.44-32.2° C
20-80 psi
137.89-551.58 kPa
0.5 gpm
1.9 lpm
Manufactured by: Aquasana, Inc.
6310 Midway Road · Haltom City, Texas 76117
866-662-6885
System tested and certied by WQA to NSF/ANSI Standards 42, 53, and 401 for the reduction of
the claims specied on the Performance Data Sheet and at www.WQA.org.
For the full list of contaminants ltered, scan
or click to view the AQ-6200 Performance Data
Sheet on Aquasana.com.
Model Replacement Rated Capacity
AQ-6300M AQ-C3M-R
800 gallons
3,028 liters
Operating Temp. Range Operating Pressure Range Service Flow
40-90° F
4.44-32.2° C
20-80 psi
137.89-551.58 kPa
0.72 gpm
2.7 lpm
Manufactured by: Aquasana, Inc.
6310 Midway Road · Haltom City, Texas 76117
866-662-6885
Model Replacement Rated Capacity
AQ-6300 AQ-C3-R
600 gallons
2,270 liters
Operating Temp. Range Operating Pressure Range Service Flow
40-90° F
4.44-32.2° C
20-80 psi
137.89-551.58 kPa
0.5 gpm
1.9 lpm
Manufactured by: Aquasana, Inc.
6310 Midway Road · Haltom City, Texas 76117
866-662-6885
System tested and certied by WQA to NSF/ANSI Standards, 42, 53, and 401 for the reduction
of the claims specied on the Performance Data Sheet and at www.WQA.org.
System tested and certied by WQA to NSF/ANSI Standards, 42, 53, and 401 for the reduction
of the claims specied on the Performance Data Sheet and at www.WQA.org.
For the full list of contaminants ltered, scan
or click to view the AQ-6300 Performance Data
Sheet on Aquasana.com.
For the full list of contaminants ltered, scan
to view the AQ-6300M Performance Data
Sheet on Aquasana.com.
PERFORMANCE & CERTIFICATIONS 11

WHO IS COVERED
AQUASANA AND ITS SUPPLIERS, (herein collectively referred
to as “Manufacturer”) warrants to the original owner who
purchased and installed the system (hereinafter “Owner”).
Registration of the product is not required to receive warranty
coverage as specied in this document. If you purchased from
an Aquasana-authorized reseller or dealer, proof of purchase
is required.
WHAT IS COVERED
This Warranty covers defects in materials or workmanship dur-
ing the limited Warranty period of your of your Aquasana Water
Filtration System including sub-components purchased with
original system (may or may not include faucet and ttings), ex-
cept as provided below. The water lter is warranted only when
it is installed, operated and maintained in accordance with the
instructions accompanying the water lter found on Aquasana.
com. A water lter should be installed in such a manner that, if
the system or any connection thereto should leak, the resulting
ow of water will not cause damage to the area in which it is
installed. For detailed instructions read the manual accompany-
ing the water lter and review drawings in the manual.
FOR HOW LONG
This Warranty runs for 12 months (365 days) from the date of
purchase by a consumer (hereinafter “Warranty Period”). No
Warranty coverage will be provided if the claimant is unable
to provide proof of purchase from an authorized Aquasana
reseller. Estimated lifespan of products is for information only
and is based on usage approximations. Water conditions and
use rates may limit the functional lifespan of your lter. This
Limited Warranty does not extend to the full estimated life span
of the system.
WHAT AQUASANA WILL DO
1. If necessary, the Manufacturer will provide a replacement
that fullls the remaining estimated lifespan/capacity of
your original purchase and send it to you with installation
instructions. If industry standards, product improvements or
product obsolescence prohibit Manufacturer from furnishing
an identical model replacement water lter under this War-
ranty, the Owner will be furnished with a new water lter of
comparable remaining capacity and functionality; however,
the Owner will be charged for the additional value of the
item(s) which Manufacturer has incorporated in the replace-
ment water lter. The Warranty period for any replacement
will run for the balance of the original 365 days.
2. Component Part – If any component part proves to Manufac-
turer’s satisfaction to be defective in material or workman-
ship within the Warranty period listed on the data plate label,
the Manufacturer will furnish the Owner with a replacement
for the defective part(s).
3. Return of Defective Water Filter and Component Parts –
Manufacturer reserves the right to examine the alleged
defect in the water lter or component part(s), and it will
be the Owner’s obligation to return the water lter and/or
component part(s) to the Manufacturer at the Manufacturers
request.
a. When returning a water lter, it must include all compo-
nent parts.
b. When returning component part(s), they must be individu-
ally tagged and identied with the water lter’s model
number, date of purchase, and date of installation.
WHAT IS NOT COVERED
1. This Warranty does not cover lter cartridges and any sys-
tems that were not installed in compliance with the instruc-
tions or that have been abused or operated incorrectly.
2. This Warranty applies only to products purchased from
Aquasana or an Aquasana-authorized reseller or dealer.
3. Except when specically prohibited by the applicable state
law, the Limited Warranty stated herein is in lieu of any and
all warranties, express or implied (whether written or oral),
including, but not limited to, the implied warranties of mer-
chantability and tness for a particular purpose.
4. Except when specically prohibited by the applicable state
law, the Manufacturer shall not be liable for any incidental,
consequential, special, or contingent damages or expenses,
arising, directly or indirectly, from any defect in the water
lter of the use of the water lter.
5. Manufacturer shall not be liable for any water damage aris-
ing, directly or indirectly, from any defect in the water lter or
component part(s) or from its use.
6. Manufacturer shall not be liable for any damage or product
failures caused by any of the following:
• The water lter or any of its component parts have been
subject to misuse, alteration, neglect or accident.
• The water lter has not been installed in accordance with
the applicable local plumbing and/or building code(s) and/or
regulations or in their absence.
• The water lter is not installed, operated and maintained
in accordance with the printed Manufacturer’s instructions,
including if the water lter has any additional aftermarket
equipment introduced into the sealed system not approved
by the manufacturer.
• The water lter is exposed to highly corrosive conditions.
• The water lter is not continuously supplied with potable water.
• The water lter is not operated within the factory calibrated
temperature limits.
• The water lter is installed in direct sunlight or exposed to
freezing temperatures.
• The water lter or any of its component parts fail due to
sediment build-up.
• Clogging due to purchaser’s failure to replace the lter
cartridges.
• Damage caused by re, ood or acts of God.
• Damage caused by over-pressurization in the water line.
7. Manufacturer shall not be liable for any claims related to
excessive noise, smell, or taste of water.
8. This Warranty does not cover damage caused by the use of
parts that are not genuine Aquasana parts. This includes, but
is not limited to replacement lters, faucets, and/or diverter
valves.
9. Except when specically prohibited by the applicable state
law, the Owner, and not the Manufacturer, shall be liable
for and shall pay for all charges for labor or other expenses
incurred in the removal, repair or replacement of the water
lter or any component part(s) claimed to be defective or any
expense incurred to remedy any defect in the product. Such
charges may include, but are not necessarily limited to:
a. All freight, shipping, handling and delivery costs of forward-
ing a new water lter or replacement part(s) to the owner.
b. All costs necessary or incidental in removing the defective
water lter or component part(s) and installing a new
water lter or component part(s).
c. Any material required to complete, and/or permits re-
quired for, installation of a new water lter or replacement
part(s), and
d. All costs necessary or incidental in returning the defective
water lter or component part(s) to a location designated
by the Manufacturer.
10. This warranty provides specic legal rights and limitations,
but you may have other rights under applicable state law.
HOW TO GET SERVICE
To receive service under this Warranty, you must contact
Aquasana (A. O. Smith Water Treatment (North America), Inc.) at
1-866-662-6885 or [email protected] within the Warranty
Period to describe the problem to a customer service represen-
tative who will verify that the product is under Warranty and
determine whether a part or the system will be replaced and
whether you must send back the unit. You will be required to
provide both proof of purchase and proper installation.
HOW STATE LAW APPLIES
This Warranty gives you specic rights and you may have other
rights which vary from state to state.
Claryum
®
2, 3, and 3+-Stage
1-Year Limited Warranty

Protect your investment and save money with Water for Life
®
.
Our Water for Life
®
program helps you protect the investment you’ve made in
your family’s health with an extended limited warranty on your new ltration
system, a 15% discount on replacement lters, and free shipping.
* Exclusions apply. Limited Warranty details are available at aquasana.com. Benets are for the term of Water for Life membership.
Free Shipping
Replacements shipped to
you right when you need
them — at no extra cost.
Discounted
Replacements
The only way to lock
in a 15% discount on
replacement lters.
Extended
Limited Warranty
Our performance promise
to you — free replacement
parts when needed.
*
No Contract
Free to join and cancel
anytime — no long-term
commitment required.
CONTACT US TO LEARN MORE
866-275-2319

100382603
AQ-6000-OM-20250922
Aquasana, Inc.
6310 Midway Road
Haltom City, Texas 76117
866.662.6885 USA
877.332.7873 Canada
www.aquasana.com
NEED HELP?
Give us a call at
866-662-6885 and
tell us what's going on.
LOVE IT?
Please let us know with a
review on Aquasana or
your retailer’s site.