Quick start guide
1. Safety Instructions
1.1 Unified Instructions
This wheeled robot can only be used indoors on flat surfaces such as wood floors, ceramic
tiles, and thin carpets. Using in outdoor space (for example, open balcony), on the rugged
ground (for example, stairs), in a temperature above 40° C or below 0° C, or on surfaces
covered with fluid or gooey stuff is not allowed.
Do not pull or push the robot while it is working. If you need to push or move the robot, press
the emergency stop switch to stop it from moving first.
Do not block the robot components or overfill the tray. Otherwise, the robot may fail to move
properly or get lost.
Do not pat the device or press or tap hard on the screen, or damages may be caused.
Do not overload the robot. Do not put any flammable solid, gas, or liquid on the tray. Do not
deliver goods with high temperatures or soups to avoid damaging the robot or injuring the
passer-by.
Do not maintain the robot when the power is on.
Cables on the ground should be put away in advance to prevent the robot from dragging them.
All sharp-edge objects (such as decoration wastes, glasses, nails) should be removed from the
ground to prevent damage to the robot chassis.
A maximum speed of 0.8 m/s (2.62 ft/s) is recommended for safe operation. No playing is
allowed in front of the robot to avoid unnecessary harm. Although the robot features automatic
obstacle avoidance, there is a blind spot. Blocking the robot moving at a high speed may cause
accidents.
Do not deliver unpackaged drinks or beverages. Do not deliver liquids at high temperatures.
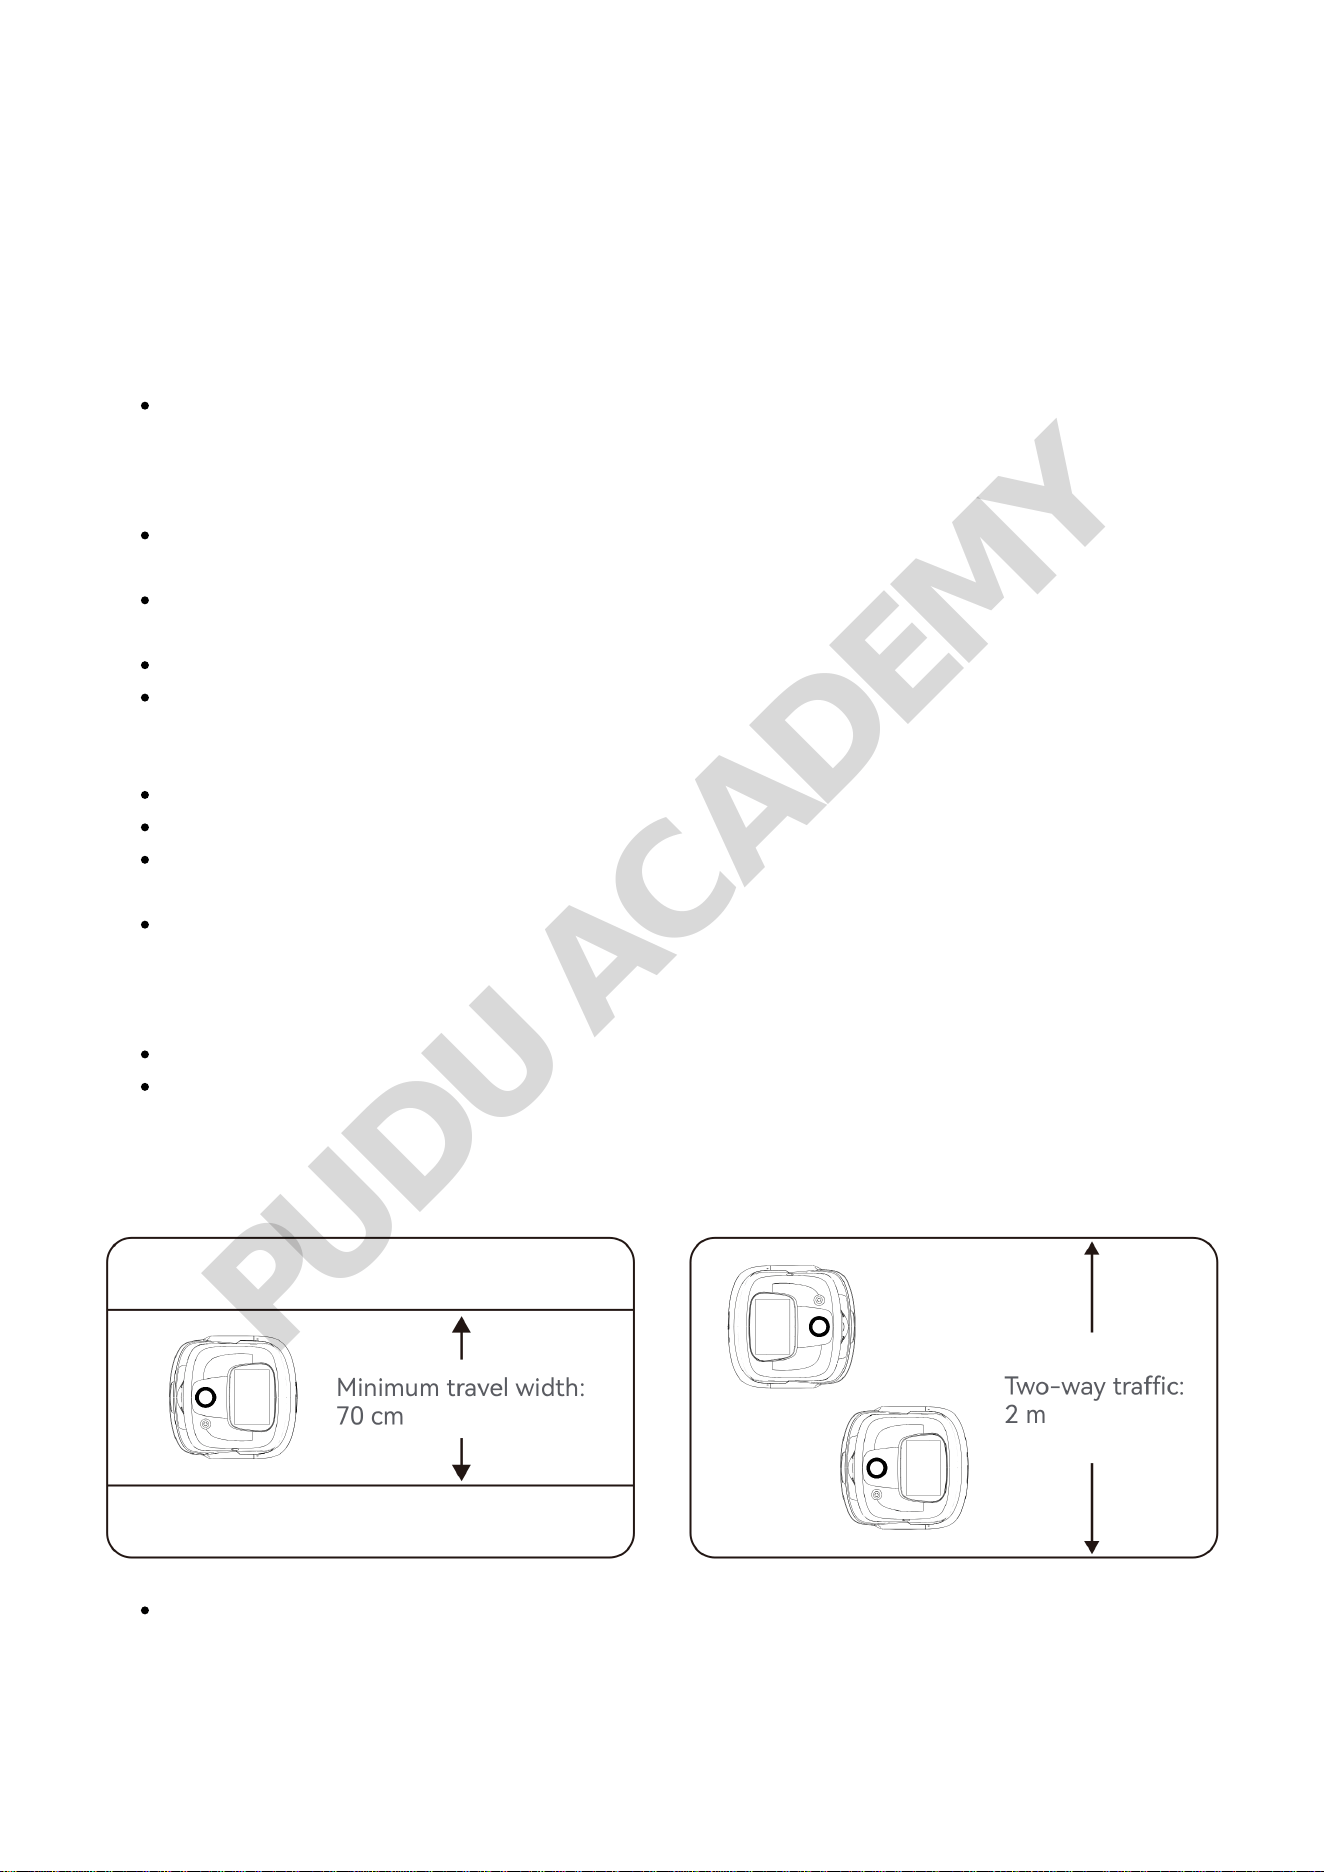
The aisle should be at least 70 cm (27.56 in) wide for the robot to pass. In the case of a long
aisle, a width of 1 m is recommended for smooth moving. A width of 2 m (6.56 ft) allows two
robots to move in two directions (The required width depends on the technician's evaluation of
the scene).
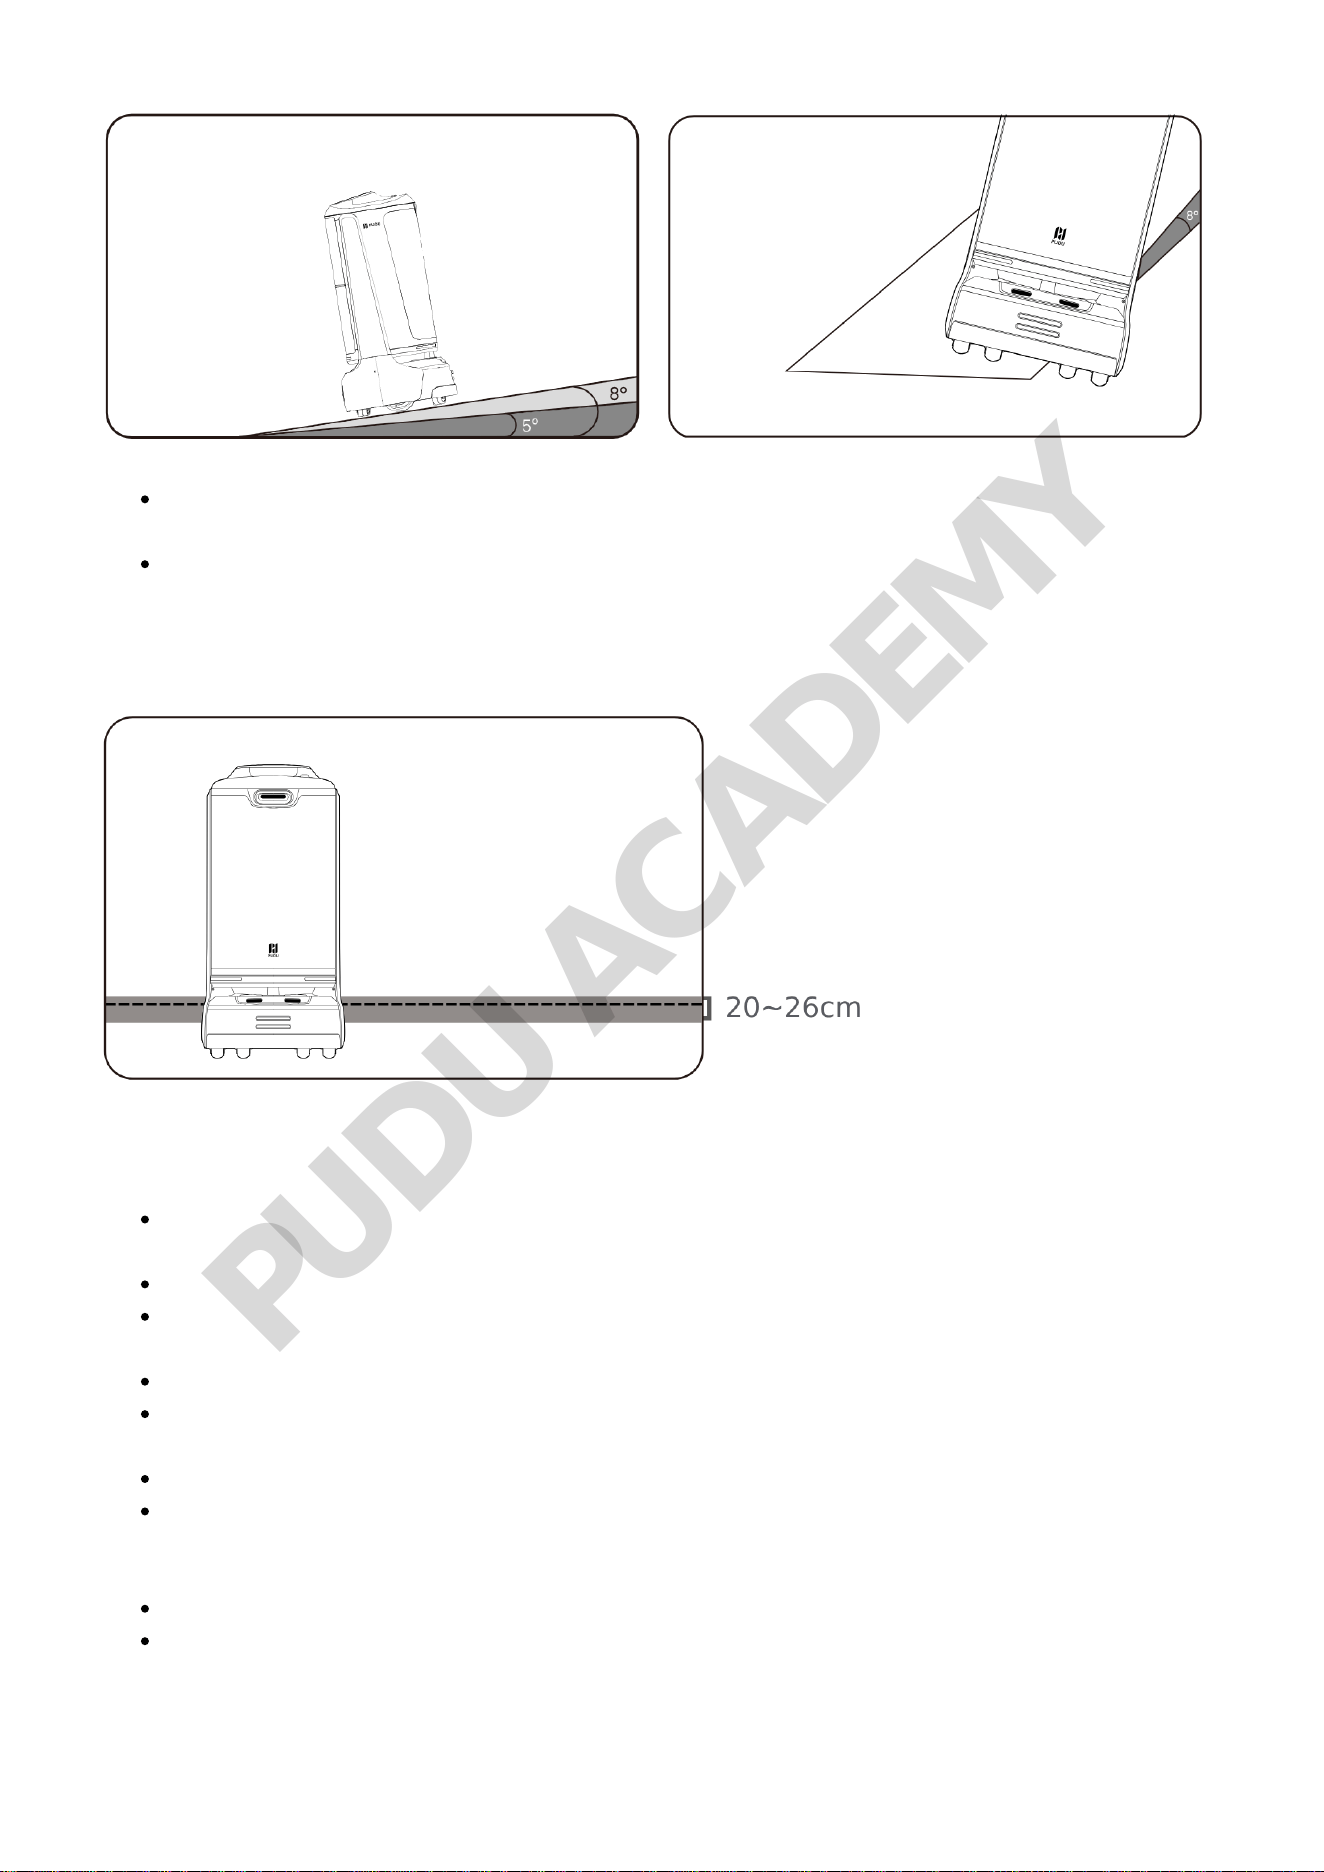
The maximum possible slope is 8° for the robot. To prevent spilling, the suggested slope
should be less than 5º, and the limit of 7.5° should not be exceeded. To prevent sliding, the
robot should not be paused when moving uphill. To prevent falling, the slope should be at least
70 cm (27.56 in) wide, and the roll angle should not exceed 8°.
PUDU ACADEMY
It is necessary to add fences or other barriers at the edge of a staircase, entrance to a
downslope, or other places where the robot is at risk of falling.
Things that are black (for example, skirting line), polished (for example, wall), or transparent
(for example, French window) at a height of 20 to 26cm (7.87 to 10.24 in) or below may
interfere with the radar and cause abnormal moving of the robot. Such sites should be
modified (e.g., posting stickers).
1.2 Instructions on power supply and power usage
When the battery drops to 20%, the robot should be charged timely. Running at a low battery
for a long time may impair battery life.
If not used for a long time, the robot should be shut down to protect the battery.
Always use the original rechargeable batteries and chargers. Do not charge your robot using
non-original chargers.
Charge the robot according to the power voltage indicated on the charger nameplate.
If the robot battery is at fault, please contact the manufacturers for replacement, do not have
it operated by a non-professional.
Do not charge the robot near flammable and explosive objects.
Store and charge the robot in a dry area at room temperatures. Never place the robot and
charger in an area of elevated temperatures (>40℃). Never let water get into the robot and
charger.
Protect the charger from collision damage.
When the robot sends an alarm, disconnect the charger immediately.
PUDU ACADEMY
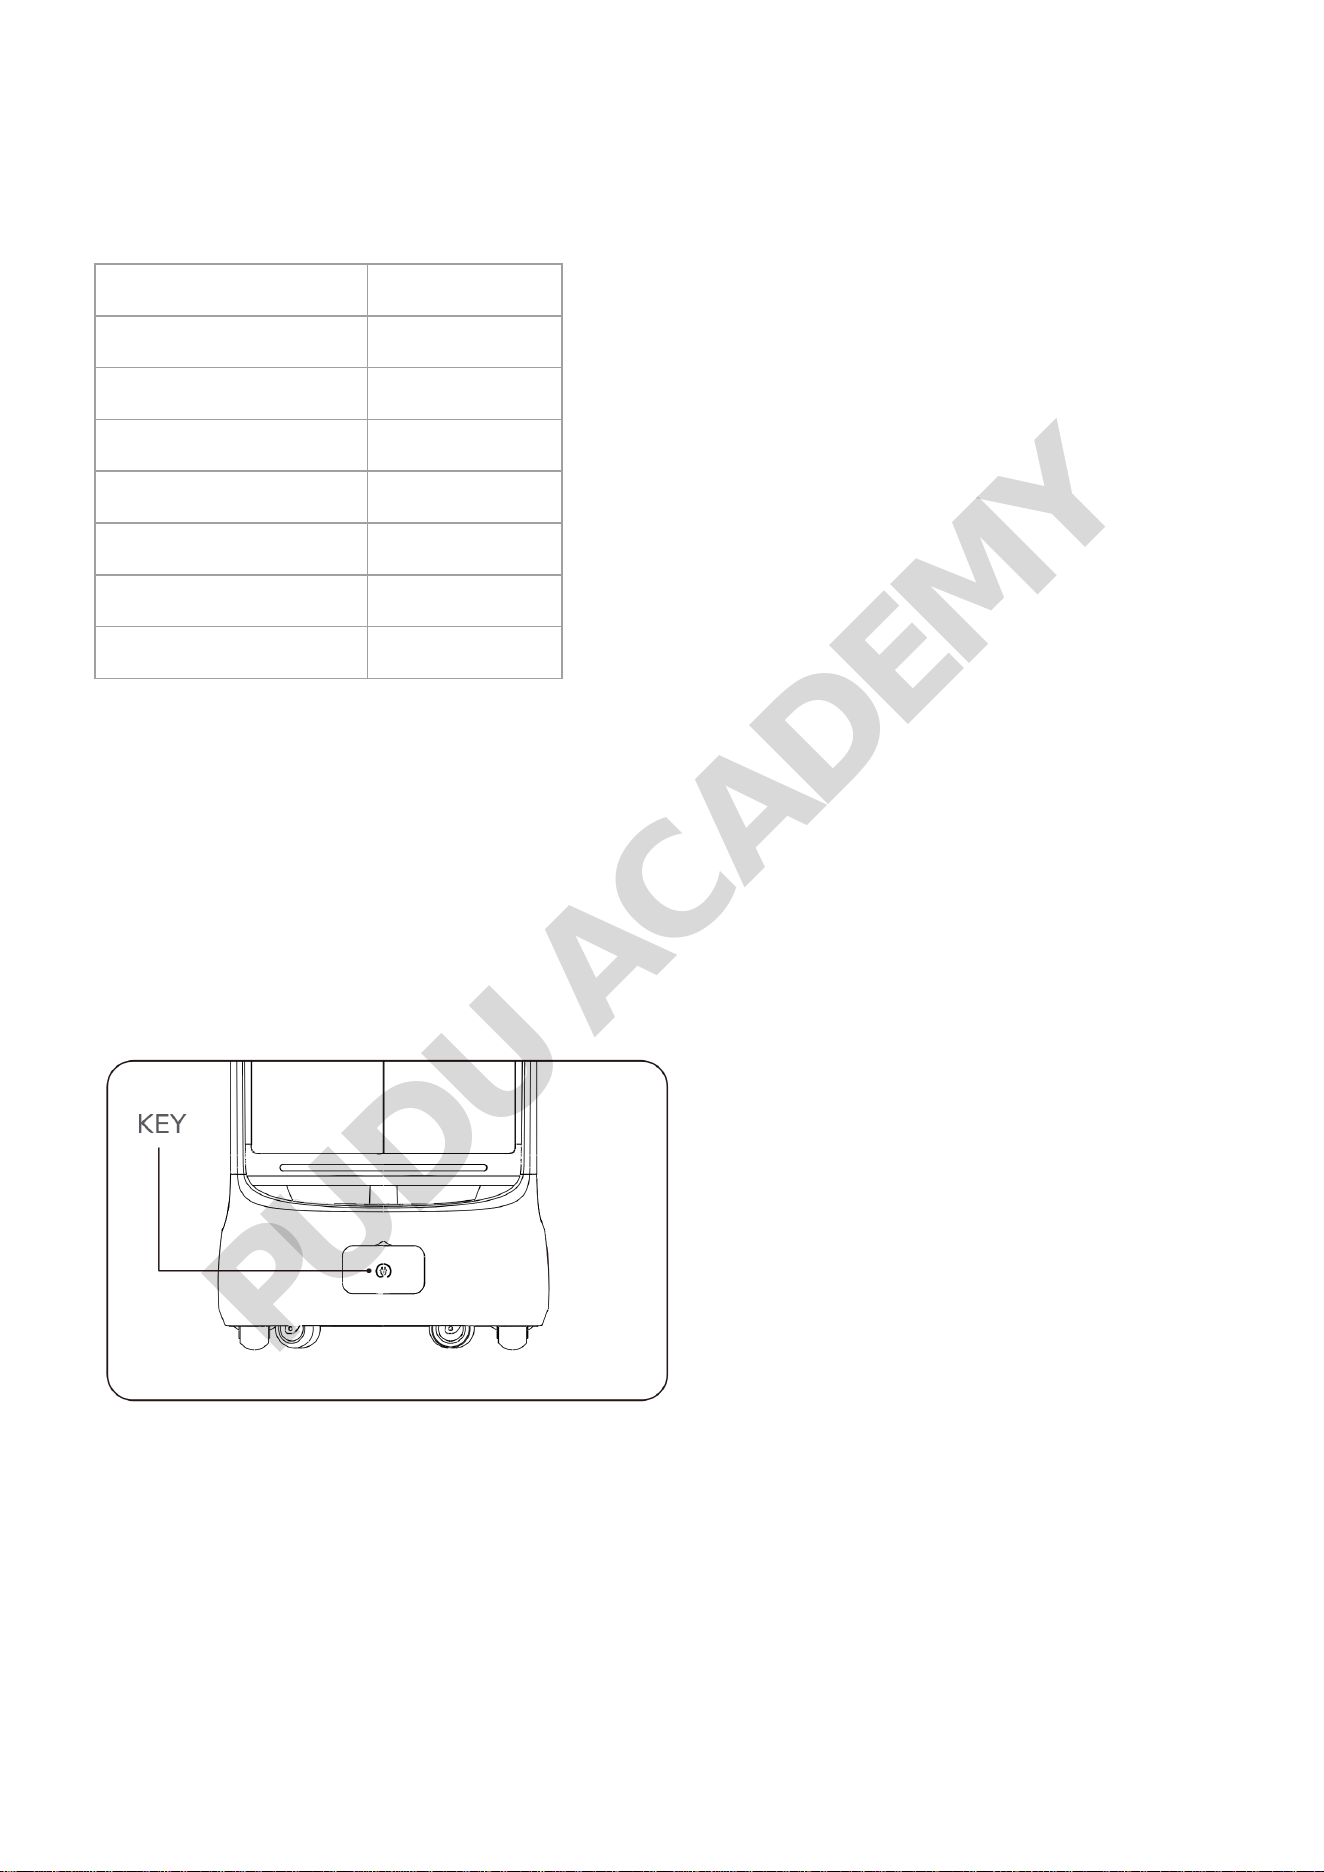
2. Product Components
2.1 Packing list
Packing list Configuration
Robot Standard
FlashBot User Manual Standard
Warranty card Standard
Quality certificate Standard
Power key Standard
Phone system Optional
Elevator IoT system Optional
3. Functions
3.1 Powering on and off
3.1.1 Power-on
Push the robot to the positioning location → Turn on the key switch → Press and hold the on/off
switch for 0.5 seconds, and wait until the bottom appears in blue.
PUDU ACADEMY
:" class="unnumbered">Positioning location for power-on:
Multi-location power-on is allowed.
The charging pile can be set as the power-on location.
3.1.2 Power-off
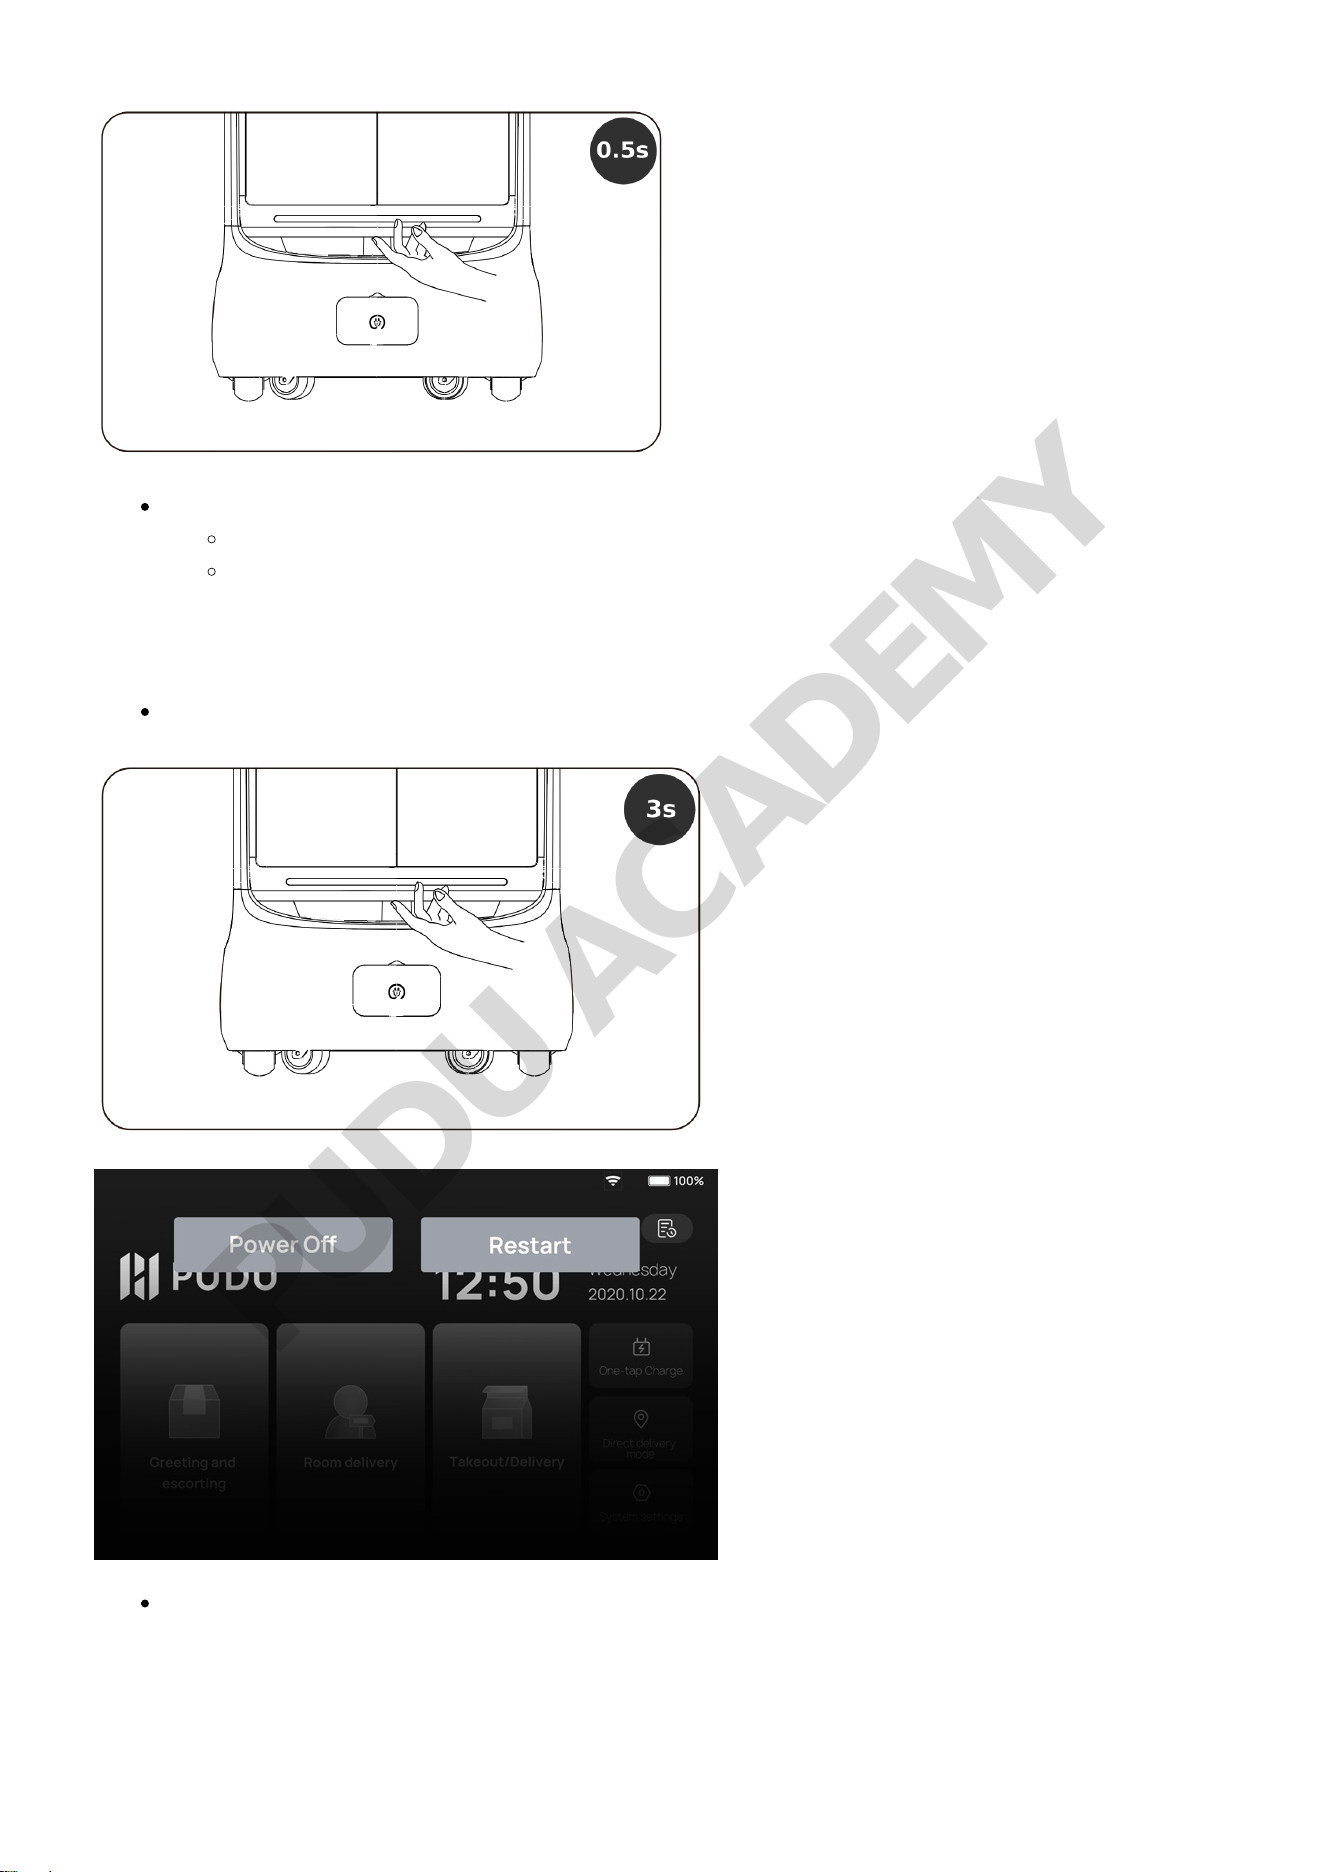
Press and hold the on/off switch for 3 seconds, at which point the lamp and screen are off.
Forced power-off:
Press and hold the power switch for 10 seconds.
PUDU ACADEMY
3.2 Charging
The robot can be charged by charger and charging pile.
Charge by charger
Plug the charging cable into the charging port of the robot and secure the connection. During
charging, if the robot is powered on, the screen displays Charging; if it is powered off, the light strip
illuminates.
Charge by charging pile
By tapping the One-tap Charge icon, the robot automatically performs the charging task; you can
also charge the robot by pushing the robot to the charging pile and aligning the charging electrode
plates on the robot with the ones on the charging pile. During charging, if the robot is powered on,
the screen displays Charging; if it is powered off, the light strip illuminates.
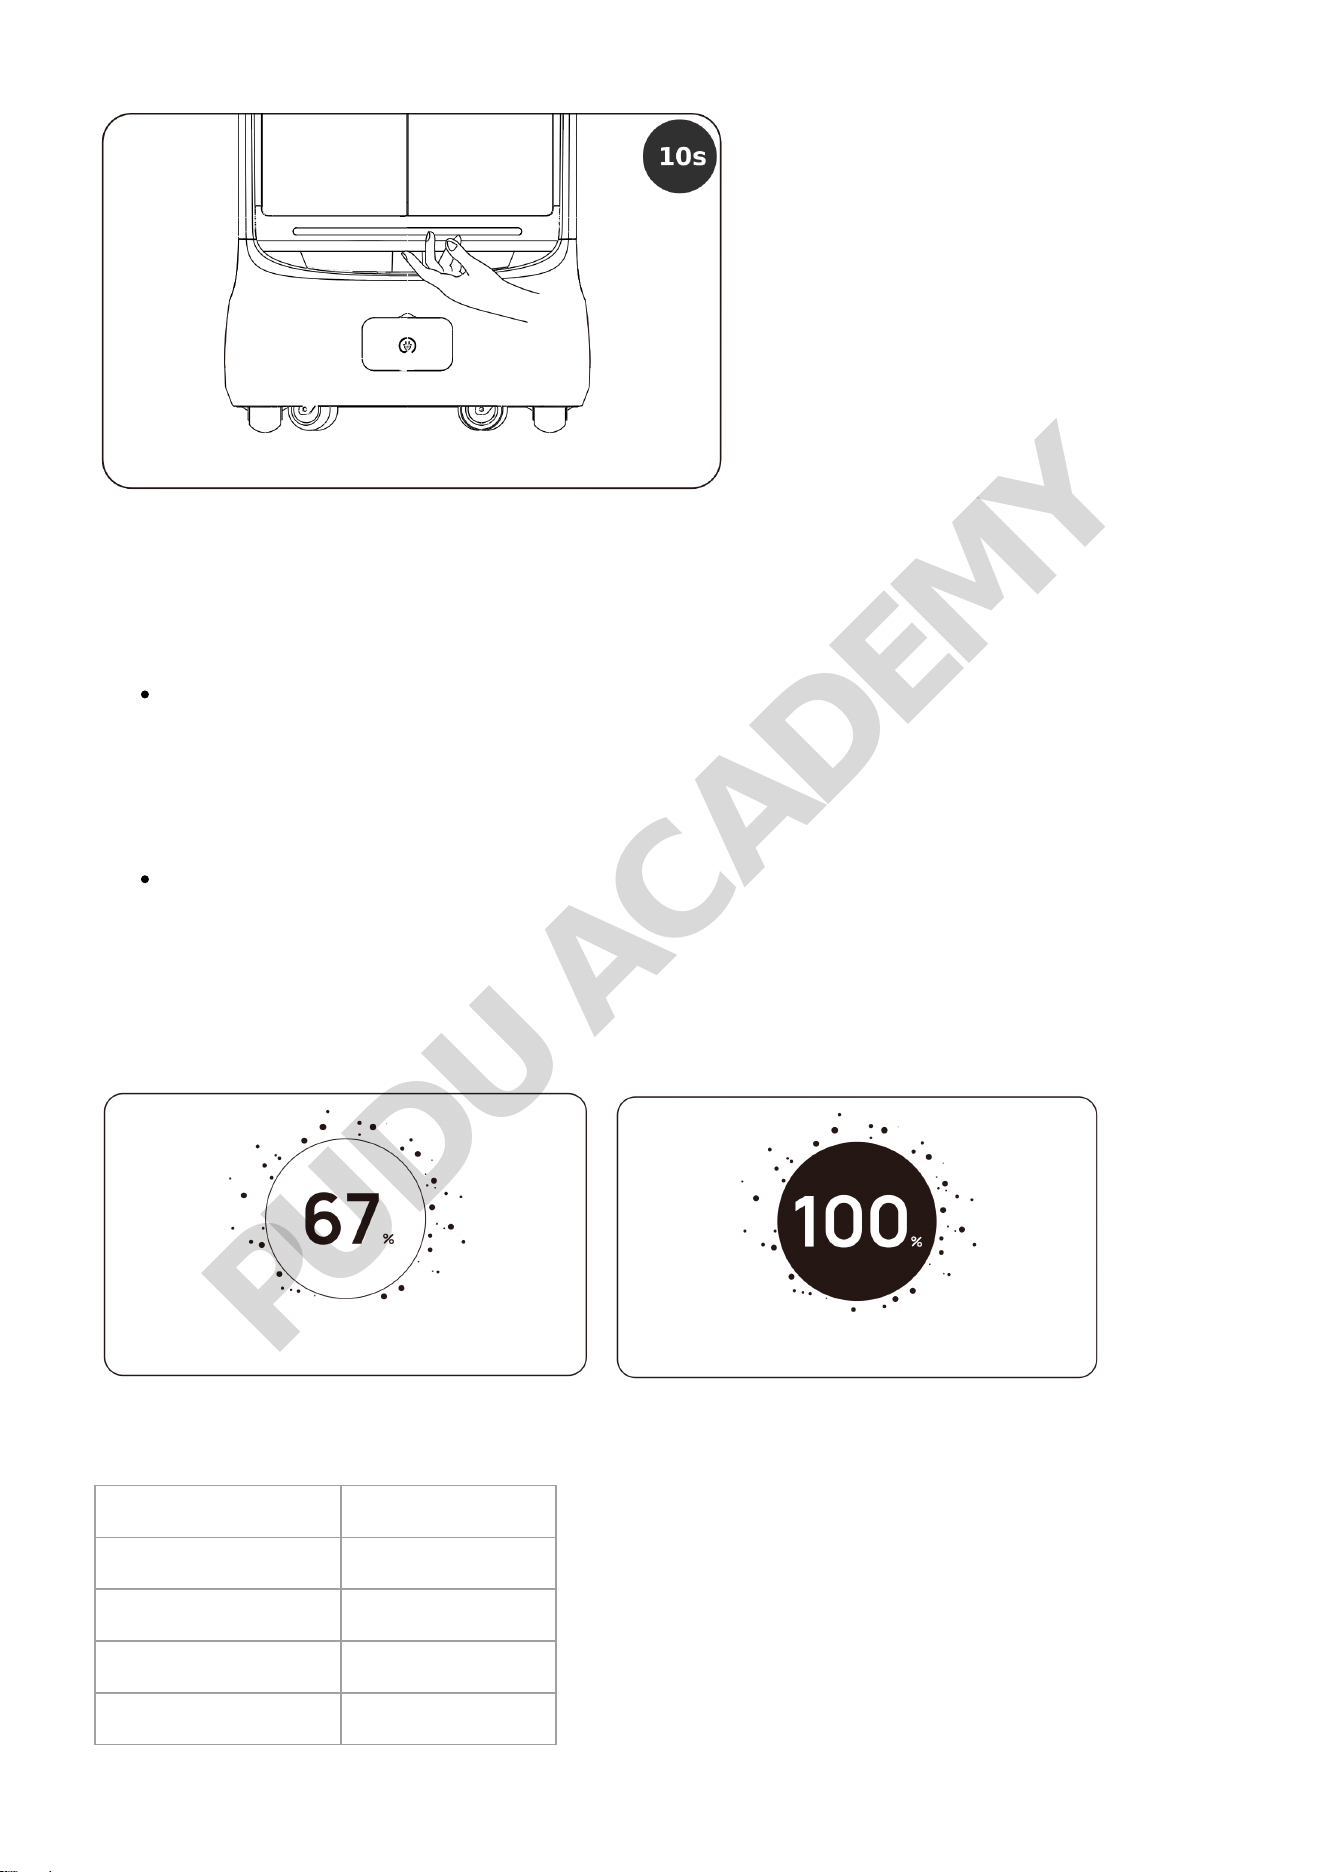
Light display and battery indication:
Battery indication Light Display
0-30% Purple breathing
30-60% Yellow breathing
60-90% Green breathing
90-100% Blue breathing
PUDU ACADEMY
100% Steady blue
3.3 Operations
:" class="unnumbered">Pause
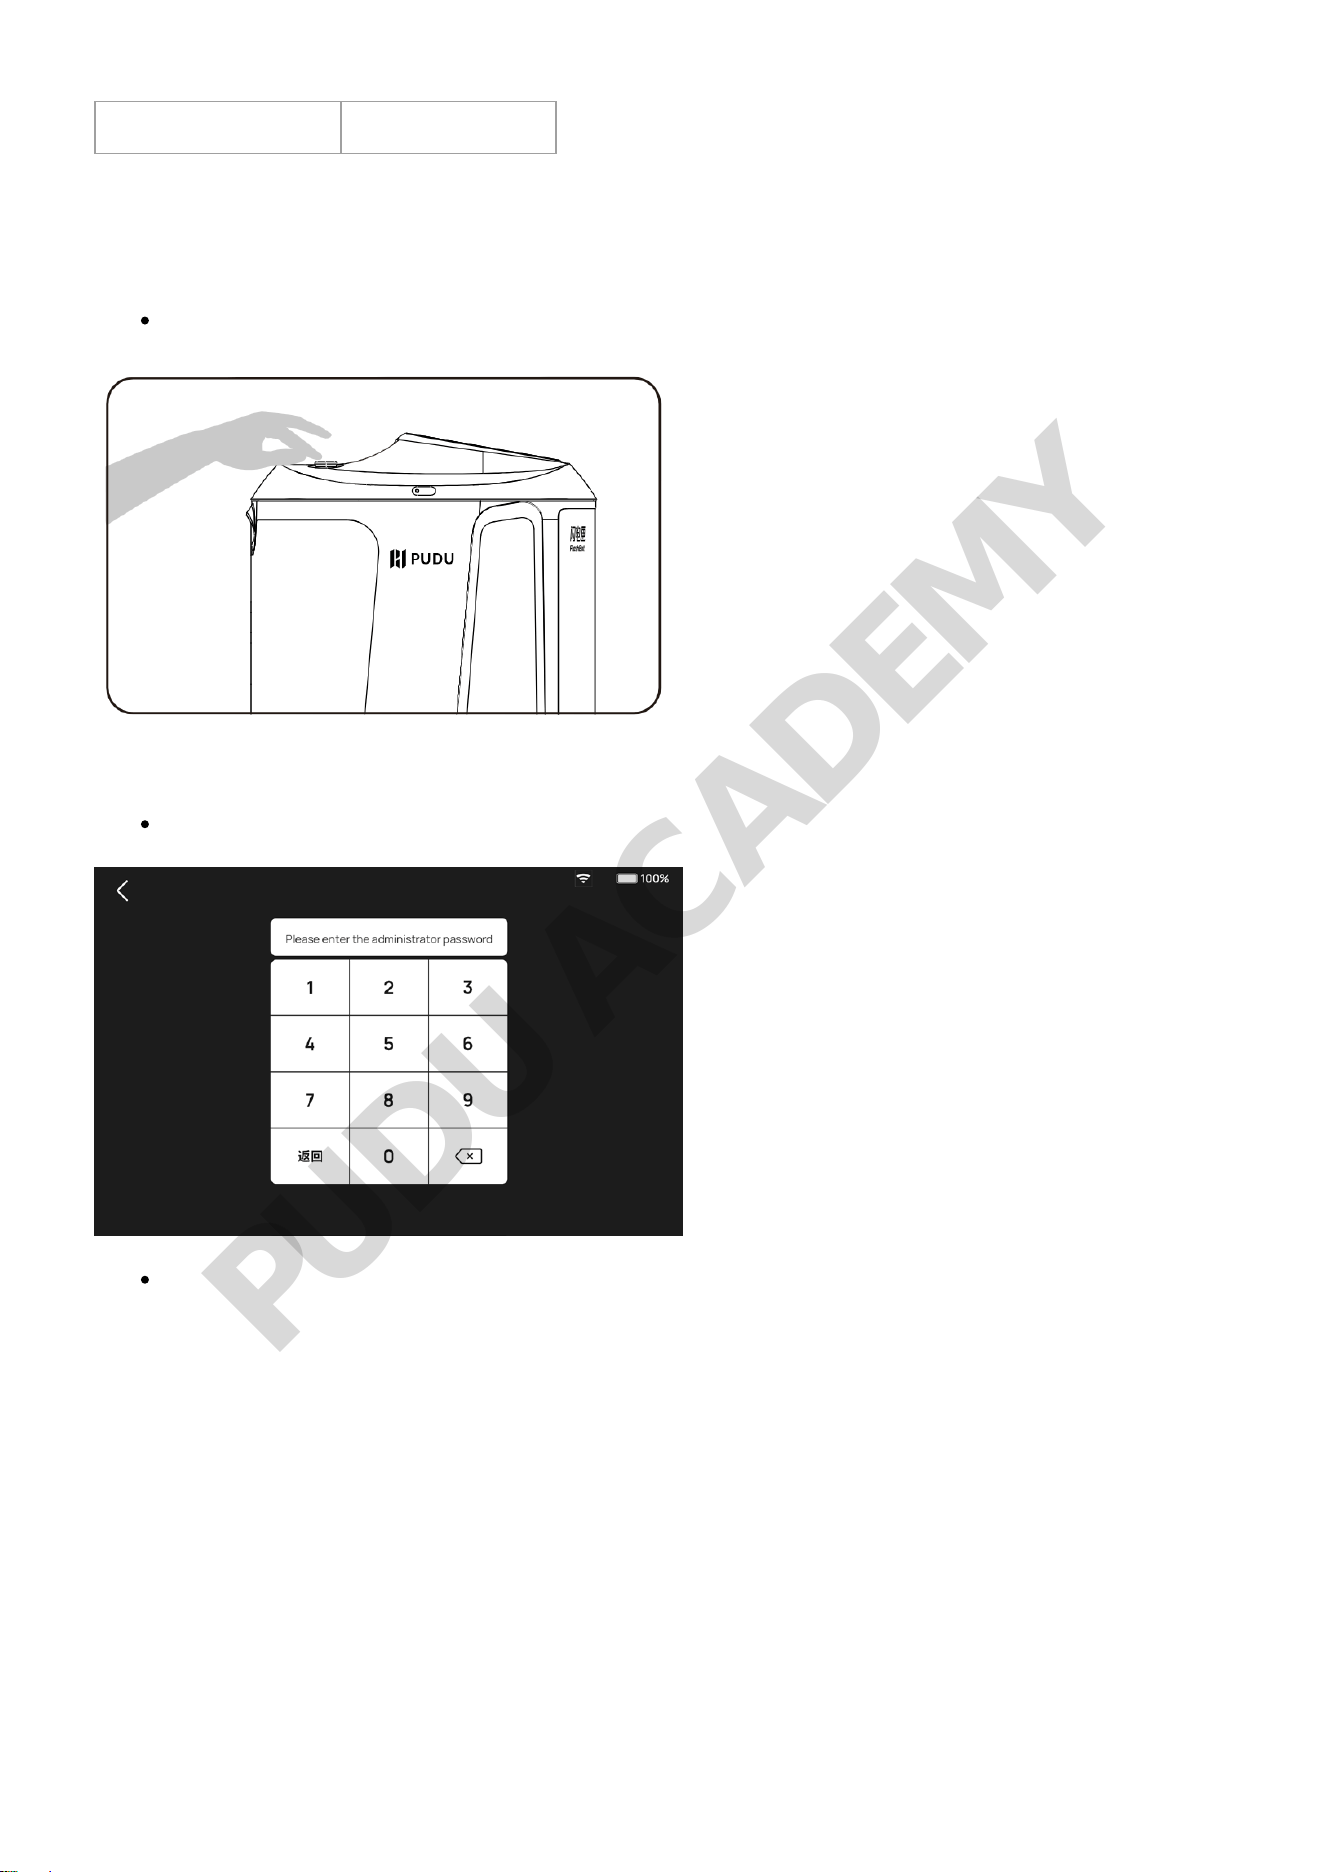
When the robot is working, press the emergency stop switch to pause the robot.
If no operations are performed during the pause, the robot will proceed with its previous task.
During the pause, an administrator authentication is required to modify tasks.
The robot cannot enter a paused state when it is waiting for or riding an elevator.
3.4 Functions
PUDU ACADEMY
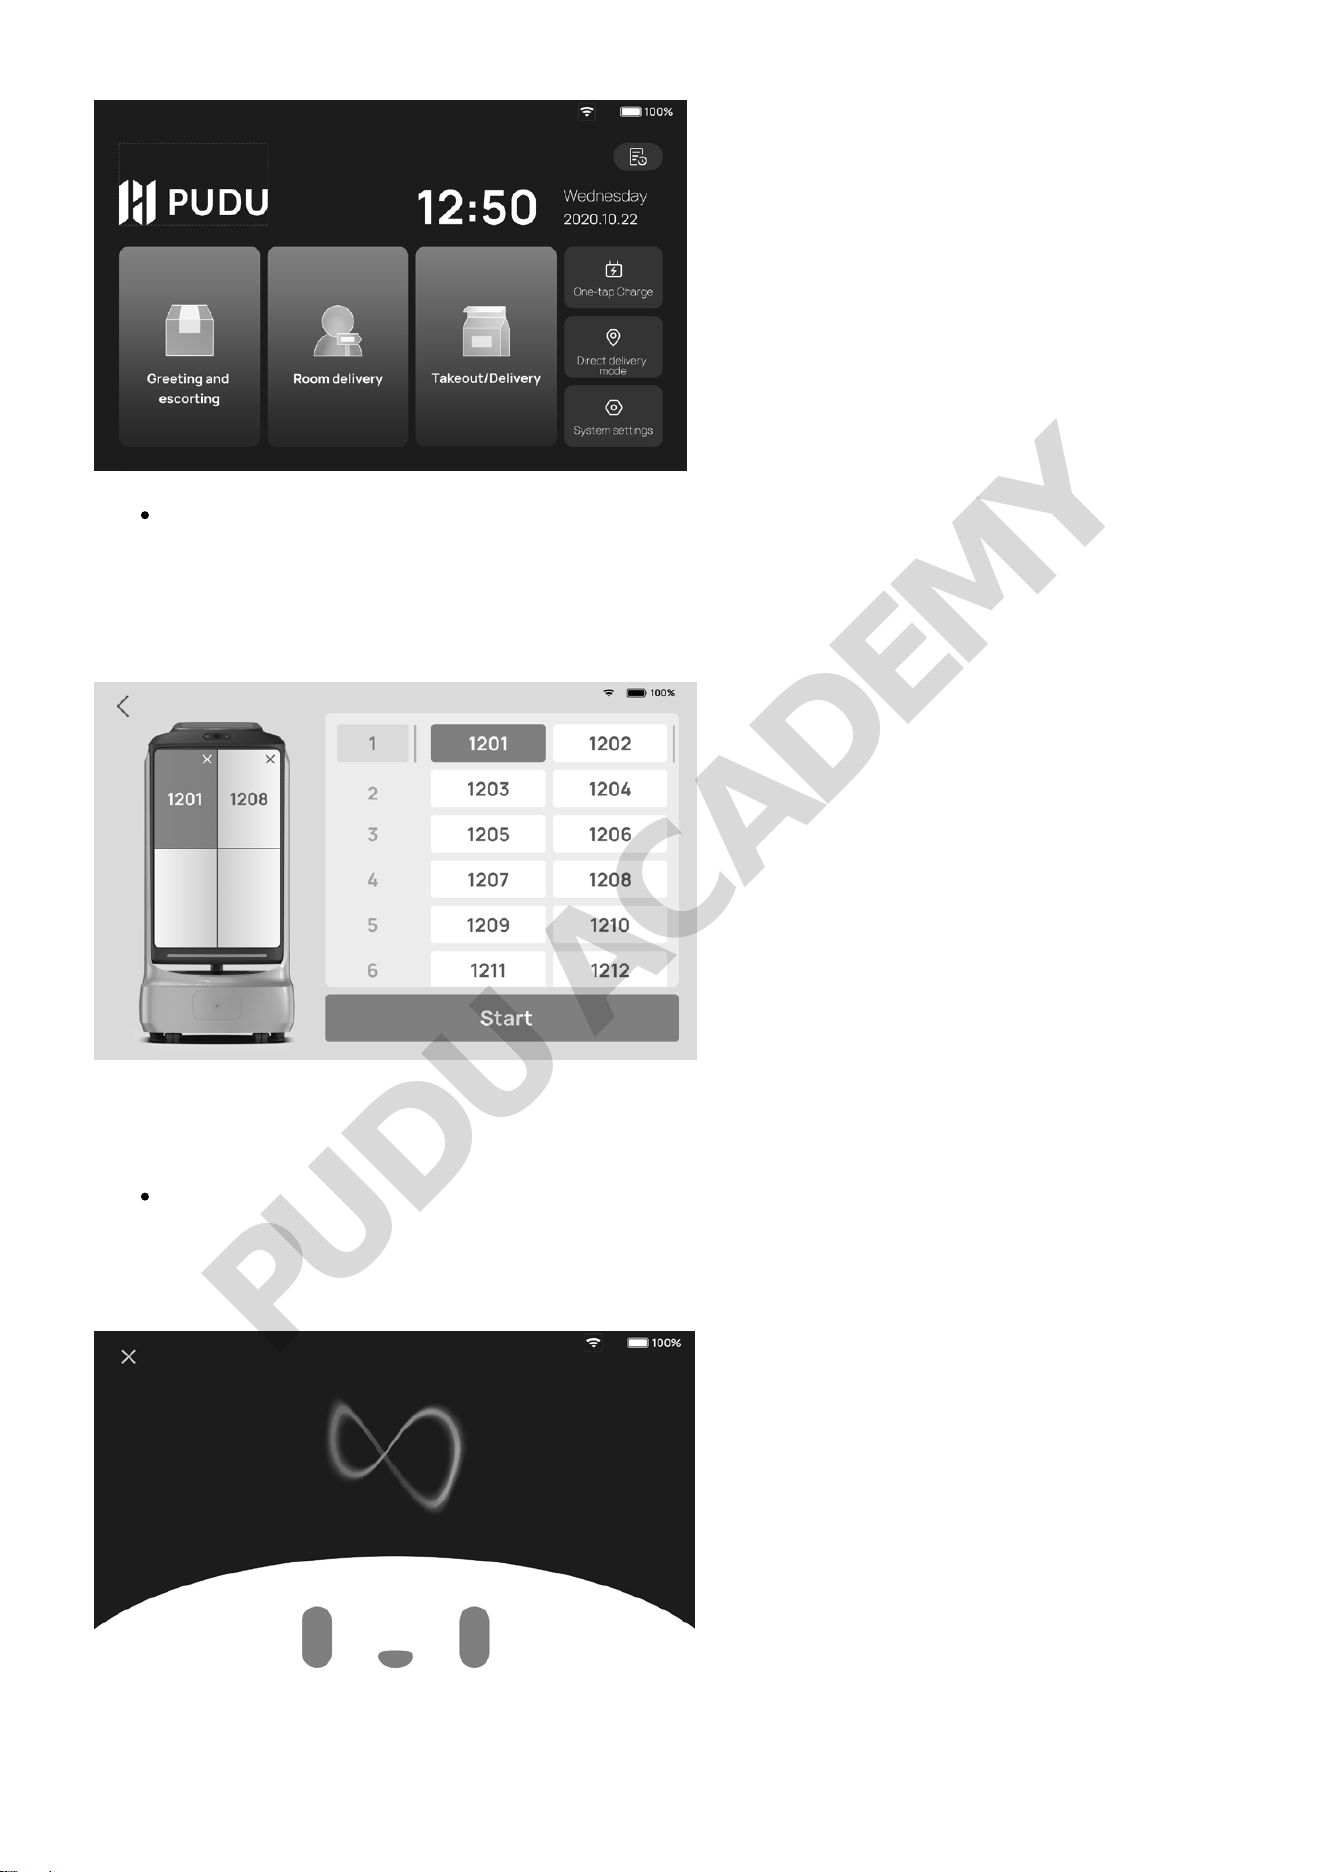
Room delivery:
Enters the room delivery interface; the initial password is 0000. Place the objects and enter the
destination for the compartment. Tap "Start" and the robot heads towards the destination
automatically.
Note: After arriving at the destination, the robot will only open the corresponding compartment to
the destination.
Greeting and escorting:
Under greeting mode, the robot can be interacted with by voice; under escorting mode, the robot
will escort the guest to the destination.
PUDU ACADEMY
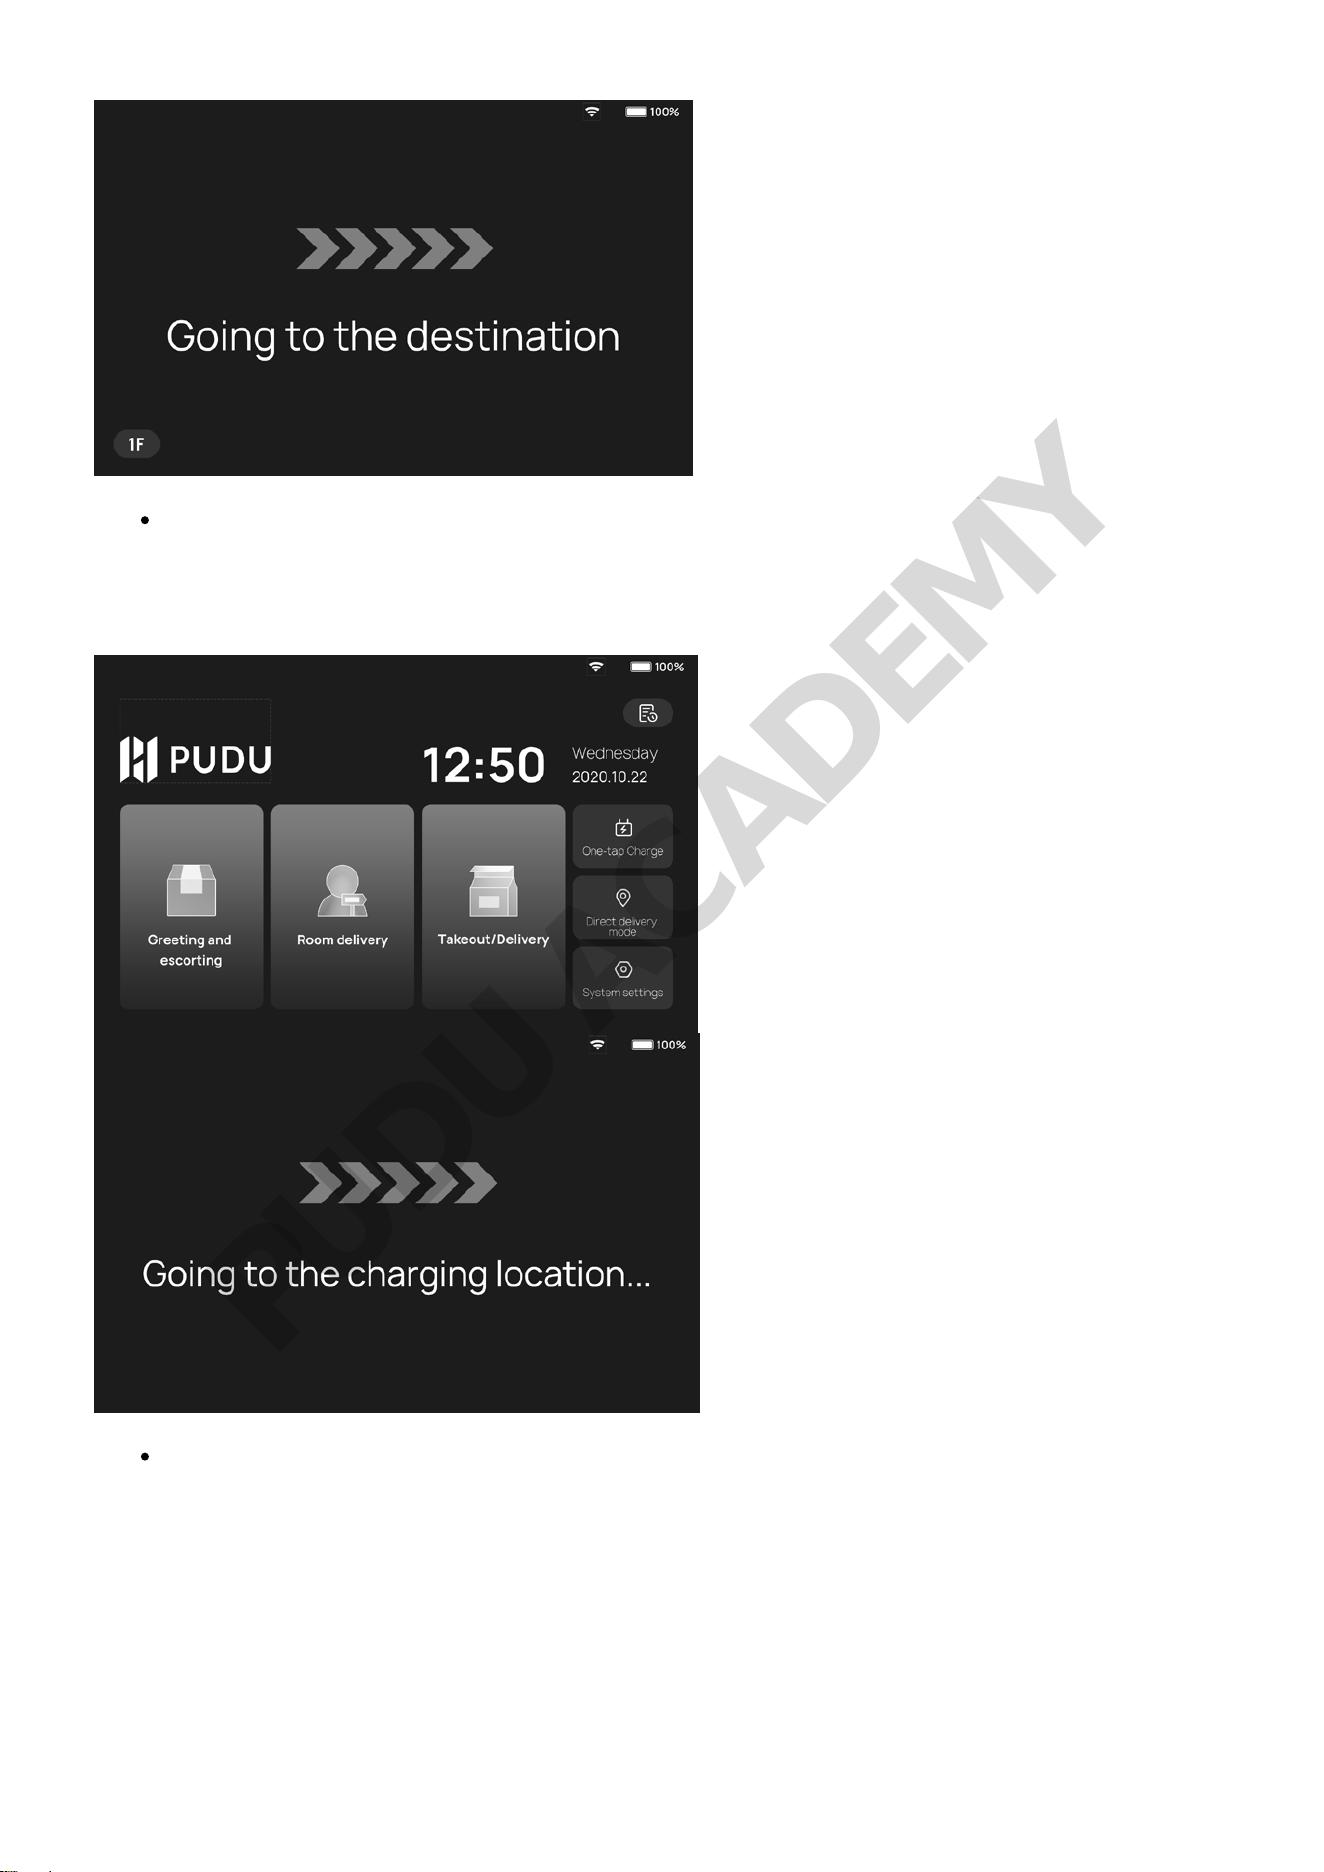
:" class="unnumbered" style="font-weight: bold;">One-tap charge:
Tap the "One-tap Charge" button and the robot will automatically head towards the charging pile for
charging.
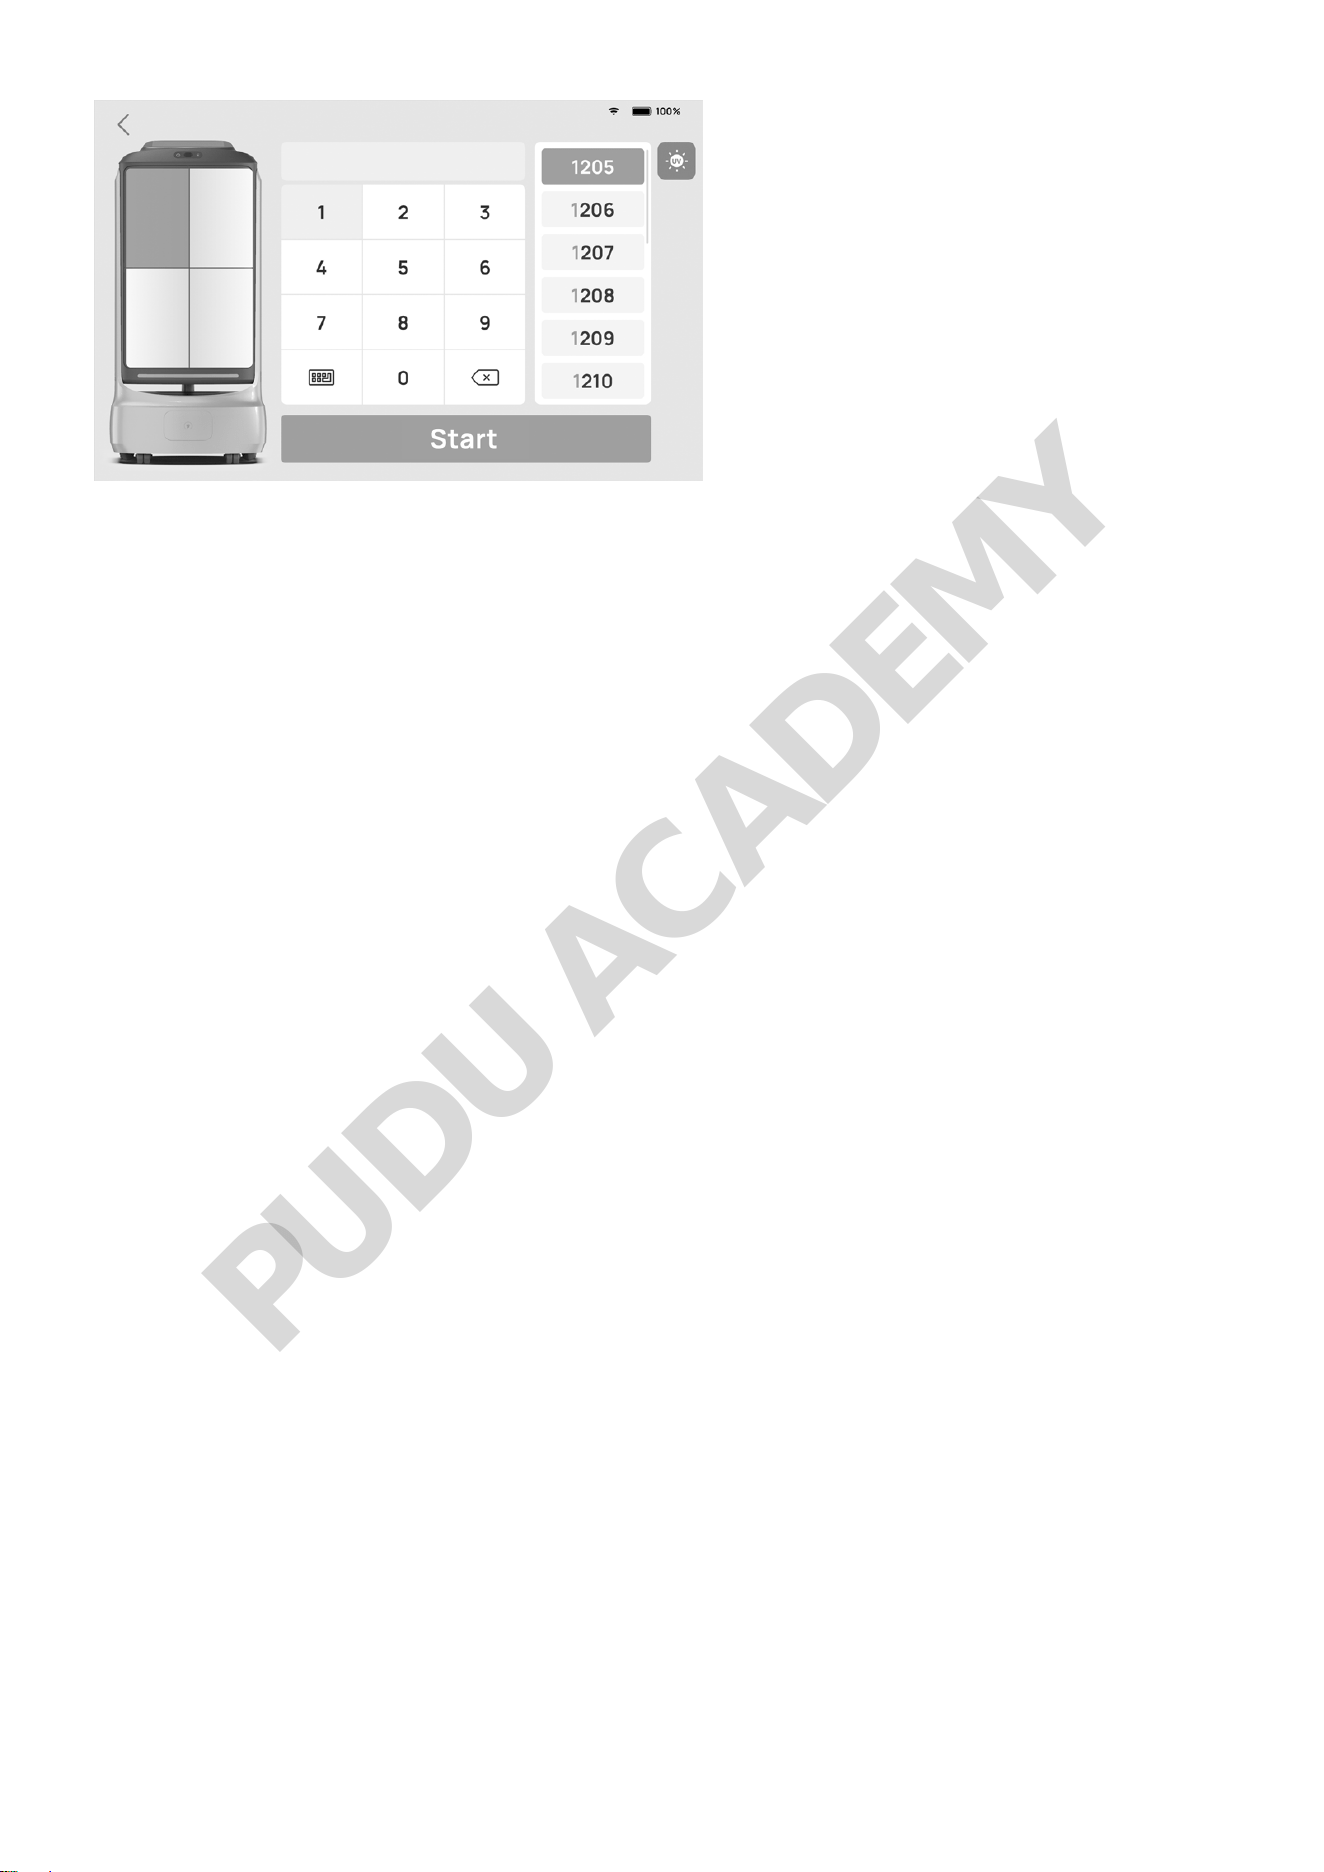
Autonomous disinfection:
After the disinfection function is enabled on the setting interface, the robot will disinfect the
compartments with UV light during delivery and standby.
PUDU ACADEMY
* The function is subject to updates from time to time, and the actual function of the robot shall
prevail.
PUDU ACADEMY